Shadow Gray has some strange characteristics color wise.
Automatically Appended Next Post: Oh yeah, after making a somewhat more uniform track shoe for the second tread system, I decided that I will remake the one and use template made track shoes as side by side, they do not look right.
[/img]
[/img]
I like the smaller 1/2 inch shoes as opposed to the less flexible looking irregular, individual shoes.
SebastionSynn wrote:
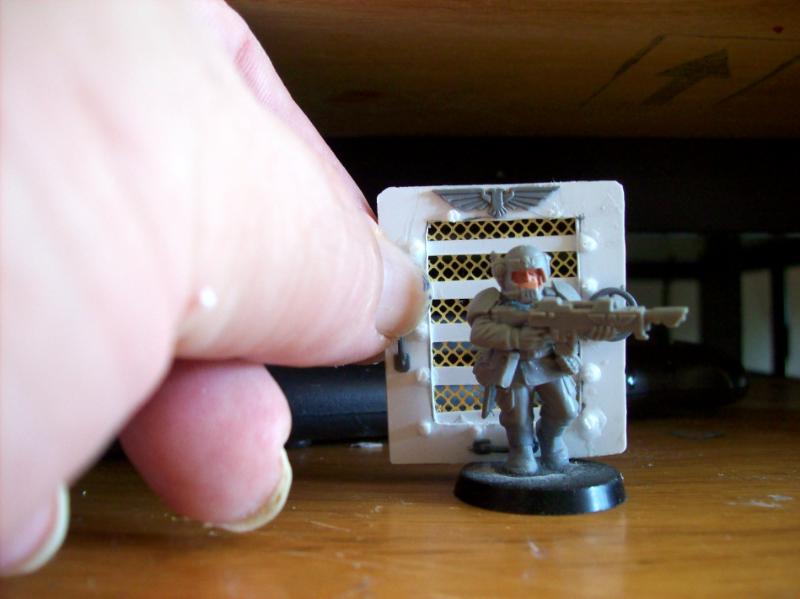
found this posted here on dakka in the modelers help thread and after going to it and looking around, figured you might want to take a look yourself. this guy has some really nice stuff and as seen above is so very kind as to provide a size reference as well.
I like this model. The inclusion of both a beaky (RTB001) marine and an old Ral Partha 25mm Battletech/Mechwarrior figure show scale well.
Thanks for that.
As for Shadow Grey - it's just a darker shade of Space Wolf Grey (both of which are blue-greys - some people perceive them as more blue than they are - and cameras especially do - it's to do with ultraviolet reflectivity and stuff. Blues are like that.
Sigh, if only I had spare cash. I have a ton of plastic-card and I ain't afraid to abuse it!
lol... and oh so true^^
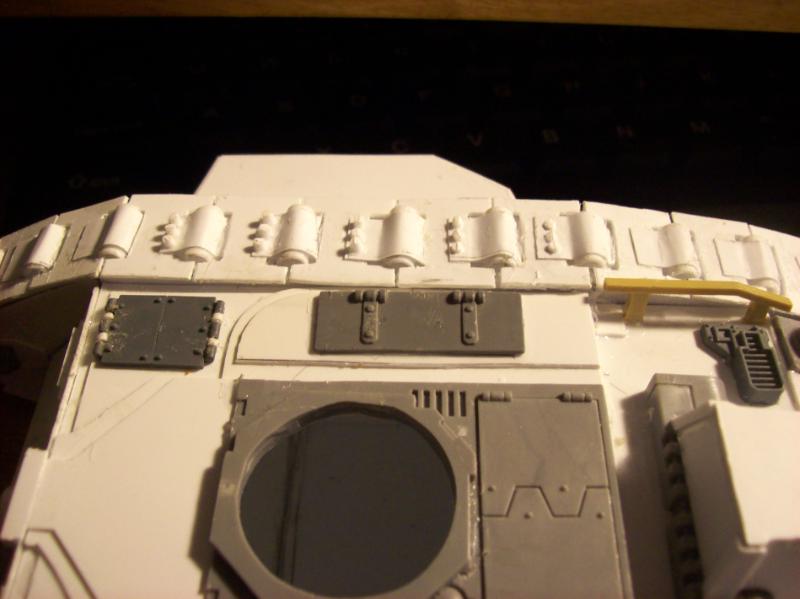
the treads without the tubes inbetween look a bit ??? to me...might be the missing bits...will be waiting for updates^^ for a comparission and then comment later on them^^
as for killing bugs and generating superbugs... had that discussion with my doc too, i am fully aware of this possibility... currently i am through my package... it only contained 3! pills...and we will see tomorow at this time how good it might have worked...up till now i feel dizzy but not so snotty and gooy anymore^^
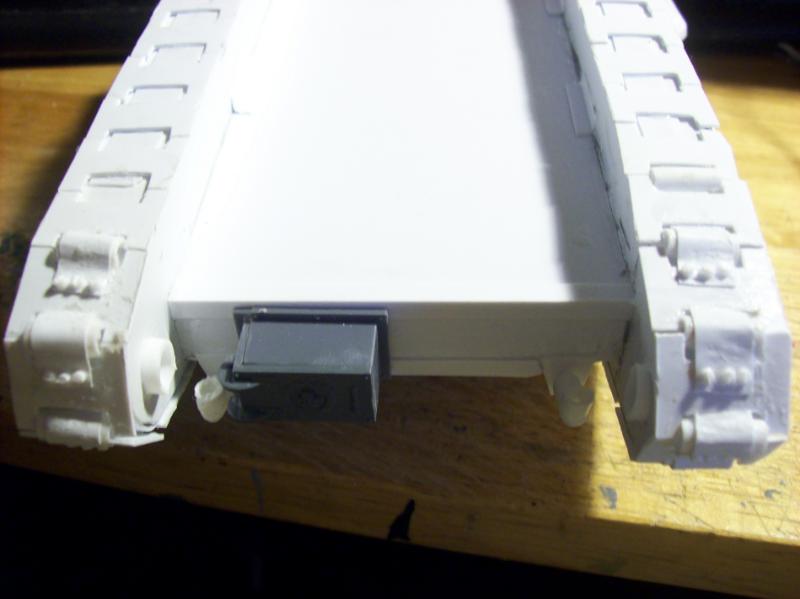
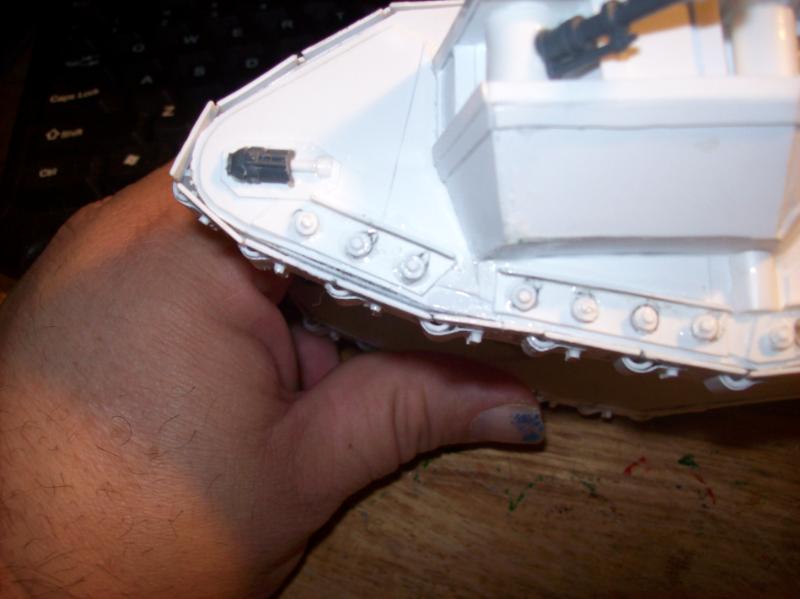
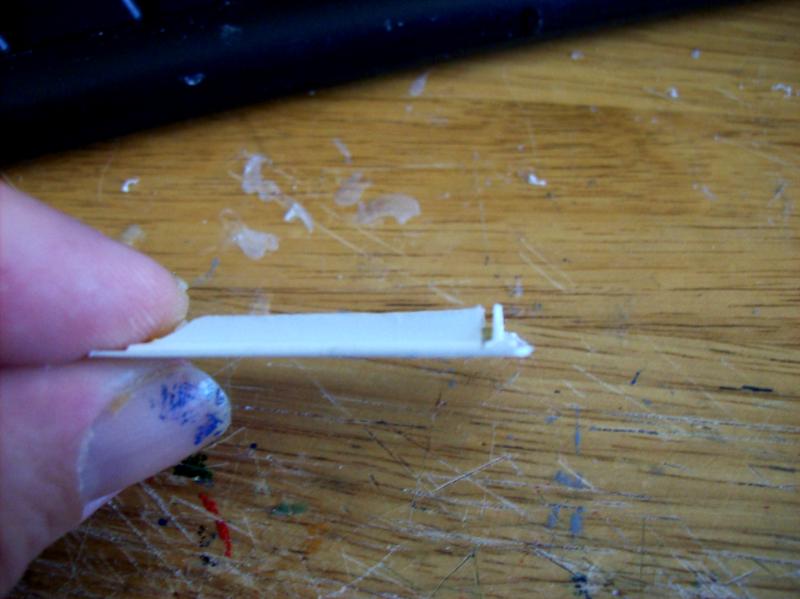
It looks odd to me as well, but they are supposed to have those holes between them filled with round stock, which I have all pre-cut, and need to cut in half or less for the parts they are to be glued into.
Ah, he gave a three pak, that means the strong stuff. Like Zithromax or stronger. Get well, sleep is the best thing on top of that as the body needs to divert power to the immune system to oust the invaders.
I know this is the look of the Mk1 land raiders but it really doesn't make sense (I know the 40k vs real-world paradox) These tracks would have you driving on (and wearing out) the pivot pins. Workable tracks put the wear on to the pads and keep it off of the pins.
I don't mean to discourage, I'm loving your projects. I just wanted to put that out there
Brotherjulian wrote: I know this is the look of the Mk1 land raiders but it really doesn't make sense (I know the 40k vs real-world paradox) These tracks would have you driving on (and wearing out) the pivot pins. Workable tracks put the wear on to the pads and keep it off of the pins.
I don't mean to discourage, I'm loving your projects. I just wanted to put that out there
Oh the beauty of WH40K and their adamantium super metals! makes great tracks for the tanks, and most slog through mud and not on roads, But yeah, a good point to bring up. Still has an oddly endearing look to them.
i am pleased to say the least...this will turn out great!
the size will dwarf some of your super heavies quite easy^^
now the treads look really as if forged in one factory, will you still detail the treads up before you go to the mainbody? or will you now skip this process? i think i have to get you a scaleshot of a pair of treadbits of a leman russ to compare them to mine too^^
Oh, I wanted to line things up better, I need to get pics of the belly plates and rear armor to show just how big it will be.
It won't be as big as the Baneblade or the Vasilyt, but should give the Akuyaku-1 a run for the money.
Stil intend to build the seen track shoes up with the other small bits as kleats, and paper thin plastic shaped to make the holding strips for the barrels in the middle of the shoes.
Also, many panels to build up the side armor of the sections and help support the double sponsons so they look right.
what stuff will you be using for kleats? wire? currently the only means i could see you make such modeled detail in such amounts for the tank...
what size in cm is the baneblade? i could later check how big my won version of the mark V special will be...by the way i think i will be using animal anmes like mammoth and smilodon for my tanks...what do you think about that?
I have a lot of the plastic cut pieces from the shoes to recycle as kleats to add to the texture of the shoes.
the Baneblade and my tank are about 9.5inches, or 240cm?
A big one to say the least.
Ironic as the Violators call tank hunting "mammoth hunting"
Oh yeah! for such a big girl, doubled sponsons are cool! forwards will be autocannons, and the aft guns will be water jacketed heavy stubbers. I will have a barbette to the aft center line for a Heavy bolter, and in the bow a dual heavy stubber. The main gun turret will have the twin las-cannons
Viktor von Domm wrote:so this will be a rather quick and more close combat tank? hmmm
as for the size i guess you mean 240mm as 240cm is bigger than you standing upright^^ but still enourmous...
lol momothhunting^^ well this is at least sounding true for them^^
Mostly a medium to low long range tank, so many 36" to 48" weapons abouard!
OOopS! meant to say 24.3cm or 243mm
Sanguinary Dan wrote:No flame throwers? NONE!
At least put a heavy flamer in that rear barbette.
But then it would cook the engine, I may decide to make the forward bow weapon a Heavy flamer if anything get's close then.
SebastionSynn wrote:this is already starting to look good, Shaso. i'm very much interested in seeing how the rest of this turns out.
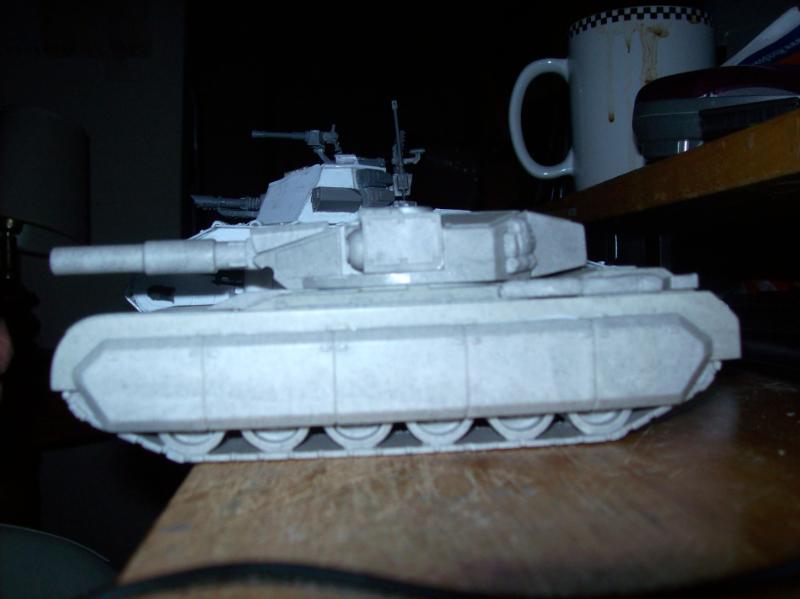
Thanks. Already measuring the basic width for the curled bands for the barrel segments and the "kleats" So far, the treads and belly plate makes it as wide as a sponsoned leman russ tank, once I make the sponsons, it will of course be much wider than that. What a monster I have developed in this Perun class tank.
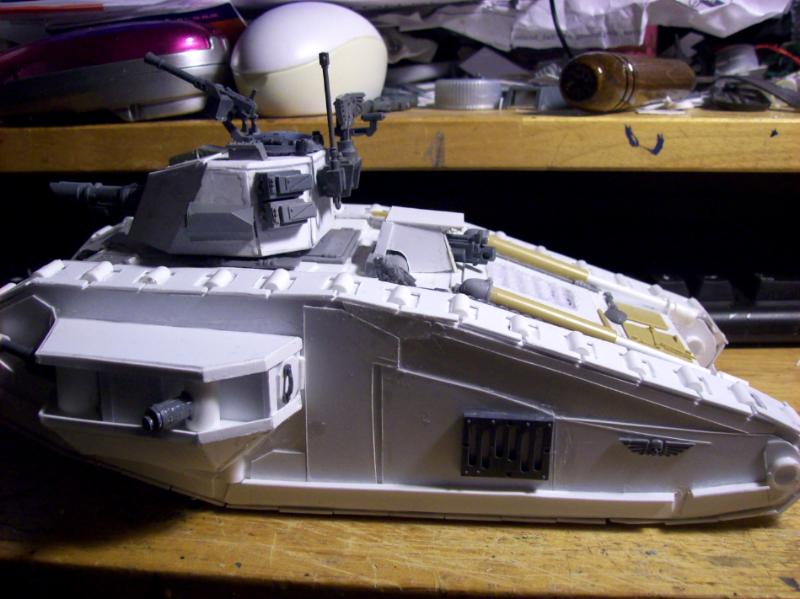
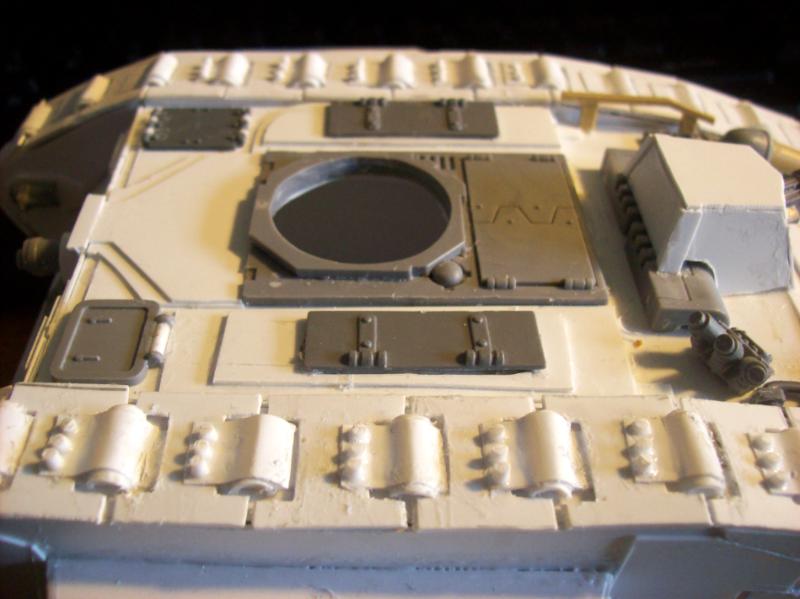
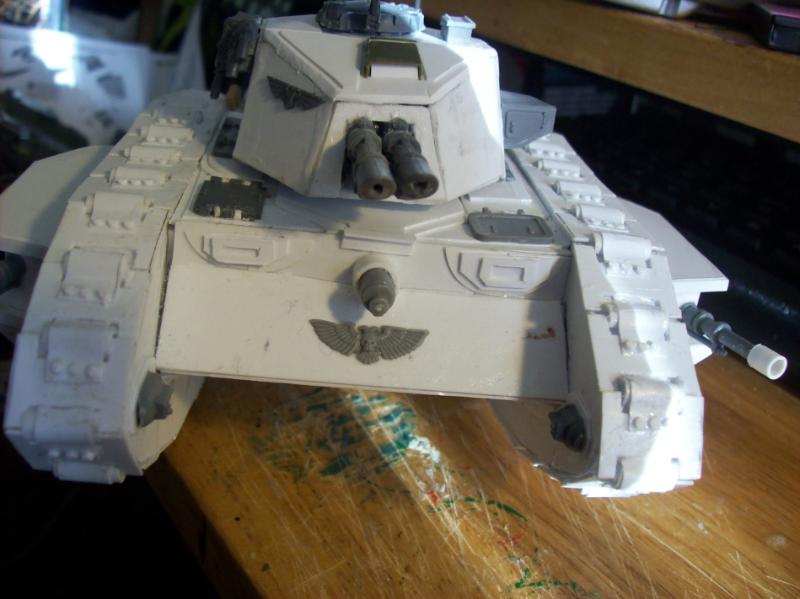
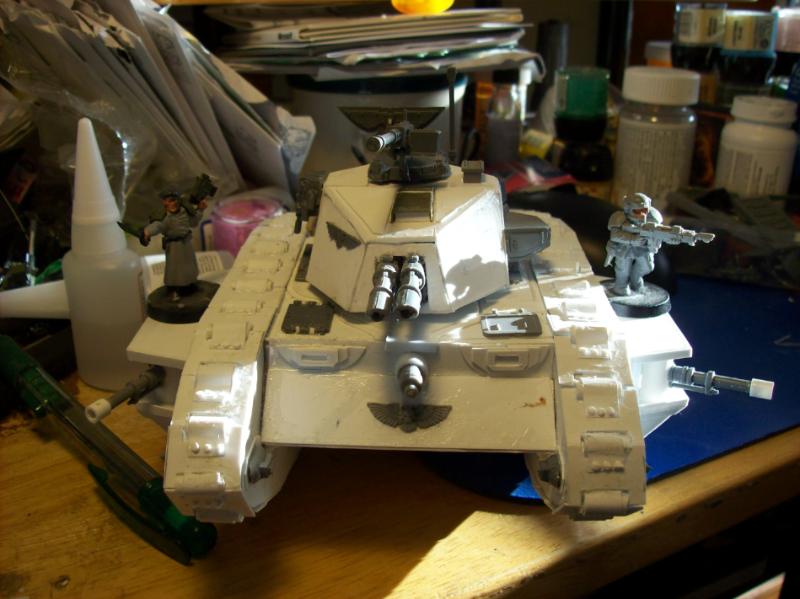
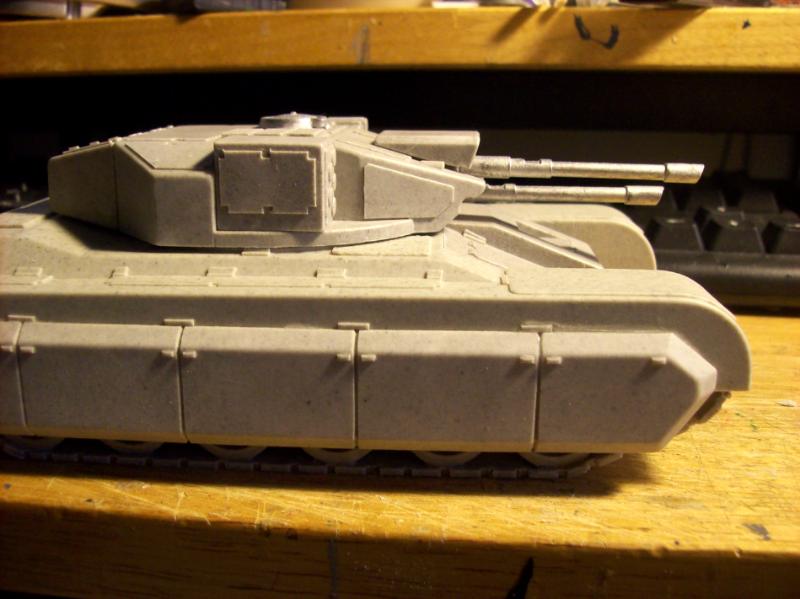
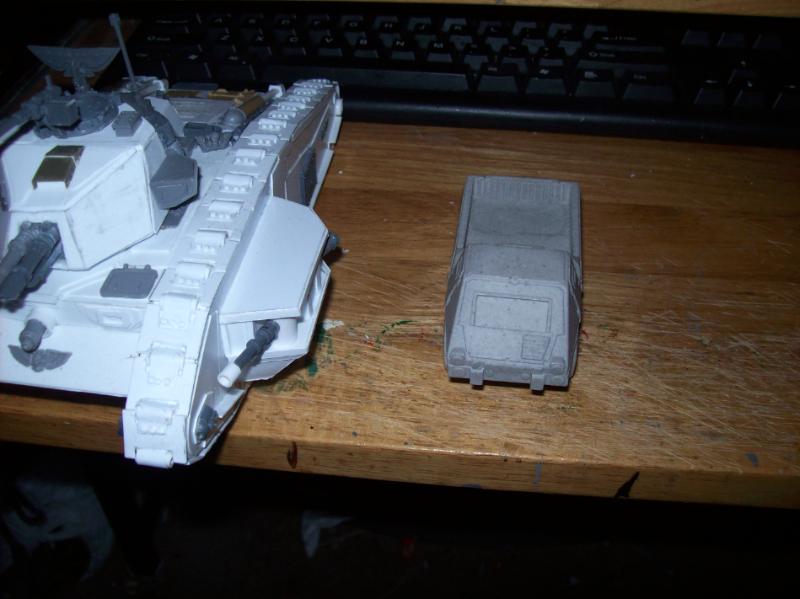
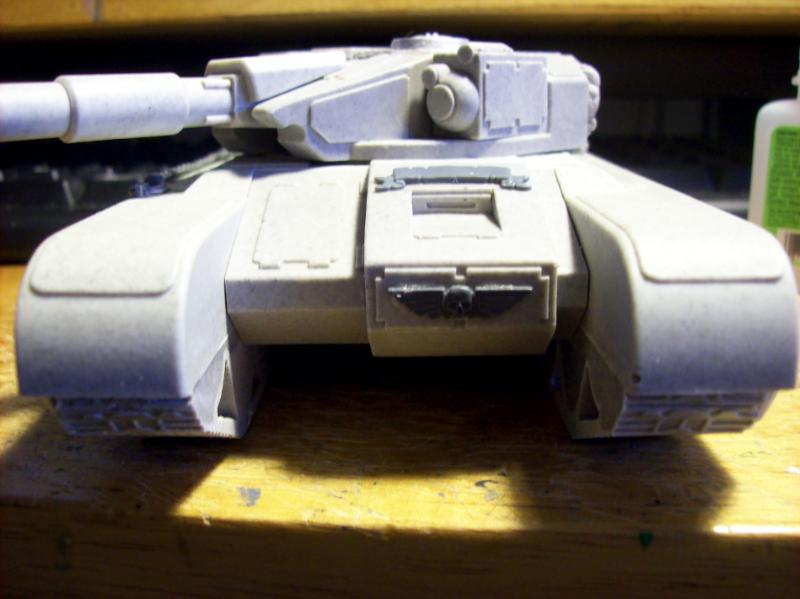
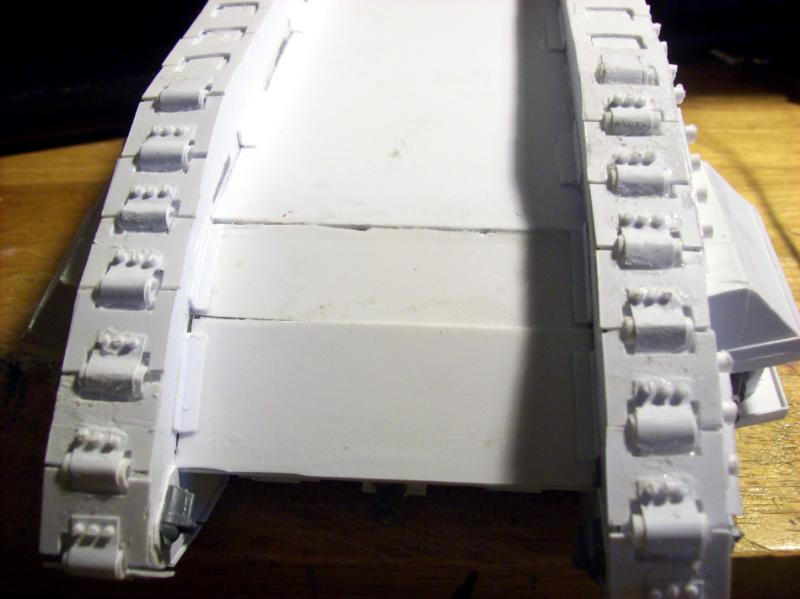
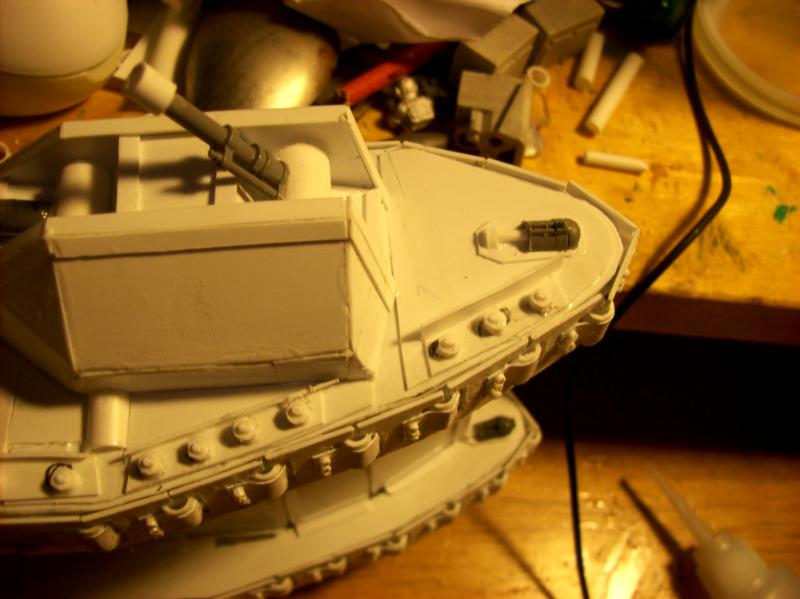
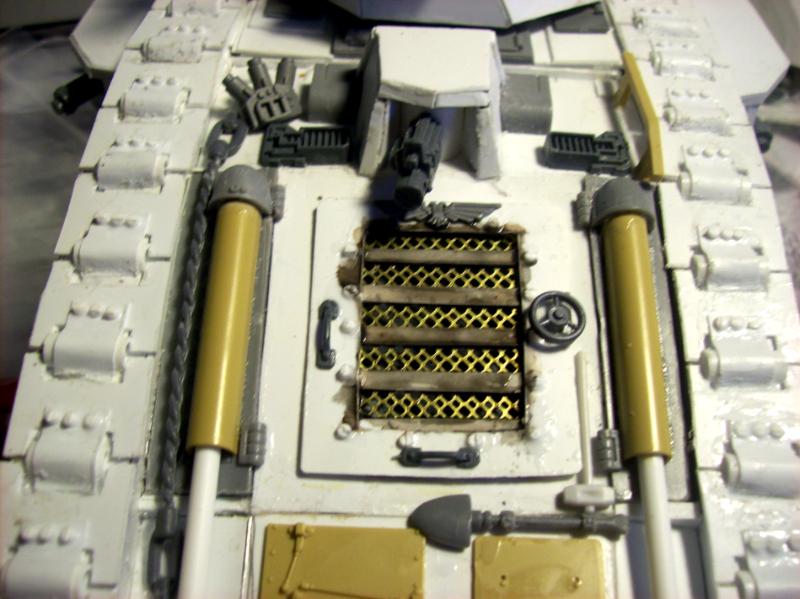
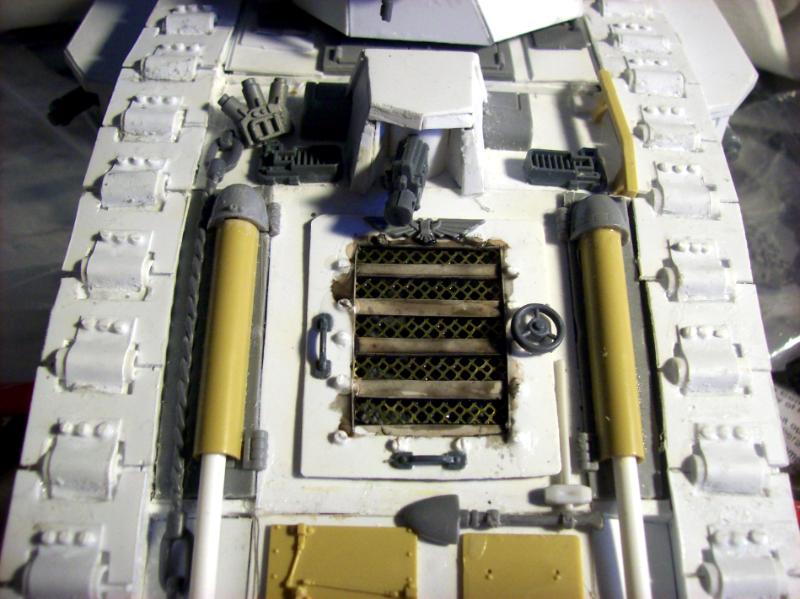
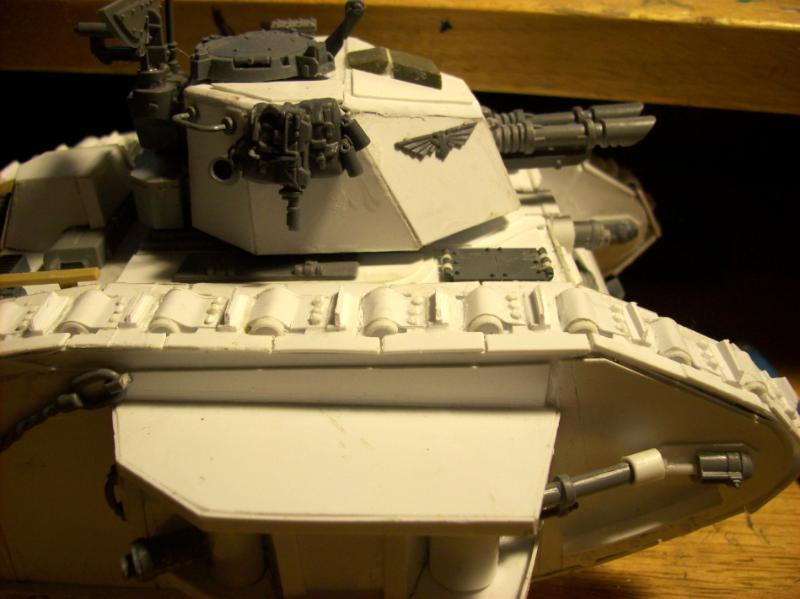
Okay, update on the "Perun" or T-400 Superheavy tank. Here I have the belly and back plates connecting the tread sections.
[/img]
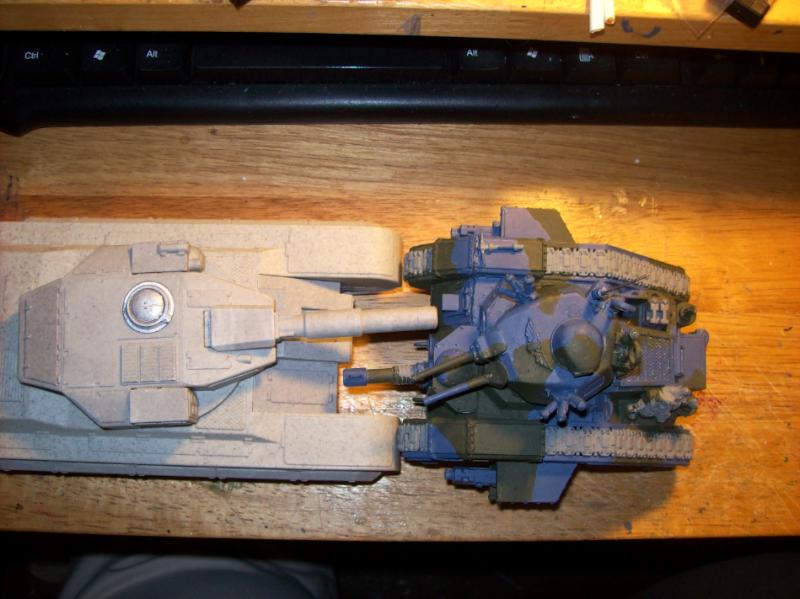
A "head on" view so you see it will be decently wide.
[/img]
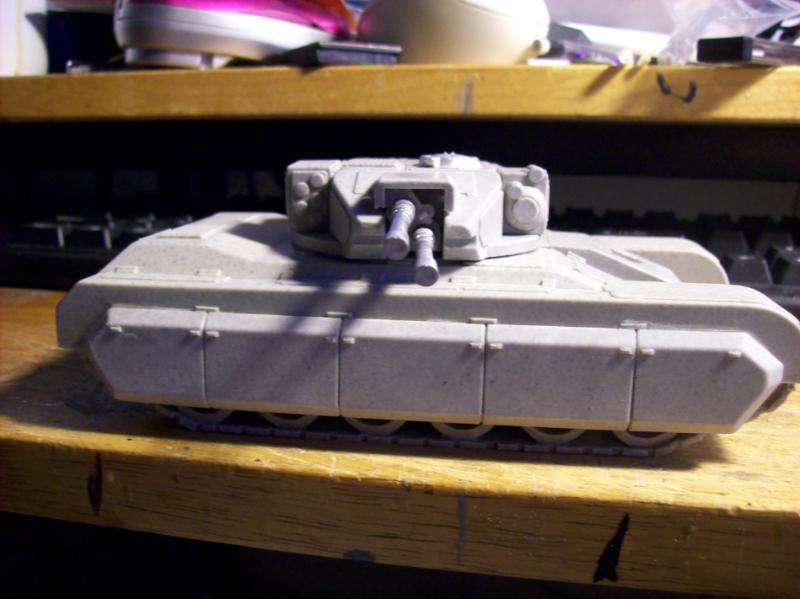
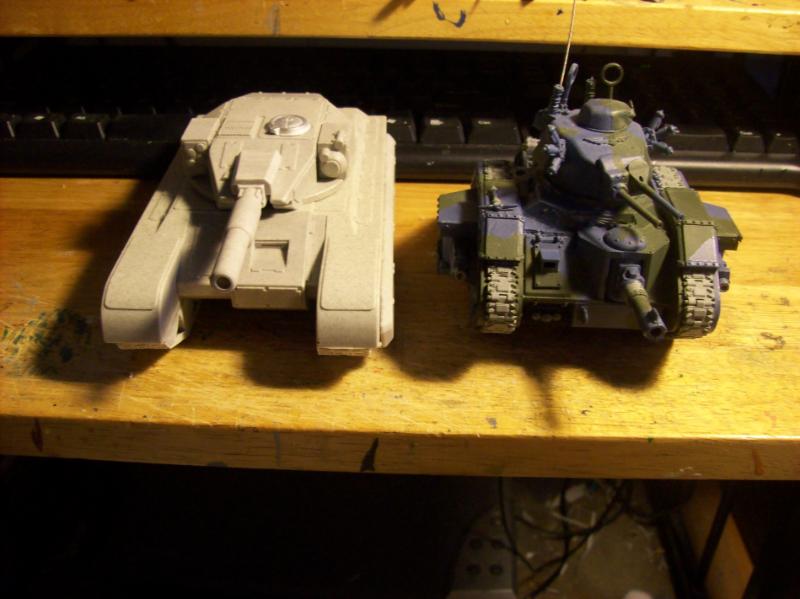
And for all the scale lovers out there who always want someething to compare it's size to, I have a Leman Russ sitting on top for comparison.
[/img] Literally it is as wide as the model with it's sponsons on. Once the Perun has it's sponsons, it will be one of the wider of my collection!
It is definitely one of the longest of the collections.
[/img]
sorry for longer periods of absence here to behold your cool work... life is ugly atm... big trouble in the family...wife and me seems all falling apart...
your tank looks very nice! this is shaping up real good, one can now picture future developments quite good! the leman russ looks punny in comparrision^^
how on earth do you keep the parts so well glued together? if i do that, a 90° glueing then it always keeps falling apart...hmmm...
Viktor von Domm wrote:
your tank looks very nice! this is shaping up real good, one can now picture future developments quite good! the leman russ looks punny in comparrision^^
how on earth do you keep the parts so well glued together? if i do that, a 90° glueing then it always keeps falling apart...hmmm...
the piggybank tanks look funny^^
cheers mate, vik
Thanks Vik
I also used some of the plastic stock that came with the tubes, one was "L" shaped and used those cut into braces, for more, I took "I" beams shaped ones, and sliced them in "L" patterns for more braces.Other wise, I would use sprue pieces for braces.
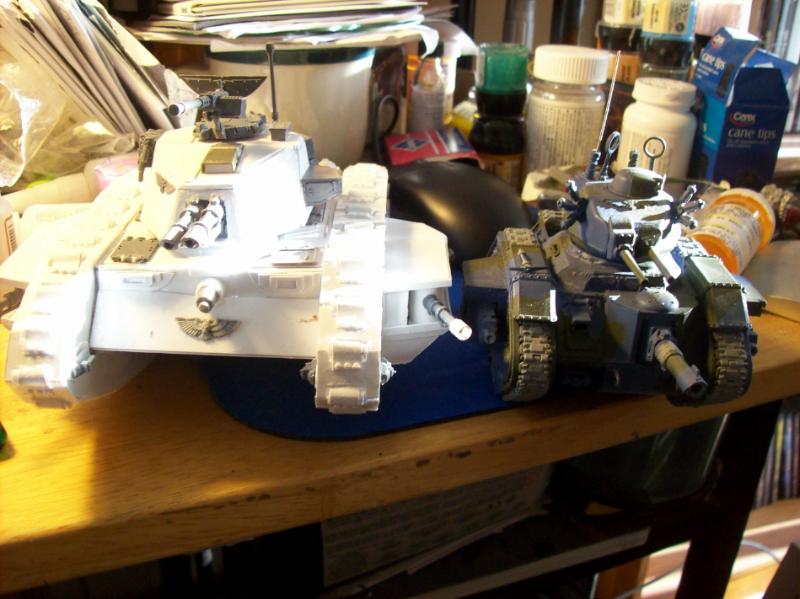
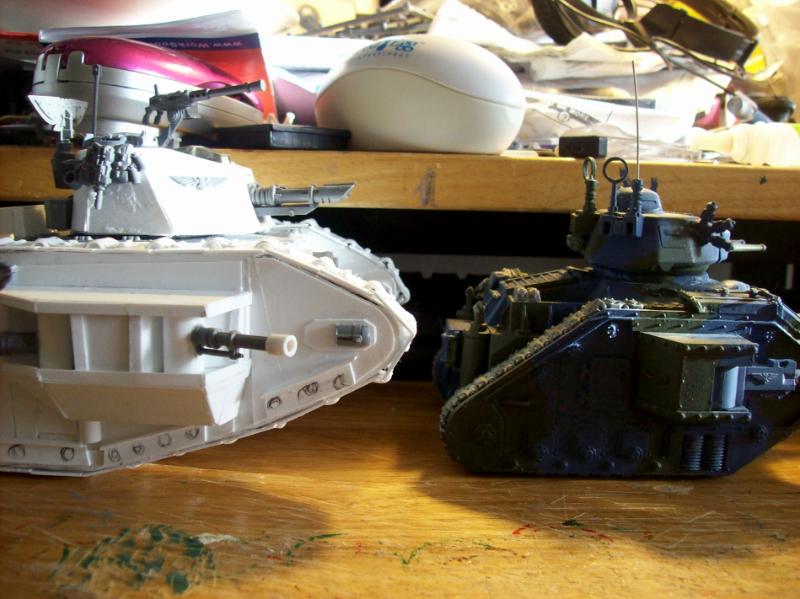
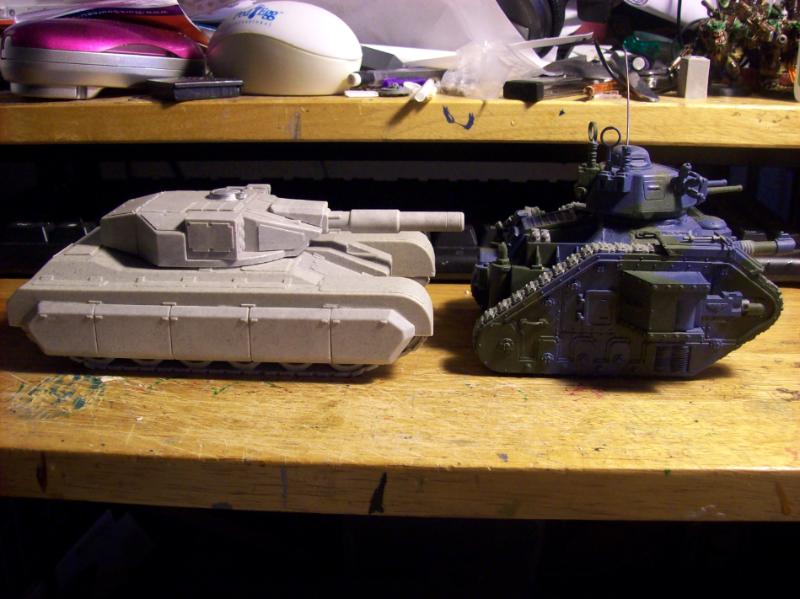
Yeah, but their shape opf treads is so like the Leman Russ kit! And of course it look puny, I am making the Perun a "Superheavy" class monster tank!^^
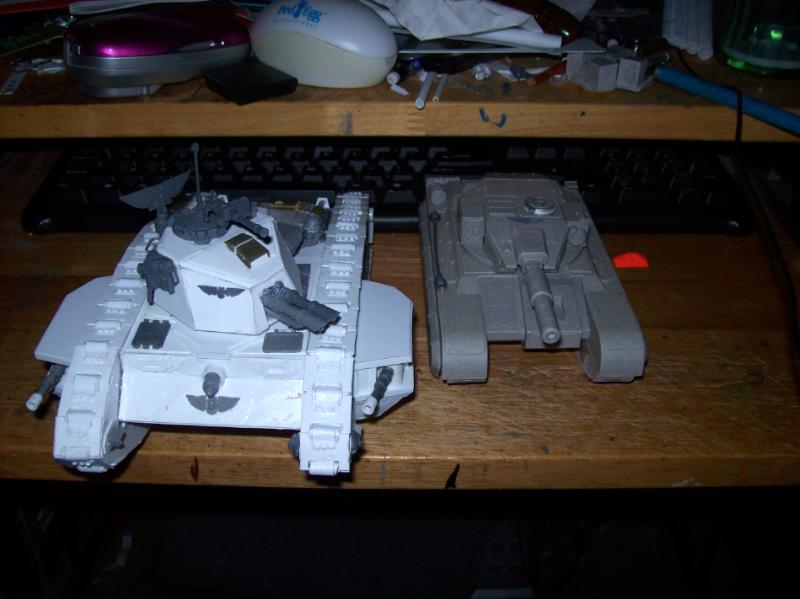
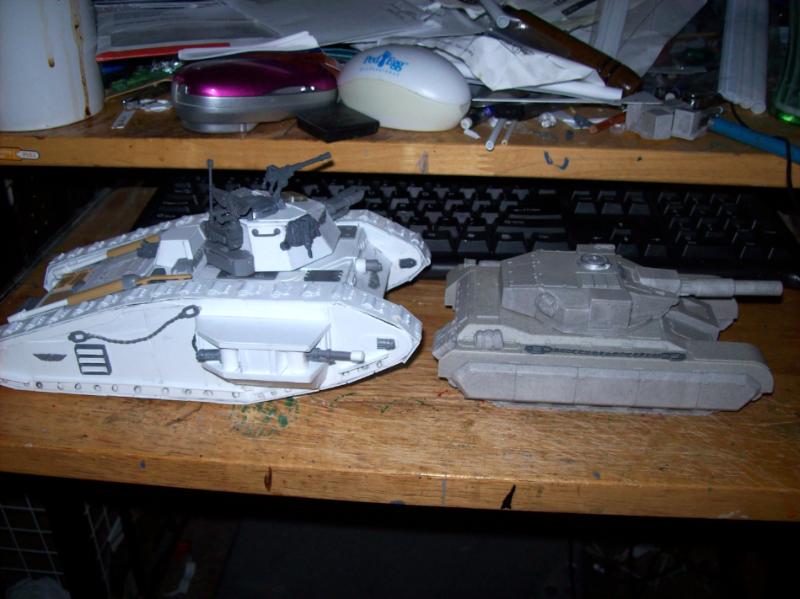
SickSix wrote:Are your other tank models 1/35 scale?
Well, the nice one with the twin long guns is 1/35th scale as is the one PzkPfw hellhound and the seadragon. the Akuyaku-1 is 1/72 originally. the MBT-90D is 1/48th and the rest are set to 40k scale.
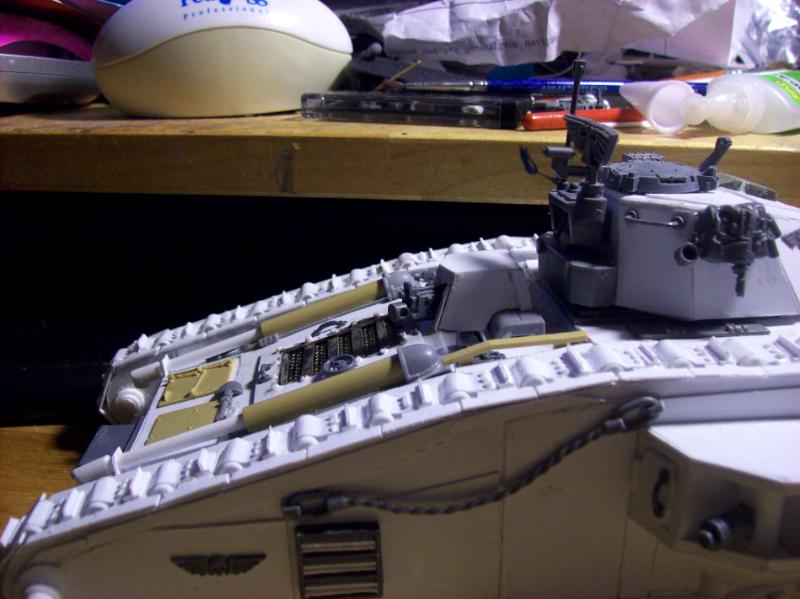
Oh yeah, more of the big tank now!
I have been busy! I am working on using some more left over Ion Cannon bitz as a 12-cylinder engine block!
[/img]
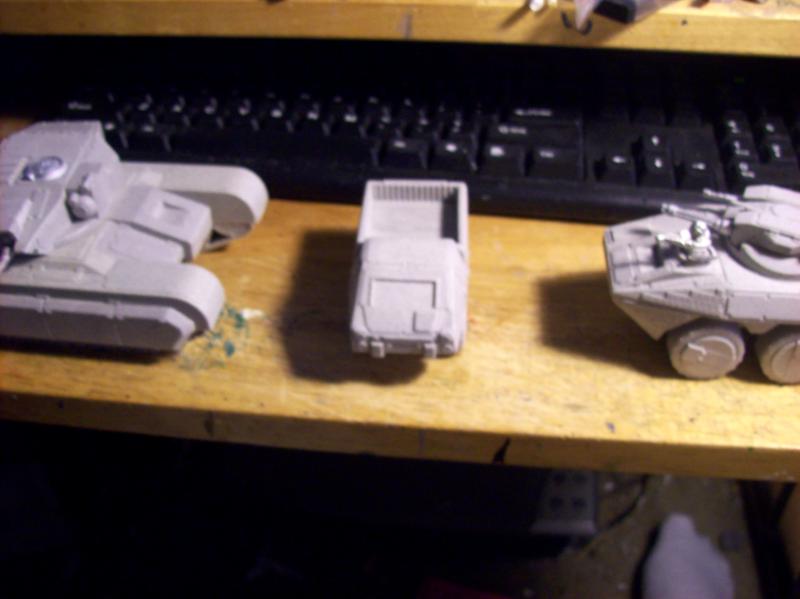
nice spoiler pic there with those lots of minis on the shelf^^ some of them i recognize but far more i am unable to name...
the mainbody of the tanks is shaping up into something really serious looking! this is going to be a fine tank, something of your shown techniques i will deeply consider as a base of thought for future projects...i think you should have had a go at constructing or even as an architect.... very sound work, are you planning to make seeable sections for the compartment? that would top the work even further...i guess you are unstoppable now^^
have you already thought up a way to make the engines and the exhausts? in my scratchbuild box i have oh so many parts that could be usefull for you but i am a fraid even if i would send them to you now they would test your ability to keep calm waiting for them to new limits... so i cross fingers for having enough on your own suitable materials...
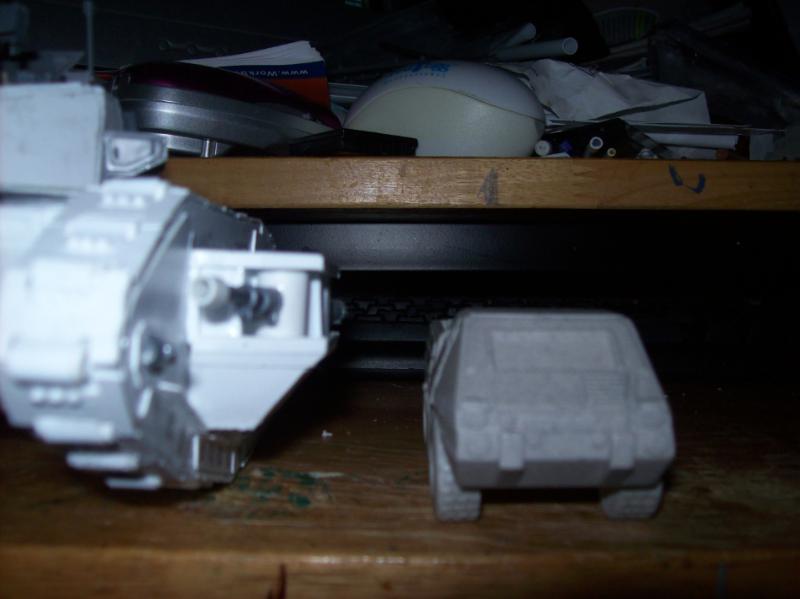
also seeing the size refference of your mouse i am now really good seeing the size of that future superheavy^^ as i haha am sitting at my own mouse atm^^ so cool work mate, and i hope to see more real soon^^
Viktor von Domm wrote:nice spoiler pic there with those lots of minis on the shelf^^ some of them i recognize but far more i am unable to name...
the mainbody of the tanks is shaping up into something really serious looking! this is going to be a fine tank, something of your shown techniques i will deeply consider as a base of thought for future projects...i think you should have had a go at constructing or even as an architect.... very sound work, are you planning to make seeable sections for the compartment? that would top the work even further...i guess you are unstoppable now^^
have you already thought up a way to make the engines and the exhausts? in my scratchbuild box i have oh so many parts that could be usefull for you but i am a fraid even if i would send them to you now they would test your ability to keep calm waiting for them to new limits... so i cross fingers for having enough on your own suitable materials...
also seeing the size refference of your mouse i am now really good seeing the size of that future superheavy^^ as i haha am sitting at my own mouse atm^^ so cool work mate, and i hope to see more real soon^^
vik
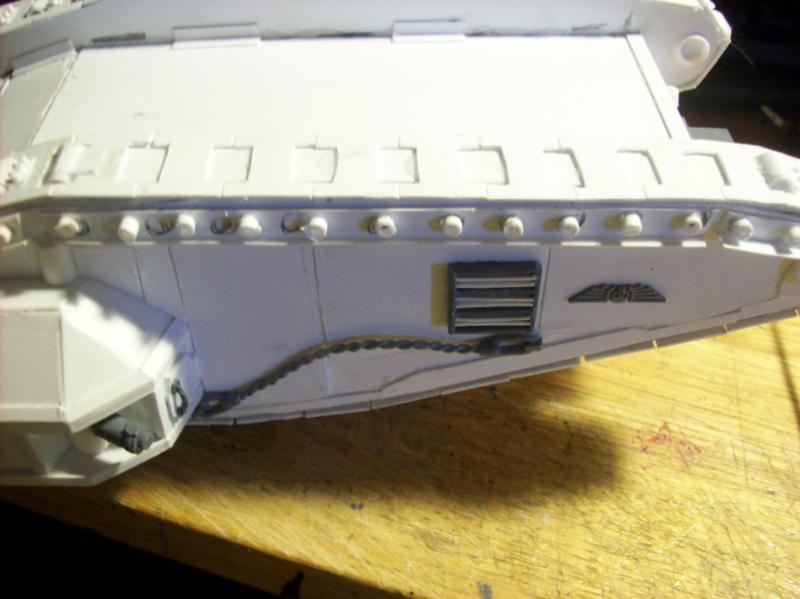
The exhausts will be atop the plates that will cover the empty spaces to the sides(Fuel pods?) I will work something out to have a grill over the engine as I intend to paint it and have it viewable through it. Years ago I entertained architecture, but decided that I loved drawing and making things to much to turn it into drudgery. I may or may not make a "transmission" for the very end compartment.
Yeah, mail from Europe is being slowed by U.S. customs due to some git sending a home-made bomb through the mail system! I will make a long exhaust like I have seen on the WWI Mk series tanks and the French Char-1B.
I found one of the razorback decks, and this will allow me to fashion a long cylinder for the turret as I use it for the main turret mount over the main compartment of the "Perun"
dantay_xv wrote:Was that the guy who used UPS to send the fake bomb from the UK to Turkey?
What an arse he was.
Most likely that was what triggered it all, and oh how much I would like to kick his arse! I have yet to get my other box of Old Crow as Jez said he was shipping it over a week ago, and it is likely siting gathering dust somewhere!
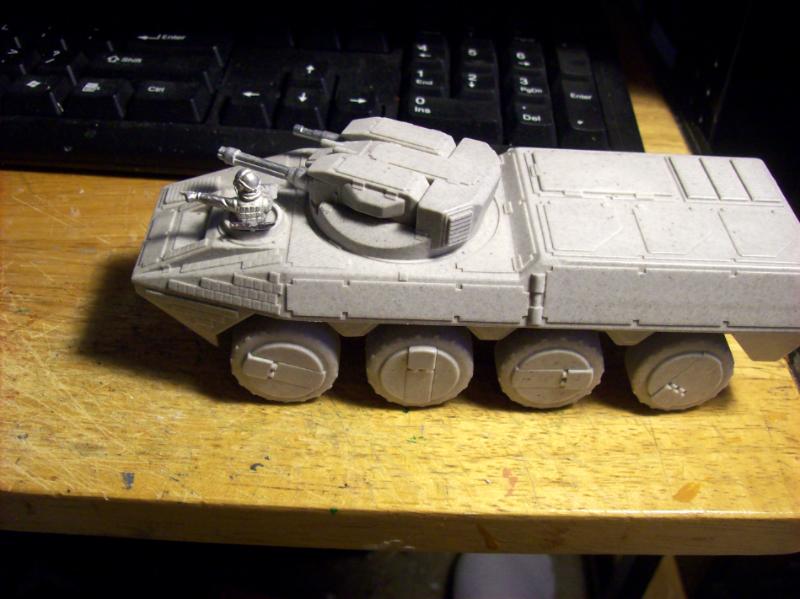
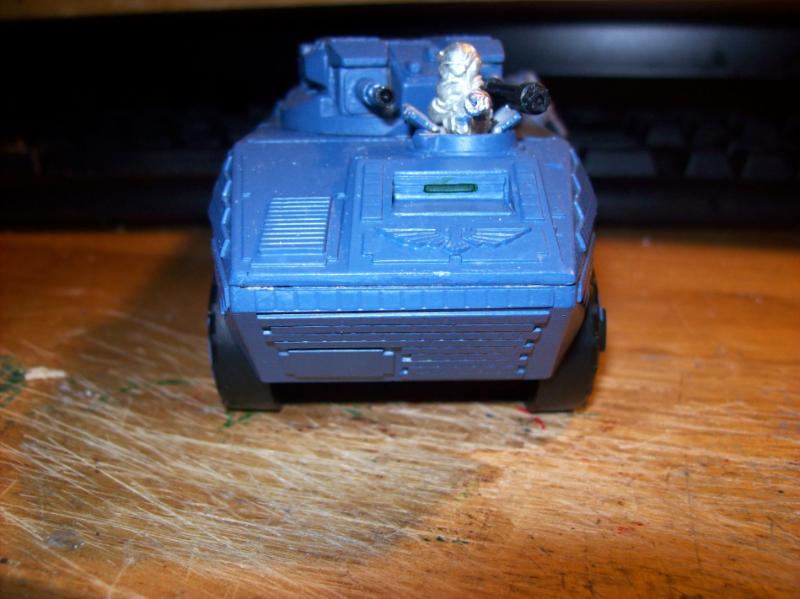
Here's mine, I saw a pic of the original posted a little while ago. Turret is a dreadnought arm. Please forgive the dust, it's been in storage for 8 years!
Vitamin_K wrote:Here's mine, I saw a pic of the original posted a little while ago. Turret is a dreadnought arm. Please forgive the dust, it's been in storage for 8 years!
That is a nice APC, and the using a spare Dready arm as remote turret is brilliant! Oregon? I am in Tualatin, where the heck are you at?
dantay_xv wrote:Was that the guy who used UPS to send the fake bomb from the UK to Turkey?
What an arse he was.
that was quite a big story here in germany too...i thinnk there was some dumba... involved here too... this kind of parcel was also sent to our "president" too...
at shaso,
I found one of the razorback decks, and this will allow me to fashion a long cylinder for the turret as I use it for the main turret mount over the main compartment of the "Perun"
....hmmm i cant picture it atm... but that stirrs my eagerness for next pic update all the more^^
Years ago I entertained architecture, but decided that I loved drawing and making things to much to turn it into drudgery.
that i think is a good decission as i think one can pretty soon ruin a love by making it ones profession.... soon it will wear out on you and only leave an empty shell of a once good thing.... so architectures loss is our gain^^
It is a piece for taking the place on a Rhino, allows the vehicle to mount a twinlinked weapon turret on the APC, but reduces the amount of troops it can carry.
No buildings designed by me. but plenty of models!
well since this whole week the family stay at home tomorrow i cant take my khorneflakes with your latest build updates.... but in my middday i will look forward to see your most recent musings and pics...i hope^^
shasolenzabi wrote:
That is a nice APC, and the using a spare Dready arm as remote turret is brilliant! Oregon? I am in Tualatin, where the heck are you at?
I'm in the Other Oregon, east of the Cascades in Klamath. Thanks for the compliment
so here is me sitting fresh face, well as fresh as a 4 hours sleep can make me^^ and hoping to see some pics but to no avail...*sad tanklover face*
ups...*puts feet in his mouth* i should have somehow read further??? that is truly incredible looking...man where had you all this stuff lying around? cool looking. that doesn´t look like it is constructed but as if it is healing in its supposed form back^^! this will be truly awsome! ad i like how you build now even the internal details!
Viktor von Domm wrote:s
ups...*puts feet in his mouth* i should have somehow read further??? that is truly incredible looking...man where had you all this stuff lying around? cool looking. that doesn´t look like it is constructed but as if it is healing in its supposed form back^^! this will be truly awsome! ad i like how you build now even the internal details!
Viktor von Domm wrote:well to cut a long praise short^^
SebastionSynn wrote:bloody hell, i knew this thing was going to look good, but your making it look simple. that's a lot of work all at once and it looks awesome so far.
Thanks. Well, no job, and time on my hands makes for plenty of work to get done each day.
Viktor von Domm wrote:he how is the tank work coming along? will your day even be more eventful with your project?
i have too medled a bit with some foamcore and will shortly show what i have done so far...^^
I added some bits from the old Char-1 to it(sand colored parts, and am working on a turret for the twin-linked las-cannons. I still have to add the tread details, sponsons, side plates, exhaust, commander hatch and vision ports.
sounds like a lot of work...but that is in fact what drives us i guess... the fun part IS to search and find bits and stuff to make a nice and convincing model!^^
OMG, you used pipe cleaners for the grillwork over the engine. LOL, that's so ghetto it's cool, can't wait to see how they look after painting them. the rest of it look good, I'm also really liking the way that turret is shaping up.
SebastionSynn wrote:OMG, you used pipe cleaners for the grillwork over the engine. LOL, that's so ghetto it's cool, can't wait to see how they look after painting them. the rest of it look good, I'm also really liking the way that turret is shaping up.
thanks for the pm.
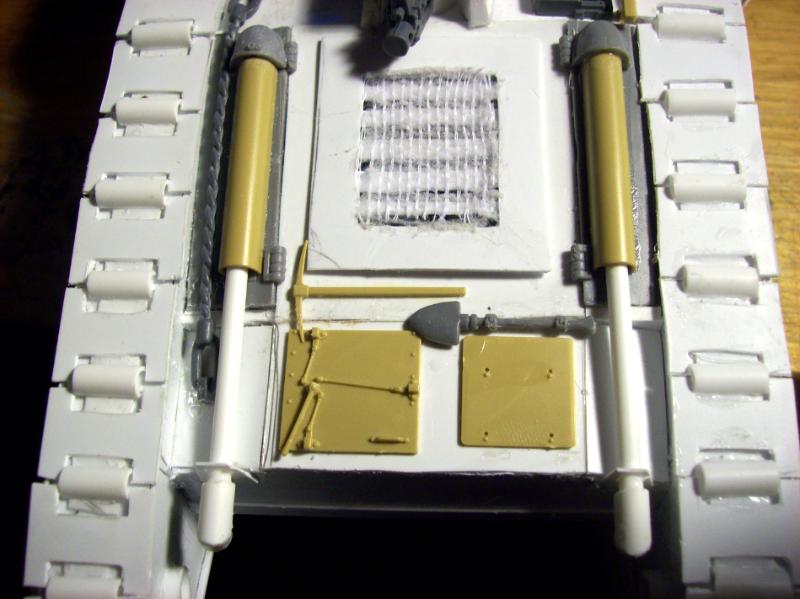
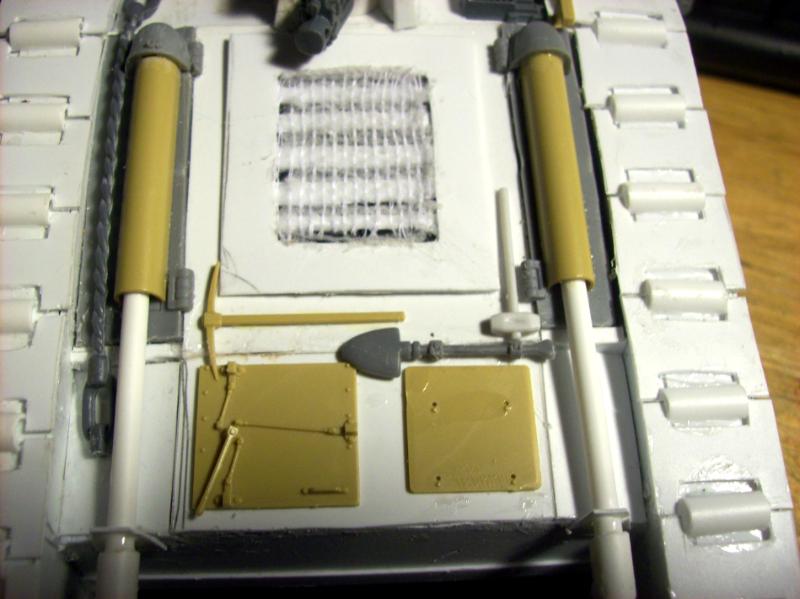
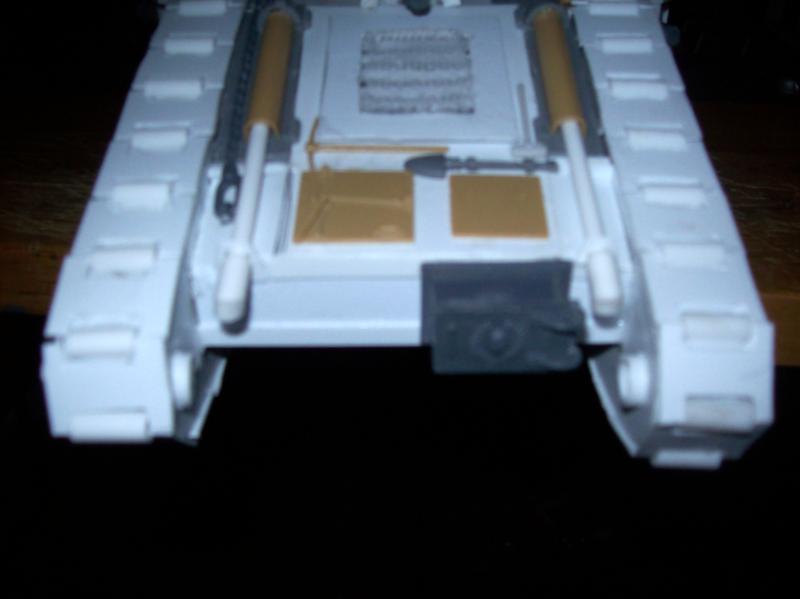
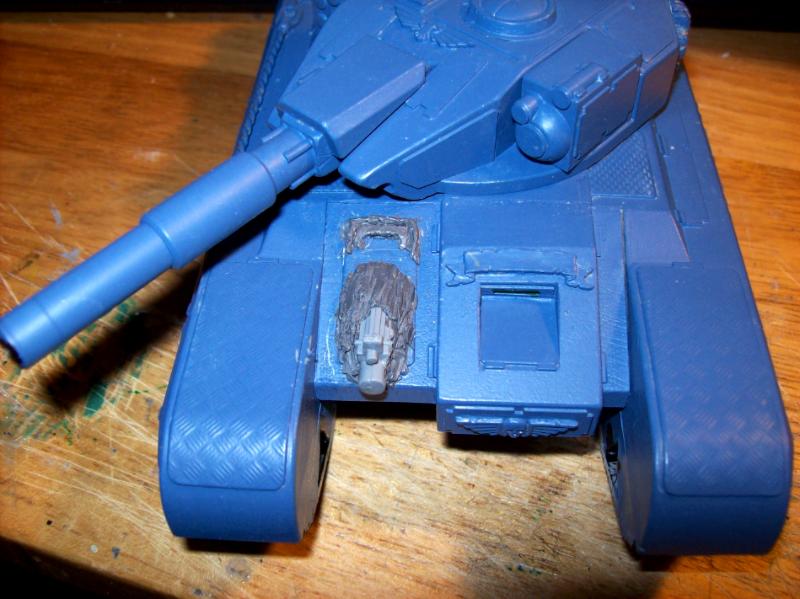
Then my trick worked even better than planned! I made thin strips of plasticard to lat under the hole on the and then cut and glued a sheet of medical gauze to the strips to add depth control.
Automatically Appended Next Post: Flash gave a ghost effect for the tank, but turret partially built.
[/img]
Turned to the camera
[/img]
The other side of the grill for the engine.
[/img]
Crisper pix
[/img]
Better light for the turret
[/img]
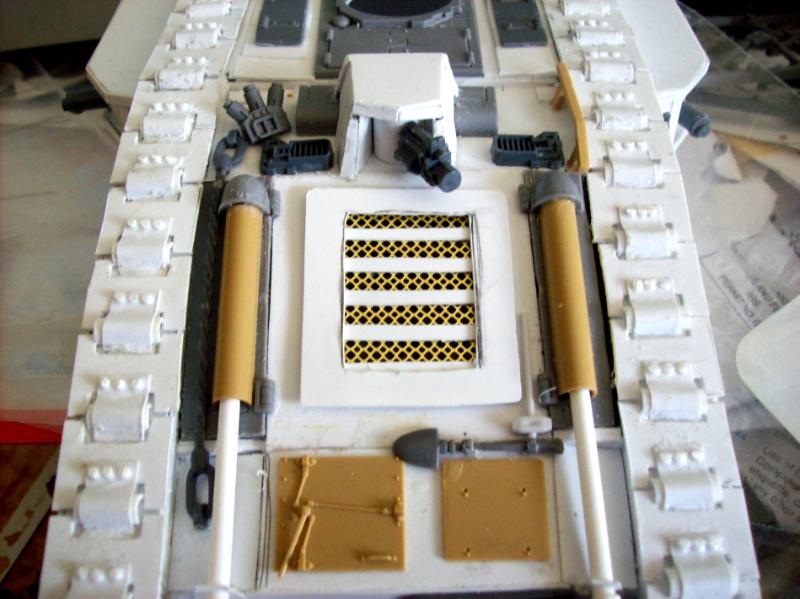
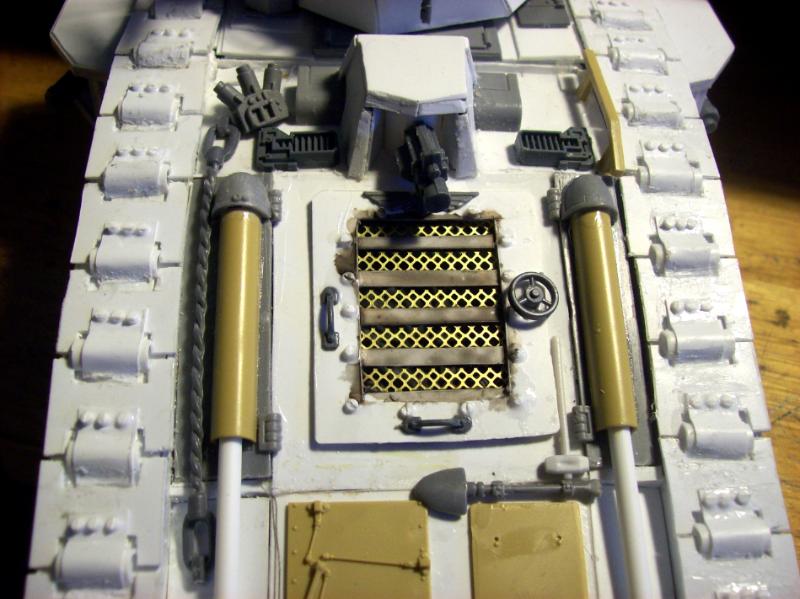
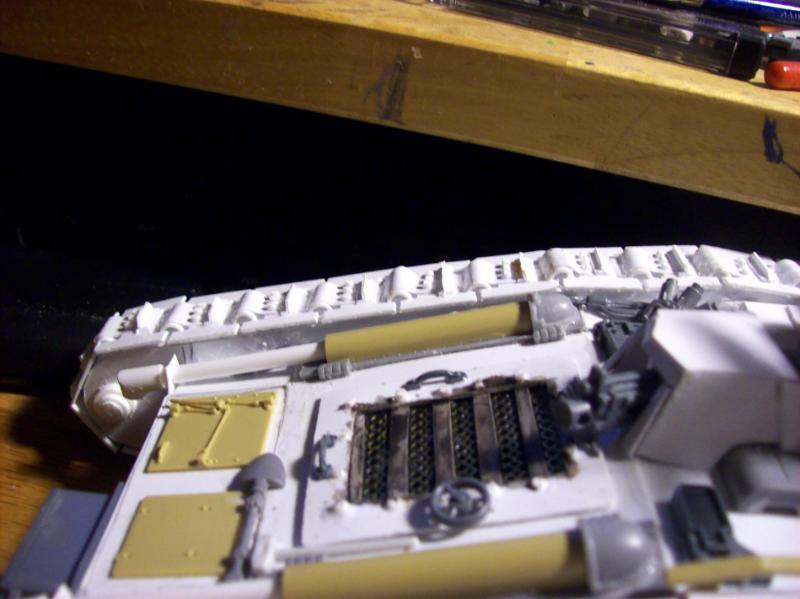
new panels on deck, these are for when the tank is w/o the turret and they can access the gears.
[/img]
ok, i really like where this is going, to see the turret building up gradualy is a nice how-to! are the sandcolored parts from the japanese tank kit? i lie the way you detail up the flat areas, lots of thoughts are involved in this built. the grill is a nice looking detail i see how it works but tho i know what parts you used i still dont comprehend/understand what you really did??? pipecleaners for what effect? the pics doesn´t show nearly anything in this particular detail for the laymen like me^^ so i have only geusswork here^^
i like the idea to make the grill removable and also that the turret is still movable...but could you show the later a bit more in detail how you acomplished that? that would help me later on enourmously^^
great work as usual and i think the top of the tank looks almost completed...
I made thin strips of plasticard to lat under the hole on the and then cut and glued a sheet of medical gauze to the strips to add depth control.
OH, ok, from the angle of the earlier pic and the way it's kinda see through it made the grill work look like pipecleaners were installed. i'll have to remember this trick with the medical gauze when i get around to making a looted tank. that's still cool though, and this whole project is looking good.
it doesn't look like you used any bracing inside the turret to apply the panels so i believe you just glued them one to the other? that shows patience. me, i'd have used bracings so i could have done the whole turret all at once.
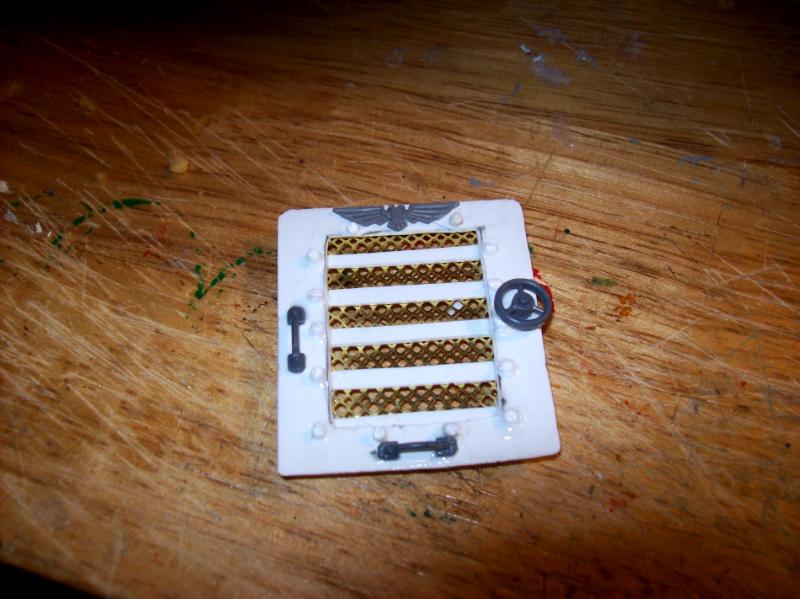
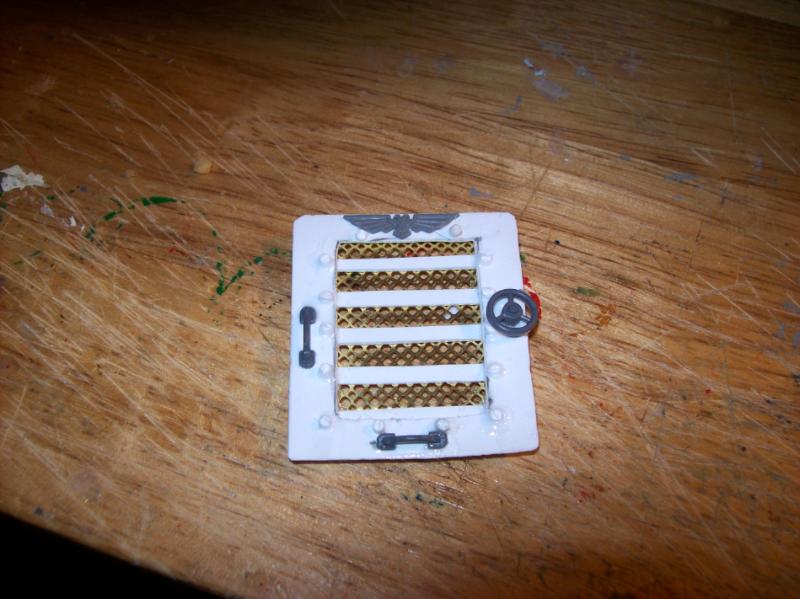
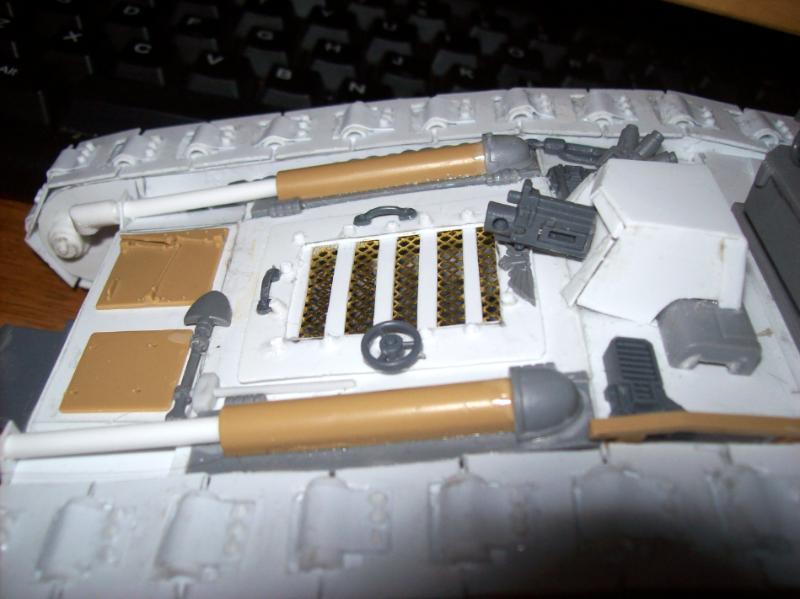
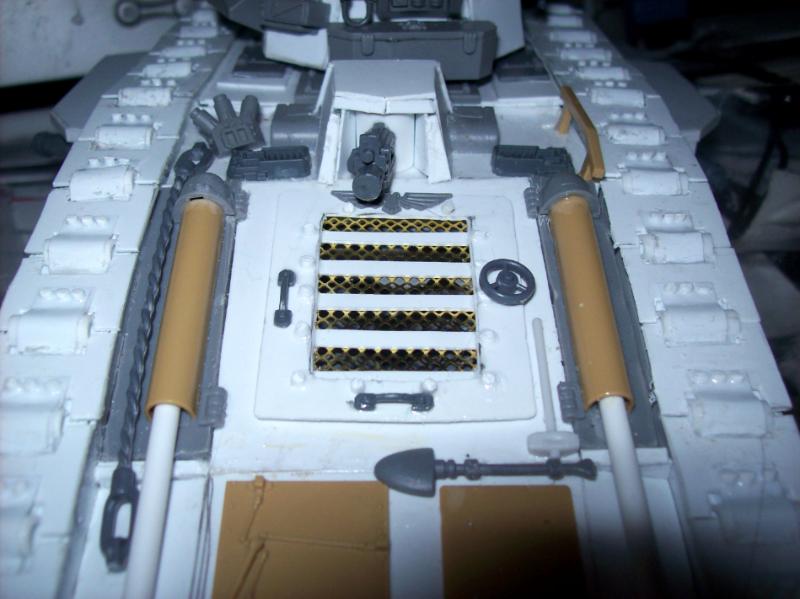
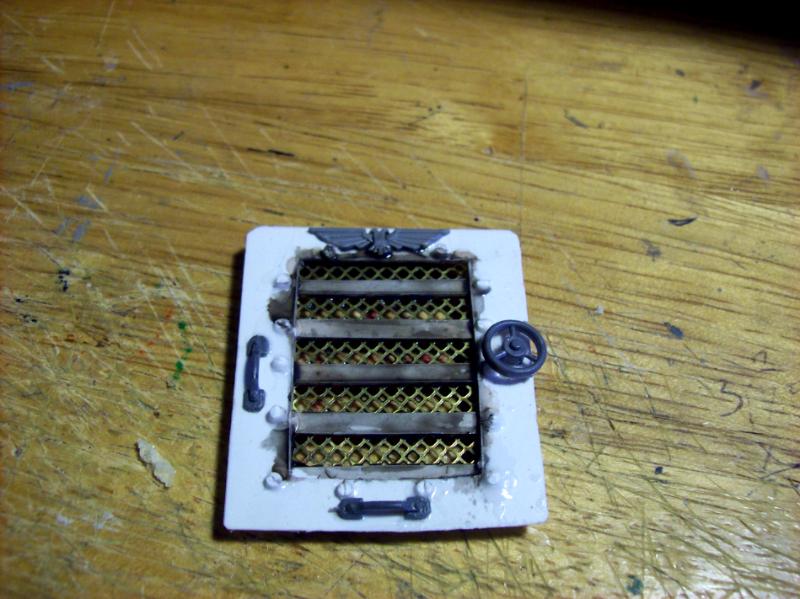
Vik+Anvildude, I have remembered the "flower" setting for micro pics and got cleaner pix for you to see the grill details, can't wait to have the washes and paint make it look more like mesh and have it look "real" First up, the way it looks from the top [/img]
Engine's view, showing the strips of plastic I set into the base for the grill. [/img]
side long view showing the "box" panels I added t6o keep it from sliding out, and helps hold it in place [/img]
Side on, the angled part is due to the "engine" making it hard to keep it a simpler straight strip. [/img]
The turret needed a good way to stay pretty much in place and this "tower" helps keep it stable. [/mg]
The turret has a top! [/img]
Clear shot [/img]
Comms and extra power supply. [/img]
Coming at ya! [/img]
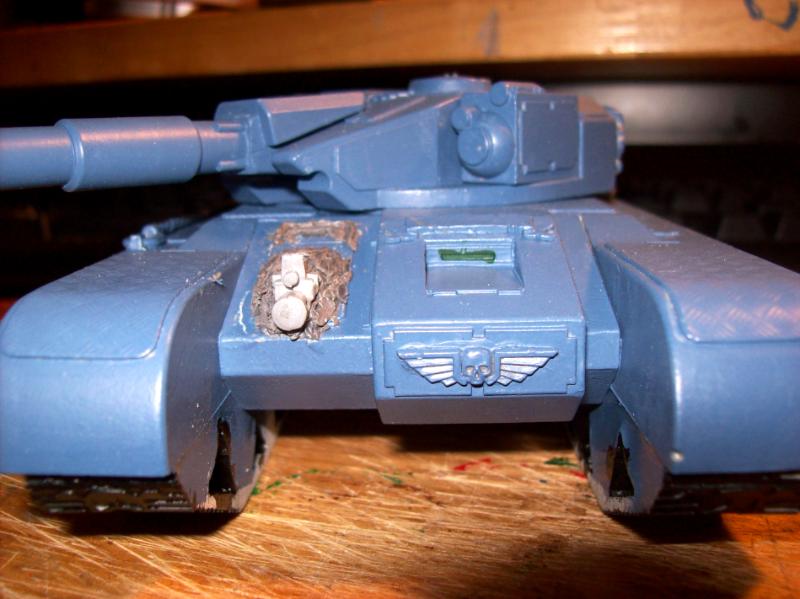
Raised up so you can see the forward details. Heavy Stubber, vision ports, Imperial Eagle. [/img]
Sebastian; No, patient as I was also playing episodes of Dr. Who to keep me busy as I waited for the panels to adhere to the base of the turret.^^
Automatically Appended Next Post: The turret by the way came out somewhat odd shaped, assymetrical from seen above, I think the Exterminator with it's French turret may have influenced that somewhat from having touched the Perun. Pretty much what happened in the interwar period as the Russians copied a lot of French designs for tanks and planes as seen by the way the Russian vehicles though made as a Russian tank or plane showed heavy French design, some American as well .
now i see and understand the grill and how you made it...wouldn´t have dreamed about using the gauze for that purpose...but whatever works is cool! for my own needs i think i will rely on toys i guess...i will deal with that when the time is on for that to search for a solution...could real wiremesh also work here?
the turret is a bit uneven but now with the extra details like comm and hatch and the nifty idea to use the HW powersuply ^^ (that will get copied as well^^ as i have quite a few of these^^) it looks like a living and working one...by the way, the hatch is from a SM tank, eh? will you add what kind of sideweapon on the gunmount?
one suggestion, did yoiu thought up to use/work with the flat space between hatch and the lasercanon barrels? this is quite a flat nearly horizontal surface and i think here could be something as well...maybe some rolled up canvas or a shovel or something in that line...or even some protective plating ...
Viktor von Domm wrote:now i see and understand the grill and how you made it...wouldn´t have dreamed about using the gauze for that purpose...but whatever works is cool! for my own needs i think i will rely on toys i guess...i will deal with that when the time is on for that to search for a solution...could real wiremesh also work here?
the turret is a bit uneven but now with the extra details like comm and hatch and the nifty idea to use the HW powersuply ^^ (that will get copied as well^^ as i have quite a few of these^^) it looks like a living and working one...by the way, the hatch is from a SM tank, eh? will you add what kind of sideweapon on the gunmount?
one suggestion, did yoiu thought up to use/work with the flat space between hatch and the lasercanon barrels? this is quite a flat nearly horizontal surface and i think here could be something as well...maybe some rolled up canvas or a shovel or something in that line...or even some protective plating ...
Well, that area wil have some more plates added to it on the turret, and I am working on an optical box or such system for the sighting of the lascannons on top of the extra plates too!
If I had some patches of window screens, or wire mesh, I would have used that instead of the cottony gauze. The hatch is indeed from a SM tank, a spare set it was. I have a pattern for the sponsons set for cutting and tube stock for the weapons. I have spare auto-cannons and some weapons for Heavy Stubbers, with the "water-jacket look for the barrels.
Viktor von Domm wrote:now i see and understand the grill and how you made it...wouldn´t have dreamed about using the gauze for that purpose...but whatever works is cool! for my own needs i think i will rely on toys i guess...i will deal with that when the time is on for that to search for a solution...could real wiremesh also work here?
the turret is a bit uneven but now with the extra details like comm and hatch and the nifty idea to use the HW powersuply ^^ (that will get copied as well^^ as i have quite a few of these^^) it looks like a living and working one...by the way, the hatch is from a SM tank, eh? will you add what kind of sideweapon on the gunmount?
one suggestion, did yoiu thought up to use/work with the flat space between hatch and the lasercanon barrels? this is quite a flat nearly horizontal surface and i think here could be something as well...maybe some rolled up canvas or a shovel or something in that line...or even some protective plating ...
There will presumably be a heavy stubber in place on that cuppola, so the forward turret roof would be an ideal place to store the ammo cans for it
Brotherjulian wrote:
There will presumably be a heavy stubber in place on that cuppola, so the forward turret roof would be an ideal place to store the ammo cans for it
These will be modified, I had chopped the flash suppressors for another model off, and will use the plastic tube stock of the right size to replace them.
Wow you've been busy!
to take away the noticability (Is that a word? It is now!) from the asymetrical turret, add some extra gubbinz to the flat areas of it.
I really like where this is going, and it's one of the best WIP tank conversions I've seen on dakka!
keep up the good work!
and I agree with vik. about the assault cannon being the best looking and hving stuff on the flat areas.
i myself am musing the thought if i should use bolters for the sponsons...? i fear my own stock on autocanons wouldn´t make me make symetrically weaponsoutloads, which i think is a must have!
if you tell me now that you have made them movable after all too then i throw away my chisel and my paints and start growing pigs in the land...^^
seriously, looking cool!, tho i have to say seeing you cutting up autocannons somehow makes me cringe^^ all that beautiful weaponry cut to size...argh^^
the smaller gun...what does it count as? looks a bit like a vickers or will it be a bolter, i am afraid the pics again wont yield enough information to recognize completly^^
*throws away modeling tools...* he did it , first pic shows it clearly now that you actually made movable sponsons...damn you...for my own sponsons i have decided for now as i use the foam that this will be a thing when i go for a second tank...then i will include some other features i think... i even thinking about a nonmovable turret...would probably be a neat feature but too much work currently on this project to get it work...plasticcard is in that regard the better material all the way through if you want mobility...
Viktor von Domm wrote:if you tell me now that you have made them movable after all too then i throw away my chisel and my paints and start growing pigs in the land...^^
seriously, looking cool!, tho i have to say seeing you cutting up autocannons somehow makes me cringe^^ all that beautiful weaponry cut to size...argh^^
the smaller gun...what does it count as? looks a bit like a vickers or will it be a bolter, i am afraid the pics again wont yield enough information to recognize completly^^
*throws away modeling tools...* he did it , first pic shows it clearly now that you actually made movable sponsons...damn you...for my own sponsons i have decided for now as i use the foam that this will be a thing when i go for a second tank...then i will include some other features i think... i even thinking about a nonmovable turret...would probably be a neat feature but too much work currently on this project to get it work...plasticcard is in that regard the better material all the way through if you want mobility...
vik
Vik, they do swivel. Tube in tube stocks help.
Yeah, it is a unpleasant job, but they do need to be set up for the swivel. Oh the Heavy Stubbers, yeah like Vicker water jacketed MG's.
I made it from Ork shootas.
If I had the foam instead, I would be making flats with holes and making pegs for the weapons for the mobility.^^ No need to throw in the towel yet Vik. It can be done! all you have to do is look at your project with different eyes.
the thing with the foam is that it somehow hinders movability... the turret i maybe try even...this will take some considering materials but i think at least this could be achieved...the sponsons...well i could at least make a new take on them and redo from scratch as i haven´t invested that much work on them atm... so there is still enough or rathe rnot so much comittment atm to that part of the project...in fact the turret even might go too through a rebirth... as all is in constant flux^^ for now i only had planned to use sewing bobbins to make tube from to instal the weapons into and thus making the mounts of the sponsons...this idea could very wel be made whole from cardboard i guess... i still have some pretty thick cardboard...gosh mind is racing^^
OH! bobbins and pins! that is the way Vik! the foam would hold the pins in place as they help make the bobbins swivel! Same basic prinicipal to the tubes, just slightly different!
the foam would hold the pins in place as they help make the bobbins swivel!
...
hmmm do you think one upper and one lower pin would be enough? this might cause wobble in the construction when the weaponarm is turned...hmmm....if i am lucky i have bobbins of different sizes and this could make all the difference...
hey Vik, don't forget that you already have tube stock lying around your house, it's just in a form you never thought about using in a model before. you have pens and q-tips, remove the ink chamber from the pen and use the outside of the pen, you can use the ink tube and writing nib as a rokkit by trimming it down to size and super glueing the end so the inkl doesn't leak out. as for the q-tips just remove the cotton and you'll see where you need to trim it to get rid of the area that was melted to hold the cotton in place. save the cotton and attach it to a base and paint it up as smoke, then when you have a weapon destroyed in game, you pull the smoke base out and place it in the appropriate area.
EDIT: and straws, almost forgot the drinking straws.
If you're using Plastic q-tips (cotton swabs on sticks) that is. Paper ones don't work so well as tubes.
But yeah, pens work great for that. Drain the ink out of them, and if you have big gel pens and smaller regular pens, the inner tubes fit within each other pretty well.
you are all totally right.... have some already chopped up felt pens from my kids lying around and have forgotten almost about them...the q-tips i will absolutley use...the idea to make markers of the cottonbuds is new but so nice that i will efinatly try that one out^^
as for other more unigue looking barrels my wife recently provided me with lots of pens from an old satchel she had lying around...some rather nice detailed things now in my collection.... i also recommend the search for spent ink cartridges of inkpens will show what i mean in my blog shortly...i have rummaged around in my scratchbuild box and came up with some cool looking bits... also what i havent seen here around for barrels to be used is cable tech... lots of chopped up bits in my box from computer cables like serial or parallel cables and even networkcables might make fantastic weapons...do take a look at my collection... i bet you have this stuff lying around too at your cellar or wherever you store such thingies^^
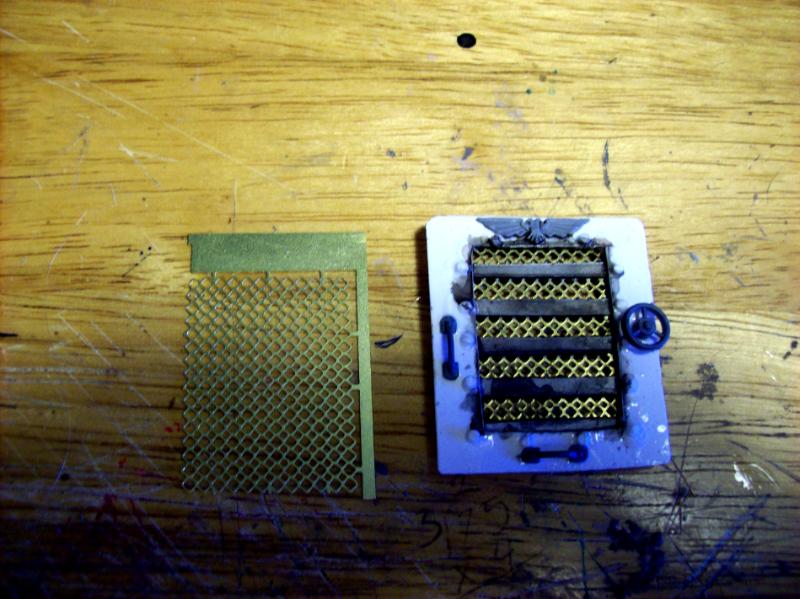
Um I might have something that will work 1000 times better than the gauss I have spare grills from the GW basing boxes the engine would be more visible through that.
sonofruss wrote:Um I might have something that will work 1000 times better than the gauss I have spare grills from the GW basing boxes the engine would be more visible through that.
You'd probably have to mail it then, but I have no cash presently.
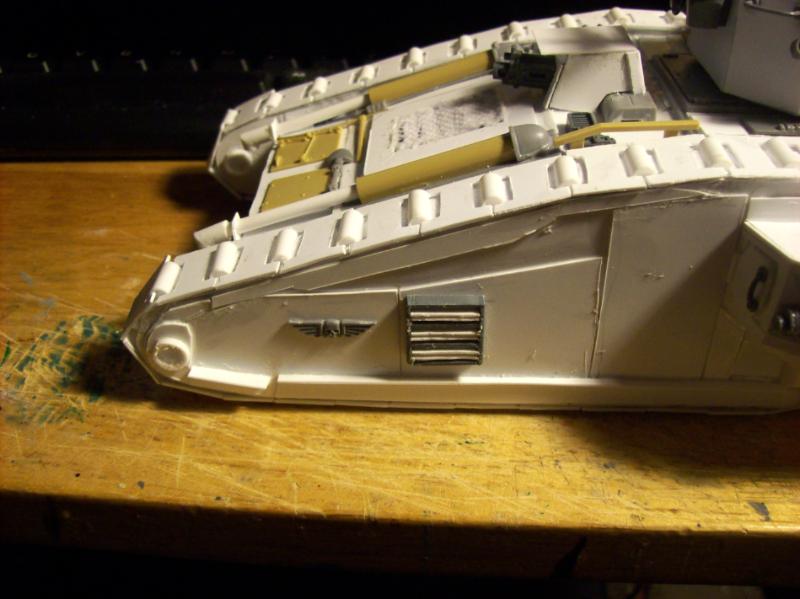
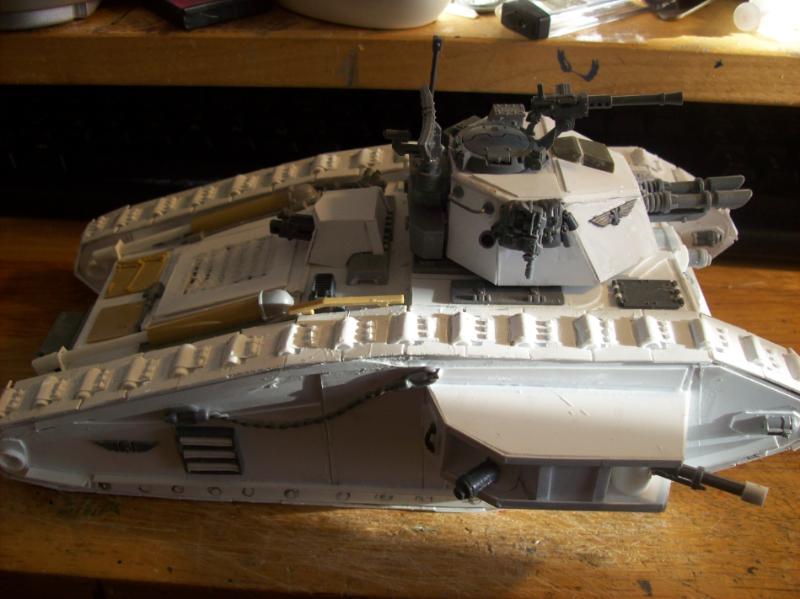
Automatically Appended Next Post: More work done on the massive perun tank.
[/img]
Automatically Appended Next Post: Plates are being added as well.
[/img]
Automatically Appended Next Post: Exhaust system is in place, I have to add pix with the end caps, they help to point the exhaust down and to the rear
[/img]
Armor plates and vision systems for the turret!
[/img]
Automatically Appended Next Post: It is slowly coming together!
[/img]
whoa! the only thing that still looks a bit empty is the sides of the tracksystem...otherwise i think you almost finished the tank! i really like the exhaust system you built, thats the look! if by chance you can add curved pipes to the endings then the look would be completly superb!
Automatically Appended Next Post: oh and did i tell you how much i like the sponsons? they look very classy in design! your tank looks straight from a historybook! i think you need to find out to built the as of now used bitz from plasticcard and tubes and then you could do your own production of cool looking tanks and make a fortune by selling those beasts!
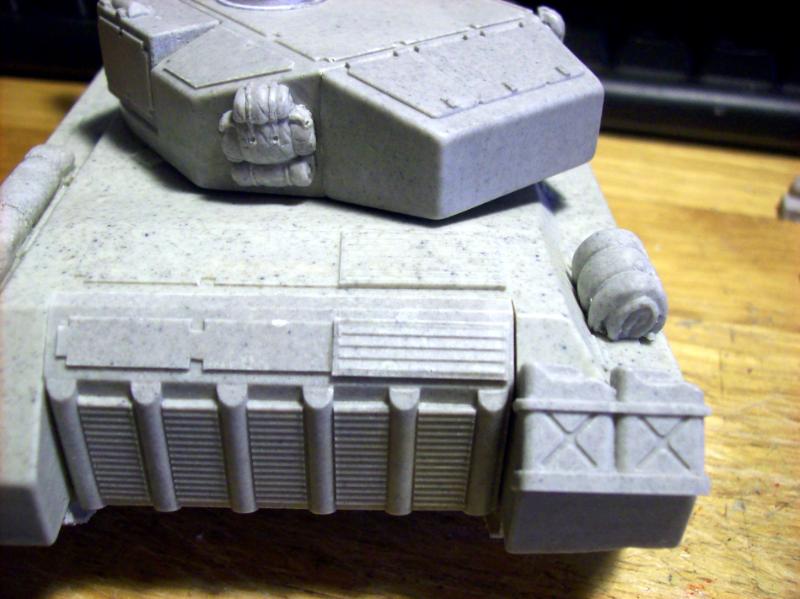
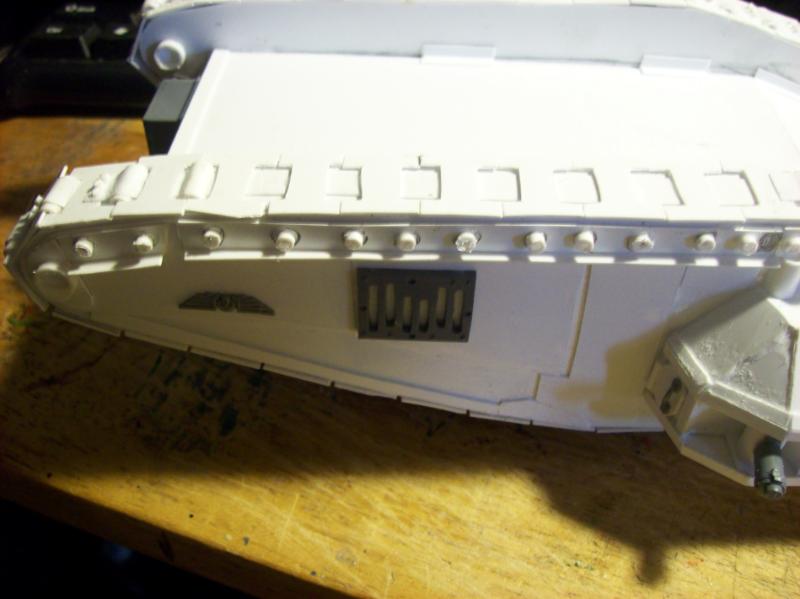
I do think you need to put some cleats or something on the tread shoes themselves, though. They look just a little smoothe and bare for something that's going to be grinding through the mud.
Could not find curved pipes, but may make a more steam punk-ish "L" shaped down pipe for the exhaust system, I already have made parts that could accept a second part for that, otherwise they resemble racing exhaust ends. ,"<I" is the shape.
Oh the track shoes will get their attention, just a lot of the same basic pieces cut for them is what is needed. Then they will have the kleats and hinge parts.>
tanks looking good. for the exhaust pipes you say steampunkish, but my mind pictures using tube stock cut at different angles and glued together making a three or four part elbow as it were. Not sure we're talking about the same thing, but i think the end result will be similar.
SebastionSynn wrote:tanks looking good. for the exhaust pipes you say steampunkish, but my mind pictures using tube stock cut at different angles and glued together making a three or four part elbow as it were. Not sure we're talking about the same thing, but i think the end result will be similar.
Yeah, a two piece cut to make a sharp angled down vent for the exhaust is what I wound up with, very simple design.I will have to make the L-join show rust as that would be the issue with such piping from those days.
[/img]
Different angle.
[/img]
Based upon piping I have actually seen from old pix.
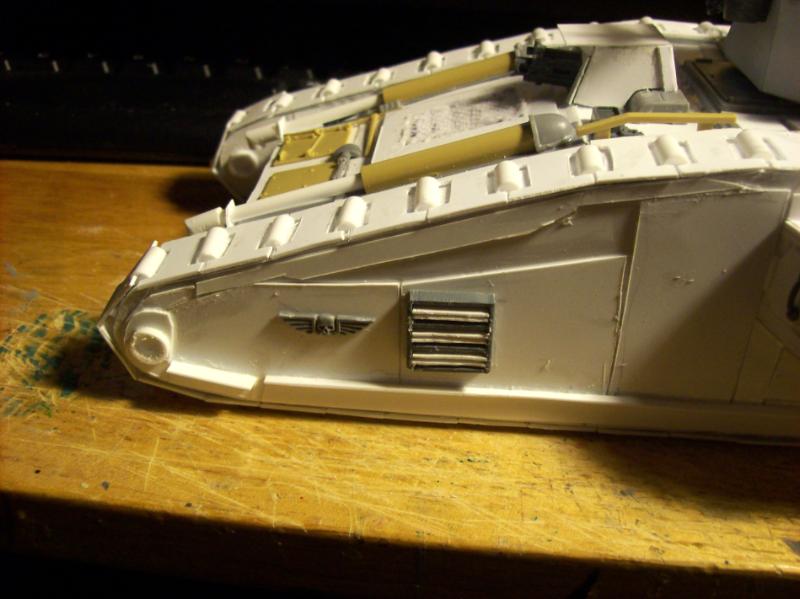
Automatically Appended Next Post: Second sponson in place, and added some other touches to the Perun tanks.
[/img]
Needs fuel cans back here I think.
[/img]
The other side.
[/img]
The full effect head on!
[/img]
Automatically Appended Next Post: Wonder what it will take to get the kleats and rivets details on? the beast will look fantastic, what say others?
i am a fan...if one would ask me^^
just came to recognize the steelplating on the trakcsside...exellent! (it is time to go for a wash, well actually not but would help a great dieal to let us see some outlines better...)
the exhausts look very convincing, and i lkie that detail that they face down now... this means someone in the mechanarium planned to make a tank not seeable miles ahead^^...my own tank will of course get exhausts due to steampunk tech that will face upwards...i have yet to think this through as to the how and where...
by the way...when will the meshugge making riveting begin? i bet you will be a crippled man afterwards^^ all those many rivets could be exellent for toturing a mere man^^ but as you are a tanklover i guess you will overcome^^
Viktor von Domm wrote:be sure of that...maybe i do a nametag on a plate^^
LOL! I'd be semi-famous then!
Mad4Minis wrote:Thats looking great.
Thanks! the bulk of the major work is gotten to, now for the turret sides/kleats and rivets. Oh yeah adding a side vent made from a spare basilisk and added slats of sheet styrene on the side of the tank. IF I find another, I can use it to make a matching vent on the other side.
Well, I want to make sure I have more than one to load in, but the cut and modified frame is glued to the side of the tank, and now to add the other slats for the vent to look right.
The idea is similar to the pic where you see a vent working on the side to the rear, but this is piece that sticks out somewhat.
Automatically Appended Next Post: Looking at what I am trying to do, the tanks shares some of this as inspiration;
The turret added in makes it almost look like a WH40k version of:
Automatically Appended Next Post: But then again, neither of them has the double action sponson I have on mine, nor the Twin-linked Las-cannons.
dantay_xv wrote:Wow, the tank is coming along swimmingly, and like the tank pic taken from Indiana Jones and the last crusade
Thanks Dantay_XV, I am waiting on new grills from Sonofruss to re-do that engine cover. As for that picture, the Perun seems to slightly resemble the Last Crusade Tank as it was also a MK-VIII style design with a turret instead of weapon tower.
if you take the international (i think i saw that name once mentioned in that regard) as reference, you get instant points for coolness^^ i too have recently...er... about saturday i guess researched in that department^^
the tank looks very good...tho i think i have to point saomething out here...now that the vent pics have shown a bit more detail on the tracksystem sides i think you have to make a very weathered tank for once...your other tanks mostly due to the camopaint have a rather clear and altogether crisp look to them... i have detected now some unsanded and sometimes not straightly cut edges on the platings... now that is in no way to point out sloppy work...this is not my intention, but now i think i see the demand (well in my voyoristic needs i see this more^^) to get a nice downweathered tank from you^^... for comparrission i recommend neil101 take on that totally downweathered teadpole in his thread...he used salt and hairspray weathering and even pastelcrayons to get rusteffects and such thinks...i think your tank, being the behemoth he IS, would really greatly benefit from this way of painting up...well maybe it is just me...but sometimes i can be quite keen on such things^^
and by the way... if all that from me sounded too sour...this thread is currently(and for a very long time too) the topmost i look forward to when i login here! just to tell you where i am standing^^
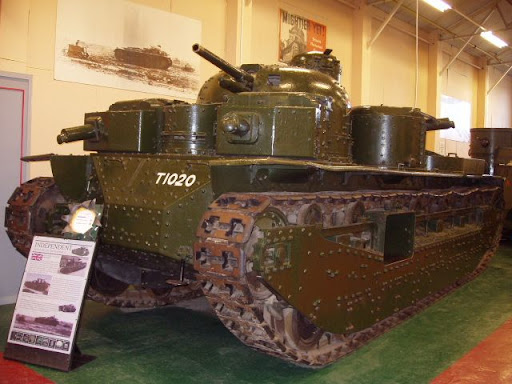
Yes, Vik, the MK-VIII "International" was a definite inspiration for the Perun.
Oh, the way the military works, the rust effect Neil had on that tadpole was his fluff also said that they had found it rusting away and simply got it working again. I do plan on making this is one seasoned old beast more weathered and there will be like the Sea-dragon, bared and rusted metal to play with. I may also do some of that trick with the vents as the crews it has had over the years may have cheated and used the vent slats as foot holds to scramble up the sides!^^
I know ya do Vik, and I am glad for the input! Still need rounds for the lower tracks, and the kleets and rivets as these will hold the weathering powder nicely....I may have to embarrass myself a bit and buy more cheaply some of that skin powder in the women's beauty section. Basically the same stuff from FW but they make sure there is no odor and put it in a different container, this way they get more money from their version!
well i think we had this discussion in our begining friendship here about makeup and then the next step to pastel crayons...the latter would save you the embarresment to buy the former^^ by the way, there was that initial thread by samus i think that some peeps said that the makeup wouldn´t be the right choice...maybe you could even use very fine sawdust? or even powdered stone...as of the persuasion when you drill holes in your walls?...as it happens i have drilled just the very moment three holes i the wall to make an aperature to hold our bikehelmets...4 of them... so lots of drilling... and the dust looked quite useable...not that i saved it up^^ but later on this might come in useful^^^
Oh, the way the military works, the rust effect Neil had on that tadpole was his fluff also said that they had found it rusting away and simply got it working again. I do plan on making this is one seasoned old beast more weathered and there will be like the Sea-dragon, bared and rusted metal to play with. I may also do some of that trick with the vents as the crews it has had over the years may have cheated and used the vent slats as foot holds to scramble up the sides!^^
right on all acounts...his fluff isn´t yours and his way shouldn´t be yours as well as downright copying isn´t very stylish and we do want do create glamortanks here^^ and glamor has to have it´s own style...^^
vent slats as foot holds to scramble up the sides
this!!!!! sounds very good, fluffy to the max...love that idea already!
Yes, Vik, the MK-VIII "International" was a definite inspiration for the Perun.
)
as for your kleats needs... i use a holepunch like this:
you could do kleats that way by simply repeatedly making not round "rivets" shaped disks but instead very cautiiously making halfmoonshaped "toenails"... and then use these...by nature of the holepunch the edges will be slightly raised, which could benefit the look and you get thus something more to drybrush some look onto...
Have you considered filing down chalk, like the stuff kids use on a blackboard, you get it in various colours, mixing browns and oranges would give you good rust for example.
And again no beauty counter weirdness, plus chalk would maybe be cheaper..
holy bitz...you do actual angles now? well this hopefully doens´t make you go insane in the process...well if it does then at least you have a very fine detailed tracksystem... and what is sanity compared to a working looking tracksystem these days anyway^^
by the way...i see some SM shoulderpads for searchlights? very nice idea^^
Viktor von Domm wrote:holy bitz...you do actual angles now? well this hopefully doens´t make you go insane in the process...well if it does then at least you have a very fine detailed tracksystem... and what is sanity compared to a working looking tracksystem these days anyway^^
by the way...i see some SM shoulderpads for searchlights? very nice idea^^
Well, the angle of the bitz will be smoothed down to flat. But the parts wrapping over are what I am shooting for, half way done!
[/img]
Viktor von Domm wrote: of course the exhausts... was confused...
this tracksystem will look very lovley!
LOL! no worries there Vik, we will get you up to speed regarding the mighty Perun class tank! Yes, thanks for the track system comment! The different thickness of plasticard allows me ot do all kinds of neat tricks, like different card stock and old cereal boxes would If I was able to only use what was laying about the house, as I can seem to stop myself from making these things!
I wonder how I would do if I had a scrapyard and tools for putting metal monsters together?^^ Oi! you over dere, bring me that tranaxle and hook it to that shaft unner the body! Don;t drop that gubbinz!
Anyway, here is another angle
[/img]
One side has the "loops" all done, nearly there on the left flank!
that is a very tideous amount of work i can only guess...is the thin plasticcard so easy to wrap around the round angles? when i do my next project tank, then i definatly have to get me some thinner than 1mm plasticcard to get such works done...the stuff i have is so uneasy to cut... and wrapping around something to make round forms is totally out of the question...do you cut the piece in the needed size and then just glue it with superglue? is it difficultto get it to stay in place?
lol... must be something thats conected to your glue as i think whenever i tryx to superglue plasticcard it tends to me too long adjustable...i have to clamp or otherwise secure the glued points...otherwise they would part again by sheer materialdynamics...
Automatically Appended Next Post: oh and paperthin plasticcard...do you recon it is as thick/thin as a plastic folder you might use in school?
Viktor von Domm wrote:lol... must be something thats conected to your glue as i think whenever i tryx to superglue plasticcard it tends to me too long adjustable...i have to clamp or otherwise secure the glued points...otherwise they would part again by sheer materialdynamics...
Automatically Appended Next Post: oh and paperthin plasticcard...do you recon it is as thick/thin as a plastic folder you might use in school?
Ah, now instant glue will do that, I am using at present the Army Painter plastic glue for the Perun project.
LOL! I would say it is less than 1mm thick maybe .010" thickness.
phantommaster wrote:Looking great shasolenzabi!! Can't wait to see it painted!!
Thanks Phantommaster, it still has plenty of detail work to be done, and then the painting can start!
The tank is fantastic ! really nice attention to detail matey. But then again you do know your tanks;-) i saw these the other day and thought you might find them handy on this project. i plan on picking some up in the near future. nuts and bolts and rivets galore...
Viktor von Domm wrote:so we await new picture updates matey...or did something keep you away from your work? been awfully quite in these parts around here...
vik
I was trying to have more work done to impress the friend about paying me for his having me work on the GK models.
I have more work done to show off, I will have more later.
[/img]
i see the engine grills haven't arrived as yet. did you use rod plasticard for the shoe rivets or is that drops of glue? either way the whole is coming along nicely.
SebastionSynn wrote:i see the engine grills haven't arrived as yet. did you use rod plasticard for the shoe rivets or is that drops of glue? either way the whole is coming along nicely.
SonofRuss reported the one grill was being elusive. I had spaghetti thickness plastic stock glued and snipped repeatedly! still need more of it though to finish them.(lower front treads, )
simply stunning looking! i know how hard that riveting up is for a fact! the treads are cool looking!
could you do a side frog view of the trackssystem? you did something on the lower sides that i wanted to see close up...did you pencil positions for the future rivets down there or are there already rivets glued on?
I was trying to have more work done to impress the friend about paying me for his having me work on the GK models
hell if he is trying to wriggle out of the amount of money then hand him the plastic as is and count this as an educational moment for yourself... the mentioned amount of payment for this work is more of a nonprofit base as is so he could and should be more grateful...i feel my temple veins swelling atm...
No need for rage Vik. Yeah, the pencil marks are for possible placements of end caps for the holding of the wheels, inspired by the lower armor on the MK series tanks and the "International" MK-VIII
Gonna try similar stuff then on you metal beasty?^^
Still so much to get done! gotta buy some more spaghetti thickness plastic to finish the treads off, the the side grip kleats, rivets, and caps.
ever thought of actually using spagettis to work with? i once used them to make sadly too big/long rivets from them... cooked them for three minutes and then cut them up... still have them in my materialsection... maybe one day i use them up to some other use... like shells for a base or such things...
and i am currently thinking very hard how to make the look of the trads outer section... so...^^
And these ideas help, but I like to use food for welll,,,,, food!
I can't wait to see what other goodies arrive ion the mail! I can use spare bitz for the tank that is to be half way between the Russ, and Perun in size
sunlight makes so much difference when taking a pic! looks so cool!
how did you just shave down the rivets a bit? must have taken ages and quite a big bit of concentration...
Viktor von Domm wrote:sunlight makes so much difference when taking a pic! looks so cool!
how did you just shave down the rivets a bit? must have taken ages and quite a big bit of concentration...
Concentration aplenty! some are a bit lower as my hand did slip down a bit with the snippers though.^^
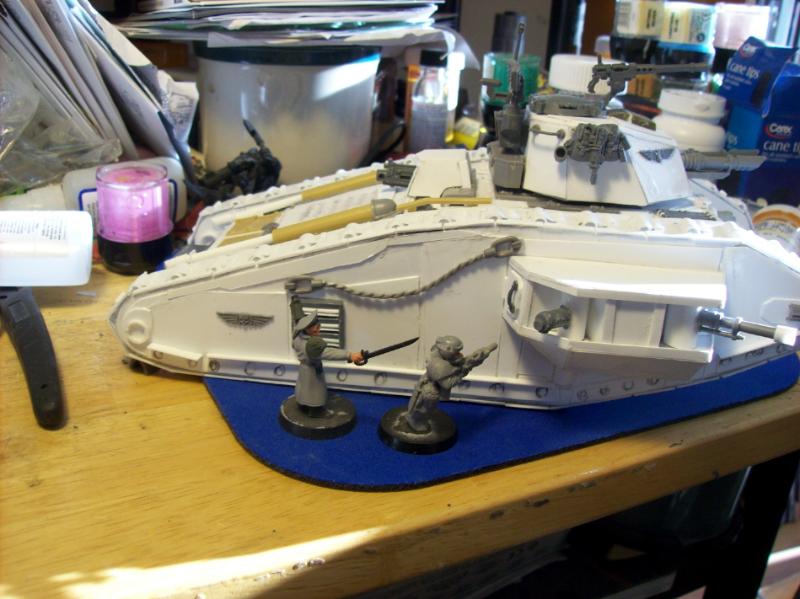
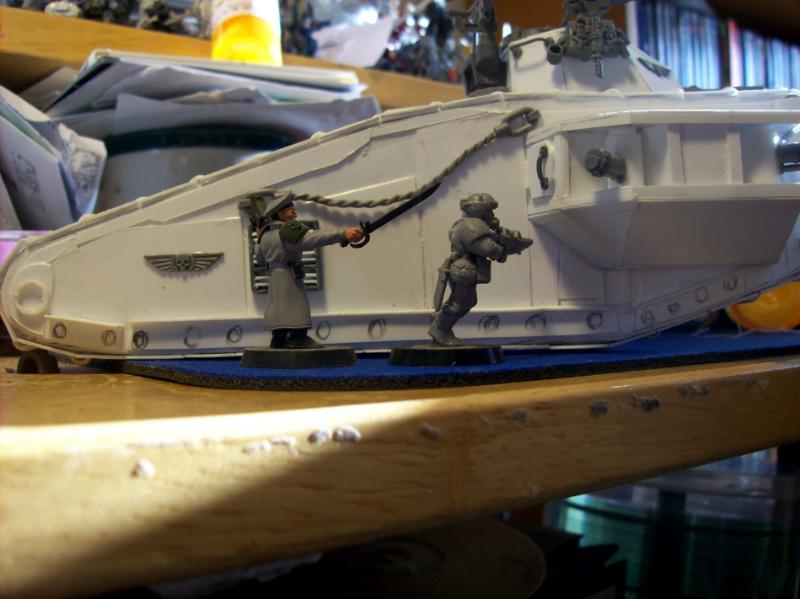
Oh and posed it with some of thee troops for a size reference with the turret and such!
[/img]
closer to "ground" level
[/img]
And in front of the big beast so folks get an idea how wide it is to people on the tabletop I can see the need for putty next!
[/img]
yeah small putty job but only! the scale while still a big tank is quite good matching... that is a main issue i ahve with mine...your tank looks very good scalewise...
Concentration aplenty! some are a bit lower as my hand did slip down a bit with the snippers though.^^
it all averages out in the whole ^^
whats that attachment on the left side of the turret? seems i forgott that...that grey plastic bit there?
do you already or will you buy some tankcrew as to be sitting on the hull? you know those ones here? those that can sit on the hull and make it even more lived on^^
Viktor von Domm wrote:do you already or will you buy some tankcrew as to be sitting on the hull? you know those ones here? those that can sit on the hull and make it even more lived on^^
I actually have the two on the right already sitting on my tractors!
Viktor von Domm wrote: that is a heartless comment to this pic... even leman russ comanders have feelings...dont you know?
But a factual one! here is the final nail in the coffin for it. One detail in favor of the Leman, it does use less materiel and resources to make them., 2-3 russ tanks could be easily made from the materials of the superheavies! BUT the superheavies do have the charm of being monsters on the field!
[/img]
lol that puts insult to injury...when you keep on misstreating your imperial backbone tanks then they will leave you barenacked on the battlefield...it has been recorded bofore in imperial history...(actually making that up, but it sounds cool^^)
in actual game play, the big stuff has a tendency to be targeted more than the small stuff because the opponent knows that if he doesn't take out the apoc tank fast it will just chew through everything he has on his side of the board. last apoc we had here in the area, my opponent fired everything he had at my scorpion super heavy and got nothing, but i wasted his landraider in one shot.
that PT cruiser, is looking real nice there shaso, hopefully, when i have the chance to do my looted pod it will look just as good.
SebastionSynn wrote:in actual game play, the big stuff has a tendency to be targeted more than the small stuff because the opponent knows that if he doesn't take out the apoc tank fast it will just chew through everything he has on his side of the board. last apoc we had here in the area, my opponent fired everything he had at my scorpion super heavy and got nothing, but i wasted his landraider in one shot.
that PT cruiser, is looking real nice there shaso, hopefully, when i have the chance to do my looted pod it will look just as good.
Very True, the main thing about the Apocalypse Super-Heavies and Gargantuan creatures is that they can draw fire, and still kkeep going after a hit or two!
I think that will work out just fine, can't wait to see how it all looks!
Thanks! and my Sabre tanks finally arrived with the second Claymore as well!
[/img]
The Sabre with BIG gun
[/img]
[/img]
With Annihilator Twin-Linked Las-Cannons
[/img]
[/img]
Sabre and Claymore with extra truck!
[/img]
Automatically Appended Next Post: The Sabre has a tight fit with the Lascannon mantlet, and magnets and shims for the Big Bore as it still was jiggling a bit.
man, that stuff of his is great looking, but i just don't see me having any use for it, except to ork it out and that would be a shame. i do still like some of the accessories he has though.
well i hope now that the sabre is there that you wont abandon the perun project...and i rather dont think the saber is a good standin for a leman russ...wider and i think he looks rather like a middle version between a monstersized tank and the lightweight russ...
Viktor von Domm wrote:well i hope now that the sabre is there that you wont abandon the perun project...and i rather dont think the saber is a good standin for a leman russ...wider and i think he looks rather like a middle version between a monstersized tank and the lightweight russ...
True, the Sabre is a somewhat different animal than The Russ,. But is a tank I will still use,m and it is slightly thinner than the russ with sponsons, but w/o sponsons, the Russ is thinner!
[/img]
BUT, the tanks came with kit! so they will appear a bit "lived in" Vik [/img]
Camo netting and kit bags!
[/img]
Fuel cans and more rolled kit!
[/img]
Automatically Appended Next Post: And with the day, I also bought more stuff for the Perun!^^
Well, they were a self presented gift for my March based B'day. I think that the kit and the small truck as a sorry for it taking so long for it all to get here.
i recently optained some plastic pieces that i plann to one day use as trucksplatforms...the part where the goodies are transported on...this truck of yours could be a chimera of sorts^^
Great work so far and thanks for putting up the size comparison with the sabre. The Sabre looks like it would be a good MBT to accompany a Pig Iron AFV. Both have a less riveted look while remaining suitably chunky.
i actually like the archaic look of the perun far more than the clean modern look of the sabre...if forced to choose i would choose the old fashioned WWI and WWII design over any modern design any day of the week^^ but thats not saying i wont look forward to seeing you paint up the sabre ^^
Viktor von Domm wrote:i actually like the archaic look of the perun far more than the clean modern look of the sabre...if forced to choose i would choose the old fashioned WWI and WWII design over any modern design any day of the week^^ but thats not saying i wont look forward to seeing you paint up the sabre ^^
Yeah there is something to be said for each design concepts, but the older monsters had a definite coolness factor of their own as they were the precursors pf the modern styles.
[/img]
well actually in this last shot you see the total differencys of both... your perun is a menace going bullish in fron to the enemy... he leans forward with all its firepower... whereas the sabre is so leaned back je looks almost like he is relaxing in a comfy sofa... for me it is all the difference... looks like the sabre crew after choosing that said tank didn´t take seriously to fighting the enemy...more of a well they get there eventually...sort of^^
cool truck... a true lifesaver^^
and by the way...i just love my godzilla movies for the great music they have... that music is really a one of their own in every good sense of thsi word!
Viktor von Domm wrote:cool truck... a true lifesaver^^
and by the way...i just love my godzilla movies for the great music they have... that music is really a one of their own in every good sense of thsi word!
And just think, I found out that clip is from a movie where this guy day dreams a lot, hence his acting all Dragonball-Z with his fists balled up and the hair up like that when he sees the shop sign on the ground, and he is pissed off at Godzilla! But yeah, I see this truck zipping about like that, leaping over debris and bouncing a lot along rough ground.
chromedog wrote:I see you have the Rebel there (as well as the Sabre).
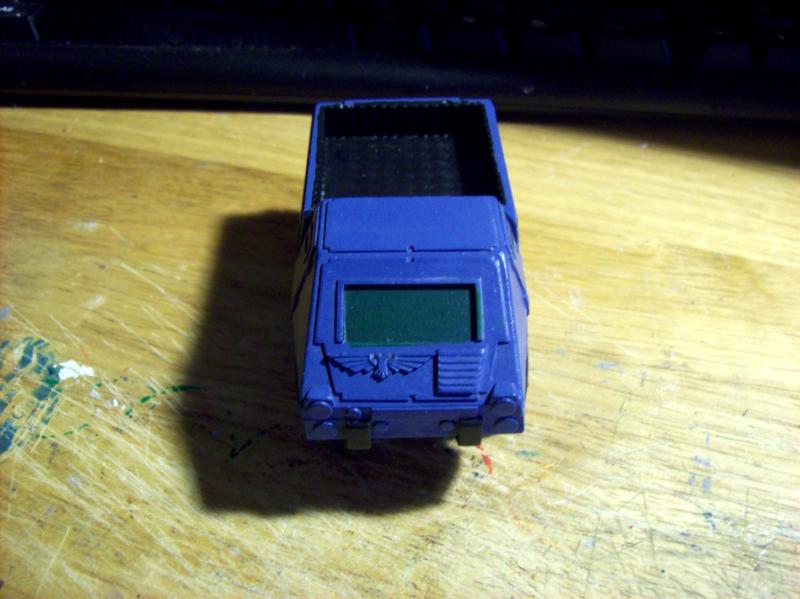
Is it a "technical" in the making?
I got just the truck, added a "toolbox" to the back, it was an little extra something from Jez, as I was waiting so long for the Sabres and last Claymore and that the Old Crows were my own gift to me for my b'day this year Chromedog, a nice little truck, it is "growing" on me.
the truck could be a bit like a mascot for your troups...with a banner and such things....or you could give it scouting abilities^^ like in the movie^^
by the way... i saw that sign in the movie too...but did you actually read that? are you fluent in japanese?
No, I do not read Japanese. I just know from a friend of mine who does read japanese and speak it due to his wife being Japanese that the guy in the movie has issues and that the movie is all about him and his odd dreams or fantasy states.
ah so i understand...what was the name of the movie? might catch it that way... godzilla was always fun to watch...also they had great taks with tesla coils and such stuff^^
@ Vik, I will have to ask him if he knows the name of the movie. Yeah, i loved watching those come out to fight Godzilla then he'd melt them! I first saw that last design when they did a modernized version of Godzilla vs Mothra.
@ Mad4minis, Yeah, I made one a permanent Battlecannon/Vanquisher model, and the other can swap out from the big bore to the twin lascannons.^^
hmmm... sounds like a cool tool to have around...
er... is that too a tech that is lost to the IoM as i cant recall seeing that tech with either imperials...
Viktor von Domm wrote:hmmm... sounds like a cool tool to have around...
er... is that too a tech that is lost to the IoM as i cant recall seeing that tech with either imperials...
hm...maybe the tech's just too strange for them, or it is seen as being a traitor for using xenos tech...
Sorry haven't been keeping up with the thread the two grills i found will be on there way as soon as I get home and mail them as per the exhaust there are tools that can bend brass tubing you need to go to an auto parts store and ask them for a tubing bender for brake lines also you want a tubing cutter don't get a hobby one at a hobby store get one at lowes or home depot much cheaper for the same thing.
like Shrike said it's Ork tech, the stompa comes with parts for one, and ForgeWorld has one on a Battlewagon that looks really nice. there's also an old goblin artillery piece that is a lifta droppa. I want one because it's a piece of Ork tech that i don't have in my arsenal yet, and i really don't like the stompa models, they look too much like a mother-in-law in a moo-moo dress.
sonofruss wrote:Sorry haven't been keeping up with the thread the two grills i found will be on there way as soon as I get home and mail them as per the exhaust there are tools that can bend brass tubing you need to go to an auto parts store and ask them for a tubing bender for brake lines also you want a tubing cutter don't get a hobby one at a hobby store get one at lowes or home depot much cheaper for the same thing.
Cool, but I got the exhaust dealt with already, including down spouting! I will be looking for the grills this week then.
SebastionSynn wrote:
like Shrike said it's Ork tech, the stompa comes with parts for one, and ForgeWorld has one on a Battlewagon that looks really nice. there's also an old goblin artillery piece that is a lifta droppa. I want one because it's a piece of Ork tech that i don't have in my arsenal yet, and i really don't like the stompa models, they look too much like a mother-in-law in a moo-moo dress.
Very powerful Ork Tech indeed, and I did face one mounted in a battlewagon, it made a pure joke as he got lucky on me and did not only move my landraiders with impunity, but also managed to rip weapons out and immobilize them as he rolled five glancing hits each time he dropped my landies, made my marines have to walk. I like my Stompa, I call it "Patches"
Viktor von Domm wrote:lol... now with that picture in my mind i can never look again at a stompa with innocent eyes^^
Now I can tell you, my Stompa has made a ruin out of many targets and foes, against Infantry the flame Belcha is nasty and so is the Psycho-dakka-blasta, (One time it took 20minutes before I rolled doubles to end the ammo load.) and it has mauled Monoliths in close combat. But yeas, it still get's called an "Ork in a dress" by my local group.
Hey Shaso, another dakka thread had this guy linked up. there's some interesting looking stuff there, but what would interest you the most i think is the Leviathin down near the bottom of the page.
he has one on the first page that has four sets of treads instead of 6 and is about half the cost, since i won't be using the top for anything just the treads, i might order that one so i can make some grot tanks. a friend of mine has a scroll saw that would allow me to saw the treads in half down the middle, essentially turning four sets of treads into 8. That is if their thick enough, which for grots they should be.
you even do the underside of the tracks? you`re a track maniac^^ by the way...i always wondered why vehicles do not get bases as well...? is there a reason beside basecontact? if i made a very small base without too much overlapping?
the those spots^^ look good, and i knew you couldn´t keep yourself away from the sabre for long^^ the name tag looks in my opinion the best! did you ever try to make one like this on your own with thinplasticcard? a bigger one? that`be cool!
have you thought about breaking up that big space on both trackcovers of the sabre?
by the way yet again, saw your putty work on the perun...that beast is mainly a beast for all the hard and cool work you`ve pu(ttied) in^^ feel very proud about of your tremendous effort to the art of tankmaking!
Viktor von Domm wrote:you even do the underside of the tracks? you`re a track maniac^^ by the way...i always wondered why vehicles do not get bases as well...? is there a reason beside basecontact? if i made a very small base without too much overlapping?
the those spots^^ look good, and i knew you couldn´t keep yourself away from the sabre for long^^ the name tag looks in my opinion the best! did you ever try to make one like this on your own with thinplasticcard? a bigger one? that`be cool!
have you thought about breaking up that big space on both trackcovers of the sabre?
by the way yet again, saw your putty work on the perun...that beast is mainly a beast for all the hard and cool work you`ve pu(ttied) in^^ feel very proud about of your tremendous effort to the art of tankmaking!
vik
Thanks vick, Yeah, I could not leave the underside totally bare. As for bases, no need, as the tanks have a large enough "footprint" to work off of, and the weapons are where you fire from instead of the edge of the base as Infantry do.
LOL! Have Sabre, will work on them! I may just greay stuff the name scroll of the Perun to get a bigger one, and i need to find one for the second Sabre. If you mean the big rounded space on the track covers or the sides, I have something for the sides done.
I have yet to do putty work on the Perun tank as yet....Now get ready for more pics!
The truck, partial paint and then I used a flash!
[/img]
[/img]
[/img]
Second Sabre with viewer and Heavy bolter added
[/img]
[img]
[/img]
The first Sabre with HB and viewer
[/img]
[/img]
Claymore with dome kitting.
[/img]
[/img]
The Sabres also have Aquila symbols of their flanks.
seems you´ve been verrrrry busy mate, lots of blue tanks and stuff^^ to tell you the truth... due to the flash maybe the first thought that came to my mind when seeing the truck: LEGO^^ the blue is just the lego blue^^ i had some thought come to my mind regarding that lil fella...why not build up on his platform a big and i doo mean BIG communication aperatus? thus he could be a good additionand also a very cool and unique objective marker...
your tanks look very good in royal blue^^ and the 40k upgrads looks already very convincing... the only thing i would look agian over is the viewpoint over the heavy bolter... i think there needs to be another layer of greystuff as of now there seems to be too much uneveness...
and the claymore looks soooo long...holy...i realized from my youth that i have seen quite some russian parades marching in berlin... mostly on telly mind you as i was born on the other side of the fence...we did only get the british and some american parades but nevertheless those i have seen of the russuians....this claymore looks right out of these footages...^^
Viktor von Domm wrote:seems you´ve been verrrrry busy mate, lots of blue tanks and stuff^^ to tell you the truth... due to the flash maybe the first thought that came to my mind when seeing the truck: LEGO^^ the blue is just the lego blue^^ i had some thought come to my mind regarding that lil fella...why not build up on his platform a big and i doo mean BIG communication aperatus? thus he could be a good additionand also a very cool and unique objective marker...
your tanks look very good in royal blue^^ and the 40k upgrads looks already very convincing... the only thing i would look agian over is the viewpoint over the heavy bolter... i think there needs to be another layer of greystuff as of now there seems to be too much uneveness...
and the claymore looks soooo long...holy...i realized from my youth that i have seen quite some russian parades marching in berlin... mostly on telly mind you as i was born on the other side of the fence...we did only get the british and some american parades but nevertheless those i have seen of the russuians....this claymore looks right out of these footages...^^
They are all painted with the Shadow gray, but alas it always loves to show as blue!^^ I will be sanding down the gray stoff to get rid of the rough edges of the viewpoints of the Heavy Bolters, no worries there. I may make the truck some sort of comms objective, or something.
Ah yes, I was only allowed to be on the Allied side of Germany and not make the East German and Russian Army mad. Saw their frontier wall during a visit near Hell Germany.(They even had a wood carving devil)
But yes, the Claymores are my BTR's^^(Chimeras) due to the way they resemble the Russian transports.
More pics of the Perun.
Track tensioners are visible, and so are the wheel caps all set up, like the International!
[/img]
The back sprocket wheel end caps for their own axles.
[/img]
gosh...there is so much detail that you made... two sized of plasticcard rods make one axle of the sprocket wheels? you must have a very steady hand...
on another issue...where did you say had you that grill vent on the last pic? i need to get that one myself...bet thats not possible but i like the ovenlook about it...
In competition with the T-100 Leman Russ series, and the T-90D Mazurka series, the T99 Sabre
[/img] Featuring a turret mounted missile launcher, and 125mmMain smoothbore cannon, hull mounted Heavy Bolter and can actually use either HE or APFSD rounds as well as anti-tank/anti-air missiles. Sophisticated electronic detection and vision/target acquisition package as well as an in depth defense package, the T-99 should see a good chance at combat operations beyond the scope of the competition! Capable of comfortably holding a 4 man crew with the loader replaced with an autoloading "arm" while the T-90D has a three man crew but can be more limited by it's smaller size for prolonged operations.
The T-100 is an older more venerable model of simpler construction, making it a less comfortable machine of it's crew of 4-6(depending if sponsons are fitted), but having the benefit of cannabilizing similar dersigned Russ series tanks from potential hostiles in the field.
The T-99 though is however for it's class a more versatile and efficient machine for the future of combat and will be of superior range due to a more fuel efficient engine. The T-99 is also rated for all combat environments and is even amphibious!
Once again.T-99
[/img]
T-90D
[/img]
The T-100
[/img]
All three competing to see which shall be the Iron Fist of the Emperor!
cool! you must have read a thousand description of m,arketing advertisments for tanks...at least your fluff reads that way... the language you use is very fitting! makes me rethink if i need a tank...but i guess somewhere before i said that too^^
um... on a more grave note...i detected a major mouldline on the T90-D...barrel...the light catched it quite disturbingly^^
i hope you can pry off the current engine cover with minimal loss and effort, i will look forward to see what you ordered!
by the way... i couldn´t compose myself any longer and ordered about nearly all of zinges whole range of selfcast stuff...will keep you informed as to what this will be used for...
looks nice now installed...but i wonder if you could have got something cheaper from a DIY store...that brassedged stuff surley wasn´t cheap? are did you get it mostly for free?
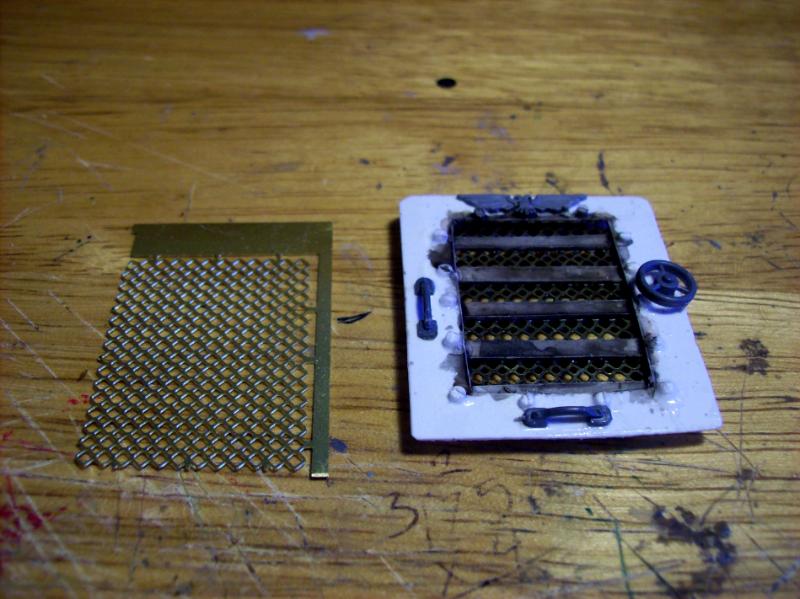
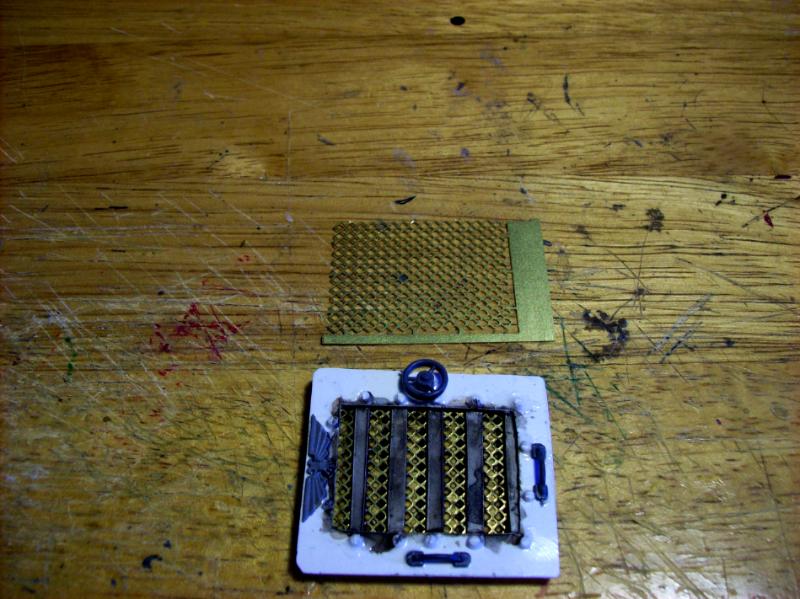
Got it free from Sonofruss, he happens to live in the Portland area, so he offered the brass^^I have added details to the engine grill hatch, hang on and I will take pics
too smooth to be for real...this way now it looks as if it would be working! if you ever come across the brassedged aquillas i think they are hopefully smaller for such occaisions...this is the only downside of the hatch for now... the boltheads and the handles and the wheel fit as tight as a glove^^
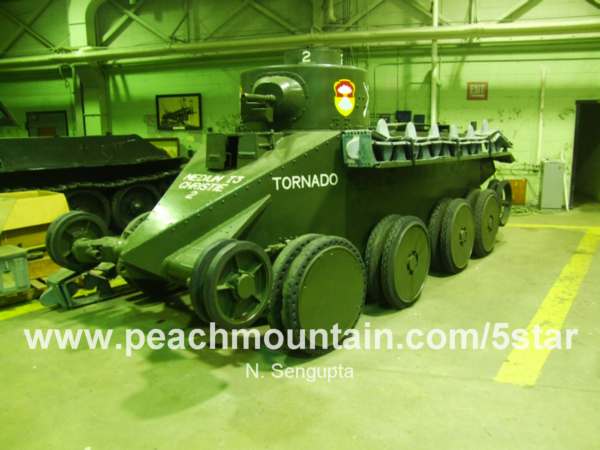
Nice tanks. If your still looking for odd tanks, here is a couple. Sorry, couldnt help myself. for real now. PzKpfw Maus super-heavy tank. A1E1 Inderpendent. Char d'Assault Saint Chamond heavy tank. Char B1-bis Heavy Tank. Ford 3 Ton tank. Holt's gas-electric tank. Holt's HA 36 tank. Skeleton tank. No, 1 lincoln machine "little willie". LK II light tank. Medium A Whippet. M1931 Christie. Renault FT-17 Light tank. SMK heavy tank. M50 Ontos tank destroyer. M56 Scorpian tank destroyer. Strv 103 S main battle tank.
Ok, its a bit more than a couple but i think they're odd. aslo, They're all real.
More oddballs !! nice stuff , and the hatch is lovely work ,, well the whole tank is lovely work , so much attention to detail ... Baiyuan would be proud !! you really have outdone yourself shazza , it is an amazing job!
as for that oddball M1918 Ford 3 ton Light Tank . have you seen the test videos , they crack me up , especially at 41 seconds lol
neil101 wrote:More oddballs !! nice stuff , and the hatch is lovely work ,, well the whole tank is lovely work , so much attention to detail ... Baiyuan would be proud !! you really have outdone yourself shazza , it is an amazing job!
as for that oddball M1918 Ford 3 ton Light Tank . have you seen the test videos , they crack me up , especially at 41 seconds lol
Thanks Neil! I still have rivet works to do to the Perun before painting can take place.
I loved that video, it is indeed funny, and yes, that section of the vid is priceless!
Other than the Christie designs I'd say all of the inter-war designs are Oddballs. It's a real shame that there aren't more mainstream model kits for that era. But I think Shaso is doing a damned fine job of capturing the feel of those designs.
i still think the rear barbette should have a heavy flamer, but that's just me
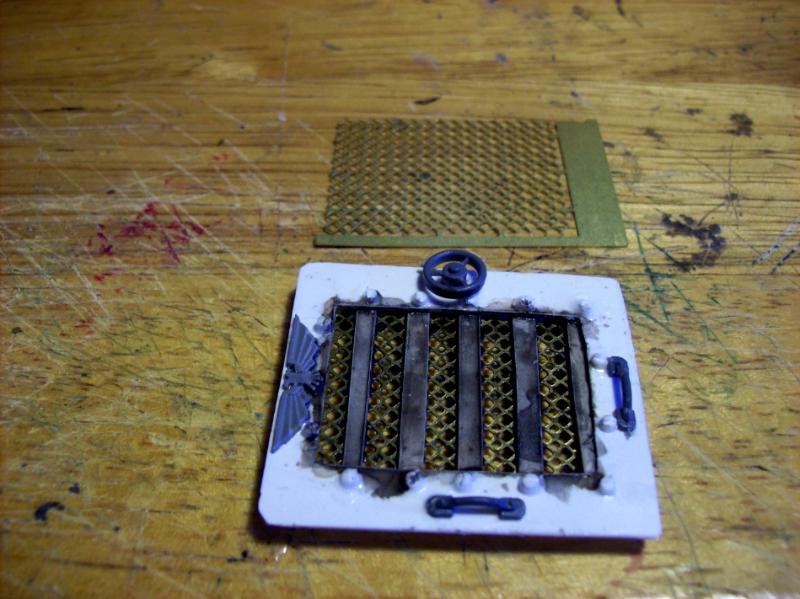
Don't you dare paint over that brass, though. If you're doing anything to it, use some Ink for oil stains. But leave the brass nice and shiny! (if you spray primer, just smear it with talc or vasoline).
Don't think it's hinged. I think it just lifts out, like it does in real life. The wheel's just one one side, but unlocks all sides, and acts as the handle for that side.
My guess is that it is hinged for access and servicing, however, for big maintenance the hatch would need to be removed, hence the extra handle for men or cranes to lift it away or put back into place.
Sanguinary Dan wrote:Other than the Christie designs I'd say all of the inter-war designs are Oddballs. It's a real shame that there aren't more mainstream model kits for that era. But I think Shaso is doing a damned fine job of capturing the feel of those designs.
i still think the rear barbette should have a heavy flamer, but that's just me
Thanks! I do try to use that old fashioned look, and the rules say you are not supposed to place your own templates over your own vehicles, now if I could have an INferno Cannon, that would work!
Anvildude wrote:Don't you dare paint over that brass, though. If you're doing anything to it, use some Ink for oil stains. But leave the brass nice and shiny! (if you spray primer, just smear it with talc or vasoline).
Hmmm, military doctrine is usually to make all things uniformly drabbed. I will test with either badab Black or Devlan Mud to get an "Oil stain" effect.
SebastionSynn wrote:ummm, Shaso? What's the point of having a grab handle on the opposite side of the hatch from the handle wheel when the hatch should be hinged?
As stated below, the wheel is the release and handle for the side it is on. The hatch has to move by sliding as the Heavy Bolter hangs over too much for a decent hinge to work.^^
Anvildude wrote:Don't think it's hinged. I think it just lifts out, like it does in real life. The wheel's just one one side, but unlocks all sides, and acts as the handle for that side.
You won the prize! you got the idea of the difficult make work for maintainence that they did for this monster!
Viktor von Domm wrote:
ummm, Shaso? What's the point of having a grab handle on the opposite side of the hatch from the handle wheel when the hatch should be hinged?
that made me feel a bad boy as i loled and this is not nice about the good work of a friend...i think your comment tarnished my karma substantially^^
but i think anvildudes comment is a very good explanation!
Yeppers! they do make it more work oriented that way of release slide and move it across to another part of the tank as they get into the engine. At a Garage, they can even have it hoisted out of the way too!
dantay_xv wrote:My guess is that it is hinged for access and servicing, however, for big maintenance the hatch would need to be removed, hence the extra handle for men or cranes to lift it away or put back into place.
Very close as well Dantay! But no hinges as the HB is overhanging the hatch. If the crew has to access it, they can by sliding the hatch out of the way, or I could be using a slide spring unit that allows the Hatch to move away from the HB as it is swung up, but the hatch is big.
Viktor von Domm wrote:also a very good solution! sounds very convicing...
Even that detail I try to slip in as in 40k all is sweaty work!
Automatically Appended Next Post: Washes did not stick to the brass
Automatically Appended Next Post: As you can see, this is a hefty sized hatch!
[/img]
your poor buggers have to sweat for the emperor... the emperor is now not even satified that the guardsmen give their blood...nay...he wants as much out of them as he can get^^
I think it just lifts out, like it does in real life
I did not know this. I'll be the first to admit that i know next to nothing about tanks, other than the fact that they are dead killy, and I can take on out with a LAW rocket if i'm really lucky and really ballsy. thank you for todays learning lesson, it is appreciated, and will be worth remembering when i'm building my own models.
same thing to the others who also answered that question of mine, thank you.
Sanguinary Dan wrote: I still think the rear barbette should have a heavy flamer, but that's just me.
Shasolenzabi replied: Thanks! I do try to use that old fashioned look, and the rules say you are not supposed to place your own templates over your own vehicles, now if I could have an Inferno Cannon, that would work!
Then how do all the Imperial vehicles with flamer/template turrets work? The Razorback, Bane Wolf and Immolator all have to place their templates over their own hulls when they fire. So I think you might be thinking of the targeting rules that prevent you from intentionally hitting friendly models when placing the template over the enemy unit here.
And a massive fan of white hot, liquid fire is a lot more of a deterrent to the bad guys than a few random tracers.
Most of them hang over the sides and such. but if they fire forwards most of the time some of them touch that part of the tank and even if targeting the enemy, if the end touches the tank, it is an area some have argued with me about, BUT I will likely pull the BBB out and look at the rules for vehicle mounted flame templates, the Perun would indeed need a Inferno cannon to get clear anyway as not enough template would hit the enemy!
I think that "flying tank" is an Israeli Merkava. A bit of an odd ball itself. Its a MBT with a compartment in the rear for around 5 soldiers. IIRC the fuel is housed between layers of the armor, forming a sort of armor layer itself.
Definitely a Merkava. The rear compartment can carry troops, but you'd have to dump out ammo and other such. I'm told it's more of an emergency evac option than anything else.
The engine and diesel tanks are in front of the crew compartment and are indeed sealed behind armored bulkheads. They designed the "Chariot" for the highest possible levels of crew protection. Extremely logical for a country with much less population than any one of it's four neighbors.
Yeah, I do love me a Merkava! Oddly enough, the Russians had a engine forward design that never got adopted back in the 1950's would have had a 100mm gun onboard. I present Object 416 for your perusal.
any new pics? you have been lying low for a while^^
i think there are certainly some layers of green and black on your old crow tanks and hopefully we get to see some new and shiny pics of the perun!?!^^
About to go and dungeon play, for my Barbarian, and tomorrow my Marines are to clash with enemies of mankind. I did try to wash the grill to make it look oily, I will take a pic tonight when I get home and post it.
Automatically Appended Next Post: At this point, it is still too shiny.
[/img]
To handle the shine and give your wash something to stick to you should spray it with a flat sealer first. Then if it's too flat a very light dry brush of silver brings back the highlights.
looks good Shaso, came out looking a lot like you wanted it to look.
Off topic, i don't suppose you have 5 space marine bolt pistols lying around in your bits box? I got my hands on some fantasy Black Orks that i want to turn into 'Eavy Armored 'Ard boyz, and i don't have enough Ork sluggas of my own to give them all a shooty weapon.
so when your amries clash against enemies of the emperor, will you do battlereports? yes, yes, yes? looking forward to these^^
about your oilstains for the grills...i will keep quite for now, have to see how this will turn out ...for now i think your pics doesn´t do your work justice...which means you probably see a lot more of your effort on those pics than me...besides, the off whiteness of the plasticcard takes a whole lot of awareness away from other painting efforts...so when the perun sees priming the effect will certainly be better seen...^^
I haven't caught up on this thread for waaaaay too long. Really nice 'card work there Shas'o!
The sabres are chunky beasts. I note you added a hull HB. Are you planning to do sponsons?
I also see someone posted the Daemonscape Leviathan. I picked up one of those and used the tracks to make this (with a little help from everyone's best mate Old Crow ). Using all 6 tracks on 1 tank definately push it into super-heavy territory. The thing is only a tad shorter than a baneblade. However 4 track units on something would make a nice little MBT.
shasolenzabi wrote:Yeah, I do love me a Merkava! Oddly enough, the Russians had a engine forward design that never got adopted back in the 1950's would have had a 100mm gun onboard. I present Object 416 for your perusal.
Bolt pistols are single hand weapons, bolt guns (bolters)are primarily 2 handed guns although Astartes can use them one handed. As could anyone of quivalent strength
Viktor von Domm wrote:that palette looked way yucky^^
so when your amries clash against enemies of the emperor, will you do battlereports? yes, yes, yes? looking forward to these^^
about your oilstains for the grills...i will keep quite for now, have to see how this will turn out ...for now i think your pics doesn´t do your work justice...which means you probably see a lot more of your effort on those pics than me...besides, the off whiteness of the plasticcard takes a whole lot of awareness away from other painting efforts...so when the perun sees priming the effect will certainly be better seen...^^
It is a sign that it is not wasted money as it sees use!^^
Ahh, Tourney today saw my dice as faithless fethers! Lost all the fights! Trounced by Tau, then chaos, and then Tau who got to choose a desert open table!
Flinty wrote:I haven't caught up on this thread for waaaaay too long. Really nice 'card work there Shas'o!
The sabres are chunky beasts. I note you added a hull HB. Are you planning to do sponsons?
I also see someone posted the Daemonscape Leviathan. I picked up one of those and used the tracks to make this (with a little help from everyone's best mate Old Crow ). Using all 6 tracks on 1 tank definately push it into super-heavy territory. The thing is only a tad shorter than a baneblade. However 4 track units on something would make a nice little MBT.
Really no room for the sponsons on the Sabres hulls, but one mod is the turret mounted Missile Launcher, likely emphasis on MISS!
Thankls for the liking, that beast has been coming along better than I planned. Yeah, but Plasticard scratch built for us w/o cash to spend on models. :(
SebastionSynn wrote:
Not bolt pistols, but normal bolters.
bolters are two handed? or single hand? if their single handed then those would work for me just fine.
They are supposed to be 2 handed for Marines, but they are about the size of sluggas anyway. I would have to see when I can mail them as cash is low to ship.
dantay_xv wrote:Bolt pistols are single hand weapons, bolt guns (bolters)are primarily 2 handed guns although Astartes can use them one handed. As could anyone of quivalent strength
Like I said above, Orks can do it as they are slugga sized.
neil101 wrote:the wash is perfect for that grubby oily look.
Thanks! now that it has dried, the effect is noticeable, will have a daylight pic later when the sun is out, my dirty grill with the other clean one. In fact, it almost looks like a BBQ grill that has seen use!
In fact, it almost looks like a BBQ grill that has seen use!
lol... i have seen chocolate tanks today and now barbeque tanks...i think we are all a bit hungry aren´t we, from all that long hard work with tanks and stuff...?
Sanguinary Dan wrote:Definitely a Merkava. The rear compartment can carry troops, but you'd have to dump out ammo and other such. I'm told it's more of an emergency evac option than anything else.
The engine and diesel tanks are in front of the crew compartment and are indeed sealed behind armored bulkheads. They designed the "Chariot" for the highest possible levels of crew protection. Extremely logical for a country with much less population than any one of it's four neighbors.
They DO have a merkava hulled heavy APC though. The Namer (leopard). Replacement for the Achzarit (feminine hebrew for "Cruel", colloquially known as "bitch" by its crews) which was based off a T-54/t-55 (which were salvaged off their opponents during the various Arab-Israeli wars). Mate of mine used to serve in one (Achzarit) while in the IDF.
very good looking kleets you did there... the whip must been a fullsized bullwhip for that hard and repetitive work!^^
only one thing i would want to add...the hinges of the shoes are nearly at the same hight raised as the kleets outreached points...thus when turning the hinges would need to crawl through the dirt as well and would have to litterally drag their wihght too to and through .... this might lead to unwanted wastage... tho i have to add that this might be due to the angle of the pics...if proven wrong then dont remember this^^
also the grill looks very good, and for this you choose quite a good range of different angles to show all that a single pic couldn´t do...so you gave quite a 3d version of your bitz in single pics!!!
The kleets are actually on the same plate shoe as the hinge is bolted onto, so they are all both on the same plate apiece, thusly the weight is on the same shoe as the hinge/kleet per shoe.
Thanks, the grill is a nice piece of the tanks' overall kit.
Viktor von Domm wrote:wouldn´t expect anything less, as the product speaks volumes on itself!^^
Thanks! The perun is a one of my many brain children, with the others I had used kits and cut rebuilt them, the Perun is the first using only a few bitz to help, but scratch-built from simpler parts. Compared to this, a Fighta-bomma will be easy for me now!

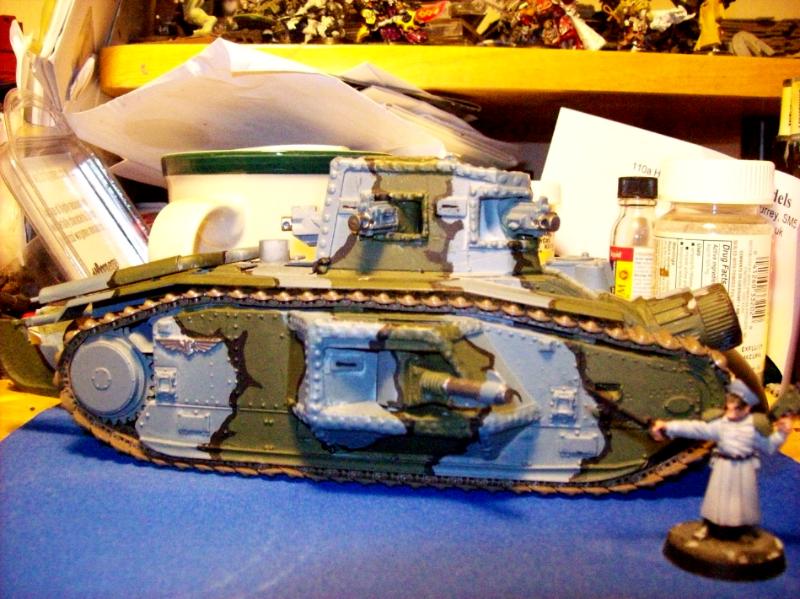

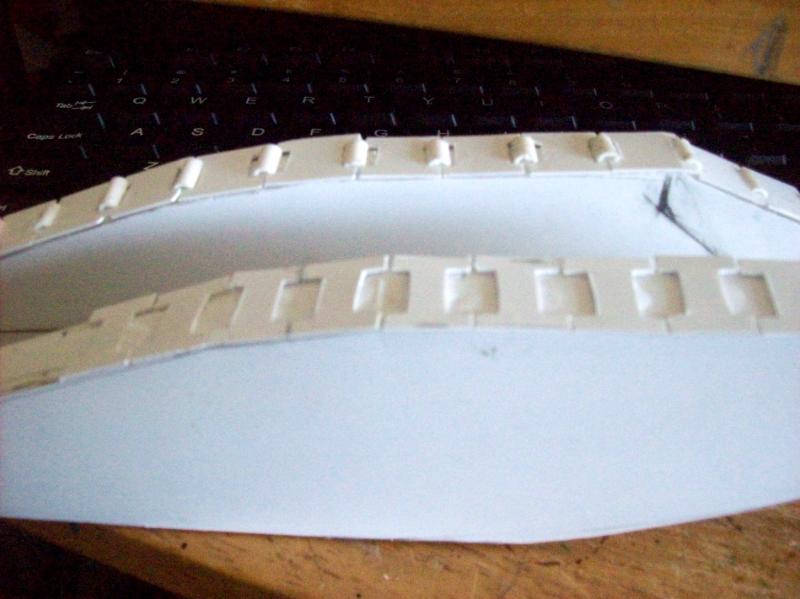
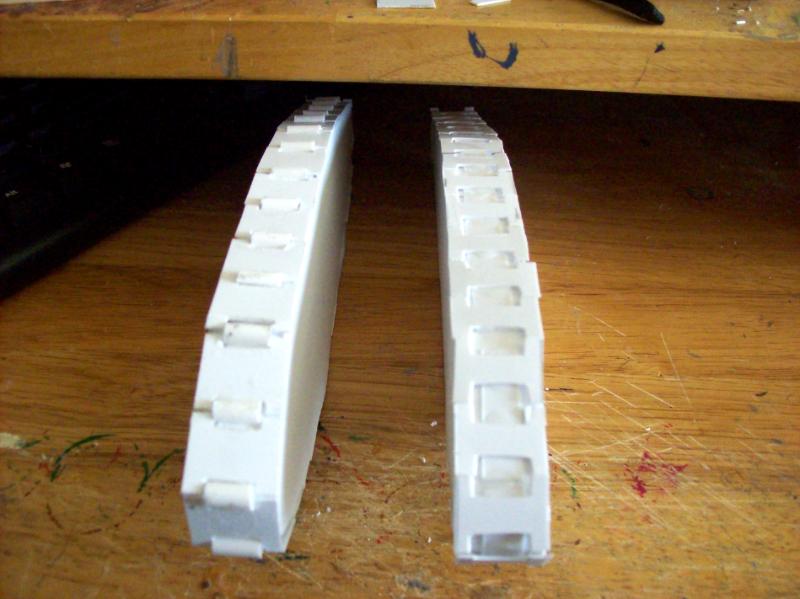

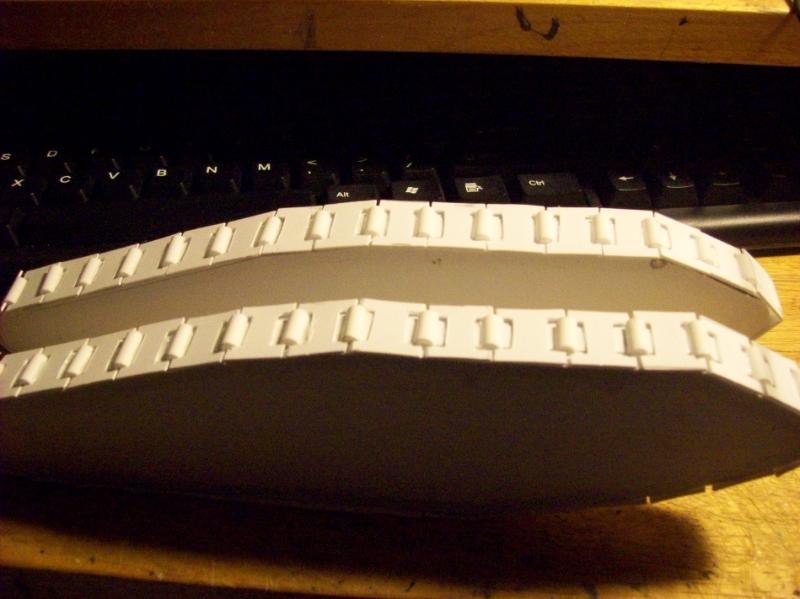
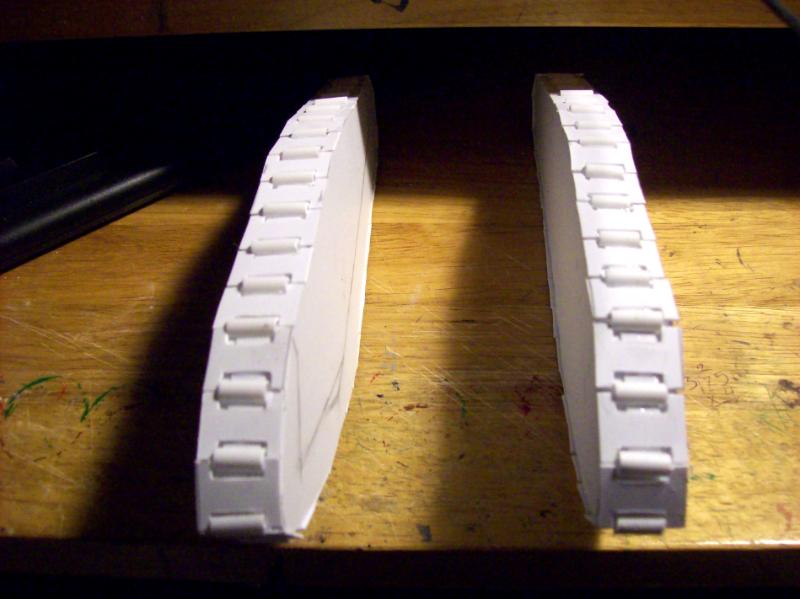
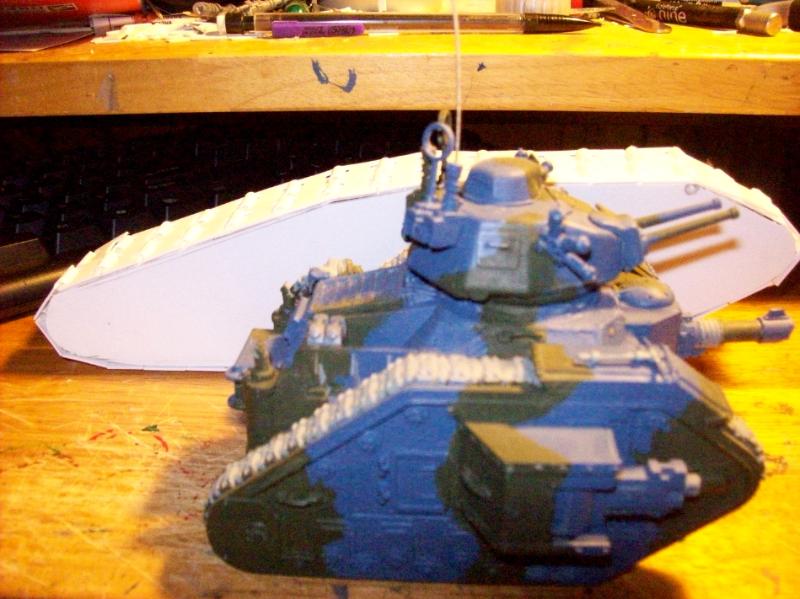
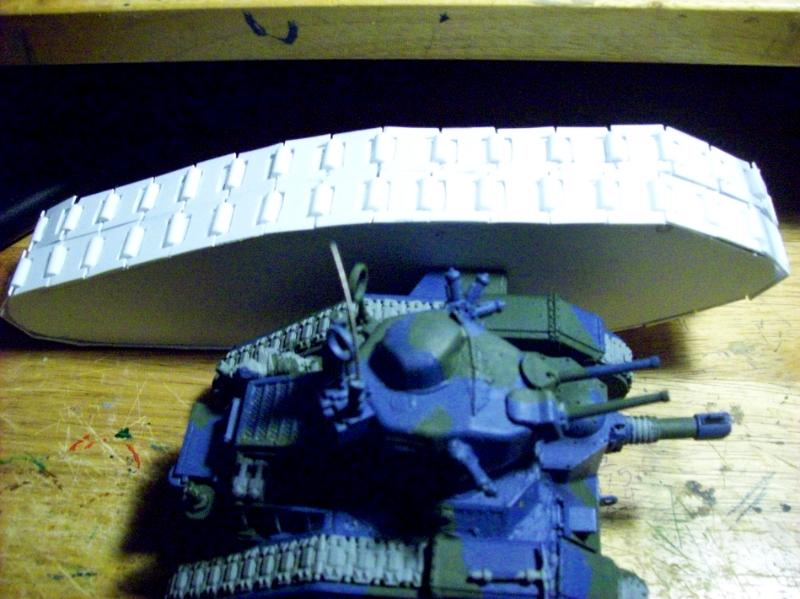
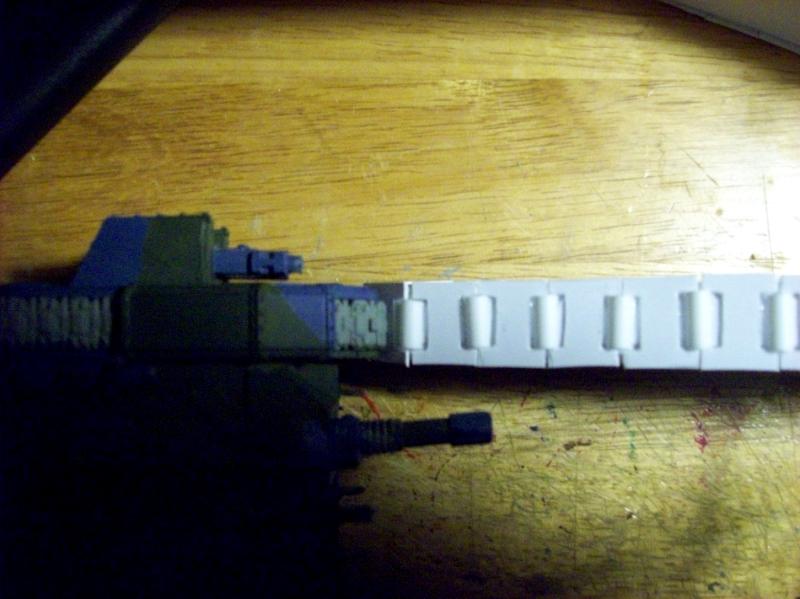


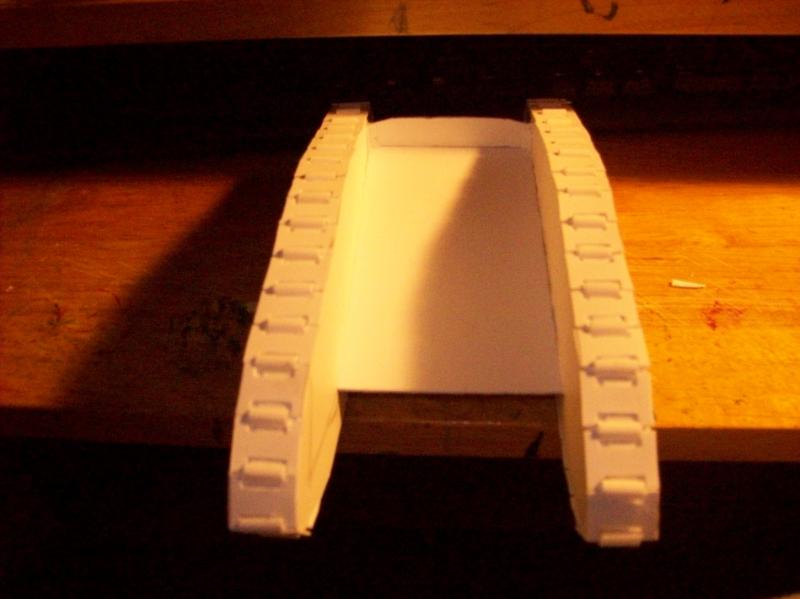
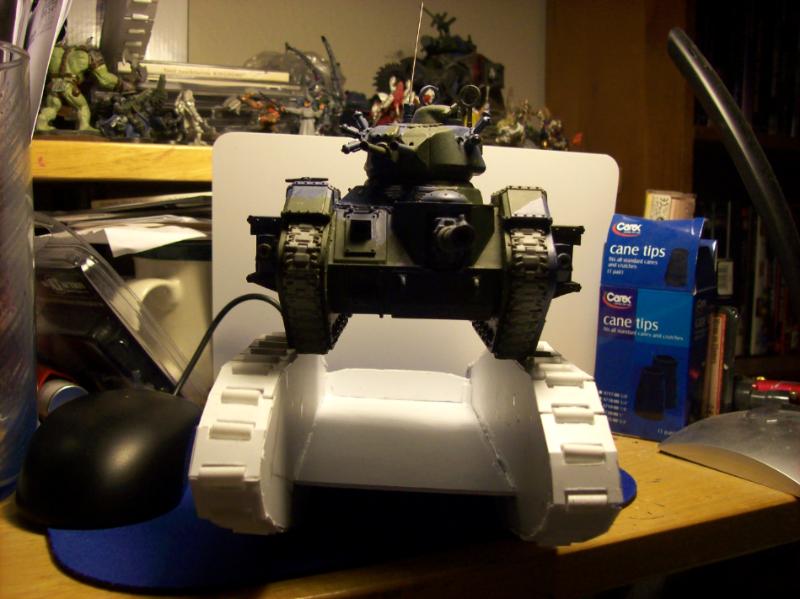
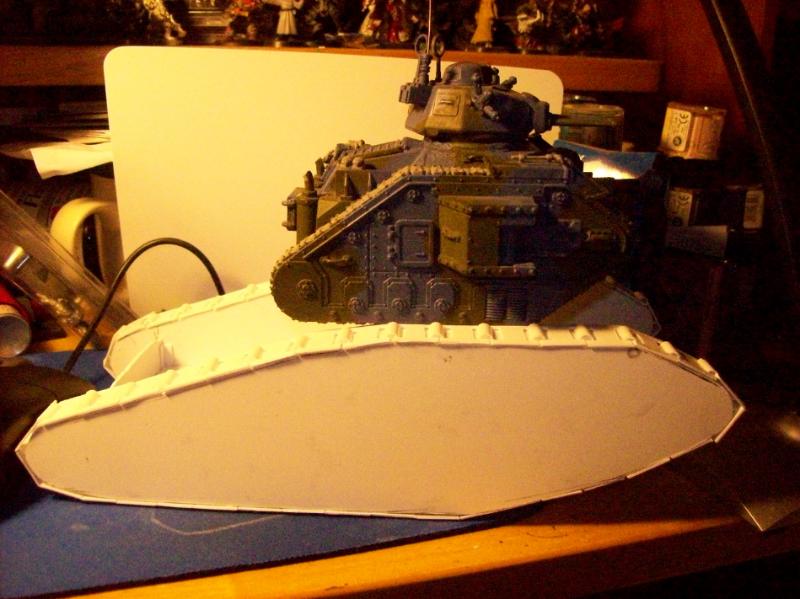
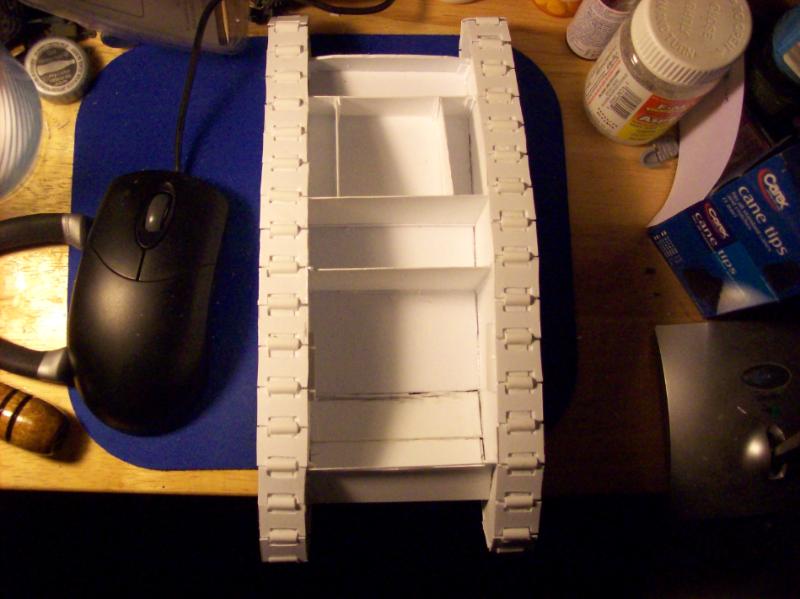
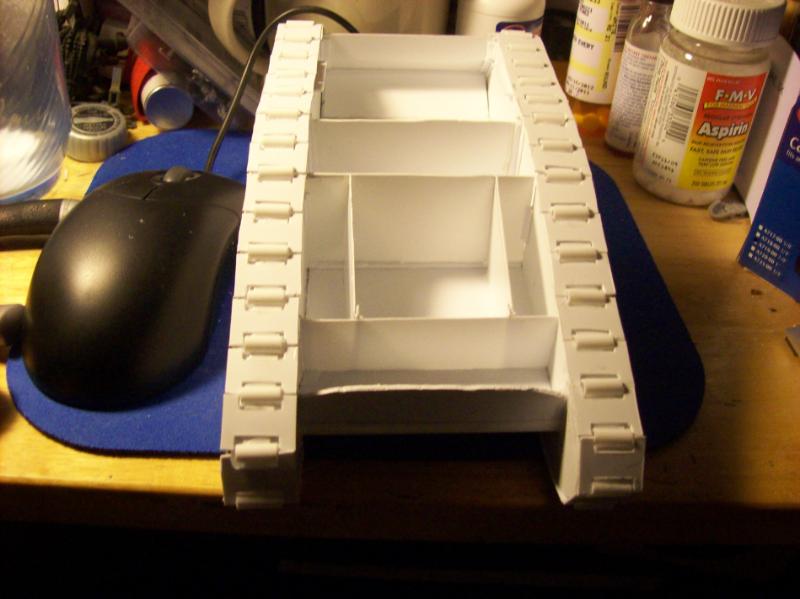
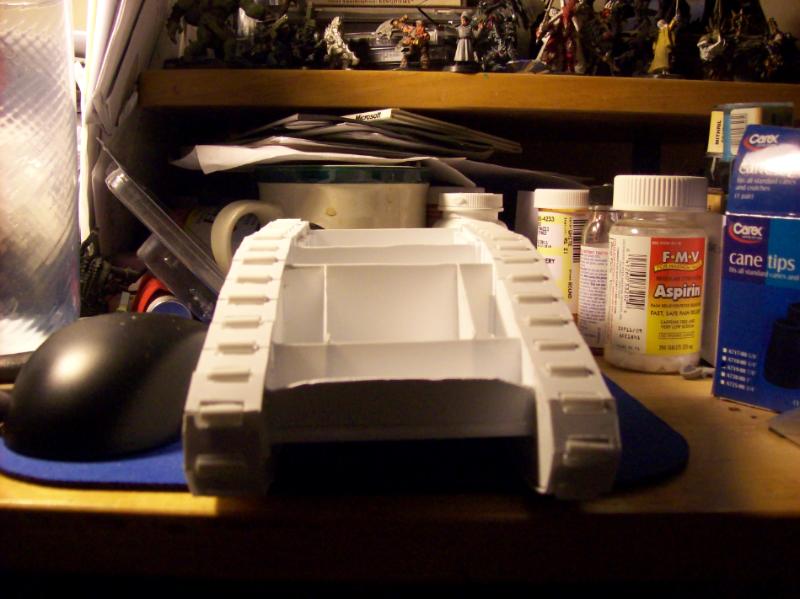
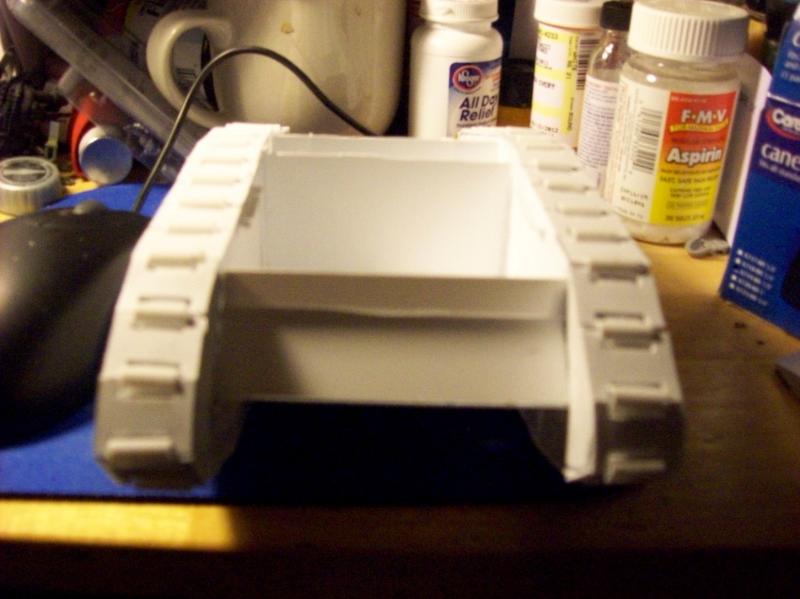


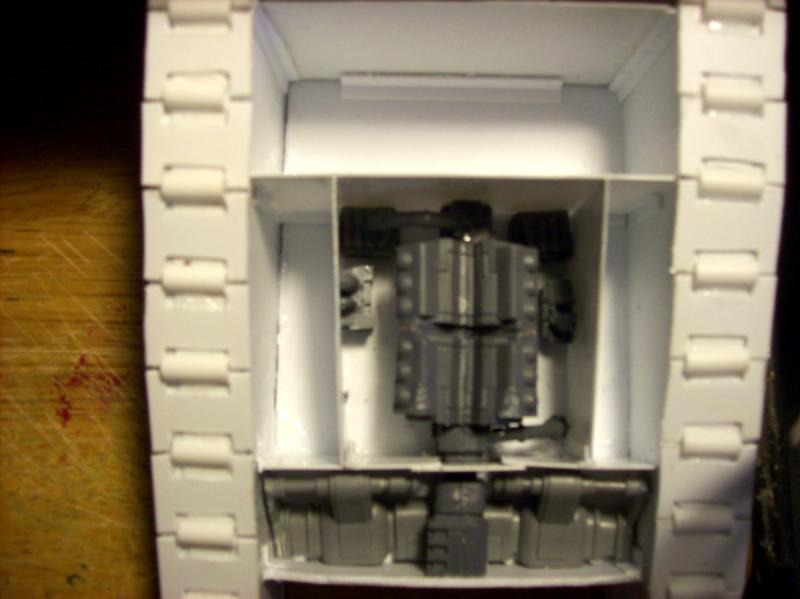
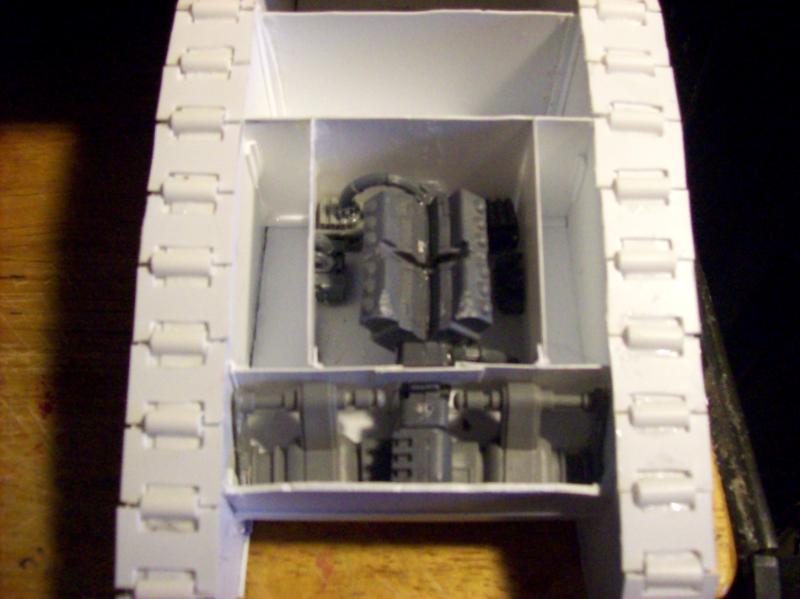
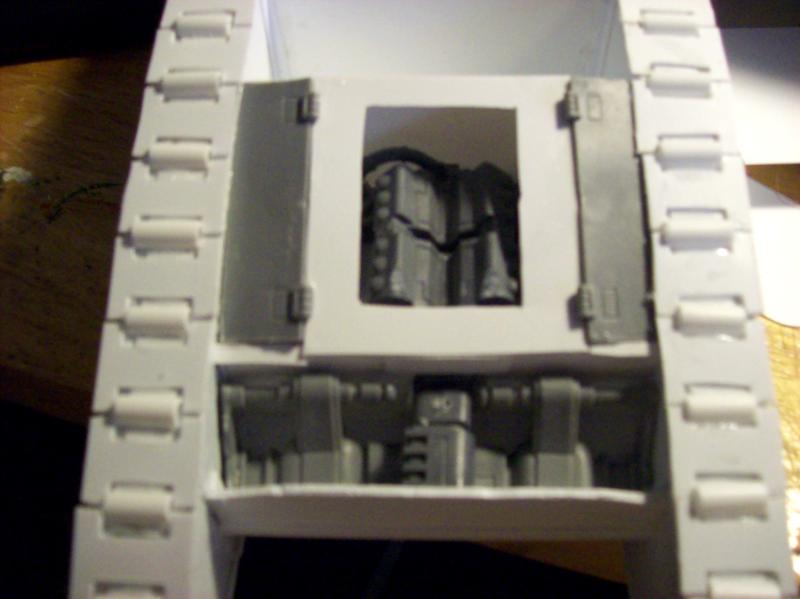
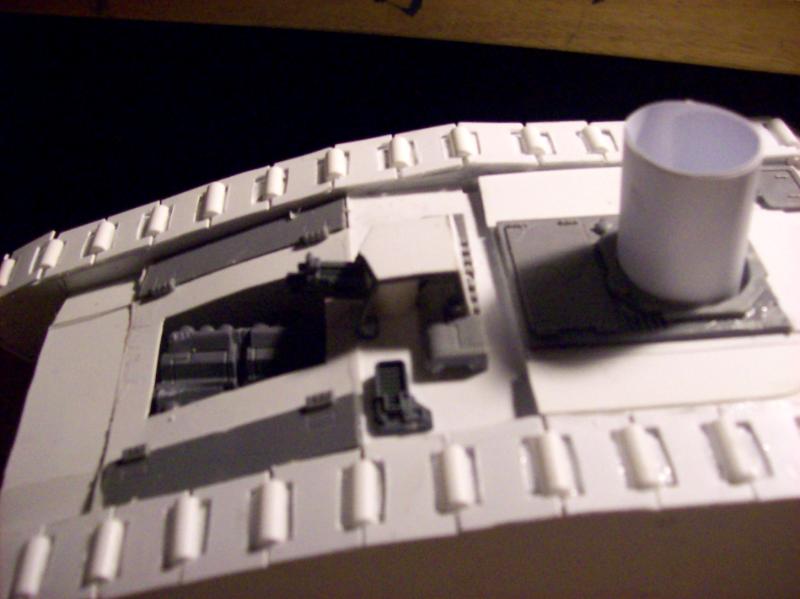
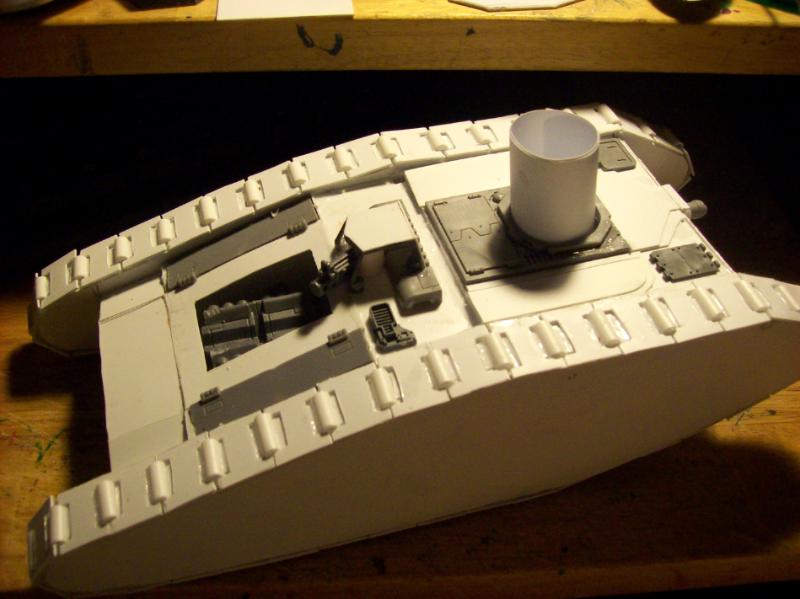
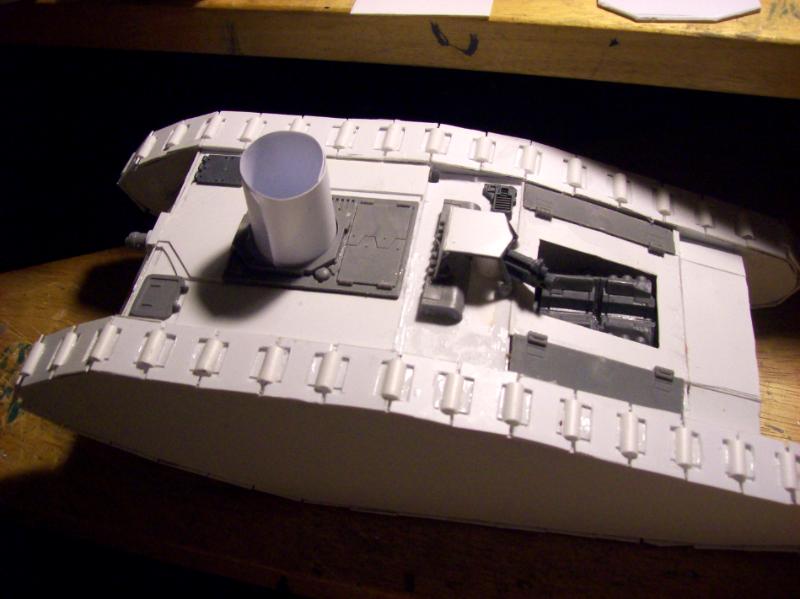
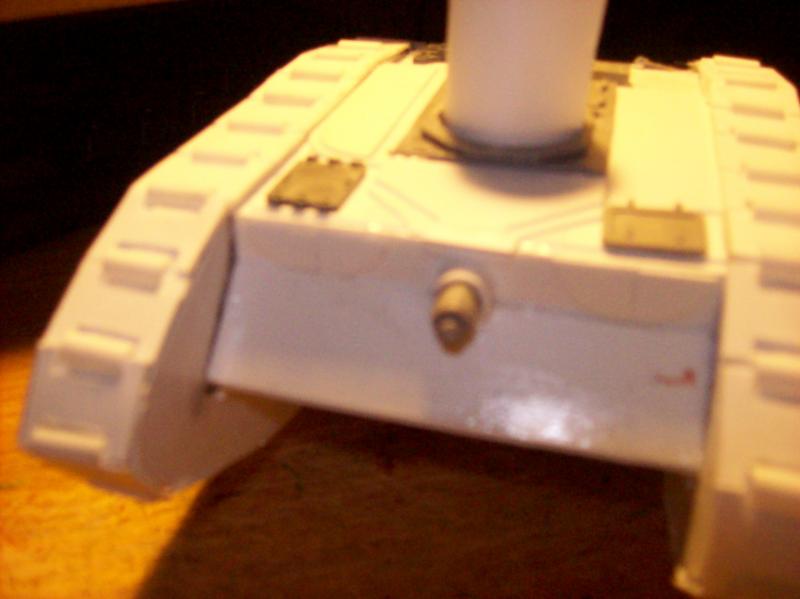


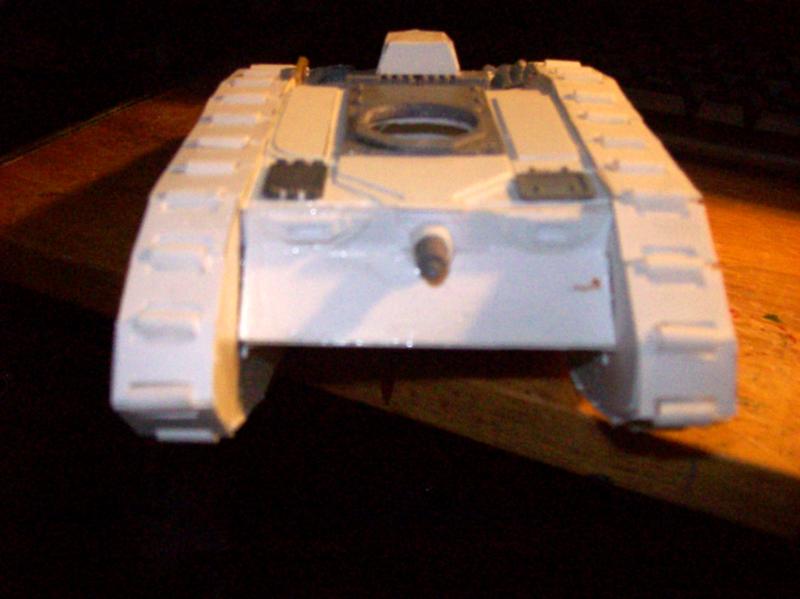

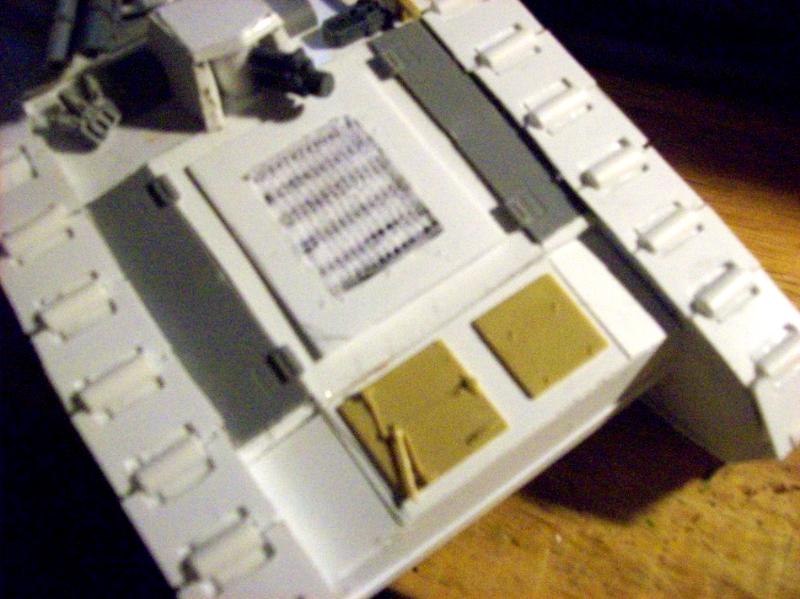

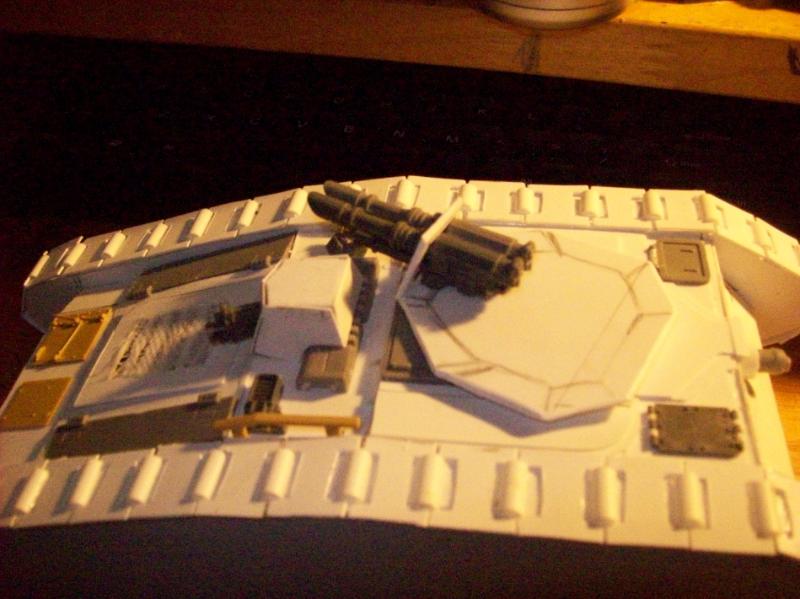
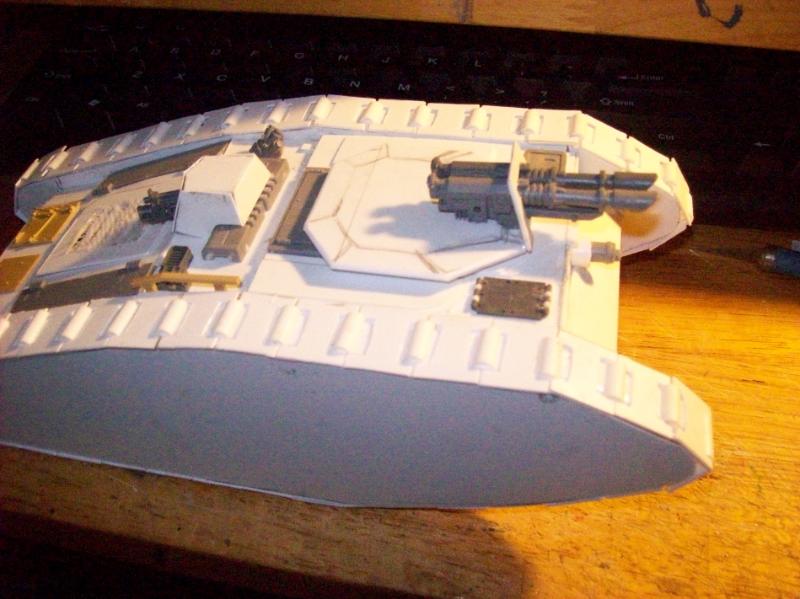

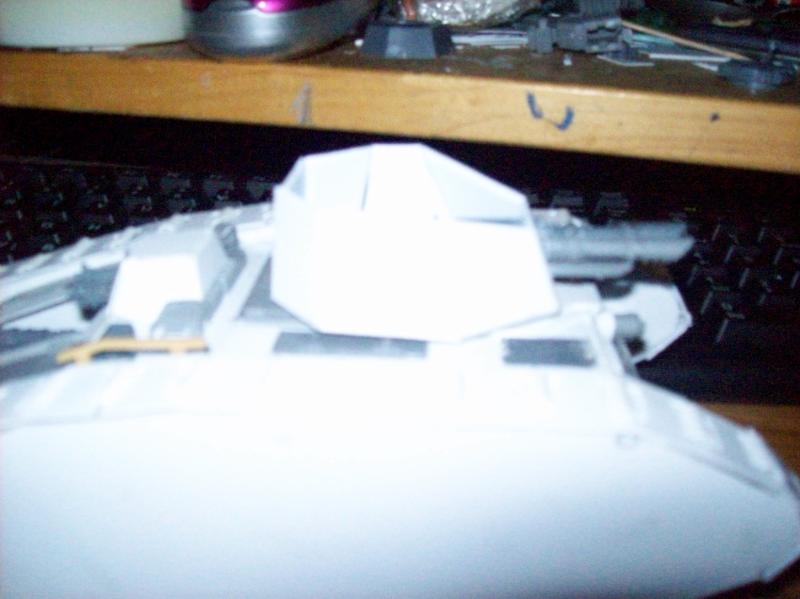
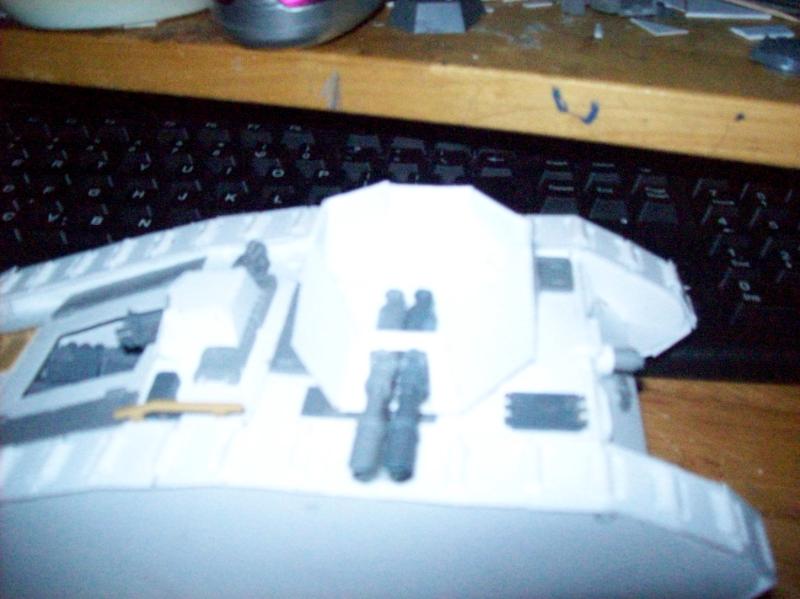
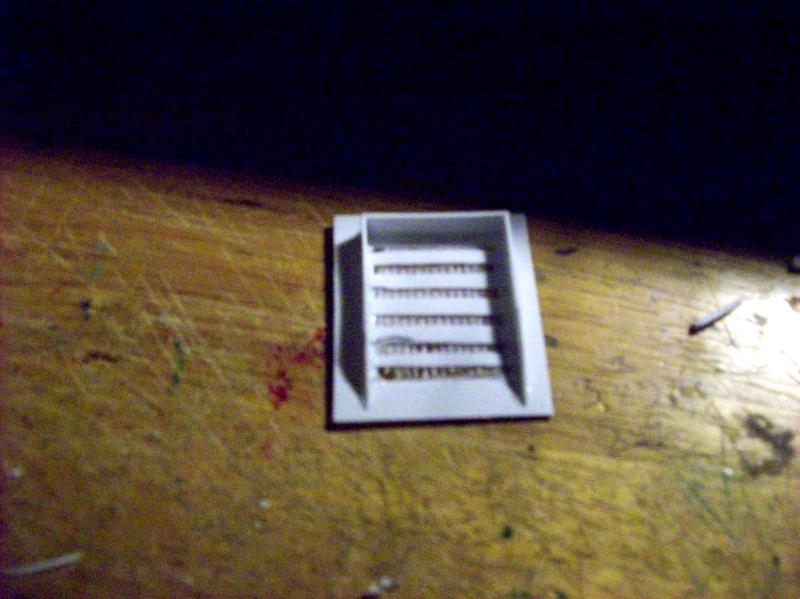
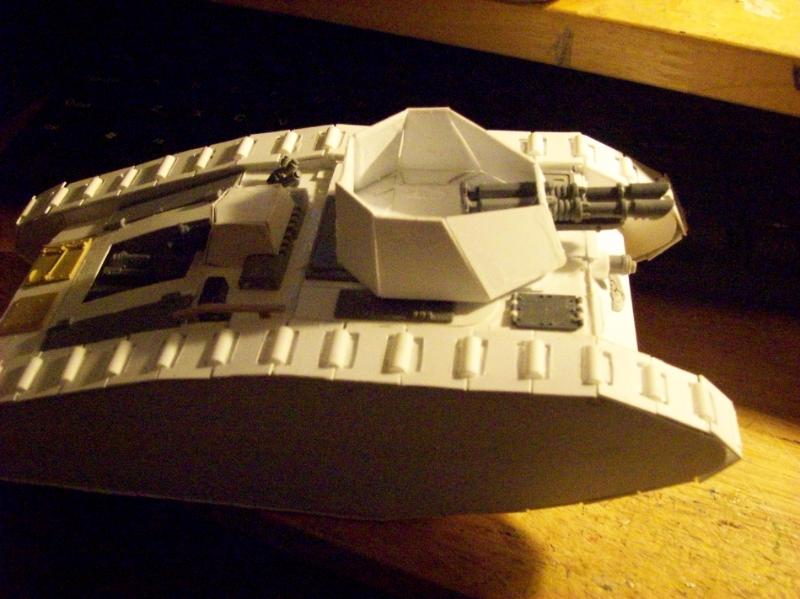
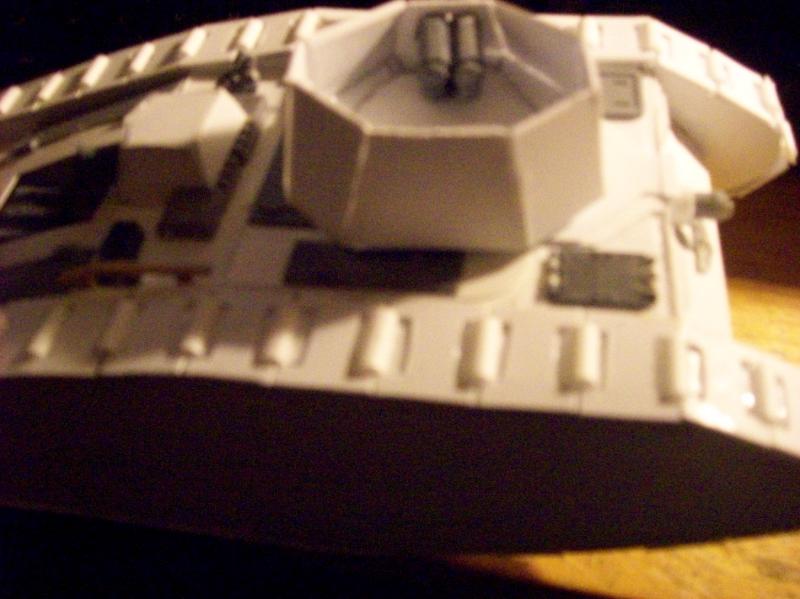

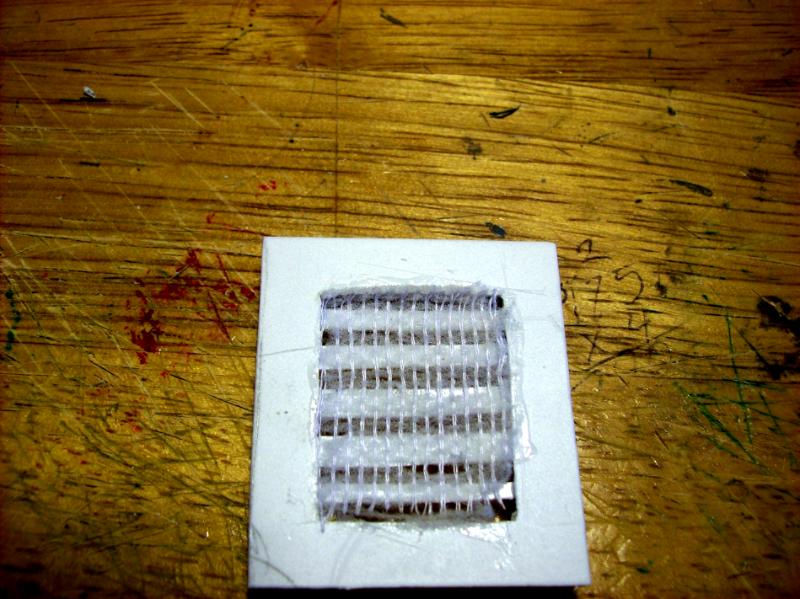
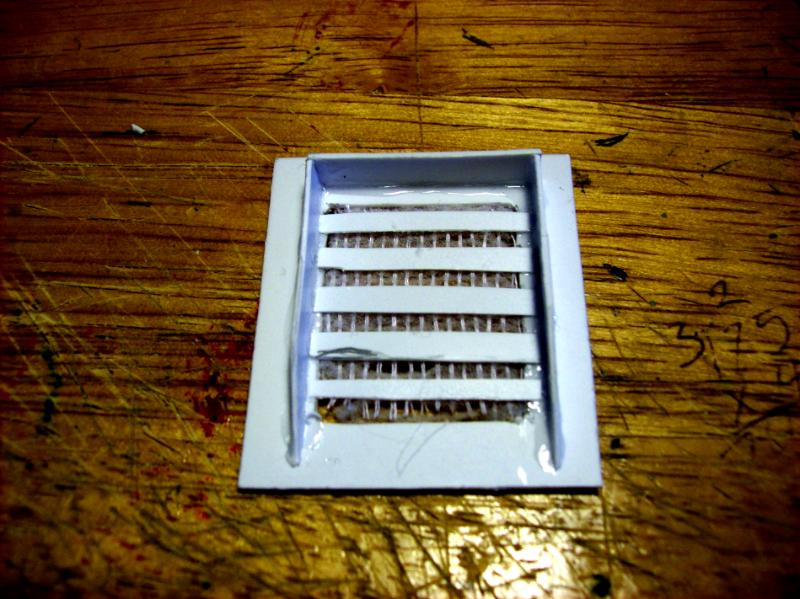
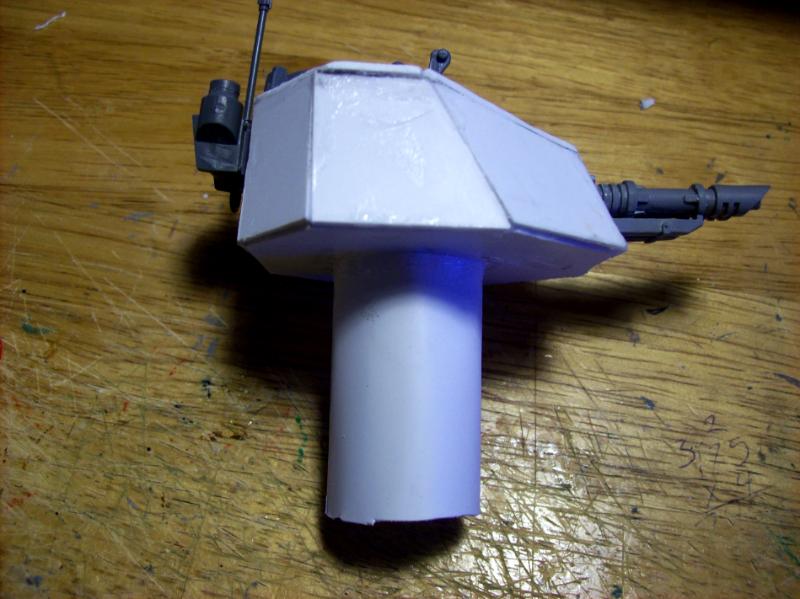
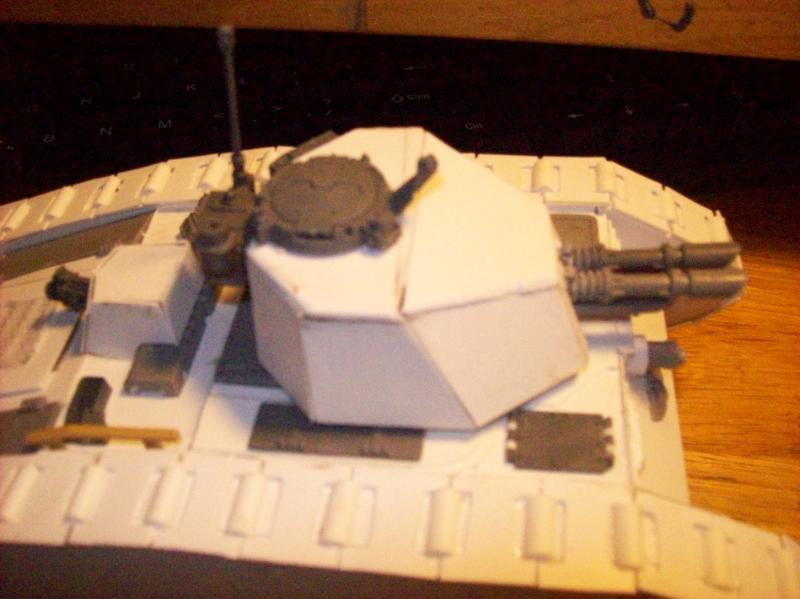


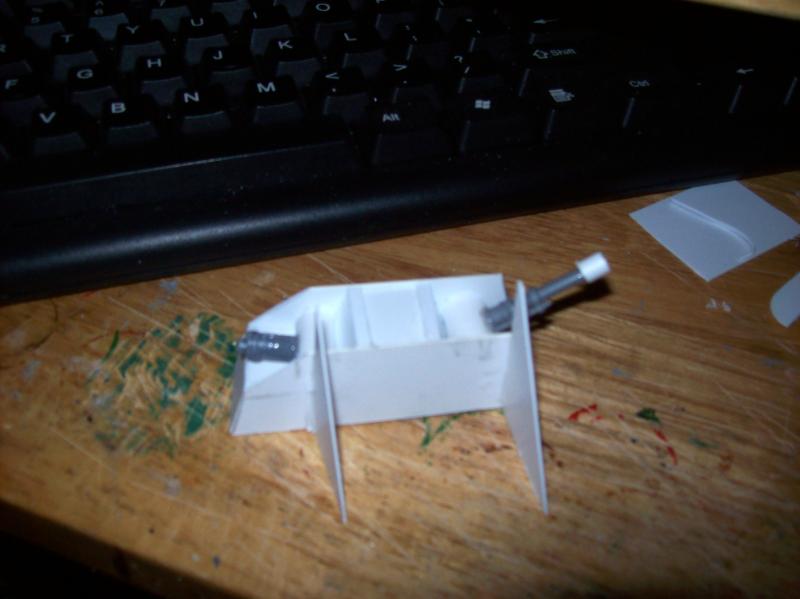
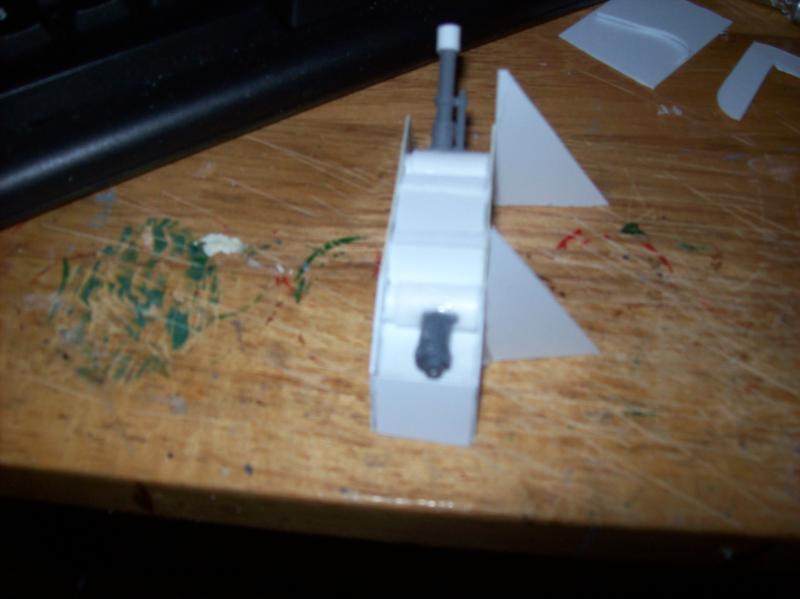
 you are all totally right.... have some already chopped up felt pens from my kids lying around and have forgotten almost about them...the q-tips i will absolutley use...the idea to make markers of the cottonbuds is new but so nice that i will efinatly try that one out^^
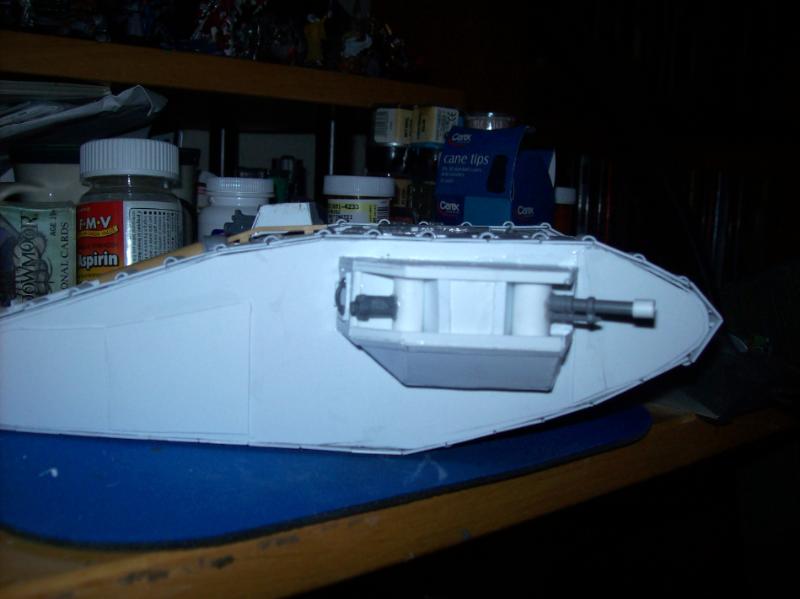

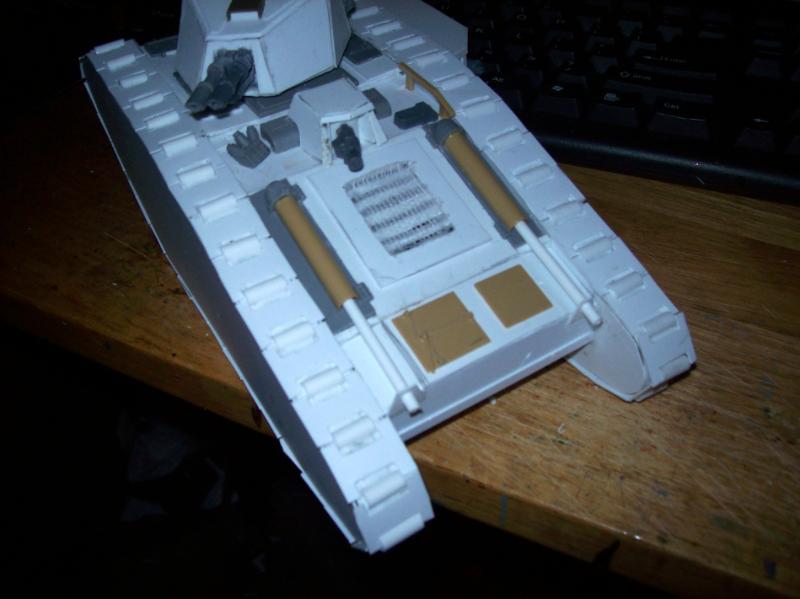
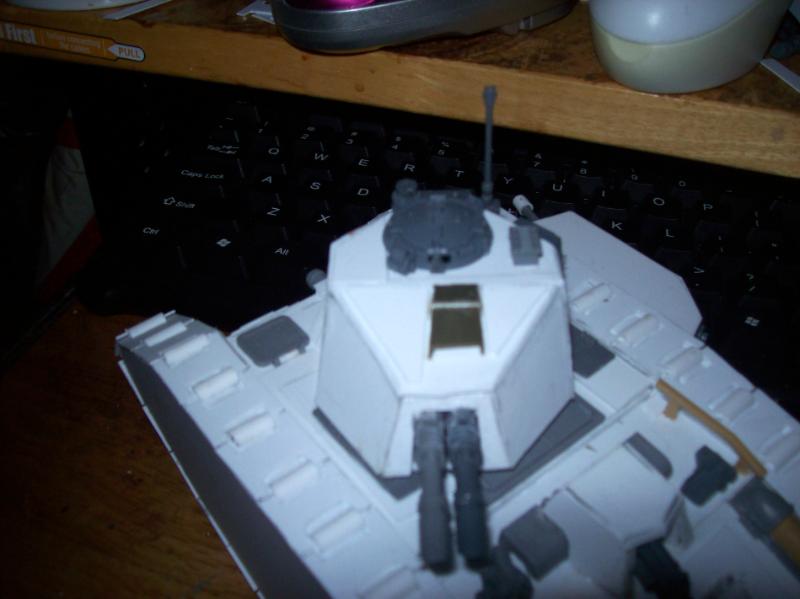
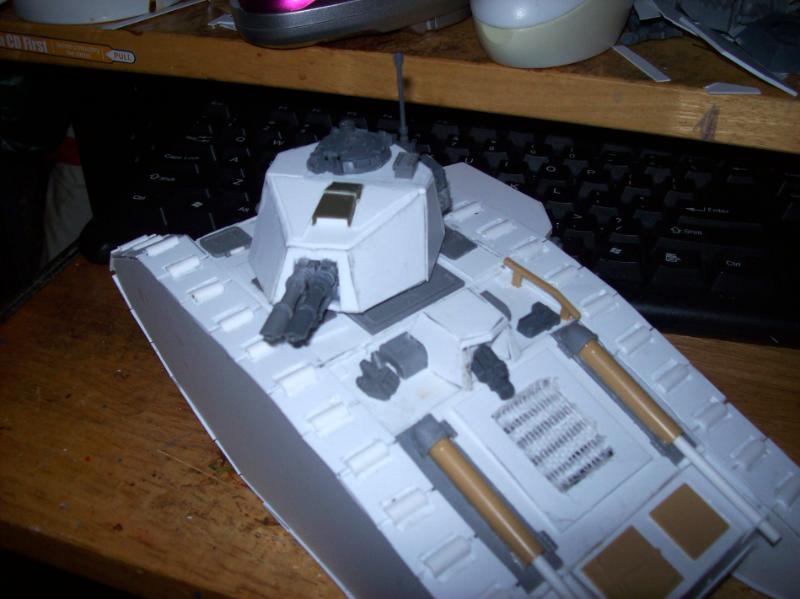
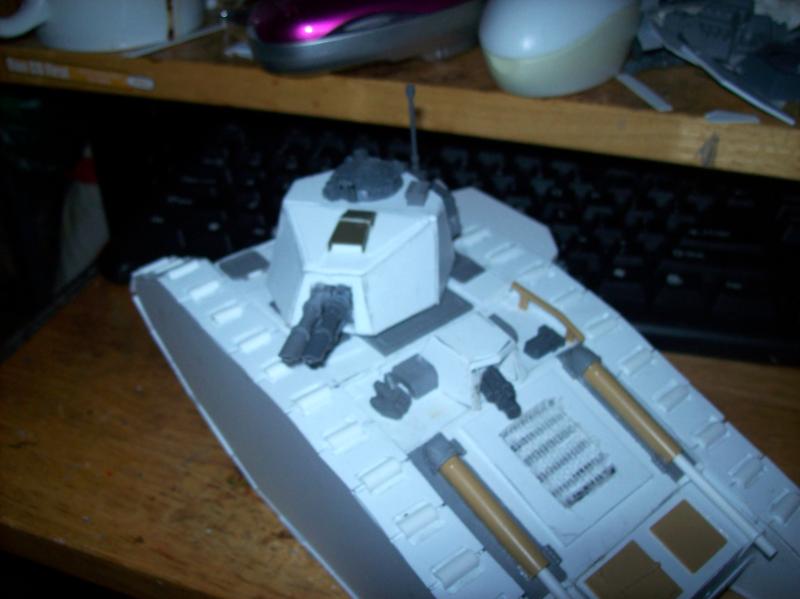
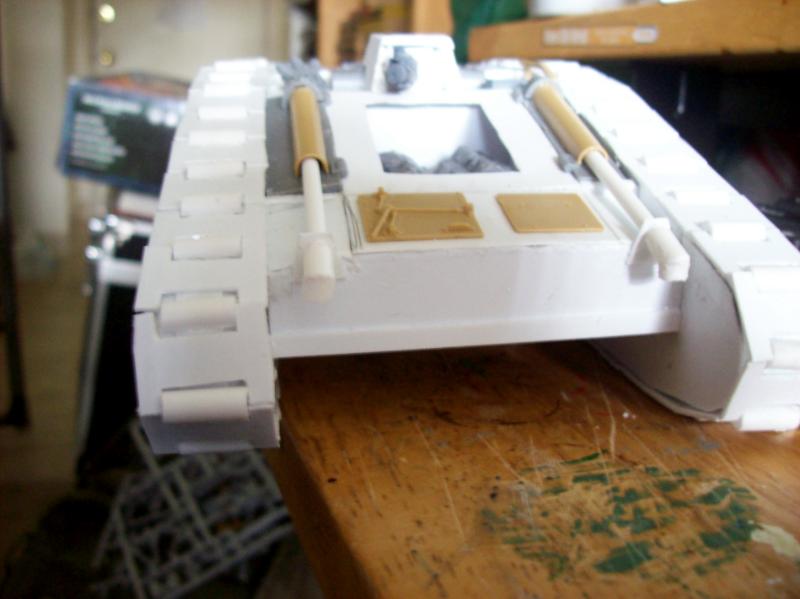


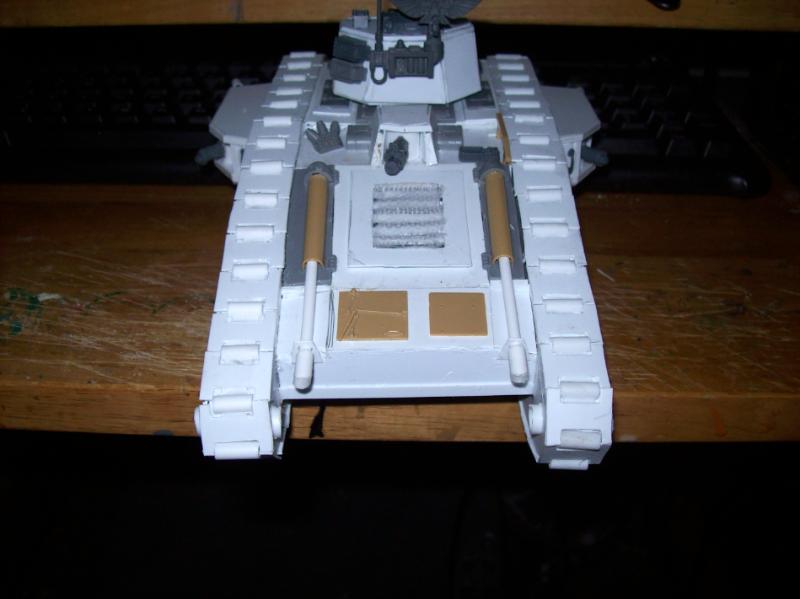
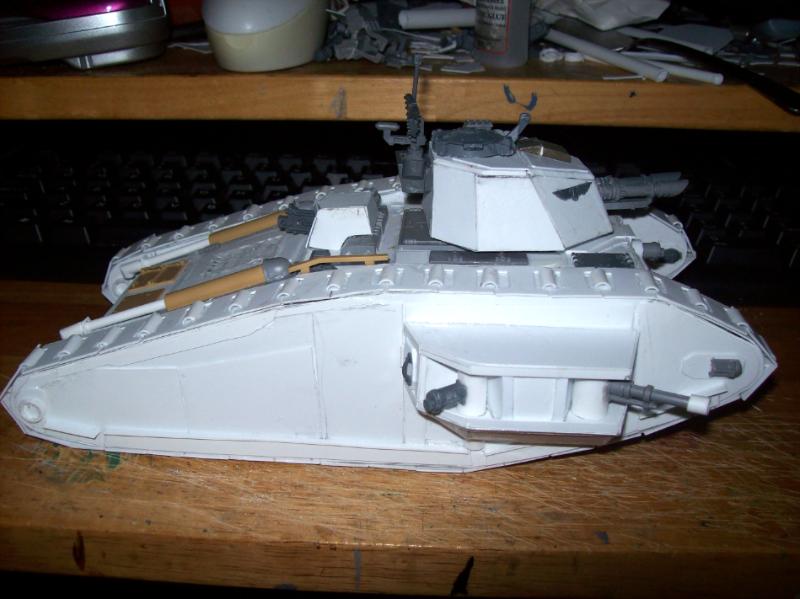
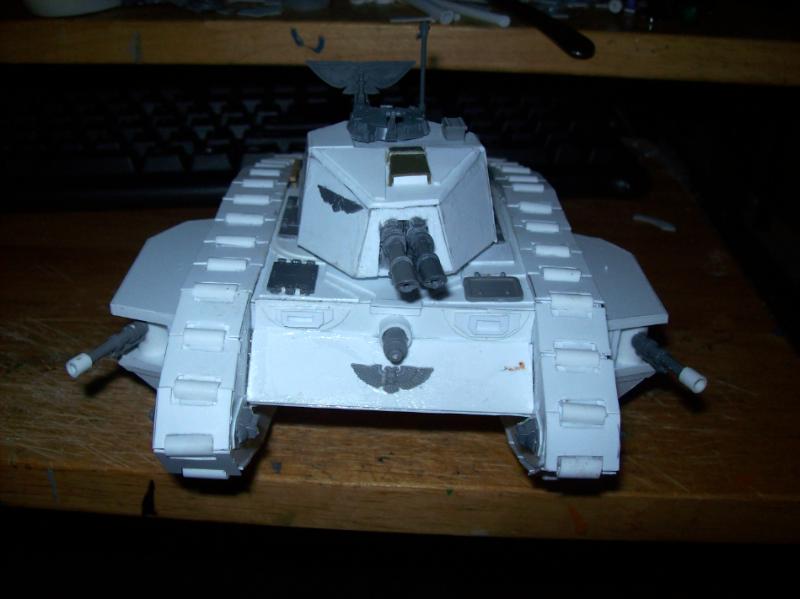
_tank.jpg)