This game could be given the subtitle “Winning in spite of yourself.” As I made some very critical errors due to my inexperience facing Tau and failing to pay proper attention to the terrain set up.
The game was played at the
GW battle bunker in Franklin Mills,
PA and I have to say Im impressed with the improvements they have made to the store since it was at its old location on the other side of the mall years ago. (Yeah its been that long since ive been there)
Thanks to Smashotron for taking the time out of his very busy schedule to help me out with a game against the Tau. His list follows below.
HQ:
Shaso - 75
AFP - 20
Missile Pod - 12
Shield
Gen - 20
HW-MultiT - 5
• 132
2 Shas'vre - 70
2 Shield
Gen - 40
2 PlasmaR - 40
2 Missile Pod - 24
2
HW-MultiT - 10
• 184
TROOPS:
FWT (9) - 90
Shas'ui + bond - 15
• 105
DevilFish - 80
SMS - 20
DP - 5
• 105
FWT (9) - 90
Shas'ui + bond - 15
• 105
DevilFish - 80
SMS - 20
DP - 5
• 105
FWT (12) - 120
Shas'ui + bond - 15
• 135
KROOT (20) 140
• 140
FAST ATTACK:
PATH (8) - 96
Shas'ui + bond - 15
• 111
DevilFish - 80
SMS - 20
DP - 5
• 105
PIRANHA (5) - 300
FusionB (3) - 15
TargetA (5) +
DP (5) - 50
• 365
PIRANHA (5) - 300
FusionB (3) - 15
TargetA (5) +
DP (5) - 50
• 365
HEAVY:
HH - 90
RailG - 50
SMS - 20
TLock + MultiT +
DP - 20
• 180
HH - 90
RailG - 50
SMS - 20
TLock + MultiT +
DP - 20
• 180
HH - 90
RailG - 50
SMS - 20
TLock + MultiT +
DP - 20
• 180
TOTAL:
• 2497
Having never played against the Tau Empire codex I was interested to see how what problems it would give me. Turned out my worst problems would be of my own making.
Here is the list I tried out, I know that Im kind of alone in constantly wanting to run without a
PBS but I just expect Ard Boyz Opponents to be looking for that and packing heavy Psycic defense. Playing without them keeps me from building my strategy around them and removes that automatic priority one target that most players will expect when facing Mech Vets. I may just be stubbornly resisting buying the damn things since I have already spent so much money on the army but if they turn out to be necessary I will break down.
HQ –
CCS 4x Melta, Chimera,
HS -155pts
HQ –
CCS 4x Melta, Chimera,
HS -155pts
Elites – Inquisitor + Mystics + Melta Bombs – 37pts
Troops - Veterans, 3x Melta, Chimera,
HS -165
Troops – Veterans, 3x Plasma, Chimera,
HS – 180pts
Troops – Veterans, 3x Plasma, Chimera,
HS- 180pts
Troops –
PCS 3x flamer, 1x Hvy Flamer, Chimera,
HS – 130pts
Troops – Infantry Squad, Flamer, Krak, Melta Bombs – 70pts
Troops – Infantry Squad, Flamer, Krak, Melta Bombs – 70pts
Troops – Veterans 2x Flamer, 1x Hvy Flamer, Demolitions, Priest -175pts
Fast Attack – Valkyrie, Rocket Pods – 130pts
Fast Attack – Vendetta – 130pts
Fast Attack – Vendetta – 130pts
Heavy Support –
LR Squadron: 2x Vanquisher, 2x
LC, 2x Plasma Sponson, Pask – 470pts
Heavy Support –
LR Squadron: 1x Demolisher -165
Heavy Support –
LR Squadron: 1x Demolisher -165
Total : 2497
Sadly I forgot to print my list out Friday and totally forgot about the Priest in the Flamer Vets squad, DOH!!!
I will post extensive pics late tonight when I get home. I was planning to add some Vassal details but then I actually tried to do the first two turns and I don’t have that kind of time Hopefully the pics will be sufficient.
The game was Dawn of War Annihilation ( The worst combo for
IG deliberately ) and I gave my opponent choice of first turn. The goal here was to make this game as difficult as possible since I was not likely to get many other chances to play Tau before 7-12.
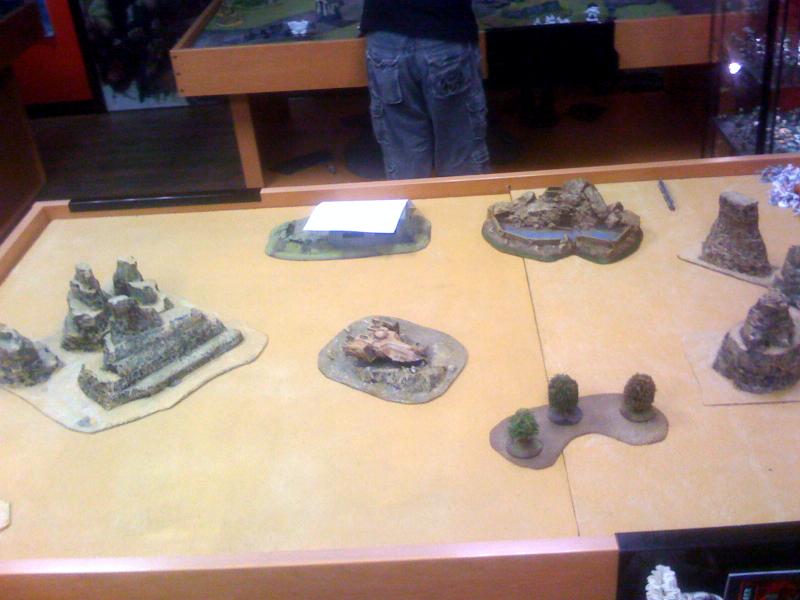
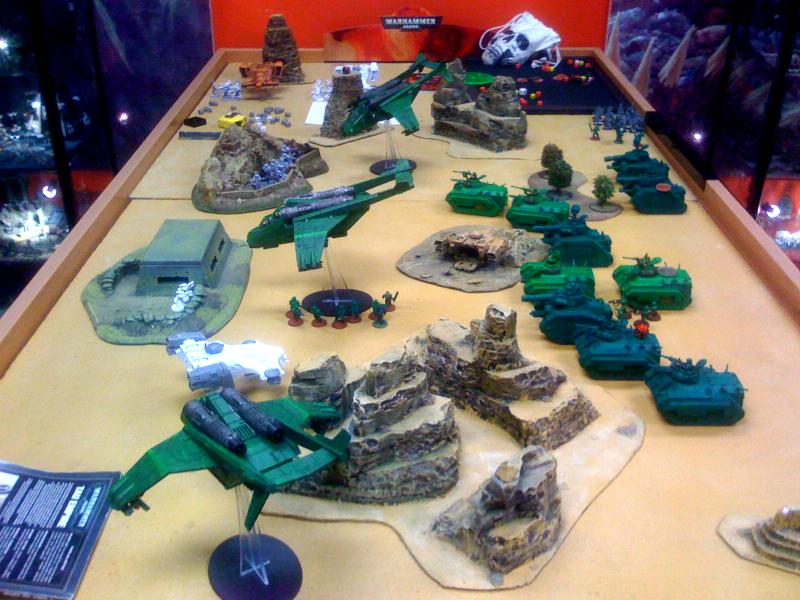
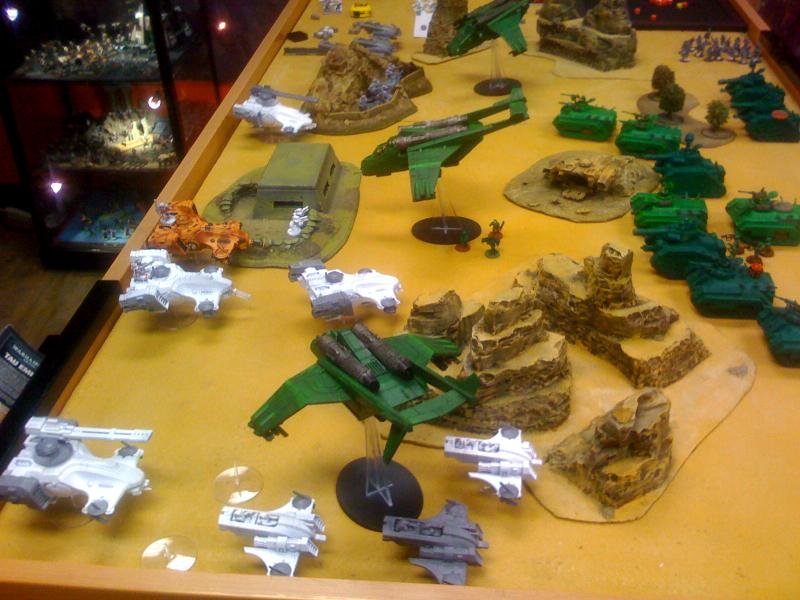
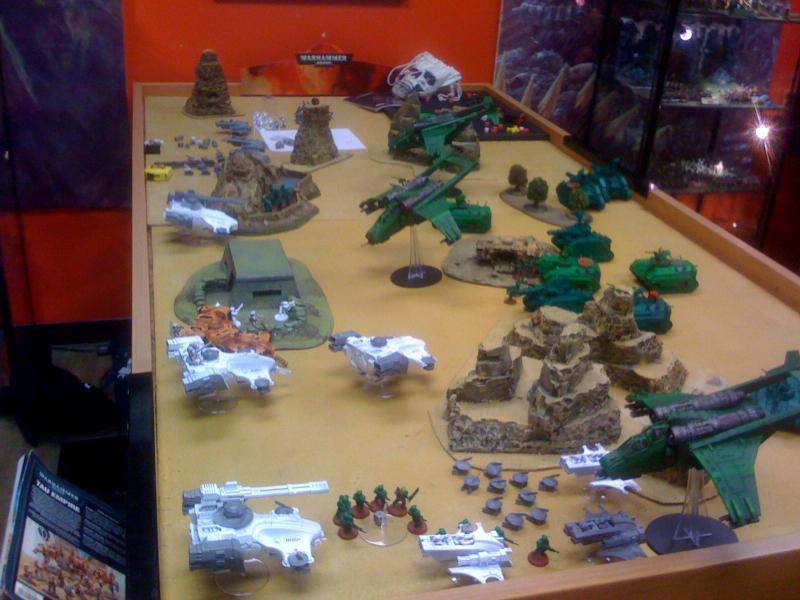
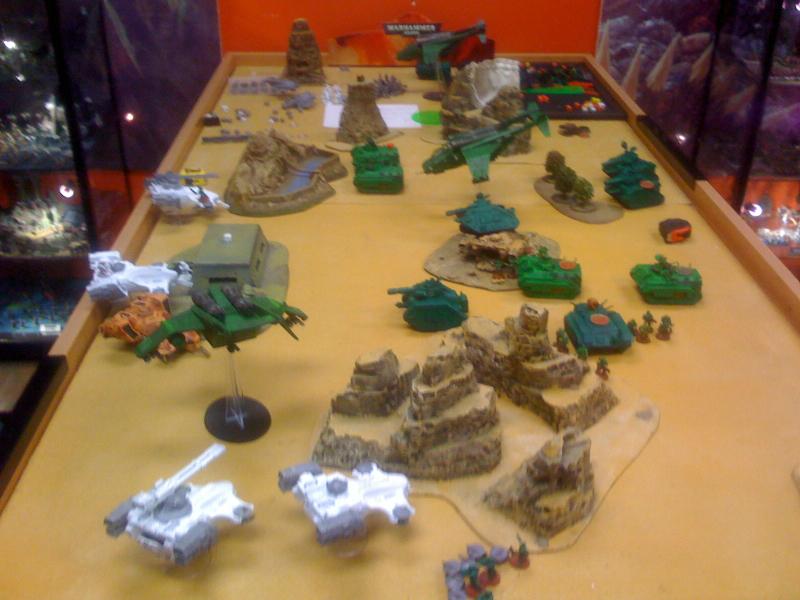
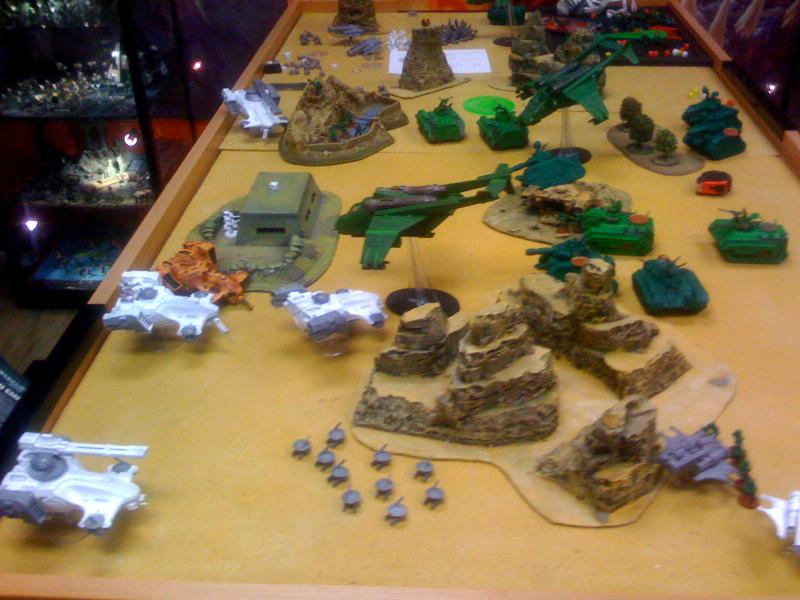
Terrain was set up bad for
IG as well. On the left side of the board was a HUGE desert canyon piece that was 12”x12” and pretty much impassible to vehicles. The center of the board was a neat wrecked devilfish piece while he had a fortified mountain terrain piece on the right side of his deployment and I had a small wooded area on that side of mine. He also had a small bunker complex piece in the center rear of his deployment zone.
Only a small choke point to squeeze my vehicles through at board center or I would be forced to swing around the wrecked fish and go towards the right flank. My opponent chose to deploy only his
HQ suit squad right behind the giant canyon piece and one squad of
FW in the fortified mountain on his side of the right flank.
Tau Turn 1
My opponent surprised me by choosing NOT to bring in anything further other than his pathfinders and hold his entire remaining army in reserves. He said that he felt that if he came on that he would be shot to bits early. We discussed throughout the game if this decision had worked out for him and I can see his point since I had very effectively only 4 viable shooting phases in the game due to that decision. It also allowed him to ensure that my own tanks had very limited fields of fire
IG Turn 1
I made a number of critical errors here. First I moved my entire Chimera Phalanx into the board center making it easy for my opponent to spread out and minimize their firepower. Second I positioned myself so that the Melta
CCS would be forced through the narrow chokepoint at board center. Third I put Pask’s Squadron too close to the board edge risking an outflank attack.
My Demolishers moved in with the Chims and my ValkDettas did my standard three pronged attack with the Valk carrying the demo vets up the center and my two Vendettas moving up each side. Everything popped smoke to make his turn two fire less effective.
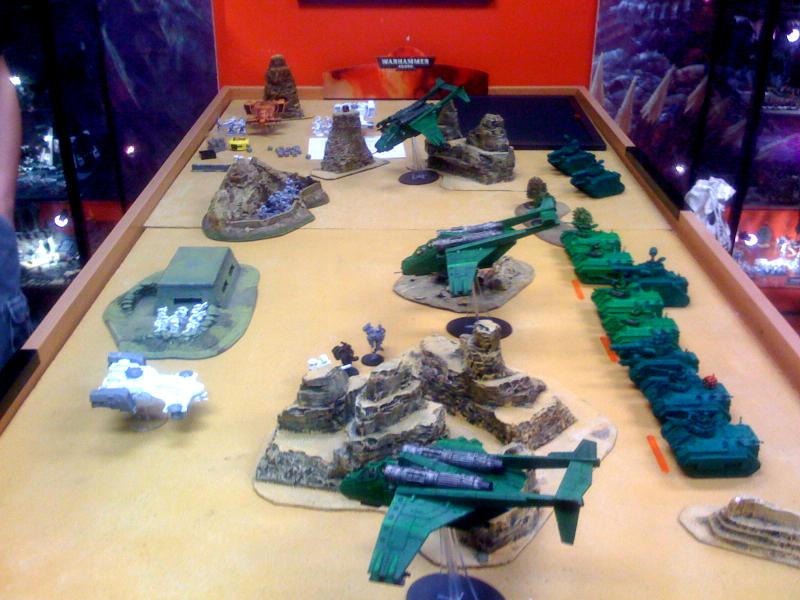
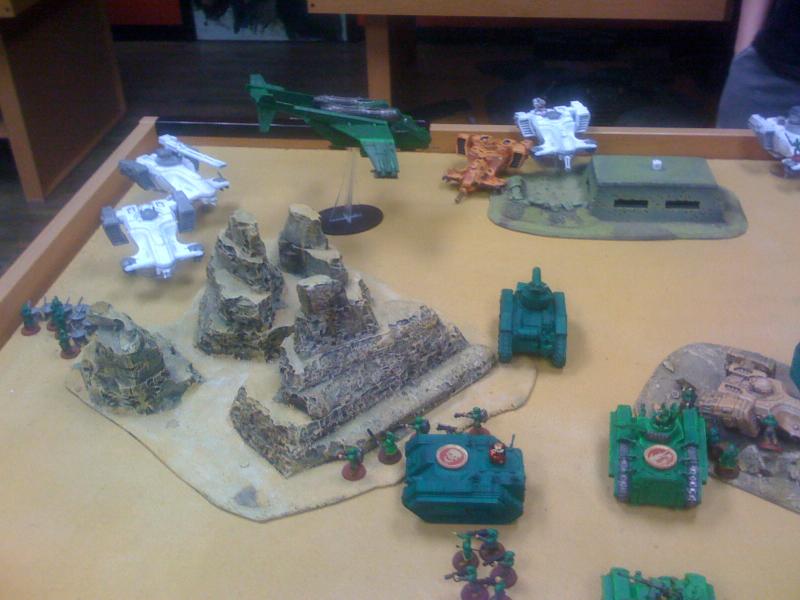
Tau Turn 2
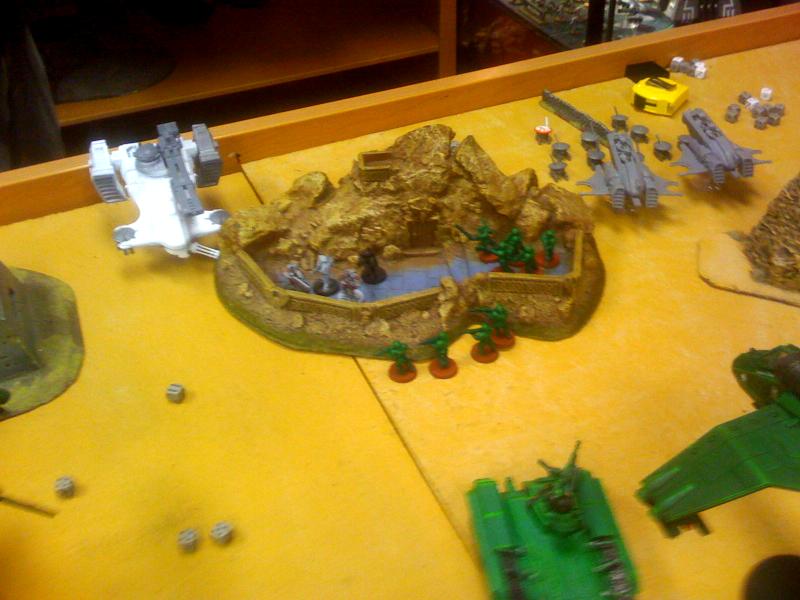
This turn was pretty unimpressive with the Tau getting only one RailHead and his Kroot from reserves. They moved in slowly with the Rail Head coming in between the fortified hill on the right and the bunker in the center. The Pathfinders came in and deployed into the fortification from their fish while the Kroot outflanked perfectly taking advantage of my poor placement. His suits jumped out from behind the rocks to position for a posthot at my chimeras.
His shooting went fair with his Suits managing to immobilize one of my
CCS chimeras ( a blow that would prove crippling later on) This reminded me of how terrible my first turn move had been by not hiding my
CCS chims behind the rest of the Phalanx. On the other side the Kroot rapid fired into Pask’s squadron but thanks to the smoke managed only to shake them and knock out one weapon, however it was Pask’s main cannon that was lost another early crippling blow due to my poor initial movement.
 IG
IG Turn 2
This was the turn where I made my most critical error. I ran straight for the chokepoint with my remaining
CCS Chimera moving up leading the pack toward the narrow funnel flanked by the rest of my phalanx. On the far right flank of the phalanx the two plasma vets moved full speed to get around the wreck and make a separate attack supported by the Vendetta.
The Valkyries each moved forward slowly preparing to combine fire on the lone rail head while Pasks squadron moved as fast as their lumber hulls could go while the Inquisitor who had been positioned behined them moved to put himself and his mystics in between the vulnerable tanks and the advancing Kroot Horde. In the center my Vendetta moved ahead to position the demo vets for an attack on the Crisis Suit team.
Shooting went well for me as the Vendettas destroyed the lone rail head with concentrated lascannon fire. In the center the Pathfinders were almost wiped out by two perfect Rocket Pod hits that killed all but two of the dangerous marker lights. The Crisis team was annihilated by a combined assault of demo charge and demolisher cannon rounds while the heroic inquisitor killed a single Kroot before his inevitable sacrifice.
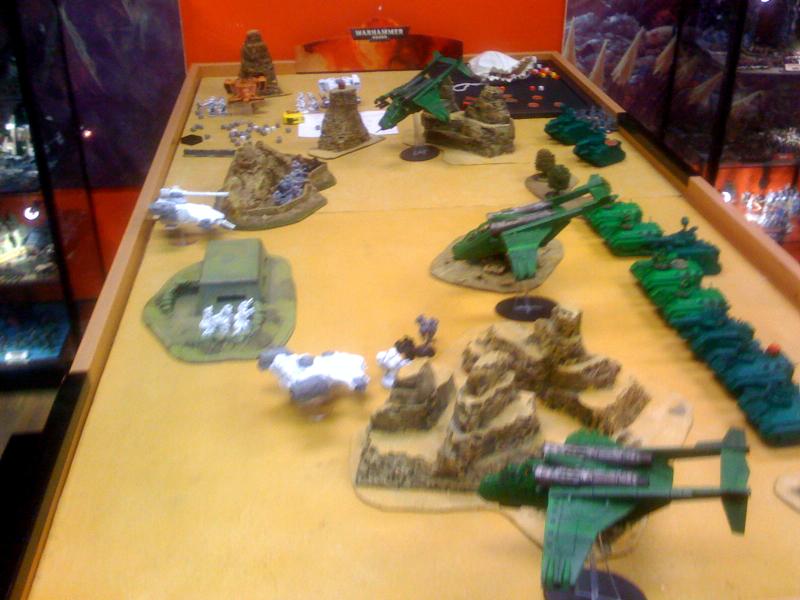
Tau Turn 3
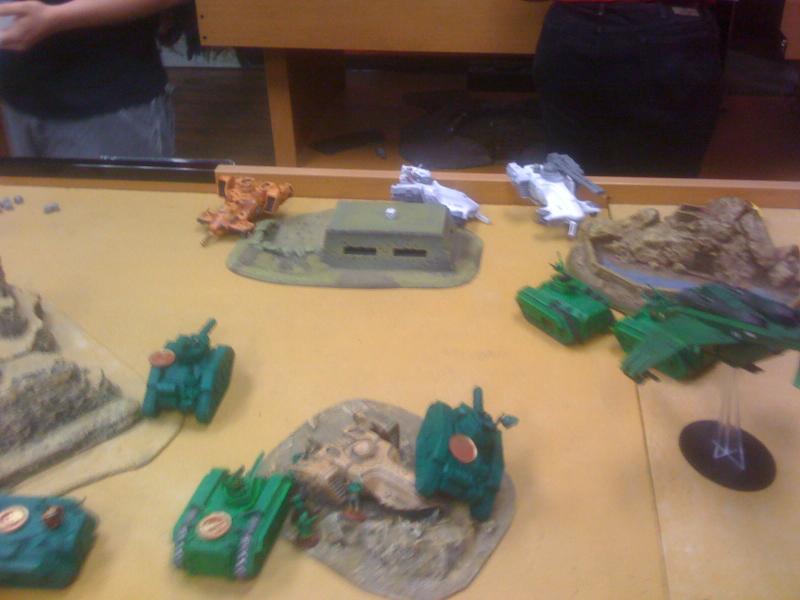
This turn the Tau reserves arrived in force ( actually my opponent rolled for only one hammer head but in order to make the game more even we gave him all of his reserves at once ) So now the full force of the Tau Empire raced towards my simple guardsmen. He brought in both loaded WarFish just to the left of the bunker in the center at slow speed to enable them to pound on my demo vets. One Railhead came in on the far left and one in between the bunker and the fortified hill flying over the burning wreckage of the first Railhead. The Piranha squadrons came in on opposite corners. The one on the Left moving flat out while the one on the right moved in more conservatively using the fortified hill for cover.
His shooting phase went rather poorly with only his two rail heads having a chance to fire. One missed and the other hit my left hand Vendetta shaking it. He did manager to use all of his burst cannon from the DevilFish to nearly wipe out my Demo Vets leaving only three who ran back towards the safety of my own lines. The ciritical problem here was that they ran directly back to block the chokepoint stalling my entire chimera advance.
His Kroot slaughtered the Inquisitor and his retinue but were left staring down the barrel at four plasma cannons from Pask’s Squadron.
 IG
IG Turn 3
I had a serious problem at this point as the survivors from my Demo Platoon were completely blocking the chokepoint between the devilfish wreckage and the canyon. This force me to make difficult terrain tests to move around them and in another devastating blow my second
CCS Chimera was Immobilized not only robbing me of both of my best anti tank units but also blocking any further advance through the chokepoint.
I was forced to split up with the two demolishers moving forward over the rubble and wreckage respectively, my Melta vets and flamer
PCS moving to the left to try and do an end run around the canyon and my two Plasma Vets moving off to the right to assault the Piranha’s.
Pasks squadron spun in place to annihilate the Kroot while all three skimmers moved to better positions. Both basic infantry squads disembarked one in the midst of the Piranhas and the other in perfect position to assault the Tau Firewarriors holding the fortified hill on the right side.
My shooting went very well as one demolisher wrecked one of the newly arrived devilfish forcing the firewarriors out into the open where they were quickly reduced to half strength from multi laser and missle pod fire after the remaining pathfinders had been dealt with. Pask annihilated the Kroot with massed plasma cannon fire while my Lascannons took out two pirhanna and my infantry squad facing the fire warriors killed 4 with flamer fire.
In the assault phase the squad on the left killed a single pirhanna while the squad on the right killed all but 4 fire warriors who then fled towards the board edge.
Tau Turn 4
With plenty of targets available now the Tau made only token moves. The firewarriors who lost the previous rounds combat fled off the table while the squad in the center ran to hide behind the bunker. Each Piranha squad moved at combat speed towards the nearest chimeras while the Hammerheads held ground targeting my Vendettas.
On the left the Vendetta, the Melta Vets Chimera and the infantry squad that had assaulted the piranhas were all destroyed in quick succession. On right the piranhas failed to score any serious hits on my plasma chimeras and the second rail head immobilized the Demolisher that was riding over the wreckage in the center.
At this point the battle was very even and momentum was turning towards the Tau. I had 6
KP to his 4 and my two best units were effectively out of the battle due to the loss of their rides. I had made critical errors in initial movement and was outgunned and outnumbered. Time to get my drek together!
IG Turn 4
This was my best turn. I moved the Melta Vets from the wreckage of their chimera towards the piranhas on the left while moving both plasma vet squads toward the piranhas on the right. Pask turned to focus on the nearest RailHead. My valkyrie moved to hit the hiding tau firewarrior squad behind the bunker, exposing its rear armor to a railgun shot my thinking being that the railgun would penetrate regardless so no need to play coy. The Demolisher on the left closed the distance on the remaining full devilfish while my infantry squad tried to move for a charge against the Devilfish ( and rolled double ones on the difficult terrain test!!!)
My shooting was devastating. I killed all of the piranhas on the right side between the rapid firing plasmaguns and the vendetta. Pask destroyed the pathfinders empty devilfish, the melta vets and chimera multilasers killed all but two of the Piranhas on the left flank while the Valkyrie and Demolisher killed all but one lone firewarriror from the squad hiding behind the bunker.
For my assault phase I prepared to attack the Rail Head on the right with my infantry squad,,, and rolled double 1s again for the difficult terrain test!!! As my troops apparently were unable to get out of all the Tau blood.
Tau Turn 5
For Turn 5 the Tau Drones moved in on each side. On the left the came around the canyon to attack the melta vets while on the right they moved in to attack my suddenly keystone cop imitating infantry. The lone surviving Devlfish moved to hide behind the bunker in an attempt to deny further
KPs Both Railheads moved to get better shots and the two surviving piranhas moved toward my
PCS in their chimera, the last surviving Chimera that had tried to make the run through the chokepoint of death.
His shooting was quick but he did manage to Shake my Valkyrie, immobilize my second demolisher, kill all but 4 of the Melta Vets, slaughter all but the sgt of the slippery idiot infantry squad and wreck the
PCS chimera but was unable to stop the approaching plasma vets or vendetta on the right side.
IG Turn 5
At this point I was trying in vain to take out the Rail Heads and managed to do exactly nothing more than shake one of them with all my combined firepower. I did finish off the Pirhana squad by disembarking the Melta
CCS that had been hiding in its chimera since it was immobilized on turn 3 and plama fry the drone squadron that had been devastating my infantry squad. My melta squad killed a couple drones then Charged but were unable to do enough damage to route the damnable tau automatons.
My lone sgt did manage to charge the devilfish but missed with his meltabomb.
Tau Turn 6
With only , two railheads and one devilfish left alive and his drones locked in combat my opponent had little movment. He did try to hide his Devilfish better and got another good shooting positon with his unshaken rail head. His shooting immobilized my valkyrie and killed the lone SGT but nothing more.
The assault phase saw the drones kill all but my Veteran Sgt from the melta vets squad.
IG Turn 6
Trying for easy
KP I focuses all my firepower on the last surviving Devilfish but the damned disruption pods foiled me again. I was able to do no more than blow off its burst cannon but I did manage to scatter one demolisher shot into the lone firewarriror and finish off the annoying little blue coward.
The last moment of drama for the game came with My lone SGT actually won the combat against 9 drones and denied my opponent the
KP for his squad. Medal for you SGT!!!
FINAL RESULT:
IG 10 TAU 6
OBSERVATIONS:
Most of my problems this game were caused by my own mistakes in the first two turns and I was actually very pleased with how the list was resilient enough to allow me to rebound from those early mistakes and still pull off a fairly convincing win.
I did discover just how tough tau vehicles are with those damned disruption pods of theirs. I think I would have actually done better against broadsides since so many more of my weapons would effect them. The hammer heads were just very hard to take out since my opponent used the reserve deployment to bring them on the board in the most difficult positions for Pask to deal with them.
I did not feel the need for the
PBS but I may swap the
PBS back in for the second demolisher. Im still undecided on that. Otherwise the army performed perfectly even though Pask was greatly reduced in effectiveness due to my early mistakes.
Automatically Appended Next Post:
Ok, finished up and added the pics, hope y'all enjoy it.


 22-3(Local) GT Circuit 2-0-1

 54-8-4 (local) 5-1 Ard Boyz


 65/4/6,
  10/2/1,
  10/3/0,
  2/0/1,
  0/1/1
0/1/1


 I play Tau and I think you're going to be able to handle them, but it's cool to see you preparing for all possibilities!


