| Author |
Message |
 |
|
|
|
|
Advert
|
Forum adverts like this one are shown to any user who is not logged in. Join us by filling out a tiny 3 field form and you will get your own, free, dakka user account which gives a good range of benefits to you:
- No adverts like this in the forums anymore.
- Times and dates in your local timezone.
- Full tracking of what you have read so you can skip to your first unread post, easily see what has changed since you last logged in, and easily see what is new at a glance.
- Email notifications for threads you want to watch closely.
- Being a part of the oldest wargaming community on the net.
If you are already a member then feel free to login now. |
|
 |
2011/01/17 14:19:24
Subject: Tarantula Sentry Emplacement[C&C needed]
|
|

Ollanius Pius - Savior of the Emperor
Gathering the Informations.
|
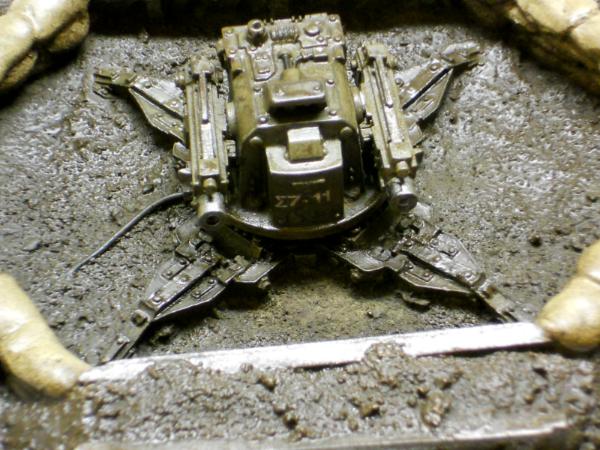
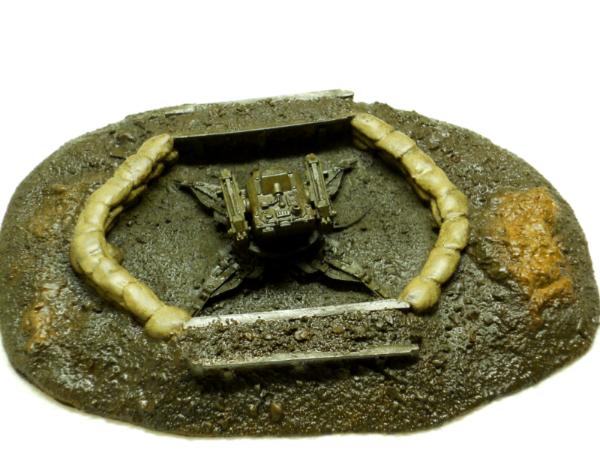
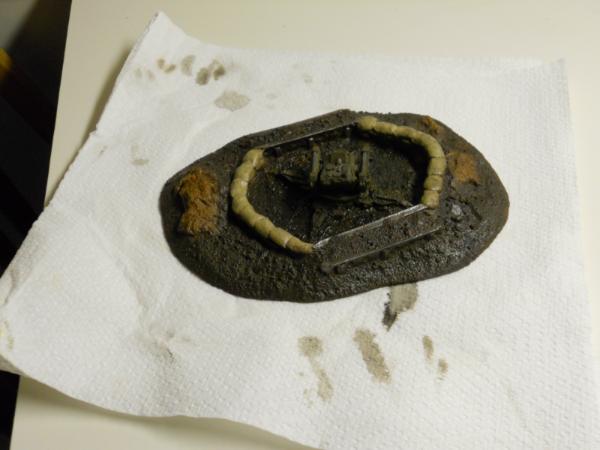
Doing this as an airbrush project. All that's left is to attach the guns to the Sentry Gun proper, do the campaign decals, add some static grass and flock outside the dugout, and some rust on the corrugated metal components.
With that in mind, what else can you lot think of that I need to do? Should I add some more detailing, like barbed wire and spent HB shells?
Camouflage the gun up to add some more color to a rather drab piece?
Thanks in advance for the help guys!
|
|
|
 |
|
2011/01/17 14:50:22
Subject: Tarantula Sentry Emplacement[C&C needed]
|
|
[ARTICLE MOD]
Huge Hierodule
|
Don't know if you're are going only airbrush, but I would do the sandbags in a separate color as well as the legs of the tarantula. While everything would get muddy, you would still see a gradiation of color from the top of the sandbags to the bottom, where it is muddier. Same with the tarantula stand.
|
|
|
|
|
|
2011/01/17 15:31:47
Subject: Tarantula Sentry Emplacement[C&C needed]
|
|
Ollanius Pius - Savior of the Emperor
Gathering the Informations.
|
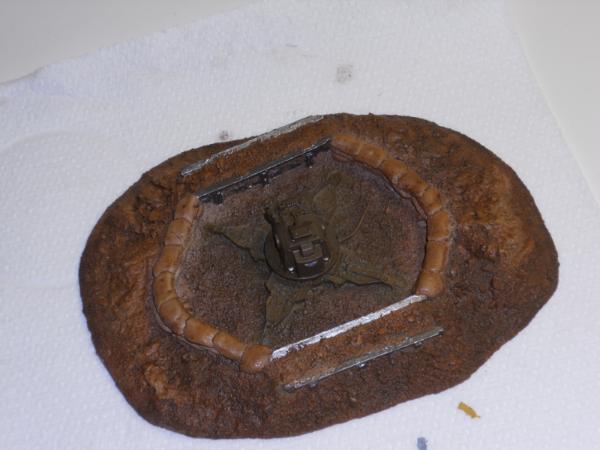
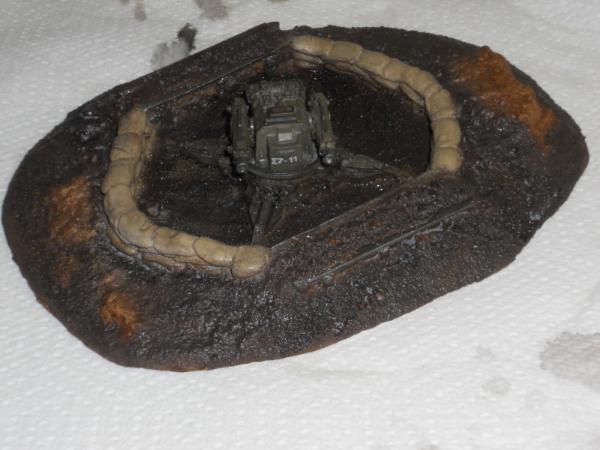
I think the biggest problem I've now learned:
I underestimated the strength of Burnt Umber as a color.
That "brown" effect?
It's Burnt Umber, as watered down as I could get it for airbrushing.
The sandbags originally started out as a white-grey, the ground itself was a light brown, the gun Olive Drab, etc.
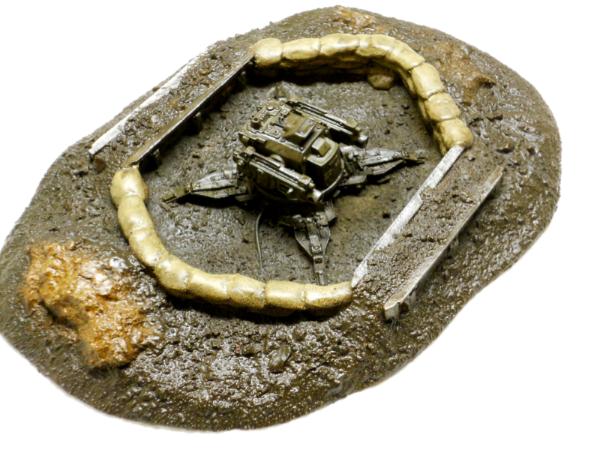
I went back and just did touch-up work, bringing it all back up to the "Prebrownout" conditions. Automatically Appended Next Post: 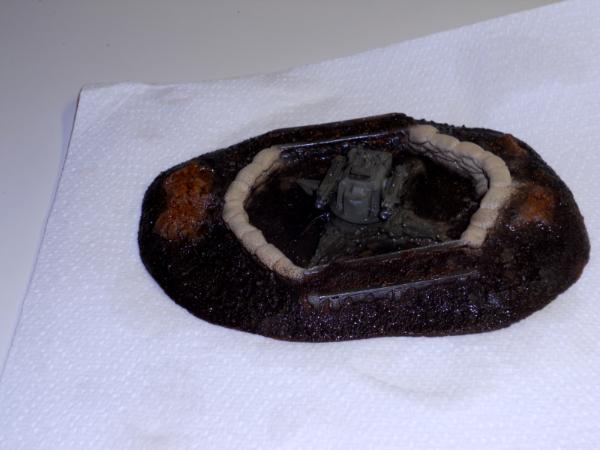
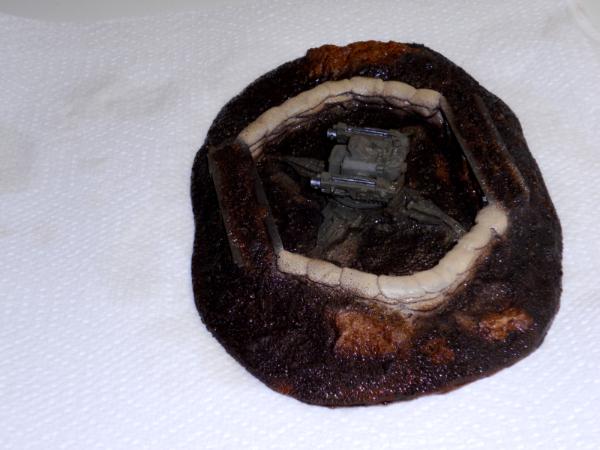
There's the "revised" shots. Not sure where to go from there though.
|
|
This message was edited 1 time. Last update was at 2011/01/17 17:29:31
|
|
|
|
|
2011/01/17 17:47:17
Subject: Tarantula Sentry Emplacement[C&C needed]
|
|
[ARTICLE MOD]
Huge Hierodule
|
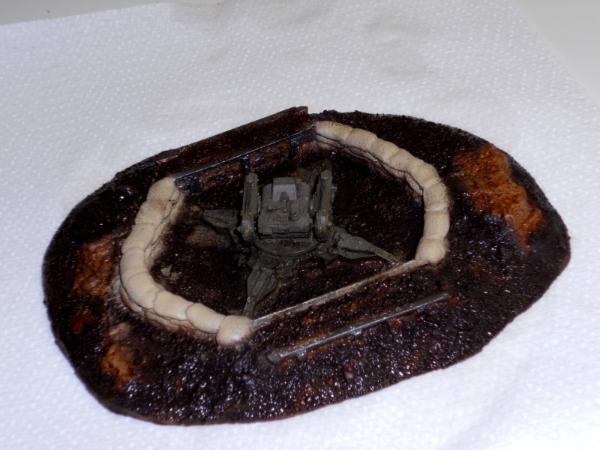
Better. I would like to see more definition between the sand bags, which you could have gotten by drybrushing them from top to bottom. Much clearer definition though, you can make out that there are different components on the base.
|
|
|
|
|
|
2011/01/17 17:51:21
Subject: Tarantula Sentry Emplacement[C&C needed]
|
|
Ollanius Pius - Savior of the Emperor
Gathering the Informations.
|
Do you think a brush wash on the sandbags would add more definition?
Or do you think I should go back and drybrush some defining lines on 'em?
|
|
|
|
|
2011/01/17 18:08:21
Subject: Tarantula Sentry Emplacement[C&C needed]
|
|
[ARTICLE MOD]
Huge Hierodule
|
Brush wash into the crevices followed by a little more drybrushing on the highlights.
|
|
|
|
|
|
2011/01/17 18:40:16
Subject: Tarantula Sentry Emplacement[C&C needed]
|
|
Deranged Necron Destroyer
|
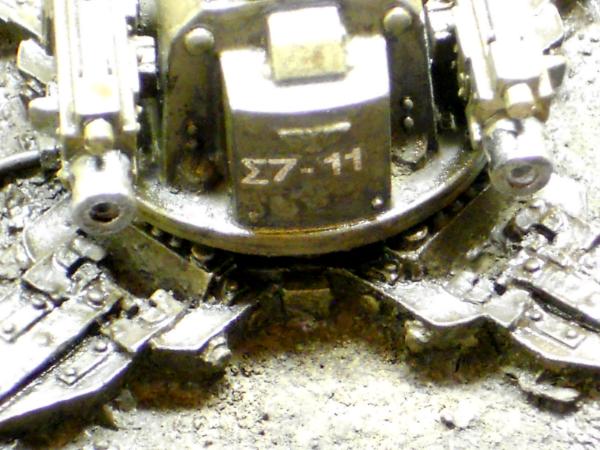
I would try to add some more metal showing. Some nice boltgun metal showing through on the turret would really separate it from the rest.
|

malfred wrote:Buy what you like.
Paint what you love.
|
|
|
|
|
2011/01/17 18:55:05
Subject: Re:Tarantula Sentry Emplacement[C&C needed]
|
|
Fixture of Dakka
|
Crates, or ammo boxxes? debris of some kind.
|
"But i'm more than just a little curious, how you're planning to go about making your amends, to the dead?" -The Noose-APC
"Little angel go away
Come again some other day
The devil has my ear today
I'll never hear a word you say" Weak and Powerless - APC
|
|
|
|
|
2011/01/17 19:00:27
Subject: Tarantula Sentry Emplacement[C&C needed]
|
|
Ollanius Pius - Savior of the Emperor
Gathering the Informations.
|
@alarmingrick I'm thinking that the best way to add some more detail is some netting draped over the main body of the turret and the guns, or some rusted barbed wire strung up.
@Mewiththeface Yeah. I'm probably going to do the "chipping" after the model's all washed, varnished, etc using the tip of a pencil or Aged Iron weathering powders.
|
|
|
|
|
2011/01/17 19:20:35
Subject: Tarantula Sentry Emplacement[C&C needed]
|
|

Avatar of the Bloody-Handed God
Inside your mind, corrupting the pathways
|
Have you thought about adding some camo nets to protect it from air detection?

And you can never go wrong with razor wire 
Also, I hope you don't the shakes from F:NV withdrawal 
|
|
|
|
|
|
2011/01/17 20:57:27
Subject: Tarantula Sentry Emplacement[C&C needed]
|
|
Ollanius Pius - Savior of the Emperor
Gathering the Informations.
|
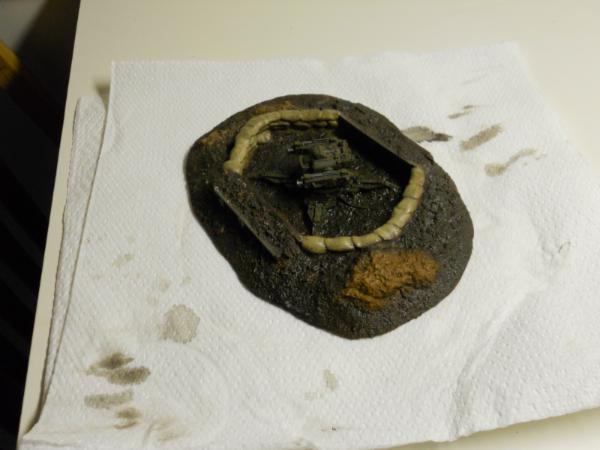
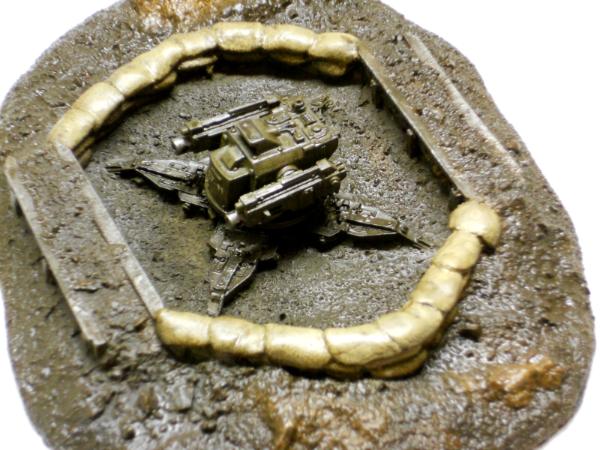
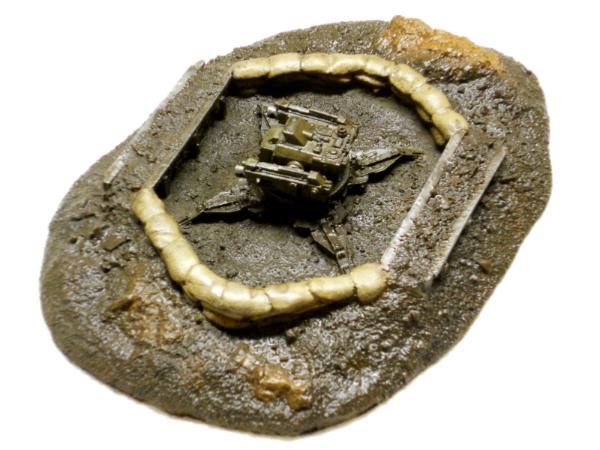
Washed the sandbags, did a very very light drybrush(none of my colors match perfectly to the Vallejo AB color, and I'm not too keen on drybrushing anyways) to the sandbags, and applied a very very light dusting of a "dust" wash I've cooked up to the recesses of the Tarantula body.
Think it's ready to be varnished and then weathered?
Finished! Might go back and do some more pencil weathering.
|
|
This message was edited 2 times. Last update was at 2011/01/18 01:55:13
|
|
|
|
|
2011/01/18 08:30:05
Subject: Tarantula Sentry Emplacement[C&C needed]
|
|
Avatar of the Bloody-Handed God
Inside your mind, corrupting the pathways
|
It is looking better
|
|
|
|
|
|
2011/01/18 12:17:20
Subject: Re:Tarantula Sentry Emplacement[C&C needed]
|
|
Ollanius Pius - Savior of the Emperor
Gathering the Informations.
|
|
|
|
|
|
2011/01/18 12:52:51
Subject: Tarantula Sentry Emplacement[C&C needed]
|
|
[ARTICLE MOD]
Huge Hierodule
|
Nicely done. I liked the progression from the first pic you posted.
|
|
|
|
|
|
2011/01/18 13:24:37
Subject: Tarantula Sentry Emplacement[C&C needed]
|
|
Ollanius Pius - Savior of the Emperor
Gathering the Informations.
|
Thanks, Ifurita!
|
|
|
|
|
2011/01/18 13:26:40
Subject: Tarantula Sentry Emplacement[C&C needed]
|
|
[ARTICLE MOD]
Huge Hierodule
|
Are you happy with the results? Looking back, what would you do differently?
|
|
|
|
|
|
2011/01/18 13:28:56
Subject: Tarantula Sentry Emplacement[C&C needed]
|
|
Ollanius Pius - Savior of the Emperor
Gathering the Informations.
|
Camo netting and pinning the guns to the turret so they could elevate, are the two biggest ones in my mind right now. I tried to do some camo netting but it just wasn't looking right so I scrapped it.
I do need to find a good sized piece of wire to do the antenna though. The spot is all drilled out to accept it, just need the piece.
|
|
|
|
|
2011/01/18 20:05:15
Subject: Tarantula Sentry Emplacement[C&C needed]
|
|
Ghost of Greed and Contempt
|
Thought about using a corpse? Y'know, sort of like an: "unlucky dude, almost made it" thing, maybe a guardsman blasted in half or something.
some nice red blood could add a bit of contrast as well.
Otherwise, not bad at all.
|
|
|
|
|
|
2011/01/18 20:35:54
Subject: Re:Tarantula Sentry Emplacement[C&C needed]
|
|
Fixture of Dakka
|
i still say you need something to make it more lived in.
i'm not saying dump a trash can out, but a crate or some random small boxes.
give a more lived in feel. and don't get me wrong, it's a fantastic job. i'm loving it!
question. what where you using for the camo netting? and if you don't mind me asking,
what Went wrong?
|
"But i'm more than just a little curious, how you're planning to go about making your amends, to the dead?" -The Noose-APC
"Little angel go away
Come again some other day
The devil has my ear today
I'll never hear a word you say" Weak and Powerless - APC
|
|
|
|
|
2011/01/18 20:38:15
Subject: Re:Tarantula Sentry Emplacement[C&C needed]
|
|
Ollanius Pius - Savior of the Emperor
Gathering the Informations.
|
alarmingrick wrote:i still say you need something to make it more lived in.
i'm not saying dump a trash can out, but a crate or some random small boxes.
give a more lived in feel. and don't get me wrong, it's a fantastic job. i'm loving it!
I'm still looking for some excess stuff I may use to fill in the space.
I don't want to go over board simply because it's not something "lived in". It's a dugout where they emplaced a sentry gun, and likely just left it sitting there.
question. what where you using for the camo netting? and if you don't mind me asking,
what Went wrong?
I have some gauze bandages that I ripped the gauze out of, and just leaving the mesh.
It wasn't taking paint properly like they usually do, and it just wasn't feeling "right" with the dugout.
|
|
|
|
|
2011/01/18 20:50:00
Subject: Re:Tarantula Sentry Emplacement[C&C needed]
|
|
Fixture of Dakka
|
Kanluwen wrote:alarmingrick wrote:i still say you need something to make it more lived in.
i'm not saying dump a trash can out, but a crate or some random small boxes.
give a more lived in feel. and don't get me wrong, it's a fantastic job. i'm loving it!
I'm still looking for some excess stuff I may use to fill in the space.
I don't want to go over board simply because it's not something "lived in". It's a dugout where they emplaced a sentry gun, and likely just left it sitting there.
question. what where you using for the camo netting? and if you don't mind me asking,
what Went wrong?
I have some gauze bandages that I ripped the gauze out of, and just leaving the mesh.
It wasn't taking paint properly like they usually do, and it just wasn't feeling "right" with the dugout.
have you tried "Elmers" or white glue/water mix on it before painting it? just curious. i was using the same thing for some RRs i was
working on. kind of like a saddle blanket. made the rider set a little more "natural".
on the camo netting. have you ever tried screens, like the ones that go outside of your house window? i worked at a company a while
ago that made security screens. we had tons of the stuff. it seemed like a good idea to try. all i ever made were netting rolls out of the for vehicles.
not to mention the hole are so small, they obscure more than i liked. i know, that's the idea, but you still want to see some of it for gaming or dispaly.
also the plastic mesh bags that oranges come in would give you a way to add leaves or what ever and still give you good sight of the model under it.
|
"But i'm more than just a little curious, how you're planning to go about making your amends, to the dead?" -The Noose-APC
"Little angel go away
Come again some other day
The devil has my ear today
I'll never hear a word you say" Weak and Powerless - APC
|
|
|
|
|
2011/01/18 20:54:10
Subject: Tarantula Sentry Emplacement[C&C needed]
|
|
Ollanius Pius - Savior of the Emperor
Gathering the Informations.
|
I've tried security screens before, and they're just too rigid.
|
|
|
|
|
|
|