Forum adverts like this one are shown to any user who is not logged in. Join us by filling out a tiny 3 field form and you will get your own, free, dakka user account which gives a good range of benefits to you:
No adverts like this in the forums anymore.
Times and dates in your local timezone.
Full tracking of what you have read so you can skip to your first unread post, easily see what has changed since you last logged in, and easily see what is new at a glance.
Email notifications for threads you want to watch closely.
Being a part of the oldest wargaming community on the net.
If you are already a member then feel free to login now.
2011/12/04 21:48:06
Subject: 1850 Tournament List Test - Space Wolves vs The Lost and the Damned
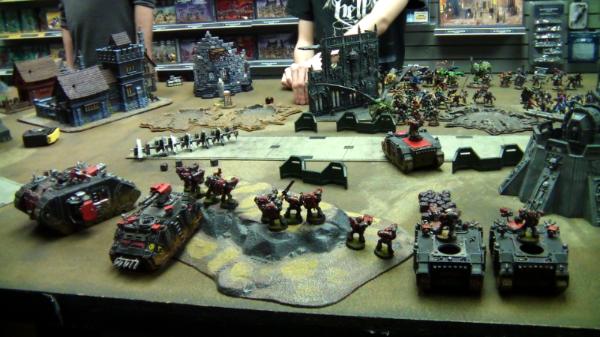
Background There's a semi-annual tournament coming up in February in my area. I wanted to go to it the last time it was held, but it didn't work out, unfortunately. However, I should definitely be able to make it this time, and I'm getting stoked for it. I want to take an assault-based Space Wolves list, and figured that centering it around Ragnar would be a good way to go this. On top of that, Ragnar doesn't seem to get used as much as some of the other Space Wolves special characters.
Anyway, I wanted to test out my list, and decide if I needed to buy another Razorback for it. After the Titan Massacre was over, I asked anyone if they wanted to give it a shot against my list. I had another Mech Guard player considering it, but then, to my surprise, one of the regulars at the store said he'd give it a try – with an old-school Lost and the Damned army (a mixture of units from Chaos Space Marines, Witch Hunters and The Eye of Terror campaign book – which came out back when I started40k)! I had fought this guy once before with his Chaos Daemons, and he tabled me by Turn 4. I didn't really expect that to happen again this time, but it would give me a feel for my list in any case...
ANDILUS GREATSWORD'S GREAT COMPANY – TOURNAMENT LIST
Troops Grey Hunters Unit Alpha – 228pts
10x Grey Hunters (2x Meltagun, Power Weapon, Wolf Standard, Mark of the Wulfen)
Wolf Guard (Power Weapon, Combi-melta)
Grey Hunters Unit Beta – 243pts
8x Grey Hunters (1x Meltagun, Power Weapon, Wolf Standard, Mark of the Wulfen)
Wolf Guard (Powerfist, Combi-melta)
Rhino
Grey Hunters Unit Gamma – 223pts
5x Grey Hunters (1x Meltagun, Power Weapon, Wolf Standard)
Wolf Guard (Powerfist, Combi-melta)
Razorback (Twin-linked Lascannon)
Grey Hunters Unit Delta – 193pts
5x Grey Hunters
Wolf Guard (Powerfist, Combi-melta)
Razorback (Twin-linked Lascannon)
Heavy Support Land Raider Redeemer (Extra Armour, Multi-melta) – 265pts
Long Fangs Unit Alpha (5x Missile Launcher) – 140pts
Long Fangs Unit Beta (5x Missile Launcher, Razorback with Twin-linked Lascannon) – 215pts
TOTAL: 1847pts
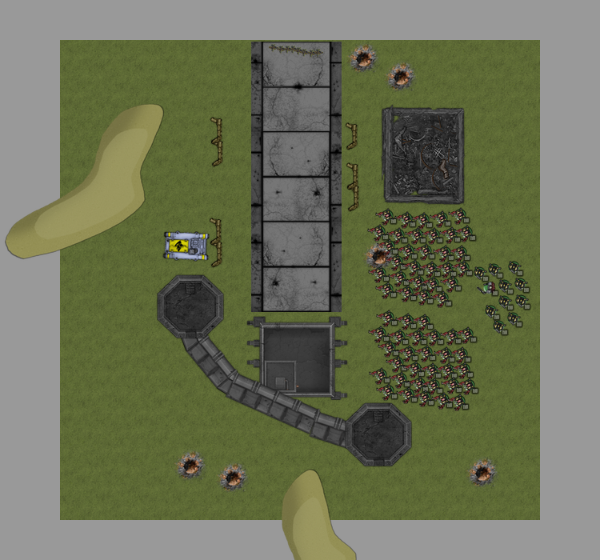
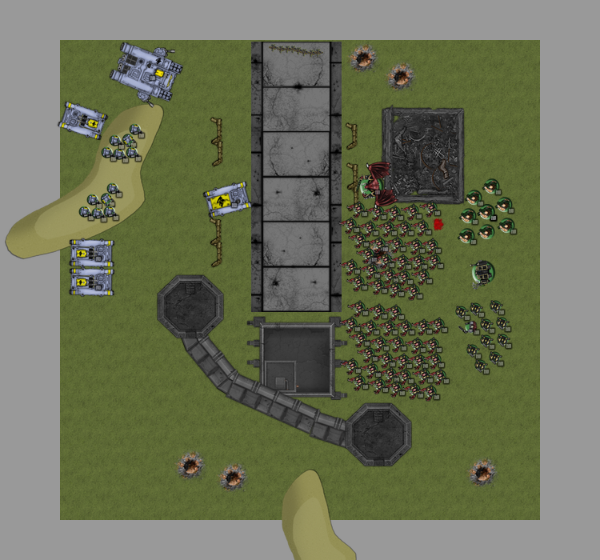
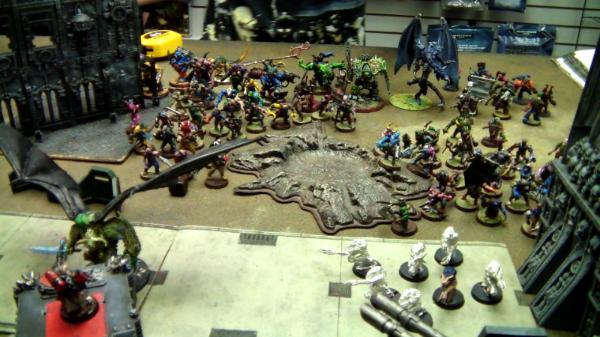
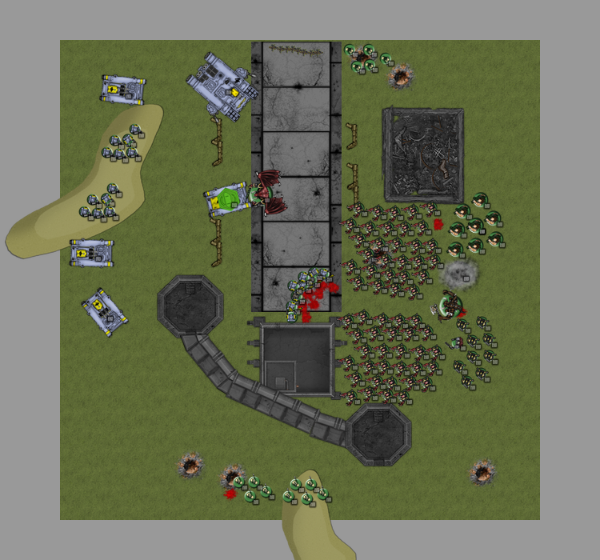
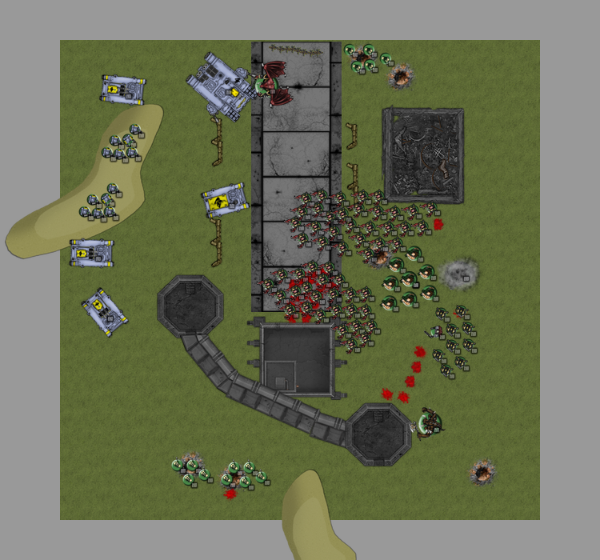
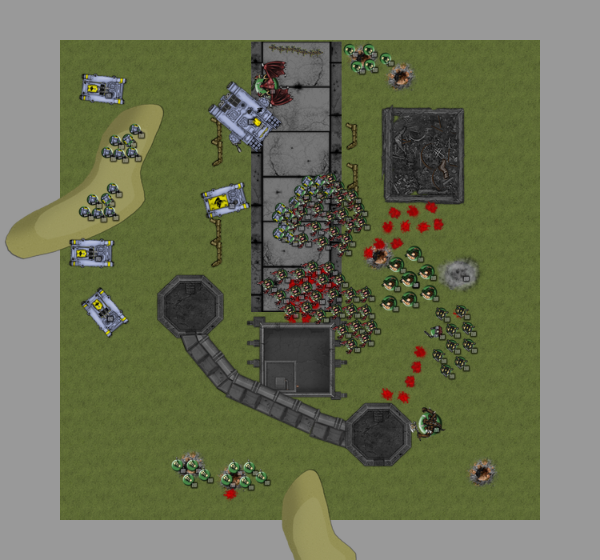
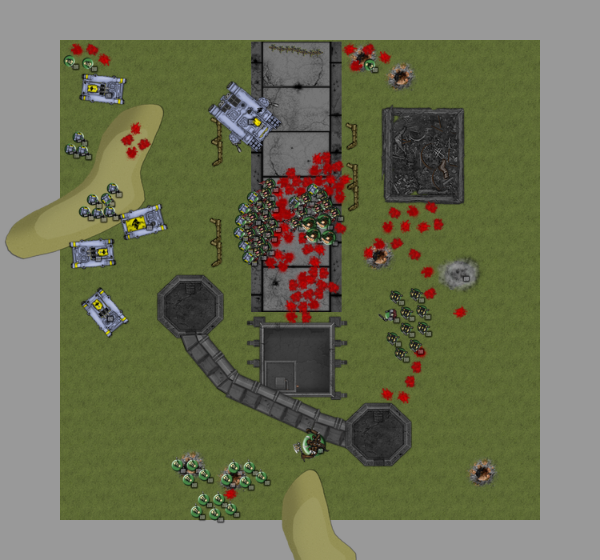
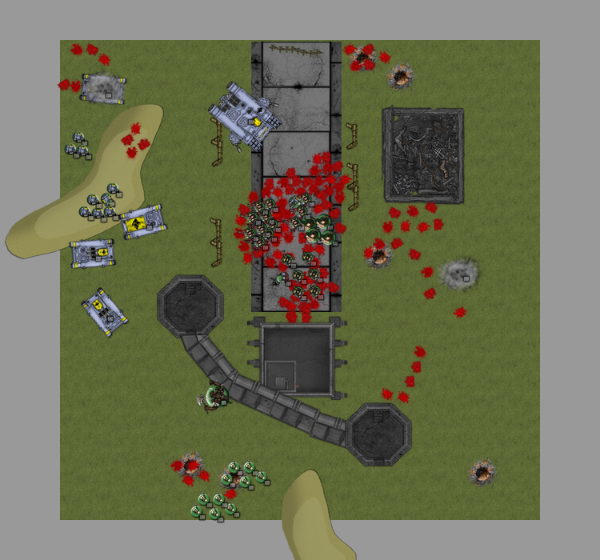
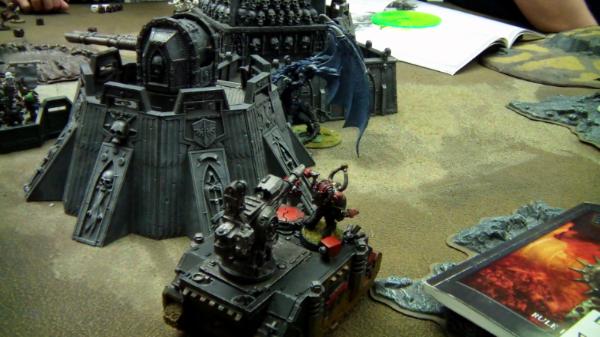
DEPLOYMENT We rolled off to see who would go first, and the Lost and the Damned won it. They decided to take the first turn, and then we rolled for mission and deployment. The result was Annihilation and Dawn of War. My opponent chose to place his Apostate Cardinal and 2 blobs units of Mutants as his first wave (I misrepresented this in my deployment overview – I accidentally put his Chaos Space Marines on the board with the Cardinal as well). He also put all his Traitors into reserves so they could outflank.
I then placed a Rhino containing my Rune Priest and Grey Hunters Unit Beta 18” away from the Mutants. According to the BGB, the Rhino counts as my 2nd Troops unit, so those are all I can place for the first turn. I decide I'd rather not steal the initiative.
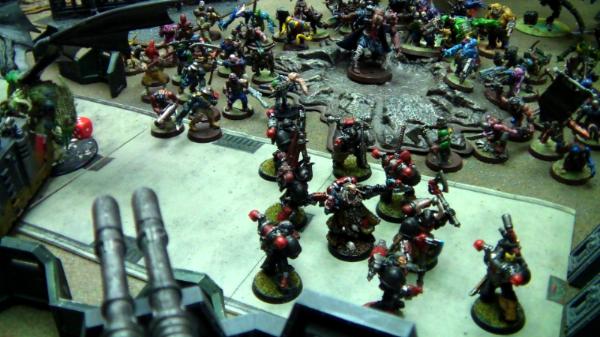
TURN 1 – LOST AND THE DAMNED The Lost and the Damned brought in all their available troops on Turn 1. The Chaos Space Marines joined up with the Apostate Cardinal, while everyone else lumbered forward. The Big Mutants used the ruins as cover, wary of potential missile fire...
In the shooting phase, the Chaos Dread tried to fire at the Rhino, but due to Night Fighting it couldn't see it.
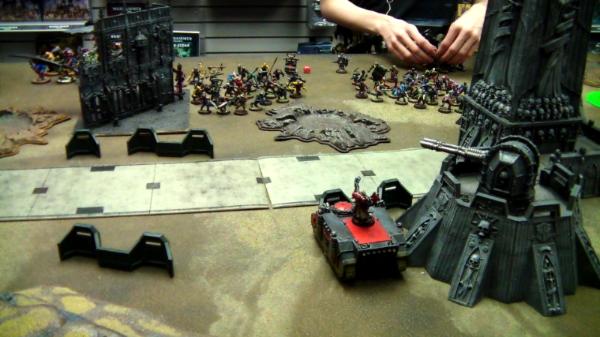
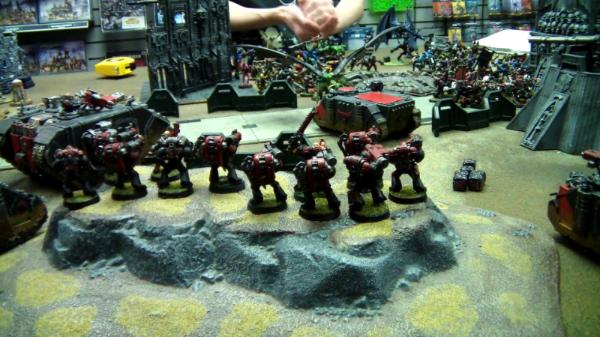
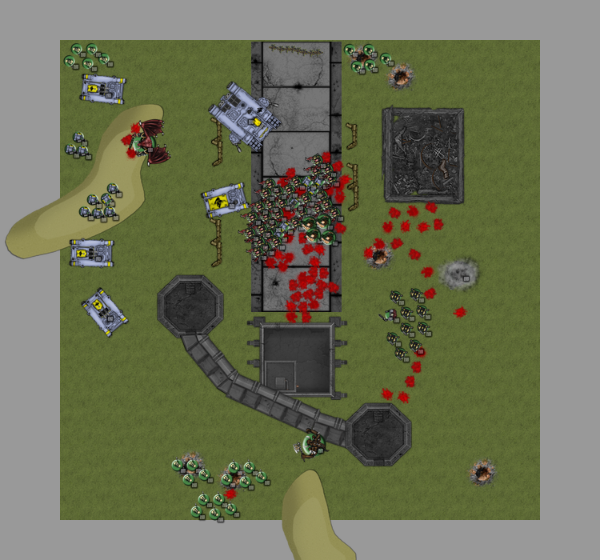
TURN 1 – SPACE WOLVES I brought in my whole army this turn. Long Fangs Unit Beta's Razorback came first, doing a reverse-moonshiner's turn to shoot the Long Fangs out onto the hill. The footslogging Long Fangs Unit Alpha marched up the hill as the other Grey Hunter units arrived. The Razorback units set up a parking lot beside each other, while Ragnar's unit shot forward in their Land Raider, hoping to get a taste of the Daemon Prince. Finally, the Rune Priest's Rhino lumbered forward to get a shot at the Mutants.
In the shooting phase, I tried to fire at the Daemon Prince with my Redeemer Assault Cannon, but it couldn't see due to Night Fighting. However, the Rune Priest cast Murderous Hurricane on the nearest Mutant unit and killed 1 (if they tried to move next turn, they'd have to take difficult and dangerous terrain tests).
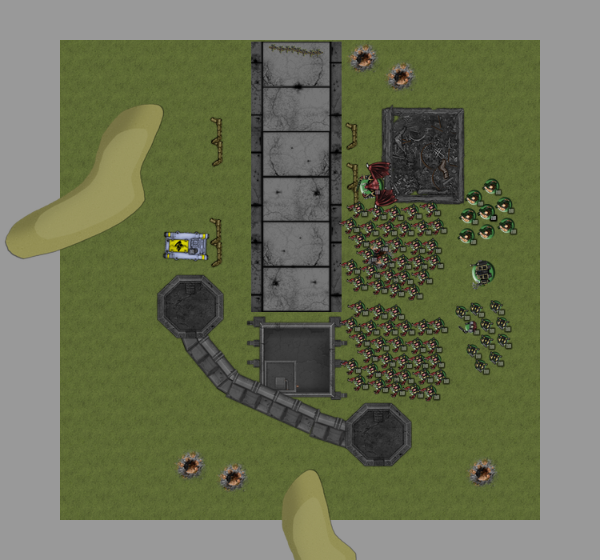
TURN 2 – LOST AND THE DAMNED The heretical horde continued to advance, except for the Mutants who had been hurricane-ed – they decided to hold their ground rather than risk losing a large portion of their horde. My opponent rolled well on his reserves this turn as well: his Lesser Daemons, Greater Daemon and 3 units of Traitors all arrived.
In the Shooting Phase, he fired at me, but wasn't able to do any damage. In the Assault Phase, the Daemon Prince attacked my Rhino, but was only able to Stun it (luckily for me!).
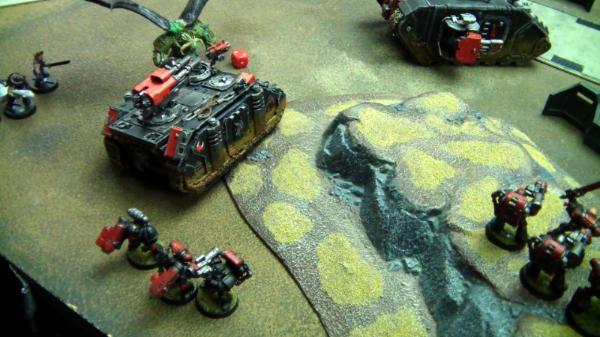
TURN 2 – SPACE WOLVES With the Daemon Prince bearing down, I disembarked the Rune Priest and his squad and sent them after the Lesser Daemons. I sent Ragnar's Land Raider after the Prince, but it was still too far away for them to assault it. Meanwhile, the Razorback containing Grey Hunter Unit Delta went after the pair of Traitor units on the far right flank.
In the Shooting Phase, the Long Fangs opened up on the Greater Daemon and Chaos Dread. The Dread exploded, but didn't kill anything else in the blast, and the Greater Daemon suffered 2 wounds. The Land Raider also fired at the Daemon Prince, putting 1 wound on it. Finally, Delta's Razorback killed 1 Traitor in a display of extreme overkill.
In the Assault Phase, the Rune Priest and his unit attacked the Lesser Daemons. They didn't stand a chance – the Grey Hunters suffer 1 casualty, but the Lesser Daemons are wiped out (the Priest kills 2 personally).
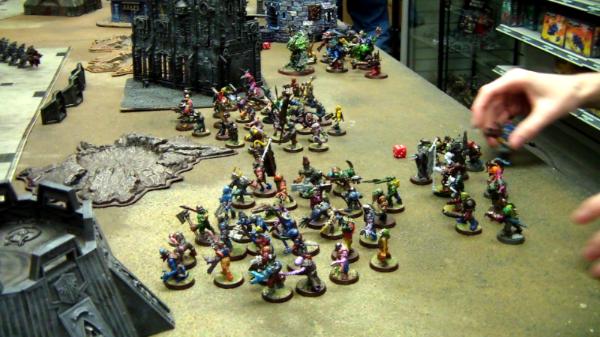
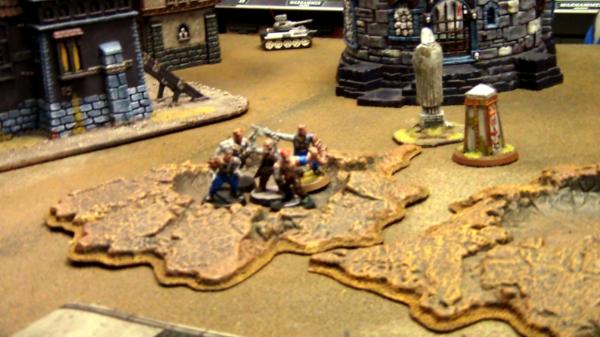
TURN 3 – LOST AND THE DAMNED The blood was finally starting to flow! The Mutant blobs moved into position to fire at the Rune Priest and his squad. Their shots scythed down 5 Grey Hunters (and a couple Mutants were killed by Gets Hot! as well), and they managed to wipe out the survivors in the ensuing Assault Phase. Meanwhile, the Daemon Prince moved from the Rhino to the Land Raider to assault it. He fails to destroy it, but succeeds in immobilizing it. Also, no reserves arrive this turn.
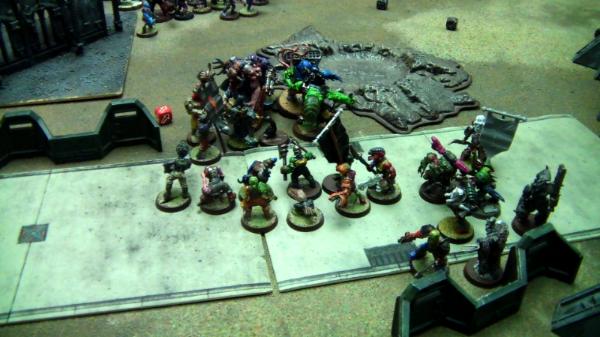
TURN 3 – SPACE WOLVES An assault-centric battle – just the way I like it! Ragnar and his unit disembark from the Land Raider and zip over to the Mutant blob to get revenge for the Rune Priest. In the Shooting Phase the Long Fangs gang up on the Big Mutants, insta-gibbing killing 3 of them after cover saves. The Long Fangs' Razorback and the Land Raider manage to reduce the Daemon Prince to 2 wounds. Also, the Delta Razorback rolls double-1s when firing at the Traitors...
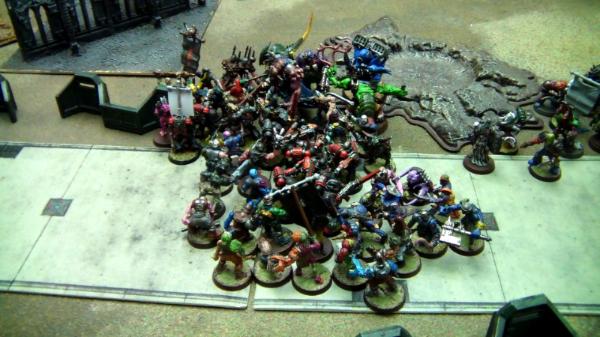
In the Assault Phase, Ragnar and his unit charge, using War Howl and rolling a 1 for his Insane Bravado (I forgot to use my Wolf Standard, that's something I'll need to remember during the tournament). Ragnar kills 3 or 4 of them by himself, while the other Grey Hunters do less impressively – however, the enemy loses 1/3 of their blob in a single turn, without inflicting any casualties on the Grey Hunters. However, they pass their Ld test automatically because of the Apostate Cardinal's False Dominion special ability.
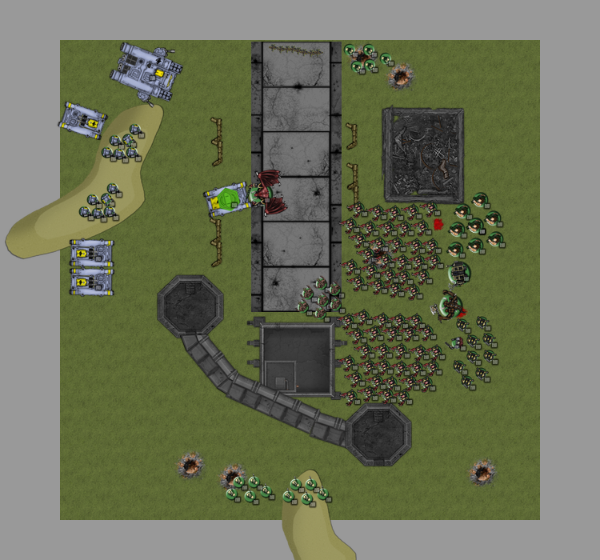
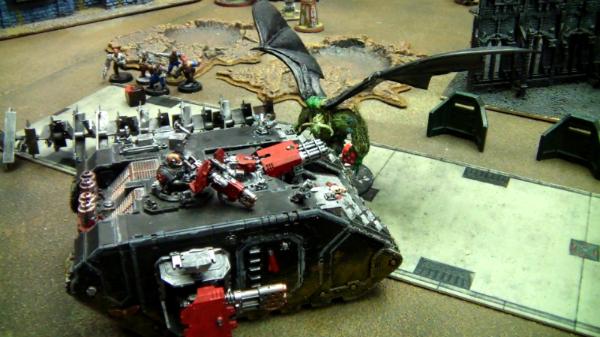
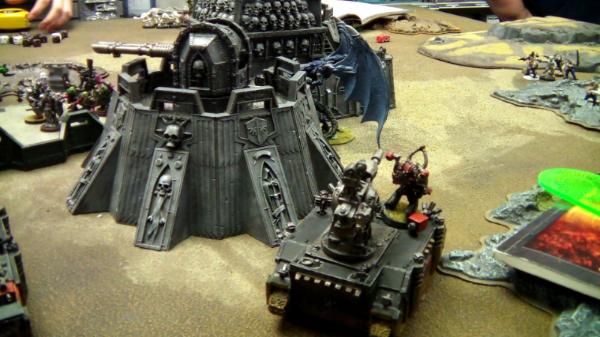
TURN 4 – LOST AND THE DAMNED This turn the last units of Traitors arrive from outflank, one showing up just behind the Long Fangs' Razorback and the other near the other 2 units of Traitors who had arrived earlier on the right flank. The Daemon Prince decided to ignore the Land Raider, going after the Long Fangs instead... uh oh. Then the 2nd Mutant blob and Big Mutants moved to assault Ragnar and his unit...
There was a distinct lack of shooting this turn, so it went straight to assault. First, the Daemon Prince killed 3 Long Fangs. The survivors ran, but stopped just short of the board edge... and were just able to regroup next turn by the slightest of margins.
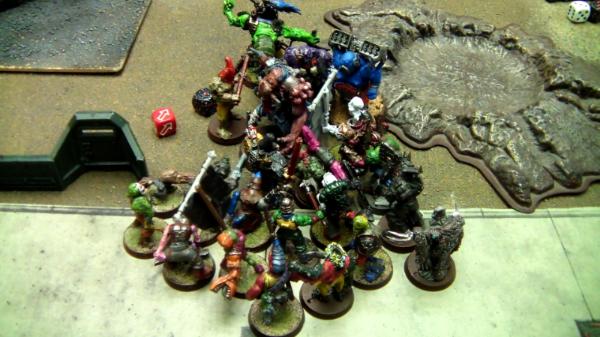
Meanwhile, the main assault turned into a bloodbath. I made a major mistake here – I completely forgot Ragnar had the Saga of the Warrior Born, so his attacks should have been increasing exponentially every turn – instead, this assault turned into a tar pit. Ragnar killed a single Big Mutant outright, while his squad attacked the smaller mutants – they killed many of them, but half the squad was brought down by the sheer number of attacks thrown at them. And, amazingly, Ragnar passed a half dozen armour saves, staying in the fight.
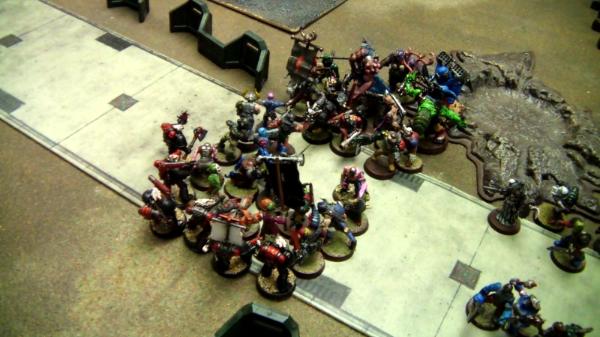
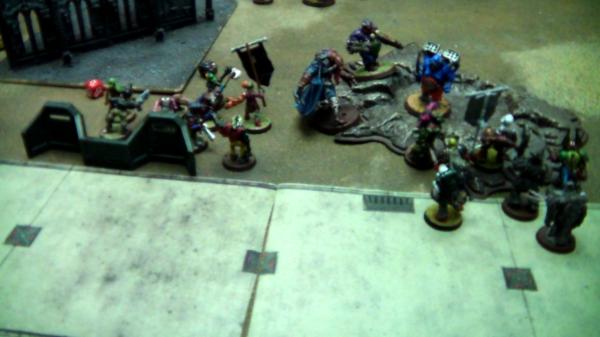
TURN 4 – SPACE WOLVES With the fight raging, I decided to get my Rhino the heck out of there to avoid bleeding an necessary kill point. I then sent Grey Hunters Unit Gamma to assist Ragnar and his unit. Not equipped to deal with the Greater Daemon bearing down on them, I backed up the Delta Razorback and took another wound off of it in the Shooting Phase. I then fired everything I had at the Daemon Prince, killing it, and having enough shots left over to kill 3 of the outflanking Traitors. The immobilized Land Raider also managed to kill all but 1 of the nearest Traitors (they passed their Morale test).
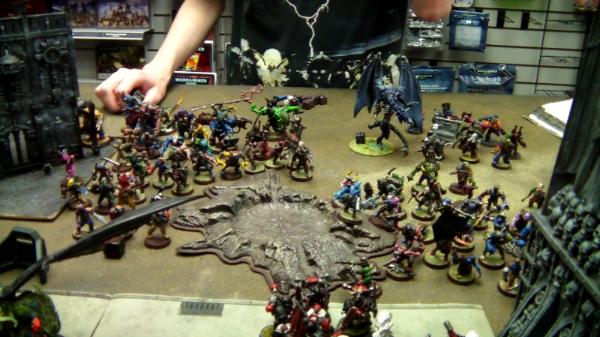
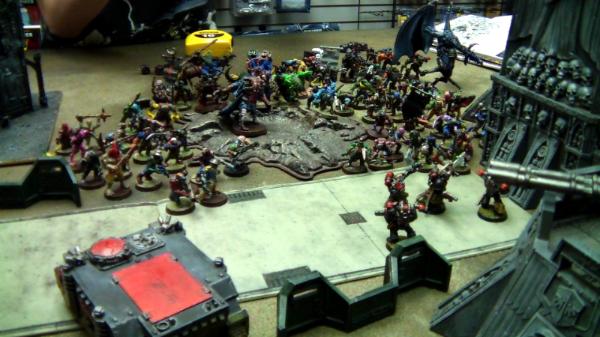
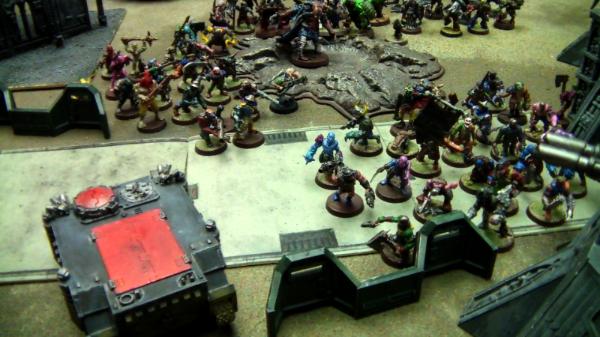
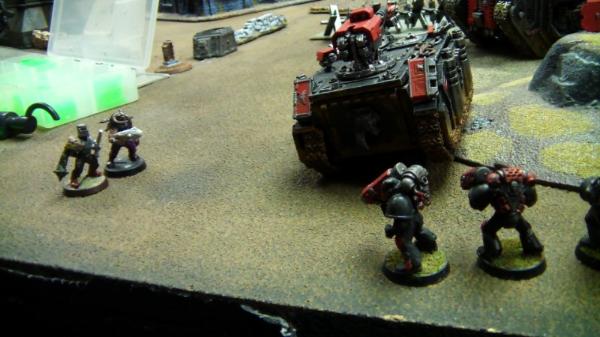
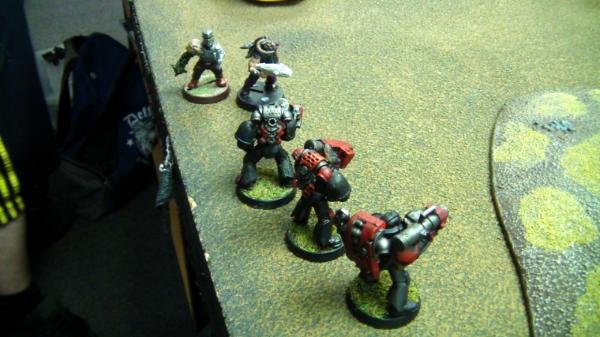
This time, I actually remembered to use my Wolf Standard for Unit Gamma. They charged in and actually caused enough casualties to split the multi-assault into two smaller combats (see the pics if you're unsure what I mean). However, Ragnar's squad continued to suffer severe casualties, being reduced to just Ragnar and a meltagunner.
TURN 5 – LOST AND THE DAMNED With the game winding down, the Lost and the Damned started focusing on getting kill points. The Greater Daemon moved forward, hoping to attack Delta's Razorback, while the outflanking Traitors decided whether to attack the Long Fangs or the Razorback. Finally, the Apostate Cardinal moved forward to support his troops if necessary.
In the Shooting Phase, my opponent decided that it would be more beneficial to try to destroy the Long Fangs' Razorback, and surprisingly it was successful – the Razorback exploded and put my opponent up by 1 kill point! Uh oh!!
In the Assault Phase, the Mutants finally wiped out Ragnar's Grey Hunters, but Ragnar himself stood strong – he saved every single wound that came his way like a champ, while killing 3 or 4 Mutants every turn. If I had remembered the Saga of the Warrior Born, he'd have been getting around 15 attacks by now... Meanwhile, in the other assault, the Grey Hunters were whittled down to half strength, but kept their attack up.
TURN 5 – SPACE WOLVES This might be the last turn, and I'm down in kill points – I NEED to pull ahead! I can't lose with a Space Wolves tournament list vs a footslogging ~8 years old Codex!
First, I moved the Delta Razorback again, trying to stay away from the Greater Daemon. Then I opened fire – the small Long Fang unit wiped out the last of the outflanking Traitors, killing them, while the other Long Fang unit split its fire, killing the last Traitor near the Land Raider, and wiping out another Traitor unit.
In the Assault Phase, Ragnar kept going like the Energizer Bunny – he suffered 2 wounds, but killed 4 more Mutants, leaving 3 (including the Mutant Boss). Another kill point within my grasp if the game goes for another turn! Unfortunately, Grey Hunters Unit Gamma didn't fare quite as well, getting wiped out after killing 3 more Mutants.
We roll to see if there's a 6th turn and...
Spoiler:
...there is!
TURN 6 – THE LOST AND THE DAMNED My opponent was getting irritated with Ragnar now – he had survived 2 Assault Phases of concentrated armour saves, and was still going at it. He wanted to ensure that Ragnar died – he threw everything he had at them, including the Apostate Cardinal's unit. Make no mistake: Ragnar did die, but he brought down 2 Mutants and wounded the Boss in the process (1 more wound = another kill point for me). None of his other units were able to do anything. The only other thing he did this turn was put the Greater Daemon in the bastion to get a cover save.
TURN 6 – SPACE WOLVES Time to clinch this one. I fired everything I had at everything that I could get a kill point off of. The Greater Daemon went down first, then the Boss Mutant. To finish things off, I fired my Long Fang shots at the Big Mutants, insta-gibbing them. At this point, my opponent called it.
Final Tally Space Wolves – 8 (Chaos Dreadnought, Lesser Daemons, 3x Traitors Squads, Greater Daemon, Mutant Blob, Big Mutants)
Lost and the Damned – 6 (Rune Priest, Grey Hunters Beta, Razorback, Grey Hunters Alpha, Grey Hunters Gamma, Ragnar)
VICTORY FOR THE SPACE WOLVES
AFTERTHOUGHTS That was way too close (in a fun way though). I don't really blame my list though, it's more my tactics and forgetting certain special rules/abilities. I should have held back with the Rune Priest until Ragnar got to the front lines and done a two-pronged attack – my plan, though, was to have Ragnar be the counter-attack. And while Unit Gamma performed poorly, the counter-attack idea was a good one, which I will keep in mind for future reference. All-in-all, the list fits my aggressive play-style, but I think I'm going to change it up a tiny bit...
I'll do a unit breakdown here:
Ragnar: The big boy did amazing, and I wasn't even using him to the best of his ability – if I had, he would have easily wiped out that Mutant Blob. Admittedly, luck played a bit of a role (surviving 2 rounds of concentrated armour saves on a 3+?), but if I had remembered his Saga then he wouldn't even have been by himself at that point. He must have killed about 2/3 of the Mutant Blob single-handedly, no exaggeration. I regret not using him more, but he's so expensive and there's always someone else I'm wanting to try out instead... A
Rune Priest: For whatever reason, these guys tend to under-perform for me. This game was a mediocre performance, but he did manage to do a fair bit of killing in close combat before he got shot down. I'm just having off-days with them so far, but if I need to I can always throw him in with the Long Fangs. B
Grey Hunters: I love these guys, but they under-performed this game. That's just the way the dice roll, I guess. B
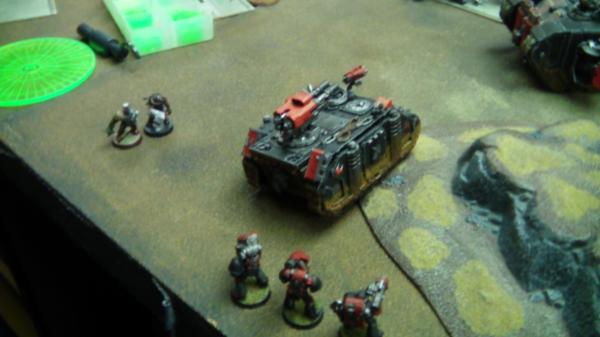
Razorbacks: Excellent. I don't tend to run Razorbacks much because I prefer larger units for close combat, but I'm definitely liking the idea of Razorbacks sitting on objectives and firing away. They were very helpful in sniping units from across the board. In fact, I had to proxy 2 of them in this game, but after the game I went and bought a new one – I'm that confident in them (and have another Lascannon turret in the post that should show up soon). A
Land Raider Redeemer: The more I use this tank, the more it becomes a staple in my lists. That it's 10pts cheaper than a regular Land Raider is just icing on the cake. I still like Crusaders better, but I'm finding less and less reasons to take the Flamestorm Cannons off the sponsons... Again, it didn't get the world on fire this game, but it did its job, and then took out a couple units after getting immobilized – can't ask for much more than that. B
Also, props to my opponent for trying out a list that broke all conventions of modern 40k and doing well with it against the odds!
Also, if you enjoyed this, then be sure to check out my other battle reports:
Okay, now that was a fun battle report. It wasn't just that your opponent was fielding Lost and the Damned(!!!!!!), but he had a nicely painted and converted army of them as well. The pics and concise game commentary were a huge plus, as was the closeness of the actual battle.
I'm impressed that the Mutants actually did that well in close combat, even without Marks or power fists. Then again, 30 dudes each is a LOT of attacks, regardless.
Thanks for sharing!
This message was edited 1 time. Last update was at 2011/12/05 04:07:59
Lord of Nonsensical Crap wrote:Okay, now that was a fun battle report. It wasn't just that your opponent was fielding Lost and the Damned(!!!!!!), but he had a nicely painted and converted army of them as well. The pics and concise game commentary were a huge plus, as was the closeness of the actual battle.
I'm impressed that the Mutants actually did that well in close combat, even without Marks or power fists. Then again, 30 dudes each is a LOT of attacks, regardless.
Thanks for sharing!
Yeah, they were just whittling me down from sheer numbers of armour saves and bad luck for everyone but Ragnar. And when the Big Mutants got in there, they were causing a lot more damage.
Great job! I'm glad to see that your assaut-y style of play is really coming together. I look forward to seeing how your style of play works out on Rascella
Also, you're army's looking really good if I do say so myself. I still have to get up that post about the Necron battle. Remind me after the 16th -- and I still need to find some way to better post my pictures lol
Anyways, like I said before, good job with the battle!
Lord-Commander Jeremiah Alexandre: 5th Victorian Army +/- 3,500 Points
Phaeron Amheosiris of the Isiran Dynasty +/- 3,500 Points
Lord Yersina Thrax of the Death Guard +/- 750 Points
2011/12/08 03:38:16
Subject: Re:1850 Tournament List Test - Space Wolves vs The Lost and the Damned
Ok will do. We'll have to start a new thread though, the old one's a few months old now so it'll get closed for "thread necromancy" if we post in it. That'd be cool if you did though, I've got a couple battle reports in reserves waiting for you and Matt to post yours.
Automatically Appended Next Post: And with Andilus at the fore, I'm going to be able to break through the enemy lines with ease - he can easily kill any character 1-on-1, and only the Nightbringer and possibly Greater Daemon will give him a truly fierce fight.
This message was edited 1 time. Last update was at 2011/12/08 03:41:19
Well I'm looking forward to seeing what you can do. I'll likely be running headlong into the Necrons and maybe even some Tyranids, so I'll probably be too occupied to lend a huge part on your front, especially with Soulcrusher being everywhere. It'll definitely be an interesting game, that's for sure . . .
But yea, we'll get the reports up after exams.
Spoiler:
Really it was just a win for Matt and then a win for me so it's not really a big deal I suppose haha!
Lord-Commander Jeremiah Alexandre: 5th Victorian Army +/- 3,500 Points
Phaeron Amheosiris of the Isiran Dynasty +/- 3,500 Points
Lord Yersina Thrax of the Death Guard +/- 750 Points
2011/12/08 14:59:17
Subject: 1850 Tournament List Test - Space Wolves vs The Lost and the Damned


 Meanwhile, in the other assault, the Grey Hunters were whittled down to half strength, but kept their attack up.


 cake. I still like Crusaders better, but I'm finding less and less reasons to take the Flamestorm Cannons off the sponsons... Again, it didn't get the world on fire this game, but it did its job, and then took out a couple units after getting immobilized – can't ask for much more than that. B


 Lord-Commander Jeremiah Alexandre: 5th Victorian Army
 Phaeron Amheosiris of the Isiran Dynasty
  Lord Yersina Thrax of the Death Guard

