So me and some of my friends have finally got around to building a gaming table for our
FLGS. I have been planing on building a trench table for years now. I now finally have the funds and people to help me.
I only now thought to make a P&B blog about it. So we have gotten a good amount of it done so far. I just thought some of you would like to see some of the progress pics we have been taking.
Any tips or tricks would also be nice to hear. This is the first table any of us has done.
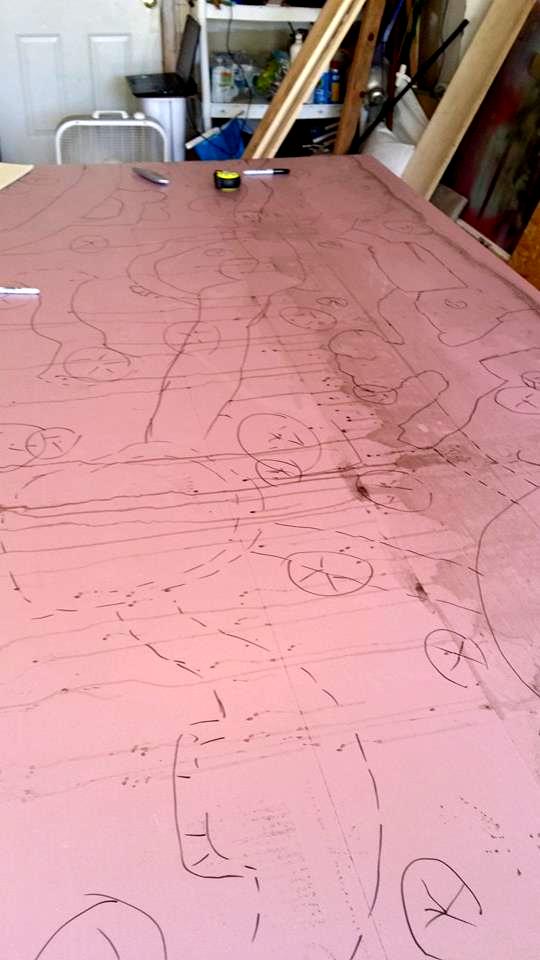
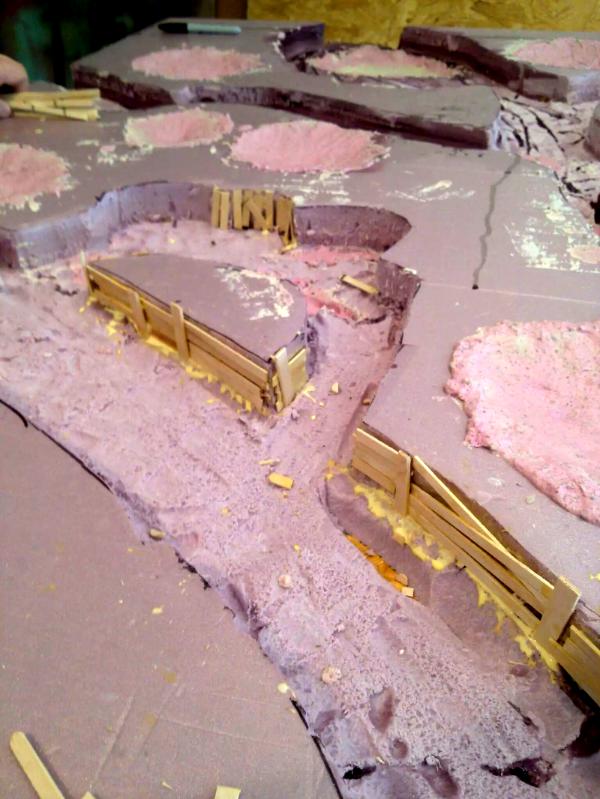
So to start off we drew what we wanted the trenches to be placed. We didn't want to do the old, two trenches on both sides and no mans land in the middle. We thought for game play purpose that would just end up making the game boring with both sides just sitting in the deployment zones.
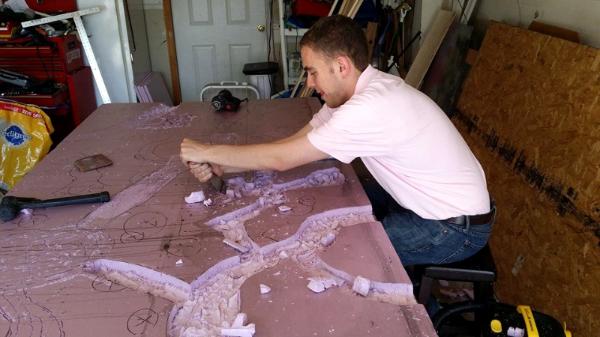
At first we tried to cut out the trenches using box-cutting knifes. But it ended up making a huge mess with little gain. So I used a drill instead. It was great, we could easily keep the trench depth at a constant height. I would cut and jigsaw the trenches and then we could pluck out the foam.
P.S. Not Me
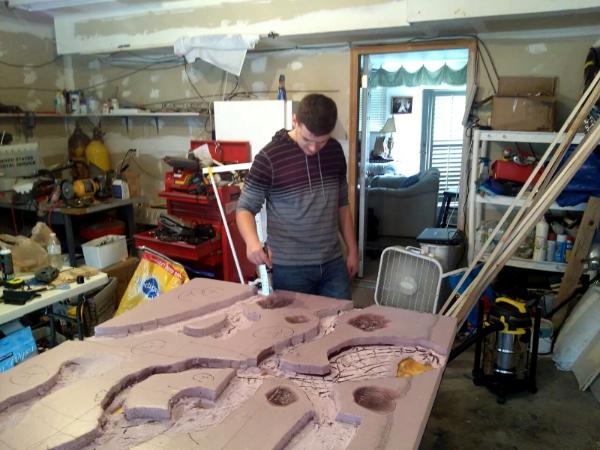
To make the craters, I just used a pen torch to melt the foam.
P.S. That is me

I then coated the craters with mix of plaster and sand to get that mud look.
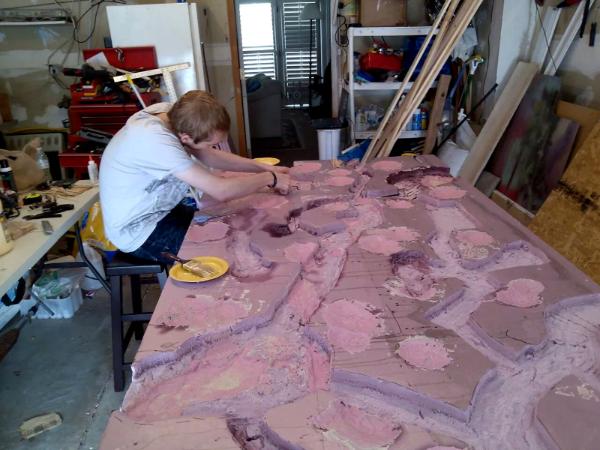
We tried using wood glue. But I was just a giant mess and took way too long to dry.
Turned out that hot glue guns are awesome

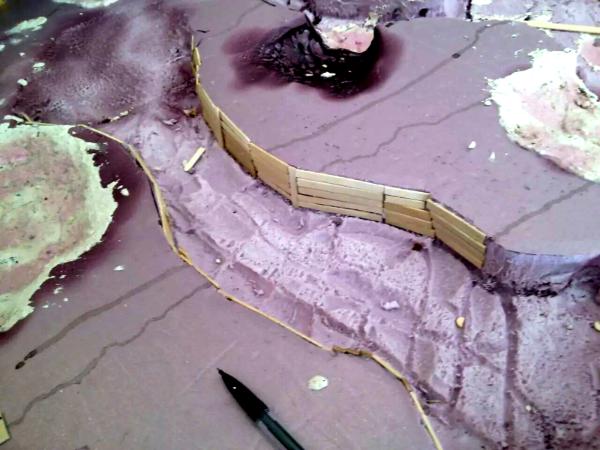
To break up the trenches, we used cardboard liners to simulate metal sheets. They did use this in WWI
http://cdn.images.express.co.uk/img/dynamic/129/590x/poppy3-442002.jpg
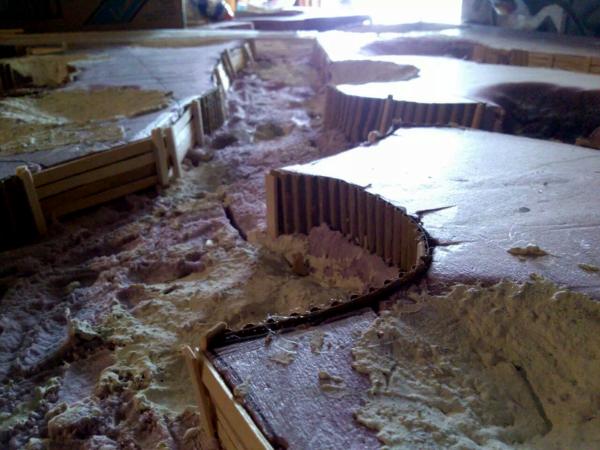
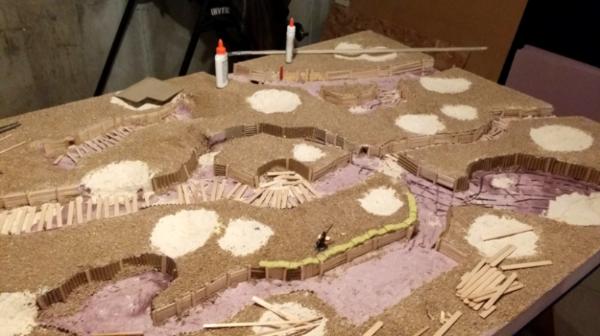
Here is our newest pic. We have about 90% of the trench siding done. Once that is done we are planing on covering the trench floor with more of that plaster/sand mix. Then putting duck boards on top.


 Deff Gearz 2,000+pts. (50% painted),
  Retribution 57pt.(70% painted),
  FOW
FOW 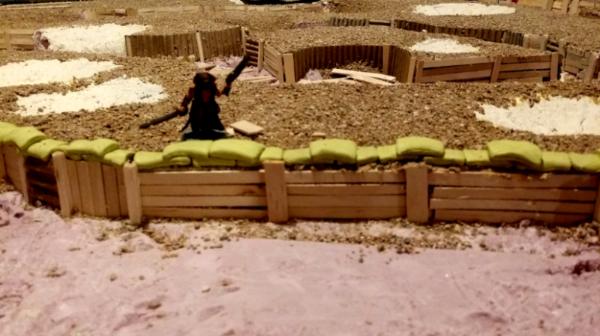

 Finished Forge World Elysian Army
  Finished Tau Sept Cadre
  Finished Ork Waaagh |
  Alaitoc Eldar Warhost
  Finished Order of Our Martyred Lady - Sisters of Battle
  Finished Necromundian Imperial Guard Regiment


