There's a lot of potential weathering techniques. Here's some I like to use on my models.
1. Paint chipping. Can be done in different ways, depends what you think is under the paint. Here's a schematic I made for another thread on what I think is a good way to do paint chipping.
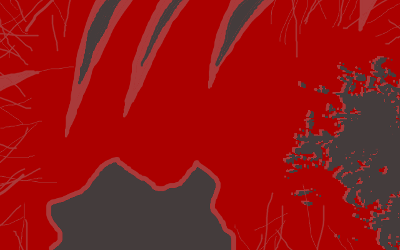
Basically you have your base colour, you paint grey (or metallic if you want) blotches on to it and then use a lighter version of your base colour to "highlight" the scratches. You can also use that lighter colour to make some smaller scratches that damaged the paint without going through. Going around the image, to create long scratches like at the top, you'd paint on long strips of grey and then highlight the edges with a pale red. The chunk of paint missing on the bottom left would be done by just painting a blob with a paint brush. The stuff on the right of the image which looks like abrasion damage is something you'd apply with a sponge.
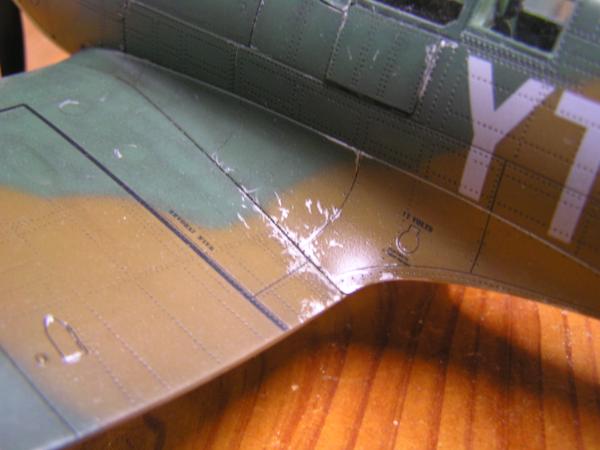
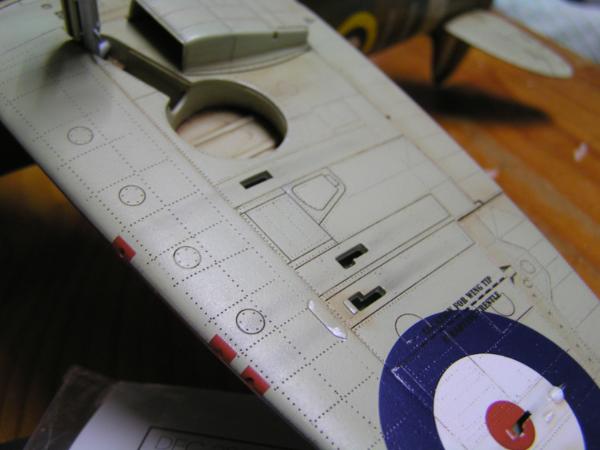
I normally apply my scratches with a sponge or with a fine detail brush. On my WW2 aircraft like this one (which were aluminium under the paint) I just painted on Runefang Steel with a fine detail brush, slowly building up the paint chips with a series of smaller scratches (rather than just painting a big blob).
A more advanced method would be to use a chipping medium or salt to do the paint chipping.
I think you have to be somewhat artistic when you apply paint scratches, try to use them to tell a story rather than just applying them evenly all over the model otherwise it will look strange. For example, the spitfire has more paint scratched off around that area because that's where the pilot and mechanic would climb up on the wing when getting in to the cockpit and the hatch which is scratched up is a swinging hatch which would be open and closed frequently. The paint scratching in the bottom left of the photo is where the flap mechanism pops out of the wing and though you can't see it in these images I have done scratching around the machine gun access panels, electronics access panel, oil filler, etc. On tanks you tend to get scratching around hatches and blackening around the engine.
2. Airbrushing - if you have an airbrush you can airbrush brown tones lightly to represent a build up of grime or light beige tones to represent dust. On the spitfire above I used an airbrush to darken the areas around panel and rivet lines.
3. Pin washing - That's where you do a wash that only focuses on the crevices. There's a few ways of doing it but my preferred method is an oil wash. Enamel washes also work well. You can use acrylic washes but they are hard to manipulate and often look messy (and not in the good way).
4. Pigments - You can use pigments to create dusty effects, dirt build up, you can mix it with varnish and/or plaster and/or sand to make mud effects. Personally I've always struggled with pigments, they can look good but I find it really hard to predict what they'll look like when I'm done so I don't really like them.
5. Oil Paints - Oil paints can be manipulated after you've applied them. They can be smeared, wiped off, drybrushed back on, blended in. Stuff that's a nightmare to do with regular acrylic paints. For example, the bottom of this Spitfire wing I applied black and dark brown oil paint quite heavily, then wiped it away with a tissue (leaving it in the crevices, panel lines and whatnot) then came back with a regular brush and reapplied it areas that I wanted it to be more built up and progressively drybrushed it in and wiped it away with a tissue until I had the effect I wanted (for example around the flap and aileron and in the wheel well). The subtle gun smoke trails weere achieved by drybrushing black oil paint in long streaks.
If you don't own an airbrush, oil paints can be a way of achieving similar results with regular hairy brushes (if you know what you're doing!). In fact oils beat the airbrush in some areas, like being able to create a sharp line that gradually fades out, something that's almost impossible to do with an airbrush but easy to do with oils.
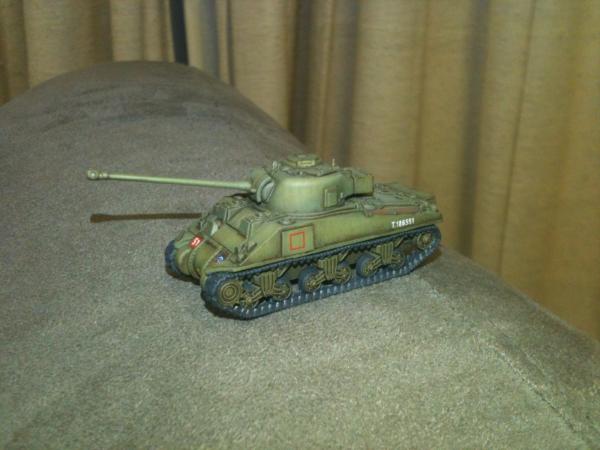
6. Acrylic washes. I am falling out of love with acrylic washes. But they can still be good. This Sherman I achieved the streaky dirt effect by applying dark brown wash mixed with plenty of drying retarder in to the crevices and then coming back with a clean brush and blending the wash in to the panel, by using a streaking motion to create the blends, the blends ended up streaky and makes it look like it has been dirty and maybe rained to create the streaks.
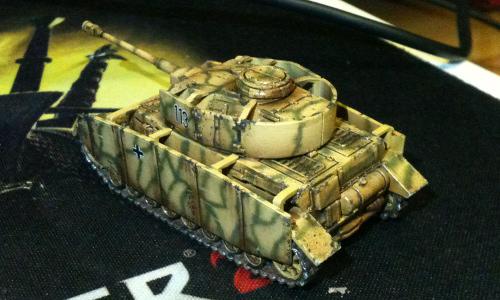
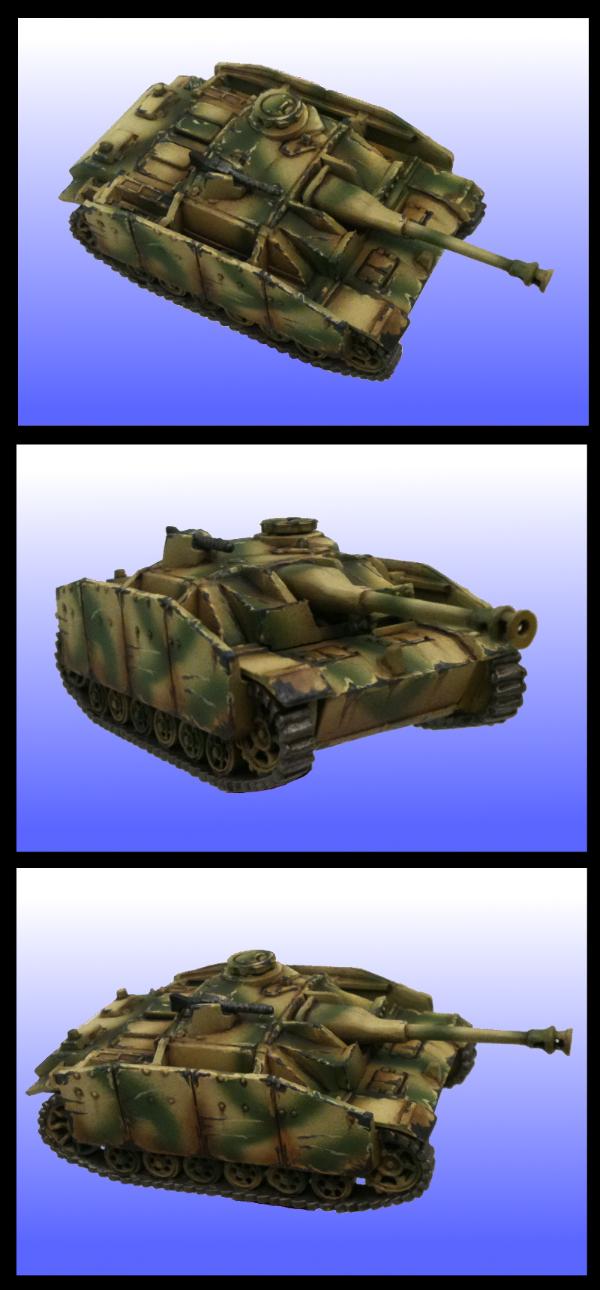
I usually use a mix of techniques. For example these German tanks I initially painted them to be clean then did paint chipping using dark grey paint on a sponge then highlighted the paint chips with a light sand tone (lighter version than I used on the base coat) then drybrushed a dark brown to look like dirt and grime build up and then used an enamel wash pin wash to darken the crevices and create some streaking. I really like the effect. I used a couple of different browns for the streaking and focused some of them around the paint chips (where dirt and rust would accumulate).