| Author |
Message |
 |
|
|
|
|
Advert
|
Forum adverts like this one are shown to any user who is not logged in. Join us by filling out a tiny 3 field form and you will get your own, free, dakka user account which gives a good range of benefits to you:
- No adverts like this in the forums anymore.
- Times and dates in your local timezone.
- Full tracking of what you have read so you can skip to your first unread post, easily see what has changed since you last logged in, and easily see what is new at a glance.
- Email notifications for threads you want to watch closely.
- Being a part of the oldest wargaming community on the net.
If you are already a member then feel free to login now. |
|
 |
2015/11/25 09:47:01
Subject: Weathering models
|
|

Fresh-Faced New User
|
Hey guys,
What are some advanced(or not-so-advanced) techniques you guys use for sullying your models? Personally, I prefer my models to be dirtied over a clean look; I much prefer the looking of them campaigning. I am looking for any advice beyond simply using a wash.
Thanks!
|
|
|
 |
|
2015/11/25 10:04:21
Subject: Weathering models
|
|

Is 'Eavy Metal Calling?
|
There are many ways of going about this, depending on the extent you want to weather, the environment you have in mind, the model themselves and the colours you've used. Certain textures and colours respond better than others to specific techniques. Here's a post of mine on some methods from a while back:
 Paradigm wrote: Paradigm wrote:
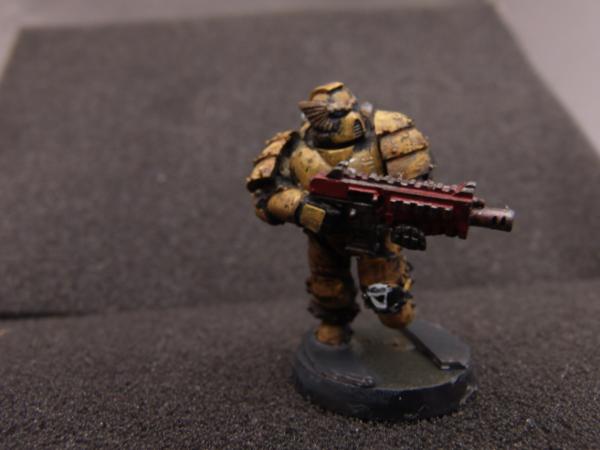
As for weathering, there are many ways to go about it. A favourite of mine for power armour is sponge weathering for realistic chipping. Take a piece of sponge or scouring pad and lightly dip it in the desired chip colour, then just dab that on the area you want to chip. It's simple, and very effective:
For powerders, just brush them on! I use chalks rather than anything fancy, just a light coat around the boots for tying the minis to the bases:
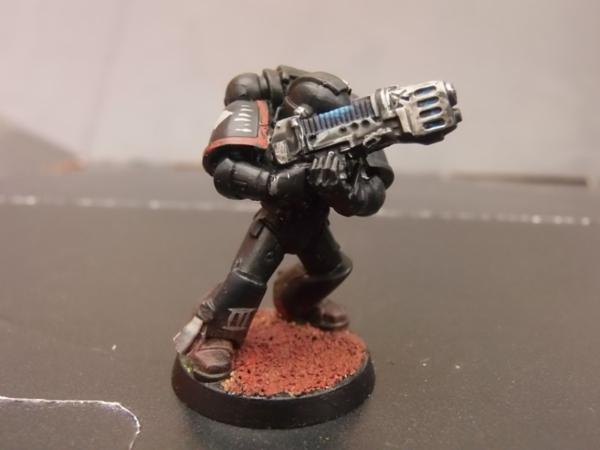
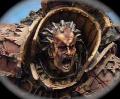
For larger chips in armour, you can take the colour you use for sponge weathering and paint it on the relevant area, then do a quick highlight of the armour colour around the edge to emphasise the chips (see the fist):

Finally, you can use washes in general to add a veneer of grime to a mini. Typhus Corrosion is a good paint to sparingly use for this, as it's formulated to look a bit gritty/oily when dry.
!
|
|
|
|
|
|
2015/11/25 10:55:14
Subject: Weathering models
|
|
Dakka Veteran
|
I am no expert, but I have had some decent results. On my tanks I used some GW ink I forgot the name of (a yellowish brown) dabbed on the rivets and seams and I think it looked good. My mud is brown paint with flour mixed in.
|
|
|
|
|
2015/11/25 11:56:49
Subject: Re:Weathering models
|
|

Cultist of Nurgle with Open Sores
|
Using a wash! 
Jokes aside, "using a wash" is not as simple as GW wants you to belive. If you really want a quality-weathered model, there are TONNS of information you can get from scale modeling scene.
First of all, acrylic water-based washes are not your friends in good-quality weathering, especially on large surfaces. When weathering is of concern, enamel-based products are a way to go, be that washes, filters or just oil pains (which are all essentially the same thing, just diluted in different proportions).
Next is chipping. This is an area where a lot of wargamers make a critical mistake – chipping with metal. The thing is, metal chips on armor almost never occur. Real-life chippings are either primer showing through much less adhesive camo paint (and priming is usually done with brown), or, indeed, metal, but already oxidized. In either case, chippings are mostly brown (with the exception of hard edges and tracks). This is even more important when you take your space marine – their armor is made of CERAMICS, not metal, and as such it would make more sense to chip them using light grey or sand colors.
Then there are all sorts of pigments that can greatly help you to initate realistic rust, dirt, dust, etc. Just don't overdo them – dirt tend to accumulate in very specific parts of vehicle. Same goes for rust – tank, which is in constant use, will be kept in good condition, and rust will only form on constantly heated parts, i.e. on exhausts but never on tracks.
Though mainly suited for vehicles, books like AK-Interactive F.A.Q. 2nd ed. will be of a great help. There are also lots of weathering turtorials on youtube (for ex., Mig Jimenez).
But the BEST piece of advise would be to stop painting silly miniatures, get out of your dark room and go out and look around! Visit some military histroty museum, observe real tanks, take some photos and ry to imitate!
Hope that was helpful!
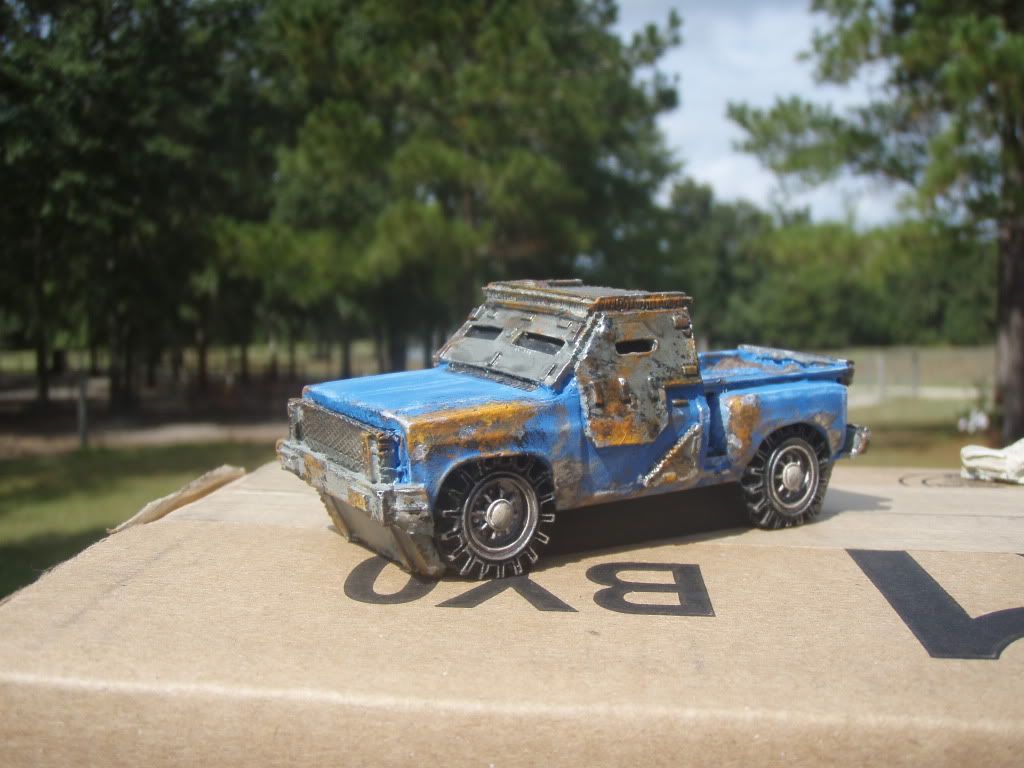
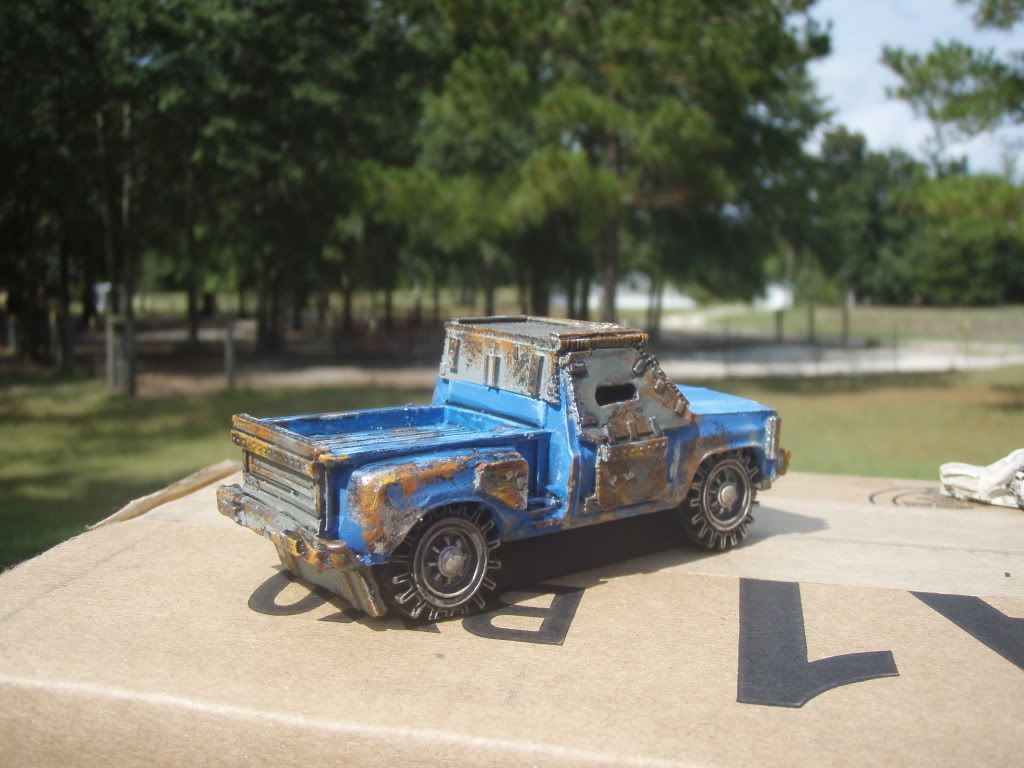
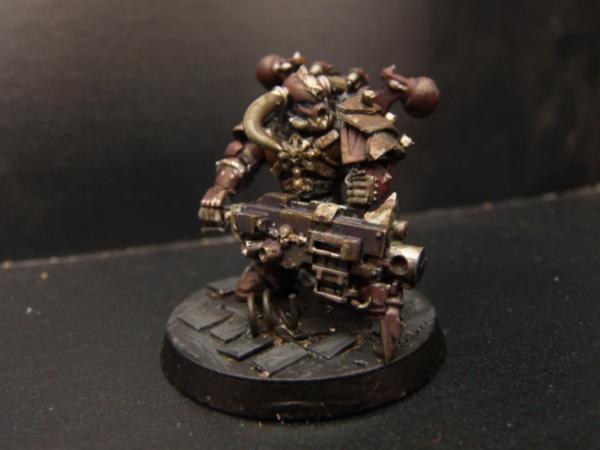
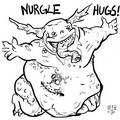
p.s. To illustrate what more-or-less realistic weathering looks like, let me shamelesly post my own example:
|
 "Never try to teach a pig to sing. It is a waste of your time, and it annoys the pig." "Never try to teach a pig to sing. It is a waste of your time, and it annoys the pig." |
|
|
|
|
2015/11/25 12:15:53
Subject: Re:Weathering models
|
|

Grizzled Space Wolves Great Wolf
|
There's a lot of potential weathering techniques. Here's some I like to use on my models.
1. Paint chipping. Can be done in different ways, depends what you think is under the paint. Here's a schematic I made for another thread on what I think is a good way to do paint chipping.
Basically you have your base colour, you paint grey (or metallic if you want) blotches on to it and then use a lighter version of your base colour to "highlight" the scratches. You can also use that lighter colour to make some smaller scratches that damaged the paint without going through. Going around the image, to create long scratches like at the top, you'd paint on long strips of grey and then highlight the edges with a pale red. The chunk of paint missing on the bottom left would be done by just painting a blob with a paint brush. The stuff on the right of the image which looks like abrasion damage is something you'd apply with a sponge.
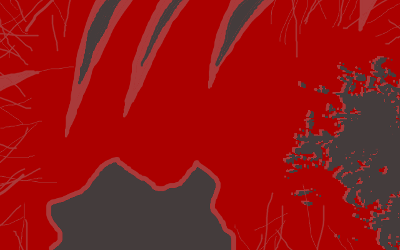
I normally apply my scratches with a sponge or with a fine detail brush. On my WW2 aircraft like this one (which were aluminium under the paint) I just painted on Runefang Steel with a fine detail brush, slowly building up the paint chips with a series of smaller scratches (rather than just painting a big blob).
A more advanced method would be to use a chipping medium or salt to do the paint chipping.
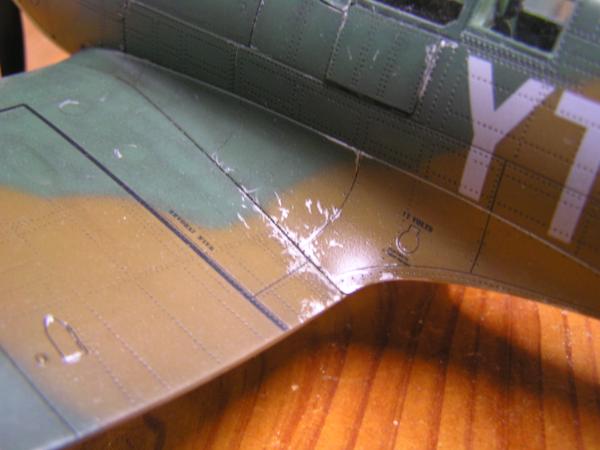
I think you have to be somewhat artistic when you apply paint scratches, try to use them to tell a story rather than just applying them evenly all over the model otherwise it will look strange. For example, the spitfire has more paint scratched off around that area because that's where the pilot and mechanic would climb up on the wing when getting in to the cockpit and the hatch which is scratched up is a swinging hatch which would be open and closed frequently. The paint scratching in the bottom left of the photo is where the flap mechanism pops out of the wing and though you can't see it in these images I have done scratching around the machine gun access panels, electronics access panel, oil filler, etc. On tanks you tend to get scratching around hatches and blackening around the engine.
2. Airbrushing - if you have an airbrush you can airbrush brown tones lightly to represent a build up of grime or light beige tones to represent dust. On the spitfire above I used an airbrush to darken the areas around panel and rivet lines.
3. Pin washing - That's where you do a wash that only focuses on the crevices. There's a few ways of doing it but my preferred method is an oil wash. Enamel washes also work well. You can use acrylic washes but they are hard to manipulate and often look messy (and not in the good way).
4. Pigments - You can use pigments to create dusty effects, dirt build up, you can mix it with varnish and/or plaster and/or sand to make mud effects. Personally I've always struggled with pigments, they can look good but I find it really hard to predict what they'll look like when I'm done so I don't really like them.
5. Oil Paints - Oil paints can be manipulated after you've applied them. They can be smeared, wiped off, drybrushed back on, blended in. Stuff that's a nightmare to do with regular acrylic paints. For example, the bottom of this Spitfire wing I applied black and dark brown oil paint quite heavily, then wiped it away with a tissue (leaving it in the crevices, panel lines and whatnot) then came back with a regular brush and reapplied it areas that I wanted it to be more built up and progressively drybrushed it in and wiped it away with a tissue until I had the effect I wanted (for example around the flap and aileron and in the wheel well). The subtle gun smoke trails weere achieved by drybrushing black oil paint in long streaks.
If you don't own an airbrush, oil paints can be a way of achieving similar results with regular hairy brushes (if you know what you're doing!). In fact oils beat the airbrush in some areas, like being able to create a sharp line that gradually fades out, something that's almost impossible to do with an airbrush but easy to do with oils.
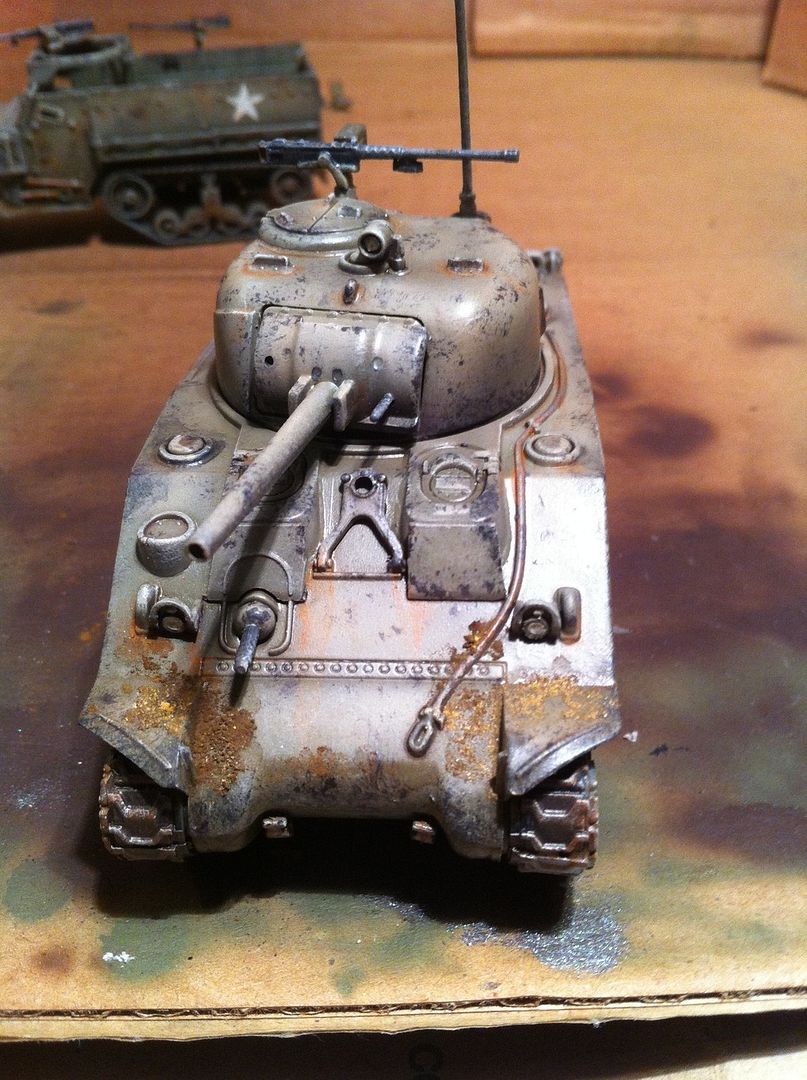
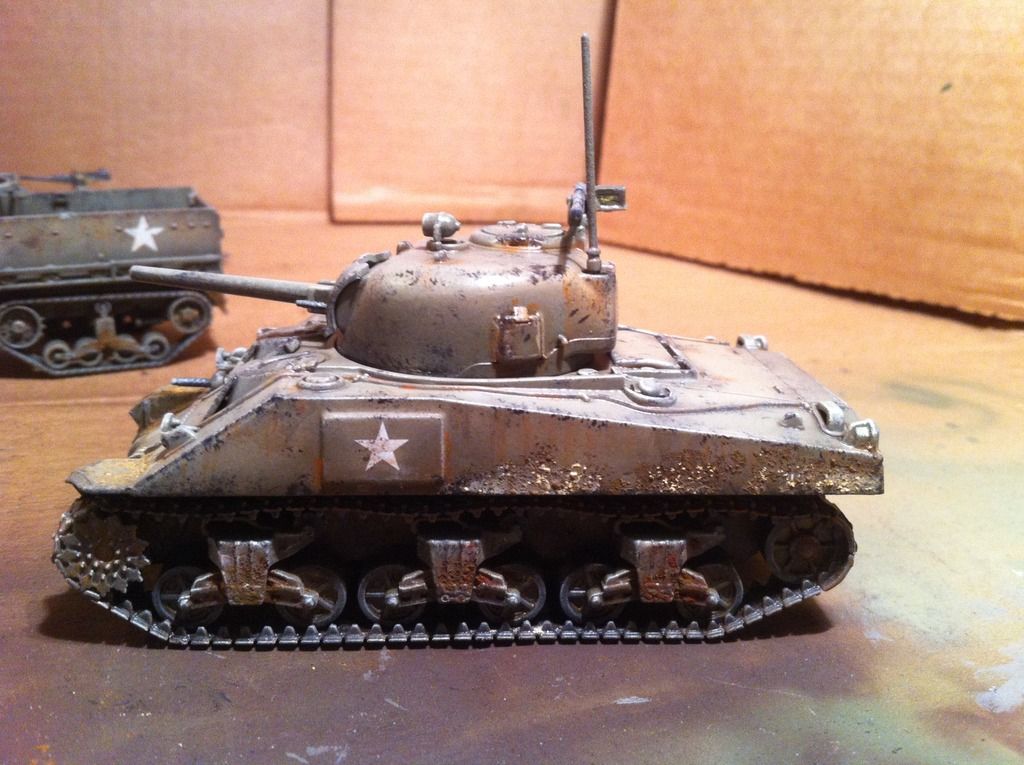
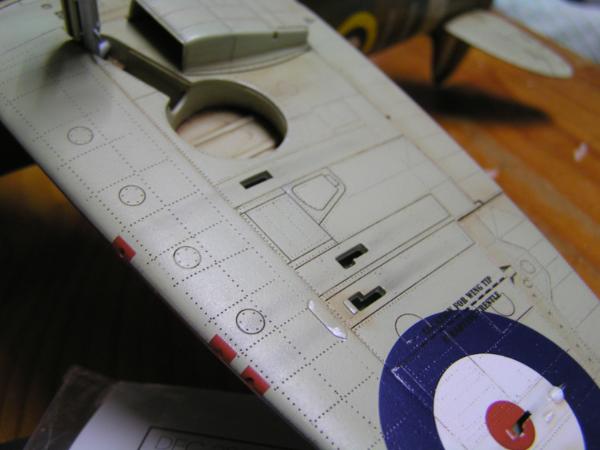
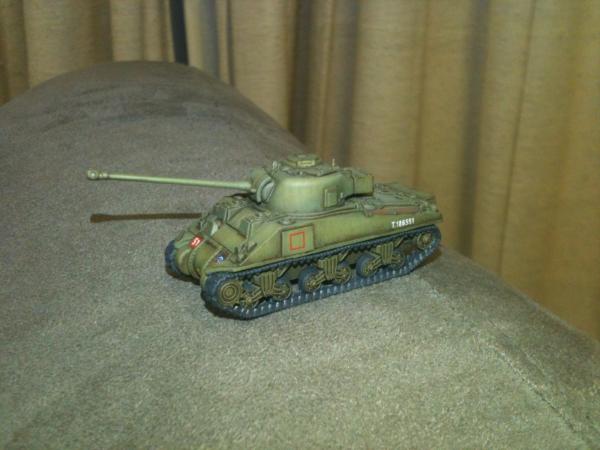
6. Acrylic washes. I am falling out of love with acrylic washes. But they can still be good. This Sherman I achieved the streaky dirt effect by applying dark brown wash mixed with plenty of drying retarder in to the crevices and then coming back with a clean brush and blending the wash in to the panel, by using a streaking motion to create the blends, the blends ended up streaky and makes it look like it has been dirty and maybe rained to create the streaks.
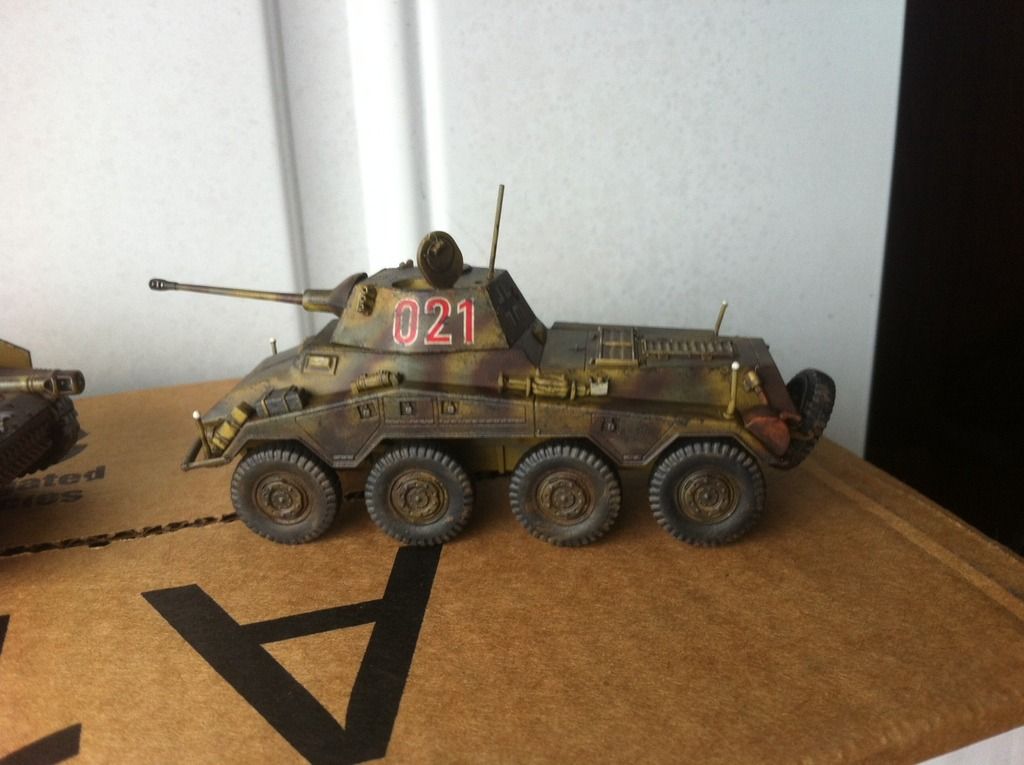
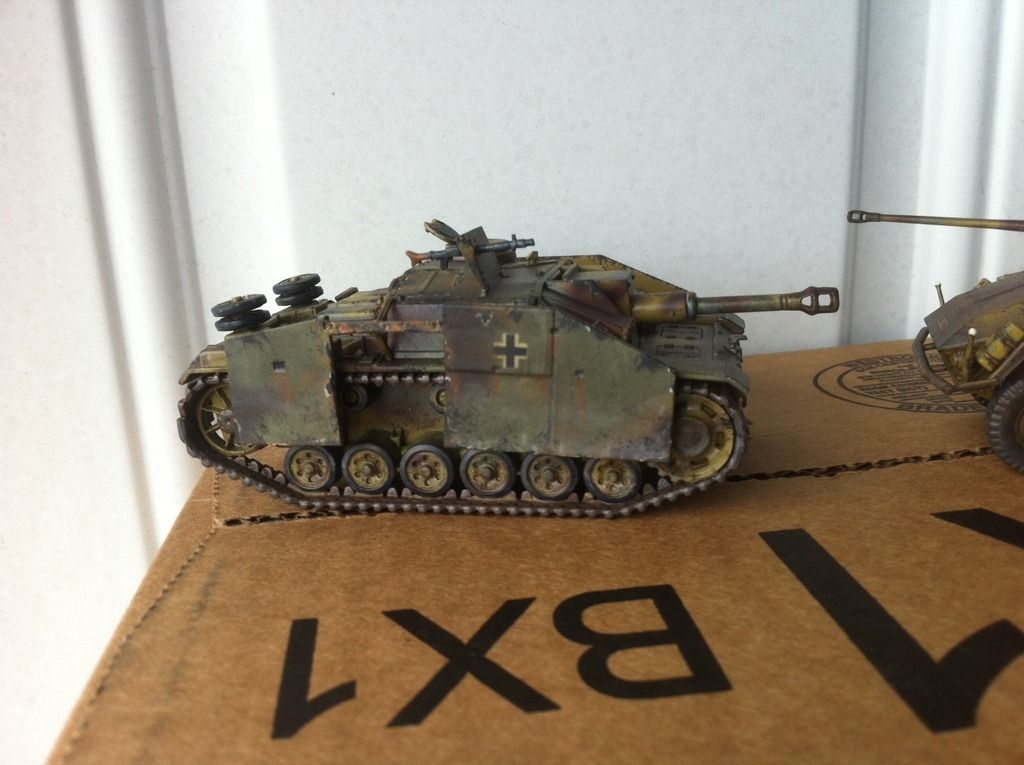
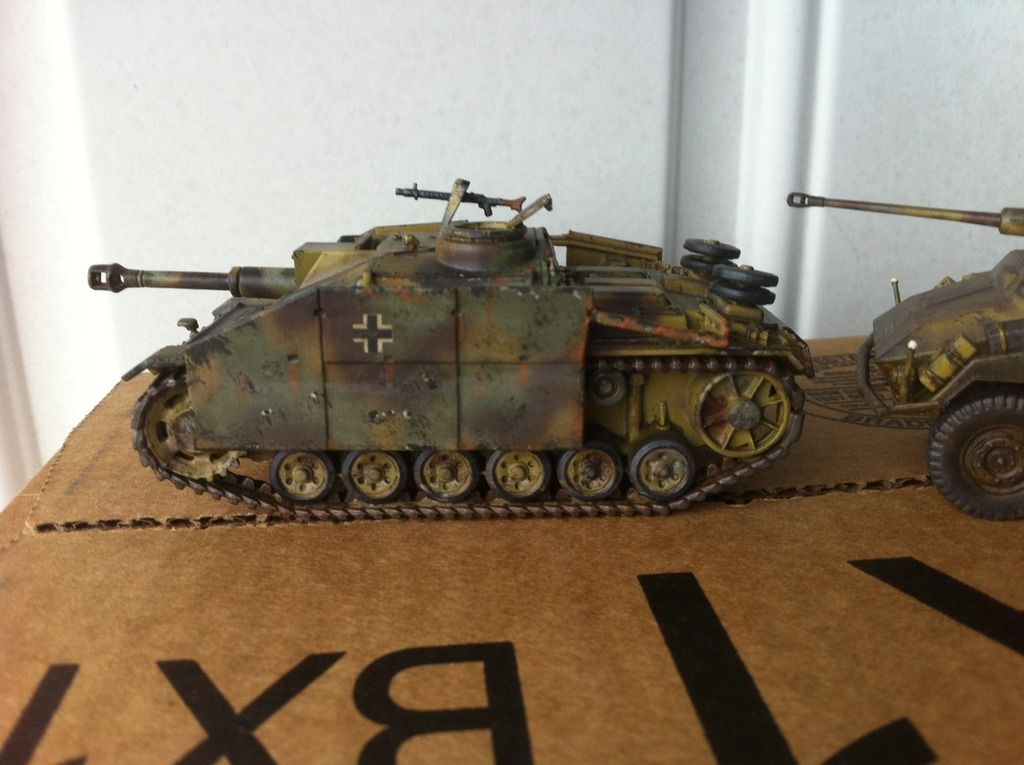
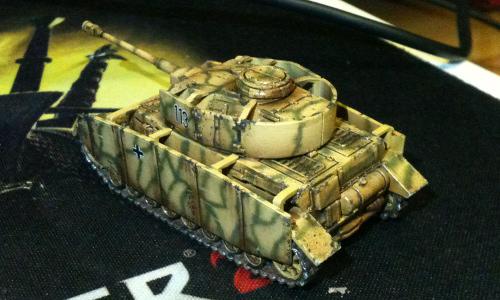
I usually use a mix of techniques. For example these German tanks I initially painted them to be clean then did paint chipping using dark grey paint on a sponge then highlighted the paint chips with a light sand tone (lighter version than I used on the base coat) then drybrushed a dark brown to look like dirt and grime build up and then used an enamel wash pin wash to darken the crevices and create some streaking. I really like the effect. I used a couple of different browns for the streaking and focused some of them around the paint chips (where dirt and rust would accumulate).
|
|
This message was edited 1 time. Last update was at 2015/11/25 12:18:16
|
|
|
|
|
2015/11/25 12:38:47
Subject: Weathering models
|
|
Dakka Veteran
|
Oh I have so far to go.
Thanks for the info.
|
|
|
|
|
2015/11/25 12:49:41
Subject: Weathering models
|
|

Whiteshield Conscript Trooper
Portugal
|
So, in 40k I tend to use a little different mindset from regular scale modelling. I like to give my models some realism but not anchor myself with that realism. 40K models are cartoonish in nature so, my paint schemes usually have some of that exaggeration present. The same applies to weathering. I apply the rule of cool over realism any time. If you need to apply a rust stain to break up the flatness of some panels, go ahead, even if it wouldn't rust. On infantry models, I usually just dirty them up, although sometimes, I chip armour, but usually using a 00 brush, not a sponge. Since the models are relatively small, you can build up too much weathering too quickly. It's better to just suggest weathering than to apply a heavy coat of weathering. Less is more, usually. It avoids the model looking too busy and overloaded. Also, I usually look up as reference, industrial machinery and construction equipment. The weathering is usually easier to spot against the yellow colour of the machinery
|
|
|
|
|
|
2015/11/25 13:20:55
Subject: Re:Weathering models
|
|
Grizzled Space Wolves Great Wolf
|
 TseGuevara wrote: TseGuevara wrote:Next is chipping. This is an area where a lot of wargamers make a critical mistake – chipping with metal. The thing is, metal chips on armor almost never occur. Real-life chippings are either primer showing through much less adhesive camo paint (and priming is usually done with brown), or, indeed, metal, but already oxidized. In either case, chippings are mostly brown (with the exception of hard edges and tracks). This is even more important when you take your space marine – their armor is made of CERAMICS, not metal, and as such it would make more sense to chip them using light grey or sand colors. Then there are all sorts of pigments that can greatly help you to initate realistic rust, dirt, dust, etc. Just don't overdo them – dirt tend to accumulate in very specific parts of vehicle. Same goes for rust – tank, which is in constant use, will be kept in good condition, and rust will only form on constantly heated parts, i.e. on exhausts but never on tracks.
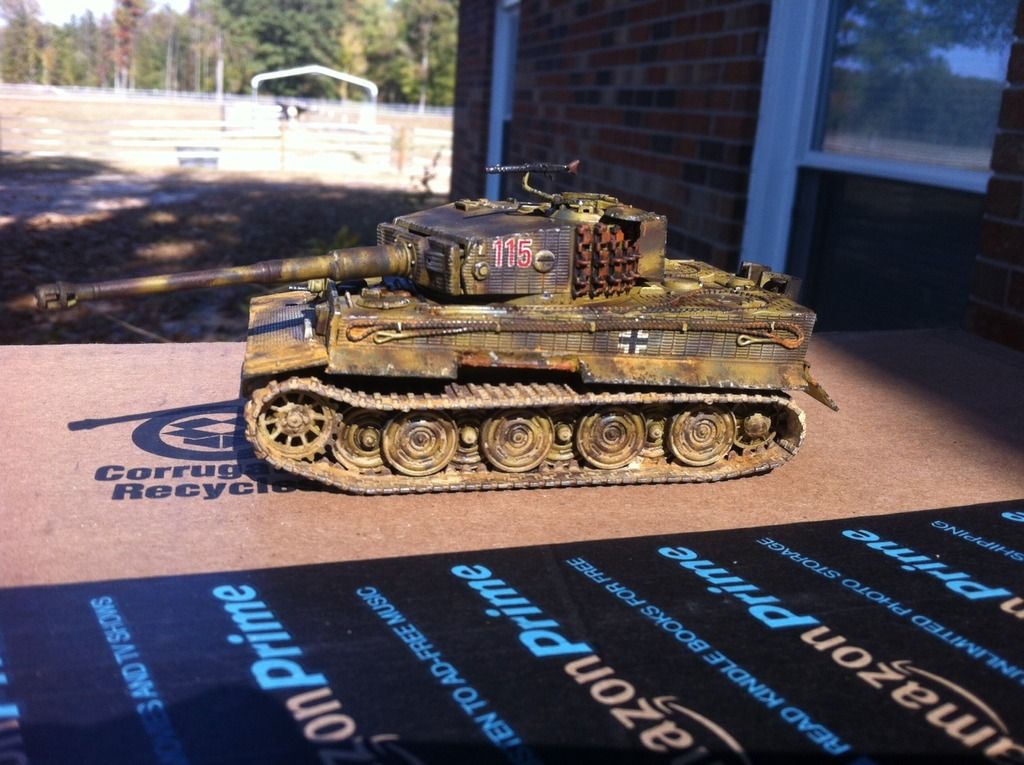
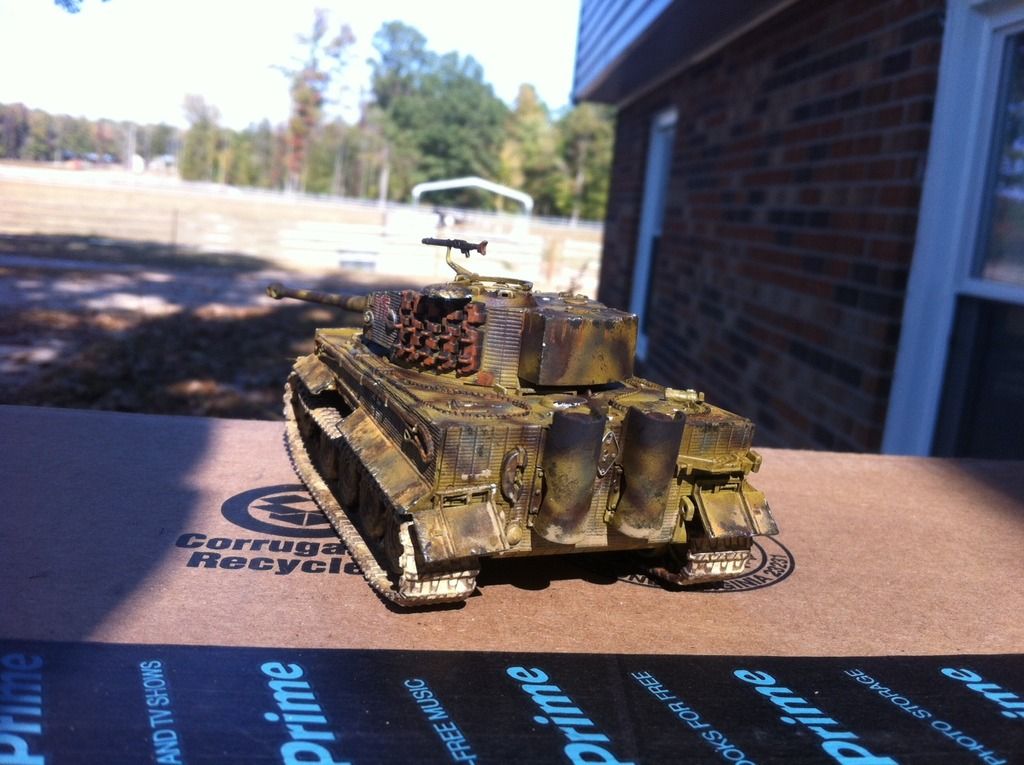
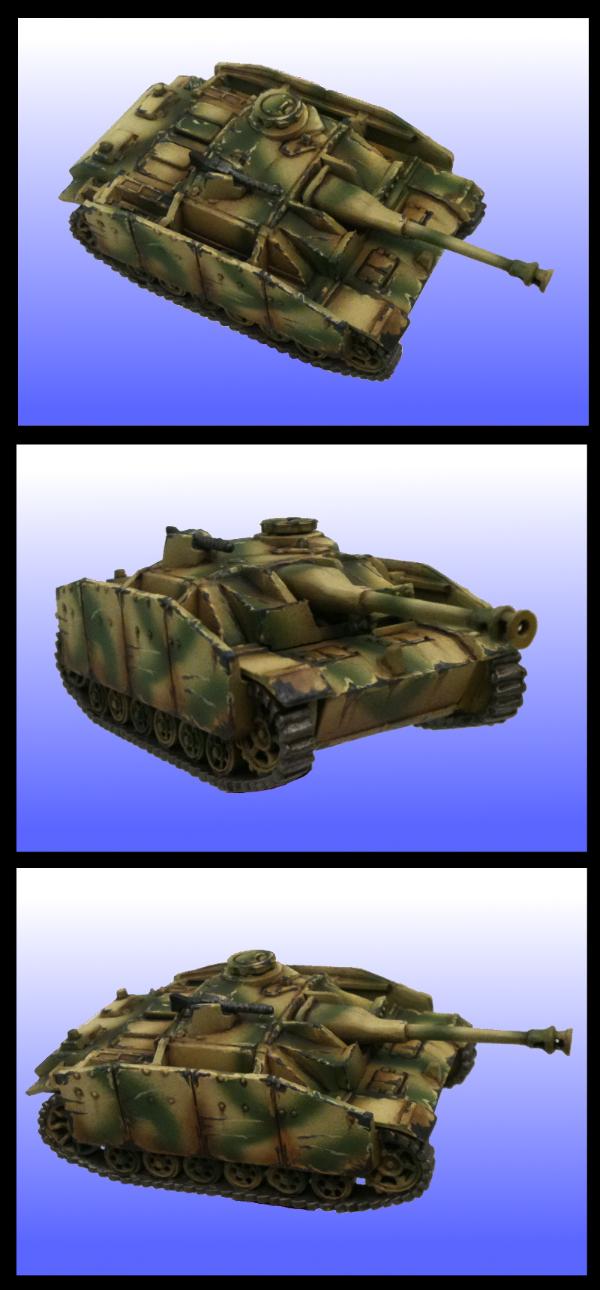
It all depends on the subject matter and what story you are trying to tell. In the context of 40k, you can tell almost any story you want, materials can be whatever you want, paint can be whatever you want. As an FYI, I used metallic to do the paint chipping on the Spitfire because in real life they were aluminium and paint tended to not stick brilliantly to them. It's quite common to see photos of WW2 aircraft with scratches and chips exposing the bare metal underneath. Sometimes huge chunks of it, some more than others, lots of photos of Japanese aircraft missing yards of paint. I've seen photos of Spitfires that had more paint missing than my model, others which didn't have a scratch on them. My 15mm tanks are overweathered, the Stug has unrealistically large chunks of paint missing.... but I like them because they are 15mm scale so rather than trying to be photo realistic I intentionally exaggerated the weathering so it stands out more on the table top and in my display cabinet. In the end you are just trying to tell a story and do it convincingly. If there's going to be exposed metal, ask why, ask if there should be smaller scratches that didn't penetrate the paint but are still visible, should there be exposed primer, should the paint just have come off in a big chunk, if so why? Should there be some transfer (like if it drove through a brick wall, there might be brick coloured marks on it).
|
|
This message was edited 2 times. Last update was at 2015/11/25 13:23:51
|
|
|
|
|
2015/11/25 13:31:24
Subject: Weathering models
|
|
Regular Dakkanaut
|
I think oil paints are very good for weathering. Winton oils are 4-5 dollars I think and last forever. My burnt umber and white are 6 years old and about 3/4 full. Burnt umber, burnt siena, raw sienna, Naples yellow, black and white can do a lot of different things grime wise.
|
|
|
|
|
2015/11/25 13:45:11
Subject: Re:Weathering models
|
|
Fixture of Dakka
CL VI Store in at the Cyber Center of Excellence
|
|
Every time a terrorist dies a Paratrooper gets his wings. |
|
|
|
|
2015/11/25 15:22:01
Subject: Re:Weathering models
|
|
Fresh-Faced New User
|
I do still indeed have more progress to make with my weathering to become as good as you guys.While weathering vehicles is still difficult for me (less so now than, say, a few years ago - when I started this hobby), I've mostly stuck to weathering infantry because I mostly do skirmish games. Currently, I do not play any historical games, but I've been seriously considering Bolt Action and/or Team Yankee.
Recently, a friend and I started a campaign for 40k. My regiment consist mostly of assault brigades so I've been weathering them to reflect such. They (my IG/ AM) have this Franco-German aesthetic, their fatigues were painted with VMC Heavy Blue and their armour/weapon with VMC Blue Grey, both of course being washed and highlighted. I am using Secret Weapon Miniatures weathering pigments (the urban set to be specific) - and while it works wonders for basing - I have difficulty reflecting the weathering on the miniatures. My guess is the color of their fatigues is too bright so it mutes the weathering effect I am going for (mostly dusty/ashen), so perhaps I should give them a more earthen/mud weathering - to reflect campaigning between siege battles?
And thank you to everyone for sharing their pictures and techniques. Very informative!
|
|
|
|
|
2015/11/25 15:44:56
Subject: Weathering models
|
|

Rogue Grot Kannon Gunna
|
Paradigm wrote:There are many ways of going about this, depending on the extent you want to weather, the environment you have in mind, the model themselves and the colours you've used. Certain textures and colours respond better than others to specific techniques. Here's a post of mine on some methods from a while back:
Paradigm wrote:
As for weathering, there are many ways to go about it. A favourite of mine for power armour is sponge weathering for realistic chipping. Take a piece of sponge or scouring pad and lightly dip it in the desired chip colour, then just dab that on the area you want to chip. It's simple, and very effective:
For powerders, just brush them on! I use chalks rather than anything fancy, just a light coat around the boots for tying the minis to the bases:
For larger chips in armour, you can take the colour you use for sponge weathering and paint it on the relevant area, then do a quick highlight of the armour colour around the edge to emphasise the chips (see the fist):
Finally, you can use washes in general to add a veneer of grime to a mini. Typhus Corrosion is a good paint to sparingly use for this, as it's formulated to look a bit gritty/oily when dry.
!
Are those waxed chalks good aswell?
|
|
|
|
|
2015/11/25 15:53:34
Subject: Weathering models
|
|
Is 'Eavy Metal Calling?
|
Not sure what you mean by waxed chalks, I just used a cheap pack of artist's chalks; grind up a bit, add some water, apply to the mini and as the water evaporates, the chalk will be left behind.
|
|
|
|
|
|
2015/11/25 16:19:10
Subject: Weathering models
|
|
The Daemon Possessing Fulgrim's Body
|
The best weathering advice I can offer is to tell a story with it.
By that, I mean take rust. Rust doesn't spontaneously appear in the middle of a panel, as a rule, it generally appears where water naturally collects, then spreads out from that point, but will favour spreading in the direction that the water overflows from the start point. Should rust appear in the middle of a panel, then there would likely be damage to that panel, so that should be seen too.
Paint doesn't just chip randomly either. There will be areas subject to much heavier wear, the area around the tracks for instance, especially where the tracks on a tank would flick debris up in the air, and leading edges and front facing panels will attract more wear than flat or rear facing.
It doesn't mean damage can't occur in other places, but if you think about where on the model weathering would occur, and how that would develop, you'll get a much more plausible look to the weathering.
|
We find comfort among those who agree with us - growth among those who don't. - Frank Howard Clark
The wise man doubts often, and changes his mind; the fool is obstinate, and doubts not; he knows all things but his own ignorance.
The correct statement of individual rights is that everyone has the right to an opinion, but crucially, that opinion can be roundly ignored and even made fun of, particularly if it is demonstrably nonsense!” Professor Brian Cox
Ask me about
Barnstaple Slayers Club |
|
|
|
|
2015/11/25 16:25:34
Subject: Weathering models
|
|
Fixture of Dakka
CL VI Store in at the Cyber Center of Excellence
|
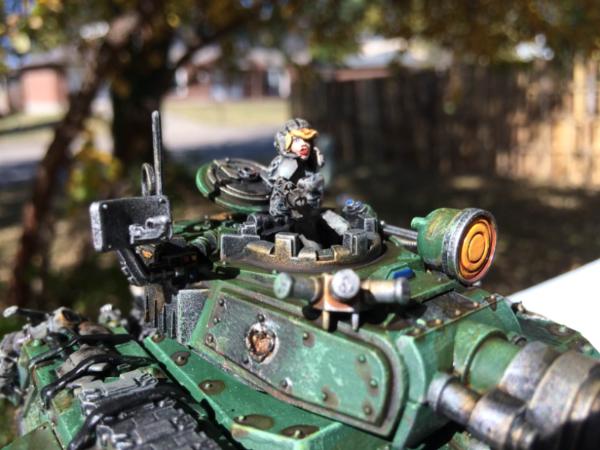
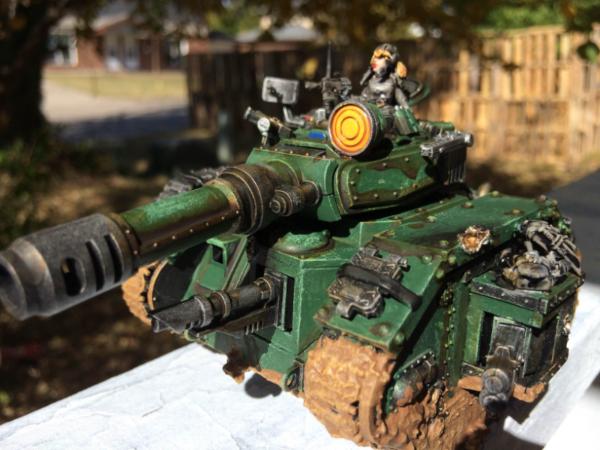
 Azreal13 wrote: Azreal13 wrote:The best weathering advice I can offer is to tell a story with it.
By that, I mean take rust. Rust doesn't spontaneously appear in the middle of a panel, as a rule, it generally appears where water naturally collects, then spreads out from that point, but will favour spreading in the direction that the water overflows from the start point. Should rust appear in the middle of a panel, then there would likely be damage to that panel, so that should be seen too.
Paint doesn't just chip randomly either. There will be areas subject to much heavier wear, the area around the tracks for instance, especially where the tracks on a tank would flick debris up in the air, and leading edges and front facing panels will attract more wear than flat or rear facing.
It doesn't mean damage can't occur in other places, but if you think about where on the model weathering would occur, and how that would develop, you'll get a much more plausible look to the weathering.
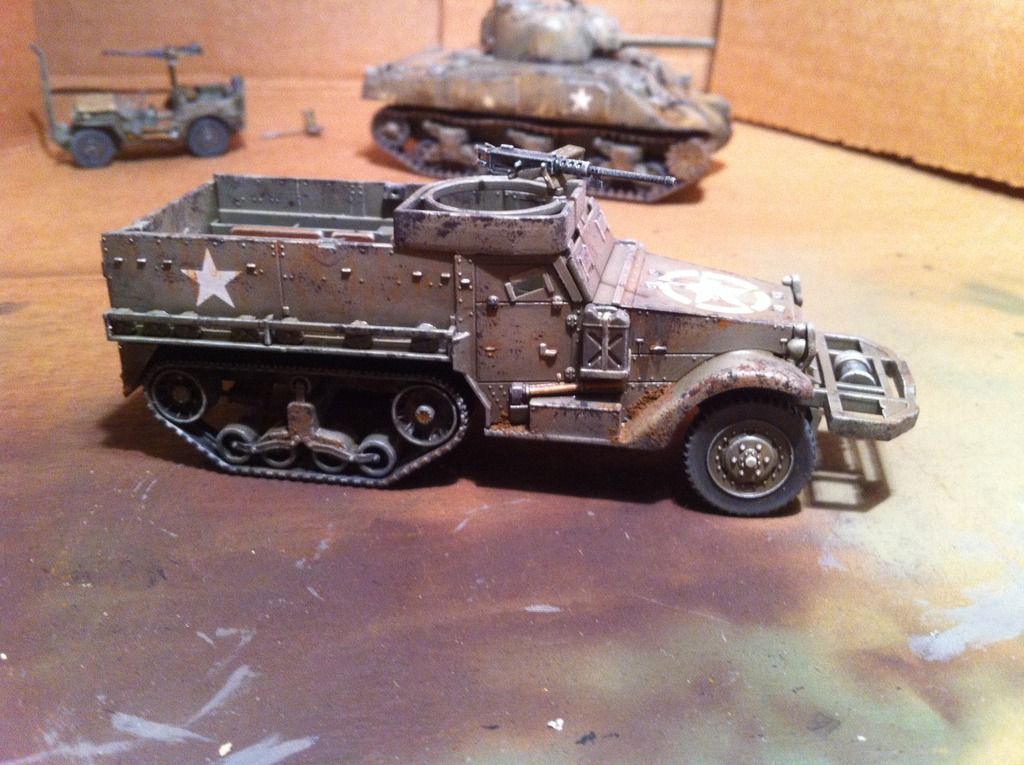
Very well stated. I know my stuff is 'over weathered' (done purposely in order to play with some new techniques I was trying and because at scale it needs to be a bit overdone to look 'good' on the gaming table) but I did try to apply that philosophy. Wear is focused on where it would occur for the most part. I spent a tiny bit of time on armored vehicles and think that has influenced how I weather them.
|
Every time a terrorist dies a Paratrooper gets his wings. |
|
|
|
|
2015/11/25 20:00:06
Subject: Re:Weathering models
|
|
Fresh-Faced New User
|
Thanks for the advice everyone!
|
|
This message was edited 3 times. Last update was at 2015/11/26 04:38:37
|
|
|
|
|
2015/11/26 06:14:30
Subject: Re:Weathering models
|
|
Douglas Bader
|
For chipping color (and weathering in general, really) I suggest getting some scrap parts and testing your ideas. I found that on my tanks bare metal just didn't look right, so I switched to doing the chips with a dark gray primer color. But with other color schemes you might prefer different chip colors.
|
There is no such thing as a hobby without politics. "Leave politics at the door" is itself a political statement, an endorsement of the status quo and an attempt to silence dissenting voices. |
|
|
|
|
2015/11/27 16:16:53
Subject: Re:Weathering models
|
|
Utilizing Careful Highlighting
|
when you guys are talking about oil washes, what exactly are you using? Do you simply thin the desired oil paint for use as a wash or is there some other product available as an oil wash? or both lol I guess same question for the testors enamels as well.
I've used oil enamel and acrylics (now) but generally for very different things. My testor enamels were always the ones I used for models before (cars planes etc), for instance. I've really only started playing with various techniques, and mixing paint types too, when I started doing miniatures again.
|
|
|
|
|
|
2015/11/28 01:17:24
Subject: Re:Weathering models
|
|
Grizzled Space Wolves Great Wolf
|
Guildenstern wrote:when you guys are talking about oil washes, what exactly are you using? Do you simply thin the desired oil paint for use as a wash or is there some other product available as an oil wash? or both lol I guess same question for the testors enamels as well. I've used oil enamel and acrylics (now) but generally for very different things. My testor enamels were always the ones I used for models before (cars planes etc), for instance. I've really only started playing with various techniques, and mixing paint types too, when I started doing miniatures again.
For oil washes I always just mix my own from regular oil paint and white spirit. You can thin it a lot, in which case it will tend to pull itself in to the crevices very easily, or you can only thin it slightly in which case it's easier to clean up afterwards and tends to be a bit more opaque. If I thin it heavily, I tend to aim to only get it in the crevices so there's little to no clean up. If I don't thin it much, I tend to cover the entire surface and then use a tissue to wipe it up and a soft brush to blend it in. Creates a slightly different effect. You can make oil washes using something like Humbrol Thinner as well, I know some people who swear by it, but I find it to be way too harsh on the underlying paint for my likings. When I talk about enamel washes, I'm typically just meaning premixed ones that you can purchase. Tamiya make some extremely thin washes designed for panel line washes, I find they tend to work best on aircraft which have very fine panel lines, I don't really like them on armoured models. AK interactive, Testors and Humbrol all make enamel washes as well but I haven't tried any of those ones as of yet. I haven't tried it before but on the aircraft I'm currently working on I intend to mix my own enamel wash as I don't own the colour I want to use in wash form.
|
|
This message was edited 2 times. Last update was at 2015/11/28 01:26:50
|
|
|
|
|
|
|
|