| Author |
Message |
 |
|
|
|
|
Advert
|
Forum adverts like this one are shown to any user who is not logged in. Join us by filling out a tiny 3 field form and you will get your own, free, dakka user account which gives a good range of benefits to you:
- No adverts like this in the forums anymore.
- Times and dates in your local timezone.
- Full tracking of what you have read so you can skip to your first unread post, easily see what has changed since you last logged in, and easily see what is new at a glance.
- Email notifications for threads you want to watch closely.
- Being a part of the oldest wargaming community on the net.
If you are already a member then feel free to login now. |
|
 |
2018/06/11 19:22:13
Subject: Terrain Tutorial: Making a Ruin from Cardboard Gift Boxes!
|
|

[MOD]
Making Stuff
|
From the Comm Guild blog: http://www.thecommguild.com/roller/thecommguild/entry/terrain-spotlight-cardboard-gift-box
 - by Iain Wilson - by Iain Wilson
If you've been following my hobby articles for any length of time, you may have noticed that I'm rather fond of using cardboard gift boxes to make buildings (If you're new here, you can see examples here, here, or here). But while intact buildings are all well and good, a balanced battlefield should include a mix of line of sight blocking terrain and area terrain, and so this week I'm breaking out the old gift boxes and the Maelstrom's Edge terrain sprue for some good, old-fashioned ruins.
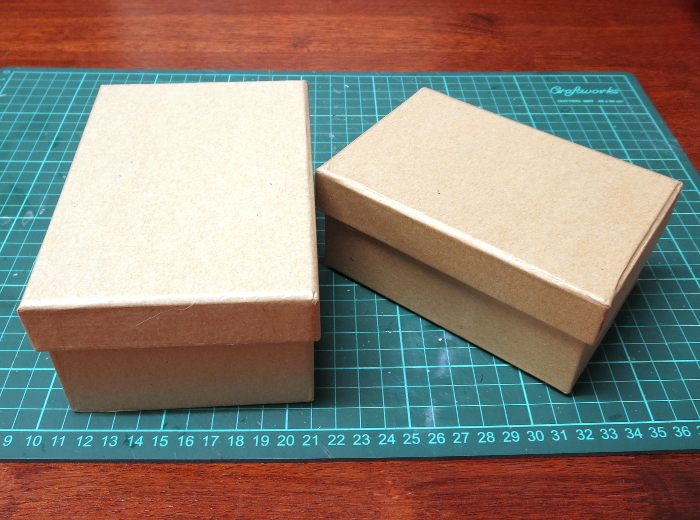
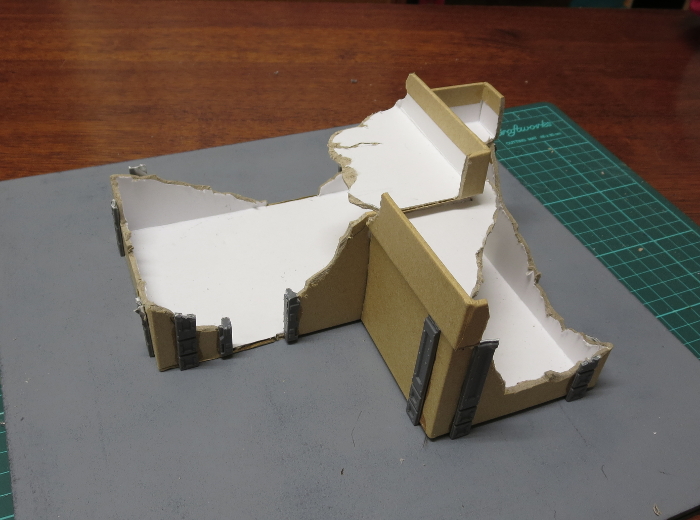
The structure for this build comes from two cardboard gift boxes, bought from a local discount store.
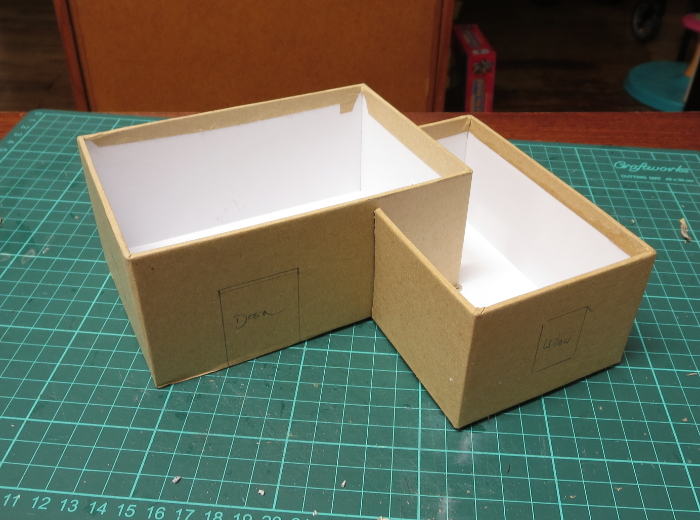
The lids were flipped over to create a walled roof, and I removed a corner of the smaller box with a sharp hobby knife so that it nestled in neatly against the larger box.

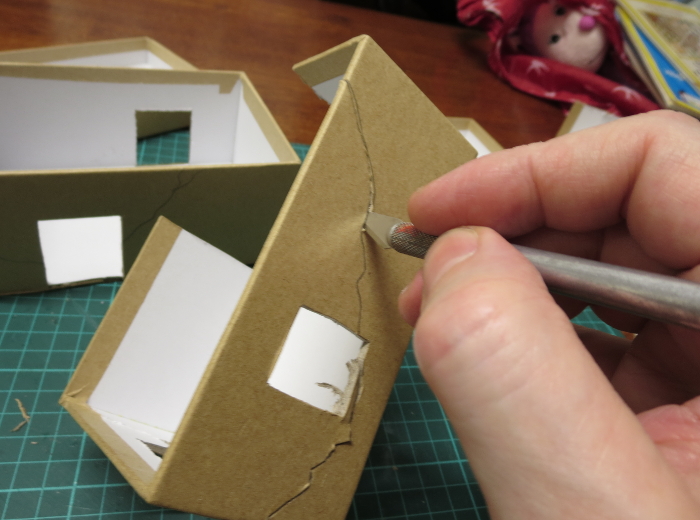
I used a door and a shutter window from the terrain sprue to mark out positions for doors and windows, by sitting them in place and tracing around them with a pencil.
Then I used the hobby knife to cut the door and window holes out, and marked out a rough plan for the building damage - the line around the building shows where the walls would be cut down, leaving more raised areas on corners, where the structure would be stronger.
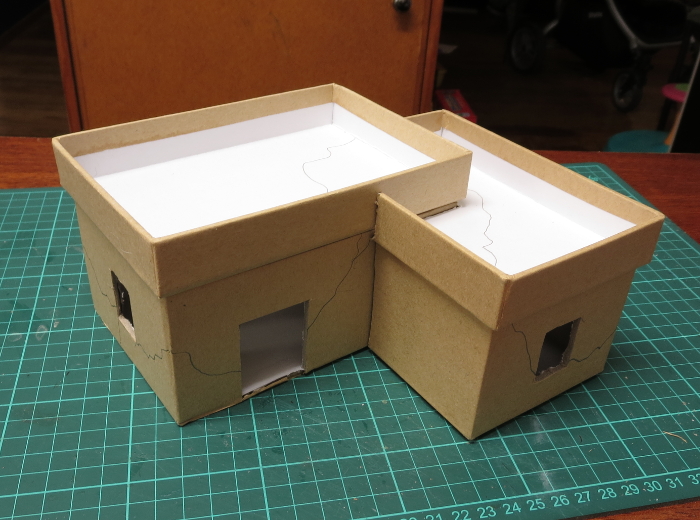
The hobby knife was put to use again, as I cut along the ruin line all the way around the building.
Once done, the cardboard structure went together like this:
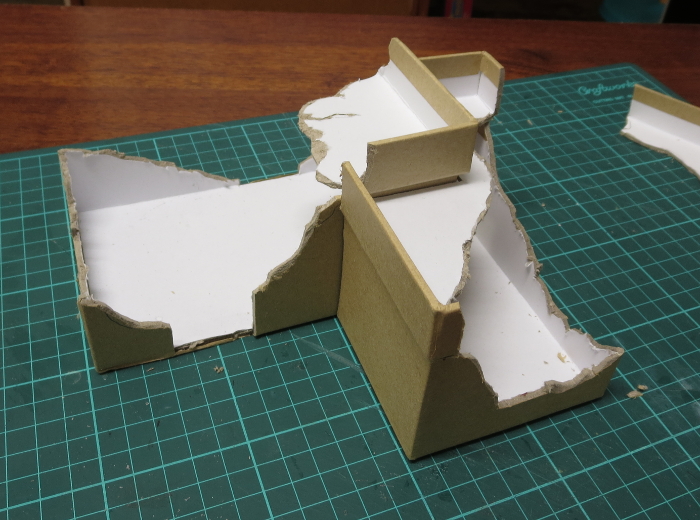
As a handy side-effect, the pieces removed from the tops of the walls can be saved and used to create other ruins later...
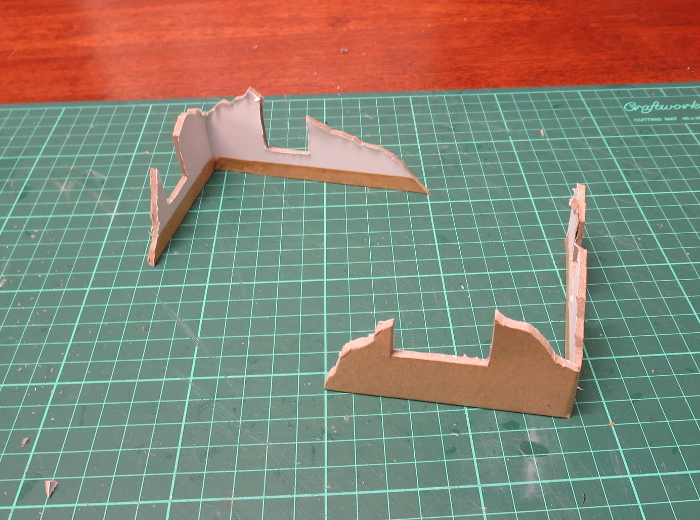
Because the ruin line wound up around the bottom of all of the window frames, I just left them bare. For the doorways, though, I chopped the door panel out from the surrounding doorframe, and cut the frame into shorter pieces to match the height of the ruined walls.
The doorframe pieces were then glued in place, and I also added some support struts on the corners of the walls, also suitably cut down to height and with the cut ends messed up a little with some clippers to simulate explosive damage. With these all in place, I glued the whole building structure to a base board of masonite.
If you're just after a quick and easy ruin, this is the point where you can call the job a good'un and go and slap some paint onto it. For some extra detailing, though, I chose to glue some chopped up card from the gift boxes and some leftovers from the cut terrain sprue bits around the building, and then using a generous amount of PVA glue added some gravel and sand.
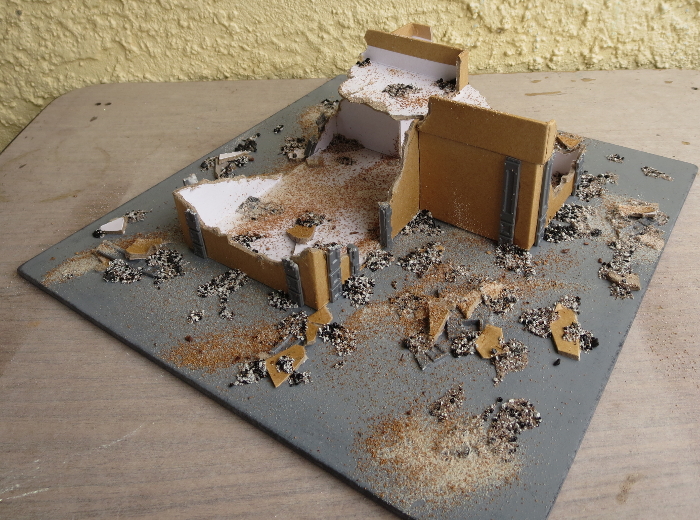
After leaving the glue to dry, it was time for paint!
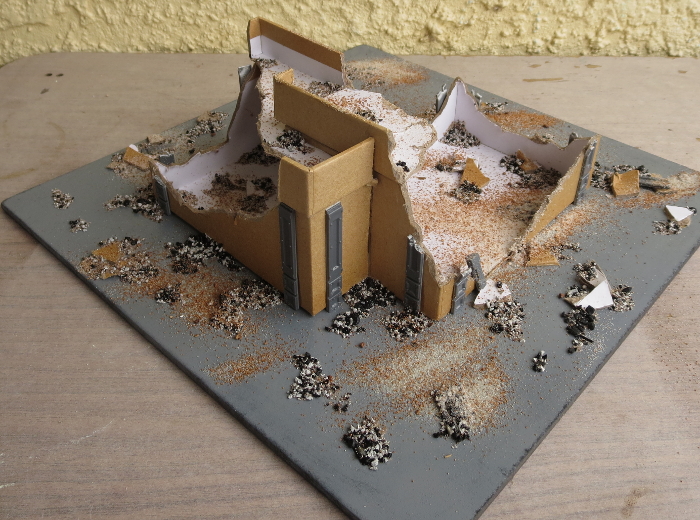
I started with a basecoat of grey spray, and then a light spray with white around the walls and the bigger rubble patches.
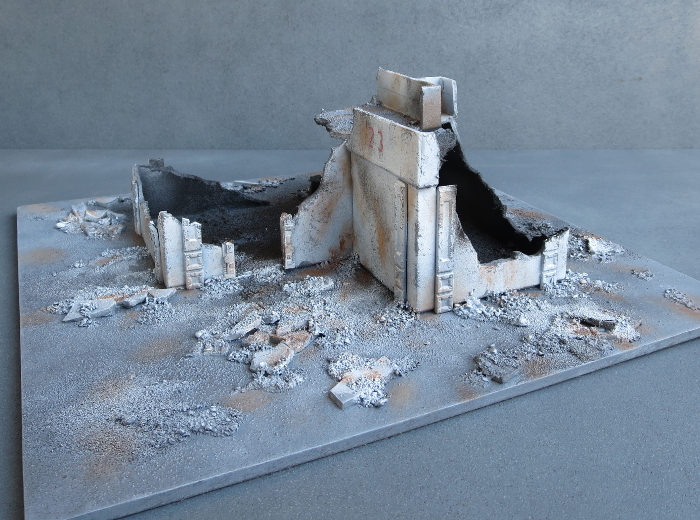
The exposed sections of the baseboard and the building floors was then re-based in Vallejo Neutral Grey, and then drybrushed with Vallejo Light Grey.
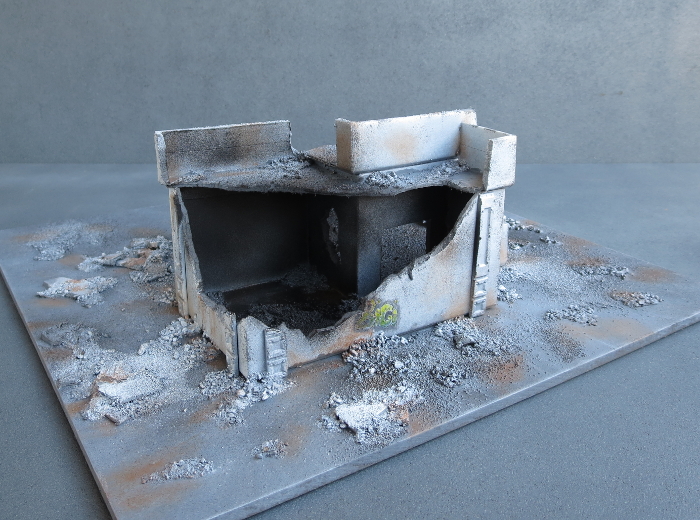
Everything was then dirtied up with some Neutral Grey sponge-weathering and spots of drybrushed Vallejo Beasty Brown.
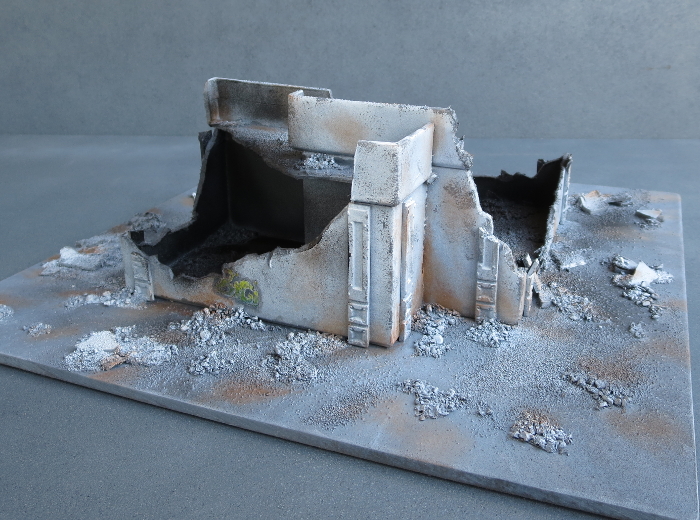
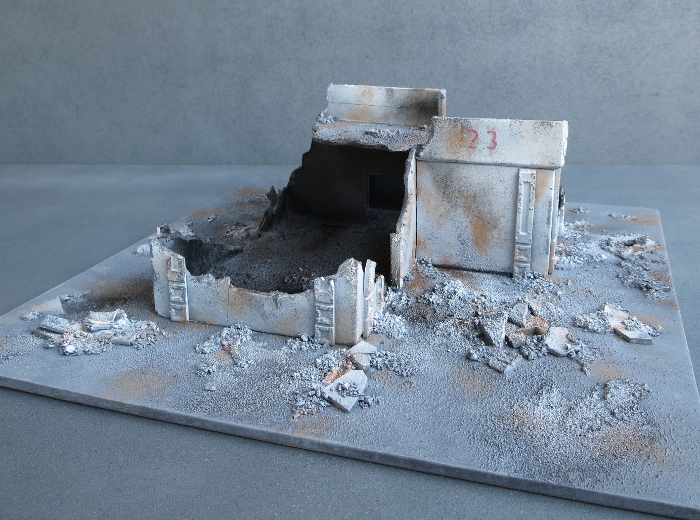
I added a couple of extra details for colour - the number on the roof railing by dabbing through a number stencil with a large brush and some red paint, and a little graffiti on the back wall painted with yellow and some blue ink straight over the grey wall to give it a faded appearance.
The final step was a quick blast of black spray into the interior of the building to create some contrast.
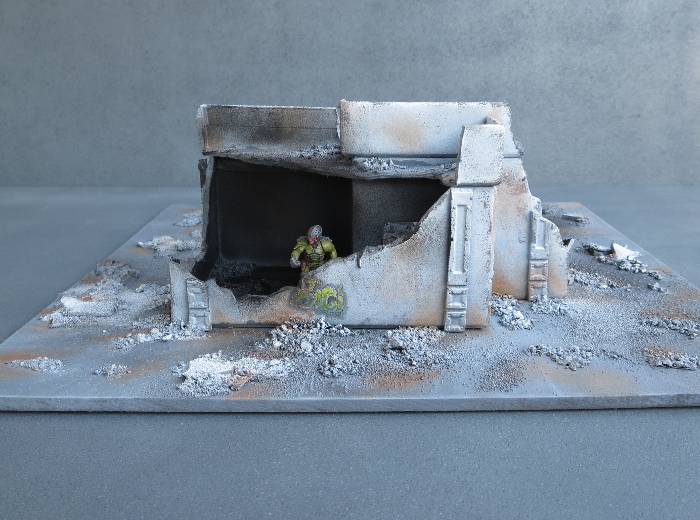
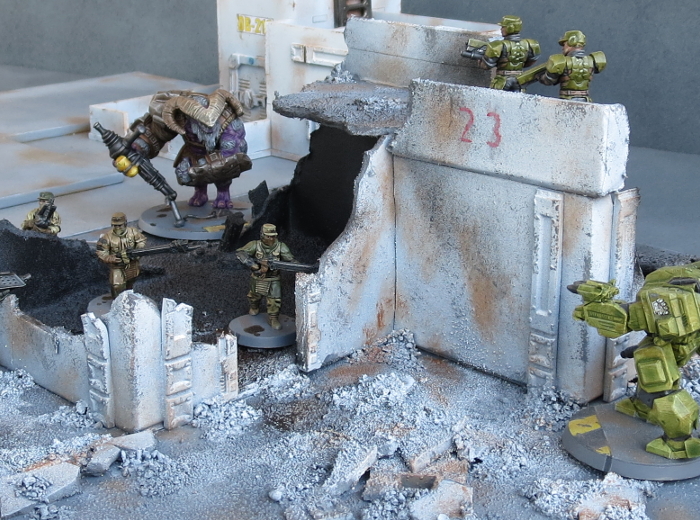
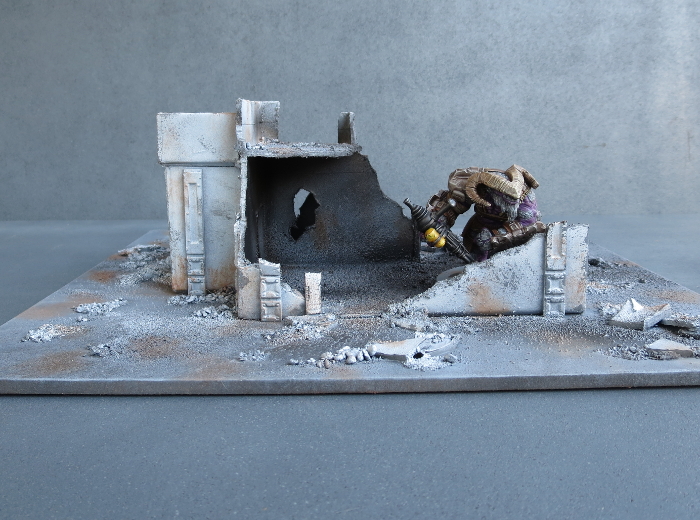
And that's it - one ruin, ready for the table!
If you're keen to try this for yourself, you can pick up the giftboxes from gift stores all over the place, or online with a quick Google search, and the Maelstrom's Edge terrain sprue along with the rest of the Maelstrom's Edge model range from the webstore here.
For other Maelstrom's Edge modeling articles, including tutorials and walkthroughs of a wide range of different building and miniature projects, check out the article roundup here, or for help or advice, or just to share your work, feel free to visit the Comm Guild Facebook page!
|
|
|
|
 |
|
2018/06/12 21:34:49
Subject: Terrain Tutorial: Making a Ruin from Cardboard Gift Boxes!
|
|

Fixture of Dakka
|
Simple but effective.
Cheers,
CB
|
|
|
|
|
|
2018/06/12 22:59:47
Subject: Terrain Tutorial: Making a Ruin from Cardboard Gift Boxes!
|
|

Stealthy Grot Snipa
|
What he said! Cheers Insaniak, look forward to giving this a try 
|
|
|
|
|
|
2018/06/13 19:22:43
Subject: Terrain Tutorial: Making a Ruin from Cardboard Gift Boxes!
|
|
[MOD]
Making Stuff
|
Awesome, thanks 
|
|
|
|
|
|
2018/06/14 02:46:08
Subject: Terrain Tutorial: Making a Ruin from Cardboard Gift Boxes!
|
|
Dipping With Wood Stain
|
Great stuff, and excellent use of some readily available and cheap materials.
Love it.
|
|
|
|
|
2018/06/29 07:35:36
Subject: Terrain Tutorial: Making a Ruin from Cardboard Gift Boxes!
|
|

Cog in the Machine
|
Wow! I'll really have to copy your building sooner or later. Thank you very much for this awesome tutorial!
|
|
|
|
|
|
|
|

 Finished Forge World Elysian Army
  Finished Tau Sept Cadre
  Alaitoc Eldar Warhost
  Finished Order of Our Martyred Lady - Sisters of Battle
  Finished Necromundian Imperial Guard Regiment

