Hello and welcome to my duel tutorial/review of Greenstuff Worlds Two-part silicone putty and acrylic resin.
So I purchased these two products as they seemed to be a relatively simple and inexpensive way to dip my toes into the resin moulding/casting side of the hobby.
Acrylic Resin & Two-part Silicone Putty
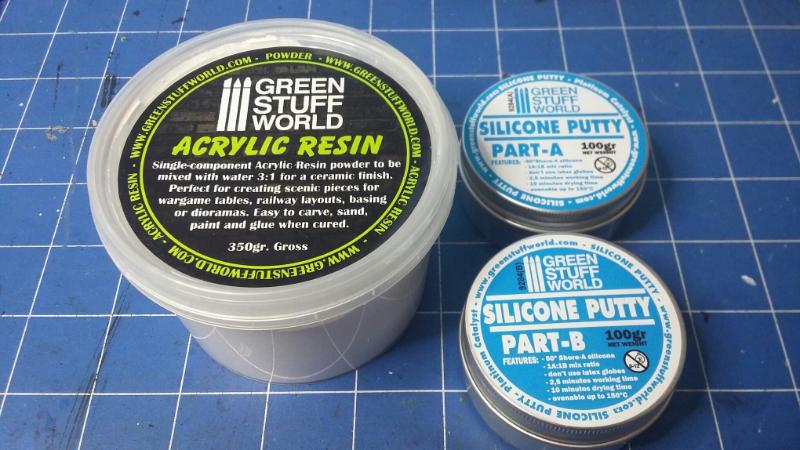
They currently retail on GSW's site for 4.95Euros for 350grams of the acrylic resin and 12.85Euros for 200grams of the 2-part silicone putty. Available
here and
here respectively.
Phase 1. - The Moulds.
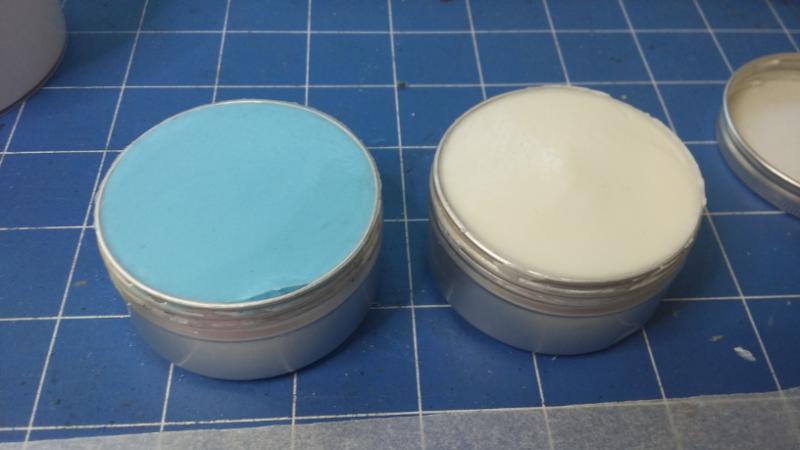
With the lids popped off, the putty looks like this.
Two-part silicone putty
Before handling this stuff, I gave my hands a good wash to get any dirt and oil off, as the website does say that certain chemicals can inhibit the curing process. They also say to only use Vinyl gloves rather then latex as latex will also inhibit the cure. I didn't have any Vinyl gloves, so I just made sure to take care and wash my hands again after before I touched anything.
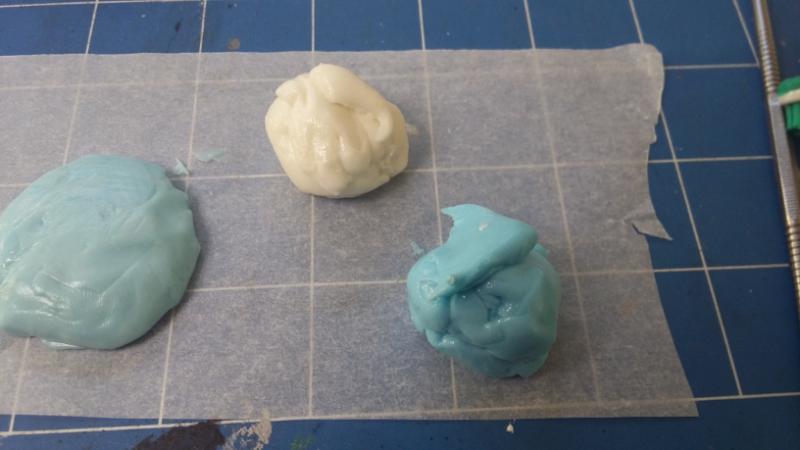
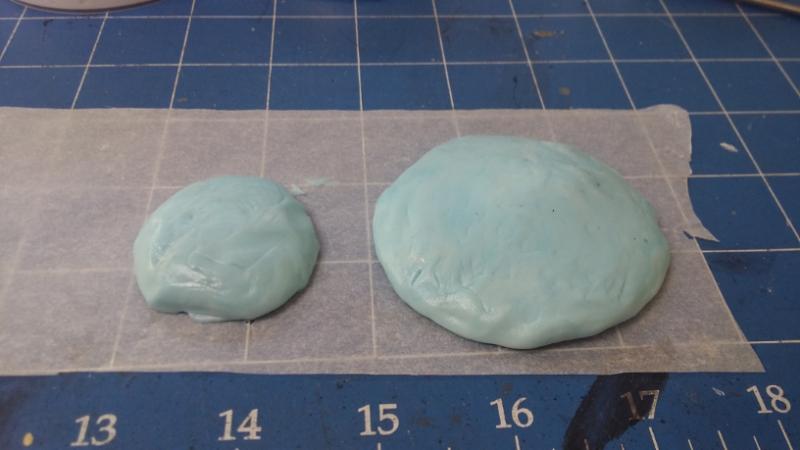
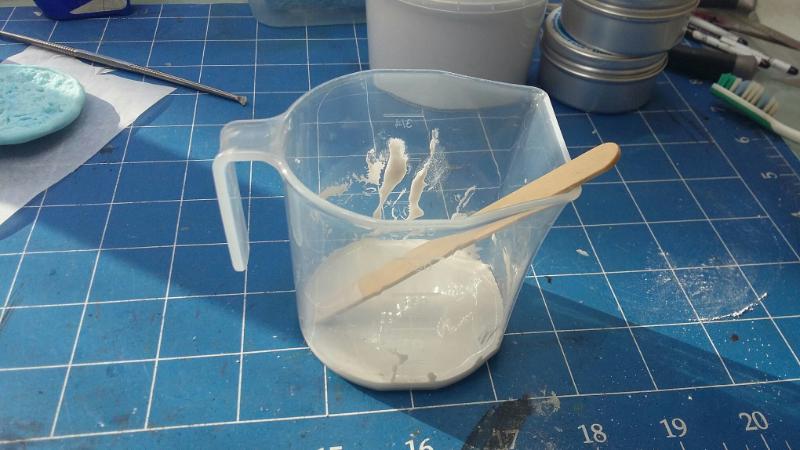
This stuff needs a 1:1 mix of both A and B parts. I found it easiest to scoop out with the spade end of one of my sculpting tools. A small spoon or butter knife would also work quite well. You should have what looks like to blobs of of chewed gum. In this photo you can see a portion that i've already mixed next to the new bits. Once mixed it should go a greyish-blue.
Seeing as this was a bit of an experiment for me, I decided to use more putty then I thought I'd need. That way i'd cover my bases and wouldn't end up having to use even more to do it all again because I hadn't used enough the first time. (turns out I could have stood to use a little more anyway)
Before and after mixing
You will notice, if you mixed the putty by hand, that your fingers/hand will have an almost oily residue left on them. Try not to touch anything if you can help it. I ended up getting it all over my phone because I was using it to take photos with.

An alcohol wipe took care of that mess though.

Now we need something to make a mould of. I've chosen these two resin base things.
The subject matter

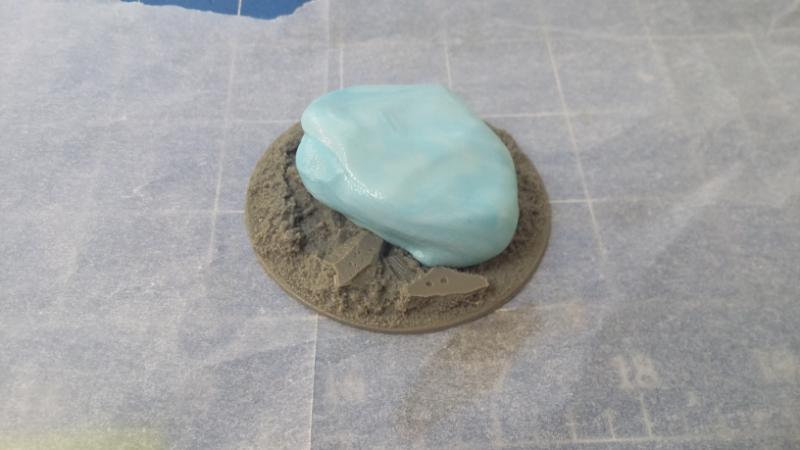
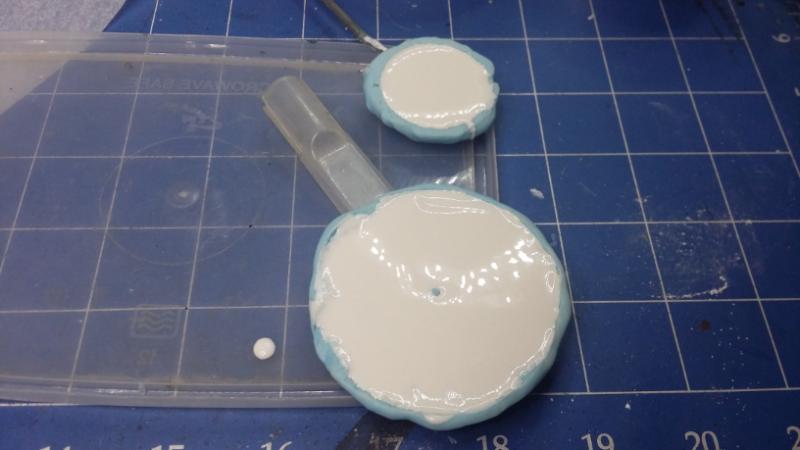
This next part is pretty simple. Just whack your putty blob on what you want to mould and work it all in. The putty is pretty malleable so it shouldn't take much effort to get it into all the cracks and crevices. Again, I found the spade end of a sculpting tool to be a big help here. Just use it to push down evenly. I also spread as much excess as I could over the edges to create help a bit of a lip. (it will come in handy later.)
Cover your subject matter
At this point you will need to determine whether you've used enough putty or not. If you have, fantastic. If not, then you have a little bit of time, although not much, to mix up more putty and correct any issues. But it does set quite quickly. It becomes unworkable within about 2 or 3 minutes and supposedly completely sets at the 10 minute mark.
I left mine for about half an hour though just to be on the safe side.
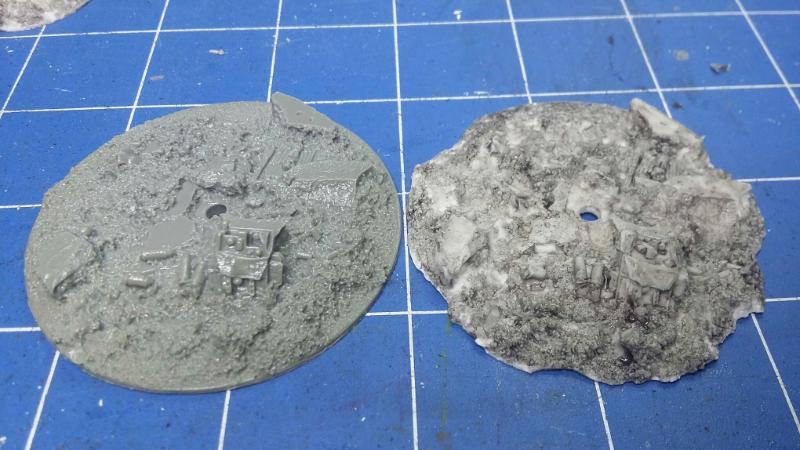
Here you can see both parts after they've set completely. They will take on a rubbery feel at this point. They will also look delightfully edible. Although I wouldn't.
 Subject matter completely covered
Now that they've fully set, they are ready for
de-moulding.
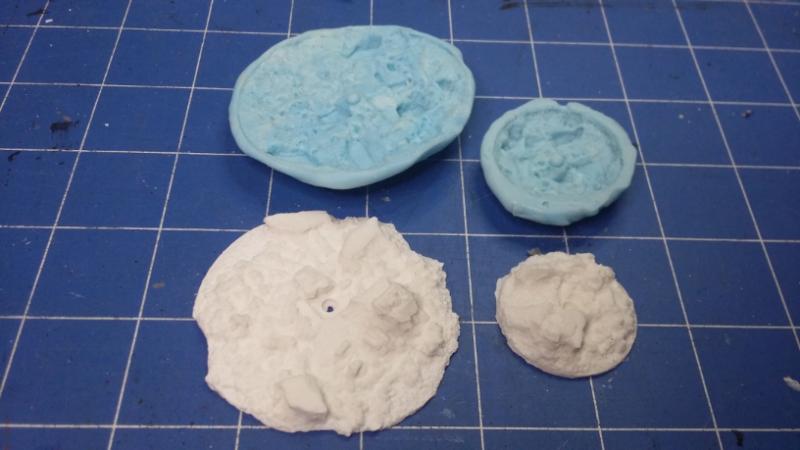
I just kept going around the edges working them off little by little so as not to damage or tear the moulds. I'm not sure how much abuse they can handle, but they seemed pretty strong. Although I'd image the thickness of the mould would play a part in that.
The final results
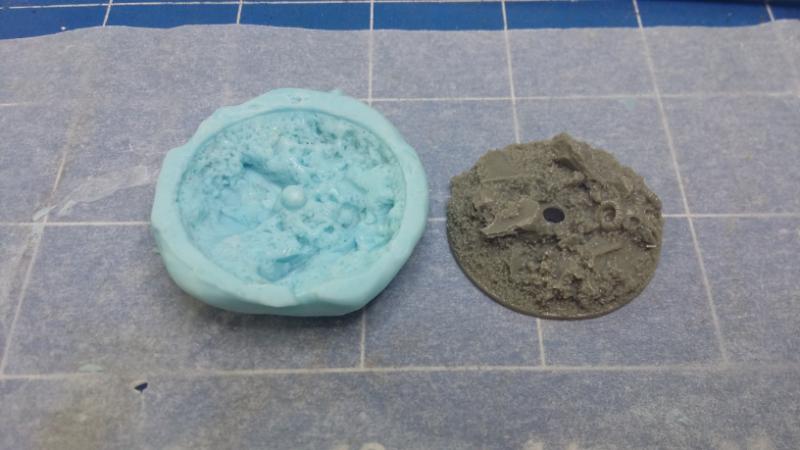
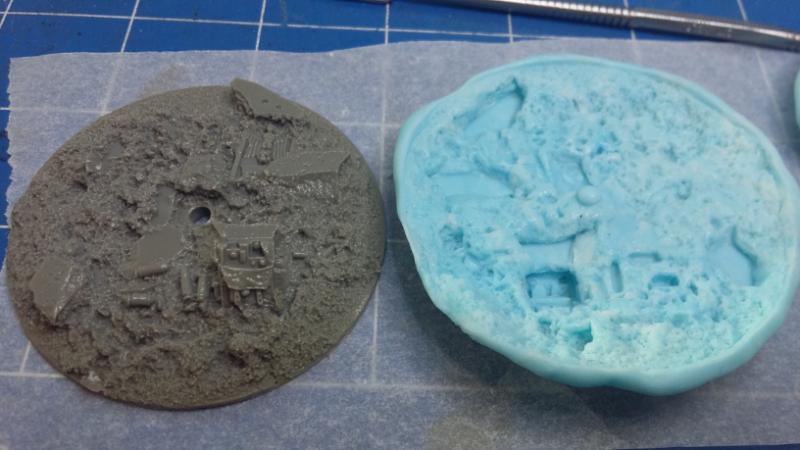
The detail retention looks just about perfect from what I can tell. No damage to either piece of the resin bases. I'd call that part a success!
So that concludes Phase 1. Onto...
Phase 2.- The Pour.
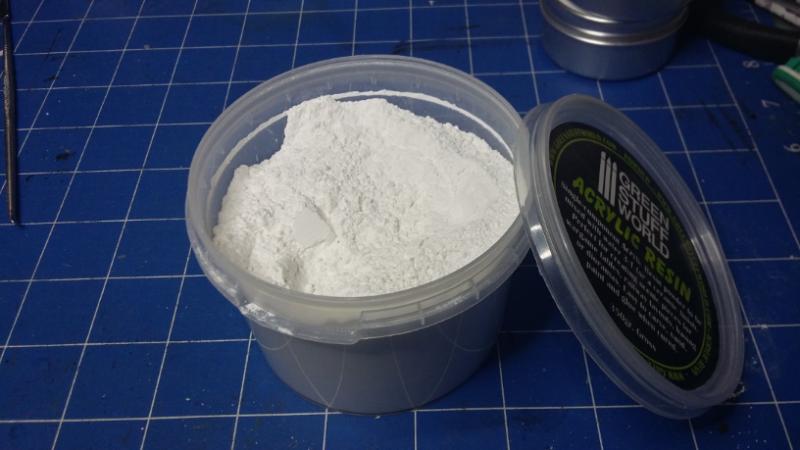
The acrylic resin comes as a tub of lovely, suspect looking white powder.
The resin
It's a basic 3:1 ratio of resin:water. I used 15ml (1 tablespoon) of resin powder to 5ml (1 teaspoon) of water and that was enough to cover both my bases (one is 60mm, the other 30mm) with a minuscule amount left over.
When I mixed mine up though it was a bit paste like and wasn't watery enough, so I added in a few more drops of water and it came out nice and runny. (
This video shows their resin being very runny,)
Liquid resin
With the resin ready to go, it's just the simple matter of pouring it into the mould. It's easy enough, but in my case, my moulds have convex bottoms, so they needed to be propped up so they didn't roll around.
Pour complete
This is where the lip I mentioned earlier comes into play. By pushing the resin down and around the rim of the base (not applicable in every instance, but it was with this) you create a lip that will stop the resin just leaking off the edges once it's poured.
With the resin poured and curing, we move onto...
Phase 3. - The Cast
The final step in the process is to demould your casts. Easy but ever so slightly nerver wracking for a first timer.
[I forgot to take a photo of the bases once set, but before demoulding. They take on a flat whiteish grey look and are hard to the touch.]
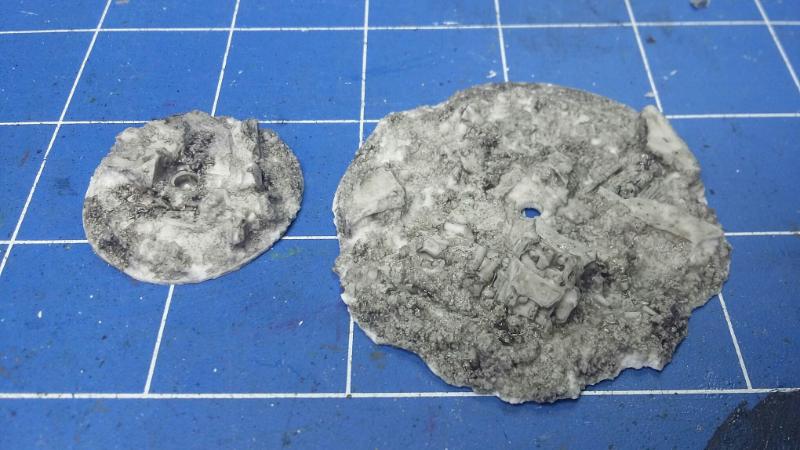
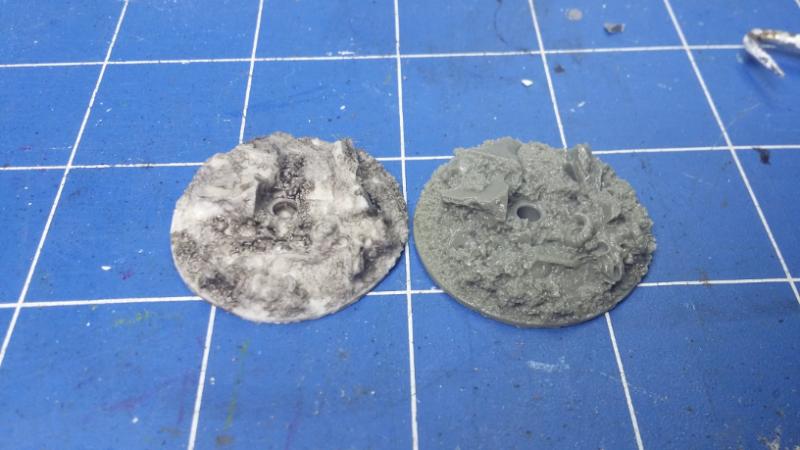
So here you can see the resin bases taken out of the moulds. They were a breeze to get out. No sticking to the mould or tearing, etc. Very easy system.
De-moulded pieces
And here they given a black wash so the details jump out a bit. Still not perfect, but it gives you a good idea of what they look like.
Washed with black
 Large comparison
 Small comparison
In conclusion.
I'll come back and write up a more detailed review of it later when I have time.
But in the mean time, the final products are very satisfying. The resin, once set, is quite tough and has a nice ceramic feel to it. The weight's not bad either and the detail retention is near perfect as far as I can see.
Thanks for taking the time to read through my post. I hope it was of some use.


