Switch Theme:

Roy Langa's Painting Blog (Formerly Cult of The Sky Father - A Genestealer Blog)  [RSS] Share on facebook Share on Twitter Submit to Reddit
»
Author Message
Advert


Forum adverts like this one are shown to any user who is not logged in. Join us by filling out a tiny 3 field form and you will get your own, free, dakka user account which gives a good range of benefits to you:
  • No adverts like this in the forums anymore.
  • Times and dates in your local timezone.
  • Full tracking of what you have read so you can skip to your first unread post, easily see what has changed since you last logged in, and easily see what is new at a glance.
  • Email notifications for threads you want to watch closely.
  • Being a part of the oldest wargaming community on the net.
If you are already a member then feel free to login now.


Made in gb
The Hammer of Witches


cornwall UK

Hooray! Good to see you painting

You should make one out of paper, I made my light box outa a bit of wire, tape and a4 paper. Then I just push a daylight bulb against it and click. Its very small and folds flat.

   
Made in us
Repentia Mistress


Awesome to see you back to painting. What scale is that FW mini? It looks massive.


Made in gb
Been Around the Block


Great Britain

Wow, looks like its easier than I thought to make a decent lightning set up, hopefully my pictures from now on won't be of potato quality.

The mini is just standard Forge World scale (28mm?). Most Forge World stuff just seems to be better / more realistically proportioned (based off my knowledge of the GW Cadians).

   
Made in gb
Been Around the Block


Great Britain

Okay, its a double bill (almost) for me in that my next update isn't 4+ months apart.

Whilst I was waiting for bits an pieces on the Enforcer to dry (and in-between painting my Blood Angels Captain) I worked on a truck for the Pulp gaming I get up to.

Here's some pictures with better lighting than usual (still need to invest in a better camera though).


Whilst I was taking the last picture, the bumper and lights fell off so I had to glue them back on, however the owners are most likely to be bootleggers who don't care too much if the bumper is straight (at least that's my excuse).

I'm not that used to painting vehicles so hope it didn't come across as looking too flat. Initially I wanted to have it as black, but couldn't get it to look right, so the base is Vallejo German Grey finished with satin varnish (with gloss used for the headlights and bottles). Also, I had to battle with the superglue frosting up when I was attaching everything, does anyone know of ways to stop this from happening? Fortunately I've noticed that a coat of varnish can hide it a bit.

I've got the rest of the bootleggers in a box somewhere needing a coat of varnish so once I dig them out and finish them, I might post another shot.

   
Made in gb
Been Around the Block


Great Britain

Ok, so I'm back to making some scenery, hopefully a little more structured than before.

All my previous scenery you might have seen has been donated to a friend (who hosts most of the games we play) leaving me into a situation where I can't hold any games myself. I would obviously like to change this, so have decided to set myself a rather ambitious goal of building a cityfight / cities of death board.

The plan is to design everything aligned to a grid system, so I can easily add in new roads, buildings and centrepieces, but also incidental decorations, such as sandbags, tank traps etc.

I'm still in the planning phase for it at the moment (thinking of aligning everything to either a 6" grid or all buildings to a 9" grid to give an allowance of 6" for roads meaning that every 2' should consist of two buildings and a road - basically I need to put my maths hat on).

So before I make a start on the 'meat' of the project, I've been working on a couple of pieces. The first is a simple test of a technique that I read online somewhere - creating dragon's teeth tank traps out of ice cube trays.

My initial experiment has been using filler (the sort of stuff you use to fill small holes and cracks in walls and can be easily found in pound shops).


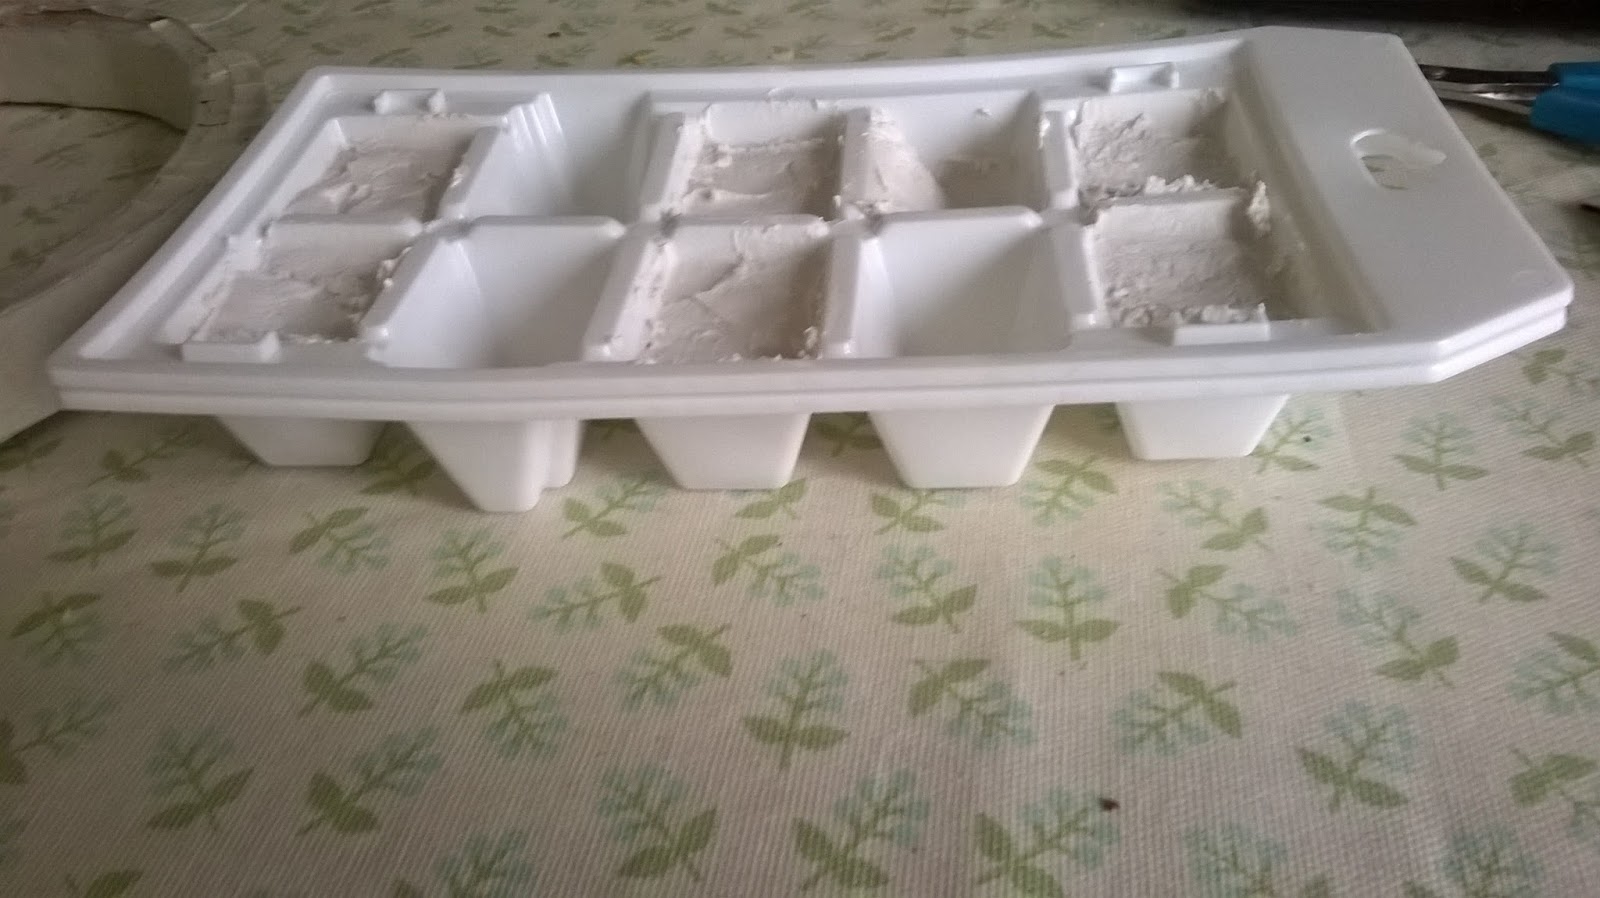
The method is cheap, but it seems to take forever for the filler to dry, so I've not been able to see any final results. I attempted removing some, one after a day, another after two days, but the filler still hadn't set, leaving me with pieces that I couldn't use for what I intended, though they could easily represent damaged teeth or rubble for elsewhere.


I'll leave the rest a few more days before removing them.

Another piece I'm working on is a centrepiece to try and make the board a little bit more than a few ruins and roads. These pieces are designed to be much bigger than the usual grid size (like 18"-24") and used to represent features such as town squares etc.

This piece is a fountain, inspired by this image I found (I believe from Stalingrad).


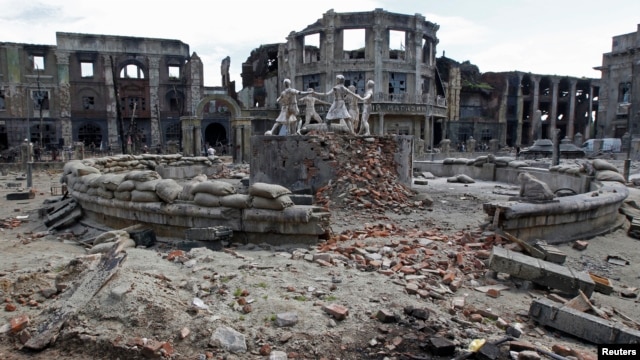
I'm not trying to replicate it outright, but its being used for some inspiration, and here's some WIP shots:


The first step was to cut two rings out of corrugated cardboard (as I had plenty of it lying about) and attaching strips of thin card to the sides to create the basic structure. The gap was unintentional (due to my bad measuring skills, but I plan of knocking holes in it etc, so its not all bad.


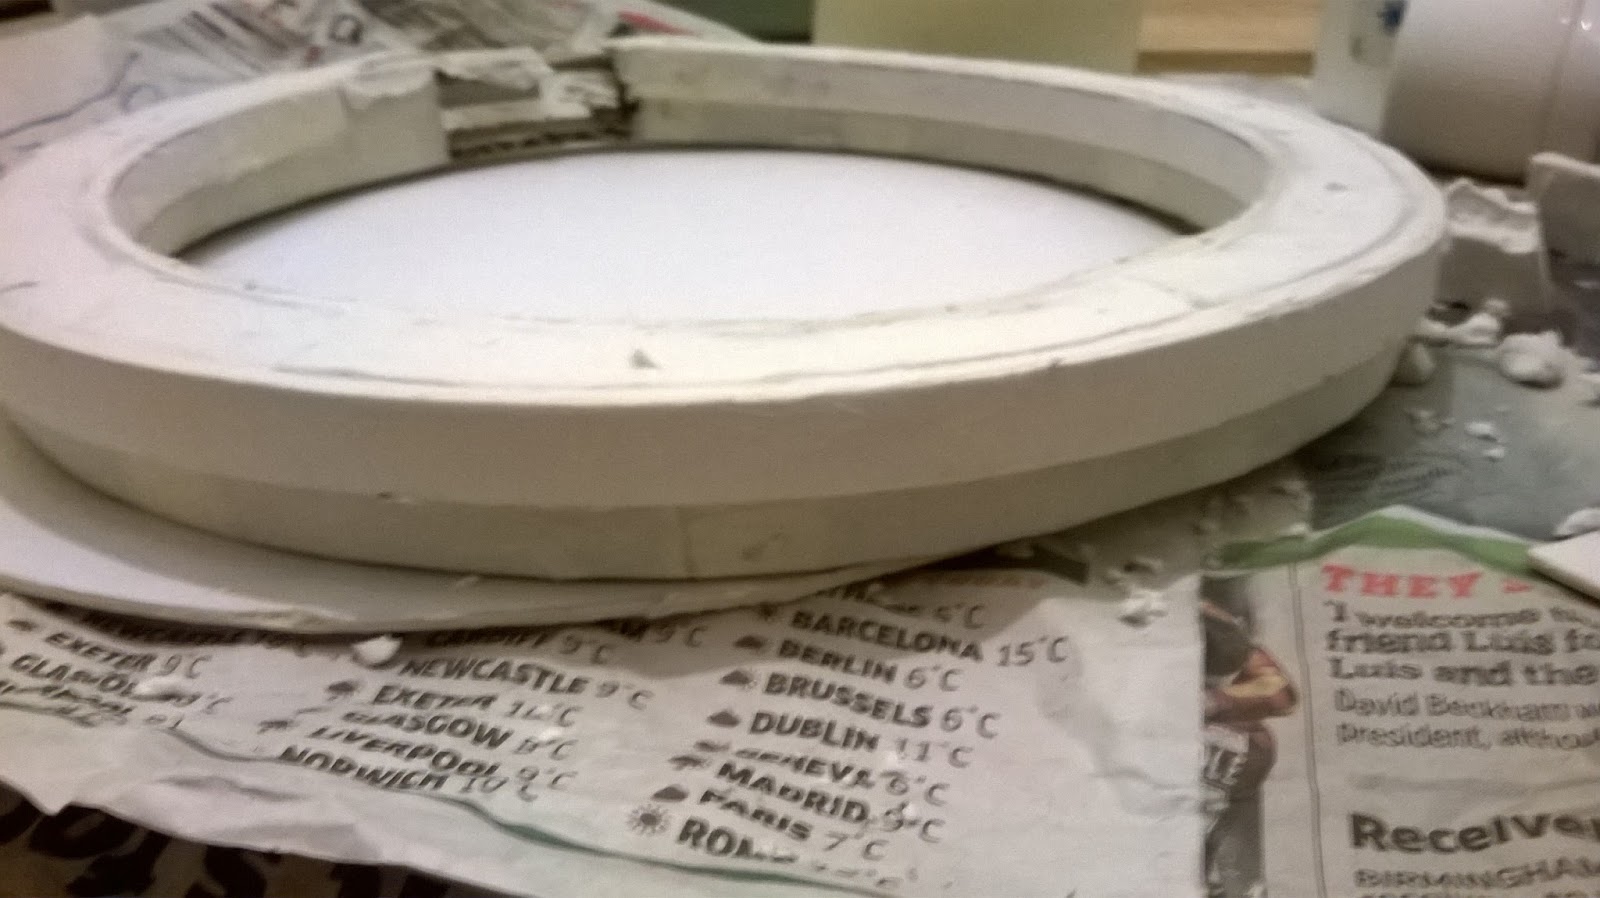
The next step was to get some thicker card (I used mountboard) and create a lip (if that's the correct word) to the wall, to give it a bit more of an interesting shape. I used two strips on the inside and outside. Once the glue had set, it had the bonus of giving the fountain a little more structure.


The last step I've done so far is to apply filler to the top, to create a bit more strength but also, when sanded, should provide me with a bit more of a level surface to top off.

I've cut out some more mountboard to place the fountain on, to raise it up a little from the base it will sit on, and its going to be topped with two sheets of foamcore stuck together and bevelled off.

Its still a way from completion, but I think its coming along alright.

   
Made in gb
Been Around the Block


Great Britain

So the tank traps didn't work. The filler didn't set properly, cracked and seemed really brittle. The next step is to attempt it using air drying clay or plaster.

The fountain is coming along nicely:


The top was made from two sheets of foamcore stuck together, cut to shape, bevelled and sanded (which makes a LOT of mess).


I then used a ballpoint pen to create the grooves between the topping slabs and some minor details such as bullet holes. I also filled in some of the gaps with filler.


The fountain was then stuck to the first part of its base (to raise it up a little from the base it will eventually sit on), more damage was applied with a knife and more filler was applied, also to the top to emphasise the damage and give them a bit more of a texture.


The hole was filled with a little more filler to represent damaged masonry / cement and topped with some rubble, created from the parts I'd cut off whilst making the damage.

The next step is to create the centrepiece, probably from a cut down Pringles tube, though I'm unsure what to use for the statues...

Additionally, I started work on a plasma generator to provide power to the surrounding buildings.


The main structure is made from an old cheesecake carton that I extended with some thick card. The plasma coils have been made from stripped back corrugated cardboard.


Forum Index » Dakka P&M Blogs
Go to: