Forum adverts like this one are shown to any user who is not logged in. Join us by filling out a tiny 3 field form and you will get your own, free, dakka user account which gives a good range of benefits to you:
No adverts like this in the forums anymore.
Times and dates in your local timezone.
Full tracking of what you have read so you can skip to your first unread post, easily see what has changed since you last logged in, and easily see what is new at a glance.
Email notifications for threads you want to watch closely.
Being a part of the oldest wargaming community on the net.
If you are already a member then feel free to login now.
This match is the Farsight Bomb Tau (now at 2000) vs some Nids. The army I am taking to my next tournament will be one of these two, but I'm not sure which one. I also hope my images are better this time around. Anyway, on to the lists!
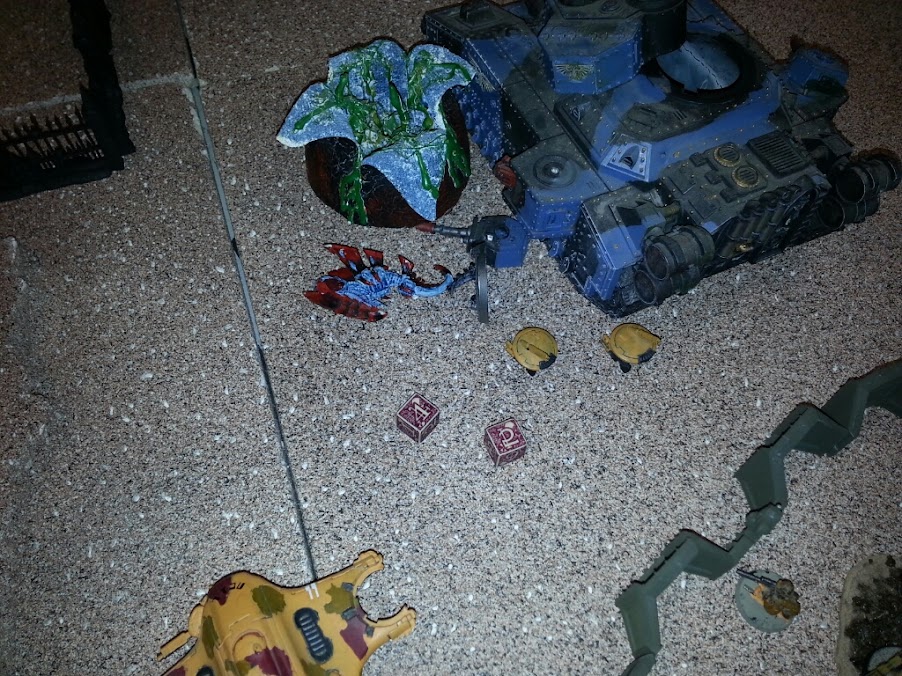
Hammerhead Gunship w/ Ion Cannon, Blacksun filter, Disruption Pod Hammerhead Gunship w/ Ion Cannon, Blacksun filter, Disruption Pod
Aegis Line w/ Comms Relay
(In this match, Shadowsun is a cleverly disguised Imperial Fists Terminator. Also, my Riptides are being converted from Gundam Astrays which is still in progress)
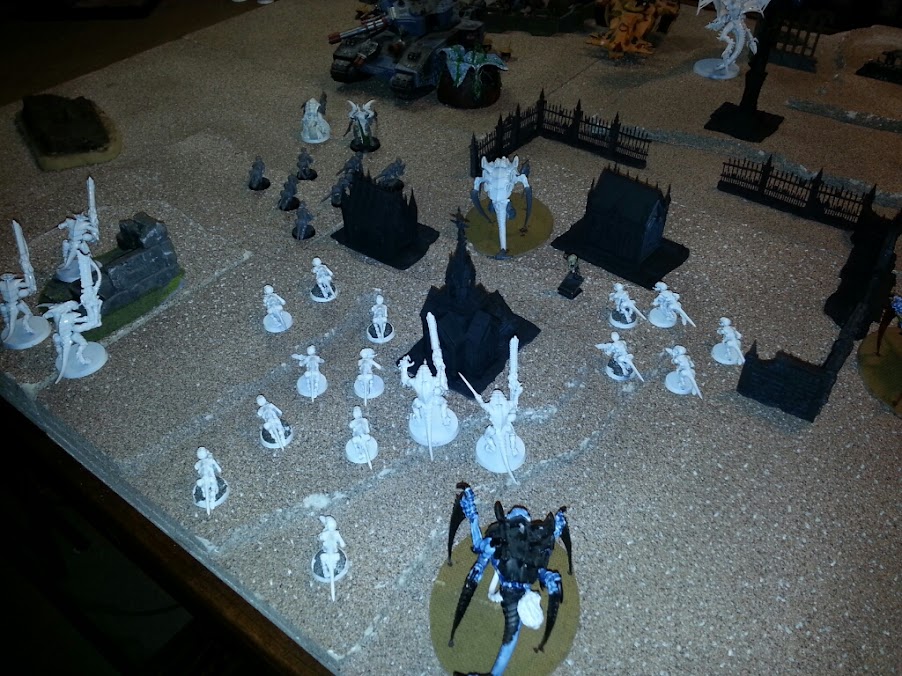
Nids - 2000
Flyrant w/ 2 Twin-Linked Brainleech Worms (big wings)(warlord = -1 to opponent's reserves, Powers = Endurance, Life Leech) Flyrant w/ 2 Twin-Linked Brainleech Worms (little wings)(Powers = Iron Arm, Life Leech)
2x Hive Guard 2x Hive Guard Doom in Spod (Power = Psychic Shriek)
3x Biovores 2x Biovores (Designer's Note: I really don't like the biovore models, so mine are converted from Warriors. Tervigons are also conversions from Carnifex)
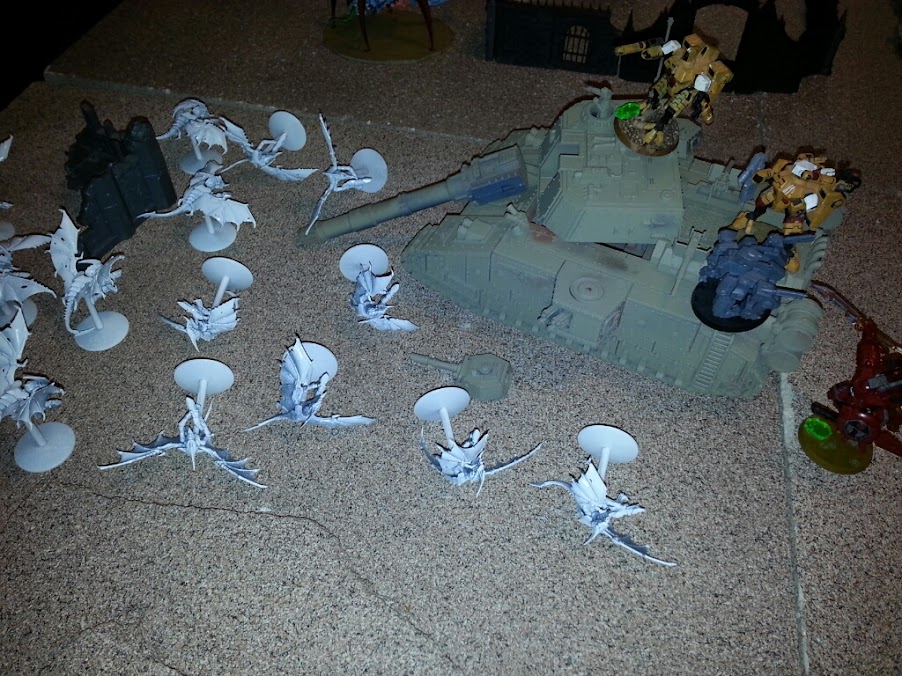
Flyrant swoops up to put some hurt on the all alone pathfinders. (Note: Flyrants would alway cast Endurace/Iron arm successfully)
Stuff shuffles. Tervigons are Enduranced
Other flyrant swoops up side to try and strip down the hammerhead's side armor.
Shoots strips off 2 hull points... so close
Flyrant kills two pathfinders. They would go to ground and hold.
Biovores combine to kill four pathfinders from one squad and two from the other. They both are pinned and would both hold.
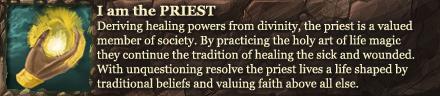
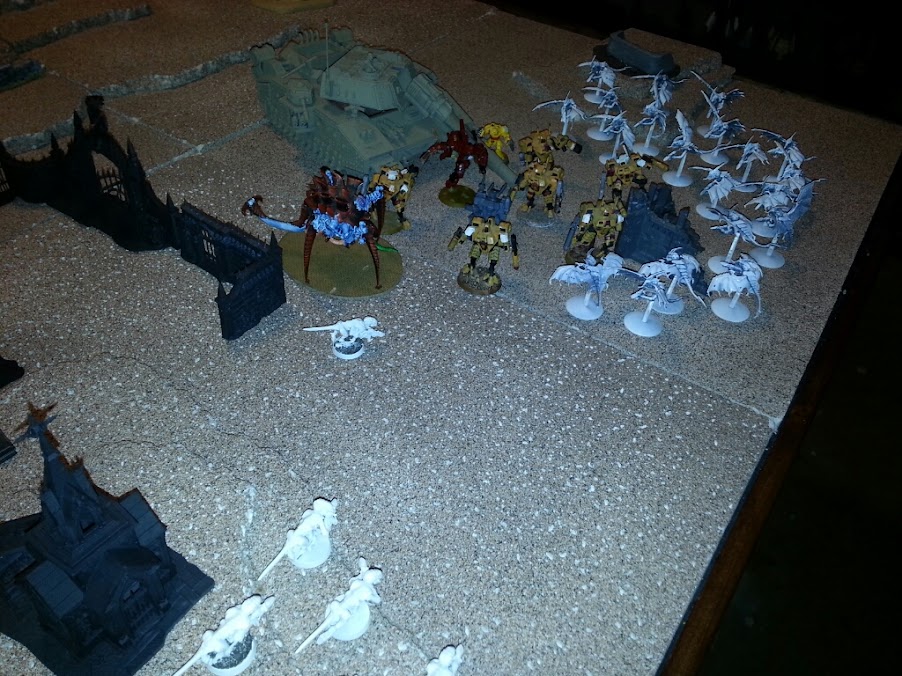
Tau Turn 1
Spoiler:
Overview of Tau turn 2
Riptides and Hammerhead move to destroy the flyrant bearing down on them. Riptides would both Nova to fire their Fusion blaster twice.
Hammerhead shuffles and frees drones (as did the other one).
With very little markerlight support, Drones, Riptide, and Hammerhead fell the Tyrant for First Blood
The other hammerhead would kill one Hive Guard, and the drones killed the other (hiting and wounding on 5's)
After jump moves, trying to lure Doom into "safe" drop zone. Think he'll take the bait?
Nids Turn 2
Spoiler:
Overview of Nids turn 2. Only the Doom comes in to play.
In anticipation of Farsight this turn, Tervigons make babies. This gives 5 and craps out.
The other two make 9 and 7 respectively
Doom does not take the bait and comes in to right at 1" away from my drones. This is sneaky, as it keeps me from using my S8 blast to intercept from riptides. Flyrant also swoops over for some lovely side armor on the Hammerhead
This is the to wound roll from the first intercepting riptide's fusion blaster... craps
The second however, wounds twice and here are the invul saves from doom. Pop goes the Mylanta with ever doing anything.
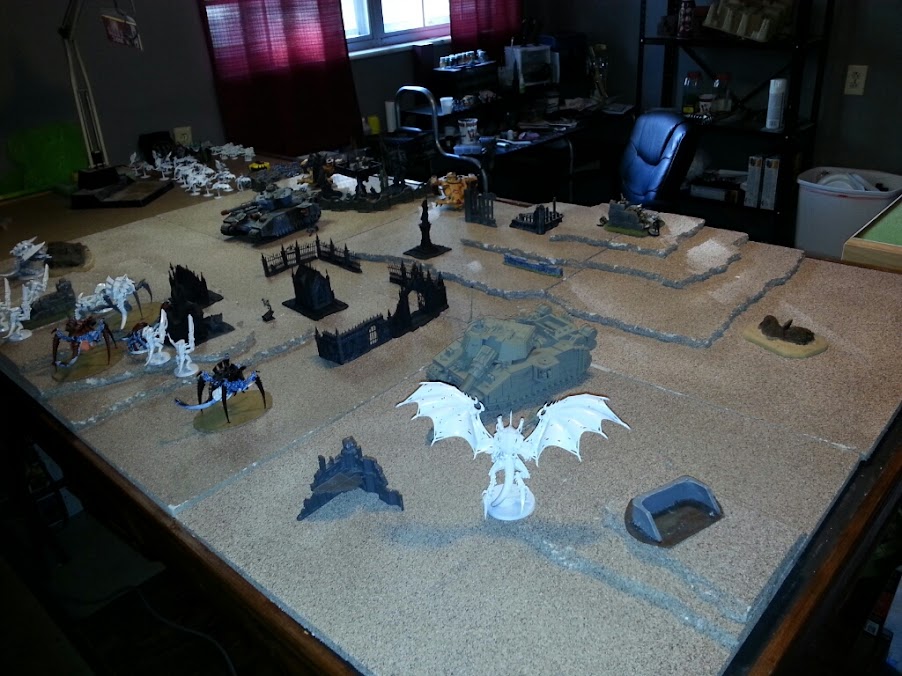
Backfield shuffles a bit. Nids are trying to make is so that no matter where Farsight comes in, he will get pounced on by gants the next turn.
Spod whips down the drones while the flyrant strips off one hull point thanks to cover saves.
First biovore shots kill off the last of the pathfinders while...
...the second kills off two of the other squad. They would pin, then hold Hive guard are out of range this turn.
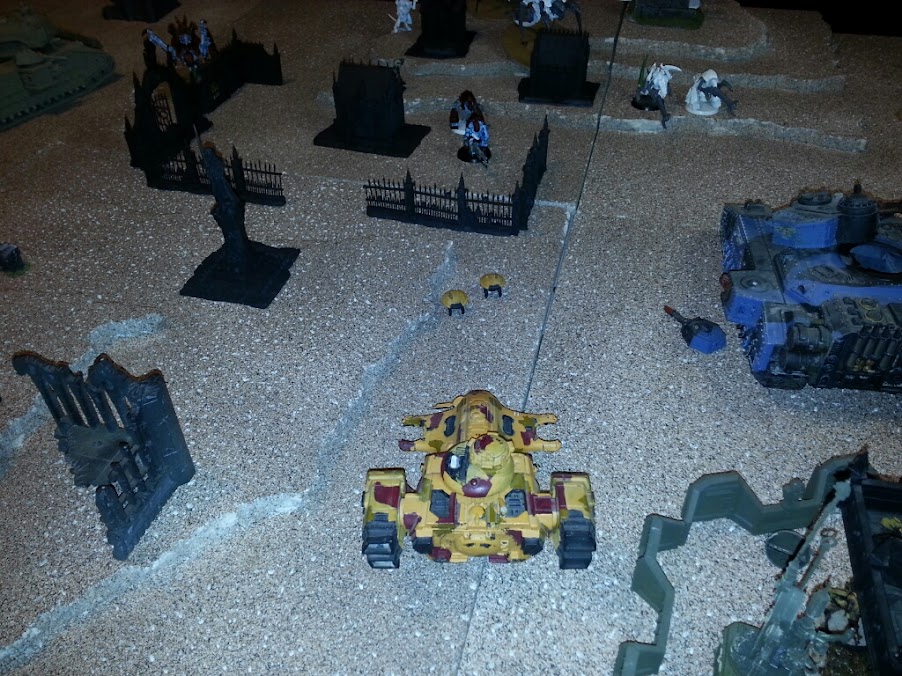
Tau Turn 2
Spoiler:
Overview of Tau turn 2
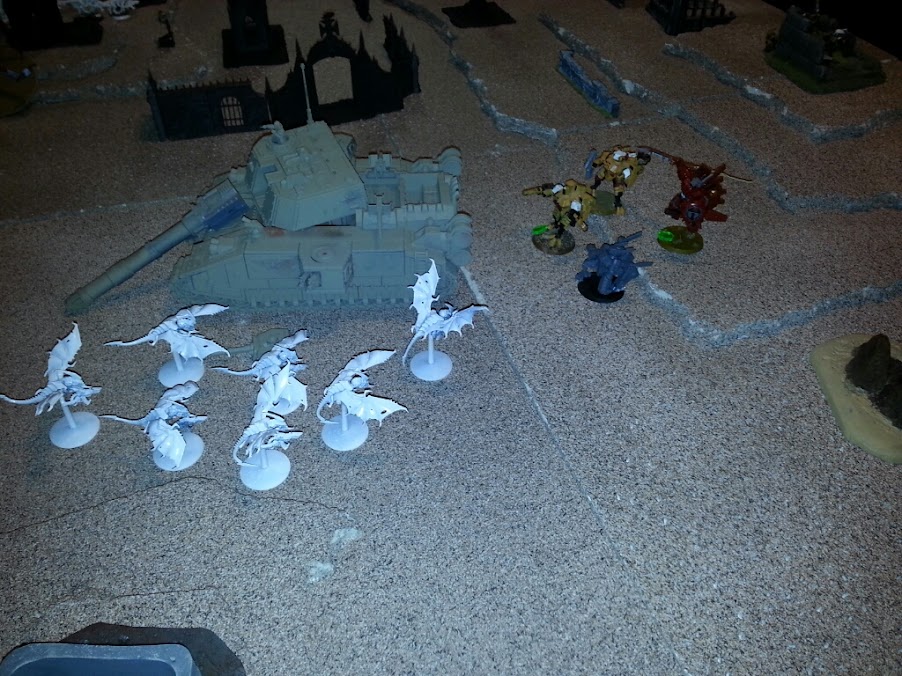
Farsight (black dice) and 6 man squad (little red) would come in to play. Tau acually rerolled to keep firewarriors off of the table.
The bomb cometh
Firewarriors would come on hoping to help with the Flyrant
Riptide would try to nova for firing it's fusion blaster twice and fail, this was the last nova attempt. In hindsight, this was really dumb, as the Riptide couldn't fire the blaster this turn anyway...
Stuff moves...
It takes the combined power of a the firewarriors (who grounded it) a riptide (who missed) and both hammerheads to take down the flyrant, earning Slay the Warlord
Other Riptide trys to blast the Biovores but misses.
Farsight bomb puts 5 wounds on the Tervigon, kills four termagants, and the two man biovore squad.
Nids Turn 3
Spoiler:
Overview of Nids Turn 3. Only the Gargoyels would come in to play. Was really wanting the gants too.
Oh Hai! We are the gargoyles about to rape your bums yes?
In classic fasion, the Tervigon with 5 wounds was also the one with enfeeble. It would perils and die... but Farsight got enfeebled!
The resulting explosion(thing) would only kill two gants.
Bugs push forward. Tervigon there would warp speed for +2
Makes me think of the battle of Little Big Horn...
Gants would put and wound on a suit
Gargoyels would take out another suit. Note: They rolled saves like champs.
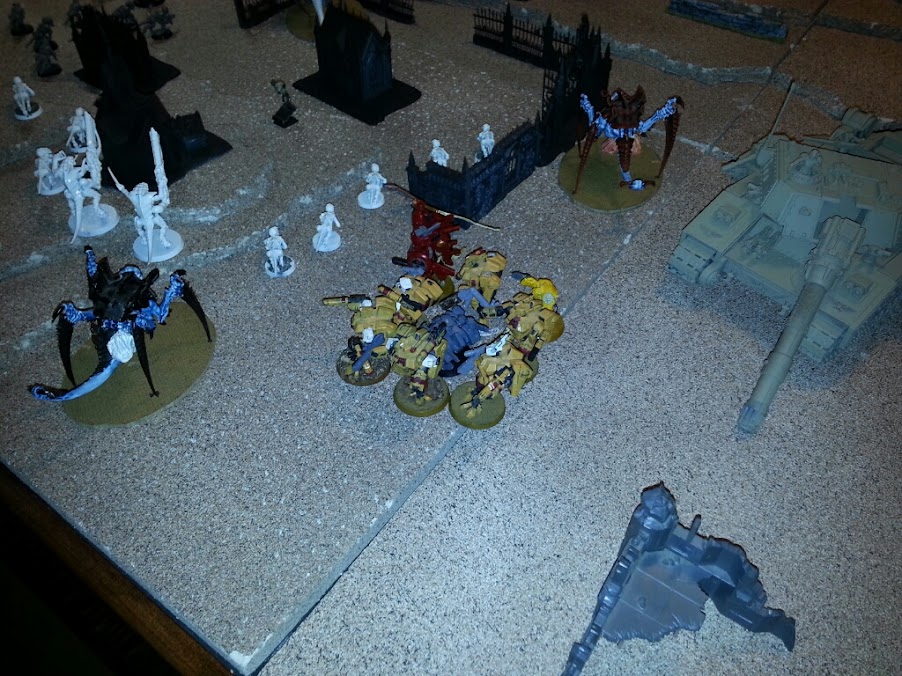
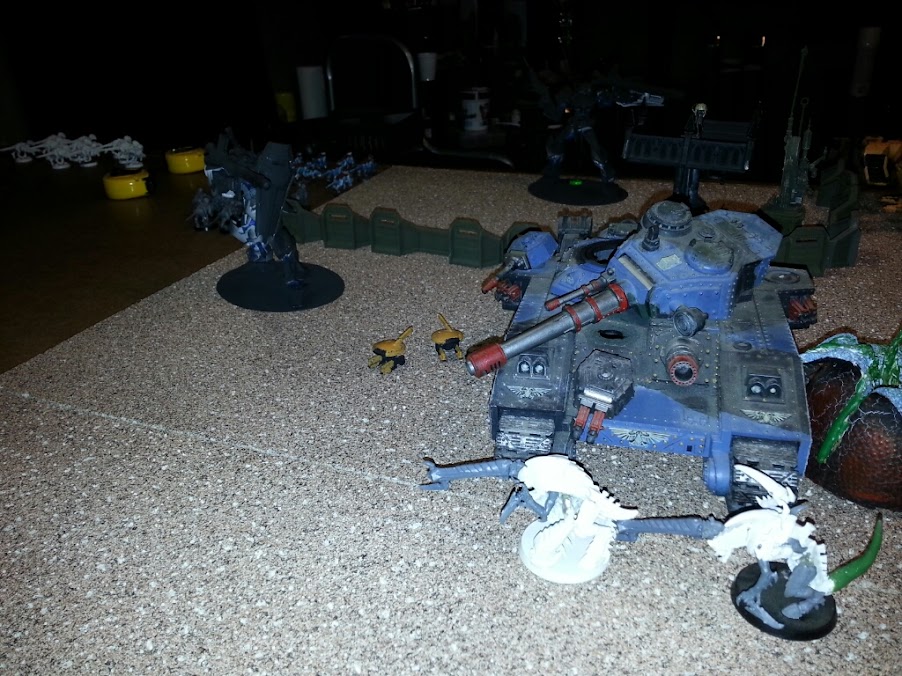
Hive guard would blow the hammerhead sky high!
This is why Tau wanted the firewarriors to stay off the field. Biovores would fire at the firewarriors...Aaaaand they're gone!
Lone gant would declare charge (Note: I kinda hate the whole, get one chance at overwatch so declare little units first thing) and would be baked alive by the flamer.
Gargoyles and Tervigon would charge. Tervigon would issue a challange and Shadowsun would accept. Slight mistake here, due to the way the gargoyles were deployed, they had to move through those ruins, causing them to go last!
Shadowsun stikes first, does nothing, gets popped (T3 from enfeeble)
The rest of the squad would only down five gargoyles
Gargoyles in return would down three suits and put a wound on Farsight.
Farsight breaks and manages to not get swept (with a 6)
Tau Turn 3
Spoiler:
Overview of Tau turn 3. Thanks to rerolls (still have one pathfinder next to comms array) nothing comes in.
Stuff moves around... nothing really to say
Farsight regroups and moves a bit. No dangrous wounds from debris
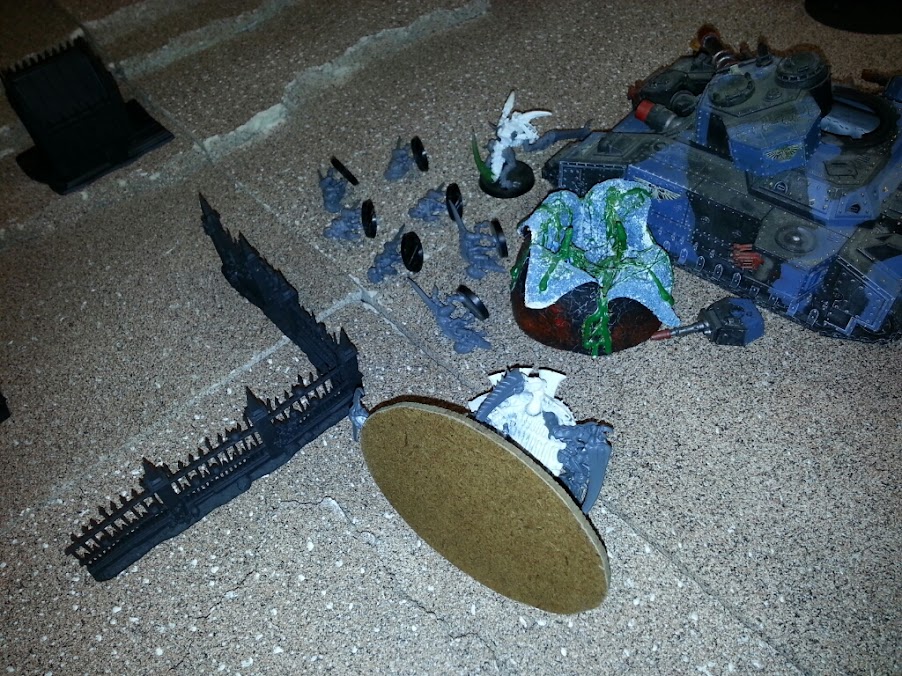
Free drones down another hive guard! (different squad but still)
Lonesome pathfinder squad marks up the Tervigon and the hammerhead and riptide combine to end it's life. The ensuing explosion(thing) takes out the entire gant squad next to it.
Other riptide downs the last hiveguard
Farsight and company but down eight more gargoyles, then jump away.
Nids Turn 4
Spoiler:
Overview of Nid Turn 4. All the gribblies come in to play.
Here comes the calvary... or just some gants...
Gargoyles move up to try and have another go at Farsight
Biovores would miss Farsight bad...
...BUT would kill off two of the pathfinders causing the last one to run off the board.
Upon trying to assault, the gargoyles would lose two members, then fail the assault with a 4
Tau Turn 4
Spoiler:
Overview of Tau turn 4. Incomming Firewarriors
Farsight go in for the kill
Firewarriors move on ready to reinforce
Riptide and drones move up to take out some biovores/gants and to set up for Linebreaker
Without a better target, firewarriors drop the spod
Riptides combine to kill off two biovores and three gants. They would both hold
Drones kill another gant
Farsight manages to kill the last of the gargoyles
Nids Turn 5
Spoiler:
Overview of Nids Turn 5. It would not be nightfight. Not much left
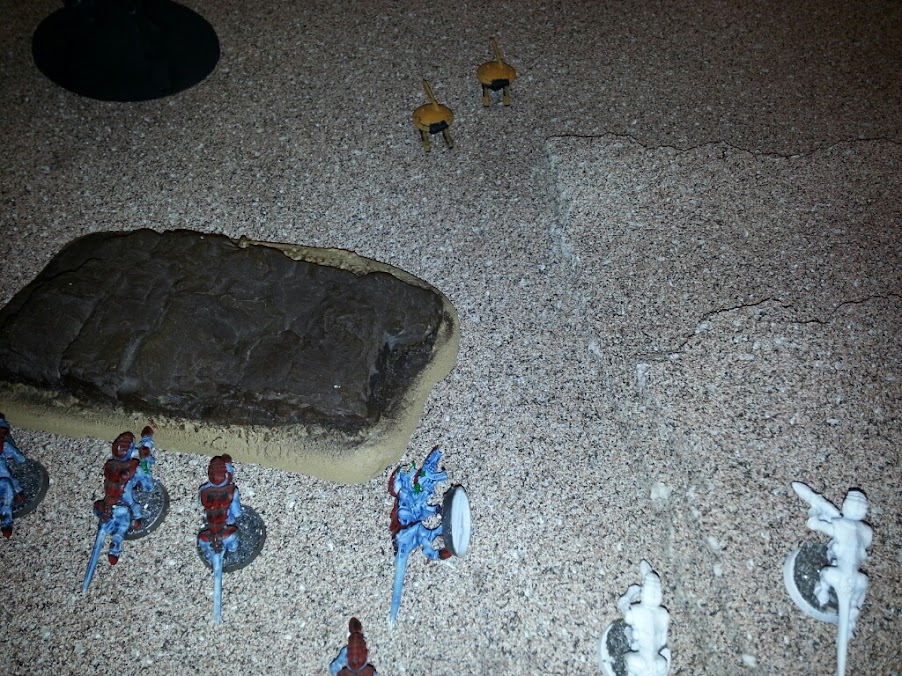
Gants would instinctive behavior up to the rock, and then take out the drones.
Tau Turn 5
Spoiler:
Tau would combine fire to down the last Tervigon. with all synapses gone, Nids would forfiet.
This game was very back and forth. I thought that when the gargoyels and Tervigon hit the enfebled Farsight, it was all over for them. The range and devistation of the Riptides cannot be overstated. I'm seriously thinking about dropping one of the hammerheads for a 3rd riptide. I just don't want one tank sitting by it's lonesome. One of the major reasons I take fusion blasters on my Riptides is for doom, and dropping dreads.
The nids kinda got screwed over on the psychic powers. Not every models needs life leech... more Iron arm would be nice! It felt like as soon as the nids would push toward the Tau side, they would get focused on and killed. Worked well for the Tau, not so much for the Nids.
This message was edited 1 time. Last update was at 2013/05/09 12:32:01
"Now the general who wins a battle makes many calculations in his temple before the battle is fought.
The general who loses a battle makes but few calculations beforehand." - Sun Tzu
I couldn't really tell where the objectives were but I wonder if your opponent had been more aggressive with his tervigons and pushed for your firebase he may have given himself more of a chance?
What is the mathhammer on a coma relay ensuring turn 2 bomb? 66%?
I'd sure miss 1-2 turns of shooting from that unit
How did you break and run? You didn't use pure tide for stubborn?
You need gun drones for horde slaying! And abalative wounds.
I've really thought about not mixing the suits, but here is my reasoning for mixing (two fold). First, it's a hold over for when it was unclear if you could take multiple single weapon choices that I never changed. Second, I want to be able to split my fire against infantry more effectively. It's kinda of a "jack of all trades" scenario.
The comms relay gives me a 89% chance for a turn two bomb. (Probability of .11 of failure). If I did the math wrong hopefully someone will correct me.
I complete forgot that Purtide can give me stubborn! Wouldn't have mattered as Farsight rolled an 11 for Ld.
I'm trying to keep the cost of the bomb low, that's why I haven't taken any drones. This is the first game that I've played where there was even a single casuality to the squad, so we shall see in future games how the squad evolves.
I couldn't really tell where the objectives were...
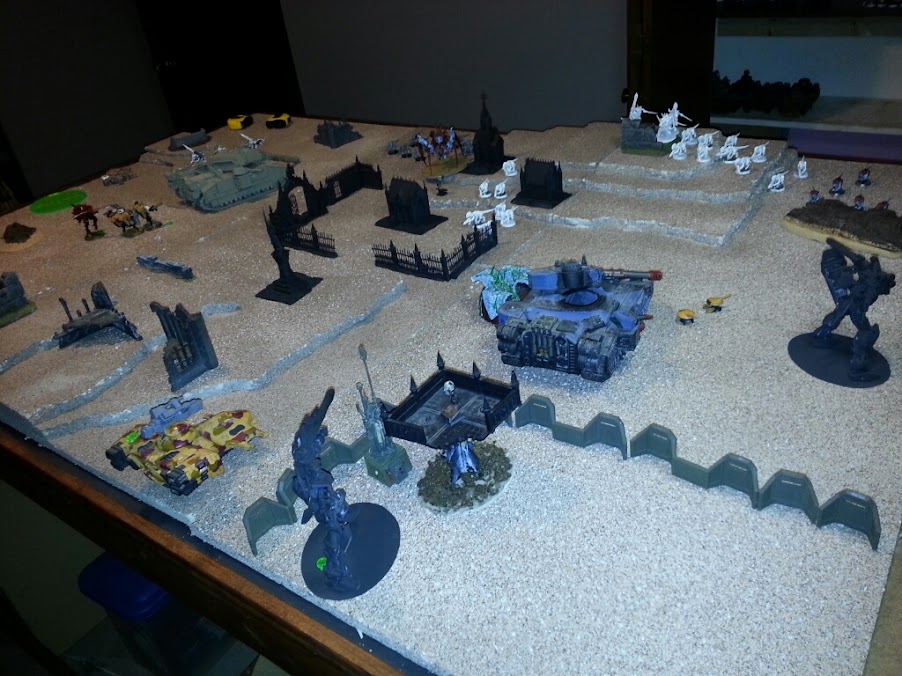
Good point, I'll fix that in the report. Short version: Tau's was on the platform and Nid's was in the middle of the graveyard.
"Now the general who wins a battle makes many calculations in his temple before the battle is fought.
The general who loses a battle makes but few calculations beforehand." - Sun Tzu
Really enjoyed this one. It was bloody and pretty back and forth as you said. Additionally I didn't notice any major tactical errors and both players seemed to have a solid plan.
I really like the idea of using the comms relay to keep the FW safe from the raining death of the biovores! I've actually been thinking about throwing a comms relay on my bastion since the new tau codex has a ton of skyfire and intercept options anyway. Granted its not really a reason to take the upgrade on its own but if you're already taking one for your deathstar strike this is a nice second perk.
Side Note: Shadowsun has base T3 without enfeeble. Meaning she had T2 at the time of her death.
Also, the farsight bomb in my opinion and from my experience is much better as a shadowsight wave. Drop the aegis and the 6 man firewarrior squad and give the wave gun drones. Having that squad on the table turn 1 is huge. And you can still get them close to the target you want with infiltrate and they become even faster with shadowsuns 3d6 jump move
This message was edited 1 time. Last update was at 2013/05/09 13:28:38
7000pts
(In Progress)
"I don't need to hold a single objective to win any of the missions" -FlingitNow
@AJSnips44: It's been discussed before in other threads, the shadowsun/farsight bomb can't infiltrate -- infiltrators deploy at a different time (read: last) than ordinary units, so she cannot join during deployment unless they deploy normally or are held in reserve.
@Thread: Maybe i was wrong, but did the gargoyles assault into the farsight bomb the same turn they came in from reserves? That is a big no-no, and while Tau still won that could have shifted the game unfairly.
The nid player did make some mistakes but overall i think this report just shows how well tau shooting can be, especially when units support one another and focus-fire on individual targets, bringing them down one by one. A hive tyrant with 1 wound on it will still wreck vehicles and infantry in CC, a dead one will not.
Tau'va!
This message was edited 1 time. Last update was at 2013/05/09 13:45:49
Been out of the game for awhile, trying to find time to get back into it.
Maybe i was wrong, but did the gargoyles assault into the farsight bomb the same turn they came in from reserves? That is a big no-no, and while Tau still won that could have shifted the game unfairly. .
No your completely right. That was a big rules drop on both our parts! Wow, remembering that would have changed the way Nids played the game entirely from deployment on. May have to do a rematch on this one. Thanks for pointing that out.
"Now the general who wins a battle makes many calculations in his temple before the battle is fought.
The general who loses a battle makes but few calculations beforehand." - Sun Tzu
tetrisphreak wrote: @Thread: Maybe i was wrong, but did the gargoyles assault into the farsight bomb the same turn they came in from reserves? That is a big no-no, and while Tau still won that could have shifted the game unfairly.
You are not wrong, this is in fact the case.
"We are all connected. To the Earth, Chemically. To each other, Biologically. And to the rest of the Universe, Atomically."
Flyrant
Flyrant
Doom in pod
3 zoanthropes
Deathleaper
Tervigon
Tervigon
gaunts
gaunts
BL w/toxin stealers (scything talons on the BL)
25 Gargoyles with all the upgrades
When you're given the opportunity to deploy second, you should place yourself in position to be all over your opponent turn 2. If you put your gargoyles in reserve and deploy all over the table, you will not be able to pressure your opponent. Imagine if one turn 1 you were looking at charges from his gargoyle brood and his Flyrants. The doom is going to come on any second and you haven't even started thinking about the tervigons.
Doom placement is key in 6th. If something with interceptor is within range, try to deploy out of LoS from those models. This might not have been possible on this table (hard to tell what's going on at times) but that wrecked baneblade would have been a good choice to hide behind.
Does your buddy put upgrades on the gargoyles? It's worth it to lose 5 gargoyles to give them all toxin sacs and adrenal glands.
Tau target priority should go to the marker lights. Without them, they're just BS 3 and without TL you've already nullified half of their firepower. Vehicles are for assaulting with Tyranids, don't worry about shooting them unless you're trying to sneak first blood from a mech list.
Speaking to your Riuptides ... a heavy burst cannon Riptide with skyfire/interceptor is generally better against flyers. Have you tried that config at all
"Now the general who wins a battle makes many calculations in his temple before the battle is fought.
The general who loses a battle makes but few calculations beforehand." - Sun Tzu
But you like to load up your bomb to 1000 points, lol. Certainly it is a preference ... i use one ion one hbc ... hbc has better odds against flyers by far
Tough loss for the bugs. Doesn't seem like the tyranid player is as experienced as the Tau player. Bugs work much better when they deploy most of their stuff on the table (i.e. gargoyles). You want to give your opponent as many "targets" as possible to make his target prioritization as difficult as possible.
Also, I'd probably go with both flyrants on the same flank (just space them out so that the blast can't hit both....and keep them out of Markerlight range if possible). Yeah, Tau would probably take down the Warlord, but at least it would most likely guarantee that one will make it in to kill off a riptide.
I personally have not fought against Tau yet with my bugs (been all daemons recently). I just may have to try them out against our local Tau player (with 3 Riptides!).
This message was edited 2 times. Last update was at 2013/05/12 17:30:31
"Now the general who wins a battle makes many calculations in his temple before the battle is fought.
The general who loses a battle makes but few calculations beforehand." - Sun Tzu
I think Daemons pose a real problem for Tau, especially with 4 or 5 FMC. Tau can only shoot so much before it gets to them.
I'd really love to see Nids vs Tau from jy2s perspective. Most of what I've seen has been either a Tau victory or a bad list by Tau. Now by mathhammer I honestly think Nids can beat Tau (although its tough) but I'd love to see a great Nids player like jy2 take it on, I'm sadly out of gaming for the next month.
One thing I think you really need to do with this list is bubble wrap the farsight bomb with kroot. If you bubble wrap the bomb, it gets a +2 cover save from being in the kroot and can't be assaulted. you can infiltrate the kroot so they will be close enough on turn 2 for your farsight bomb to hide behind when they deep strike. If you go with shadowsun as commander, you can infiltrate the kroot farther up the board and then jsj the bomb into the kroot on the first turn.
The key to strategy is not to choose a path to victory, but to choose so that all paths lead to a victory.
War is beautiful because it establishes man’s dominion over the subjugated machinery by means of gas masks, terrifying megaphones, flame throwers, and small tanks. War is beautiful because it initiates the dreamt-of metalization of the human body. War is beautiful because it enriches a flowering meadow with the fiery orchids of machine guns. War is beautiful because it combines the gunfire, the cannonades, the cease-fire, the scents, and the stench of putrefaction into a symphony.
-Filippo Tommaso Marinetti
A neat little trick i learned with MR doomy, as im an aggressive bastard , If you just go ahead and stick that pod 1 inch away from an enemy unit GUESS WHO CANNOT PLACE A BLAST MARKER ON THEIR ON UNITS?
So effectively,imo, you can place the pod in a spot where you cannot be ID forcing your oppenent to either shoot a missle system at the doom, yes please dont shoot my tyrants next turn thanks, or the doom goes BOOM.
And even if the pod scatters then you just take the defensive stance and use the pod to block los.
Automatically Appended Next Post: also ive gotten a few matchups vs tau in the last few weeks
and ive learned item number 1 BIOVORES EAT COVER SAVE UNIT ASAP!
This message was edited 1 time. Last update was at 2013/05/19 05:54:52
Thanks for the time to post your battle and pictures. It is always fun to see tyranids, even when they loose, and getting a look at the Tau (which no one in my group plays).


 = 3500
  = 3500
  = 4000
  = 2500
  = 1000
  = 500
= 500  = 3000
  = 2000
  = 1000
  = 2500
  = 1500
 My Eldar exodite Dakka Blog

 7000pts
 (In Progress)