| Author |
Message |
 |
|
|
|
|
Advert
|
Forum adverts like this one are shown to any user who is not logged in. Join us by filling out a tiny 3 field form and you will get your own, free, dakka user account which gives a good range of benefits to you:
- No adverts like this in the forums anymore.
- Times and dates in your local timezone.
- Full tracking of what you have read so you can skip to your first unread post, easily see what has changed since you last logged in, and easily see what is new at a glance.
- Email notifications for threads you want to watch closely.
- Being a part of the oldest wargaming community on the net.
If you are already a member then feel free to login now. |
|
 |
2024/12/07 16:15:17
Subject: Waaazag's terrain tutorial blog (formerly The Shattered City)
|
|

Stealthy Grot Snipa
|
That's a really cool effect there, very convincing!
|
|
|
|
 |
|
2024/12/07 21:06:04
Subject: Waaazag's terrain tutorial blog (formerly The Shattered City)
|
|

Ragin' Ork Dreadnought
Deep in the Outer Boroughs of NYC
|
Thanks, Skinflint!
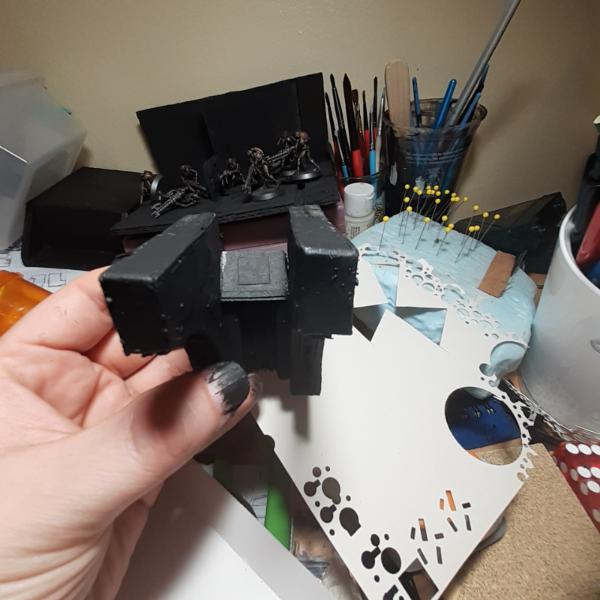
I glued the sandwich halves together with the door meat. I guess the glue counts as mustard? And now it's time to show off the door in action.
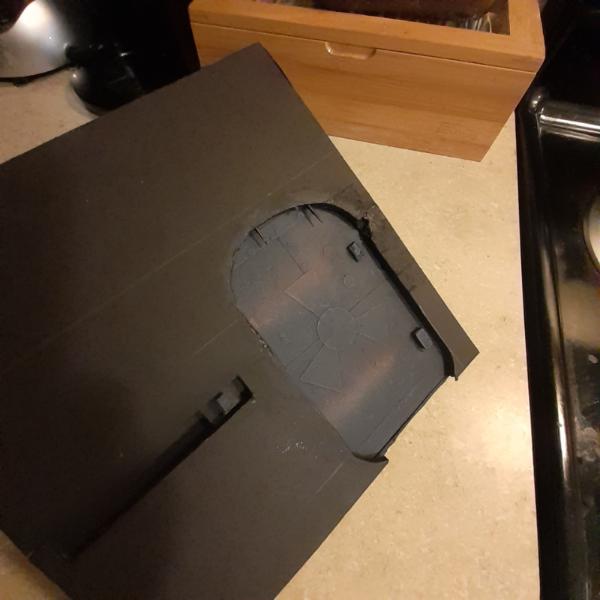 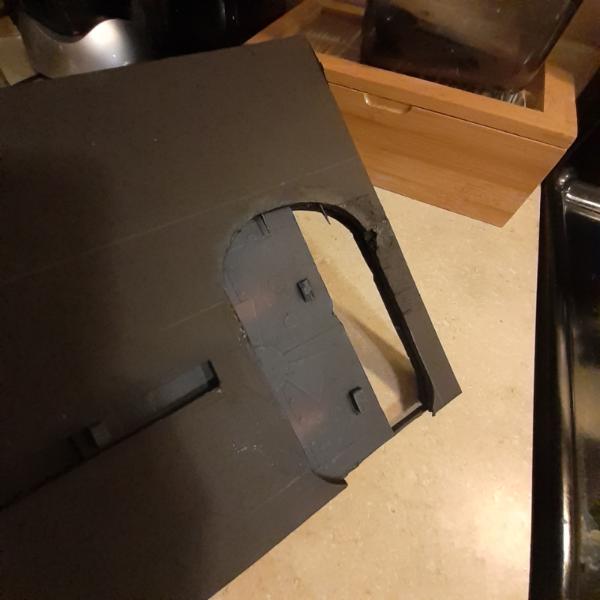 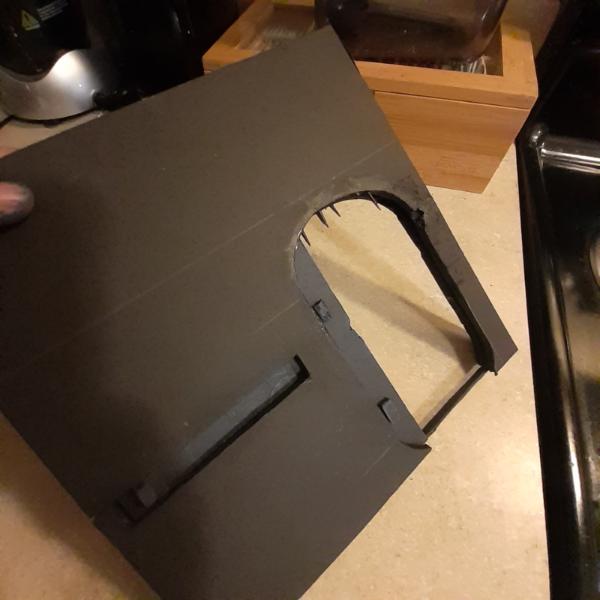
And then the whole package to its base. I used my two other WIP elevated walkway pieces to prop it up in case it tried to fall over while the glue sets.
Sandwich from above.
And kinda how it will look on tbe table, by way of its braces.
Only this small update today. There will be more progress tomorrow. Thanks for looking and have an awesome day!
|
|
|
|
|
|
2024/12/08 21:29:16
Subject: Re:Waaazag's terrain tutorial blog (formerly The Shattered City)
|
|
Ragin' Ork Dreadnought
Deep in the Outer Boroughs of NYC
|
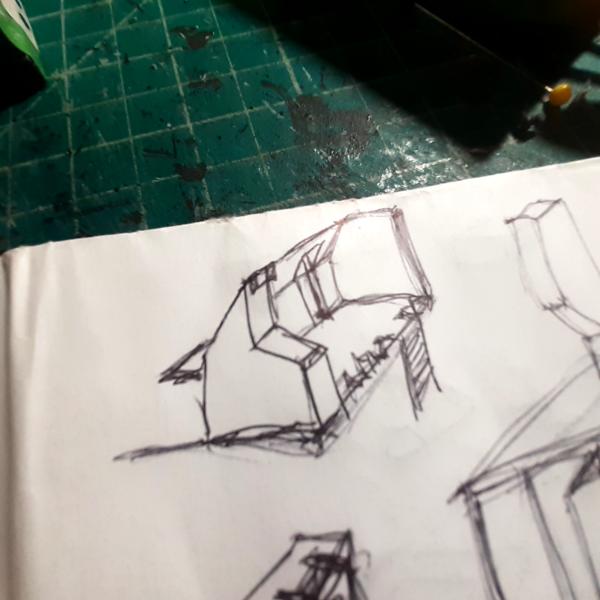
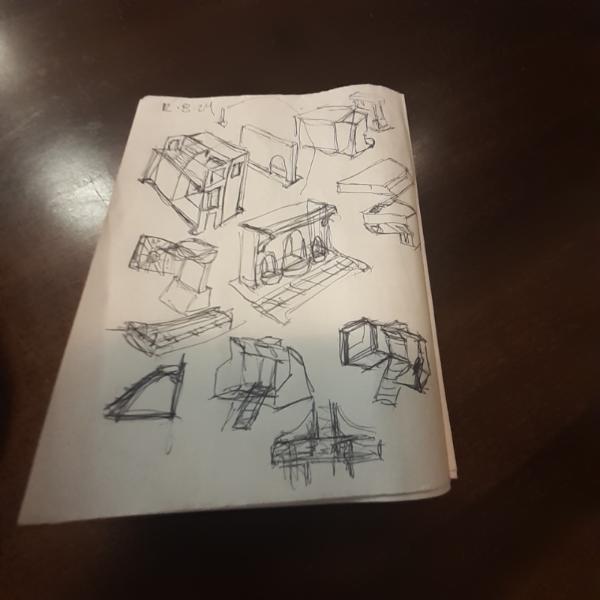
Various sketches working through design challenges.
  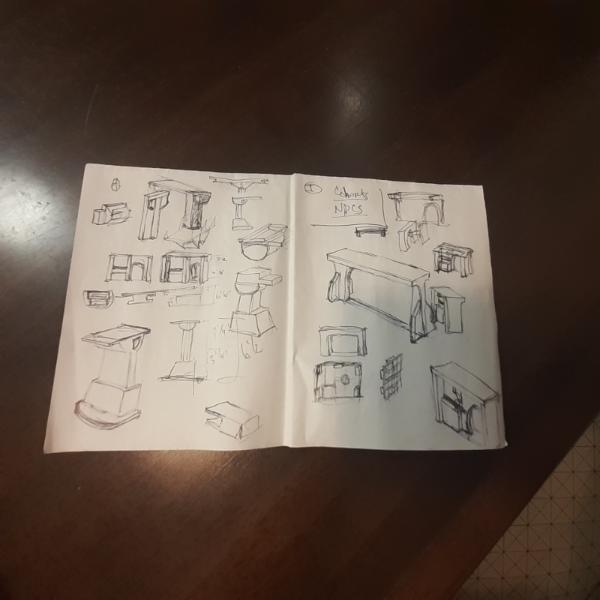 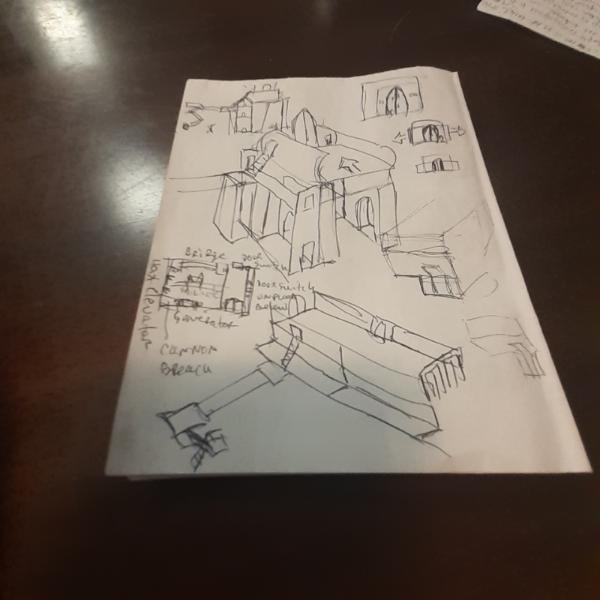
Sorry there's no terrain today. I'm trying to be gentle with myself for taking one night off without building or writing anything. It feels uncomfortable to not be in a state of perpetual creation. I always feel like I'm running out of time.
Thanks for looking and staying with me.
Oh, also, what would be the general community interest in me posting terrain tutorials in a video format, like a YT channel? Think anyone would be interested in that? Just putting the idea into the universe.
I hope everyone has a wonderful and stress free day.
|
|
|
|
|
|
2024/12/08 22:13:09
Subject: Waaazag's terrain tutorial blog (formerly The Shattered City)
|
|
Decrepit Dakkanaut
|
Hey pal. Do not beat yourself up about not doing stuff. Firstly, you sketched! That's stuff. Secondly, you owe it to no-one. Your hobby, your way  no guilt over not making stuff!
|
Theophony"... and there's strippers in terminator armor and lovecraftian shenanigans afoot."
Solar_Lion: "Man this sums up your blog nicely."
Anpu-adom: "being Geek is about Love. Some love broadly. Some love deeply. And then there are people like Graven.  |
|
|
|
|
2024/12/09 16:19:58
Subject: Waaazag's terrain tutorial blog (formerly The Shattered City)
|
|
Ragin' Ork Dreadnought
Deep in the Outer Boroughs of NYC
|
 inmygravenimage wrote: inmygravenimage wrote:Hey pal. Do not beat yourself up about not doing stuff. Firstly, you sketched! That's stuff. Secondly, you owe it to no-one. Your hobby, your way no guilt over not making stuff!
Thanks graven. I really appreciate you.
I made a small progress last night. Not much, but at least I remembered to take a couple of pictures. I added the basic under structure for a few support beams on one side of my giant door piece.
That's it. My weekend is coming up (I work 5 days straight, but my 2 days off are not Saturdays and Sundays) so I hope to get a boatload of work done on those days.
Thank you all for looking at my stuff. Your encouragement, support, and feedback has been a life line to me. Words fail me to express the depth of my gratitude. I truly hope everyone has their best day today.
|
|
|
|
|
|
2024/12/09 16:31:14
Subject: Waaazag's terrain tutorial blog (formerly The Shattered City)
|
|

Regular Dakkanaut
|
@Warboss_Waaazag Planning things with sketches is still doing something and while it might not feel as productive as the actual building part, hobby stuff should not feel like something mandatory, although I also feel a bit bad when I can't do something I wanted/planned to do on a given day.
I have seen a few terrain building tutorials so if you are up for it, it could certainly be interesting to watch. You make some really nice things from concept on paper into reality.
|
|
|
|
|
|
2024/12/09 16:47:05
Subject: Waaazag's terrain tutorial blog (formerly The Shattered City)
|
|
Ragin' Ork Dreadnought
Deep in the Outer Boroughs of NYC
|
 GreenScorpion wrote: GreenScorpion wrote:@Warboss_Waaazag Planning things with sketches is still doing something and while it might not feel as productive as the actual building part, hobby stuff should not feel like something mandatory, although I also feel a bit bad when I can't do something I wanted/planned to do on a given day.
I have seen a few terrain building tutorials so if you are up for it, it could certainly be interesting to watch. You make some really nice things from concept on paper into reality.
Thanks, GreenScorpion. I very much appreciate your kind words.
|
|
|
|
|
|
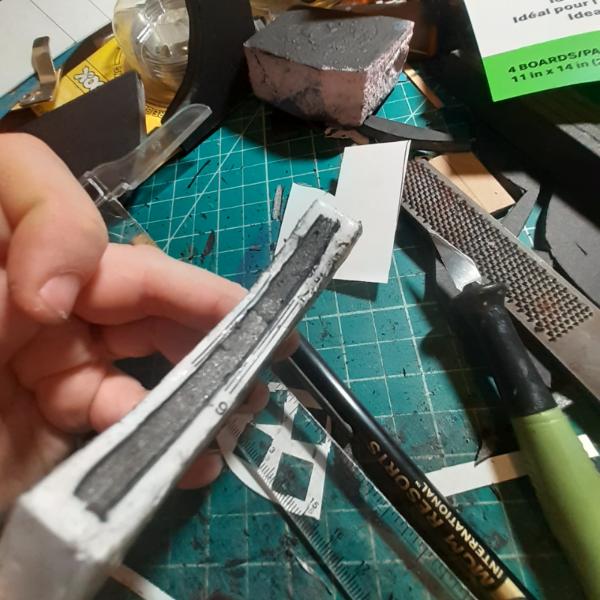
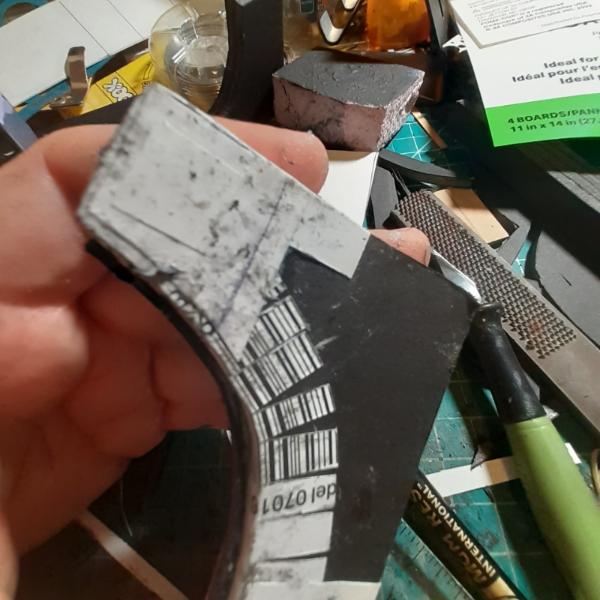
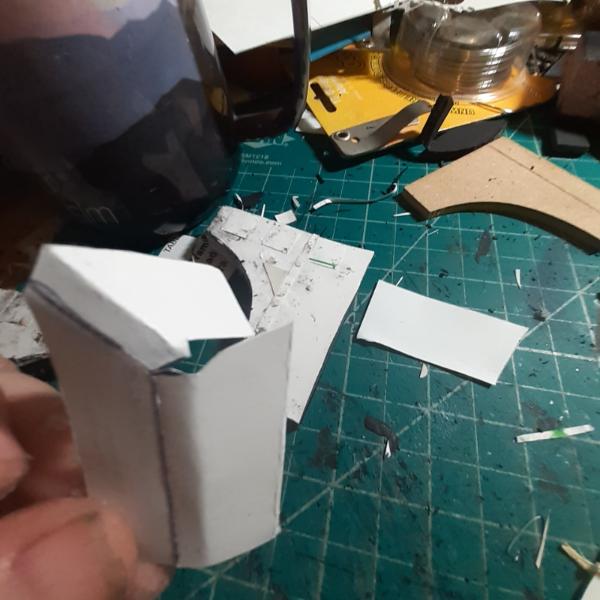
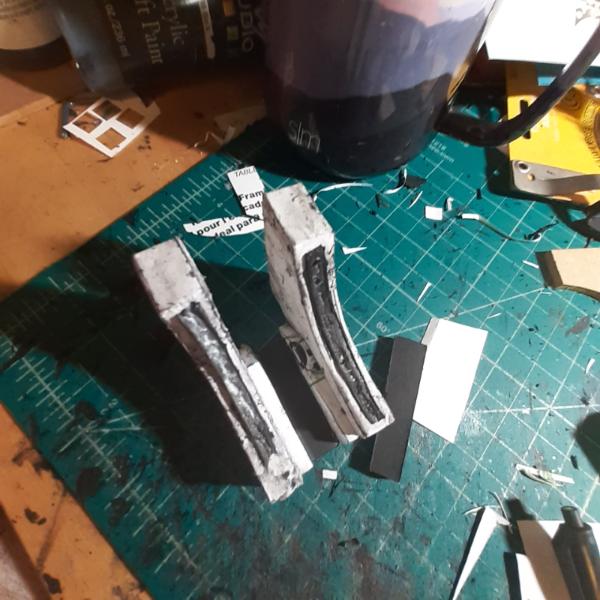
2024/12/10 18:34:44
Subject: Re:Waaazag's terrain tutorial blog (formerly The Shattered City)
|
|
Ragin' Ork Dreadnought
Deep in the Outer Boroughs of NYC
|
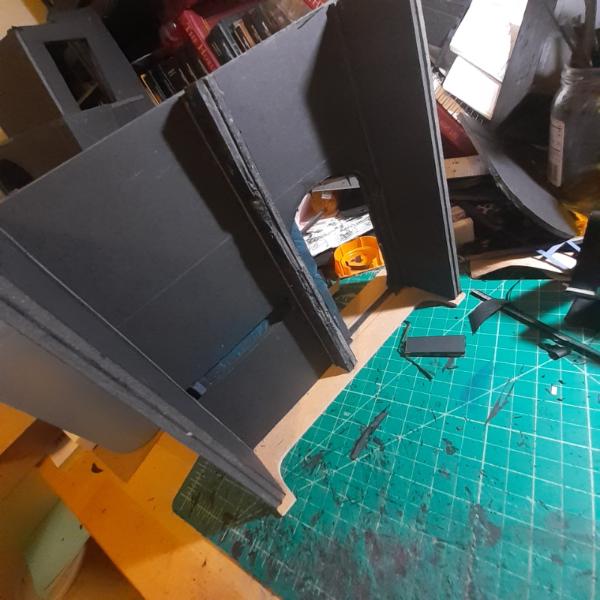
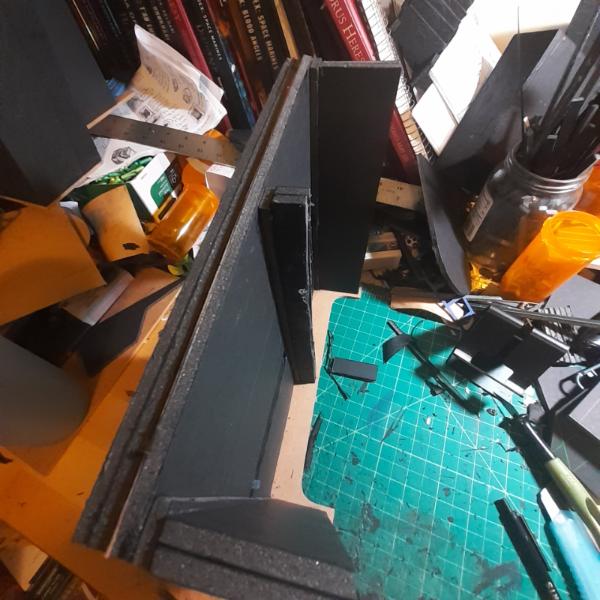
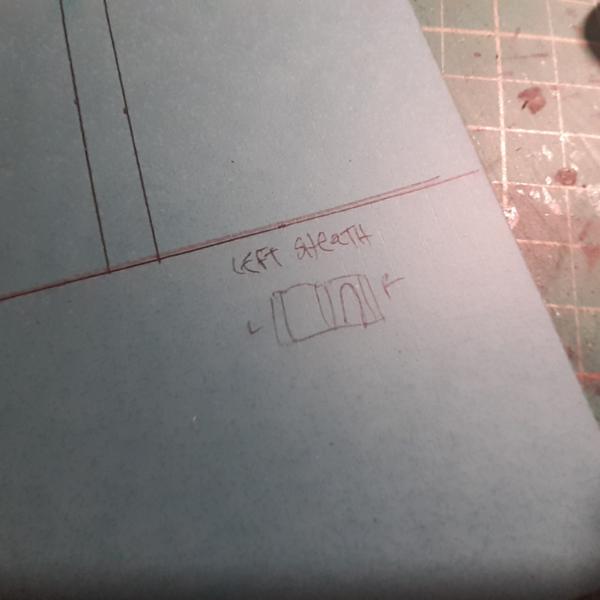
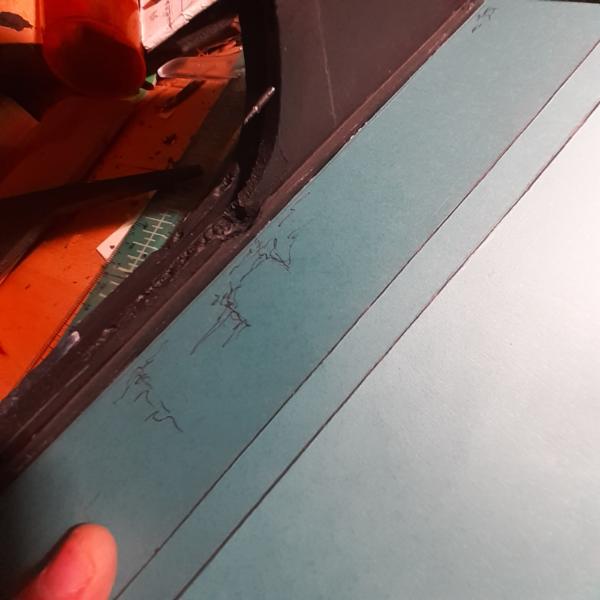
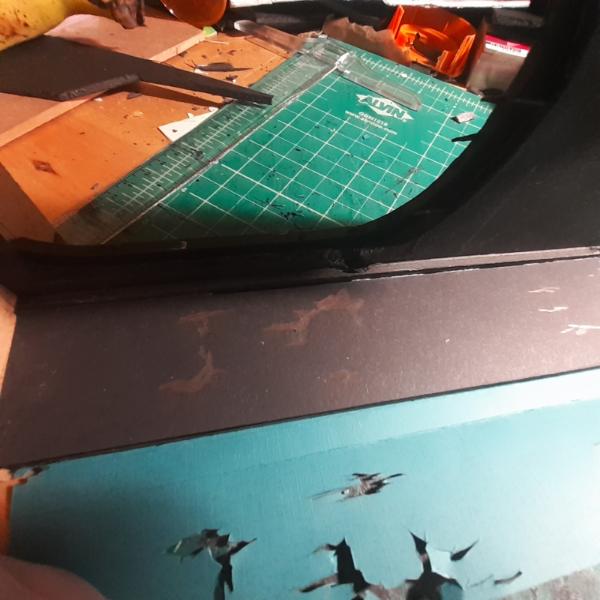
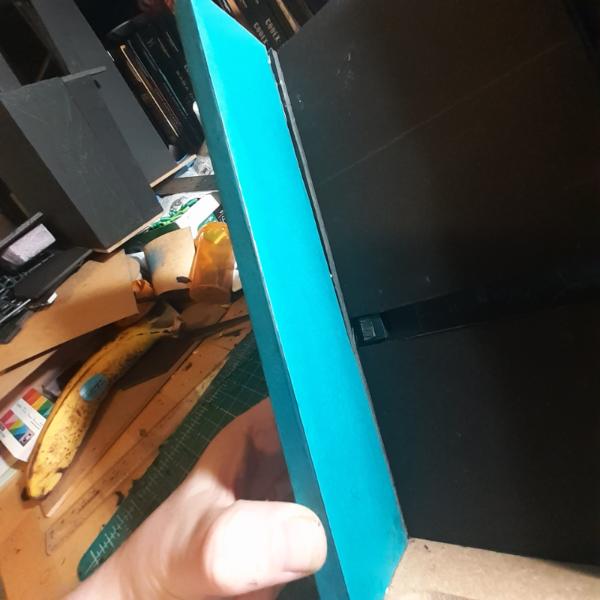
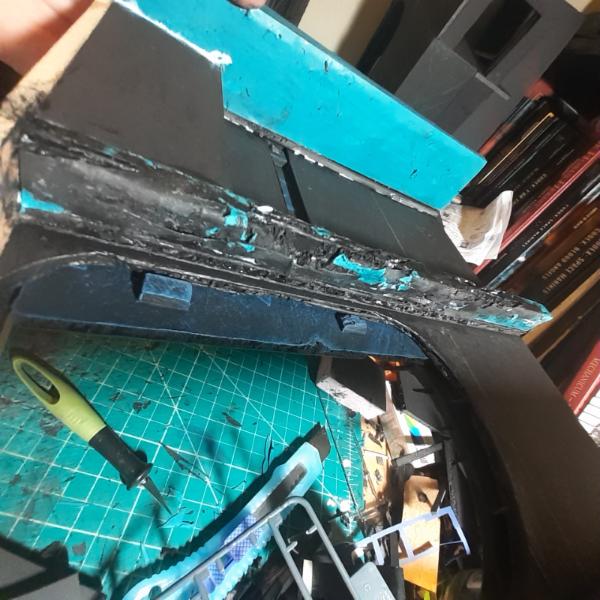
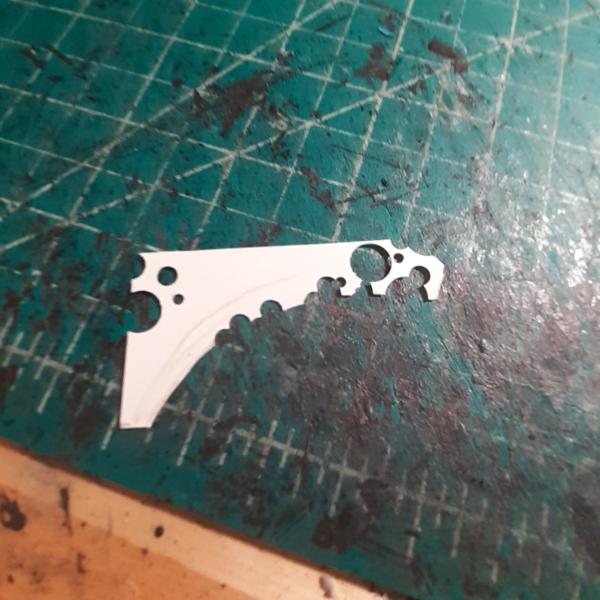
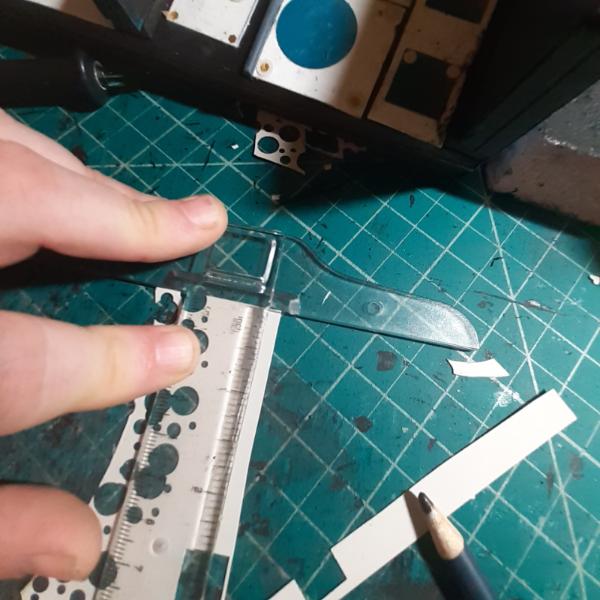
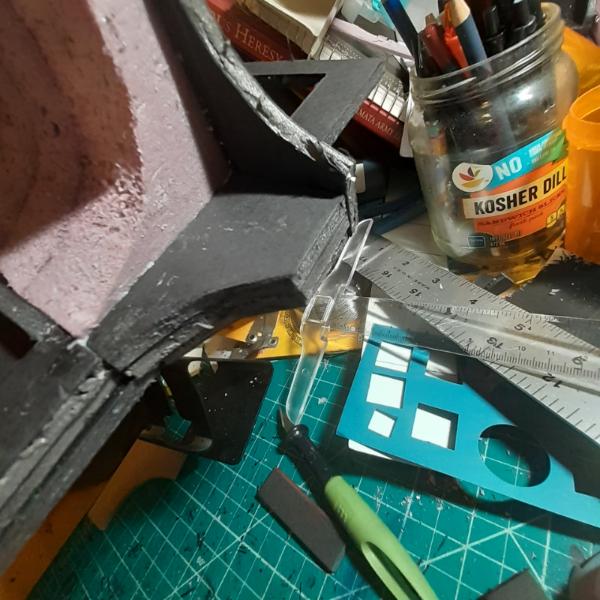
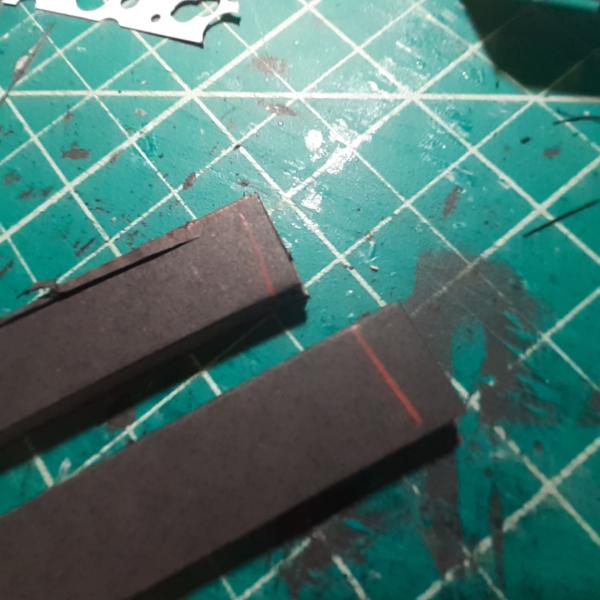
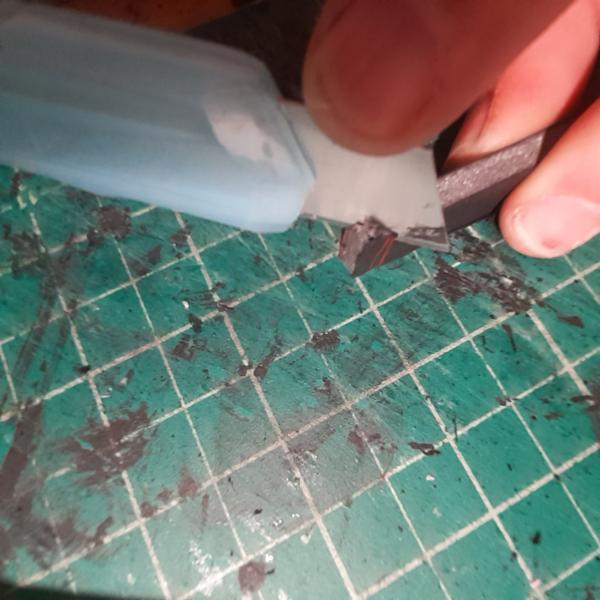
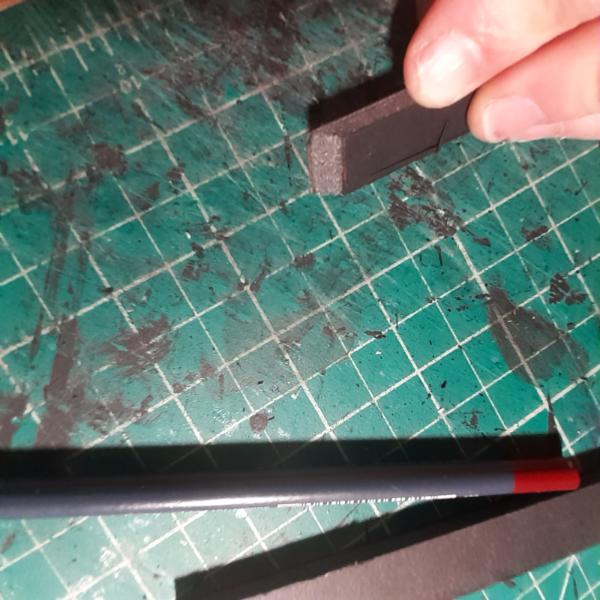
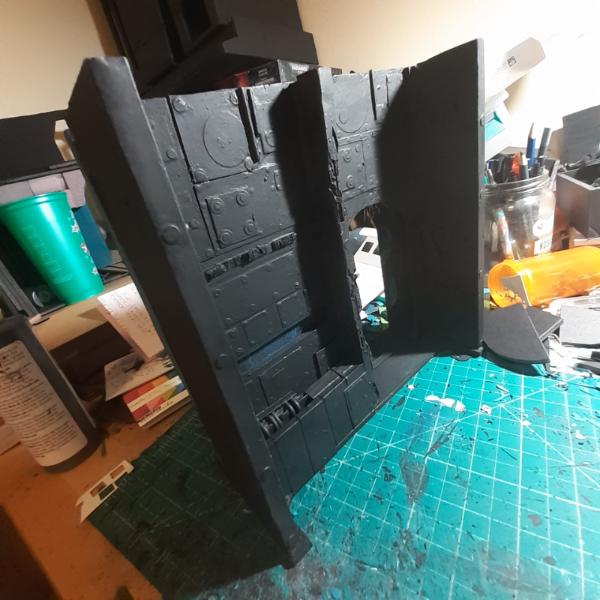
I made more progress on the big door. I had to make a sheath for the pillars I'd already glued in place, so I started with this vaguely textured paper sheet. Drew my lines on for cutting and folding, and created a little diagram for me so I wouldn't get confused.
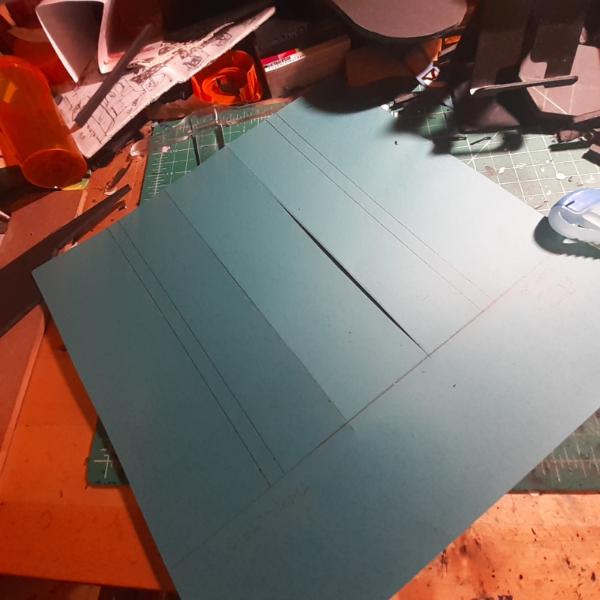 
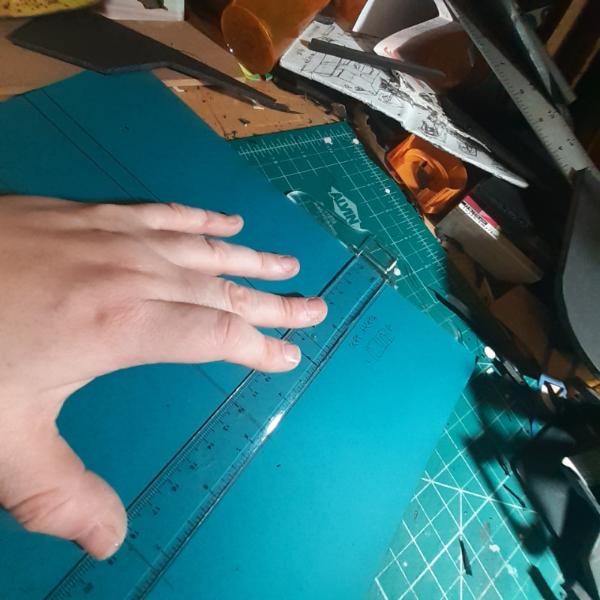
Whipped out my trusty Invisible T Square (which I misplace at least four times a day) and made my cuts. My blades are so sharp that this plastic ruler is barely a straight edge anymore.
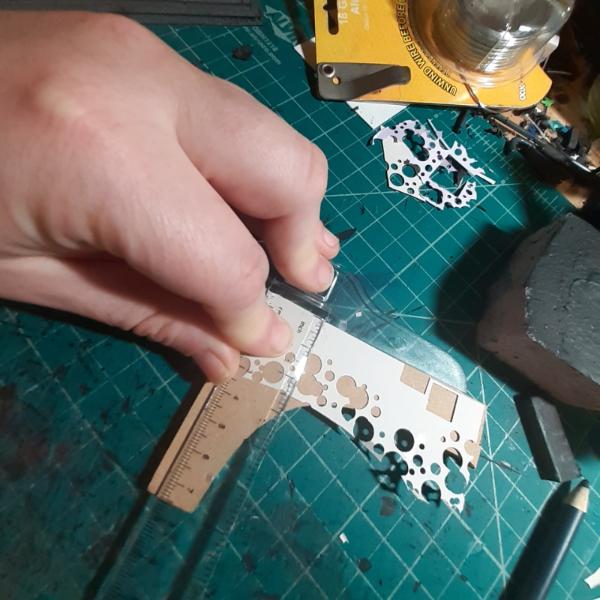
Then, after I folded my paper in the wrong direction, and then folded it the right way so it would fit as intended, I got to work drawing out the outlines of where I wanted to put the rust and decay. And then I realized I had put these marks on the inside. The idea behind this door is that there's a radiation leak where it leads to, so all the structures surrounding the doorway are heavily damaged and those further away are less so. With that in mind I flipped the paper and aligned it to the damage I already portrayed in the archway and jazzed my marks up a bit.
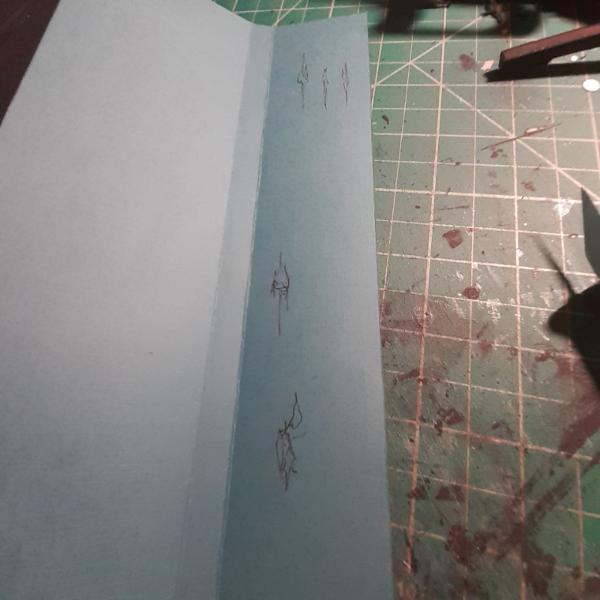 
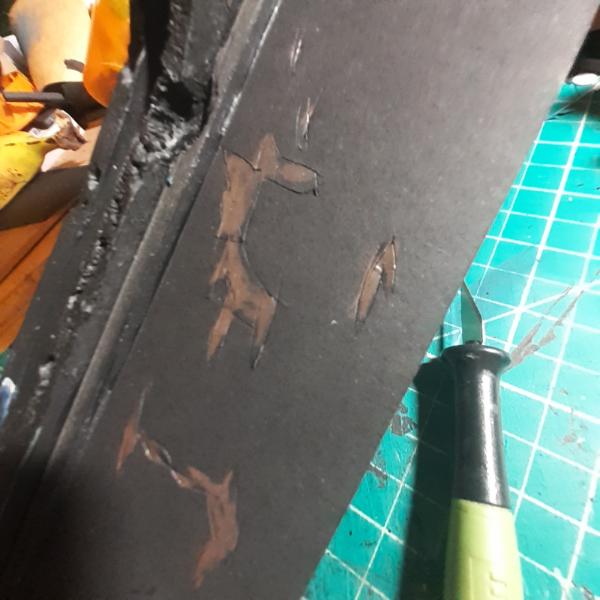
Cut the inside, flip to compare, and cut again.
 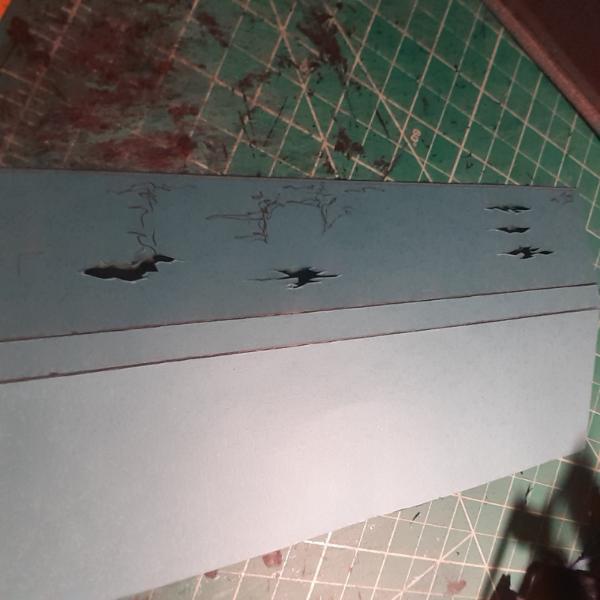 
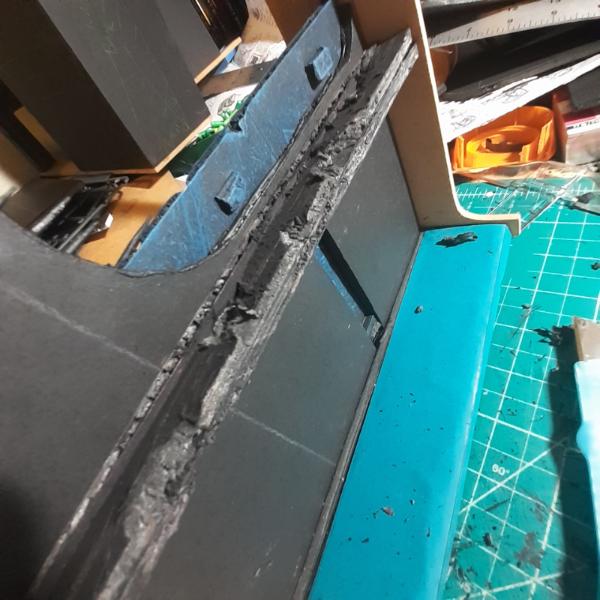
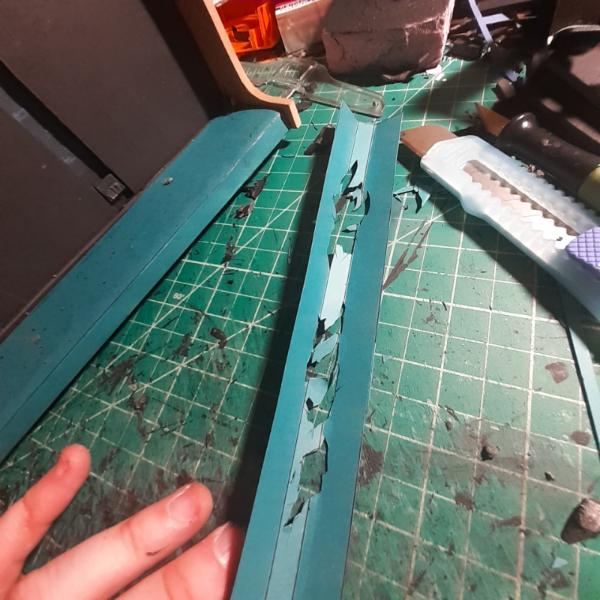
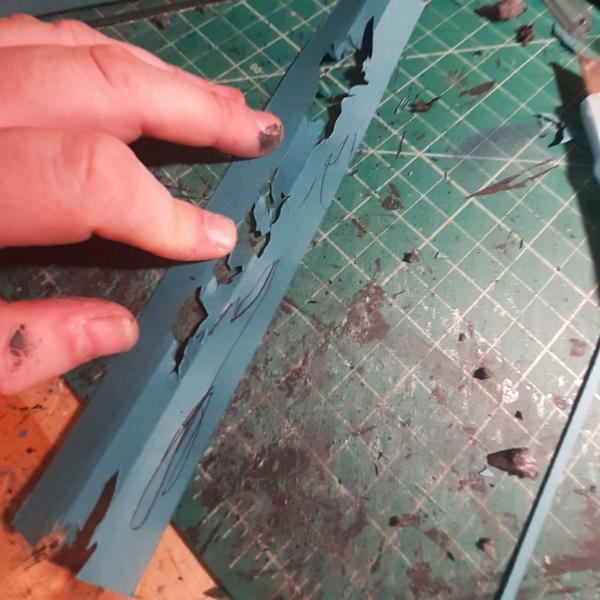
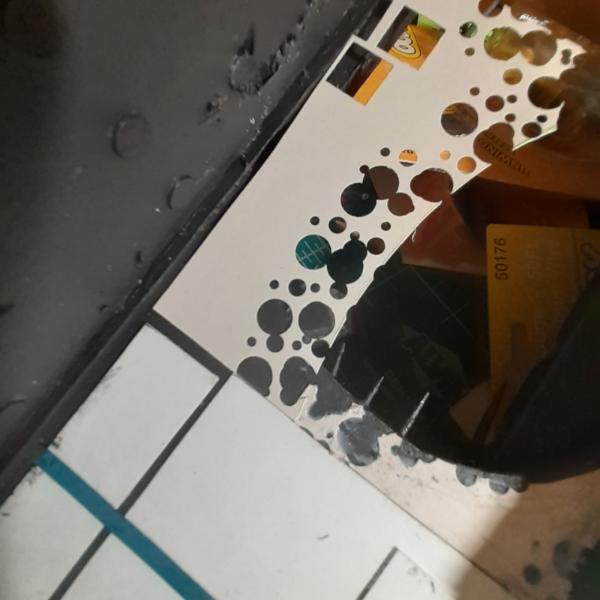
Then I overlaid the paper to the pillar and used a colored pencil to mark where the damage would show through. This process also further and naturally distresses the paper, which is nice.
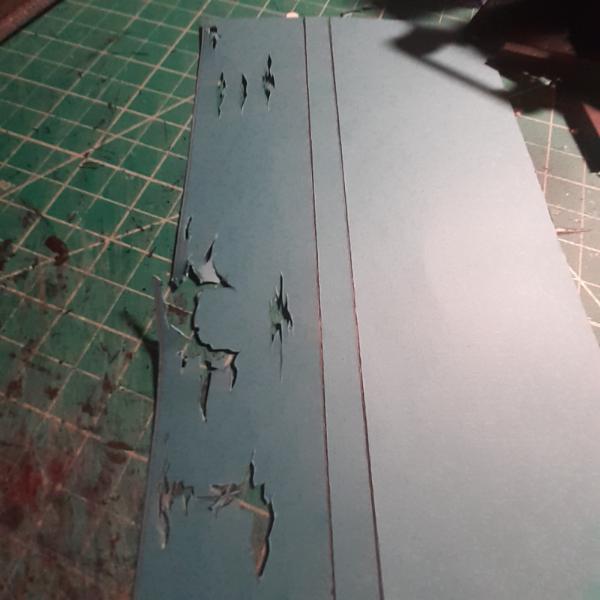
I did some basic outline scrapes and tried to peel away the paper from the foamcore, but I recently swapped my exacto blade and it turned out to be too sharp to distress the project in a satisfactory manner. So I used its sharpness to stab the bejeezus out of my outlines and go from there. It worked much better, although I wound up wiping the garbage off the blade with my bare fingers, forgetting how sharp it was and promptly slashed a good cut into my fingertip. It's been a long time since I did that. Ouch.
 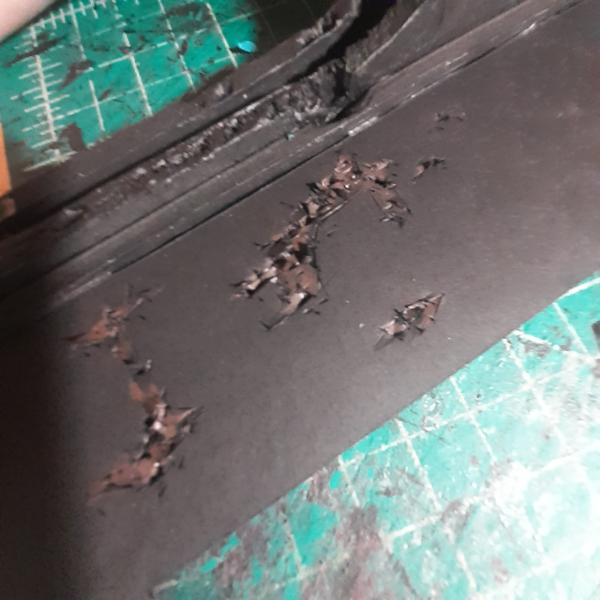 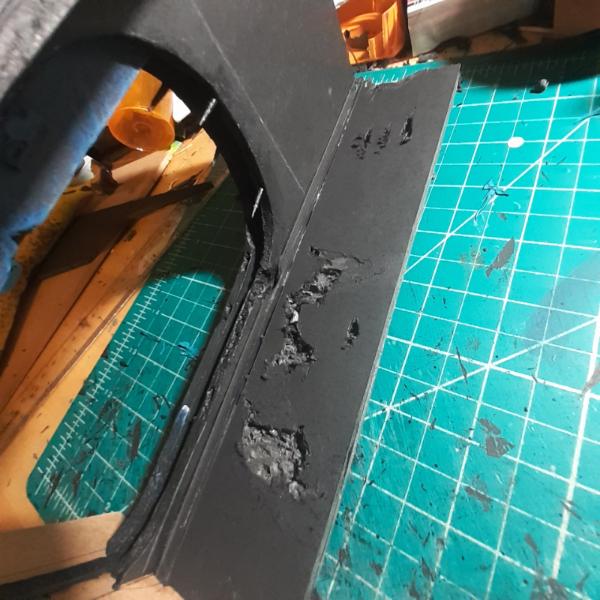
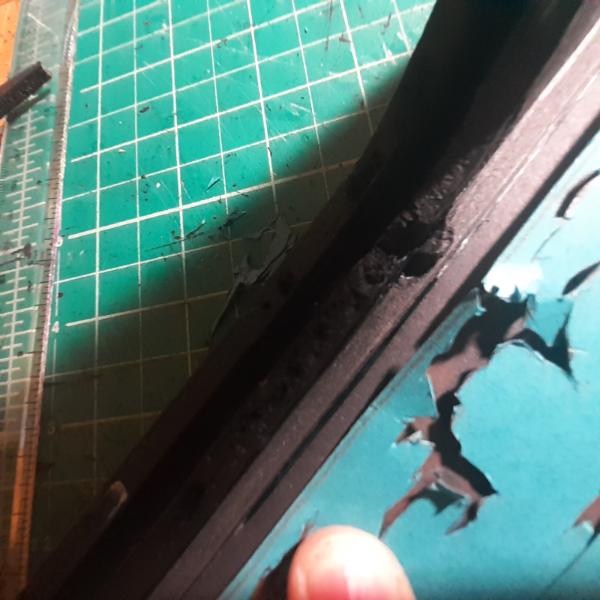
Then I sealed it with glue and painted it black, before gluing the sheath on over it. You'll notice I already painted the inside and outside of the damaged bits of the sheath to make the finished priming and painting process easier. I always use way too much glue for these damaged sheaths because I want it to help me further distress the paper. The paper I use is many-layered and pulls apart as I rub it into place. Strangely, this creates a better looking decayed metal effect than any I try to do deliberately. The extra glue also seals the paper and adds a further texture to the exterior. I spend a lot of time rubbing and smoothing this excess glue until it gets tacky and then starts to pull in interesting patterns. Bits of stray paper, foam, and drier glue globs also get stuck under this layer, adding further texture.
And now we come to the weirdest part of this build, where I explain my material acquisition process. You see, I grew up with the original Star Wars movies. And one brother (amongst many) who really nurtured my creativity. He bought me things like The Empire Strikes Back book of concept sketches that showcased designs that never made it into the films. I would copy and modify those sketches over and over again. The images of it are some of my clearest memories. He also brought me to exhibits of the props used in the films and showed me videos of the build process of ILM (the Industrial Light and Magic production studio was created to do all the practical effects work of Star Wars: A New Hope) and watched in awe as grown men butchered thousands of model kits and used mundane materials and items to create immense "miniatures" of Star Destroyers and X Wings and Death Stars and AT-ATs. All this instilled in me the idea that I can find details and ideas in nearly any object.
Fast forward to today, as I wander craft stores, yard sales, antique shops, 99 cent stores, and art supply stores, evaluating every item for its terrain building potential. It's why I use paper instead of plasticard, why I collect and task my friends to collect orange juice bottle caps, why I use dark brown glitter as burned shattered glass, and why I bought a jar of tiny flat basketballs to use on this project, too.

Because it works. And $4USD is a tiny amount to spend on hundreds of details I don't have to make myself.
Everything is material. Let your imagination run wild. Thanks for looking. Have the best day today.
|
|
This message was edited 4 times. Last update was at 2024/12/10 18:41:45
|
|
|
|
|
2024/12/10 18:43:08
Subject: Re:Waaazag's terrain tutorial blog (formerly The Shattered City)
|
|
Stealthy Warhound Titan Princeps
|
I thought those tiny basketballs were all Tau logos at first.
I honestly believed you had hand drawn each one...
|
|
|
|
|
|
2024/12/10 18:53:30
Subject: Re:Waaazag's terrain tutorial blog (formerly The Shattered City)
|
|
Ragin' Ork Dreadnought
Deep in the Outer Boroughs of NYC
|
 Lathe Biosas wrote: Lathe Biosas wrote:I thought those tiny basketballs were all Tau logos at first.
I honestly believed you had hand drawn each one...
I wouldn't put it past me. Woe betide the project I currently hyperfixate on.
|
|
|
|
|
|
2024/12/11 16:56:41
Subject: Waaazag's terrain tutorial blog (formerly The Shattered City)
|
|
Regular Dakkanaut
|
Good progress with the damage and the use of cheap materials for detailing is a great idea.
As someone who has built a small fortress out of used matches I do think that reuse of garbage can be great. Building something of that size with thousands of matches is probably not something I would recommend though.
|
|
|
|
|
|
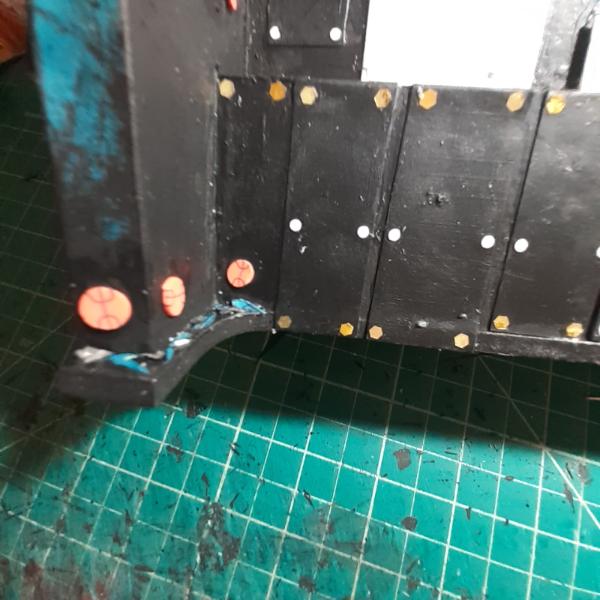
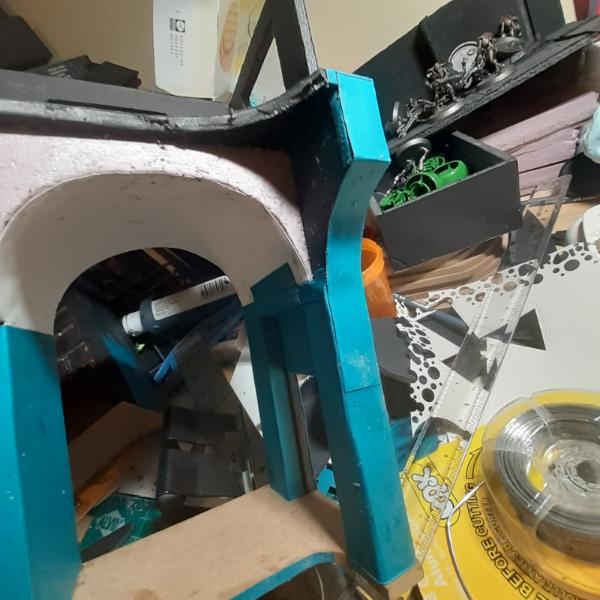
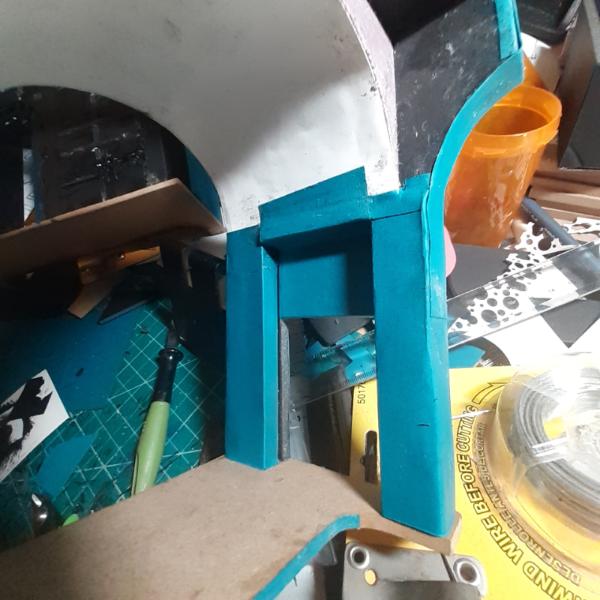
2024/12/11 16:59:41
Subject: Re:Waaazag's terrain tutorial blog (formerly The Shattered City)
|
|
Ragin' Ork Dreadnought
Deep in the Outer Boroughs of NYC
|
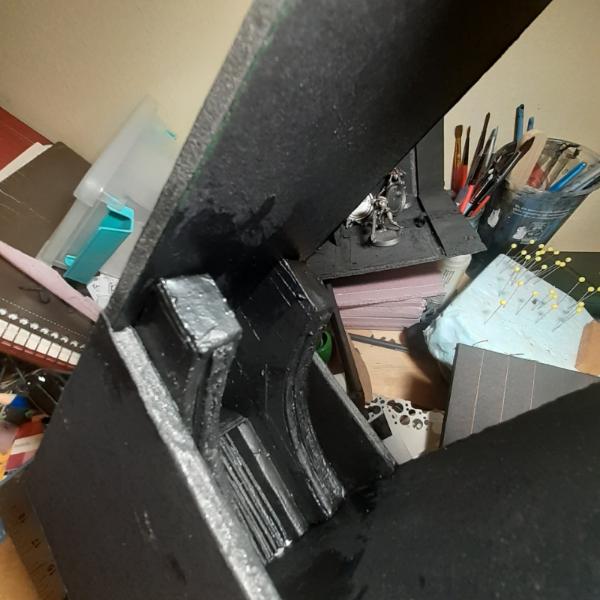
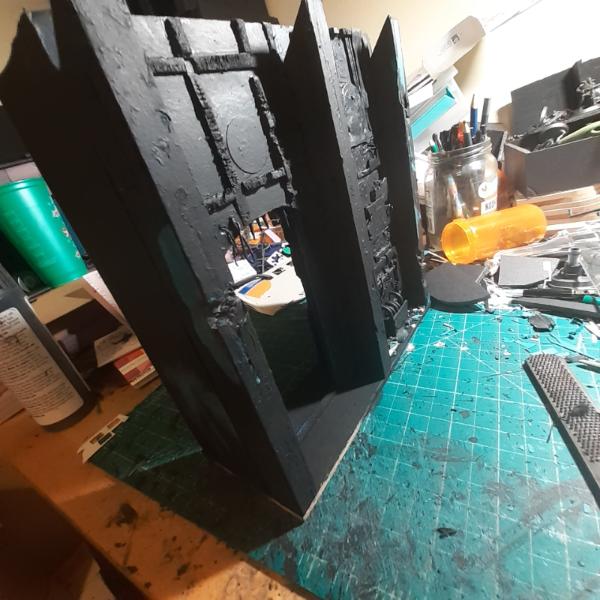
I wrapped the left column with no distress, mostly because I wanted to save myself some work.
And then proceeded to distress the heck out of the central column.
The inside and outside of my paper wrap.
And then all the distress of gluing it into place. I also glued a wall into place between the nondoor column and this center column in anticipation of the details I intend to put there (and before I primed all the details behind it, like a dumbass; yay more difficulties for no reason).
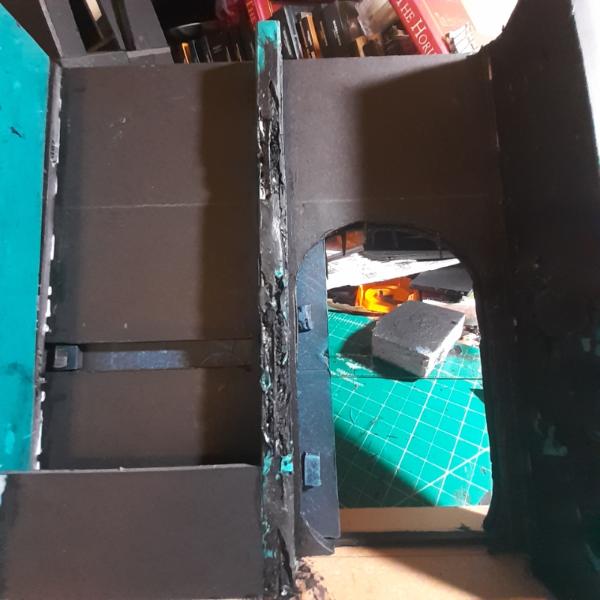 
Now more basketballs and some wall dressings.
And then a quick review of finished versus WIP piles.
Thanks for looking. I'll post up more stuff soon. Have an awesome day! Automatically Appended Next Post: GreenScorpion wrote:Good progress with the damage and the use of cheap materials for detailing is a great idea.
As someone who has built a small fortress out of used matches I do think that reuse of garbage can be great. Building something of that size with thousands of matches is probably not something I would recommend though.
Wow, that sounds like an endeavor! And yeah, garbage and unusual materials seems to have become my trademark. I just went to my storage unit yesterday and dragged out a hole crate of odds and ends - lollipop sticks, wooden cubes, tongue depressors, coffee stirrers, drinking straws, broken dollhouse furniture, pieces of cheapo wooden puzzles, and more! I'm looking forward to implementing these bits on all my stuff going forward.
|
|
This message was edited 1 time. Last update was at 2024/12/11 17:06:58
|
|
|
|
|
2024/12/11 22:17:56
Subject: Waaazag's terrain tutorial blog (formerly The Shattered City)
|
|
Decrepit Dakkanaut
|
Very dramatic. Keep it up!
|
Theophony"... and there's strippers in terminator armor and lovecraftian shenanigans afoot."
Solar_Lion: "Man this sums up your blog nicely."
Anpu-adom: "being Geek is about Love. Some love broadly. Some love deeply. And then there are people like Graven. |
|
|
|
|
2024/12/12 07:16:29
Subject: Waaazag's terrain tutorial blog (formerly The Shattered City)
|
|
Ragin' Ork Dreadnought
Deep in the Outer Boroughs of NYC
|
Thanks, graven. I will!
And as evidence, I started with this sprue left over from a bunch of mecha kits my friend gave me a few years ago.
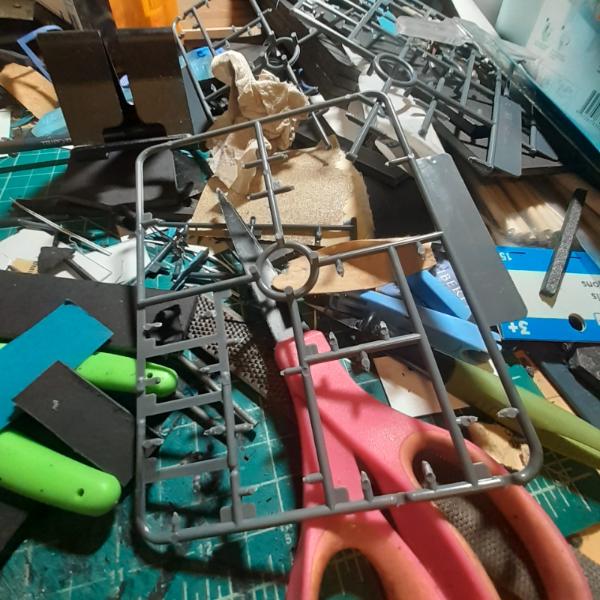
The rounded nature of these gave me the idea to have pipes coming up out of the hole I had made with the low wall. After struggling to get my paintbrush into that area, I primed the hole as best I could and then attached the sprue-pipes to a piece of spare foamcore. I shaved some grooves into the foam to create channels for these pipes to fit into and used coarse sandpaper to file away any details that might give these plastic bits away as sprue. After a quick prime and the addition of another foam chunk, I started building the insert.
Then jammed it in place, realized there was more gap than I thought, and hastily added more paper to the extra space until it fit as snuggly as possible.
More details up soon. Thanks for looking!
|
|
|
|
|
|
2024/12/12 11:12:34
Subject: Waaazag's terrain tutorial blog (formerly The Shattered City)
|
|
Regular Dakkanaut
|
Leftover sprues are an amazing material! If you ever need a round control terminal/table that circular part in the middle seems like a good start, it even has little feet.
|
|
|
|
|
|
2024/12/12 14:11:30
Subject: Waaazag's terrain tutorial blog (formerly The Shattered City)
|
|

The Dread Evil Lord Varlak
|
Very nice. I really will need to take inspiration on some of those techniques.
|
https://www.dakkadakka.com/dakkaforum/posts/list/0/766717.page
A Mostly Renegades and Heretics blog.
GW:"Space marines got too many options to balance, therefore we decided to legends HH units."
Players: "why?!? Now we finally got decent plastic kits and you cut them?"
Chaos marines players: "Since when are Daemonengines 30k models and why do i have NO droppods now?"
GW" MONEY.... erm i meant TOO MANY OPTIONS (to resell your army to you again by disalowing former units)! Do you want specific tyranid fighiting Primaris? Even a new sabotage lieutnant!"
Chaos players: Guess i stop playing or go to HH. |
|
|
|
|
2024/12/12 16:22:09
Subject: Re:Waaazag's terrain tutorial blog (formerly The Shattered City)
|
|
Ragin' Ork Dreadnought
Deep in the Outer Boroughs of NYC
|
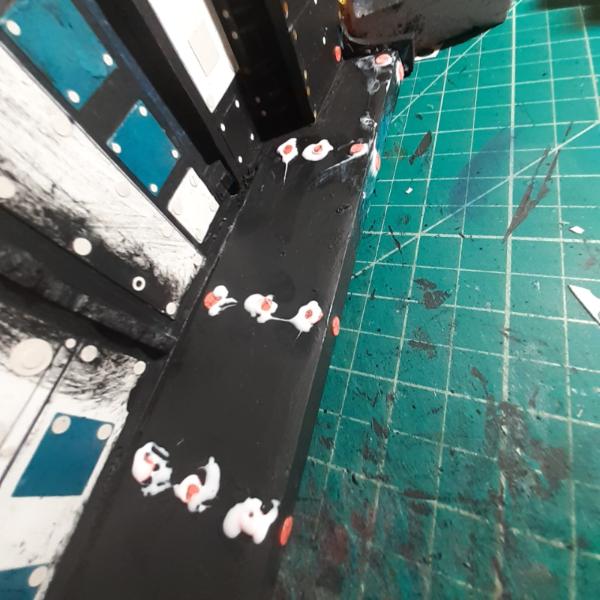
Thanks, GreenScorpion and Not Online!!!.
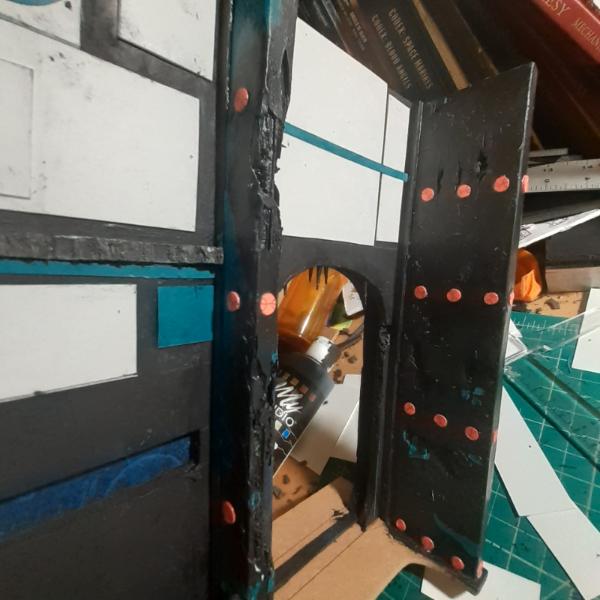
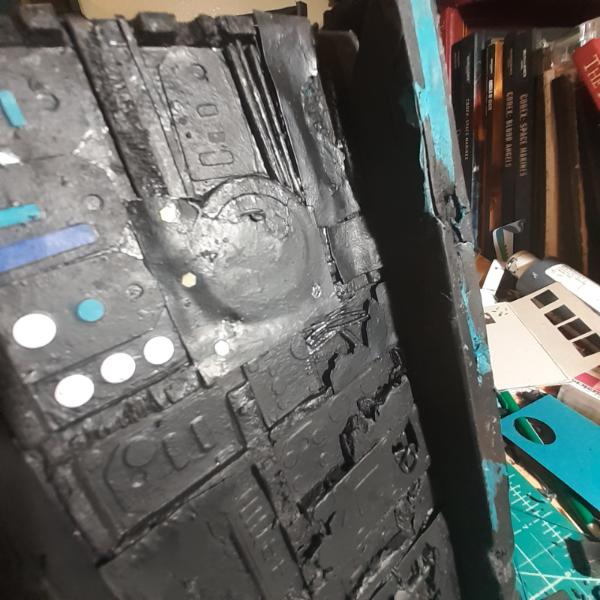
Here is my latest craft store haul. I intended to use these glitter packs as individual bolts, but now that I have started to I fear each individual glit might be too flat to even pick up paint. I guess time will tell.
Anyway, I used the gold glitter and paper dots to add some details to the piece.
I also filed down another sprue bit to make a pipe.
And then went a little berserk with garbage in the corner.
But that's my update. I'll post more as I get it done. Thanks for looking and have an awesome day!
|
|
|
|
|
|
2024/12/13 18:48:48
Subject: Re:Waaazag's terrain tutorial blog (formerly The Shattered City)
|
|
Ragin' Ork Dreadnought
Deep in the Outer Boroughs of NYC
|
VERY little progress, but I started work on the structural supports for the other side of the big door piece. I measured, cut incorrectly, and trimmed until these slivers lined up to create an angle. Then glued them all together and used the power of HAND to make sure they cured flush and aligned correctly.
  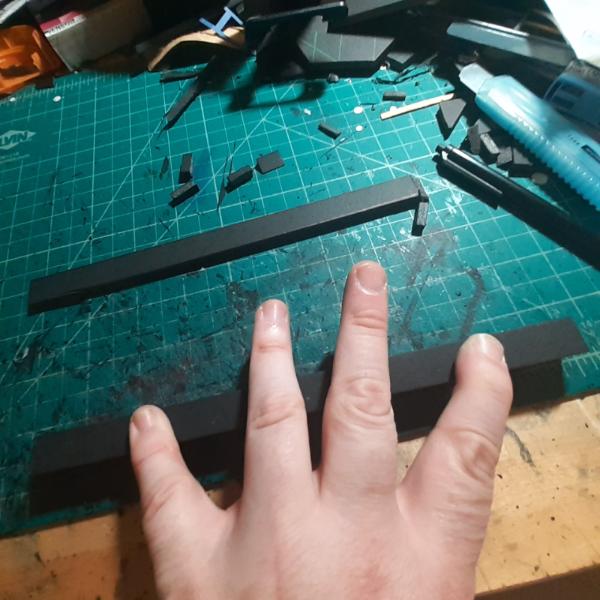
With luck I'll have more to post up later today, but this is it for now. Thanks for looking.
|
|
|
|
|
|
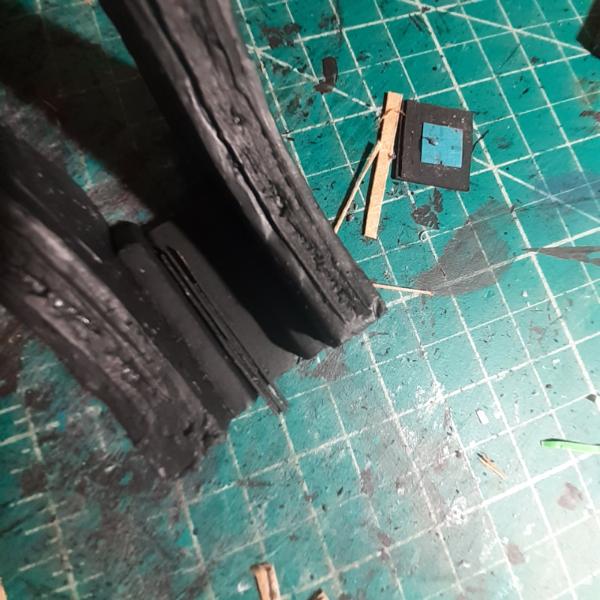
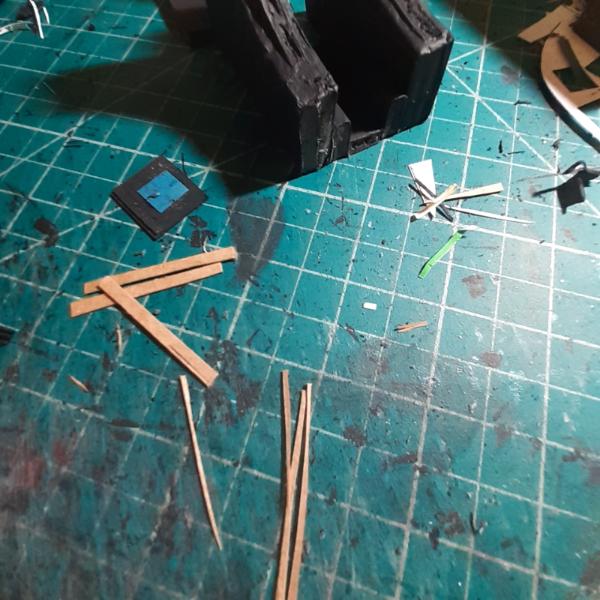
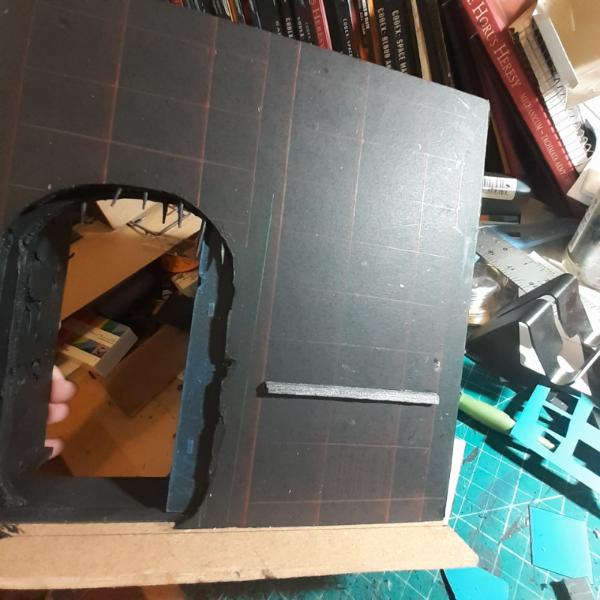
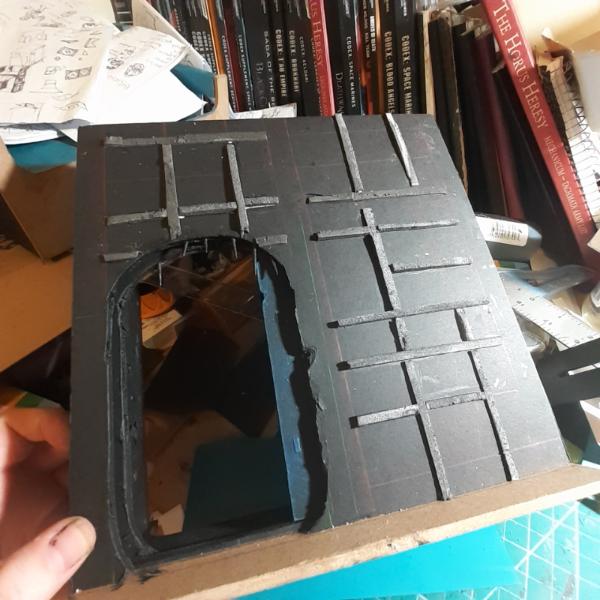
2024/12/17 07:34:18
Subject: Re:Waaazag's terrain tutorial blog (formerly The Shattered City)
|
|
Ragin' Ork Dreadnought
Deep in the Outer Boroughs of NYC
|
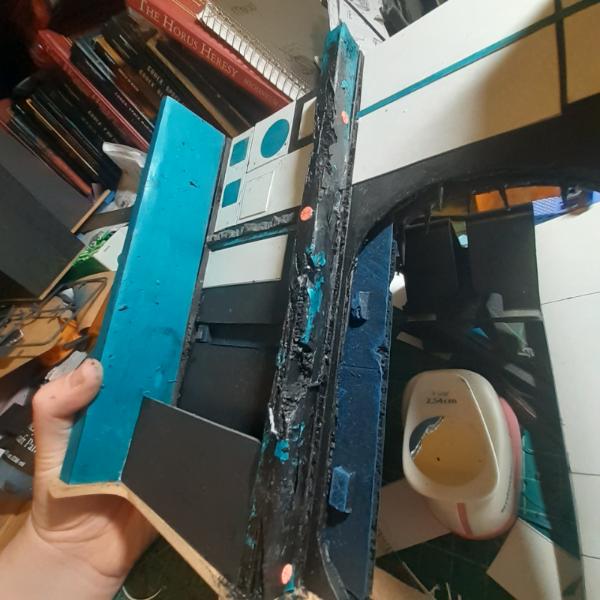
Various fiddling with scrap paper to create archway details.
Measure once, cut twice, right?
And this my trusty smoothing block aka just another cast off amongst thousands.
And then with all the bells and whistles.
I noticed my basketball rivets were looking kind of exposed so I added some glue to smooth out their details.
During that process I noticed a blank spot in the central column, so I added more details there.
Then I detailed the second half of the big door piece, over the actual door.
And added a stalagtite next to the pipe on the first side.
Thanks for looking. I'll have a bunch more progress shots tomorrow.
|
|
|
|
|
|
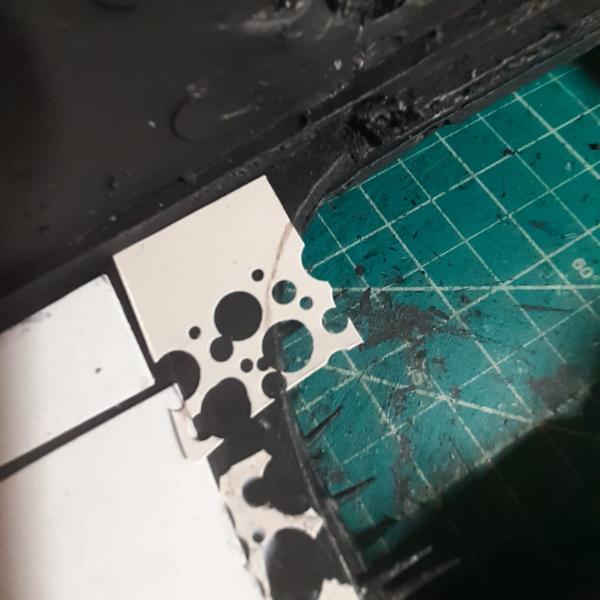
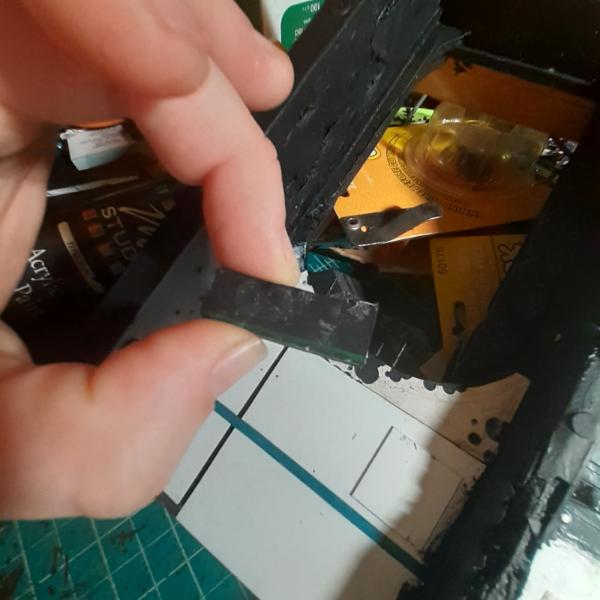
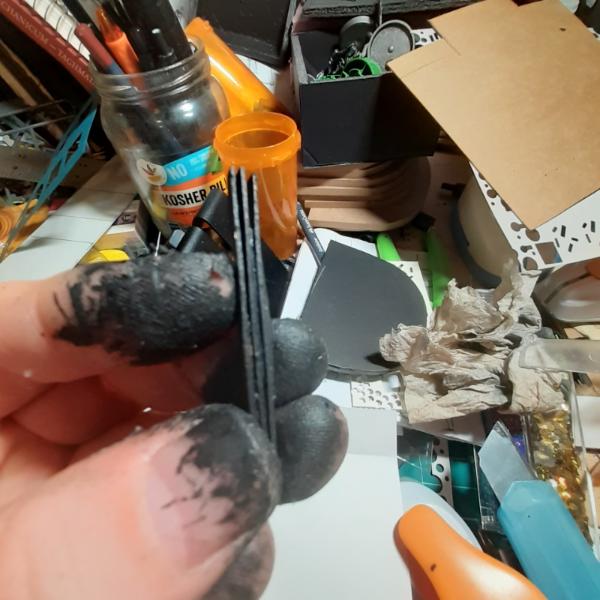
2024/12/17 23:00:52
Subject: Re:Waaazag's terrain tutorial blog (formerly The Shattered City)
|
|
Ragin' Ork Dreadnought
Deep in the Outer Boroughs of NYC
|
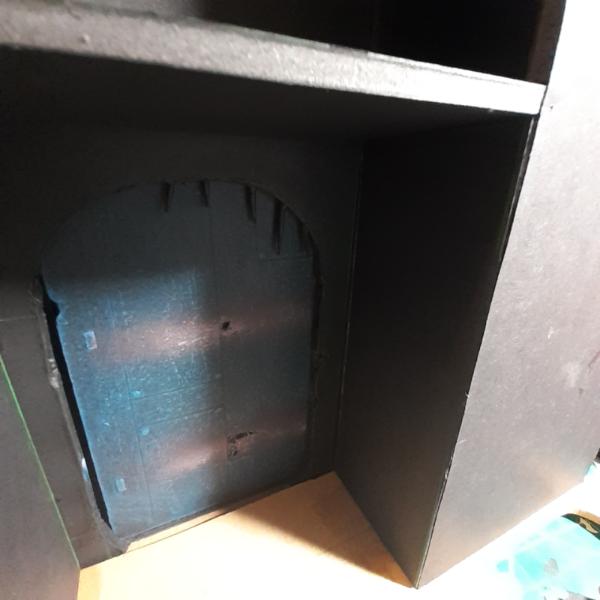
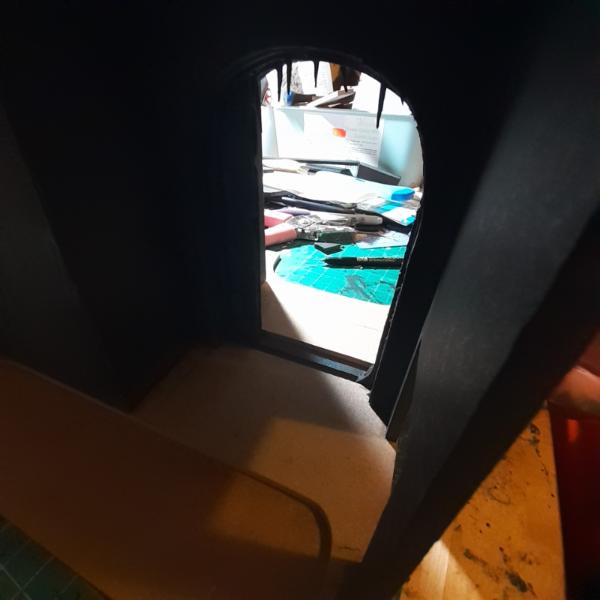
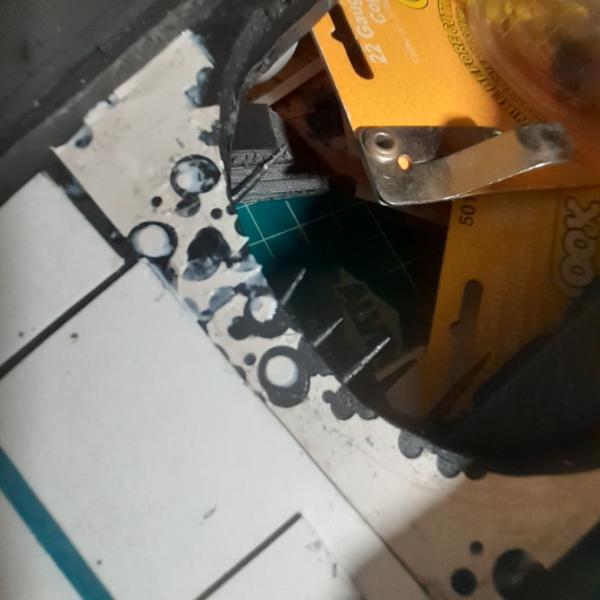
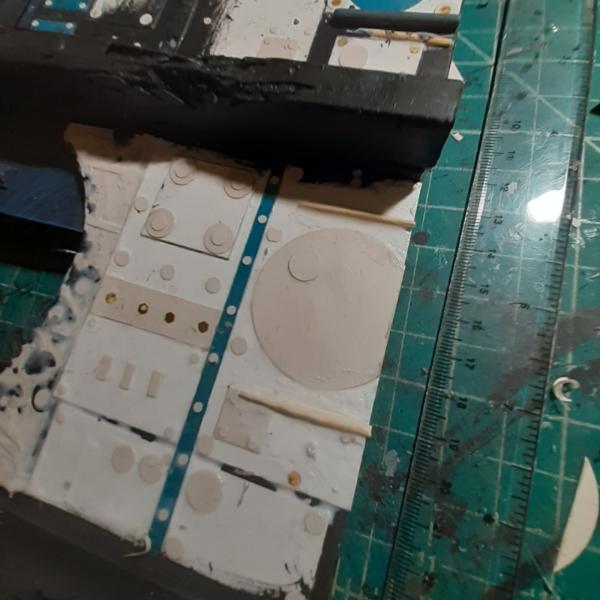
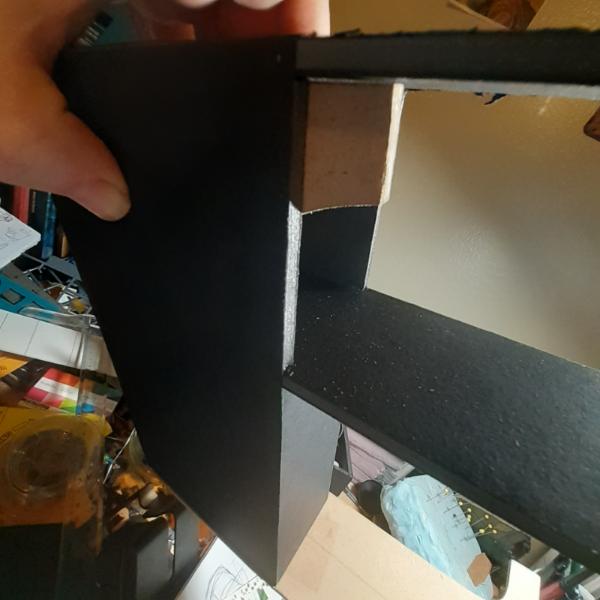
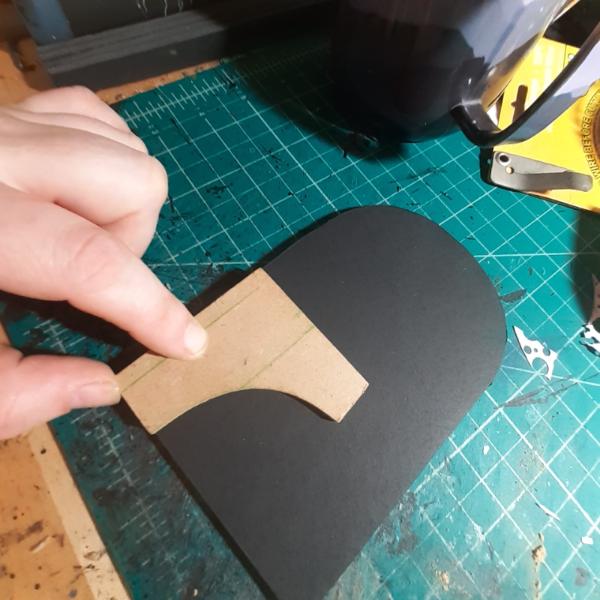
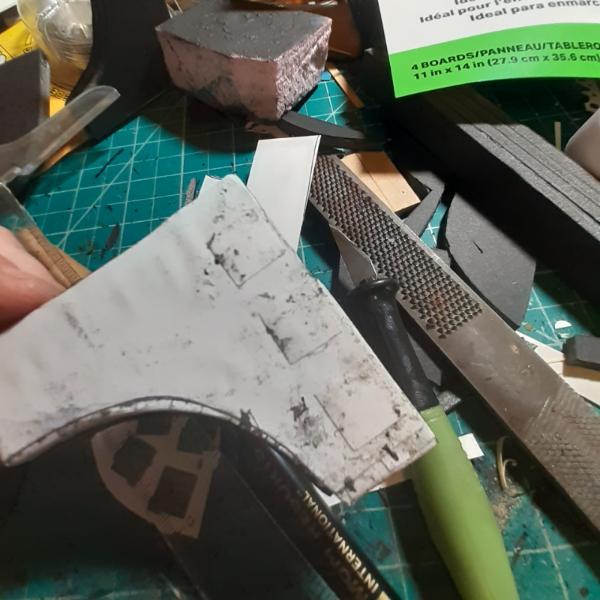
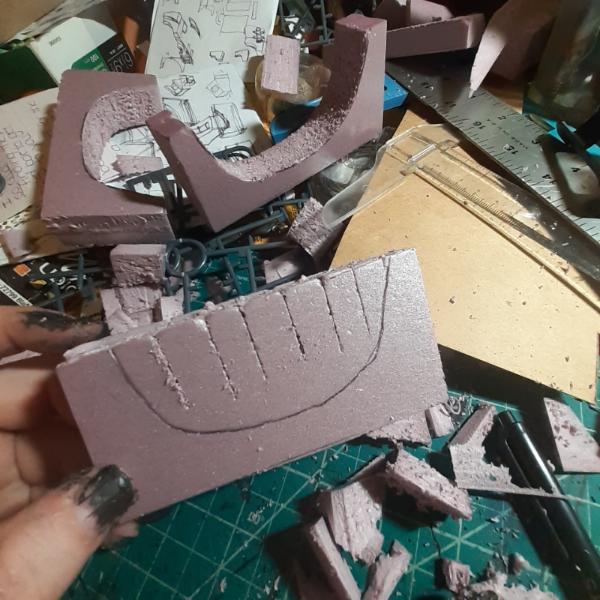
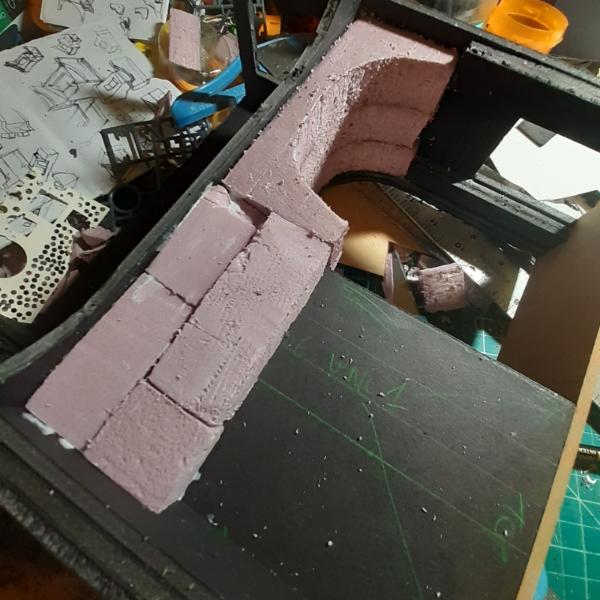
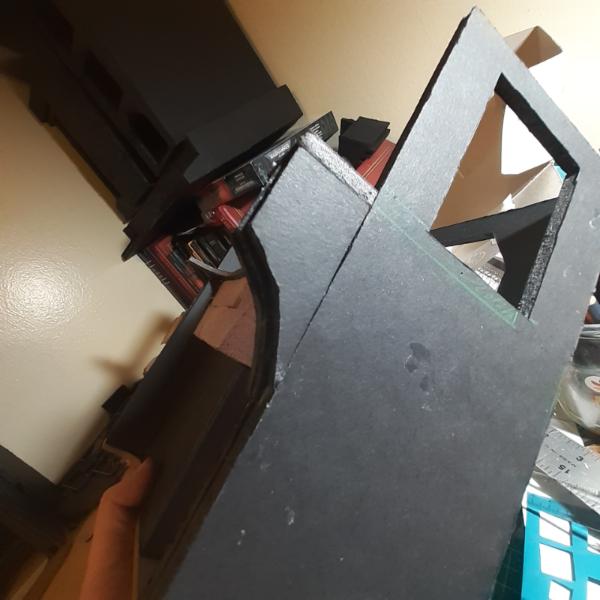
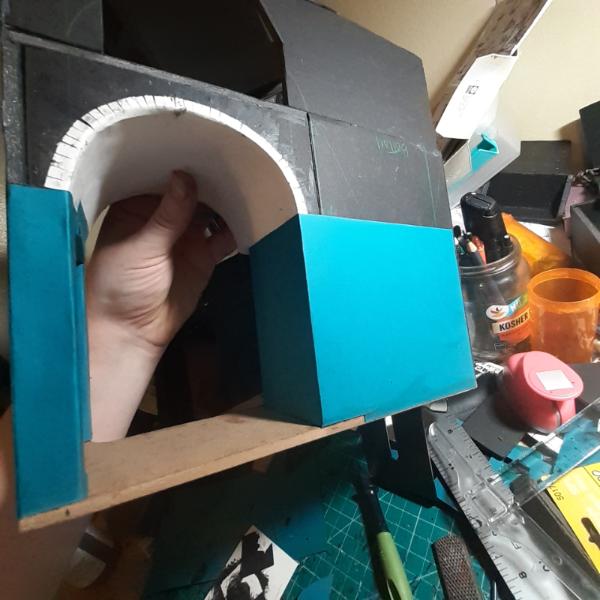
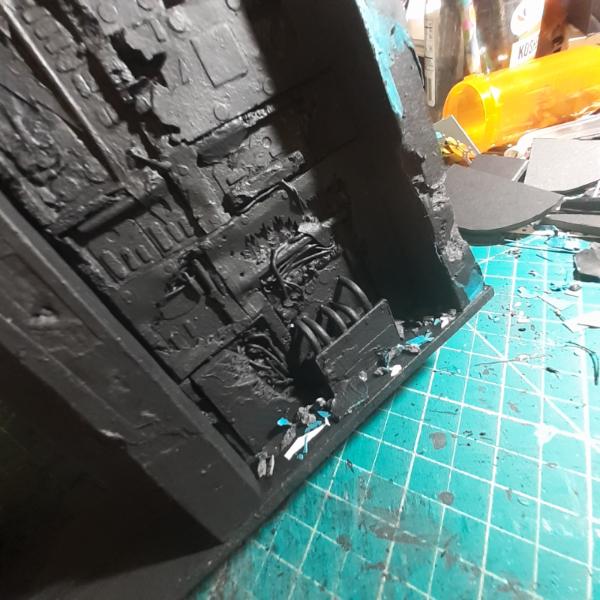
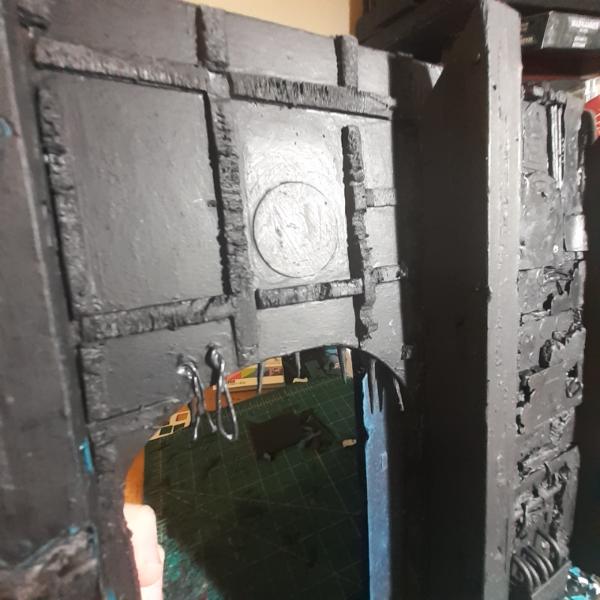
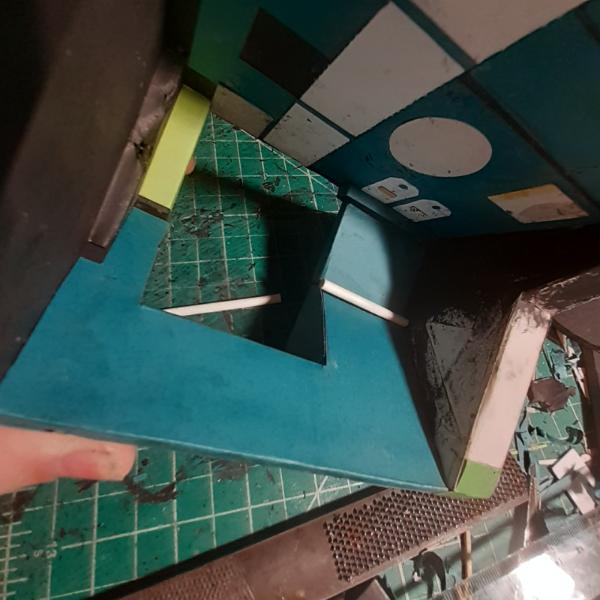
Okay, remember that alcove I had trouble photographing? Well I decided to add some details to it. First, I took a scrap of a masonite "F" and cut it down to the correct height.
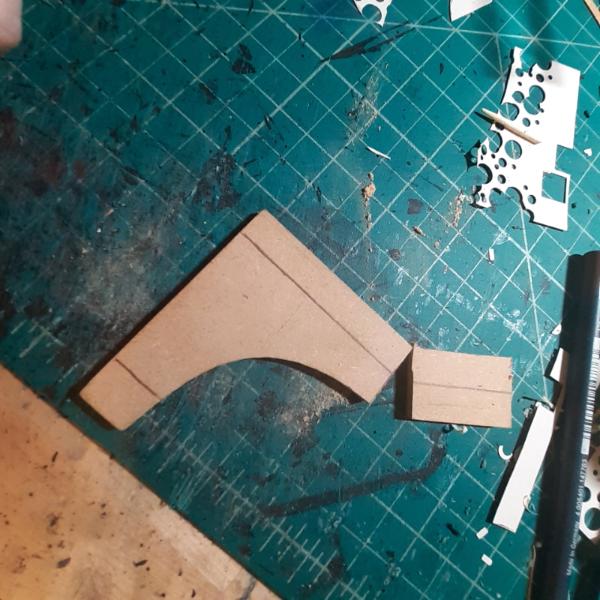
And then I test fitted it to the alcove to see what the end result might look like.
On to using my template
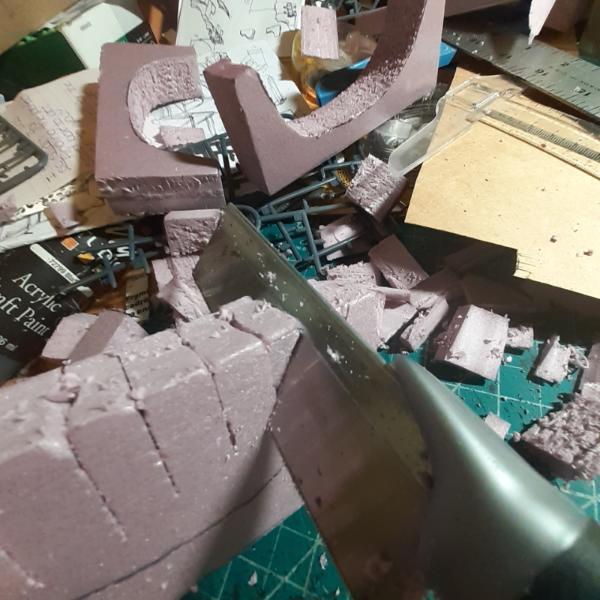
Easy enough. I cut out those original 3 and then went through a couple of base ideas about how to use them. I was thinking I might glue 2 together and then alternate them with a recessed detail. Or glue 3 together, or.... Hm. I settled on cutting out 1 more piece to make 4 in total, glued 2 together to make a thicker support. I made 2 of these; then detailed them up and decided to make a single recessed detail between them. Paper wrapping foamcore shapes is the smartest mistake I stumbled upon with this project.
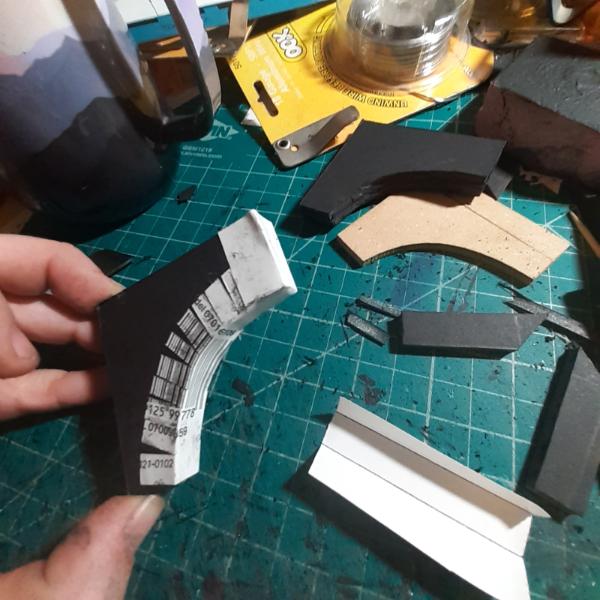 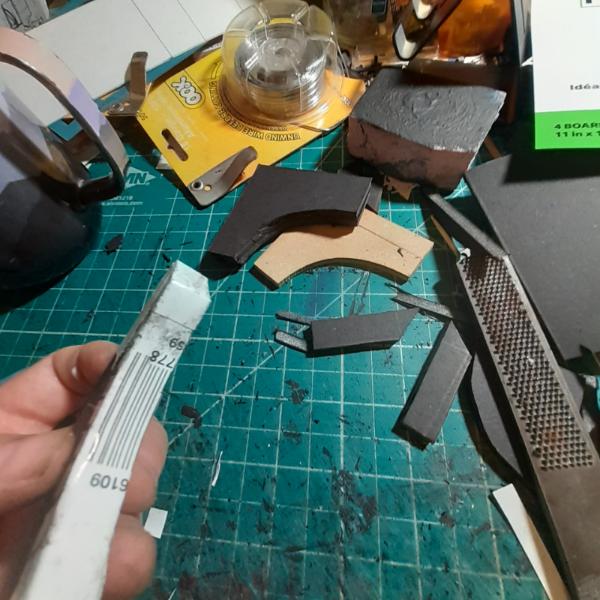 
Never just discard cast offs, folks. You have no idea how useful all these extra slivers of foamcore have become.
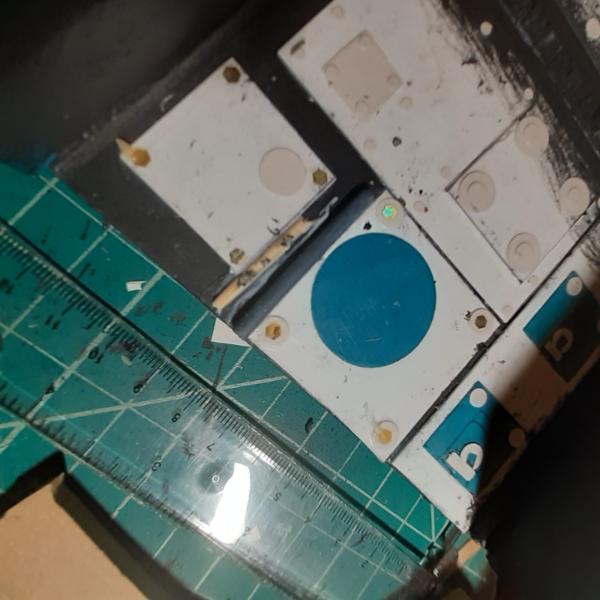
I cut a sloping widget of foamcore, too. It needed covering so I went a little silly, but it worked.
And then, tada, the whole insert glued together.
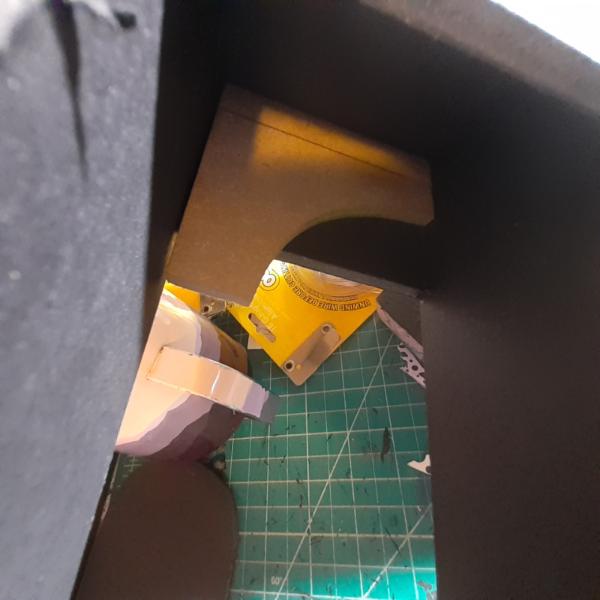
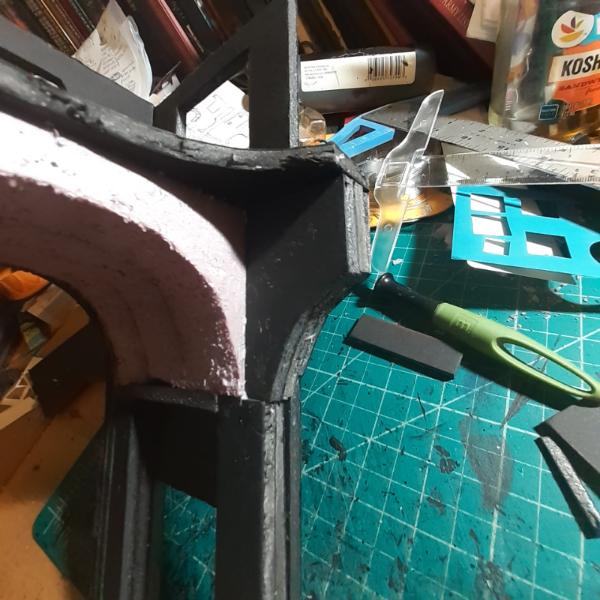
After priming the thing, I got to work on the radiator/vent thing I wanted in the middle. It took some fiddling to figure out the exact size, shape, and placement of the tines.
But I eventually figured it all out.
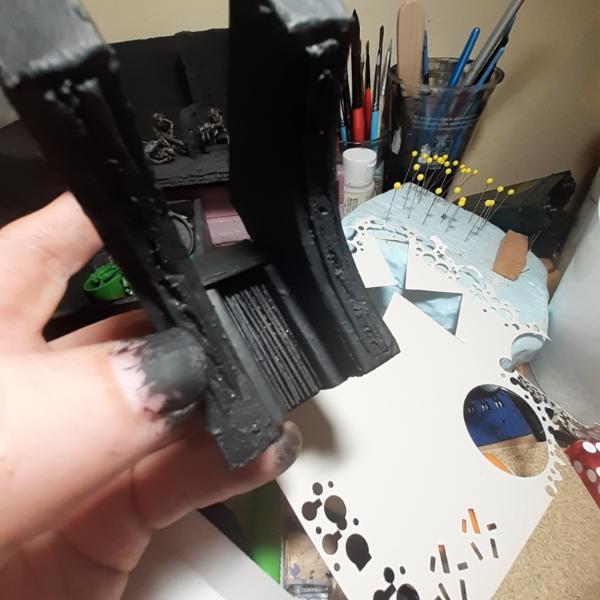
Here it is from the top view (which no one will ever see again).
And here it is tucked away in that impossible to photograph alcove.
This project has really brought the "insane attention to details" out of me. The number of tiny things I've made and hidden, in places only barely visible to even a scrutinizing viewer, is significantly greater than 1.
Thanks for looking and have an (insanely) awesome day!
|
|
This message was edited 1 time. Last update was at 2024/12/27 16:19:36
|
|
|
|
|
2024/12/18 10:53:39
Subject: Waaazag's terrain tutorial blog (formerly The Shattered City)
|
|
Decrepit Dakkanaut
|
Insane and AWESOME
|
Theophony"... and there's strippers in terminator armor and lovecraftian shenanigans afoot."
Solar_Lion: "Man this sums up your blog nicely."
Anpu-adom: "being Geek is about Love. Some love broadly. Some love deeply. And then there are people like Graven. |
|
|
|
|
2024/12/18 17:44:57
Subject: Waaazag's terrain tutorial blog (formerly The Shattered City)
|
|
Ragin' Ork Dreadnought
Deep in the Outer Boroughs of NYC
|
Aw shucks, thanks graven.
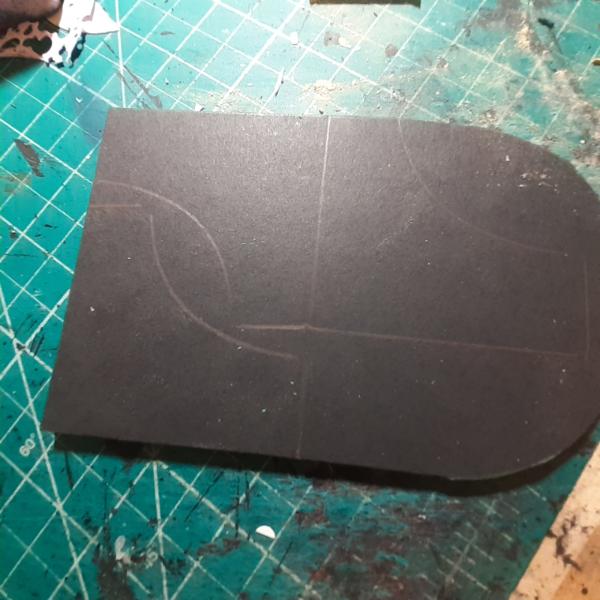
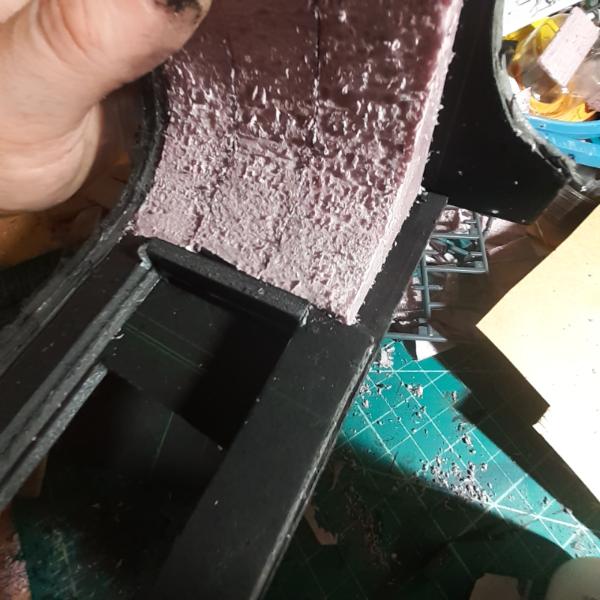
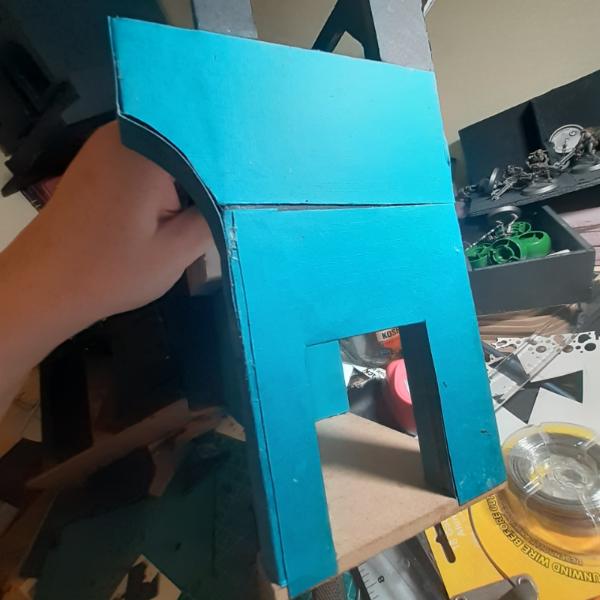
I started work on an archway for another piece.

It was a pain to carve out and I eventually shaped it with my curved rasp.
  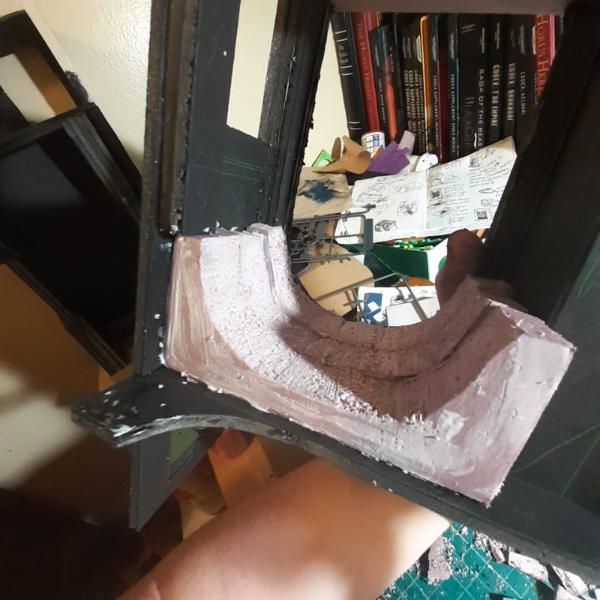
Then I started to add more details and tried to smooth the transition from foamcore to big blocky pink foam.
I felt the floor flanges needed some support, so I built one.
Slow progress is still progress. By working on multiple pieces at the same time I feel like the whole process is taking longer. It's difficult to acknowledge that I am making progress because it doesn't feel like I am. When all 5 of the pieces I am currently working on are done, all more or less at the same time, I will probably feel differently.
Anyway, thanks for looking. Have an awesome day, and comments are always welcome.
|
|
|
|
|
|
2024/12/19 15:46:44
Subject: Waaazag's terrain tutorial blog (formerly The Shattered City)
|
|
Stealthy Grot Snipa
|
This is looking awesome Warboss, love the sprue pipes, I'm nicking that idea ;-)
|
|
|
|
|
|
2024/12/19 16:13:07
Subject: Waaazag's terrain tutorial blog (formerly The Shattered City)
|
|
Ragin' Ork Dreadnought
Deep in the Outer Boroughs of NYC
|
Excellent! That's why I document all of this (and totally not just to generate dopamine boosts when y'all give me such high praise. Honest). Please, nick away.
I started wrapping the archway piece and now I feel like it's wearing pajamas.
Now I am struggling with the idea of leaving this part exposed like it's made of stone, instead of wrapping it like I had originally planned.
Thoughts? Suggestions? I know it's totally on brand for 40k spaceships to have stonework and masonry onboard, I just don't know if it would look right, here. The archway is going to get gussied up with fancy ceiling tiles and the very first piece I made is virtually covered in ornamentation, but is stonework here too far fancy? I guess I just worry about collective uniformity when I'm done with the set.
Also, new, more realistic goal for my December is to complete this piece, the door piece, and the impossible alcove piece by the end of this year and save the structural support, the balcony/top cover, and all the rest of the set yet to be created for next year. I'm tired of setting impossible goals for myself.
Please, comments and feedback are welcomed and encouraged.
Thank you for looking in on me. I love you all.
|
|
This message was edited 1 time. Last update was at 2024/12/19 16:20:16
|
|
|
|
|
2024/12/20 15:53:41
Subject: Re:Waaazag's terrain tutorial blog (formerly The Shattered City)
|
|
Ragin' Ork Dreadnought
Deep in the Outer Boroughs of NYC
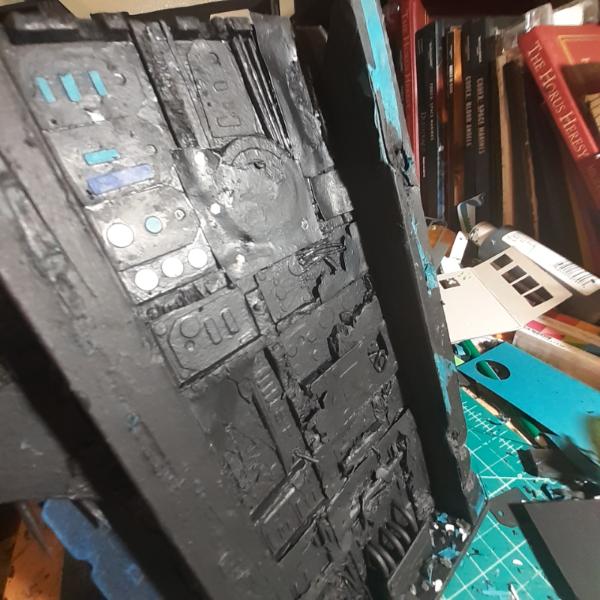
|
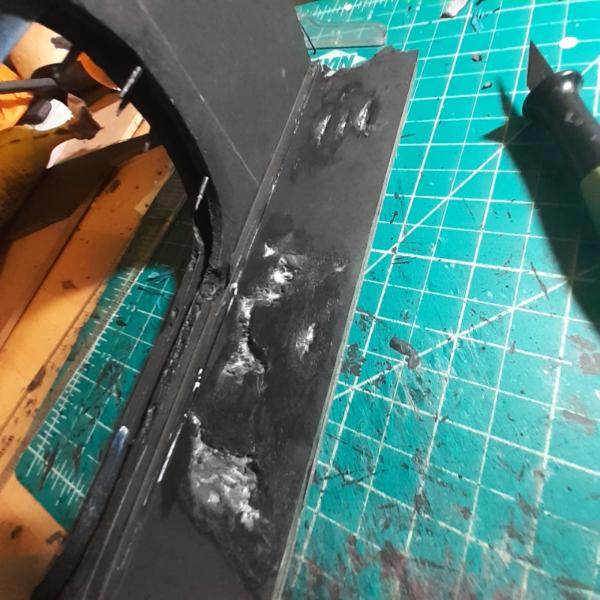
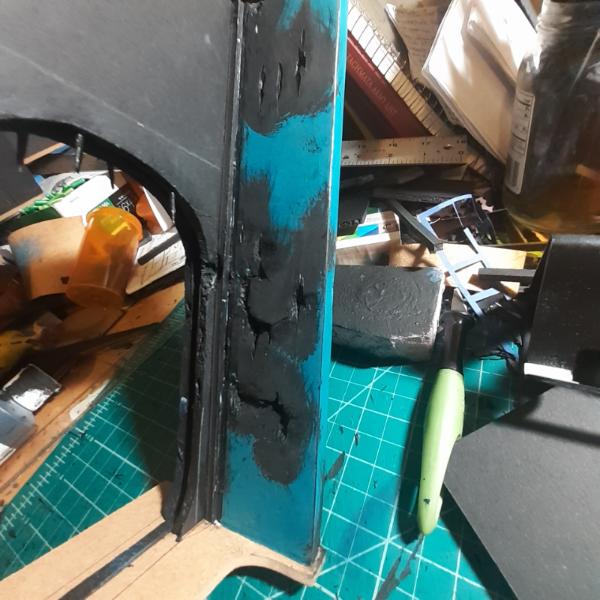
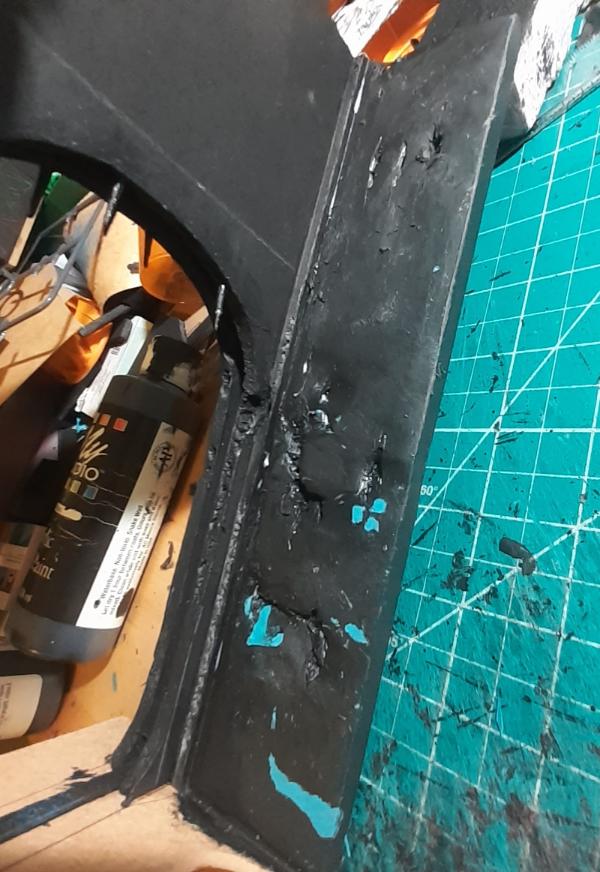
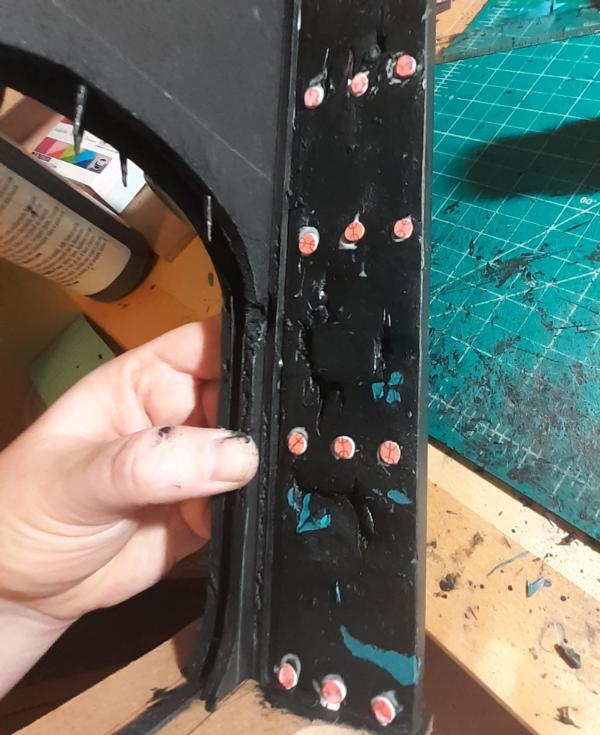
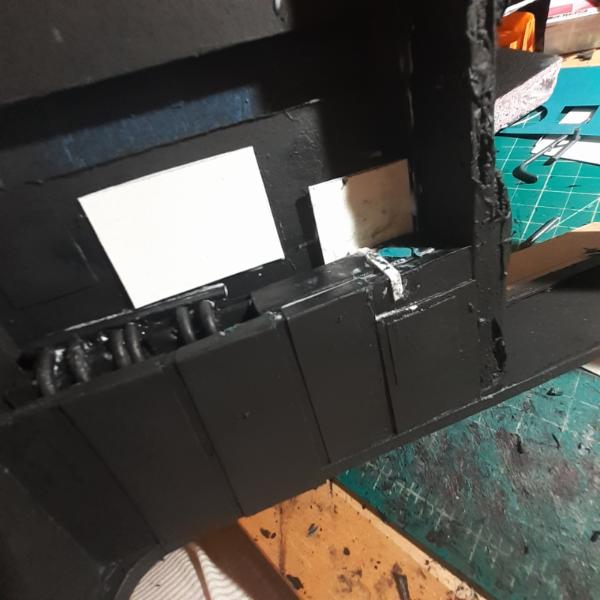
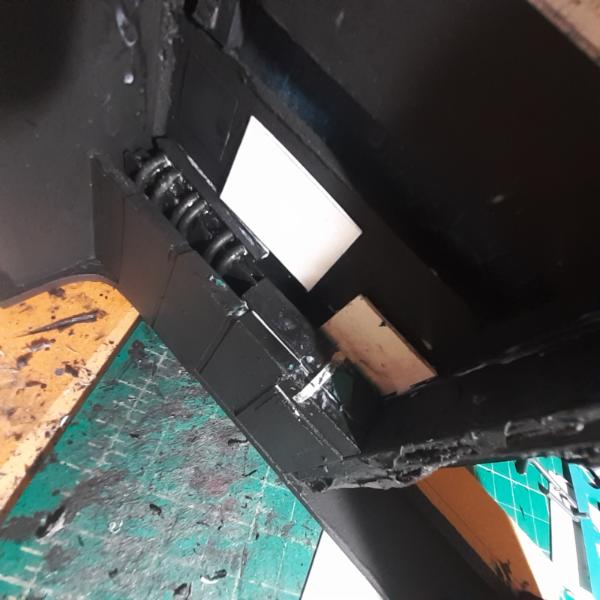
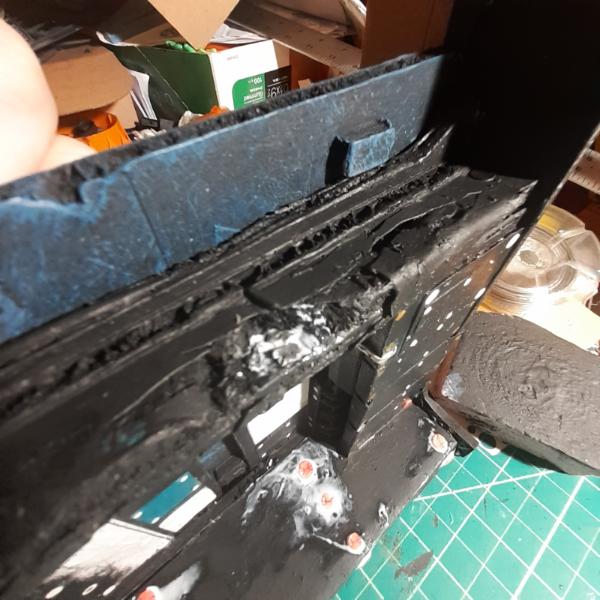
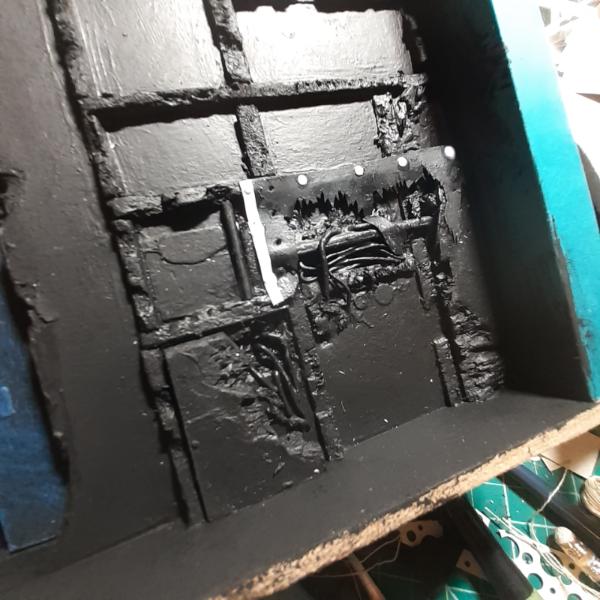
Chugging away, I finally got to work on the other side of the giant door piece. I had the idea that this side of it was exposed more directly to the radiation that's damaged the support structures on the first side. So I endeavoured to create depth to build into by first laying out a grid in colored pencil and then using the multitude of foamcore scraps I had laying around to emulate the wall's internal superstructure.
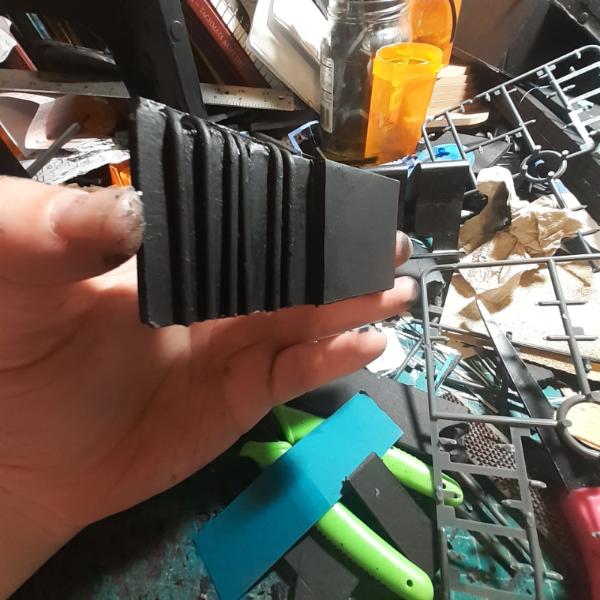
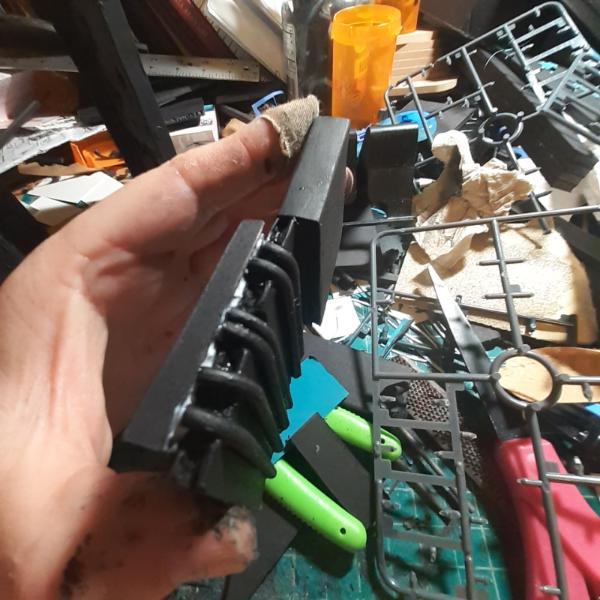
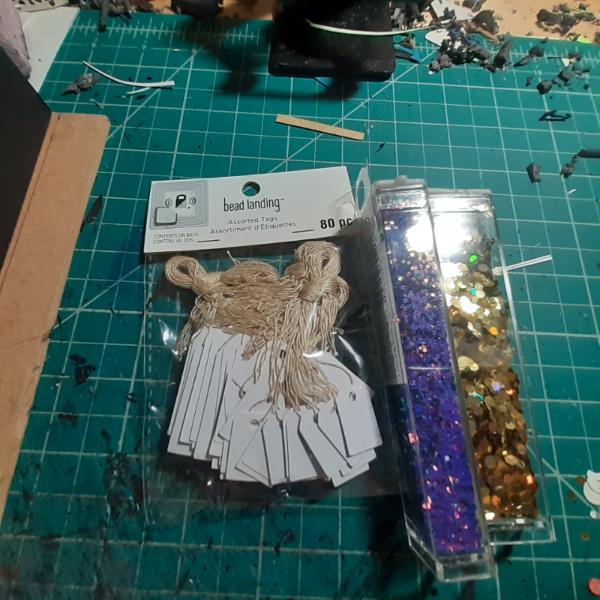
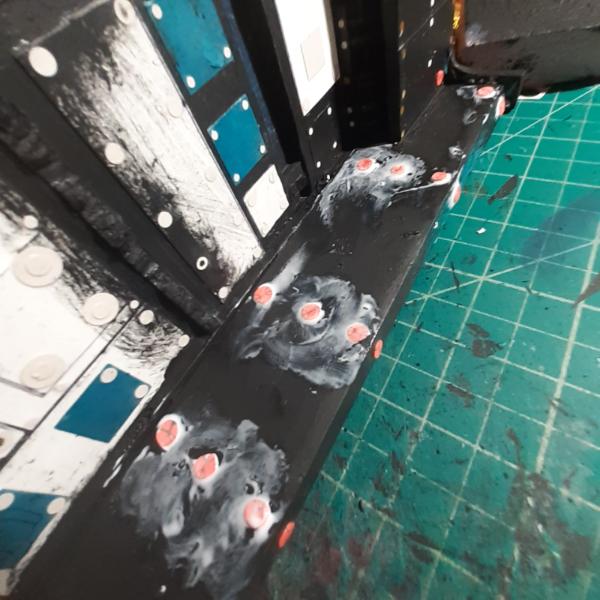
And then, after running the flat of my hobby blade over the framework to create "damage" and irregularity, I immediately got to work layering "damage" using lengths of various gauges of copper and aluminium wire, scrap paper and foamcore bits, paper circles, those mini tags I recently bought, string, and anything else nearby that I thought might do the trick. In some places I cut down into the foam of the piece itself. I wanted layers and layers and layers of detail, but didn't want to clearly define what any of it actually was.
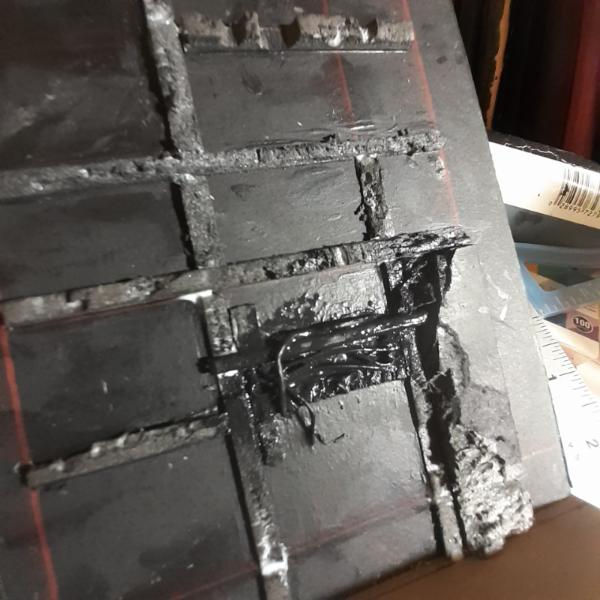
You'll notice between these shots that I realized I would need more foam strips to glue my "rotted panels" onto, even with the spaces I left for my pillars to sit in. So I just glued more strips along the lines originally meant to be the border of this pattern. I also strengthened these strips with a layer of finger-applied white glue and a heavy dose of matte black craft paint. 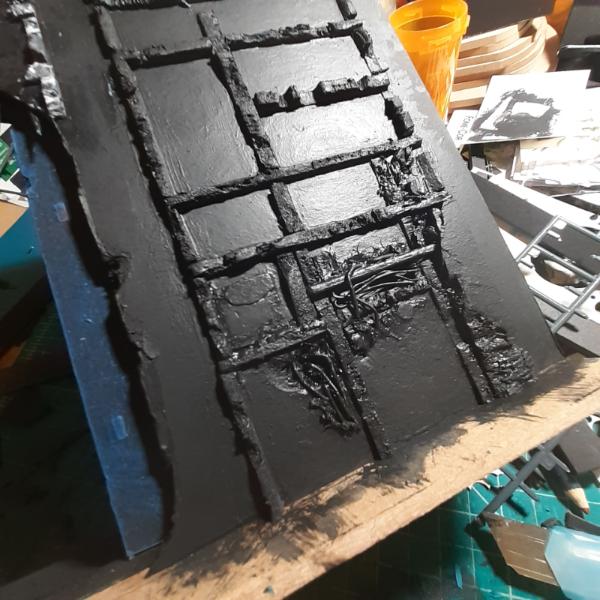 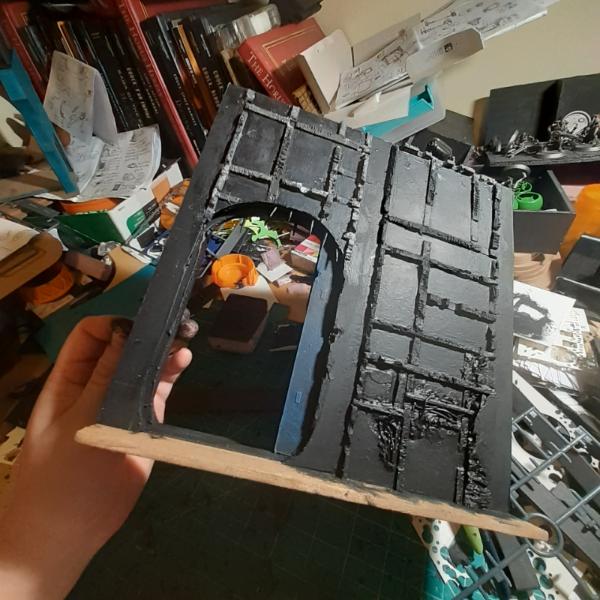
About midway through this process I realized I should finish and apply the support pillars I had planned and so got to work actually finishing them. Repetition is boring, but here I demonstrate how I used this guiding mark to cut the angles I wanted. This is roughly 1cm from the top of the strip. I just scored this with my hobby knife and then used that score mark as the guide for my blade to cut the angle.
Not very interesting, but a necessary step. Then I glued them together, one strip at a time and weighed the join down with my heavy rasp while I worked on other details. The wrap was so tedious and uninteresting that I didn't bother to take pictures of the process. It's all much the same as all the other times I've wrapped stuff. Measure once, fold, test fit, be sad, frustratingly apply glue and sloppily paste the whole thing on. Then create a small extra piece to cover what the first sleeve missed. Prime black (or forget to) and glue to the main piece. Tada.
And then I spent just...so much time getting fiddly with the details until I couldn't take it anymore and put it to the side for now. I'll pick this up again at a later date.
Thanks for looking and have an awesome day! I'm still open to feedback on this post and any other throughout this whole blog. Questions, comments, critiques?
|
|
This message was edited 2 times. Last update was at 2024/12/20 16:01:52
|
|
|
|
|
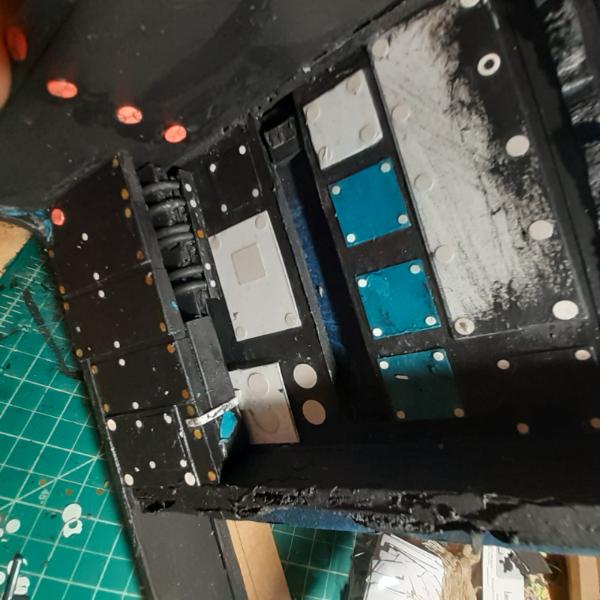
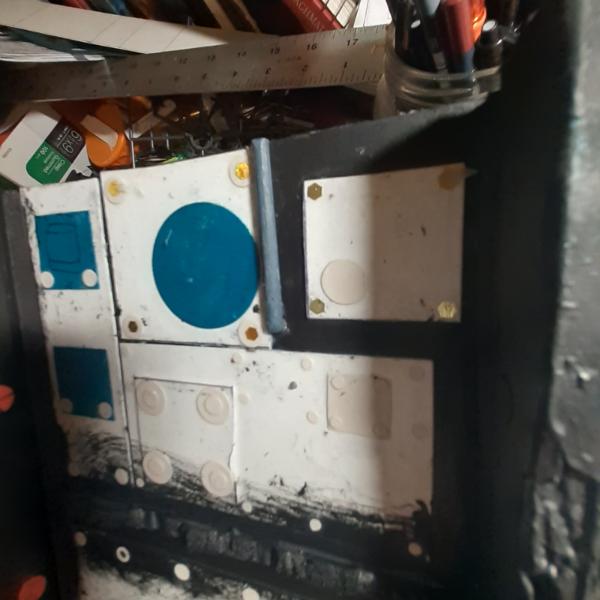
2024/12/22 20:39:20
Subject: Re:Waaazag's terrain tutorial blog (formerly The Shattered City)
|
|
Ragin' Ork Dreadnought
Deep in the Outer Boroughs of NYC
|
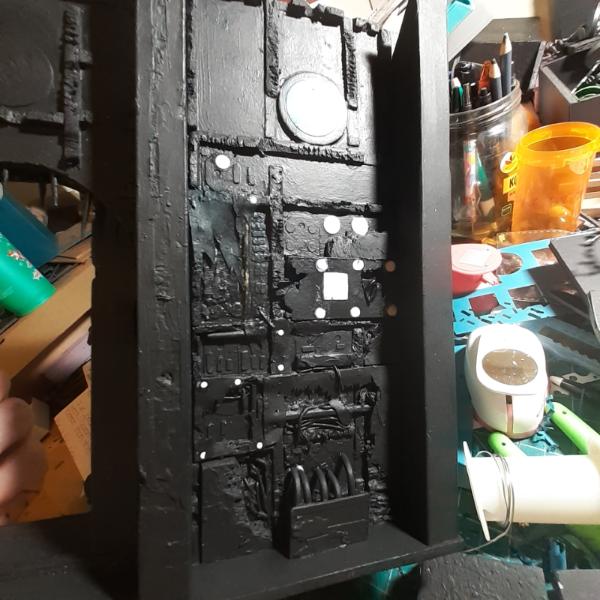
Finally primed the finished wall.
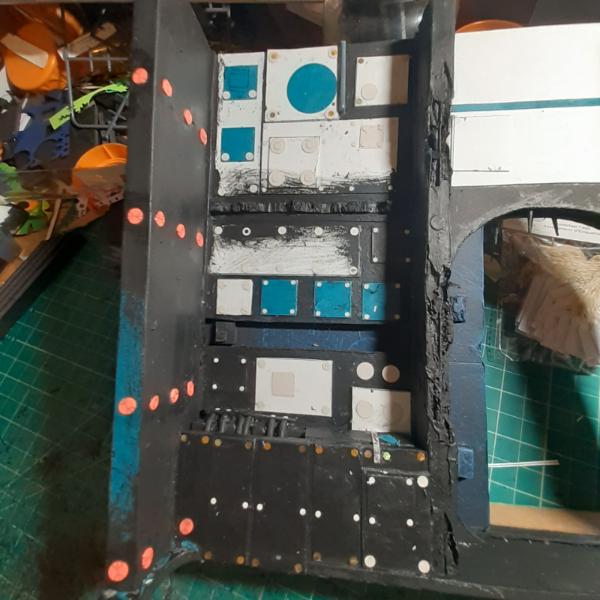
And got all 3 pillars in place on the other side.
And did a ton more work on the detailed side. The bottom:
The top:
The wall as a whole:
And just getting started on the wall over the door:
More to post up soon! Thanks for looking and have a happy and safe holiday of choice! I celebrate the Winter Solstice, personally.
|
|
|
|
|
|
2024/12/24 17:43:02
Subject: Re:Waaazag's terrain tutorial blog (formerly The Shattered City)
|
|
Ragin' Ork Dreadnought
Deep in the Outer Boroughs of NYC
|
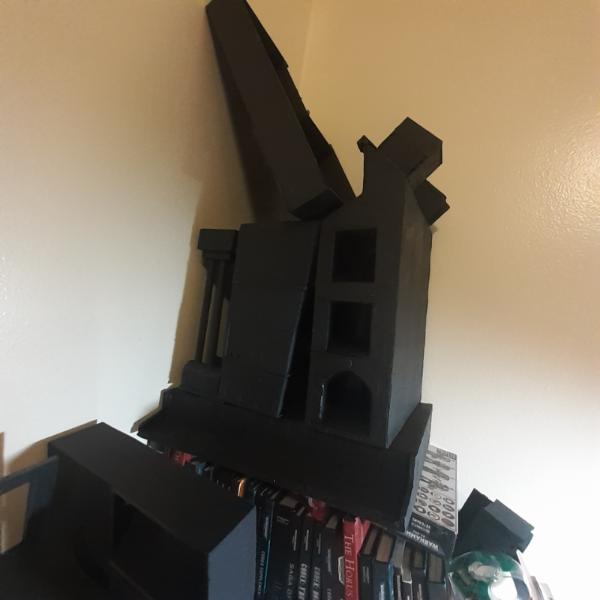
I did some work on the stairs topper. Started wrapping it and detailing the floor.
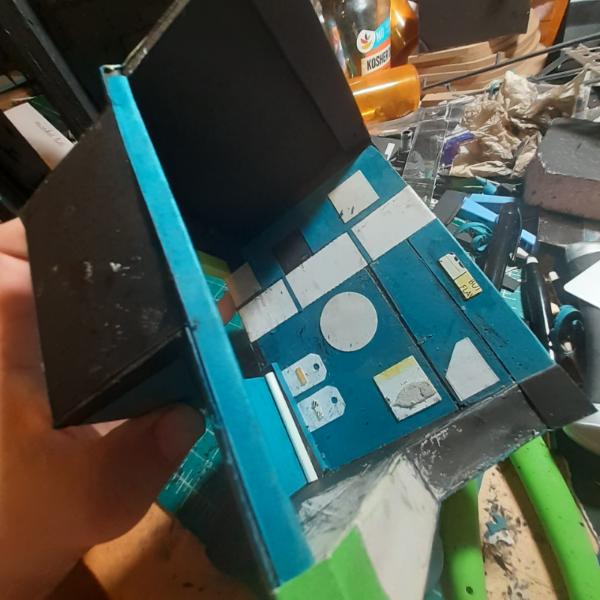 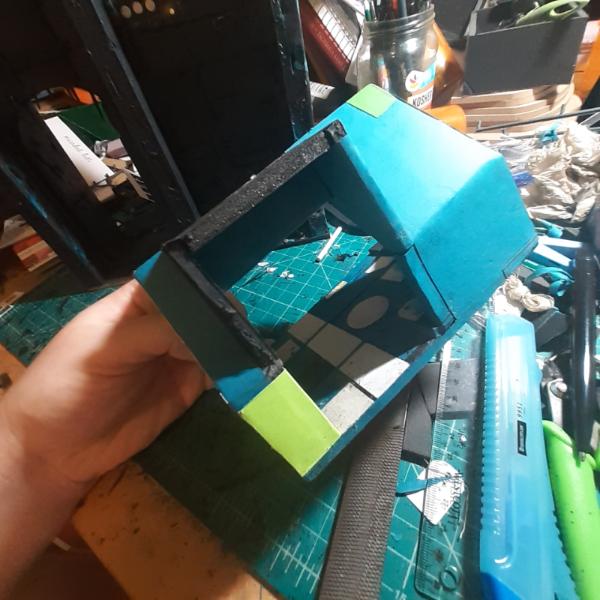
Paneling the exterior wall...
And detailing the underside/ceiling for the level below (and priming it whenever I had left over black paint on my brush from painting something else)...
And then some ideas about what to do with the inside wall join (that's a lolipop stick cut down to size)...
Thanks for looking and have an awesome day!
|
|
|
|
|
|
2024/12/26 15:04:12
Subject: Waaazag's terrain tutorial blog (formerly The Shattered City)
|
|
Regular Dakkanaut
|
Your detailing is looking quite nice, can't wait to see the full set of terrain all together when you are done.
|
|
|
|
|
|
2024/12/26 21:41:08
Subject: Waaazag's terrain tutorial blog (formerly The Shattered City)
|
|
Ragin' Ork Dreadnought
Deep in the Outer Boroughs of NYC
|
GreenScorpion wrote:Your detailing is looking quite nice, can't wait to see the full set of terrain all together when you are done.
Thanks, GreenScorpion, me too!
|
|
|
|
|
|
2024/12/26 22:43:07
Subject: Waaazag's terrain tutorial blog (formerly The Shattered City)
|
|
Walking Dead Wraithlord
|
Insane attention to detail seems an appropriate diagnosis. An epic build, for sure!
|
|
|
|
|
|
|
