Forum adverts like this one are shown to any user who is not logged in. Join us by filling out a tiny 3 field form and you will get your own, free, dakka user account which gives a good range of benefits to you:
No adverts like this in the forums anymore.
Times and dates in your local timezone.
Full tracking of what you have read so you can skip to your first unread post, easily see what has changed since you last logged in, and easily see what is new at a glance.
Email notifications for threads you want to watch closely.
Being a part of the oldest wargaming community on the net.
If you are already a member then feel free to login now.
2013/12/16 07:01:52
Subject: First BIG terrain piece - ruined mixed commercial/residential
For your sanity, I've decided to split this post up. If you want to read a bunch of interesting information about the building of this terrain piece, click on the spoiler below, otherwise, just scroll on down to the pictures.
Spoiler:
To begin with, I'd note that this isn't my first terrain piece. I did a bit of work with my Foleran desert scheme (crushed limestone, small shrubs, etc.) over the past several years. You can see them show up in my 5th and 6th edition battle reports from time to time. These earlier works were little projects mostly designed just to build my skill set. A few small rock pieces for layering terrain, a corrugated steel shed and a watchtower for building construction, etc. Most of that was a few years ago - I'd spent most of my time building up my guard army from a semi-painted 1000 point force to a more or less completed army. I did have a brief stint in terrain building more recently when I made this number. For that terrain piece, I decided to make it look like my berzerkers' bases. After that, though, I worked on my CSM army some more, including a new, better way of doing basing. Having taken a break from playing 40k since a couple of months ago, I decided to work on some terrain. Rather than being the desert pattern, it would be my new grey-brown static grass motif of my chaos army.
But I didn't want to make yet more tiny pieces. This time, I wanted to do something real. I wanted it to be big, and I wanted to use my knowledge of 40k to make a terrain piece specifically for 40k.
A fair bit of design work went into this project. The first thing I didn't want was to have yet more tiny ruins nubs scattered around the table. I didn't want yet more terrain that heavily favored gunlines - like aforementioned GW ruins nubs that allow a squad to spread out across a couple of levels to avoid blast templates and barrage weapons, while also getting a cover save and slowing down potential assaulters while also giving them a height advantage allowing them to shoot over terrain and thus negate cover saves. None of that at all.
I decided that, for pity's sake, I'd do this ruined building (as I knew I wanted it) with a tiny bit of that kind of usual ruins nonsense, but with a few things to mollify it. Firstly, I would have some windows, but I'd keep them to a small, reasonable number. A few models could shoot down from a good vantage point, but not an entire unit, if possible. There would also be some more hide-in-ruins-cover places to shoot from, but they would be on the ground floor, and I'm anticipating creating more terrain that blocks line of sight at that level. Finally, the best of this kind of "traditional" ruins benefits would come with a secret cost. The base of this ruins would be 14" x 20" and the choice shooting gallery setup would be on one of the short sides. This means that, in a 12" deployment zone situation, that you can deploy in the ruins, but you have to spend at least a turn moving forward to take up positions in the windows, rather than just starting the game guns blazing. Likewise, in a 24" deployment, nobody would be able to put gunline units deep in their backfield and still use the best part of the terrain.
I also went back and forth about a roof and decided in favor of it. The idea being that you get to shoot over terrain, but, being a flat roof, you don't get the benefit of cover while you're using it. Plus, there's a chance you can get in underneath their line of sight, which is especially easy with a roof in the middle of a big terrain piece.
But beyond this basic consideration, there were other things I planned as well to make the terrain more dynamic. More terrain that you actually use, and likely don't use the same way twice in a row. To this end, I designed it to have the bombed out roof and a bombed out second floor that have various bits of nested line of sight blocking and revealing. I also made it so that from one diagonal direction lines of sight are blocked along the entire terrain piece, while on a different axis, you get to "cut" through the corners. Basically the idea was to create a bunch of different places in a single piece that have a mix of different types. You know, something interesting.
But there was also something else I wanted. Before I started this project I did a little math and found out something absurd. Assuming you take 1/28th scale to be a 1:60 ratio (which is what I used for this project, more or less), then a standard 4x6 foot table represents a very, very small area being fought over. We're talking about an area smaller than your average Wallmart parking lot (as in roughly HALF the size). It's about as big as the parking lot in front of the strip mall where my FLGS is. That's very, very small. As such, I wanted to bring some sense of correct scale to my terrain, to get people to see what they're actually shooting over, rather than the ruins nubs loosely sprinkled here and there.
I started by going out with the tape measure and getting the size of the tiny house that I rent and was shocked to see how big it was (like 6" on a side, or something, for a seriously tiny house). After that, I started walking around and, as best I could, approximating the size of buildings downtown in the small city where I live. Eventually I decided to make the Wagner Coal Transfer building the base around which I'd build my model, at least for approximate size (I wanted a building that was a little more square, though). Like many buildings where I live, the piece would be a mixed commercial/residential, where it has a small shop or two on the ground floor and then a few apartments up above it.
For the end design I decided on something akin to a showroom floor with big windows in front with a little bit of office space in back. As the second floor would be mostly bombed out, I'd more or less just need the floorboards and not so much of a floor plan.
While the designing was going on, construction was started. I cut out a big piece of .050 sheet styrene for the base, and decided that for the concrete walls (didn't want to futz with brick), they'd be a laminate of two pieces of .050 glued together.
Immediately, though, I ran into a problem: windows. Most of this terrain piece wouldn't be just straight walls, but would be a combination of bottom, below-window pieces, top above-window pieces, and then full-height sections of walls between the windows. When people do this correctly, they go and use a laser cutter to just cut out the windows from solid pieces of plasticard. I know absolutely nothing about that, so I'd have to do things by hand with my trusty x-acto knife. This, of course, led to problems because .050 plasticard is really hard to cut, much less accurately. As I paneled everything together, there were the invariable seams and as things got glued together getting the alignment of the pieces correct was virtually impossible. I tried to use greenstuff to fill in the gaps, but the end result were seams everywhere.
After some work, I had the basic footprint of the building laid out and the first floor completed.
Once this was done, I finalized the floor plan. I'd have a big front room, a hallway leading back to a set of stairs and to a small office space. All of this, though, meant interior walls. Not knowing exactly how the floorboards were going to go down, I just assumed that they'd all be seen, and so built them "right". In this case, I broke out the .030 plasticard and made the walls with some .050 beams between them.
Here it is half-constructed:
You can see the door there. Anyways, once that was done, I put some more .030 on the other side to create the appearance of drywall nailed to studs. This was done for the stairwell, and for the hallway with a half-collapsed piece in the office space to show where there was once a division, but it got bombed out.
The last thing for the bottom floor was the stairs. These were done by making a pair of "stair jigs" so to speak - two stepped pieces of .030 plastic in a triangle shape. To this I cut out more .030 for the stairs and then glued the stairs into their frame. This allowed me to have the stairs as a cohesive unit that I could then glue down on to the terrain.
With this complete, I ran into my first of several paint vs. construction problems. I wanted to glue in the stairs and the walls, but this was invariably going to be impossible to prime, let along paint once everything got glued down. There would be just too many nooks and crannies. After deliberating, I decided I could probably get a paint brush in there, but the pieces would have to be primed before they were glued in place.
After this, it was a matter of throwing around some sand on the ground floor and calling the construction complete. Time to move on to the upper floor. This meant more .050, and more not laser cutting, and more seams that I continued to struggle with.
When this was done I wound up in a real jam. The next step was putting down floorboards. If I put them in now, though, then there was no possible way that I'd be able to prime the underside of them, and painting the floor and walls through floorboards was going to be likewise nearly impossible. The only way for it was to assemble and paint the floor boards, then paint the walls and floor of the main terrain piece, and then glue the floorboards in. This was going to be risky (that the floorboards wouldn't be assembled right and wouldn't fit, or that the connection between the boards and the wall would be weak, or that I could glue things in wrong and leave glue marks on completed wall, among other possible problems). Plus, I really, really don't like the idea of doing separate things in separate ways at separate times. I'm a big fan of assemble then paint...
But there was nothing for it, and so I started painting.
First came the walls. For this I pulled out a secret weapon - a spray can of black texture spraypaint. The texture was really subtle on purpose. All I wanted was to roughen things up a bit to look more like concrete and less like a smooth surface. With careful use of masking that went down and in the end produced a completely perfect (if extremely subtle) effect. Meanwhile, everything else on the ground floor was hit with regular primer (including a coat over the stipple paint as it came out kind of shiny).
While all of this was going on, I was having to deal with a nagging design problem. Namely, just how "fresh" did I want these ruins to be? On the one hand, fresher meant more detail. I could put up motivational posters in the office ("breaks longer than 10 minutes are HERESY", "work smarter AND harder", and the like), I could paint on some details in the showroom ("our prices are great (technically the same mandated prices as everyone else)", or "Shoplifters will be purged with fire", etc.). I could have fun with things and screw around.
Every time I tried to do this, though, it just wasn't quite coming out the way I wanted. Baby blue walls in the office looked bad, and they looked better when they became faded, and they became best when I gave up and just painted them light grey. These same kinds of problems continued, as adding more stuff tended to make things just look more cluttered, not more better. Especially once I put down a bit of static grass inside the building, the aesthetic finally gelled.
This wouldn't be a thriving city recently shelled and evacuated. No, this would be the ruined husk of civilization ruined long, long ago. The only purpose this building has had in living memory has been being fought over, and the only reason its being fought over is because it's there. Half of the second floor would be caved in, but below it it wouldn't be full of concrete and floorboard debris - no, all of that had been cleared off long ago. Everything not nailed down had been looted, and re-looted and eventually broken down and forgotten.
There would be a new aesthetic for this - the austere beauty of total desolation. I was now on a mission to make everything look as depressing as I possibly could.
This also had an added side-benefit. My work on this project, as it was already becoming plainly clear, was very, very sloppy. I'm still not that great at working with plasticard, and I was doing this in a bit of a hurry to get enough done before my morale broke as it tends to to on over-ambitious projects like this one. With this choice though, the unending pile of mistakes and shoddy work started to look like features. As the grey-streakiness of the concrete started to develop, the seams in the .050 started to look less like I made a mistake and more like the concrete of the building just wasn't laid out very well in the first place. The warped walls looked like maybe they were once at a 90-degree angle, but have since been wrecked out of place. The fence I would build at the end would particularly benefit from this (as you'll see later - no, it wasn't warped on purpose).
Once I'd painted everything to be painted, I spray sealed it and threw in a bit of static grass. The idea being that it's been desolate long enough that nature has started to pathetically attempt to reclaim it (but even this is being done in a half-assed, depressing, desolate way with anemic splotches of dried tufts long desiccated and dead).
This left only two things for the main building, the floorboards and the ceiling. The floorboards were put together by making some .050 beams and then making a LOT of small .030 planks. The process was surprisingly straightforward, sort of like weaving a basket, except it was only over-over bits.
Once again, this was rife with cutting errors and other problems. There are all of these gaps in here not because I was trying to make it look desolate, but because I just couldn't do it any better with the time, tools, and skills that I had at my disposal. The one benefit I can claim is that by using this method the end result, while looking gossamer thin is actually very strong, for much the same reasons that spaghetti bridges are. Lots and lots of surface area and contact points with lots of flexible strips and lots of glue.
And while the weave was strong, after I'd painted it, my fears came to roost. Gluing them down into the ruins was very tricky especially as, as feared, things weren't constructed quite flush (walls or floorboards), which left tiny gaps everywhere. On every floorboard set I could get one wall glued down nicely, but then had to slightly twist everything into place for imperfect seams, yet again. By this point, though, I was starting to get burned out. I did the best I could (and I might come back on one spot that really doesn't want to stay anchored and put a little reinforcement in) with my dwindling patience and, seeing that it could hold up big, heavy metal models with a little bit of vigor in their placement, I was happy enough with the structural integrity.
Believe it or not, I got to this point, roughly 2/3-3/4 done in just a week and a half. Burned out, though, I put this project on hiatus for a bit over a month. Slowly but surely I started to pick at it again, this time taking about three weeks to finish it completely off while also working on other stuff.
When I came back to it, the only thing that was needed on the main building was the roof. For this, it was time to go back to my nearly exhausted .050 stash (yes, I used just a little bit over an entire 4x6 foot sheet of .050 plasticard in the making of this terrain piece. Thank goodness for bulk rates). With a little work, I had the two pieces I wanted cut out. The small piece would go on the corner, while the large piece would cover nearly half of the terrain piece as completed so far. The only problem this left was that it created a huge blank space over detail.
To fix this I drilled in some holes and put in two small bits of tubing as exhaust ports from something in the closed-off part of the terrain piece. I put down several layers of backing, knowing that they would be the two things sticking off of the top, and had a risk of being pushed into the model to be lost forever. It's probably the strongest part of the piece now. Anyways, this still left a big space that I wanted to do something with. I had plans for doing an air conditioning unit or something on the top when I reminded myself of the aesthetic I was going for - instead there would be just the bent, rusted lugs that USED to hold what was once an air conditioning unit or something until desperate civilians had scrambled up off the roof and removed it for scrap.
These pieces were then painted, sprayed and glued down. The end result was pretty beefy. A bit of overlap along most of the seams meant a lot of surface area, and I could (and do) regularly pick the piece up by its roof overhangs without problems.
When this was done, I had a finished building, but not a finished terrain piece. As you can see from previous pictures, there was a extra blank spot. This was designed to be the rear lot. After flirting with it being a parking lot briefly I decided that no, this would just have been a grassy patch out back that would have been used for the rear entrance and for storage.
I had ideas of making it a combination of wooden fence and chain-link, but in the end decided to go with just the wood, and have it be damaged to open up some line of sight. Unlike in my last terrain piece, though, everything was smaller, as it was to scale. Instead of big .050 supports, it used small, thin .030 supports. This meant that after I made the frame the very act of gluing the boards of the fence down caused it to warp. As I put down the layering for elevation with more plasticard, that caused more warping. Then the sand - more warping. The desolation look made this not so bad, but it certainly presented me with some challenges for next time I want to do fencing.
The only other things were a bit of detail on the large, blank rear side of the building. I started by putting a door in by just adding the frame and painting it a different color. I also added in a tiny peephole (which the pictures below don't show well, but it's completely perfect), and threw on a handle from the guard vehicle sprue to create the effect of an impenetrable steel door.
I also, just to make it look more depressing, created some sort of chemical storage tank out of two bits of spare PVC joiners and more plasticard with some rivets, along the lines of how I made the tanks for my hellhounds. After more masking and priming, it was into the final stretch.
Now, while I was working on this, Games workshop came out with its new "technical" paints, and, on impulse, I bought the cracked earth stuff. I did some experiments with it and then decided that perhaps it would help with the rust effects I wanted on the tank. The idea would be that it would make the cracks, I'd paint white over it, and then I'd wash a rust color into the crevasses. It turned out, though, that the cracks were too fine for this, and so it didn't really go as planned. The underlying extra paint at least made it so that the rust coloring didn't look merely painted on, but sort of like it was bulging up from underneath paint.
I also, when doing the sand, decided to leave a big patch open into which I gooped half the paint pot. The idea was that there would be a low spot that water (or perhaps that leaky old chemical tank) would drain into (how... depressing?). In the end, once again, the cracked effect was too slight to be properly seen, and so I just sort of had to deal with it. More static grass and I was done. All I had to do was a bit of repair-work (while static grassing, the piece started falling off the table, and I grabbed it just by the fence. With the exception of the floorboards, my work is usually pretty darn durable, which this event showed).
After that, all I did was some detail-work (well, before the static grass), like adding in some bullet holes to two of the corners, and throwing on some graffiti (with some splotches where the owner of the building tried unsuccessfully to paint over them), and rusting things up a bit.
Then it was just a matter of taking some pictures.
To view a larger copy of this picture, click here.
To view a larger copy of this picture, click here.
To view a larger copy of this picture, click here.
To view a larger copy of this picture, click here.
To view a larger copy of this picture, click here.
It's hard to see with a camera, but if you look at it flush, you will notice that there are bullet holes around the window ledge and then, from a front-on angle, bullet holes in the back walls in the gaps where the windows are.
To view a larger copy of this picture, click here.
Probably one of the things that I'm most proud of is that, because everything was built more or less to scale, and because everything was painted, etc. This terrain piece even looks great and, more importantly, realistic-ish, even from usually less-flattering angles, like this one looking in through the side big window.
To view a larger copy of this picture, click here.
Right? that could be a real building... sort of?
And then, to give a better sense of it, I threw in some of my minis to show off the scale of everything a bit better:
And there you have it.
So, talking about the pros. Firstly, this is a huge terrain piece. While it looks like it's only big enough to hold a guard infantry platoon and some extras in it, don't be fooled - this piece is just a little bit smaller than 1.5 x 2 feet. That's nearly 1/6th of the board. Put another way, when you roll for the amount of terrain in a 2x2 foot square, this piece takes up the whole square. Really I just need a couple more of these and a few smaller pieces and I have myself an entire game board. Secondly, I really like how complicated the piece is. Some models get cover of one kind here, but of a different kind there, and sometimes there's line of sight blocking, but sometimes no, etc. etc. Also, of course, this terrain piece is a heckuva lot better than the usually small, often broken, nearly always unpainted little terrain runts that you usually see, at least where I live. I have to say, I'm over all rather impressed. Also, this piece weighs surprisingly little, and is mostly laminated plasticard, which means it's practically indestructible.
For the cons, I'm not actually that sold on the static grass. It looks good when you're in there in model's eye view... but not so great otherwise. I especially am having problems getting a ground color light enough to make it so that the little clusters don't distract you from looking at the rest of the piece because of how cluttered it makes stuff. Also, of course, there's the irritating floorboards. And the huge pile of mistakes everywhere... everywhere.
In a way, though, this was a good piece to make mostly because I got a LOT of experience from it. I'd never tried doing concrete walls, and now I know the kinds of problems they create. I'd never worked at scale with the correct, thin-gauge plastic card. I'd never done anything properly multi-leveled before. I feel like I've done everything I'm going to do for some time in this piece, and so I got all of my little baptisms of fire out of the way in preparation for my next piece. My next piece which, I can say with a great deal of certainty, will be less ambitious than this one.
Anyways, I hope you like it, and that those who read the top part found it somewhat informative. Time for a short break over the holidays before it's time to buy some more static grass and sheet styrene and have another go, hopefully a little wiser...
Like the look of it, great job. Being nit picky, those are some very straight lines on the broken wall sections. How durable are you finding the staggered planks to be? I've wanted to do something like it, but it looks like it wouldn't hold up to much. Looks good though.
A ton of armies and a terrain habit...
2013/12/16 11:38:58
Subject: Re:First BIG terrain piece - ruined mixed commercial/residential
I love the floor and think it looks great with the models on it, you've really thought it out. the bullet marks in the walls are awesome!
The only thing that I'm unsure of, other than the bullet holes, the walls look a little...too....clinical...maybe that's not the right word. What I'm trying to say is that it's 40k and the walls look a little clean, no smoke damage, rubble debris or blood stains.
Brotherhood of the Damned 20,580
Nids 1,900
5,800
I am the Beard and I'm..........*whispers* Awesome
2013/12/16 12:49:27
Subject: Re:First BIG terrain piece - ruined mixed commercial/residential
Nice model and a really neat paint jub. HOWEVER, I would add more weatherin to make it really stand out. Check some pictures of old concrete for reference. Smears of runst from internal reinforcing, white drips from salt leaching out ogf the crete, brown rising damp and green algea are all great and easy ways to make your models really look the part. YOu have done all the hard work, and its really well done. Next comes the fun and easy part, ,making it dirty!
Ailaros! dude that looks brilliant! :-) the flooring is just excellent and a very good write up on how you did the project too! I love the pic of the 'real building' things like that make for more exciting hobby times I think, when you can feel the setting your models are in battling across ruins etc. I almost wanted to shout to the guard " Terminators!! below you!" job well done!
Flesh Eaters 4,500 points
" I will constantly have those in my head telling me how lazy and ugly and whorish I am. You sir, are a true friend " - KingCracker
"Nah, I'm just way too lazy to stand up so I keep sitting and paint" - Sigur
"I think the NMM technique with metals is just MNMM. Same sound I make while eating a good pizza" - Whalemusic360
2013/12/16 17:27:57
Subject: First BIG terrain piece - ruined mixed commercial/residential
Sweet piece, looks very functional and immersive. I think some more weathering and beating up the broken wall/roof sections a bit, make them a bit more jagged, would make this amazing.
2013/12/16 17:40:44
Subject: First BIG terrain piece - ruined mixed commercial/residential
It looks pretty cool. The floorboards, despite what you might say about cutting mistakes, look great. I like the static grass as well.
The only thing I might say about it is the roof and walls look a little plain. Some air conditioning units, buttresses, more graffiti, posters etc would really bring this building to the next level, as would some rubble along the outer margin between the walls and the edge of the board.
Mr.Omega wrote:Very, very cool. I'd imagine that the kill team rules would work really well it.
nerdfest09 wrote:I almost wanted to shout to the guard " Terminators!! below you!" job well done!
Lol! ... almost... but maybe not. One of the things I think is interesting about having a scale backdrop is that it really accentuates the size difference between, say, running terminators and puny little guardsmen. These pictures sort of don't give it justice (it never does for size comparisons for some reason), but in real life it's easy to see how a guardsmen easily fits into his spacious environment while the terminators are ALMOST scraping their spikes on the ceiling, and how they couldn't fit through regular sized doorways (not even close).
Also, something I wanted to note is that I'm not intending on playing any of this as area terrain, so you could actually move through the parts of the model you could move through at-speed. I can see a few times when you'd want area terrain for its own sake, but most of the time, it feels like area terrain is a cop-out for having insufficiently complicated terrain in the first place.
dracpanzer wrote:those are some very straight lines on the broken wall sections.
Elmir wrote:Looks very nice. Although I would consider putting a bit of PVA/fine sand and rocks on the edges of the crumbled concrete.
Yeah, I'll be the first to admit laziness here. I was trying to get back into the project and if it meant that I had to do something too easy to do anything at all, so be it.
I'm not 100% certain what I can do to fix it, though. I mean, would simply rounding off the edges fix it by itself? Would adding sand make it look crumbly or more like it has some random sand glued to the edges? Is there a way I could have rebar poking out without it being a GIANT pain in the ass?
For now, I guess it will just have to be uncorrected. In my next ruins piece I'll try out something different, and if I get something I like, I can always come back to this model later.
Beard wrote:What I'm trying to say is that it's 40k and the walls look a little clean, no smoke damage, rubble debris or blood stains.
Ramshackle_Curtis wrote:Nice model and a really neat paint jub. HOWEVER, I would add more weatherin to make it really stand out. Check some pictures of old concrete for reference. Smears of runst from internal reinforcing, white drips from salt leaching out ogf the crete, brown rising damp and green algea are all great and easy ways to make your models really look the part. YOu have done all the hard work, and its really well done. Next comes the fun and easy part, ,making it dirty!
Cave_Dweller wrote:I think some more weathering and beating up the broken wall/roof sections a bit, make them a bit more jagged, would make this amazing.
I'm not going to lie, the LAST comments I expected were "it's not dirty enough!" I'd have thought that between the streaky and splattered paint and the grass growing indoors, and the rust that that would be that!
I guess my first concern would be one of making the model too cluttered. I will certainly agree that there are some bare patches, but there are also places of lots of detail. I'm loathe to cram every single surface with something as I'm afraid that it will make things look too cluttered (something I'm already feeling in danger of with the model as-is).
Plus, how would I weather it? I could add lichen, for example, but that only makes sense in cold, wet climates, which doesn't feel like it would quite fit in a world of sandy gravel and dry grass. I could do dust, but what color, and would it still look like dust? Would it still look like a concrete building behind it? Also, I guess I'm just concerned that there are some kinds of weathering that I'm not entirely certain I could pull off. Blood, for example, is hard enough, but making realistic looking blood as if it's been there on the wall for three years? Likewise, smoke damage seems like it would be tough, but in this case I'd have to weather it, and then weather the weathering. I don't even know what smoke damage that's had a decade of exposure to the elements even looks like.
Beard wrote:the bullet holes
In this case, I was just trying to follow pictures.
Not, perhaps, WELL, but...
I suppose the real complaint I'd have for realism here is that there just aren't enough bullet holes, perhaps. I might also at some point consider going in with a dark grey and lightening up the pips a little bit.
The bullet holes look great, I'm tempted to try add some to the next terrain i build.
As a whole it looks great, but it looks as though the building has has sections removed so you could see inside, rather than looking like it's come straight out of the warzone.
I wouldn't go over kill on the bullet holes though. Some suggestions:
I wouldn't say you need loads of "grubbiness" ...just...sorta... a blood streak down the wall, as if someone/something got shot up and slid down it.
On the floor down stairs a few of the Planks crumpled up, below where they all fell in to look as if the floor caved in, maybe skeletal legs poking out?
possibly some brick/plasteel scattered arouns where the walls have been blown apart.
outside, have another gas canister, but have it blown apart, and then have smoke/explosion damage to the wall and yard
Brotherhood of the Damned 20,580
Nids 1,900
5,800
I am the Beard and I'm..........*whispers* Awesome
2013/12/16 20:35:42
Subject: First BIG terrain piece - ruined mixed commercial/residential
awesome terrain man! The only thing i think to add to it is some debris (floorboards concrete etc.) on the ground opening to make it look like it had collapsed.
Iron Warriors
2013/12/16 21:02:26
Subject: First BIG terrain piece - ruined mixed commercial/residential
If my post show some BAD spelling issues, please forgive-me, english is not my natural language, and i never received formal education on it...
My take on Demiurgs (enjoy the reading):
http://www.dakkadakka.com/dakkaforum/posts/list/537654.page Please, if you think im wrong, correct me (i will try to take it constructively).
2013/12/16 21:05:22
Subject: First BIG terrain piece - ruined mixed commercial/residential
Ailaros wrote: For the cons, I'm not actually that sold on the static grass. It looks good when you're in there in model's eye view... but not so great otherwise. I especially am having problems getting a ground color light enough to make it so that the little clusters don't distract you from looking at the rest of the piece because of how cluttered it makes stuff.
The static grass is what jumped out at me, first, as problematic. I don't find it cluttered, so much as overly stark. Close up, as you said, it looks great. From a distance, it looks... actually, almost like mold. Dense, self-contained little colonies of fuzz that stand out from the underlying surface. I think either larger, more even patches with feathered edges or sparser applications of smaller clumps (at scale, many of the clumps are the size of a pizza, not a fist, as I'm used to seeing around areas of packed earth) might look less jarring. The also tend to splay out a decent bit, forming little mounds of grass instead of mostly vertical tufts. Actual electrostatic application (it's pretty simple to rig up a cheap DIY applicator, although it can become painstaking to move the pin from patch to patch, when they're all so tiny) can help with that. Lightening the groundwork would certainly cut down on the contrast with the grass, but I'm afraid that it might then muddy the transition to the grey of the building. Besides, I quite like the current coloration.
Grass aside, the facade could use a little dressing up - not just the overly straight breaks, but also the perfectly clean and even butt-joins. The building currently looks like it was cleanly punched out of sheet concrete and is held together by magic. Even just a little lip at the top - no larger than a street curb - suggested solid walls and an inset roof would do wonders, I think. The "main" room also seems like slightly too large a span to have had unsupported wooden flooring. A small pillar or two (H-beams, on end, feel like a simple/sensible option, if you can get the styrene stock) would keep you from being able to shove a tank in there, but I feel like the construction would have required something like that, or at least a horizontal span stiffer than a 2x4. The lack of trim around doors and windows doesn't bother me - I've seen that in unfinished prefab concrete building, before - but the construction just doesn't quite seem plausible with those little extra omissions/simplifications.
To your credit, points like those sticking out is a testament to the generally realistic feel of the building. The whole construction feels so close to "right" that I naturally expect those little details, just from a quick glance. If you can eke out that little (well, not necessarily little) bit of extra effort in detailing any followup projects, I'm fully prepared to be blown away.
[edit:] Almost forgot - absolutely killer atmosphere in those interior shots. If anything was happening inside the building during a game, I'm sure my face would be practically glue to the windows, just soaking in the scene.
This message was edited 1 time. Last update was at 2013/12/16 21:18:42
The Dreadnote wrote:But the Emperor already has a shrine, in the form of your local Games Workshop. You honour him by sacrificing your money to the plastic effigies of his warriors. In time, your devotion will be rewarded with the gift of having even more effigies to worship.
2013/12/17 02:25:37
Subject: Re:First BIG terrain piece - ruined mixed commercial/residential
That's amazing work! Not only is it well done, but it's multi-functional. It can be climbed on, run through, can obscure units, conceal them entirely, and there is little to no areas of the terrain that can't be stood upon by a model. I really like that you resisted the temptation to put rubble everywhere.
I wish we had this piece at our local club, I really do. It'd be a great addition to a Necromunda board.
Fantastic work, truly. Would make a great centerpiece for a more residential urban table
War Kitten- Nothing evens the odds like a reaper chainsword to the naughty bits
Sgt. Vanden- And now I'm a whale with panties. Can't see how this day can get any better.
Great looking piece, the centre piece for many a battle and the site of many valiant final stands, I'm sure! The wooden floor is really well done, as well as the bullet holes, but adding some more weathering would really finish the terrain for me.
2013/12/17 19:25:17
Subject: First BIG terrain piece - ruined mixed commercial/residential
Beard wrote:On the floor down stairs a few of the Planks crumpled up, below where they all fell in to look as if the floor caved in, maybe skeletal legs poking out?
possibly some brick/plasteel scattered around where the walls have been blown apart.
Guitarquero wrote:The only thing i think to add to it is some debris (floorboards concrete etc.) on the ground opening to make it look like it had collapsed.
oadie wrote: A small pillar or two (H-beams, on end, feel like a simple/sensible option, if you can get the styrene stock) would keep you from being able to shove a tank in there, but I feel like the construction would have required something like that, or at least a horizontal span stiffer than a 2x4.
Right, so let me clear the air on this. The thing to remember here is that I'm not making a 1:60 scale ruined building. I'm making a terrain piece for a miniatures game.
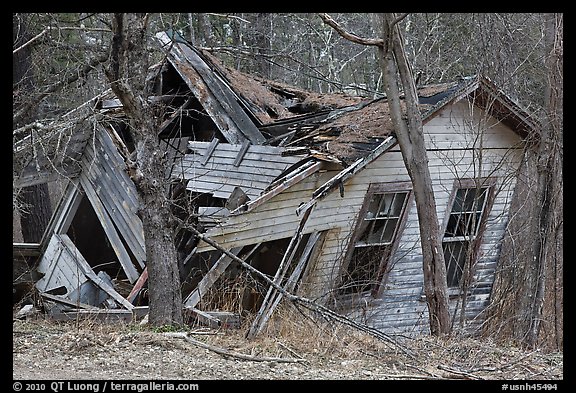
The nuance here is that, in real life, when things collapse and become ruined, ALL of the material still stays there, and in more or less its original configuration. It just changes its Z-axis somewhat. To illustrate my point, here's what REAL ruins look like in the real world:
Put another way, when things become ruins in the real world, they turn from boxes into cone-shaped piles of bricks and bits of timber. If I wanted to do it realistically, all of the bottom floor would be filled in with rocks and rubble and floorboards. The problem, though, is that it would make the ground floor useless, as there wouldn't be space for models (and it would be a wobbly model syndrome from hell problem). The only way it can work in a game is if I clear out the crap.
But it always begs the question in situations of terrain like most gamers make it - why would someone come by and clean up 90% of the rubble, but still leave a thin film in the corners? Surely if it was work cleaning it up, it would be worth cleaning, well... all of it up. What I was trying to do here with this terrain piece was the idea that it had been long ago looted. All of those floorboards that aren't part of the floor have been picked up and used somewhere else (like boarding up some of the windows, for example.
Furthermore, I think it adds, rather than detracts from the desolate nature. It implies that there was a time between when the building was destroyed and now where there was still life and civilization enough to clean things up, and that second gasp was then later smothered out.
Sort of lord of the rings... ey... sort of.
dracpanzer wrote:How durable are you finding the staggered planks to be? I've wanted to do something like it, but it looks like it wouldn't hold up to much. Looks good though.
So, the floorboard weave itself is actually ludicrously strong, being banded fibers. The only problem is keeping them attached to the wall itself, where there's less surface area. It's especially a problem given that things weren't put together altogether correctly and flush.
Were I to do this again, I think I'd add a layer underneath the boards. Like, the ceiling of the floor below. Not because the floorboards aren't strong, but more because I'd want a template to glue everything straight and even onto. It would also give me a third layer to make things a little thicker to attach a little more strongly to the wall.
oadie wrote:Close up, as you said, it looks great. From a distance, it looks... actually, almost like mold.
You're not actually the first person to say that, and it's something that I've been considering. I'll just have to develop my technique more, I guess. In the very least I can take a little bit of consolation that it looks like mold, right? Because mould is also a sign of decay and desolation.
oadie wrote:Lightening the groundwork would certainly cut down on the contrast with the grass, but I'm afraid that it might then muddy the transition to the grey of the building. Besides, I quite like the current coloration.
Yeah, that's a problem I was having as well. One of the things that added to the aura I'm going for is the fact that it's in that faux-monochrome. The problem, then, is getting concrete, weathered boards, less weathered wood, grey-brown sand, caked mud, and dead grass to look sufficiently distinct from each other.
oadie wrote:The building currently looks like it was cleanly punched out of sheet concrete and is held together by magic.
What?
Jimsolo wrote:I wish we had this piece at our local club, I really do. It'd be a great addition to a Necromunda board.
Beard wrote: it looks as though the building has has sections removed so you could see inside, rather than looking like it's come straight out of the warzone.
Ohh... that's a little hard to un-see.
I'll definitely have to go back and fix that once I figure out how.
1) Break up the sharp edges on the holes if you can. Right now it looks like it was carefully cut along a knife-sharp line. In reality the concrete would break with a rough edge. Or if it's painted metal you'd have bent and torn areas around the edges of the hole.
2) Add some subtle dirt on the walls around the wood floors. It's most obvious in your "less-flattering angle" shot, the floor just sits next to the wall without really coming together visually. It looks like the building got dirty and then you glued the floor in there sometime later. What you want is some dirt in all of those corners where the wood floor meets the wall, both because dirt collects in corners and because it blends the two materials together a bit and unifies their color. You've got a similar problem with the ceiling to wall joint in that shot. Compare those joints to the one between the bottom concrete floor and the walls, which is really well done and looks like the whole thing got dirty together.
3) Add some detail to the walls. Whatever this building was for before it was destroyed it probably had some signs/stripes/etc on the interior walls, a giant company name/logo on the outside wall, exit signs and security card readers next to the doors, etc. You probably want a subtle door/window frame around those holes since the door/window wouldn't be mounted directly on the concrete. The area around the white tank is excellent, repeating those kind of details around the rest of the building would help a lot.
Overall it's a very nice piece of terrain though.
There is no such thing as a hobby without politics. "Leave politics at the door" is itself a political statement, an endorsement of the status quo and an attempt to silence dissenting voices.
2013/12/18 07:37:59
Subject: Re:First BIG terrain piece - ruined mixed commercial/residential
Here's an example of broken concrete edges. See how they're so much rougher and it looks like the concrete wall was smashed instead of neatly cut?
(And BTW, I don't suggest trying to duplicate the rubble on the floor. It looks cool, but as a gaming piece it's somewhat lacking.)
There is no such thing as a hobby without politics. "Leave politics at the door" is itself a political statement, an endorsement of the status quo and an attempt to silence dissenting voices.
2013/12/18 08:15:57
Subject: Re:First BIG terrain piece - ruined mixed commercial/residential
oadie wrote:The building currently looks like it was cleanly punched out of sheet concrete and is held together by magic.
What?
Nonsensical on its own, but I had hoped, at least, that it was clearer in context. I was referring to the fact that the faces were completely seamless, as was the join with the perfectly flush roof. The building had the feeling of a prefab concrete structure (relatively thin and perfectly flat walls, clean holes for openings instead of an exposed or ruined framework), which is why the unadorned window/door cutouts didn't bug me, but the perfect smoothness did - those are BIG slabs if they're all one piece. If it was to be such a structure, I would expect at least some degree of overlap at corners, if not seams where slabs abutted, like those in this picture (which varies so much in form from your building that it's useless as a general example, but at least contains the specific elements I'm talking about):
Even if the edges were to be kept (almost - you can barely make out the seam, much like in your building) perfectly clean, I didn't think the roof should be, as well. If it was also cast as a slab, I'd expect overlap:
If it followed modern construction methods for a building of its size (as it appeared to, otherwise), the walls would extend slightly beyond the roof, leaving the lip I mentioned:
As for the H-beams, I thought they'd fall into a happy middle ground, being a dedicated part of the "skeleton" of the structure as opposed to the piles of crap that are liable to fall off. One or two small pillars would, as mentioned, preclude parking a tank in the room, but wouldn't do much to impede infantry, either in terms of abstracted movement or physical model placement/stability. I wasn't suggesting rubble, but a small (at least in terms of footprint), discrete addition to the structure.
The Dreadnote wrote:But the Emperor already has a shrine, in the form of your local Games Workshop. You honour him by sacrificing your money to the plastic effigies of his warriors. In time, your devotion will be rewarded with the gift of having even more effigies to worship.
2013/12/18 19:54:15
Subject: First BIG terrain piece - ruined mixed commercial/residential
Oh, so what you're saying is that I need MORE seams, not fewer. That's interesting - making it more of a purposeful feature instead of trying to hide it as a mistake.
My first thought on seeing it was, where's all the rubble? Then I read this:
Ailaros wrote: Right, so let me clear the air on this. The thing to remember here is that I'm not making a 1:60 scale ruined building. I'm making a terrain piece for a miniatures game. (snip)
Put another way, when things become ruins in the real world, they turn from boxes into cone-shaped piles of bricks and bits of timber. If I wanted to do it realistically, all of the bottom floor would be filled in with rocks and rubble and floorboards. The problem, though, is that it would make the ground floor useless, as there wouldn't be space for models (and it would be a wobbly model syndrome from hell problem). The only way it can work in a game is if I clear out the crap.
Which is a very fair point.
One possibility for a future endeavor might be making easily removable floor sections/ which have piles of brickwork in the corners (or just have the brick piles all glued together and liftable). More work, and more hassle but it would look awesome. But as you say, it's a gaming piece not a diorama.
Hand to heart, this could be a photograph of a real world location. I don't think there is higher praise for miniature terrain.
That being said, the wall sections where they are broken are far too neat as Peregrine noted.
Also, your IG have the exact same color scheme as my nephews. I mean, exact-exact. Freaky.
This message was edited 2 times. Last update was at 2013/12/18 22:24:19
lord_blackfang wrote: Respect to the guy who subscribed just to post a massive ASCII dong in the chat and immediately get banned.
Flinty wrote: The benefit of slate is that its.actually a.rock with rock like properties. The downside is that it's a rock
2013/12/18 23:13:28
Subject: First BIG terrain piece - ruined mixed commercial/residential


 Brotherhood of the Damned 20,580
 Nids 1,900
 5,800
5,800


 Iron Warriors


 ) bit of extra effort in detailing any followup projects, I'm fully prepared to be blown away.


