| Author |
Message |
 |
|
|
|
|
Advert
|
Forum adverts like this one are shown to any user who is not logged in. Join us by filling out a tiny 3 field form and you will get your own, free, dakka user account which gives a good range of benefits to you:
- No adverts like this in the forums anymore.
- Times and dates in your local timezone.
- Full tracking of what you have read so you can skip to your first unread post, easily see what has changed since you last logged in, and easily see what is new at a glance.
- Email notifications for threads you want to watch closely.
- Being a part of the oldest wargaming community on the net.
If you are already a member then feel free to login now. |
|
 |
2015/06/30 14:09:41
Subject: Terrain for Cities of Death/Horus Heresy board
|
|

Longtime Dakkanaut
|
[youtube]After creating some post in swap shop, I thought to myself: why not delve into this DakkaDakka thing deeper? And here I see this awesome thing. Especially, when blogging on "blogger" is just soo damn boring. And there I have a bunch on Cadians, that need their flakk armor pimped, bases done and, ofc, themselves painted. Then there's Dreadfleet, Leman Russ tanks, various commanders who need magnetising, kitbashing veterans and pimping a razorback, asa it arrives 
So here it goes, my 10 cadians. The bases are nothing fancy, just gravel I bought from store dedicated to all those realistic models. I suppose, I could've made some sand patches in random locations, for more pimpier looks, or for it to cover the bases more perfectly. I think, I will have to go back to that store and buy some more finer sand, just to make sure, it doesn't look better. Anyways:
I also bought etched brass. Just because there can never be too much Emperor. The small Aquilas will go on shoulder pad, leaving the other one for squad markings. Smallest ones - regular guardsmen, larger ones - veterans. Should add them in few upcoming days, depending on the level of lazyness, lelel.
|
|
This message was edited 80 times. Last update was at 2021/01/10 14:08:05
|
|
|
 |
|
2015/06/30 14:25:50
Subject: Re:Astra Militarum and other stuff.
|
|

Ancient Venerable Black Templar Dreadnought
|
Try getting a mix of the gravel you have and smaller stuff, mix it together, it will look nicer.
I would also run my finger around the base and remove the "loose" bits along the side.
Guys walking on a bunch of 1" round gravel would be having a hard time! 
I see you worked hard at trying to get those mold lines removed off of helmets and shoulder pads, well done!
Good luck with the Aquila, fitting those on shoulder pads I would expect to be difficult.
It certainly looks like you have a lot of paint ready to go.
|
A revolution is an idea which has found its bayonets.
Napoleon Bonaparte |
|
|
|
|
2015/06/30 15:49:25
Subject: Astra Militarum and other stuff.
|
|

Never Forget Isstvan!
|
Looking good so far, I would also suggest what talizvar suggested for the basing.
|
|
|
|
|
|
2015/07/02 17:49:25
Subject: Astra Militarum and other stuff.
|
|
Longtime Dakkanaut
|
Haha, so after reading your comments, I brutalized those bases the same evening. Today went to modelling shop again and grabbed TWO packs of basing matereal. One being quartz sand, other - some tiny gravel stuff. Whole trip took me 2+ hours, but it was worth it, just because of the way the salesgirl looked at me  Her face expression was like: "and what on earth are you going to do with that??".
So, here's my first "pancake" (we have a certain saying, which involves pancakes, lel):
I tried using the adhessive tape method to stick that tiny Aquila into place, but I found that the tape also reacted with super glue. So I took a needle, some white tac, made a small bubble on one side. The super glue was enough to leave Aquila sticking in place. Thought I have some problems with placing them in middle correctly, due to glue being extra stronk and cementing in seconds :(
For the base I just mixed all three matereals in once place. I think, it really turned out well Might need to fix the edges a bit later, but I'm quite happy with it.
1 guardsmen done, 39 to go
|
|
This message was edited 2 times. Last update was at 2015/09/01 17:05:12
|
|
|
|
|
2015/07/02 17:52:03
Subject: Astra Militarum and other stuff.
|
|
Never Forget Isstvan!
|
Looking good! Maybe try tweezers to place the aquilas onto the shoulder pads as metal won't bond super fast to the plastic.
|
|
|
|
|
|
2015/07/02 17:54:58
Subject: Astra Militarum and other stuff.
|
|
Longtime Dakkanaut
|
Looking good! Maybe try tweezers to place the aquilas onto the shoulder pads as metal won't bond super fast to the plastic.
Oddly, it bonded SUPER fast. Though I'm using 'super moment'
|
|
|
|
|
|
2015/07/02 20:55:30
Subject: Astra Militarum and other stuff.
|
|
Ancient Venerable Black Templar Dreadnought
|
Make sure you "rough-up" the brass parts so both glue and paint stick. They need surface area to grab onto, smooth is bad. This advice works for any smooth surface unless using a "weld" bond.
I must admit, the Aquila looks really good.
I would suggest using a mix of fine sand vs course of about 3 to 1. You want it to look like rough terrain that happen to have bigger bits lying around.
By the way: you are in Lithuania? I game with a Polish guy and a Russian guy: what "stereotypical behavior" would make you different from these guys? The commonality is if they are not loud and arguing they are not having fun. I like them so...
|
A revolution is an idea which has found its bayonets.
Napoleon Bonaparte |
|
|
|
|
2015/07/05 19:12:45
Subject: Re:Astra Militarum and other stuff.
|
|
Longtime Dakkanaut
|
Moving on. Finished 10 regular guardsmen. Man, I have to tell, glueing that brass is a bitch. Or I just MUST find some super glue with a dedicated brush applicator, cause it's overspilling now and creating unwanted bumps. For the bases I tried adding some more sand, instead of larger gravel. I just noticed, some barrels look really ugly and will need firther fixing. Also don't mind the sand spilling over edges, I wil clean it, as soon as the glue dries
I am also really happy I wound some wire for LR hatch:
When I first assembled troops, I kinda skipped officers, cause I wanted to magnetize them. The magnets have finally arrived, so it's drilling time! Tbh, IDK why I'm doing this There's some green stuff added to one arm pit, which needs some minor fixing as well.
So, in conclusion, I have the following things to do:
*Find super glue with brush applicator to reduce the ammount of extra glue spilled over shoulder pads.
*Clean the bases when they dry
*Clean the Aquilas from excess glue.
*Fix barrels on some lasguns.
*Tidy the greenstuff on magnetised seargent.
*And, ofc, more on with the rest guardsmen. 30 more left
By the way: you are in Lithuania? I game with a Polish guy and a Russian guy: what "stereotypical behavior" would make you different from these guys? The commonality is if they are not loud and arguing they are not having fun. I like them so...
Yeah, I'm from Lithuania. I'm afraid, I can't really think of any stereotypes, cause there are so few of us, compared to Poland and Russia (though I have no idea, how many people play wargames in Russia). But I can say, that both 40k/ WHF are not amongst popular systems (it's mostly Infinity and WM/H) and the upcomming 40k tourney will, most likely, have 10 players. It's just that a lot of players don't think that both systems are that good and worth all the investment. Or they are just veterans, played Warhammers in their time and moved to other systems. Yet those who play, tend to talk about "fun vs competitive", "balance" and "superheavies/LOW's: yes or no" topics.
|
|
This message was edited 2 times. Last update was at 2015/07/05 19:15:15
|
|
|
|
|
2015/08/06 16:21:12
Subject: Re:Astra Militarum and other stuff.
|
|
Longtime Dakkanaut
|
Crazy little (big?) thing called laziness, damn it. Anyways, here’s what I’ve been up to for the last weeks:
1) Finished adding Aquilas to guardsmen. Based and primed them. Not really happy with the overall looks of those Aquilas, was expecting a bit more detail. I guess, I’ll have to try paint a few test models and see how it goes.
2) Drilled all of them sponsor weapons for one Leman Russ. Not really worth the pictures. Just basic holes
3) Kitbashed? 4 sergeants for compulsory troop choices. Discarded the idea of magnetising (way too much complex work to be worth the time and if I will ever want some power fist armed sergeants, I'll just get the stock ones from ebay, or just buy additional box and glue them). Still, I tried to make these look somewhat more unique from the rest 9 guardsmen.
|
|
|
|
|
|
2015/09/01 17:01:54
Subject: Re:Astra Militarum and other stuff.
|
|
Longtime Dakkanaut
|
Uh. From now I'll know, that magnetizing Dozer Blades should be done from the very first steps of assembly, not when the whole hull is already glued :| Still, I somehow managed to magnetize two Lemans so they can be more pimpier than they were before. There's still quite a lot of job to be done on the second Russ (have to glue all those extra bits, duh).
AFAIK, old Russ kits had a separate place for all those jerry cans? Anyways, I didn't really want to glue then straight, so made special holders.
That look like this, when glued to the tank. You might also notice the track armor bits are misplaced. That's because of two reasons: why would some1 want shorter armor on the front and larger on the back, when Leman is generally fethed anyways if some1 gets to it's back. The second reason is, I think, these tank upgrade sprues were meant for older Russess, as there's just no place for the longer bit - it gets pushed to the outer side way too much. Though I agree that the older way looks more kewl.
I also decided to add seats to Chimera. By now they have some green stuff on them to simulate that stuffing effect. AND I ordered a LED kit, so will try to add that sweet red light to the inside.
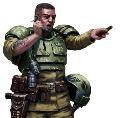
And this is what I've been up to when glueing stuff gets boring. My counts as Pask, or "Drive me Closer".
|
|
|
|
|
|
2015/09/10 15:59:48
Subject: Re:Astra Militarum and other stuff.
|
|
Longtime Dakkanaut
|
And not a single beer was taken that evening
|
|
|
|
|
|
2015/09/11 08:20:09
Subject: Astra Militarum and other stuff.
|
|

Regular Dakkanaut
Kettering, Northamptonshire, UK
|
Lol, you know you can just twist the drill bit with your hand to go through plastic? no thumbs/fingers need near misses with a power drill! nice start to your guard, are you working towards a set list or just making stuff up as you go?
|
|
|
|
|
|
2015/09/11 22:52:42
Subject: Re:Astra Militarum and other stuff.
|
|
Longtime Dakkanaut
|
Lol, you know you can just twist the drill bit with your hand to go through plastic? no thumbs/fingers need near misses with a power drill! nice start to your guard, are you working towards a set list or just making stuff up as you go?
Yeah. I usually do that when I need a 3mm hole. But this one was as safe, as it could get: reduced power and minimal force applied to push it deeper
Tbh, there's no list, but I'm mostly thinking about foot conscripts with Inquisition. Oh, and Marauder Destroyer with Warhound Titan
|
|
This message was edited 1 time. Last update was at 2015/09/11 22:53:51
|
|
|
|
|
2015/09/15 18:32:26
Subject: Re:Astra Militarum and other stuff.
|
|
Longtime Dakkanaut
|
Some more engineering:
Going to finish it this week. Hopefully
|
|
|
|
|
|
2015/09/27 17:03:16
Subject: Re:Astra Militarum and other stuff. Chimera with leds.
|
|
Longtime Dakkanaut
|
As always took more than expected. But still, I'm quite happy with it. Besides, I also got an opportunity to try Typhus Corrosion (super cool product)
Oh, and in the end I gave those leds an extra coat of simple red dye so the light is kinda warmer now.
|
|
This message was edited 1 time. Last update was at 2015/09/27 17:03:46
|
|
|
|
|
2015/09/27 17:17:51
Subject: Astra Militarum and other stuff. Putting LEDs inside Chimera.
|
|
Never Forget Isstvan!
|
Very cool man! Glad to see everything is still coming along, we got a guy at my store who does a lot of LED stuff and I always like seeing other people do it also.
|
|
|
|
|
|
2015/12/08 19:59:58
Subject: Re:Astra Militarum and other stuff. Putting LEDs inside Chimera.
|
|
Longtime Dakkanaut
|
Oh man, nearly 70 days have passed since last entry ;O So here I am, doing everything, EXCEPT working on my poor guardsmen. Srsly though, my new years promise is going to make this stuff more active, just for my personal motivation.
Boozing:
Painting Sigmarines (those are now finished, but in the end I still got extremely lazy):
Painting Dreadball Orcs:
Painting some marines for some random custom chapter a friend decided to create for his possible future kill team games. Or maybe trying to get better at straight highlights and ooooh man, do they look horrible in photos
|
|
This message was edited 1 time. Last update was at 2015/12/08 20:00:16
|
|
|
|
|
2015/12/31 19:53:49
Subject: Re:AM/IG. Batch painting Cadians
|
|
Longtime Dakkanaut
|
Hell yeah, finally managed to get something going!
Batch painted (and washed) 9 Cadians:
Closer look:
Aaand, got some basecoating going on the next 9 that still need some fixing and washing. And after that there's still 18 more poor souls, not counting sergeants and platoon commanders.
|
|
|
|
|
|
2016/01/28 17:53:16
Subject: Re:AM/IG. War on mold lines!
|
|
Longtime Dakkanaut
|
Uh, so nearly month passed. And I have to sai it's been quite productive month: managed to paint (basecoat+wash) 35 cadians! That brings me to somewhat 50ish guardsmen total. 100 more to go (not counting these 50 that will need layering, detailing, etc).
Though while painting I just couldn't stop noticing ninja mold lines I missed (or wasn't bothered to scrap away at first, because I thought I ain't gonna see them). So while models are indeed +- clean and could be passable on a tabletop, my inner perfectionist decided to make war
Anyways, lesson learned: clean those bastards before priming ant painting. Oh, and nevermind the blunted blade
|
|
This message was edited 1 time. Last update was at 2016/01/28 17:55:41
|
|
|
|
|
2016/03/18 23:29:27
Subject: Re:AM/IG. War on mold lines!
|
|
Storm Trooper with Maglight
|
would like to see what you've done with these guys recently
|
|
|
|
|
|
2016/04/19 07:14:37
Subject: Re:Gallery of failures. Feat: Cadians, Tanks, Atrapos, AoS marauders.
|
|
Longtime Dakkanaut
|
Here it goes, a loooong report of what I’ve been FAILING these few months. I will start from where I left…
So, the war on mold lines wasn’t as splendind as I expected it to be. But after a handful of swearing, I finally managed to pass my own quality check. Don’t be mistaken - I’d still gladly throw some of them away, because they are too imperfect for my liking. The biggest problem was failure] to take a very fine sanding paper and remove the excess (w/e it’s spelled) super glue right at the beginning. Actually, now I would say that it’s the only way to do so. DO NOT ever try to remove it with a knife, because it will most likely come off unequally, leaving huuge mess right where the edge of the etched brass meets plastic. I also kindafailed to remove some of the smaller mold lines perfectly and ended up damaging some of the details, especially the tiny lines on their helmets. An optimist could possibly say “hey, it’s just combat damage”. But I sai – DEFINITELY not good.
Just look at that monstrosity, how hideously its armor is deformed :|
After cleaning the mold lines off of already half way painted models, I decided to assemble the leftover Cadian troops I still had. This process, kinda, went pretty smoothly, because the previous Cadians showed me the most problematic places to clean.
The third thing on assembly line was the Inquisition Rhino. I have to say, it was pretty smooth run, until I bumped into magnetising Rhino to Razorback hatch and Razorback’s weapons (not that I’m ever planning on using Lascannons, but still). This was yet another fail: no matter what, the doors still seem to hang in the air and the heavy bolters are pure mess, even though they do get covered by the armor plate. I’m planning into this by buying more led kits, but still not sure if it’s worth it.
So, Leman Russ. FAILED to glue the tow cable properly, ended up messing side armor.
The Leman Russ has some more gakky places like overspilled glue which I’ll try sanding away with some 200isg sanding paper. Just to, most likely, ruin it more.
CERASTUS KNIGHT – ATRAPOS. I just simply can’t describe the proportions of my failing when I misunderstood an actual detail with a friking mold line. Ended up filing it away, but in turn filed some depth from the front armor plate (facepalm x999999). Tried to restore it to some extent, but the result is clear
Oh, and there’s more: guns that will possibly won’t hold in place (that’s what you get for trying to articulate an arm in 3 places) and the torso that now appears to be too low then it should be (because I also magnetised it).
Arm joints, where, due to my failure in removing more mold lines, I simply made the matters worse. Again, liquid green stuff didn’t help at all. Maybe primer will hide some of it…
I also got an opportunity to practice painting skin tones. Am I satisfied from what I’ve got? Not really.
Rakarth flesh->Purple wash = meh.
Rakarth flesh->Red wash = meh.
Rakarth flesh->Reikland Flesshade = pretty good for pale flesh.
Rakarth flesh->Sepia wash = meh.
Bugman’s Glow->Reikland Fleshade = nothing new.
Cadian Fleshtone->Reikland Fleshade = pretty good, gives a noticeable lighter tone on the flesh.
Then I kinda had an opportunity to also practice painting some skulls. Or, to say so, experimenting how different washes work. And to be honest, I haven’t really noticed any real difference between Agrax and Nuln Oil.
Which leads me to the Servo Skulls I never really finished
So that’s it for this time. Think I'm going to puke from all these imperfections. And after that - off to fix at least some of them (pictures did show what a nekked eye could not see). Bleh.
|
|
This message was edited 5 times. Last update was at 2016/04/19 10:56:54
|
|
|
|
|
2016/04/20 17:15:28
Subject: Re:Gallery of failures. Feat. Cadians, Tanks, Atrapos, AoS marauders.
|
|
Storm Trooper with Maglight
|
No need to be so negative, I think you've done some good work. Some of these mistakes are easily fixed
|
|
|
|
|
|
2016/04/25 12:45:14
Subject: Re:Gallery of failures. Feat. Cadians, Tanks, Atrapos, AoS marauders.
|
|
Longtime Dakkanaut
|
 STG wrote: STG wrote:No need to be so negative, I think you've done some good work. Some of these mistakes are easily fixed
Will see. Hopefully the primer will hide some of those failings.
Anyways, Imperial Navy reinforcements (x2 Thunderbolts and x2 Vultures) and two arms for a my Titan (I didn't even started assembling ). Still, at the moment I have to finish posing that Knight and then go on with these sexy things.
|
|
This message was edited 2 times. Last update was at 2016/04/25 12:46:17
|
|
|
|
|
2016/04/27 17:26:34
Subject: Astra Militarum. Some Imperial Navy reinforcements.
|
|
Longtime Dakkanaut
|
Uh, today was an interesting day, because for the first time I tried weathering, oil washing and varnishing on my Inquisition Rhino :> And, i have to say, it's harder than it looks. Though, I guess I could say that I learned to following things today:
*Be modest with weathering. Too much can be bad, while too little can always be fixed. Ensure that there's not a lot of paint on the sponge and DON'T RUSH.
*MOAR clear varnish. I kinda went half-jew this time and thought it was going to be enough. Nope, the oil wash still went thru in some places. Definitly not as planned. Still, in the end I managed to wipe most of it away. So next time - at least two strong coats.
*MOAR white spirit into those oil paints. Better thinner than thicker.
And, I guess, that's mostly it. Oh, and I really need to work on painting those screens. Heck, maybe i should just buy a bunch of them from ebay, just to get that thing staight.
Some pictures.
Panel:
Side interior:
Hatch parts:
Without roof:
With roof:
And daaayum, how I missed that horribly warped back door
|
|
This message was edited 1 time. Last update was at 2016/04/27 17:31:19
|
|
|
|
|
2016/04/27 21:30:02
Subject: Re:Astra Militarum. First time weathering, omg.
|
|
Storm Trooper with Maglight
|
looks pretty neat, would like to see what you've done with all your guardsmen from earlier in the thread
|
|
|
|
|
|
2016/04/28 06:04:17
Subject: Re:Astra Militarum. First time weathering, omg.
|
|
Longtime Dakkanaut
|
STG wrote:looks pretty neat, would like to see what you've done with all your guardsmen from earlier in the thread
To be honest - not much. I just pretty much base colored and washed them (there should be a picture somewhere of how one of them looks), so the rest kinda look the same. Didn't have time (or was just slacking too much) to paint more. Though I should add some layers soom - I'm really curious myself wether after all those failings with etched brass they will still be at least decent... because from what I've already tried, the etched brass, especially after priming it and adding a base color over it, tends to lose a lot of details.
|
|
|
|
|
|
2016/04/28 08:12:46
Subject: Astra Militarum. First time weathering, omg.
|
|
Pious Palatine
|
Wow. That interior looks awesome, dude. Great work.
EDC
|
|
|
|
|
2016/04/29 12:30:11
Subject: Astra Militarum. First time weathering, omg.
|
|
Longtime Dakkanaut
|
Thanks
Here's a small update on the Rhino. The whole thing looked quite bland so i decided to add more colors to contrast a bit. I also brought back some of the original pre wash color to make interior to look a bit cleaner, but kinda messed up with the door spaces and places where I put masking tape on (shouldn't rely on them that often)
Also put FWs Extra Armor. Hand't I lost the order details, I would've defeinitely contacted them and asked for few replacement parts, because MAN, IS THAT THING A BITCH TO PUT ON - needed A LOT of filing and dipping in hot water and in the end I stil couldn't get some parts to fit right.
|
|
This message was edited 2 times. Last update was at 2016/04/29 12:31:50
|
|
|
|
|
2016/05/01 17:51:53
Subject: Astra Militarum. Inquisition Rhino
|
|
Longtime Dakkanaut
|
Hey, look at me, being so active and such. Maybe I should reward myself with a few more FW flyers or Imperial Knight Renegade box
Anyways, painted a servo skull for my future Inquisitor. Still wip though.
|
|
|
|
|
|
2016/05/01 22:51:29
Subject: Re:Astra Militarum. Inquisition Rhino and servo skull
|
|

Strategizing Grey Knight Chapter Master
|
Very cool, I like the design for the rhino and yes, those panels are a nightmare to affix.
Also you shouldn't need to hide your pictures behind spoiler tags I would imagine most people have fast enough internet
|
IceAngel wrote:I must say Knightley, I am very envious of your squiggle ability. I mean, if squiggles were a tactical squad, you'd be the sergeant. If squiggles were an HQ, you'd be the special character. If squiggles were a way of life, you'd be Doctor Phil...
The Cleanest Painting blog ever!
Gitsplitta wrote:I am but a pretender... you are... the father of all squiggles. .
|
|
|
|
|
|
|


 Click below for plenty guardsmen


