Forum adverts like this one are shown to any user who is not logged in. Join us by filling out a tiny 3 field form and you will get your own, free, dakka user account which gives a good range of benefits to you:
No adverts like this in the forums anymore.
Times and dates in your local timezone.
Full tracking of what you have read so you can skip to your first unread post, easily see what has changed since you last logged in, and easily see what is new at a glance.
Email notifications for threads you want to watch closely.
Being a part of the oldest wargaming community on the net.
If you are already a member then feel free to login now.
2020/06/04 15:01:58
Subject: 3D Printing Blog, Come gather round the printer kids
Not Online!!! wrote: So i am slowy starting to get some funds and have never done this so what would i need to get started?
Beyond of course a printer, a programm to design the minis and resin aswell as a cleaner anyone any suggestions?
You may not necessarily need a program to design at first, as there are thousands of designs for free on Thingiverse. For items needed you will need a few for resin printing, here is my list:
- medium sized container that you can seal up (tupperware, etc.) to put the alcohol into and swish around to clean your prints. I actually give it two baths, one in 91% and another in 70%.
- rubber gloves - disposable (another nearly impossible item to find nowadays)
- lots of paper towels and alcohol
- small paper paint strainers to strain back resin from your vat when you have a color change or a failed print
- spare FEP film
- a plastic putty knife to remove prints from the print bed
- lots of resin!
- a 405u UV lamp to cure your prints. I have a 60w UV lamp that I affixed into a fairly large plastic tub lined with tin foil. I have it hooked up with a timer, so I can set it for the few minutes needed. You can also set them outside, but that takes a while...
- For modelling and manipulation programs I use the Windows 3D Builder (already on Windows 10 machines) a lot, Meshmixer a little and Blender rarely - all of these are free.
A lot of this stuff might come with your printer already, so you won't need them right away, but I have found generic stuff for all the items works just fine and I do not have to get name brand stuff.
Thanks, will look further into, still i'd rather design something or another for my own as i intend to start out with bitz for minis moreso then actual minis.
https://www.dakkadakka.com/dakkaforum/posts/list/0/766717.page A Mostly Renegades and Heretics blog.
GW:"Space marines got too many options to balance, therefore we decided to legends HH units." Players: "why?!? Now we finally got decent plastic kits and you cut them?" Chaos marines players: "Since when are Daemonengines 30k models and why do i have NO droppods now?" GW" MONEY.... erm i meant TOO MANY OPTIONS (to resell your army to you again by disalowing former units)! Do you want specific tyranid fighiting Primaris? Even a new sabotage lieutnant!" Chaos players: Guess i stop playing or go to HH.
2020/06/05 15:11:47
Subject: 3D Printing Blog, Come gather round the printer kids
H wrote:Wow, those are really nice, definitely an upgrade to what came with that kit.
I'd like to model some things myself, but I simply have no skill at all with it yet. I need to find some good tutorials and maybe I can learn a bit. I have some ideas of things I'd like to do, but right now, I don't know the first thing about actually modeling anything and the prospect seems a bit daunting.
Thanks. I appreciate it.
There are a range of Modelling software packages out there. I use zBrush. It does have a cheaper, feature limited version, but the full version is $800ish US. Probably the best for organic modelling and sculpting. It has a pretty steep learning curve, but there are dozens and dozens of tutorials on YouTube. Both official and not.
Fusion 360 has a free license for individuals working on personal projects. Full paid license would need to be obtained if you started doing anything else with it. It is an extremely powerful CAD/CAM software. Several good tutorials on YouTube.
Blender. Fully free and getting more powerful with every update. There are good tutorials on YouTube. Be sure to get the tutorials for the latest version though, because a good bit has changed from earlier packages. Look for version 2.8+. Blender also has sculpting capabilities that are not as good as zBrush, but getting better.
Theophony wrote:
So I was wondering of you fellow printers, how often have you needed to change a nozzle? The Ender site said maybe once a year. I’ve been printing basically non-stop for a month. What sort of time frame have you all gotten.
I haven't used mine enough to speak from experience, but I do know that the filament you use will make a big difference in nozzle life. Some materials are much more abrasive than others. For example, Wood filaments, carbon fiber filaments, and even glow PLA are much more abrasive then straight PLA.
Also, you can get steel nozzles which should increase the time between replacements.
MDSW wrote:
You may not necessarily need a program to design at first, as there are thousands of designs for free on Thingiverse. For items needed you will need a few for resin printing, here is my list:
- medium sized container that you can seal up (tupperware, etc.) to put the alcohol into and swish around to clean your prints. I actually give it two baths, one in 91% and another in 70%.
- rubber gloves - disposable (another nearly impossible item to find nowadays)
- lots of paper towels and alcohol
- small paper paint strainers to strain back resin from your vat when you have a color change or a failed print
- spare FEP film
- a plastic putty knife to remove prints from the print bed
- lots of resin!
- a 405u UV lamp to cure your prints. I have a 60w UV lamp that I affixed into a fairly large plastic tub lined with tin foil. I have it hooked up with a timer, so I can set it for the few minutes needed. You can also set them outside, but that takes a while...
- For modelling and manipulation programs I use the Windows 3D Builder (already on Windows 10 machines) a lot, Meshmixer a little and Blender rarely - all of these are free.
A lot of this stuff might come with your printer already, so you won't need them right away, but I have found generic stuff for all the items works just fine and I do not have to get name brand stuff.
Here is my list for a resin printer:
1. IPA at least 90% pure, but as close to 100% as you can get. A bit hard to come by these days.
2. 3 tupperware style containers:
A. Slightly used IPA
B. Pure, clean IPA
C. Clean water
I swish in the used IPA first, and use a soft bristle brush to brush down the print. Then in the clean IPA. Then in the clean water. Do that a couple times before you cure the print.
3. Rubber gloves. Go with nitrile because they have the best chemical handling properties. Resin can be nasty stuff and some people react worse to it than others. Nitrile is the best barrier that I know of. Unfortunately also a bit hard to come by these days.
4. A metal paint scraper for getting items off of the build plate. Slightly sand the edges to round them a bit and be careful of the plate when removing prints. I find this to be much better for removal than the plastic spatula.
5. A plastic spatula. This is for removing cured resin from the FEP film when you get an inevitable bad print. Don't get your metal tools anywhere near the FEP!
6. Spare FEP. They wear out. The Photon had a couple spares when I purchased mine, and other printers may as well. If not, they are common on eBay or Amazon.
7. A 405U UV lamp, as MDSW said. Lots of options available on eBay and Amazon. You will use this to fully cure your prints after you wash them.
8. Lots of paper towels, again as MDSW suggested. I use blue shop towels from the automotive department, but plain old paper towels will work just fine.
9. A couple lint free rags to wipe off the LCD screen and the FEP after you have cleaned and dried it. Make sure they are lint free and be very careful with their application.
10. A new USB stick or memory card (this is printer dependent). The ones you get with the printers are mostly garbage and cause tons of headache. New ones are cheap on eBay or Amazon. Go with a known brand like SanDisk.
Thanks Taarnak . I’m only using basic PLA for now. Cheap and easy for tons of terrain, which will eventually get painted, so no glow in the dark needed.
LOL, Theo your mind is an amazing place, never change.-camkierhi 9/19/13
I cant believe theo is right.. damn. -comradepanda 9/26/13
None of the strange ideas we had about you involved your sexual orientation..........-Monkeytroll 12/10/13
I'd put you on ignore for that comment, if I could...Alpharius 2/11/14
2020/06/05 21:47:08
Subject: Re:3D Printing Blog, Come gather round the printer kids
Theophony wrote: Thanks Taarnak . I’m only using basic PLA for now. Cheap and easy for tons of terrain, which will eventually get painted, so no glow in the dark needed.
No problem. Glad I can contribute a little bit.
My buddy, who prints tons and has for a couple years now, swears by PLA+. He has had parts made from straight PLA that came apart after a time. Has not seen the same issues with the PLA+. Might be worth looking into.
I’ll check it out, but honestly, cost wise I’ll just print another whatever if something happens. Most of my terrain is at 5% infill for speed and making it light.
LOL, Theo your mind is an amazing place, never change.-camkierhi 9/19/13
I cant believe theo is right.. damn. -comradepanda 9/26/13
None of the strange ideas we had about you involved your sexual orientation..........-Monkeytroll 12/10/13
I'd put you on ignore for that comment, if I could...Alpharius 2/11/14
2020/06/06 22:46:50
Subject: Re:3D Printing Blog, Come gather round the printer kids
Just wanted to throw this link in here, feel free to link any cool kickstarters you all see for 3D printing.
https://www.dakkadakka.com/dakkaforum/posts/list/789017.page#10822300 starts this coming Friday. It’s a 3D printing group who have designed prints to use on the FDM spools to make towers for both fantasy and scifi terrain. I haven’t dug deep into it yet, but options for lighting as well. Good timing as I was about to cut up the spool I have to make a paint rack I saw.
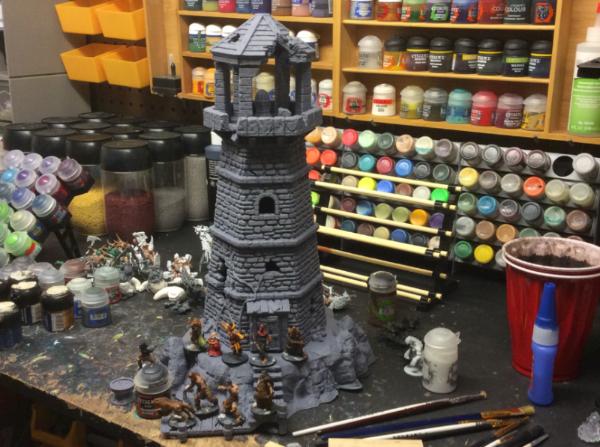
In other not related news, I’m chugging along on my lighthouse print. I’m about 20 hours into a draft print of it for Frostgrave terrain an have all three base structures, the first floor printed, two different light sources and I’m about half way done with the second floor. Should be over 1’ tall when done.
This is before the third piece of the base was done.
So my question today is: Am I the only one who wants to buy 3 more printers to have them all going at the same time so I don’t find myself sitting and watching it print ? Seriously, I just stopped by Miniaturemarket and my local shop and almost asked them if they want to go into business with me and start printing terrain cheap .
Half way there.....Oooooooohhhhhhhh O living on a prayer......(you young uns won’t know where that’s from and that’s okay .
Base and two layers done, three layers and a roof to go yet, about 6” tall.
This message was edited 1 time. Last update was at 2020/06/07 03:01:44
LOL, Theo your mind is an amazing place, never change.-camkierhi 9/19/13
I cant believe theo is right.. damn. -comradepanda 9/26/13
None of the strange ideas we had about you involved your sexual orientation..........-Monkeytroll 12/10/13
I'd put you on ignore for that comment, if I could...Alpharius 2/11/14
2020/06/07 18:32:51
Subject: Re:3D Printing Blog, Come gather round the printer kids
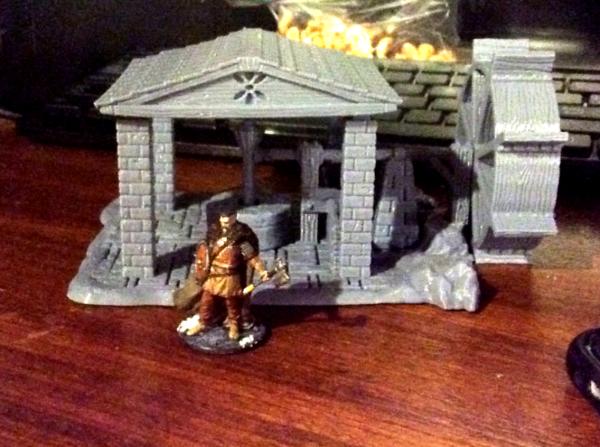
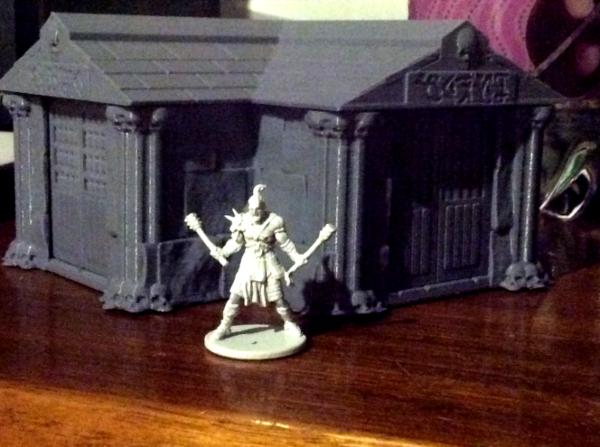
Needing to budget my time well, I decided to print the Mill main structure while setting up and sanitizing church between services. Took just over 6 hours. The roof will take 2.5hours and the wheel itself is a 4.5 hour print, but they will go after the rest of the lighthouse is completed.
Zombicide guy for scale.
“There’s trouble at the Mill!”
“What sort of trouble?”
“I don’t know, I wasn’t expecting some sort of Spanish Inquisition”
If you don’t know the rest then you are uncultured .
LOL, Theo your mind is an amazing place, never change.-camkierhi 9/19/13
I cant believe theo is right.. damn. -comradepanda 9/26/13
None of the strange ideas we had about you involved your sexual orientation..........-Monkeytroll 12/10/13
I'd put you on ignore for that comment, if I could...Alpharius 2/11/14
2020/06/08 13:08:00
Subject: Re:3D Printing Blog, Come gather round the printer kids
Finished up last night on the lighthouse, too tired to post it.
This morning the wheel was waiting for me on the print bed, and I did the roof in 2hours 26 minutes
Now I just need a misterEdwards figure from little house on the prairie sneaking his whiskey jug under the wheel.
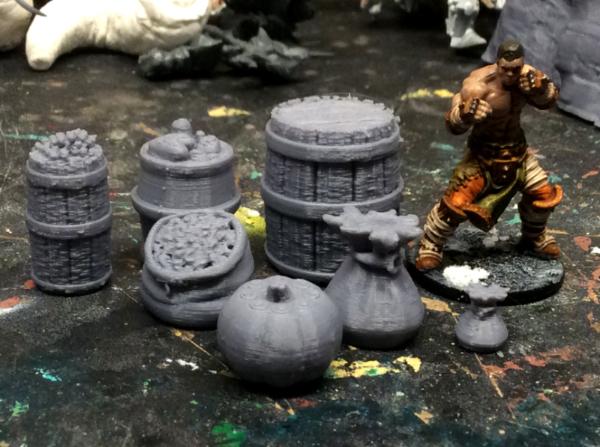
Got a build plate of sundries going now, only 1 hour print time, but has 3different barrels, two bags and a pumpkin.after that I have a couple ideas, but no solid plans. I need to take an inventory of what I printed so far and go through some more books for ideas.
Printed in draft quality, tabletop terrain pieces, not diorama stuff. Just an hour and 6 minutes for all these pieces.
Barrel of limes, barrel of big potatoes, sealed barrel (thinking of cutting one in half height wise for a washing tub. Up front is a sack of potatoes, big pumpkin and large and small sacks. All would fit nicely in a market setting or by my lighthouse as provisions for the warband.
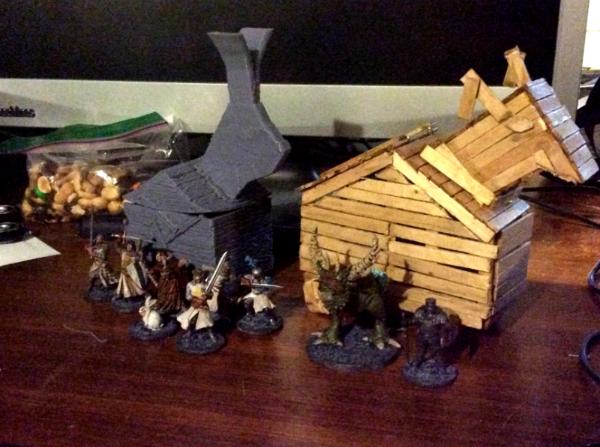
So a long time ago....when Black Plague came out and I got the Zombicide Monty Python Knights, I NEEDED a giant wooden bunny. So I made a sad little one out of wooden sticks. So today I started printing a replacement I found.
Unfortunately, I hadn’t recalibrated the print bed and I think there may be an actual bend to mine because the one corner I should where the print edge lifts keep happening. So when the corner of this really started to come loose I was worried I wasted a lot of time on this print. I was in hour 5.5 of a 6 hour print when I heard pop, and the last remaining piece to be finished(the rabbits head) popped off the print bed prematurely. So the tops of the ears are not there . Otherwise the curled corner could be disguised easily enough. It’ll be a while before I decide to reprint the head as it’s servicable right now. I feel like 4 models could fit inside like the Zombicide cars. If nothing else part of the warband can hide while the police arrest Arthur’s men for killing the documentary guy .
Perhaps I should build a giant wooden badger
This message was edited 2 times. Last update was at 2020/06/08 20:07:10
LOL, Theo your mind is an amazing place, never change.-camkierhi 9/19/13
I cant believe theo is right.. damn. -comradepanda 9/26/13
None of the strange ideas we had about you involved your sexual orientation..........-Monkeytroll 12/10/13
I'd put you on ignore for that comment, if I could...Alpharius 2/11/14
2020/06/08 21:21:24
Subject: 3D Printing Blog, Come gather round the printer kids
That's a very nice knight.. and some very cool looking terrain! I've got a resin printer but I only print small RPG type figs so it's nice to see others printing out terrain themselves.
2020/06/09 01:09:37
Subject: 3D Printing Blog, Come gather round the printer kids
Oh, he’s in the picture, part of the warband. He even got a joker hair coloring from one of your contests long ago .
LOL, Theo your mind is an amazing place, never change.-camkierhi 9/19/13
I cant believe theo is right.. damn. -comradepanda 9/26/13
None of the strange ideas we had about you involved your sexual orientation..........-Monkeytroll 12/10/13
I'd put you on ignore for that comment, if I could...Alpharius 2/11/14
2020/06/09 06:16:50
Subject: 3D Printing Blog, Come gather round the printer kids
@Taarnak, will you be making that model public, or selling him? He looks really cool. Also what scale is he set to print at?
Sitting around the house got old a while ago, but trying to maintain the sanity I’ve looked at older sections of my mountain range of shame and got a bit of a bug to look at Kings of War again. My grudge against Mantic is deep though, so it’s hard to think about pushing one of their games. After a bit of 3D surfing I found some items to print and may have an idea for army building (2nd edition style), not sure how it would align with their new third edition release.
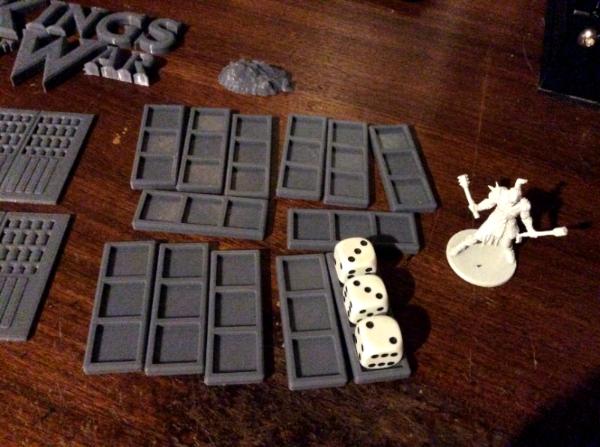
Found the Logo online as well as some wound tracker dice holders.
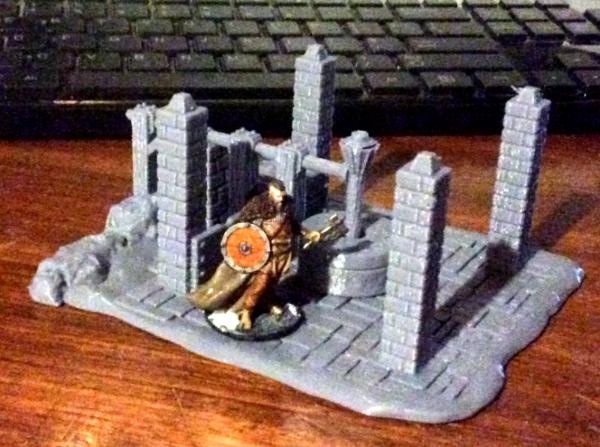
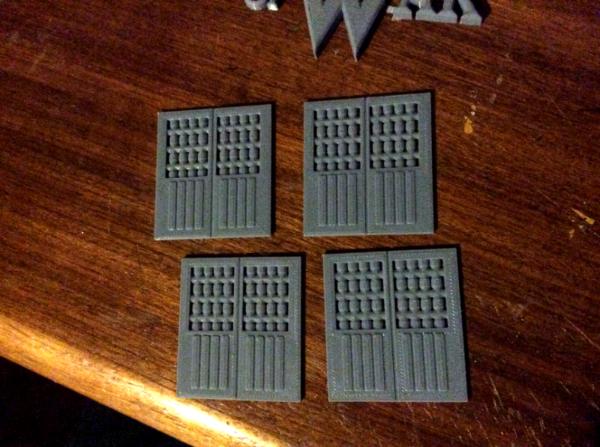
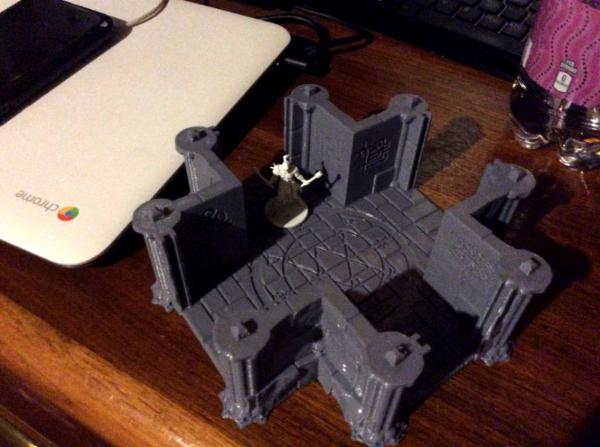
Also finishing up the Crypt for Frostgrave.
Doors
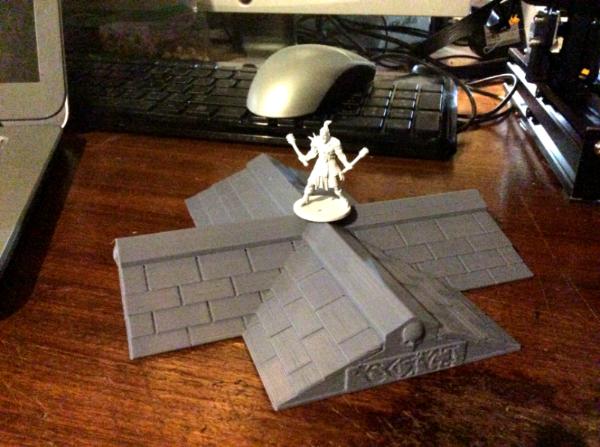
Roof with Zombicide dude for scale.
Fresh off the print bed right now.
Fully assembled, took about 23 hours total printing on my Ender 3 at Draft quality(tabletop) with a 5% infill and supports only on the roof section. Great print, designed by a guy named SableBadger on Thingiverse. I’ve printed a few of his designs, I should post this picture on their too .
One of the shows I loved as a teen was Star Trek Next Generation. Their was an episode where a scientist came up with the idea of Exobots. Basically drones that could replicate their own tools to complete a job and were given tasks to do. While I’m not worried that my Ender will become self aware, I have watched a few videos on additions people are making to their Enders and have even printed and installed a few myself. I won’t post pictures here, unless people ask for them, but I have printed a fan cover to protect the electronics better, two different filament guides that work together to keep the filament from bending or getting tangled and an x-axis adjustment plate to help keep alignment better over time.
So what have you guys done to your machines?
LOL, Theo your mind is an amazing place, never change.-camkierhi 9/19/13
I cant believe theo is right.. damn. -comradepanda 9/26/13
None of the strange ideas we had about you involved your sexual orientation..........-Monkeytroll 12/10/13
I'd put you on ignore for that comment, if I could...Alpharius 2/11/14
2020/06/12 14:46:34
Subject: Re:3D Printing Blog, Come gather round the printer kids
Theophony wrote: @Taarnak, will you be making that model public, or selling him? He looks really cool. Also what scale is he set to print at?
First let me say that I am jealous of the output. Lol. Everythig is looking good.
Secondly, that sculpt is intended to be an adult version of Eric from the Dungeons & Dragons cartoon. It is going to be part of what I refer to as my Nostalgia Project. I'll be making miniatures of my version of toys, TV show characters, fantasy art, and book characters from my youth. Mostly the 80s. Not sure I'll be able to distribute the files, but I will let you know if I do.
As to the size, that is one of the things I am trying to learn about with this figure. Getting the exaggerations done so that they look good at 28-32mm (especially the chainmaille!) and then learning how to make the software print them at the correct size. zBrush has no native scale, so I can't just tell it something is 32mm and off we go. There are tools to help with scale now, but I am still learning how to use them.
I did make 2 prints of the figure. The first was more like a 20mm figure, and the second a 35-40mm one.
I'll try to get pictures up today.
Awesome , I’ve barely touched tinkercad, only making flat bases. Will be looking forward to the progress.
Always wondered if Eric ever pulled the sword out would he find out it’s magical too?
Edit: You cost me money on his page . Luckily most things I liked were on sale, so I’m not decimated. Got the elementals and hill giants as well as other things. I also joined his email list, good work .
Automatically Appended Next Post: Production is high, too high , I need to start painting again .
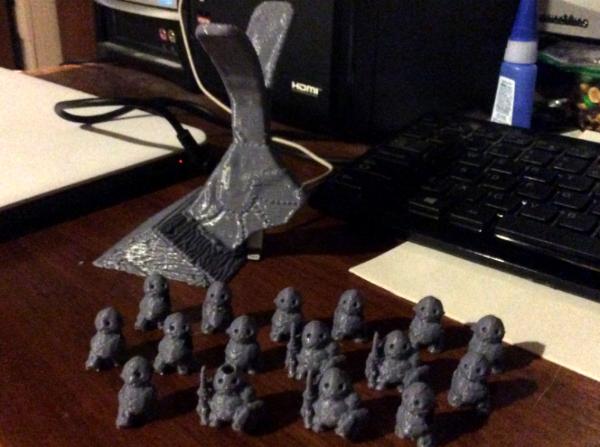
Remade the top of the Giant wooden bunny again with much better success, and a clump of Clods The guy in the front row had an issue in printing, looks like he got scalped, or I guess in clod terms that might be a divet FOUR!!! The one section with spear and shields come with arms attached, I have to print arms for all the others. They have left and right arm sets for clubs, axes, swords and open hands. There’s also a print for left arm shields, but sadly no right arm shields.
They don’t look great coming off the print bed because of the supports, but they clean up pretty quickly.
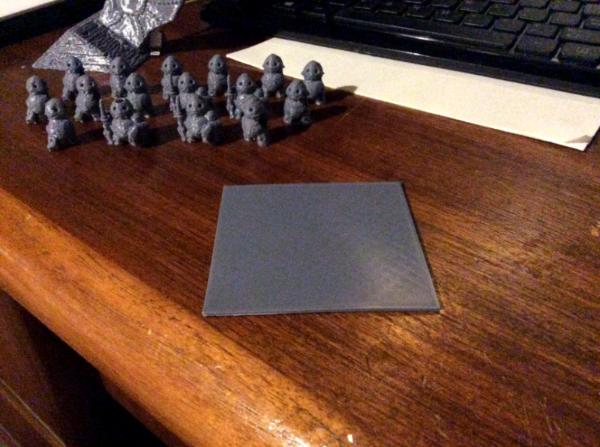
Also my first ever fully designed and printed by me item.
Spoiler:
you have to start somewhere . 75mm x 75mm x 2mm base for a Titan in Kings of War.
This message was edited 2 times. Last update was at 2020/06/12 23:40:49
LOL, Theo your mind is an amazing place, never change.-camkierhi 9/19/13
I cant believe theo is right.. damn. -comradepanda 9/26/13
None of the strange ideas we had about you involved your sexual orientation..........-Monkeytroll 12/10/13
I'd put you on ignore for that comment, if I could...Alpharius 2/11/14
2020/06/13 22:23:21
Subject: Re:3D Printing Blog, Come gather round the printer kids
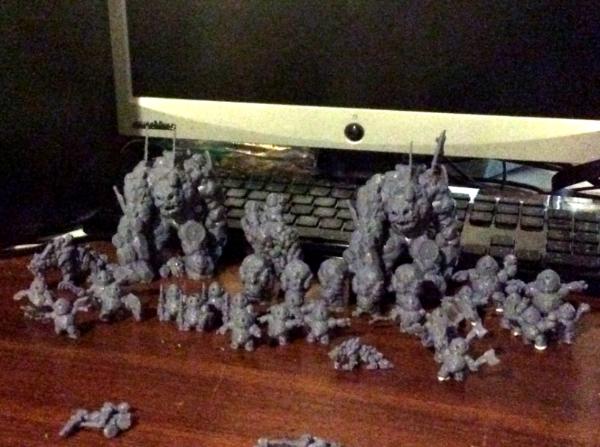
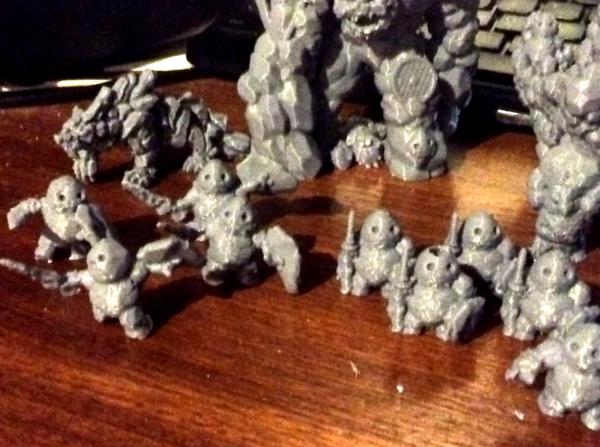
So for those that really don’t know me......I get crazy sometimes...and things get out of hand .
The Clod army begins to grow.
Some close ups
Sword or spears and shields. The spear and shield is a set model, no adjusting him, but the sword and stone(shield) as with most of the others have sockets for shoulders so arm placement is widely variable.
Two open arms and guys chucking rocks as big as they are(single print just multiple copies). The 5 clod smashers prints all came out with bad layer lines. Not sure if it’s the sculpt or an adjustment I made on the printer bed level. I have a different sculpt printing now so we will see if the issue continues.
Twin axe wielders and peltasts (rock throwers) the bigger ones in back are the same file just printed at 150%. I might mix up a few more prints doing 10% bigger than usual and 10% smaller than usual to give unit some more variety, but I think the 150% was just too big of a difference. I’ll probably use those for test paint colors.
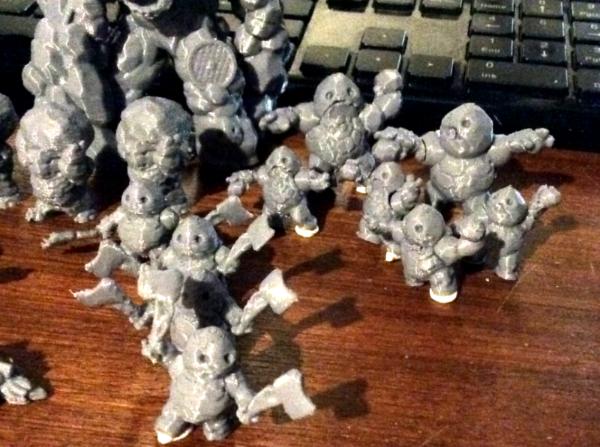
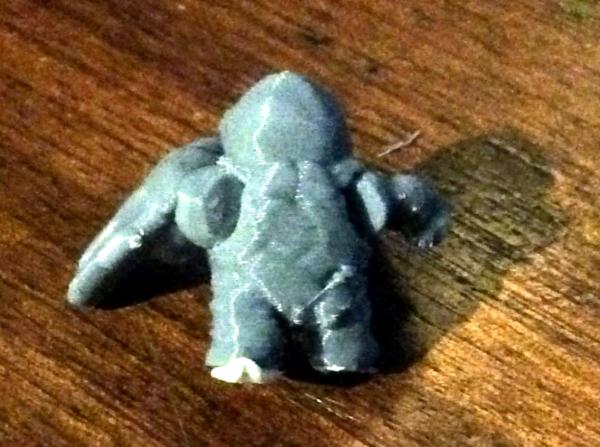
So one issue I’ve run across is to dynamically pose them some of the models have gaps in the shoulder area.
I think I’ll overcome this issue pretty easy by applying Astrogranite debris from GW over the spots before priming them.
I have to say that while gluing the arms in place I absolutely have fallen in love with some of their faces . Just some great expressions on them.
LOL, Theo your mind is an amazing place, never change.-camkierhi 9/19/13
I cant believe theo is right.. damn. -comradepanda 9/26/13
None of the strange ideas we had about you involved your sexual orientation..........-Monkeytroll 12/10/13
I'd put you on ignore for that comment, if I could...Alpharius 2/11/14
2020/06/13 22:49:16
Subject: Re:3D Printing Blog, Come gather round the printer kids
Love this thread! Hope to be able to contribute soon as we just got an Epax delivered this week!
Current Project: Random quaratine models!
Most Recently Completed: Stormcast Nightvault Warband
On the Desk: Looking into 3D Printing!
Instagram Updates: @joyous_oblivion
2020/06/14 03:14:39
Subject: 3D Printing Blog, Come gather round the printer kids
Joyous_Oblivion wrote: Love this thread! Hope to be able to contribute soon as we just got an Epax delivered this week!
Excellent . Hope to see some cool builds
LOL, Theo your mind is an amazing place, never change.-camkierhi 9/19/13
I cant believe theo is right.. damn. -comradepanda 9/26/13
None of the strange ideas we had about you involved your sexual orientation..........-Monkeytroll 12/10/13
I'd put you on ignore for that comment, if I could...Alpharius 2/11/14
2020/06/15 17:54:56
Subject: 3D Printing Blog, Come gather round the printer kids
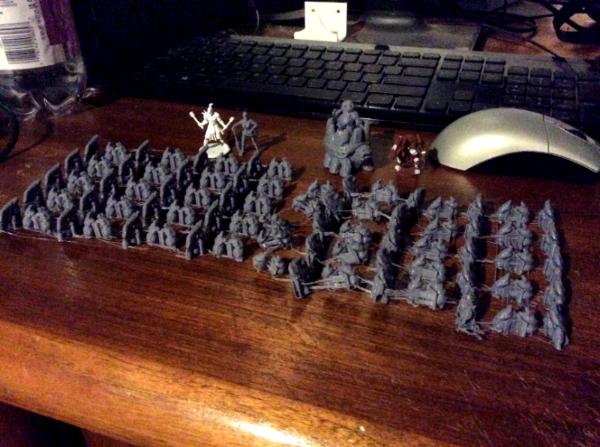
Okay, I haven’t slept the day away . Just haven’t had time to sit and post, but plenty of time to walk by the printer and start stuff.
That would be 40 sets of clod arms with open hands and 40 left handed shields.
Behind it is a Zombicide figure for scale with a samurai themed Ogress next to him carrying a Kanabo.
Further to the right is a Clod riding a Dirtle (a dirt- turtle ) the top of the dirtle has a 1” diameter flat spot for miniatures to stand on, so a wizard or hero can stand their and I see easy to change out. Also a Mantic Orc for scale.
I’d been hearing a strange noise from the printer. As I started to type this up the filament supply couple came completely apart. I’ve put it back together, no major issue. It just needed to be threaded back in.
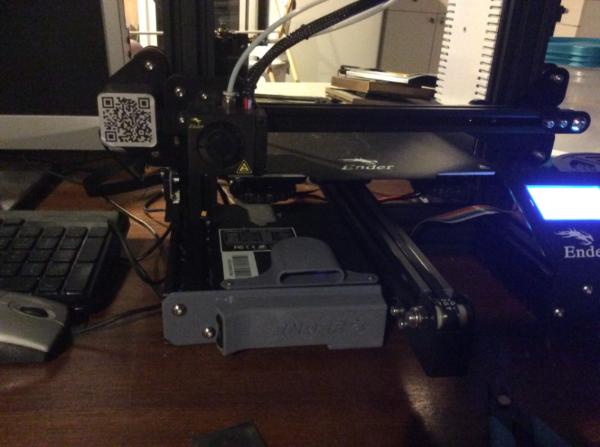
The bigger issue I had yesterday was when I was trying to break a model off the build plate, the build plate tore right in the center. It was a small hole, not even a quarter the size of an eraser on a pencil, so I kept printing with no problem except a little longer to take the models off the plate. Luckily I had ordered a new plate a few days earlier just to have a spare so I could clean this one while still printing. It and another item arrived that same morning, so I really wasn’t put out. The other item I received was a MicroSD card extension piece. I think the one really annoying part of the Ender3 is the location of the microSD card reader, it’s right under the bed and so low to the base that anyone with even normal sized fingers will have difficulty getting to it. Since I have two cards and swap them back and forth constantly it’s a hassle. I guess I’m not the only person who has an issue with it as there’s are multiple prints out there to fix the problem with the extension I ordered. I was ordering the extension and ordered the spare build plate to reach free shipping , what providence . So I printed the new card extension holder on the new build plate, which I hadn’t noticed was a magnetic one so no more messing with clips holding the build plate on and getting in the way of bed leveling. It also has an overhang which works as a handle so I’m not grabbing a hot bed. It’s also so much more flexible which makes popping the builds off easier and quicker.
The extension is now out from under the build plate, vertical and angled outwards slightly. So much easier to change out. It’s part of that gray plastic part on the front that says Ender 3 on it. The fan directly above it is another modification I did because that’s the air intake to cool electronics, but it’s directly below the build plate where small pieces of filament tend to drop . Lots of design out there to pimp the Ender 3, I have a few in place.
So cost of the two (card extension and magnetic build plate) came to $21,00 shipped :
Thanks for stopping by. Now go order your own Ender 3 . So worth it.
LOL, Theo your mind is an amazing place, never change.-camkierhi 9/19/13
I cant believe theo is right.. damn. -comradepanda 9/26/13
None of the strange ideas we had about you involved your sexual orientation..........-Monkeytroll 12/10/13
I'd put you on ignore for that comment, if I could...Alpharius 2/11/14
2020/06/16 15:53:28
Subject: 3D Printing Blog, Come gather round the printer kids
Yes, one of the first mods I did for my Ender 3 was the SD card housing with the extension cord built in, so it is off to the side and so much easier to get to. Other upgrades I printed for my Ender was the filament guide, tool box (great to use and take up all that empty space on the lower right front), filament turn dial and the control box covering. I also cut a piece of styrene to cover up the lower left rails, as they kept getting trash caught inside. Also, a few cord clips here and there...
And, yes, the Ender 3 is one of the best FDM printers in the lower price range available. I got the Pro version with the magnetic removal plate - OMG, I love that. It also moves the lower area fan to the bottom so crud does not fall into it from the top. Also, add a few washers to the bed spring bolts to tighten them up and it make bed levelling so much easier and consistent - no need to get the beefier springs. I also installed the TL smoothers, which may not be needed, but I swear it made my prints smoother.
This message was edited 1 time. Last update was at 2020/06/16 15:54:51
MDSW wrote: Yes, one of the first mods I did for my Ender 3 was the SD card housing with the extension cord built in, so it is off to the side and so much easier to get to. Other upgrades I printed for my Ender was the filament guide, tool box (great to use and take up all that empty space on the lower right front), filament turn dial and the control box covering. I also cut a piece of styrene to cover up the lower left rails, as they kept getting trash caught inside. Also, a few cord clips here and there...
And, yes, the Ender 3 is one of the best FDM printers in the lower price range available. I got the Pro version with the magnetic removal plate - OMG, I love that. It also moves the lower area fan to the bottom so crud does not fall into it from the top. Also, add a few washers to the bed spring bolts to tighten them up and it make bed levelling so much easier and consistent - no need to get the beefier springs. I also installed the TL smoothers, which may not be needed, but I swear it made my prints smoother.
Thanks for that rundown . I have a few of those mods downloaded, and having gotten the magnetic removal plate was a god-send. I have also done the upper filament guide, I did the lower one, but it kept catching on the filament so I took it off. I’ll have to get washers as that sounds like a great cheap (also known as a Theo) fix.
What’s a TL smoother? I’ll look at doing one once I know what it is.
Have you done anything to the fan on the extruder? I’ve seen some videos, but most show they don’t really improve anything quality wise.
I had skipped the tool drawer and the clips as I just wasn’t bothered with the space under there, but if you say they are good I’ll move them up the list.
Have you done anything with the feet? I’m not sure it’s necessary, but I’ve also seen a lot of folks have done it to reduce the noise.
Spent the morning getting my filling replaced . Now my right side of my face is numb and I can’t get the Bill Cosby sketch out of my mind .
Also reworked the files. I was printing 16 Clods (4of which had shields and spears) and 20 sets of arms with 20 shielded left arms. It was a lot of waste. So now I have one file that does 10 clod bodies 2sets of 5 different ones) and 10 sets of open hands.
After looking at the weapons and single piece prints yesterday I’m thinking of a completely new idea to the army....and new colors . Thinking about painting them all orange . Yes, “It’s Cloddering Time!!!” Or something like that . Also as gamers what would you guys think about differentiating the units using different color markings. I really like the open hands and dislike the weapons, except throwing rocks, so what if I used basically all the same figures and just did some slight alterations. The Dwarf Berserker equivalents would have grass tufts on their heads(hoping I can make them look like mohawks ). The iron clad equivalents would have no ornamentation as they are the baseline guys. One group would have yellow flowers on their bases, another might have the dead grass around the bases. The hard parts are the missile troops. I was thinking the ones with bows would have the arm sets withers they are holding rocks in both hands, the crossbow guys would have just one hand with rocks (longer reload time ) .
LOL, Theo your mind is an amazing place, never change.-camkierhi 9/19/13
I cant believe theo is right.. damn. -comradepanda 9/26/13
None of the strange ideas we had about you involved your sexual orientation..........-Monkeytroll 12/10/13
I'd put you on ignore for that comment, if I could...Alpharius 2/11/14
2020/06/16 19:38:30
Subject: 3D Printing Blog, Come gather round the printer kids
Yes - Bill Cosby is still one of the great stand-up comedians. So sad his fall from grace...
I did not do anything to the feet and I agree, the fan extruder mods just seem to get in the way and does not provide any substantial benefit, so I did not do them either.
The TL Smoothers can be looked up on Amazon and they are not expensive. I only did them on the x & y (side-to-side and back & forth - z axis-up and down, not needed) - Not sure if I have the axes listed correct... What they do I will go off of my memory, so i might be slightly off, but they smooth the electrical current to the stepper motors so you do not get the tiny little jerks when the current reverses, goes off and on, etc.
This message was edited 1 time. Last update was at 2020/06/16 19:44:34
MDSW wrote: Yes - Bill Cosby is still one of the great stand-up comedians. So sad his fall from grace...
I did not do anything to the feet and I agree, the fan extruder mods just seem to get in the way and does not provide any substantial benefit, so I did not do them either.
The TL Smoothers can be looked up on Amazon and they are not expensive. I only did them on the x & y (side-to-side and back & forth - z axis-up and down, not needed) - Not sure if I have the axes listed correct... What they do I will go off of my memory, so i might be slightly off, but they smooth the electrical current to the stepper motors so you do not get the tiny little jerks when the current reverses, goes off and on, etc.
You are exactly correct from my understanding of their use MDSW. I have them for my Ender but I haven't installed them yet.
Watched a couple videos about the TL smoothers, can’t say I’m too impressed with the difference, I’ll keep them in mind later on, $11 (for all 3 axis) isn’t much for a possible better print quality, just isn’t that noticeable of a difference to me for terrain that most times I’m printing in draft quality anyway.
Though maybe it would have helped with this mess.
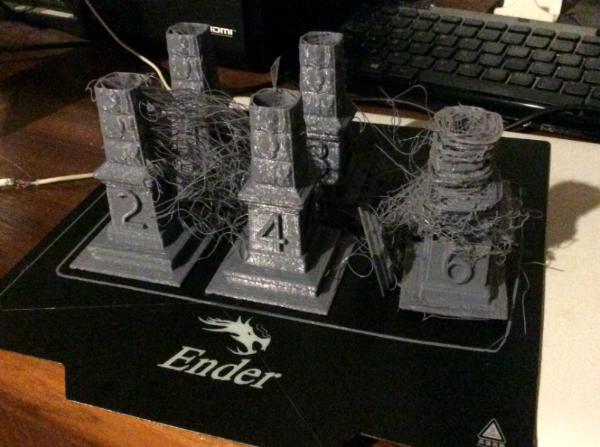
Woke up to find this still going on my printbed. 9 hours 46minutes and a whole lot of wasted filament . Obelisk 5 sheared off right at the top of the 5, which upon further inspection every one of them broke at that same height. There has to be something wrong with that design file. Obelisk six had come off of its base early on, but somehow replanted itself and almost survived until that same level on the design.
I was going to use these for a Frostgrave scenario, but the mix of a bad design and size of the base has me worried. Also the time and amount of filament wasted means I won’t redo the same file again. I will however try and adjust the file, cutting it at the mark above the numbers and hopefully get the obelisks to print still. Bases are 60x60mm the obelisks are 30x30.
edit: Lots of cussing today. Seems the blow out on the obelisk may have caused my second nozzle clog. luckily i ordered 10 replacements a couple weeks back. The constant use and long print times can cause these things i'm told. Only took me like three hours to figure it out and 5minutes to swap extruder tips. printing like a dream now.
also got another spool in. was down to 1.75 rolls . I may sign up for a bi-weekly amazon drop for $22 each time. I think thats safest and cheapest in the long run. I haven't seen my three spools for $50 dollar deal again.....I've been looking.
This message was edited 1 time. Last update was at 2020/06/17 20:06:00
LOL, Theo your mind is an amazing place, never change.-camkierhi 9/19/13
I cant believe theo is right.. damn. -comradepanda 9/26/13
None of the strange ideas we had about you involved your sexual orientation..........-Monkeytroll 12/10/13
I'd put you on ignore for that comment, if I could...Alpharius 2/11/14
2020/06/18 10:44:07
Subject: Re:3D Printing Blog, Come gather round the printer kids
So yesterday was frustrating. Lots of failed prints, a clogged nozzle from the obelisk print. But even before I figured that out I got a couple small prints done which gave good detail, but then had horrible prints in between. I finally got pissed off enough I turned off the Ender 3 and walked away for a while (3-4 hours) came back, finally installed the z axis bed leveler, and cleared the clog.
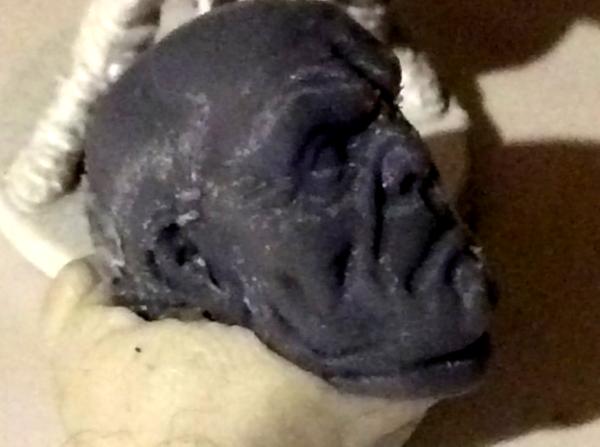
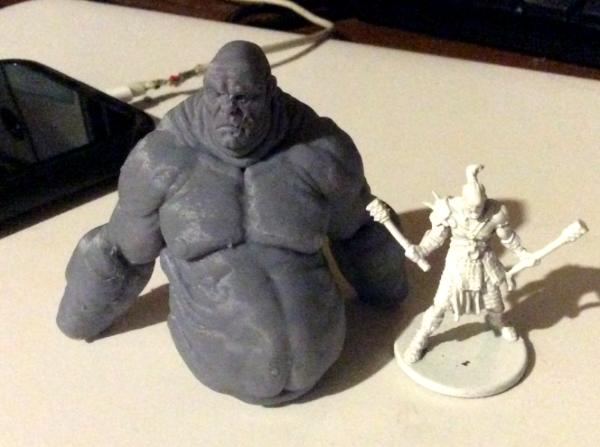
First print afterwards. Absolutely .....I wouldn’t say beautiful as he has a face only a mother could love.
Yes, he’s a giant, so the print should be a bit cleaner than normal, especially since I’m using the detail level of print on him. I think I’ll call him Royce, cause he has Rolls.
I will now argue with anyone who says you cannot get details done nicely on a FDM printer .
Zombicide guy for scale.
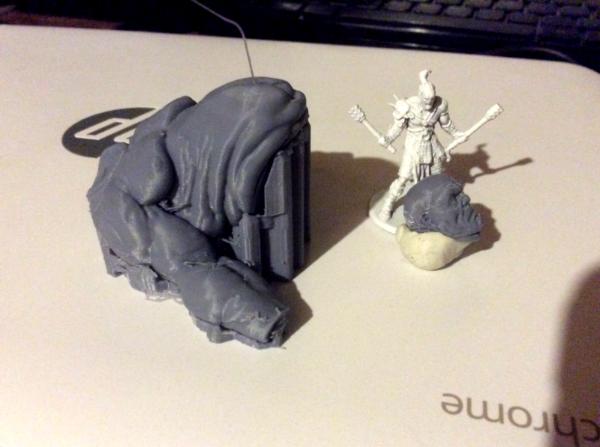
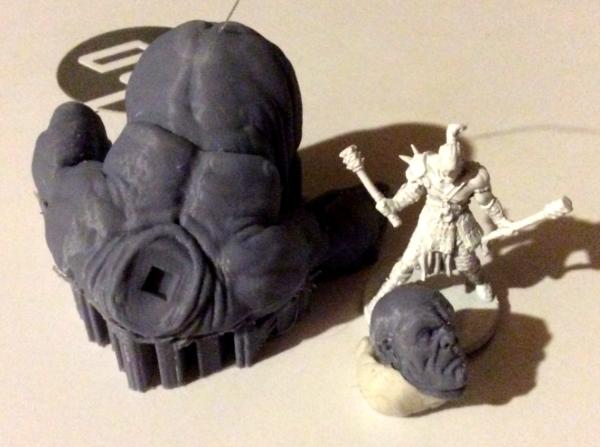
The parts have joints like on resin casts, and fit perfectly together. Man they grow ‘em big in Indiana.
So this is part of a two giant set from Duncanshadow.com (Thanks Boss Salvage who pointed me to that site), I believe they were on sale for $1. Great design. He has it split into parts or able to print all as one file. It may take longer, but I’m doing all the parts separately in hopes of better detail. Seems to be working out. He has a Patreon page and tons of models. I downloaded a few more including a trio of Earth Elementals.
Check him out . More later, have to go work at church some this morning, but will print his legs while I’m gone.
This message was edited 2 times. Last update was at 2020/06/18 14:19:20
LOL, Theo your mind is an amazing place, never change.-camkierhi 9/19/13
I cant believe theo is right.. damn. -comradepanda 9/26/13
None of the strange ideas we had about you involved your sexual orientation..........-Monkeytroll 12/10/13
I'd put you on ignore for that comment, if I could...Alpharius 2/11/14
2020/06/18 15:25:06
Subject: 3D Printing Blog, Come gather round the printer kids
Happy to help! And even happier to see more of Duncan's prints in the wild - Royce looks great already. How did his back rolls survive all those supports? I'm not really sure with how invasive FDM supports are on mini details.


 ? Seriously, I just stopped by Miniaturemarket and my local shop and almost asked them if they want to go into business with me and start printing terrain cheap
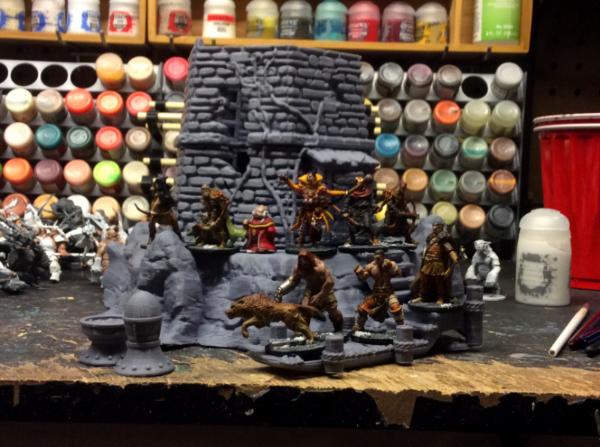
 .
.
 . Otherwise the curled corner could be disguised easily enough. It’ll be a while before I decide to reprint the head as it’s servicable right now. I feel like 4 models could fit inside like the Zombicide cars. If nothing else part of the warband can hide while the police arrest Arthur’s men for killing the documentary guy


 .
.


 . So worth it.
 . Thinking about painting them all orange
  . Yes, “It’s Cloddering Time!!!” Or something like that