Hey folks!
Here's my latest effort in chronicling my
40k tournament experiences! This one didn't require me driving 11 hours to a
GT or flying 3,000 miles; just an hour drive to the nearest
FLGS! Welcome change, although I'm driving 9 hours to Atlanta next weekend for the second round of the Atlanta Circuit; gotta defend my title.

You can read my other battle reports for this tournament here:
'Ard Boyz Preliminaries Round One <You're reading it!>
'Ard Boyz Preliminaries Round Two
'Ard Boyz Preliminaries Round Three
The 'Ard Boyz scenarios for the preliminary rounds can be found here:
Scenarios.
My Ork list for this event is pretty much the same one that I've been running for the last year or so, modified up to 2500 points:
The Pink Waaaugh!
HQ: Ghazghkull Thraka
HQ: Big Mek with a Kustom Force Field and a Powerklaw
Troop1: 20 Boyz (Nob, Powerklaw)
Troop2: 20 Boyz (Nob, Powerklaw)
Troop3: 12 Boyz (Nob, Powerklaw) +Trukk with Reinforced Ram and Boarding Plank
Troop4: 19 Gretchin + 1 Runtherder.
Troop5: Ghazghkull's Harem (9 diversified Nobs) with Cybork Bodies in a battlewagon identical to heavy support battlewagons:
Nob 1: Painboy
Nob 2: Bosspole
Nob 3: Waaaugh! Banner + Ammo Runt
Nob 4: Powerklaw
Nob 5: Powerklaw + Kombi-Rokkit
Nob 6: Powerklaw + Kombi-Rokkit + Ammo Runt
Nob 7: Big Choppa
Nob 8: Big Choppa + Kombi-Rokkit
Nob 9: Big Choppa + Kombi-Rokkit + Ammo Runt
Four Kombi-rokkits should give me one hit at BS2, with three re-rolls from the ammo-runts giving me one more hit; IE - two chances to wound a monstrous creature before assaulting, or maybe a transport popped before I assault so I get the contents instead of the vehicle.
Elite 1: 15 Burnas
Elite 2: 5 Lootas
Elite 3: 5 Lootas
Fast Attack 1: 2x Deffkoptas, both with twin-linked rokkits and buzzsaws.
Fast Attack 2: 1x Deffkopta with a twin-linked rokkit and buzzsaw.
Fast Attack 3: 3x Warbuggies with twin-linked rokkits.
Heavy 1: Battlewagon + Deffrolla + Boarding Plank + Big shoota + Grabbin' Klaw + Armor Plates + Grot Riggers
Heavy 2: Battlewagon + Deffrolla + Boarding Plank + Big shoota + Grabbin' Klaw + Armor Plates + Grot Riggers
Heavy 3: Battlewagon + Deffrolla + Boarding Plank + Big shoota + Grabbin' Klaw + Armor Plates + Grot Riggers
A note on tactics: As you'll be able to see from my deployment and movements, the
KFF and Nobs go together, Ghazghkull runs with burnas, and both of those wagons are flanked by wagons with boyz in them, all within the 6" bubble to get saves, with the trukk running behind the wagons for screening to serve as backup/support assault, and the rokkit buggies just being a nuisance to keep things away from my battlewagons.
*IMPORTANT NOTE* For all three games, I explained to my opponent that I had Deffrollas, but that for modeling purposes I was leaving them off for the game. I've had
GW Deffrollas on order since February (backordered) and my Deffrollas are heavy PVC pipe and the magnets don't hold them in very well - and given the debates raging on Dakka about the Deffrolla not being part of the hull and the implications for assaulting the battlewagons and deploying out of the battlewagons, my answer is to model my deffrollas in the upraised position; something I can't do with my PVC pipes. So when you see pictures of my Battlewagons without Deffrollas, that's why - they're sitting off to the side on my tray.
---------------------------------------------------------------------------------------------------------------------------------------------------
First game of 'Ard Boyz and I'm faced against the army I fear the most. Dark Eldar! Not only Dark Eldar, but the Dark Eldar player who got me interested in Dark Eldar in the first place. It all started a year+ ago when Ghazghkull and a unit of diversified nobs assaulted an archon with an incubi unit and four turns of combat later my nobs and Ghazghkull were dead - and I thought to myself, "Holy crap, something scarier in assault than Ghazghkull!" In all fairness, the incubi had done their job then died, but the Archon's shadowfield didn't fail him.
Dark Eldar:
HQ: Lelith Hesperax. Retinue: 8x Wyches, Succubus+Agonizer; plasma grenades, 2x blaster, wych weapons. Transport: Raider+Horrorfex+Nightshields
Troop1: 9x Wyches, Succubus+Agonizer; 2x Blasters, Plasma Grenades, Wych Weapons. Transport: Raider + Horrorfex + Nightshield
Troop2: 9x Wyches, Succubus+Agonizer; 2x Blasters, Plasma Grenades, Wych Weapons. Transport: Raider + Horrorfex + Nightshield
Troop3: 9x Wyches, Succubus+Agonizer; 2x Blasters, Plasma Grenades, Wych Weapons. Transport: Raider + Horrorfex + Nightshield
Troop4: 9x Wyches, Succubus+Agonizer; 2x Blasters, Plasma Grenades, Wych Weapons. Transport: Raider + Horrorfex + Nightshield
Troop5: 9x Wyches, Succubus+Agonizer; 2x Blasters, Plasma Grenades, Wych Weapons. Transport: Raider + Horrorfex + Nightshield
Troop6: 9x Wyches, Succubus+Agonizer; 2x Blasters, Plasma Grenades, Wych Weapons. Transport: Raider + Horrorfex + Nightshield
Elite1: 6x Warriors + 1x Blaster in Raider+Horrorfex+Nightshields
Elite2: 5x Warriors + 1x Blaster in Raider+Horrorfex+Nightshields
Elite3: 5x Warriors + 1x Blaster in Raider+Horrorfex+Nightshields
Heavy1: Ravager (3x Dark Lances) + Nightshield
Heavy2: Ravager (3x Dark Lances) + Nightshield
Heavy3: Ravager (3x Dark Lances) + Nightshield
Pre-game tactical assessment:
1. I fear Dark Eldar. I play both Dark Eldar and Orks, and I think that if my Dark Eldar went up against my Orks, my Orks would leave the table in tears.
2. On the flip side, I didn't take Dark Eldar to 'Ard Boyz - it had nothing to do with mission 3, but rather a belief that Dark Eldar don't scale up to 2500 points well. My opponent ran a wych cult with 1
HQ, 6 troops, 3 elites and 3 heavy supports, all in raiders. I could do the same thing at 1850.
3. I'm also not in the same position I was a year+ ago with my Orks. I *PLAY* Dark Eldar now, and I know their tricks. His
DE list is pretty vanilla, not optimized at all, and is missing the little things that rightfully make people afraid of Dark Eldar. No Crucible of Malediction, no Nightmare Doll, no haywire grenades - all his wyches are packing dual blasters, and while I have a healthy respect for lances, my own abysmal shooting abilities with them make me view a wall of lances with a grain of salt.
4. Perhaps most telling of all - rather than adding killing potential (Warp beasts, reaver jet bikes, another
HQ unit) he chose to kit out his units to increase their survivability. 9 wyches instead of 5 or 6, Nightshields on every raider - that's 210 points dedicated to making the enemy have 6" less range. You could get two RJB squads with 2x blasters each for about 180 points.
In short, I'm extremely wary of his list because I know what lance spam can do, how destructive wyches are in close combat, and we're in a mission favorable to his army....but I'm not quivering in fear because I have the measure of Dark Eldar and give them the appropriate amount of respect.
-------------------------------------------------------------------------------------------------------------
We roll for objectives and I win - I get to place three and he gets to place two. From the side I was standing on at the time, I deployed the first 12" from the left and rear table edge. My opponent put his first 12" away from mine, also 12" away from the edge. I dropped mine along the same line, so now there are three on the back table edge. His last and my last both go 12" from those three, so we have a relatively compact area to fight over.
We roll the dice for deployment and the Dark Eldar player wins. He's got a *very* tough choice to make. He can go first and get an alpha-strike, or he can go second and have the ultimate say in who gets which objectives. Both are important, and he ultimately chooses to give me the first turn so that he can weigh in on the objectives at the end of the game, presumably either by assaulting me off of them or moving in raiders to contest. With his I5 and 9-wych squads (and plasma grenades on everything) he'll do just fine in assault, and as a
DE player, you want to be assaulting onto an objective, NOT sitting on an objective holding it.
*NOTE* We made a mistake for deployment - neither of us noticed the triangle deployment, and we deployed using pitched battle.
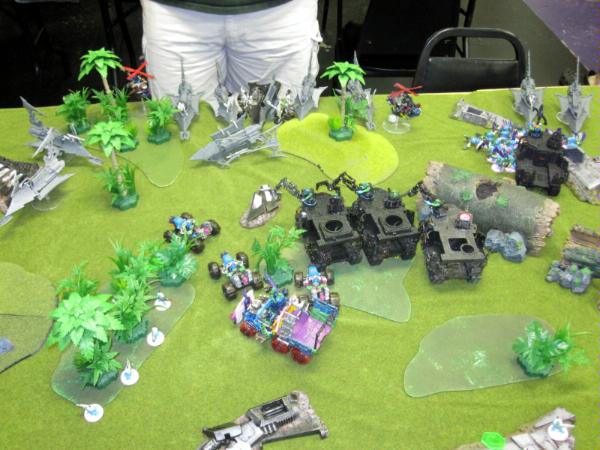
Ork Deployment: You can see four of the objectives clearly; three along my front lines, one 12" in front. The 5th objective is in the forest top right by the hollow log.
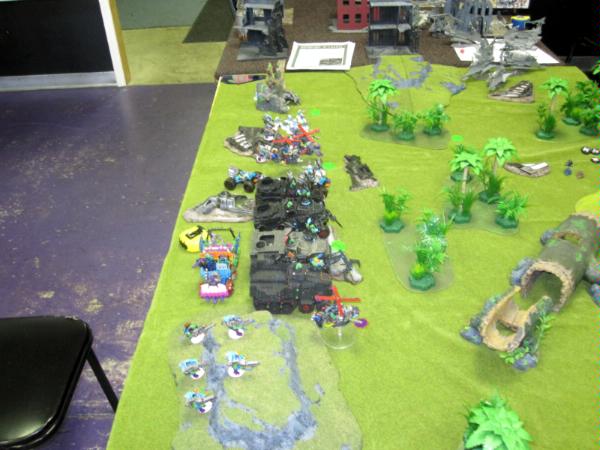
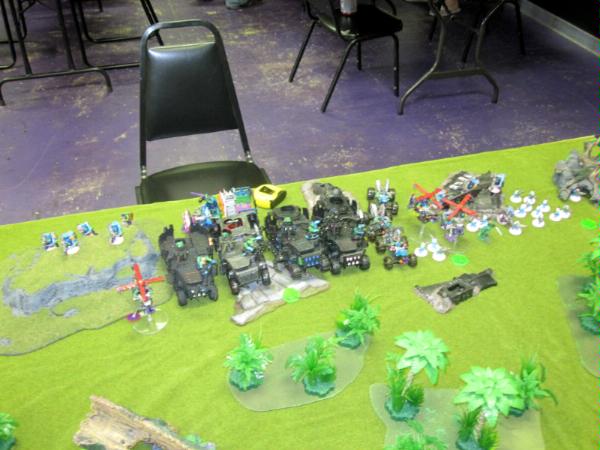
My deployment from the front: I have Lootas on the Left in an elevated position; 2" apart from each other. Lootas on the right doing the same. The
KFF is with the nobs in the second from the right (facing them) so that all four wagons and the buggies are getting obscured status, while the trukk simply can't be seen because of the wall of battlewagons. Deffkoptas on either side of my lines so that they can go to work doing something useful with luck.
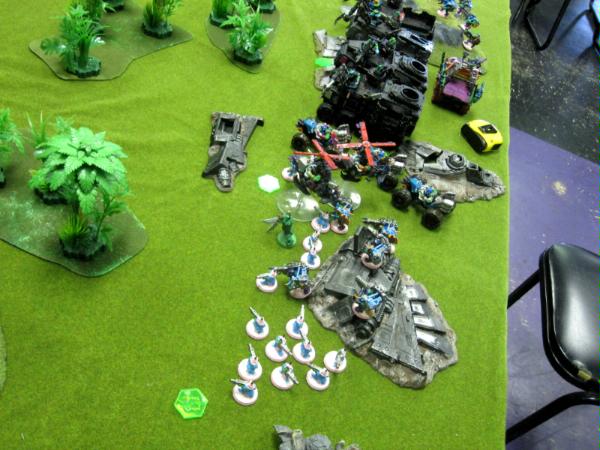
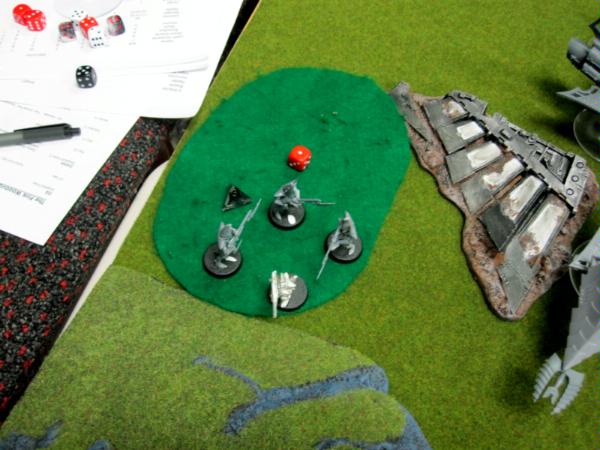
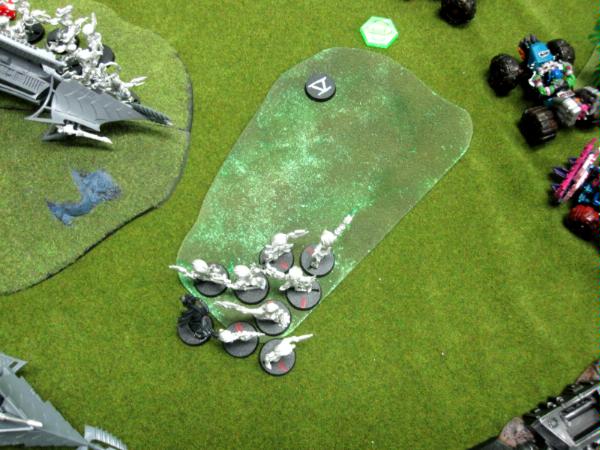
A better closeup of my gretchin. My goal for this game is to use my gretchin to hold four objectives; closing in on two of them after my army has crossed over the deployment lines - I want the gretchin to sweep in and spread out to free up the rest of my army from having to babysit objectives. The bunching up you see if where I'm going to have to stretch out to grab objectives.
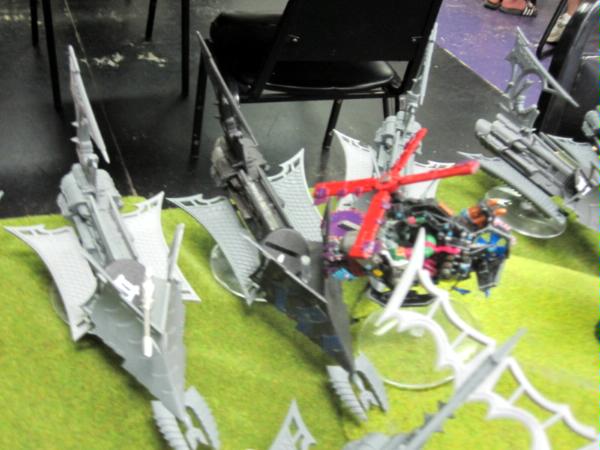
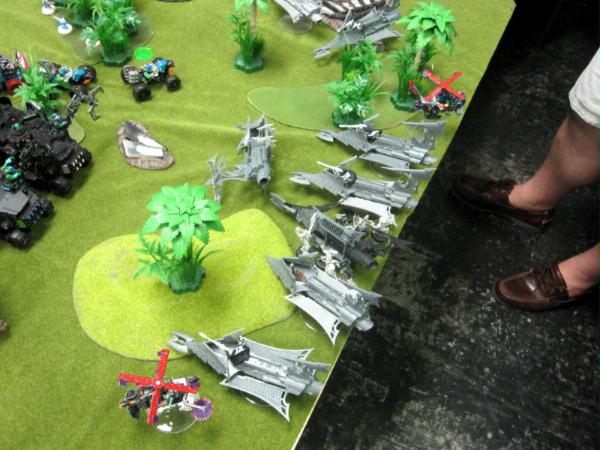
My opponent deployed in return, with his raiders on the table edge and his ravagers providing cover to the raiders he cares about. The lone partially primed raider is Lelith. I take my scout moves and zoom up the table, staying 12" away.

Ork Turn1 Move:
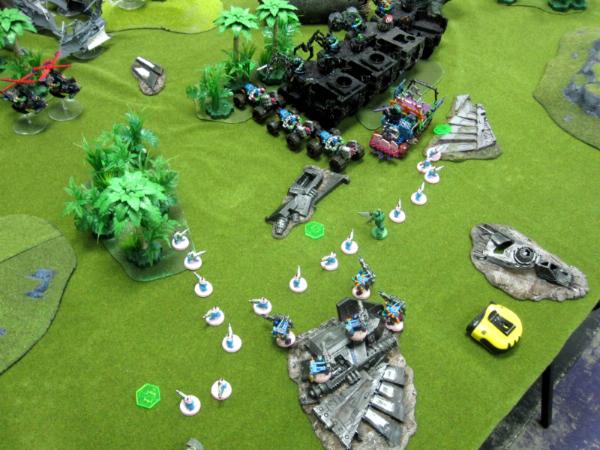
My formation rolls dangerous terrain across the board and is ok! I roll up the middle of the table - I'm using that big log thing to screen my right flank, and I can't really pick a side to try rolling up because Dark Eldar can outmaneuver me. My gretchin
2d6 and spread out towards the objectives. I've got one unit holding three objectives and closing in on a fourth...and they only cost me 67 points! =) Meanwhile, my Deffkoptas move 12" towards the raider line and prepare to try causing trouble.
Ork Turn1 Shooting: The only shooting worth note is that my left side Lootas shot and exploded his far left ravager. Boom.

My lone deffkopta did nothing, my buggies whiffed, and my two deffkoptas got a weapon destroyed result on the ravager they fired at.
Ork Turn1 Assaults:
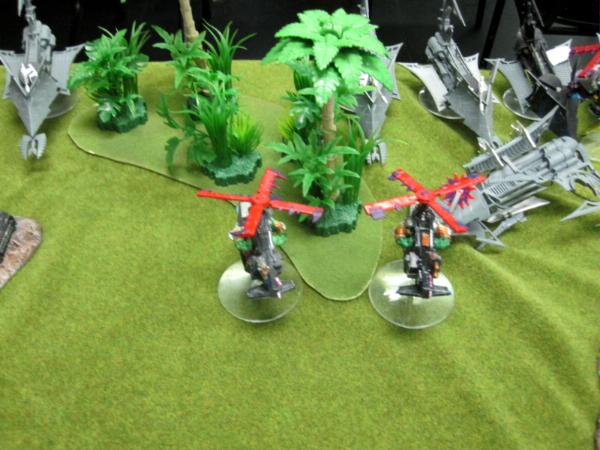
My lone deffkopta assaulted into Lelith's raider and passes his dangerous terrain test. If possible, I want Lelith out of that transport; she's too dangerous to be allowed to run around free beating on me. Those wyches have 6+ armor saves and if I can explode their transport, even better - some of them are certain to die.
My unit of two deffkoptas declare their primary target to be the ravager they fired at and the closest moves into assault. I declare that I'm going to attempt a secondary assault against his other ravager with my other deffcopta and am able to make it in while keeping 2" coherency.

Three attacks later on each, the left ravager explodes and the right ravager is wrecked.
My lone deffkopta doesn't fare so well and is only capable of stunning Lelith's raider.

Personal note
I run my ravagers with three disintegrators each. While his lances scare me more than disintegrators, him putting those out front made them a target I couldn't ignore, especially since they were blocking access to the raiders behind them. I didn't discover until after I noted his now lack of disintegrators that those were DARK LANCE ravagers! I had just wiped out 9 of his dark lances.
Dark Eldar Turn1:
My opponent shifts several of his raiders 12" to his left (my right) to get side armor shots on my right battlewagon. On my left flank, a couple raiders shift up 6-12" to get better firing angles, and in the middle....he stays put. Tactical mistake on his part, I won't deny it. =p His shooting went as follows:
1. His raiders on my right shot side armor of my battlewagon; one missed, I made one
KFF save.
2. His raiders in the middle lanced my wagons and either missed or I made my
KFF saves.
3. His raiders on the right shot my wagons and either missed or I made my
KFF saves.
4. All his mounted troops and elites (wyches and warriors) shot at my deffkoptas with splinter pistols, blasters, and rapid-firing splinter rifles. I won't deny that the dice gods were with me; I made the most amazing number of saves, and ended up losing one deffkopta out of my unit of two to a blaster insta-killing it, and my other deffkopta taking a wound from a splinter rifle. My saves were absolutely amazing.
Dark Eldar Turn1 Assault:
As if to add injury to insult, my lone wounded deffkopta still in base contact with Lelith's raider applies a buzzsaw judiciously and wrecks it.
Ork Turn2:
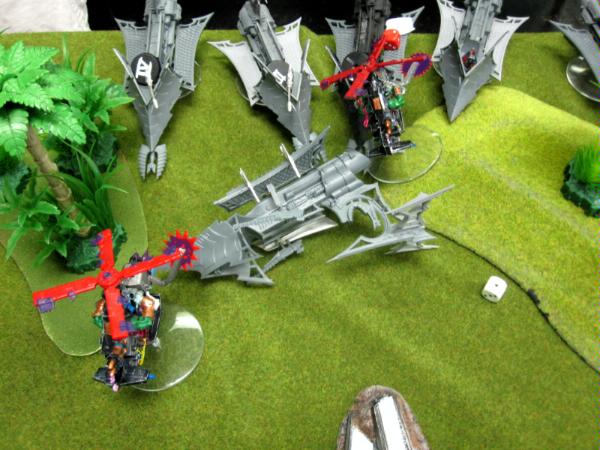
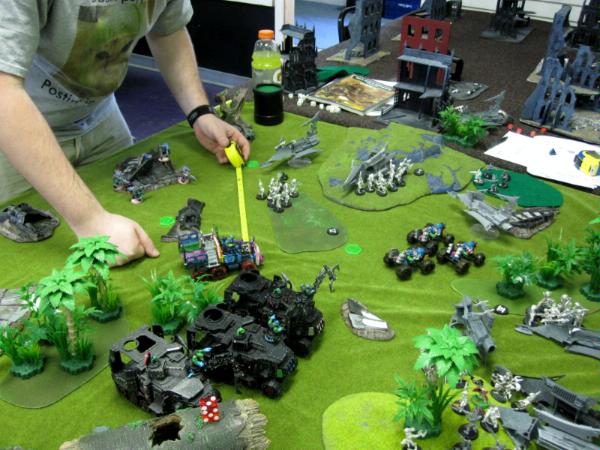
My Battlewagon brigade trundles another 12" up the board. The log is funneling me and would end up with a battlewagon in the rear, so I decided to split it off and go for his two lone raiders. My deffkoptas both jump to opposite sides of his raiders that haven't moved so that they can duplicate their first turn efforts. My gretchin finish spreading out and now sit on all four objectives.
My battlewagon dumps out its boys. I don't hold out high hopes of doing anything major, but if I can stun/shake those raiders, those are two lances not shooting at me, and statistically I should get 12 hits, meaning two glances - hopefully one on each. One is full of warriors, the other has wyches.

Here's a picture of the main event though. I'm hoping my warbuggies can pick off another raider, and maybe my Lootas too, and if my deffkoptas can weigh in, I can seriously cripple his mobility.
Ork Turn2 Shooting:
My left side Lootas open up and explode a second raider; I kill one warrior inside and the other four fail their pinning test. So far this game that 5 man Loota unit has killed 210 points (1x ravager, 1x raider, both upgraded) and made up for the cost of both Looa units.
I'm a little hazy on this next part. Between my other Loota unit and the right deffkopta, the raider next to Lelith's was destroyed. Musta been the Lootas; wouldn't make sense for me to shoot something I couldn't assault with a Deffkopta.
On the left side, my deffkopta immobilizes the raider it shoots at:

Ork Turn2 Assault:
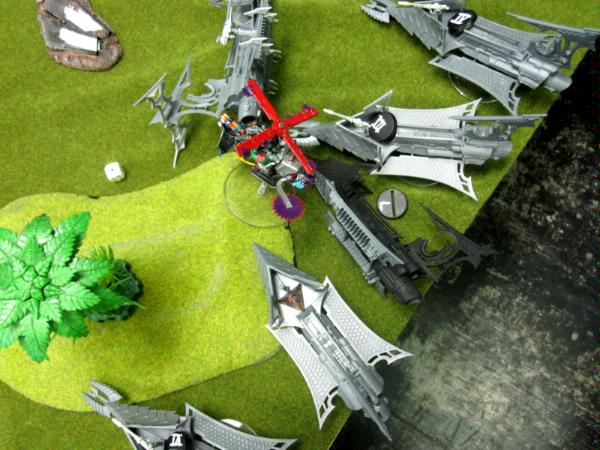
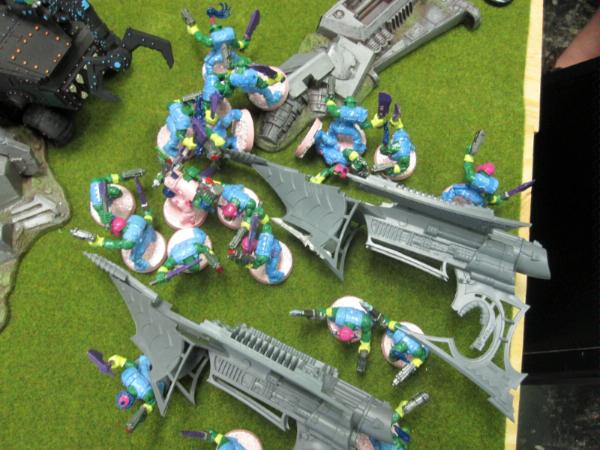
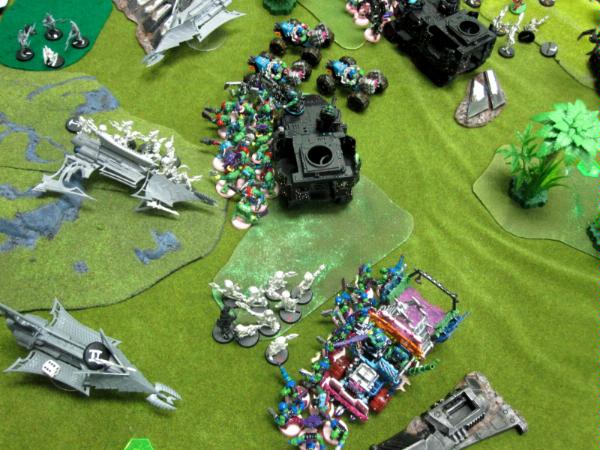
My boyz assault into his two raiders! I roll a six on my difficult terrain test! I've just gone from hoping to ground those two raiders to possibly boiling the units inside too!
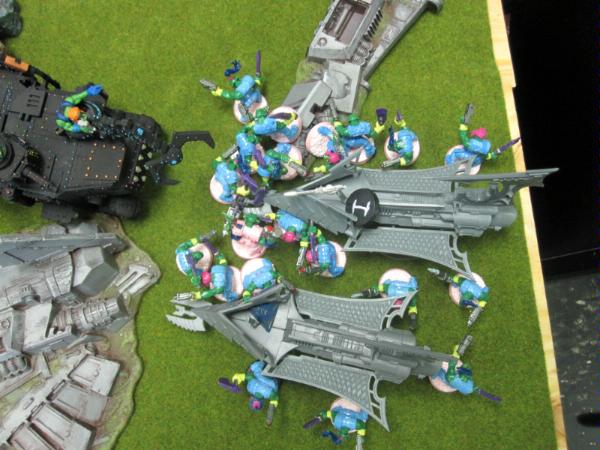
Unbelievably, 76 attacks later I wreck both of the raiders! I scored two glancing hits against one, one glancing hit against the other...and I rolled a six on the damage chart against each. With the transports surrounded and unable to disembark, the units inside perish in the screaming flames of plastic unpainted raiders!
Dark Eldar Turn2:
The wyches from his immobilized raider disembark and move 6" up towards the middle of the table. At first I thought they were going to assault my warbuggies because he was asking me questions about them...until I realized he was after my gretchin.
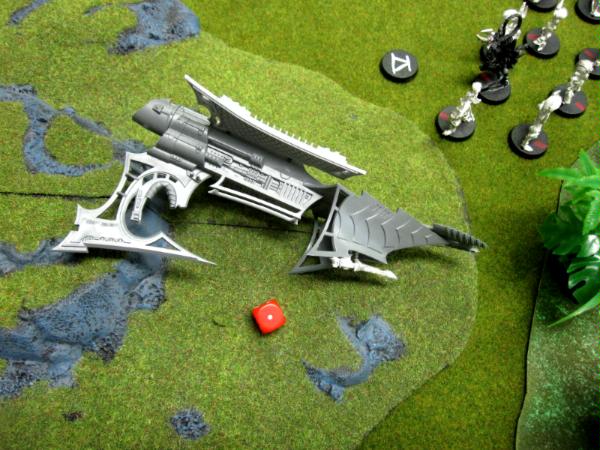
One of his surviving raiders moves flat out across the table to land on a hill - he's trying to close on my objectives, and he rolls a one - wrecking his own raider since he just moved flat out. The wyches inside disembark.
Dark Eldar Turn2 Shooting:
Both of my remaining deffkoptas finally bite the dust, and a variety of dark lances and blasters plunk harmlessly off my battlewagons. Heh. Blasters. Plinking off my battlewagons. You KNOW what that means. If he's in range to blaster me, I'm in range to burninate.
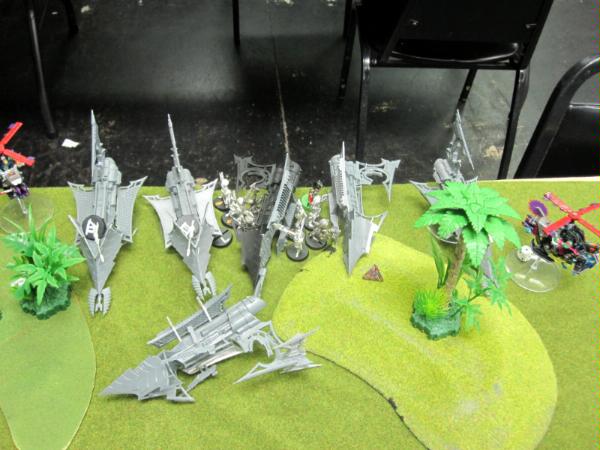
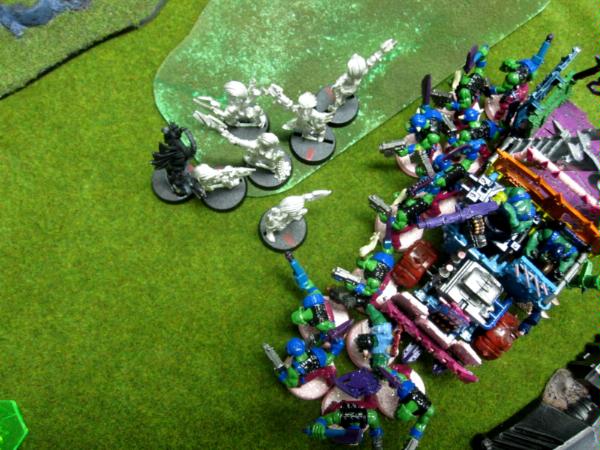
Dark Eldar Turn2 Assaults:
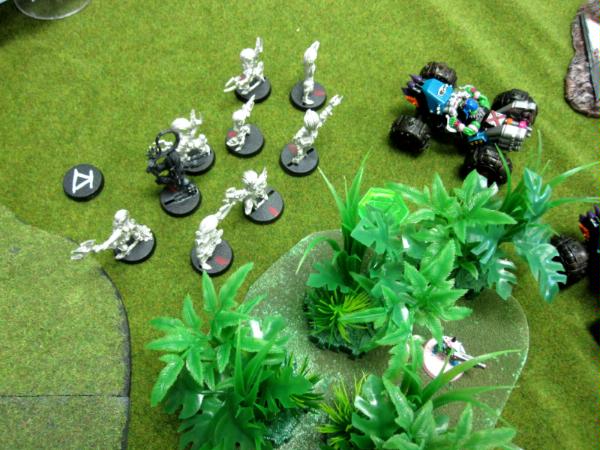
A picture is worth a thousand words. His wyches assault into my gretchin, and kill 8-9 of them. They're so spread out that there is no response, and I lose combat, fail to roll

and am obviously caught and wiped out. I go from holding four objectives to holding no objectives.
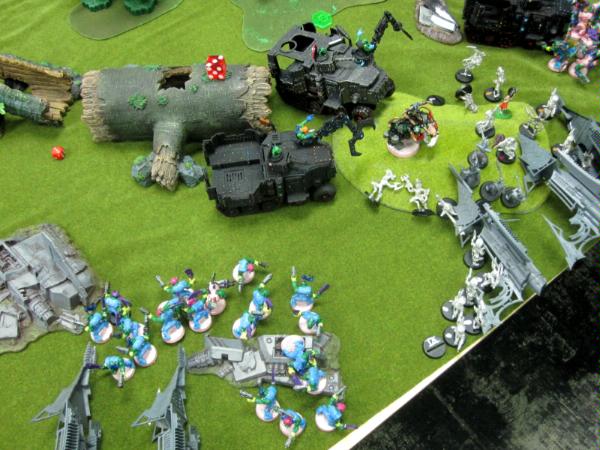
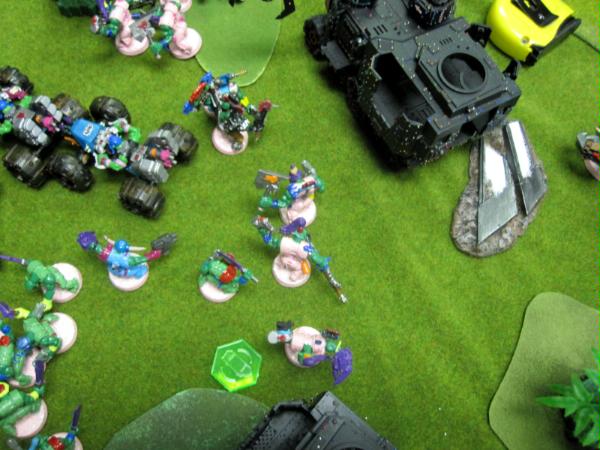
Ork Turn3: I'm forced into reactionary mode. Yes, that is a picture of me wearing a shirt of my avatar. The back says "D to the Ork" He's got a raider in my rear left that just moved flat out, a wych unit out of cover from the crashed transport, and a bunch of wyches along his back edge from the wrecked/immobilized transports that have moved up a bit. With him largely disembarked, its time to make my move and call the Waaaugh!
My Trukk boyz move back towards my deployment zone to deal with the wyches who just massacred my gretchin. My remaining battlewagon full of normal boyz disembarks next to the wyches from the crashed raider. My nobs get out to challenge the wyches in cover back in his deployment zone
Meanwhile, my victorious blue orks unentangle themselves from wreckage and head towards the wyches closest to them (they'll make it with a 6" fleet and a 6" assault so they're comfortable) and Ghazghkull lumbers out of his battlewagon, undecided about where to assault. Lelith and wyches deserve attention, but they have a 2++ and a 4++ which don't put his STR10 to the best use...I'm not sure where to apply Ghazghkull's might so I plop him right between everything to figure it out later.
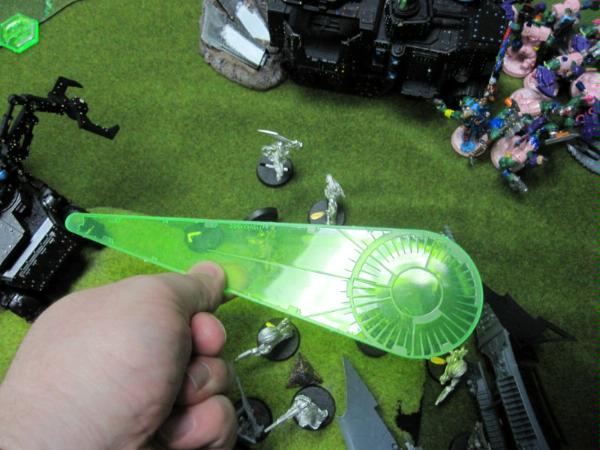
Ork Turn3 Shooting:
My favorite part:
The BURNINATION! The Burna Battlewagon nicks three wyches from Lelith's squad and one from the warrior squad, and I multiple that by 15. The warriors evaporate, and the wyches all evaporate (except for Lelith, whose Shadowfield sputters out, causing a wound).
After that, boyz, trukks, battlewagons, Lootas....everything opens up on wyches trying to pare them down into something less threatening so that I can win combat. I kill two from the unit that killed the gretchin. My rear left Lootas also exploded the wych transport that made it into my rear lines...and it actually killed 6/9 wyches inside.
In midfield my boyz kill three.

In the back, the nobs open up on the wyches and do nothing....and Lelith is out in the open by herself having failed a wound. I'm torn here because Ghazghkull could be put to better use against the wyches by the blue boyz and Lelith could be easily killed with some big shootas at this point, but I'm using all those big shootas and every other gun I have (even Lootas could have killed her) to try thinning out wyches to make my boyz have a great chance of success. Ultimately, I decided that the wyches and the mob of 20 blue boyz could sit there and duke it out and it wouldn't matter because they were far from the objectives. Ghazghkull went to go munch on Lelith.
Ork Turn3 Assaults:
We were running short on time so the pictures got light here, but the results are what would be expected. 12 Trukk boyz assault into the wyches; take losses but kill all but the succubus in return. The 20 ork boyz assault into the wyches and kill them. Ghazghkull kills Lelith, the nobs kill their wyches, the blue boyz kill their wyches. Where possible, I consolidate towards objectives (I think we just hit the 10 minute mark).
DE turn3: His warriors (previously pinned) move towards my nobs and don't hurt them. His immobilized raider does no damage to a battlewagon. His 3 remaining wyches in my rear make for an objective.
Ork Turn4: My opponent didn't try denying me round4. He played slow...not slow playing, just playing slowly because he wasn't sure how to deal with my army and he was getting beaten hard, so I didn't want to pressure him to pick up the pace. at the end of turn3, he has an immobilized raider and 3 wyches left on the board and could have made me get a minor win (possibly) if he pushed it here, but let us take a turn4.
My trukk boyz spread out and grab two objectives.

My nobs and my other boyz grab two more, giving me four total.
Ork Turn4 shooting: My Lootas finish off his three surviving wyches, and my nobs use their kombi-rokkits to wreck his immobilized raider, and my opponent is tabled.
Game end: I score a 20 point massacre for owning 4 objectives, I gain all four bonus points, and also have 2500 victory points (for the game3 bonus point) to count towards my running total.
While my opponent made some mistakes....and I exploited his mistakes....the dice were very nice to me. Its almost as if they punish me when I play
DE, and reward me when I go back to my Orks. Maybe I should get separate dice for the Dark Eldar.


 .....Bay Area Open GT 2013 - Best Tyranids
 .....LVO GT 2014 Team Tournament - Best Generals
 2000
2000 


 7000pts.
 5000pts.
 on the way.