The last time I played against Tau, we both brought unusual, experimental lists. I brought my shunt-punch alpha-strike Grey Knights (back before the
FAQ's disallowed Scout shunting) and my friend brought his kroot-heavy Tau with 100 kroots! (Battle report
here for those interested.) This time, my opponent brought a more traditional Tau army (
BTW, it is a different opponent than in my first game against Tau). Knowing how good Tau can be when commandeered by someone who knows how to run them, I decided to take my more competitive Crowe-Purifier
GK list. I'm not taking any chances on Tau.
At the time, I did not know this, but my opponent, Gus, had not lost to Grey Knights yet. Actually, his army does very well against
MEQ armies. The only army that gave his Tau trouble were Janthkin's tyranids (an army he had yet to beat, I believe). Will my purifiers give him just as much trouble? Or I am just another
MEQ army to him? We shall see....
------------------------------------------------------------
My list:
Grey Knights 2K

Castellan Crowe
Venerable Dread - 2x
TL-Autocannons, Psybolt Ammo
Venerable Dread - 2x
TL-Autocannons, Psybolt Ammo
Vindicare
6x Purifier Squads - 2x Psycannons, 3x Halberds, 1x Warding Stave, Rhino
6x Purifier Squads - 2x Psycannons, 3x Halberds, 1x Warding Stave, Rhino
6x Purifier Squads - 2x Psycannons, 3x Halberd, 1x
MC-Hammer, Rhino
6x Purifier Squads - 2x Psycannons, 3x Halberd, 1x Hammer, Rhino
5x Grey Knight Strike Squads - Rhino
Dread - 2x
TL-Autocannons, Psybolt Ammo
Dread - 2x
TL-Autocannons, Psybolt Ammo
Tau 2K
Shas'
el - Airbursting Fragmentation Projector, Missile Pod, Stimulant Injector (feel no pain), 2x Gun Drones
3x Battlesuits - (Fireknives) Plasma Rifle/Missile Pod/multi-tracker
3x Battlesuits - (
Deathrains) Twin-linked Missile Pods/Flamer, 2x Gun Drones
3x Battlesuits - (
Deathrains) Twin-linked Missile Pods/Flamer, 2x Gun Drones
12x Firewarriors - Shas'ui
12x Firewarriors - Shas'ui
12x Kroot + 5x Hounds
12x Kroot + 5x Hounds
8x Pathfinders - Devilfish w/Disruption Pod
Piranha - Fusion Blaster (melta) and Targeting Array
Piranha - Fusion Blaster (melta) and Targeting Array
Hammerhead - Railgun, Burst Cannons, Multi-Tracker, Disruption Pod
2x Broadsides - Advanced Stabilization System (Slow and Purposeful), 1 Team-Leader with Target Lock and 2x Shield Drones
2x Broadsides - Advanced Stabilization System (Slow and Purposeful), 1 Team-Leader with Target Lock and 2x Shield Drones
-------------------------------------------------------------------
PRE-GAME ANALYSIS:
Grey Knights:
I respect Tau. They are a very good army when run by a capable general. He's got good shooting with a way to take away my cover and he's got enough rapid-firing guns to deal with my
MSU troops after he pops my vehicles. While this will be my first time playing against Gus, I know he's a good player. After all, he's been playing consistently at our
LGS and against top-notch opponents as well. He's played against Janthkin, Reecius and other good players there. I can't take him lightly.
At the same time, I've traditionally done very well against Tau. My win record against them is probably at around 80% or so. I've only ever lost twice against Tau, and both those games were when my opponent had 500pts more than me (they brought 2K of Tau against 1.5K of my older daemonhunters). What's more, most of my wins came when I was running my older daemonhunters in land raiders against their railguns.
If I'm going to win, I've got to prioritize my shooting. I'm going to destroy any of his threatening or blocking vehicles first (piranhas, railhead). Then I'm going to take out his suits (especially his fireknives) with my insta-killing dreads. Focus fire on them and they should go down. If his pathfinders prove too annoying with their cover-negating markerlights, then I'll focus on them. Meanwhile, my knights will be heading aggressively towards his front lines. I can't reliably take out his broadsides with anything but assault, so I'm just going to ignore them at first.
As the more aggressive player, I think I'm going to have the advantage in mission-based objectives. In annihilation, it could be anyone's game. I'll have 4 easy kill points with his vehicles, but I also see that he can easily get 5KP's when he takes out my rhinos. As far as deployment is concerned, shooty armies like Tau prefer deployment where they can maximize their shooting. Thus, he's going to want Dawn of War or Spearhead, while I'm going to want Pitched Battle. As far as who goes first, I'm going to want the initiative. It wouldn't be too good if he takes out my transports in my own deployment zone.
Tau:
He's got 18 S7 36" shots, of which 12 of them are twin-linked. He's got 5 S10 AP1 railguns, all of which can target a different unit. And he's got a way to take away my cover save. To my rhinos, he's got some scary firepower. I can take out 1 railgun reliably (his railhead), but I won't be able to do much against his other shooting, at least not until I get closer. And while his anti-infantry shooting isn't spectacular, it's enough to take out 5-6 men marine squads. His greatest chance lies in taking out my mobility. If he can do that and force me to footslog, then he's got a good chance of winning. Otherwise, I do.
As with usual Tau tactics, I can assume that he won't be playing for the objectives, at least not initially. It's going to be focus-fire and blocking out my units. Well, I'm going to make sure I take out his blocking vehicles (and thusly, his mobility as well). The key is going to be how well I can survive his focus-fire.
-------------------------------------------------------------------
Mission: Annihilation
Deployment: Pitched Battle
Initiative: Grey Knights
-------------------------------------------------------------------
Deployment:

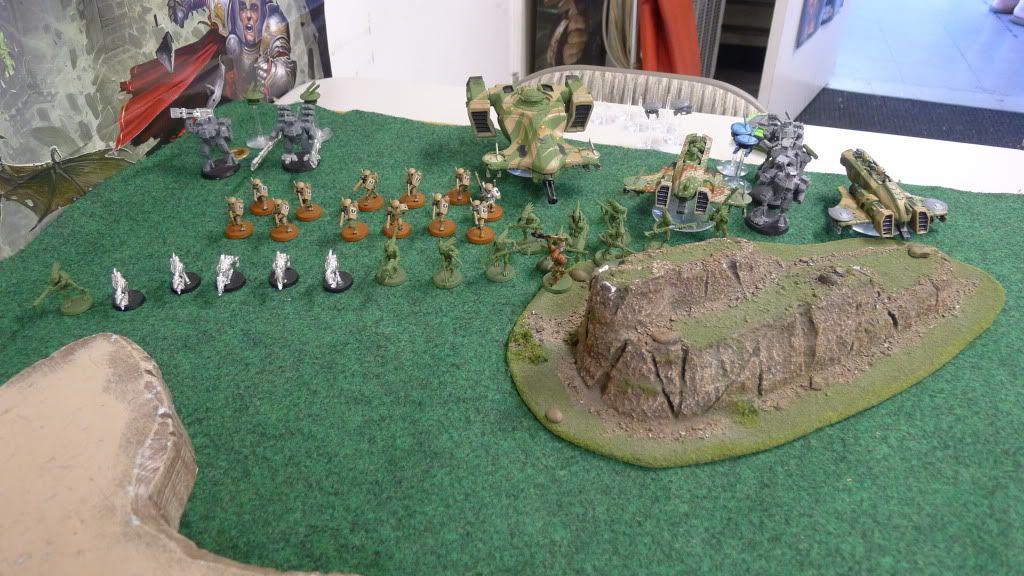
Grey Knight deployment. I've got 2 dreads and a vendread in the ruins to the right and a vendread behind cover to the left.
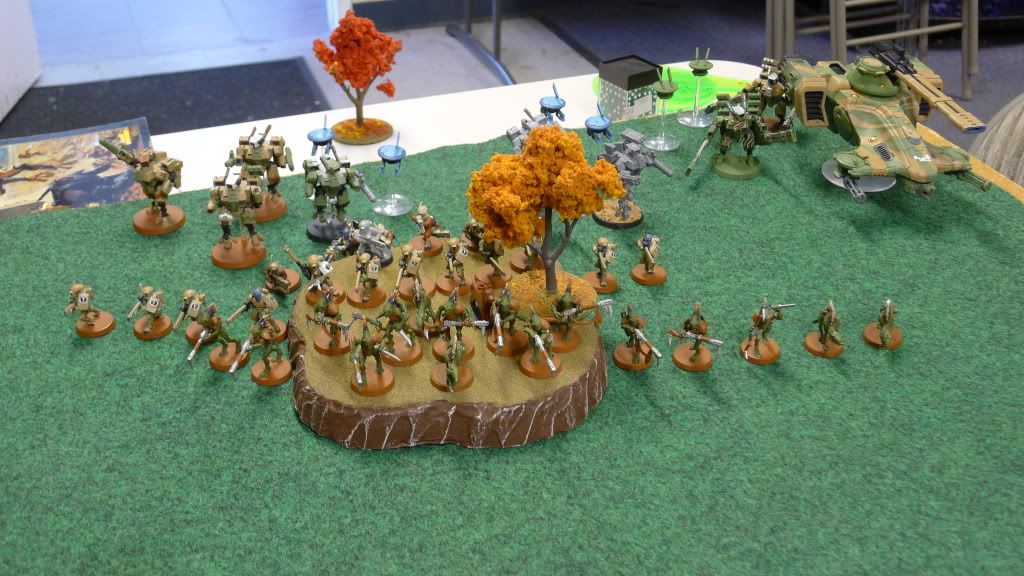
Tau deployment. Half of his army, including his pathfinders and his
HQ+fireknives, castles to the right.
The other half, including his piranhas and devilfish, castles to the left.

Overview of Tau deployment.
I then infiltrate my vindicare in the middle forest. He then infiltrates his kroots in his own deployment zone to act as screens.
He fails to steal the initiative and awaaayyyyy we go!
-------------------------------------------------------------------
Grey Knights 1

I move all my vehicles towards his left flank. My plan was to sweep one of his flanks and avoid some of his firepower from the opposite flank. I especially wanted to move out of the range of his markerlights. Hence, I wouldn't have to worry about them, at least not initially. Lead rhino pops smokes and Crowe runs.

Shooting by my right vendread stuns, immobilises and destroys the railgun from his hammerhand, despite cover from his disruption pods (it might have been the work of 2 dreads).

On the left flank and despite cover, I blow up both of his piranhas with my dreads.
My vindicare tries to snipe his left broadside but he makes his cover.
Not too bad for my shooting. Now let's see what Tau can do without 75% of his blocking vehicles.
GK: 2, Tau: 0
Tau 1

Tau movement to the right....

....and to the left.

He markerlights my lead rhino with his pathfinders and proceed to blow it up. Then explosion and focus-fire single-shot from his kroots (or maybe it was his fire warriors) kill 4 purifiers. With the lead rhino gone, his
deathrains open up on my 2nd rhino without cover and stun + immobilise it.
Finally, his fire warriors (or maybe it was his kroots) fire at my vindicare. He rolls well and I am forced to go-to-ground for the 2+ cover. I still take 1W.
Wow...it's only turn 1 and I've already got 2 incapacitated rhinos. Not good.
GK: 2, Tau: 1
Grey Knights 2

At this point, for some reason, I decided to deviate from my original plan and split up. Uh...not sure what I was thinking here. Vehicles move at cruising.

My rhino (with the strike squad) pops smokes and my knights run.

My dreads focuses on his left
deathrains but only kill his 2 drones. I form a new plan, which is to kill just enough to force morale. His suits pass their morale.

Then I decided that his pathfinders were enough of a nuisance to warrant some firepower. I kill off about half the squad. Again he passes morale.
GK: 2, Tau: 1
Tau 2
Not much movement. Jumping beans jump around.

Even with only a few markerlights left, he hits my lead rhino going towards his right flank and reduces its cover by 2. The result? A wrecked rhino. He also manages to shake the rhino behind.

On the left flank, he blows up my strike rhino, pinning my strikers in the process. Doh! He then kills off the 2-purifier unit and whittles down the larger purifier unit. Also, despite going-to-ground, he shoots down my vindicare with mass pulse rifles (he's been rolling extremely well on his shooting so far).

Finally, his broadsides take aim at my dreads. He blows up one of my regular dreads. (My vendread on the right actually got immobilised Turn 1 by his broadsides....they didn't miss much all game.)
Nasty turn of shooting for Tau. Tau's shooting was on fire. Afterwards,
GK rhinos were on fire as well.
GK: 2, Tau: 6
Grey Knights 3

Last mobile
GK rhino cruises forwards and pops smokes. Purifiers run along, using it for cover.

Crowe and purifiers move forwards.

Here, I make a crucial mistake. My purifiers were planning on assaulting his kroot. However, they also fire on the kroot just before. With just 3 guys, unfortunately I roll well for their shooting and kill just enough kroots to force morale. Kroots then fail their morale and fall back, taking them out of my assault range. Doh!!

When I want them to fail morale, they don't. When I don't want them to, they do. Well, my plans not going so well.
My dreads fire but don't do enough damage. I believe I focus all of them on his
HQ + fireknives. I kill all the drones....but his suits make every single one of their saves!
GK: 2, Tau: 6
Tau 3

Devilfish moves to block out my knights. Fortunately for me, he immobilises himself on terrain. Unfortunately for me, his kroots pass morale and regroup.

Tau shift around on the right flank.

His shooting takes out my 3-purifier unit.

On the right, his pathfinders reduces my rhino's cover and his
deathrains then blow it up. Between the explosion and double-tap rapid-fire, the purifiers inside is reduced to just 1 man. Also, he shoots down 2 purifiers....with the burst cannons on his immobilised hammerhead.
WTF!?!
 GK: 2, Tau: 8
Grey Knights 4
GK: 2, Tau: 8
Grey Knights 4

Finally, it looks like I'm going to make it into combat.

Strikers and Crowe advance as well.
I focus all my dreads on his fireknives. Again, I can't get a wound pass any of their armor saves.

Assault!

Strikers win and causes his kroots to fall back. They are below half strength and cannot regroup. Crowe fails to damage the immobilised devilfish. I mainly assaulted it to get extra movement.

On the right, between Cleansing Flame and force weapons, I wipe out his kroots (I believe I swept them).
GK: 4, Tau: 8
Tau 4

Kroots run off the board.
Deathrains jump on top of the hill. 1 suit takes a wound to dangerous terrain. Firewarriors get ready to pulse-rifle my strikers to death.

Jumping beans keep on jumping on the right.

With the help of markerlights, he wipes out both units of purifiers.

Firewarriors execute my strikers. Broadsides blow Crowe to smithereens.
He has now killed all of my knights. At this point, it is just a formality.
GK: 4, Tau: 12
Grey Knights 5

Haha...I've still got 1 rhino alive!

Finally, my dreads kill some suits, taking out 2 from his fireknives. That is all the offense I could muster.
GK: 4, Tau: 12
Tau 5
 HQ
HQ breaks off from the fireknives and joins his firewarriors because he is a coward.


He doesn't do much to my dreads, but he did kill my last rhino.
With that, we end it here.
GK: 4, Tau: 13
It feels weird to say this, but it's.....
Total Domination by Tau!!!
Good job, Gus. Will be seeing you in the rematch.


 .....Bay Area Open GT 2013 - Best Tyranids
 .....LVO GT 2014 Team Tournament - Best Generals


 ]
]


 2000 ultrasmurfs 4th


 And if you're drinkin' well, you know that you're my friend and I say "I think I'll have myself a beer"