| Author |
Message |
 |
|
|
|
|
Advert
|
Forum adverts like this one are shown to any user who is not logged in. Join us by filling out a tiny 3 field form and you will get your own, free, dakka user account which gives a good range of benefits to you:
- No adverts like this in the forums anymore.
- Times and dates in your local timezone.
- Full tracking of what you have read so you can skip to your first unread post, easily see what has changed since you last logged in, and easily see what is new at a glance.
- Email notifications for threads you want to watch closely.
- Being a part of the oldest wargaming community on the net.
If you are already a member then feel free to login now. |
|
 |
2011/08/07 09:48:29
Subject: Adepta Sororitas Army. a.k.a SoB - Sisters of Battle. (updated 10/25/11)
|
|

Pragmatic Collabirator
|
(To see all of the pictures and skip my ramblings, feel free to check out my Photobucket album where I will upload all of the pics including some not shown.)
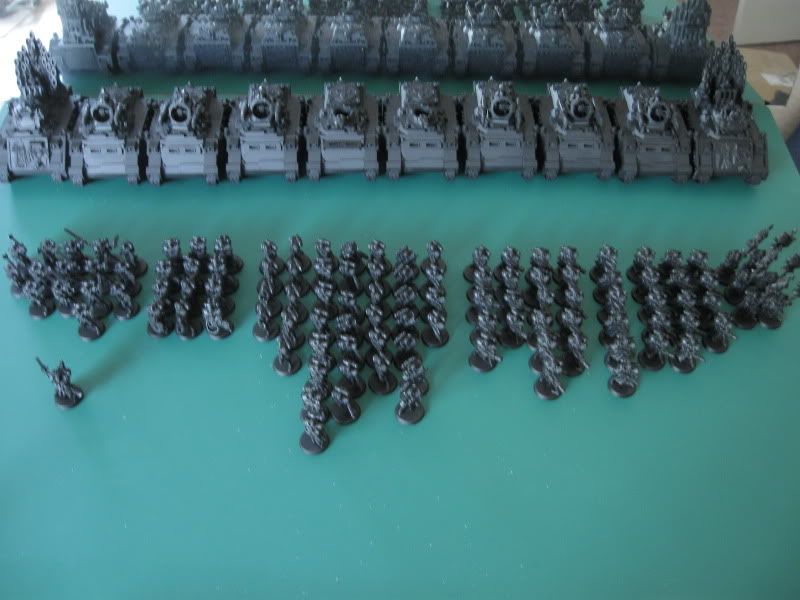
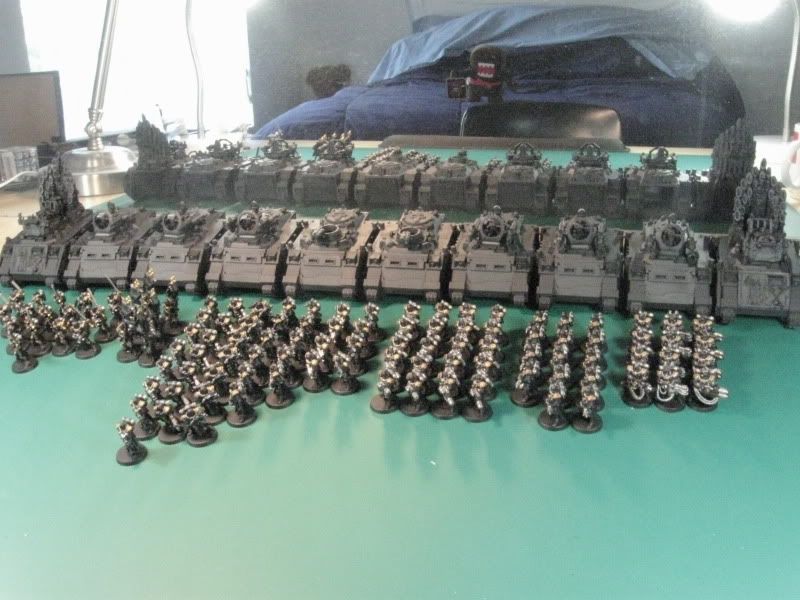
With part 1 of the White Dwarf codex release, I figure it is about time to get started on a project that has been on my to do list since the early summer of 2009. I had bought a bulk of it right before the price hike of that year knowing that I would eventually need the models anyway. In the following year of 2010 I decided to future proof my investment due to all the rumors of new models and sculpts. Below you can see (most of) the results.
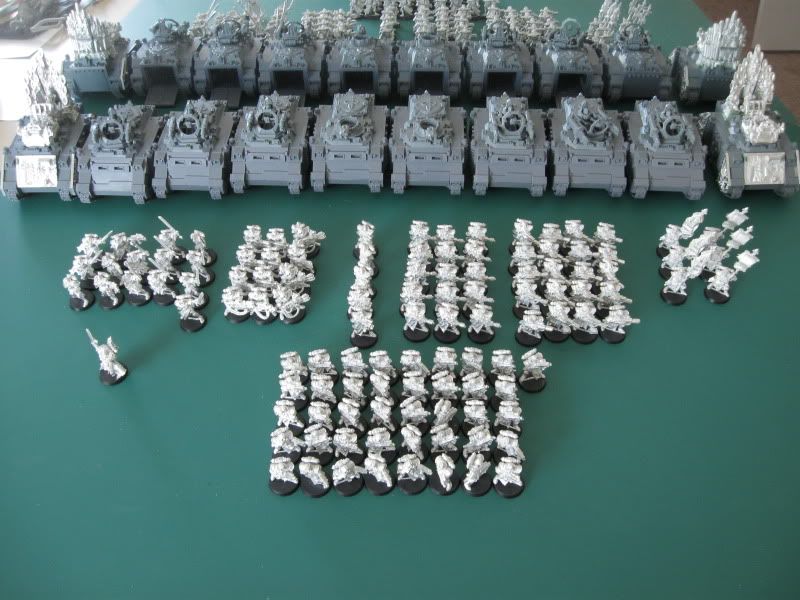
You are looking at:
1 cannoness
16 sister superiors with various weapons
4 of each heavy weapon
6 storm bolters
15 flamers
20 meltaguns
41 Bolters
6 imagifers
8 transports
2 exorcists
Items not yet assembled nor shown
2 St. Celestines
1 cannoness
1 priest
2 meltaguns
3 penitent engines
1 exorcist
3 immolators/rhinos
1 box of repentia
1 box of arco-flagellants
The objective of this blog? Not really sure, other than to record my progress on one of my armies. Lots of people always ask when they see the finish result of my work and I suppose I have been inspired by djphranq and his many many many blog posts. Also I hope that it will keep me organized and on track to finish this long overdue project.
So, onward to Part 1: Priming
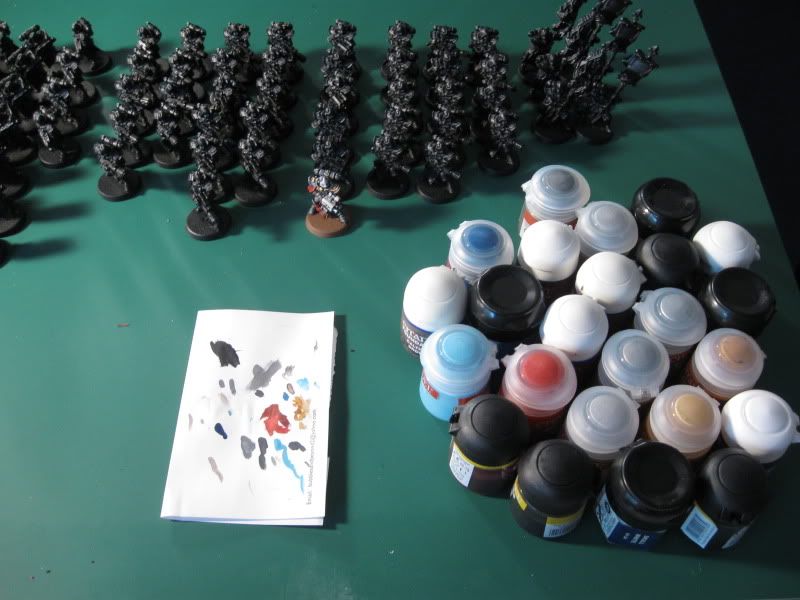
Here is an image of my priming station that I have out on my apartment patio. I cut open the only box I had on hand (which previously was used to deliver my friends wedding present. Enjoy the waffle maker!) I don't have a lazy Susan so I just set down a piece of paper that I could rotate around to get a better angle. You dont have to use new paper. Past due bills can also work, seeing that it is a SoB army, there should be several lying around the house. I slid a random magazine under the paper to lift it up and put it aside for the models to dry before flipping them to prime the next side.
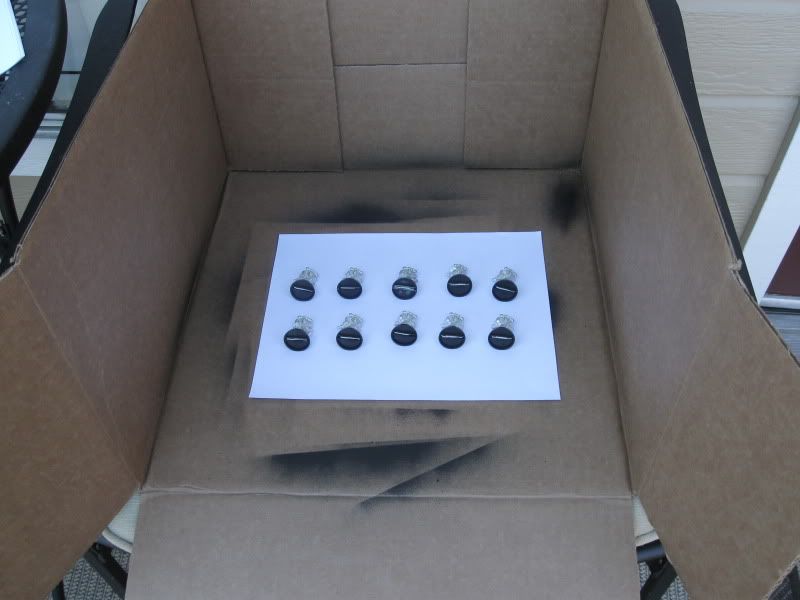
This whole process took several hours since I had to be extra careful not to get primer anywhere on the property. I am going to need that rent deposit back. I only had room to do them in batches of 10 models and I had several to go through. It didn't help that one of the older primer cans started gushing out from under the nozzle. The infantry took up about 1 whole can of Board to Pieces brand primer. The dry time is longer than most primers I have used but the results are so smooth. So smooth that it is semi glossy. Normally primer is suppose to be a little rougher so that paint sticks easier, but I prefer the smoother finish rathar than risk some of that sandy effect that can sometimes occur with other brands I have used.
Seeing as how I was out of a good can of primer I headed to my LFGS to pick up more. Unfortunately when I got there they were out. Plenty of white, grey, and clear, but no black. The stuff is popular. I had to go with Army Painter black mat primer before I ran out of sun. I have used this brand of spray before, just with different colors. I have had good results so I wasn't worried. Turns out that stuff is pretty awesome. I could feel the primer coming out with stronger and more steady pressure than the other brand. Although the results were a bit more dull, the layers were still acceptably smooth. The dry time on it was also much faster, which was both good and bad. Good because it made the process go by faster, bad because it would really reach the nooks and crannies that the other primer would reach.
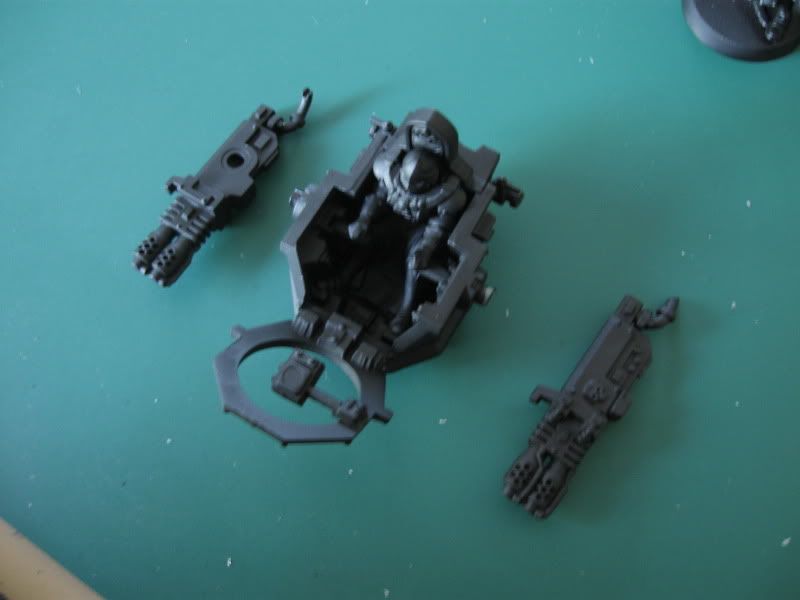
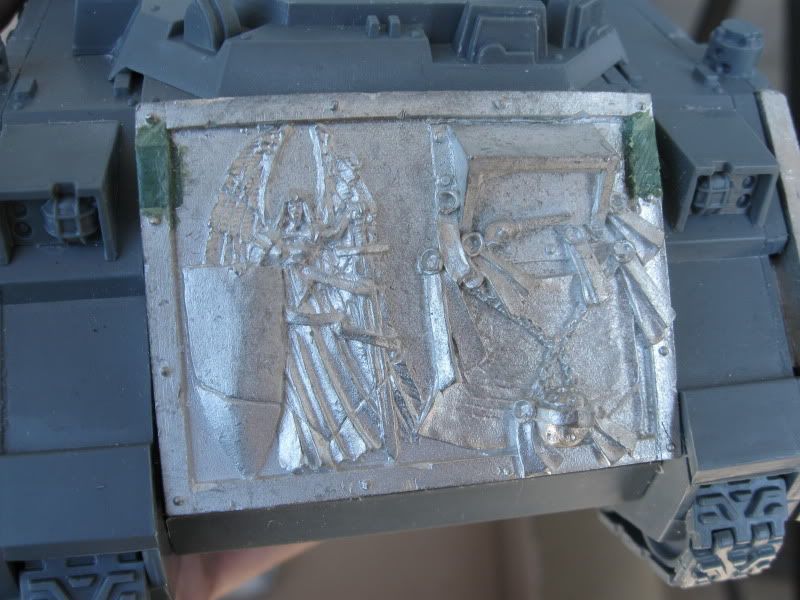
Some notes on the vehicles. for better access to the inner components of the immolator turret. I glued down three of the 4 walls and used the front as a spacer to keep it all aligned. That way I could fold down the front for priming and painting. Similarly, i did not fully glue in the driver and loader of the exorcist.
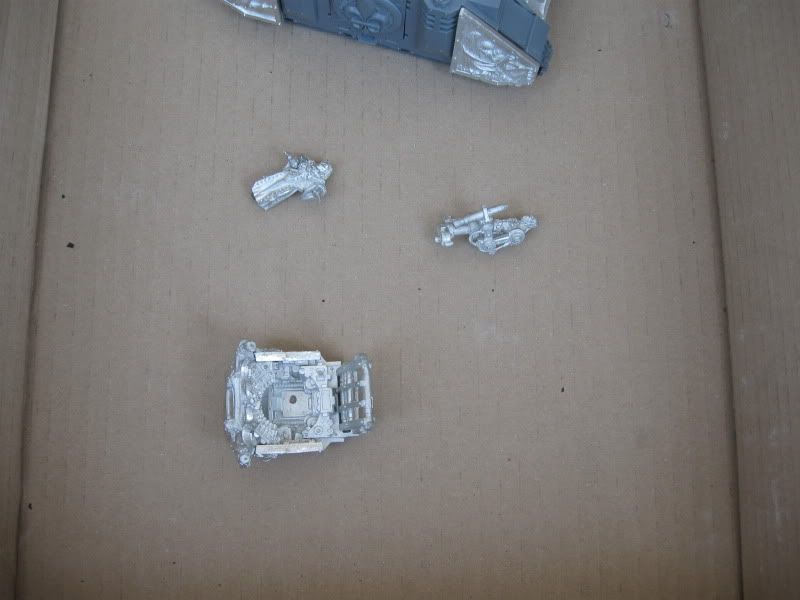
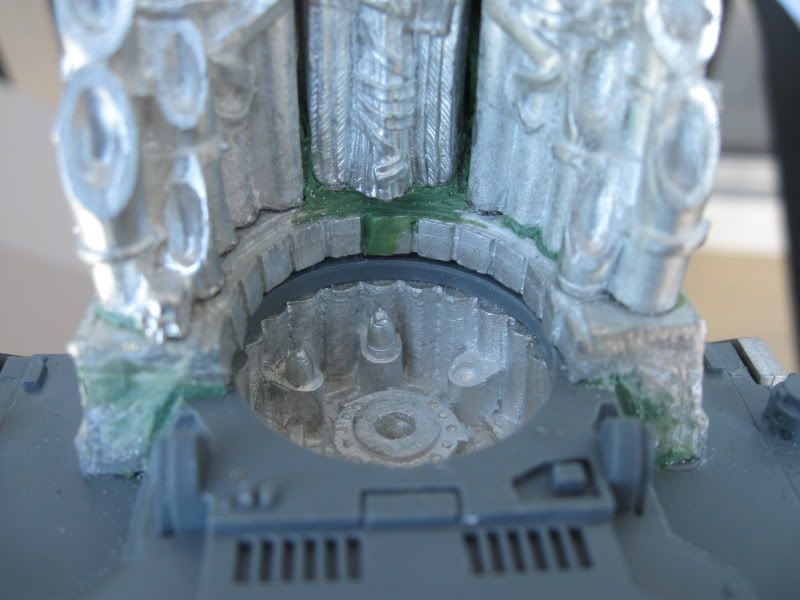
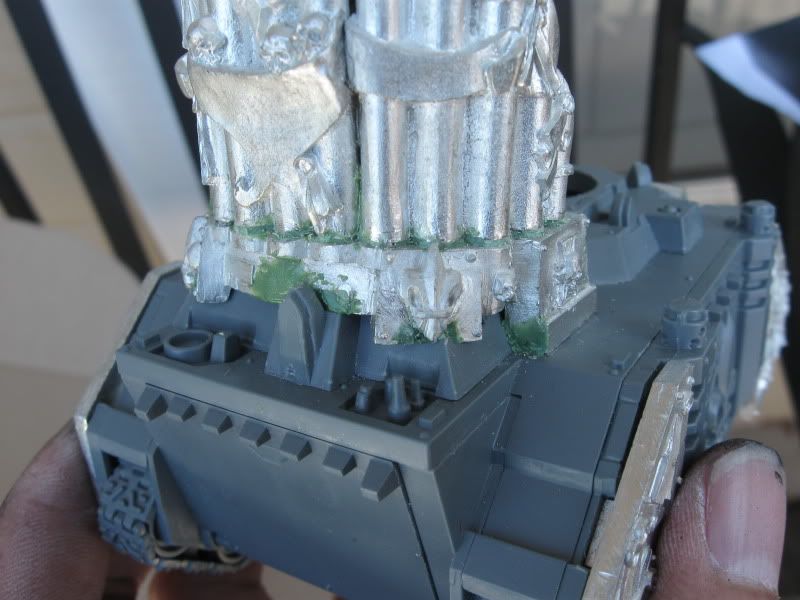
Did I mention I hate the exorcist model yet? Well I do. But I want to share my spite by making people look at it when I play against them, because I know they will be checking line of site to it every turn until it wrecks. Anyway, to make things easier, I cut the barrel/pipe mount up the middle to bend it straight. I also cut areas of the kit that go around the vehicle's hull to make it fit properly. Once assembled I had to fill the holes that were made. (Some by me, some by GW) Take a look.
So, systemattically going though the bottoms, backs, sides, front and top, Here is the result.
 mmm
mmm...nice and uniform
I went ahead an organized the infantry by sculpts so that when I assembly line paint them I can go through all of the detail systematically. Hopefully by doing so I wont miss any of the pesky purity seals that like to hide in odd places.
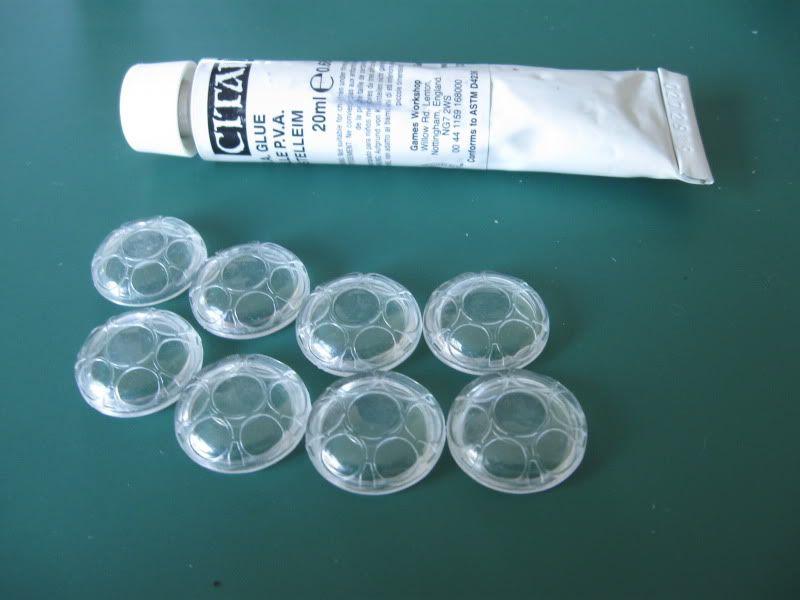
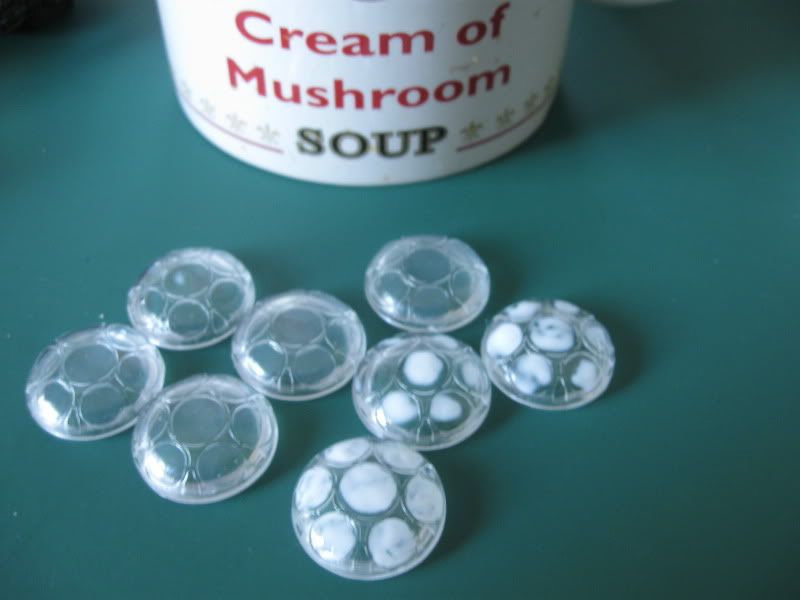
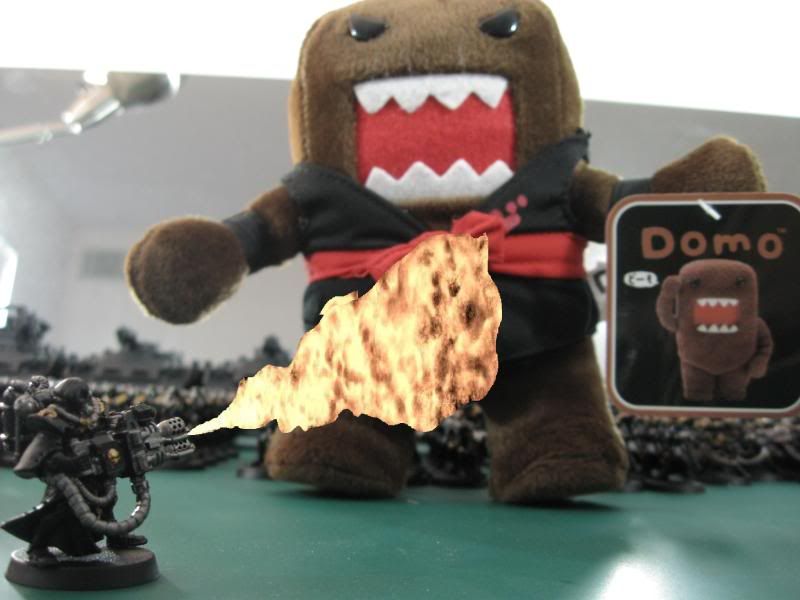
But wait! Something is missing! ...dome, dome, DOME!
I don't intend to paint over the clear parts of the windows, so here is a trick I picked up from a Excommunicate Traitoris GW. Use PVA glue to mask the windows before priming. I know the Vallejo Model line has some masking medium but I have seen and used this method before with satisfactory results. Most of you readers will probably already have some PVA glue readily available. Just apply a small amount of glue to the circular windows of the dome. When you reach the rased edges of the frame, the liquid tension should keep it stuck in place right where you want it. The trick is to not use too much that when it dries, the elasticity of the glue pulls the glue away from the frame. And also not to use too little that it is difficult to remove later or doesn't cover all of the window when it dries. In retrospect. I think I should have added a color to the glue so that I can see if it has covered the areas that I want it to.
I am going to wait till I figure out the full paint scheme before priming these.
Which brings me to Part 2: Planning
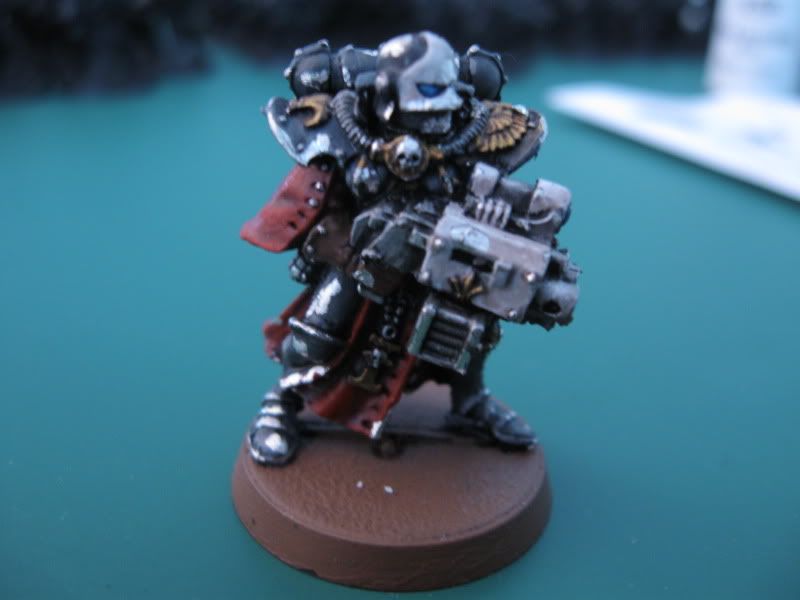
After days of pondering and researching, I decided to go with something not too far off from a codex color scheme. I need a test model to see if it would work. I am pretty sure I can spare a storm bolter...
Here is a quicky using the same brush I used for the window masking. Now that she is done I can come up with an action plan.
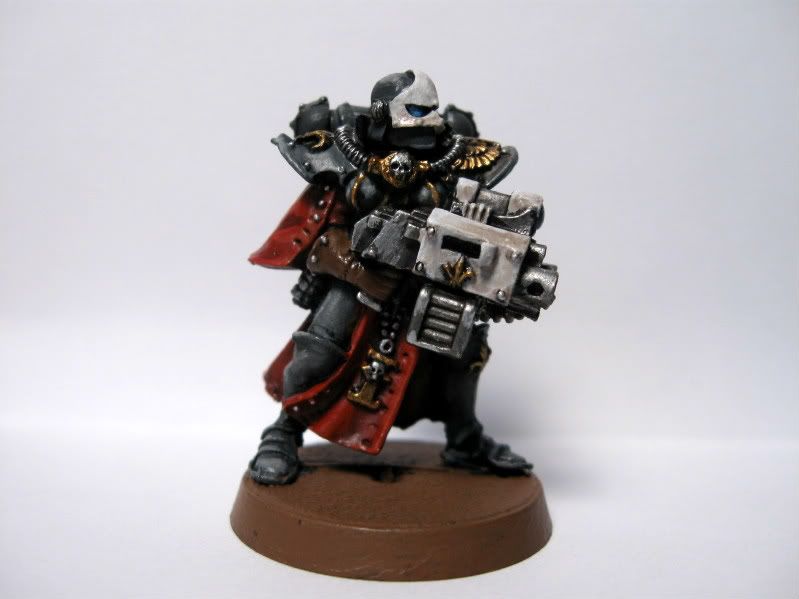
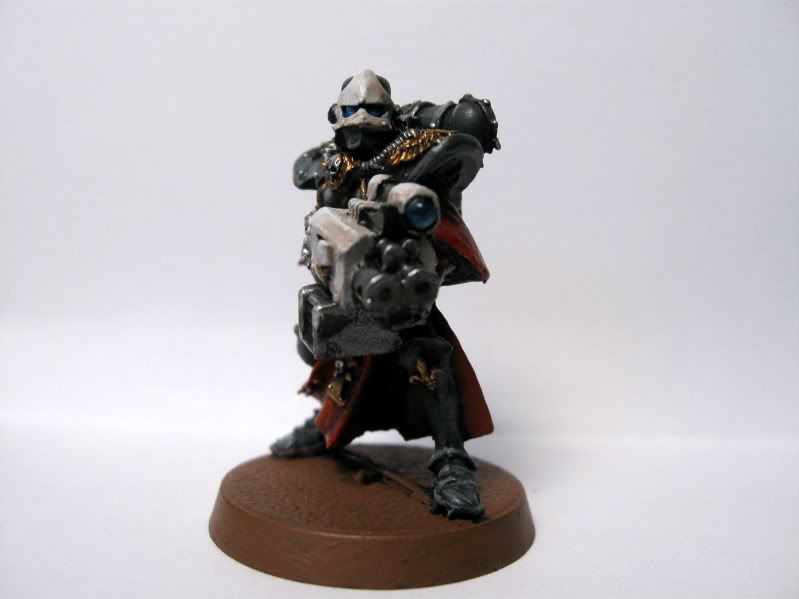
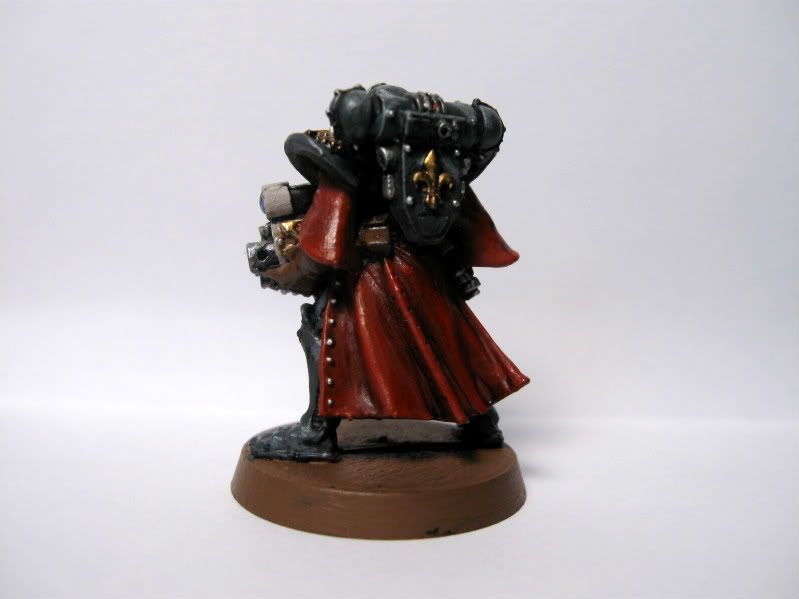
By the way, anyone else notice that this model is tainted by mutation? She has a sixth finger!
Based on the details needed to paint her, I think this will be the steps I use to paint the rest of the infantry:
1) Golds using, Tin bits>Shining gold>Burnished Gold>Gryfonne Sepia
2) Metals using, Boltgun>Chaimail>Badab Black>Myrthil Silver
3) Reds using, Mechrite Red>Blood Red>Devlan Mud*>Blood Red
4)Leather using, Calthan Brown>Bleached Bone>Devlan Mud*
5)Lenses using, Regal Blue>Enchanted Blue>Ice Blue>Skull White
6)Off Whites using, Dheneb Stone>Skull White>Devlan Mud*
7) Armor using, Adeptus Battlegrey>Codex Grey>Badab Black>Fortress Grey
8) Studs using, Chaos Black>Chainmail
9) Skin and Make-up using, Various tones
10)Hair using, TBA
11)Base using, Calthan Brown>sand>Brown Ink>Bleached Bone>Scorched static grass
*Although, the Devlan Mud seems to have a gloss finish even after it is dry so I may switch it up to a Scorched Brown glaze instead
The first of many!
(you can get a better sense of the gray armor in this picture.)
I will get the basic colors down then concern myself with unit markings once Part 2 of the codex is released. I am still debating on doing damage and weathering effects since that seems to be all the rage these days.
Thanks for reading. Lets hope I get this thing done.
|
|
This message was edited 9 times. Last update was at 2011/10/26 07:39:09
|
|
|
 |
|
2011/08/07 09:58:29
Subject: Adepta Sororitas Army. a.k.a SoB - Sisters of Battle. Time to get the ball rolling. WIP (heavy)
|
|

Black Captain of Carn Dûm
Were there be dragons....
|
That cost a prety penny, looks like you might manage it though, and still look pretty sweet going by your test model!
Automatically Appended Next Post:
That cost a prety penny, looks like you might manage it though, and still look pretty sweet going by your test model!
|
|
This message was edited 1 time. Last update was at 2011/08/07 10:01:00
"As a customer, I'd really like to like GW, but they seem to hate me." - Ouze 
"All politicians are upperclass idiots"
 |
|
|
|
|
2011/08/07 10:02:35
Subject: Adepta Sororitas Army. a.k.a SoB - Sisters of Battle. Time to get the ball rolling. WIP (heavy)
|
|
Lord of the Fleet
|
Very nice blog you've got going, the only problem being some photos aren't working. I shall be following this with excitement. 
|
|
|
|
|
2011/08/07 10:13:09
Subject: Adepta Sororitas Army. a.k.a SoB - Sisters of Battle. Time to get the ball rolling. WIP (heavy)
|
|
Pragmatic Collabirator
|
Valkyrie wrote:Very nice blog you've got going, the only problem being some photos aren't working. I shall be following this with excitement.
Thanks. I moved the photos to their own album on my account. I previewed the message several time before submitting and they all came up. I am not sure what it could be.
|
 I have Faith. I have Faith.
"Strong units. Weak units. That is only the selfish perception of people. Truly skilled players should try to win with their favorites."
Sisters of Battle Paint Blog
|
|
|
|
|
2011/08/07 22:54:52
Subject: Re:Adepta Sororitas Army. a.k.a SoB - Sisters of Battle. Time to get the ball rolling. WIP (heavy)
|
|
Fixture of Dakka
|
Can't wait to see more progress. Great test model. That's a good idea. I should start doing that with future armies.
|
|
|
|
|
2011/08/07 23:00:11
Subject: Re:Adepta Sororitas Army. a.k.a SoB - Sisters of Battle. Time to get the ball rolling. WIP (heavy)
|
|
Freaky Flayed One
|
Thanks for the Idea of using glue to mask the plastic that is awesome.
|
|
|
|
|
2011/08/08 03:26:11
Subject: Adepta Sororitas Army. a.k.a SoB - Sisters of Battle. Time to get the ball rolling. WIP (heavy)
|
|
Veteran Inquisitorial Tyranid Xenokiller
|
:O
That looks like it is going to take a very very very very very very........... very long time.
Looks great so far though. Keep up the good work. 
|
|
|
|
|
|
2011/08/08 05:36:07
Subject: Adepta Sororitas Army. a.k.a SoB - Sisters of Battle. Time to get the ball rolling. WIP (heavy)
|
|
Dakka Veteran
|
On the first pic I though "damn that is a lot of tanks". Then I noticed the mirror... XD
Test model looks hot, good luck with the rest!
|
|
|
|
|
|
2011/08/08 07:38:18
Subject: Adepta Sororitas Army. a.k.a SoB - Sisters of Battle. Time to get the ball rolling. WIP (heavy)
|
|
Hurr! Ogryn Bone 'Ead!
|
I will be following this one, that is one impressive collection of sisters. How ARE you going to pay those late bills you just primed over?
|
The pen is mightier then the sword, but you must keep a sword handy for when the pen runs out of ink.
|
|
|
|
|
2011/08/08 09:34:09
Subject: Adepta Sororitas Army. a.k.a SoB - Sisters of Battle. Time to get the ball rolling. WIP (heavy)
|
|
Sneaky Lictor
|
WarMill wrote:On the first pic I though "damn that is a lot of tanks". Then I noticed the mirror... XD
I did the same thing! Shenanagins! SHENANAGINS!!!!
In a seriousness though It looks like a sweet army. The test model came out great and I like the comprehensive style for the blog that you started with. I will be monitoring. Automatically Appended Next Post: As far as the gloss on Devlan Mud use a Matte Varnish. The gloss will be gone.
Please please please varnish these minis. Metal has a tendency to chip and you don't want to have to redo your efforts.
|
|
This message was edited 1 time. Last update was at 2011/08/08 09:35:54
My P&M Blog: http://www.dakkadakka.com/dakkaforum/posts/list/315066.page
Correct. Despite countless millennia of evolution, technological advances and civilization, we're still monkeys throwing feces at things we don't like.-Zed.
Imperial Flyers don't actually "fly" they just go fast enough that they fall in an arc that keeps them parallel to the ground. -Clockwork Zion
|
|
|
|
|
2011/08/08 19:21:31
Subject: Adepta Sororitas Army. a.k.a SoB - Sisters of Battle. Time to get the ball rolling. WIP (heavy)
|
|
Avatar of the Bloody-Handed God
Inside your mind, corrupting the pathways
|
I do love Sisters armies - just a shame they are so monopose and metal (and thus difficult to convert).
Looking forward to seeing yours built up.
|
|
|
|
|
|
2011/08/08 19:28:23
Subject: Adepta Sororitas Army. a.k.a SoB - Sisters of Battle. Time to get the ball rolling. WIP (heavy)
|
|
[DCM]
.
|
Awesome in terms of ambition, scope and pace.
Brave in the sense that this army is undergoing changes, and probably will change again within a year or so.
Bravo to you, good sir, and good luck!
|
|
|
|
|
2011/08/08 19:40:29
Subject: Re:Adepta Sororitas Army. a.k.a SoB - Sisters of Battle. Time to get the ball rolling. WIP (heavy)
|
|
Sword-Bearing Inquisitorial Crusader
Northern Virginia
|
great job man this is almost identical to my color scheme. only difference is I dry brush astronomicon grey to make it look more like stone armor. Great project and good luck!!!
|
"Paranoia is a very reassuring state of mind. If you think they are after you, you think you matter" |
|
|
|
|
2011/08/08 20:22:24
Subject: Adepta Sororitas Army. a.k.a SoB - Sisters of Battle. Time to get the ball rolling. WIP (heavy)
|
|
Fresh-Faced New User
|
I thought by the picture you had enough models for 2 armies.
Then I noticed there was a mirror. Doh.
Anyways I look forward to seeing more into this.
|
|
|
|
|
2011/08/08 20:31:59
Subject: Adepta Sororitas Army. a.k.a SoB - Sisters of Battle. Time to get the ball rolling. WIP (heavy)
|
|
Sword-Bearing Inquisitorial Crusader
|
Test model looks good, and I admire your dedication, production lining all of that. Good luck!
grrr
|
|
|
|
|
2011/08/08 23:50:57
Subject: Adepta Sororitas Army. a.k.a SoB - Sisters of Battle. Time to get the ball rolling. WIP (heavy)
|
|
Angelic Adepta Sororitas
|
If i had that many tanks to paint, i'd be knifing myself right now. Good luck to you! =) Will be watching.
|
|
|
|
|
|
2011/08/09 00:57:19
Subject: Adepta Sororitas Army. a.k.a SoB - Sisters of Battle. Time to get the ball rolling. WIP (heavy)
|
|
Angry Chaos Agitator
|
Good luck. Motivation! Motivation!
|
I am now accepting commissions for any hobby project! I've been in the hobby since '92. Specializing in traditional brush methods, creating a gritty dark aesthetic. From single character models to entire armies. From individual terrain pieces to entire table tops. From tabletop level to masterclass level painting. From purchasing and assembly to leveling up your assembled armies paint job. If it has to do with the hobby I can do it! Hit me up and let's chat about your project! |
|
|
|
|
2011/08/09 01:02:25
Subject: Adepta Sororitas Army. a.k.a SoB - Sisters of Battle. Time to get the ball rolling. WIP (heavy)
|
|

Road-Raging Blood Angel Biker
|
omg I almost burst into tears just looking at them unpainted... You can do it!! 
|
|
|
|
|
2011/08/09 02:35:05
Subject: Adepta Sororitas Army. a.k.a SoB - Sisters of Battle. Time to get the ball rolling. WIP (heavy)
|
|
Pragmatic Collabirator
|
Rabid Ferret wrote:Please please please varnish these minis. Metal has a tendency to chip and you don't want to have to redo your efforts.
OH GOD! WHY DIDN'T YOU TELL ME SOONER!
Nah, just kidding. I took a letter opener to it. Now it's got real paint chipping, none of this NMM stuff...
Anyway, I know varnish is a must and it well get to that point once I start applying decals. First it's the gloss varnish for protection, then the decals, then the gloss over the decal to seal, then mat varnish to bring it back and bring the piece together. Gunna be a while before that.
In regards to the mirror, it is purely functional.
-keeps things from rolling off the edge of my desk.
-help me to see things hiding behind models, like brushes, paint pots, other models, etc
-doubles the lighting on my work space. I have two desk lamps on both sides of me facing crisscross over the models towards the mirror. It's like having lamps at 4 angles. Plus I have another lamp that arches over above the models.
I have no doubts that this project will get done. I am aiming for the end of the month if I can get some much needed time off from work. I tend to stay well motivated by sheer spite. For GW to stop production of these relics that have stood the test of time and to make their rule set sub par, I am determined to keep these models alive. And hopefully it will make the many victories to come that much sweeter.
|
|
This message was edited 2 times. Last update was at 2011/08/09 03:35:39
I have Faith.
"Strong units. Weak units. That is only the selfish perception of people. Truly skilled players should try to win with their favorites."
Sisters of Battle Paint Blog
|
|
|
|
|
2011/08/09 06:32:11
Subject: Adepta Sororitas Army. a.k.a SoB - Sisters of Battle. Time to get the ball rolling. WIP (heavy)
|
|
Angelic Adepta Sororitas
|
paintedpotato wrote:
In regards to the mirror, it is purely functional.
And you can see if there's a sneaky ninja creeping up behind you! Obviously the first consideration.
|
|
This message was edited 1 time. Last update was at 2011/08/09 06:33:29
|
|
|
|
|
2011/08/10 06:31:46
Subject: Re:Adepta Sororitas Army. a.k.a SoB - Sisters of Battle. Time to get the ball rolling. WIP (heavy)
|
|
Pragmatic Collabirator
|
So I just got distracted by an awesome deal for an apartment, or rather condominium. As cool as it might be, it is going to distract me away from my goal. (I can't paint if my desk is on a truck.)
On the plus side, I got approved for my mandatory week of vacation on Sept 19-the 23rd... I am going to try and make it for Da Grand Waaagh tournament in Alameda. That is my new deadline
So here is my progress from the last 2 days.
Tin Bits!
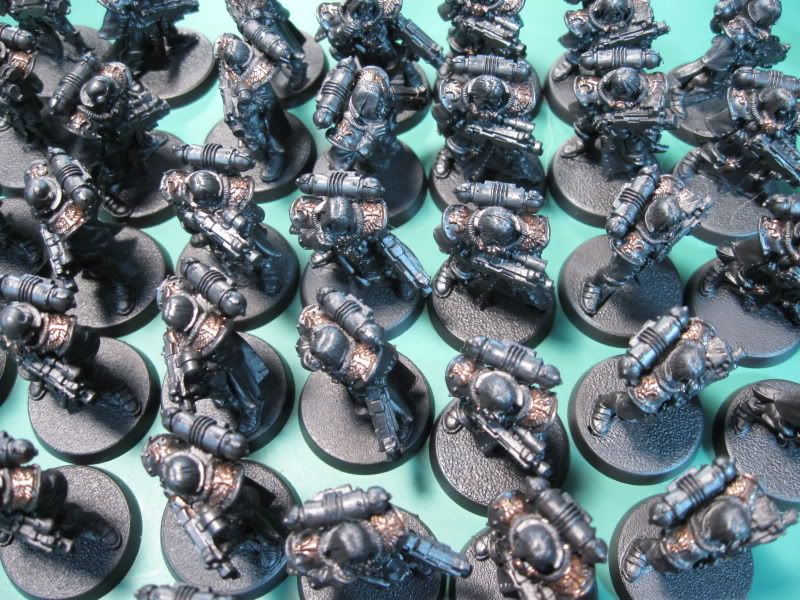
Shining gold is shining
I am half way through the shining gold on all of the infantry, I intend to finish that step tonight since I probably wont be able to do anything on them tomorrow during bad movie night. And the day after that is date night. But at least I get to do an all nighter starting early Friday.
|
I have Faith.
"Strong units. Weak units. That is only the selfish perception of people. Truly skilled players should try to win with their favorites."
Sisters of Battle Paint Blog
|
|
|
|
|
2011/08/10 07:53:55
Subject: Re:Adepta Sororitas Army. a.k.a SoB - Sisters of Battle. Time to get the ball rolling. WIP (heavy)
|
|

Fresh-Faced New User
|
awesome work, never seen that many nuns with guns!
paintedpotato wrote:Rabid Ferret wrote:Please please please varnish these minis. Metal has a tendency to chip and you don't want to have to redo your efforts.
OH GOD! WHY DIDN'T YOU TELL ME SOONER!
Nah, just kidding. I took a letter opener to it. Now it's got real paint chipping, none of this NMM stuff...
Anyway, I know varnish is a must and it well get to that point once I start applying decals. First it's the gloss varnish for protection, then the decals, then the gloss over the decal to seal, then mat varnish to bring it back and bring the piece together. Gunna be a while before that.
in regards of your picture:

|
|
|
|
|
2011/08/10 20:46:40
Subject: Re:Adepta Sororitas Army. a.k.a SoB - Sisters of Battle. Time to get the ball rolling. WIP (heavy)
|
|
Fixture of Dakka
|
Grats on the new place.
I look forward to the progress after the move.
I ought to try metallic areas first when painting. Maybe I'd get better results.
|
|
|
|
|
2011/08/10 22:24:27
Subject: Re:Adepta Sororitas Army. a.k.a SoB - Sisters of Battle. Time to get the ball rolling. WIP (heavy)
|
|
Pragmatic Collabirator
|
djphranq wrote:Grats on the new place.
I look forward to the progress after the move.
I ought to try metallic areas first when painting. Maybe I'd get better results.
the reason I do it is because the heavy pigments float round in a really clear medium and doesn't cover well. It lets me get sloppy first with quick dry brushes and such. When I go over the "messed up" areas with foundation paints, they have really good coverage and hide the "mistakes". If you try to paint a layer of shining gold over red usually you can see the red bleed through, so that is why I do the metallics first. I feel it lets me paint faster.
|
I have Faith.
"Strong units. Weak units. That is only the selfish perception of people. Truly skilled players should try to win with their favorites."
Sisters of Battle Paint Blog
|
|
|
|
|
2011/08/10 22:37:18
Subject: Adepta Sororitas Army. a.k.a SoB - Sisters of Battle. Time to get the ball rolling. WIP (heavy)
|
|
Fixture of Dakka
|
Wow I could never paint that many minis all at the same time I'd go insane. The most I do is three at a time, my hat goes off to you if I had one on.
That six fingers thing is very odd, burn the heritic!
Keep up the excellent work looking forward to your progress.
|
|
|
|
|
|
2011/08/16 02:26:32
Subject: Re:Adepta Sororitas Army. a.k.a SoB - Sisters of Battle. Time to get the ball rolling. WIP (heavy)
|
|
Pragmatic Collabirator
|
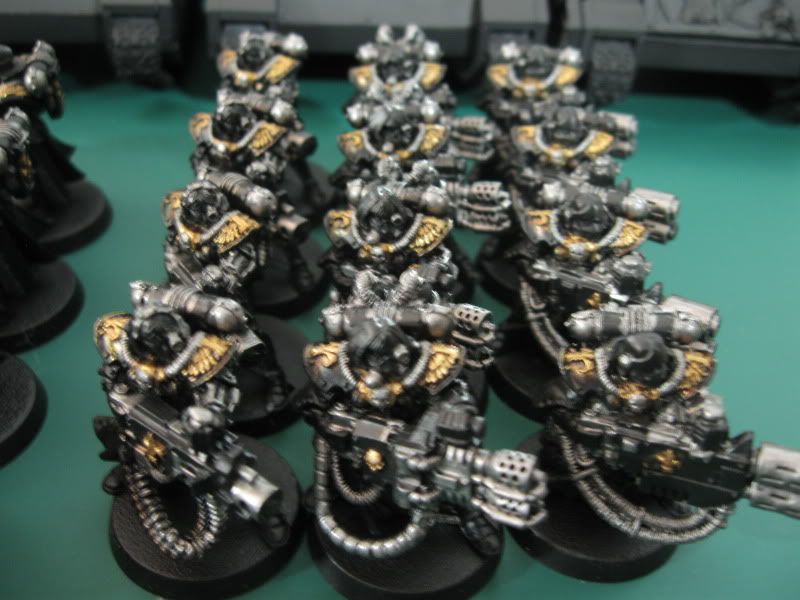
Progress report from this last weekend.
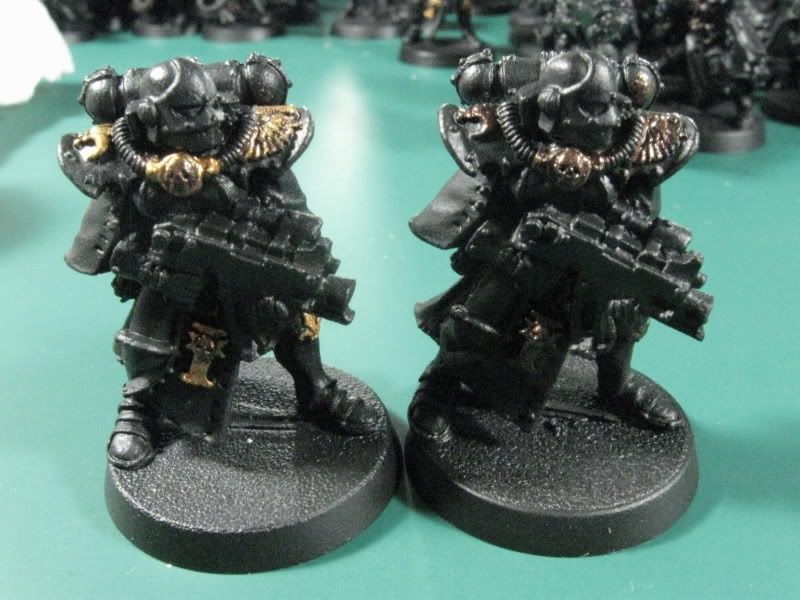
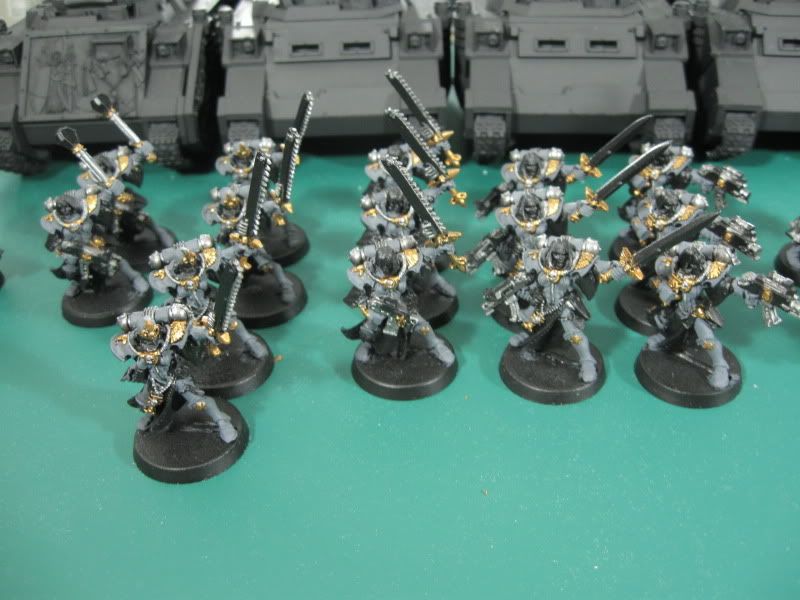
Bolt gun metal is done! (at least on the infantry)
I switched up the scheme a bit and did the exhaust domes in boltgun instead of the armor color. I think I see a row that I need to go back to...
Leaders with various equipment. Not sure if any of them will be viable so I got a little of everything.

Heavy Weapons, The few that I have
Flamers
Meltaguns, I think I have enough
Here is a wide shot of....OH CHRIST! A NINJA!
KILL IT WITH FIRE!
So that is where I am at as of now. Hopefully I can get more done on my day of this week. I am planning to move onto either the robes or the armour depending on which one seems more efficient to the process. The crazy thing is, I have 8 more blisters of bolters in reserve to bolster the ranks... Overboard? nah
|
|
This message was edited 1 time. Last update was at 2011/08/16 02:39:13
I have Faith.
"Strong units. Weak units. That is only the selfish perception of people. Truly skilled players should try to win with their favorites."
Sisters of Battle Paint Blog
|
|
|
|
|
2011/08/16 19:58:00
Subject: Adepta Sororitas Army. a.k.a SoB - Sisters of Battle. Time to get the ball rolling. WIP (heavy)
|
|
Regular Dakkanaut
|
paintedpotato wrote:In regards to the mirror, it is purely functional.
-keeps things from rolling off the edge of my desk.
-help me to see things hiding behind models, like brushes, paint pots, other models, etc
-doubles the lighting on my work space. I have two desk lamps on both sides of me facing crisscross over the models towards the mirror. It's like having lamps at 4 angles. Plus I have another lamp that arches over above the models.
I have no doubts that this project will get done. I am aiming for the end of the month if I can get some much needed time off from work. I tend to stay well motivated by sheer spite. For GW to stop production of these relics that have stood the test of time and to make their rule set sub par, I am determined to keep these models alive. And hopefully it will make the many victories to come that much sweeter.
Yeah, sure. And what are all those mirrors on the ceiling for, huh?
|
Build a fire for a man and he will be warm for a day; set a man on fire and he will be warm for the rest of his life. 
Sly Marbo was originally armed with a power weapon, but he dropped it while assaulting a space marine command squad just so his enemies could feel pain.
Sly Marbo doesn't go to ground, the ground comes to him. |
|
|
|
|
2011/08/23 08:28:54
Subject: Adepta Sororitas Army. a.k.a SoB - Sisters of Battle. Time to get the ball rolling. WIP (heavy)
|
|
Pragmatic Collabirator
|
whocares wrote:
Yeah, sure. And what are all those mirrors on the ceiling for, huh?
Those were there before I moved in. And the coin operated bed is to help mix paint... 
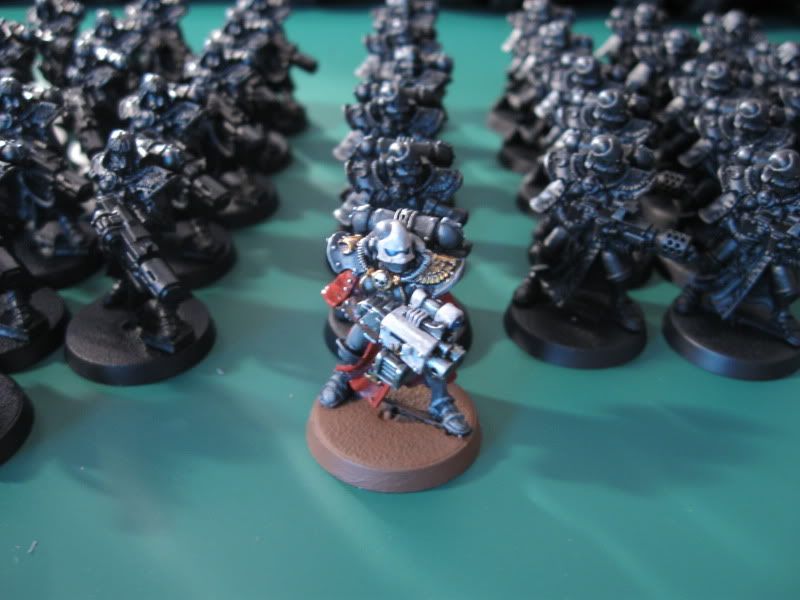
Anyways, here is my weekly update on the Sororitas Army.
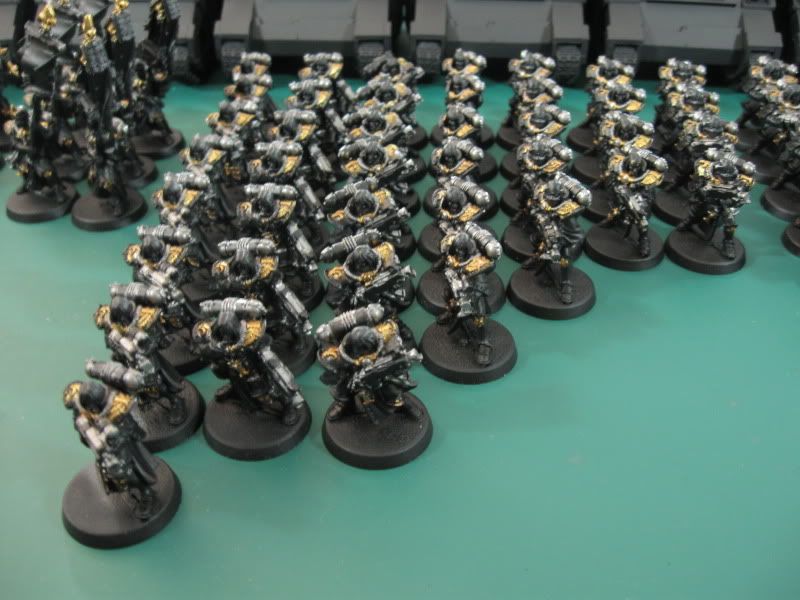
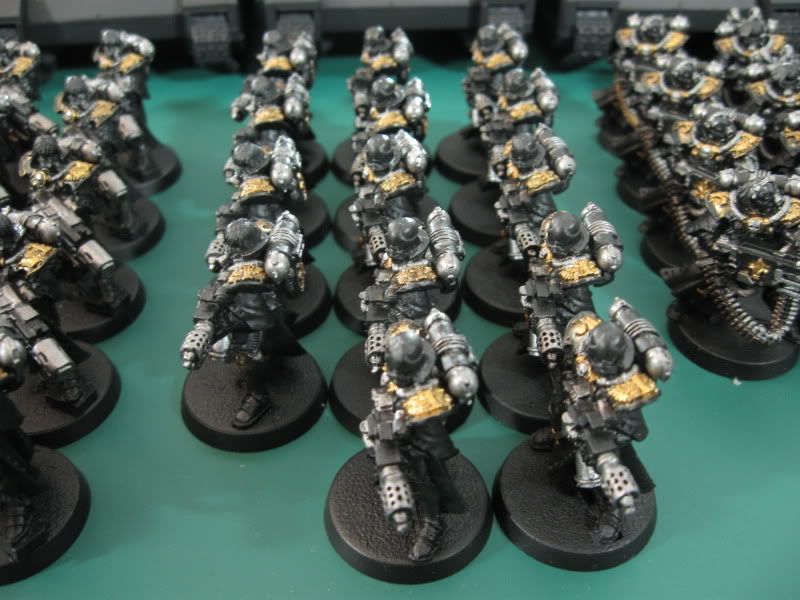
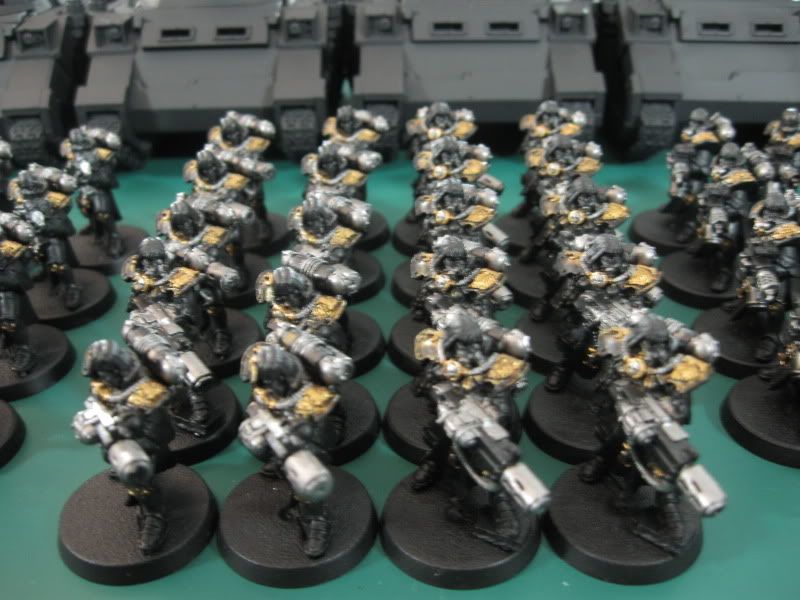
It feels like I am not getting enough time to just sit and Marathon paint like I used to. I blame eBay for having affordable seraphim models up for auction. My eyes have been glued to that rather than my models. All I was able to get done this last week was the base coat of Adepta Battlegrey. The process took longer than expected since I had to avoid all of the gold lilies. I can just imagine the new plastics; those things will be everywhere! Still, I felt that doing it this way is easier than having to carefully paint the lilies over the armor instead. Since most of the metal details are all raised from the armor, I only needed to drag the tip of the brush along where the details meet the armor, much like lining.
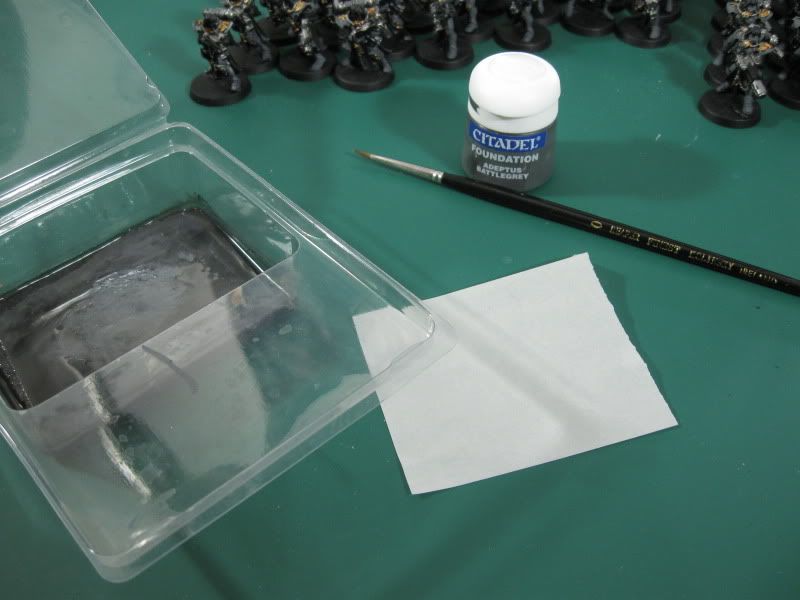
The foundation paint was pretty thick and it seemed to dry up faster than expected. To avoid chalking and streaky textures on my models, I used a poor mans wet pallet set seen bellow. It is just an empty blister pack with a piece of blister sponge and the pallet paper on top of that. Just add water! Instead of dipping into the pot several times, I was able to base coat about three models with one drop of foundation paint. It covers so well, even watered down. Now that the grey is done it really helps the gold pop off a bit better.
The next step will probably be to base coat the red on all of the cloth. I am expecting this to go much faster than the grey since there wont be too many extra details that I will have to go around.
Okay, too many words. Here are some pics.
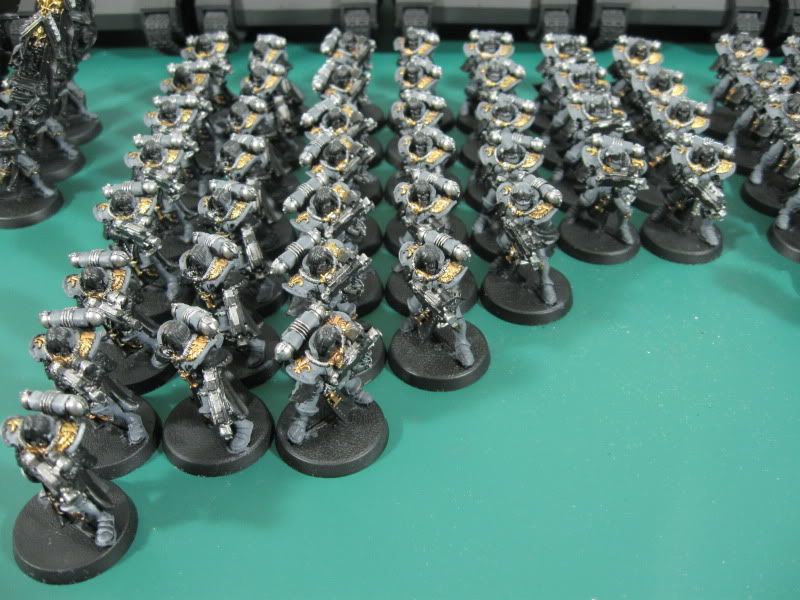
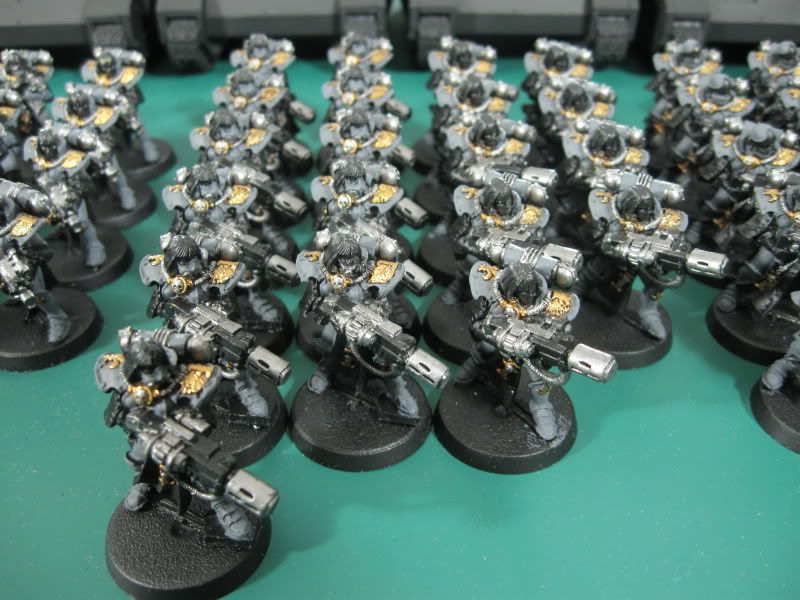
There is a few more, but you get the idea. They look a bit bland at the moment, but if I ever play them like this an anyone asks, I will tell them they are the new plastics.
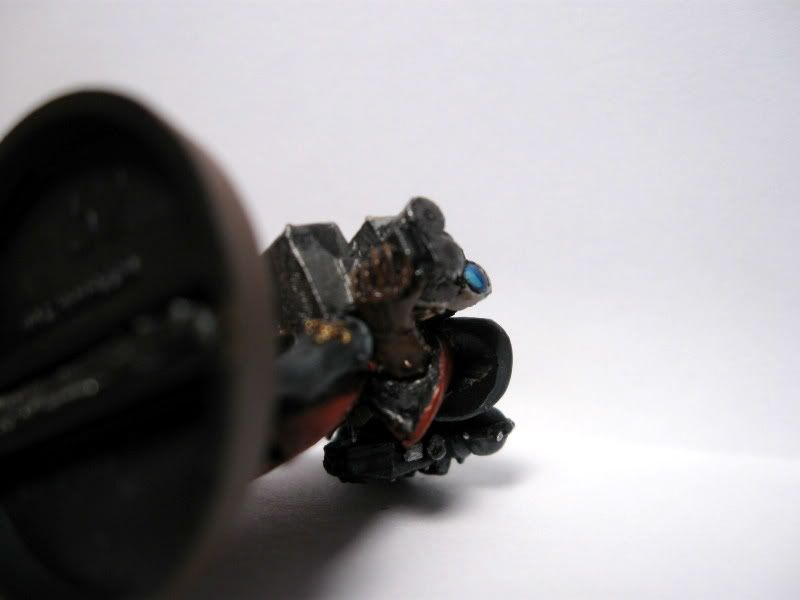
Here is an extra treat.
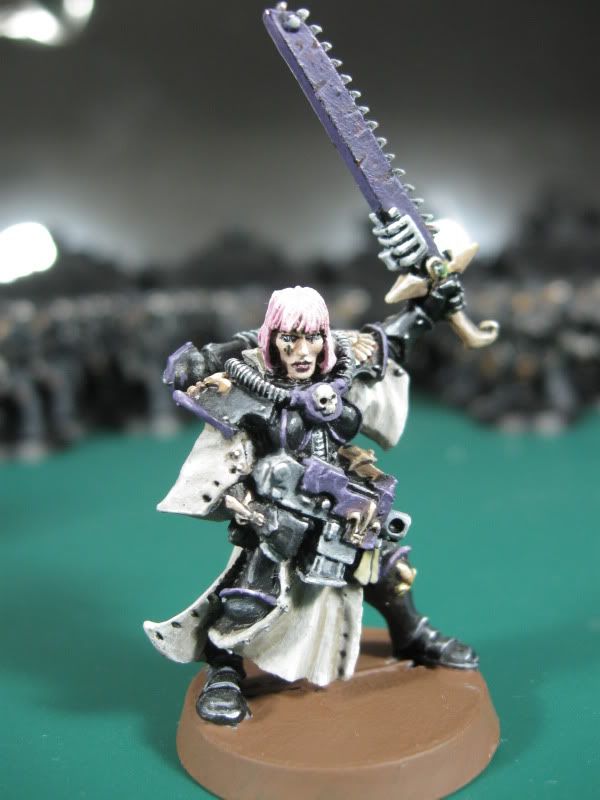
(God damn I hate macro shots...)
It's the color scheme I used on an old friend's army, only NMM style with some weathering and paint on highlights! I was crazy and experimental in my youth and wanted to see what all the hubbub was about. Not my cup-o-tea. This was the test model years ago when I first bought all of this stuff. Nothing really stood out enough on table top so it didn't make the cut. You can tell why I chose this as the test figure because the sword hilt got cut. I think the previous owner used to do fencing and felt this shape to be more practical.
That's all for tonight, but stay tuned for more exciting updates later in the week! Yay!
|
I have Faith.
"Strong units. Weak units. That is only the selfish perception of people. Truly skilled players should try to win with their favorites."
Sisters of Battle Paint Blog
|
|
|
|
|
2011/08/23 20:25:50
Subject: Adepta Sororitas Army. a.k.a SoB - Sisters of Battle. Time to get the ball rolling. WIP (heavy)
|
|
Angelic Adepta Sororitas
|
paintedpotato wrote:
All I was able to get done this last week was the base coat of Adepta Battlegrey.
You say that like its an underachievement. Look how many there are! At least you have built up the stamina to run the same colour on everything in the same run. Hmm, stamina.... mirrors......
|
|
This message was edited 2 times. Last update was at 2011/08/23 20:26:28
|
|
|
|
|
2011/08/23 21:09:54
Subject: Adepta Sororitas Army. a.k.a SoB - Sisters of Battle. Time to get the ball rolling. WIP (heavy)
|
|
Fixture of Dakka
|
Holy months income on a table batman. It makes me cringe a little to see SoB armies in the raw. Looks like a fantastic start to what should be a very cool army.
|
|
This message was edited 1 time. Last update was at 2011/08/23 21:11:29
 Avatar 720 wrote: Avatar 720 wrote:You see, to Auston, everyone is a Death Star; there's only one way you can take it and that's through a small gap at the back.
Come check out my Blood Angels,Crimson Fists, and coming soon Eldar
http://www.dakkadakka.com/dakkaforum/posts/list/391013.page
I have conceded that the Eldar page I started in P&M is their legitimate home. Free Candy! Updated 10/19.
http://www.dakkadakka.com/dakkaforum/posts/list/391553.page
Powder Burns wrote:what they need to make is a fullsize leatherman, like 14" long folded, with a bone saw, notches for bowstring, signaling flare, electrical hand crank generator, bolt cutters..
|
|
|
|
|
|
|


