Switch Theme:

Deathwing Armour - Step by Step Tutorial w/ pics!  [RSS] Share on facebook Share on Twitter Submit to Reddit
»
Author Message
Advert


Forum adverts like this one are shown to any user who is not logged in. Join us by filling out a tiny 3 field form and you will get your own, free, dakka user account which gives a good range of benefits to you:
  • No adverts like this in the forums anymore.
  • Times and dates in your local timezone.
  • Full tracking of what you have read so you can skip to your first unread post, easily see what has changed since you last logged in, and easily see what is new at a glance.
  • Email notifications for threads you want to watch closely.
  • Being a part of the oldest wargaming community on the net.
If you are already a member then feel free to login now.


Made in nz
Navigator


Auckland, New Zealand

Hey guys, I've been asked to post how I paint my Deathwing.
Especially since I brag about how easy and idiot-proof it is

For Terminator Armour the only paints used are Dheneb Stone and Gryphonne Sepia.
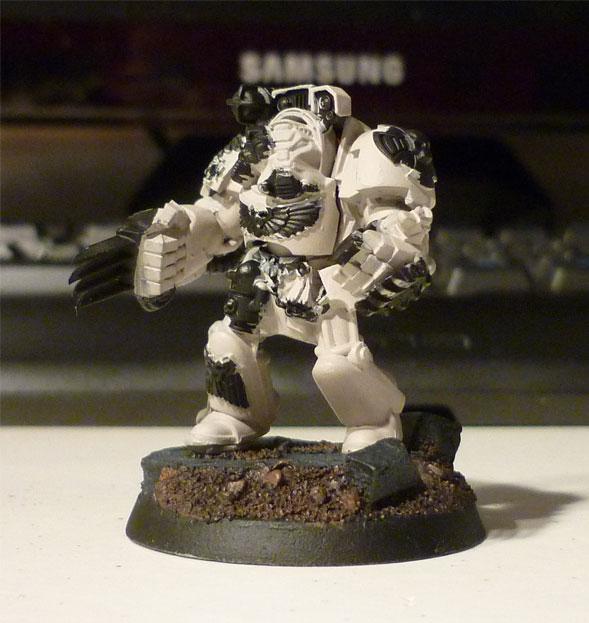
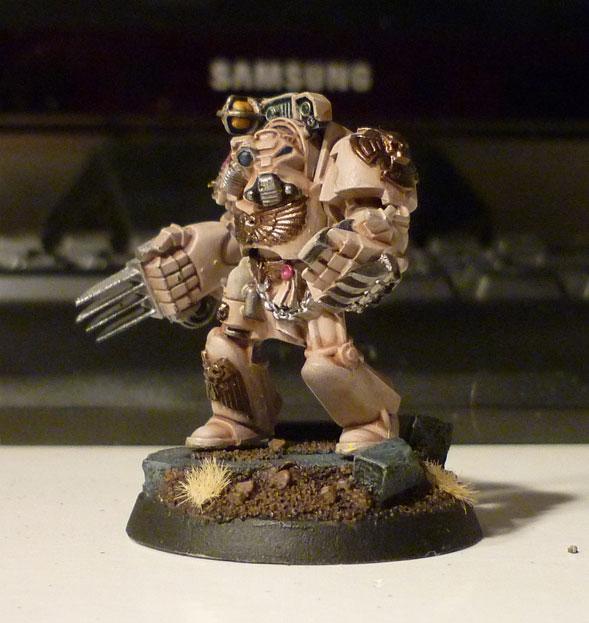
Step one:

Paint Dheneb Stone straight over your basecoat. Works just as well on black as white.
And just incase you don't know Dheneb Stone is a foundation paint. So shake the hell out of the paint pot before you start, and water it down at least 1:1 water/paint.

(This is just one coat straight over black, Dheneb Stone is AMAZING)
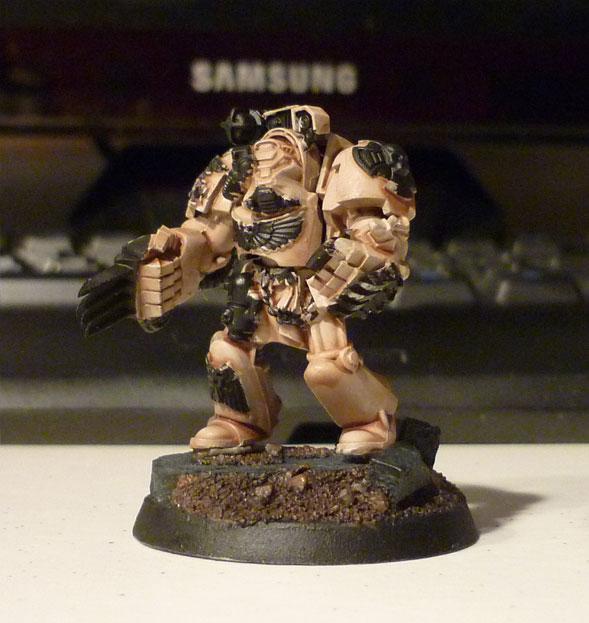
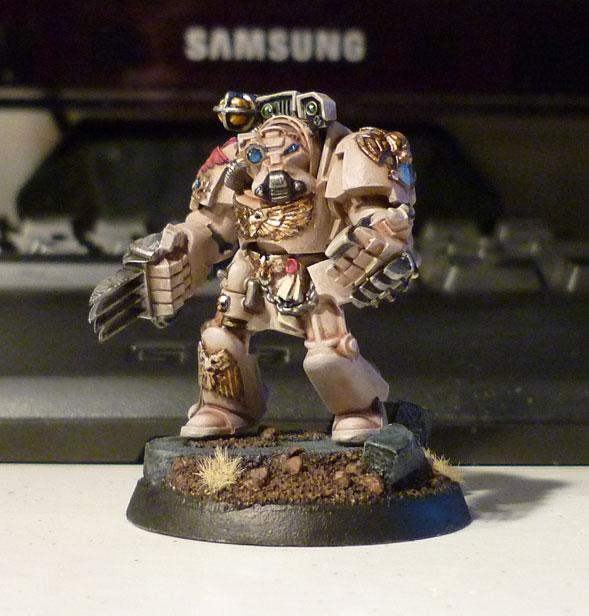

Step two:

Wash the entire surface of the Armour with Gryphonne Sepia.
This isn't just to shade it but also change the hue of the Dheneb Stone. Make sure you get it all!
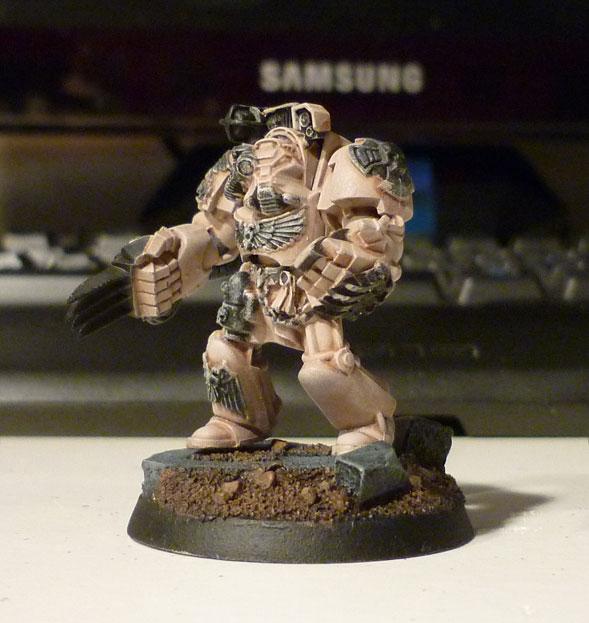
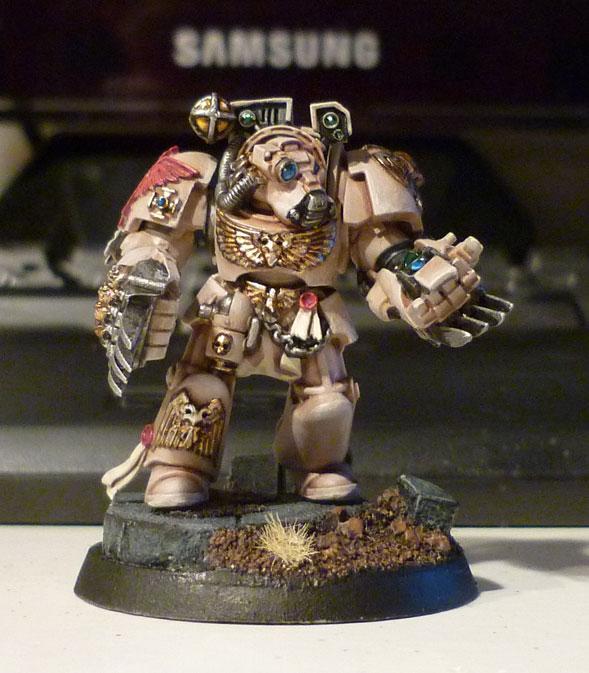


Step three:

Drybrush the entire mini with Dheneb Stone. Avoiding the deep recesses. Sounds simple but you need to do it right!


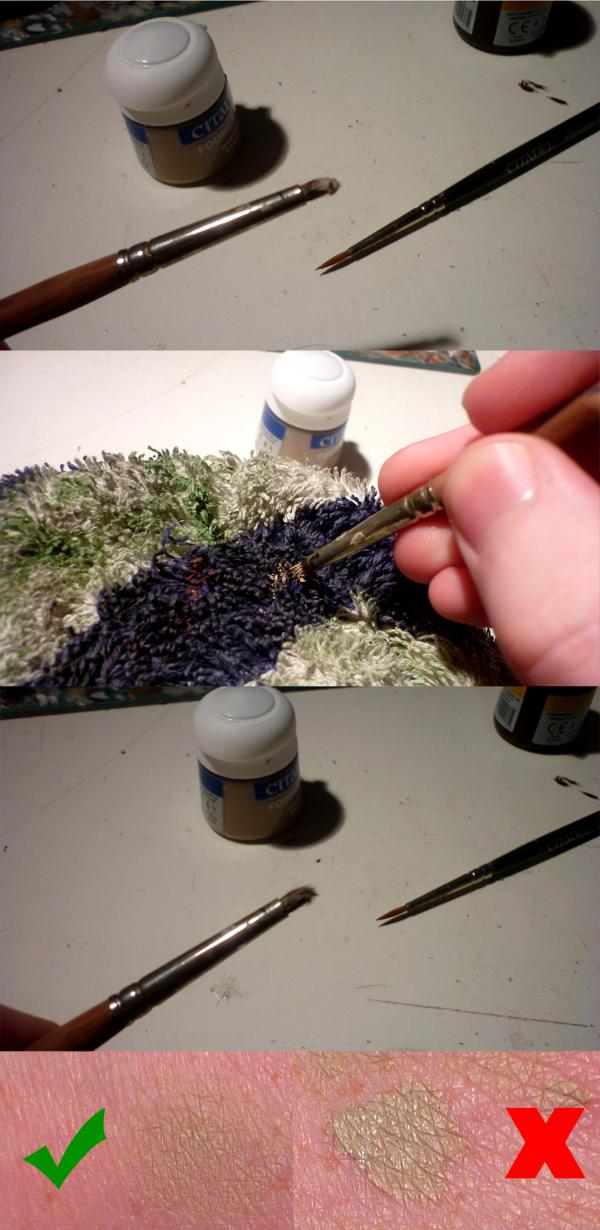
Quick how to drybrush tutorial:

(Don't water down the Dheneb Stone here but still shake the pot.)
Get a proper brush, something like the Citadel Medium Drybrush.
Wipe/brush off almost all the paint from your brush before you start.
A good way to test if you have too much paint on the brush is to lightly drybrush the top of your hand.
If the paint is running into the lines on your skin there's too much!
You want it to almost be like a dusting of paint.


Then do the paint/shade/highlight thing on the details and done.
(Not covered in this tutorial)


If you would like to see more completed examples check out my Deathwing Gallery here on Dakka.

If you have any questions let me know!

   
Made in au
Boosting Ultramarine Biker


Australia

Very nice tutorial the dry brushing process is very well done too. Are there any washes with your metallics like the golds and silvers to dull them a little or do you leave them bright?

"Freehand it like a boss" - starsdawn

My very first blog, wish me luck
Once a Space Marine blog, now corrupted by Nurgles Rot...
http://www.dakkadakka.com/dakkaforum/posts/list/619535.page


4000+ points with elements from the 1st, 2nd and 10th company. 
   
Made in nz
Navigator


Auckland, New Zealand

Marine_With_Heart wrote:Very nice tutorial the dry brushing process is very well done too. Are there any washes with your metallics like the golds and silvers to dull them a little or do you leave them bright?


I havn't really settled on a gold I like.

I do the regular scorched brown/shining gold 1:1 base -> dwarf bronze -> shining gold
Then sort of play around with a mithril silver/burnished gold mix and washes/glazes (sephia/mud/baal red/ogryn flesh) and finally edge highlight with straight mithril.

So as you can see I didn't cover it in this since I really don't know what I like yet lol.

This is my latest gold experiment:

   
Made in au
Boosting Ultramarine Biker


Australia

What gold you there on the Chapi seems like a good choice. I'm still experimenting with my golds too with some of minitaures having different variants of it lol
Never tried useing Burnished gold though, only shining gold mixed with the mithril.

"Freehand it like a boss" - starsdawn

My very first blog, wish me luck
Once a Space Marine blog, now corrupted by Nurgles Rot...
http://www.dakkadakka.com/dakkaforum/posts/list/619535.page


4000+ points with elements from the 1st, 2nd and 10th company. 
   
Made in us
Hard-Wired Sentinel Pilot


Florida

Awesome tutorial!!

My Blog
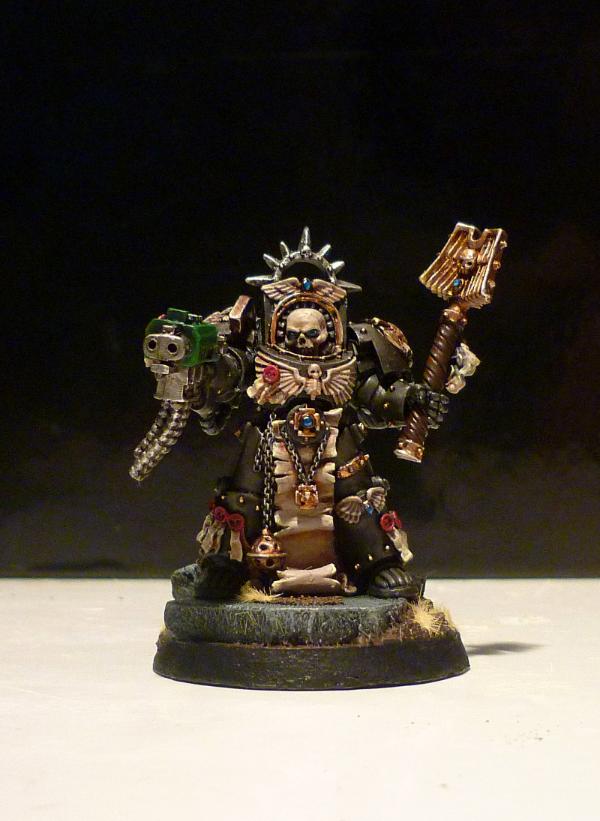
Knights of Titan 500 points Primary Knights of Titan WIP Blog
Warp Angels 750 points Primary Warp Angels WIP Blog
The Eternal Crusade XXXX points Primary
DO:80s++G++M+++B++I+Pw40k10++D++A++++/fWD-R++T(D)DM+


Forum Index » Painting & Modeling Tutorials
Go to: