| Author |
Message |
 |
|
|
|
|
Advert
|
Forum adverts like this one are shown to any user who is not logged in. Join us by filling out a tiny 3 field form and you will get your own, free, dakka user account which gives a good range of benefits to you:
- No adverts like this in the forums anymore.
- Times and dates in your local timezone.
- Full tracking of what you have read so you can skip to your first unread post, easily see what has changed since you last logged in, and easily see what is new at a glance.
- Email notifications for threads you want to watch closely.
- Being a part of the oldest wargaming community on the net.
If you are already a member then feel free to login now. |
|
 |
2012/03/28 03:38:41
Subject: Making space marine armor. For you!
|
|

Brainy Zoanthrope
|
Well, I have tried (And Failed) at keeping up some other P&M Blogs, but now I have a brilliant Idea, that I want to share with everyone: I will be making space marine armor!
I went to this thing called animazment a couple of years ago, and I saw some neat costumes, like spartans and Poison Ivy, but no space marines. So this year, I decided to try my hand at cardboard/duct tape armor. I started earlier this evening, and thought "Man, I wish I could share this with the dakka community! They would love this!" Then I remembered about the P&M Blogs, and thought "Well, now all I ned is a camera." Then came the realization that I still have my parent's nice camera, and so I will be ab;e to take pictures along the way and share with you guys step by step information so that you can make your own. So here we go:
Day 1:
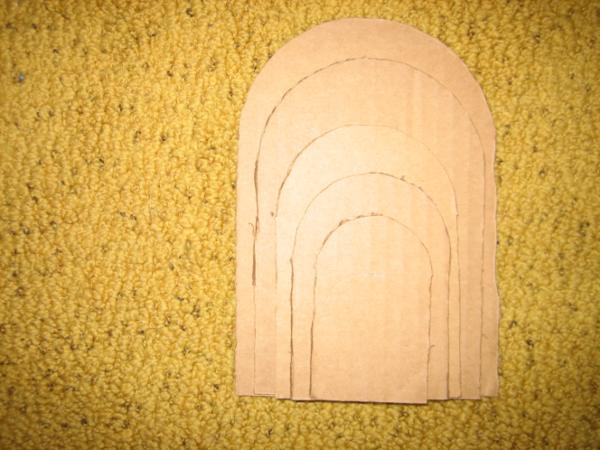
I though about it, looked up some referance, Started designing the bracer first (Seemed simple enough).
Now, I had only once before tried to make cardboard armor, and I tried making curves by bending it. Didn't work too well. So I tried a new aproach: manually cut out each layer, and slowly build it yp from there. Now, I do realize that this style will take much longer, and use much more cardboard, but it is still way nicer looking.
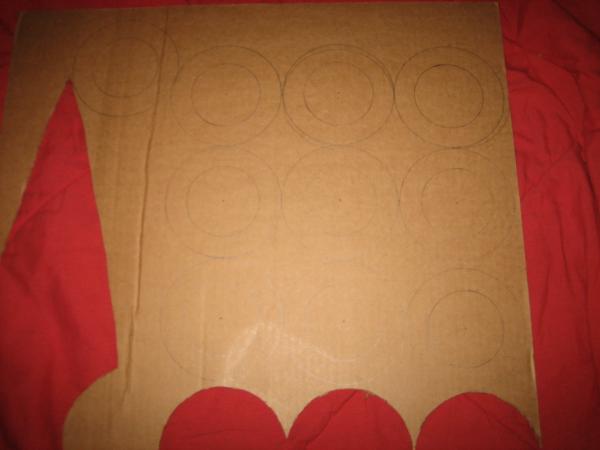
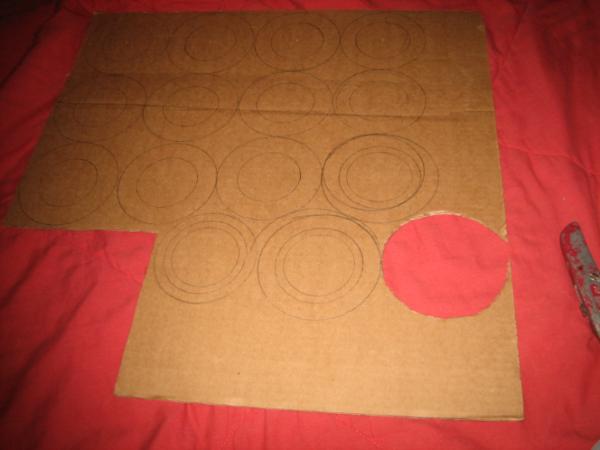
I simply used a compass, and drew circles, all the same radius (Somewhere about 2 1/2") and then drew smaller circles (About 1 11/16") inside. I cut out the circles, and then the smaller inside circles, with an x-acto knife and a boxcutter.
I used a really handy trick I learned called "Precutting." What it is is where you trace the circles lightly with the x-acto knife, slicing through the first layer but not enough force to cut through the corrugated part, this leaves a nice groove that the boxcutter can easily follow, creating nice circles.
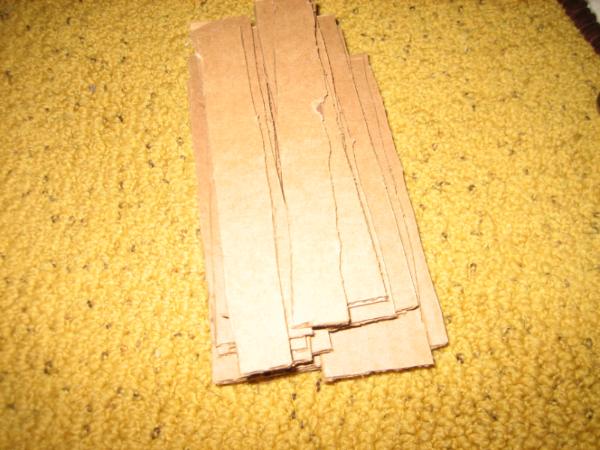
So this is what I got completed today constructionwise:
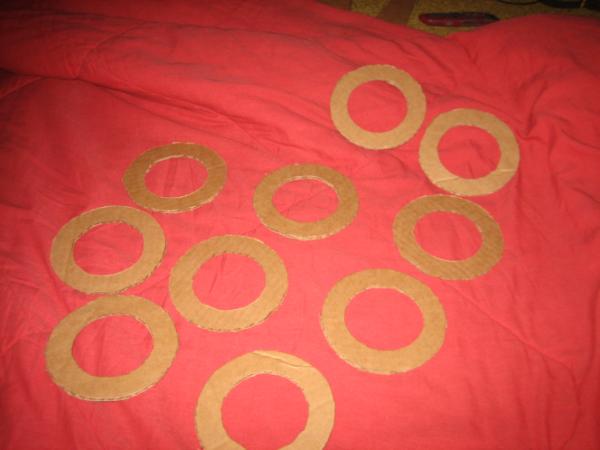
Sheet with templates
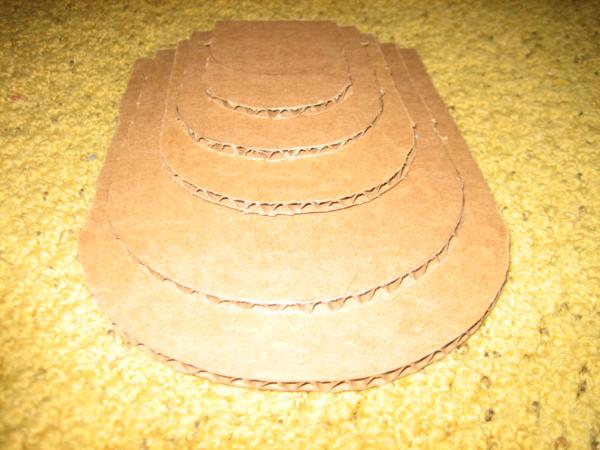
Cut rings With excess
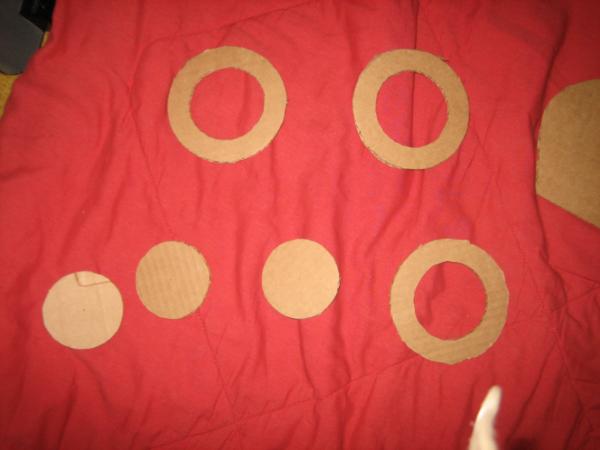
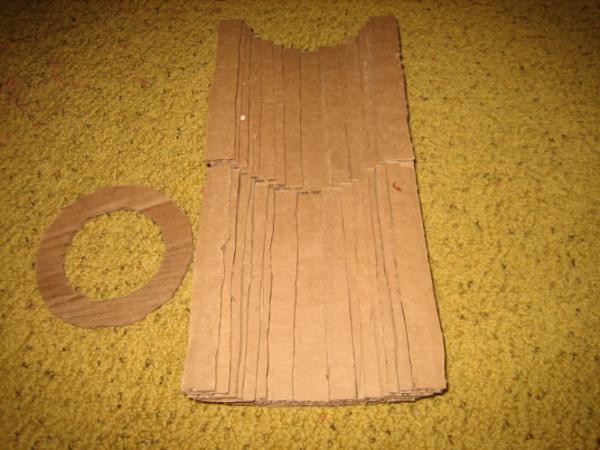
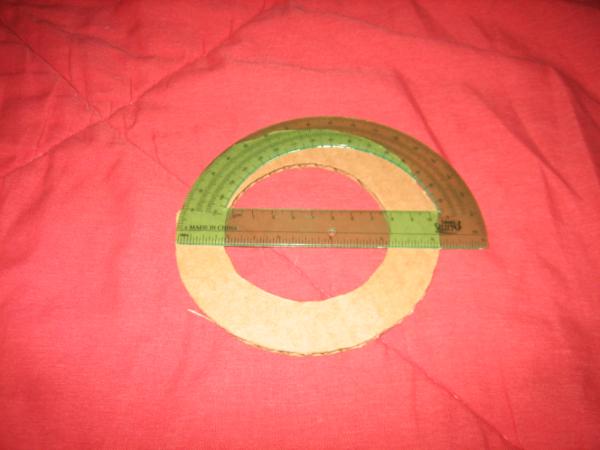
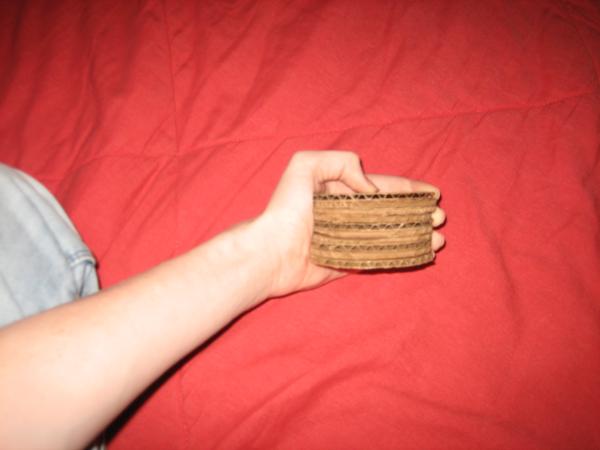
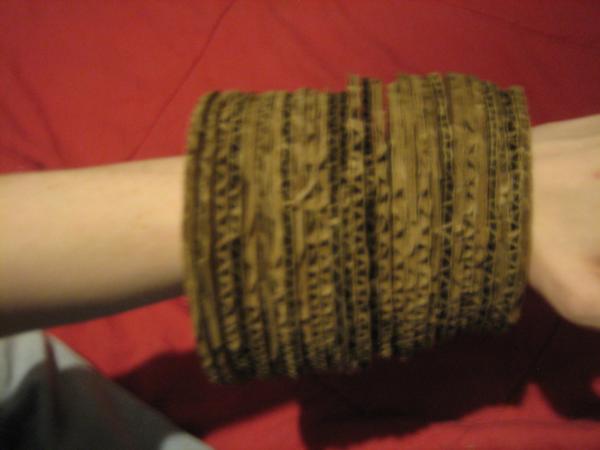
Outer band, for arm
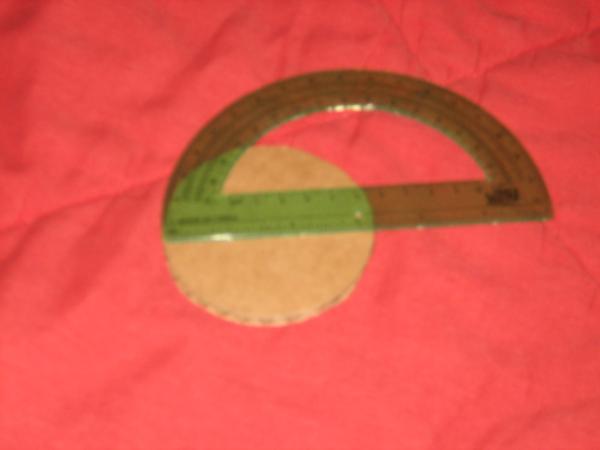
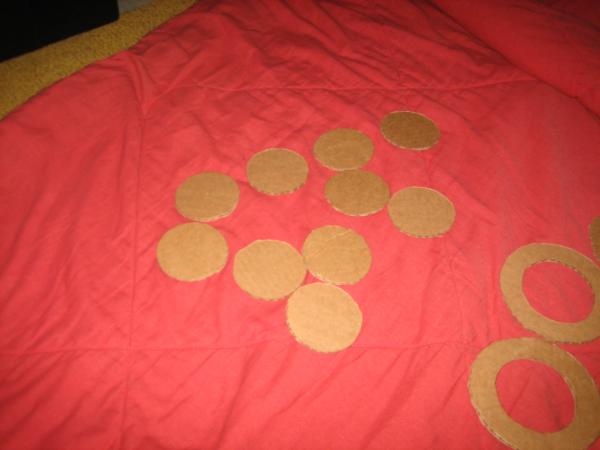
Excess center. Maybe useable for grenade piece.
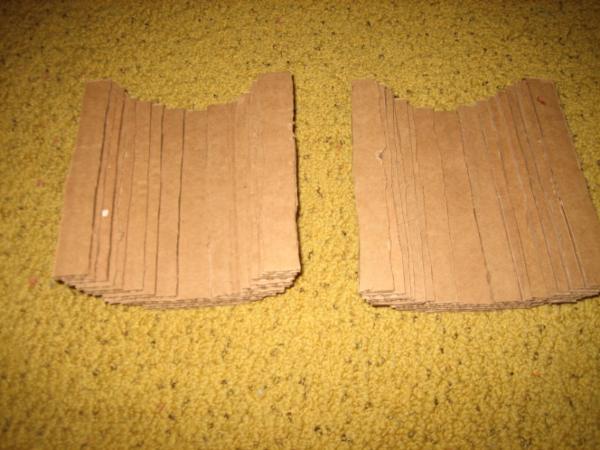
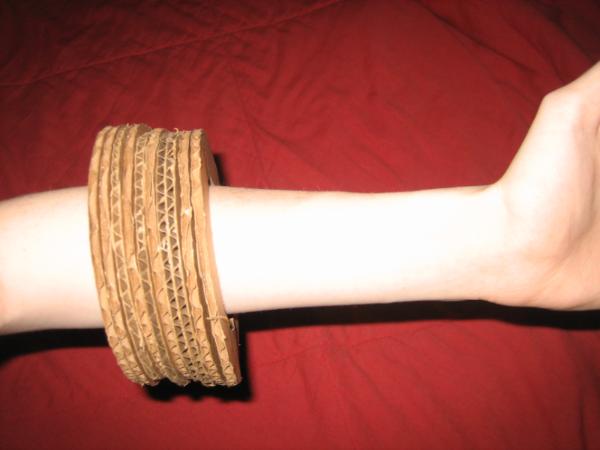
3 cut outer bands on forearm... I'm going to need a lot of these...
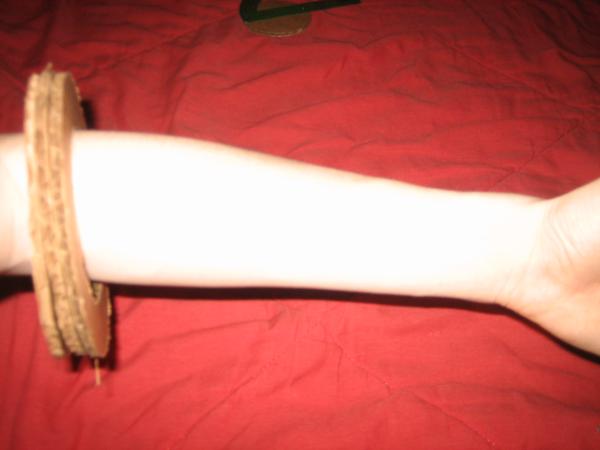
So here is where we start.
By the way, I was listening to "Gods of War" while making these.
|
Current Armies:
~2500pts  _--_--_--_~1750pts _--_--_--_~1750pts  _--_--_--_~1000pts _--_--_--_~1000pts  _--_--_--_~1300pts _--_--_--_~1300pts  _--_--_--_~750pts _--_--_--_~750pts  _--_--_--_~2000pts _--_--_--_~2000pts  |
|
|
 |
|
2012/03/28 10:28:45
Subject: Re:Making space marine armor. For you!
|
|

Longtime Dakkanaut
|
I will be watching this closely, interest = more than peaked 
|
|
|
|
|
|
2012/03/28 11:34:51
Subject: Re:Making space marine armor. For you!
|
|
Brainy Zoanthrope
|
Morning update: I woke up early, and couldn't get to sleep... so I worked on the armor instead of sleep 
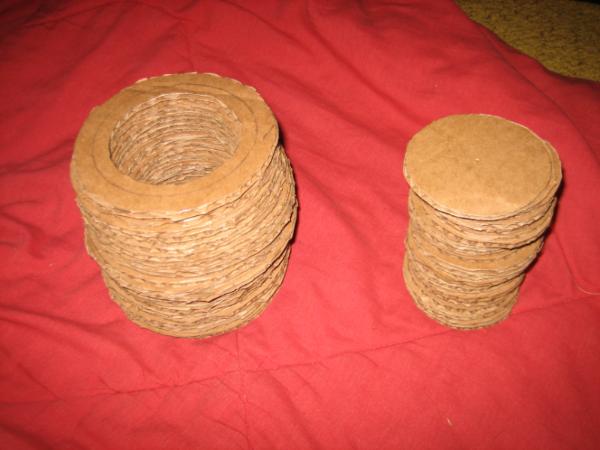
In 45 minutes, I actually got a lot done. I got another 7 rings cut, and I have 3 left on this sheet, but I have some more sheets.
Now I have 10 rings and leftovers
Current progress down my arm:
Yeah, those leftovers are really looking grenadelike right now...
|
Current Armies:
~2500pts _--_--_--_~1750pts _--_--_--_~1000pts _--_--_--_~1300pts _--_--_--_~750pts _--_--_--_~2000pts |
|
|
|
|
2012/03/28 12:10:03
Subject: Re:Making space marine armor. For you!
|
|
Nurgle Predator Driver with an Infestation
|
Talk about a full scale marine... So are you going to make up rules for you? I can see it now, You walk into your FLGS and look around and say, save this. Kicking a table. O man, I can't wait to see this when its all done. What chapter are you going to paint it?
|
|
|
|
|
|
2012/03/28 12:43:36
Subject: Making space marine armor. For you!
|
|
Brainy Zoanthrope
|
I'm thinking Blood Ravens, because they are quite iconic to people who both play and don't play 40k. But I might make more than one suit.
|
Current Armies:
~2500pts _--_--_--_~1750pts _--_--_--_~1000pts _--_--_--_~1300pts _--_--_--_~750pts _--_--_--_~2000pts |
|
|
|
|
2012/03/28 13:55:47
Subject: Re:Making space marine armor. For you!
|
|

Lady of the Lake
|
May not be worth it, but it might be cool to make a sort of stand for the suit while not in use when you're done with them.

|
|
|
|
|
|
2012/03/28 13:58:36
Subject: Making space marine armor. For you!
|
|

Thunderhawk Pilot Dropping From Orbit
|
I want too make one now!
|
|
|
|
|
|
2012/03/28 14:13:52
Subject: Re:Making space marine armor. For you!
|
|
Longtime Dakkanaut
|
n0t_u wrote:May not be worth it, but it might be cool to make a sort of stand for the suit while not in use when you're done with them.
That's one of the best I've seen in a while
|
|
|
|
|
|
2012/03/28 14:39:11
Subject: Re:Making space marine armor. For you!
|
|
Stormin' Stompa
|
Sub'd
Looking forward to seeing it finished
|
|
|
|
|
|
2012/03/29 03:08:09
Subject: Re:Making space marine armor. For you!
|
|
Brainy Zoanthrope
|
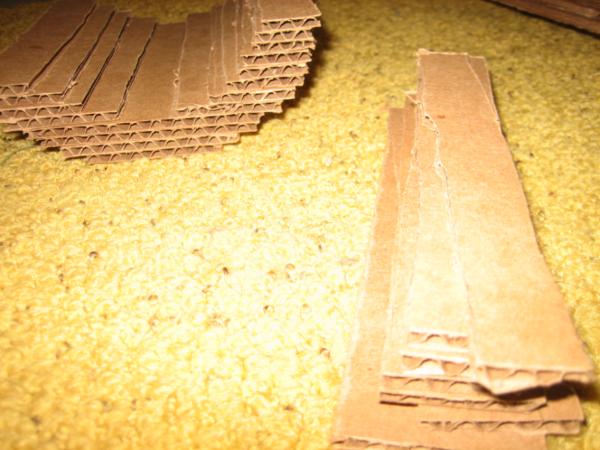
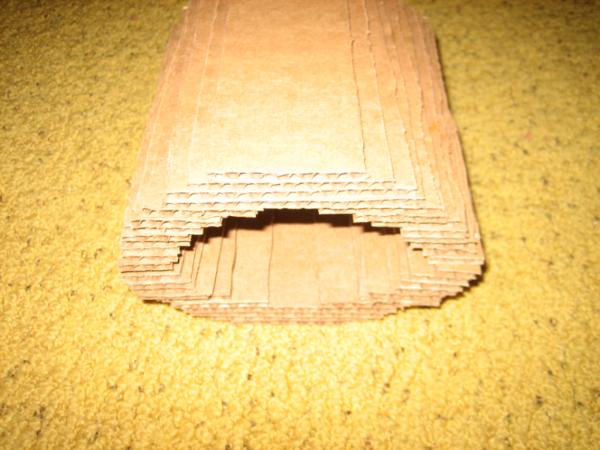
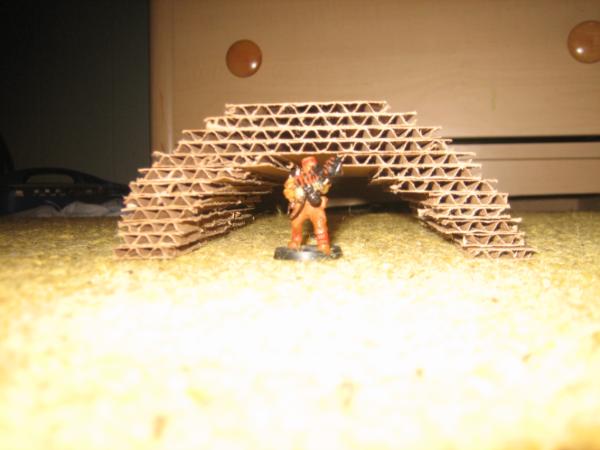
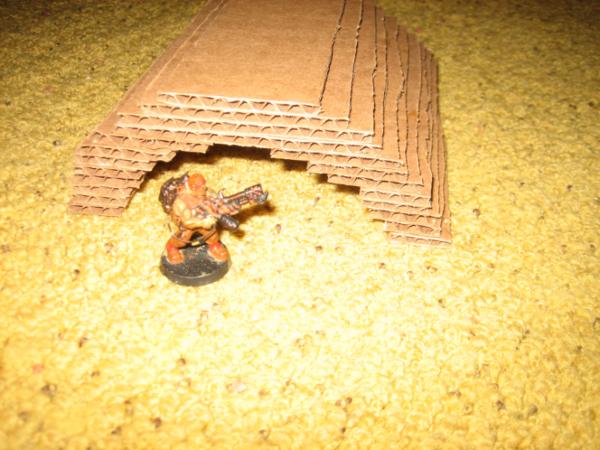
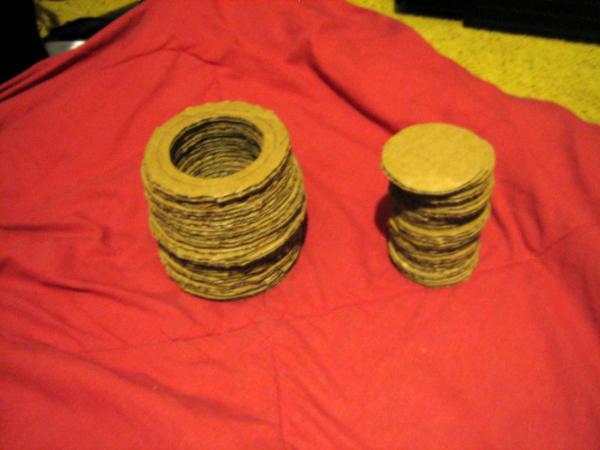
Today:
15 more rings join the ranks, making the total now 27 rings. And I have decided something new: I'm going to try and cut down on cardboard costs by making it a more "Traditional" way. The rings I have now will be going towards maybe a powerfist.
Images
|
Current Armies:
~2500pts _--_--_--_~1750pts _--_--_--_~1000pts _--_--_--_~1300pts _--_--_--_~750pts _--_--_--_~2000pts |
|
|
|
|
2012/03/30 02:01:31
Subject: Making space marine armor. For you!
|
|
Brainy Zoanthrope
|
Unfortunately nothing to report today, and I wont be able to report anything over the weekend, due to a non-wargaming competition that I will be taking part in.
|
Current Armies:
~2500pts _--_--_--_~1750pts _--_--_--_~1000pts _--_--_--_~1300pts _--_--_--_~750pts _--_--_--_~2000pts |
|
|
|
|
2012/04/10 01:31:43
Subject: Re:Making space marine armor. For you!
|
|
Brainy Zoanthrope
|
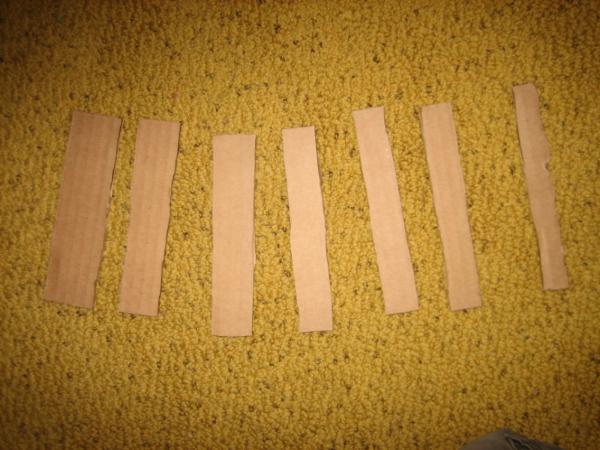
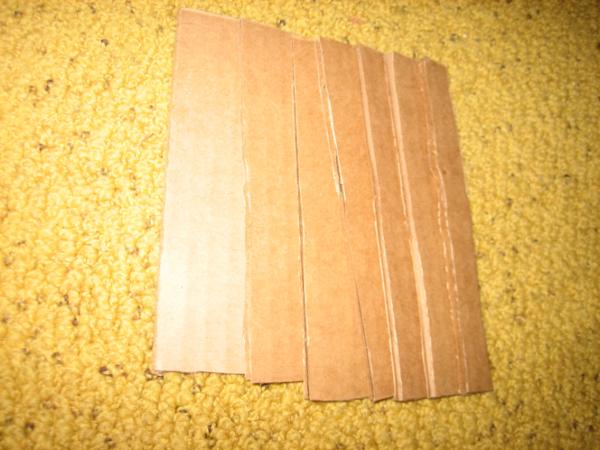
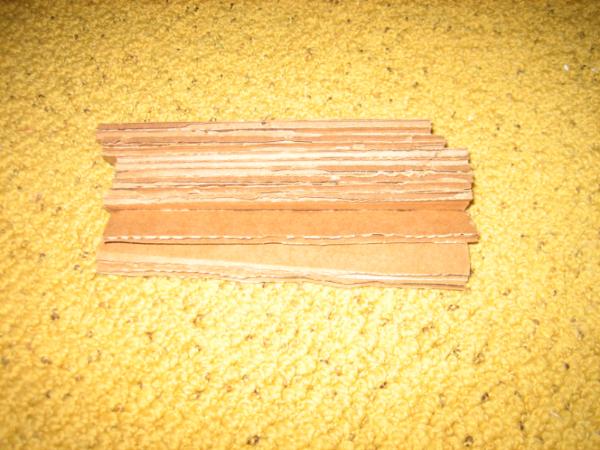
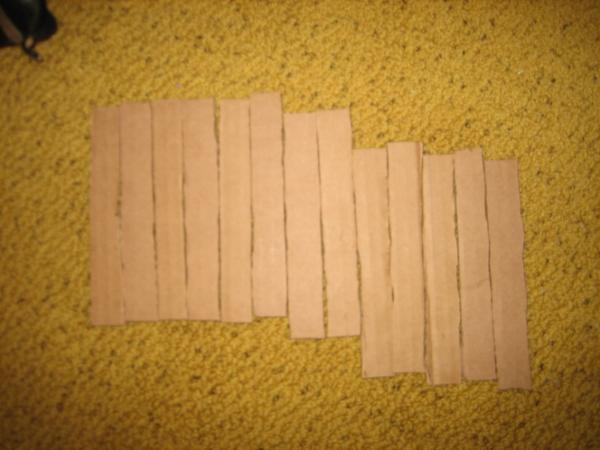
Sorry for the delay, English and Programming Homework is piling up, so the next few weeks will have only a few updates. But right now, I had an Idea: less excess waste if I build sideways, rather than up. Let me explain. I will build it layer by layer on the other axis. So first, I need lines.  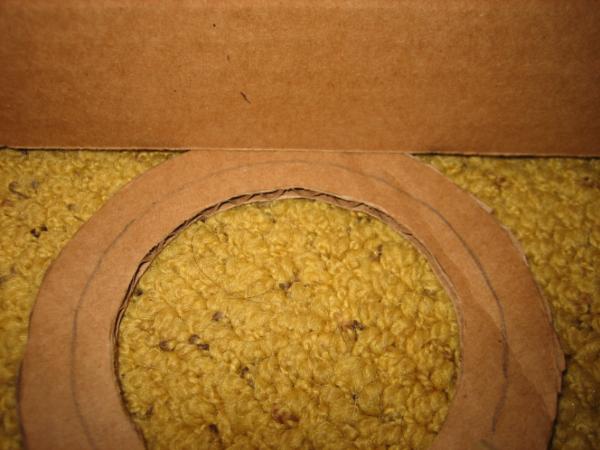 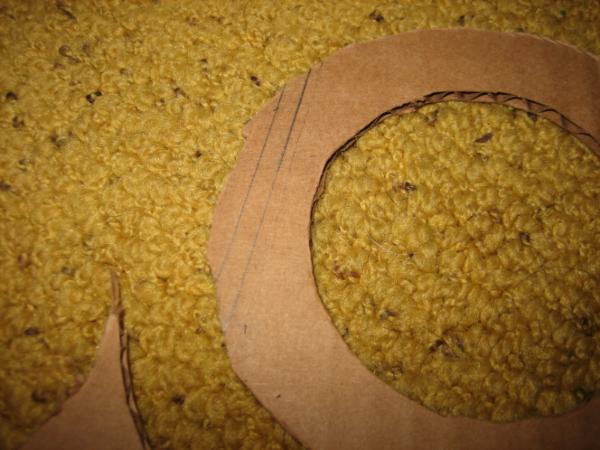 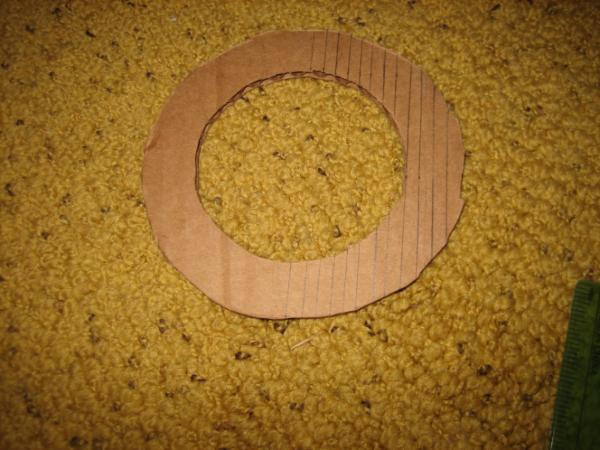 This is where the camera died, so I couldnt get any pics of cutting the strips, but soon I will take some pics of the cut strips and then gluing/taping process.
|
|
This message was edited 1 time. Last update was at 2012/04/10 15:40:04
Current Armies:
~2500pts _--_--_--_~1750pts _--_--_--_~1000pts _--_--_--_~1300pts _--_--_--_~750pts _--_--_--_~2000pts |
|
|
|
|
2012/04/30 03:04:54
Subject: Re:Making space marine armor. For you!
|
|
Brainy Zoanthrope
|
|
|
This message was edited 1 time. Last update was at 2012/04/30 03:05:57
Current Armies:
~2500pts _--_--_--_~1750pts _--_--_--_~1000pts _--_--_--_~1300pts _--_--_--_~750pts _--_--_--_~2000pts |
|
|
|
|
2012/04/30 16:25:50
Subject: Making space marine armor. For you!
|
|
Gargantuan Gargant
|
This is an interesting idea.
Seems incredibly labor intensive, but very cost effective. I work in medical supply, giving me a virtually unlimited access to cardboard. If your project works out I will using it as a reference for my own armor,
|
|
|
|
|
|
2012/04/30 23:57:49
Subject: Making space marine armor. For you!
|
|
Brainy Zoanthrope
|
If I had that kind of acess to cardboard, I would have stuck with the ring process, as it is materials consuming and unfortunately has a large amount of waste.
If you have even one of those old school compasses, then the process is incredibly simple when making the ring design.
And, I am honored that you are considering working on it yourself! If you ever start, feel free to post it here.
|
Current Armies:
~2500pts _--_--_--_~1750pts _--_--_--_~1000pts _--_--_--_~1300pts _--_--_--_~750pts _--_--_--_~2000pts |
|
|
|
|
2012/05/01 00:35:11
Subject: Making space marine armor. For you!
|
|
Incorporating Wet-Blending
Wales: Where the Men are Men and the sheep are Scared.
|
Would love to see more of this
may be next years haloween costume.
|
|
|
|
|
|
2012/05/01 00:42:51
Subject: Making space marine armor. For you!
|
|
Shadowy Grot Kommittee Memba
The Great State of New Jersey
|
Your process is extremely flawed... (both of them). The original ring process was correct in concept (using rings to make the shape of the armor) but not in execution (you're not supposed to use rings to cover the ENTIRE shape).
What you're supposed to do is build it like you would a boat. Use rings every few inches to create an overall frame/shape held together by support pieces running parallel to your arm/perpendicular to the rings. You then fill in the gaps using a filler material (fiberglass, paper mache, foam, etc.) and then sand it/cut it/drill it/machine it to shape, paint and voila.
|
|
This message was edited 1 time. Last update was at 2012/05/01 00:44:01
|
|
|
|
|
2012/05/01 00:43:26
Subject: Making space marine armor. For you!
|
|
Thunderhawk Pilot Dropping From Orbit
|
Stay out of the rain! lol Great idea! Watching! Don't let us down!
|
Click the images to see my armies!

 |
|
|
|
|
2012/05/01 01:46:45
Subject: Making space marine armor. For you!
|
|
Brainy Zoanthrope
|
chaos0xomega wrote:Your process is extremely flawed... (both of them). The original ring process was correct in concept (using rings to make the shape of the armor) but not in execution (you're not supposed to use rings to cover the ENTIRE shape).
What you're supposed to do is build it like you would a boat. Use rings every few inches to create an overall frame/shape held together by support pieces running parallel to your arm/perpendicular to the rings. You then fill in the gaps using a filler material (fiberglass, paper mache, foam, etc.) and then sand it/cut it/drill it/machine it to shape, paint and voila.
To each their own. I have seen this method before, and I considered it. But I decided that if I did it that way, It wouldn't be a project of endurance, time, and frustration, it would be a "month-long" hobby work. I dont want it to be too easy. I'm an apple with wings, and decided to fall further from the tree of creative design.
|
|
This message was edited 1 time. Last update was at 2012/05/01 03:30:54
Current Armies:
~2500pts _--_--_--_~1750pts _--_--_--_~1000pts _--_--_--_~1300pts _--_--_--_~750pts _--_--_--_~2000pts |
|
|
|
|
2012/05/01 04:05:41
Subject: Making space marine armor. For you!
|
|
Gargantuan Gargant
|
If you keep track of measurements and mock up some templates of your work, it would give us something to follow along with and maybe we could help improve th design
|
|
|
|
|
|
2012/05/01 14:33:07
Subject: Making space marine armor. For you!
|
|
Brainy Zoanthrope
|
I'll get started on those measurements, then.
|
Current Armies:
~2500pts _--_--_--_~1750pts _--_--_--_~1000pts _--_--_--_~1300pts _--_--_--_~750pts _--_--_--_~2000pts |
|
|
|
|
2012/05/04 13:00:53
Subject: Re:Making space marine armor. For you!
|
|
Brainy Zoanthrope
|
|
Current Armies:
~2500pts _--_--_--_~1750pts _--_--_--_~1000pts _--_--_--_~1300pts _--_--_--_~750pts _--_--_--_~2000pts |
|
|
|
|
2012/05/04 13:04:35
Subject: Making space marine armor. For you!
|
|

Regular Dakkanaut
|
Very interesting.
|
|
|
|
|
2012/05/17 06:55:08
Subject: Making space marine armor. For you!
|
|
Gargantuan Gargant
|
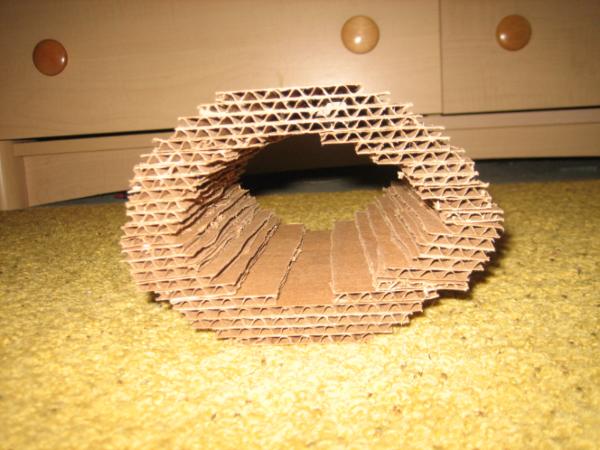
You can repurpose damage space marine armor into terrain 
|
|
|
|
|
|
2012/05/17 07:21:07
Subject: Making space marine armor. For you!
|
|
Bounding Assault Marine
|
Rennoc215 wrote:chaos0xomega wrote:Your process is extremely flawed... (both of them). The original ring process was correct in concept (using rings to make the shape of the armor) but not in execution (you're not supposed to use rings to cover the ENTIRE shape).
What you're supposed to do is build it like you would a boat. Use rings every few inches to create an overall frame/shape held together by support pieces running parallel to your arm/perpendicular to the rings. You then fill in the gaps using a filler material (fiberglass, paper mache, foam, etc.) and then sand it/cut it/drill it/machine it to shape, paint and voila.
To each their own.
I have seen this method before, and I considered it. But I decided that if I did it that way, It wouldn't be a project of endurance, time, and frustration, it would be a "month-long" hobby work. I dont want it to be too easy.
I'm an apple with wings, and decided to fall further from the tree of creative design.
So, you're intentionally making it 10 times more difficult and labor intensive than it should be... just because?
Not sure if serious...
|
|
|
|
|
|
2012/05/17 17:41:54
Subject: Making space marine armor. For you!
|
|
Pious Palatine
|
^ I think he is and I think he's serious.
Frankly I applaud you Rennoc215, I can see you want a big project to work on and I can't wait to see the results.
I just hope the updates continue to be frequent and you manage to see this epic task through to completion.
Subbed!
D
Edit: It's gotta be the beakie helmet btw.
|
|
This message was edited 1 time. Last update was at 2012/05/17 17:43:15
|
|
|
|
|
2012/05/17 17:50:24
Subject: Re:Making space marine armor. For you!
|
|
Speed Drybrushing
|
lets hope it doesn't rain that day.
|
|
|
|
|
2012/05/17 17:51:31
Subject: Re:Making space marine armor. For you!
|
|
Regular Dakkanaut
|
If you want a labor of love so to speak, try fiberglass. Easyier to shape and paint

and how to do it.
http://fiberglassblades.com/Process_FF.html
|
|
|
|
|
|
2012/05/17 23:46:53
Subject: Making space marine armor. For you!
|
|
Gargantuan Gargant
|
That's a great link tdwg83.
To be honest, with all the custom armors out there, I'm really suprised there is no set of patterns for Space Marine armor out there.
|
|
|
|
|
|
2012/05/19 21:47:33
Subject: Re:Making space marine armor. For you!
|
|
Gargantuan Gargant
|
I was Binging arounf the interweb and came across this set of instructions on how to make our own Space Marine Armor
Instructions
1 Spray your hockey helmet, umpire's chest pad, knee and elbow pads with red spray paint. Spray the paint using a back and forth motion to cover every spot. Let them dry and spray on one more coat of paint.
2 Spray your rubber boots in the same way as the pads if they are not already red. Let them dry.
3 Put on your black jumpsuit and red rubber boots. Attach your chest pad, elbow and knee pads. Put on your helmet. Put on your black leather gloves. Pick up your gun
I hope they help 
|
|
|
|
|
|
|
|
 Oh my...... I feel a need to do unmentionabel things with you now Scottie


 2000 pts
  2000 pts


 My CF blog