SO, finally we've got around to playing and reporting a proper game of 6ed. We've played a couple so far and all the rulebook-checking meant we never got to finish a game, so today we've been playing using my new reference sheets.
WE ACTUALLY GOT
TO TURN FIVE. And had a real result. Amazing. Here's how it went.
As always, pics are by Panic through the game. Attempting to remember what happened by me.
Panic's Grots - 1500pts -
http://www.dakkadakka.com/dakkaforum/posts/list/261148.page 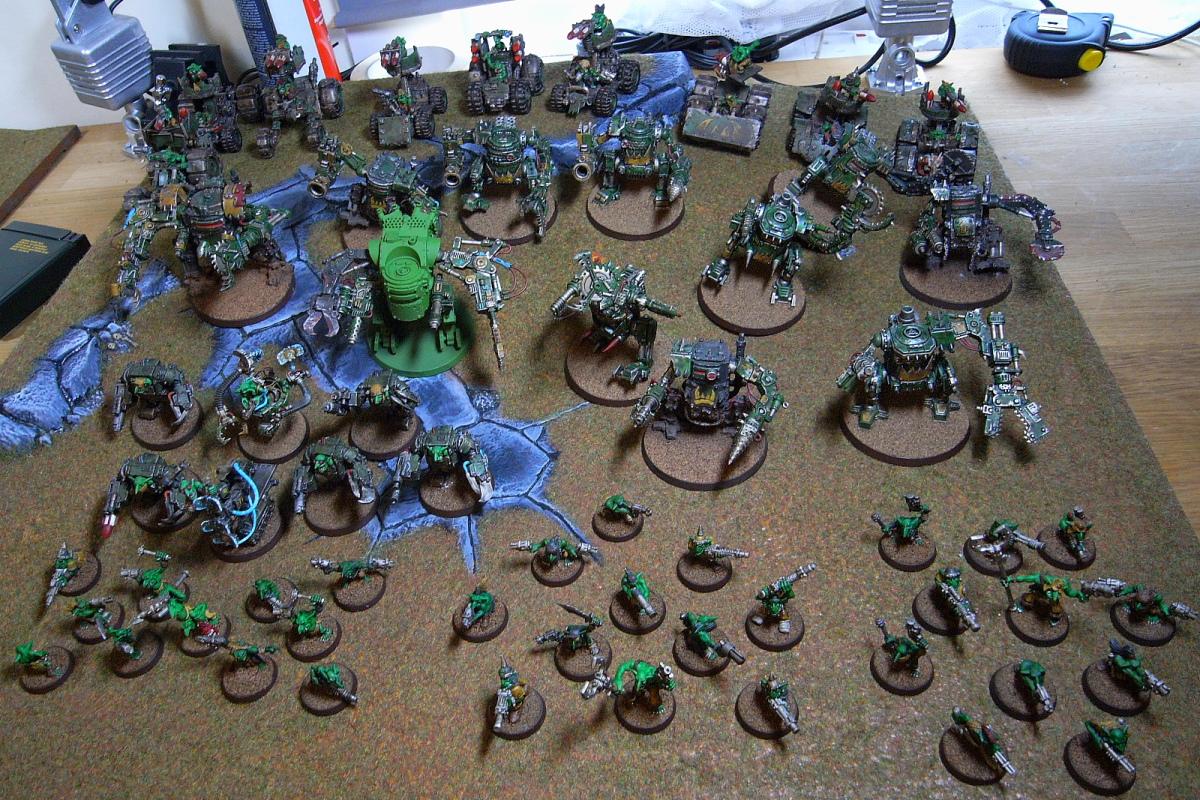
* Little Big Mek (
KFF)
* Little Big Mek (
KFF)
* 5 Megagrotz (1 Rokkit, 1 Skorcha,
TL Shootas)
* Deff Dred (2 Klaws, 2 Big Shootas)
* Deff Dred (2 Klaws, 2 Big Shootas)
* 3 Buggies (
TL Rokkit)
* 3 Buggies (
TL Rokkit)
* 3 Buggies (
TL Rokkit)
* 3 Killa Kans (Skorchas)
* 3 Killa Kans (Grotzookas)
* 3 Killa Kans (Big Shootas)
ArbitorIan's Tau - 1500pts -
http://www.dakkadakka.com/dakkaforum/posts/list/291790.page 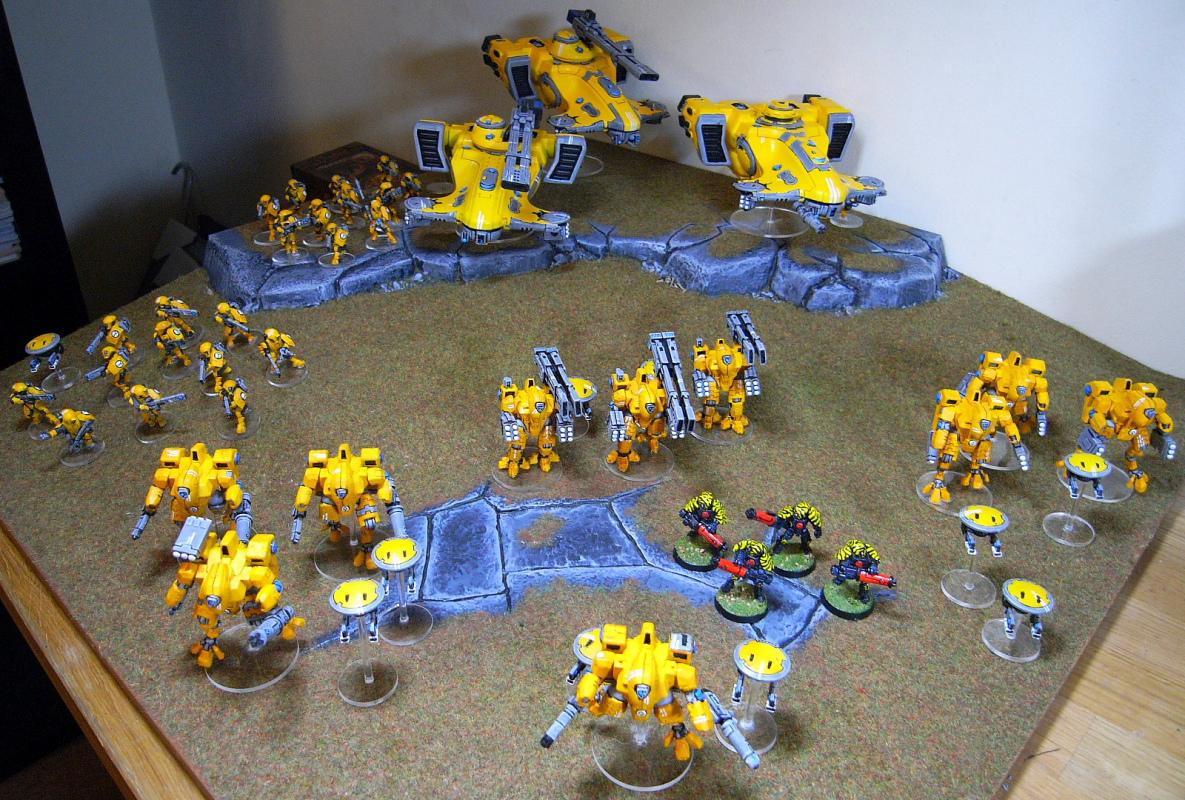
* Shas'
el (PR,
FB,
MT, HWDC, 2 Gun Drones)
* 3 Crisis Suits (
TL MP, 1 x
BSF, 1 x
TL, 1 x
DC, 1 Gun Drone)
* 3 Crisis Suits (Flamers,
BC, 1 x
MP, 1 x
BSF, 1 x
DC, 2 Gun Drones)
* 4 Stealth Suits (
BC, 2 x
BSF, 2 x
DC, 1 Gun Drone each)
* 11 Fire Warriors (Shas'ui with HWDC, 1 Gun Drone)
* 11 Fire Warriors (Shas'ui with HWDC, 1 Gun Drone) in Devilfish (Disruption Pod, Multitracker,
SMS)
* 3 Broadsides (
SMS, 1 x
BSF, 1 x
TL, 1 x
DC, 2 Gun Drones)
* Hammerhead (Railgun,
SMS, Disruption Pod, Multitracker)
* Hammerhead (Railgun,
SMS, Disruption Pod, Multitracker)
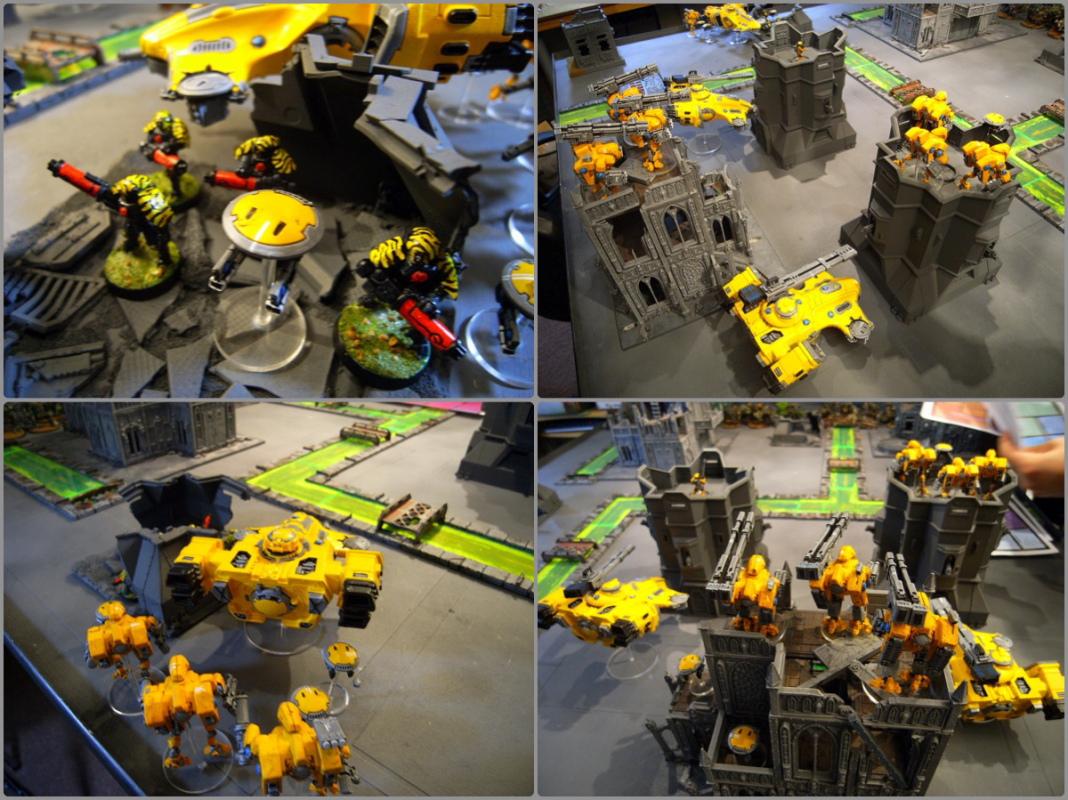
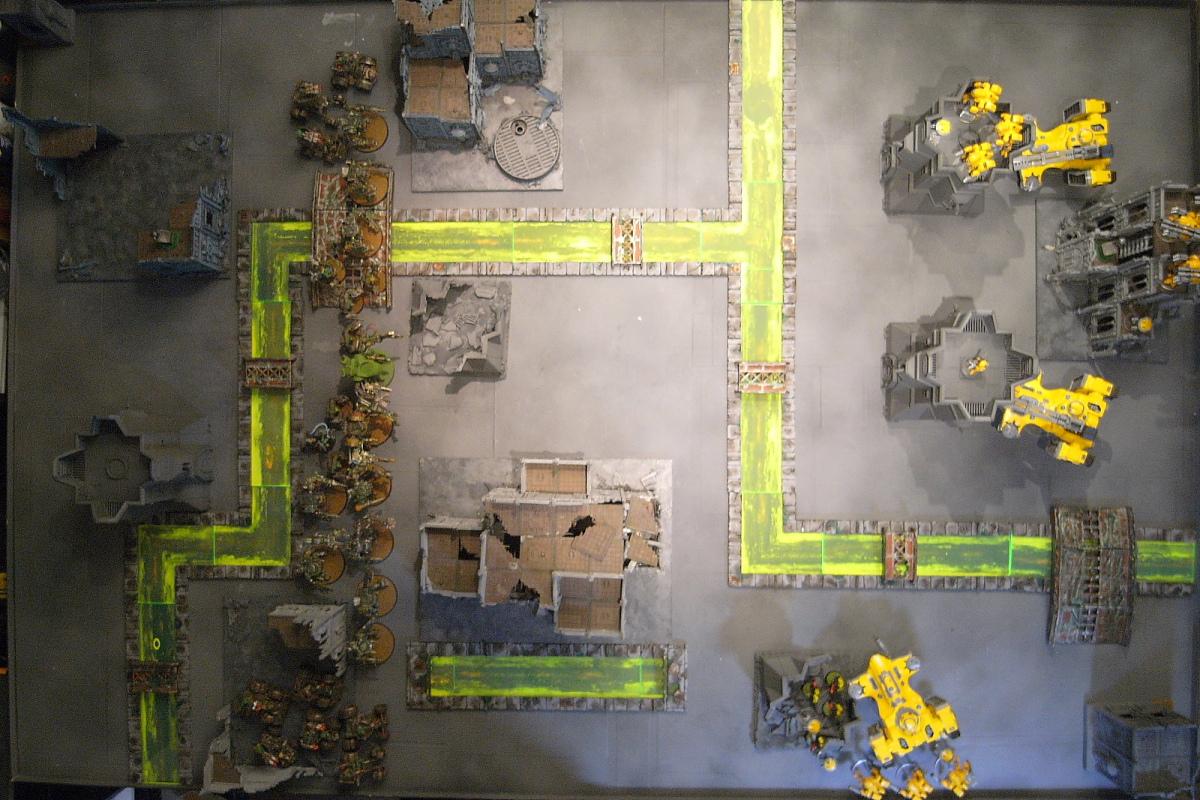
Deployment We rolled for mission and deployment, getting Emperor's Will (single Objective each) and Hammer & Anvil (sideways deployment). Tau elected to deploy first and take first turn, staying in the back of the field with most units deployed in or around the two bastions, and the Devilfish, Stealth Team and
BC Crisis Team on one flank. The
MP Crisis Team are on the battlements of one bastion, and the
FW squad in the main part of the other bastion. The commander went into
DS reserve.
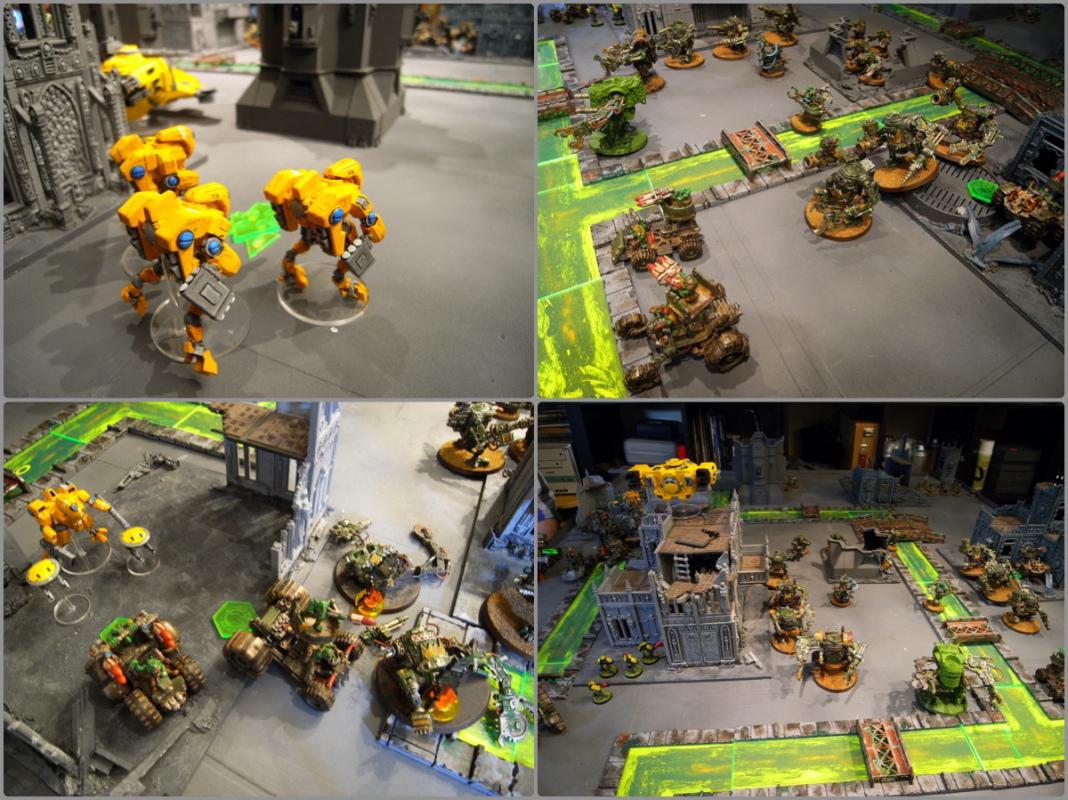
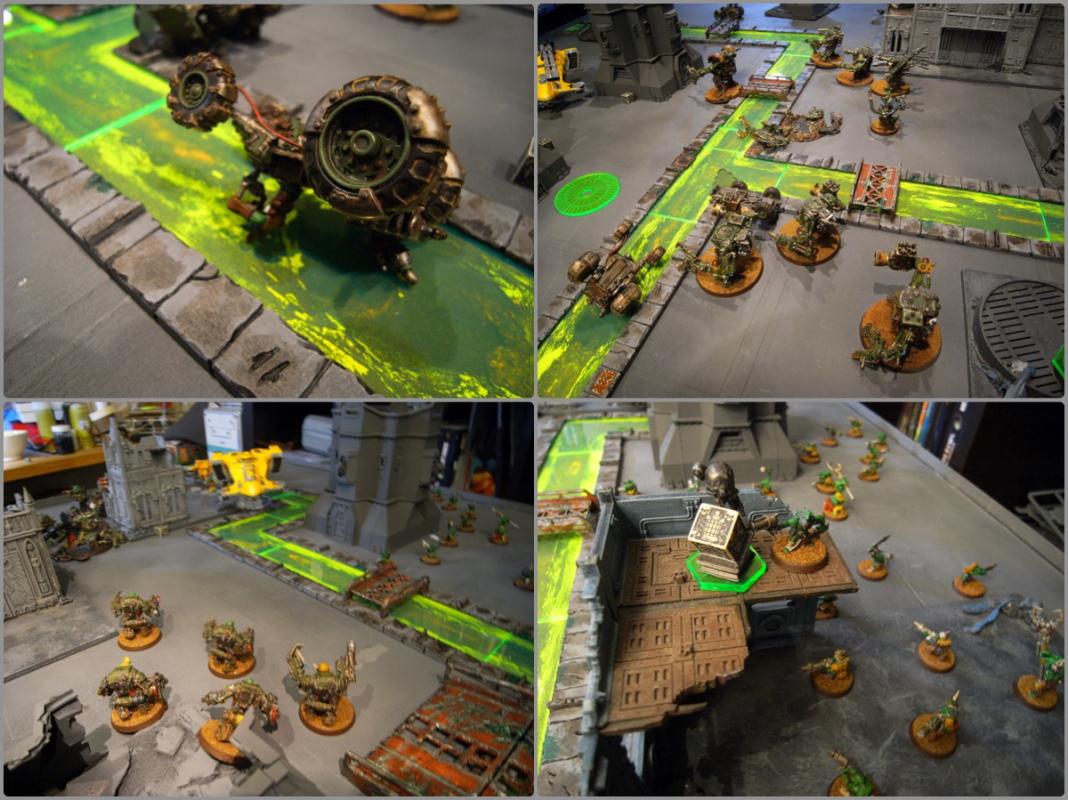
The Grots the set up in the classic Kan Wall, two Deff Dreds in the center supported by Kans and
KFF Meks, and the buggies on the flanks, all in a line as far forward as the zone would allow. The Grots were held in reserve to hold the backfield objective.
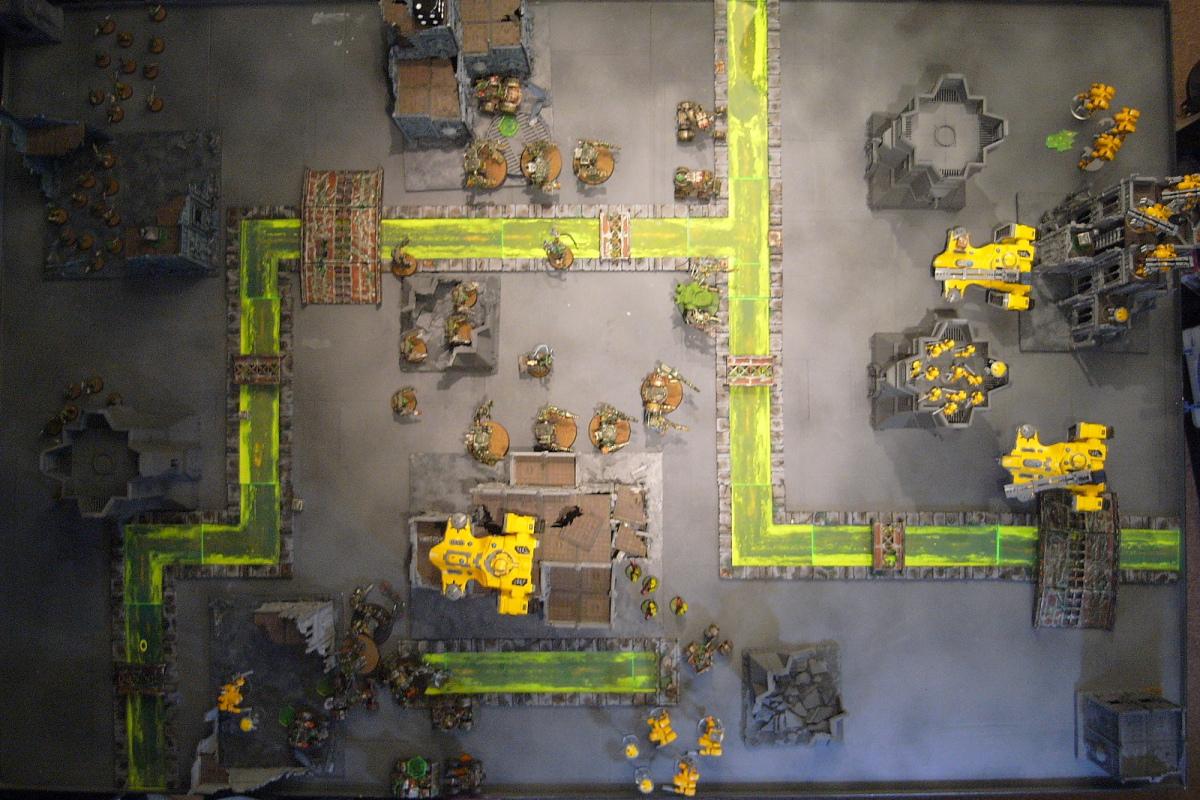
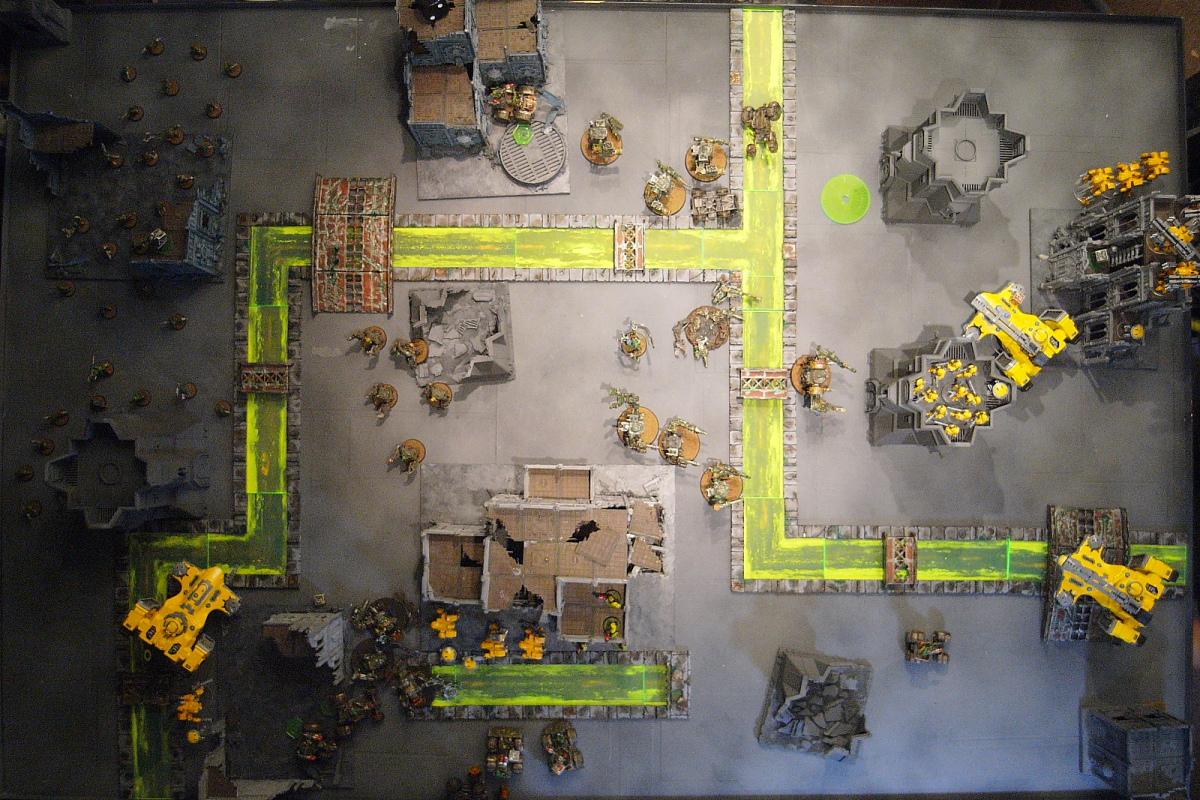
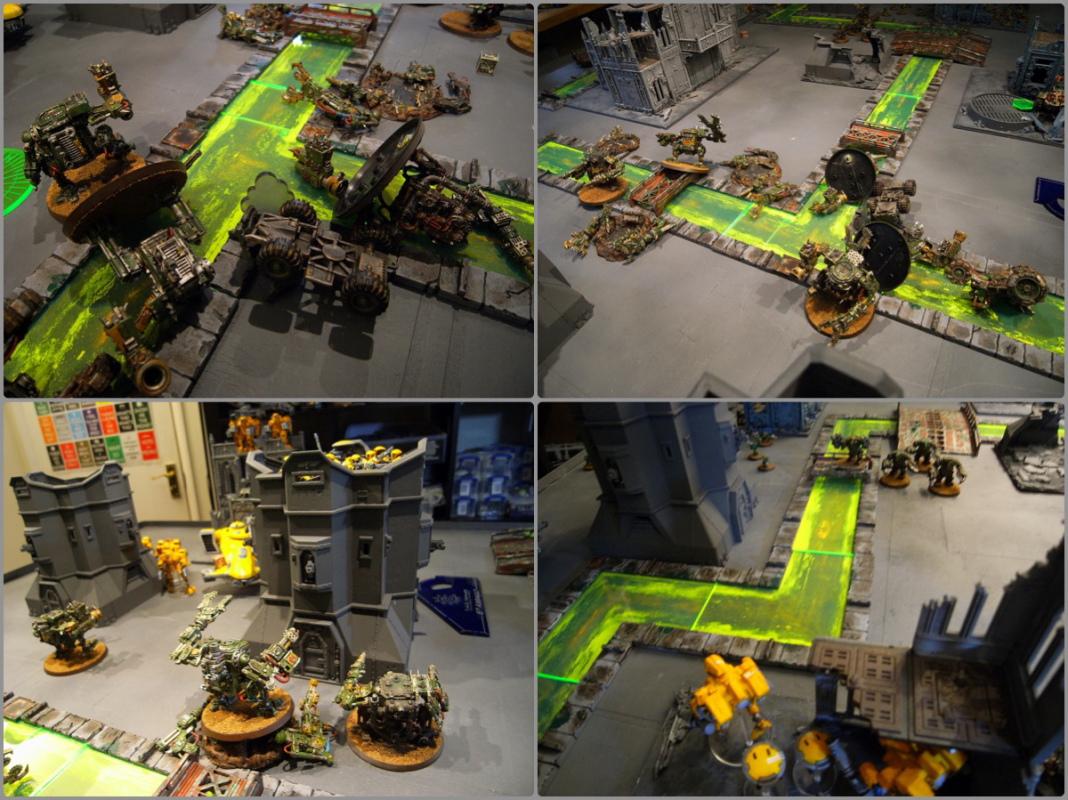
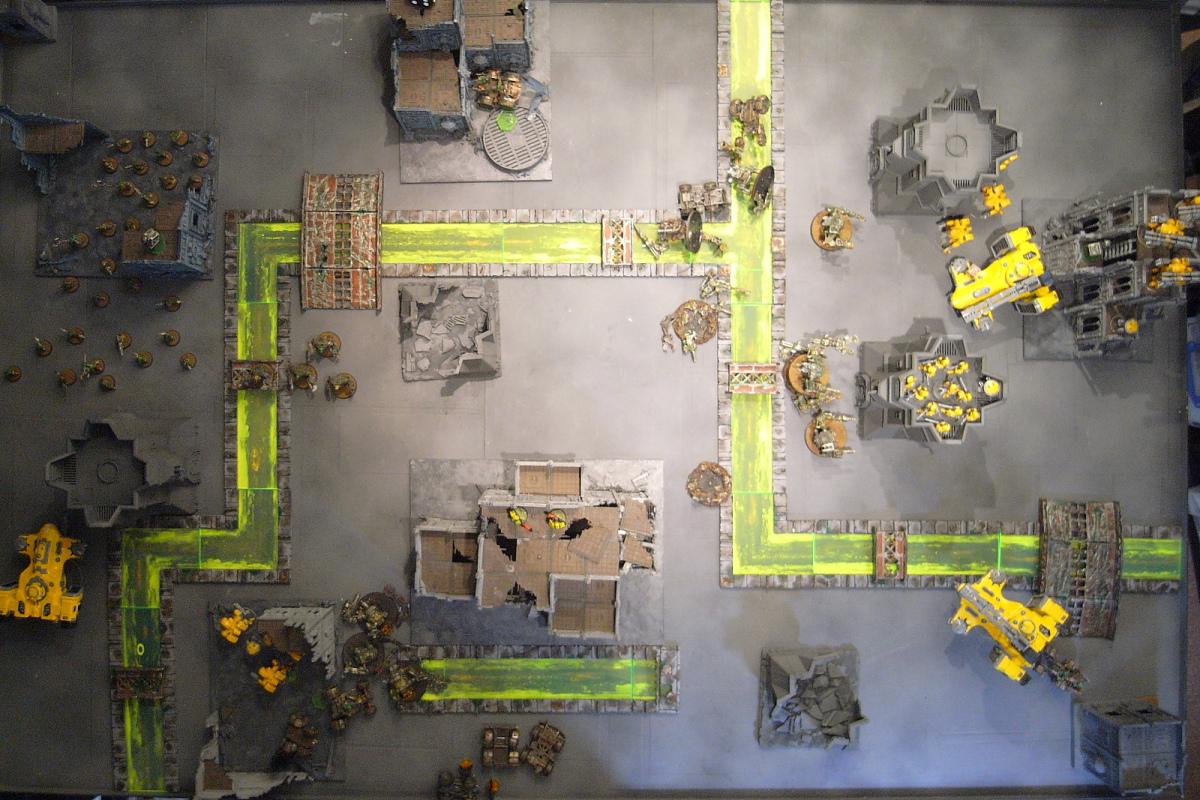
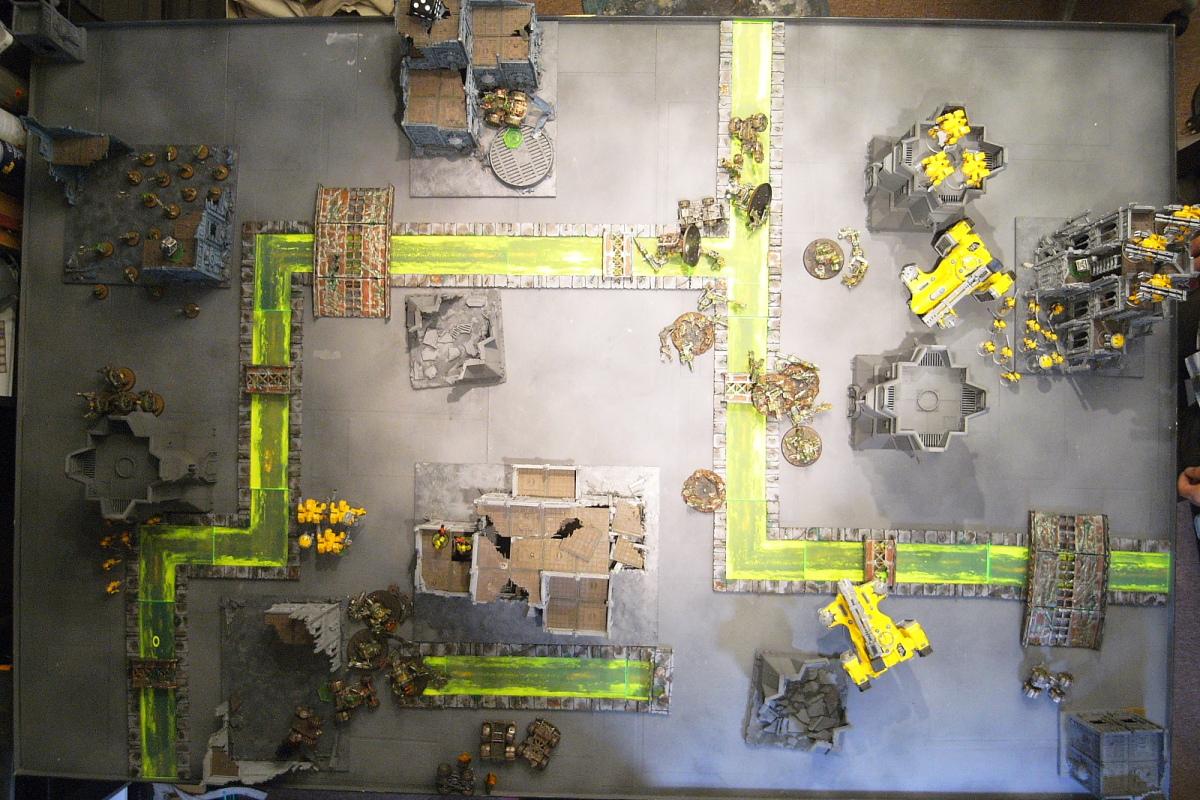
Final deployment - the Grots as far forward as possible while the Tau try and make the most of the extra backfield and stay away!
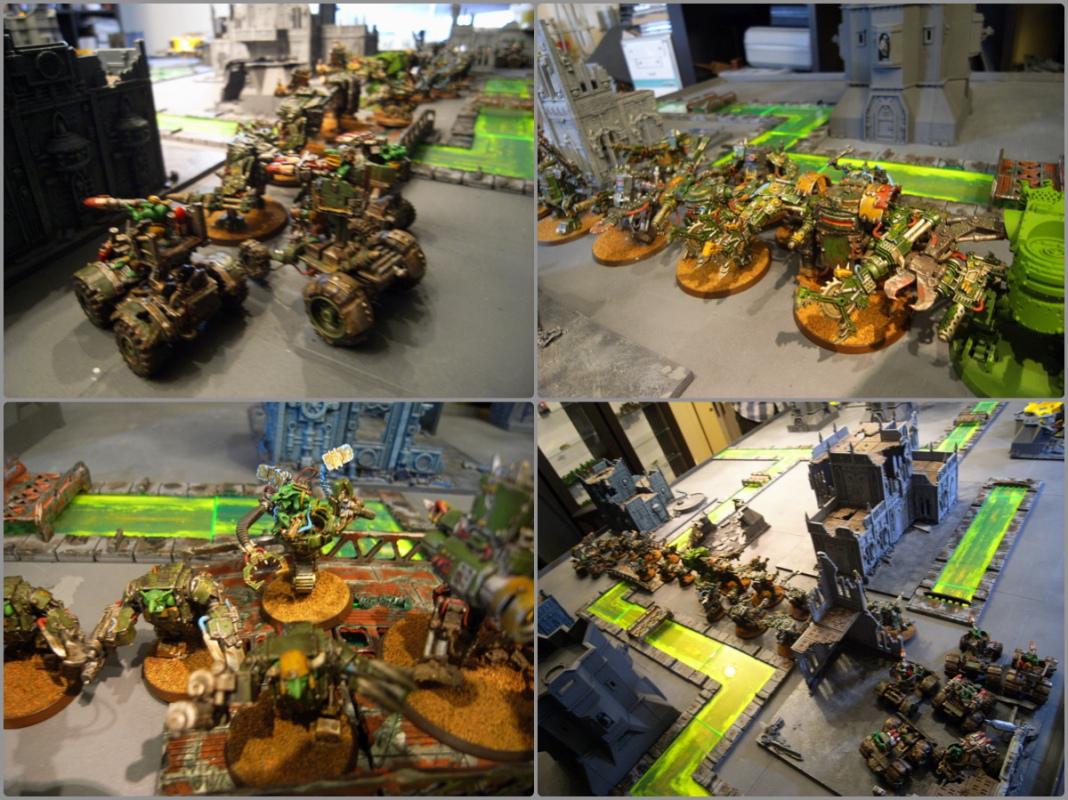
 Turn One
 Tau started, revealing their objective to be a Targetting Array (not much use to the already
TL Broadsides controlling it, though!). Both Hammerheads moved to activate their Jink saves (3+ with a disruption pod) and the Devilfish moved forward, moving Flat Out to give it a ridiculous 2+ cover save against shooting from more than 12" away. Not to mention, Night Fighting was in effect - but despite the number of Blacksun Filters in use Tau shooting was poor, resulting in a single Stunned Kan. The flanking force jostled a bit but were out of tange for the most part.
The Grot line then made a big push, discovering that all the canals for this game would be Firewater - dangerous terrain which auto-wrecks any immobilised vehicles! Various buggies stalled and immobilised themselves in ruins, creating about five separate units of buggies on the bottom flank. Generally, shooting was poor or exchanged for running, but a lucky rokkit destroyed the drone in the
MP Crisis Team, and they promptly failed their Morale check, falling back from the battlements...

At the end of Turn One, the Grot line has moved forwards considerably, but become a bit disordered on the bottom due to immobilisations and the breaking up of squadrons.
 Turn Two
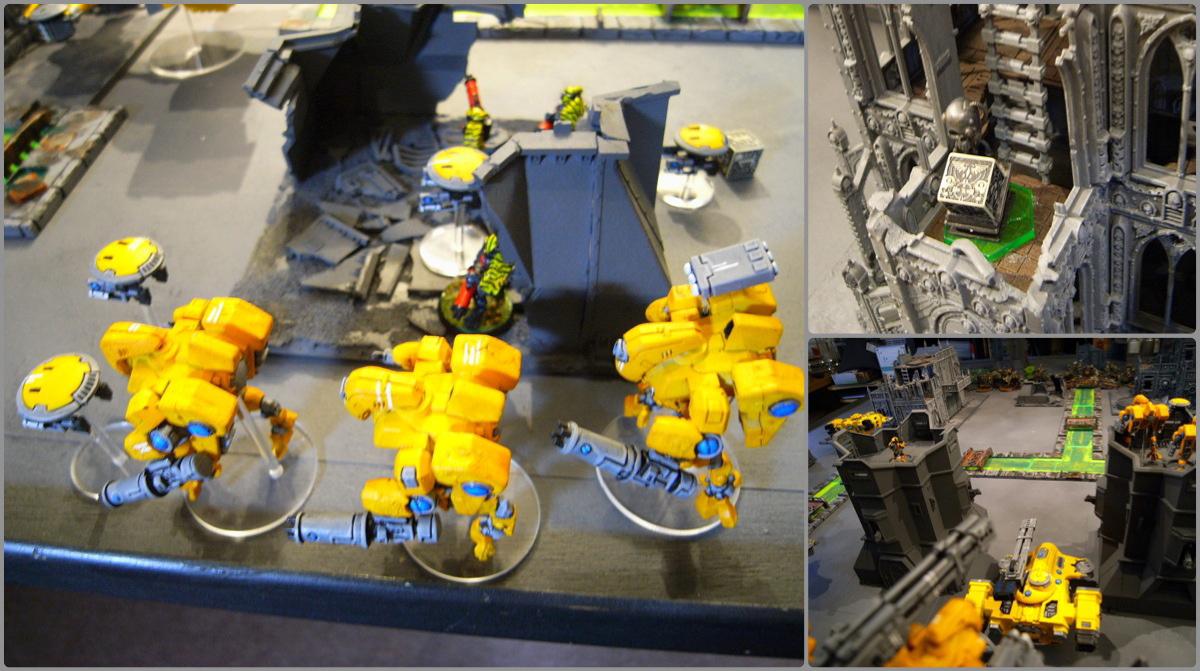
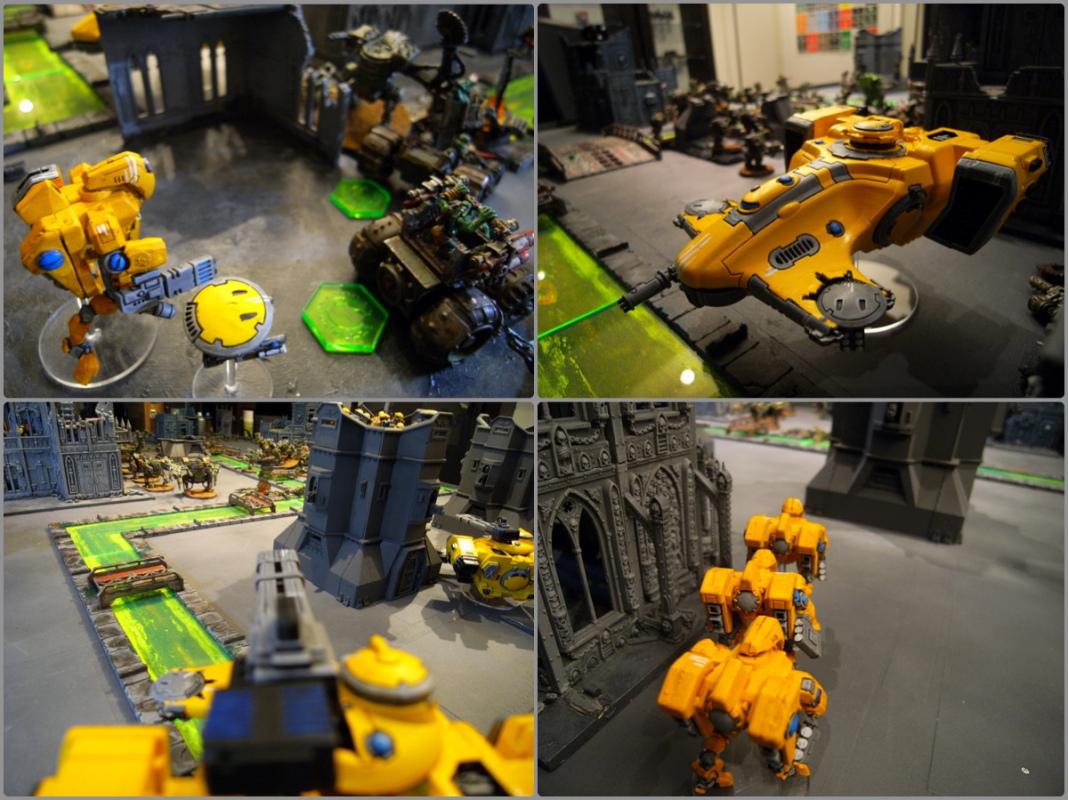
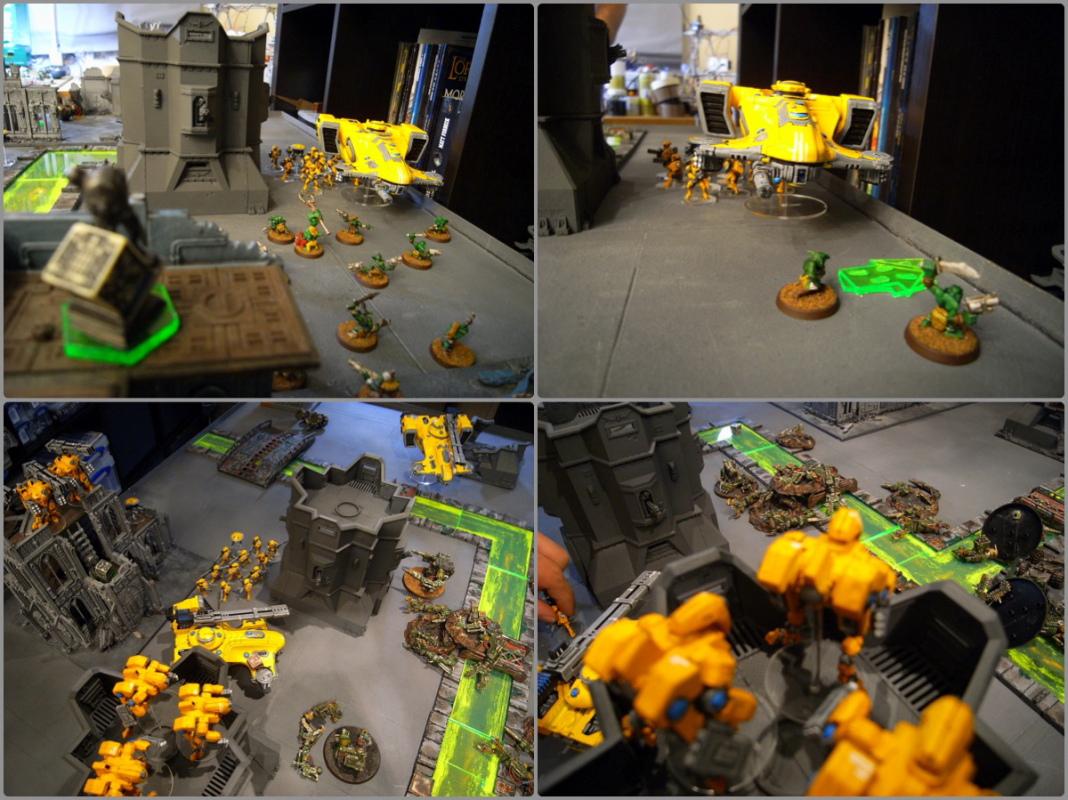
 The commander arrives, jetpacking in behind the immobilised buggies at the bottom, as on the same flank the Stealth and
BC Crisis team move forwards to engage the buggies. The Devilfish takes a risky move in going over the top of the ruins, passing it's dangerous terrain tests.
The
MP Crisis Team fail to regroup, falling back to within an inch of the edge of the board. The commander then opens fire on the closest team of Kans, killing two. In the Grot turn, the remaining Kan turns around to charge him, taking out a drone with it's Big Shoota, but then rolls low to charge through difficult terrain and fails the charge. The rest of the Grot line advance, reaching the forward canal section and the
KFFs managing to save every Railgun shot aimed at them!
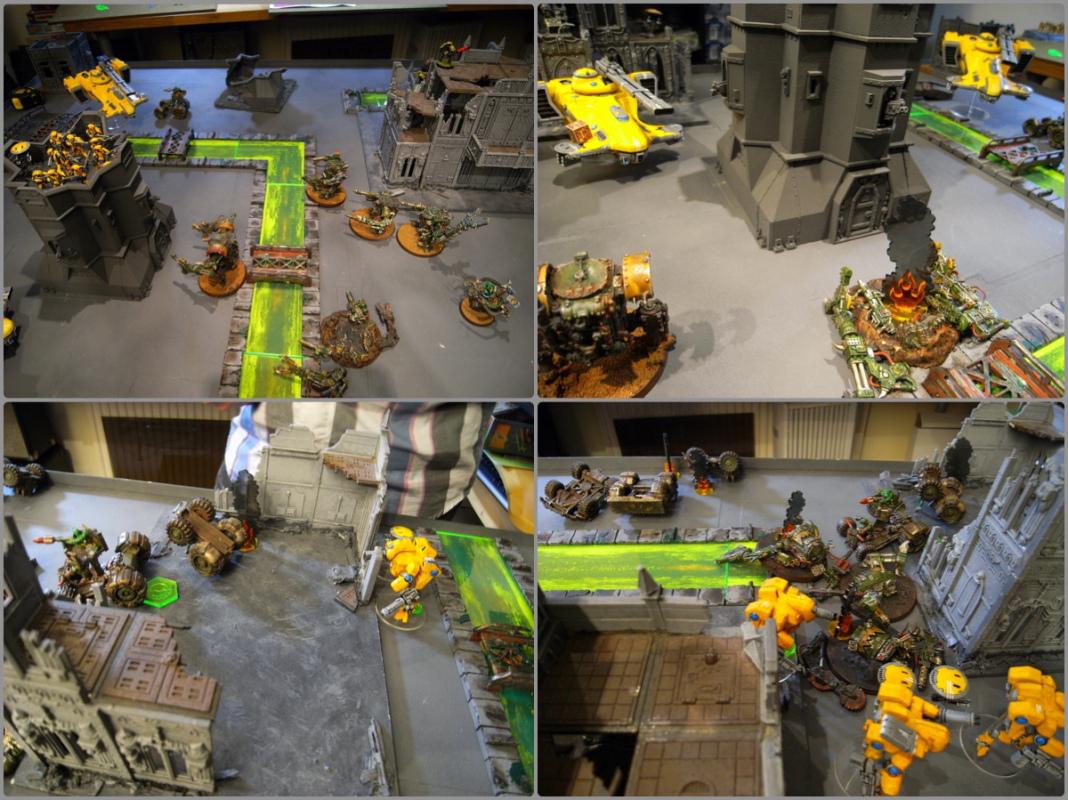
At the end of the second turn, the Grot line is at the river, with the loss of just a few buggies. At the bottom flank, things are a bit different, with only a few surviving buggies and one Kan. The Meks have also left the Meganobz squad to try and keep up with the Kans - since the Meganobz can't run any more, they slow down the whole advance. The grots have arrived though, all three squads swamping their own objective at the back.
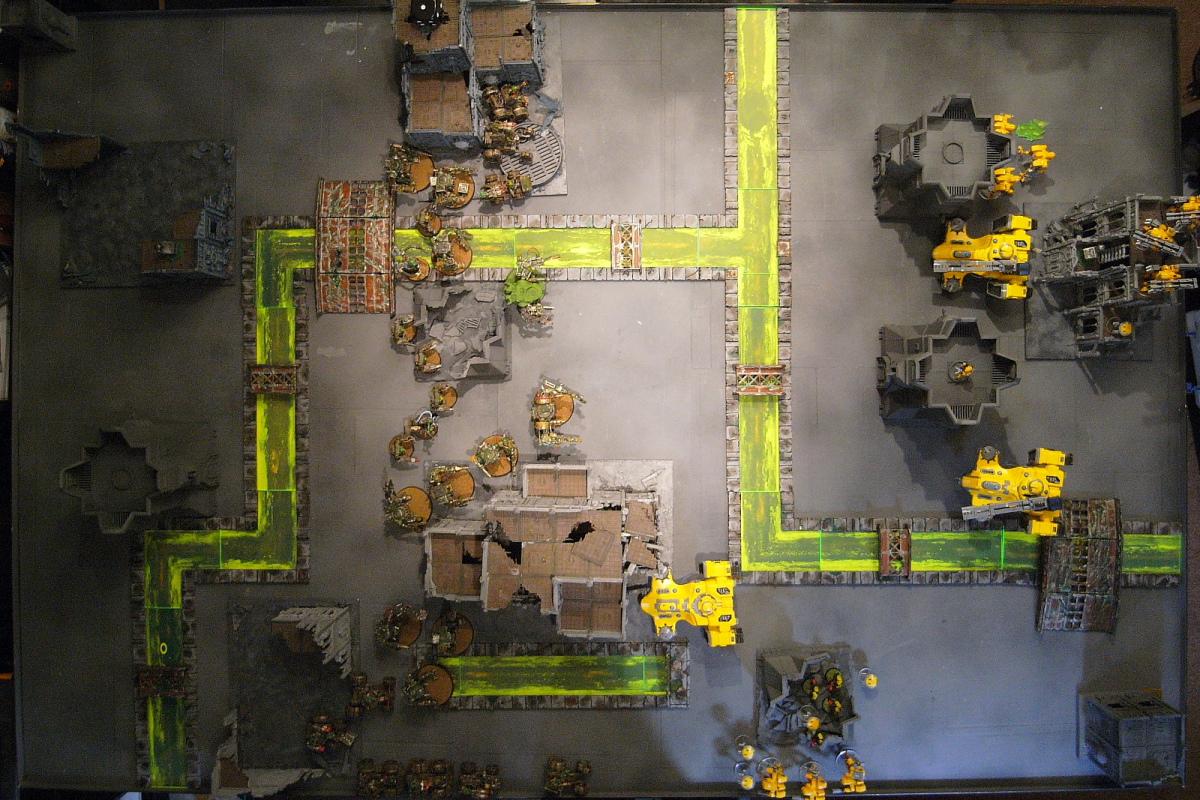
 Turn Three
 In turn three, the Devilfish clears the building, landing in the enemy deployment zone, and then move Flat Out to cross over to the far canal. The
MP Crisis team regroup and arrange themselves to see the now lonesome Head Mek, killing him with
MP fire. This leaves the lead Dred vulnerable and it is popped by a Devilfish railgun.
The Fire Warriors fire at the leading buggy squadrom, wrecking one, while on the bottom flank, burst cannon fire takes Hull Points from many vehicles but fails to wreck any. The commander destroys the last of his Kans though with his
FB.
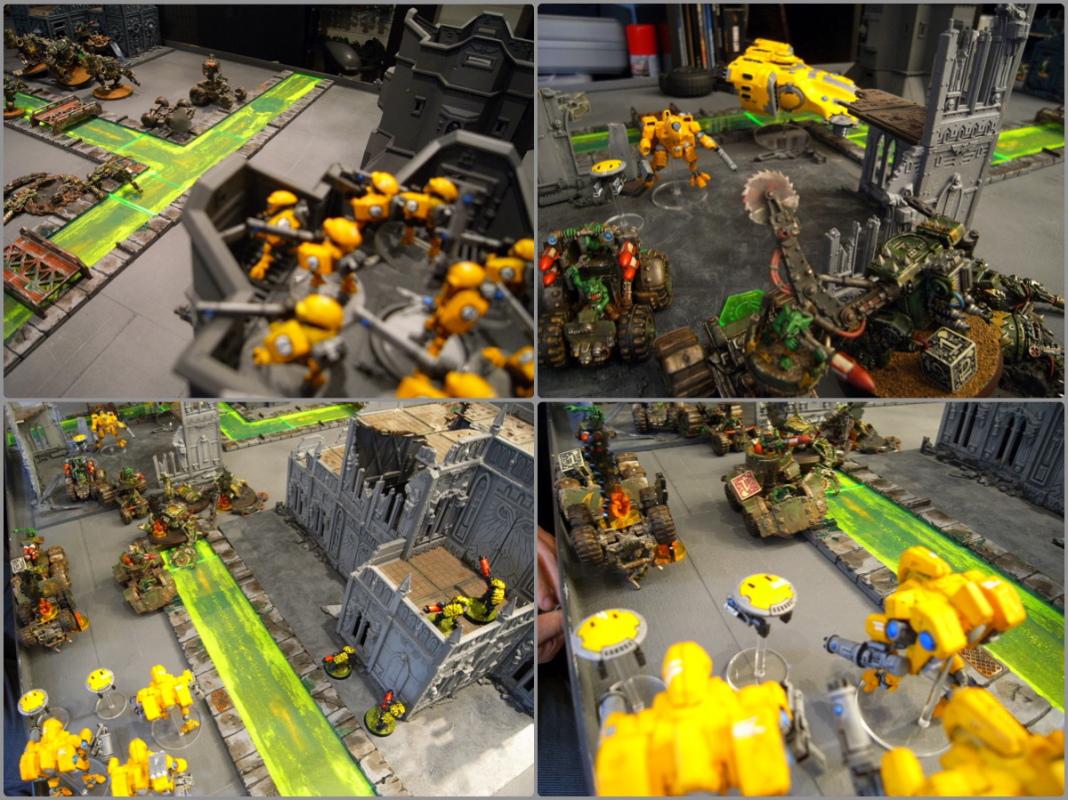
In the Grot turn, the final advancing buggy kills itself in the fiery canal, but the rest of the line continues the advance, two Kan squadrons closing to the canal and the Dred crossing it, ready to krump a bunka next turn. the Meganobz turn around, seeking to help out the Grots repel the pesky Devilfish.
At the end of turn three, Grots still have seven walkers about to reach the Tau lines and a Devilfish in their backfield. They also take a hull point from the central Devilfish with a glace that gets through it's crazy cover saves.
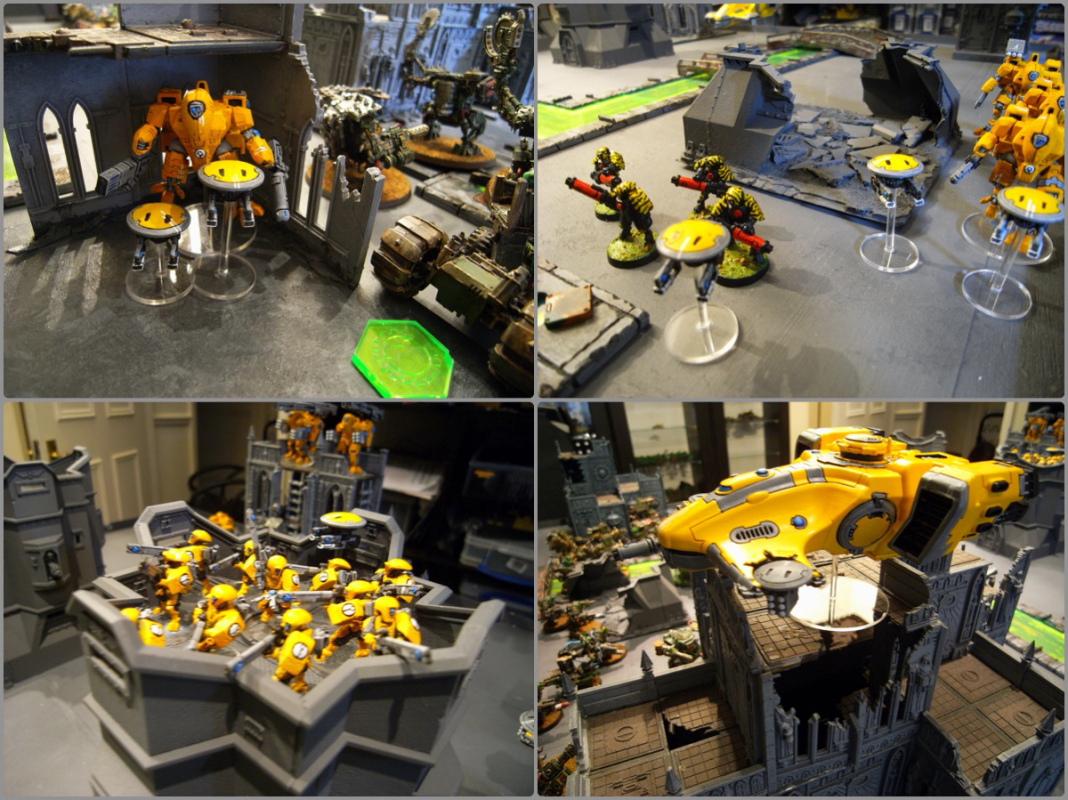
 Turn Four
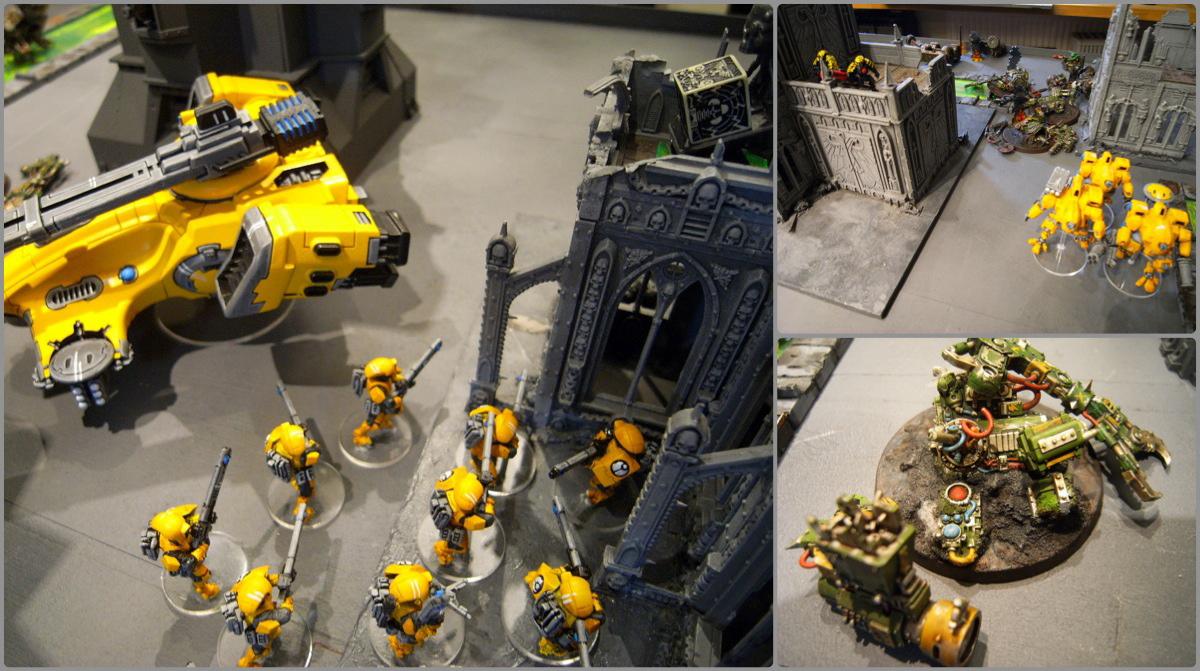
 The Fire Warriors are now in range of the second Mek, and kill him, leaving the final walkers vulnerable - the last Dred is killed by a Hammerhead Railgun. Railgun fire from the Broadsides knocks out a couple more Kans, and the Commander kills one of the immobilised buggies while the
BC Crisis team bounce through the wreckage to help out the Devilfish.
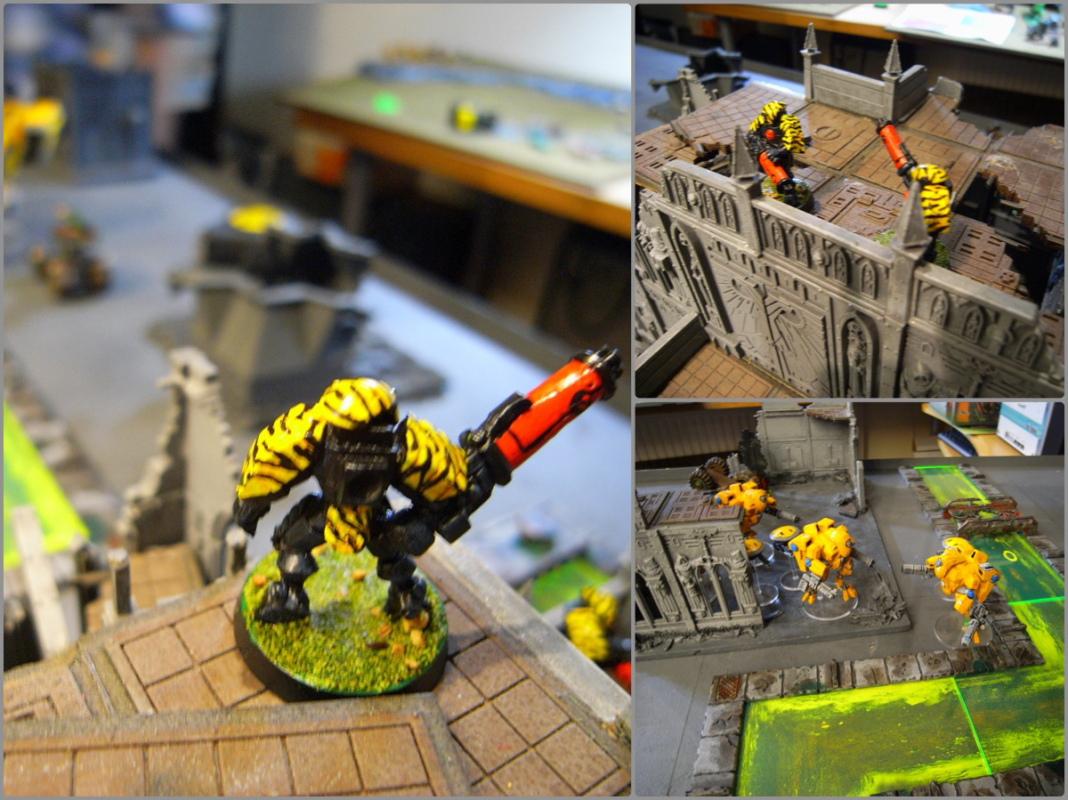
The Stealth Team (in their old-skool colour scheme - really must get around to repainting these guys) advance up the central building but run foul of Dangerous Terrain tests, losing two suits, while the
BC Crisis team thrust into cover.
In the Grot turn, more of the line falls to fire, only three Kans actually making across the final canal. The Meganobz continue to move to defend the objective, opening fire on the Commander and killing him with surprisingly accurate Big Shoota fire!
At the end of Turn Four, the game now centres on defending the two objectives, particularly the Grot one. A sneaky Grot Buggy has got behind the far Hammerhead, but still can't hit anything.
 Turn Five
 In turn five, with no
KFF left, the massed Tau fire from Hammerheads, Broadsides and
MP Crisis Suits take out everything left in the Tau zone - three Kans and the sneaky buggy. In the Grot zone, the
FWs dismount and destroy the closest Grot squad, but are still quite far away from the objective.
The Fire Warriors disembark the bastion and move to claim their own objective, and the
BC Crisis Team and Stealth Suits shoot at the Meganobz with no effect.
And in the Grot turn, the Megagrotz charge the Devilfish, exploding it and killing so many Fire Warriors that they start to fall back, effectively ending the threat to their objective. However, it's not enough and the game ends there.
Tau - 6VP (Objective, Slay the Warlord, First Blood, Linebreaker)
Grots - 4VP (Objective, Slay the Warlord)


 3500
3500


 Brothers of Sanguinor
 Purifiers
  - 1500 6th ed codex: 2 wins, 1 loss, 0 draws