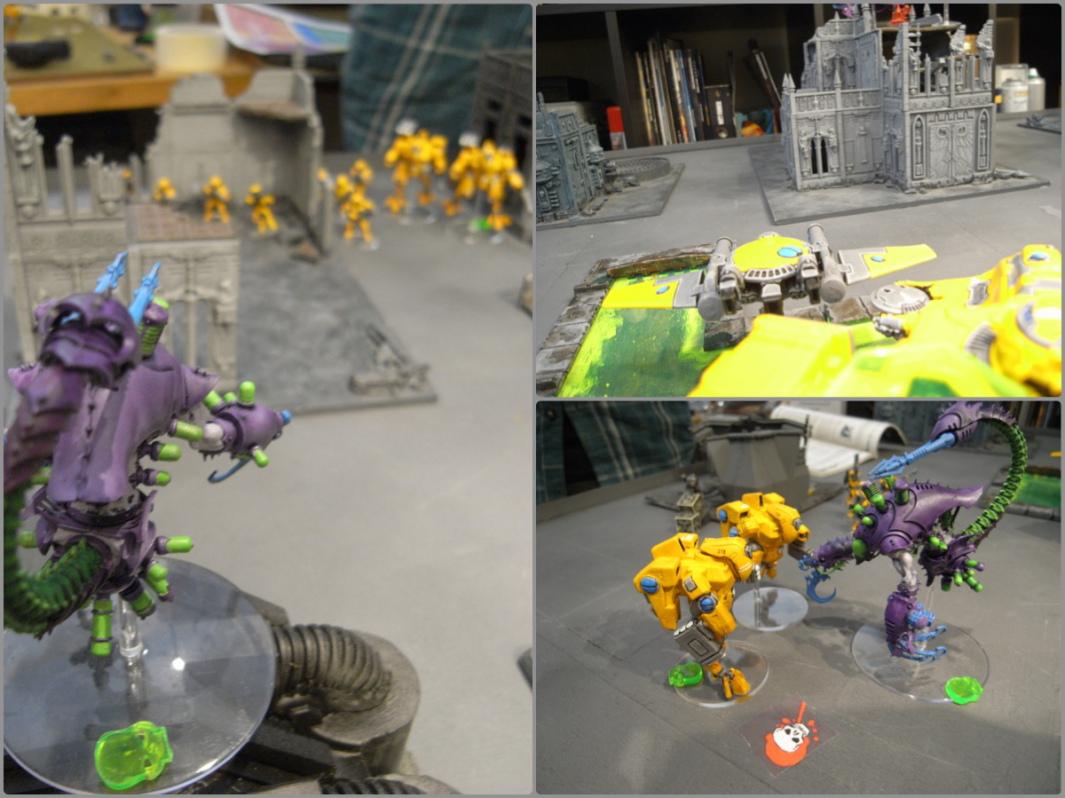
Back again! It's been a busy gaming week - we might even get a third of these done by the end of it. We've also been trying out my new reference sheets (which speed things up a lot), testing new units, and trying out new markers and ways of doing things.
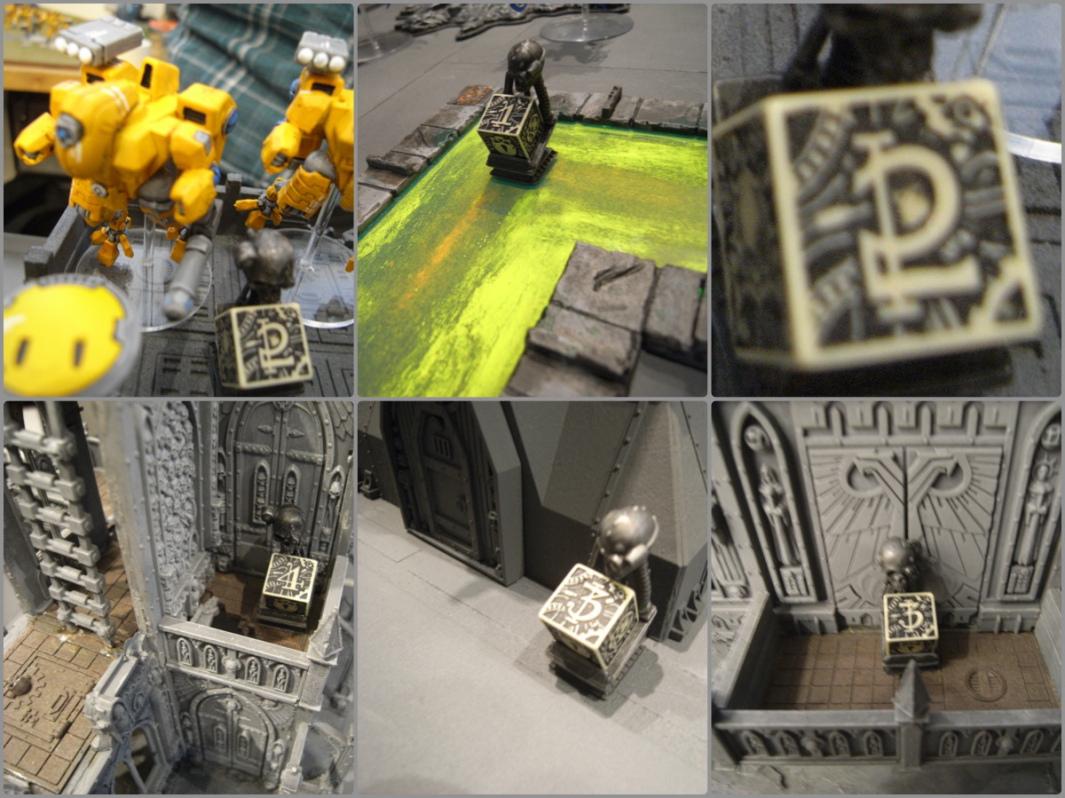
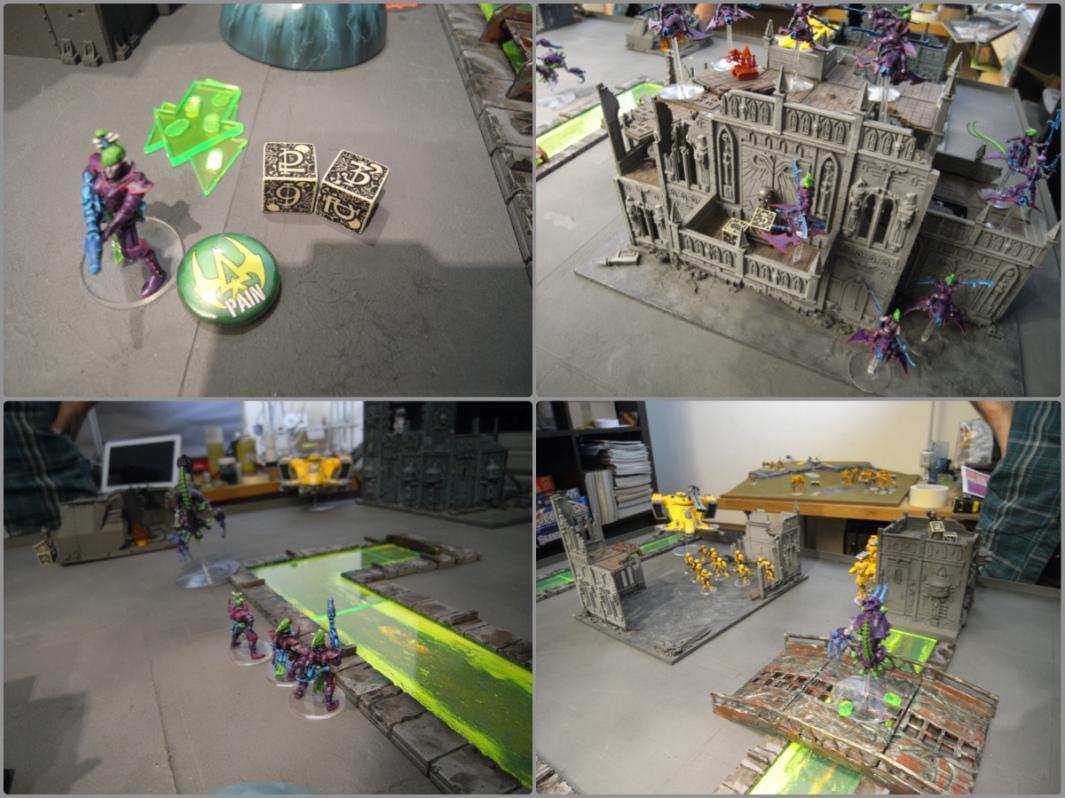
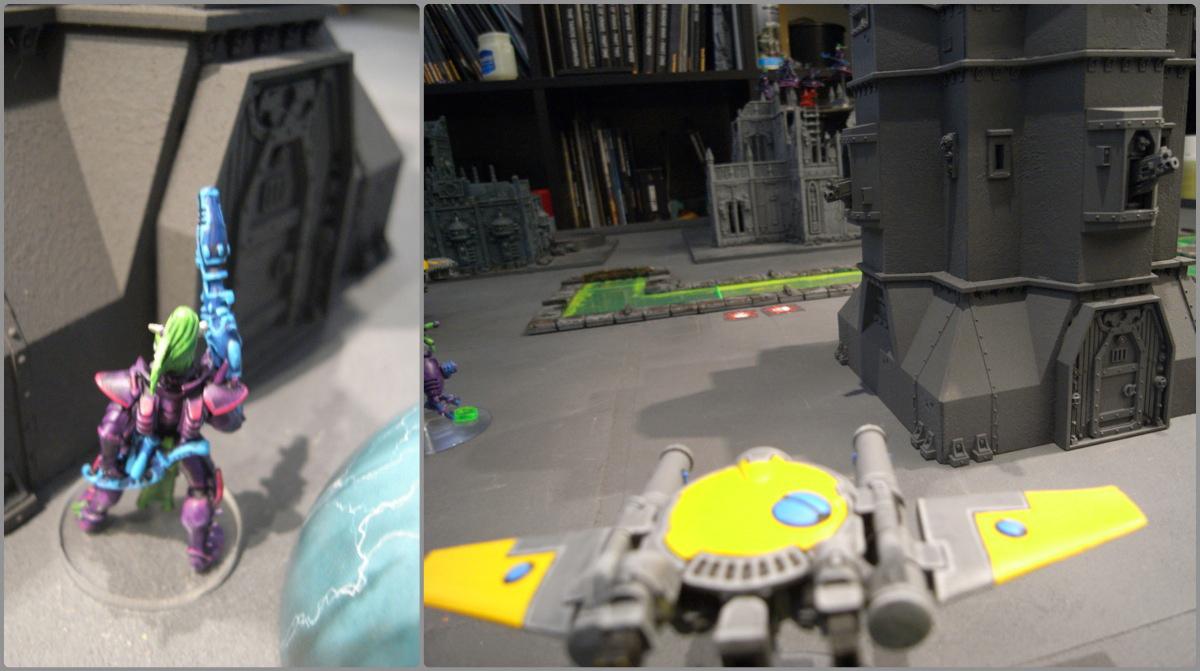
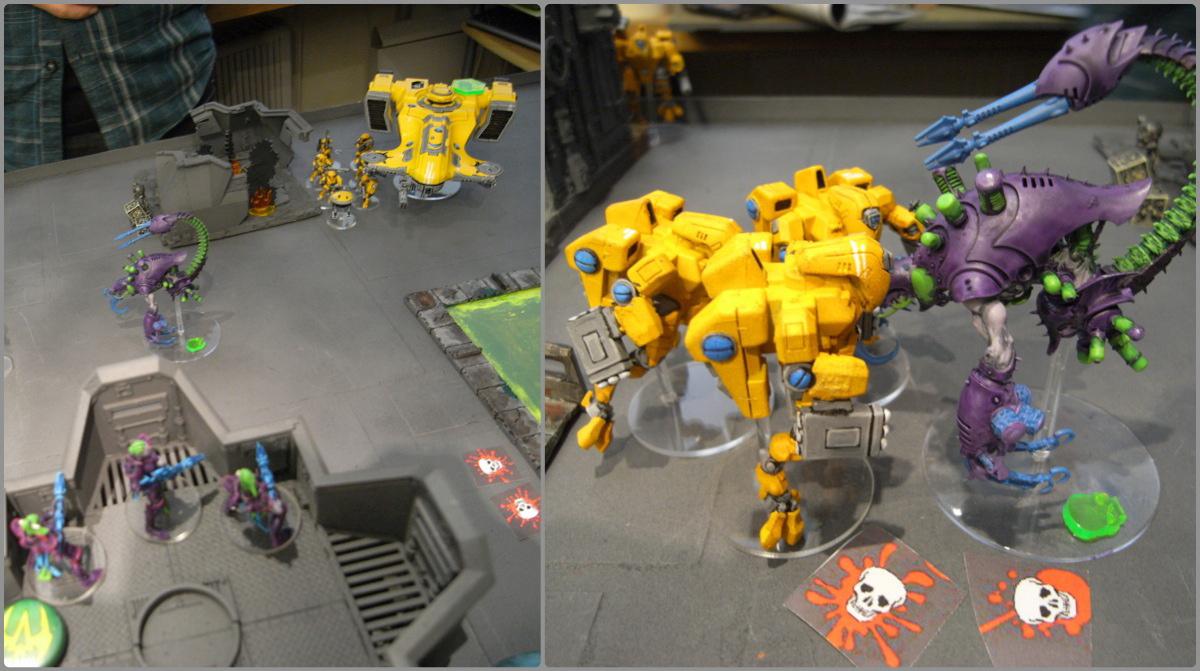
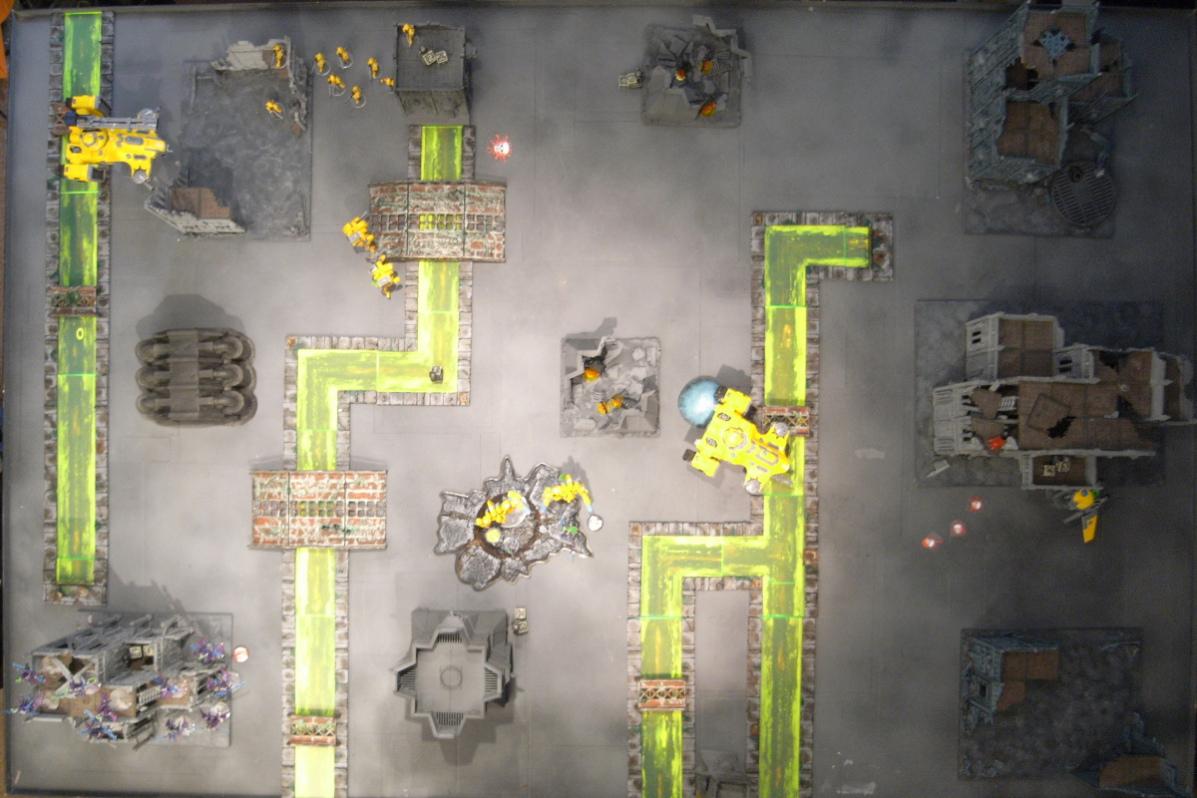
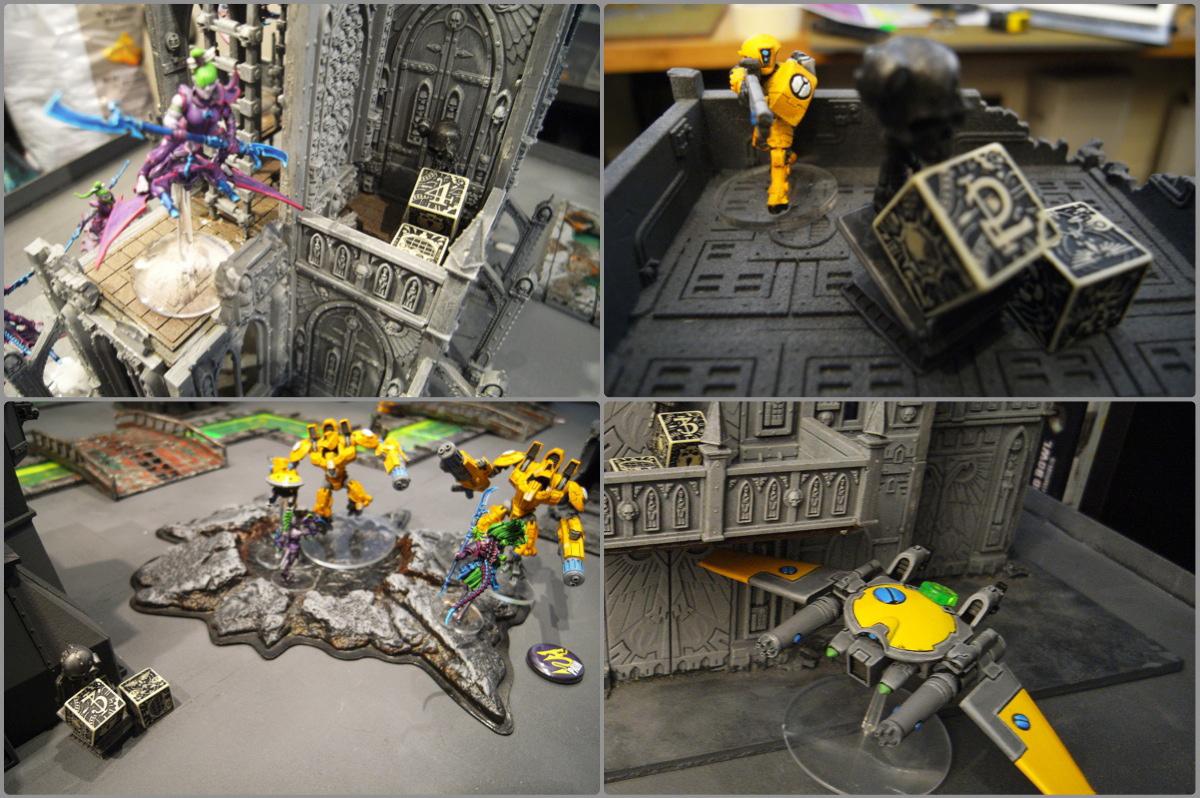
In this report, we printed a load of test 'dead' markers on paper, placing them on the board so that you can see who was killed in each turn (kinda like the old skull symbols in
WD reports). If they're useful to people, we'll make some clear plastic versions. However, keeping track of wounds like this meant that we ended up taking an overhead shot every PLAYER turn rather than every GAME turn - which slows things down a bit. What do you think? Is it worth it in the end? Should we continue doing it by player turn, or could you keep track of things with death markers and overheads every game turn? Let us know and we'll continue to refine...

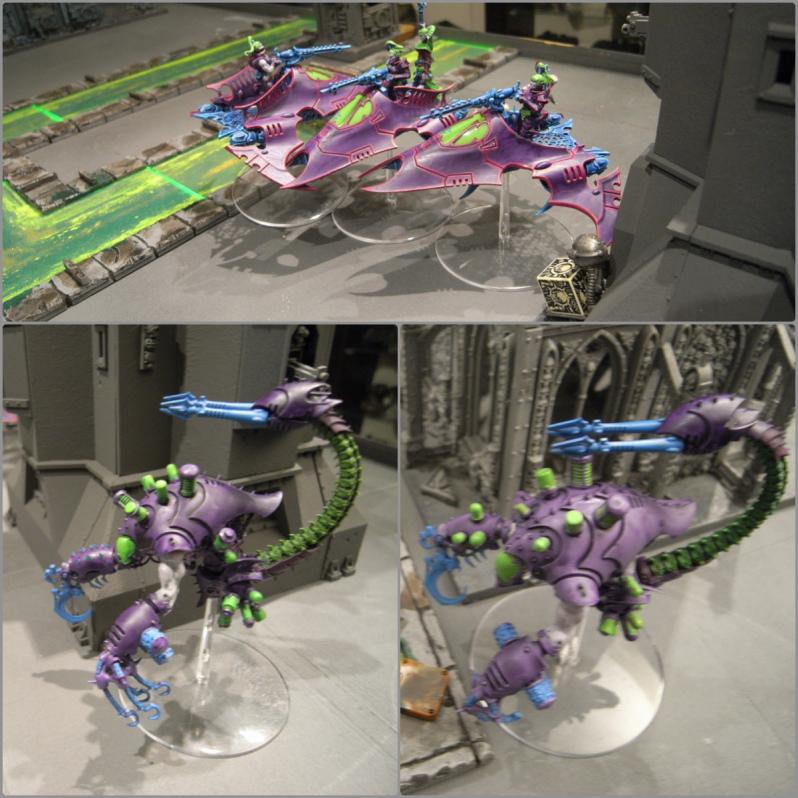
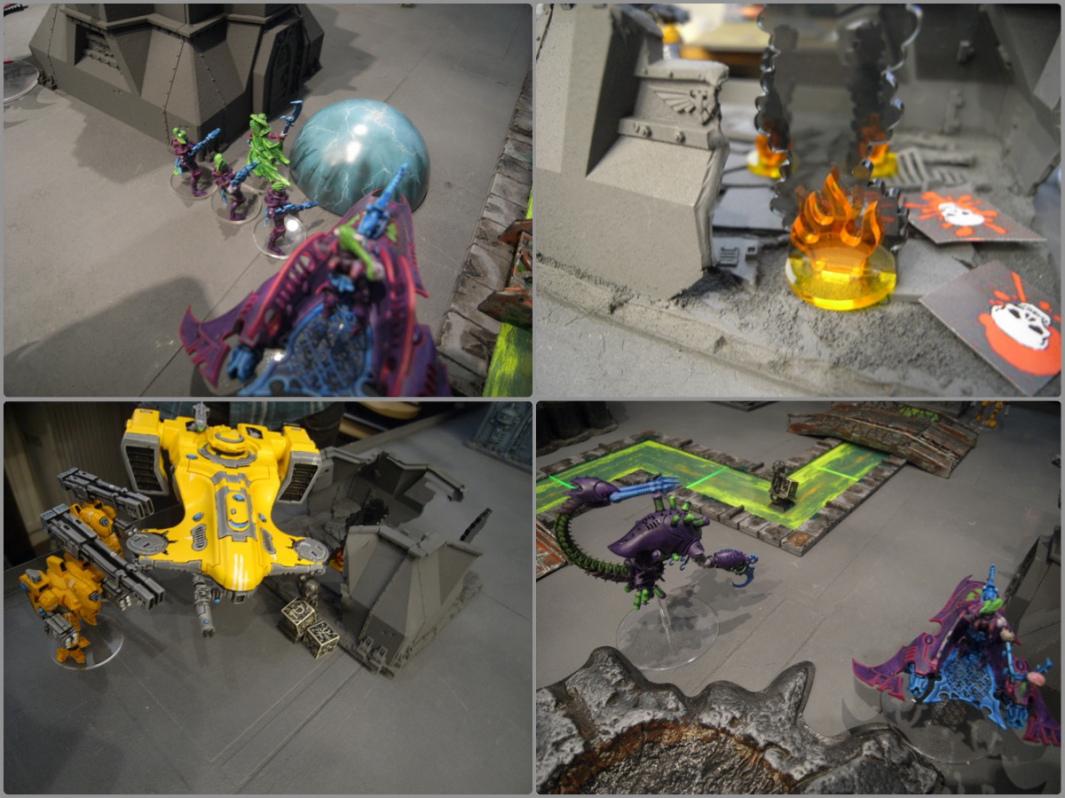
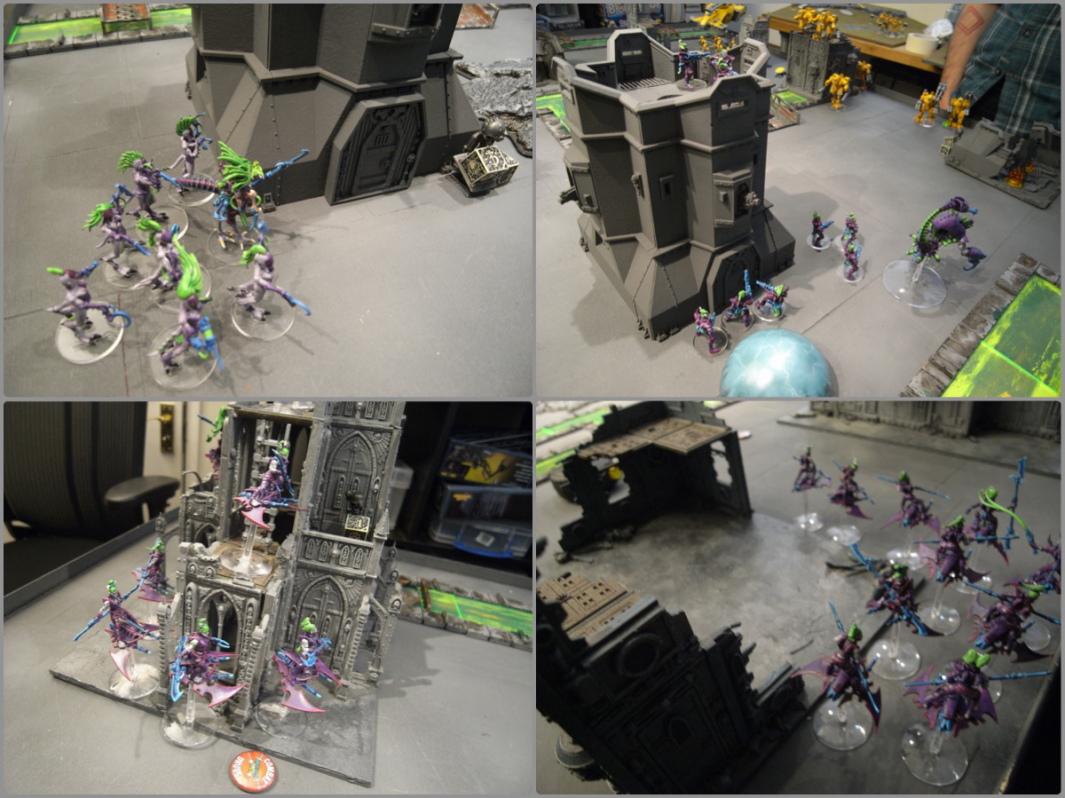
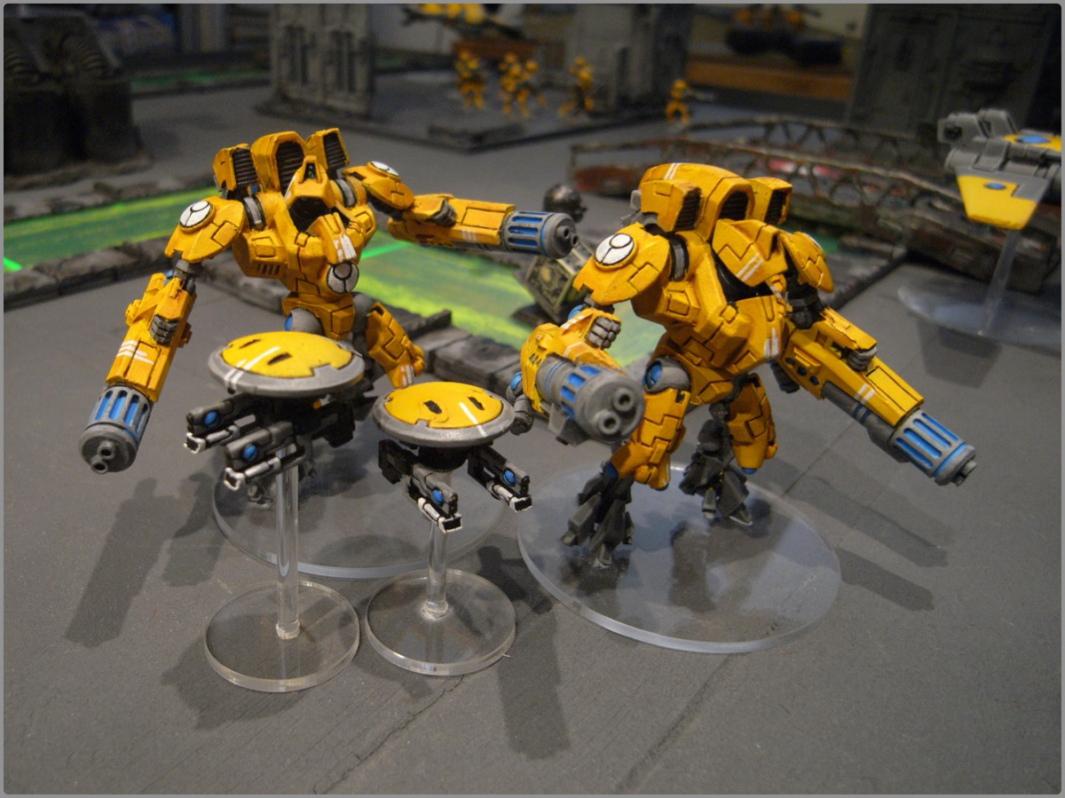
This time Panic broke out the Dark Eldar to test them out in 6ed, and because we wanted to play a game where all the bases were clear. I'm using my Tau again, but with the addition of a Remora drone and some new Xv9s that I've been building all week.
Panic's All-Girl Hellions - 1500pts - http://www.dakkadakka.com/dakkaforum/posts/list/336125.page 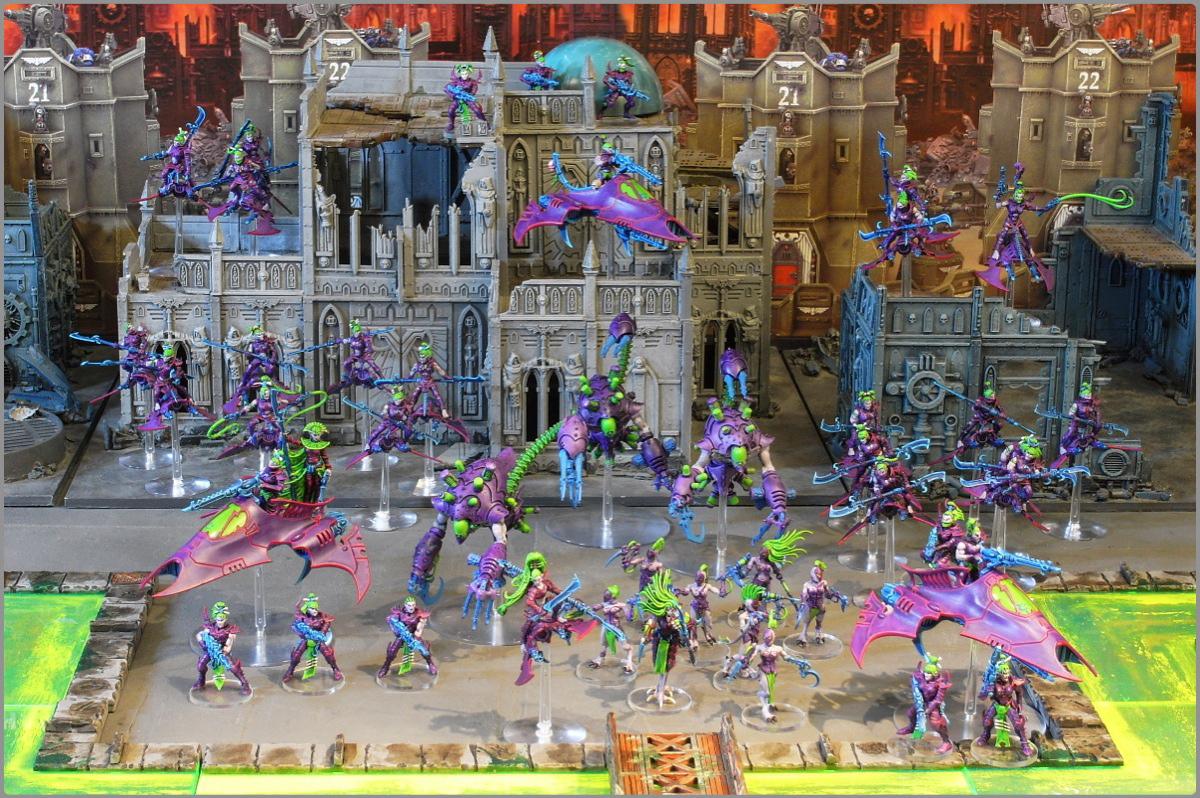
* Baroness Sathonyx, the Sky-bitch
* 10 Hellions (Helliarch, Agoniser, Phantasm)
* 10 Hellions (Helliarch, Agoniser, Phantasm)
* Haemonculus (Webway Portal)
* 10 Wracks
* 3 Kabalite Trueborn (3 Blasters) in a Venom (2 Splinter Cannons, Nightshield)
* 3 Kabalite Trueborn (3 Blasters) in a Venom (2 Splinter Cannons, Nightshield)
* 3 Kabalite Trueborn (3 Blasters) in a Venom (2 Splinter Cannons, Nightshield)
* Talos (ChainFlails,
TL Haywire Blaster)
* Talos (ChainFlails,
TL Haywire Blaster)
* Talos (ChainFlails,
TL Haywire Blaster)
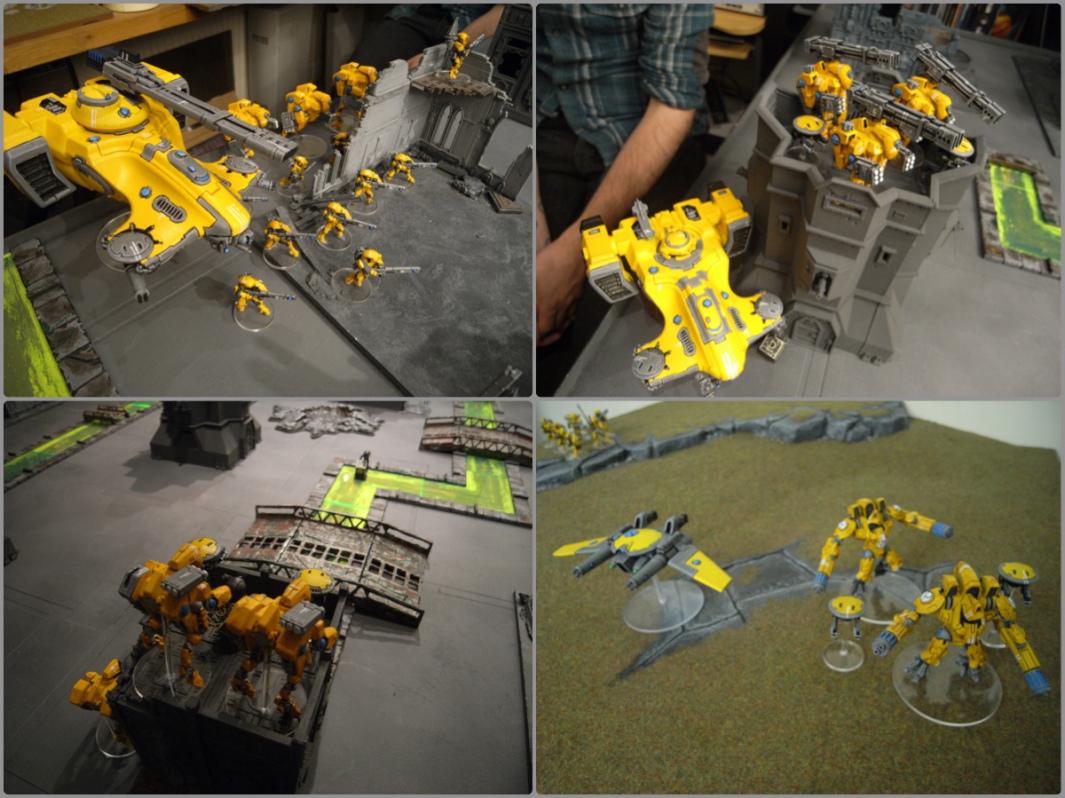
ArbitorIan's Yellow Tau - 1500pts - http://www.dakkadakka.com/dakkaforum/posts/list/291790.page 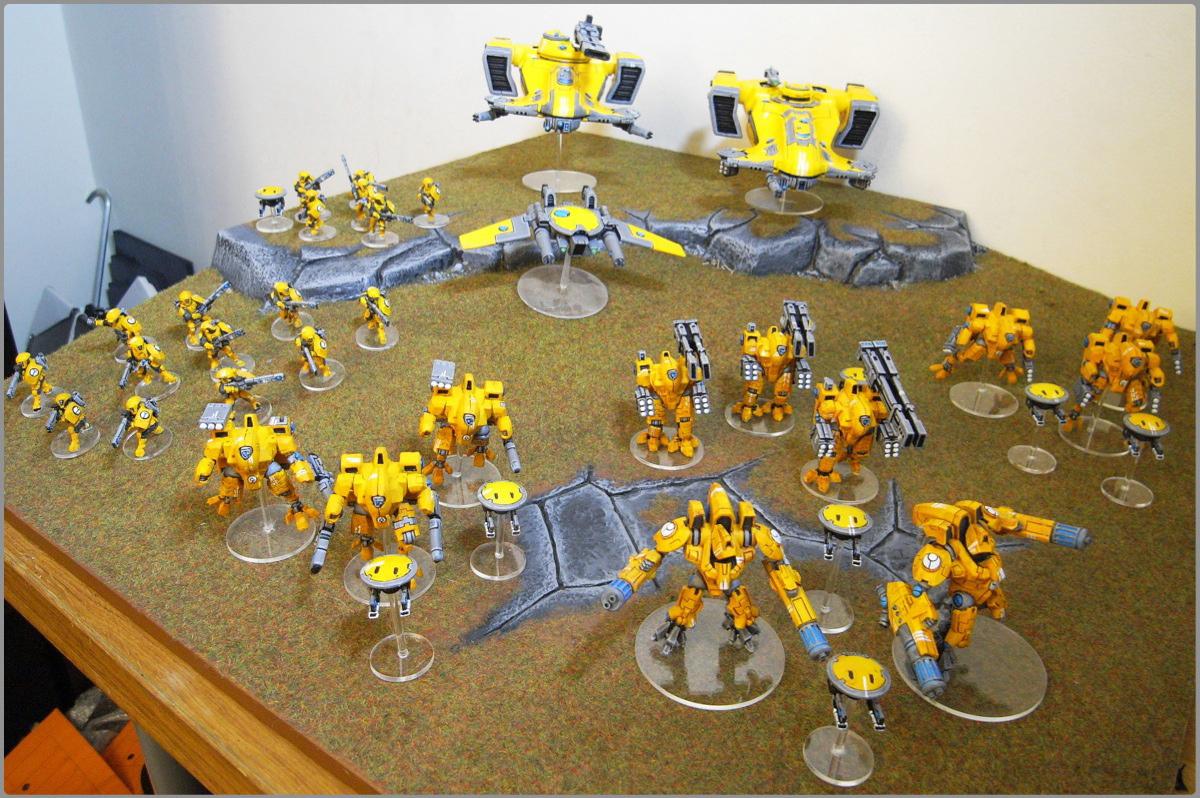
* Shas'
el [PR,
MT,
MP, HWDC, 2 Gun Drones)
* 2 x Crisis Bodyguard [PR, 1xMP/
BF, 1xFB/
TL)
* 3 x Crisis Team [TLMP, 1xBF, 1xTL, 1xDC, 2 Gun Drones)
* 11 x Fire Warriors [Shas'vre with HWDC, Gun Drone)
* 6 x Fire Warriors [EMP Grenades] in a Devilfish [Seeker Missile,
DP,
SMS]
* 2 x XV9 Hazard Suits [2 Fusion Cascades, 1xBF, 1xDC, 2 Gun Drones)
* Remora Drone
* 3 x Broadside Suits [
SMS, 1xTL, 1xBF, 1xDC, 2 Gun Drones)
* Hammerhead (Railgun, 2xBC,
DP)
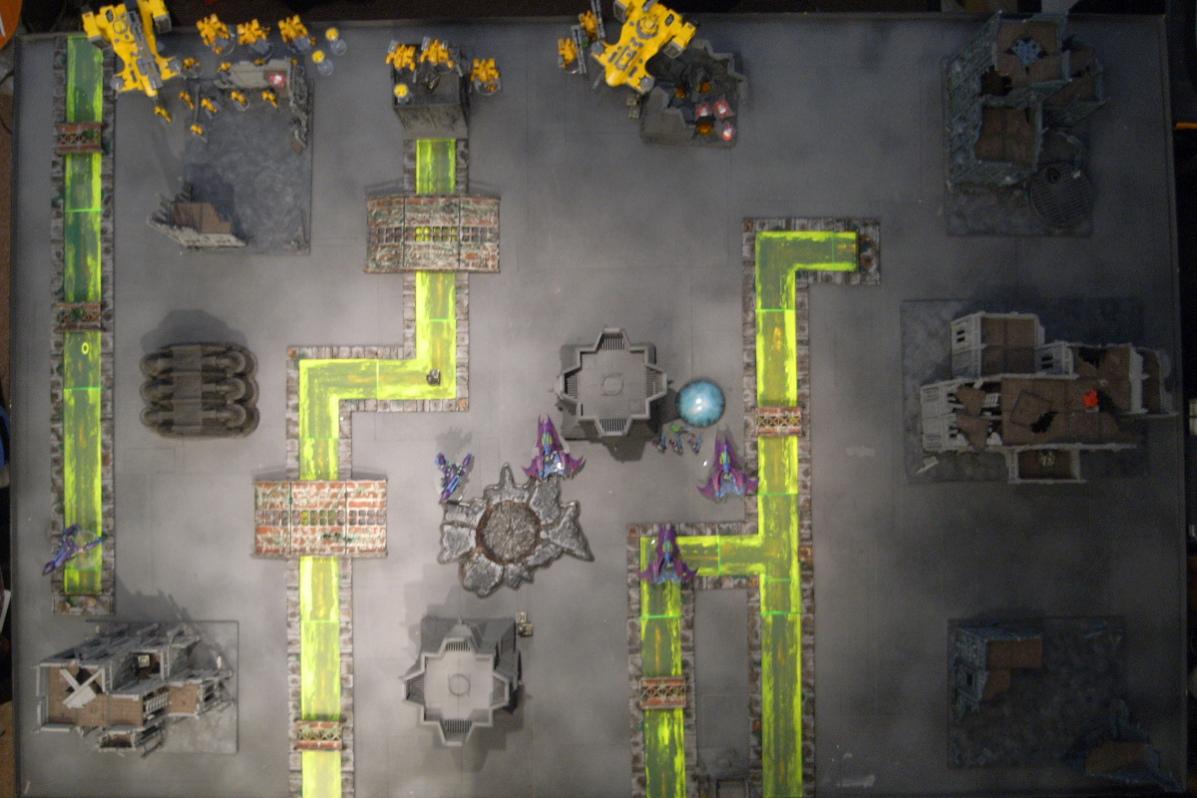
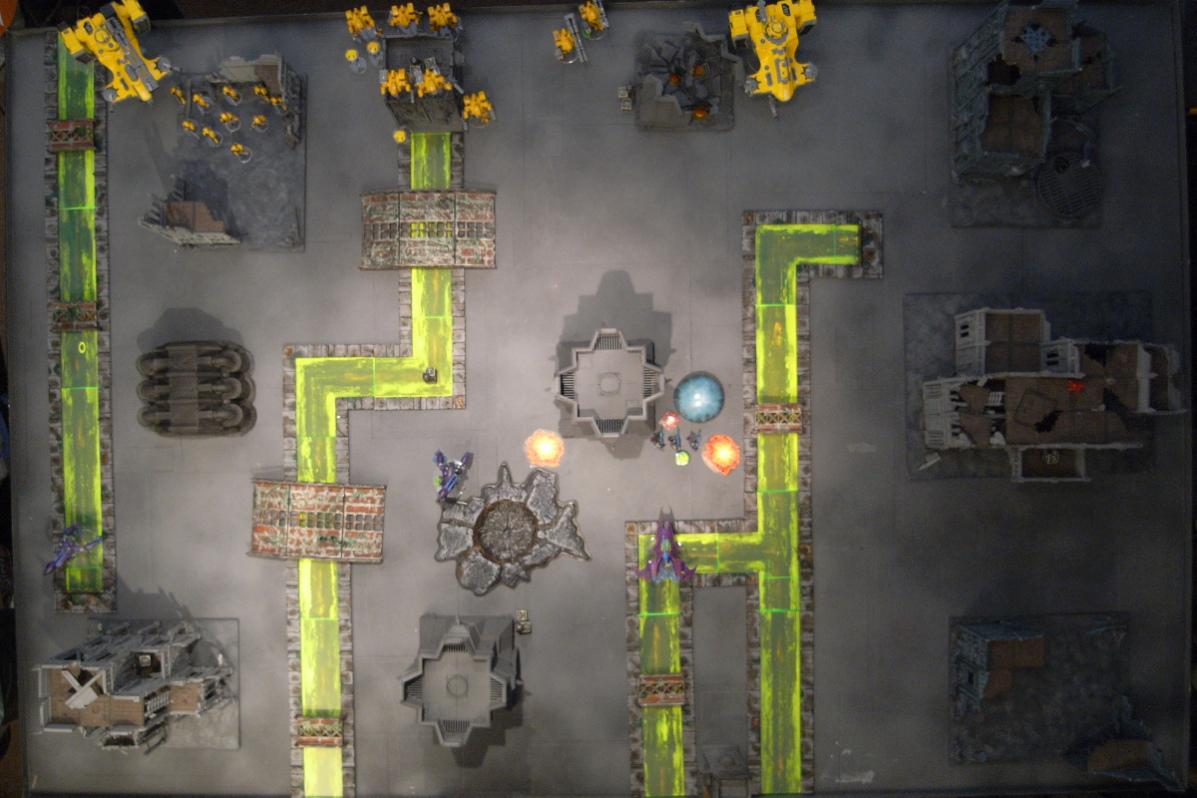
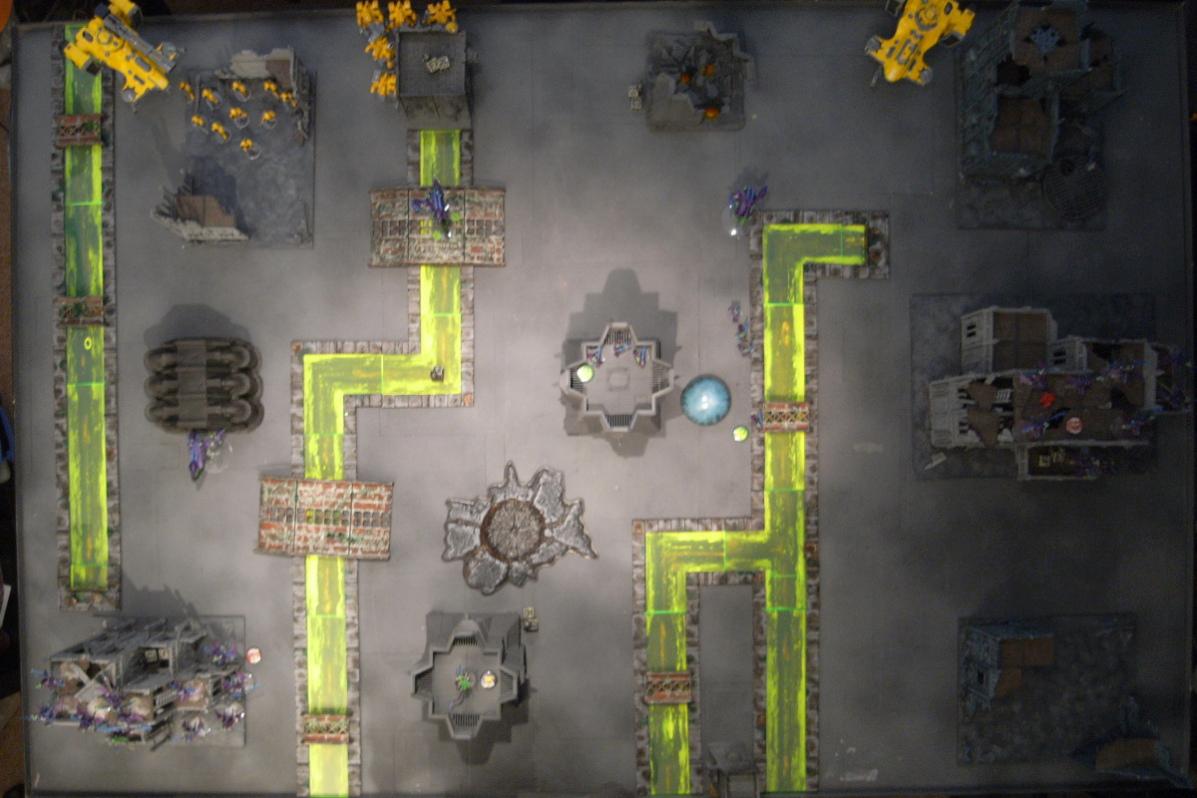
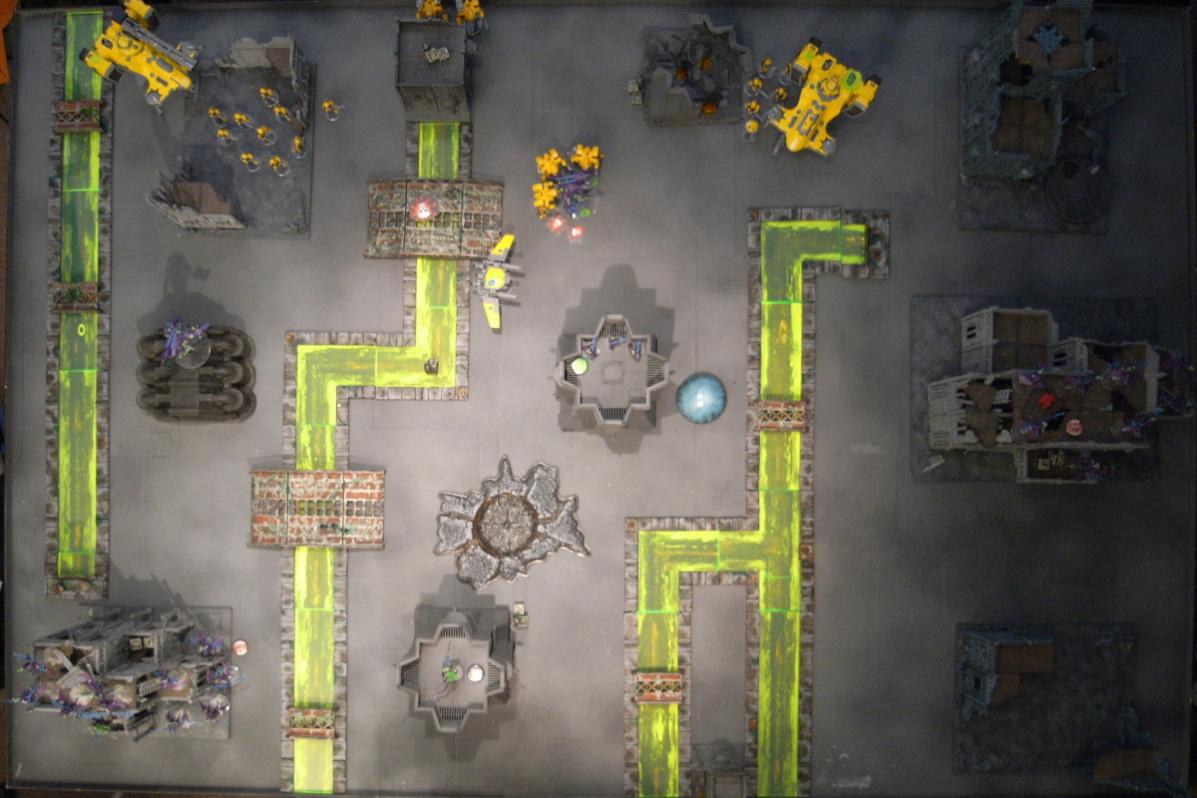
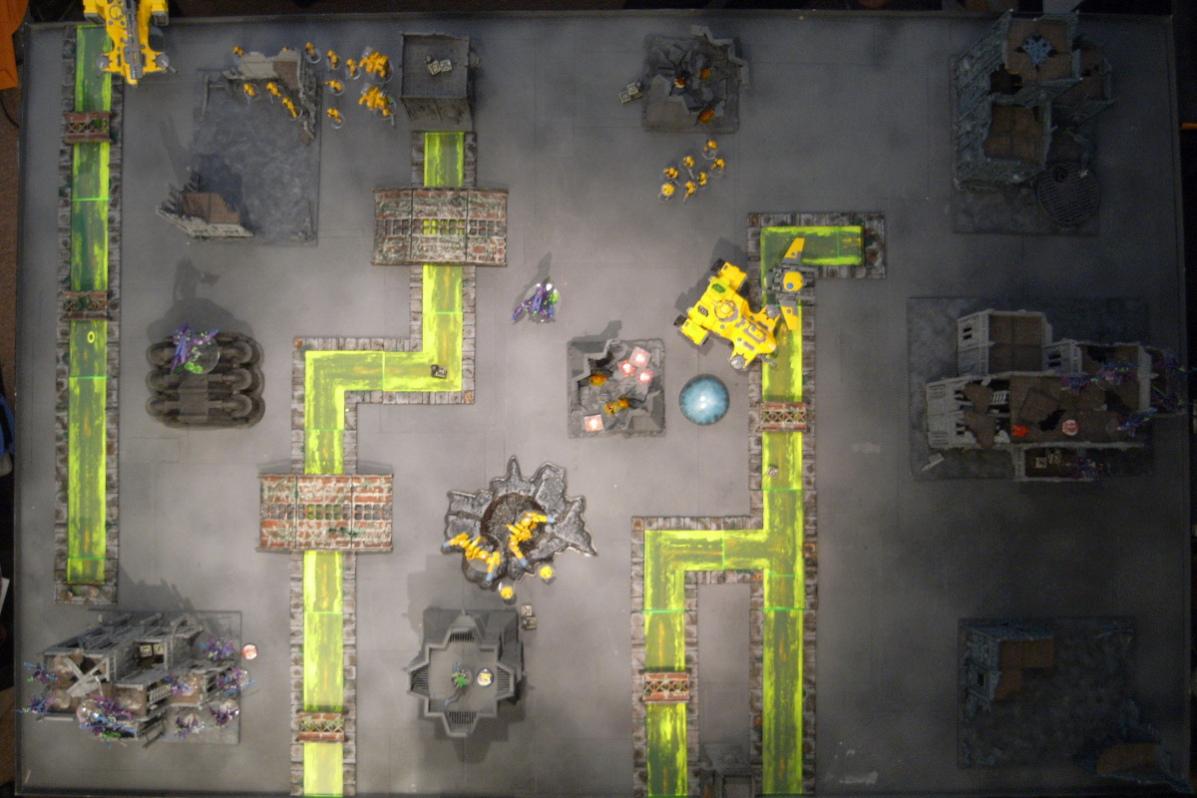
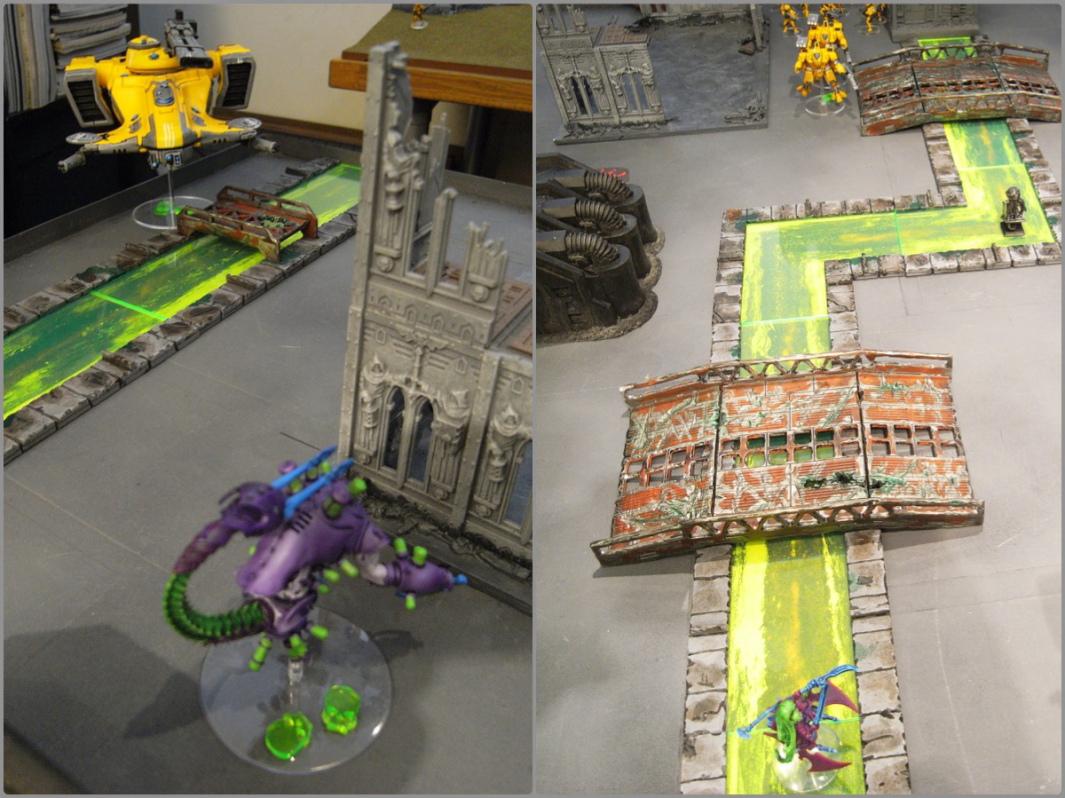
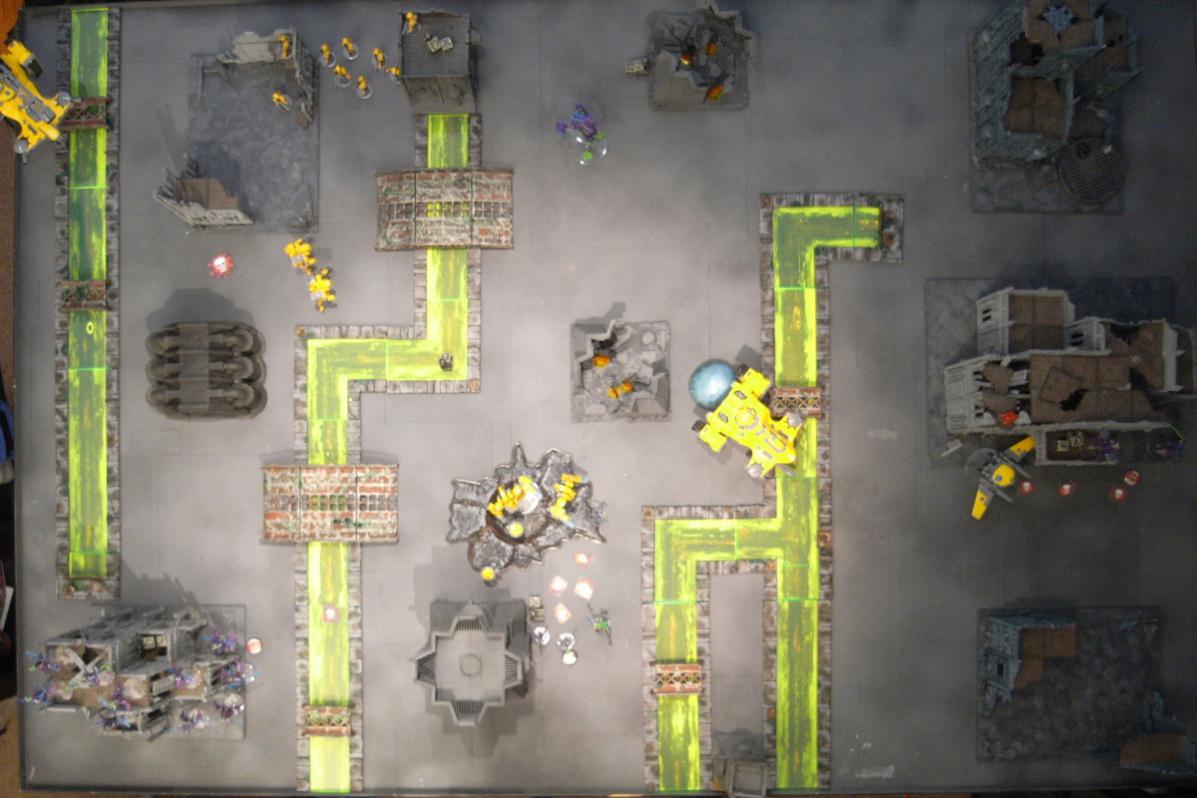
Deployment We rolled The Scouring as the mission and Dawn of War as deployment, with the Dark Eldar winning the roll to choose table half and then the roll for first turn. The Tau commander rolled Conqueror of Cities, giving all his troops +1 cover and Move Through Cover in Ruins (yay!) and Baroness Sathonyx got Master of Manoeuvre allowing her and her squad to Outflank. Dark Eldar deployed first, as far forwards as possible, with the 3 Venoms and the Haemonculus squad in one and the others empty. Two of the Talos deployed at the back of the field. The rest were held in reserve.
The Tau deployed, as always, as far back as possible, in the corner and crowding around the ruins at the back. The Broadsides deployed in a bastion and the XV9s and Remora were held in reserve.
We then turned over our six objectives, finding that both of the 3-pointers and the 4-pointer were in the
DE half of the table, and the Tau had the 2-point ones. The central objective was only worth 1 point!
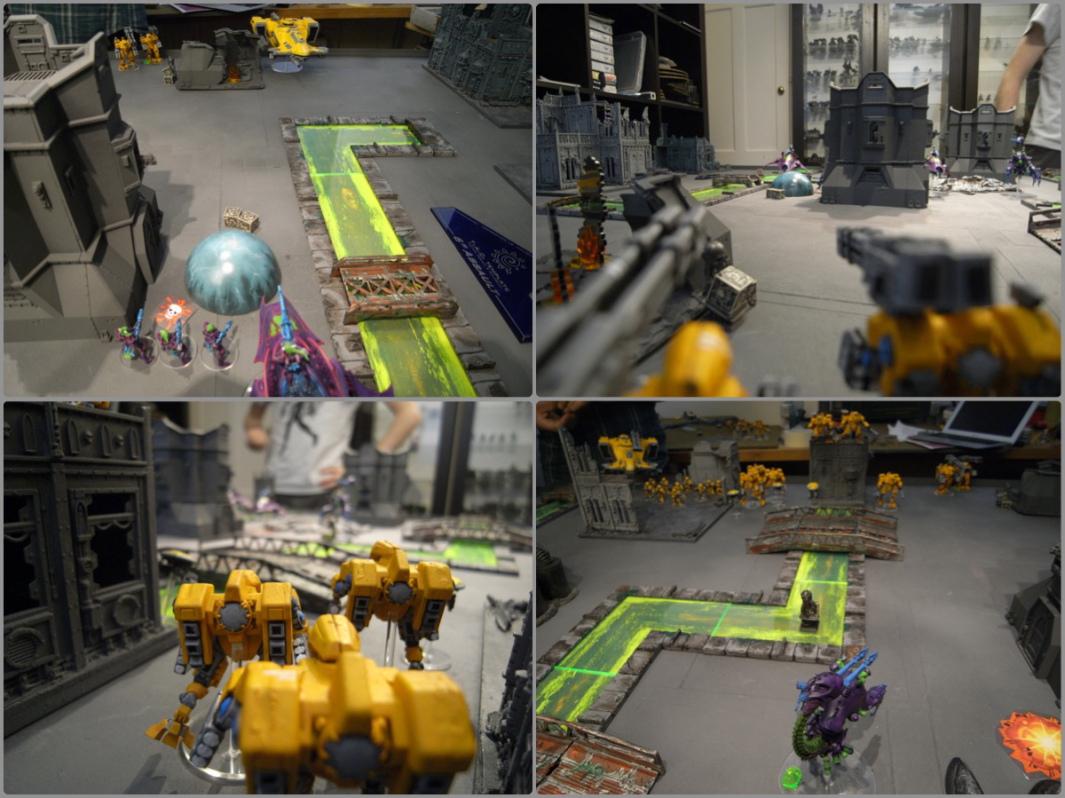
 Dark Eldar Turn 1
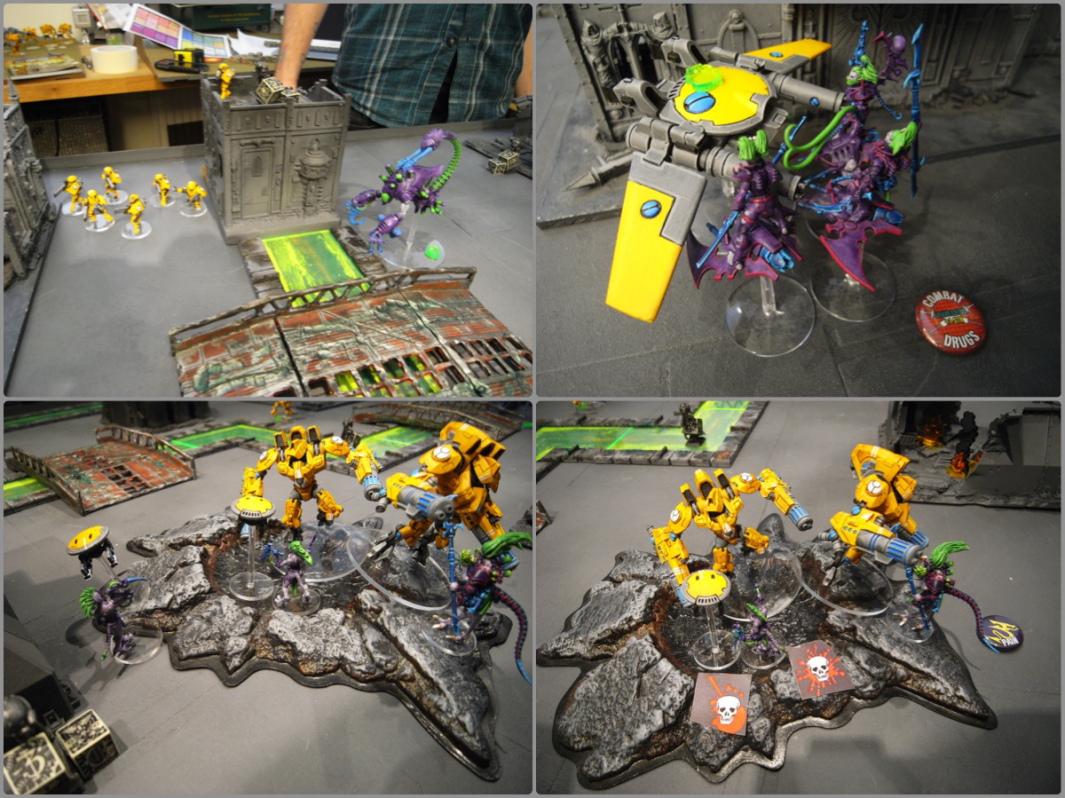
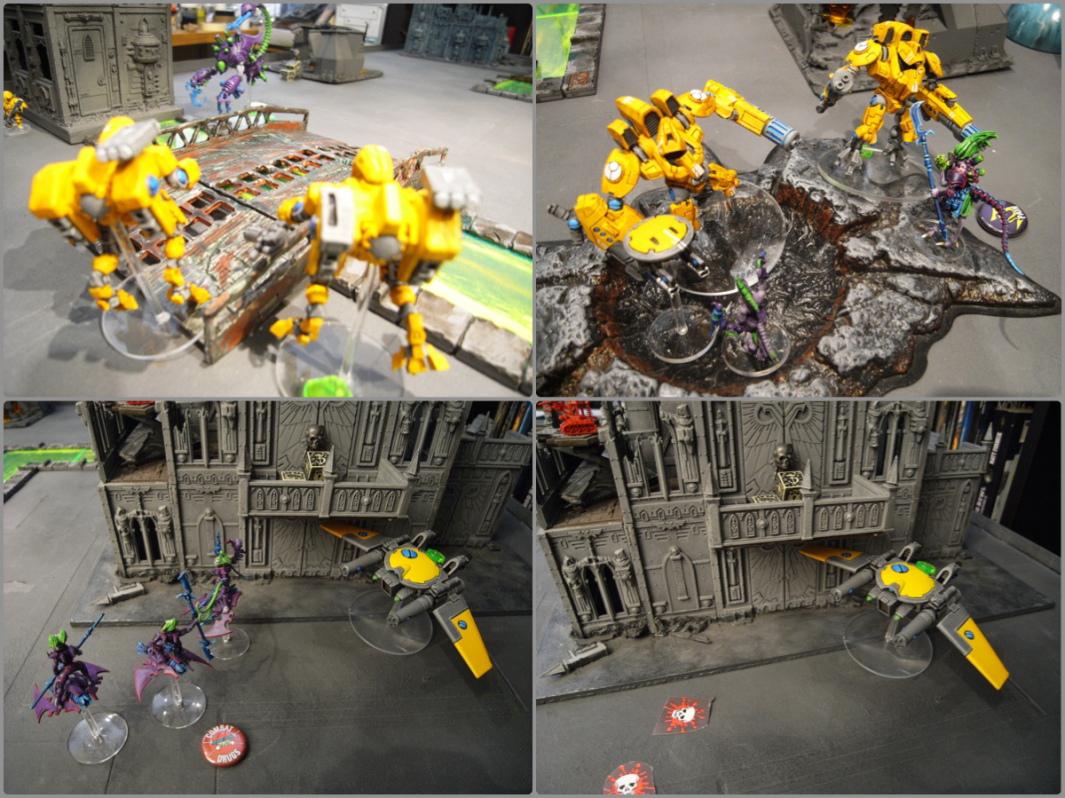
 The Haemonculus moves forward and disembarks with her squad, who drop the Webway portal as far forward as they can. The other empty Venoms move up in support. The squad of Trueborn then open fire on the building housing the Broadsides, instantly detonating in and killing both Gun Drones and one of the suits, inflicting a wound on another! The suits have to immediately disembark and run for cover behind the Devilfish.
In the rest of the turn, the Night Fighting and fantastic cover saves from Conqueror of Cities mean that only two gun drones are lost to splinter fire.
 Tau Turn 1
 The Devilfish then fires everything it can at the Trueborn squad, killing the Haemonculus with
SMS fire. The
MP Crisis team and the Broadsides take out a Venom each, but the Hammerhead misses with it's shot.
The rest of the army fire at the closest Talos, but only inflict one wound, and the suits bounce back into position
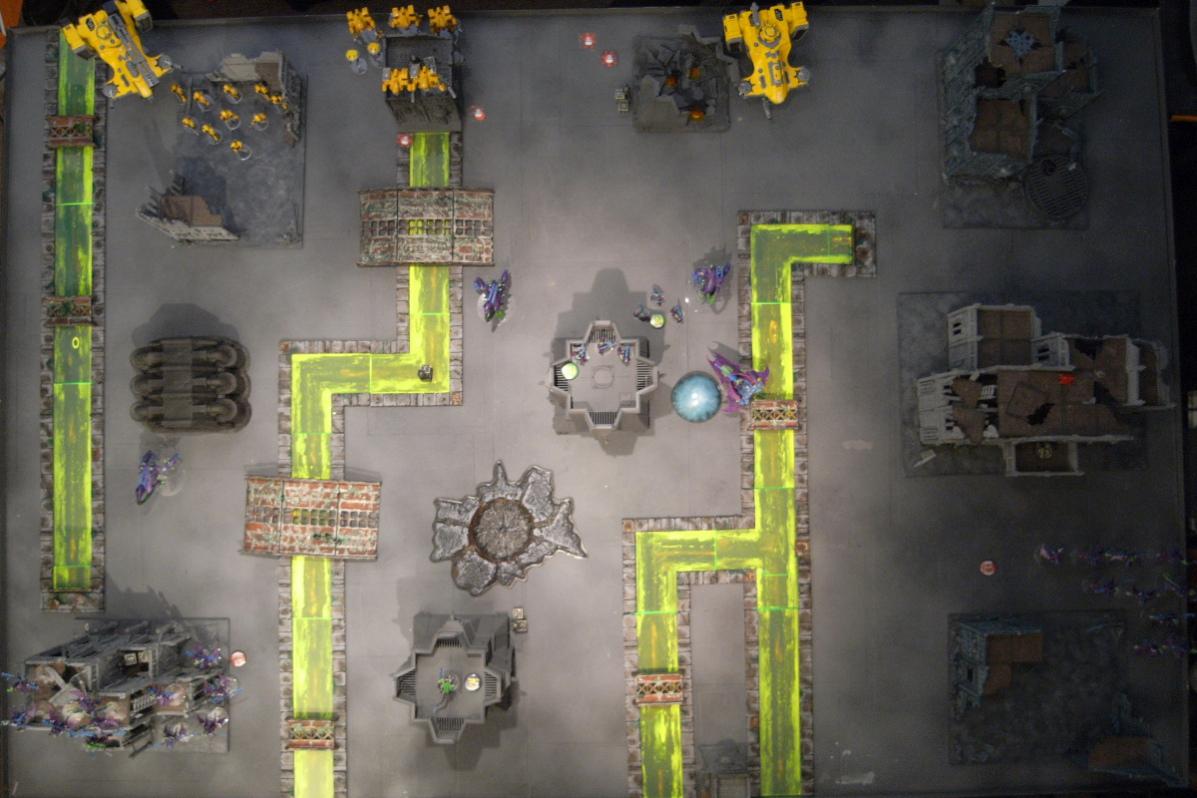
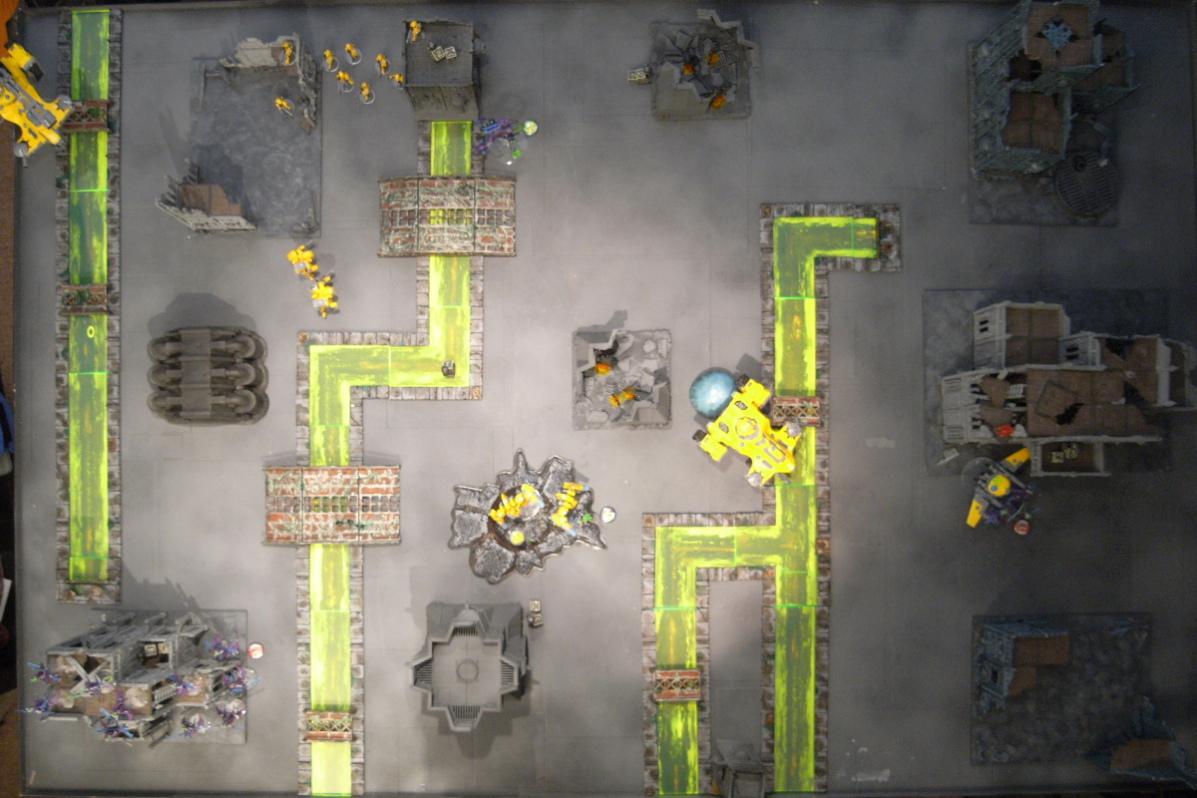
 Dark Eldar Turn 2
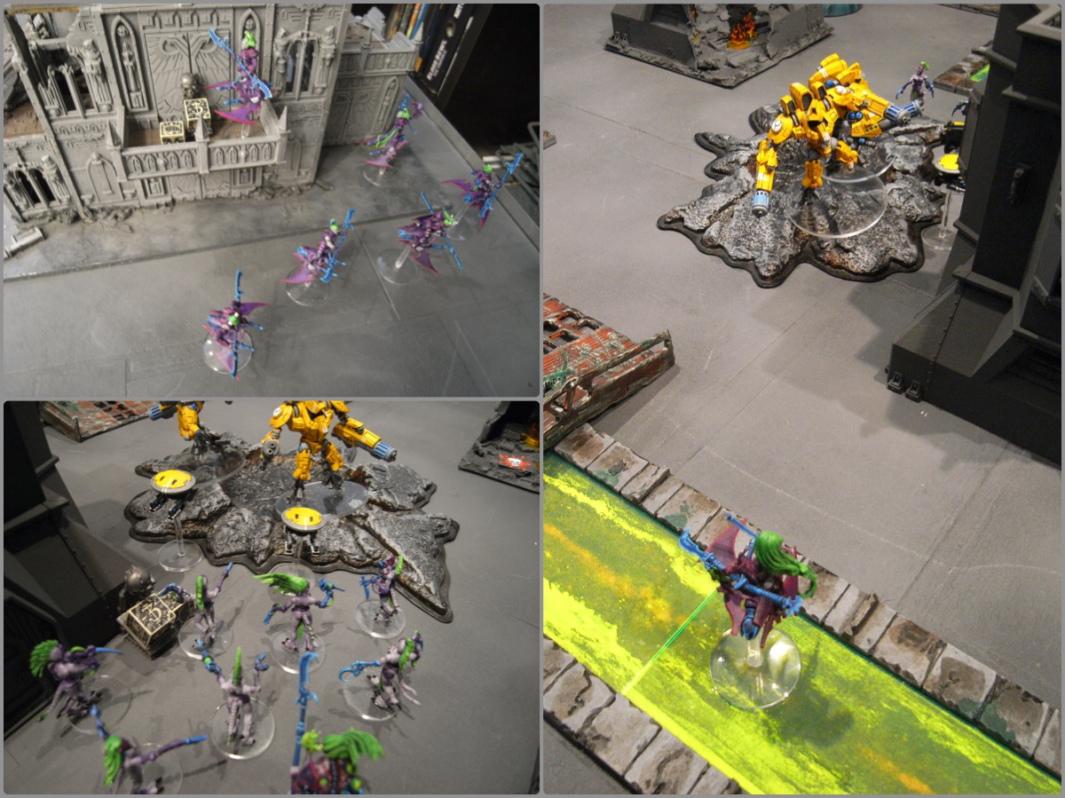
 The new reserve rules are kind to the Eldar, and everything arrives from reserve, the other two Trueborn squads and a Talos appearing from the portal while the Hellions grab the high-value objectives and the Wracks move into the back-of-field Bastion to grab another. The new trueborn move into the central bastion.
The forward trueborn squad inflict Instant Death on the last two Broadsides and splinter fire claims a Gun Drone and the closest Crisis suit in the commander's squad.
 Tau Turn 2
 Reserves aren't quite as kind to the Tau, and nothing arrives this turn. The commander's unit and the fire warriors try to take out the nearest Talos, but only reduce it to one wound, while the
MP Crisis team pop out from behind cover to destroy the final Venom.

On the other side, fire from the Devilfish kills two of the closest Trueborn, forcing the last one to flee.
 Dark Eldar Turn 3
 The last trueborn attempts to regroup and succeeds.
Interesting rules issue - if the unit is only 3 strong, they can NEVER be reduced to under 25%, and therefore always regroup on full Ld? Anyway, the survivor moves into the bastion, which has been vacated by one of the full-strength trueborn units. The Talos all move forward, the closest one moving across the bridge to charge the commander, but the charge fails!
The other Talos is advancing on the Devilfish, as the nearby Hellions shuffle around to get more in cover.
 Tau Turn 3
 Some reinforcements finally arrive in the form of a Remora Drone, whose Burst Cannons kill two of a trueborn squad, forcing another retreat. The Devilfish moves up to disgorge it's unit of Fire Warriors, but all their S5 fire only causes one wound on the Talos. The large fire warrior squad try to take the last wound from their closest Talos, but fail, so the Hammerhead removes it with it's Railgun.
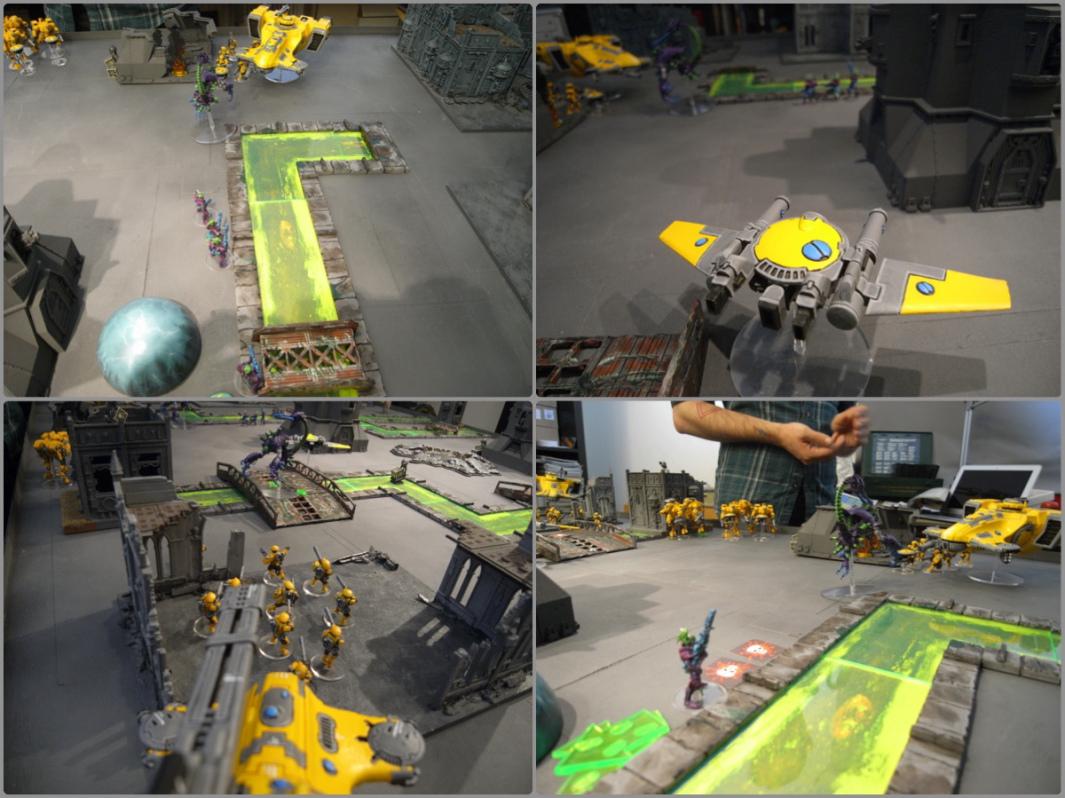
The
MP Crisis suits them start an advance, firing on the central bastion, but failing to hurt it...
 Dark Eldar Turn 4
 The remaining trueborn rallies after his squad was killed by the Remora and seeks cover. Meanwhile, a blaster from inside the bastion actually hits the Remora, which is forced to Evade to save it.
The Talos swings around and heads for the
MP Crisis suits, charging them and killing both drones. The suits don't hurt it, but hold their ground.
The trueborn on top of the bastion fire on the Devilfish. It's Disruption Pod saves mean it avoids serious damage, only being shaken.
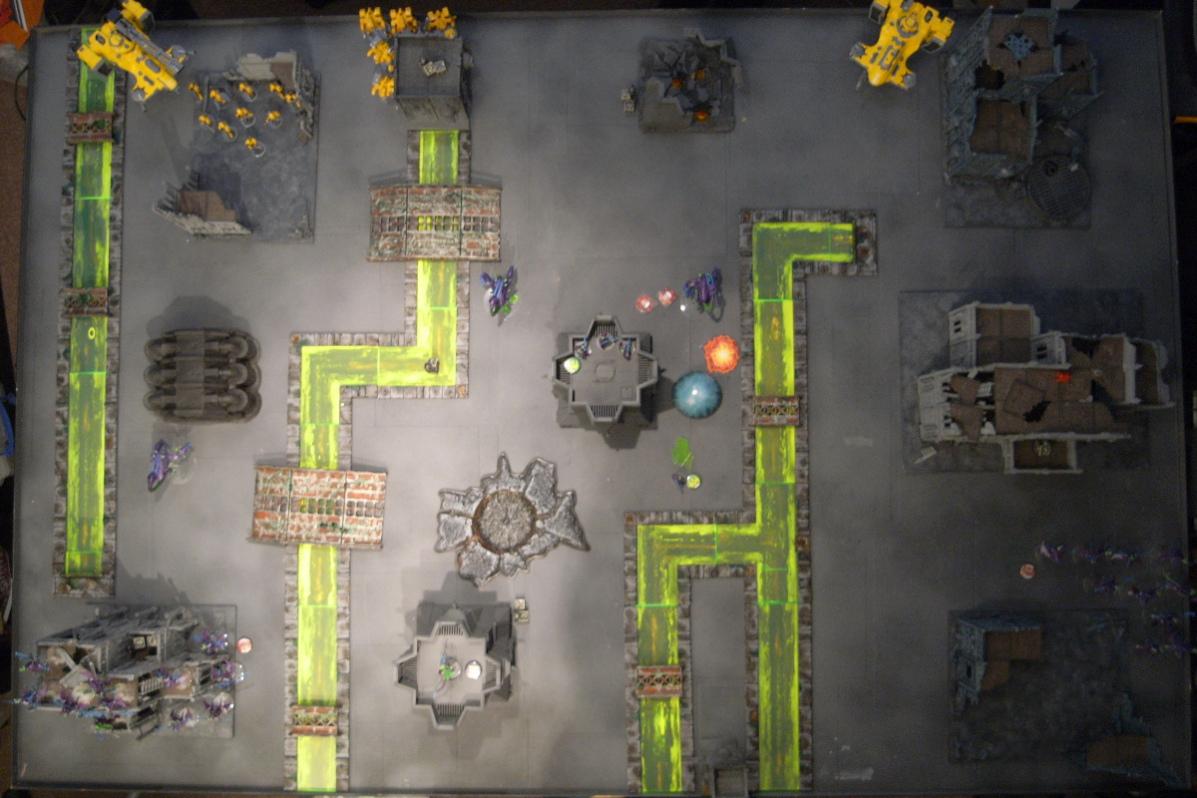
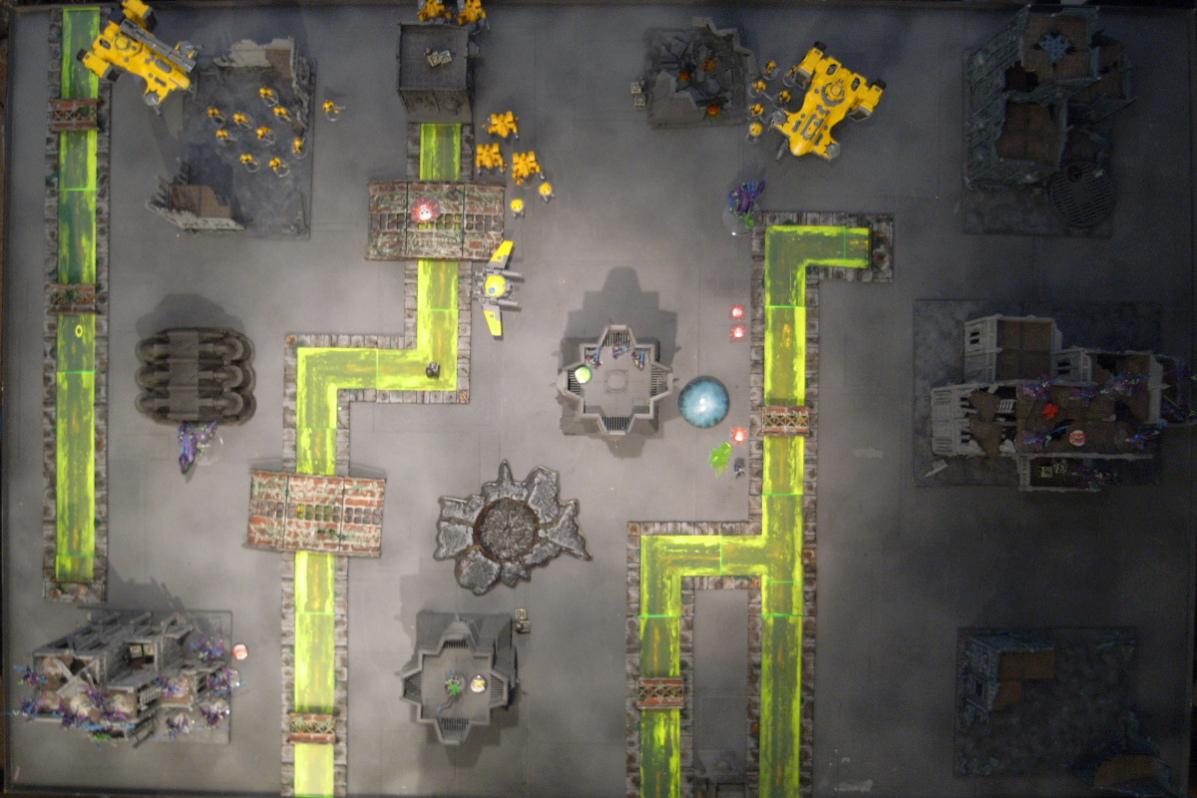
 Tau Turn 4
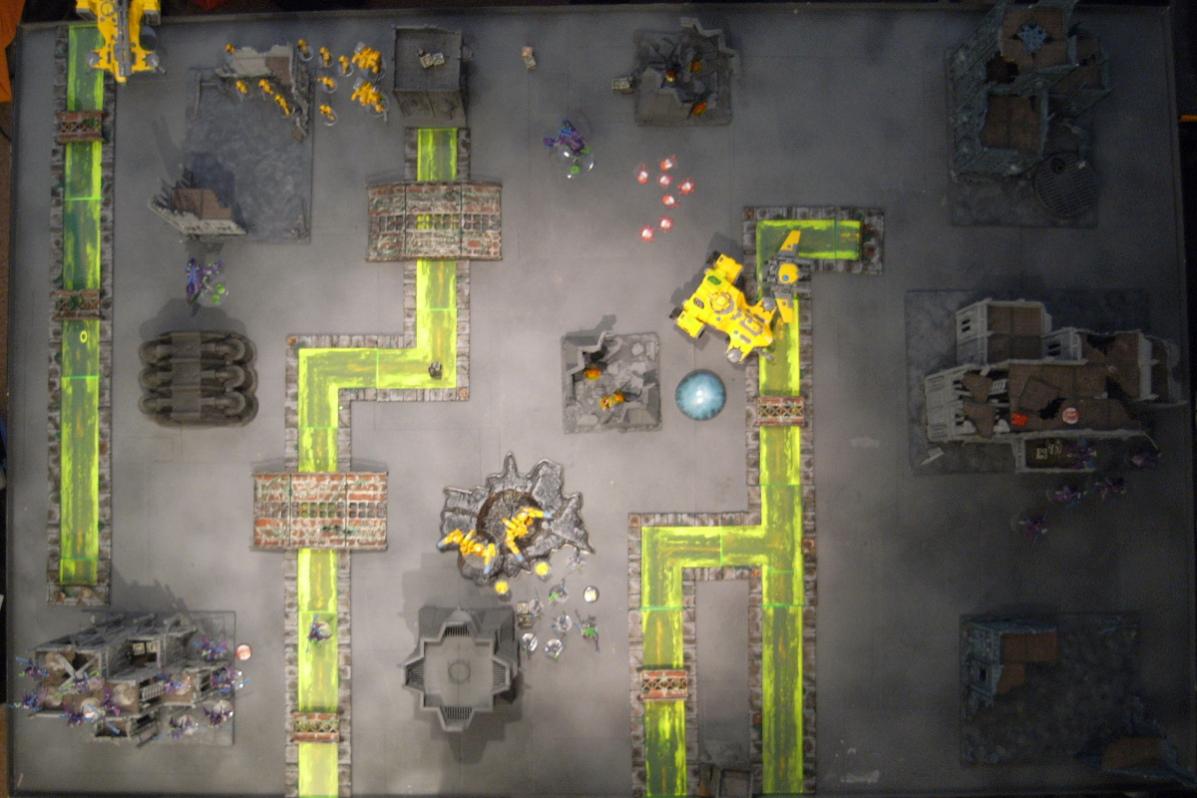
 And, with reserves auto-arriving on turn four now, the XV9s land in the centre of the field. The immediately let rip with their fusion cascades on the central bastion, detonating it and killing all the trueborn inside and nearby!
The left flank swing around to target the next advancing Talos, while the central one inflicts three wounds on the
MP Crisis team, forcing a retreat and wiping them out in a sweeping advance.
And the evading Remora and Shaken Devilfish move up to the Hellions holding the objective on the right hand side, shooting snap shots and killing two. The XV9s then make a Thrust over to the last remaining bastion.
 Dark Eldar Turn Five
 The Hellions on the right move down to hide behind the cover, and Baroness Sathonyx detached from her squad to attempt a charge on the XV9s. She manages to survive the overwatch fire due to her fancy shield, but fails the charge distance by half an inch! The wracks also disembark the building, but due to the disembark move, cannot assault this turn. they spread out to deny the objective to the (scoring, due to the mission) XV9s.
The central Talos turns again, having dispatched the
MP Crisis suits, and attacks the small Fire Warriors squad, killing two.

The Fire Warriors then fail their sweeping advance and all die, and the Talos turns to find the next enemy...
 Tau Turn Five
 The Tau shooting phase goes particularly well - the Hammerhead takes the last wound form it's Talos, and the commander's unit open fire on the Baroness from afar. She fails one of her 2+ saves and is instant deathed to death!
The Remora switches to Hover mode, moving as a Fast Skimmer to get close to the objective (as a Fast Vehicle, it's scoring in this mission) and the Devilfish focuses fire on the Hellions, killing all in the open. The Hellions pass their morale check, though, and stay on the objective. The XV9s then take out half of the wrack squad.

So, at the end of Turn Five, things are looking in the
DE favour, with them controlling all the high value objectives.
Interesting Rules Issue - in this mission fast attack units and fast attack vehicles are listed as 'Scoring', but NOT listed as 'Denial'. Which means that even though the Remora and the Hellions are both scoring units within 3"of the objective, the Hellions still control it, since while the Hellions can deny the Remora, the Remora cannot deny. Weird. Anyway, we roll and get another turn!
 Dark Eldar Turn Six
 The Talos advances to the Fire Warriors holding the main Tau objective, but fails it's charge roll because of the difficult terrain! The Hellions on the right then charge the Remora, causing one glance, and the wracks charge the XV9s, causing two wounds but losing two wracks in the process.
The wracks draw, but the charge has pulled them from the objective.
 Tau Turn 6
 The commander takes the last wounds from the single remaining Talos as the XV9s fight to another draw. The Remora disengages from the Hellions, still within 3"of the objective, and kills all three, now in the open, with Burst Cannon fire.
And the game ends on turn six!
The Tau control a 3-point and a 2-point objective, with points for Slay The Warlord and First Blood. However, the Dark Eldar now only control the 4-point objective. Tau 7 - Dark Eldar 4


 3500
3500