Continuing our saga of EVERYONE VS TAU. Next up were the Dark Eldar, meaning we had a lovely all-clear-bases game. We also played a particularly complex mission from the Tau Altar of War which might need a bit of explaining...
Panic's All-Girl Hellion Display Team - 1500pts 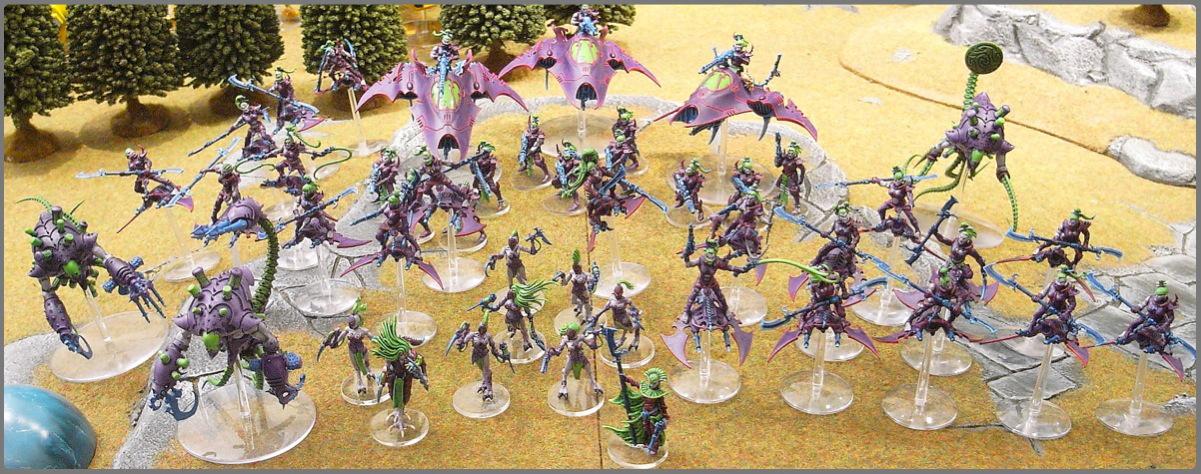
* Haemonculus [Webway portal]
* Baroness Sathonyx
* 9 Hellions plus Helliarch [Agoniser]
* 8 Hellions plus Helliarch [Agoniser & phantasm grenades]
* 7 Wracks
* 4 Trueborn [3 blasters] in a Venom [double splinter cannon]
* 4 Trueborn [3 blasters] in a Venom [double splinter cannon]
* 4 Trueborn [3 blasters] in a Venom [double splinter cannon]
* Talos [
TL haywire]
* Talos [
TL haywire]
* Cronos [spirit siphon, spirit vortex]
ArbitorIan's Tau Ye'lo Sept - 1500pts 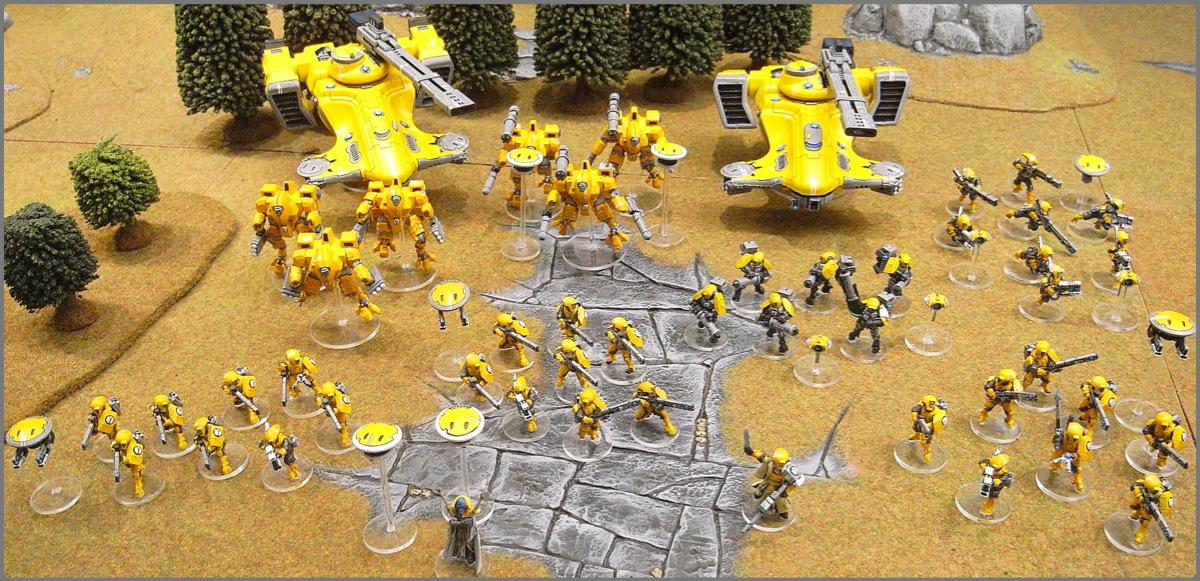
* Ethereal with 2 Shield Drones
* Cadre Fireblade
8 Fire Warriors [Pulse Rifles] including a Shasl’ui [Markerlight, Target Lock] and 1 Gun Drone
8 Fire Warriors [Pulse Rifles] including a Shasl’ui [Markerlight, Target Lock] and 1 Gun Drone
8 Fire Warriors [Pulse Rifles] including a Shasl’ui [Markerlight, Target Lock] and 1 Gun Drone
3 Crisis Suits (
TL Missile Pods)
3 Crisis Suits (
TL Plasma Rifles, Burst Cannon) with 2 Shield Drones
6 Stealth Suits (Burst Cannon) including a Shas’vre (Markerlight) and 2 Marker Drones
8 Pathfinders (3 Rail Rifles) including a Shas’ui, Grav Inhibitor Drone and 2 Marker Drones
Hammerhead (Railgun,
SMS, Disruption Pod, Submunitions)
Hammerhead (Railgun,
SMS, Disruption Pod, Submunitions)
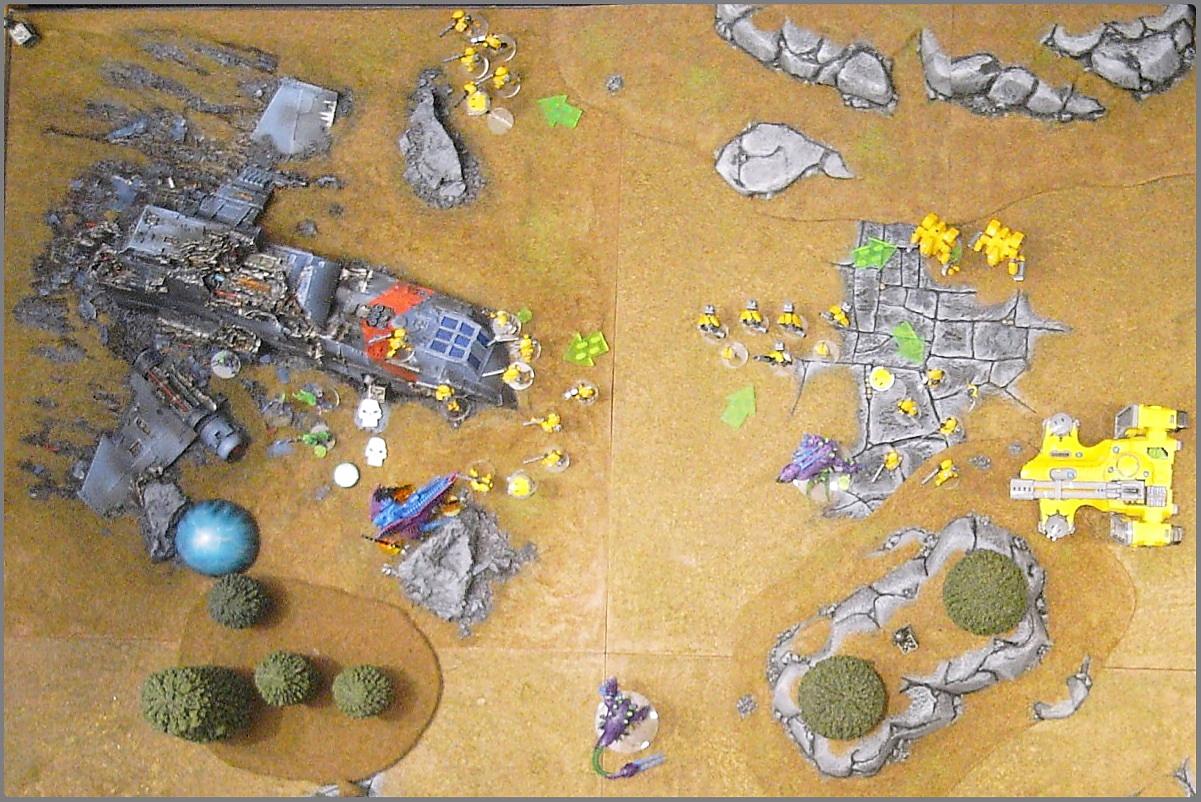
Mission We played Fighting Withdrawal from the Tau Altar of War supplement. This is gonna take a bit of explaining....
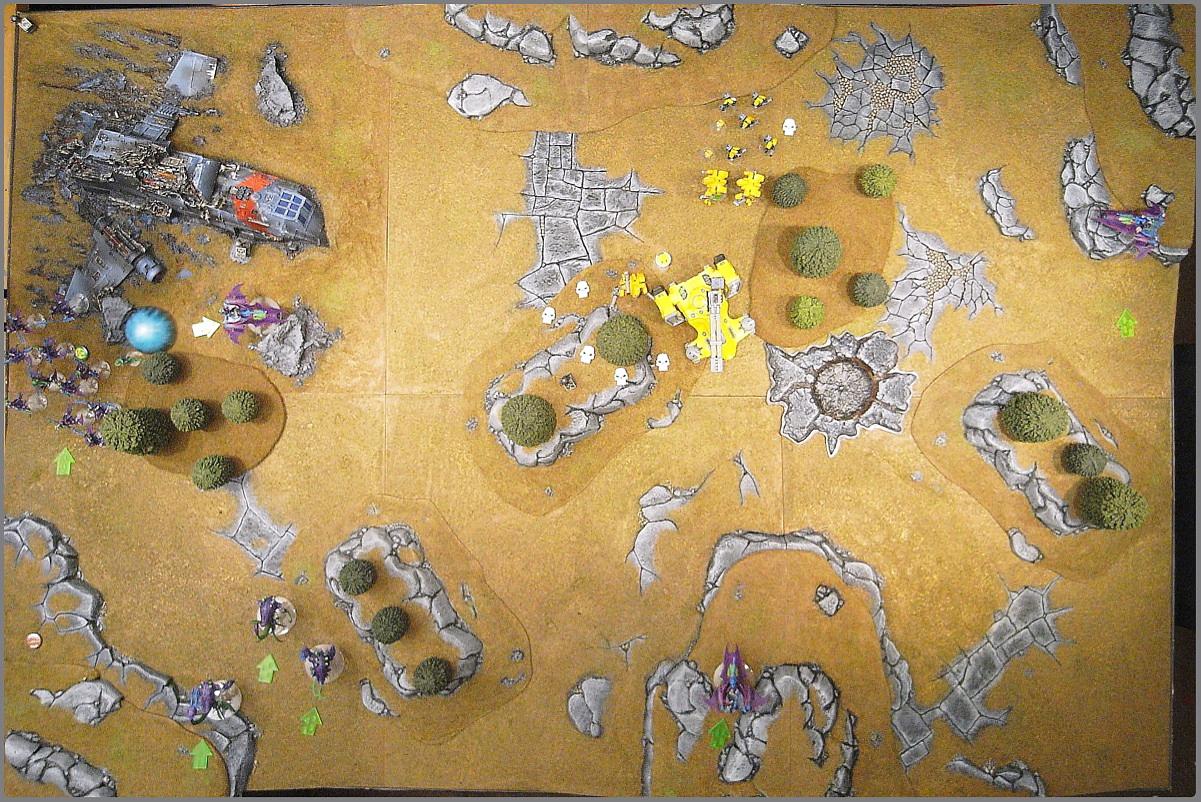
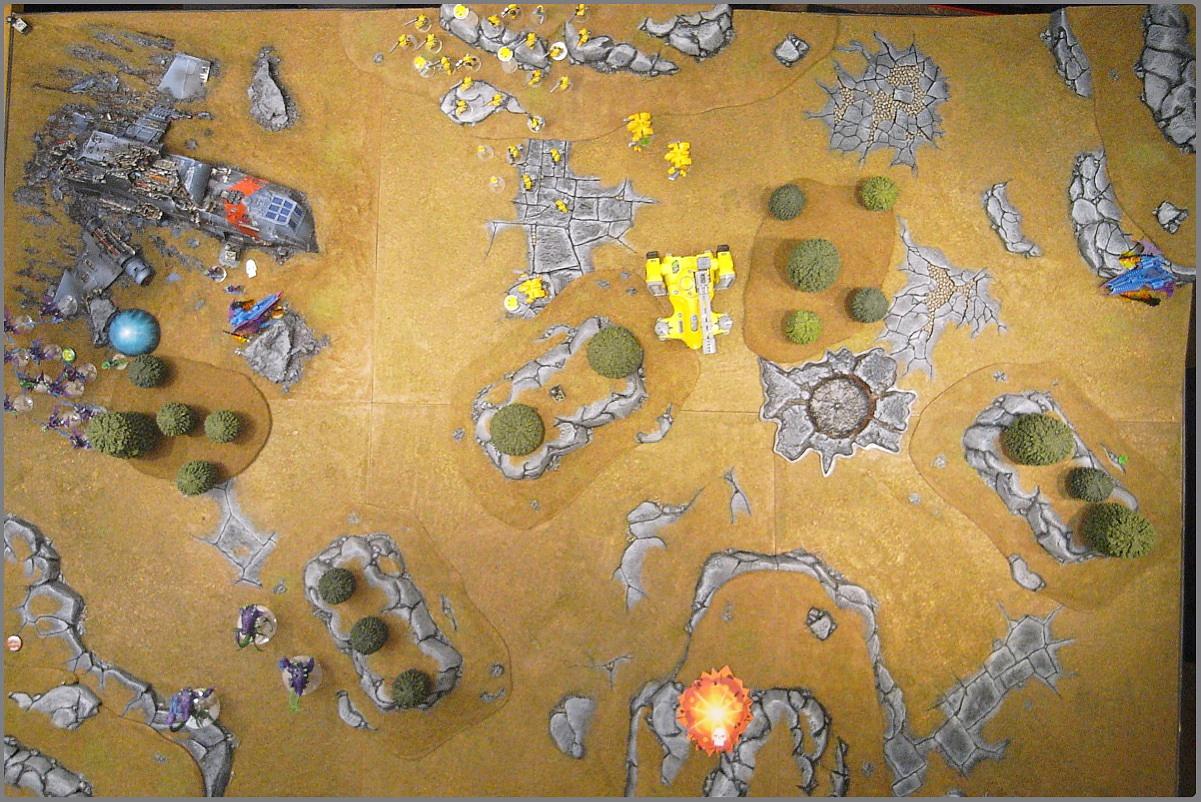
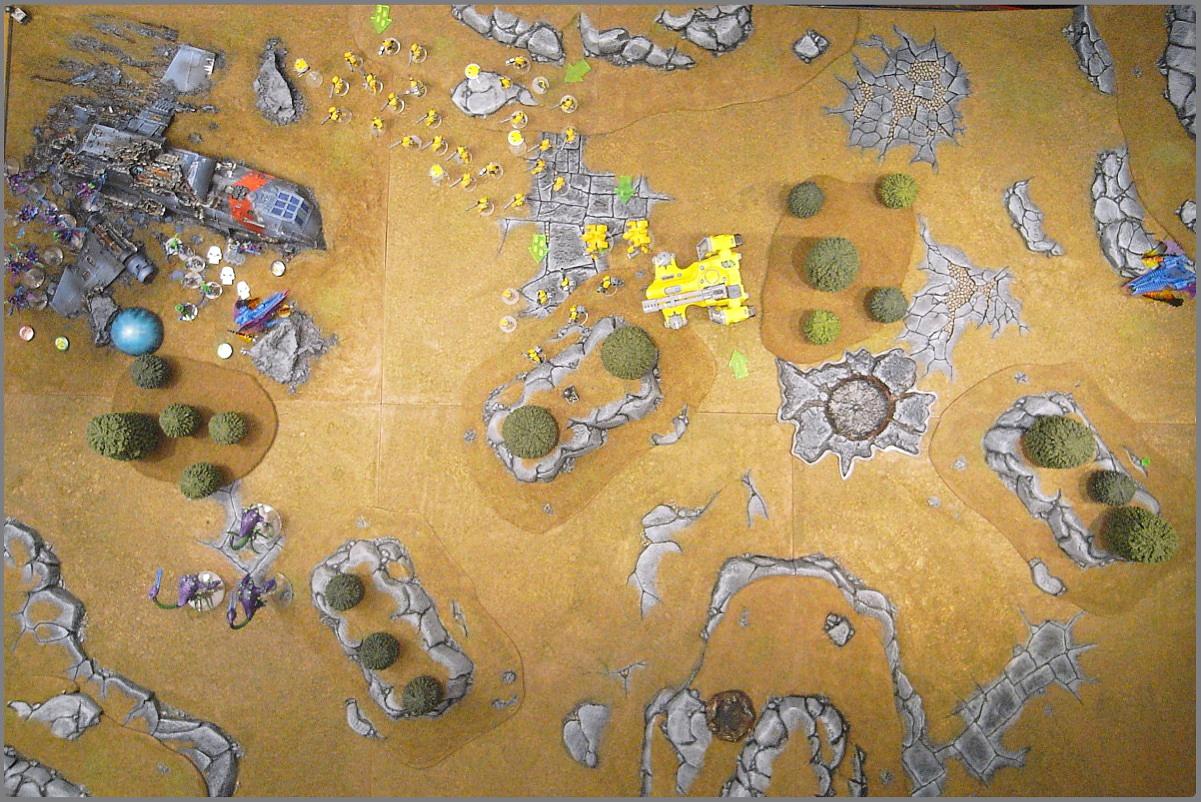
Deployment zones are diagonal. The Tau deploy half their units on the table at the start of the game, in the Dark Eldar deployment zone. The other half are in reserve, ready to come on from either of their table edges. The three objectives are in the centre, in the Tau corner, and halfway between, meaning that Tau will have to fall back into their own half to capture them.
The Dark Eldar don’t set up at the start - at least half their army will arrive from either of their table edges in Turn One. Dark Eldar always get first turn.
The mission also gives all the Tau units Hit & Run, so they can withdraw more effectively. Because of the weird setup, there is no Linebreaker victory point.
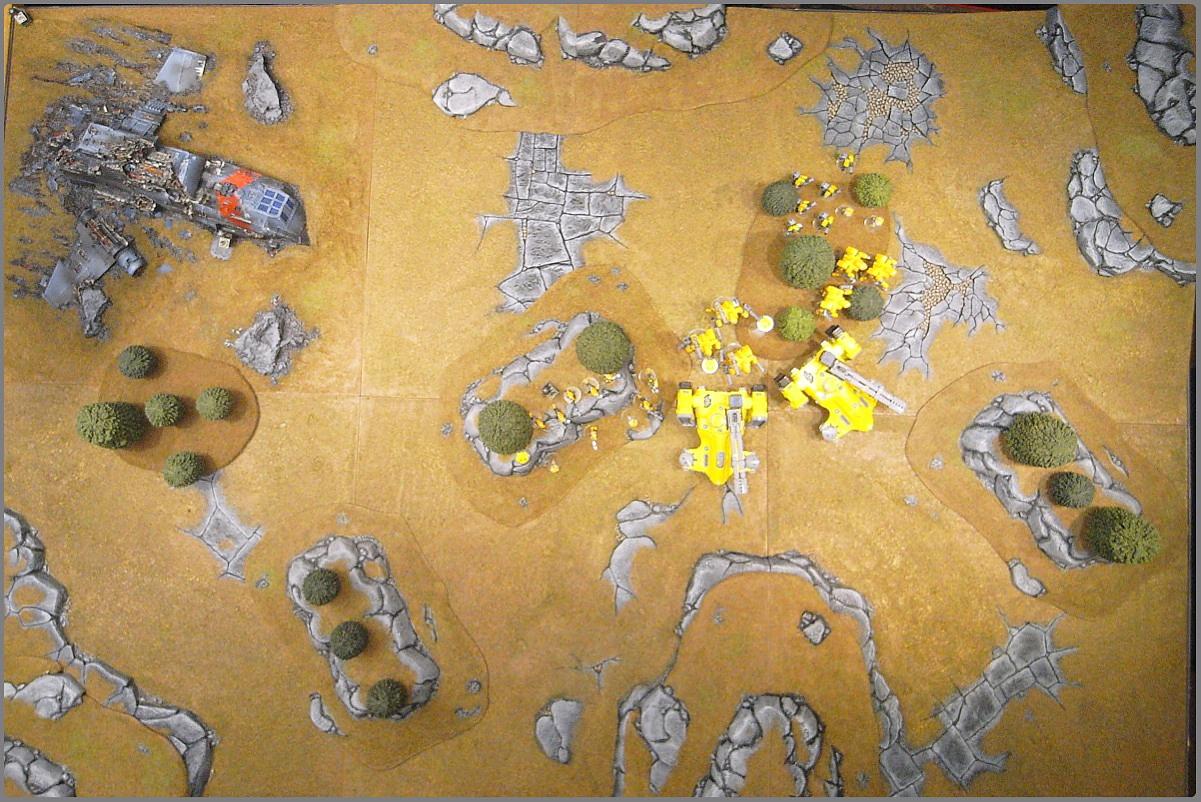
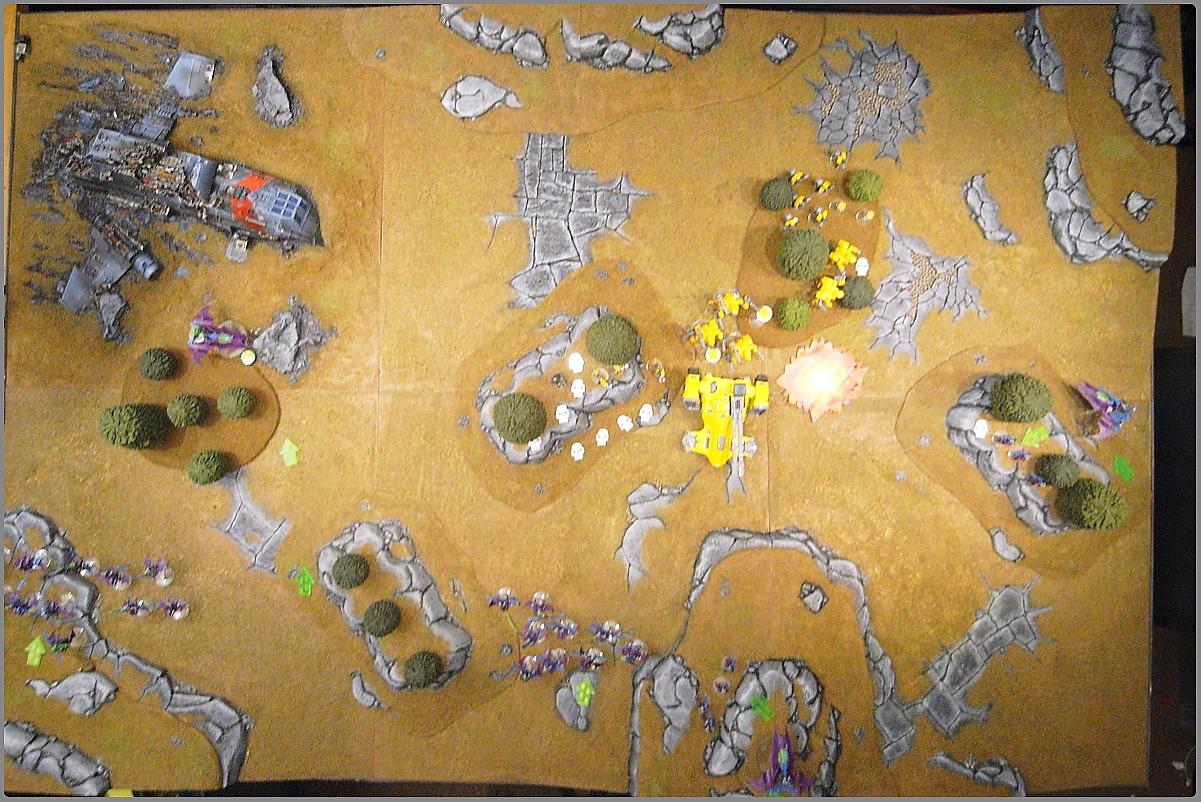
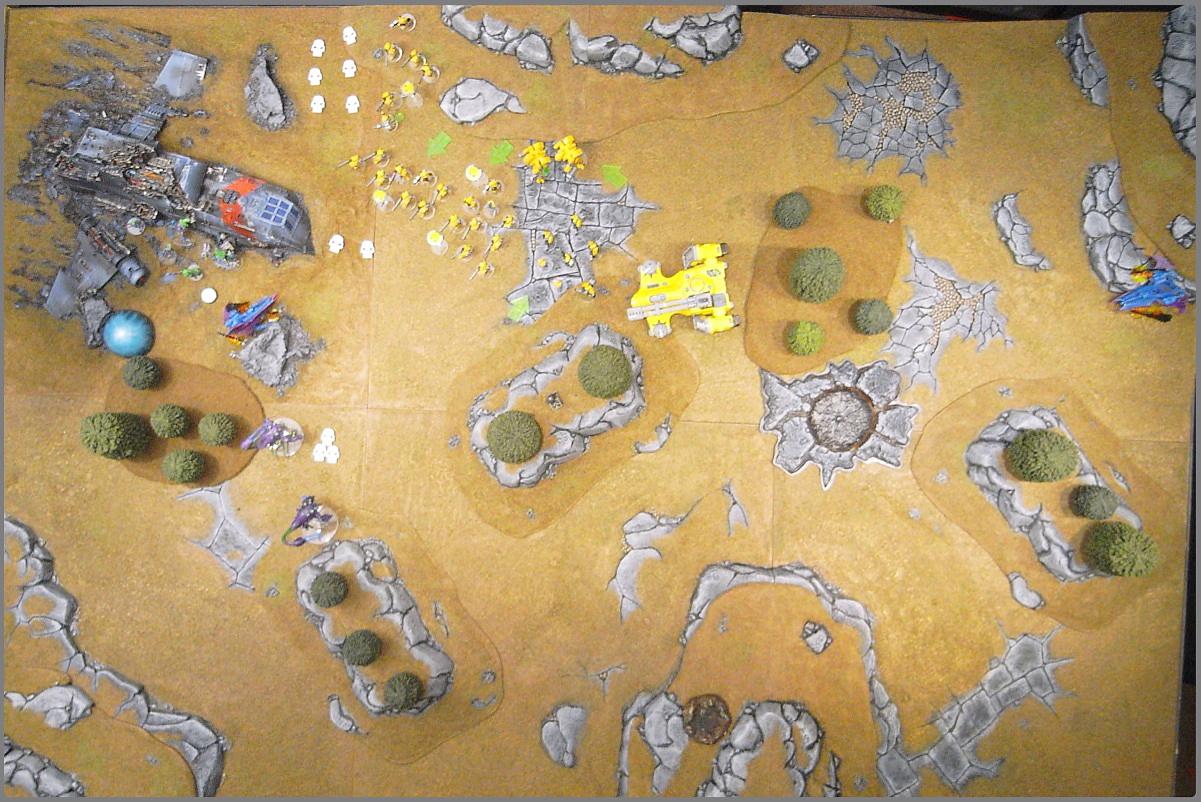
 Pre-game & Deployment
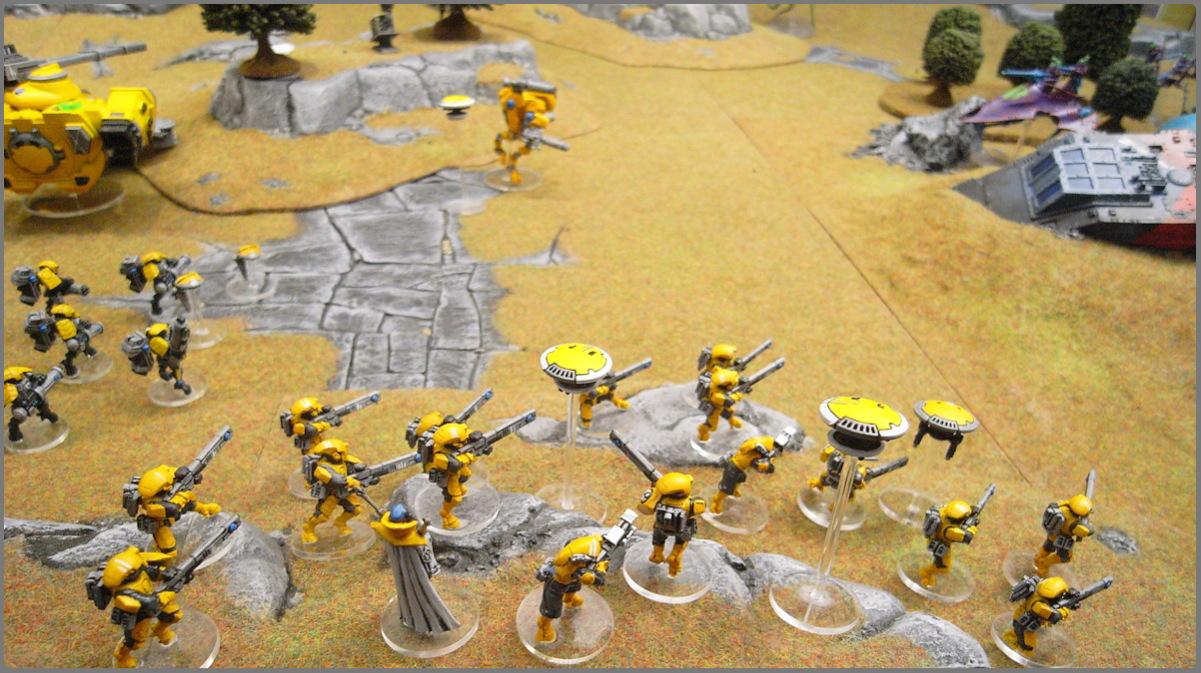
 Tau set up in a group in the centre, as close to their own deployment zone as possible. All the slower units were kept in reserve - Fire Warriors,
HQ choices, etc. The Pathfinders were on the central objective. The mobile suits would be retreating toward the crashed Thunderhawk.
The Dark Eldar weren’t on the board, but held the Wracks, Talos & Chronos in ‘reserve’. The rest of the army would move on, close to the Tau, in Turn One.
 Dark Eldar Turn 1
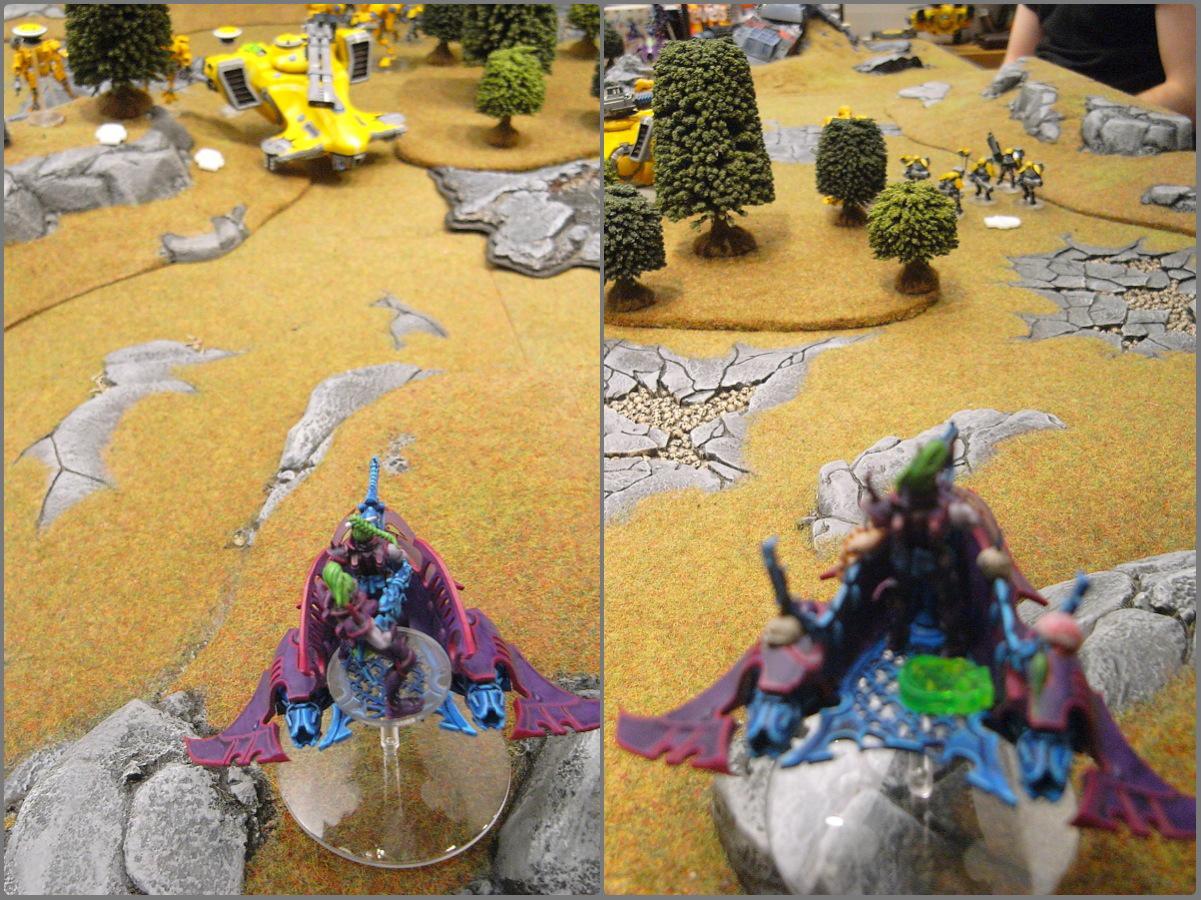
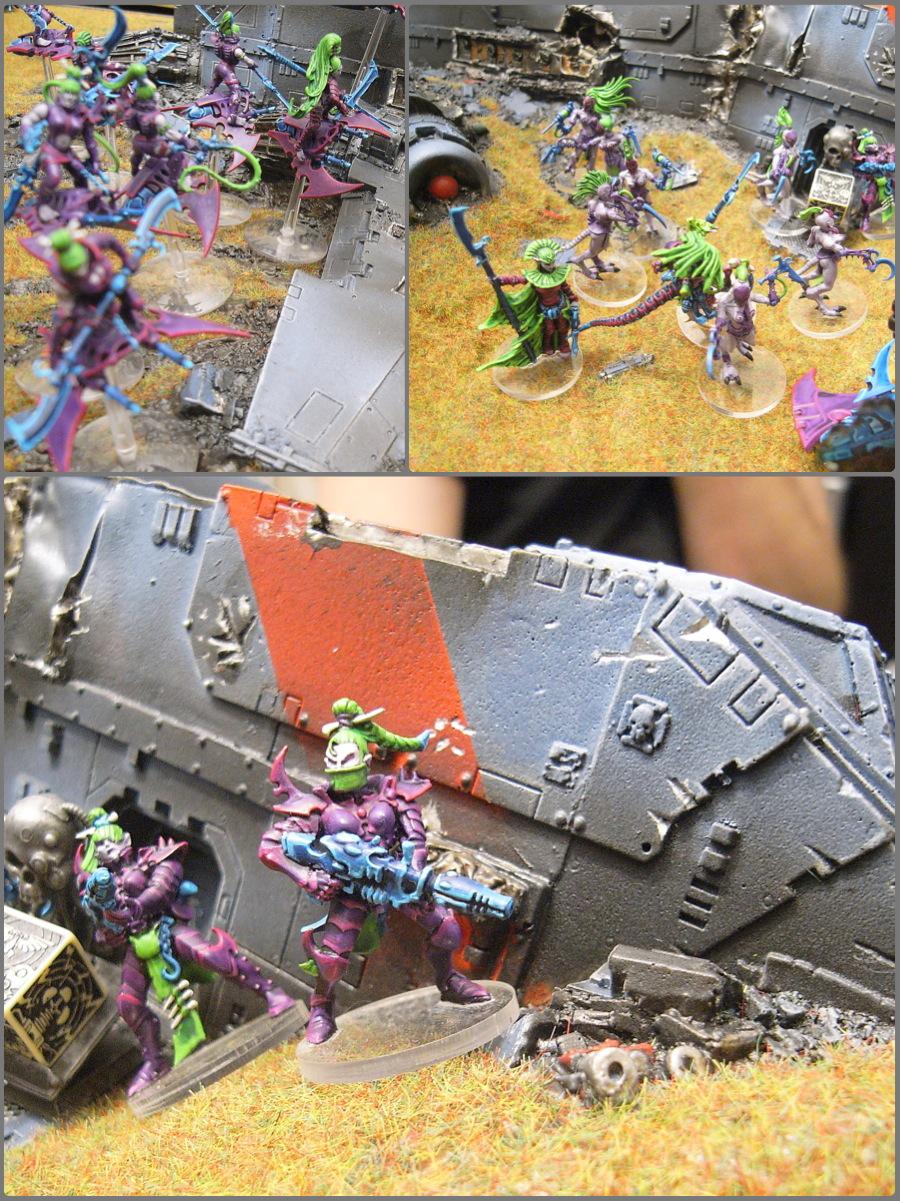
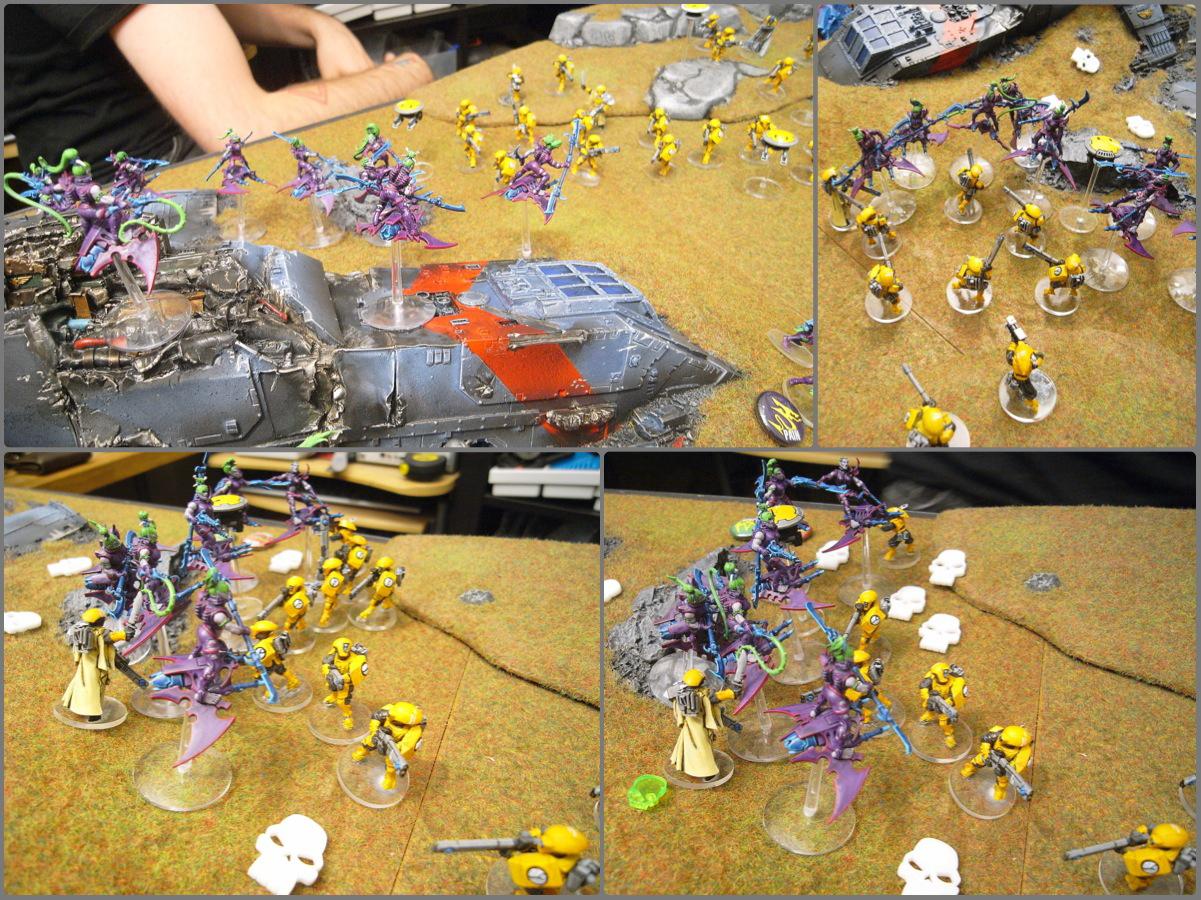
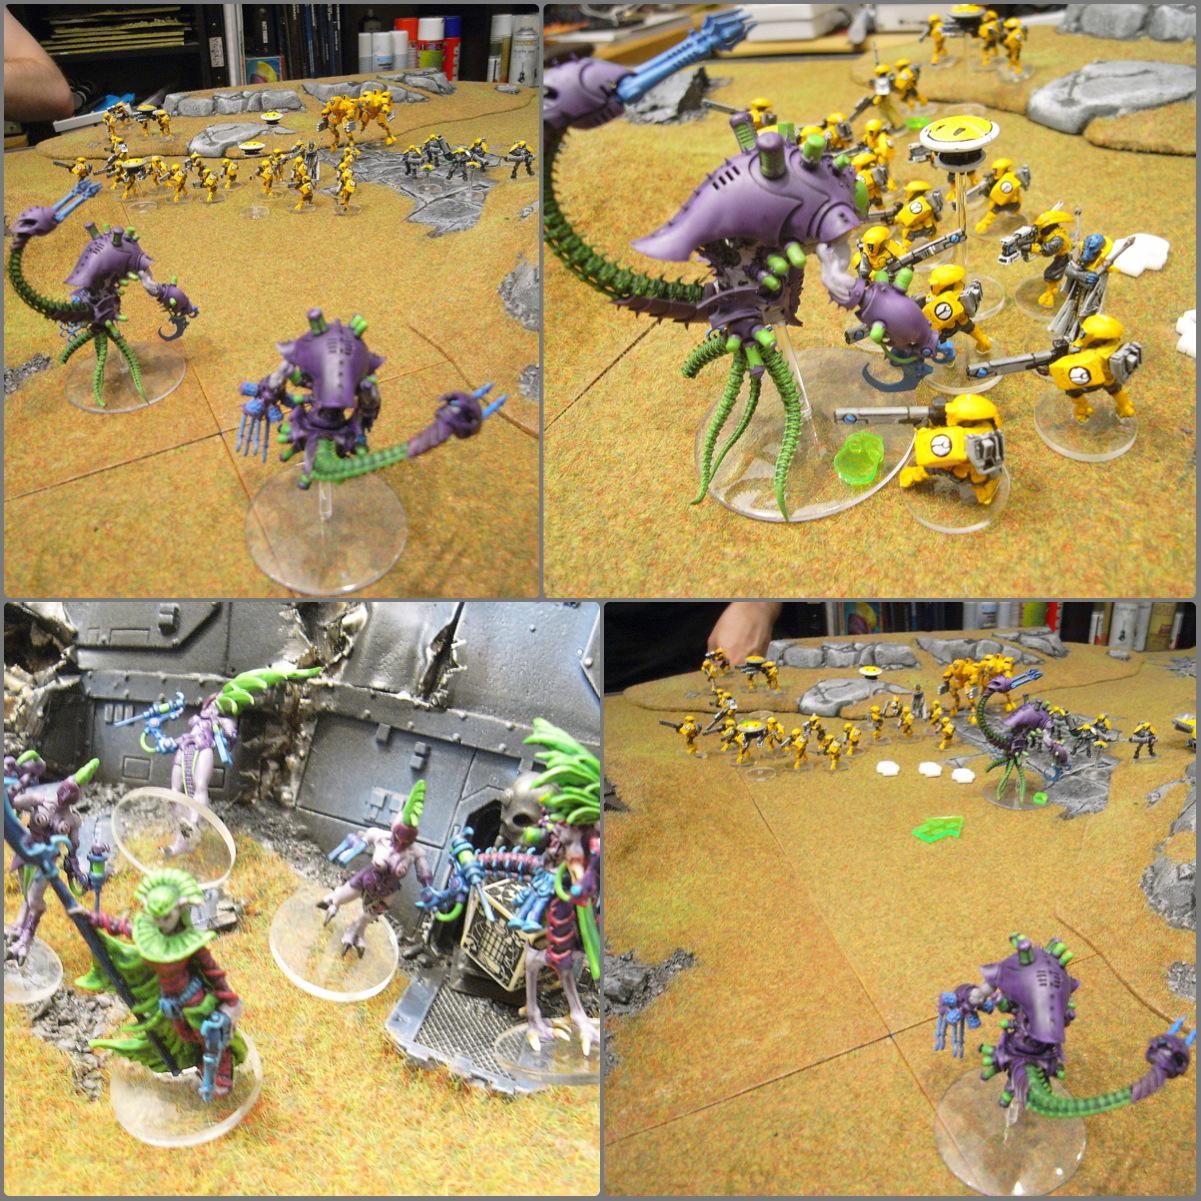
 The Dark Eldar sweep in, the two units of Hellions coming in on the flank and heading straight toward the Thunderhawk, while the Venoms disgorge Trueborn into the forests.
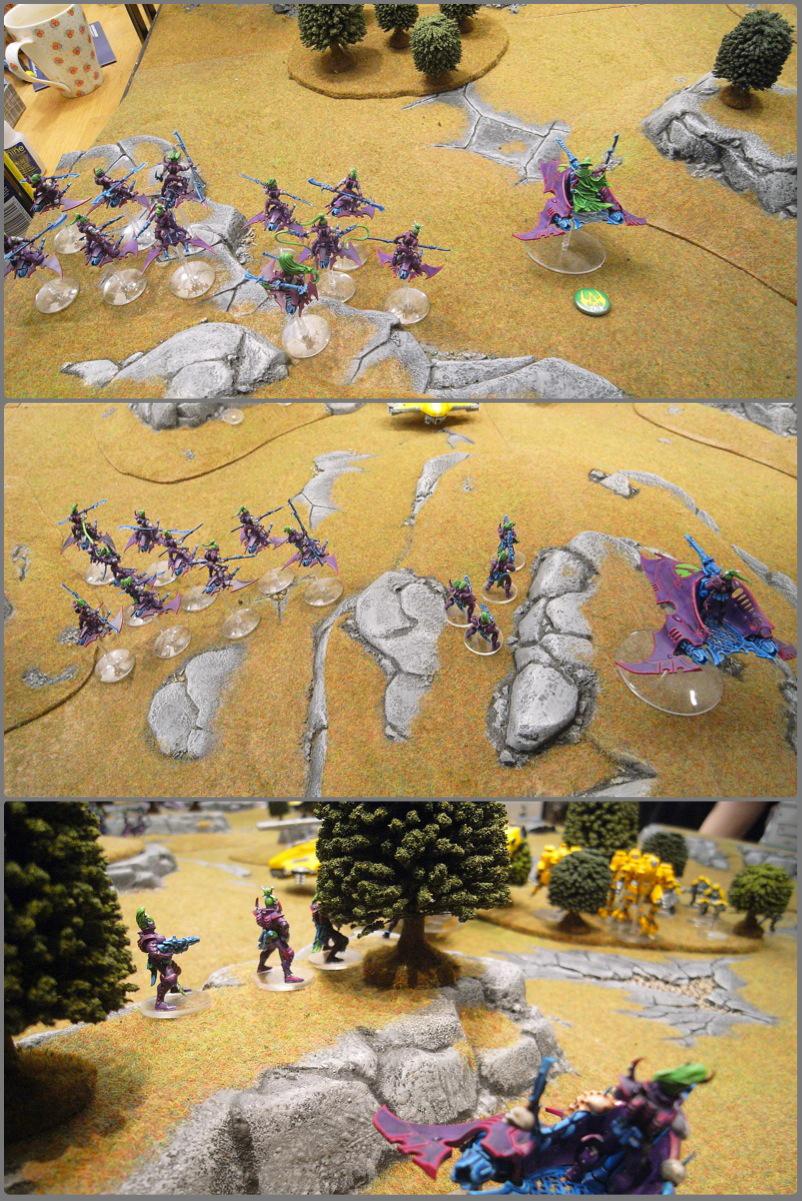
The first squad to fire explode a Hammerhead, but suffer a casualty when we realise that all the forests are infested by DEATH BUDGIES!! Massed splinter fire takes out the majority of the Pathfinders and one of the Missile Suits.
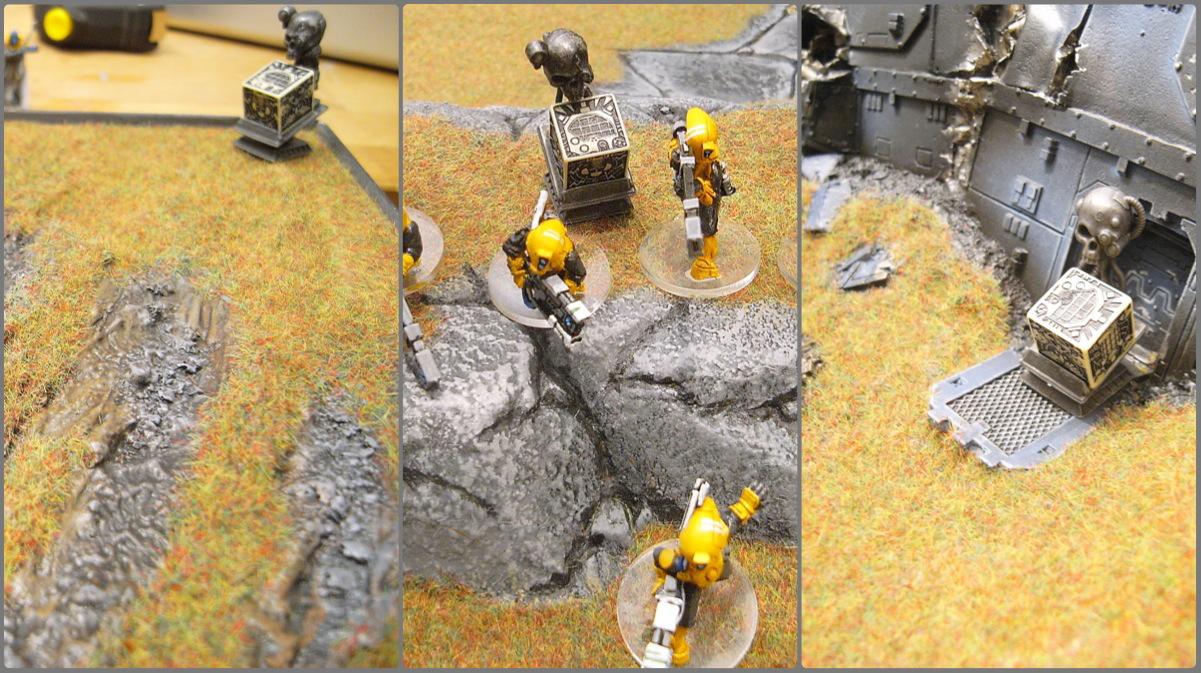
The Haemonculus in her Venom opts to go flat out and reaches the objective in the Thunderhawk. This means she won’t be able to drop her portal this turn, though.
Lots of purple, very close to the Tau lines!
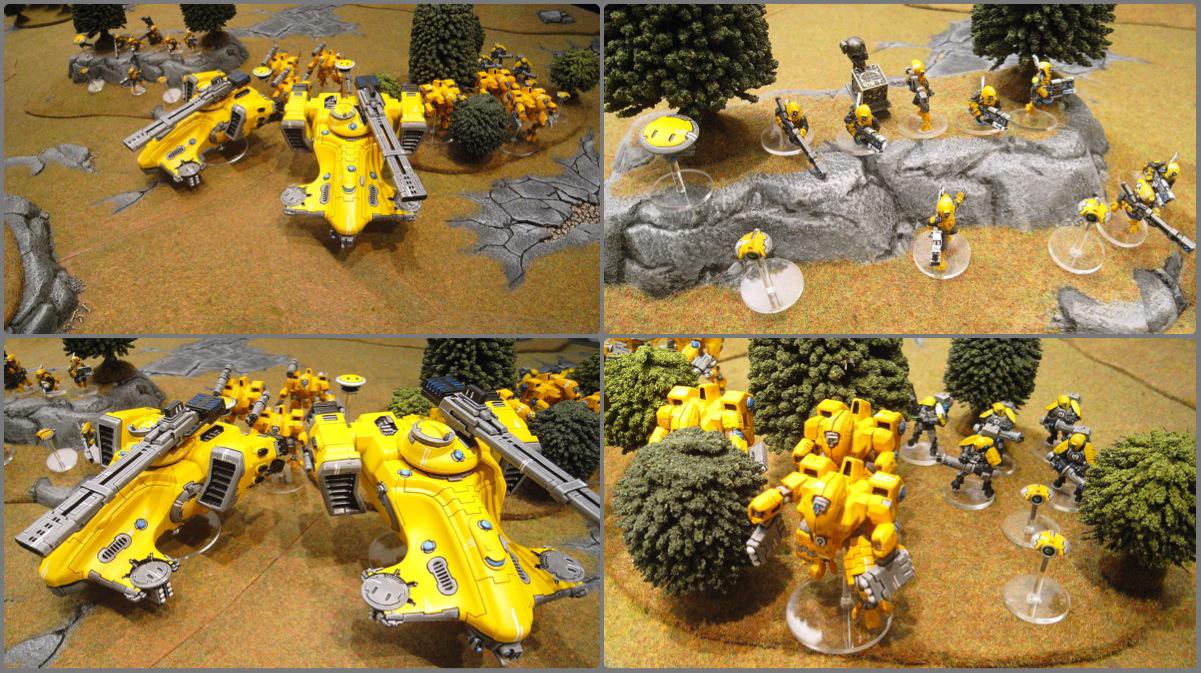
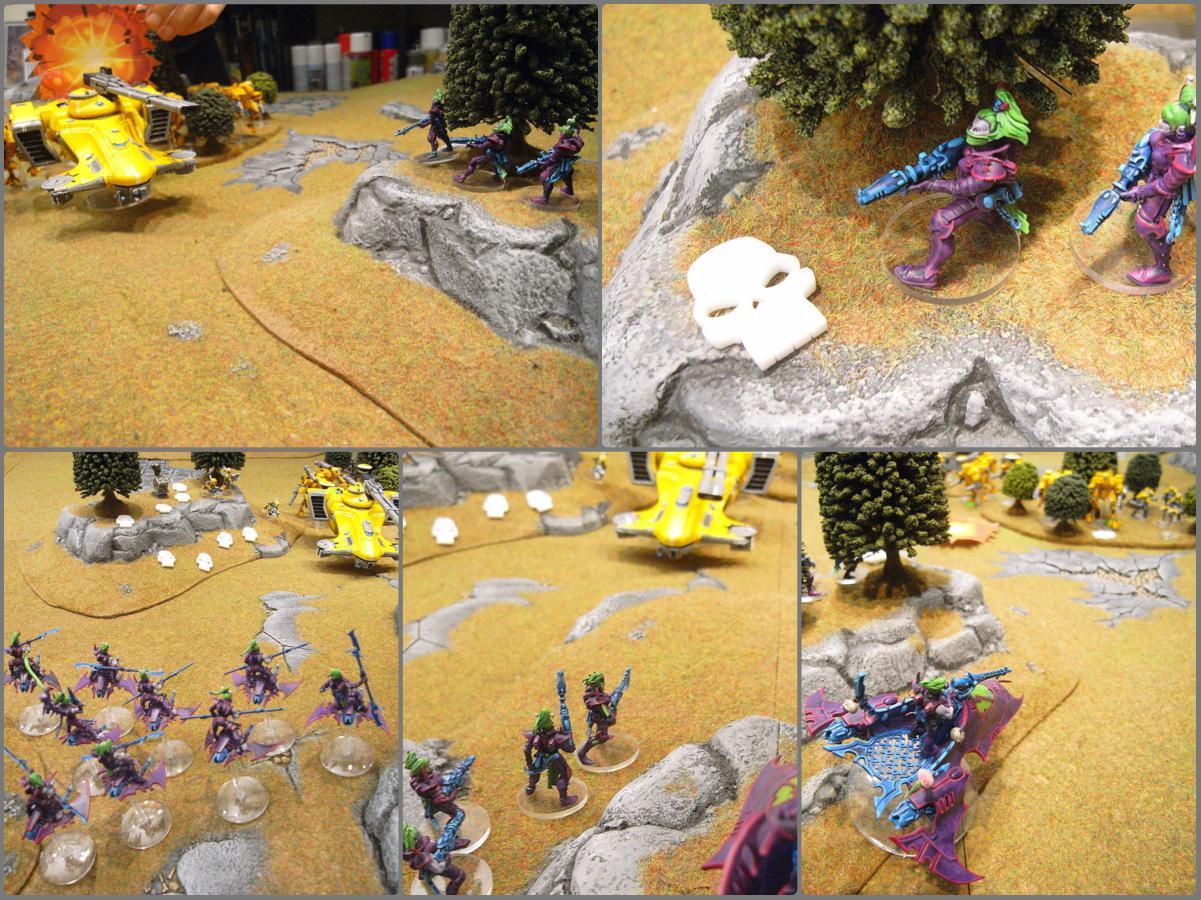
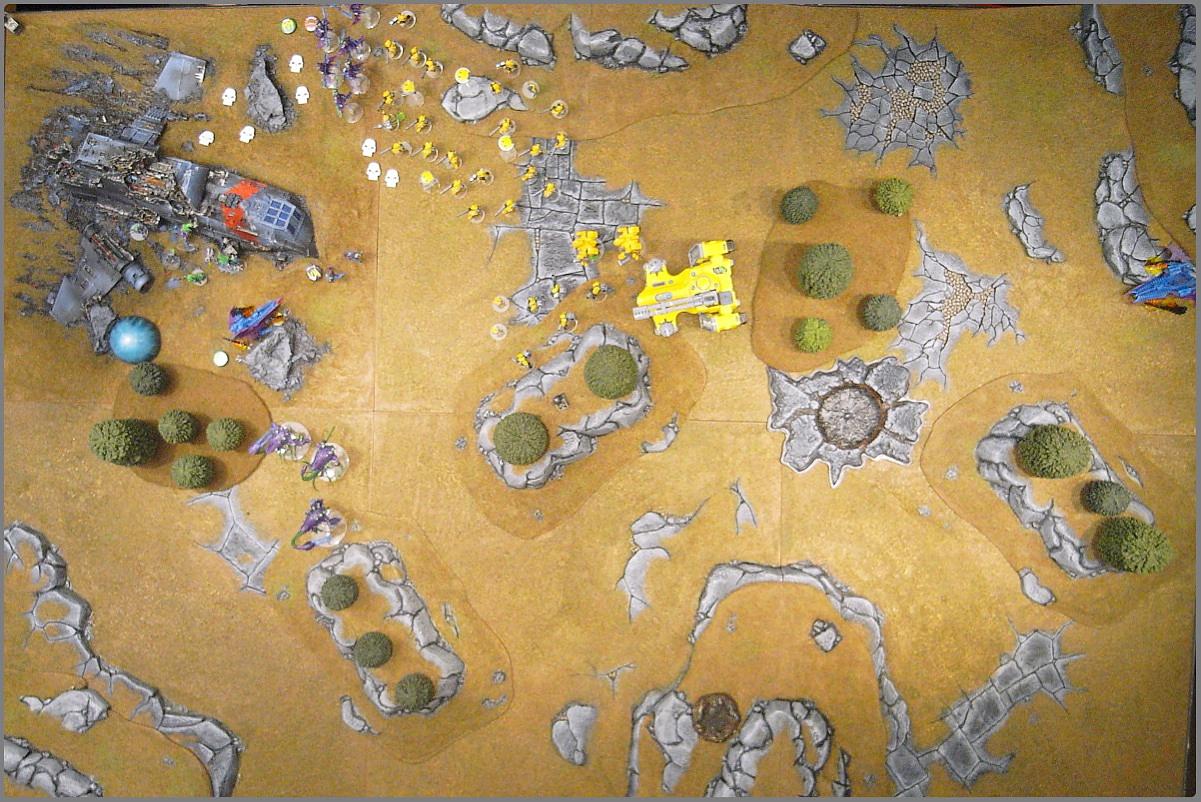
 Tau Turn 1
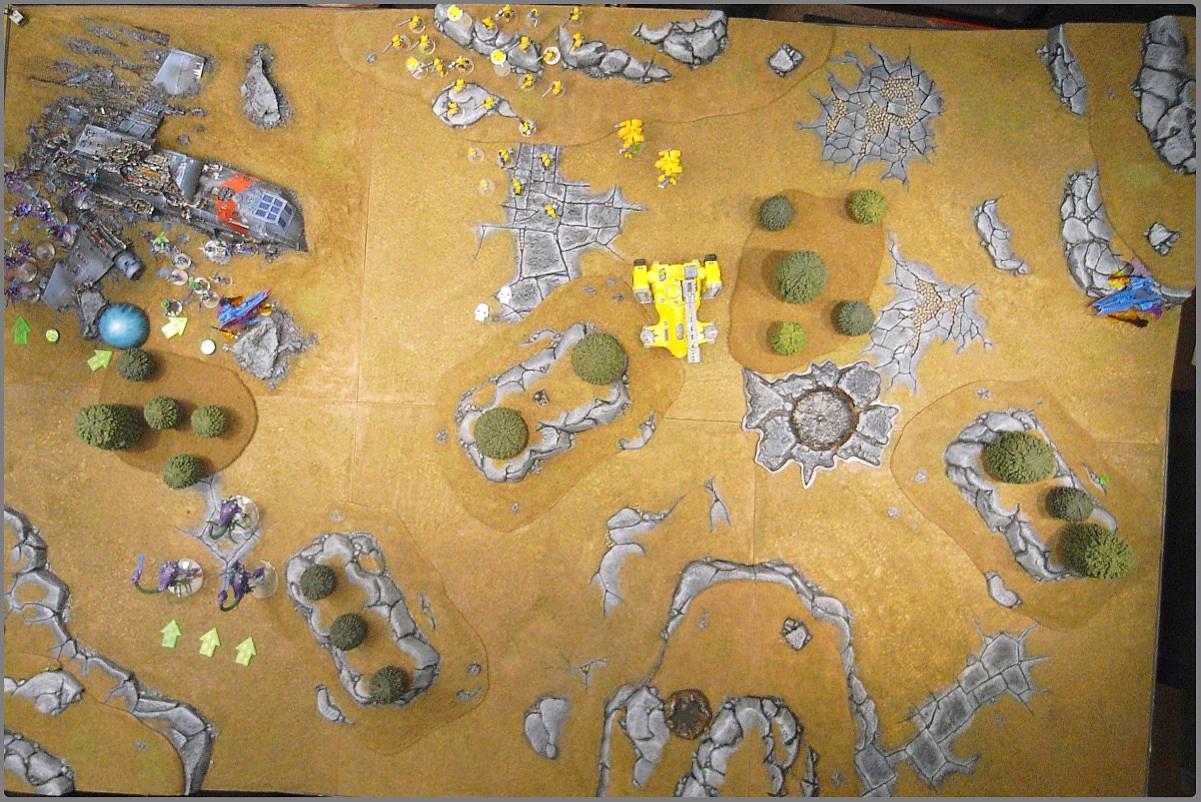
 Everything moves into position, attempting to get out of the forests. One pathfinder isn’t so lucky, getting eaten by DEATH BUDGIES.
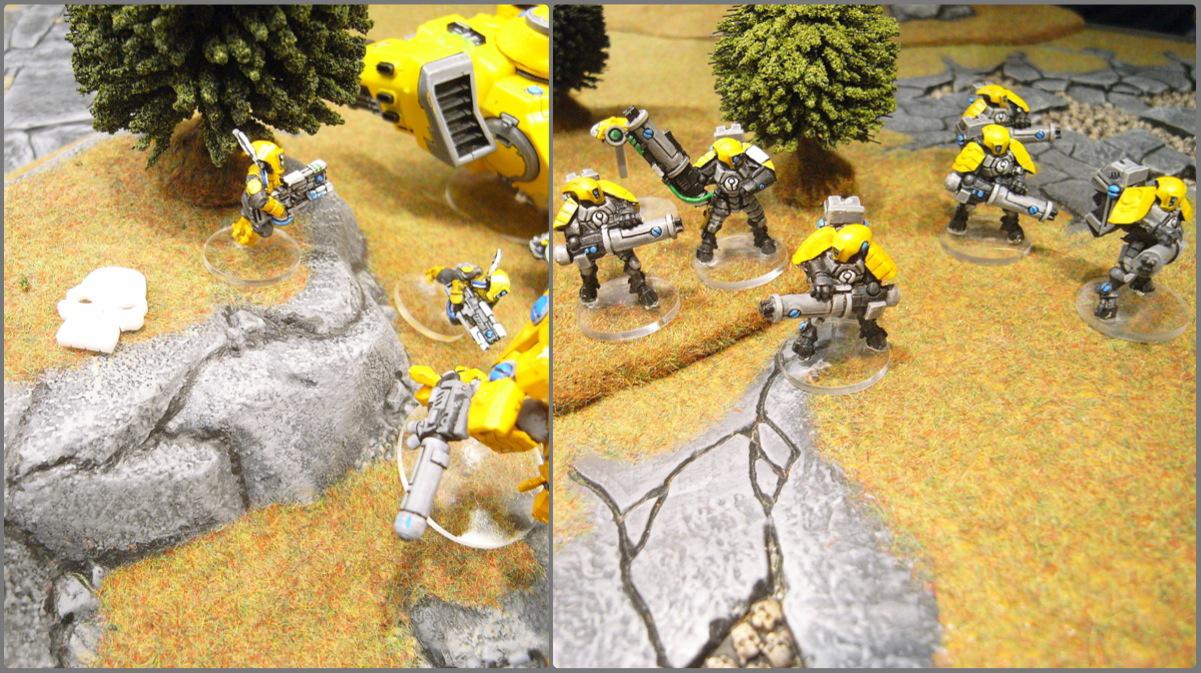
A colossal amount of firepower is directed at the large squad of Hellions from the Plasma Suits who, with the help of the two remaining Pathfinders, manage to wipe the whole squad out. The Stealth Team concentrate on the Trueborn on the right, killing all of them, and the Hammerhead fires a submunition at the Trueborn in the centre, killing all but one!

Before their bounce moves, the Missile Suits also manage to score a glance on the Venom on the right.
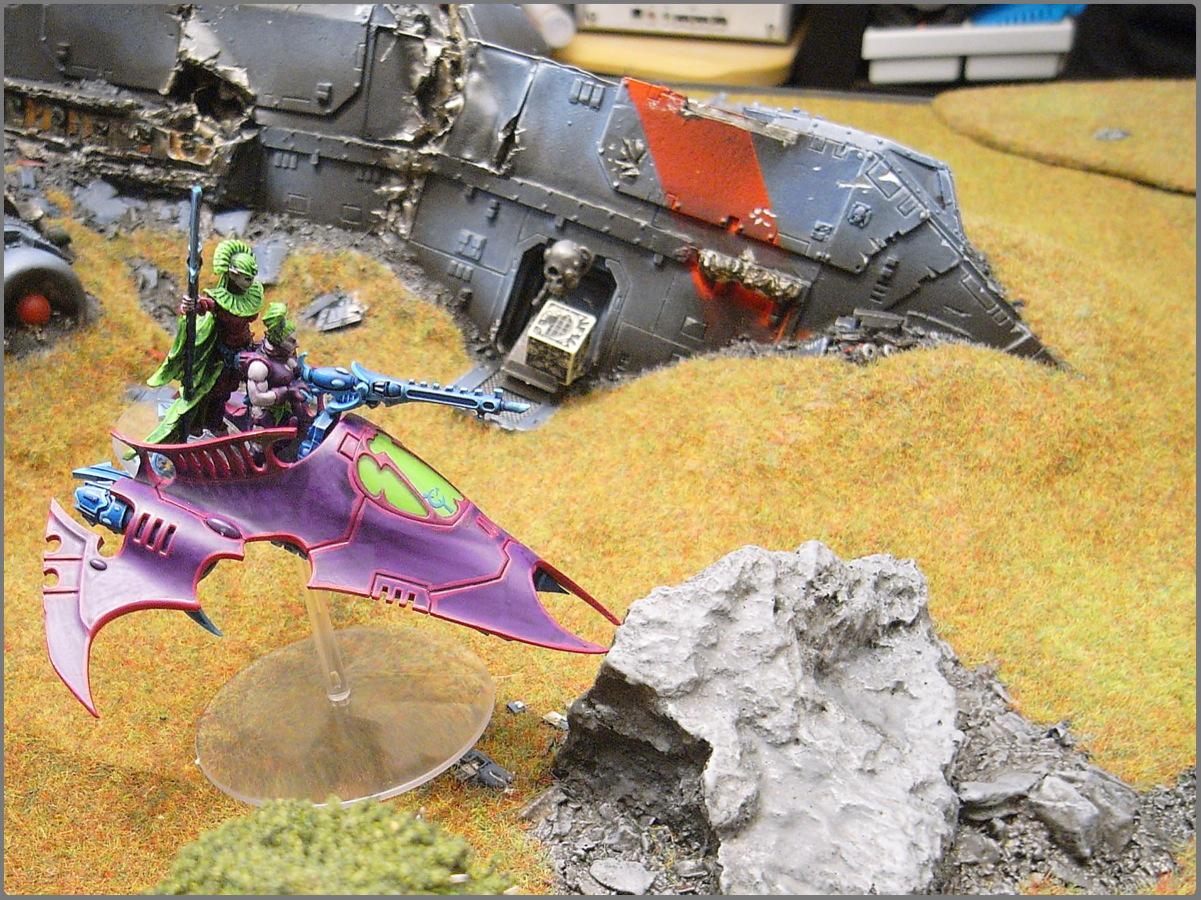
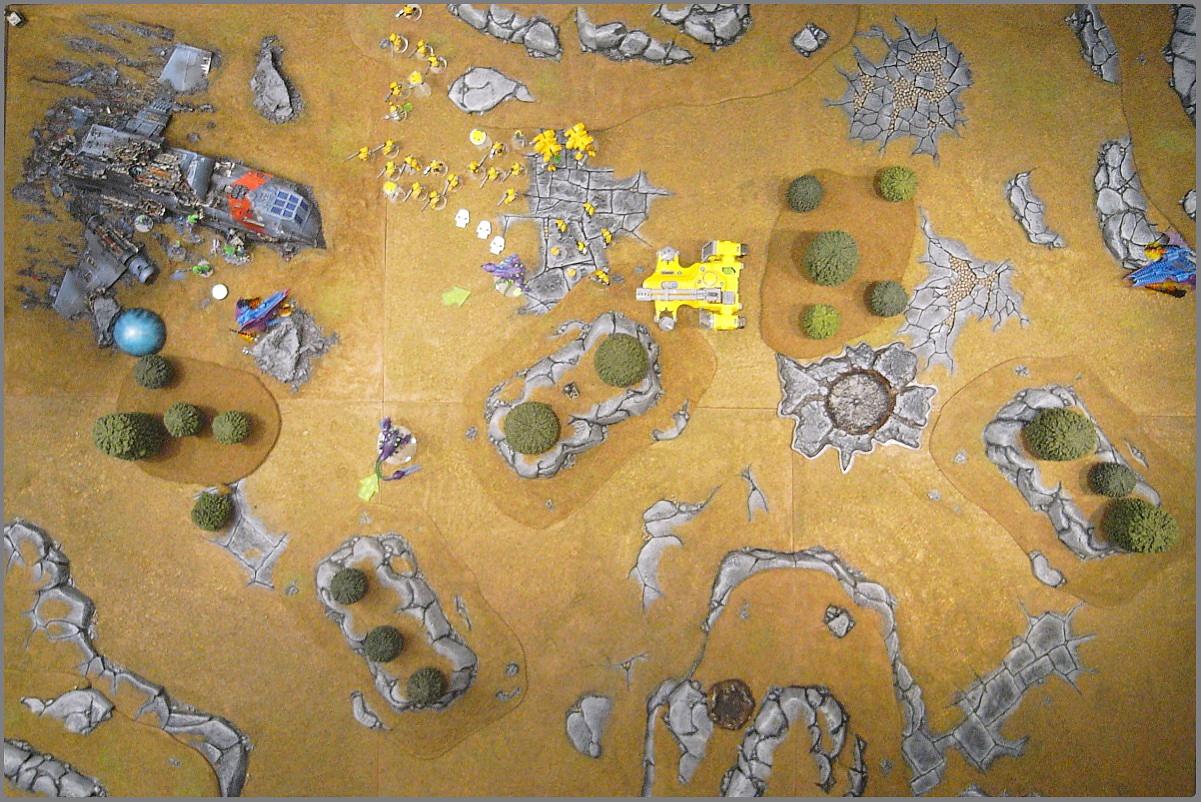
 Dark Eldar Turn 2
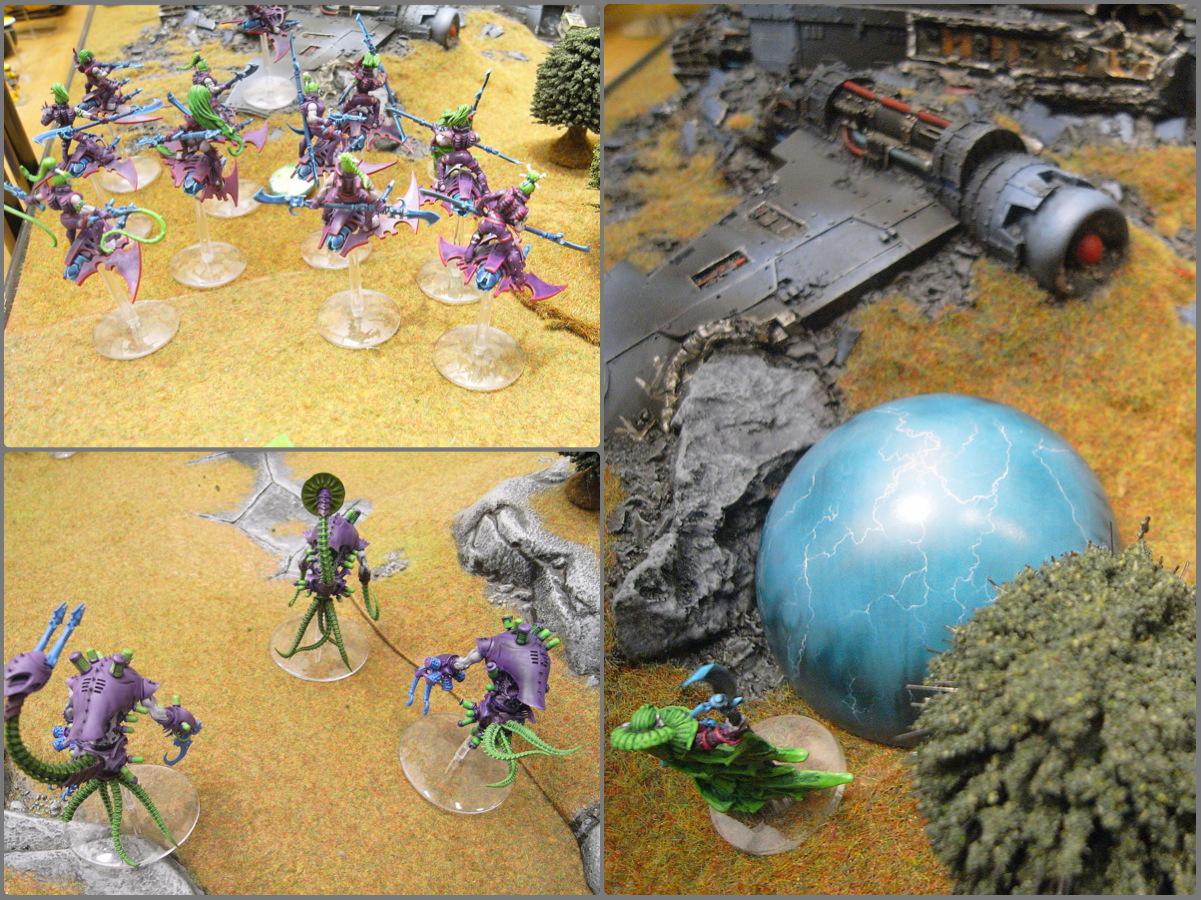
 The Hellions with the Baroness continue to zoom down the flank. Unfortunately, both Talos and the Chronos turn up before the Haemonculus has had a chance to open the warp portal, so they have to walk on from the table edge!
The lone Trueborn gets back in his Venom, and the skimmer kills the last of the Pathfinders, while the Venom on the right takes out one Stealth suit.
And, after placing the portal, the Venom and Trueborn squad with the Haemonculus fire at the Plasma Suits, killing two suits and one of the drones!
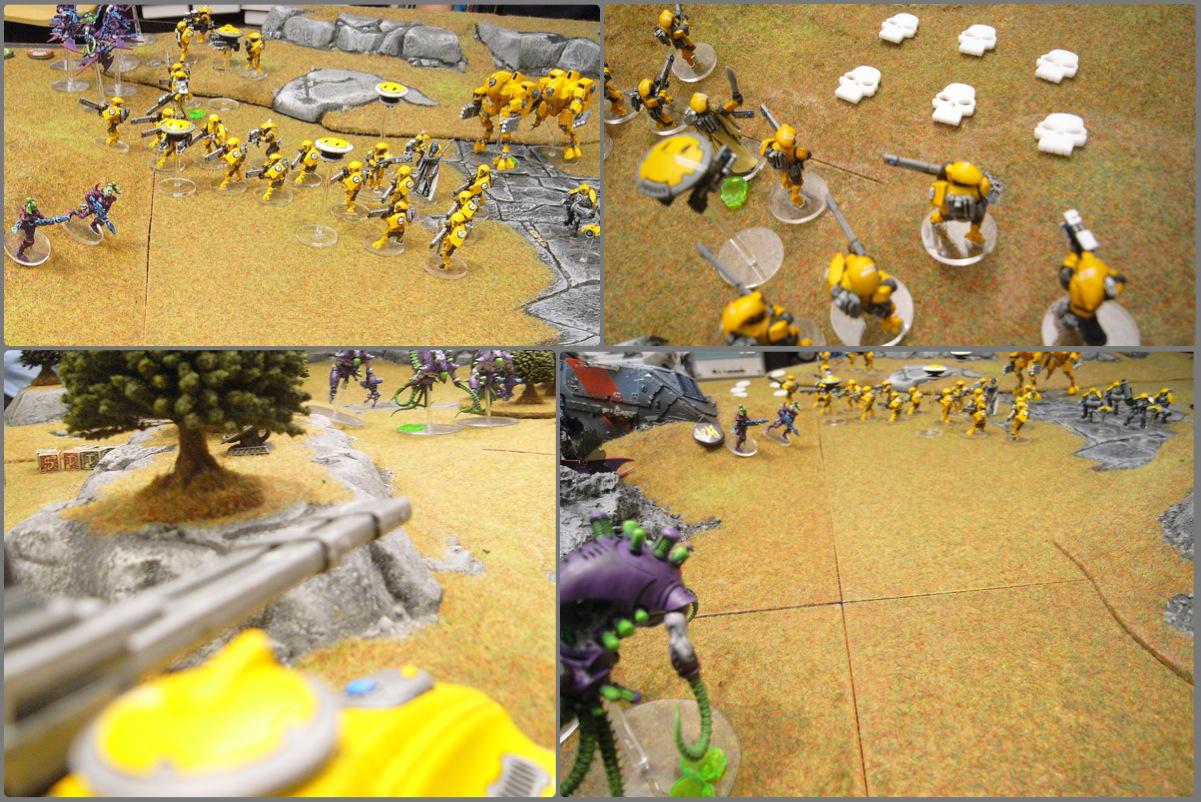
 Tau Turn 2
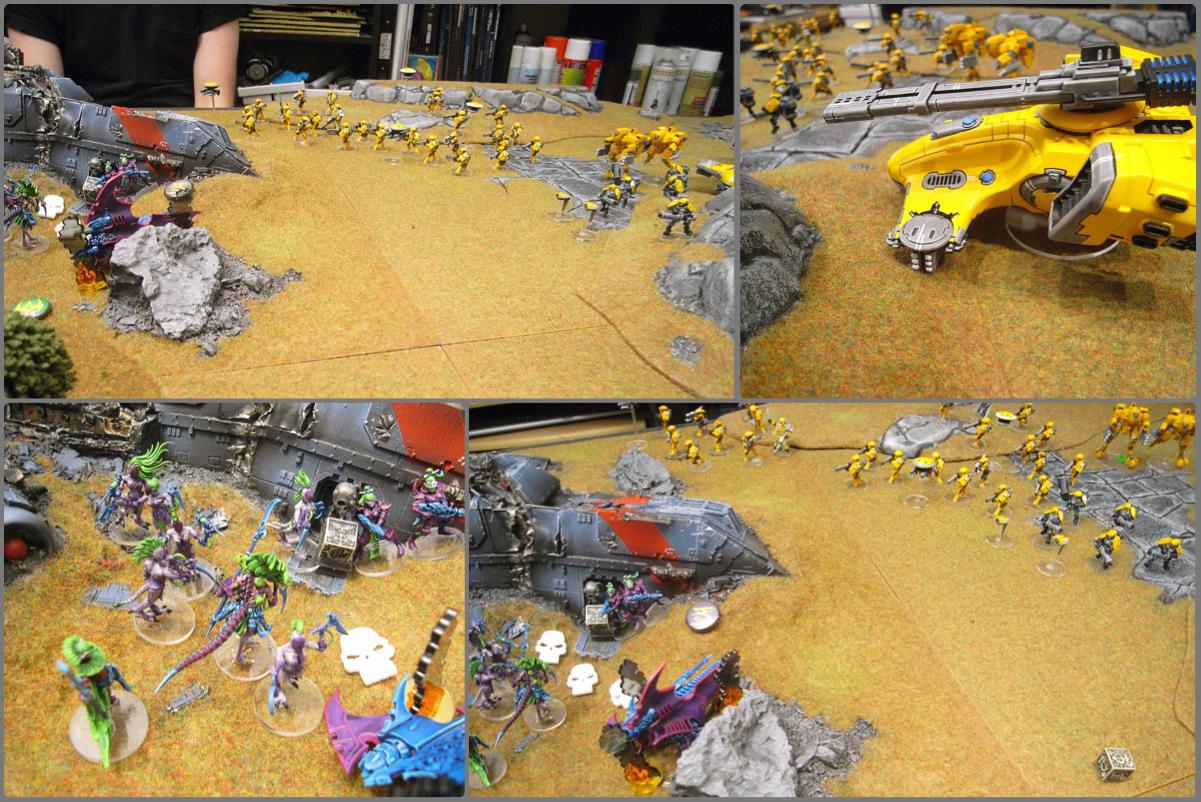
 The Tau gunline forms as two Fire Warrior squads and the Ethereal arrive on the top edge.
The rest of the army target the Venoms - the Missile Suits remove the last point from the one on the right, the Hammerhead explodes the one in the centre, and the lone Plasma Suit wrecks the one by the Thunderhawk.
The Stealth team forms up with the gunline to target the remaining Trueborn, but cover from the Thunderhawk wreck means they only kill one.

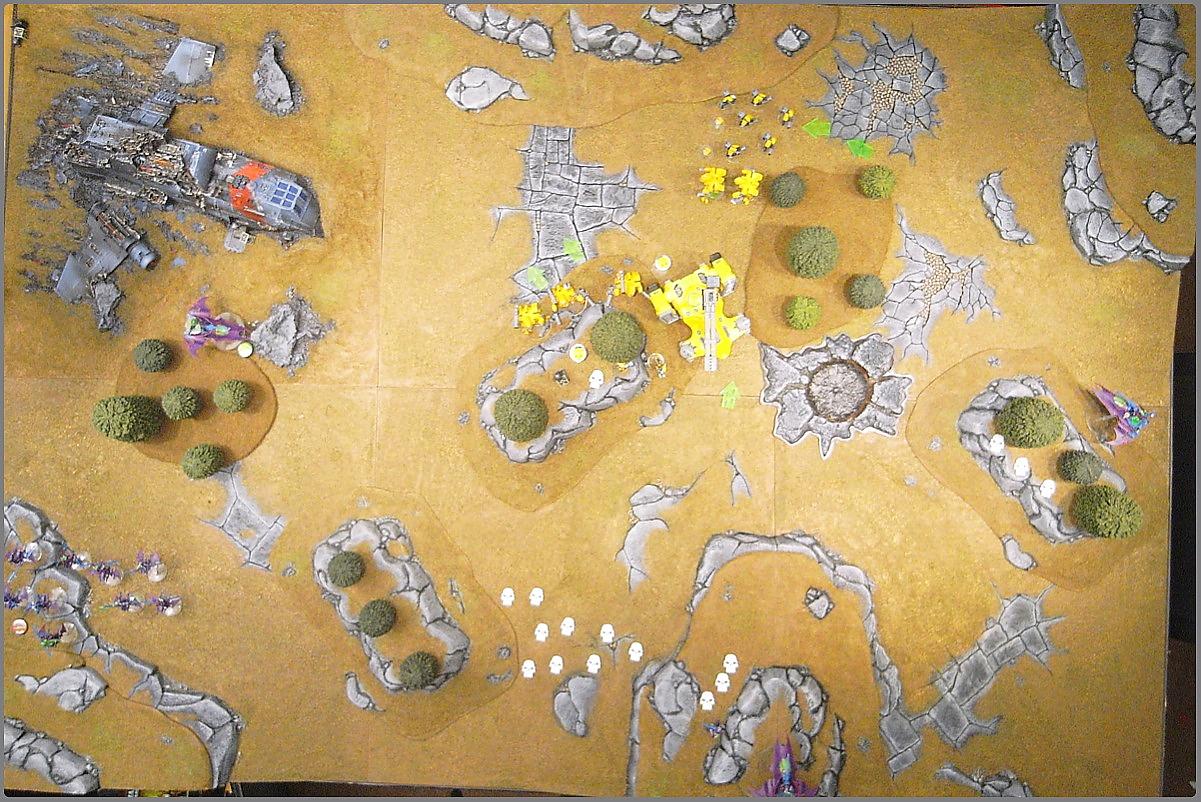
The game is now completely centred on the Thunderhawk.
 Dark Eldar Turn 3
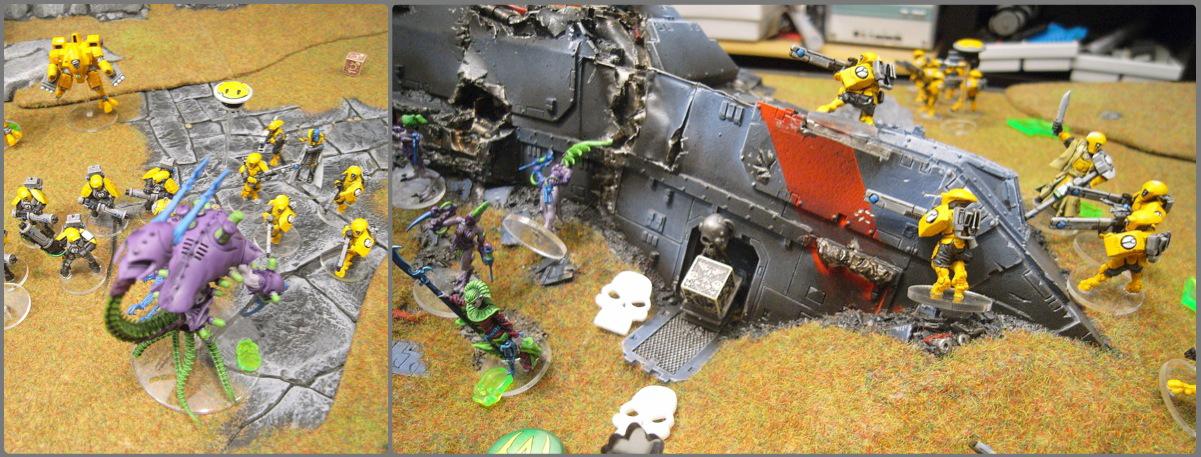
 The Hellions move into cover as the Wracks arrive through the portal, claiming the Thunderhawk objective.
Fire from the remaining Trueborn kills the last Plasma Suit.
 Tau Turn 3
 The final Fire Warrior squad arrives with the Fireblade, as the Ethereal’s section attempts to wheel around the wreck. Everything aims at the wracks, but they pass all their saves and only three die.
The Fireblade’s unit run toward the wreck.
 Dark Eldar Turn 4
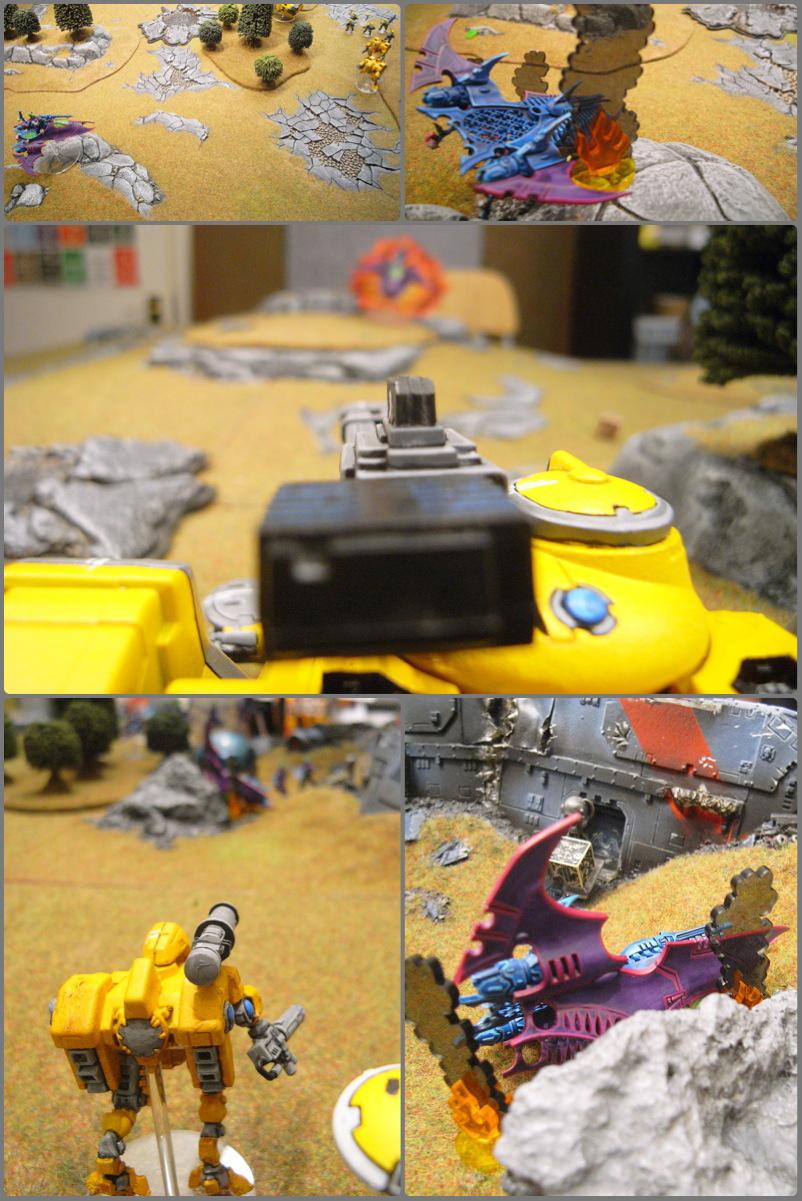
 The Helllions take the plunge, advancing over the Thunderhawk to charge the Fireblade’s squad. Massed supporting fire takes it’s toll, though, killing half the squad including the Baroness! In combat, half the Fire Warriors die and the Fireblade suffers a wound but, using their mission special rule, the Fire Warriors disengage at the end of the round.
Meanwhile, the Talos & Chronos advance, and the last Trueborn move into the open to get a shot at the Hammerhead, but miss.
 Tau Turn 4
 The gunline advances a little, the Fireblade’s squad firing four shots each at the remaning Hellions, killing them, and another squad taking out the two remaining Trueborn. The Hammerhead knocks a wound off the Chronos.
And then the Ethereal’s squad and Missile Suits take the final two wounds from it, killing it.
 Dark Eldar Turn 5
 The two Talos charge, but only one makes it into combat, munching through Fire Warriors and forcing the Ethereal’s squad to fall back. The Wracks move further into cover around the objective.
The Talos consolidates toward the Stealth Team.
 Tau Turn 5
 Realising that they’ve been moving backwards all game, the Fireblade’s squad run forward, just nudging close enough to contest the Thunderhawk objective. Nobody else is in range, so the entire line shoots at the Talos or the Wracks, but only kill two of the Wracks.
And END OF GAME! The main objective is contested, and the other two aren’t held, so it’s a draw!
Tau - 1VP (Slay The Warlord)
Dark Eldar - 1VP (First Blood)


 Besides, if it had worked, it would also have made a significant difference to the game. Win some. Lose some.


 70/100 of deathwing, 50/100 ravenwing, 80-100 3rd company
 +6k pts

 I have no idea what I'm doing...
 Raginmund, Jarl of Sepp

