Forum adverts like this one are shown to any user who is not logged in. Join us by filling out a tiny 3 field form and you will get your own, free, dakka user account which gives a good range of benefits to you:
No adverts like this in the forums anymore.
Times and dates in your local timezone.
Full tracking of what you have read so you can skip to your first unread post, easily see what has changed since you last logged in, and easily see what is new at a glance.
Email notifications for threads you want to watch closely.
Being a part of the oldest wargaming community on the net.
If you are already a member then feel free to login now.
Hi everyone - I don't normally take work in progress pics while I sculpt, but I remembered to do it with this one... at least, I remembered eventually; I forgot to take any armature pics.
What I'm doing is making a dragon for my 28 / 32mm range. I want it to be castable in metal, in a standard 9 inch mould. But making a dragon sculpt for casting in a 9 inch spincasting mould places certain constraints on the design.
Firstly, there's the size - there's only so much space in the mould. Secondly, it's flat - and this means the model has to be either tall and thin, or low and wide... or in lots of pieces, and I want to keep it down to 4 pieces at most. Thirdly, no single piece can be more than about 27mm thick at the widest point...
I experimented with a tall thin design first of all, but it was proving very difficult to achieve a good look without being in lots of parts. And with metal models, you want to avoid that really.
So I switched to the low, wide design. I also decided at this point to do something a bit different - to try and make a (nearly) physically-possible dragon, or as close as I could get within the design limits... and this means no more than 4 limbs, so the arms have to be the wings. And I went for a pterosaur-style wing, with an elongated finger down the outside edge. I also decided to make the dragon in a crawling pose, to get him on a level with the other figures in the range.
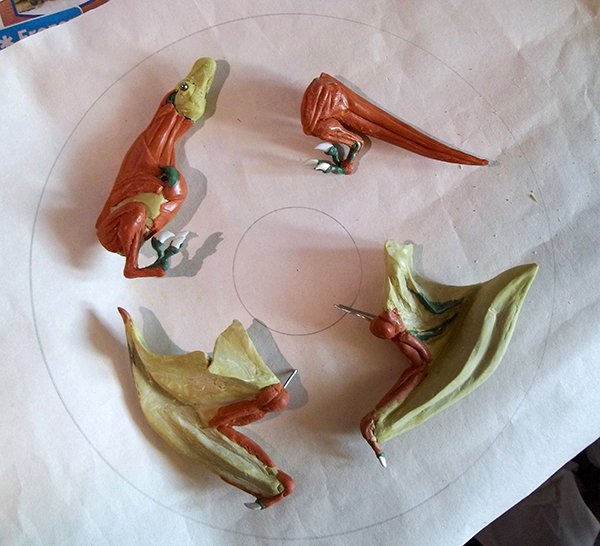
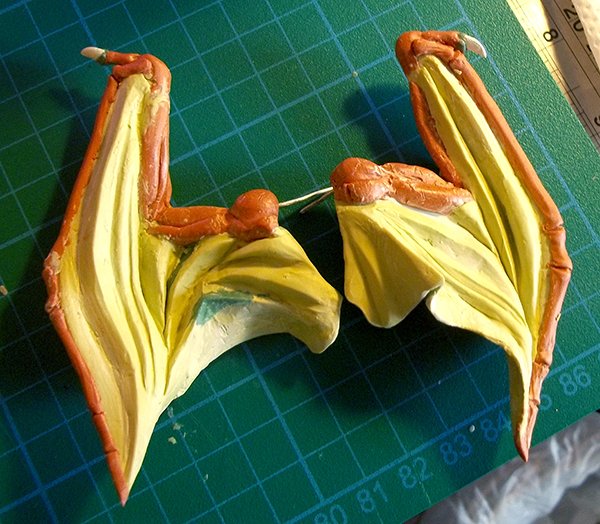
So I bent up some armature wire, and mixed up some Milliput putty, and made the basic shape. Then, using a different colour Milliput, I modelled the main muscles onto the dragon. Finally, I attached a couple of ball bearings for eyes. Then I laid the pieces out onto a sheet of paper with the shape of a 9 inch mould drawn on, to make sure it would fit!
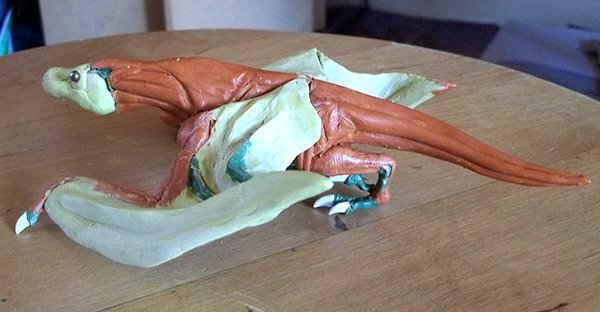
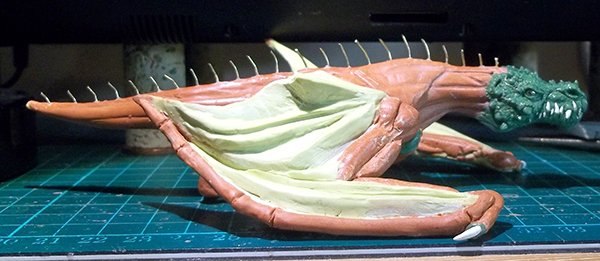
Next I stuck the pieces together to make sure it would work as a model...
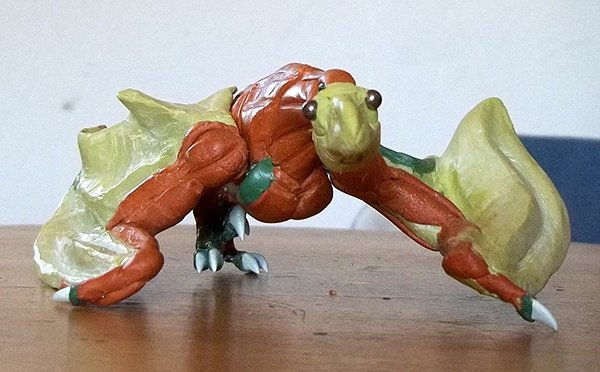
And here's an adventurer's-eye-view... more cute than menacing at the moment, really!
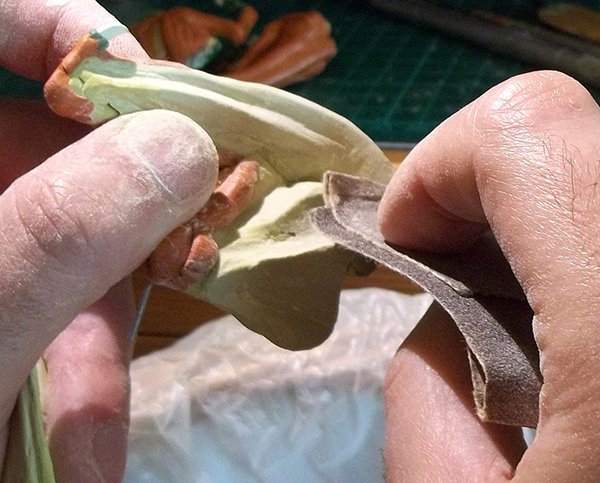
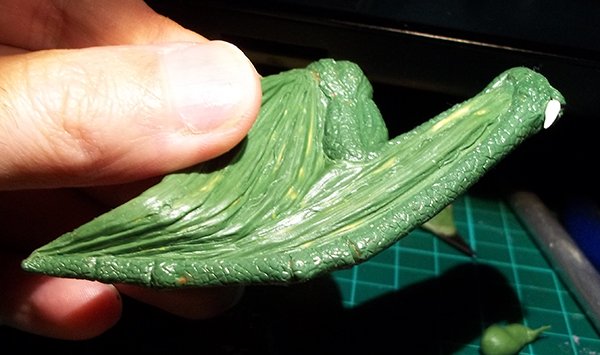
I decided to clean up the wings after that... added a few more folds, and sanded them down.
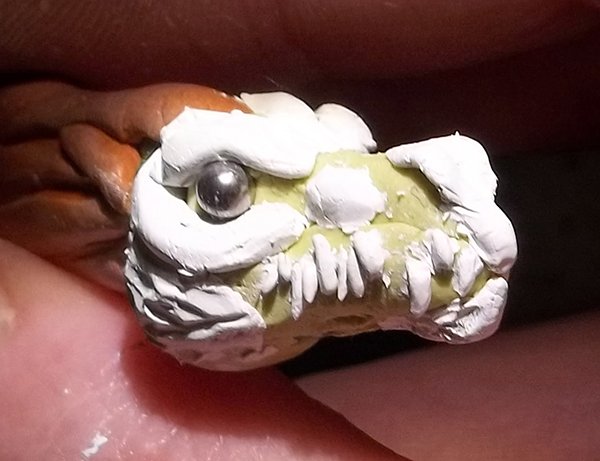
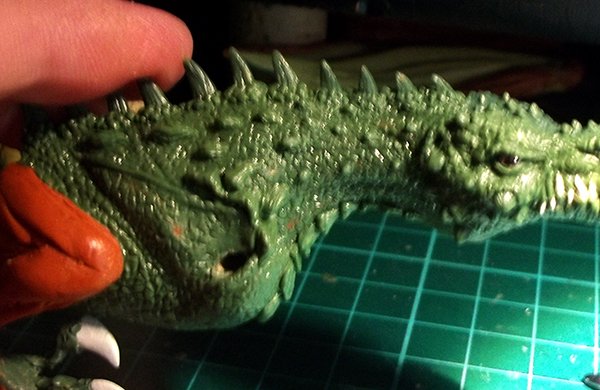
Next I began working on the head... firstly I added some more Milliput (White, this time - no real reason, but it's easier to see I guess!) to give some shape to the skull.
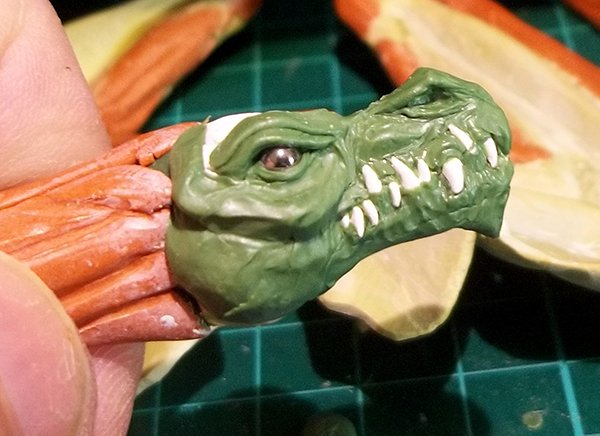
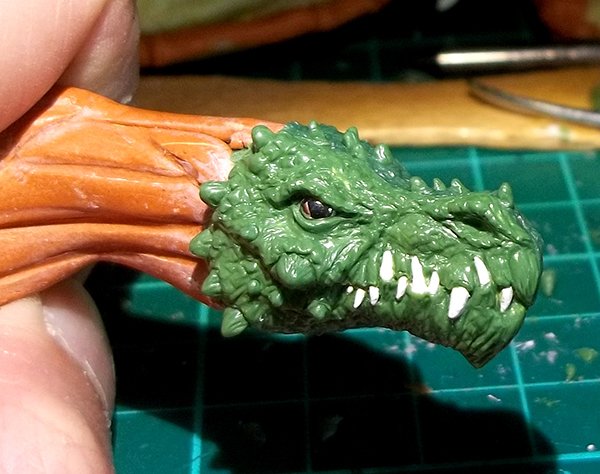
Once the Milliput was dry, I started working with Green Stuff over the top...
First layer:
Then while it is still soft, sculpting details into it:
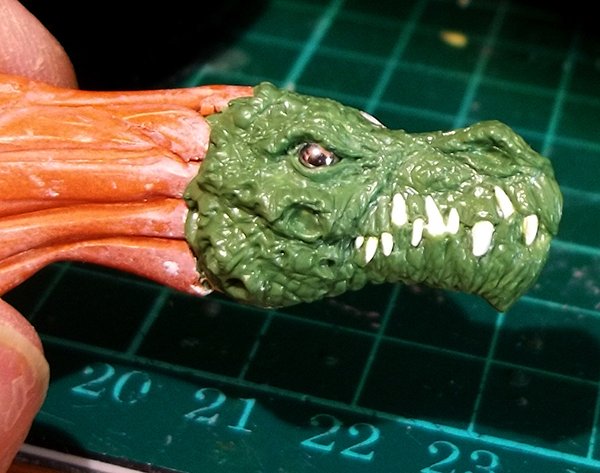
...and adding a few extra details...
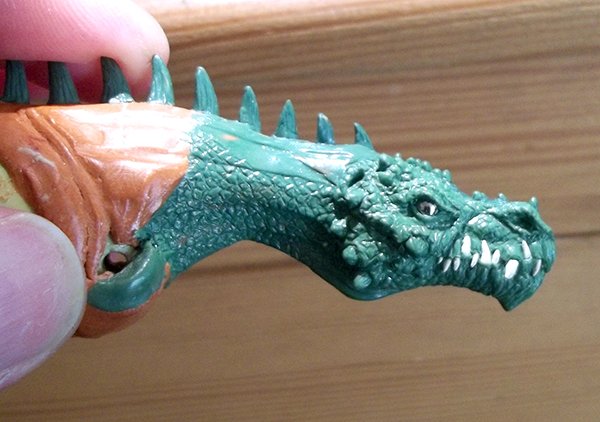
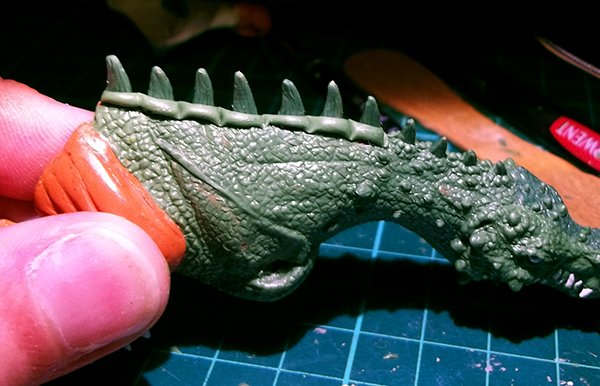
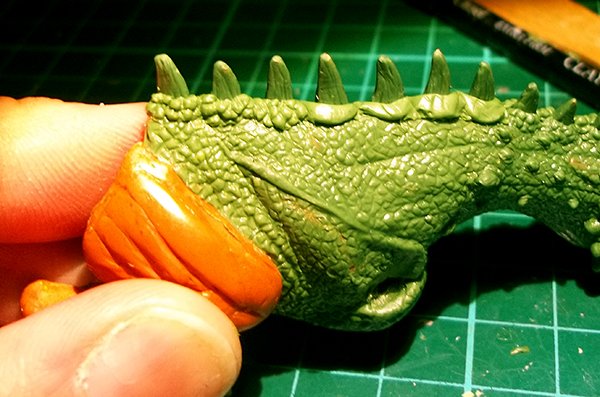
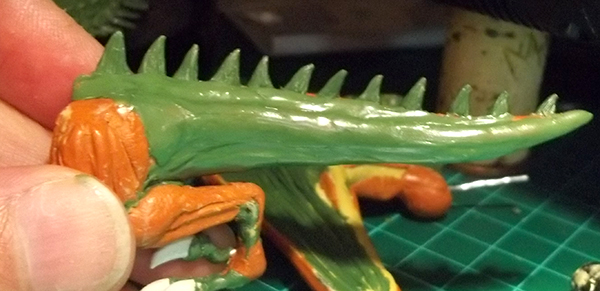
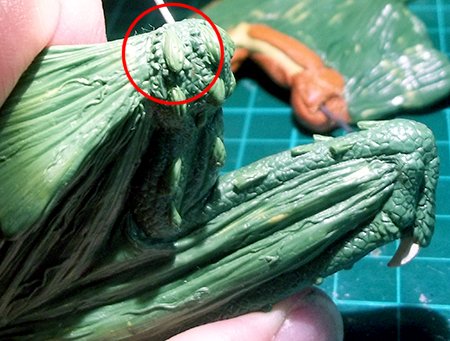
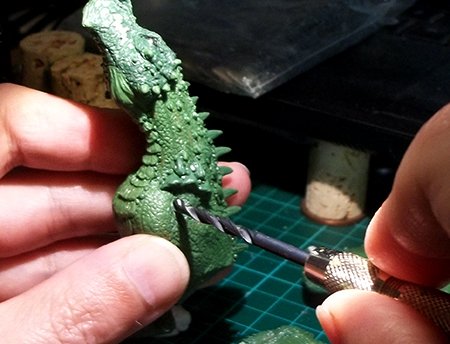
Then I decided he needed a row of spines down his back, so I drilled a lot of holes, and attached little bits of brass wire.
Next, I sculpted the spines, and started working down the neck...
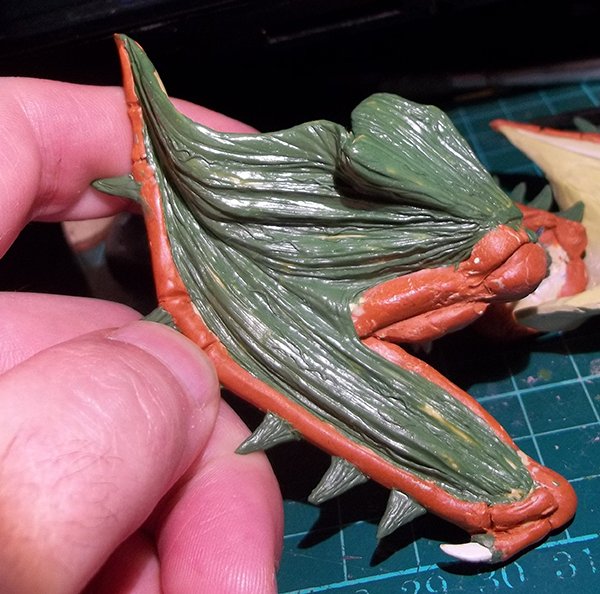
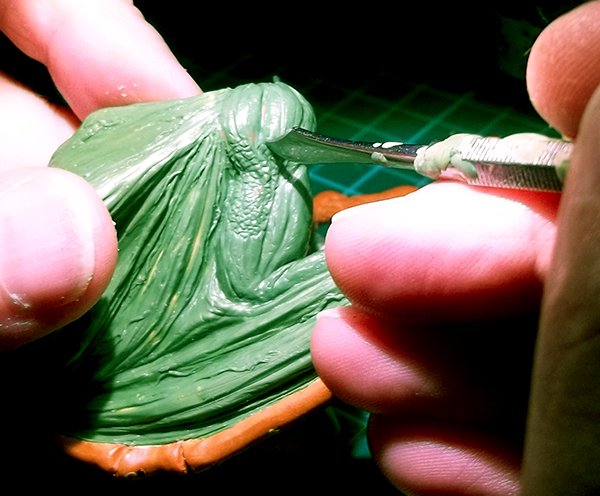
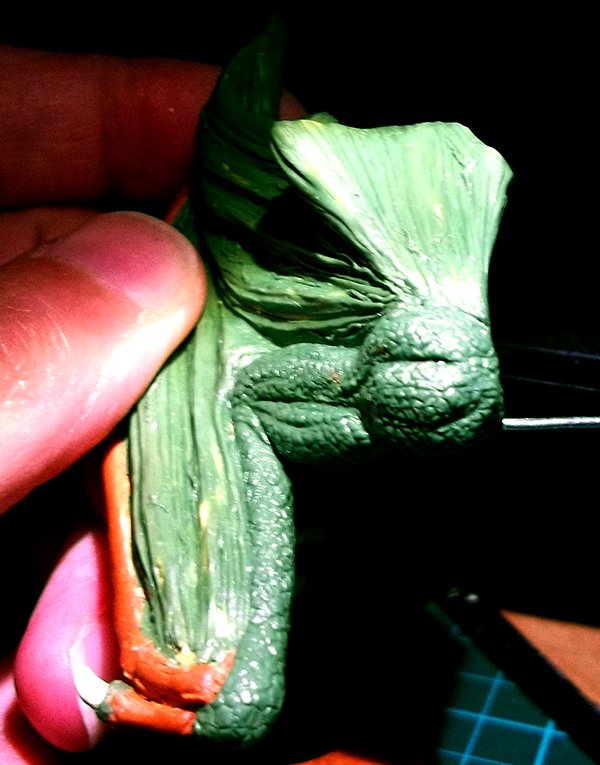
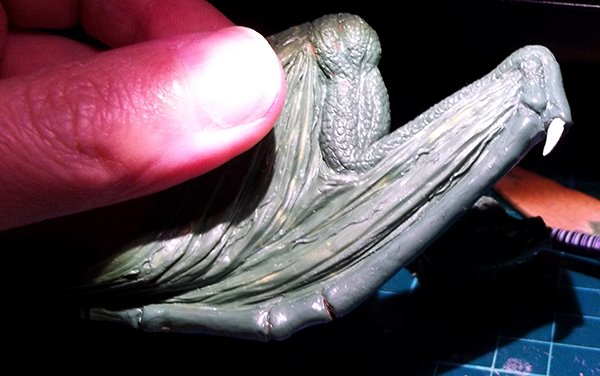
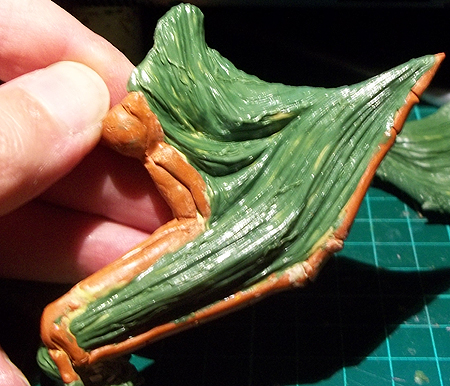
While that putty was curing, I made a start on the wing membranes.
(You can see there that I added spines to the wing edges as well... but I decided they didn't really work, and have cut them off.)
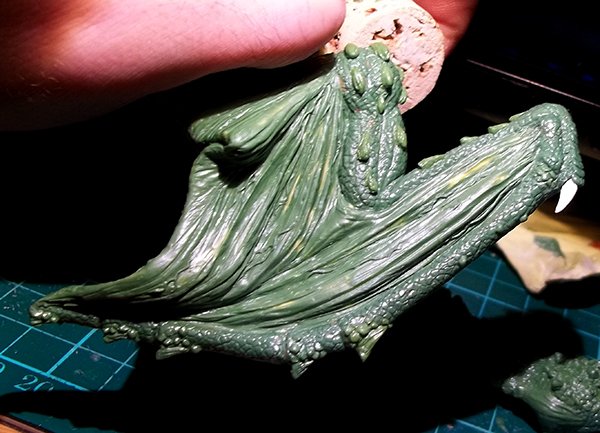
And I started on the body again:
And onto the underside of the wings...
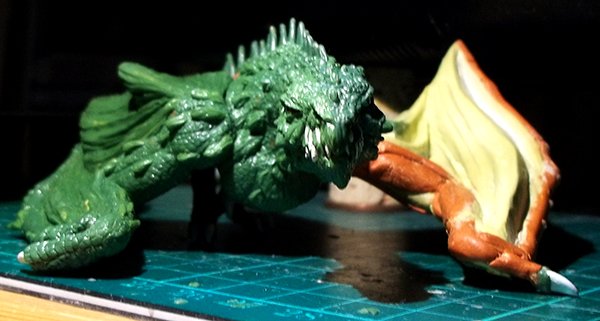
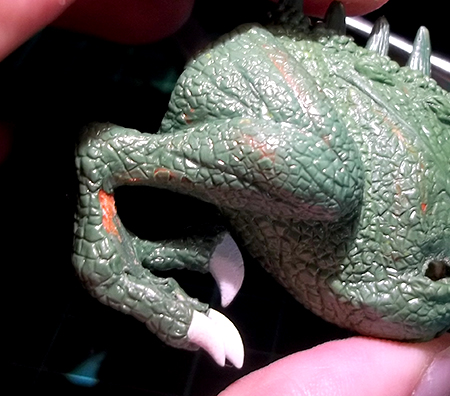
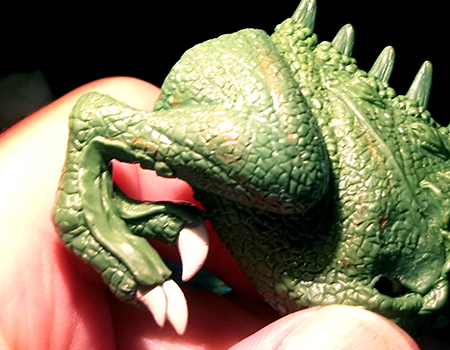
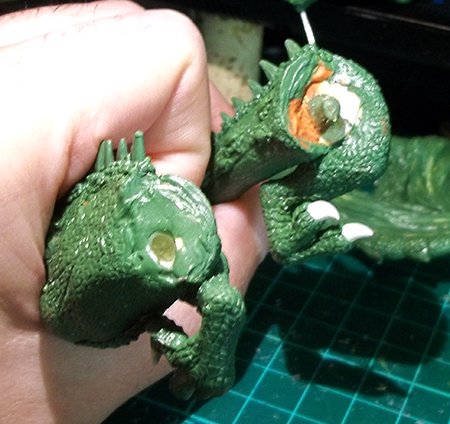
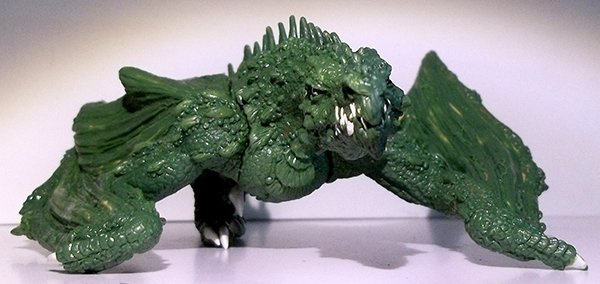
And then, a quick test fit - now the adventurer's-eye-view looks a bit scarier!
Next I continued working on the body, and got one of the wings finished.
I started by extending the skin down the side of the body:
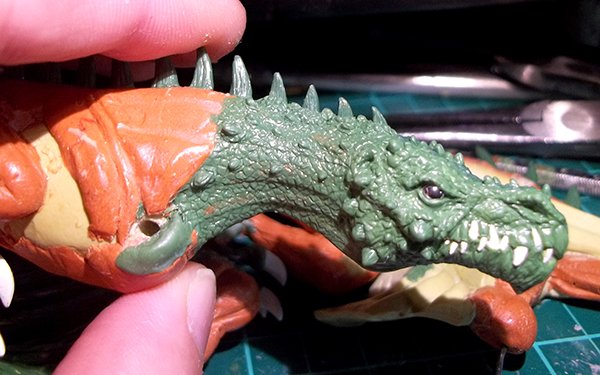
Then I added a strip of putty to the spines, to blend them in a bit:
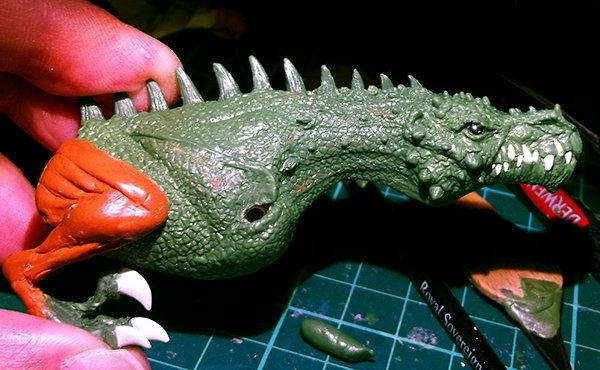
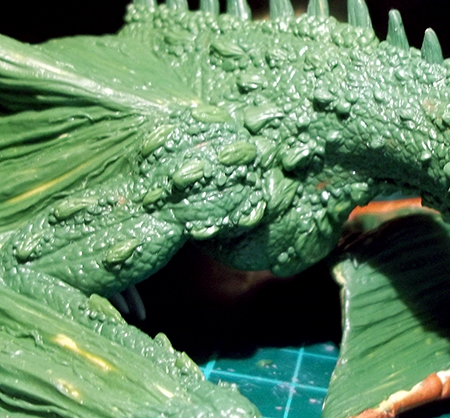
Then I started adding a few more large scutes / osteoderms to the body, and shaped them:
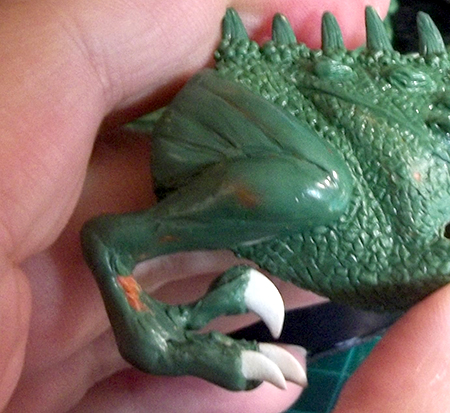
Next I started on the wing - I covered the shoulder and upper arm in putty and sculpted the scaly skin pattern:
Then I did the same for the rest of the arm - a layer of putty, then marking out the scales:
Then I added a bunch of extra scales, to make it look a bit more 'dragony':
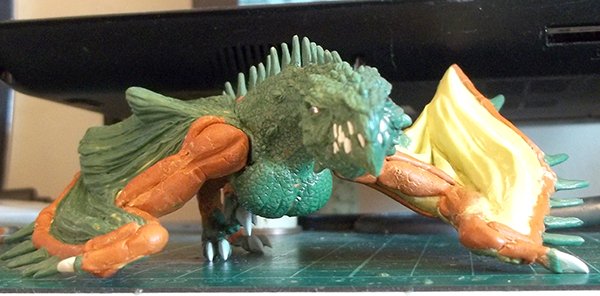
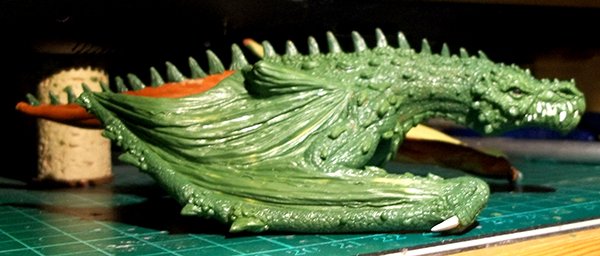
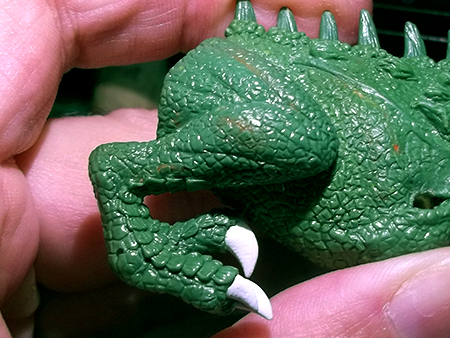
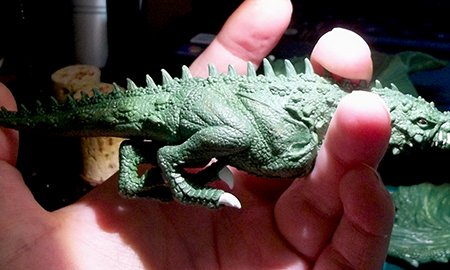
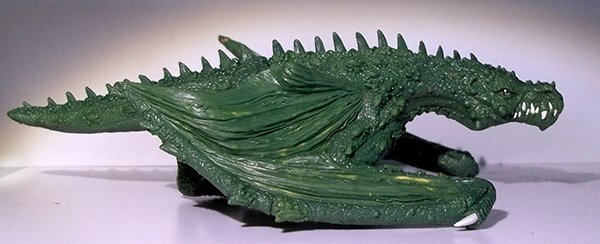
And putting it together - this is where we are at so far:
I'll get back to sculpting now... I've got a leg to do next. I'll post more when I've done it.
Awesome progress so far. I tried to sketch (and later sculpt) dragons myself during my life and i always fail to get the head right. But you did an excellent job there. And i like how you worked the folds and vains into the wings. The whole pose reminds me somewhat of a bat. Which is a good thing as your plan was to create a more realistic dragon. (Although you could argue that it is more of a wyvern than a dragon depending on what fantasy terms you look at)
One thing that i don't like are those larger scales( or bone plates? but not the spikes - i like those) on his arms and back. You did a fine job pulling the ones on the fingers into the scaley skin but i fear that the ones on the arm and the larger ones on the back are a bit too much even after adding additional scales around them. While i like the idea of them and they work nice to break the pattern of the scales i think they are a bit to large and look somewhat like foreign objects there.
But other than that great work on the sculpting and pose.
This message was edited 1 time. Last update was at 2013/09/25 09:54:04
Thanks everyone - your comments and feedback are all appreciated!
btldoomhammer wrote: One thing that i don't like are those larger scales( or bone plates? but not the spikes - i like those) on his arms and back. You did a fine job pulling the ones on the fingers into the scaley skin but i fear that the ones on the arm and the larger ones on the back are a bit too much even after adding additional scales around them.
While i like the idea of them and they work nice to break the pattern of the scales i think they are a bit to large and look somewhat like foreign objects there.
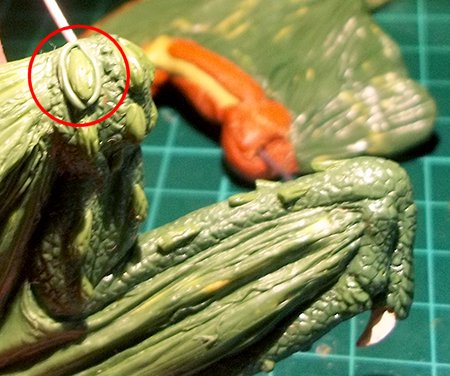
I've had a go at blending them in a bit more - hopefully it has improved things a bit. There's a few pics below, but they didn't come out very clearly...
Well, I managed to get a bit further with the dragon yesterday - so I think we are still on target for master moulding on Monday night...
I made a start on one side of the tail:
Next I did the membrane on the other wing:
...and then got to work on one of the legs:
While that putty was curing, I went back to the wing and body parts, and had a go at blending the large scales in a bit better. It's not easy to see in the pictures, but it definitely looks better now.
Today if it all goes to plan, I'll finish the second wing today, and the rest of the main body section.
Dude that looks awesome!!!
Wish I could sculpt even close to that standard. Where did you learn to sculpt? And do you have any links to good tutorials you could share with us sculpting noobs???
I guess it might just be me, but I liked the scutes before they were "fixed". If you look at real life examples on things like crocodillians, the scute is a single scale. The new ones look more like tumerous clusters instead...granted I tend to have the same issues with back spines as well, since those also tend to be single scales as you see on things like green iguanas or webbing/crests like you find on green basilisks and flying dragons.
Dont get me wrong, it looks good, but I do tend to prefer pulling from reality when I build my fantasies.
soitra wrote:... Where did you learn to sculpt? And do you have any links to good tutorials you could share with us sculpting noobs???
It's all just practice, really. I've never found anywhere that teaches mini sculpting. I've heard there's a lot of tutorials on You tube, but I've not looked, to be honest.
Cuchulain wrote:.... Is that green stuff?
Yes, green stuff over milliput.
Sean_OBrien wrote:I guess it might just be me, but I liked the scutes before they were "fixed"....
I know what you mean - but they just looked wrong to me. I think it was the size of them; if they were smaller, I think I'd have got away with them not looking so 'stuck on'.
Anyway, the last 2 days have been spent working flat out on dragon sculpting.
I completed the body, tail, second wing and second leg... I won't post work in progress pictures of them, because they are basically the same as the earlier pics! Instead, we'll go straight onto the putting-it-all-together bit...
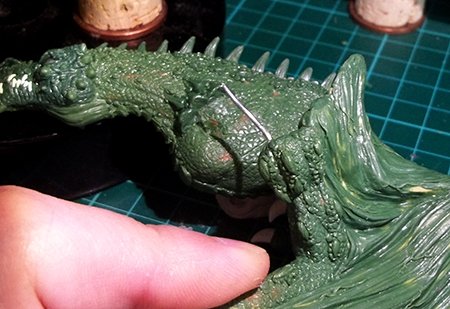
The body joint I'd fitted when I built the armature seemed to work well. It was basically just a hole on one part, and a section of oval brass tube on the other. All I needed to do was tidy up the joint surfaces, and it fitted together very cleanly.
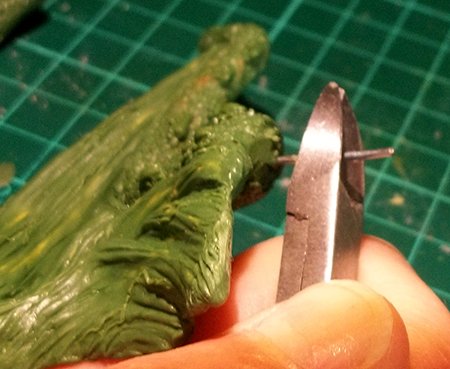
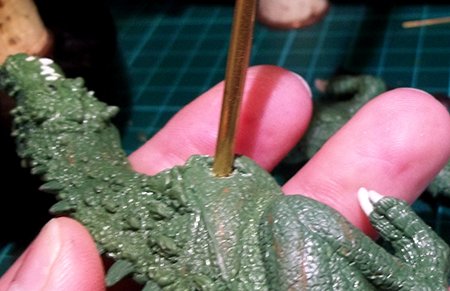
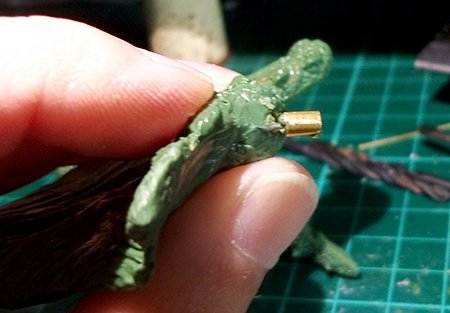
Next I sorted the wing joints - these were a bit more complicated... first I had to trim the armature wire, as it was too long. I left a short piece of wire sticking out - about 6mm or so.
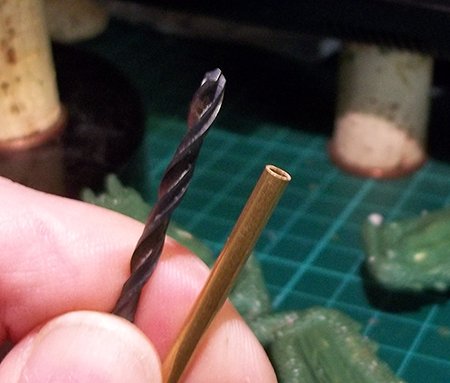
Next, I took a length of brass tube, and found a drill bit with the same diameter. Then I drilled two holes into the dragon's body, and checked to make sure the brass tubing would fit alright.
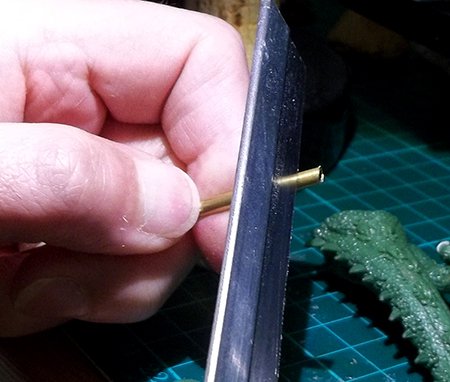
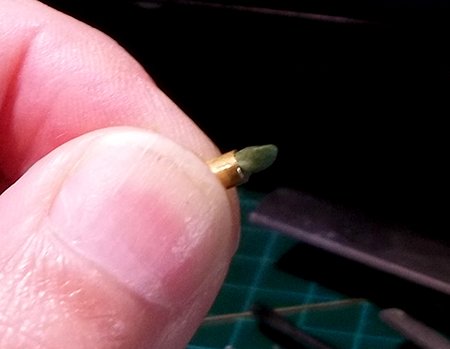
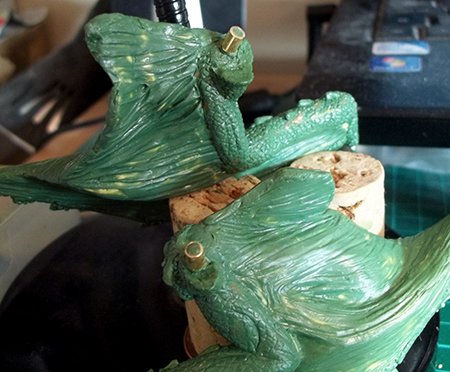
Then I cut two short lengths of the brass tube using a jeweler's saw. I stuffed some freshly mixed Green Stuff into the pieces of tube, and pushed them onto the armature wires on the wings. I smoothed off the excess Green Stuff, and left them to let the Green Stuff harden.
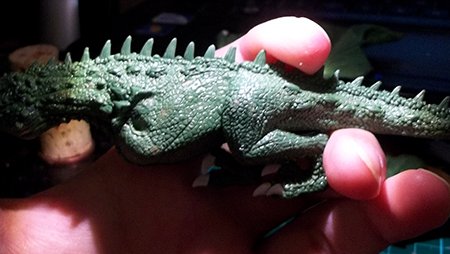
Finally, I put it all together and took a couple of photos and a little video...
I want to see this thing painted. If you can paint it to the same standard as the sculpting it'll be so epic.
I'm celebrating 8 years on Dakka Dakka!
I started an Instagram! Follow me at Deadshot Miniatures! DR:90+S++G+++M+B+IPw40k08#-D+++A+++/cwd363R+++T(Ot)DM+ Check out my Deathwatch story, Aftermath in the fiction section!
Credit to Castiel for banner. Thanks Cas!
AntomanElven wrote:.....Is that dragon cast in metal on your kickstarter, or what?
Yes, it's a metal model.
PrehistoricUFO wrote:I was actually a vocal supporter for your Dwarf models when you first posted them I think on Warseer (or maybe here) to ask for opinions.
Thank you!
RiTides wrote:It's fantastic seeing how you took this from start to finish. Thanks for sharing it!
Glad you enjoyed it! The hardest part was remembering to take the photos as I went along...
Vineheart01 wrote:...i want one so i can make my Warboss ride in glory! lol
Well, you can always pick one up on our Kickstarter...
Not massivily impressed but you look to be on the rigth path, I think the pose would be more fitting if it where a baselisk or something like that. Intrested in seeing how you proced
Wow, great sculpt! Well done with persevering with what I would think would be a tedious task in sculpting all the scales.
Awesome wings and face!
WAAAGH! Gutsnagga Mo-ork- 5000pts Kult of speed + goffs
red space marines, (almost angry enough!) 2000 points
Here's my P&M blog - http://www.dakkadakka.com/dakkaforum/posts/list/551978.page And here's a thread of my completed miniatures -
http://www.dakkadakka.com/dakkaforum/posts/list/551971.page 'You have that the wrong way around. Space Hulk teaches the inmates how large numbers of fast moving vicious hand to hand combatants can over come a small number of gun armed adversaries, in a sequence of narrow corridors.' -Orlanth


 Innocentia Nihil Probat.
  Son of Dorn
 3500
3500 


 An ork with an idea tends to end with a bang.
 14000pts Big 'n Bad Orkz
 6000pts Admech/Knights
 7500pts Necron Goldboys


 red space marines, (almost angry enough!) 2000 points
