Hey everyone,
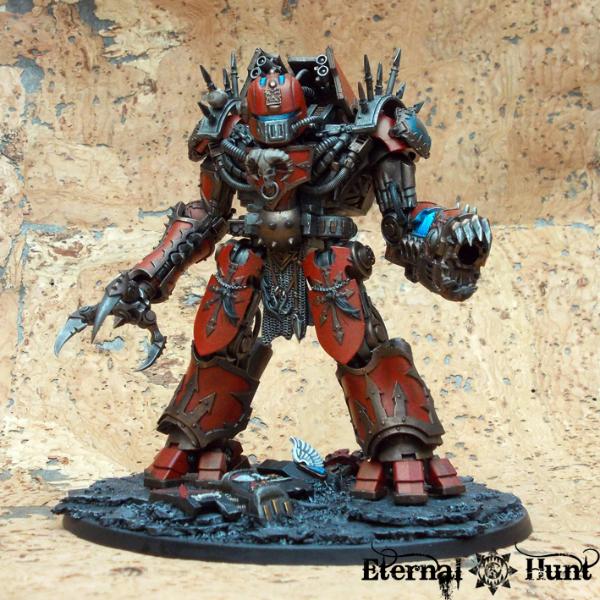
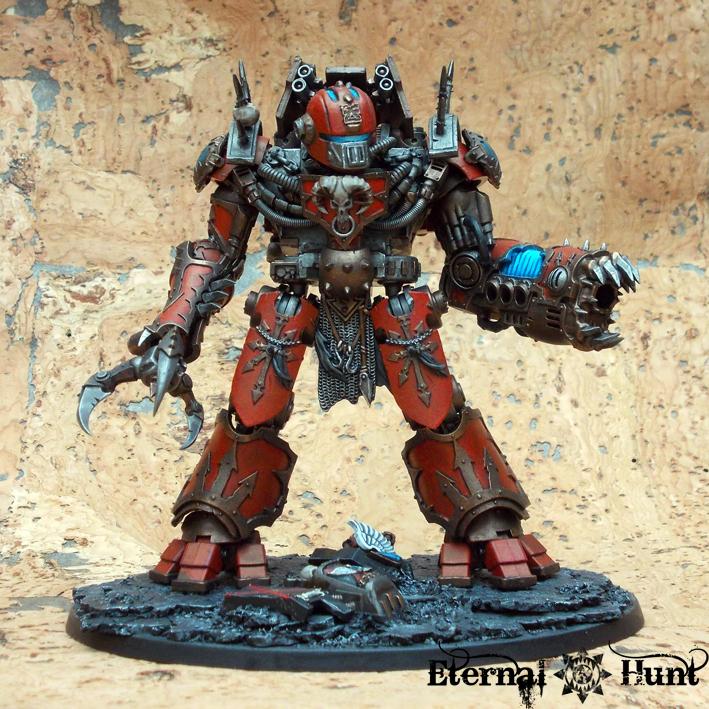
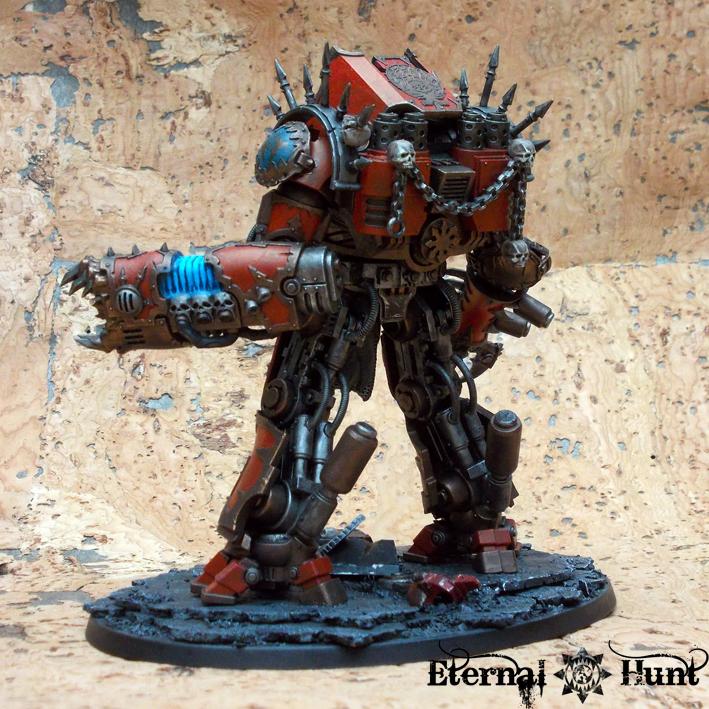
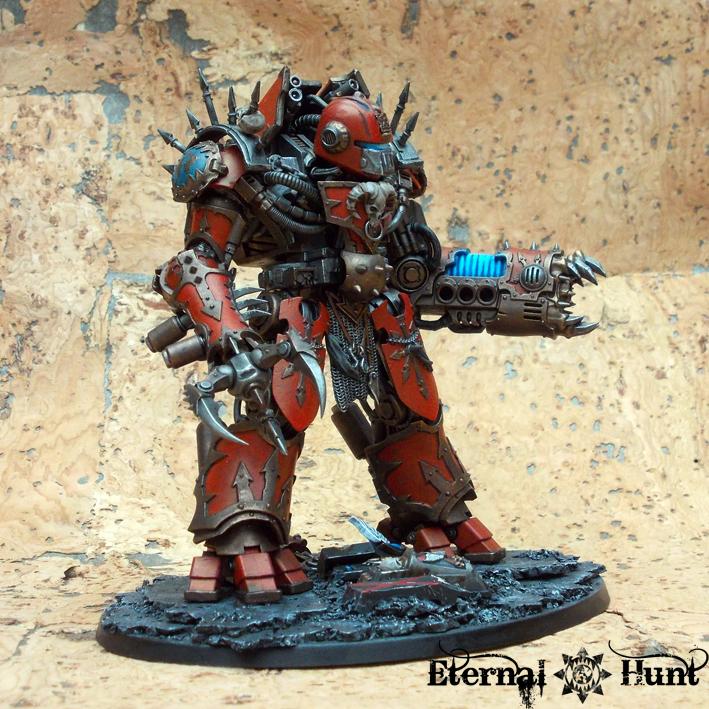
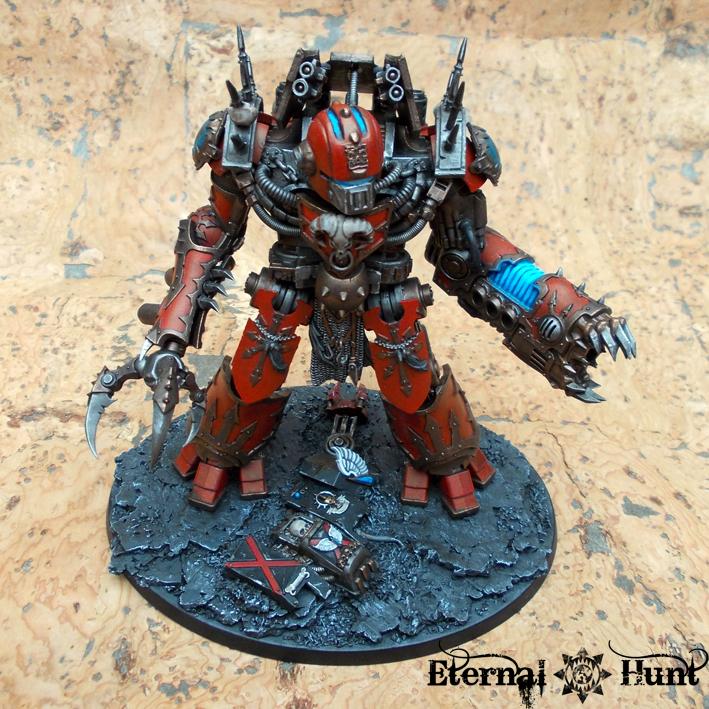
Some time ago, I built a new warmachine for my army of World Eaters. I called it the Wargrinder, and this is what it looks like:
Since quite a few people have been requesting some kind of tutorial for this conversion, here you go: A set of (hopefully) short and concise instructions that will lead you to your own counts as Defiler/Decimator/Knight Titan/whatever fighting in the service of the dark gods.
Before we begin, a disclaimer of sorts: What originally gave me the idea to tackle this conversion in the first place was Chris’ great Decimator kitbash on his blog,
A Host of Word Bearers . Be sure to check out his version as well, because the idea was really all his. His model also shows that there are numerous visual alternatives to the bitz I chose. And none of this would have happened without him, so a huge THANK YOU to Chris!
Many thanks must also go to my fellow hobbyists
Biohazard and
GuitaRasmus , whose fantastic, kitbashed daemon engines and vehicles never fail to amaze and who taught me that attempting a bigger model like this was a possible (and rewarding) hobby endeavor. Thanks, you guys!
So, let’s cut to the chase, shall we?
I. What you need I’ll list the ingredients for the model exactly as I built it. However, in case you cannot get hold of some of the bitz or prefer a different approach, feel free to substitute whatever bitz you like or have lying around – this is chaos after all

Anyway, here’s the shopping list:
- One complete Nemesis Dreadknight kit (or, failing that, at least get the legs and torso)
- Two arms from the Heldrake kit (yes, the long arms that the wings are attached to). You’ll at least need the claw for one of the two arms as well.
- The armour plates from the
Maulerfiends’ front legs .
- An
ectoplasma cannon from the Forgefiend
- Two shields from the WFB warriors of chaos -- whatever designs suit you best.
- A loincloth from the plastic daemon prince
- Some additional chaos armour plates. In my case, I used one armour plate from the Heldrake kit,
one from the Forgefiend/Maulerfiend kit and one from the Defiler
- A suitable head.
In my case, I used a head from an old 80s’ G.I.Joe action figure called “Big Boa”, but there are really lots of lots of heads you could use, chief among them the skull head from the Khemri warsphinx kit (or the other head variants that come with the kit), a Defiler head and facemask, a juggernaut head or something similar
- A smoke launcher from the chaos vehicle sprue
- Whatever spikes, chains, skulls and doodads you might want to use for additional decoration. I used two ogre gutplates to represent the World Eaters’ legion bagde, two circular trophy racks and a skull and chain combo from the chaos vehicle sprue, a
FW brass etched Khorne symbol and a horned beast skull (from the WFB Minotaurs, I believe).
- Whatever bitz and materials you need for the base.
II. Preparation: 1. Collect and clean all the bitz you need, get rid of the mouldlines etc. This should be par for the course.
2. When you look at the two armour plates from the Maulerfiend’s front legs, you’ll see that one of them has some Forgefiend fingers attached to them that you’ll need to get rid of: Carefully cut them off and sand down the remaining stubs until the right armour plate looks exactly like the left.
3. You’ll need all the cables you can get for this conversion, so you might want to collect all the cables that come with the Dreadknight kit at this point. In some cases, you will have to cut them off the Dreadknight weapons.
4. Get some modeling putty to tack parts of the model together! This will be a pretty huge model, and painting it will be much easier if you keep it in several sub-assemblies. Trust me! Still, you’ll want to test fit the different parts of the model, and you’ll need the putty to get an idea what the finished model will look like.
And we’re good to go.
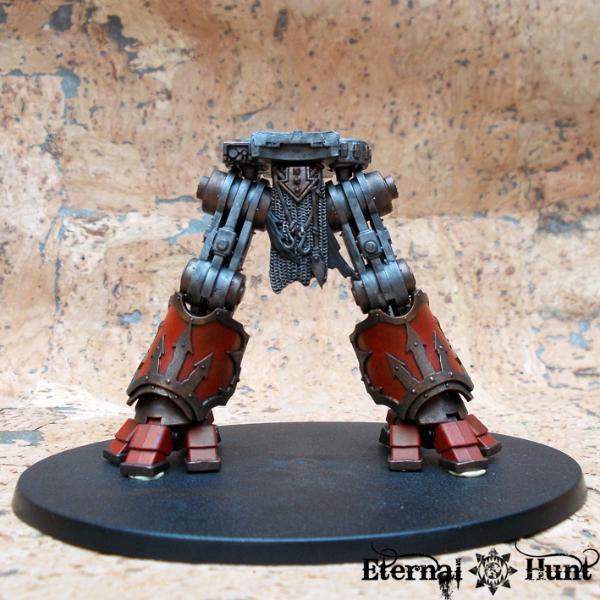
III. Assembly 1. Assemble the legs and feet as described in the Dreadknight instruction manual. Leave off all the armour plates, though.
2. Use modeling putty to attach the feet, legs and crotch area to the base. That should give you a good and rather stable base to work from. You’ll notice that the Maulerfiend armour plates perfectly fit the Dreadknight lower legs, by sheer coincidence. The
WoC shields will later be used as armour on the upper legs. For now, none of this needs to be glued together, though: Leave that until after painting. The tacked together legs should look pretty much like this (only without the colour):
3. Next up, you’ll need to cut the little platform the Dreadknight’s pilot is standing on away from both the crotch area and the torso base. Gently cut it off in a slight curve. Don’t worry if it turns out slightly messy – bitz will be used to cover this area.
4. Afterwards, assemble the basic Dreadknight torso as described in the instruction manual until you end up with something looking pretty much like this (minus the head and shoulders and the armour plate over the torso, of course):
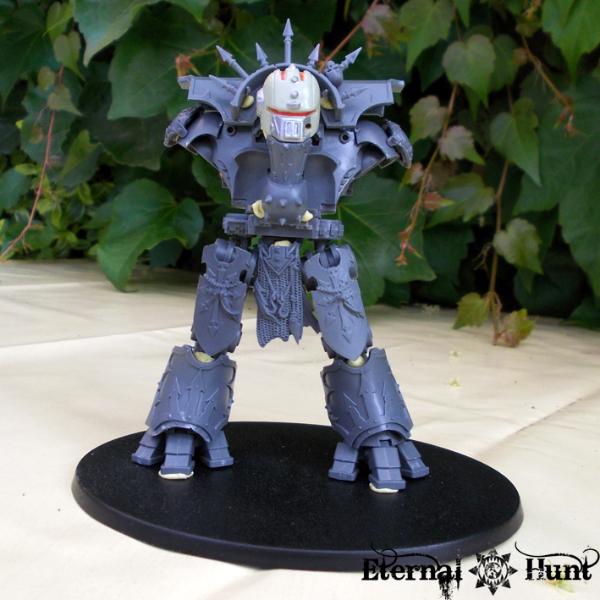
The basic torso construction should be glued together at this point. However, don’t glue it to the lower body yet: Again, you should leave that until after painting.
5. Before you continue, you should take a moment to think about where you want the head to sit on the finished model: If you favour a more upright position, like on my model, read on. If you would like to have the head sit more in the chest area, you will have to adjust the next steps accordingly to reflect that.
6. Use all the different cables from the Dreadknight kit to cover up the hollow part at the front of the torso and to get a look slightly resembling that of the original Decimator. Try to go for a slightly symmetrical setup, although it doesn’t need to be too exact. In my case, I used a piece of Maulerfiend lasher tendril to mark the middle of the body, so I had something to tell me what the cables should connect to. After this step, you should have something like this (again, minus the armour plate on top):
7. Attach the head by whatever means necessary
In my case, I used a generous helping of superglue to attach the head to the model, plus some additional cabling to create more points of attachment. If you’re not sure about the position yet, use some modeling putty to experiment with different setups.
8. While the torso is drying, begin assembly of the arms. If you want to replicate my weapon setup, follow the steps as described. If you want to go for a different loadout or would like to magnetise the arms, more power to you! You’ll have to adjust the next steps accordingly, though.
9. The right arm is basically a standard Heldrake arm, assembled as per the instruction manual. The only deviation from the standard is that I cut off the three small, decorative winglets on the forearm, because I thought they looked slightly silly. To fill the holes, I used some bitz (in this case, some bolts from the Dreadknight kit). The arm can be glued together (although I’d personally leave off the clawed hand and only permanently attach it after painting.)
10. The left arm uses the upper arm from the Heldrake kit. I cut off the elbow joint, following the curve of the armour. The forearm is simply an ectoplasm cannon from the Forgefiend kit. I used some cabling and one of the hydraulic struts that come with the Dreadknight kit to improvise a new elbow joint and to attach the weapon at the angle I wanted. All the parts of the arm can be glued together at this point.
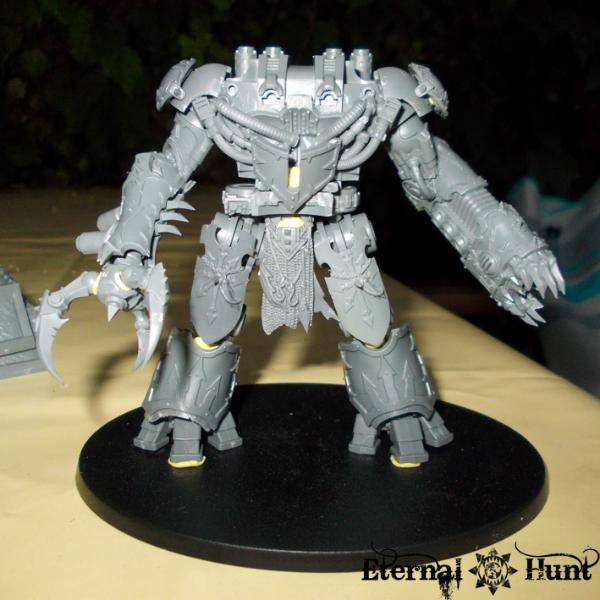
11. After the arms have been completed, you’ll have something like this:
12. Only detail work remains: I used the armour plate from the defiler kit to work as some kind of cowling above the head, and to bulk out the shoulders of the model. The smoke launcher was cut in half, and both halves were glued into the cowling at an angle.
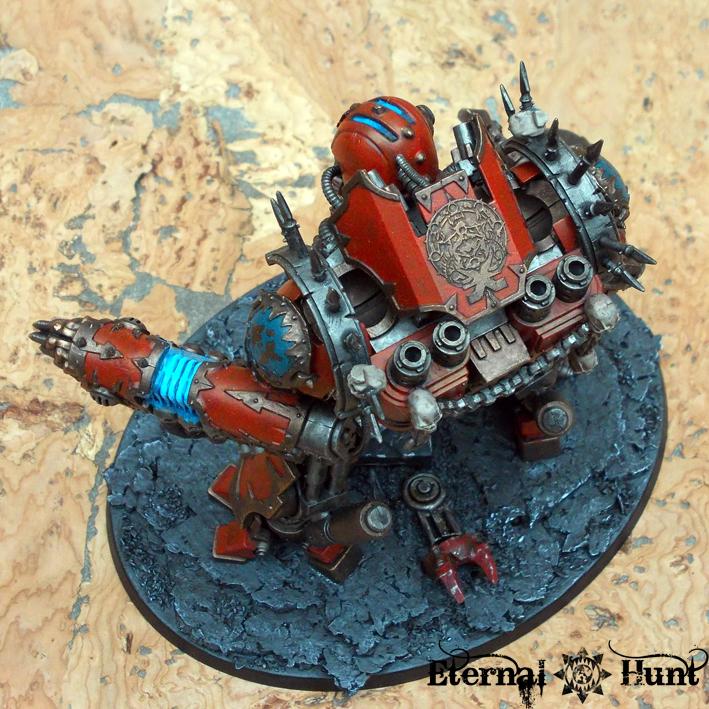
13. And finally complete the detail work on all the additional bitz and armour plates you might be using. For my model, that meant adding the horned skull to the chest armour, adding some skulls and chains to the reactor on the model’s back and preparing the rest of the bitz. Take a moment to think about which bitz to glue on and which to leave for later. In my case, the trophy racks, cowling on the model’s shoulders and improvides legion badges were all only attached with modeling putty to be taken off again during painting.
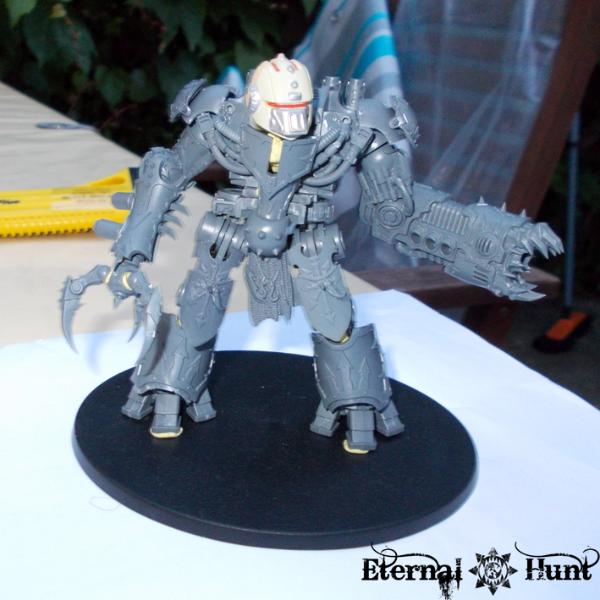
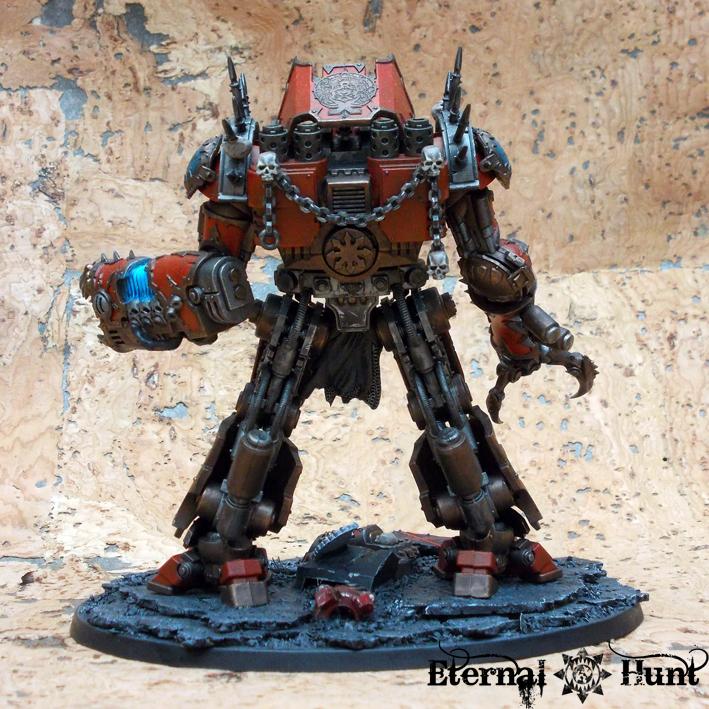
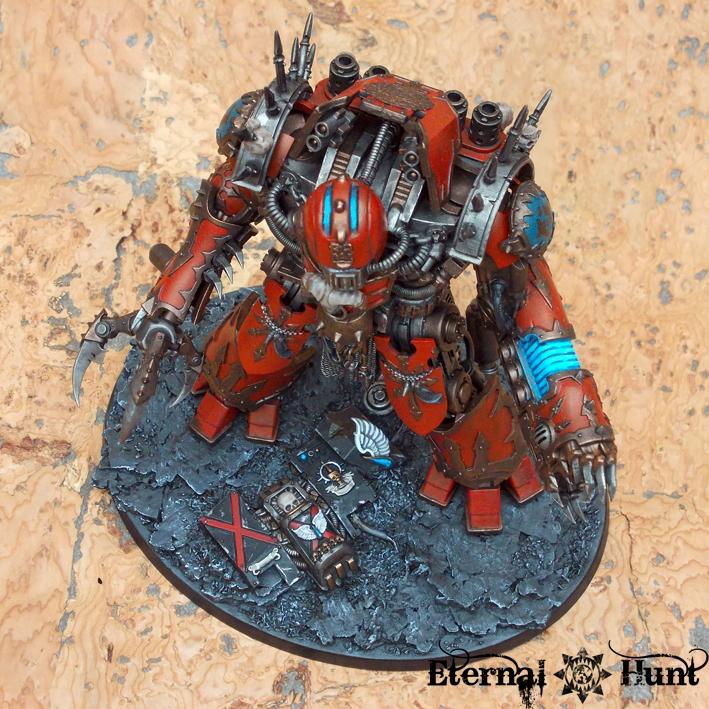
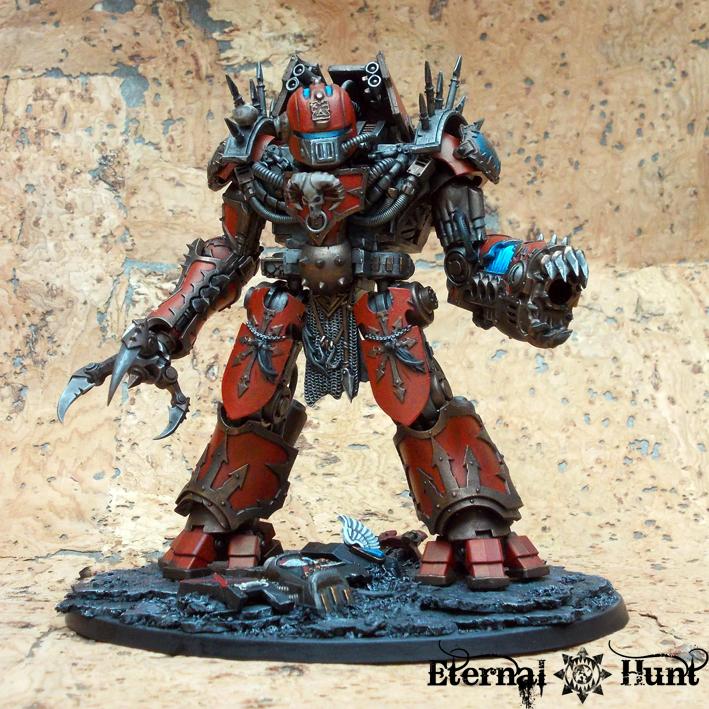
14. At this point, the model should basically be completed. It should look like this:
 IV. Painting
 Now, if you listened to me and kept the different sub-assemblies only temporarily attached with modeling putty, you’ll be able to disassemble the model for easier undercoating and painting.
1. Personally speaking, I’d advise you to first paint the feet, legs and crotch area, then glue the finished pieces together, so it looks like this:
2. You can then paint the torso and add it to the legs. Like so:
3. And finally, you should paint both arms and glue them to the torso. You should also paint and attach any additional bitz at this point.
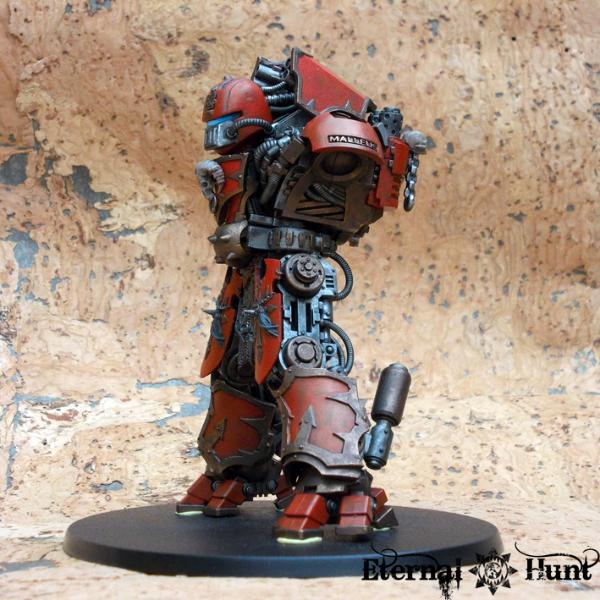
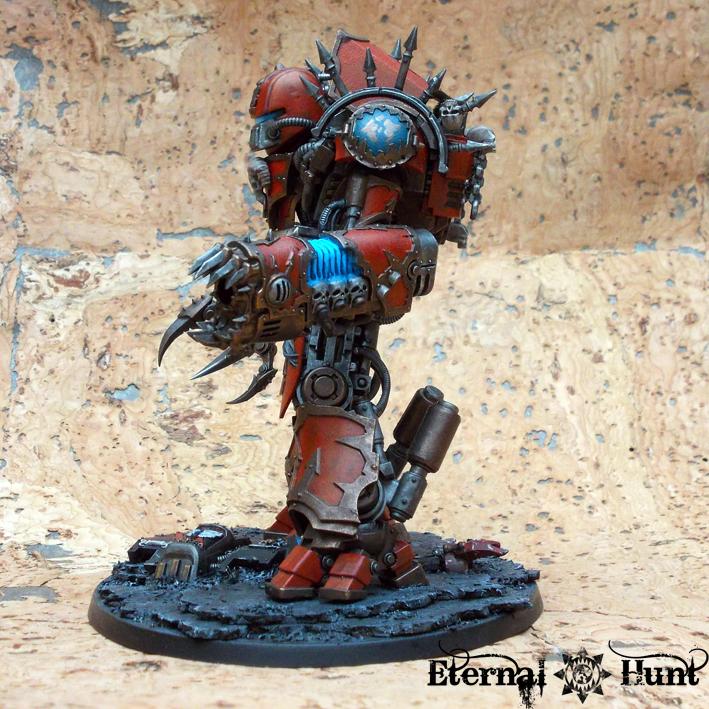
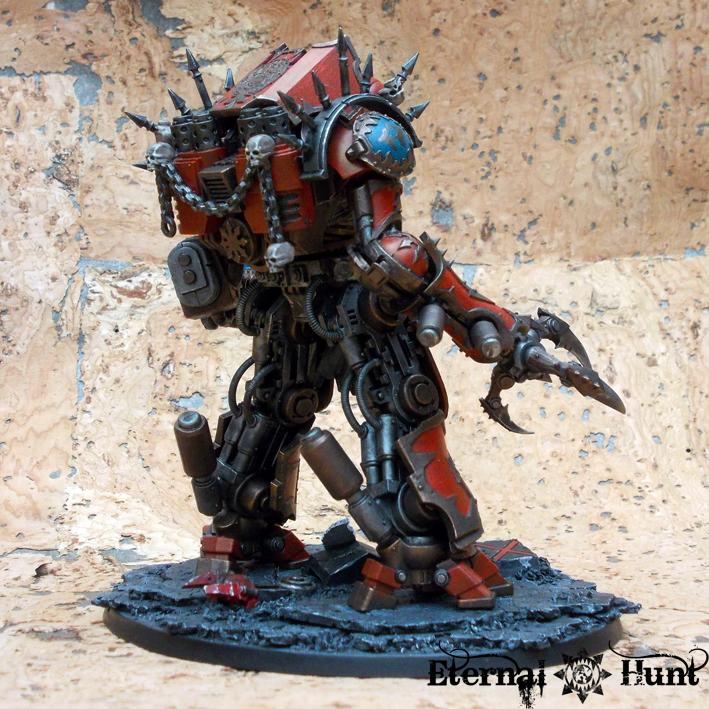
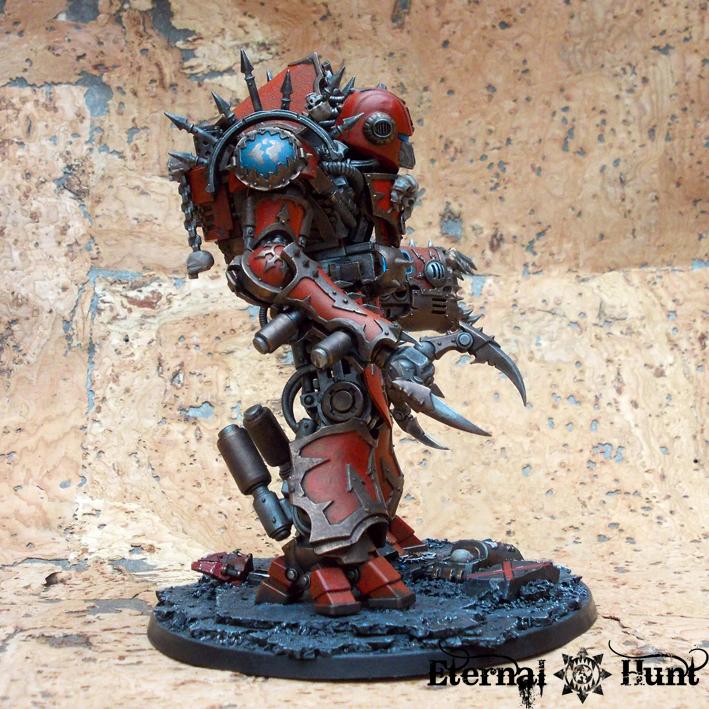
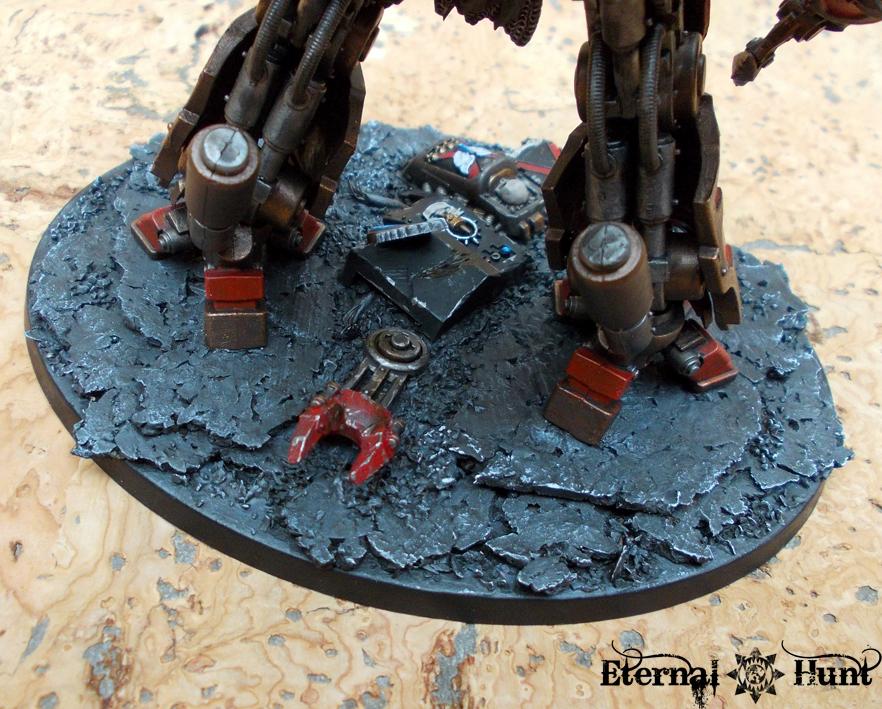
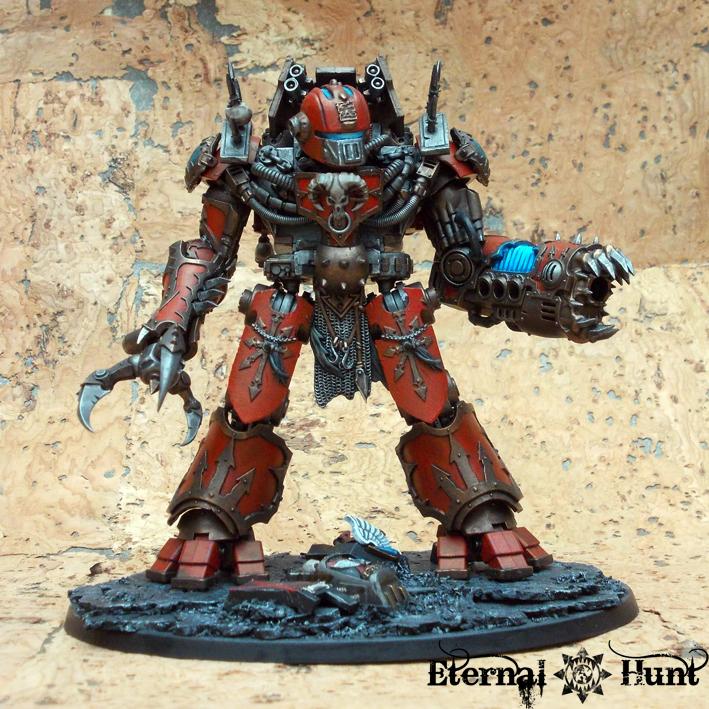
And with that, you should have your very own Wargrinder pattern Blood Knight. Congratulations! All that's left to do is to build and paint a suitably impressive base for the model. I based mine on the remains of a Blood Angels Furioso Dreadnought. Here's a look at the finished model:


And what to use the model for? Well, to be perfectly honest, I mainly started this project due to the prospect of being able to convert and paint an awesome model. Still, there are a number of possible in-game uses for the Wargrinder, of course: The most obvious choice would be to use it as a Decimator. The size of the model is similar, and using it in that capacity would be a great way of having access to a Decimator without having to get the “official” model, The small problem here is the
WYSIWYG rule: The base is quite a bit bigger than the Decimator’s standard base — and I simply refused to glue the Wargrinder to a smaller base, because that could have looked rather ridiculous. Still, while I didn’t try to model for advantage, the fact remains that the bigger base may make things ever so slightly easier for me
The other problem is the model’s weapon: I just used the leftover Forgefiend weapon because I liked the look of it, but it doesn’t really represent either equipment choice available to a Decimator all that well. Still, with a little goodwill on my opponent’s part, the Wargrinder would certainly make for a pretty cool counts as Decimator.
It could also be used as a counts as Forgefiend, Maulerfiend or even Defiler, come to think of it. Sure, each of these options will once again require an understanding opponent, but the bottom line remains the same: Even though my main objective was to build and paint a badass-looking model, the Wargrinder could very well come in handy on the table as well!
So, before I wind up this article, let me present some fluff to go with the new model. So here’s all you need to know about the Wargrinder:
 Wargrinder pattern Blood Knight The warmachine designated Wargrinder by the legionaries of the 4th assault company is certainly a terrifying testament to Huntmaster Deracin’s dark genius. Bigger even than the fearsome Contemptor, the Wargrinder usually towers over the battlefield, a metallic embodiment of murderous intent.
Based on the ancient and hallowed warmachines of the Legio Cybernetica that fought alongside the XIIth Astartes Legion during the Great Crusade and subsequent Horus Heresy, the Wargrinder has evolved into something altogether different: While there are still enough hints as to its origin, the machine’s armoured bulk now resembles nothing so much as the form of a traitor Astartes, its baroque armour plating and daemonic weapons a clear indicator of its allegiance. and its fluid, almost organic, movements terrifying to behold.
While the Wargrinder is infused with the energies of the warp, it remains a machine: In eerie contrast to the frenzied and bloodthirsty traitor Astartes fighting alongside it, the daemon engine’s relentless advance betrays the precision of an automaton: A Wargrinder never tires, never retreats, until its task is done. But where an organic follower of Khorne would leave himself be consumed by his instinct and his rage, it remains emotionless and calculating, its behavioral protocols ensuring its murderous efficiency.
In the armies of Khorne’s Eternal Hunt, Wargrinders fill a combat role similar to that of the accursed Decimator daemon engine. Equippable both for short and long range combat, a Wargrinder is a highly versatile warmachine. It is also a terror weapon, frightening to behold to those standing against the 4th. And a chilling reminder that even the most sophisticated machines ever devised by mankind may be turned against the servants of the false Emperor…
So there you have it: I hope this tutorial was helpful and easy enough to understand! If you have any questions or require more information, don't hesitate to let me know! I'd also love to hear any ideas you might have or see your own Wargrinder versions posted here in the thread, once they are completed. And, of course, you are also very welcome to check out my
army thread here on Dakka or
the blog I am running to post stuff regarding my various hobby projects.
This has been Krautscientist. Thanks for tuning in!


 My
My  My
My  My
My  My
My 

 Night Lords (40k): 3500pts
 Klan Zaw Klan: 4000pts


