True, this amazing build does seem like you're flexing on us Meer Just kidding, and I hope you don't mind that I took that little bit of text out of context for that joke.
I find builds that require so much measurement and precision to be tiring. I will often switch to free form slapdash scratch building of ork vehicles when I need a break from imperial builds. Maybe you should do the same? Either way keep up the great work on the Kittyhawk
Thanks for looking in, Syro! Being able to exchange the odd joke with your friends and peers on Dakkadakka is a big part of why I keep posting here!
And yes- after a build like this, next project is going to be something with no curves, no right angles and no long calendar given over to it.
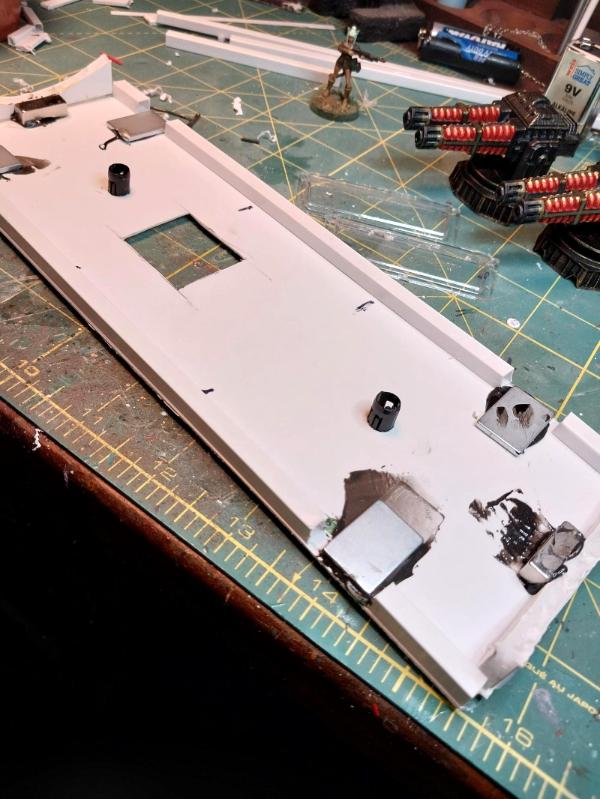
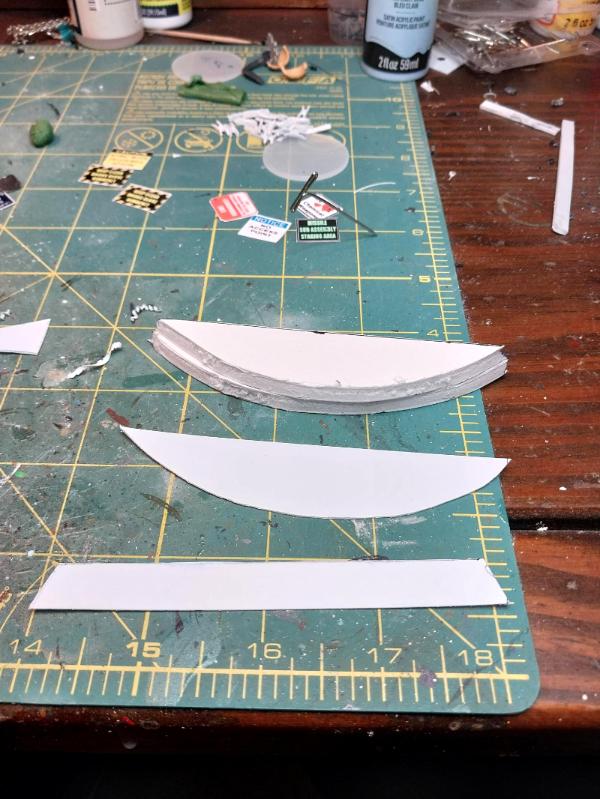
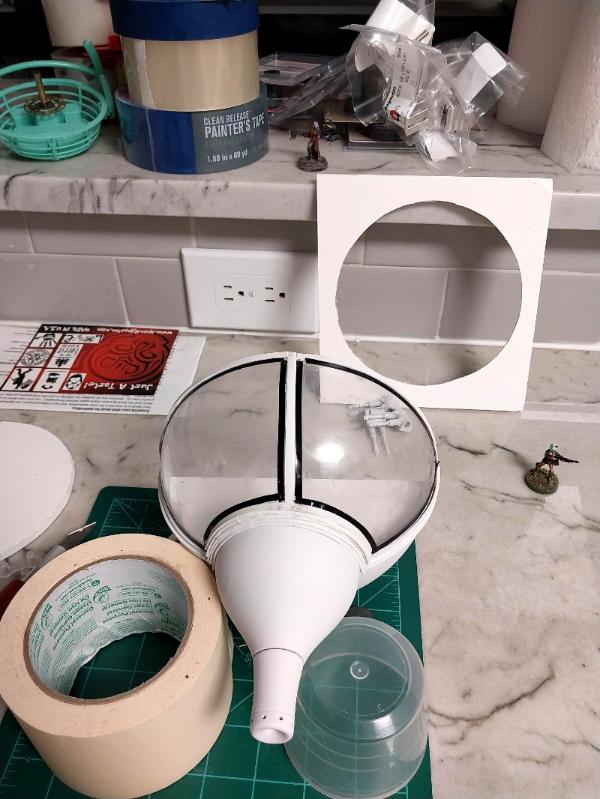
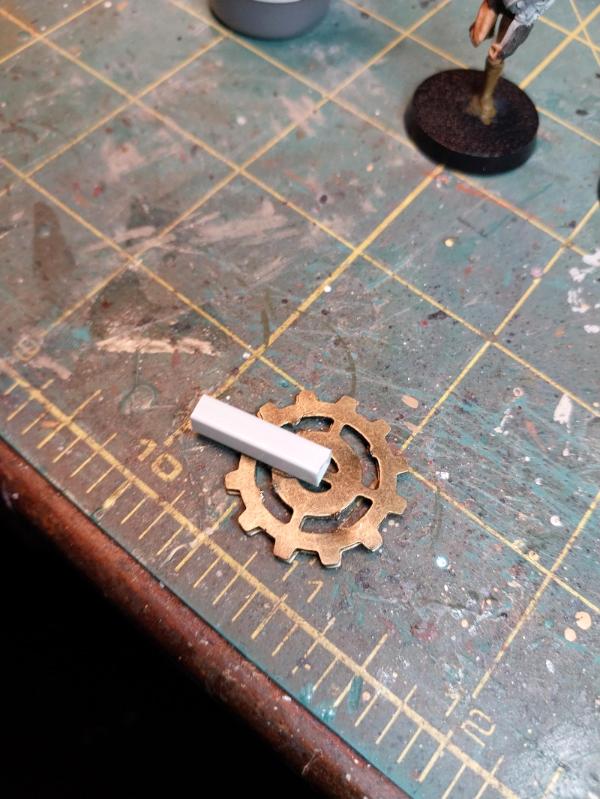
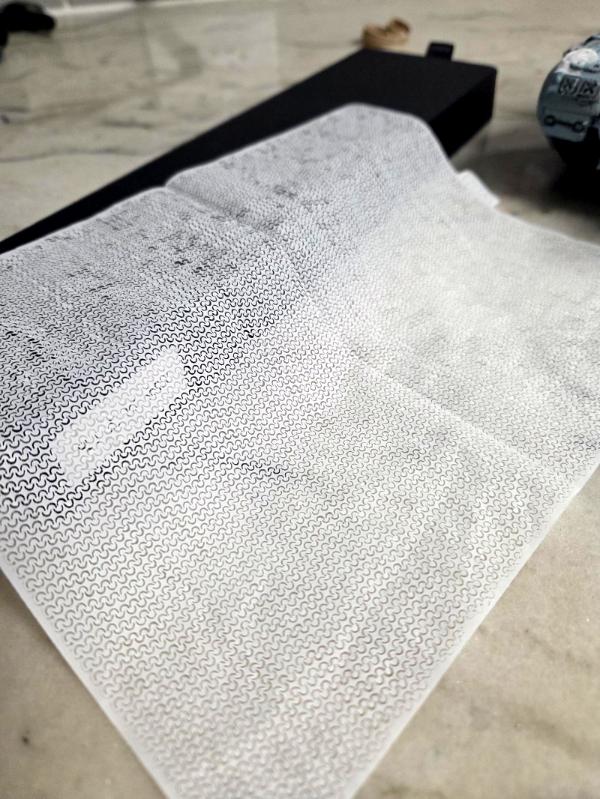
Tonight was a 'slug it through' kind of experience, ending with all my fingers glued together and baking soda everywhere. First up, I finished tweaking the hull plate so it fits exactly into the top rim of the gondola:
Then cut out the upper and lower plates for the rounded ends and started gluing up. Started with Aileen's Tacky glue, shifted to 527 and then tried cyanoacrylate, then cyanoacrylate with baking soda as a catalyst. I went a bit too fast on the second end and it broke apart and I had to start over, so one end is finished, the other needs the plates installed. I'll need to fill in the gaps- probably with greenstuff- and then can get on with the rest of the work:
So, a lot of time invested for not a terrible lot to show, but all necessary. Really, the work should get easier once the framing for the gondola is complete- just fiddling in the guns and lights!
I'm also thinking that instead of windows on the rounded ends, I may do a Nekomimi version of aquila, some kind of big heraldic emblem, preferably in 3D if I can figure out what I want and how to do it (a problem for another day).
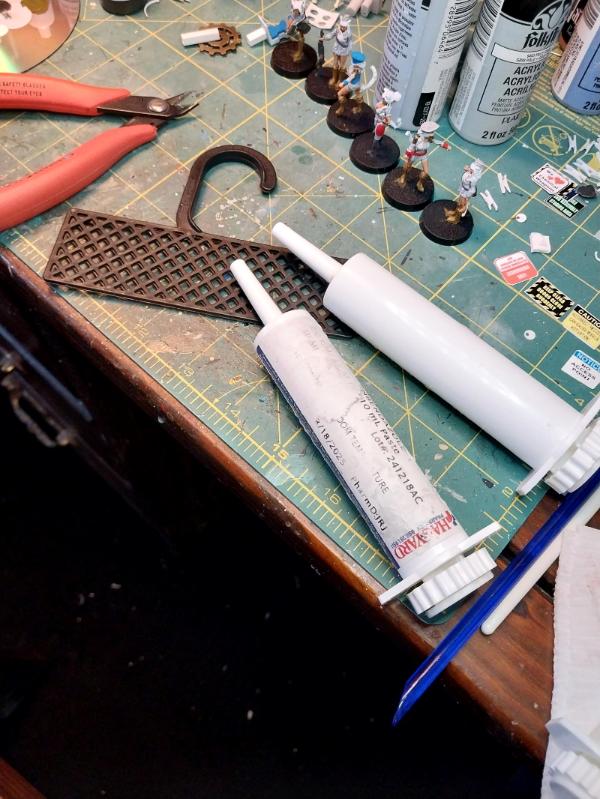
Welp, we've tried Aileen's Tacky Glue, cyanoacrylate, superglue plus baking soda- tonight we try the strongest adhesive and substance known to man- GREENSTUFF.
Basically, I'm going to cover all the 'structural' seams of the weapons gondola with greenstuff and then use the utmost of my acumen to hide it all using paints, trim pieces and other textures. I'm very hopeful that this will work, as I'm tired of being stalled out on this step:
A lot of it on the inside will get closed in and those rounded ends just became crew's quarters. The stuff on the outside top won't be seen anyway- and the stuff on the outside underside we'll see. I may just paint it like kapok and it's some kind of 'floatation' for if the zep sets down on water. Or, just paint some interesting color and maybe add texture or leave it alone and let the viewer figure out what it is. High altitude insulation to avoid losing cabin heat? Sure! Something else? Sure!
This junk better hold or I'm scrapping the whole idea and trying something else- probably get rid of the curved surface and stick to right angles even though they won't look right on an airship- but they'll be easier to glue up.
Come to think of it, Vincent Price's airship in the movie Master of the World had a lot of right angles:
I may get some more in tonight, but surely tomorrow.
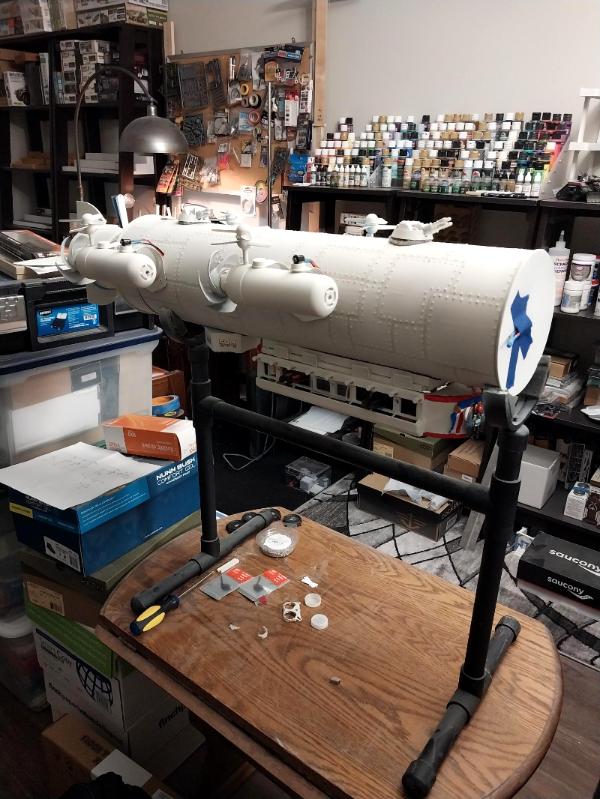
The greenstuff has made for a very solid 'box' that is the walls and decksole of the gondola; the one end (arbitrarily designated as 'the bow' since both ends are symmetrical) is finished and I've started closing in the crew's berthing as you can see; I've leaned a plaster casting spaceship door (Hirst Arts) to get a feel for the dimensions and I think it will work fine (naturally I can only find one; I'll have to hunt around some more or cast another for the other end):
At the other end (stern, arbitrarily) you can see I've got the decksole panel in and, because of course, ran out of greenstuff. I'll have more by the weekend and can finish it up on Monday or Tuesday. I'm not being terribly careful about smoothing things out as it won't be visible once closed in.
Everything to finish this step off now requires just styrene, superglue gel and an Xacto knife. I'm looking forward to finishing this part, as then next is wiring the running lights, battery box and finally moving on to the nose assembly/bridge. Last step will be applying a myriad of decalage and painting the crew figures.
Thanks very much for the kind words, Cam- it means a lot coming from you (first person to ever comment on my thread!).
Once this is wrapped up, I'll be very happy to tackle some more mundane 'limited in scope' projects. I need more riflecat infantry, for instance. Not to mention the Mountain of Shame that languishes awaiting commencement.
My emergency resupply of greenstuff arrived today, so when I can get back to work ([possibly Tuesday night) I have the wherewithal to get everything done, given the determination; and you folks provide me with that.
The greenstuff work is finished- the box that is the frame of the gondola is very sturdy, so much so that I have now decided that, in times of stress or necessity, it can be detached from the lifting bag and descend to earth under the power of its own rockets. This way, the weapons gondola serves as the vessel's lifeboat or could even be deployed as a mobile battery. I was only half kidding before when one of you asked if the ship was intended to be gamed- I said yes then and am more serious about saying yes now; it might be that the boarding rules from Pike & Shotte or some game like that might be adaptable, plus the whole ship-to-ship aspect of combat.
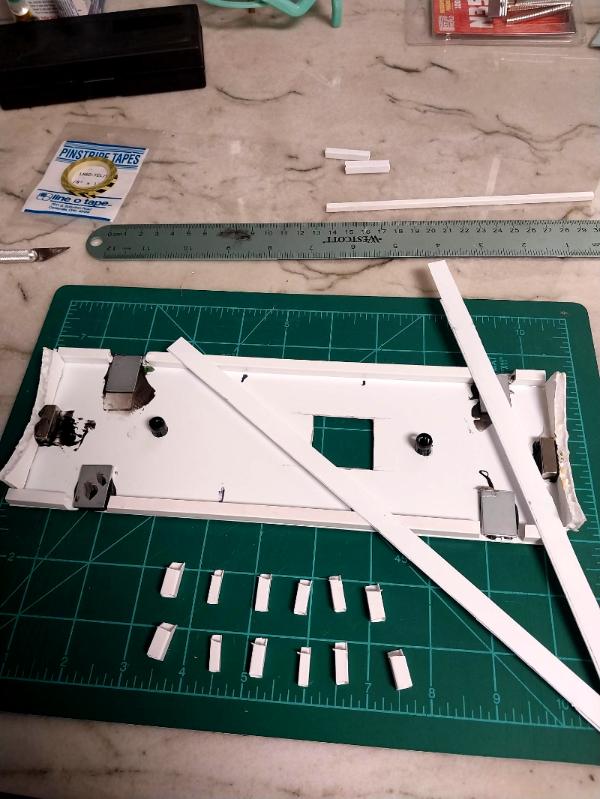
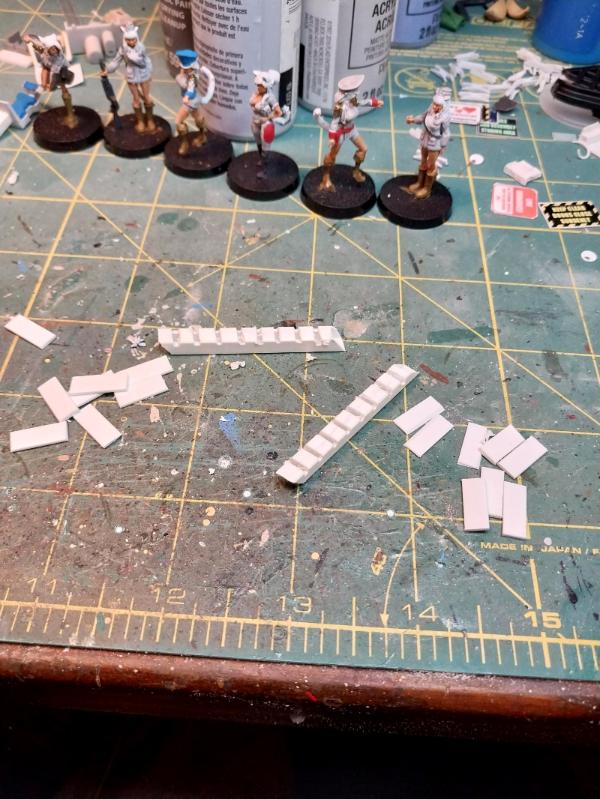
Got both end sections closed in with plasticard. Now we're at the 'add trim to hide the errors in the previous trim' stage:
Next up (maybe even tonight) is to add a piece of diamond plate plasticard for the decksole; I reckon to paint this a tan color to provide some visual distraction from everything else being shades of white.
And then the real fun begins with the addition (finally) of actual guns, plus any gubbins I have lying around to help fill all that empty space. I have also decided that the projections hanging over the top of each weapons port are lifting/loading winches and can also be used for fast-roping troops into harms way- or even boarding other zeppelins. Over the side your breachers go, land on the other zep's bag, place the cratering charge and BOOM! you're in and rampaging through the enemy's superstructure before he knows it.
I even have some multipart, multi-pose Aero Pixies to customize for the fast-rope assault troops.
Oh, and the greenstuff on the outside of the gondola that I can't hide behind plasticard? I'm going to add more and make it into decorative red, white and blue bunting that highlights the ship's sigils I'll be adding.
More follows soonest. Much as I like working with greenstuff, I'm glad to be back to plasticard and superglue again!
More work done tonight and hopefully a bit more later:
First up, cut that piece of diamond pattern treadplate for the decksole and used Rustoleum's Primer & Paint Panzer Pixie Blue to both primer and basecoat it (would have [preferred a tan, but didn't want to stall out again waiting to get the right color; as Jessie the Body Ventura schools us in the original Predator movie: "Ain't got time to bleed."
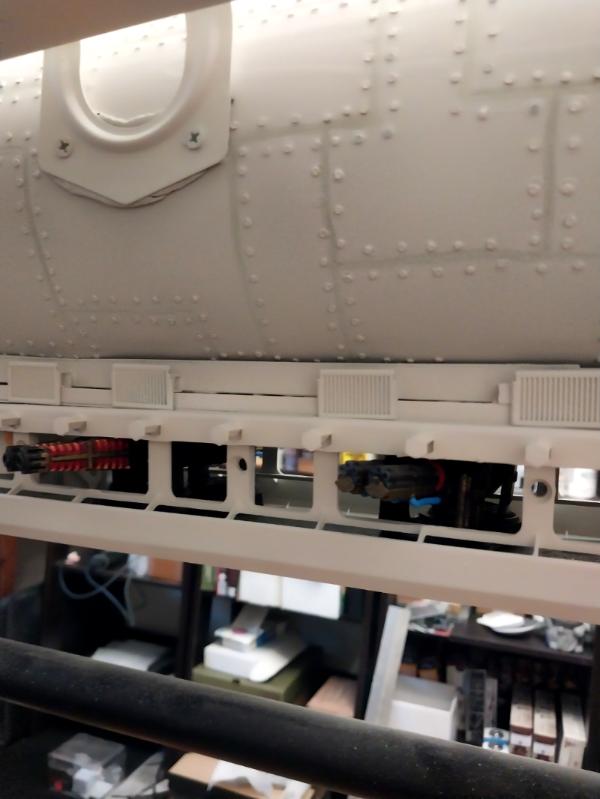
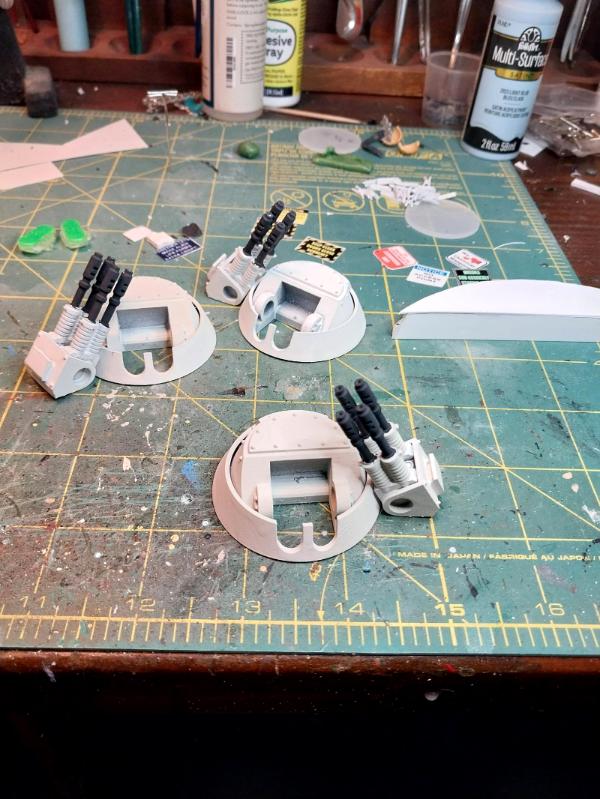
Next, test fitted the guns- as anticipated I needed to cut out a window bay strut to give them full range of motion to track forward and aft (I'll hold them in place with 3mm magnets), but they'll fit nicely and I can add black and yellow hazard striping around them to mark the danger areas when firing:
Score: there's that nice big open area in the middle that's just begging for a weapons control station to get built in; I wasn't anticipating doing somethign like that but it's too perfect, so that may be tomorrow night's task.
Two twin plasma cannon mounts and two twin GAU-8 30mm depleted uranium gatling gun mounts (same as the A-10 Warthog, just because) ought to be enough (although as the man said, you can never be too rich, too handsome, or too heavily armed).
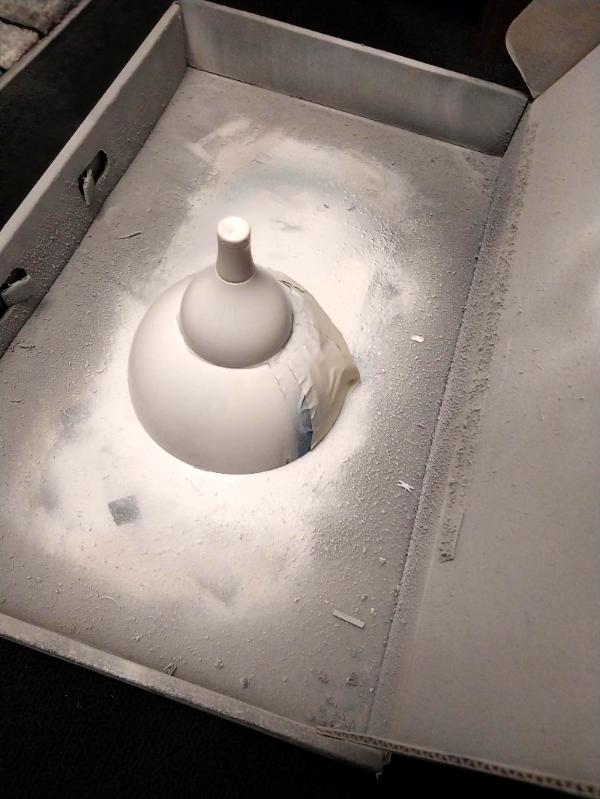
So those are being primered now:
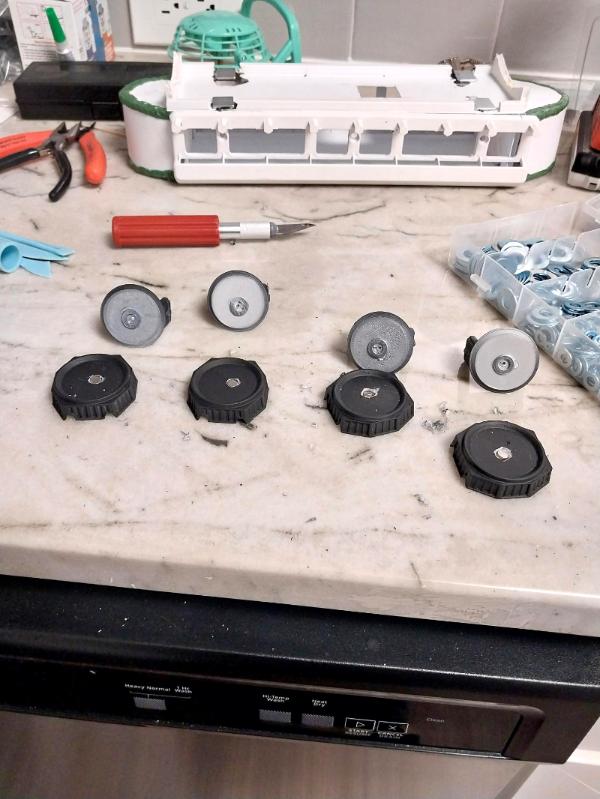
Next, glued in a rail to fasten the bottom set of neodymium magnets to (there will be an upper set on the plate that permanently mounts to the hull)- this will let me attach or remove the gondola to turn on lights, change batteries or game the gondola separately:
And then used JB Kwik Weld to fasten the magnets; when seriously dry I'll primer the whole thing and then test fit the upper magnets to the plate and see how it all hangs together:
I indexed the poles on the magnets by lining them all up together and running a Sharpie marker down the middle, so hopefully they'll mate up properly with the top set of magnets- but that's why the test fit, to make sure the poles align and the streams don't cross. Something I meant to do but see I didn't looking at the photo is glue some caps to those open spaces on the bulkhead trim- I may get to that a bit later.
I did actually get some more work done before heading up to the farm for the weekend, but not really enough I thought to be worth taking a pic and posting here. I've primered and now basecoated all the guns and mounts- going for a "Imperial Death Star" motif with black and bronze, and primered the gondola. I've some ideas for the fire control center- heavily influenced by the work Klaus, Not Santa did on his Athena some years back- not sure I have the skill to carry it off.
Then it will be assembly time and at any time I can run the wiring for the port and starboard running lights (my blinky LEDs came in). With 8 LEDs total, each at 3 volts, I can't run one long series circuit- I'm going to have to run things in parallels of 9 volts (need to add another LED in there- maybe two lamps in the gondola), so I'm not going to solder the joins, I'm going to try these 'press connector' fittings in hopes it will be easier to run the correct wires together. I'll post pics when I get to that stage.
Then it will truly be on to the bridge, and looking into the home stretch for completion.
Thank you all for looking in and especially the encouragement. I find it very easy some nights to find excuses not to work in the project, but as soon as I am in the chair, bingo! Two hours have passed and I don't even realize it.
OK- not a lot to show for it, but got a lot of skull sweat out of the way, learned some things and got a little bit done.
What I thunk about: I now know definitively what LED lights I need, what voltage battery holder to use and where it will be mounted and how many circuits it will take to rig everything. I learned this largely by testing the blinking red and green running lights I ordered (always test, test, test before you start soldering!). The red and amber lights I ordered worked fine, but four of the green ones were completely dead and the fifth didn't blink, just steady light. But in looking at how I was going to actually wire them up, I realized I'm going to have to pull the tail section off to get inside the hull to run the wires. Not a problem, as there is only a single sheet metal screw holding the whole thing together. But progress, as I know how to do what I want to do now.
What I learned:
- If you have a blinking LED in your series or parallel circuit, all the lights will blink, to include the cabin lights you were including to balance the circuit to avoid having to solder in a resistor. This may seem obvious in retrospect, but it didn't occur to me before monkeying with test circuits. The positive is that I now know I'm going to use 3V coin batteries rather than 1.5V stick batteries, which will make fitting the battery boxes in much easier, be more efficient and easier to wire. Lighter, too.
- Old greenstuff is a fething to work with. The stuff I'd been using until recently must have been at least two years old and- despite being kept as best as possible in an airtight container, was extremely stiff. Tonight I used brand new greenstuff to attach a few things (see below) and was amazed at how soft and easy it was to work with. Don't get me wrong- my hat is still off to the gang that craft incredibly intricate details in the stuff, that's an art. But I was making it harder on myself than it needed to be. When I go to make the banner bunting to hide the crappy greenstuff welds on the bow and stern of the gondola, I go at it gaily knowing that it won't be nearly the bear I thought it was going to be.
What I done:
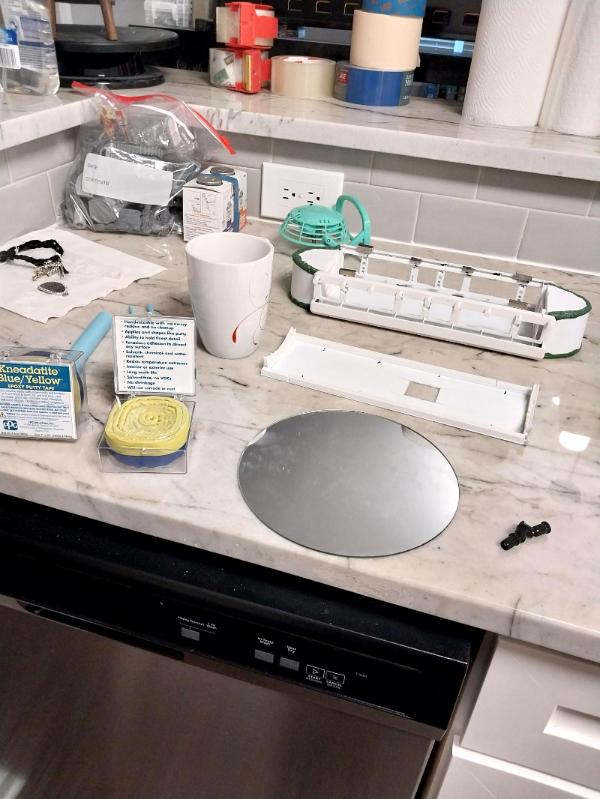
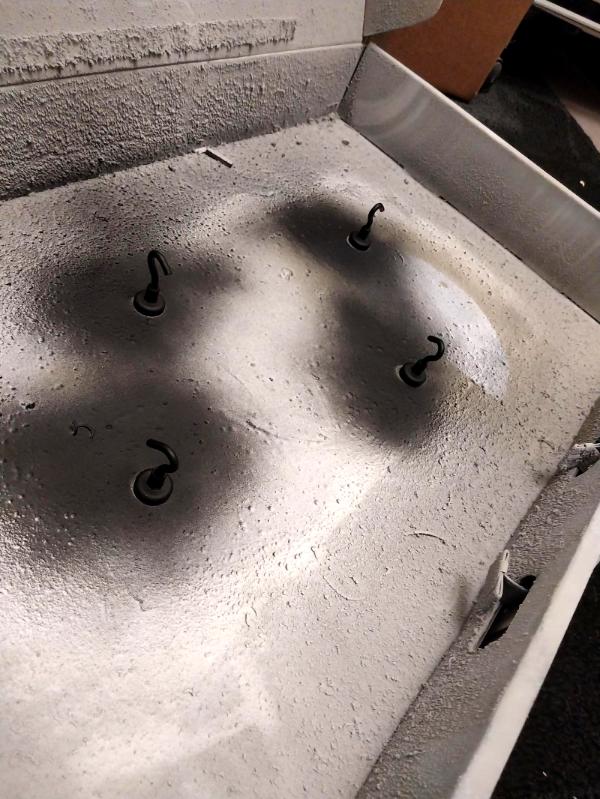
Firstly, I'm ready to mount the cabin plate to the zeppelin hull that will allow the gondola to be removed to game or change LEDs, batteries, etc. I tested the magnets I have and they will easily hold everything together. Got my supplies laid out:
And attached the magnets with greenstuff:
The side you see will get greenstuffed directly to the hull and the magnets will be directly over the magnets that are attached to the gondola itself.
I also know how I'm going to run my wires to the cabin and running lights, so greenstuffed the 5mm LED sockets to the locations where the lights will be:
I know where the cabin lights will go (ice blue) but am not positive how I'm going to mount them- I may wind up just gluing them to the cabin plate and the whole kit and kaboodle will remain attached to the hull when the gondola is removed.
I also know (mostly) what the Gunnery Station is going to look like and only need to figure out how to make that happen- glue up styrene or carve pink foam board. Each method has strengths and weaknesses.
In any event, I have to order some doo-dads, which will give me time to finish the gondola, run some wires, and even paint some things. Depending on how fast they get here, I'll have time to stattt on the bridge/nose section and by golly we're nearly done.
Ooo, this project looks fantastic! I also love that you've kept the curved ends despite the annoyance that they've brought you. The shape looks great. Looking forward to seeing the rest of this build.
Amazing workon the gondola, Meer You've progressed so much in what feels like a short period of time. That's exciting that you are going ahead with having the gondola detachable and playable. The ship to ship combat idea is intriguing too, does anyone else have something that could battle it out with the Kittyhawk? I also like how you figured out the lights with the tail section. Keep up the amazing work
Thank you much for the kind words Syro and Warboss! The largest part of my satisfaction in posting to Dakkadakka is the opportunity to share work with friends who will at the same time encourage but also provide well-intentioned constructive criticism at critical junctures.
Tonight was very much in keeping with the Paula Adbul song Opposites Attract, especially the line "I take two steps forward, you take one step back". Some of what got done tonight was rework of what got done last night, starting with:
The greenstuff I used to fasten the top plate magnets didn't hold them to the styrene sheet. Also, the magnets didn't line up and were so strong the gondola and the top plate wouldn't line up. So, off came the greenstuff (disappointingly easily) and on went the JB Weld:
I cut notches in the side rails of the plate so the magnets would line up and tested by fitting them together to stay whilst the JB Weld sets. So far, it works.
Next, wanted to get moving on the guns- starting with the mounts. I didn't like the way the trunions set into the base and just wobbled around, so I drilled out a 3mm hole, filled it with superglue and tamped in a magnet. Then I glued a small washer to the underside of the trunion, let set, and fitted together. This also seems to work:
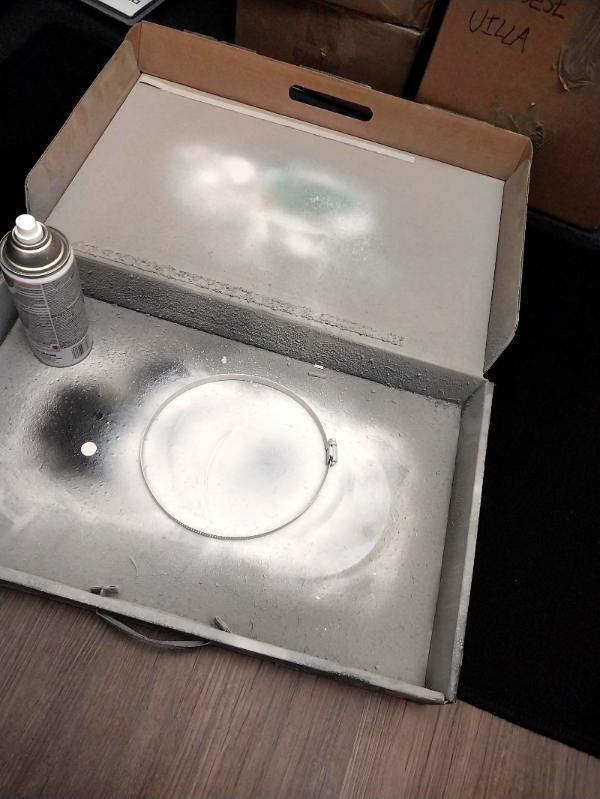
I wanted to get some actual painting done (you know, that skill that forms 90% of the hobby for most of us) but I've been terribly bad at using a shaker can to primer/basecoat the gun parts: every time I look at them again there is a glaringly huge grey spot that wasn't covered. I've hit them again, and if they are finally completely coated, will start painting on bronze and/or plasma coils tonight.
All else being equal, tomorrow I want to spend rummaging through all my bits boxes, drawers, bags, envelopes, clutches and zip purses and adding beaucoup gubbins to the gondola, preparatory to basecoating it and getting ready for final assembly (with the exception of the weapons control console, which will be a separate build of its own).
Perhaps more follows soonest, but thank you for looking in.
I think so, Tommygun. I've swapped out the big magnets on the top plate for lighter ones, and added two of the strongest ones I have to the ends deck plate so that they will reinforce the JB Weld I'll use to attach the plate to the hull. And the trick for removal is to slide the gondola to one side or the other, not try to pull directly away. If I ever sell this beast (and I probably will) I'll have to include instructions on how to turn on all the lights and remove the gondolas, and everything. And drop the bomb load that will be mounted on the battery gondola.
I will add some greenstuff to the inner corners of the gondola cabin to stiffen them up, just in case.
If not, well, everything pulls apart and I have to start over. It's good to remain humble!
Automatically Appended Next Post:
Quick morning update: all the glue, greenstuff, JB Weld and magnets have set, dried, quickened, clotted and the result is:
It works! It's alive! Mwahahahahahahaha!
That pic is showing it attached with just the new magnets on the top plate- I may not glue it to the hull at all.
Only a little time to work tonight, and Paula Abdul's Two steps forward, you take one step back is still playing.
The one step back is the magnet that attached the top plate to the hull was too strong- it pulled the curved collar off the styrene piece when I went to remove the assembly from the hull. Not too much of a set back, as I always intended to use JB Weld or 2-part epoxy to permanently attach it, it would have been nice if the magnet had been sufficient by itself, but no real problem.
It is annoying that every glue or adhesive I try to use on the styrene works only about half the time; some attachments are very solid, others pop right off no matter what I do. I've cleaned the area to be glued with alcohol pads, scored it with sandpaper to make for a better grip, doesn't help or hurt as far as I can see. The thing that works the best so far is some cheap 2-part epoxy from the Dollar store, but it makes for a lot of waste because once open, there is no good way to reseal the plungers- once you start you use it all or lose the excess.
So back to the original plan: the gondola attaches to the top plate by magnets, the top plate permanently attaches to the hull via epoxy and very strong magnets.
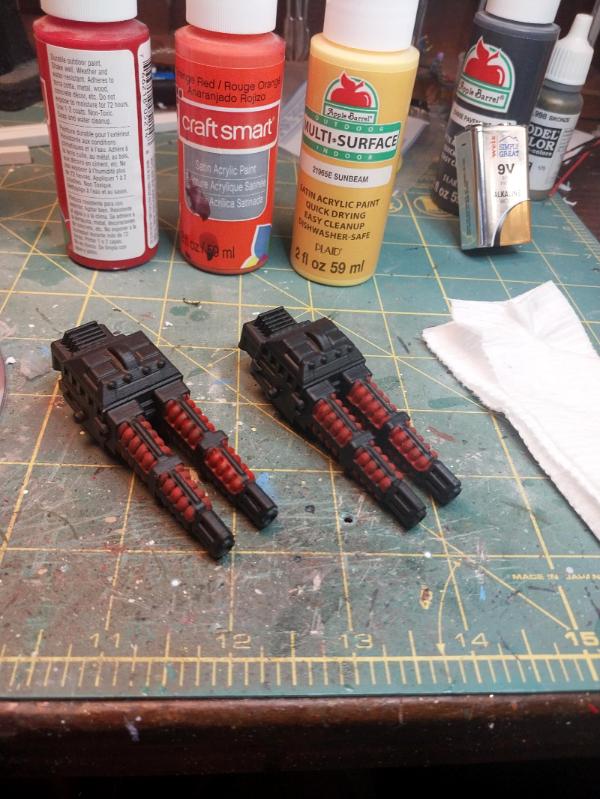
The step forward is that I actually got a little bit of stick time in on a paint brush and applied the first of two coats of the first of four colors to the plasma cannon:
That's it for now, but the pieces are lining up to finish the gondola, the guns, and the running lights, leaving the bridge, weapons console and crew.
I have to admit, I didn't intend for this to be quite such a large project when I started out, but then again- I don't really plan beyond the broad strokes of a design and really only find out what I've gotten into when I have to make the big pieces fit together!
This one has been a lot of fun so far and definitely is not in my normal "infantry and muddy tanks" genre, so- lots of learning!
Plus I get to sound off with 'Arrrr' and 'shiver me timbers' aperiodically as I do the work, so bonus.
It's funny: the top plate would have been fine if I hadn't tried to pry it off the hull- those are very good neodymium magnets. I was caught with the idea that the plate could remain attached to the gondola, instead of the original plan to permanently attach the plate to the hull and so tried to make it work.
Edison used to say he learned more from his mistakes than from his successful experiments. And earlier in this blog I posted the video of Dick Van Dyke & Co singing The roses of success grow from the ashes of defeat. from the movie "Chitty Chitty Bang Bang.
It's all good and I think I'm seeing the end of the project in the foreseeable future (which is more than I could say when I was applying more than 2500 rivets by hand! )
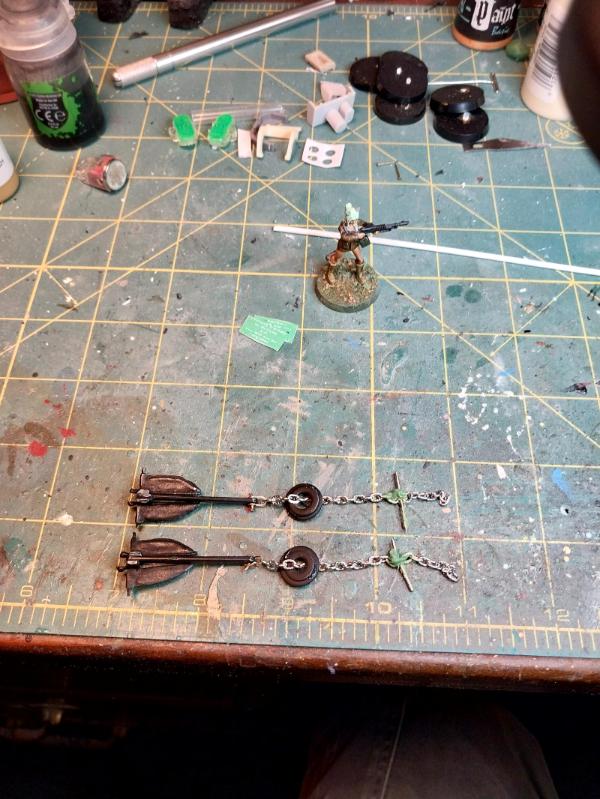
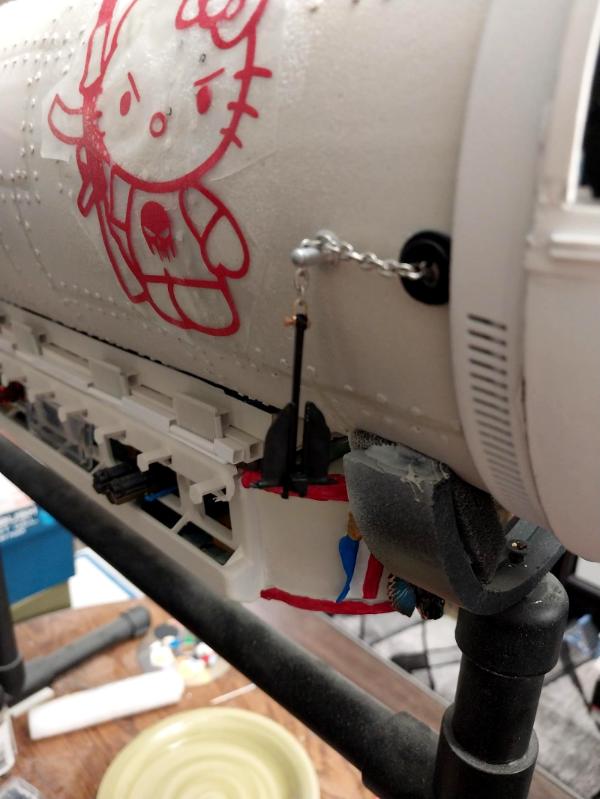
Plus this week some more gubbins came in to be added, like my Danforth anchors, so rapidly accumulating all the 'neat additions' the ship will need.
On the work front, my company won the rebid for the renewal of the program I'm on, which is good, but we won't be staying in our existing facilities. So everything is crazy as we prep for the move and make sure our client is satisfied that we know what we're doing. (He's acting much like Steve Martin as SGT Bilko in the eponymous movie where he's trying to act like he remembers drill and ceremony to conduct a platoon level inspection- lots of barking and mayhem, not much direction.)
On the home/farm front: we got our second and last cutting of hay in, so, yay! But my behind now confirms exactly to the seat of the Alice-Chalmers tractor I sat in for so many hours. It's good the weather cooperated, and we actually got it done, though.
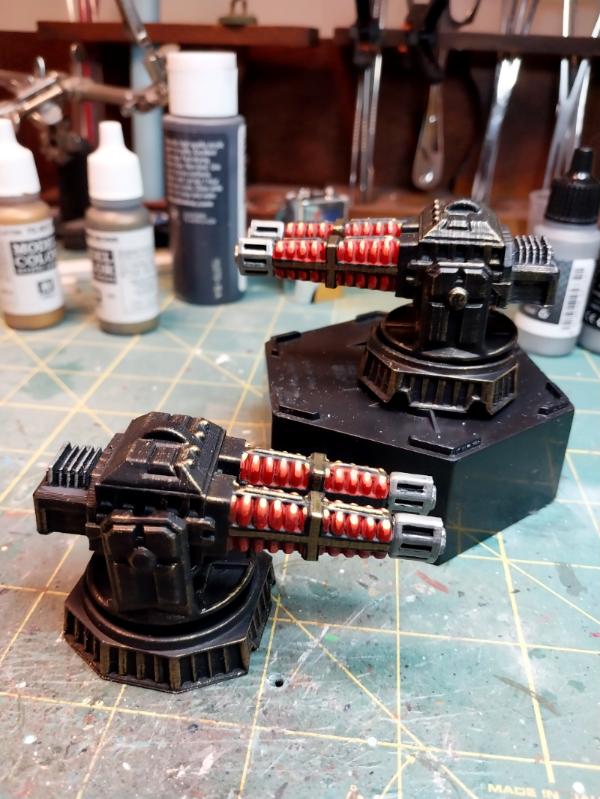
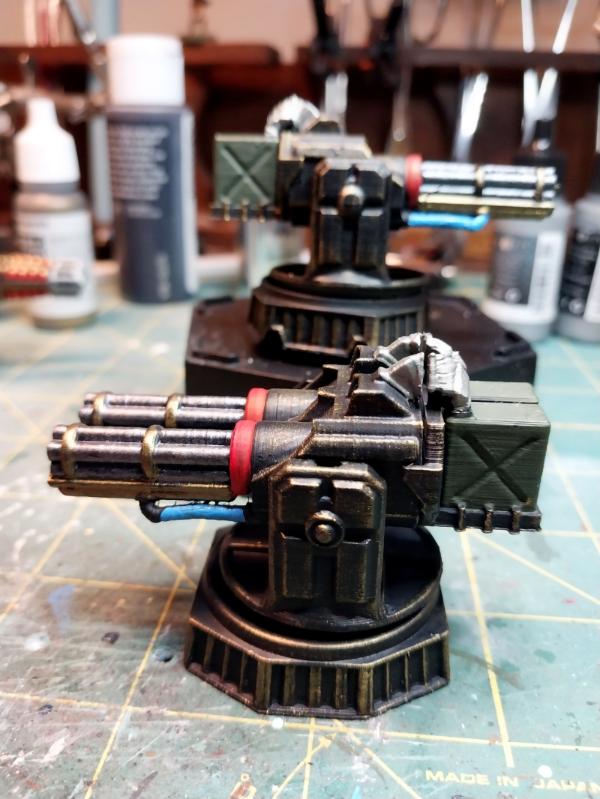
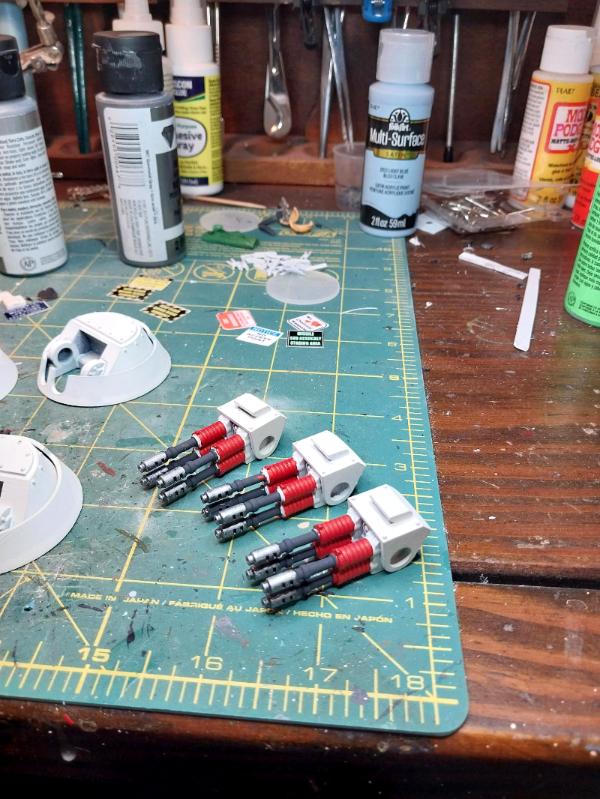
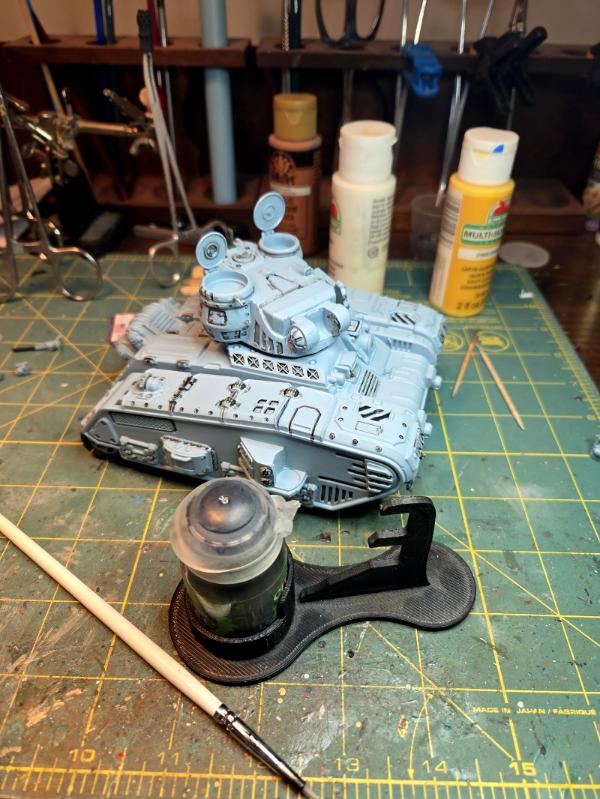
For the really important work on the Kittyhawk, tonight saw the twin plasma cannon systems nearly completed; they just need muzzle burn and some bronze wash to pick out the edges and I'm calling them done:
I've never put so much effort into trying to get the plasma glow right: that's two coats of four different colors on top of the flat black base coat to try to get it done right. Better than my previous efforts, I think, but I've still got some larnin' to do.
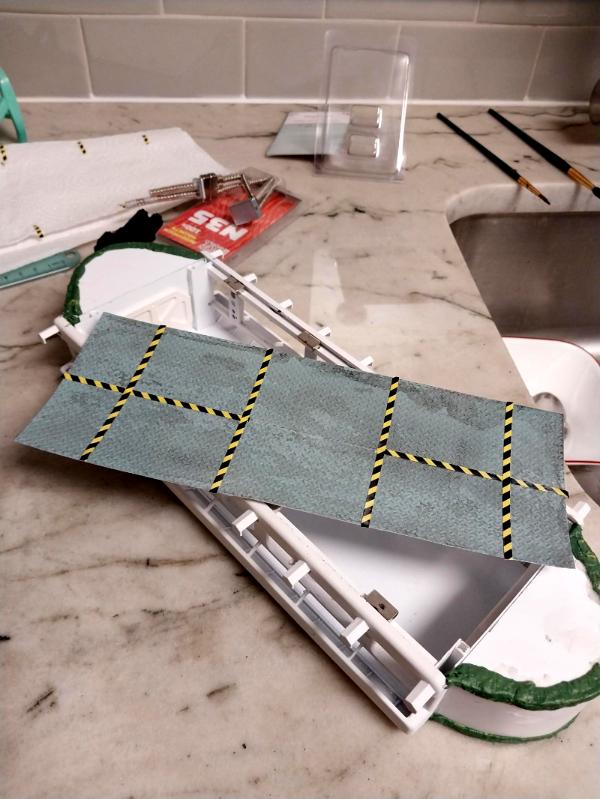
Also applied black wash, swabbed around with my dirty paint brush cup water, to the deck sole (I can't not grub a vehicle up somehow- even the Queen of the Imperial Fleet! ) and applied hazard striping to mark off where the guns will go:
The center area is where the gunnery console will go.
My new blinky LEDs are in, to replace the defective ones from earlier, so I'm hoping this week to also get the running lights, weapons gondola lights and bridge lights wired in and be done with that. I have my two-cell 2032 coin battery boxes ready, so it's just a question of doing it. Then paint the GAU-8 twin Gatlings, wash all the mounts in bronze, finish the wepps gondola and stat the bridge.
Applying all the decals I want to is going to be a couple of days work also, at the end.
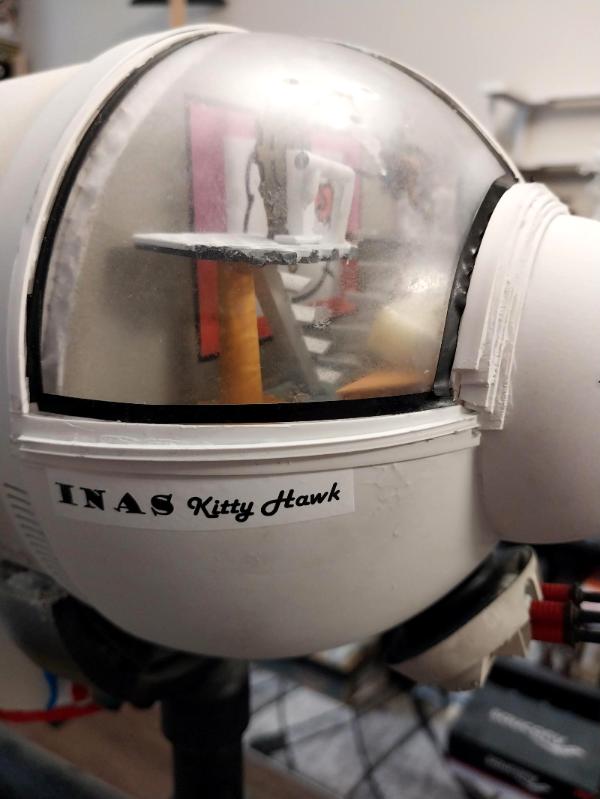
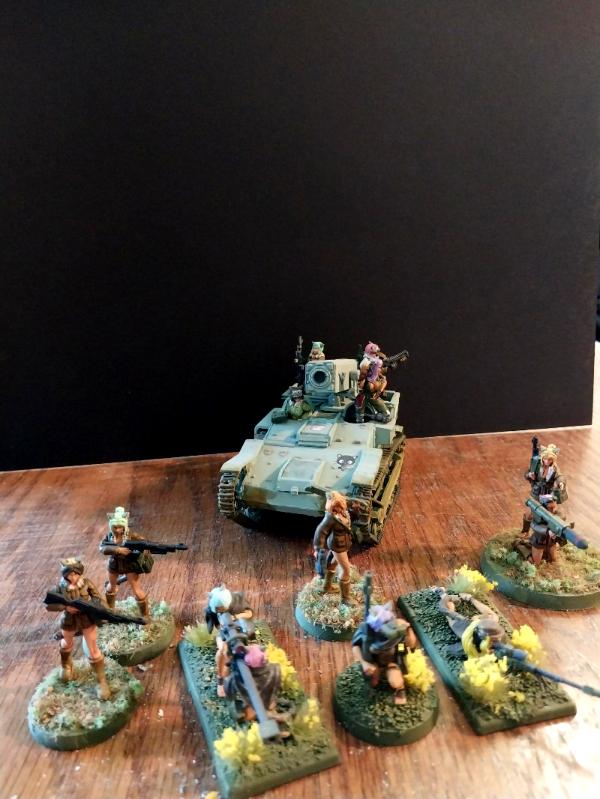
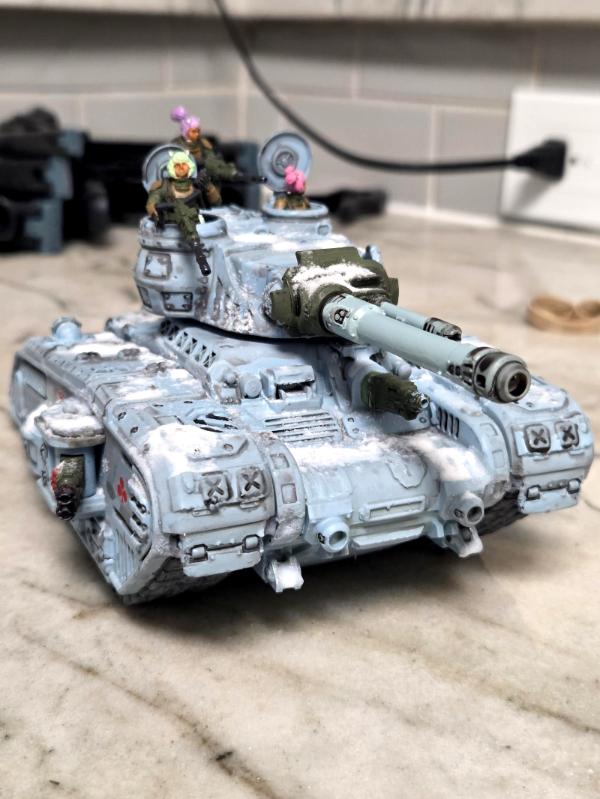
And the INAS Kittyhawk puts to atmosphere to enforce the Will of the Imperial Throne!
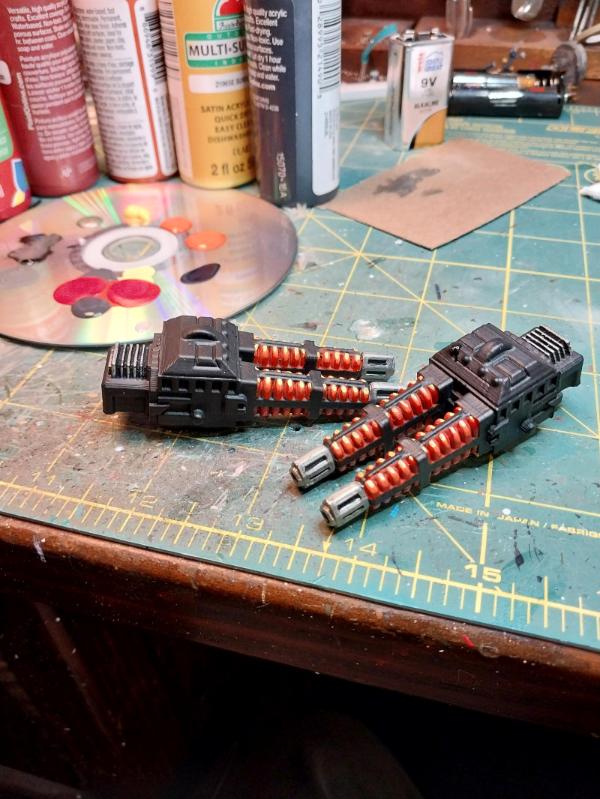
It took all the time I had tonight, but I have (nearly) finished the gallery guns for the weapons gondola. All that remains is to add the muzzle burn to the plasma cannon and then they're as done as I'm going to do them.
Here's the plasma cannon:
And the GAU-8 Gatlings:
I added a color in each case to help make the weapon 'pop', although the plasmas didn't really need it. With that, I didn't want a lot of color on the gun mounts, so just drybrushed some Model Color Brass and called it done.
Unfortunately, three of the four guns wouldn't sit tight enough to remain at whatever angle of elevation I chose, too loose. I tried punching washers out of styrene to fit over the trunnions, but that didn't work, so I just glued them more or less level. The guns will traverse, but not elevate. You pays your money and you takes your chances.
Tomorrow, I'll finish the muzzles and then move on to finally finishing off the gondola itself. I've used the extra time to obtain some more bits and bobs to help dress everything out.
Tonight, I got a surprisingly large amount of 'nug' work in- lots done in prep for some flashy work (hopefully) tomorrow, but little to show tonight. As a placeholder, here's some of what I've got up to:
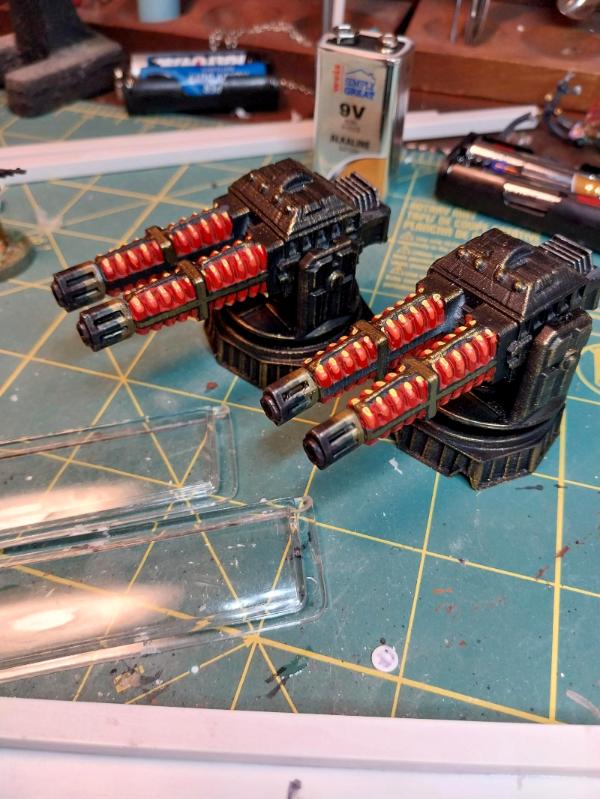
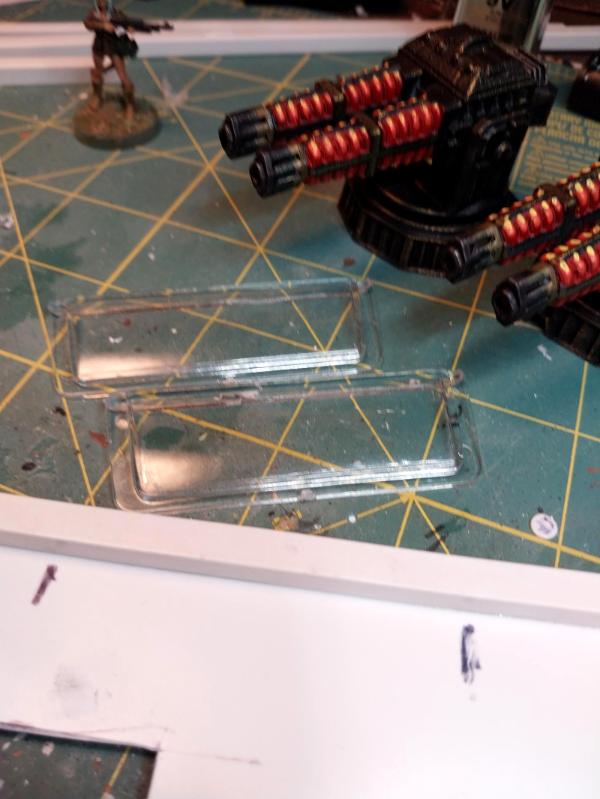
The plasma cannon are done- added the muzzle burn:
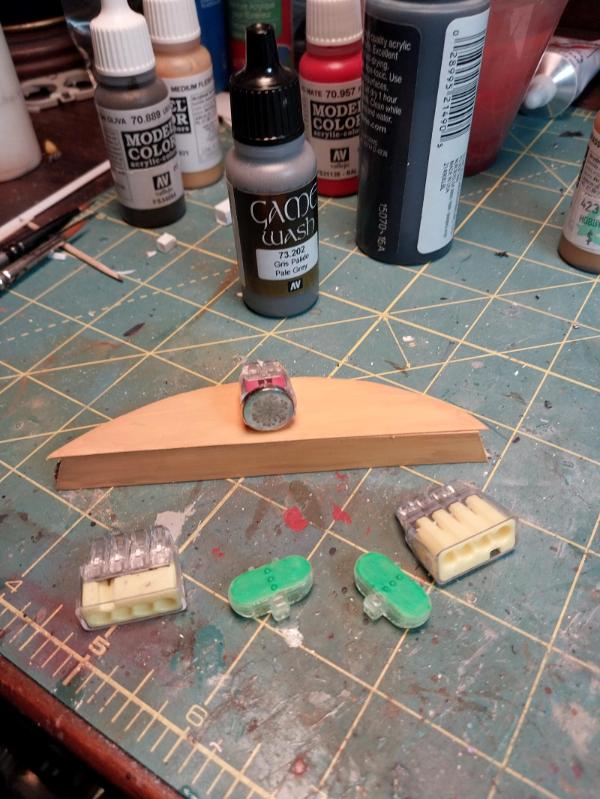
Found a metric crap-ton of bits and bobs that are going into the gondola- part of tonight was given over to finding them amongst all the boxes and bags and priming them. Amongst the lot are these clear plastic pieces, that will become the port covers for the windows/portholes located to either end of the weapons control console; I'm thinking about adding bulkheads inside, to separate the guns from console area, we'll see. I have no idea what this gidgits are or even where I got them, but they are exactly the right size to cover the openings (both in length and height):
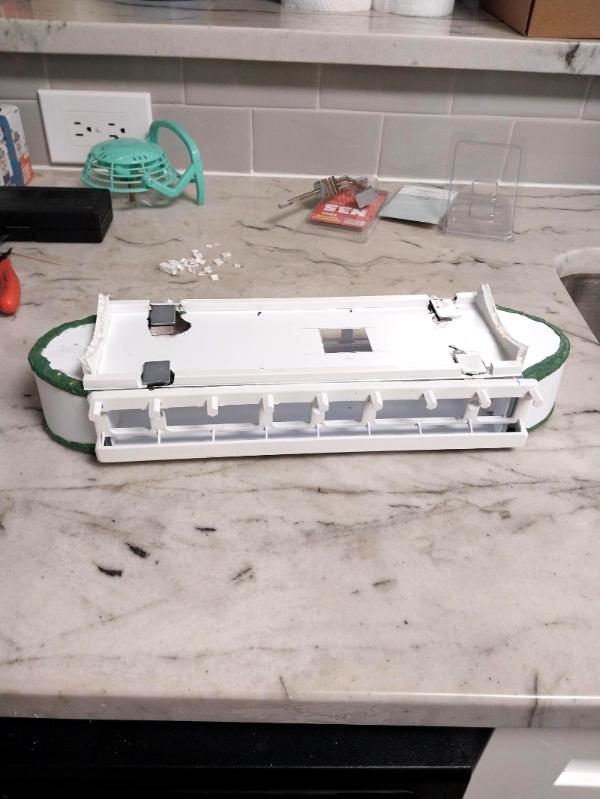
I also added LED bulb fittings to the gondola plate, the footplate of which is really the gondola ceiling. It's ready for priming now, but I can't glue it into place until I run the wires:
Tomorrow should have a lot more to show, nothing to do but vut to size and glue into place for a lot of things. Thank you for looking in, more follows soonest.
Lot of work done tonight, all over the place- gondola, gondola attachment plate, gubbins and wiring. The wepps gondola is finally approaching end state.
For the attachment plate, cut all my pieces to form the side panels and struts to have something to attach to:
And glued it up and got some primer on:
This is ready to attach to the zepp and I will as soon as I finish running my wiring. I'm not going to glue, epoxy or greenstuff it as I originally thought, the magnets hold it strongly enough that it would be redundant, and being able to tug it off lets me replace LEDs more easily if I ever need to.
The louvres on the side panels are Lego window shutters; I definitely got the idea from someone here on Dakkadakka, possibly Flapjack or one of the other scratch builders that have been so inspirational.
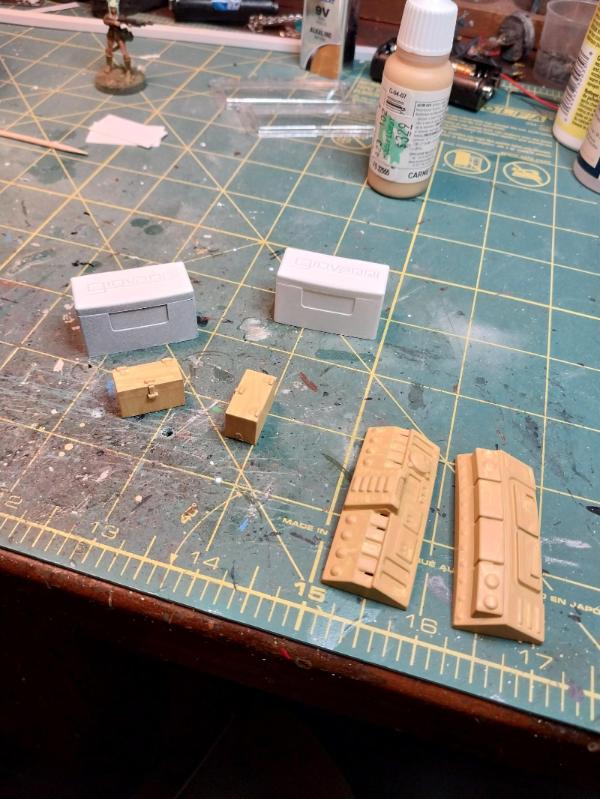
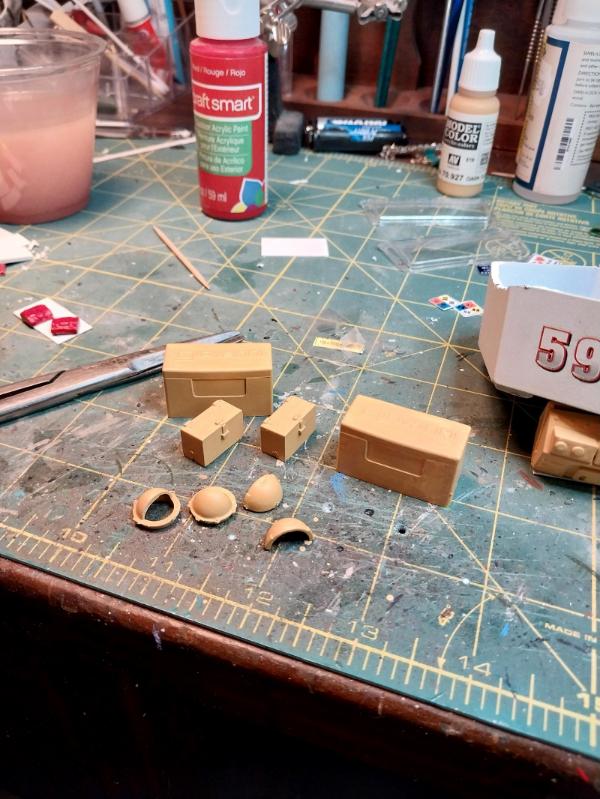
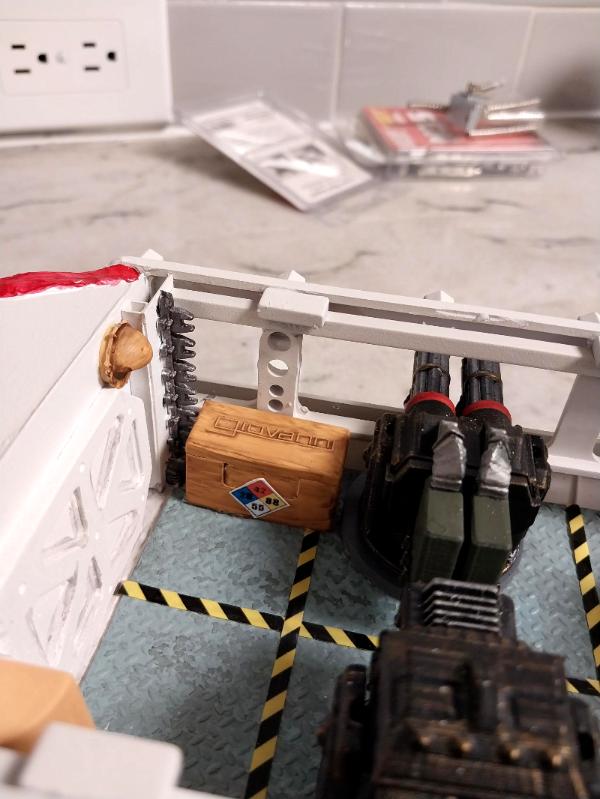
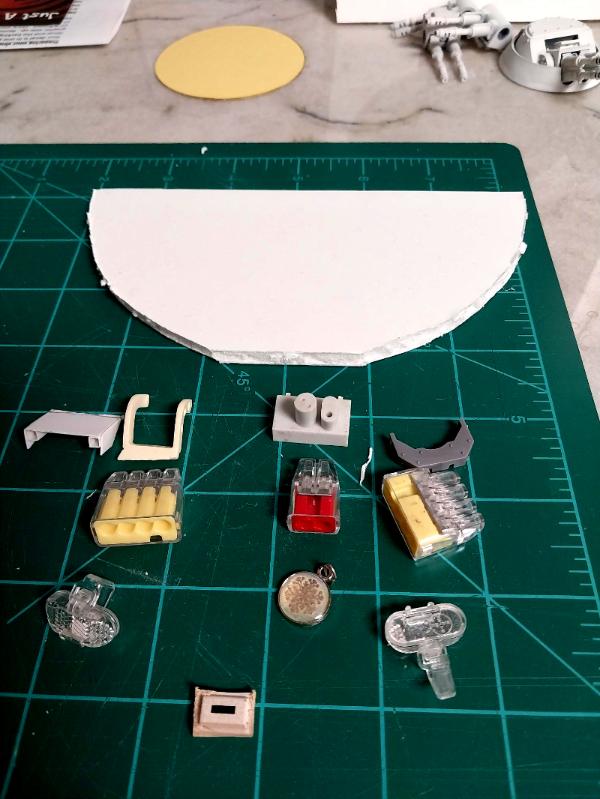
I went through all my bits boxes and bags again and found more gubbins for inside the gondola, which are glued in now but I'm not done yet so no pics for now, and others that will go on top of the deck sole; as you can see, deck lockers, ammo boxes and some other things:
The small boxes are left over from the Polish Tankette kit that became one of the Doom Pixie armored scout vehicles; the large ones are the caps from one of the brands of hand sanitizer we use. The larger pieces will form the long sides of the weapons console and are Bronekorps tank bumpers from two of the older kits. I've got a couple of other things painting up- first aid kits to hang on the wall and deck cleats for tying off lines (because airship of course) and some other things- pictures hopefully Monday.
It's getting there. Monday's push will be to finish off the gondola, get it primered and base painted, so I can get the deck sole in and attach all the other junk, then mount the guns and that's about it; then I can rig the wiring and lights and all that will be left is the bridge and crew figures.
Hokey smokes, they say that we learn more from our failures (ahem temporary setbacks ) than from our successes; therefore, I have completed my Master's Degree in hobbying and am moving on completing my thesis defense for my PhD.
Lots of lessons learned tonight.
First, although I'm keeping it in the dark until I get some painting done on it, I have modeled the bunting from greenstuff that will go on the bow of the weapons gondola and have a wicked cool sigil attached- I'm very excited to show all y'all and hopefully will get it done enough this week to show.
Lesson learned: Don't waste your time on fine detail greenstuff projects with old greenstuff: use fresh. It was a pleasure kneading the two components between my fingers to mix them rather than beat them to death with a claw hammer.
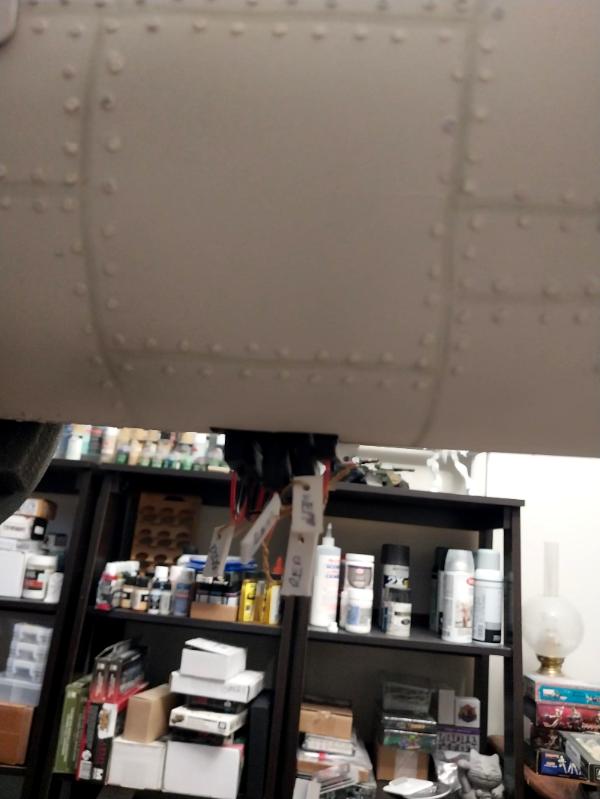
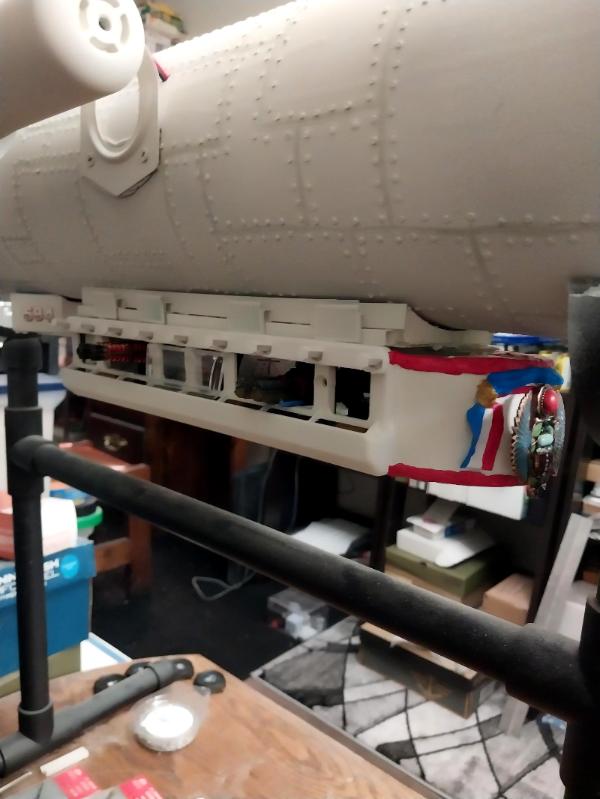
Second: I removed the aileron section and aft hull tail section to facilitate wiring the blinky lights for the engine pods and the gondola and bridge lights. Fortunately, I hadn't glued or epoxied this piece of stovepipe- I used a single sheet metal screw to hold it in place:
Lesson learned: To the degree possible, leave yourself a way to get back inside things that might need modification or maintenance.
Lesson learned: When I put this booger back it's getting three sheet metal screws to hold it in place; I was surprised at how easily the whole thing came off once the one screw was pulled.
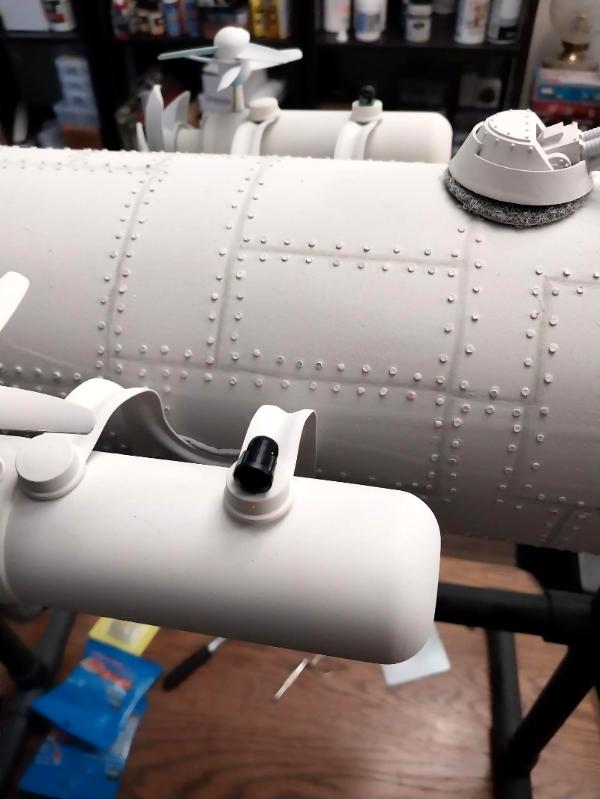
Third: Put most of my time tonight into building the red blinky lights circuit (portside running lights). You can't see it in this pic, naturally, but the two LED circuit, its battery box and its switch all work. Of course the blink is out of phase with the camera capture, but trust me, the bulb you see is blinking like a blinkin' beacon (hat tip to Yukon Cornelius):
Lesson learned: I know (now) several things:
a) How long to make my wire leads to make it easier to join everything up
b) That the 'press and hold' connectors don't work for this project- the connections must be soldered or taped with electrical tape
c) Multiple tests to ensure the circuit is wired correctly and batteries installed properly in the 2-coin battery box is never wasted: of everything that I had to do over tonight it was never because something was misrouted or wired incorrectly. Test, test, test!
Finally, the greatest lesson learned of all: To Do Anything, You Need EVERYTHING:
Tomorrow, I'll wire the starboard (green) blinky lights and maybe the wepps gondola as well and run the wire that will eventually feed the bridge lights. Then the top plate can go on (it's done) and I can focus on wrapping up the wepps gondola (it's almost done).
I'm at the point where I'm looking forward to some nice, relaxing painting of the 10 crewcat Aero Pixies I figure to do up to put in this beast. I enjoy soldering from time to time but I taught myself from YouTube, I'm not terribly good and I do find it somewhat nerve wracking at times.
Thank you for looking in, I really appreciate seeing that people have been here and even more when you comment (when there is something that needs saying- your constructive criticism is always welcome).
The Kittyhawk is really coming along. The guns in particular a nifty, especially the plasma. If you put that much attention to detail in the whole model, it will look truly fantastic. I look forward to seeing the next steps.
Thank you very much, Josh. This is something very different from any 'large scope' project I've done before and in some ways is influenced and inspired by Captain Brown's Chilliwack project- there was attention to detail on a massive scale! For anyone who hasn't seen it, I highly recommend taking a look.
Work got in the way of putting any time in tonight, which is disappointing, as we're getting to the stage where major subcomponents are so close to being ready to install, the changes should start coming quick.
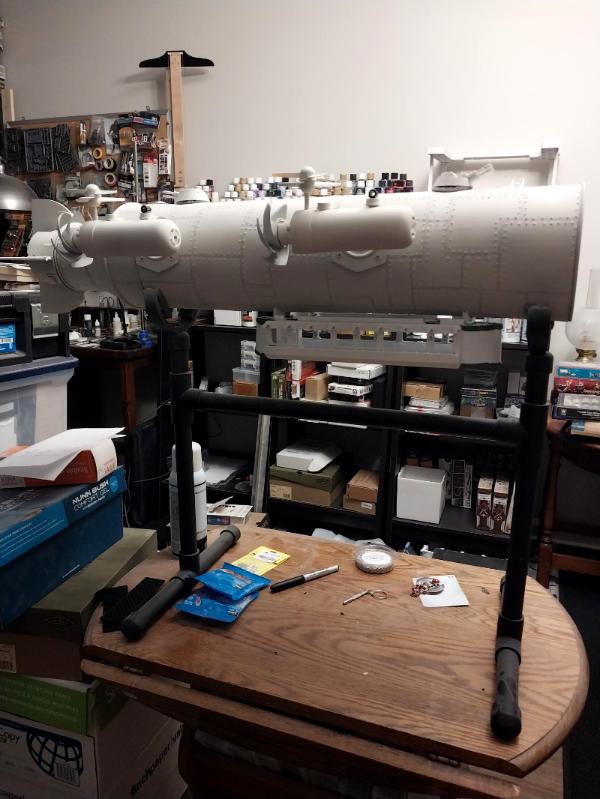
Some stats on the Kittyhawk to date:
* More than four feet long
* More than 2500 hull rivets
* 12 LED navigation lights...
* ...using more than three yards of wire...
* ...and one 9 volt and four two cell 2023 coin battery boxes
* Four Daimler Khrushart 18 Megawatt Ethereal Turbine Engines
* Armament consisting of:
- Two twin 30mm depleted uranium GAU-8 Gatling Gun mounts
- Two twin 8000 Ohm Plasma Cannon Gun mounts
- Two twin 40mm anti-aircraft dorsal mounts
- One twin 40mm Dual Purpose ventral mount (chin gun)
Thank you all for looking in. More follows soonest.
Thanks very much for looking in, Warboss! It really is good to have back here on Dakka.
Some good work tonight.
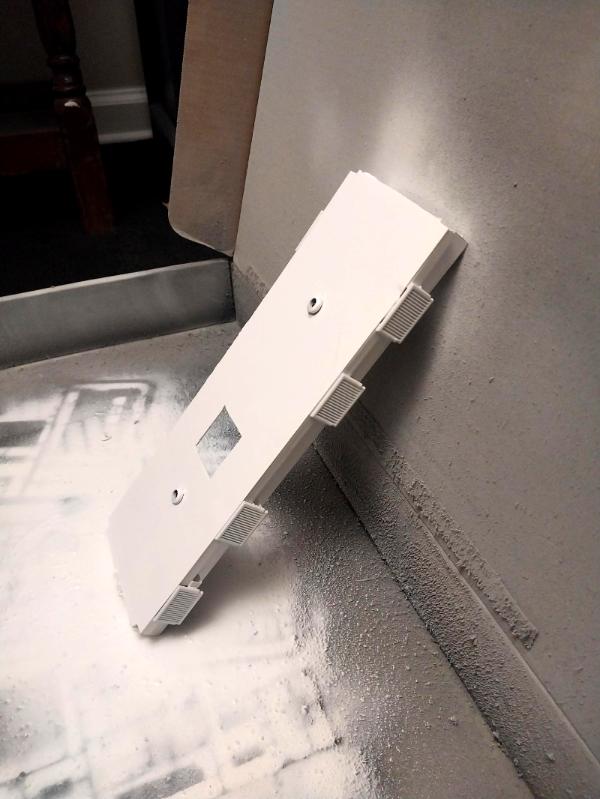
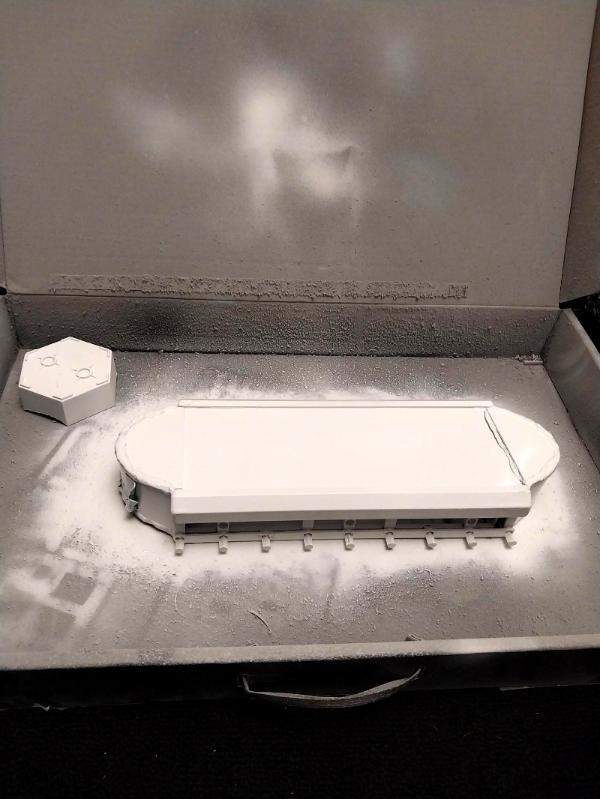
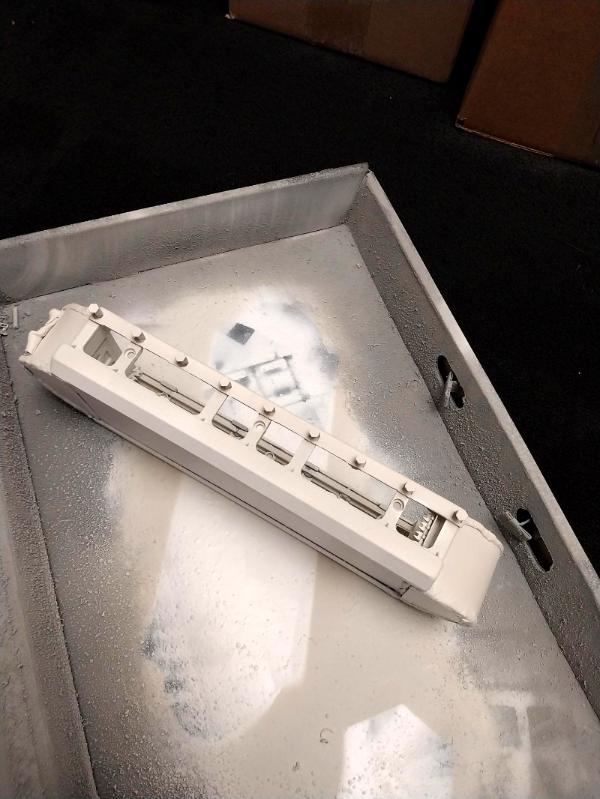
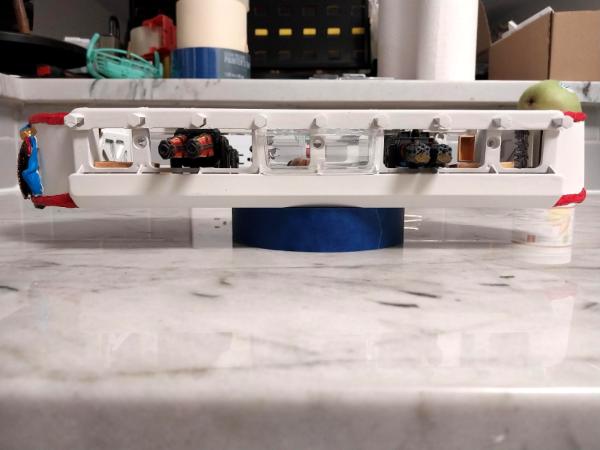
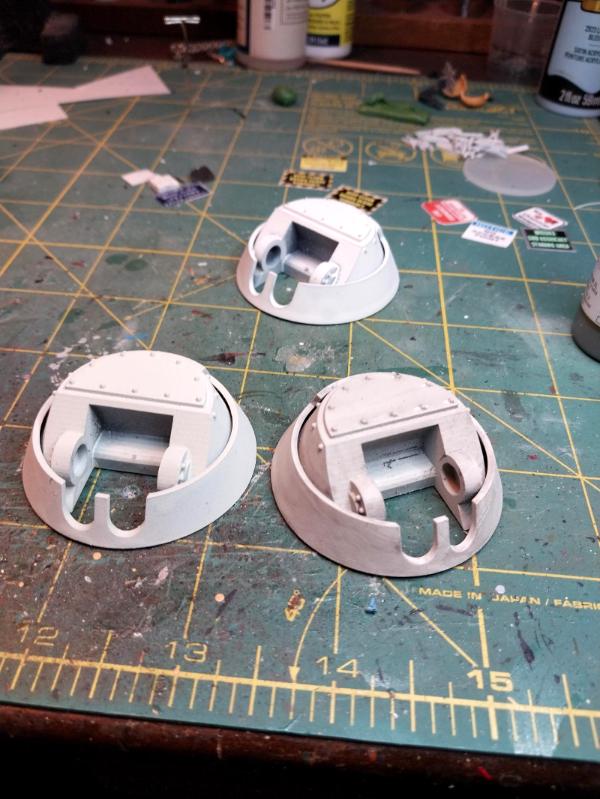
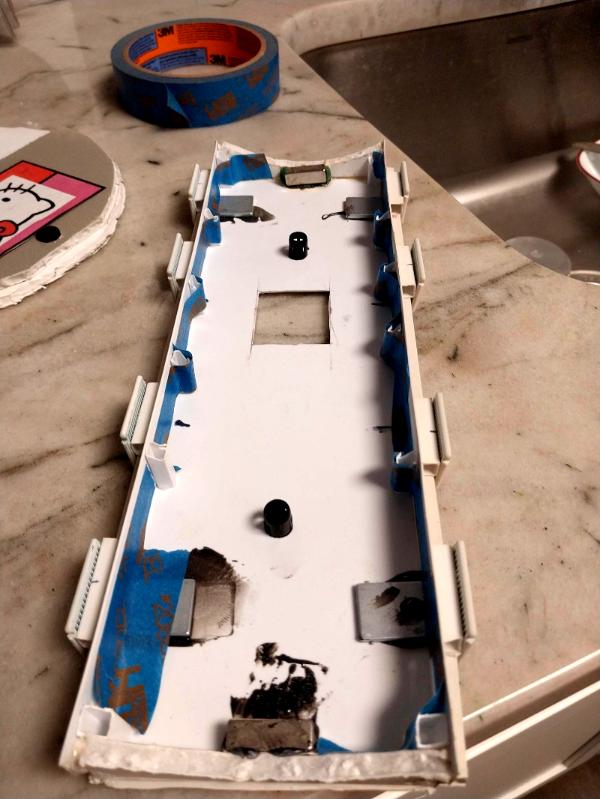
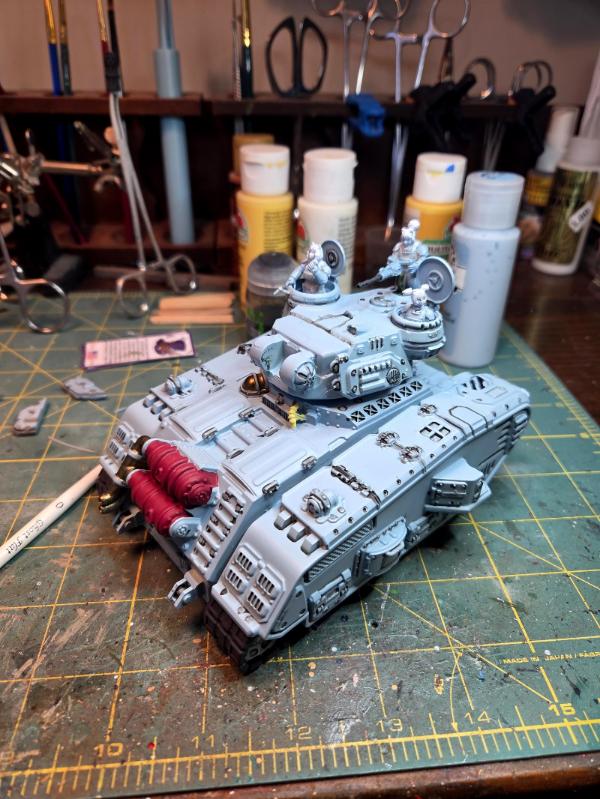
1) The Weapons and Battery Gondolas are receiving their first coat of primer, preparatory to getting their base coat:
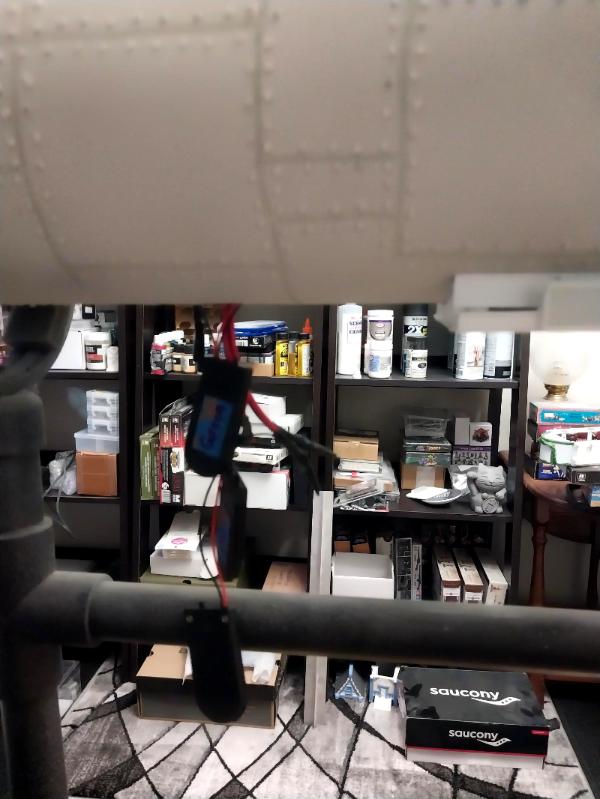
2) All the navigation and cabin lights are wired except for the Bridge (the tail section has to stay off until those are installed). This pic shows three of the four 2-cell coin battery boxes (pushing 6 volts, each) installed and waiting for the Battery Gondola to hide them (I even remembered to label them so I can replace batteries in the correct one without playing Hide and Seek with them all until I stumble on the correct one):
And the top plate is now permanently installed:
I've hit it with its first base coat color since this photo. The plate isn't glued in place- the magnets are plenty strong enough to hold it and it makes it easier to take it off if I have to replace one of the cabin LEDs. I will add indexing strips so it is easier to pop it back into place without measuring or eyeballing it a million times.
I hope to make great strides towards finishing the wepps gondola tomorrow so I can at least test fit it and see what everything looks like with blinky lights, cabin lights and gun muzzles staring out the ports.
Yes, there are a couple of rules sets that I think can work- one written specifically for airship combat:
Skies of Sordane by Sordane Publishing is for airship campaigns and ship to ship combat. I backed their kickstarters and they offer 3d printable airships of a variety of types and factions, ship maps for on-board hand to hand combat/boarding ops and rules for ship to ship engagement. This is probably the best bet, although the ratio of ship size per their rules to armament might place the Kittyhawk at a serious disadvantage.
Aether Studios offer (as their name might imply) 'cloud-based' 3d printable terrain and miniatures and I think they have a rules set as well; if not the folks who game their miniatures have probably developed or adapted something.
Pike & Shotte include a small section on ship actions in the Napoleonic period that might could be adapated.
Age of Sail definitely offers rules sets for sailing ship to ship action, not sure if they do boardings or how one might adapt the rules for aerial combat, where elevation over one's opponent is definitely an advantage.
To be honest, I've thought about how to game the zeppelin in a match and against a variety of enemies: another capital warship, a fleet of smaller corsair-type ships, etc. Just not sure who I can find to game against!
More follows soonest.
Automatically Appended Next Post:
Lots of little project work, all adding up to big components getting finished:
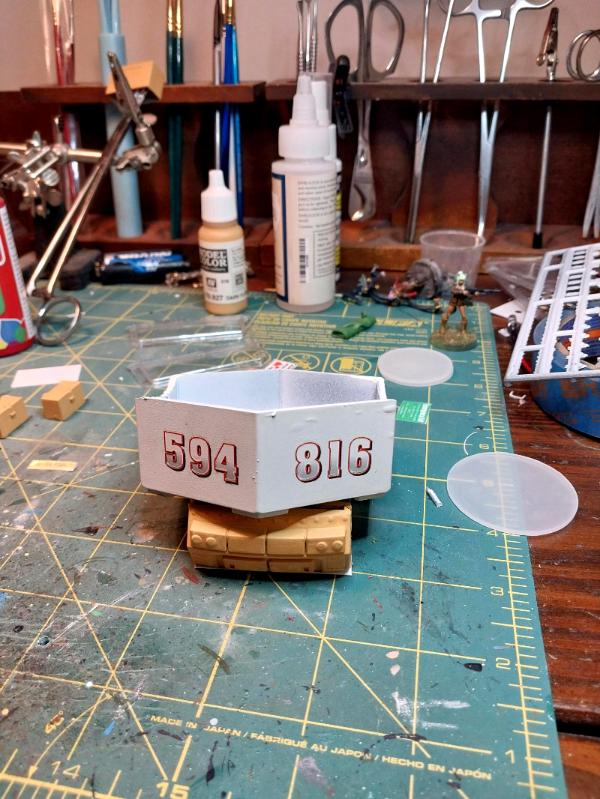
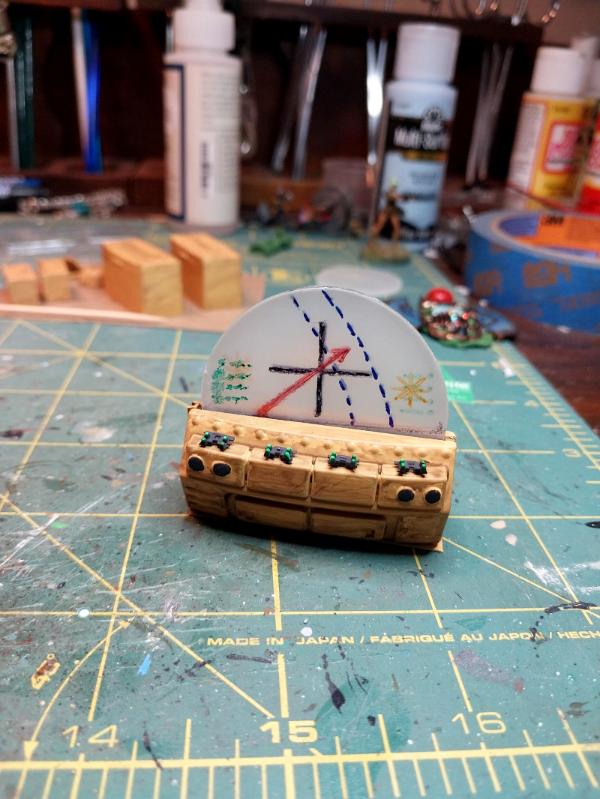
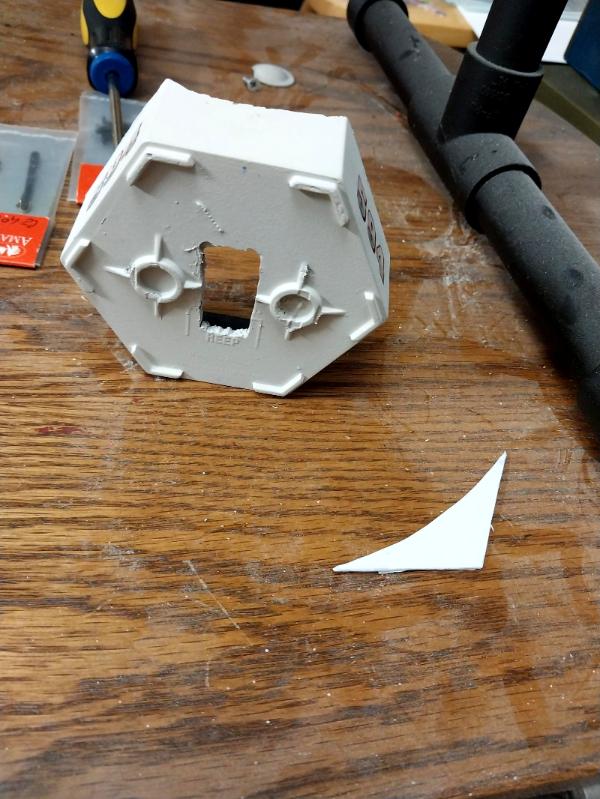
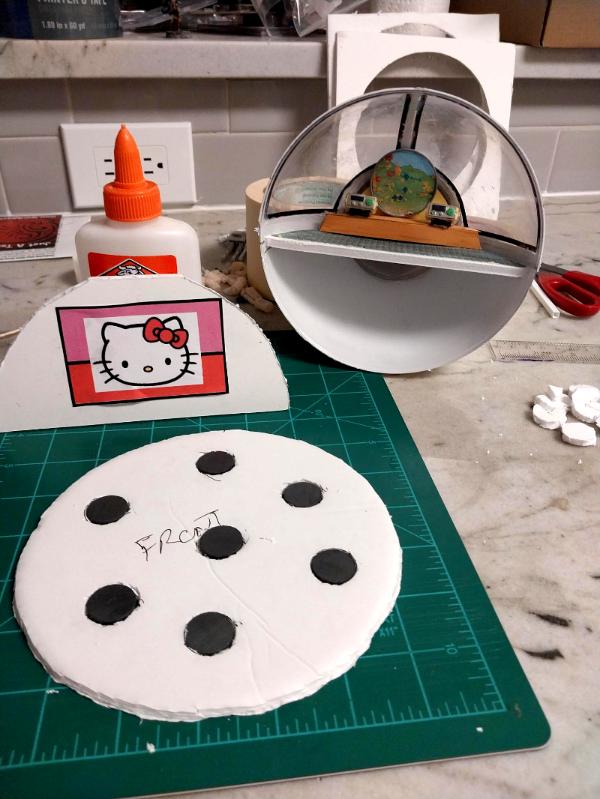
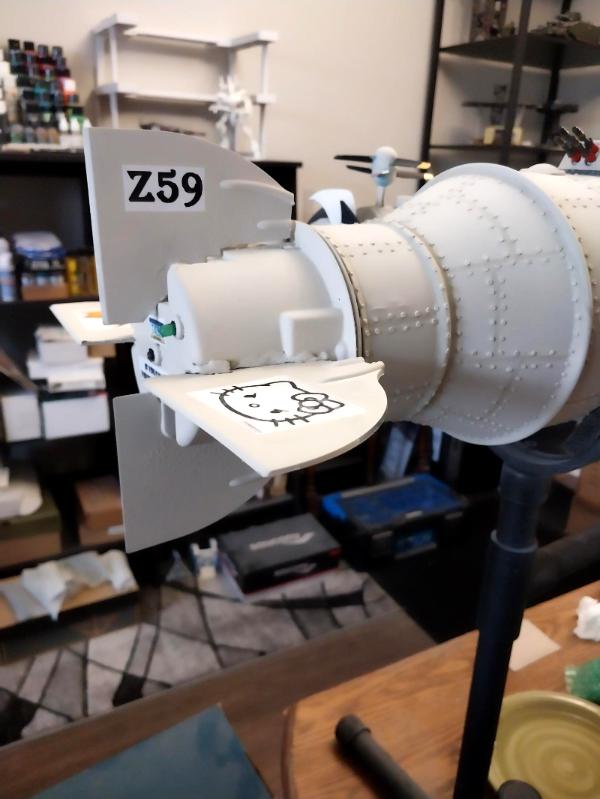
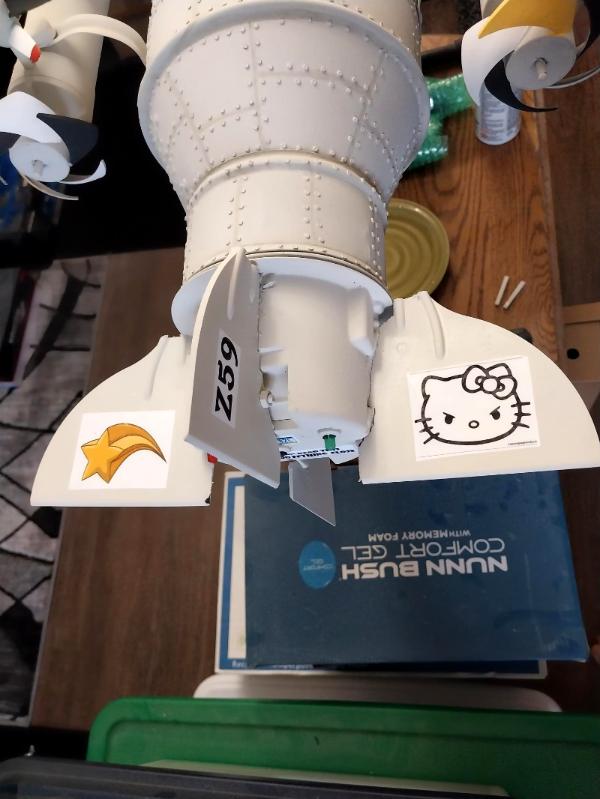
1) This is the battery gondola, fashioned from a Cobalt Keep sorting tray- I love the hexagonal shape to provide some contrast to all the circles and curves that form most of the rest of the zep:
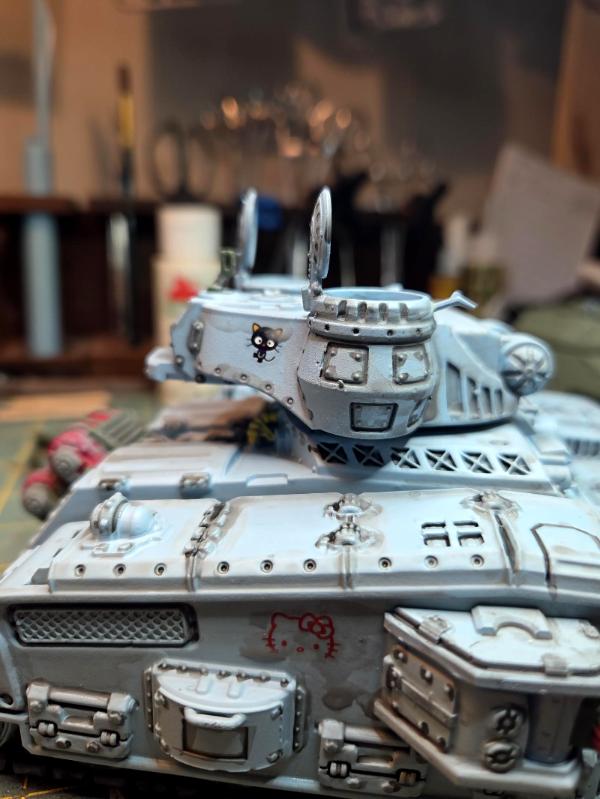
Those are Pinewood Derby racer rub on decals and seeing the pic like this makes me think I'm going to seam the edges with rivets. Why have 'em if you ain't gonna use 'em? Not sure what the numbers mean- the Nekomimi seem to have a thing for putting numbers on stuff; wait 'til you see the final engine pods!
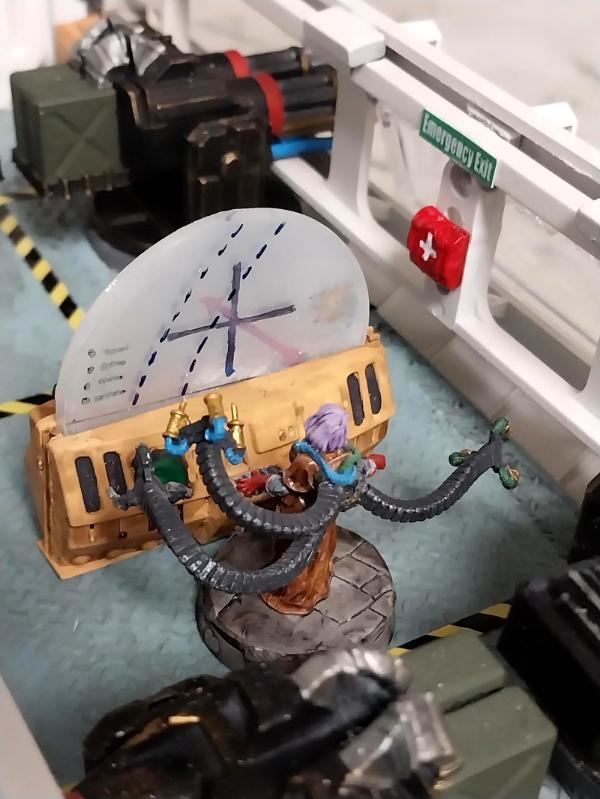
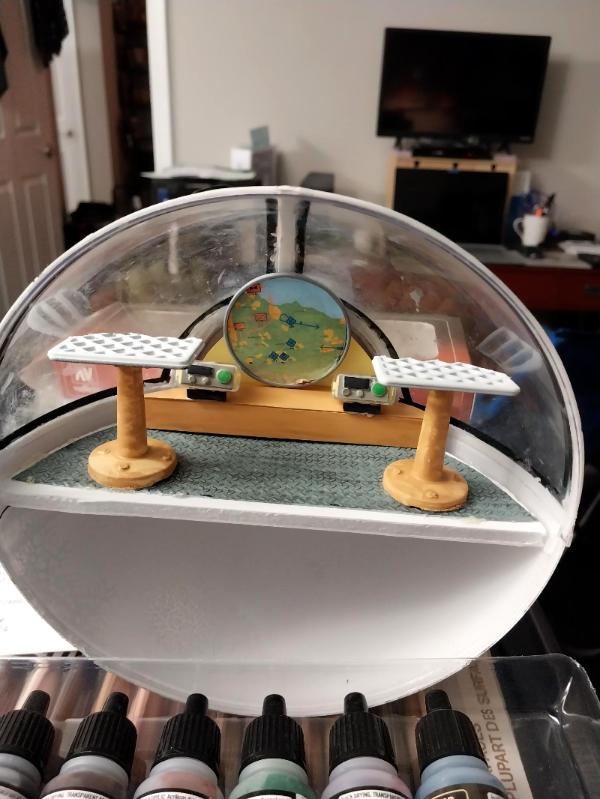
2) The wepps control console is well along now:
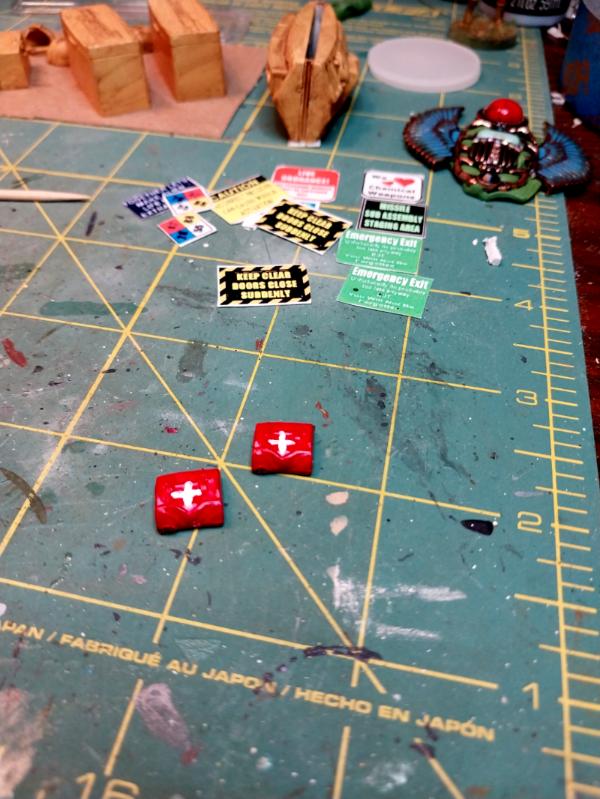
The red painted back backs are first aid kits lacking only their white crosses and some wash to dull the shine down a scooch.
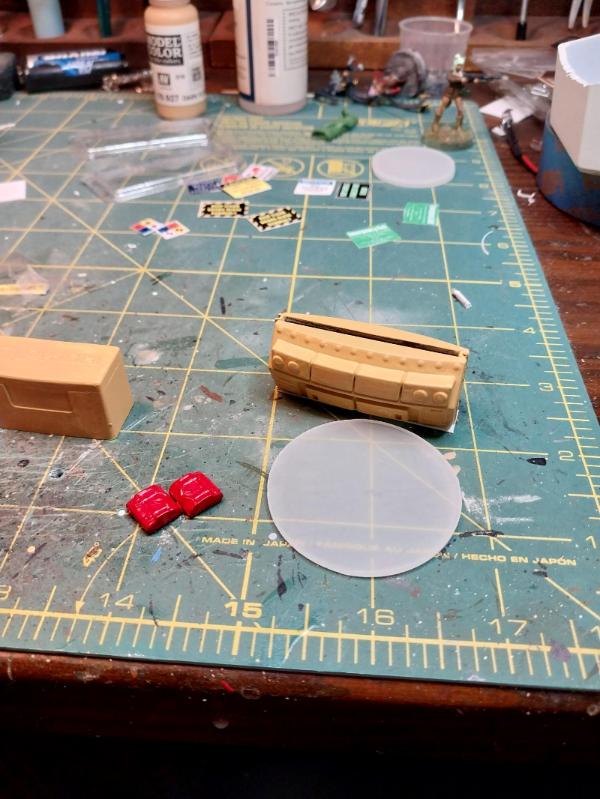
3) This is the doodadage ('Murican for 'Gubbinage') to be added to the interior of the wepps gondola:
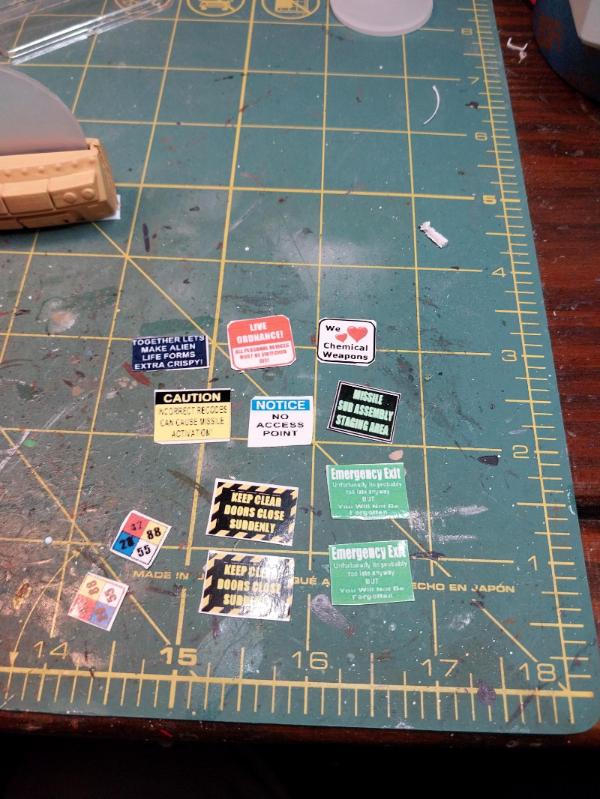
4) And signage to likewise add to the interior:
5) and the wepps gondola itself is now basecoated and ready for painting:
Might add some rivets where the greenstuff work is, maybe not. Definitely not along the sides with all the window ports and interesting angles. Like the M3A3(?) Grant tank of WWII, cast top turret, welded and riveted main hull!
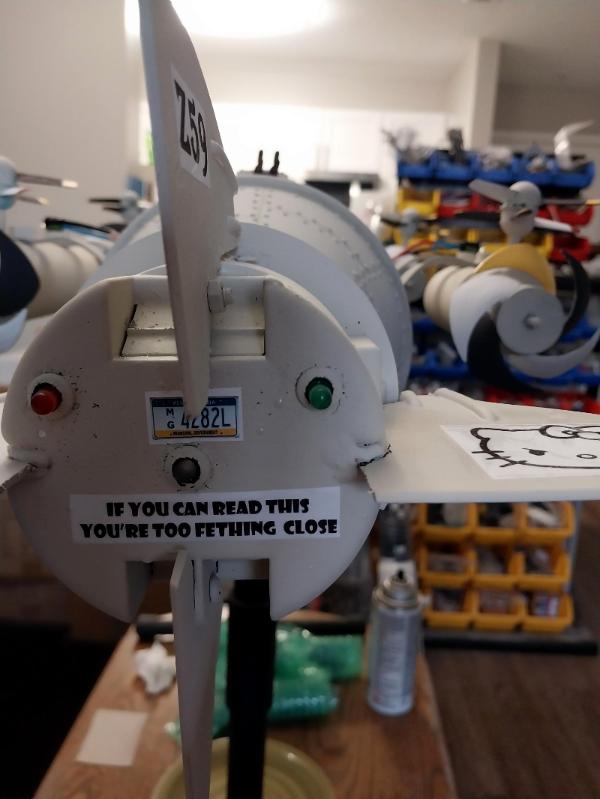
I love the "We heart chemical weapons" sign! Dark humor is best humor. I'm so happy to see you making good progress on this project, 'Cat! And thank you again for the warm return welcome. I've missed Dakka and I am glad to be back.
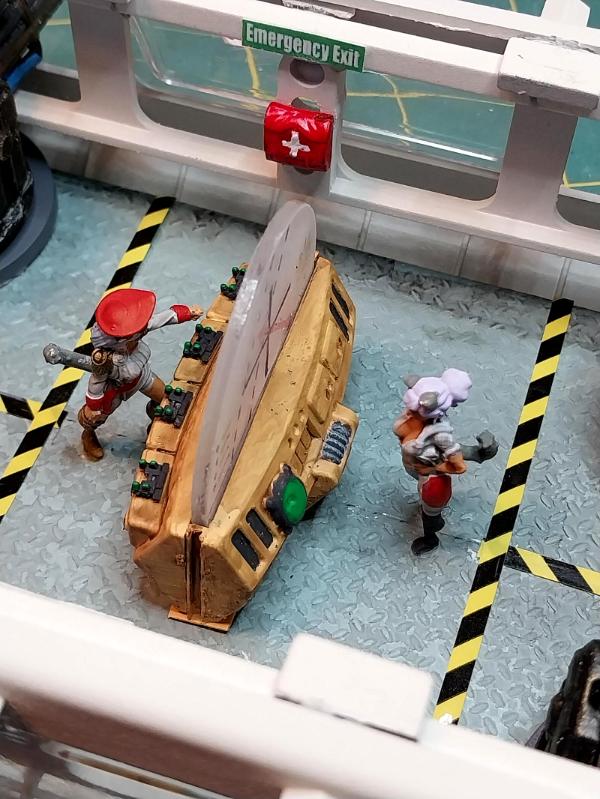
A little 'un: Added the white crosses to the first aid kits. They look terrible up close (and I used magnification to draw them!) but at a range of 18 inches or greater they look fine to the Mark I Eyeball, so I'm probably not messing with them anymore:
A big 'un: The battery gondola is done: all decals added (love those Pinewood Derby rub on decals, if the surface is smooth enough and sturdy enough for them), the gaps covered that would otherwise have shown when the square-edged gondola is fitted against the round-edged hull and the magnets installed with the strongest substance known to Nekomimi-kind: greenstuff:
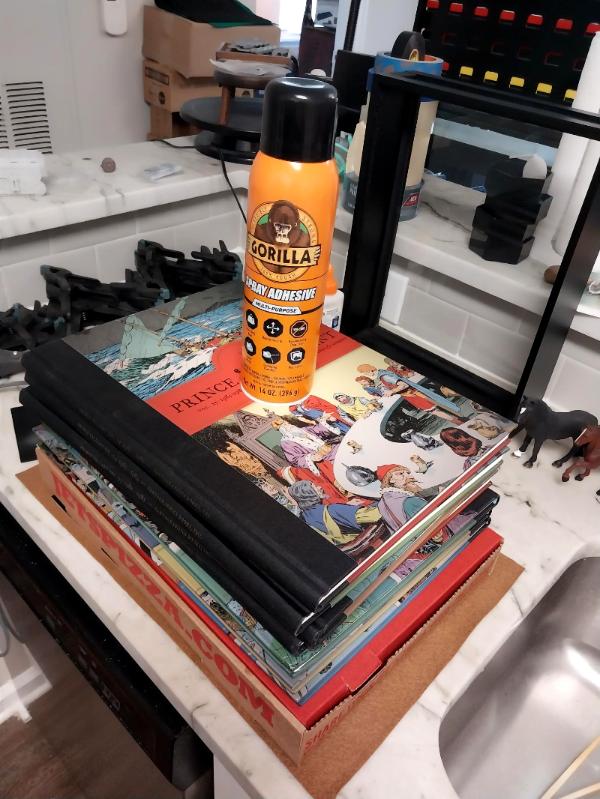
A middlin' 'un: I used diluted Aileen's Tacky Glue to fasten down the deck sole; here the paint bottles, books and boxes are applying an even pressure to keep it from curling. Once the glue sets, it's time to add some trim (to hide a multitude of sins), paint the doodage that's already installed, add more, add the signs and paint the bunting on the bow-end:
Tomorrow is going to be a short evening- got a late in the afternoon/early evening work thing, so trying to get some more painting time in tonight on the wepps console so I have something to show you tomorrow.
And, withal, Run DMC is singing You Talk Too Much on the boom box and life is good.
Thank all y'all for dropping in. More follows soonest.
Automatically Appended Next Post:
Extra points if anyone- especially our British friends- can identify the source of this post's title.
Thanks very much, Cam! The gondola, with the exception of the big guns, is a large, white space- it needed filling with something so I went through a lot of my bits to try to find 'logical' things to tuck in. When I served aboard USCGC Duane, we had a kit very similar inside the turreted 5" 38 calibre.
Tonight, every step forward was won at hard price.
First up, I'm done with the weapons console- except maybe for re-tracing the alcohol marker designs on the 'translucent screen':
The 'console' stand is made from two leftover bumpers from Bronekorps tank kits (one wasn't actually left over, when I go to make that kit, I'm going to have to fabricate a new front bumper). Those keypads in the second picture are track cleats from the Polish tankette kit that became one of the Panzer Pixie scout cars.
Next up is the battery gondola. Despite my best efforts, the battery boxes with the switches would not fit in the gondola itself, partly too tight a fit and partly the effect of the very powerful magnets that hold the gondola to the hull. So I wired little plastic tags to each box, identifying which light set it powered (to make it easier to replace the right battery) taped the boxes together, inverted them and stuck them up in the hull- problem solved:
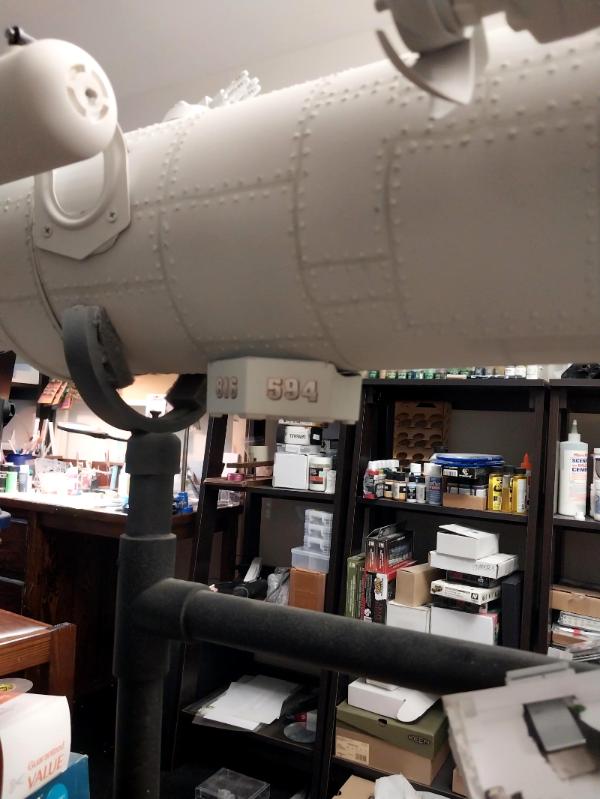
And with gondola attached:
I'll add a piece of trim in front and back to hide the gap and act as an alignment guide for putting the gondola back in place. I also want to scratchbuild bomb racks to fasten on the underside, because- bombs.
Lastly, the JB Weld failed to hold one of the magnets that hold the top plate to the hull, so am re-attaching that with Greenstuff. I'd hoped to give a photo tonight with the guns sticky tacked in place, the red battle stations lights on and everything attached, but maybe tomorrow. The tail section is re-attached and just waiting for its alignment markers to be added to help put everything back together easily.
Still at the point of adding all the bits and bobs and signage to the weapons gondola, perhaps we'll get that finished up tomorrow.
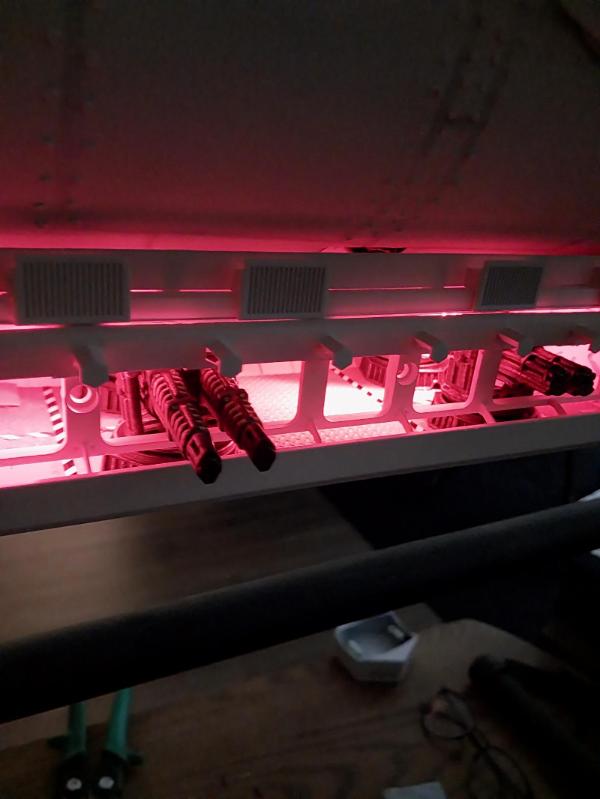
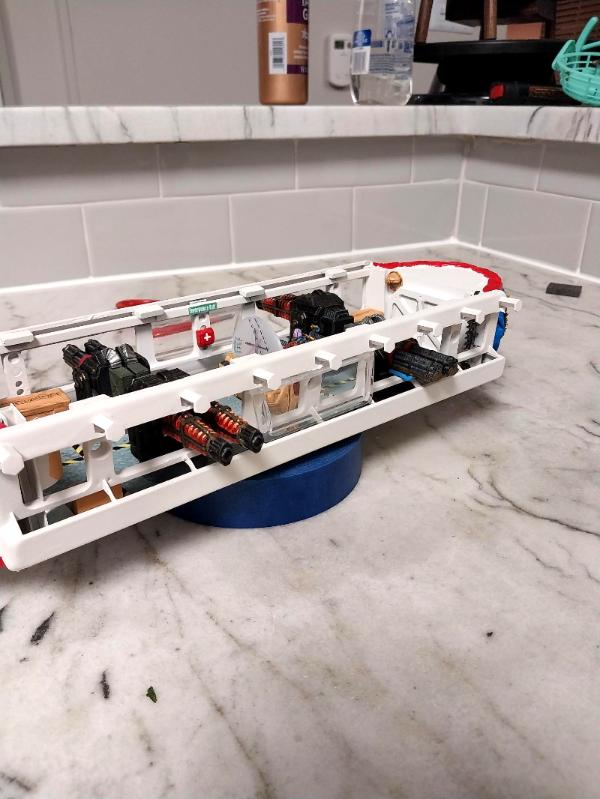
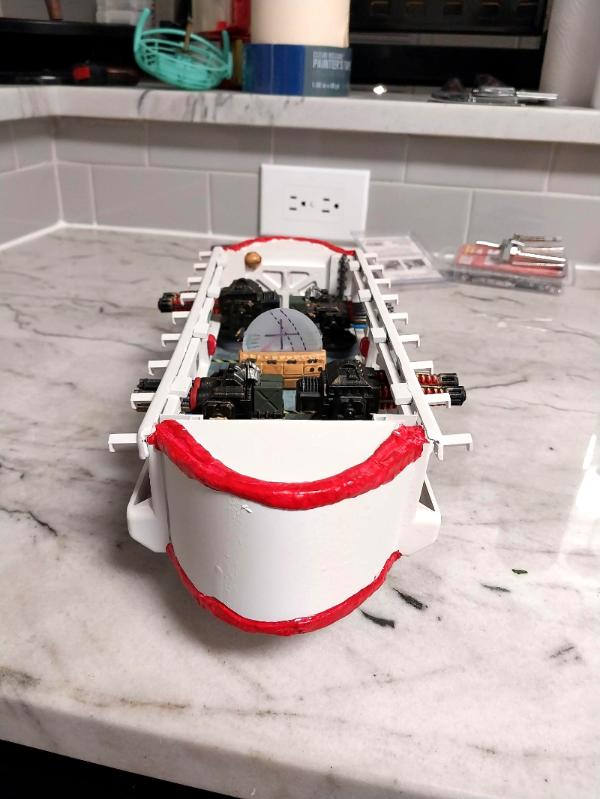
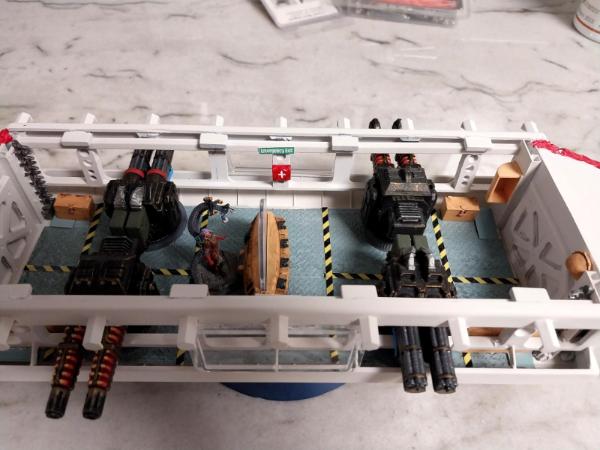
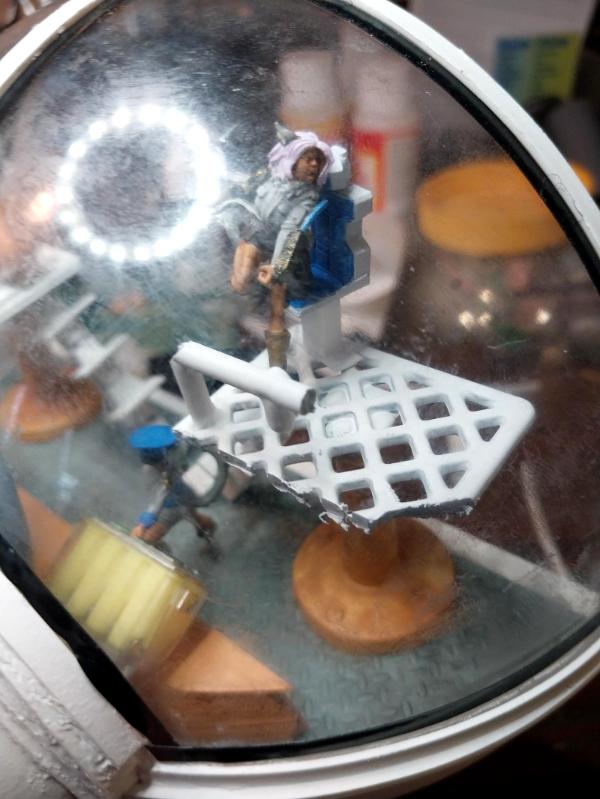
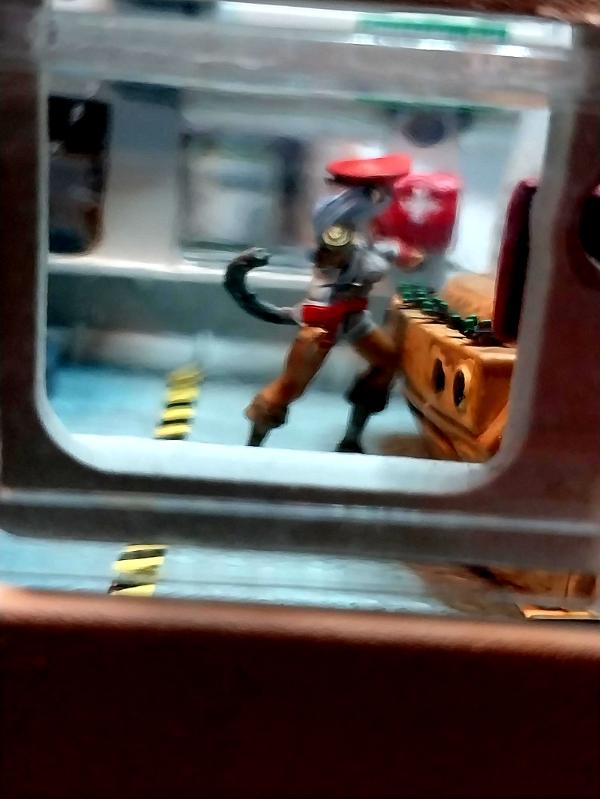
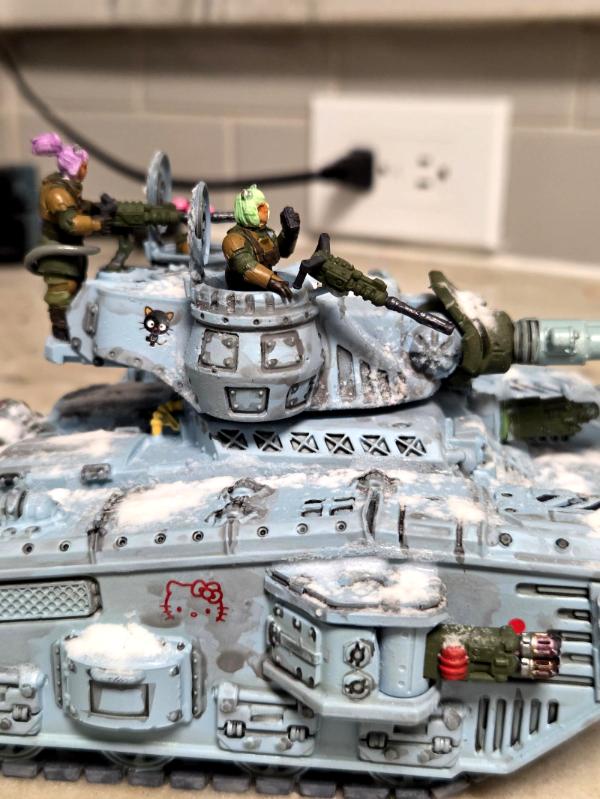
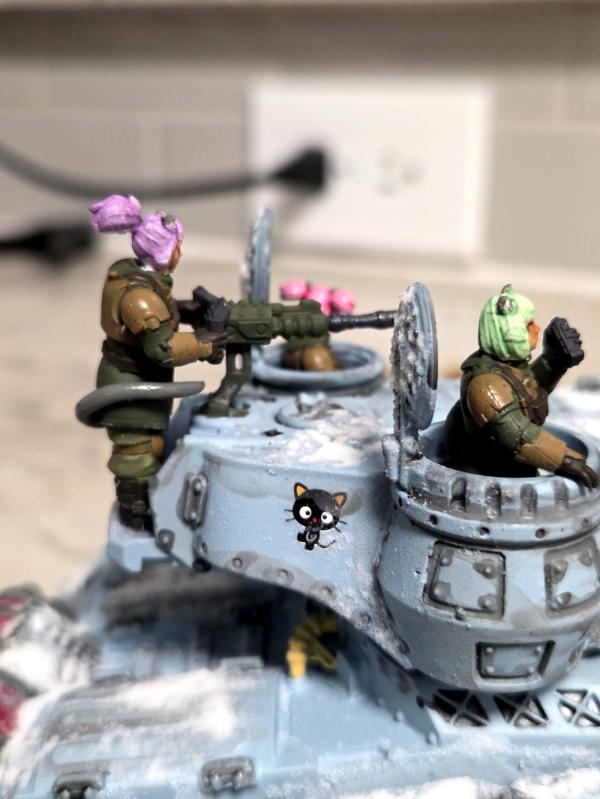
Tonight I actually got to really work on finishing off the weapons gondola: got a lot of the little bits inside painted, started hanging signage, and got the first coat of the bunting done:
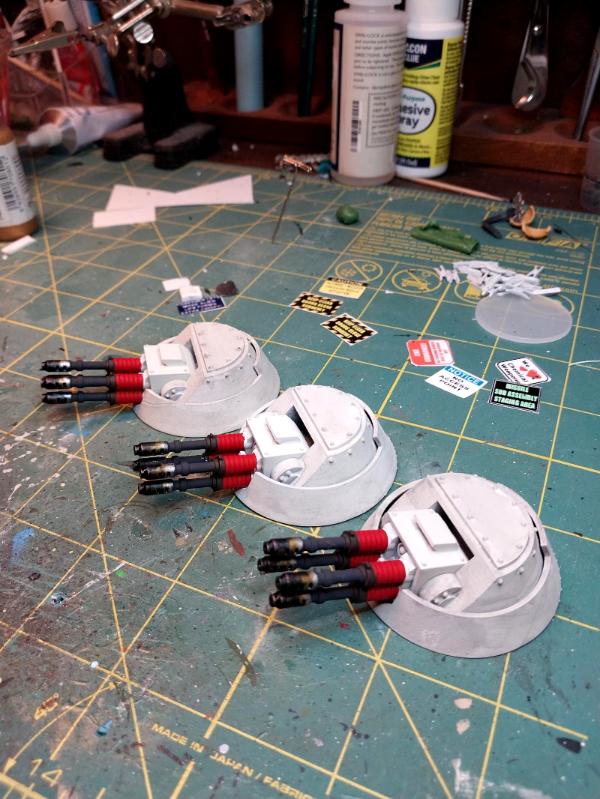
The guns here are just loose, but it gives an idea of the look:
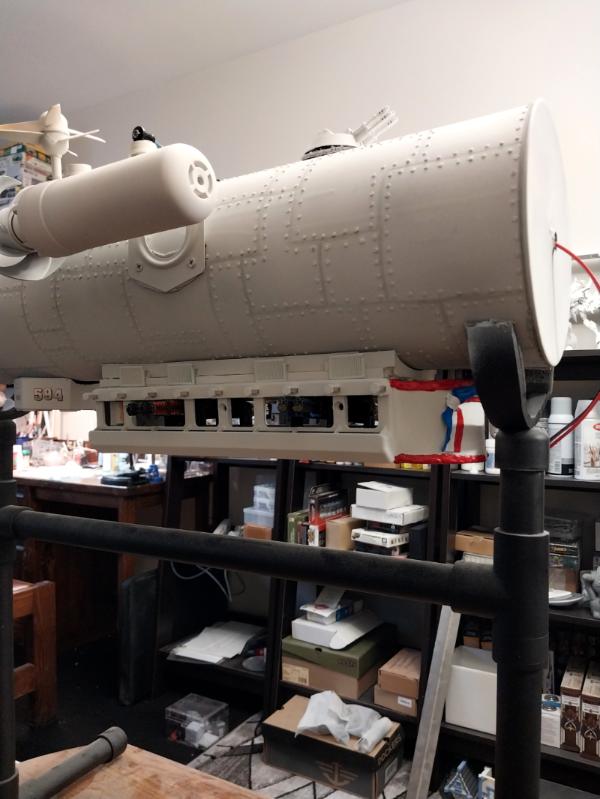
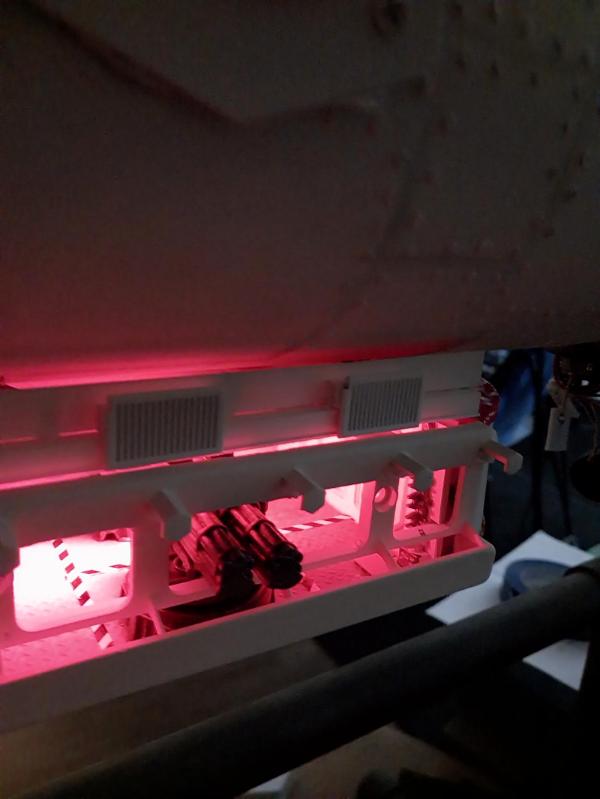
The new magnet arrangement works pretty well, although I may need to add some trim to help with alignment and blocking light from inside the cabin, as you can see in these illuminated shots:
I'll get a good interior shot when the interior is done (or least, more doner than it is now). The one thing I don't like is having to pull the battery gondola off to get at the switches for all the lights- it's a right pain to do both, and then get the darn gondola back on. So I think what I'll have to do is drill holes for the micro-switches I have, mount them permanently so they can be accessed from outside the box, and wire them into the circuits for the different light circuits. This still lets met pull the box when batteries need changing, but makes routine 'lighting off' much more easy. And shouldn't be too hard to manage. And I can still hang bomb racks to hide the switches, so- bonus!
Thanks, Warboss. Two 5mm red LEDs in the ceiling. The photo shows a lot of what looks like white light, but is reflected light off the very pale interior. I'm not going to worry about it too much, I like it the way it is too.
I do have to re-rig the switches though- just too hard to manipulate the way things are now.
Almost done with this phase and then on to the bridge.
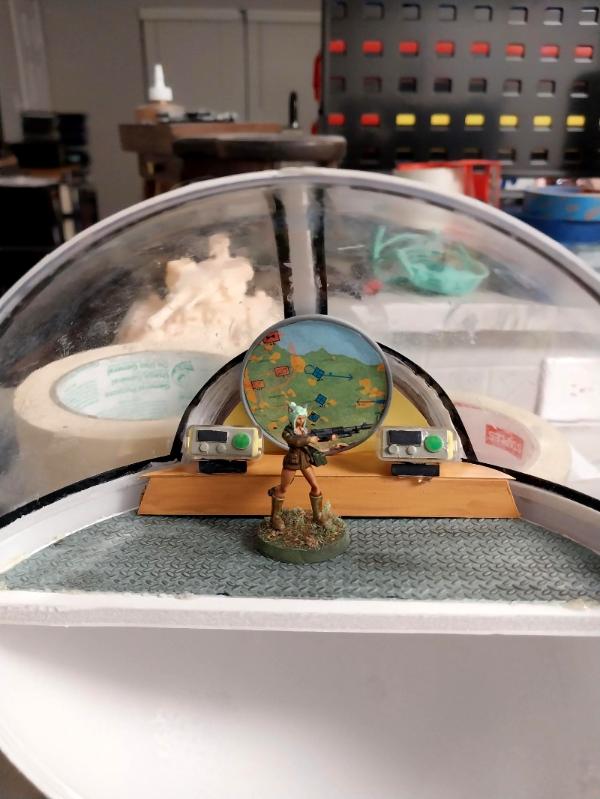
Thanks Syro! The green button is painted, and I wasn't actually trying for OSL this time, this is my latest attempt to do a radar-type screen using fluorescent paint and adding 'swirls' in flat black. However it appears, I'm happy with the outcome! I know it's hard to interpret without something in view to give it scale: the console is about 3 inches by 3 inches.
I'm actually back in the saddle modeling this week- last week was a wash due to (slight) frustration at having to re-do the switches in the battery gondola (don't get me wrong, it needs to be done and I even thought of an improvement that will protect the connections to the battery boxes and their miniscule Lilliputian wires) and having to help move my company's wood and metal working shop, but mostly having to help move the shop which made for some long days.
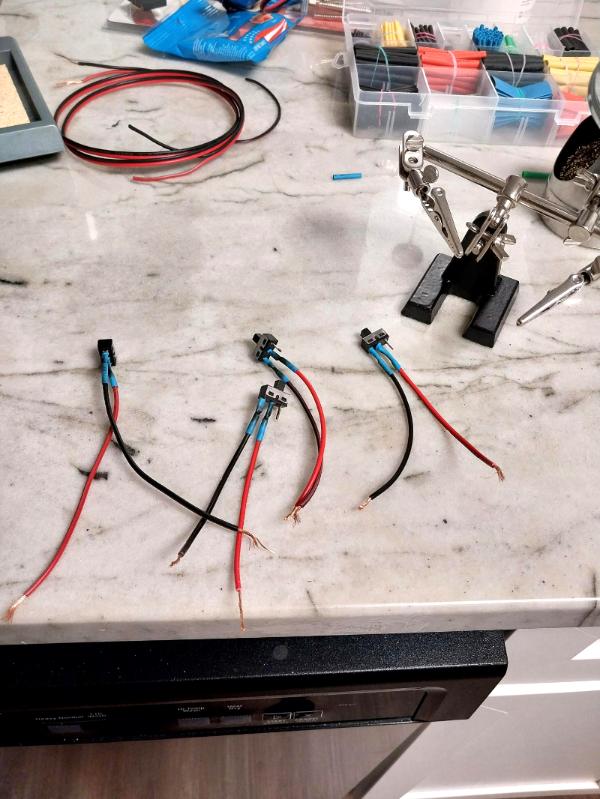
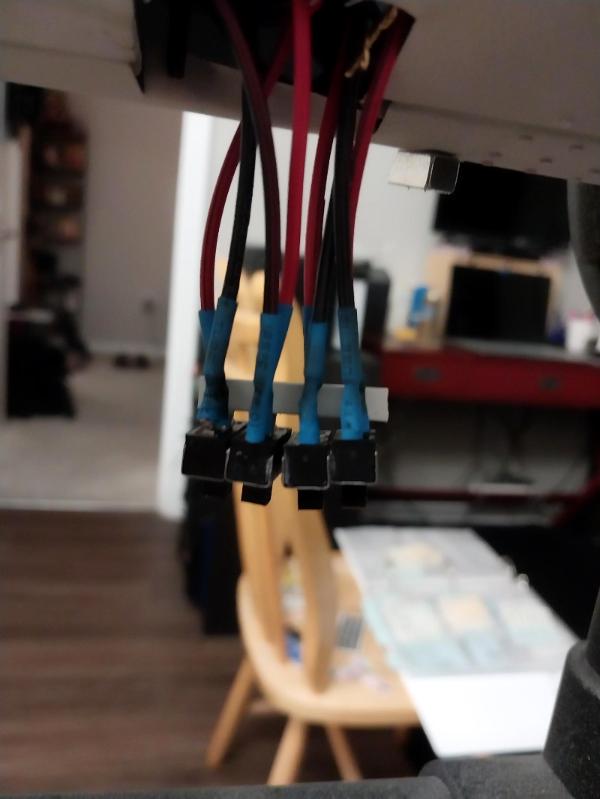
Tonight I soldered up the switches that I will fit through the bottom of the battery gondola, so that you don't have to remove it except to change batteries, you'll be able to turn everything on and off from outside:
To follow-through, I need to solder lead wires onto the battery boxes, which I can then fit into In-Sure Push-in wires connectors, which will undoubtedly be more secure than the electrical tape I have wrapped around them now.
Then back on track to finishing the weapons gondola and starting the bridge. Paint a few crew members and this project is done!
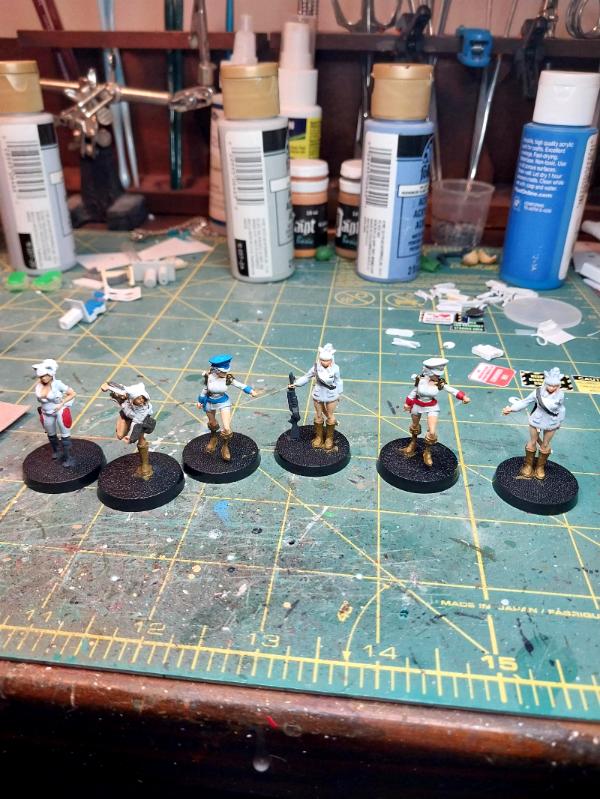
Some less-than-optimal news: Resin Munitorum, the makers of all the Nekomimi Winterguard figures I've been doing up for more than two years now, has closed down their website- hopefully only temporarily. I know it's a tough economic situation everywhere just now, and figure manufactures- especially on-demand resin printers- have a pretty thin margin, but I'm still bummed. The Winterguard are the first army-level focus I've had since I first started painting Rogue Trader in 1986. By that I mean that I was selecting models with an eye towards a total, balanced force- with the occasional 'for fun' piece added in. Everything else I've done has been selected on a 'per piece' consideration, ie: what do I feel like painting next? When you don't game, there is no incentive to producing balanced army or group sets. Hopefully they're merely on hiatus; if anyone hears anything, please let me know.
I have enough figures left to keep me busy for awhile, and overall they should let me field a well-balanced army up to around 2000 points. I'll have to go armor-heavy, rather than scads of infantry, of course, but for the lightly built Nekomimi catgirls, maybe that's more realistic strategy anyways.
So, back on track, hopefully some more to show tomorrow, thank you for looking in.
So close! Just a slightly longer day and I might could've got the battery problem sorted out. Oh well, hopefully tomorrow.
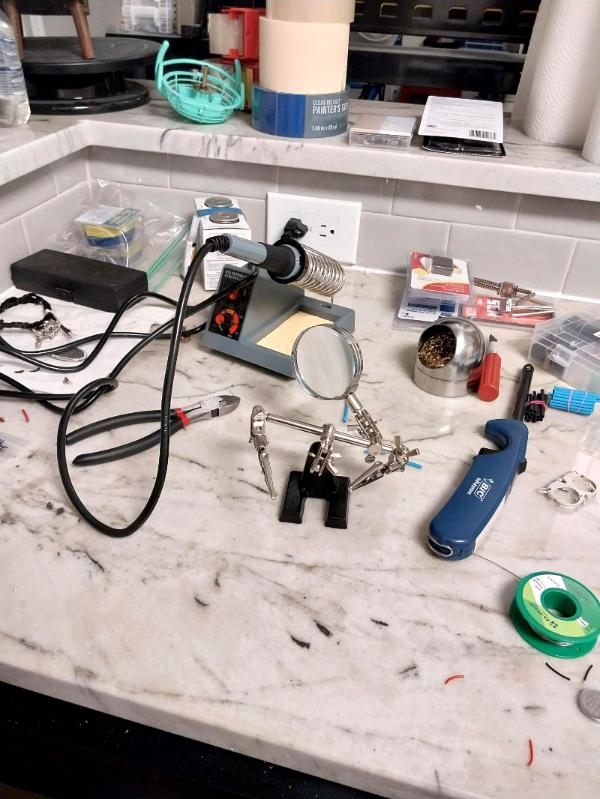
I finished undoing all the gobs of electrical tape that fastened all my connections and soldered them (turns out, you can fit a soldering iron, solder spool, two hands, a headlamp and three squirrels inside a 6 inch diameter piece of stove pipe) and fitted shrink tubing over them- both to isolate each circuit to avoid shorts and to take some of the strain of getting yanked on off the soldered joint. Then stuffed everything except the new micro-switches up into the pipe:
The plan now is to take the tail section off when the batteries need to be changed.
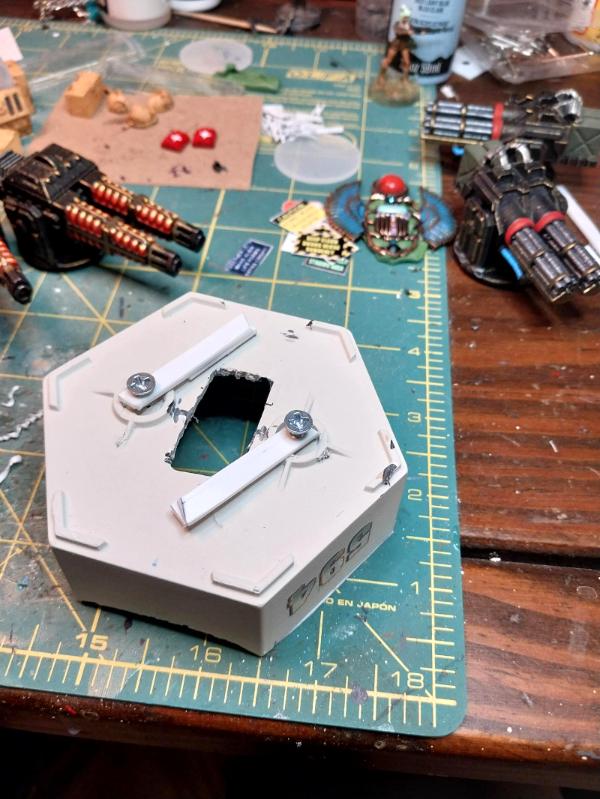
And to make the switches accessible from the outside, first cut a hole in the bottom of the battery gondola:
And glued the four micro-switches together and added a 'tie-bar' to the unused third pole:
I had a devil of a time gluing the switches together and as you can see, they aren't very even, meaning they don't fit in my carefully measured and clumsily cut hole. So tomorrow, I need to enlarge the hole, stick the switches through and add a flange so they stay in place. Then the job should be done.
As Paula Abdul (paraphrased) says: I take one step forward, I take two steps back....
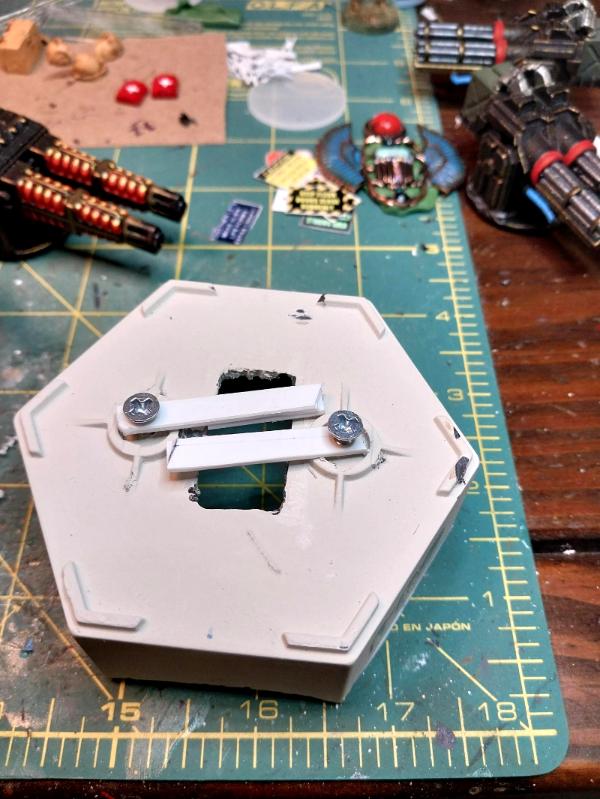
The step forward: I'm about done with what I'm going to do to improve the User Interface (UI) with this stupid battery gondola. I tried a number of different approaches: internal flanges, external flanges, magnets glued to the switches, what finally worked is the simplest (naturally) and most inelegant solution (also naturally)- moveable latches to hold the switch-block up:
Latches open:
Latches closed:
Box fething installed:
The whole thing will get some paint and rivets and I'm still wanting to hang some bombs or missiles underneath, but at the moment I'm happy it a) works and b) looks somewhat streamlined.
Step backward number 1: The guns sit too high in the gondola ports so I'm replacing the beautifully painted Gothic based with something lower profile. You don't see them with the gondola installed anyway, but I'll know. Can't be helped.
Step backward number 2: Whilst fighting with the freakin' battery box, I knocked the weapons gondola off the little table and several pieces flew off. So some repair needs to be done and then back on track to get this project wrapped up.
It's no worries really- every step backward is a chance to reassess and maybe change something for the better (like taking all the electrical tape connections for the wiring apart and soldering them properly with longer lead lines). So long as the Perfect does not become the enemy of the Good (eg: switch latches) then all is well. The hobby is for fun, yes?
Thank you for looking in. I really hope to have all new things to show soon, not rework of previously displayed items.
Sorry it was a pain to get to, but I like the look of your solution with the manual latches holding switches. And I enjoy hearing about your process solving these things.Keep up the good work Meer
Ok... so i don't get online that often in the last 2 weeks and miss what feels like 10 updates on your airship and am now confronted by basically gondola attempt 2... and am now wittnessing electrical cableing... What have i missed and how did you do that all in this short ammount of time.
Thanks Syro- the trick now is to think how I'm going to cover up or camouflage those latches!
You haven't missed much, Not Online!!! The lighting is all wired, but I had to go back in and use the soldering iron inside the pipe that makes the hull- I just didn't like the electrical tape holding connections together.
The battery gondola (the small, hexagonal one at the back) is now essentially done: originally I had hoped/planned that the coin cell battery boxes would fit in the gondola itself. They didn't, not well, and the tiny switches on them were too small to manipulate easily. So I moved the boxes up into the hull, soldered on new leads and wired (bigger) microswitches that now stick out the bottom of the gondola and are easy to turn on and off. There is a separate switch for the portside blinking red running lights, starboard green blinking running lights, red battle lights in the weapons gondola and blue night operations lights in the bridge. I tried a bunch of different ways to hold the switches where they are supposed to be, and the latches you see are the only one I found that worked. I still want to hang bombs or missiles under there, if for no other reason than to hide the latches. To change batteries, you remove the three screws that hold the tail section on to access the battery boxes.
Attempt 2 on the wepps gondola is really a continuation on attempt 1: I knocked it off the table working on the battery gondola and now have to repair the breakage I did and then continue on. The one modification here is to lower the plasma cannon and GAU-8's: the guns scrape the top of the ports on their original mountings. I'm fabricating a lower 'plinth' for them that will still let them traverse about 100 degrees left to right.
Once finished (and it should really be at the 'glue crap on' stage) there remains only the bridge, the crew figures and the decals to the hull.
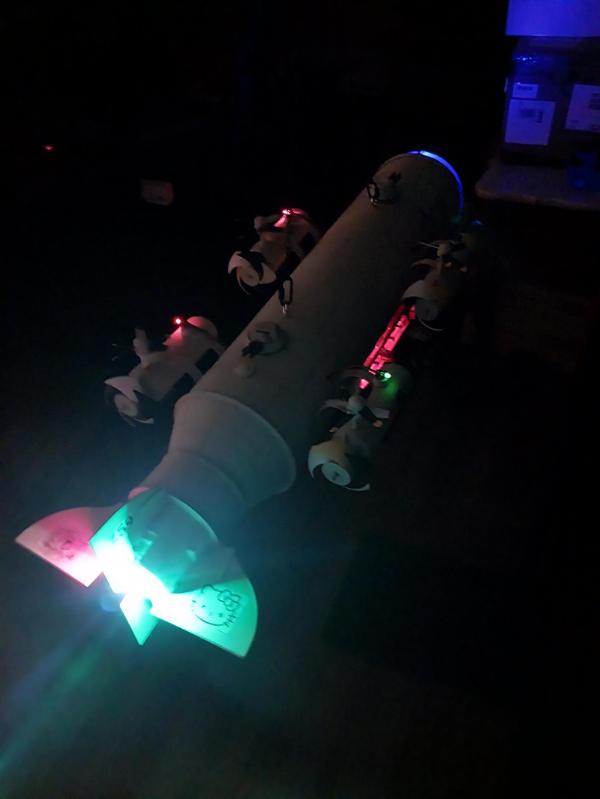
I must admit- I think the lighted up mode for the zepp is pretty cool; I'm waiting to include a short video until everything is complete and then post some good pics and the video to show how the lights look in a dark or semi-dark room.
Thank everyone for looking in and for your comments- it's very nice to know that people are following your work and taking an interest.
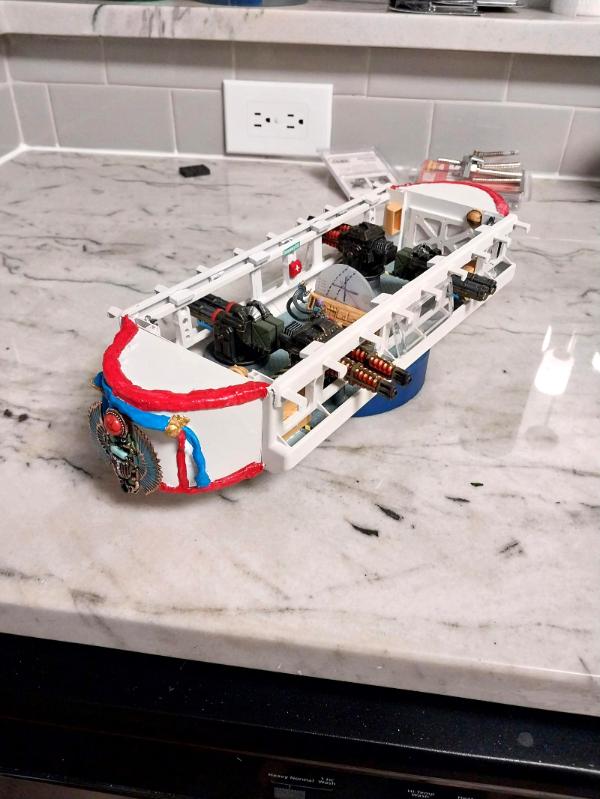
Almost done with what I'm going to do to the weapons gondola; the two things that remain are to add a couple of Aero-Pixies as gunners at the console and I'm still debating if and how to add a wash to the outside hull generally and to the bunting specifically: the colors are just too bright and I'm not to sure how to tone everything down without ruining it.
As you scroll through, please keep that thought in mind and please give me your suggestions as to:
a) Leave it alone, bright colors are fine or
b) Tone it down, and here's how (your suggestions)
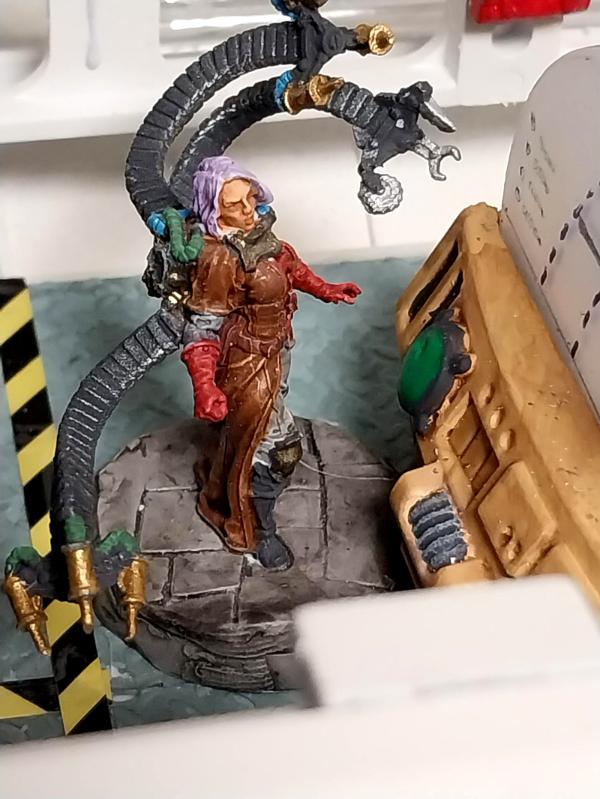
The Doc Oc Mechanic is from an early Archon kickstarter; I included her as she is very close in size to the Aero-Pixies and gives an idea of scale and size. Frankly, she looks like she belongs there, but she is actually promised to Bob's Air Delivery Service vignette which languishes unfinished but ever hopeful of completion. I may knock that otu next and be done with it. The problem is, I want to add LEDs and it's pretty far along to do that without a ton of rework. But, where there is a will, there is a way.
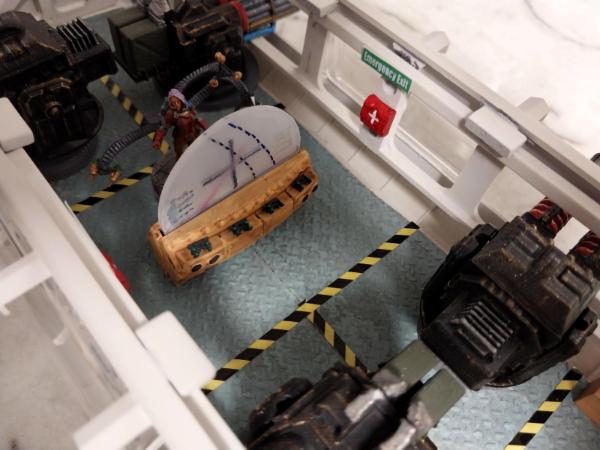
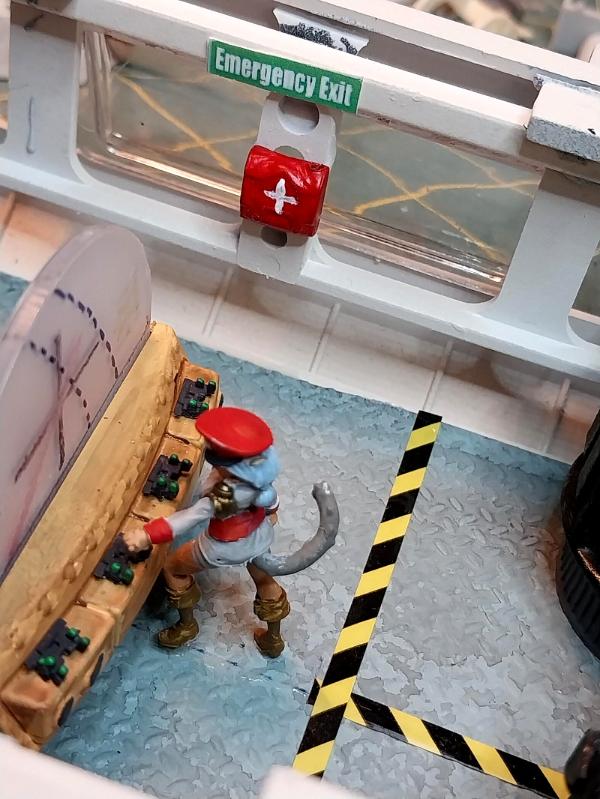
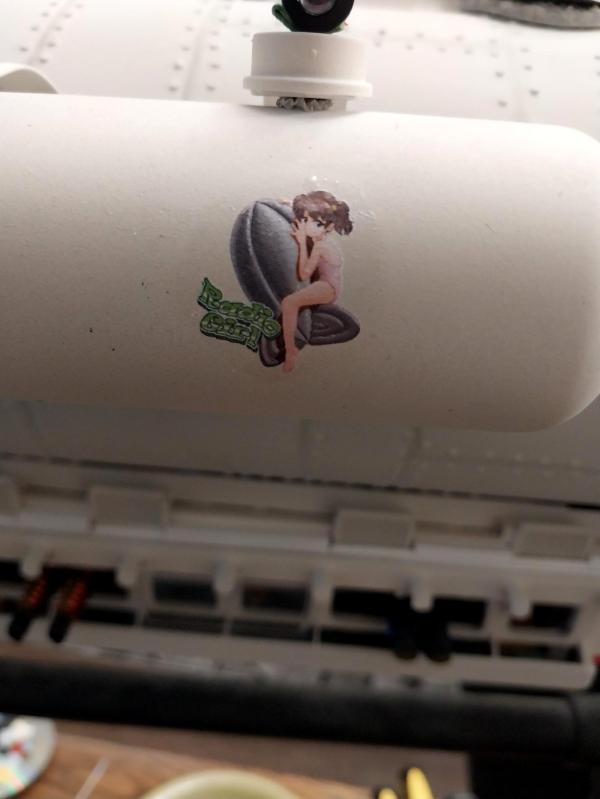
In no particular order, here is the wepps gondola:
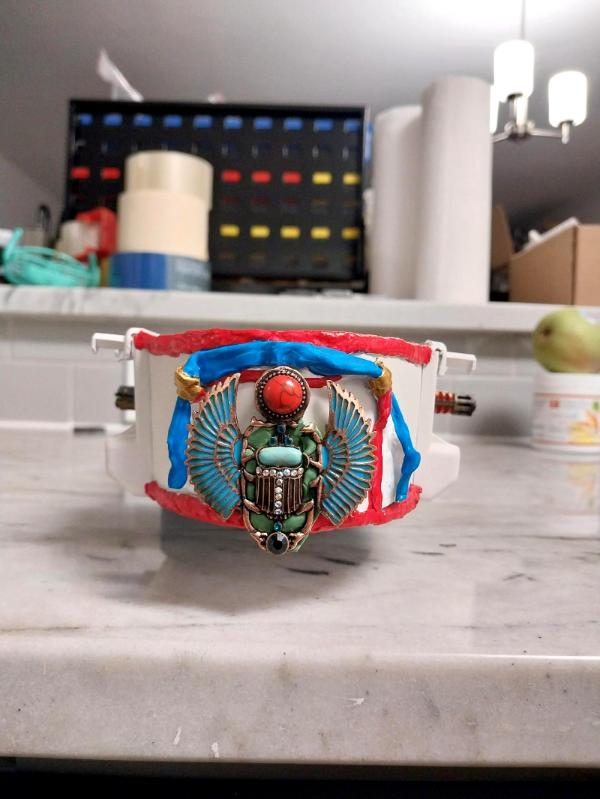
The green behind the Scarab Imperial Sigil is actual greenstuff, used for two reasons: one, I broke the darn thing trying to curve it to fit the curve of the gondola hull and had to repair it and two, it was the best self-leveling adhesive to stick the scarab to the hull and be sure it would stay. The scarab itself is a piece of costume jewelry from Michael's and cost about three dollars.
So, next steps are to was or not to wash the wepps gondola and the bridge and the crew. The bridge is easily the most difficult section for me, because a lot of it is clear plastic and leaves no room to hide mistakes with trim or paint. I have some ideas I'm anxious to try out, so that should help me keep the momentum going. Also tomorrow or Monday I'll add a shot of the gondola fitted onto the hull.
I do look forward to all y'all's advice on whether to wash the blinding white hull and bunting and if so, how.
Yes, weather the hull. Keep a paper towel handy and wipe off the excess wash. Also, add minute texture to the exterior if possible. A thin layer of white glue spread with your fingers until mostly dry will add a layer of uneven coat that will give your washes and/or powders something to adhere to without just looking like dirty splotches of paint every where. I recommend doing an image search for peeling paint in your chosen color (white) to give you an idea of where the rust starts to break through and how dirt and grime accumulate on machines.
Thank you for the advice, Warboss- and I'm going to attempt something along the lines of what you've suggested. I especially like the trick of using white glue to add some texture to the otherwise very smooth hull. Something I'm also going to do is rivet this crate up- that'll for sure give wash something to collect around.
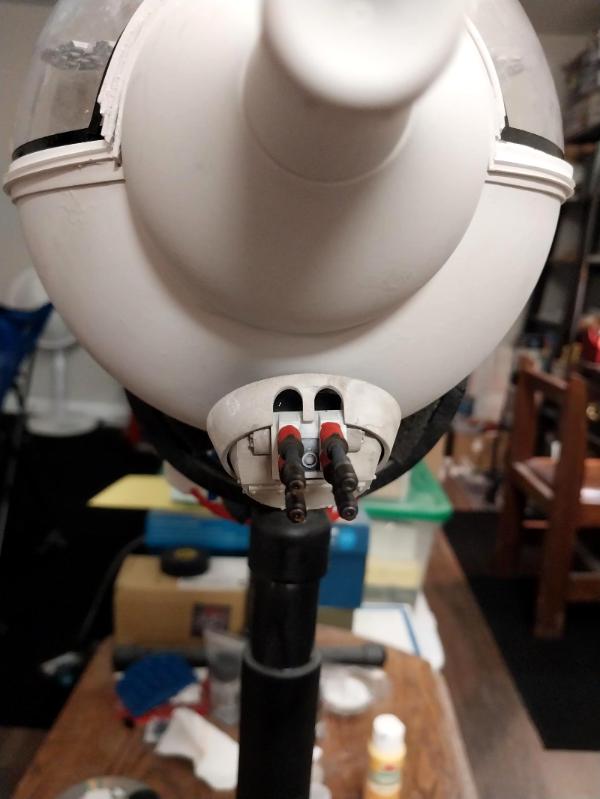
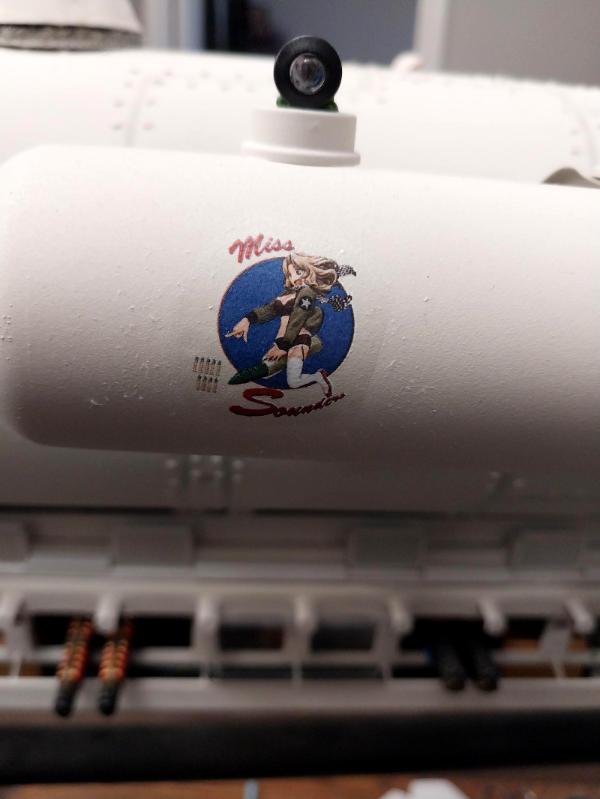
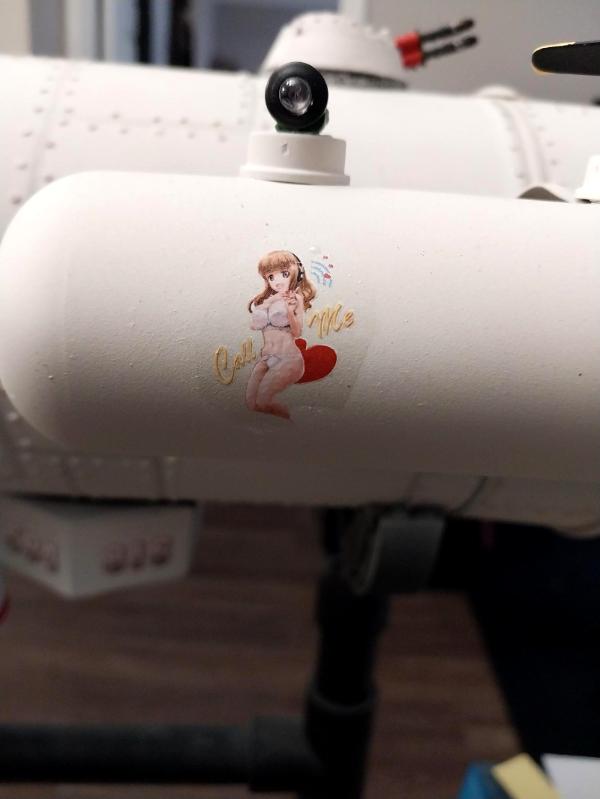
Here are two shots of the wepps gondola in place on the hull:
Seeing the pics, I'm tempted to pull the mounting plate for the gondola off and find a way to have the gondola mount directly to the hull; this would give a slightly slimmer profile- it's a bit chunky as is. We'll see.
Wow, this thing is CHONK. Stunning work so far. For me, personally, I don't feel like a gigantic zeppelin needs to be sleek. But don't let my opinion influence your decision. Do what feels correct to you.
Good evening everyone. Before I announce a triumphant return, let's see if I can get more than two posts in a row, eh?
Warboss, Paddy, Olthannon, thank you for looking in and your kind words. I really appreciate the encouragement that all y'all in the Dakka community provide and that encouragement is a large part of my determination to get back into this project and finish it up, and [proceed on to others.
By way of explanation, 'in real life' doesn't really convey the depth of commitments elsewhere I've had that have prevented anything other than work for some time. I've had to travel quite a lot and the weather the last few weeks hasn't helped that aspect any! Another complication was having to shift my schedule around for calling my elderly mother each day: she's on the West Coast of the US, and I'm (usually) on the East. I used to call last thing in the evening my time, but that became too late for me and almost too early for her. The new best time is very good for both of us, but is also right smack in the middle of what used to be prime modeling time. This was a no brainer in terms of what was more important to do, but has taken some getting used to in terms of fitting everything in I'd like to do.
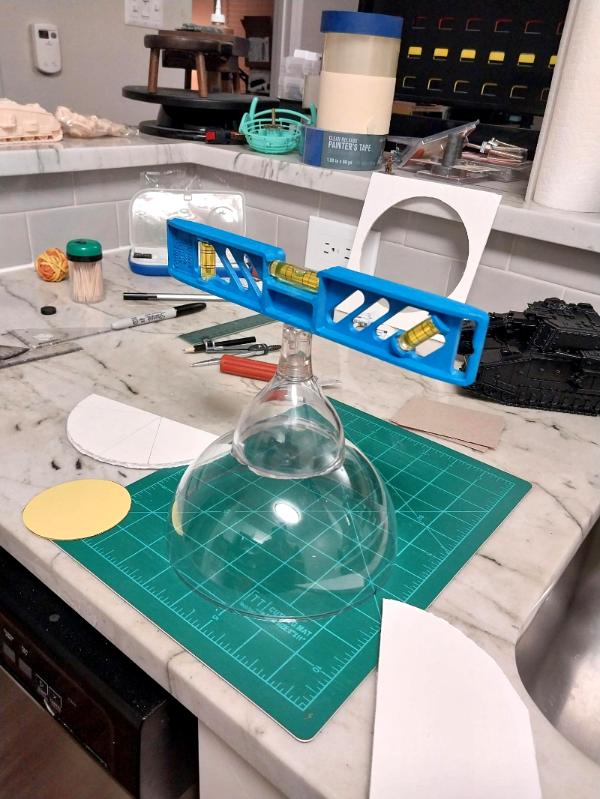
So, toujours en avant as my French cousins say. For today, a smidgen of progress to report for a substantial investment of time. Largely because geometry was involved:
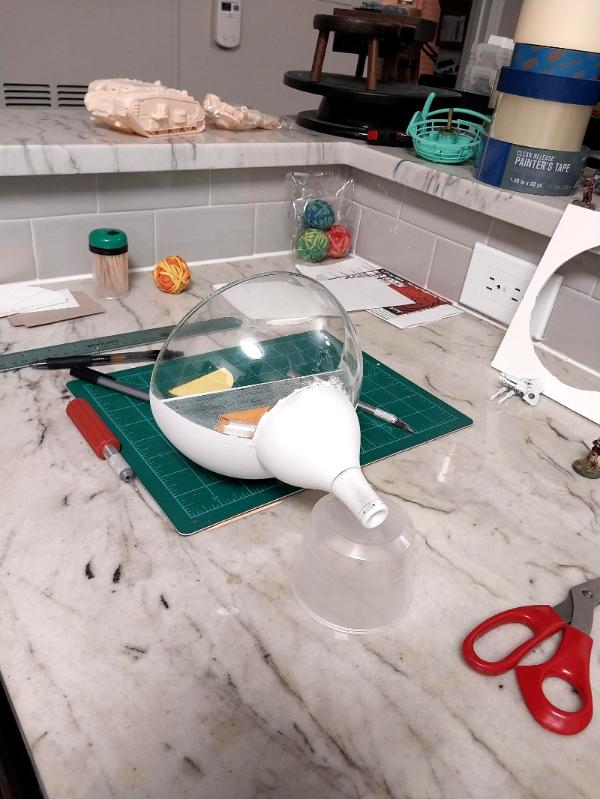
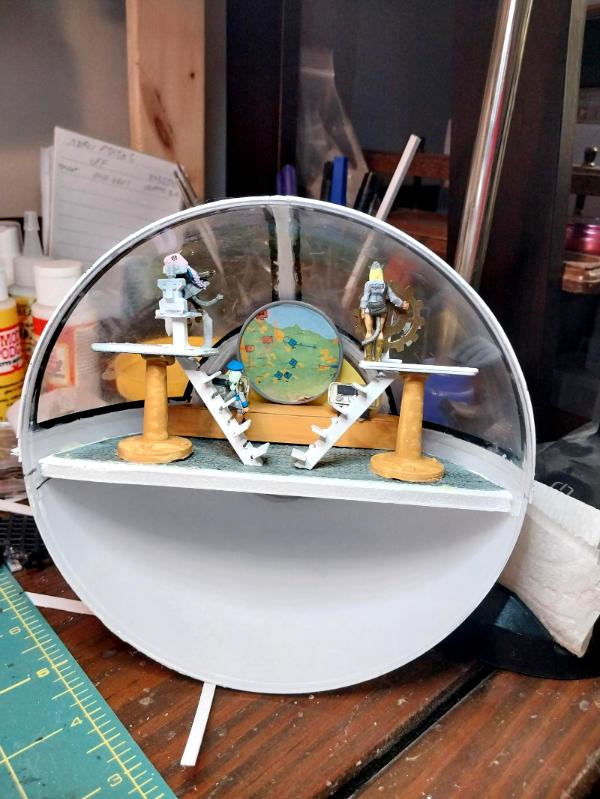
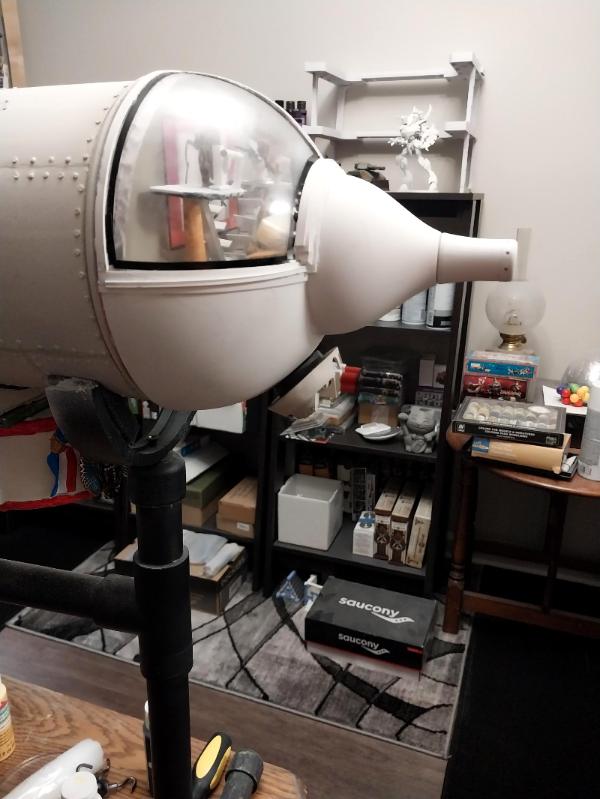
You can see in the photo that I've epoxied a doo-dad that came from the bottom of a mixing bottle to the nose assembly of the zepp, this will be the bridge. There won't be anything in that protuberance, it's just to break up the otherwise hemispherical face of the bridge. I was having extreme difficulty measuring where the center of the hemisphere was, so I finally just put the level on it and moved the whole thing around until it read level in three directions (left-right, up-down, diagonally). Drew a line around the rim with a fine point marker and slapped some glue on it.
Also, I've cut the pieces that will form the deck and aft bulkhead, and the paper cut out that will cover the bridge plexiglass where the nose cone is attached. Finally, (not pictured) I horsed around with the clerestory of the weapons gondola and decided it's just to thick and not salvageable, so off it came. I'm going to fit magnets so that the gondola fits directly against the hull and trim in to hide the gap- a much neater profile in all respects.
Warboss made a remark a bit ago about how 'chonky' this beast is (wait until you see the size comparison photo I'm going to take with a Nekomimi Aero Pixie in front of an old school Predator, in front of a Leman Russ, in front of a Baneblade, in front of a Stormblade, in front of the Kitty!) and it reminded me that every vessel in history- plus most armored vehicles- and the Kitty is both- have nicknames. So, Chonky Kitty it is. My own Coast Guard cutter USCGC Duane back in the day was known as the Dirty D both because we didn't fight fair and because her air duct systems were so full of dust in 1978 that she was forbidden to put to sea until she had been drydocked, overhauled and cleaned and recertified as 'not a flaming hazard to shipping'.
Tasks remaining are to re-attach the weapons gondola, complete the bridge, paint what doo-dads remaining need it, attach the aerial anchors and apply the decals. I really hope to stay motivated and work against this list steadily.
Again, many thanks for dropping in and all your encouragement. More follows soonest.
Moving right along- a little here, a little there, pretty soon you're talking real progress!
I've glued in the bridge deck plate:
And sorted through my junk boxes for the gubbins to make the navigator and helm positions at the forward control console:
That white piece of foam board in the back is the aft bulkhead. I've got a blue LED 'running light' that will come through the bulkhead to illuminate the bridge, and magnets will attach to the back of the bulkhead to fasten everything to the pipe cover that closes off the front of the hull.
I'm actually at the point of having to pick out Nekomimi bits to make the captain, helmscat, navigator and probably an armed bridge guard- you know: a Red Shirt.
Oh, and the lower half of all that transparent plastic gets painted hull color; I'm thinking of leaving two downward looking viewing ports, one on either side of the centerline.
It's great to see you making progress again! Those turrets look so cool! And I love the look of your cockpit. Looking forward to seeing you get more work done on it.
Thanks very much for looking in Tommygun1918 and Warboss!
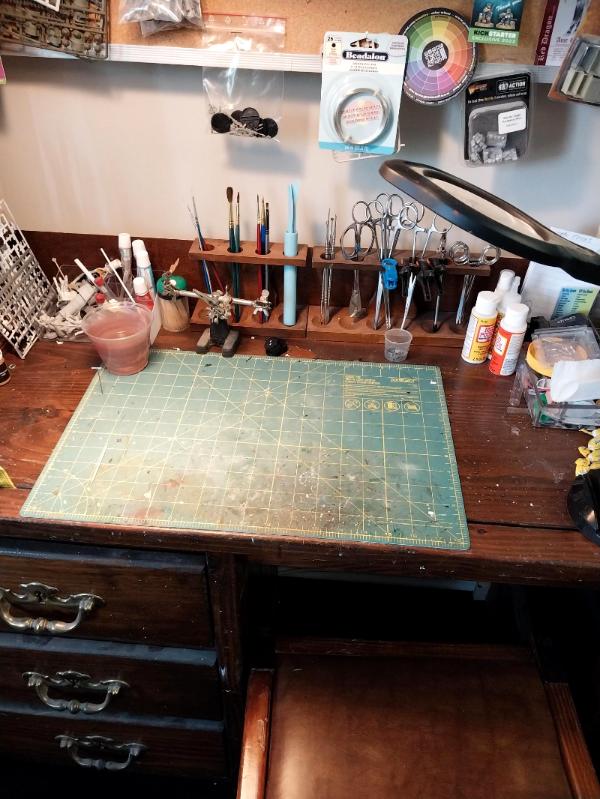
I have found it to be a truism for the several years I have been on Dakkadakka now that if I can only sit down in my chair at the little desk I practice our hobby at, I'm happily engaged for as much of the evening as I can spare. Sometimes though it seems very hard to just sit down.
The Kitty Hawk is now at the stage of needing a little of everything: detail painting, hull painting, crafting, application of decals, fiddling with magnets- there's got to be something that seems fun to do every time!
Normally I use shaker cans out on the exterior walkway leading to my apartment, for the ventilation- but I'll carry everything in as soon as I'm done, so the propellent and paint gases are (in theory) left outside, but the item(s) dry inside. The exception to the rule is if I'm leaving immediately after priming or painting with a shaker can: I get a lot of stuff done before I head out to work (in 3 out of 4 seasons ), leave a window cracked to assist air exchange and then roll out.
If I'm primering or painting with my airbrush, all bets are off- all of that happens inside whether I'm leaving afterwards or not.
Sorry to hear of your contra-positive experience with your Battle Tech miniatures, hopefully recoverable?
More follows soonest.
Automatically Appended Next Post: And thank you for the kind words, Colonel Jacka! I'm grateful that so many fellow Dakkanauts take the time to look at my thread, let alone comment- it is greatly appreciated. Hopefully I can continue to produce a project here and there worth looking at!
I know this project has been carried out for a while now- I'm pushing to wrap it up both to see the fruition of the initial concept but also to be able to just get on with something else!
Although, what that might be will take some thinking. I still have a lot of Nekomimi Winterguard figures and heavy weapons and even a couple of TomCat war-walkers to mess around with, but my heart just isn't in it now that Resin Munitorum isn't producing any more. Hopefully he'll get back into it, but until then, I may sandbag what I have left and get started wtih some other segments of the plastic Mountain of Shame that need attending to.
Great to see you back, Meer! I'm looking forward to the lined up size comparison photo of chonky kitty That story about your old coast guard ship is hilarious. And, not to be disrespectful, but I know how stress can build up without hobby time. Would it be do-able to put your mom on speaker phone and multitask with hobbying at the same time?
Thanks for looking in, Syro- very good to hear from you! I'm afraid talking with my mother takes all my (meagre) attention; she's suffering from onset dementia and I have to be very inter-active to keep a solid conversation going and not just 'talk at' her. She still has excellent long-term memory and we talk about things from the past (up to as recently as fifteen years ago) but anything more recent than that it's hard for her. And I'm happy to be able to do it, and learning a lot that happened when I was a kid and didn't think to ask!
Hobby time will come, and I'm solidly back in the groove, so that helps; like tonight:
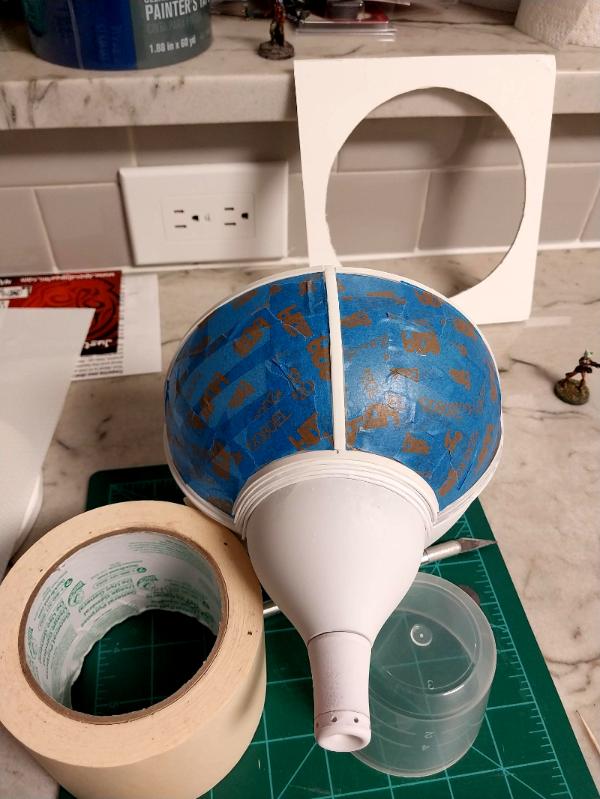
I've been dreading this step because if I get it wrong, I have to go back and rethink the entire bridge- started by masking off the areas of the plastic hemisphere that I want to stay transparent:
Then hit it with basic hull color:
This is the first, lightest coat I could manage with the shaker can- can't afford any drips! I'll hit it tomorrow morning before I go to work and that should coat well enough that I can pull the masking off tomorrow afternoon. Looking at it at this stage, this thing is begging for 'Flying Tiger' teeth on the sides of the bow, gonna have to see what I can manage freehand.
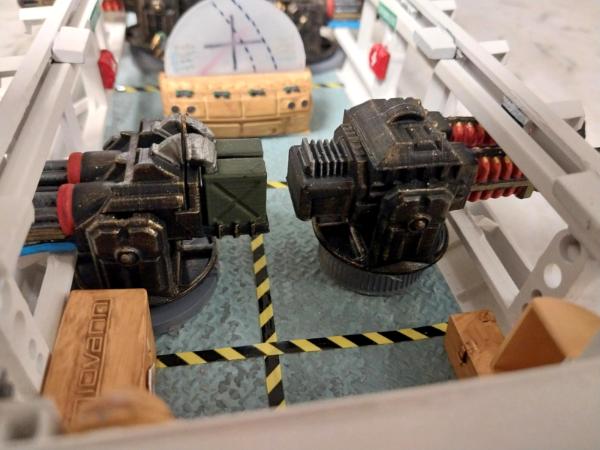
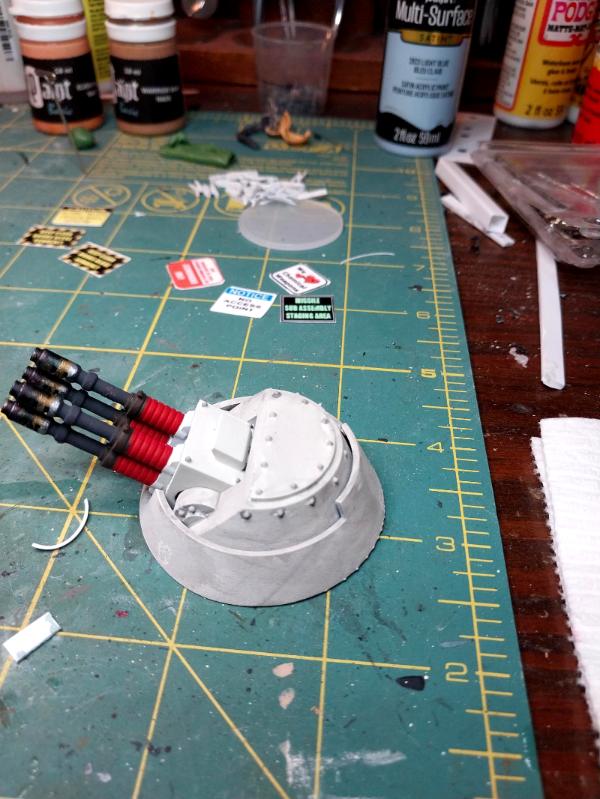
Also got a bit more done on the guns:
They're almost done- just need olive drab buffer coil retainer bands (between the red buffers and the black barrels) and muzzle burn and then I can start weathering the turrets.
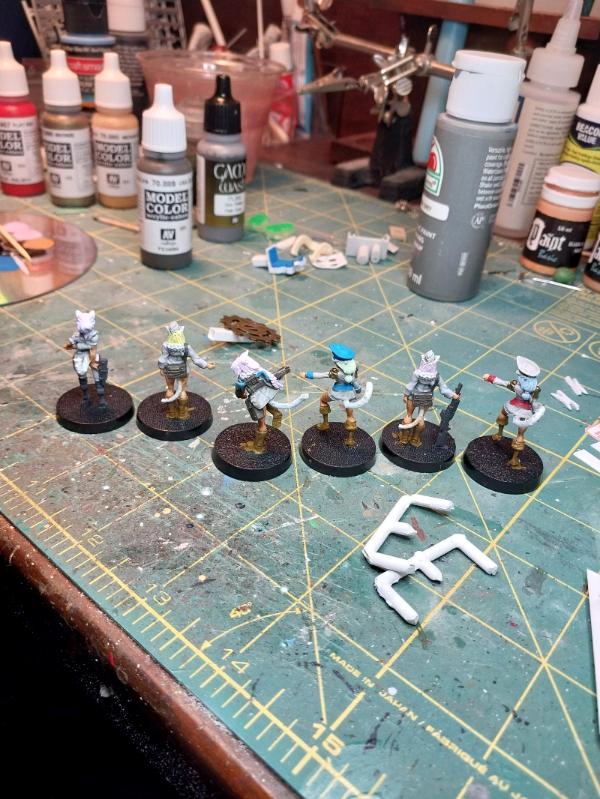
The crewcats are done with primering and I hope to start them soon- of course, have to suss out what uniform colors they'll be- this is a whole new Corps! If anyone knows a point of contact for Resin Munitorum, ask him if he's going to produce figures again!
Ah, sorry to hear that, Meer. I didn't realize/remember about the dementia. You're definitely making the right choice, and it's great that you can hear those stories. Do you have a way to get audio recordings of those stories? It could be cool to record an oral family history. I made some recordings when my grandmother told stories of her youth (when I could do it surreptitiously enough not to make her nervous) which my family appreciated. I know that I desperately wish I had more recordings of my dad's voice.
I hear you, Syro. It's like the lyrics of the song say: you don't know what you've got 'til it's gone. I've got letters from my father from when I was in service (Coast Guard was the first, then Marine Corps then Army) and it's funny: he was an Earth Sciences teacher but never wanted to learn to use a computer; he was just at the wrong point of his tech-usage wave as desk top units were becoming affordable and common. No recordings I'm afraid, of any of us. You were smart to get what you did.
Some progress tonight:
This photo shows the base color on one turret, and the base plus a grey wash on the other:
They all got the wash and I'll probably do something similar on the weapons gondola. The quad 40 turrets are done, except for a very faint rust wash that I will carefully apply to the rivet heads:
I haven't used the grey wash on the gun breeches yet and may not- I kind of like the contrast with the turret armor.
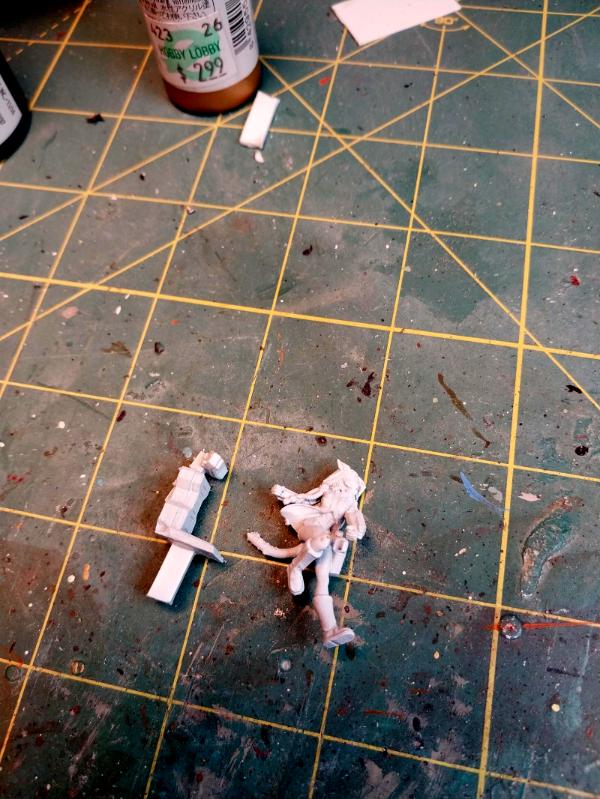
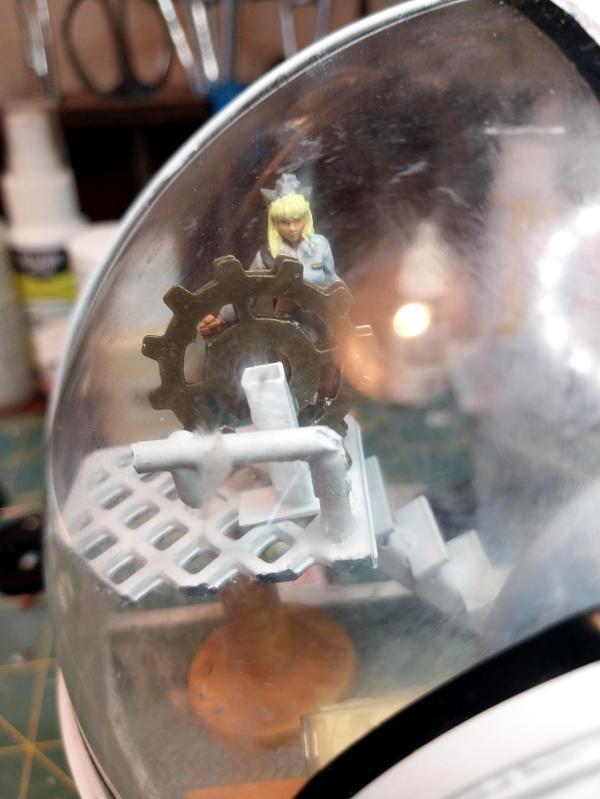
Started customizing the close combat Nekomimi Officer (Major Tanya) into the zeppelin Captain by heating and flexing the figure and trimming away the lightning claws she used to have- I think the posturing is going to work well with the command chair I've started to fabricate:
The bridge arrangement will be the classic 'Star Trek' layout with the captain's chair in the center, navigation/astrogation at the front as a pair and possibly some computer screens (or something made from old bits of circuit board) on the aft bulkhead.
And started painting and assembling said navigation/astrogation console:
I have no plan in mind for this- this is definitely 'seat of the pants' kitbashing and customizing. There are apt to be severe alterations as we go.
I had to add one more coat of rattle can paint to the nose section- hopefully I can pull the tape off tomorrow and see if it worked.
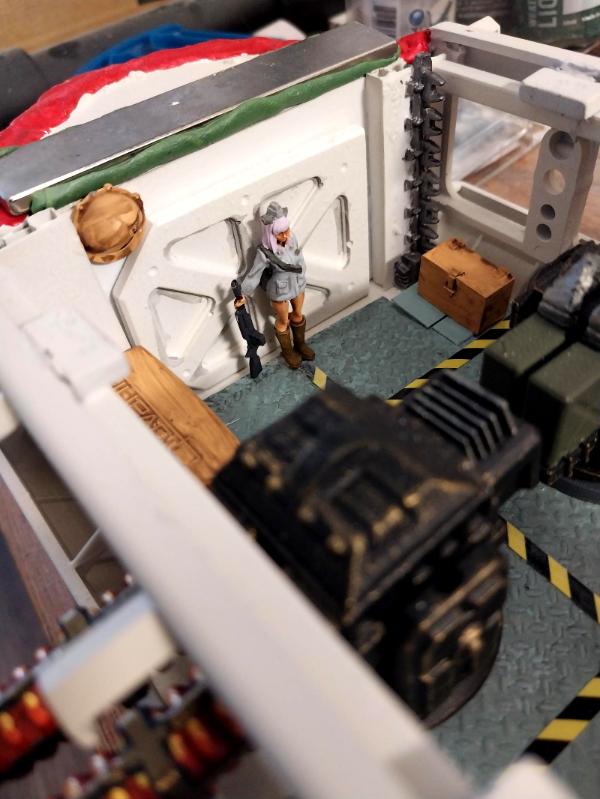
Some more work in before heading up to the farm tomorrow after work for the weekend:
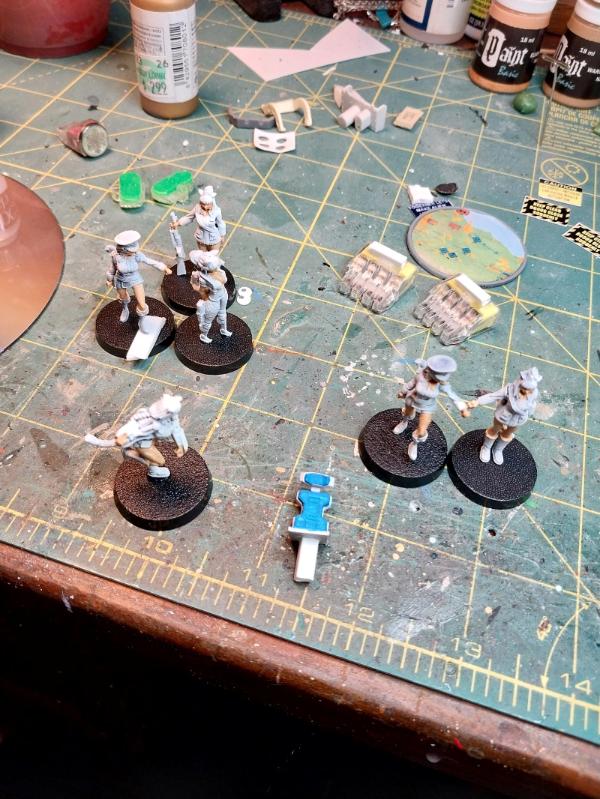
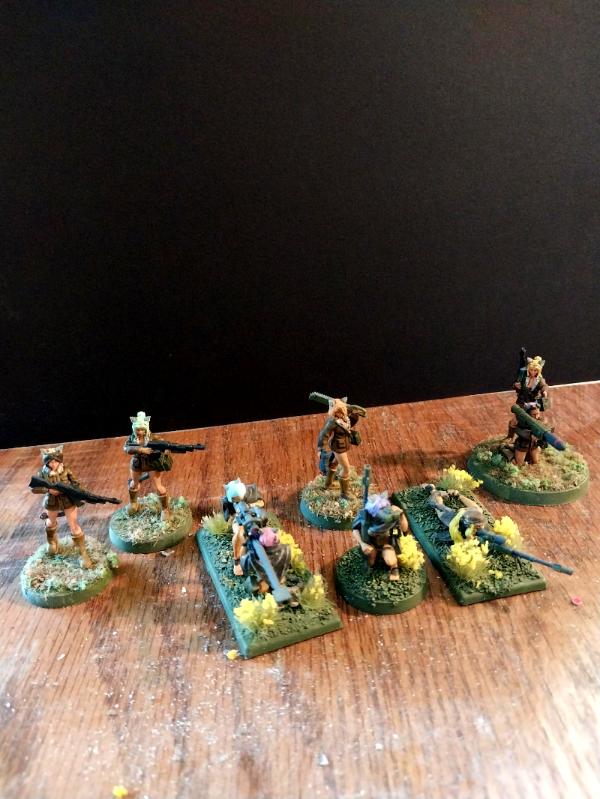
Applied temporary bases and started the bridge and weapons crews:
Touched up the quad 40 turrets- tried a light rust, didn't like it, painted out with flat white and then hit just the rivets with the grey wash, I can live with the result:
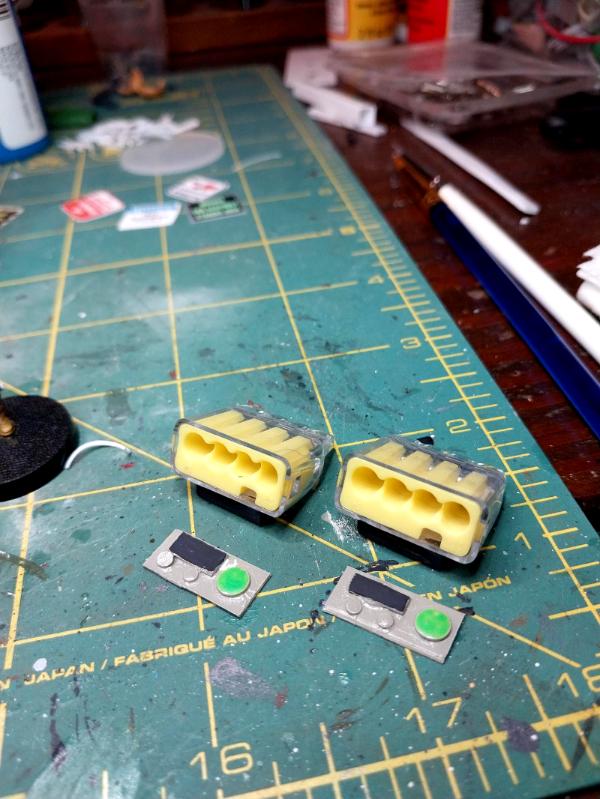
Discarded the idea of using the neon green painted lens as computer screens- they're just too big and clunky; drawing inspiration from Warboss, TommyGun and others, entered the styrene shaping fray with a very easy-entry beginning and built these screens, primed, basecoated and now just needing some touch up paints:
Finally, it happened just as I feared: despite being very deliberate and careful the last coat of paint on the bow section bubbled up:
Am I dismayed? I am not Am I sanding it down and starting over? I am not You know what that pattern looks like to me? Damage from a plasma cannon, that's what it looks like to me. I'm going to paint it up like blast damage and leave it as is (unless I sleep on it over night and can't stand the idea, in which case I am dismayed and will sand it down and start over).
I'm really liking the look of those turrets Good thinking on the plasma burn as well. I like working without much planning too, something more relaxing about not needing to measure every tiny minutiae of a build (Why orks are my biggest army )
Thanks, Syro- too true. Maybe I need to look into starting up an Orks Army! I am by nature an Imperial Guard kind of person, and it's hard to combine the words 'restful' and 'WAAAARGHHHH!!!!!!; in the same sentence, but I do see the attraction!
Thanks, PaddyMick! Ah, Bob Ross- we lost you too soon. Hard to believe that guy's nickname was 'The Beast' when he was a drill sergeant in the Air Force! And yep- the finish line is in sight. The bridge is the last major component to build and is well underway; I've started painting the bridge and gunnery crews; there are decals to add and I've received the last magnets I'm going to try to use in the mail to attach the weapons gondola. One way or the other, I'm finishing this critter soonish: I've got a million other things I want to try!
Thanks all for looking in, and all the encouragement.
Only a little bit of time to work tonight, nothing worth posting a photo of, at any rate. Started the uniforms for the crew. Took the masking tape off the bow section and now in addition to painting on plasma burns I've got to clean up the masking lines (trim hides a multitude of sins) where it leaked a little. Overall, didn't come out too badly though.
Thank you Syro- pic follows, there is some clean up needed!
Got a little more work done on the crew figures tonight:
I'm actually not as worried about precision or painting down to the smallest detail, as their visibility will be very reduced, given their position's inside the ship. I am looking for ways to provide good contrast (make things pop) for the same reason- without going overboard and making it look too blocky. The uniform coats are one example: I may change some colors because to the Mark 1 Eyeball the officers' Graphite Blue is visibly and markedly different from the enlisteds' Pale Grey, but in photos they both look chalky white. Of course, the coats will receive washes and that may accentuate the difference.
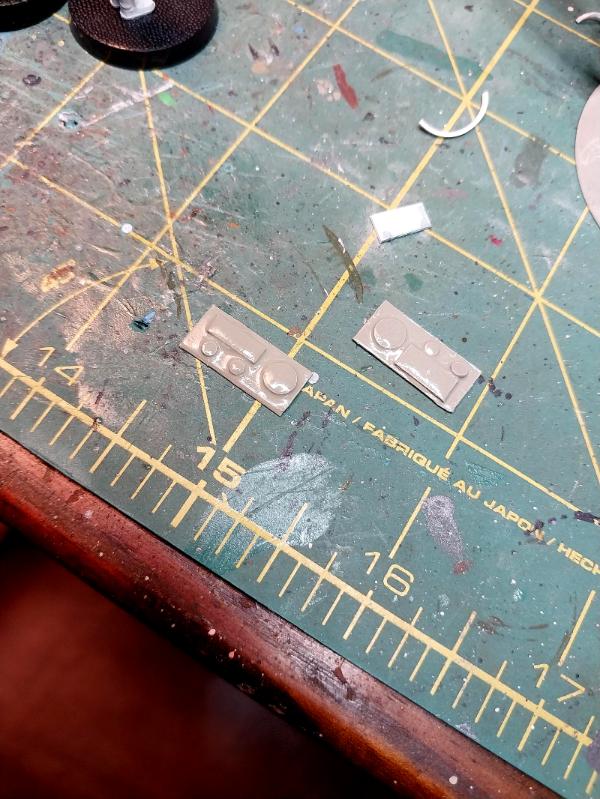
Also fiddled a bit with the navigation console computers:
I may end up only installing one, as the obvious thing to have somewhere on the bridge is the ship's wheel, not sure yet if that will be forward at the console or set to one side or even behind the captain's console.
And here is the nose section with the deck sole and navigation console dry fitted- lots of work yet to be done but seeing the end in sight:
Some trim along all the painted edges to hide the spray paint leak through the tape, add the chin guns and maybe the flying tiger teeth on the sides and we're getting towards done. The blue navigation light is already wired and run, just needs to be fitted through the aft bulkhead.
That's too bad,I have gotten that paint peeling when I have painted oils over acrylics or on a rare occasion, acrylic over unprimed surfaces.
The colors on those guns look great.
Thankee fer lookin' in, Tommygun1918! If the one 'plasma burn' goes well, I may add other authentic battle damage! to other parts of the ship. Or not, I really want to get this beast wrapped up!
The hour I had to work tonight got the nose cone cleaned up a bit, with both good and not-so-good outcomes:
Adding and building up the styrene strips did cover up the paint leaks and added some texture to the otherwise very flat curves- gives it a bit of a 'Buck Rogers' spaceship look to it, very 1930's retro, which I like. I'll do a bit more of fiddling with trim and/or filler to smooth out some of the transitions in the corners that you see and then paint. I may add a strip of styrene right up the middle, to divide the canopy into two hemispheres, just for visual interest.
On the not-so-good side, it doesn't show as badly in photos as I can see with the Mark I Eyeball, but there re some smudges on the clear plastic that I can't get off with any cleaner I've tried so far, so they're just going to have to be abrasion from combat, airborne potato virus spores or the infamous space dust when the captain takes the Chonky Kitty supra-orbital.
I'm not unhappy with tonight's progress at all- I think it is a major step forward and the installation of the flight deck furnishings can now commence, followed by getting the dad-gummed aft bulkhead in place with its magnets and then I can finish up all the crewcats and get on to decals.
Thank you for looking in, your encouragement and your constructive criticism. More follows soonest.
As the song says: 'ere we go again! Rather, I guess that's Orks, innit?
Anyway, wanted to brush paint the trim added to the nose section, and the styrene just wasn't having it. So masked up again, and used the shaker can:
If this leaks I'm just gonna paint the blinking canopy and be done with it. I was as careful as could be to ensure good line up and adhesion for the tape (and I'm using painters tape for crying out loud) so it should be okay.
Got my order in from K&J Magnetics- these are 3/4" by 3" bar magnets, and I'm using the strongest adhesive I know of- greenstuff- to fasten them to the weapons gondola:
I'm worried that the very smooth magnets won't give the epoxy anything to grab onto, and didn't know how to rough up the metal surface to make a key, so we'll see what happens. If the greenstuff doesn't hold, I'll drill through and use cut-off rivets to mechanically attach them.
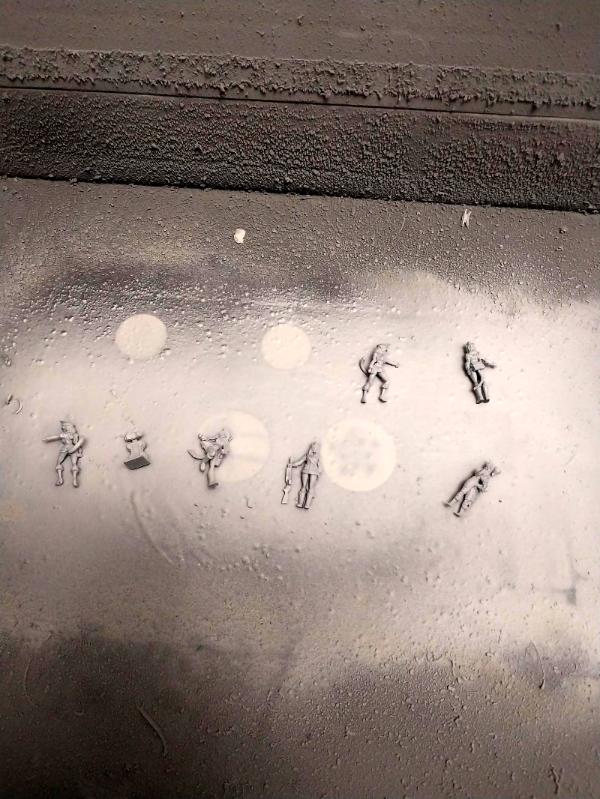
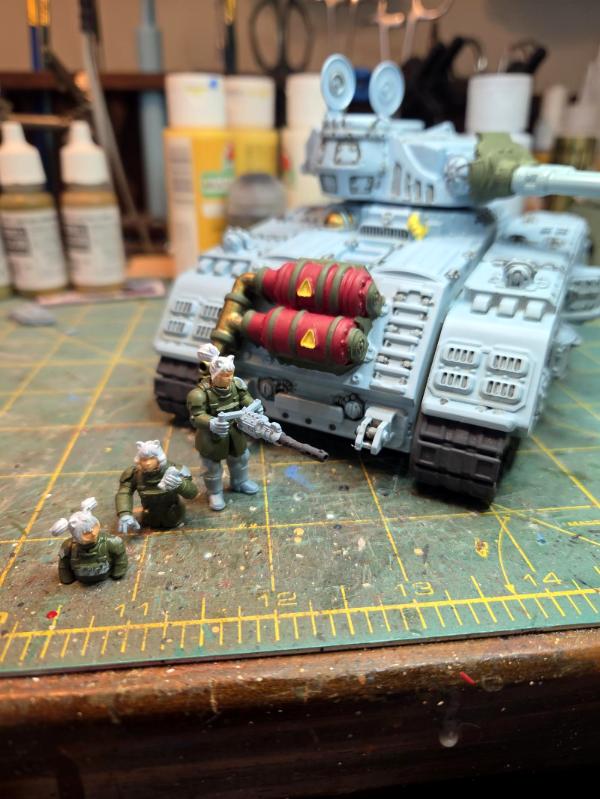
And used the time whilst the paint was drying on the nose section to get a little more work done on the crewcats:
Everybody is wearing anti-static boots (a'la The Hindenburg) even though the lifting gas used in the 41st Millenium is probably not flammable. Except the figure on the left- she has two artificial legs and I figure she is either the the exo-orbit (out of atmosphere) pilot or a fighter pilot (before I ran out of hull space, there was supposed to be the main gondola, the battery gondola and a fighter hanging under the hull, like USS Akron or Macon). She's probably a fighter jock, as those guys don't give a fething hoot in Hades about danger. Or regulations. Or non-Ray Ban sunglasses. The two under-officers have their waffenfarbe colors for their respective branches: aerial operations (blue) and gunnery (red).
Thank you for looking in. Maybeso tomorrow I'll take a break from these aspects and see about applying some decalage- but I really want to save that for last, just in case something goes wrong.
Leakage from the rattle can wasn't too bad, but there was some- so I used some old 'art lining' tape to edge it that had been hanging on my painting desk so long that the store I bought it from has since closed out of business. I'll apply some white wash where the crud is built up between the two hemispheres (the tape was gooey) and that's it, it's done. I'm gluing the deck sole in now, then the rest should go in pretty quickly:
The deck sole was interesting in itself- the edges kept wanting to curl up. So, with the extravagant number of magnets I've got lying about now, I put one under the foma board deck and one on the other side of the deck sole and magnetically clamped the sumbich in place.
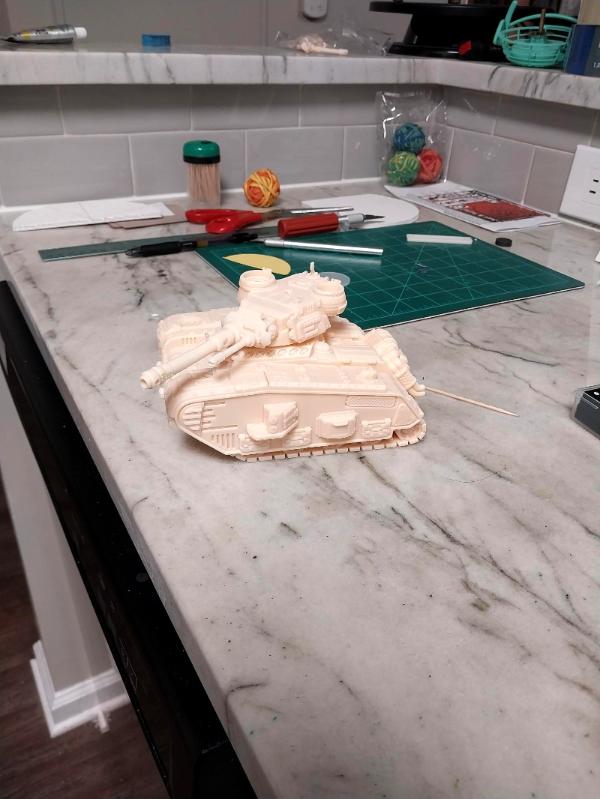
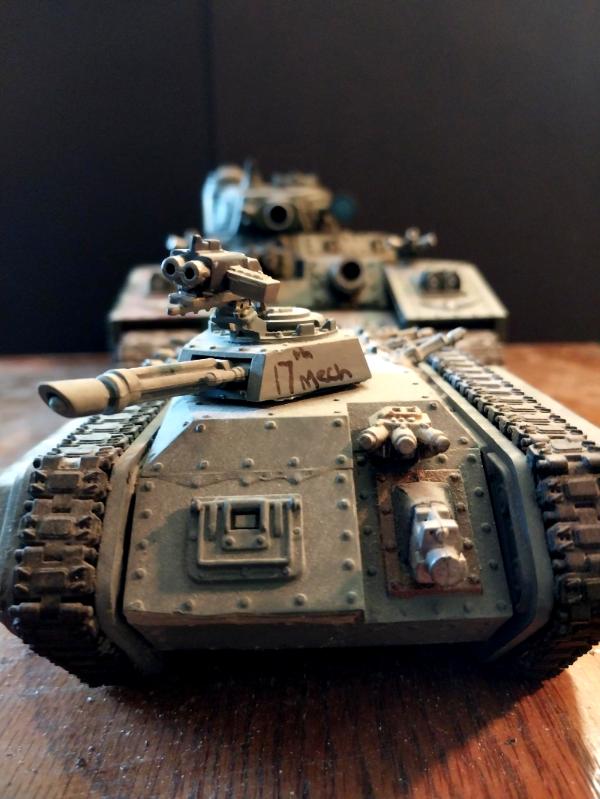
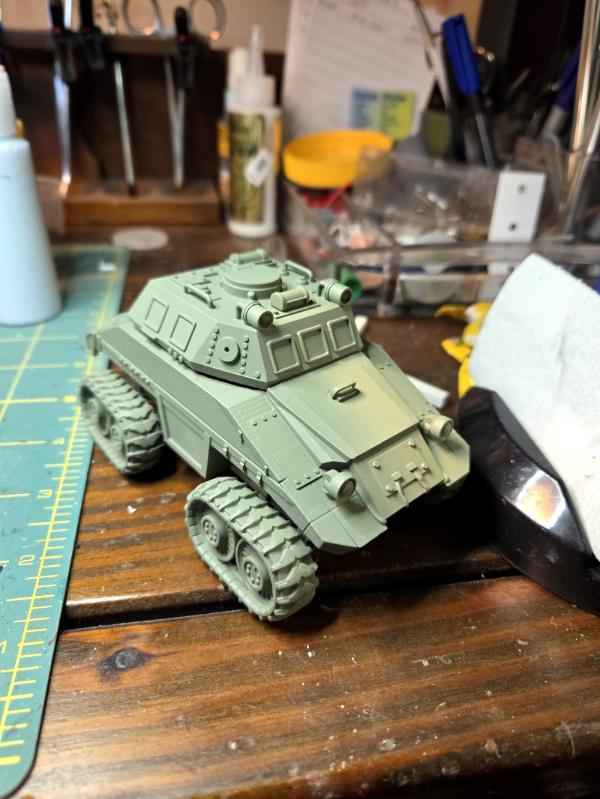
Whilst waiting for things to glue up, started gluing this tank up:
It's a bit bigger than a Leman Russ and is just begging for a Nekomimi crew- it's the perfect size for them. If I can just find some more Nekomimi figures....
Also worked on the crewcats- applying washes- pictures tomorrow if I get enough
done to be worth photographing.
Tonight I've glued in the navigator's console, the navigation and ship-handling computers and the battle display screen:
I've kind of goofed putting in so much detail, as it will largely not be seen except in the rare event that the bridge is removed for some reason. I was excited at the possibility of gaming aboard the model, but by the time you put in guns, consoles, etc there really isn't any room anywhere to do so! I can't help but do my best, even for things that won't be seen- as evidenced by the fully painted driver of the Athena command vehicle (located towards the front end of this thread) with its fully painted and detailed driver that you absolutely can't see.
Also started making the ship's wheel:
Test fitted the weapons gondola with its new, 3" long magnets and they a) look like they will stay attached with their greenstuff mountings and b) produce a somewhat slimmer profile for the Chonky Kitty; next step is to glue on 'cradling' steps to keep it aligned up/down and side runners to both keep the gondola aligned left/right but also block light from leaking out the top (we'll see how successful that is).
More follows soonest. Thank you for looking in.
And lastly have started detailing the aft bulkhead and the false 'wall' that will go behind it that will have the magnets embedded for attaching to the metal stovepipe hull. Noy much to go, save the crew, for this stage to be complete.
Thank you for looking in and the kind words, NotOnline!!! and Syro.
I'm not unhappy at the rate of progress, we do what we can do when we can do it. I do wish that the space available had allowed more for a gaming scenario, but in the end the goal was to build a zeppelin, and that I have done. (Maybe I could go to 15mm scale for gaming! )
I do have to say, I'll be glad to get this wrapped up, just to be able to work on something different. This project has called for a lot of different skills though: stove pipe manipulation, angle grinding, rivet making and application, wiring, soldering, electrical power calculation, painting, weathering and magnetism, to name the most obvious. They guys at work want me to bring it in when it's done- I think they're having trouble visualizing the ship.
I bought a tablet stand to hang the zepp from when it's finished- the pipe cradle just isn't giving me the up-vibes- which is supposed to be able to hold up 10 pounds. I may have to fix or freeze the flexible joints though, so they don't fold under the weight. At a guess, I'd say the Kitty weighs in at about 7 pounds.
More follows soonest. Thank you all for the encouragement and constructive criticism.
Wowza. I haven't checked in for a while, so the progress you've made is extra impressive. The sheer amount of stuff going into the interior-- guns, panels, that little First Aid kit-- really bring the airship to life.
Thank you both for looking in! I keep stumbling over things in my bits box and can't help but think: "Ooh! This will look cool as a {fill in the blank}!" I really need a much larger airship for everything!
Take tonight, for example: tonight was supposed to be detailing the aft bulkhead, preparatory to finishing the crew and entombing them in the bridge forevermore, mwahhahahaha! I mean, permanently locate them in a position of viewing advantage, yeah, that's it.
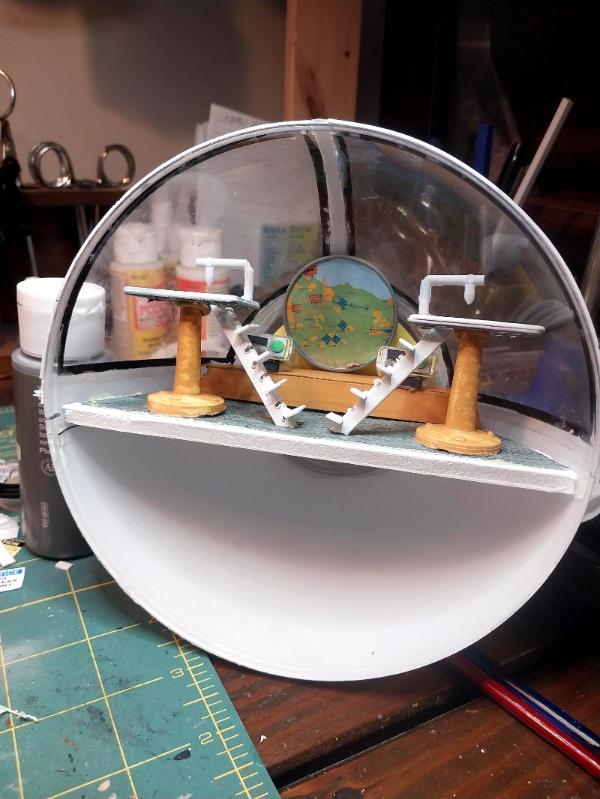
Instead, reading today's installment of Girl Genius comic (which is one of the major sources of inspiration for this whole build) I saw an interesting representation of the bridge (one of them, anyway) of Castle Wulfenbach, the flagship of the aerial empire composed of a huge fleet of airships of Baron von Wulfenbach. It answered the question of how to use the great vertical space in the bridge section, while minimizing the drawbacks of the limited horizontal space. The answer of course, is wrought iron platforms in the air.
Note: bridge space on many/most warships is limited, and even moreso on airships. If you've seen the movie Greyhound with Tom Hanks (based on a story by C.S. Forester- better known for his Horatio Hornblower books), you've seen how tight the space was on the bridge of a WWII destroyer- and that ship was twice as long as my own USCGC Duane!
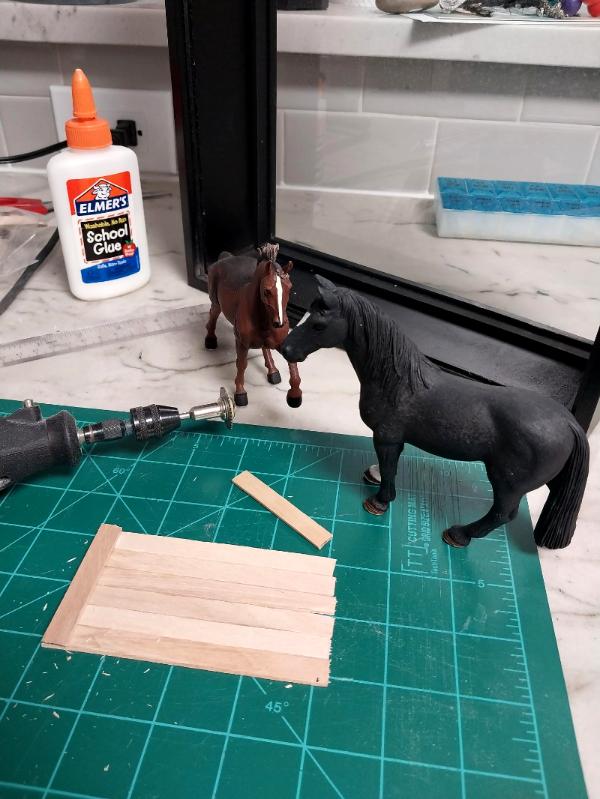
So, start with some basic building components: a hanger that a 6-pack of socks came on and a couple of Strongid paste syringes (no needle, it's adminsitered orally to horses to prevent worm infections in their intestines):
Add some creatively carved styrene bits to make your ladders (naval 'ladders' are really steep civilian stairways, ha ha):
Glue it all up, add a couple of rivets to the bases (pay attention, League of Extraordinary Riveters) and you get two command platforms, one for the Captain and one for the helmscat. The bridge guard and aerial operations officer (AOO) will be down on the deck and the supra-orbital pilot will probably be consulting with the Captain (if there is room on the paltform for both):
And that- completely unplanned modification to the bridge- used up my time for tonight. I'm excited to get all these pieces installed (the platforms and ladders are being primed now) and see how it all looks, but I think I've finally got my bridge arrangement finalized.
I really like how your nav display came out. I can't free hand that small with a paint brush.
Do you have a plan as to where you will display this beast?
Thank you TommyGun1918 and Vejut- I appreciate you looking in and taking the time to comment. I'm afraid I can't take credit for the battle display at the navigation console- I found an image of a battlefield diagram, printed it and cut it to size to fit in the raised rim of a 40mm base. For a look at what my freehand looks like, the gunnery screen at the weapons console in the weapons gondola is my freehand, and using alcohol pens to boot. Everyone has their area of strength- unfortunately, mine is weathering armored vehicles- especially mudding them up. Not a strength that finds much call in an airship build!
Lots of fiddly work tonight yielding only one photo:
I've been trying to figure out how I'm going to attach the bridge to the hull and I think this will work:
* The half circle piece of foam board you see is the aft bulkhead of the bridge- that fits in place first into the actual bridge/nose section you see behind it. I've already realized there is a wrinkle in the paper (I just found a nice Hello Kitty image, slapped it into a power point doc, added the colored boxes and printed it out) so I flipped the bulkhead over, sprayed it with the off-white I've been using for the other areas, printed another banner and will glue it into place (diluted white glue) when the paint is dry. I'd have had to redo the piece anyway, since I didn't leave enough room to run the blue LED battle lamp through the aft bulkhead (its battery and switch are in the hull) with the banner being so high, so it all works out.
* The full circle will glue onto half circle piece and has seven magnets embedded into it. I'll add a cardboard strip for the lower magnets that won't be covered by the bulkhead and hopefully- with enough glue- they'll stay where they're supposed to.
Regretfully, I'm going to have to glue the whole foam board assembly in place into the nose section- not there is really any room to game, but you hate to take irrevocable steps when you've had such a long build. What if something breaks loose and needs repositioned? To meet that eventuality, I'm going to use a rubber mastic that I should be able to pry out if I absolutely have to. The LED actually pulls out backwards through the bulkhead, so it will be easy to replace if it burns out.
I built railings for the elevated command platforms out of left over sprue- they are painted and drying and will go in tomorrow. Actually, all the platform stuff should go in tomorrow, leaving only the crewcats to fish and then glue the bulkheads in place and done.
Thanks, Olthannon! Some of the most fun I've had posting to this thread/blog is showing how I've made use of some random piece of junk I've found (once, on the Athena build, literally something I picked up in the parking lot). The best example was probably the Unobtanium Mining Facility a few pages back- that was almost entirely found items, as well as the other mining settlement/research community that I've had fun making out of pieces of PVC pipe fittings.
Feeling a little under the weather tonight, so not sure if I'll get anything advanced on the poor old Chonky Kitty, which disappoints me as what I'm working on at the moment is very fun and I'm so close to finishing what turned out to be a massive project. Needs must, when the Devil drives, of course.
Hopefully, more follows soonest. Thank you all for looking in and especially for your comments.
Thank you for looking in and the encouragement, PaddyMick! Yes, the finish line is in sight, I just have to stay a little focused and use the time I have as profitably as possible.
And not get sidetracked by last minute visits from the Bright Idea Fairy. For instance, it occurred to me just last night that it would be really mega cool to add galleries to the sides of the hull so that infantry could pour out and engage jet propelled aircraft with rifles and swords. I mean hey- it works on WH40K tanks, right? I was able to get over that with only a few hours of thinking about exactly how I would do that. 'Infantry Galleries' on zeppelins are for the next build- this one just needs to get finished!
Thank you both, Syro and Alaricuk, for your best wishes and encouragement.
Back in action tonight, things really are getting down to the wire:
Crew: Added hair color and some appointments, just need to finish small details like jacket collars (the enlisted have fur, the officers need to have their branch colors added to their waffenfarbe), earrings, tails and ears and some washes and they are pretty much done:
Bridge: Captain's and helmscat's stands are added, just need to add the railing and ladders when this glue dries; I do see those crinkles in the map display and am thinking how to hide them behind some trim, or a gadget or something; also started gluing up the aft bulkhead with its load of magnets, so this is nearing completion:
Hull: These are the strongest hook magnets I could find (K&J Magnetics) to replace the PVC pipe cradle I've been using- I have a tablet stand with weight added to the baseplate and will use chain to hang the zeppelin from, these magnets will let me remove it and go back to the cradle if needed; one at each end of the chain isn't enough lift, so they have to be doubled up- no more ordering new pieces to try to make it work, time to finish this and move on, so solutions from on-hand materials only:
The hull also needs its air-anchors attached and decals applied- I have a lot to stick on so will be a big job all by itself, but very satisfying as it will be the very last step.
Weapons Gondola: Its crewcats are nearly done, the new 3 inch magnets are attached fore and aft, just need to build the new cradling to block light from escaping once it is fitted back in place and it is done.
Quite a bit of progress tonight actually, but only one photo:
The safety rails are installed on the bridge and the ladders- all that remains for this section is the helm wheel, the captain's chair and the crewcats- and those are all complete or nearly so. Tomorrow should see that piece mostly complete. I didn't think to tonight, but will add a shot looking into the bridge from the front tomorrow.
I still hate the thought of gluing the aft bulkhead in place, but there's really no reason to make the interior of the bridge accessible, so the straightforward, easier method it probably will be.
I also spent some time tonight gluing up the aft bulkhead- cutting and gluing in place the styrene panels to (hopefully) keep the magnets in place, tacking down the Imperial Nekomimi banner- it will be ready tomorrow also. Just need to feed the blue battle lamp (LED) through the port in the bulkhead and stow the extra wire somewhere between the bridge bulkhead and the hull faceplate, and she's done. Then we'll see if the magnet trick is actually gonna work. Fingers crossed.
I've been looking at the clerestory for the weapons gondola as well- it only offsets the gondola by 1/4 inch- not enough to worry about and the ship's nickname is, after all, the Chonky Kitty. So, if I can still use it with the new magnets attached to the gondola itself, I probably will. It makes for a better seat and is nearly light-tight already, just need to add some tape internally to act as light blocks at the seams.
Finally enough done to make pictures worth looking at:
Crewcats are done, bridge furniture is done:
And the gunnery section is installed in the weapons gondola:
I also tested the hidden magnets in the aft bulkhead- I think they'll be strong enough to hold the entire bridge assembly to the flat metal front of the hull- I should be able to get that installed tomorrow (just have to figure out how to hide the wiring for the bridge blue LED battle lamp). I'll also attach the chin quad 40mm cannon turret to the bow and it's finished.
Then just reattaching the weapons gondola clerestory, decals and some paint on the maneuvering vanes/propellers and I guess this project is about done.
I was able to stay on task and get some more done tonight:
This is another shot of the gunnery section- a guard on the access hatch:
Repaired and reinstalled the clerestory- added the painter's tape to act as light block when the red battle lights are illuminated:
Installed the aft bulkhead to the bridge, glued it in place and ran the wiring for the blue battle lamp:
Two things to touch up:
I see the artist's tape has slipped a bit around the perspex canopy- I'll trim that up and push it back into place.
There is a gap between the bridge and the hull, I didn't push the aft bulkhead in deep enough (didn't want to push my luck and break something going any further), so I'll hide the gap with an adjustable clamp- like for clothes dryer hose, suitably painted and covered with gubbins so it doesn't look like what it is.
I know how I'm going to mount the chin gun turret, and there are decals to start putting on.
That looks fantastic! It's really coming together.
One random thought; shouldn't the emergency exit have a parachute next to it instead of a first aid kit?
Believe it or not, I did first try to make those packs into parachutes- but there's not a lot you can do to them so they tell the story of what they are save write 'parachute' on them, and I can't nearly begin to do that. So they became team medkits!
Automatically Appended Next Post:
Tonight's work:
Started painting the propeller vanes for the drive and maneuvering engines:
The maneuvering vanes have two black and one white vane each; the drive vanes have two white, two black and one 'eccentric' (yellow) that forms a striped blur when in motion: a part of the engine black gang's duties would be to periodically observe the eccentric blur to ensure that it was steady and smooth- if it wasn't, they were to shut the engine down pronto before it flew apart or set fire to the ship. Learned about that practice studying the USS Akron and Macon. These real history US Navy dirigibles were literally lighter-than-air aircraft carriers! Each could hold six fighter biplanes inside and the method of launching and recovering them in the air was incredible. Why there isn't a movie about this already I don't know.
Note to self: don't be in such a hurry to assemble, next time- paint 'em up first. In fairness, I wasn't sure if this idea was going to work, so didn't want to invest a lot of time painting only to have to throw it all away. It made for a lot of weird stooping and arm angles to get this first coat on, though.
And mounted the chin gun turret:
This turned out to be easier than I was initially making it out to be: I was going to use a Forstner bit and cut a circle in the bow, all kinds of things. In the end I just used JB Kwik Weld to fasten a BAM (Big A** Magnet) to the bow and drilled a cavity in the base of the turret and inserted a basing magnet and it worked fine.
Photos are nice for seeing things the Mark I Eyeball misses: for instance, I never realized there was a lens for an optic between the two pairs of guns; now I must paint them (on all three turrets- chin and the two dorsal).
I won't get a chance to work again until Monday, then it's more paint for the props, test the lights again, and apply decals. Then finish the alternate stand (which is a hanger) and photos and high fives for everyone.
These were small kits from a company that sells kits and accoutrements for scale wooden ships consisting of the anchor shank, the spades and a tiny brass shackle and pin. They were a bit of a bear to assemble, but my clumsy hands managed. I also drilled out holes for the anchor chain hawse and the anchor cathead, you'ns will hopefully see those tomorrow when I attach the anchor assemblies to the ship.
Also primered/base colored the hawse pipe covers (two sizes of small washers):
And primered/colored the adjustable clamp that will form the coupling between the hull and the bridge, and by 'form the coupling' I mean: "hide the gap":
I added another layer of paint to the propeller vanes and started painting on some details.
Lastly, I started applying the first of many decals- beginning with the 'flying tiger' teeth and eyes on the bow (like on the P40 Warhawks in Claire Chenault's Flying Tiger Squadron). I only got the teeth on today, not the eyes, so a photo tomorrow, hopefully.
Tonight was mostly applying decals, so far- although I did add the adjustable clamp to help hide the gap between the bridge and the hull (it is partially successful); no close up pics because I'm not pleased/proud at having to do that. I was going to box the adjustment knurl with gubbins to hide it, but it looks like a landing cable winch, so it stays as is for now.
First decals up- the nose section with its P40 Warhawk regalia:
Next, the Great Warrior Neko In the Sky:
I used a metric crap-ton of Solvaset to help this snuggle down over the rivets- I think that helped. I'll also be hitting this- and all the decals- with matt varnish to help hide the edges. I like the look- wasn't sure if this was going to work at all.
And then each of the engine nacelles got each their own 'lady luck charm':
Number 1 Engine- Baroness West
Number 2 Engine- Radio Girl
Number 3 Engine- Miss Sounder
Number 4 Engine- Call Me
I have some more to add, to include a couple that I have to try printing using MicroMark's ink jet printer decal sheets- we'll see how that works. The only 'modeling' piece yet to dois to add the Patented Danforth Air Anchors and hawses and then some touch up paint and I guess I'm done. Then I want to take the size comparison photo and make a little video to really show her off.
Coming very close to done with tonight's work- much progress, one set back:
I assembled the Patented Danforth Air Anchors (anchor, chain scope, threaded through the hawse covers and a fixing pin added):
I drilled a hole through the hull and the pin feeds through and prevents the chain from slipping back out. Then affixed the anchors:
I added a 3mm magnet to the back of the anchor so that it can hang free, as pictured, or be attached to the hull to stop it flinging around.
Not pictured: The Great Neko in the Sky vinyl decals were not staying adhered to the hull, so I pulled them off, sprayed Gorilla Glue Contact Adhesive and repositioned them- this seems to have worked.
I also have these mooring cleats left over- turned out they were too fine a detail and there just wasn't room to use them anywhere, so now I have to scratch build either an amphibious tank or a riverine warfare patrol boat so I can justify having bought them in the first place.
When I went to lay out and print the last decals I needed (hull numbers and ship's name) I discovered that MicroMark sent me the wrong thing- not the "print your own decal" sheets for use with an inkjet printer, but several sheets of railroad car graffiti. I'll use 'em, but they were not what I needed for today. I found some of the proper thing online and have placed an order, as soon as they arrive I can make my final decals, slap 'em in place and the ship is done. Then I can get some pics and video sorted out and move on to the next project.
Thank you for looking in. More follows as soon as I get my decal sheets.
Thank you for looking Kid_Kyoto! It's been a long time comin', but the end is nearly here for this project. I almost feel like Inigo Montoyo in The Princess Bride: "I've been in the revenge business for so long, I don't know what to do with myself." "You'd make a good Dread Pirate Roberts."
For tonight's modeling time I cleaned up all my working debris/litter of the past several months (per the historical record that is Dakka, I started this build on 22 FEB 2024) so as to start fresh on what comes next. Behold, one of two times I've actually put everything away (mostly) on my little painting desk:
The job isn't quite done- I've got a couple of custom decals to print out and affix, then some fun photos and hopefully a little video to show her off. I'm thinking a future project to enhance the Chonky Kitty is to add some 'balloon jacks' (I want to give proper attribution for the source of that character class, but I can't remember where I saw it- it's a game, or line of miniatures, I think- please chime in if you know): these would be Nekomimi conversions from something like Elysian drop troopers, or something like that. I have the Neko asteroid miners, they would form the basis (and hopefully Resin Munitorium starts printing again- fingers crossed).
But there is a job 'way overdue and it starts tonight. This is Chip Marshal:
He was a rescue of ours, came as a pair with his buddy Sandtracker (whom we call 'Sammy'). Chip started as a harness racer and was fairly successful- won several hundred thousand dollars in purses. When he started to slow down, he was purchased for agricultural use and badly overworked and poorly treated. He came to us at age 20, still wanting to keep company with humans (the capacity of animals to love amazes me, sometimes) but broken in body. We were able to give him more than a year of good food, good medicine, attention and love- when he passed he wasn't in pain, he wasn't hungry and he wasn't alone. Our tradition is to build a shadow box for the critters we try to help and who end their time with us, so I've had some of the makings for his box on hand for some time (we lost him last April) but the zeppelin was underway, now it's time to get it done:
The box will be for both Chip Marshal and Sammy- he's the black bay. I've got some photos to print out and some more gubbins to add, but I'll get Chip's part done and will add Sammy when the time comes.
I found my print-your-own decal paper, misfiled, is why couldn't find it earlier:
It comes with white backing, or transparent- this is white. I can use it if I cut close around the images, but I ordered transparent backing so I'll probably print another set and use most of those. I filled the bulk of the sheet with horse pictures we've taken over the years to make some custom photo mugs.
This is the part of the sheet that mostly has the decals for the zep:
I used a Canon 2592 (I think) cheap inkjet printer and adjusted the settings for Standard Print, Photo Paper, 8.5" x 11, that's it. Printed nice and crisp, they cut out clean and they only need to soak for about 30 seconds to apply- and they stay loose for several seconds, easy to reposition.
It costs about US$12 for a pack of 5 8.5 x 11 inch sheets.
I'll slap the last decals on probably Monday and hopefully start my little video on Tuesday next.
One thing I figured out is that every time I glued something into the bridge, the fumes from the cyano-acrylate glue etched the inside of the perspex canopy- I should have used Aileen's Tacky Glue to avoid this problem.
The final decals are in place:
The print-your-own decal sheets with transparent backing came in, but no matter what I tried, the edges kept curling up; I truly cannot recommend them. Same manufacturer as the sheets with the white/matte backing, but absolutely worthless. If I blotted them dry, they curled. If I left them to dry naturally, they curled. If I used Solvaset, the ink bled, and they curled. If I sprayed them with matte varnish, they smelled funny, and curled.
The white/matte worked just fine, and I added a matte varnish coat just to make sure they stayed in place. I just had to cut them out a little more neatly, as the outline of the backing would be easily visible against the color of the skin of the ship, but that was easily done.
Fun fact: The Coast Guard emblem and 'racing stripes' on the bow of every Coastie vessel (to include USCGC Eagle) is one huge decal, applied by specialists from the company that makes them.
Also Fun Fact: Z59 is the hull number for the zeppelin in Tom Kratman's novel The Romanov Rescue
I have one more unknown to deal with and that's the hanger stand I intend to replace the cradle- the cradle is too small for the weapons gondola as it turned out, so I want something that shows off the model better. I'll tackle that, and finishing unpacking all my vehicles and miniatures from the move last year so I can get some size comparison shots, and I am truly moving on.
Just as a quick summary:
* The bridge is half a make-your-own Christmas ornament ball
* The hull is a piece of 8" diameter stove pipe with an 8-4" reducer at the tail
* The sides of the weapons gondola are two key fob hangers
The battery gondola is a parts sorting dish from Kobalt Keep
* The tail section is a circular electrical receptacle installation
* The tail fins are cut down plastic spatulas from the dollar store
* The engine pods are used refrigerator water filter cartridges
* The engine hangers are broom hangers from the dollar store
* Three aft navigation lights, four blinking running lights, two wepps gondola red battle lights and one bridge blue battle light (all working)
* Nine feet of wiring
* Five concealed battery boxes
* Six crewcat figures
Thanks very much for looking in, Josh! I didn't realize it had been so long since the beginning, until I checked the log.
I made a start on getting the video clips I want tonight, after a quick stop at the local thrift store to get a particular item:
The tablet stand was what I had originally envisioned hanging the Kittyhawk from as a permanent display- but it is far too light, even with the extra 10 pounds of weights on the base, so I got something different for the hanger. But you put the tablet stand and its weights on the little kids' pull-wagon I got from Goodwill for US$3, and you've got a pretty good dolly mount for a cellphone camera. I just mount the phone, hit 'go' on the video record and draw the dolly along as evenly as I can.
I ran into one snag though: the hook magnets I was going to use to attach the hanging chain to the hull (so it could be removed easily if I wanted to put it back on the cradle stand) just aren't strong enough, no matter what I tried. So, the heck with it- I'm going to pick up two sheet metal eyelets tomorrow and drill holes in the hull and permanently mount those suckers. That'll put paid to the problem once and for all. And the eyelets are, in fact, lifting shackles for when the Chonky Kat is in drydock and needs to be lifted in and out of repair bays.
I hope to get the rest of the video clips shot tomorrow and a start on editing the vid, then some good scenic still shots.
Thank you all for looking in, your encouragement and advice. More follows soonest.
Thanks Doc! I've gotten a fair number of short video shots, as soon as I can find some of that mythical 'spare time' lying about I'll get it cobbled together into something that gives an idea of what the whole ship looks like!
I've some more shots of just the Kittyhawk, but will post tomorrow. I still have the video to crank out and I have a couple of ideas for shots of the zeppelin with terrain features that might be kind of cool. I need some popsicle sticks for the shadow box and then that should wrap up fairly easily and then I have to figure out what to tackle next!
I was finally able to figure out how to get images and (especially) video from my phone onto my laptop, so I can actually try to piece together my little video of the Kittyhawk.
I also have some photos in a darkened environment to better show the running and battle lights:
From aft, showing the port/starboard markers, but a nice view of the running lights also:
The weapons gondola rigged for battle:
And what I believe came out the best- the bridge, also rigged for either night running or battle:
Thank you Ragsta and Tommygun- I really appreciate you taking the time to drop a comment.
This whole project has been fun- albeit went on longer than ever I intended. And it used all my skills (as poor as many of them might be) and asked for new ones: wiring, soldering, lighting, weathering, plasticard construction, sheet metal construction, magnets, figure painting, decaling, the lot. The next one I build is going to be a bigger diameter hull with a removable side so that you can see the lift bags inside and the hangers, rooms, storage, etc as it would be in a more realistic dirigible.
I saw this short clip on the USS Macon and can't believe they don't make a cut-away kit of her and that there hasn't been a feature movie about her adventures made (although Sky Captain and the World of Tomorrow has the scene with Angelina Jolie as the commander of a flying aircraft carrier, except the Macon was real):
I absolutely need to build one of these- some of her features I had in mind for Kittyhawk but she just wasn't big enough to fit them in.
I still want to get a short video of the 'Hawk up, but have already started prepping the next three projects (all much more limited in scope than the 'Hawk): a Smilodon MBT variant, an antique mule cast iron pull toy for refurbishment (a present for my wife) and the shadow box for poor Chip.
Finally a chance to post- work has been happening but, as they say "screenshot or it didn't happen".
I've got three projects going on and over the next couple of days hope to get a progress pic up of each.
For tonight, here's a shot of some assembly for the shadowbox for Chip Marshal:
The layout will feature a section of barn stall, over which we hung a 'jolly ball'- very much like the balls we threw at each other in gym class for dodgeball, but with a handle molded on- horses love to play with them. Chip and his partner in crime Sammy (registered 'Sandtracker') would stand on either side of their section of stall wall and play keep-away with that suspended jolly ball for literal hours. And all that mouth action makes them salivate, so the rubber floor mats were covered in horse slobber and if you weren't careful you'd slip and then be covered in it.
A little more work buzzing up popsicle sticks with my Dremel and the stall walls will be cut, glued up and finished. They'll need to be stained with some washes to get a nice brown-grey color and then sealed with matte varnish.
After that, just a session with the hot glue gun and some time on the laptop printing off a couple of good pics of Chip and some painting of the figure to match his markings and then this one is done until Sammy passes (hopefully far down the road).
Thank you for looking in and commenting, NotOnline!!!, I greatly appreciate it. I took a little bit to answer as I was hoping to have photos to show, rather than descriptions to make. I did get some time in today, but have also been prepping to roll out of town for work since last I posted, so time (as it is for everyone and everything) is at a premium.
As background, I picked up three colors of felt at Michael's on the way home from work tonight (poker green, black and light brown) and elected to go with brown, as reinforcing the whole 'inside the barn' theme we've got going on:
I elected to use the spray on Gorilla Glue adhesive, vice the liquid Aileen's Tacky Glue, both because I figured it would set faster and also wasn't apt to leak through the thin felt as easily. As it turns out, it didn't leak through at all. Sprayed the hardboard shadow box backing, pressed it onto the felt, placed an (regretfully) empty pizza box on to disperse the weight and added 14 years of collected Prince Valiant comics (published by Fantagraphics Press- terrific quality, I've been collecting them for years and have the whole story from 1935 through the most recent volume published- 1991/92):
Let it dry, trimmed the edges off, and then started seeing what things would look like:
It's missing the stall pieces of course, and that's the next bit. I used the circular saw blade on my Dremel to cut all the pieces for the three stall sections I'll need, plus the upright posts/beams, and assembled everything. Then selected washes to try to get the oak/grey/brown/yellow color that our barn's stalls have- the barn dates to 1848, but the stalls are much more recent- dating to around 1900:
Started with Umber:
Added Grey:
They may need a bit of touch up with the grey, and then I'll do a very light drybrush with Spearshaft Brown, or even Sand, to get that elusive top color. And that should be that.
Then remains just final positioning of Chip's momentos- to include a good photo of him, glue it all down, detail the horse figures to match his markings and his buddy Sam's (Sandtracker), add the Jolly Ball and Chip's side of the shadow box is done.
I'm in no hurry to add Sammy's things- at the moment he's doing as well as a 23 year0old horse that's had the life he's had can be expected. But as Sergeant Major Rawling's tells the little drummer boy just before the assault on Fort Fisher in the movie Glory: "We'll all be by directly."
All we can do is try to remain ready, however each of us defines that.
I'm really impressed with the final result of the Kittyhawk. It looks incredible! I'm really proud of you for seeing that project through to its completion. And this new project looks like it is coming along at its own pace, too. Personally, I feel like most old wood has a tendency to become more grey than brown, but I have also never seen your barn in particular, so I do not speak from a place of knowledge. I look forward to seeing all your progress moving forward.
Yep, the wood is a bit odd- more of a blonde, with grey to it. Most barn wood does go grey, but this has been inside all its life, so maybe that's the difference. The color really doesn't matter in the long run- it's the suggestion of stalls that matters, not any misapropos attempt at a false realism!
So, was on fire tonight- getting things done, gluing up: at that stage of a project where all the sub-assemblies are coming together and everything just wants to fall into place. Took this photo early on to show how the 'stalls' look in the shadow box:
I was going to use the hot glue gun to start attaching things to the backplate, but thought I'd print off the pics of Chip Marshal I want to use, and glue everything up- this half of the shadow box would essentially be done.
Except the box of photo printer paper I keep on hand was actually empty. No problem, says I, there's a place just eight minutes down the road that carries it and I'll be back in a total of 20 and get on with everything.
Except that place didn't carry it any more. Neither did the next, nor the third, and now I'm out in heavy rush hour traffic with accidents every six feet on the highway and the compass is reading funny and the waist gunners are both down and I'm limping my B17G Dixie Girl in on three engines and...
Okay, no B17 but traffic was a heller. The reason all the clerks gave for why they no longer carry any specialty printer paper (no photo paper, stickers, labels, index cards, do-it-yourself greeting cards) is because everybody does digital and prints off on regular paper- if they print at all. Nobody apparently does 'real' photos any more, so why carry the paper?
I gotta tell ya, I'm tired of outliving technology. As example, I've seen movies in theatres replaced by movies on cable TV, to be replaced by laser discs, to be replaced by VHS and Betamax tapes, to see VHS win the Tape Wars, to be replaced with DvDs- supplanted by Blu-Rays and slightly by 4K High Definition discs all to be swept away by streaming. Which is fine, because most of the modern content does not appeal to me anyway.
But it is a massive feeling of displacement to look around for something that used to be so common, and find that not only can you not find it- the young person you're asking about it has never heard of using it and can't understand why you just don't do digital.
So, I'll have to order it online and whilst it's coming in move on to project Number Two: The cast iron Donkey and Rider pull toy refurbishment for my wife.
Kittyhawk looks awesome - I mean it's truly inspirational, thank you for sharing - and great army shots too.I have to admit admit I have no clue about your latest project with the horses but it looks cool. Also I echo your sentiment about technology. I don't have a smartphone, and i'm constantly being told to get an app to do stuff, even basic sevices.
Thanks for looking in PaddyMick! I considered myself to be on top of the technological wave, right up until I wasn't. I'm no Luddite, but was pretty comfortable being old-fashioned. Unfortunately, my wife and I realized that things were changing, and if we wanted to be able to function and protect ourselves we had to learn the new stuff. We've only had smart phones for a few years and I only just on this last business trip put a 'wallet' on my phone because we were in the bush right up until it was time to head to the airport- so if I was to have a boarding pass, I needed a digital wallet. Some things I know I won't ever use, so for instance I can't tell you anything about setting up a Facebook 'wall' (if they even call it that anymore) because there just isn't any way to secure your personal account information. If I could only win the lottery, I'd be 'eccentric' instead of 'crazy' or 'addled'.
Howdy Kid! Thank you also for looking in. Believe it or not, the color of the hull and gondola is an off-beige, with two layers of wash on it already- one faint black and the other a medium brown (sepia). Here's a photo with a piece of plasticard scrap against her:
I'm tempted to hit the rivets with another brown stain (dabbed on, not flooded, so it catches the edges) and maybe hit the gondola again with a greyish, aluminiumy, dustish looking wash. I'm fearful to overdo it, because it would be a metric b**ch to redo all that! But it needs something, I agree.
Paddy, the thing with the horses is a shadow or memorial box. We rescue the ones that no one else wants, often ones with nothing left in them but to have a quiet place where they aren't hungry and scared and can just rest until their time comes. When it does, I build a box with some mementoes to remember them by and my wife writes them a poem. There's pics of the box I built for our little mare Ginger earlier in the blog- hers was what got me interested in incorporating lights and soldering and things in my projects: she was fascinated with the neighbors across the road blue lights on an outdoor tree at Christmas, so I built one to go in her shadow box.
This one will be for both Chip Marshal and Sandtracker (Sammy), two Standardbred rescues who came in together to our place. Chip passed last spring, but Sammy is still going strong (at 23 years old). They loved to play with the jollyball on a tether, so that's what their box will have them doing. Sammy's figurine won't go in until he passes.
I realized that I can make a start to arranging things even whilst waiting for the printer photo paper tos how up: tonight I cut out the foam board backing layers that the printed photos will go on and started painting their edges. They stack in layers from 1-3 deep and provide some relief/texture to the back of then box:
I also made a start on an antique cast iron pull toy that I found for cheap at a yard sale- my wife loves donkeys so this will be an 'allowable' piece of bric a brac (unlike all my models and figures, which are 'less acceptable' bric a brac ) and I'll give it to her for Christmas:
I'm not going to do much to the donkey itself- I like the 'antique' patina that it has, but all the rusted areas are getting new colors. I've already started by painting the wheels gloss black- I'm using acrylics but when done will heavily overcoat it with clear lacquer. I can tell it was intended to be pulled on a string or pushed with a stick (there's an interesting clean nodule of what looks like solder in the right just being the saddle where something may have been attached) because the front wheels are attached at a bias to the center of the hub- when you push, pull or tug it it undulates up and down as it moves, mimicking a donkey's gait.
Stumbled over these dull blades from our horse clippers set and they reminded me of another long-waiting project whose time I think has come:
More on these in a bit when the shadow box and the pull toy are done.
And finally, this was just out and I felt like taking a picture of it:
I think I may have picked this up with the Reaper 5 kickstarter, but I'm not sure. In any event, if I were a dragon, books would be my hoard. I've never tried to paint a dragon figure this large before- there's a wonderful breadth to be able to express some nuance with color- so I'm not sure if or when I'll tackle it, but tackled it must be because I need it on my desk while I work or read.
Thank you for looking in and the comments- more follows soonest (including some video of the Kittyhawk 'in flight'.
Glued together the phot backings for the shadow box tonight and will hopefully slap another coat of red paint in their edges.
Gonna sneak a 'before' photo of the cast iron toy, as the page wrapped and I'd like to show before and after (would do it side by side, if I was clever):
Also finished what I'm going to do with the cast iron pull toy; looking at the photos I'm half-tempted to go in with the Dremel and grind down the rough paint edges, but when you look at it from a distance of even a foot, they are not very visible so will leave well enough alone:
You can see on the right side of the figure several rounded points- these are cast into the figure, so they aren't attached lumps of solder like I first thought. I do believe they were attachment points for something- either the lanyard for pulling or the stick for pushing is my best guess- once upon a time. You can see them at the concho point of the headstall on the bridle, the rearmost point of the saddle blanket and midway on the hip or lower torso of the rider; the point below that is definitely a piece of scale or solder:
The paint was so badly corroded when I started that I didn't realize the rider was properly sitting side-saddle!
Next opportunity to work I'll try to get the shadow box wrapped up and then back onto the next Nekomimi tank- which is much smaller than the Smilodon super-heavy, so will be the Cougar- roughly the same size as a Leman Russ.
There are some very impressive projects on the go here- I really like your horsebox vignette one! May I ask what the background to that idea is?
I remember reading about the 20s and 30s airships including the Macon and Akron. Have you ever watched Laputa Caste in the Sky? I loved that film as a kid!
Yes- Castle in the Sky is an excellent film- I didn't think to watch that one to stay motivated during the long build time- now I want to watch it all over again!
The shadow box vignette reproduces a scene from our barn- Chip Marshal and his pal Sammy (Sandtracker) would play keep away with a jolly ball ( akind of playground type ball with a handle molded onto it so horses can grab it) hung from a beam literally for hours: they'd slobber so much sometimes that the floor mats were drenched and you'd slip if you weren't careful. So the scene shows a stall, the head of the aisle and the near wall of the stall across the aisle.
I got the photos we want to include printed out tonight, added another coat of red paint to the photo blocks/spacers and am ready to start gluing things into place. I do need to find a piece of string for the ball, it really bugs me that I don't have a bird's nest worth laying about already!
I need to add the jolly ball- just need a bit of string and something I didn't notice until I looked at the photo is that Chip's mane needs to be black. Otherwise, it's done until it needs Sammy (the black horse figurine) added, which hopefully won't be for a long time. He's going to be harder to customize, because he isn't black- he's a black bay, which means he actually has brown hairs underlying the black and he shows brown at the hocks, mouth and the major creases where the big muscle groups shape the skin.
And finished repairing the last of the damage from moving, with two exceptions:
There's a little bit of everything here- the move was indiscriminate in what lived and what got 'modified': a Sister of Battle Sister Superior, a lascannon team from the Lucky 7's (77th Imperial Infantry), three Doom Pixies, a Snow Pixie, some cargo under tarps/on pallets and a robo-anti-aircraft gun that's completely scratchbuilt from my 'interesting pieces of plastic' box.
Exception 1 is the piper from the Emperor's Own Scottish Space Borders (based on my own Clan Leslie's Kings Own Scottish Borders)- I'm going to have to fabricate new drones for his pipes, and I;ve come a ways since trying to paint his face, so may give him a make over and look less like a fentynal user.
Exception 2 is the mechanicus lady from an old kickstarter- I forget the company, but have a ton of their figures still waiting their turn. I have tried every glue known to man and that last stinking robo-octo-arm won't stay attached, so now the only thing for it is to use a tiny blob of greenstuff and do some touch up paint.
Next Monday I should have some time to work on the enxt project, which is the new Cougar Medium tank (Leman Russ equivalent)- with some comaprison shots with the Smilodon,
New project- finally a straightforward, "sit down and just paint" job:
This is the Cougar, the Nekomimi Winterguard's medium battle tank. The photo is deceptive (aren't they all?): it's actually much smaller than the Smilodon behind it. I added the Leman Russ into the pic to show that the Cougar is also really much bigglier than it, so the Leman just became a scout/reconnaissance tank for the Empire.
Unfortunately, Resin Munitorum is still not printing and I'm running out of figures to adapt as crewcats, but I did find some 'Neko' head sculpts so will try to fit them onto the crewman figures that came with the tank and carry on. The sculpts are good, but they and the figures are much bulkier than the real Nekomimi. Oh well, this build is going to be winter campaign weathering and detailing, so bulkier means they're wearing their woolies.
The shadow box is still in the background on my kitchen counter because I forgot to bring a piece of string from the farm to finish off what can be done for right now.
Started pin-washing tonight, trying a new technique I saw on Youtube- careful application and then using water to dilute the edges and fade it out:
Going with a winter weathering scheme (lot of terrain materials left over from doing the ski-equipped BA-64 diorama) I wanted to try to do something different than the "all over" dirty washes I've used for most of the other vehicles I've done. Doesn't mean I won't pile a bunch of snow everywhere, though.
Also primered a new vehicle that will be for a different unit: Space Samurai:
Bit more progress tonight- finished pin washing (which for me I guess is more like detail outlining, as I'm trying to avoid actually 'washing'), added some base colors where needed and strted working on the crewcats:
Also finished basecoating the Space Samurai Sled:
The 'pin washing' didn't work so well, I think I let the wash dry too much before trying to feather it out with a wet brush. Fortunately, I had (mostly) applied it carefully and have a lot more weathering steps to try to get the winter campaign effect I want, so I think it will all be good.
The crew are essentially done- just need to start the several washes and couple of areas of dry brushing, plus fabricate two tails and paint them and the ears. The grey wash is mostly applied to the vehicle, and nest is the watercolor whitewash. On top of everything I have the AK Interactive snow modeling materials from the earlier BA-64 project, plus some doodads from Green Stuff World that I haven't tried before and am looking forward to adding and see how they work.
Thanks very much, Olthannon- nice to see you posting here! I let myself get distracted with some ideas for the Chonky Kitty and sometimes just ran into a wall where I just couldn't muster the intestinal fortitude to put some more work in- the whole project form buying stove pipe to 'done' was a bit more than a year!
A bit more work tonight on the Cougar winter campaign build:
In addition to finishing up the grey wash on the tank itself, added the last base colors to the crew, machine guns and sponson flamers. Time to add some decals before it's too late and then snow.
Also fabricated some tails for the two crewcats that would have them visible from their positions in the turret (one external sacrificial machinegunner and one three-quarter riding TC):
Resin Munitorum is printing the heads and tails conversion kits again, but not yet the actual figures, so I'm having to customize the figures that came with the tank kit myself with heads from a different Etsy seller and making my own tails. I'm hopeful that RM will offer the figures again in future.
And because I only know one unit of issue for Greenstuff (chunk, one each) I used the extra to make some stowage items- a tarp, a ruck and a sleeping roll:
First time I've tried to add buckles to the tarp straps; in the past I've tried to 'carve' them in, this time added a teeny square of greenstuff. We'll see how it paints up.
This last pic is the new camouflage netting from Greenstuff World, they offer it in white, tan and dark green. I intended to drape it artistically, but having a bit of experience with armored vehicles I know that no real tanker is going to deploy that in a way that fouls any of the hatches or the the traverse of the turret, so didn't use it for this application. It would have worked on a fixed barrel, limited traverse vehicle like a STuG, but not for a turreted MBT.
Same same, I didn't add any stowage- I had a mega assortment of gubbins and had a neat little vignette planned for the middle of the top of the turret- but anything I added just detracted from the austere, wintry tone I was looking for; all those things will get used on another build.
So, I hope you'ns like the Cougar and I look forward to your constructive criticism.
Next up will be a new army color scheme beginning with the green armored car thing pictured several installments earlier, for the Space Samurai. I believe it's going to be the ride for a group of Forward Observers with a dismounted party as people-interest. Thinking on how to add an extendable antenna for a 'Pearl Harbor' type ranging radar.


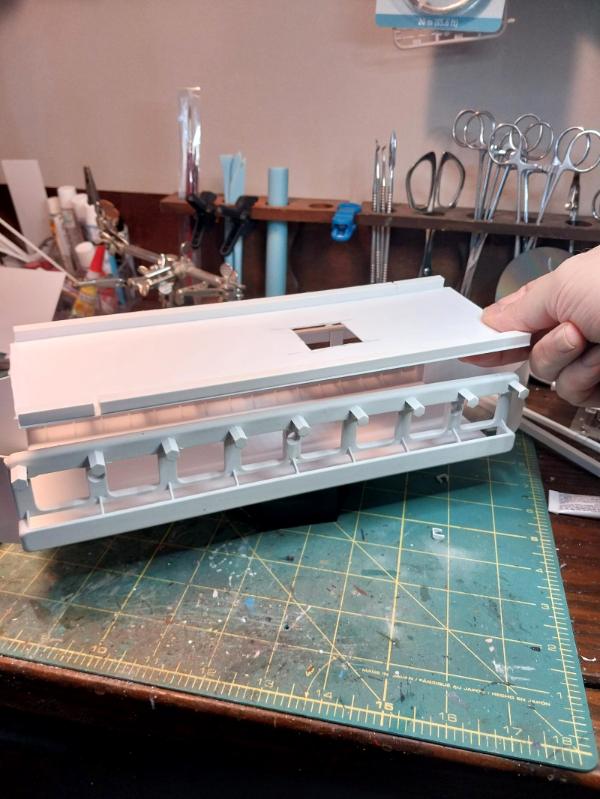
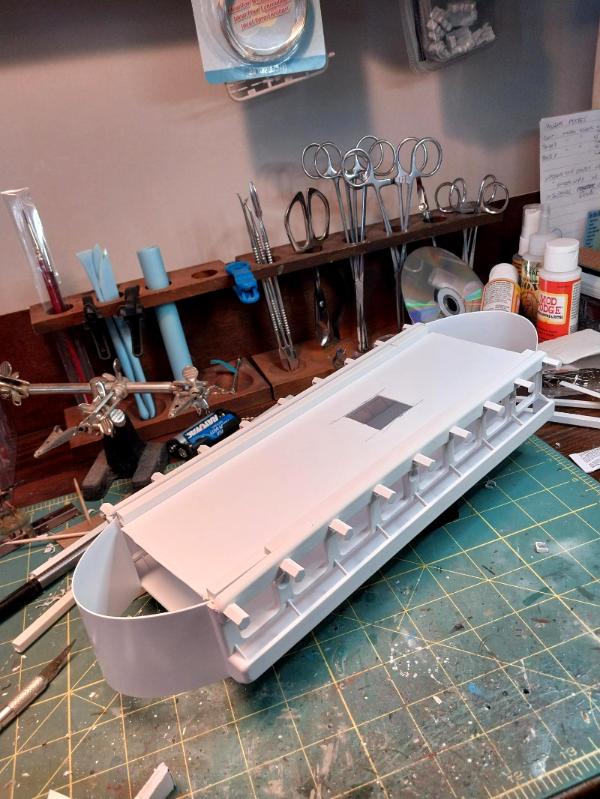
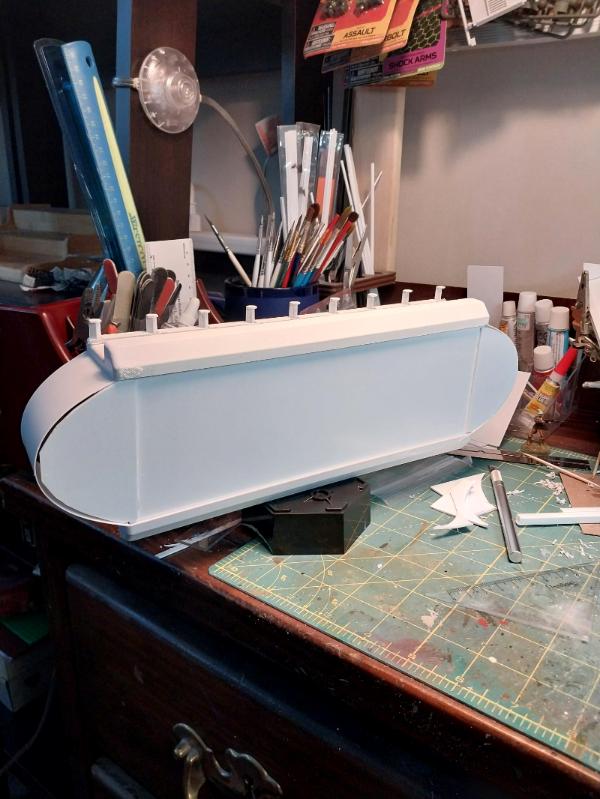
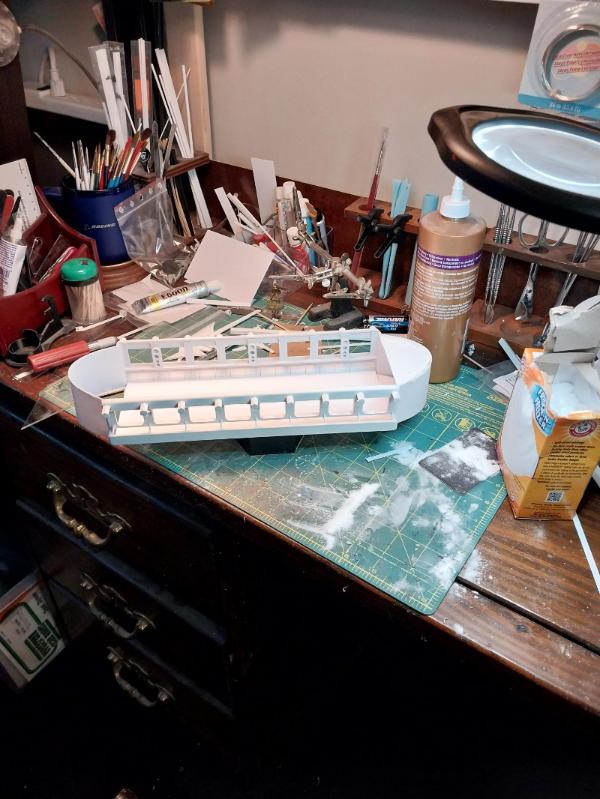

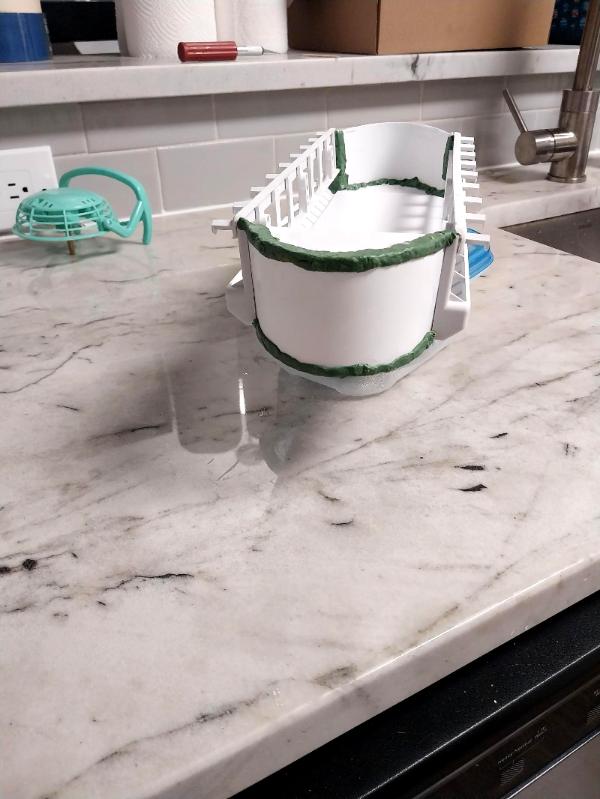
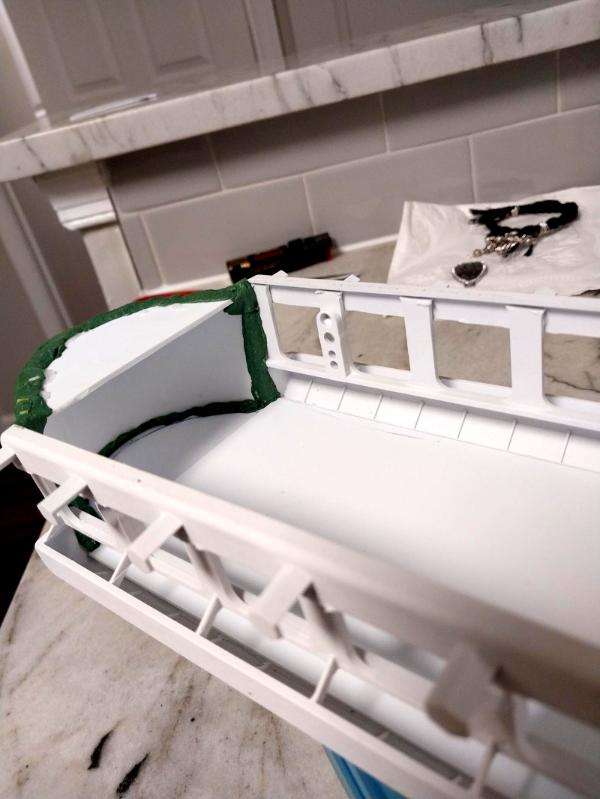
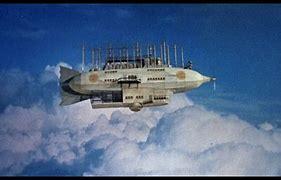
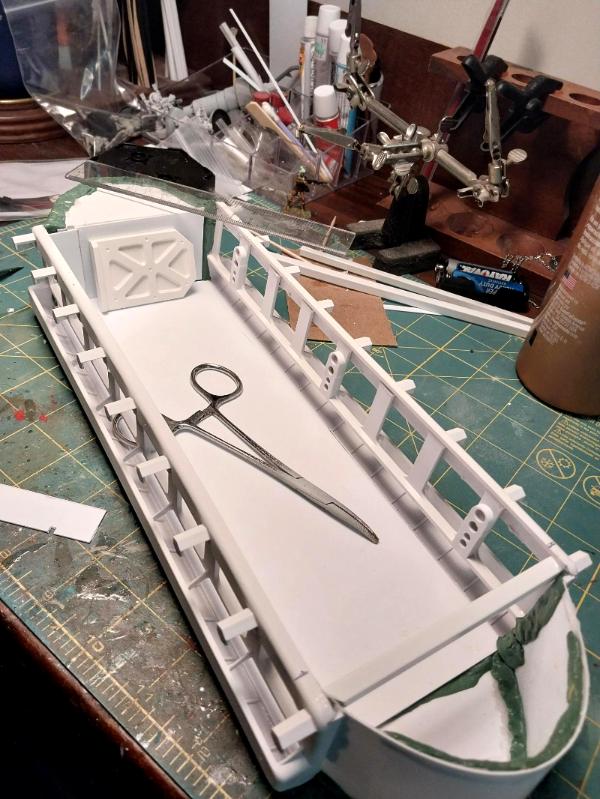
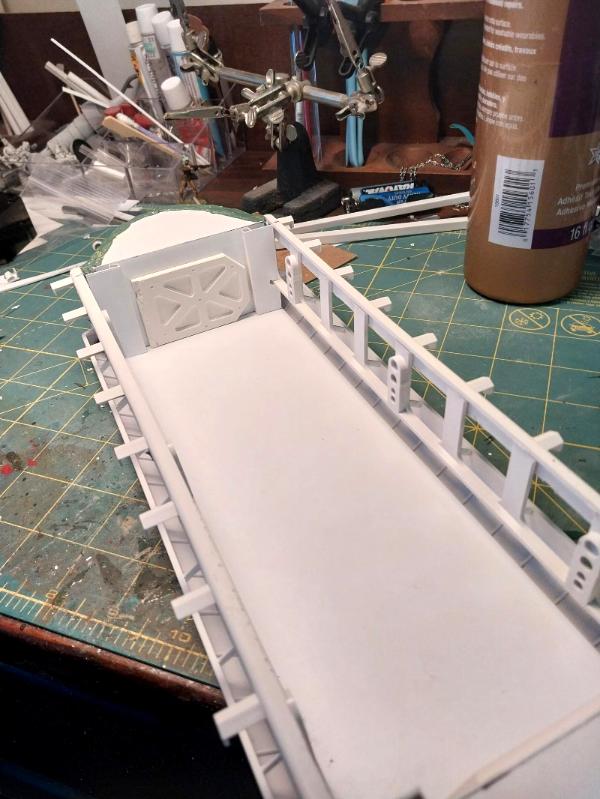
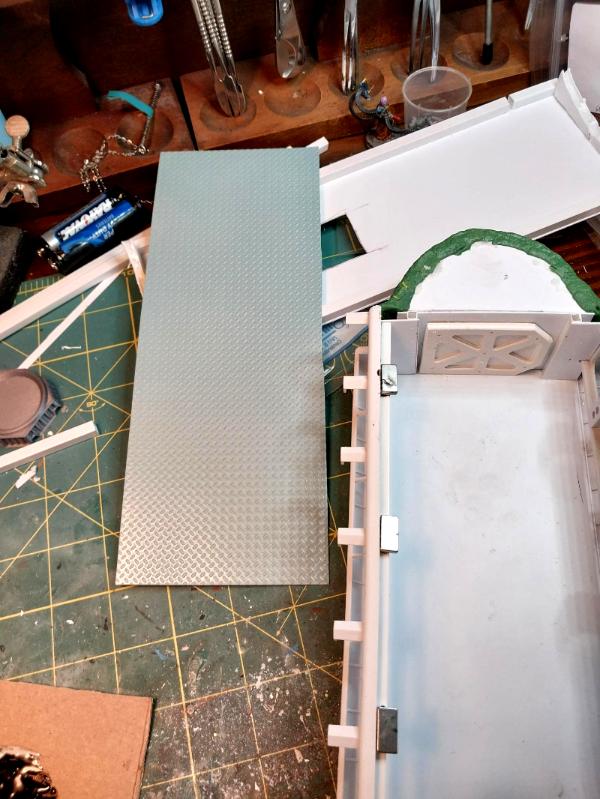
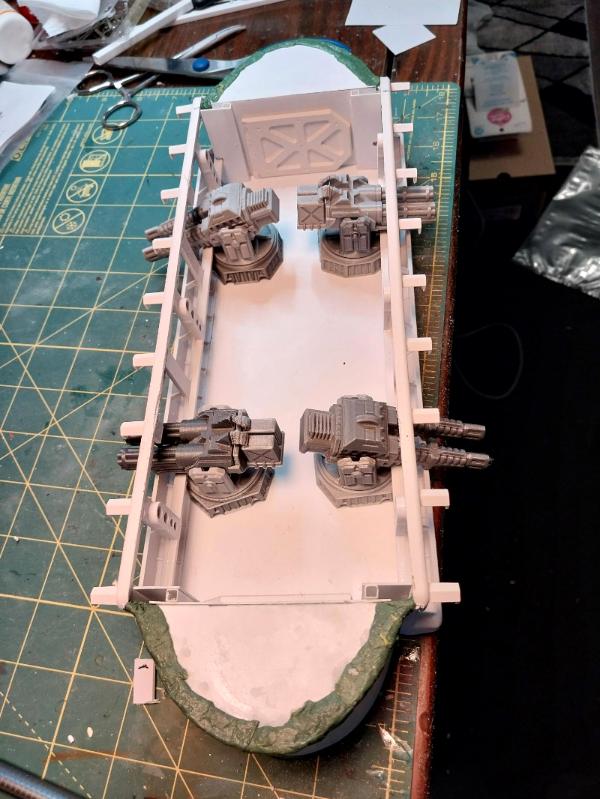
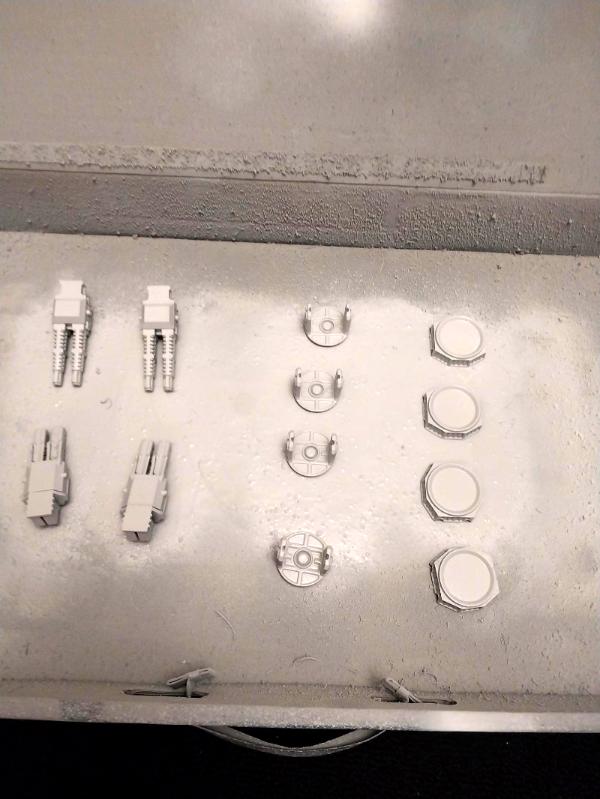
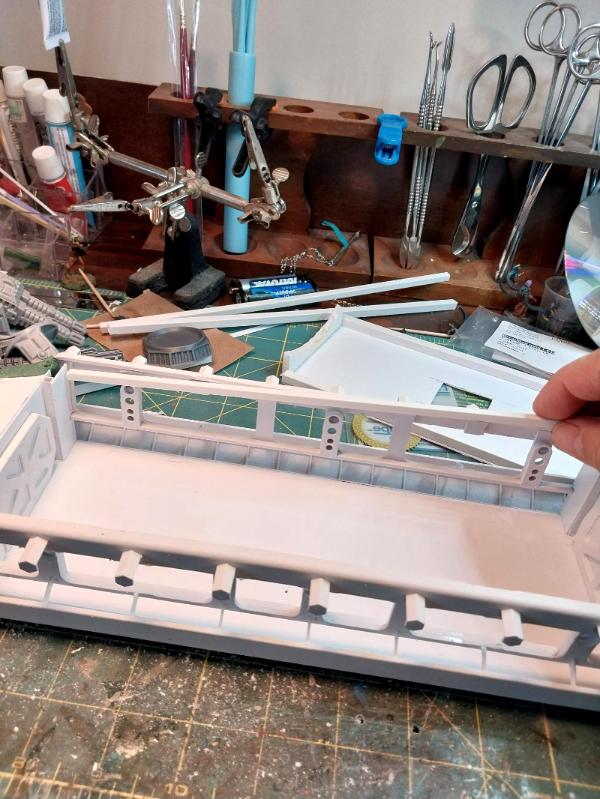
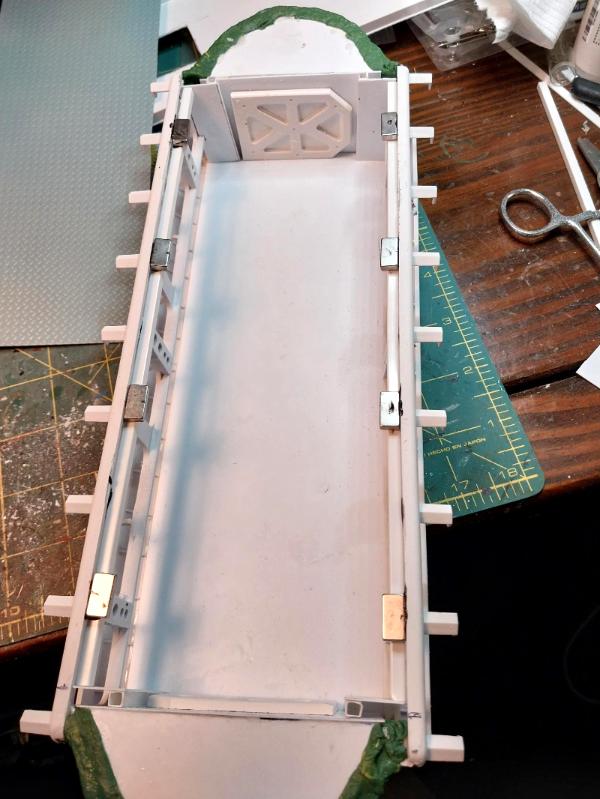
 to work with. The stuff I'd been using until recently must have been at least two years old and- despite being kept as best as possible in an airtight container, was extremely stiff. Tonight I used brand new greenstuff to attach a few things (see below) and was amazed at how soft and easy it was to work with. Don't get me wrong- my hat is still off to the gang that craft incredibly intricate details in the stuff, that's an art. But I was making it harder on myself than it needed to be. When I go to make the banner bunting to hide the crappy greenstuff welds on the bow and stern of the gondola, I go at it gaily knowing that it won't be nearly the bear I thought it was going to be.