@ Scarper- It is quite flattering to know that something I created inspired someone else. By all means please feel free to take anything and make it your own. Would love to see the results.
@ Vik- See below.
@ Celtic Strike- Thank you.
@ Briancj- I had to look that up, and while I know what it is, I still do not get it.
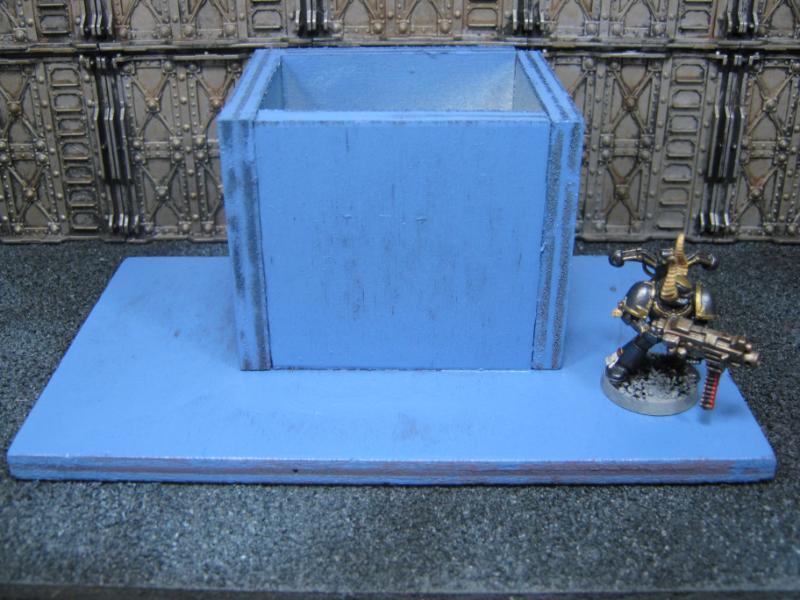
So thanks to Vik and Dave, everyone gets to see the -same finished work- Large Crate with Scale Reference!
I can see him calling out to his mates- "OI! Did any you order a package?"
Much to his surprise, it was a "special delivery". (bizarre side note- look at the head between his feet. I didn't pick that model because of the head, I picked it because it was the largest I could fit in the box. All things considered I think it's absolutely perfect and begs a storyline)
I suppose this is for the Roolz Boyz over in You Make Da Call would have an answer for this one- Armor Value or Cover Save?
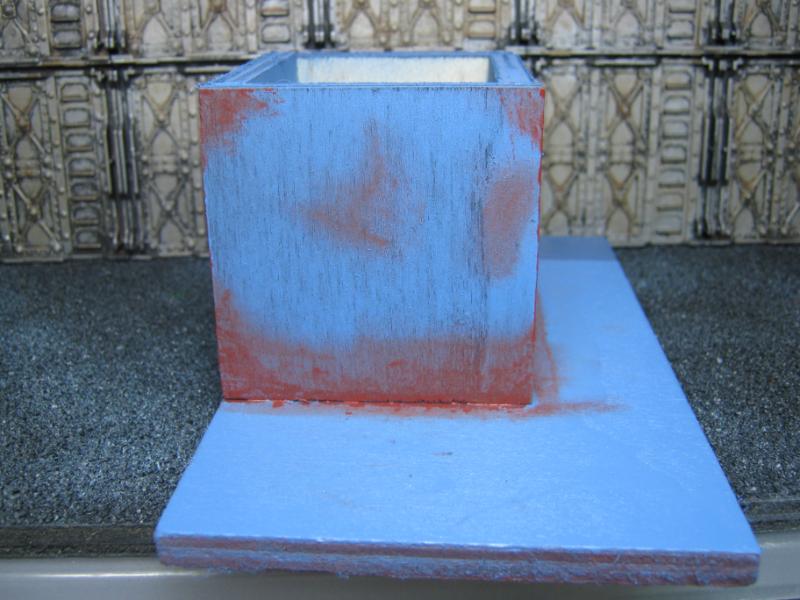
And I had to do this. It was really frustrating for me to not share what I'm working on between bits for the "crates and barrels" project because I really like it. It's also been taunting me to work on it as a main project. So I've decided to let myself really focus on it as a main project after the next batch of crates and barrels are done. It's a "reward" for staying on task. For now, here's a glimpse of the near future:
Apparently that glimpse needs some touchup work. Ha.
I did get a little work done tonight, but nothing I'm going to share yet. With luck I'll have more for you this weekend. I have a few major things going on but realistically I can get a few hobby hours in.
That's all for now, thanks for looking and thanks for posting!
at brian... yup... saw that last week on a TV show as a review of old games... most hilarious^^... i bet they used sophisticated motion capturing technique for this^^
@ dstein- I'm going to try to clean it up a bit the old-fashioned way (meaning go back and fix my mistake) but once it is done no one will even notice because that photo is like X15 the actual size of the model.
@ Briancj- Ah. Nothing like grinding a good thing into the ground so badly that the main character gets turns into a crate.
@ inmygravenimage- No, but that was an awesome guess and likely cooler than what I'm actually doing.
No update, just replying to responses (because you guys are awesome) and laying out a few ideas on where I'm going and what is next. I've been thinking about the stuff I have stored here and there, such as my Unpainted Plastics drawer, my Unfinished Buildings drawer, my GW Bitz drawer, my Random Bitz drawer... and right now I'm feeling that I need to dump out ABSOLUTELY EVERYTHING I have onto my table and sort through it again.
One problem I have is how I store things. It's neat and compact (which satisfies my need for an aesthetically pleasing and well organized space) but the old saying "out of sight is out of mind" definitely applies here and since I can't remember what I had for breakfast 2 days ago, I surely cannot remember what I stored in that drawer 2 months ago. Bringing it ALL out into the light and creating an inventory list of what I have will help me figure out exactly what I'm going to do with it all and how to prioritize those projects.
One important part of that task will be to find "quick, easy, and fun" projects that I can intersperse between my "long, difficult, and annoying" projects. I've always had a problem with motivation when I start a complicated project (something you have all seen if you've been following my project threads for any amount of time). It starts off as a brilliant idea (organically on my own or an imitation of someone else's work that inspired me) and after a period of time it grinds to a halt as I become sick of working on it and hit the wall. My Death Guard and Cult have more than a few of those right now, and my terrain is no different. I need to find things that will give me that "accomplished" feeling to keep me focused and motivated during those times where I really want to stiff-arm the entirety of my collection into the bin and stop doing this completely. Bizarre as it may sound, this isn't always fun for me. Sometimes it feels like a lot of work, and having so much failure spread out across my desk can be incredibly disheartening sometimes.
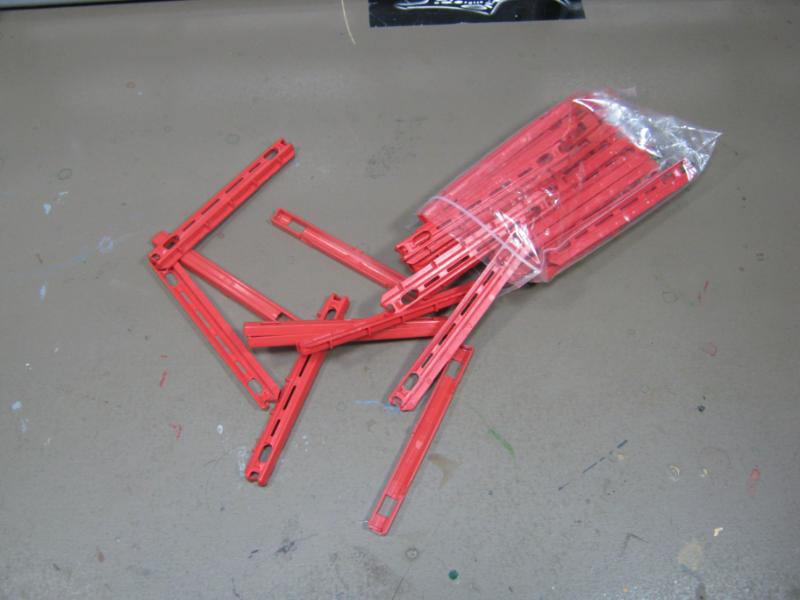
Last night I found some GW spike barricades and 4 more barrels. I don't know how they managed to stay hidden away during the great "loose bitz" roundup, but I found them now and they are going to be a quick and easy finish because they do not require a lot of additional effort to look decent. That will be an easy "win" for me before getting back to the few crate barricades I have left to do. But it's still an issue because just going through the things in that one drawer I realized that if I'm ever going to reach the goals I've set for myself, even more of my collection is going to have to go. The heartbreak of that is the things I kept after the most recent purging are awesome, I just can't see myself exclusively doing terrain for the next 5 years simply to get caught up w/ the projects I've already started.
So anyway, I'm sticking w/ my immediate project schedule (crate / barrel barricades) and I'll finish up my "teaser" piece. After that I'm going to haul out the entirety of my everything that isn't finished (including random bitz / supplies) and then decide on what is and is not going to get finished.
Will try to have something to offer other than text by the end of the weekend. Thanks for reading.
Briancj wrote:The 'Solid Snake' series of video games had gotten to a point where you were, literally, sneaking around disguised as a crate.
To be fair, it was always like that.
The original Metal Gear for the NES had the Cardboard Box as an item. That was one of its signature items, and was included in the later games as a nod to the originals.
I think if you are already looking at 'long difficult and annoying' projects then you just need to find a way to make those projects easier and less annoying.
Maybe you just need to find ways to take shortcuts to work though everything you have to do quicker. My best tips for saving time are to use a hot glue gun and spray with a couple of different shades (with my airbrush I painted a building in about 10 minutes, but spray cans work too) and then wash. Rust pigments and sponging give an effect that looks like it took hours but really takes minutes.
Or maybe you need to mix up techniques so you don't get bored, like recently I started using some hairspray/salt weathering and some bright colours to mix things up a bit. (And soon I am making tropical islands... for extreme variety).
I have to admit I look at a lot of scenery projects and I know I have nothing like enough patience for them. Especially ones that involve cutting plasticard or delicate glueing. I'd rather put a basic paint scheme on 20 bits of terrain than a perfect one on a single piece and I can't imagine every doing something I didn't find fun.
Have you considered having a bash at some more complicated graffiti? It's something that gives you a little more freedom for creativity but still helps characterise the terrain - I haven't done much terrain painting myself, but I imagine that might be something you could do as a reward between bigger projects? I know your pain with slogging away at long-term goals though - sounds like your bitz hoard might be a bit mind boggling out in the open!
You could always sculpt some zombies between paint jobs...
hey skalk... i know how you feel... lots of big projects got on the backburner for me.... most of them are still asked for by my friends but i seem to be unable to tackle them atm... i don´t know if making a big list of everything and even chucking out more cool stuff from your crawers of creativity might be a good decision... let it clutter... that´s what i do anyway... one day your hindbrain will draw the card with just that bit what you need for a new project... and then it will be the right time... of course looking through the contens is never hurting but don´t stress yourself... time will come for everything!
by the way... your musings for smaller and faster and fruitful projects have sparked a cool idea in me... i think for my son and me i will soon build a segmented munda dungeon... i think i really like that idea and it is something that will never be completed but can easily get done to fit the needs and can get additional items from time to time!
@ dstein- I'm going to try to clean it up a bit the old-fashioned way (meaning go back and fix my mistake) but once it is done no one will even notice because that photo is like X15 the actual size of the model.
@ Briancj- Ah. Nothing like grinding a good thing into the ground so badly that the main character gets turns into a crate.
@ inmygravenimage- No, but that was an awesome guess and likely cooler than what I'm actually doing.
No update, just replying to responses (because you guys are awesome) and laying out a few ideas on where I'm going and what is next. I've been thinking about the stuff I have stored here and there, such as my Unpainted Plastics drawer, my Unfinished Buildings drawer, my GW Bitz drawer, my Random Bitz drawer... and right now I'm feeling that I need to dump out ABSOLUTELY EVERYTHING I have onto my table and sort through it again.
One problem I have is how I store things. It's neat and compact (which satisfies my need for an aesthetically pleasing and well organized space) but the old saying "out of sight is out of mind" definitely applies here and since I can't remember what I had for breakfast 2 days ago, I surely cannot remember what I stored in that drawer 2 months ago. Bringing it ALL out into the light and creating an inventory list of what I have will help me figure out exactly what I'm going to do with it all and how to prioritize those projects.
One important part of that task will be to find "quick, easy, and fun" projects that I can intersperse between my "long, difficult, and annoying" projects. I've always had a problem with motivation when I start a complicated project (something you have all seen if you've been following my project threads for any amount of time). It starts off as a brilliant idea (organically on my own or an imitation of someone else's work that inspired me) and after a period of time it grinds to a halt as I become sick of working on it and hit the wall. My Death Guard and Cult have more than a few of those right now, and my terrain is no different. I need to find things that will give me that "accomplished" feeling to keep me focused and motivated during those times where I really want to stiff-arm the entirety of my collection into the bin and stop doing this completely. Bizarre as it may sound, this isn't always fun for me. Sometimes it feels like a lot of work, and having so much failure spread out across my desk can be incredibly disheartening sometimes.
Last night I found some GW spike barricades and 4 more barrels. I don't know how they managed to stay hidden away during the great "loose bitz" roundup, but I found them now and they are going to be a quick and easy finish because they do not require a lot of additional effort to look decent. That will be an easy "win" for me before getting back to the few crate barricades I have left to do. But it's still an issue because just going through the things in that one drawer I realized that if I'm ever going to reach the goals I've set for myself, even more of my collection is going to have to go. The heartbreak of that is the things I kept after the most recent purging are awesome, I just can't see myself exclusively doing terrain for the next 5 years simply to get caught up w/ the projects I've already started.
So anyway, I'm sticking w/ my immediate project schedule (crate / barrel barricades) and I'll finish up my "teaser" piece. After that I'm going to haul out the entirety of my everything that isn't finished (including random bitz / supplies) and then decide on what is and is not going to get finished.
Will try to have something to offer other than text by the end of the weekend. Thanks for reading.
If you would like i can send a few of the building panels ive made to you... heh. More stuff. Pm me your addy and I'll ship em out as soon as I can thereafter.
@ dstein- I get what you are saying and can't completely disagree. In this case I am hoping the time spent *right now* will open up a lot more enjoyable and productive quality time later for creative modeling and general hobby awesomeness.
@ Bruticus- Thank you for taking the time to really detail out some ideas. A few I hadn't considered at all really caught my interest. Specifically the hairspray / salt weathering and sponging. Is the idea behind it to remove the salt in layers to reveal paint underneath, or does it remain and provide a 3-dimentional texture? Absolute ignorance on this one, interested in knowing more. Regarding sponging, someone else recently recommended sponging to me as well. It is going to have to be my next technique experiment. Is this a 'craft store' sort of sponge or is this a 'rip off a bit of my kitchen sponge' approach?
As far as the 'long difficult and annoying', for what I am trying to achieve w/ my Necromunda terrain, it's going to be a challenge to find shortcuts. My modeling nemesis above all else, beyond even pure highlights and OSL, is rivets. I simply hate doing them, but love how they look and in order for my pieces to look complete, they need rivets. Hundreds and hundreds of them. I have no idea how the LoER does that. It is painfully tedious work for me. It's been the dead stop to more than a few projects. Additionally, I'm going to give my platforms a more sturdy look, so each level floor will be capped to add about 1/8-1/4 inch thickness. This will also lend for additional detail (cabling, piping, etc) as well as more rivets.
I'm 100% completely there with you on the '20 bits of terrain'. It's exactly what I have been doing, and for the most part I have genuinely enjoyed it. The last set of crate barricades really put me off though. Can't figure out why, but it is a small matter. They are done and I'm happy to have them in the 'completed' collection.
@ Scarper- That's a really good idea and I hadn't considered it at all. It would be really easy and yes, I could do it between other projects. And no, I'm not doing any more zombies ever again, 100 is enough... unless they are Undead Guardsmen. But really, no. No no no.
@ Vik- Like I said to Dave, it's something I had to do. I think it's a positive thing. I know for sure it's the first time since I've been modeling that I've planned something this involved. I'm hoping that a manageable and prioritized list will assist in better planning for pieces to be done and help me schedule my time more efficiently.
@ Galorn- That's really decent of you to offer. Will send a PM tomorrow morning.
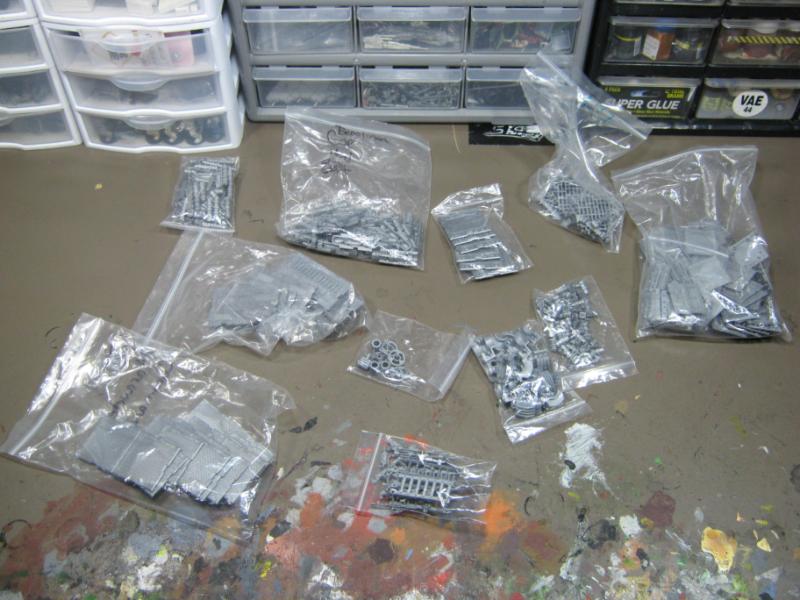
I decided to go through everything tonight, but I didn't take pics of everything. My Woods box is full of stir sticks, dowels, etc. Other things are projects I am actively working on and know that they will be completed in due time so they aren't part of the inventory.
These are the projects I have that are incomplete. Some simply need paint, others are in varied stages of being built.
(Also, another apology for the blurred pics. I have no idea what I'm doing wrong. I'll figure it out this weekend.)
My GW plastics:
The GW plastics need no explanation. Looking at it after I uploaded the pic I realized there's an awful lot of it. I've been collecting this stuff over the years and it really does belong on my tabletop, not in a box under my painting desk. I'm more inclined to finish everything here before working on anything else because it would be faster 'finished' results. There's hardly any modeling involved at this point, it's all paint. I'll be keeping these on the side though and work on them in between main projects.
These are 4 scratch builds and the rest are random plastics I've kept for different modeling ideas:
A couple pieces in the scratch builds can go, like my balsa tower. Not sure what I was thinking when I started that one. But there are some definite keepers in this that would make interesting terrain. The tanker I picked up recently at a yard sale. It based up nicely and I can see what I'm going to build with it. The multi-level tower I posted a few days ago, it's staying for sure. In fact I found the roof I made for it back when it was a different model I made for Necromunda, so that was cool. The control pad is going to be part of the same piece as the tanker. I like this stuff and I know I'll get to it.
My Fantasy buildings:
Right off I can say I feel less attached to the Fantasy stuff, but it's one of the more fun projects I've worked on. I've completed 3 houses and my only genuine disappointment is that they really have no purpose. I'd like to see them with walkways and ladders and such (as in Mordheim terrain) but without a direct application, my motivation to put time and effort into them is understandably diminished. I could run a 40K game on a completely feral world I suppose, but it would be the rare exception.
This is all of my Pegasus Hobbies:
The Pegasus stuff is my box of shame. I really should have had those things done a long time ago. The Chemical Plant is still in the shrinkwrap and I've had it for 6 months. The Gothic sets I've had for almost 2 years. The problem I've had w/ the Gothic set is that I don't want to commit it to a glued and based shape. I really like the flexibility the loose walls offer. But still, at very least I could have based them black and light spray / drybrush gray. Not even washes, just absolute basics. These should move higher on the list.
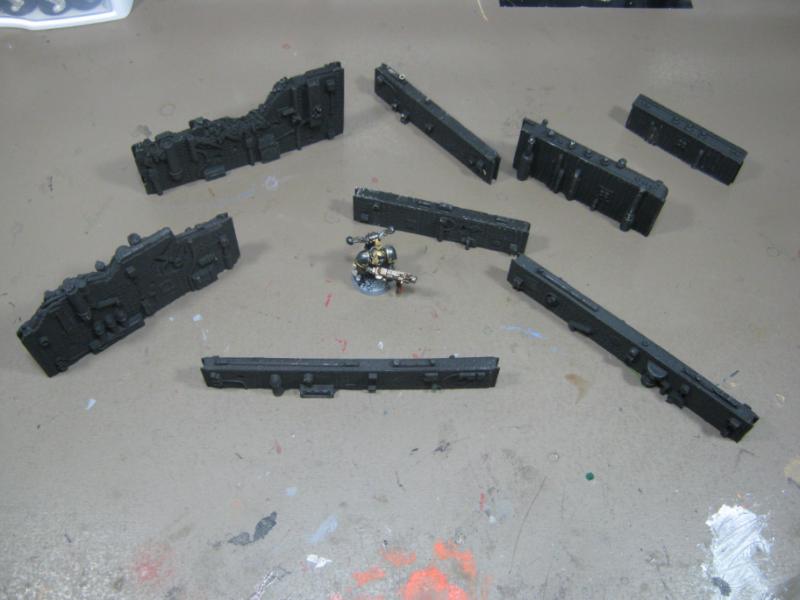
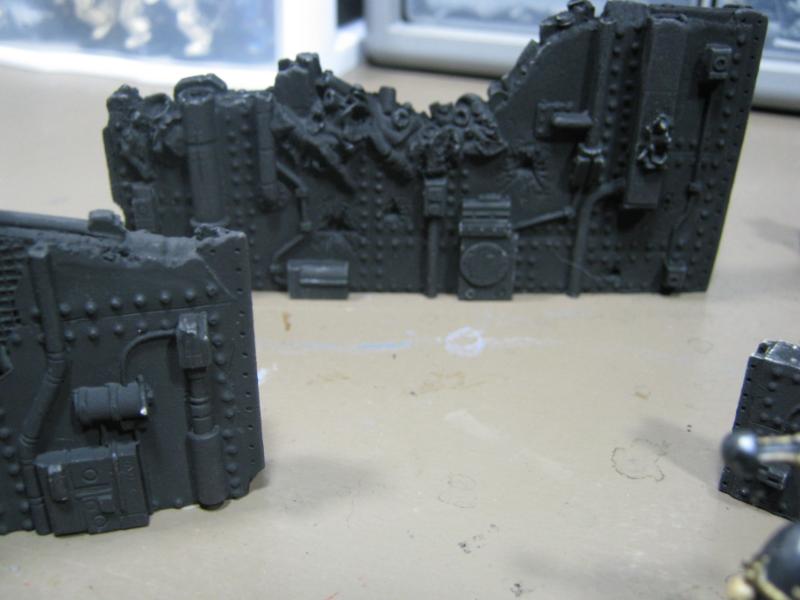
This is almost everything I have for Necromunda-style platforms:
My Necromunda stuff is what got me going on this project to begin with. I've always worked on some sort of terrain here and there, but it wasn't until a year or so ago I started being very critical of my terrain and set out to make some significant improvements. I was working 'behind the scenes' for bit until I first saw dstein's Necromunda Terrain thread. That kickstarted me and I had a pretty good run of things until I stopped doing this stuff completely (around January). After cleaning up my space I decided to get back into this, and the Necromunda platforms are still my #1 priority for projects I genuinely want to complete. I've already detailed the challenges of that, and why it keeps getting pushed back on the schedule. I'm looking for better ways to get the results I'm looking for, and I am going to complete this.
This is for walkways / towers:
This collection was HUGE, took up almost an entire large tote by itself. It has been cut deeply but I have no regrets. This is manageable and I'm certain I'll wind up using most of this stuff because it's very detailed plastic and easy to work with. In my opinion one of my best pieces from this entire project was a the platform from one of those train trestle sets. I'm looking forward to working with this stuff again.
Completely random plastics:
The random plastics have some bitz that are pretty cool and I expect I'll find an application for them. These bitz are the least critical of everything I have. There's only one specific (and very low priority) 'project' in this pile (the blue boxes), the rest are truly just bitz.
Again, not absolutely everything (kept out a couple genuine WIPs and I forgot to include any of my mountain terrain... duh) but that is the vast majority of what I have on my list of things to be done. Having seen it in this format it doesn't look as overwhelming as it did when it was in my mind (I thought it was much worse actually) and it's going to be easier to plan out what I'm actually doing next.
i really like that you have shared all those cool materials and kits with us via pics mate! i have thought of asking you to do just that... but i thought then why put you to all that hassle... thank the lords you did just that^^
specially the blue boxes on the last pic dircetly jumped at me... i see instantly a good project there... nothing really that one has to explain... they just have that archaic blocky look of the DOWPC game... same goes for the arch in the top middle of the pic... that metal one... this looks mighty promising...
where i see some problems and i share your feelings is the fantasy buildings... there is really a heap of work needed to get birdhouses and such things up to a tabletop worth look... tho i really think the very idea is too cool! but i see that is frustrating to have it sitting on a shelf...
the three buildings on the second pic tho i can only picture on someone elses table atm... two spartan or dave come to my mind as they delve in fallout related terrain and minis... these look like the very stuff they would have used for the game... in munda i can´t really see these...
as for all these cool looking pegasus parts and kits... i know...even more work ...but since you said you wanted to keep the parts modular as possible... have you thought of magnetizing the whole lot? could be the work of a lifetime...but i bet this will be stunning and fun to combine in so many way anew...
well i wish you all the luck with your next step mister!
Skalk Bloodaxe wrote:[
Completely random plastics:
The random plastics have some bitz that are pretty cool and I expect I'll find an application for them. These bitz are the least critical of everything I have. There's only one specific (and very low priority) 'project' in this pile (the blue boxes), the rest are truly just bitz.
I see a TON of the Adeptus Titanicus plastic building roofs in there (the cross-shaped pieces). *broken sobbing*
Ah you have some awesome bits to play with... are those pegasus walls the same height as bulkheads? So many possibilities! My favourite bit of scenery in games is the humble riser/baseblock/urban hill thing. You could use those pegasus walls in a couple of large squares with a solid top and bottom, just for placing other bits on top, or connecting together with walkways. Your Warhammer houses and the 3 small plastic ones look like a ramshackle town to me - combined with the bits you already have and you can easily make a small Necromunda settlement, especially if you wanted to make it Ash Wastes, use the GW bits scattered around to tie it together. The birdhouse looks a little hilarious at the moment though, I imagine a retired Lord of Change lives there.
Specifically the hairspray / salt weathering and sponging. Is the idea behind it to remove the salt in layers to reveal paint underneath, or does it remain and provide a 3-dimentional texture? Absolute ignorance on this one, interested in knowing more. Regarding sponging, someone else recently recommended sponging to me as well. It is going to have to be my next technique experiment. Is this a 'craft store' sort of sponge or is this a 'rip off a bit of my kitchen sponge' approach?
Spray the object you want to salt weather with a brown rust colour, maybe dapple some orangey rust onto it as well. Then spray it all over with the worst, cheapest hairspray you can find (important it isnt good quality). Sprink some salt on, any sort works. Wait for it to dry and then spray the whole thing again in the base colour. Light blue works well with orange rust, so does white or light grey. When very dry you get a rough brush (chop the bristles to make it harder) and some water, stab at the salt areas with the wet brush. The water dissolves the salt revealing the rust colour. If the base coat spray is too heavy (eg a primer) it can be hard to get to the rust, so an airbrush works best. Airbrushes are so amazing by the way, I wish I had used one to paint my all my older stuff, it takes like 10 minutes to paint a whole building (excluding changing the paint).
For sponge, use the sort you get in a GW blister pack, or just and fine foam. Tear it roughly and dab it in a bright metal colour then just dab it on a painted surface to give quick paint chips. I painted all my bulkheads like this: spray primer > spray dark red > wash with black ink or payne's grey > dab on rust pigments > sponge on metal chips. It doesn't look as realistic as salt because the chips are on top of the base instead of underneath, but it is so much faster. Rust pigment makes even a rushed paintjob look like it took hours.
As far as the 'long difficult and annoying', for what I am trying to achieve w/ my Necromunda terrain, it's going to be a challenge to find shortcuts. This will also lend for additional detail (cabling, piping, etc) as well as more rivets.
Here's a riviting shortcut (don't tell anyone, I know they are sacred around these parts). Get your plasticard panel, turn it upside down on a soft surface like a cutting mat and place a rounded-tipped metal thing against it (a ballpoint pen might work but there is a special tool, like a tiny icepick), tap the top of the implement with a hammer. This leaves a small indentation in the plasticard that looks like a rivet on the other side. Can do hundreds in minutes. Personally though I just chop a bit of plasticard rod with a craft knife, I cut a few dozen of roughly equal size and then dab say 10 spots of plastic glue on my panel, then pick the rivets up with the point of the knife and place them on the glue. Slower but slightly better looking.
As for piping, that refinery pack is full of it. It takes ages to glue properly but I've used the pipework all over the place (like on my highway) as random detailing.
With a hot glue gun you could get most of that assembled in a couple of evenings!
@ Vik- Glad you liked the layout. And the two items in that lot that you mentioned are definitely worthy of more attention. I'm not sure what I'm going to do w/ those two boxes, but it will likely happen once I get back started on the Necromunda project. I saw them as potential barracks / bunkers, but now I see power plant, chemical plant, PFD Command... some neat ideas running around my head.
The Fantasy buildings are actually really easy to make. I'm on the fence as to what to do w/ them. The plastic houses were intended for an Imperial settlement that was gutted by fire. I’m still not sure what I’ll do w/ them. The magnetization of the Pegasus Gothic is excellent and likely expensive. I think what I’m going to wind up doing is a basic spray / wash for some detail and see how that works. If I’m not completely happy w/ the results I’ll simply accept the fact that they aren’t ever going to be perfect because I’d rather have modular options available.
Thanks for the congrads on my 2k post. Only 13,430 more and I’ll catch up w/ you.
@ Jeffar- Thank you and welcome to the insanity! Glad you like what you see here. More work is coming very soon.
@ dstein- I’m going to keep the random plastic bitz drawer, but will likely cycle things out as I find new / better things to add. I’m going at very least remain within the finite amount of space I’ve assigned for these things. But yeah, I want to keep things that are pertinent or may have an application in the near future.
@ Briancj- Yes, I know. I got most of them in a swap w/ a friend back in 97-ish timeframe. I’ve had them forever, looking to incorporate them into my Necromunda / 40K terrain now, at least they will get used. If I had someone to play Epic with I might put them back together. My friends are cool but they are stuck in the “right now”, no one seems interested in the old games.
@ Bruticus- I believe the Pegasus panels are larger than the Necromunda bulkheads, but I could be mistaken. I’ll check when I get home. I cracked up at the Lord of Change retirement home… I might have to do something goofy w/ that idea at some point.
Thank you for the detailed salt / hairspray method. I am going to try that this weekend if I have the opportunity. Saturday I’m spending all day in the saddle, Sunday I have to do some genuine work around the house. With luck Sunday afternoon will free up some time for me.
I’ve tried the ‘indent’ rivet idea; the plasticard I’m using is too thick for that. What I am thinking about is making a rivet strip w/ plasticard and rivets, do a press mold in my mold set, cast up a few dozen of them, and glue as needed. Either way It’s going to be a task, but the prefabs have the added benefit of a support bar in addition to rivets so maybe the look will sell itself. We’ll find out soon.
@ Galon- Thank you very much. Will be appearing here soon.
@ DemetriDominov- Hi.
Last night I took some time out from things and sat down with a clear objective- try the 'sponge' method and see how it works. I did a test piece first:
I used the corner edge of my kitchen sponge because I didn't have anything else. I can see where a more compact cell sponge would create even smaller / more detailed markings. I I dabbed the corner of the sponge into my rust paint and applied directly, that's where the splotches on the lid and bottom of the barrel came from. I cut the triangle into a flatter surface and used a 'drybrush' method to reduce the surface paint on the sponge and tried again. Much better results. Also tried using the sponge to drybrush, made some very nice streaks and "chipped" effects. Washed it w/ Griffon Sepia, let dry.
Then I tried it on a piece that I'm close to finishing. Same technique as above, but much more intentional and methodical than my usual SOP of 'splob paint everywhere - drown in Sepia'. This is what I was able to achieve:
Bear in mind this was for the sponge test only, neither piece is complete. The "test" piece will be cleaned up a bit and have the detail bitz finished. The other piece that is close to being finished needs more detail and shading.
*Edit- forgot to mention that I painted the bung red on top of the metal base color and then chipped it off w/ a stick. I like how that effect came out as well*
I'm incredibly surprised and quite happy with how my first adventure w/ sponge painting turned out, and you can bet I'll be working with this a lot more to improve the technique. I'm already thinking about pieces I've 'finished' and expect I'll be revisiting them quite soon.
C&C welcomed for sure. Anyone that has advice on how to use this technique better is encouraged to share.
That looks really good. You've dabbed brown/rust over metal right? Then washed it? It's a very natural looking rust effect, I will have to try that. I tend to use the sponge to dab bright metal over a base colour like black or red, just a small amount on the corners or edges to give chips where it looks like the base colour has cracked off. Not really tried it to do rust, but I like how yours looks.
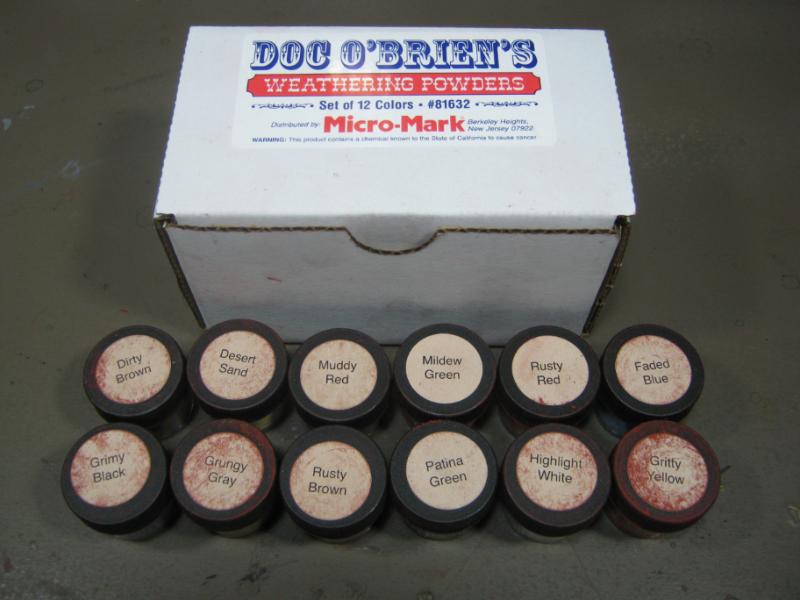
Oh and I am really taken with the forgeworld ash weathering powder as well, a wash with that and it makes everything look old and dusty.
@ Bruticus- Ah, good point, and I missed explaining a huge and important step entirely. I based the barrels flat black first, then drybrushed Bolt Gun on them until I had full coverage. At that point is where I started the rust.
I've read about powders many times but never considered them. I'm starting to think about them a lot more now. I remember reading somewhere that you can crush up some sort of charcoal colored pencils that does (almost) the same thing at a fraction of the cost of actual powders. Would have to find that article again, but it bears investigation.
I'm going to try your method (paint dirty, sponge clean) and see which way I like better. I can certainly see the application w/ vehicle damage.
Maybe I'm getting ahead of myself, but I feel like I'm right on the precipice of "the next level" for my modeling skill. If nothing else, I feel a *lot* better about where this project is going now. Massive improvements are on the horizon.
Yeah I think weathering powders are just crushed up chalk or pastels, but that sounds both messy and time consuming to get the right hues. I swear by MiG old rust and new rust. I've used it extensively on all my scenery and have barely made a dent in the bottles. I also have their black smoke one but rarely use it. You can see a lot of my scenery is sprayed black > painted in watery boltgun metal for speed > liberally daubed with pigments. Then I either sponge on some mithril silver or paint on some as scratches. Some of my walkways use corrugated card done in this technique and it looks so cool, like old rusty metal sheeting.
You are in an exciting place, I am excited for you. Mainly cos you have a huge pile of cool bits and you're going to start making some great stuff I expect.
In gameplay terms, the single best type of terrain you can make is a riser/urban hill. They make the board look so much better when everything is not at a uniform height, and break up lines of sight into cool corridors.
I'll skip on the 'home brew' powders and try the commercial ones that are made for that purpose then. Money is always an important consideration, but time is more valuable to me. I don't want to spend hours trying to figure out the right mix, or worse yet, settle for "close enough" because I got sick of trying.
I fully intend on doing some solid riser platform. The modeling possibilities are endless, they can be incorporated w/ my Necromunda terrain easily, and would make excellent objective locations. I have an idea how to do this w/o 'sacrificing' any buklheads or panels. I've already tried a test and it worked out reasonably well. I'll go into more detail once I actually make something w/ it.
Thanks for following along. Your assistance has been invaluable and has really kick-started my motivation.
I made one riser out of bulkheads, and several more just at 2" height. I would say 2" is the best height, tall enough to block LOS, climbable but at half movement and you can jump down from it relatively safely. Barrels or crates stacked next to it can also provide a way up or down.
Some of the best moments in our games come with a heavy sighting down a long firing corridor between two risers. The new overpass is also providing some amazing clashes. Basically anything that prevents the whole game just taking place on board level with only the odd guy going up a ladder is the way to go.
The rust looks good Skalk, one thing I'd recommend is doing a darker rust colour first and then a lighter one in a few places to give it a bit more depth.
@ Bruticus- Riser platforms are the order of the day very soon. I figured something out this weekend that had eluded me for some time, and the prototype looks decent. I have a few things to finish before getting to this project but I expect to make a few of these at least.
@ Vik- I'll be using this more and more to get better at it. And I've already thought about raiding my wife's makeup bag. And I also had an idea for rust powder this weekend that is 100% free and plentiful. No doubt someone else has already done this somewhere, but I'm not going to look it up, I'm going to simply have a go at it myself and see how it works. I will post the results good or bad once I have somehting to share.
@ GiraffeX- Point well taken. I tried it this weekend and I think the results came out well. Will post pics tonight or tomorrow, was not able to get any pics or update this weekend.
@ Galorn- Can't check the mail until tomorrow afternoon. I'll post pics as soon as they arrive.
@ Briancj- Can't just yet, but it is an idea I won't discount.
Got some work done this weekend but wasn't able to post pics. I'll upload tonight if possible. Basically what I worked on was items I could practice the "rust" effect on, including some older pieces that were considered "finished". I thought about keeping them "as is" to show the evolution of my terrain building, but these pieces I decided to bring up to the same level as the things I am working on and how I'll be doing things going forward.
I have ideas on what to do next, but I really need to finish the crates first. There's 3 or 4 of them left. So close to being done. It will be a huge "win" for me once they are finished and I don't want to keep passing them over or they will wind up in a bitz box again and never get used.
Played a game this weekend, 2K each side, Orks vs. Death Guard. It was a bloody scrap and I made a number of stupid mistakes, but overall I am satisfied w/ the results as we fought to a draw and for the very first time ever I was able to take down his Nob squad (including a Painboy and Warboss). If the game had lasted to turn 6 I would have lost, but it didn't and I'll take the draw. Not sure I was ready to be "social" again because I displayed some moments of poor sportsmanship (mostly complaining about how much I dislike wound allocation shenanigans) and how tired I am of 33 flavors of vanilla I have to choose from w/ CSM. Overall it was a good time and I'm looking forward to another game, though in all honestly if that doesn't happen before 6th Ed I won't be upset. May be hijacking my own threrad, and I try to keep this to myself because I know I'm in the vocal minority, but I have strongly disliked 5th Ed since the first time I played it. I announced more than once to my game group that "this is the last 5th Ed I am playing" but I kept getting dragged back in becasue I like the guys and 5th is what was getting played. I'm likely putting too much expectation into 6th, but from what I've read online it's a huge change and it is upsetting the Tourney players. That's the best thing I've read yet. Muuahhaha!
Forgot to mention that I tried somehting completely new to me and I'm looking forward to seeing what I can do with it overall. I bought some flat rust primer spray (the kind you see sprayed over huge bondo patches on cars) and tried it out on a block of wood, it looked amazing. I tried it on one of my CoD ruins that isn't finished yet and I think it came out of, needs detail works and practice w/ the spray can. Overall I think it's going to work out in the right application and is another step toward making better terrain faster.
Will have pics up tonight of all the above. Thanks for reading!
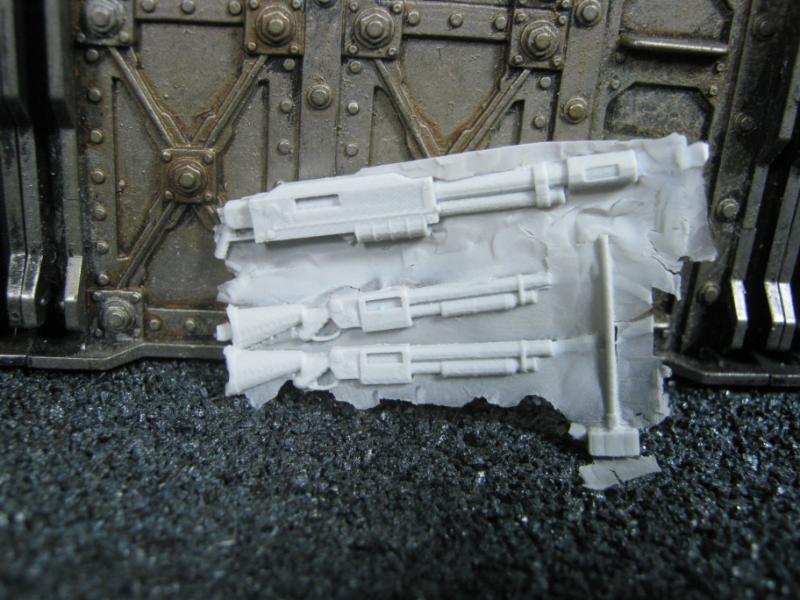
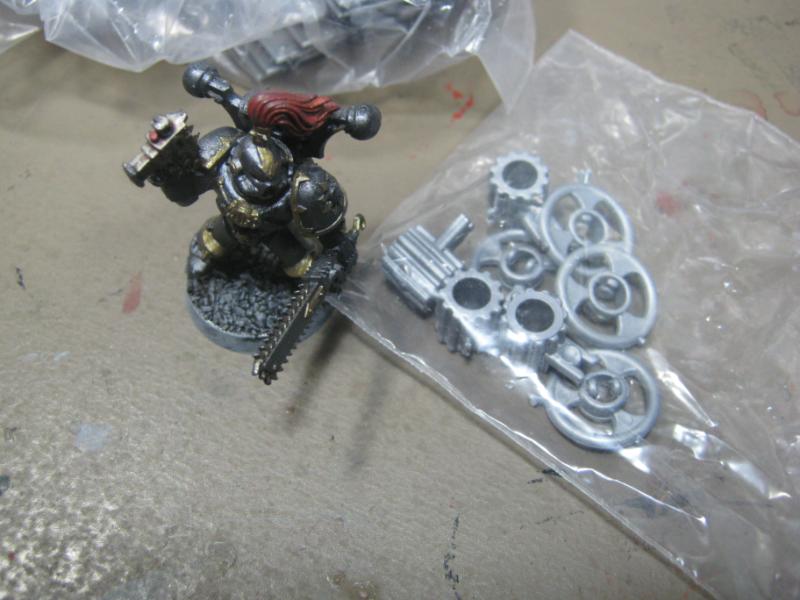
This is a couple bitz I had for my Necromunda terrain way back. I've made what I hope looks like a node or panel box or something like that. The smaller round thing I was envisioning as a generator or an AC unit. The barrels are there because I can't make myself throw them away but man I am really starting to hate those things. I think before this piece is done it will have different barrels. But yeah, I'm pretty psyched on it so far:
Next pic is of my attempt to use darker / lighter shades of brown for a layered rust look. I also tried it on a barrel I'll be showing further down. C&C on how it turned out?
This isn't 100% done but it's something I've been working on between crates and barrels and I'm close enough to being done that I'm looking for some C&C to give it the finish I'm going for. I know I need to do some cleanup on the concrete foundation (trying to make it look concrete) and then shade a bit (thinking about a couple washes and then a light white drybrush over it) and I know I have some detail on the hatches to finish, a little correction here and there (huge photos are way less forgiving than the naked eye) and I'll be ready to put the finishing touches on it that will complete it.
Here's the different barrels I've been working on. Barrel on the left is another example of my attempts at the darker / lighter brown recommendation that GiraffeX shared. I like the distinct contrast of the two colors, and it has not been washed w/ anything. That's Bolt Gun Metal, Pactra Dark Brown, and Reaper Chestnut Brown. The barrel on the right is the 2nd original "test" I did, now with a slight upgrade (I hope). I like the dead dark rust, very dirty. Has been washed a couple times.
Note that the barrels change places in this photo (R to L)
I know I will do better than this and I'm not going to lose sight of that. But right now I'm not bumming on anything- I'm pretty psyched with where I am at. As far short I am of my expectations, I am far beyond the standard previously accepted. I'm heading in the right direction. Just need practice and all the ideas I can get from you all.
That's for this one. I have another rust project going right now, is my first test w/ salt. I'm absolutely certain that I have gone horribly wrong with this, but I promise to share the pics anyway. If nothing less it will be a lesson learned. But... I could be completely wrong and it could look amazing. Hard tellin' not knowin'. Will know soon. It's drying right now. I'm logging off for now but I'll be able to post how it went tomorrow. Won't have picks until tomorrow night.
The salt test came out ok I think. Not what I expected, good or bad. I can see the idea behind the technique and I can see that w/ some practice it is going to be a valuable skill to use on specific projects. I'll post pics tonight w/ a "step by step" of what I did. The results are varied on each side, was mostly intentional but I know some of it was just happenstance. In all things, Chaos still reigns.
I found salt weathering to be a lot of fun, something about processes where you don't know how it will look until the final stage where you reveal the finished thing. I am not sure it is very time effective though.
That recent piece looks good. If I may make a suggestion, I think you could get good results painting some metal objects in non-metallic colours, like charodonite grey. Then paint metal scatches and chips on it. Too much boltgun metal looks a bit dull imo.
I think it can be tough to be sporting if you don't play much, but if you have lots of games then you can afford to be more relaxed and groovy about the outcome.
I've not played 5th edition but I lost interest in 40k a long time ago, but from my POV it seems too abstract to me, with models dying too easily. And generally with 40k the scale seems slightly wrong for the sort of forces you use - battle reports with a bunch of tanks and even fliers crammed onto a tiny board look pretty ridiculous. I prefer either squad based where every model has personality like Necro or army sized like Epic, where there is room to maneuver.
@ Bruticus- It is an odd process for sure. I'm going to practice it on different objects (empty soup / vegetable cans come to mind) and I feel I'll get better at this over time. Eventually I'll have a table covered with badly corroded soup cans. Ha.
I've been struggling with exactly what to do when it comes to the primary color of any particular object. I agree that Bolt Gun Metal on everything is dull, trying to break old habits. I'm not sure what to do for colors, though. Yellow and red attract my attention, likely because I can think of quite a few real life examples of abandoned machinery / factories I've seen w/ similar coloring.
The "theme" behind the terrain I'm building is (in 40K) to represent an abandoned Imperial outpost / stronghold, and (in Necromunda / underhive) to represent an area that was heavily industrialized a very long time ago, abandoned for decades or even centuries. The Imperial theme has Shadown Gray as my chosen primary coloring choice but I'm afraid to use it too much. I don't know how to shade or weather it properly, and I feel all of my pieces lack the depth I am looking for.
Here are some examples of work I've seen that have inspired me, and what I would like to be closer to for any "end result" for my terrain projects:
(Photo and model by madmartykmf)
(Photo and model by dsteingass)
(Photo and model by CT GAMER)
(Photo and model by Anung Un Rama)
(Photos and model by Ash1)
Photo and models by Bruticus)
Those are some lofty goals. One thing I've noticed in most of the above examples is that the modelers are incredibly talented w/ painting miniatures as well as getting great results w/ terrain. It does occur to me that I may be aiming higher than my skills can achieve. Not an excuse, just a point to consider.
That said, I'm still going to give this my best effort. I know the old techniques I've been using are adequate for a game table, I'm not a horrible modeler by any means. But to improve I need to set aside the methods I'm comfortable with and open up to learning new things. In order to learn new things, I need to know where to turn to actually learn.
You haven't missed much by skipping 5th Ed. Opinions vary, but that's mine and I'm adamant about it. And I agree with you about stuffing so much onto a small board. I'd like to play Epic again some time. *sigh*
@ Briancj- I used to have a 12X6 when i lived in VA. People didn't like it when they had to reach across the board so much, but man it was wicked fun to put out 5K worth of troops and tanks. I had a Cult of Speed that ripped that table up.
Epic (Use the NetEpic rules, they're great)
Battlefleet Gothic
Firestorm Armada
*ANY* 28mm skirmish game (Killzone, Combat Patrol are my current faves)
Epic would take a bit, as I'd have to scrounge up an army.
One thing I would do if I was doing this sort of project would be to do some google image searching on real life rusty buildings and cars etc and make a montage for reference while your painting.
I find it helps loads to have a visual aid, I do it for all my army projects.
Just for the record, Ash1's stuff is so much better painted than mine it is ridiculous. In fact all that stuff is much more carefully painted than mine, your stuff is more carefully painted than mine!
The thing about weathering powders and techniques like sponging is that they are very organic and when just used quickly they look very realistic. And if you have a consistent colour scheme it just looks very effective overall. My scheme is codex grey for concrete and basing, then I use a dark red and reddy brown rust as the main colour for objects. I use goblin green and iyandun darksun as spot colours, both weathered down a lot. Both those colours look great with the rust, though I think a bright blue would look nice too. I'd also really recommend charodonite grey as it looks great with mithril chips.
I really like the resin power box! Do you know the mfr?
The barrels you don't like look great!
You have to pick a color, any color, not just black or bg metal. You paint it the base color and then mess it up. It's hard, it doesn't look right right away, but if you are patient, it WILL pop when you weather/change the color down. I used an intermediate blue for the necromunda tower base color, then used grays to dull it down.
dsteingass wrote:I really like the resin power box! Do you know the mfr?
The barrels you don't like look great!
You have to pick a color, any color, not just black or bg metal. You paint it the base color and then mess it up. It's hard, it doesn't look right right away, but if you are patient, it WILL pop when you weather/change the color down. I used an intermediate blue for the necromunda tower base color, then used grays to dull it down.
@ Briancj- We keep talking about getting together for a game. I really think before summer is out we should work out details. I'm excited about the idea of an outside APOC game, we have a HUGE pavilion tent so we could play rain or shine. Have to get the guys on the same page and make that happen.
@ GiraffeX- . Here, let me do that again- That is a great idea and ESPECIALLY since I shared a bunch of sites w/ dstein for the exact same reason you'd think I would have thought to use them for myself as well. This was the most distinct "duh" moment I've havd in a while. Thanks for the boot. I'll get on that.
@ Bruticus- Ash1 shares the top spot of my "best modelers I've ever seen" list including movie set / historic dioramas modelers. Don't sell yourself short, not at all. The entirety of your work is excellent, and you have been a huge inspiration / help for me. The work I posted from other people were all for something a bit different. Everything I posted is a target goal, a standard I have set to work towards. Even if I never reach those goals, the positive improvement I'll achieve will be significant. I'll give those color schemes / techniques a try.
@dstein- Actually it's the back of a toy truck I picked up at a yard sale. And I just had a thought. If you would like one (or 10, or however many) and it would be a realistic option, I'd be 100% ok w/ and completely willing to take it apart and mail it to someone to be molded / cast. You have more contacts (and influence) than I do, so if you can talk someone into doing this I'll mail it to you w/ that box of other stuff I'm supposed to be mailing you (like 6 months ago or something) and then everyone gets one. Or 10. Whatever. That barrels are decent for what they are but I sincerely do not like them next to this box. In fact last night I removed and replaced them w/ the barrel I used for my rust test. I'm going to try using Shadow Gray as my cohesive color for my terrain. Changes are coming.
Galorn- See my offer to dstein above. If you're interested I'll post it this weekend. I have a few things to send out anyway.
Here are the photos for the salt test I did. I started out with the battery enclosure I took from an aircraft carrier playset. Barrel is for scale:
I based it with flat rust then let dry. I really like this color and the flat finish / texture is really cool.
Next I soaked the model w/ cheap hairspray and randomly salted it to taste. I missed a few photos for some reason, so skipping ahead here it is w/ a top coat of aluminum spray w/ a light and random spray of black and rust under it.
Once everything was mostly dry I knocked off the loose stuff bny tapping on the table, then I brushed off what would come next w/ a dry 2" paint brush. The model was pretty gross at this point so I rinsed it off in the sink under cold water and would up taking abit more off the top than I had wanted but I'm going w/ the experience as "lesson learned". Here are pics of the final result from the salt test. No other work has gone onto this (no washes, highlights, etc).
I think with some practice I'll get better at this, and with some touch-ups I can make this test piece look pretty decent. I think I did the colors in the wrong order, but not sure? C&C again very welcomed.
I would have had those pics up last night like I promised, but I had unexpected company (Feldenglas) came to visit for a while and the three of us (me, Feldenglas, and ktbb22) started talking about playing Necromunda. After a while Feldenglas said he doesn't like Necromunda as much as Mordheim so we discussed that an suddenly my gears were jammed into reverse and I did a complete 180 on everything I've been working on, thinking about, planning out, etc.
So, it looks like at very least we'll be playing some "one off" games of Mordheim!!! If I can keep this going "campaign style" I'll be wicked happy.
That said, you can likely guess where my Terrain project is going, starting right now.
Group shot:
Closeups:
I was ready to throw these away because they had no application in anything I was doing in the foreseeable future, and a few days later they have become the primary focus of all of my terrain building. I have almost no terrain for Mordheim anymore, and really the majority of it that I had was the cardstock that came w/ the original set. I didn't get to the point of a lot of scratch builds.
So yeah! This is exciting. I am going to really enjoy this project. It will be an amazing change of pace regarding building materials and colors used, but I already see numerous instances where I'll be using the new techniques I'm learning. I'm really looking forward to making the walkways, staging, random barricades, etc. Also looking forward to using some scenery flock and static grass to break up the look of things. I might even use my water effects kit.
So many possibilities, and such a solid platform to start from. I am all of a sudden REALLY happy to have kept all the Fantasy projects (so everyone that said "keep them", you were right) but the best part (for me) is that I'm still keeping my word regarding how I am going to work on my projects. The Fantasy buildings are on my "on deck" shelf and the Necromunda projects are in the same drawer the Fantasy stuff came out of. This project will cost me nearly nothing. I have everything I need already.
I will eventually get around to painting up some new Mordheim figures, but for now I'm going to crank away at this and create some really awesome stuff. So stay tuned, a huge shift and a bunch of things you've never seen from me are on the way.
That salting experiment is a success if you ask me. However I think you should take a look at actual weathered metal. There are three or four stages - the metal, (either rust or non-rusted but exposed metal), the undercoat and the basecoat. What you have done is chip off the metal to reveal rust, which is not what happens in real life. Instead of spraying with metal you should spray it with a basecoat colour like grey or red, then when you chip it off it looks like the basecoat has come off and the metal underneath has rusted.
If you look at Ash's stuff he has the green basecoat, the brown metal and he paints an edge highlight on his patches on that orangey colour which represents the undercoat. This is way more effective than if he was painting metal over brown.
Likewise when you do the sponge technique, if you use a basecoat of blue then you sponge on either metal or rust to show where the basecoat has come away. A newer object would be say, enchanted blue basecoat with dark grey chips to show how the undercoat is exposed, or metal chips where the metal has been exposed. An older object would be blue with brown chips showing rust. The fresher the chip the less likely it would have rusted.
The only problem with the sponge method is that you are putting the chip on top of the basecoat which is not realistic, while with salt it is the correct way around.
PS. In the Doom of Severus Prime thread there is a video showing the hairspray method. He uses brown for rust as the metal layer and then green as basecoat. He doesn't use salt but it's the same technique, salt is just one way of revealing the metal layer.
What you have got is a kinda all over corrosion with no basecoat left. For this look I would not use either sponges or hairspray but would simply use a lot of weathering powders and washes.
Good luck with your Mordheim stuff - I would look at how to make scenery that works every game, like generic stone risers or sewers.
Skalk Bloodaxe wrote:@ Briancj- We keep talking about getting together for a game. I really think before summer is out we should work out details. I'm excited about the idea of an outside APOC game, we have a HUGE pavilion tent so we could play rain or shine. Have to get the guys on the same page and make that happen.
@ GiraffeX- . Here, let me do that again- That is a great idea and ESPECIALLY since I shared a bunch of sites w/ dstein for the exact same reason you'd think I would have thought to use them for myself as well. This was the most distinct "duh" moment I've havd in a while. Thanks for the boot. I'll get on that.
@ Bruticus- Ash1 shares the top spot of my "best modelers I've ever seen" list including movie set / historic dioramas modelers. Don't sell yourself short, not at all. The entirety of your work is excellent, and you have been a huge inspiration / help for me. The work I posted from other people were all for something a bit different. Everything I posted is a target goal, a standard I have set to work towards. Even if I never reach those goals, the positive improvement I'll achieve will be significant. I'll give those color schemes / techniques a try.
@dstein- Actually it's the back of a toy truck I picked up at a yard sale. And I just had a thought. If you would like one (or 10, or however many) and it would be a realistic option, I'd be 100% ok w/ and completely willing to take it apart and mail it to someone to be molded / cast. You have more contacts (and influence) than I do, so if you can talk someone into doing this I'll mail it to you w/ that box of other stuff I'm supposed to be mailing you (like 6 months ago or something) and then everyone gets one. Or 10. Whatever. That barrels are decent for what they are but I sincerely do not like them next to this box. In fact last night I removed and replaced them w/ the barrel I used for my rust test. I'm going to try using Shadow Gray as my cohesive color for my terrain. Changes are coming.
Galorn- See my offer to dstein above. If you're interested I'll post it this weekend. I have a few things to send out anyway.
Here are the photos for the salt test I did. I started out with the battery enclosure I took from an aircraft carrier playset. Barrel is for scale:
I based it with flat rust then let dry. I really like this color and the flat finish / texture is really cool.
Next I soaked the model w/ cheap hairspray and randomly salted it to taste. I missed a few photos for some reason, so skipping ahead here it is w/ a top coat of aluminum spray w/ a light and random spray of black and rust under it.
Once everything was mostly dry I knocked off the loose stuff bny tapping on the table, then I brushed off what would come next w/ a dry 2" paint brush. The model was pretty gross at this point so I rinsed it off in the sink under cold water and would up taking abit more off the top than I had wanted but I'm going w/ the experience as "lesson learned". Here are pics of the final result from the salt test. No other work has gone onto this (no washes, highlights, etc).
I think with some practice I'll get better at this, and with some touch-ups I can make this test piece look pretty decent. I think I did the colors in the wrong order, but not sure? C&C again very welcomed.
I would have had those pics up last night like I promised, but I had unexpected company (Feldenglas) came to visit for a while and the three of us (me, Feldenglas, and ktbb22) started talking about playing Necromunda. After a while Feldenglas said he doesn't like Necromunda as much as Mordheim so we discussed that an suddenly my gears were jammed into reverse and I did a complete 180 on everything I've been working on, thinking about, planning out, etc.
So, it looks like at very least we'll be playing some "one off" games of Mordheim!!! If I can keep this going "campaign style" I'll be wicked happy.
That said, you can likely guess where my Terrain project is going, starting right now.
Group shot:
Closeups:
I was ready to throw these away because they had no application in anything I was doing in the foreseeable future, and a few days later they have become the primary focus of all of my terrain building. I have almost no terrain for Mordheim anymore, and really the majority of it that I had was the cardstock that came w/ the original set. I didn't get to the point of a lot of scratch builds.
So yeah! This is exciting. I am going to really enjoy this project. It will be an amazing change of pace regarding building materials and colors used, but I already see numerous instances where I'll be using the new techniques I'm learning. I'm really looking forward to making the walkways, staging, random barricades, etc. Also looking forward to using some scenery flock and static grass to break up the look of things. I might even use my water effects kit.
So many possibilities, and such a solid platform to start from. I am all of a sudden REALLY happy to have kept all the Fantasy projects (so everyone that said "keep them", you were right) but the best part (for me) is that I'm still keeping my word regarding how I am going to work on my projects. The Fantasy buildings are on my "on deck" shelf and the Necromunda projects are in the same drawer the Fantasy stuff came out of. This project will cost me nearly nothing. I have everything I need already.
I will eventually get around to painting up some new Mordheim figures, but for now I'm going to crank away at this and create some really awesome stuff. So stay tuned, a huge shift and a bunch of things you've never seen from me are on the way.
Thanks for reading!
I'd absolutely be willing to make a mold to copy that little detail piece. and send it along. Hmmm I'm also up for a road trip to game. It would just require a little coordination to get the appropriate time off of work and arrange coverage...
Your color selection is PERFECT!
To get ASH1's effect now, you need to brush paint a highlight on one edge of each of those blobs of red, that is how he gets that 3D rust effect- it makes it look like it is peeling with that forced shadow.
@ Bruticus- I agree that the paint was applied in the wrong order. I'm going to go w/ this piece because it is still decent and already above the standard I've been accepting up to this point. Next one I do will be silver / light black for shade, heavy salt, rust. I'm going to try this for weathering on wood as well.
Ash does a lot with his layers. What I thought was layered and chipped / worn paint was actually painted on by hand. I attempted it a couple times but it was nowhere close to what I thought it would look like so I passed on it. I may try it again. His recommendation (direct copy / paste) was:
Ash1 wrote:Black primer; Tamiya TS-61 Nato Green or TS-2 Dark green; dry brush with what looks like a pale grey; paintchips - outlined some sort of yellowish colour poss Vallejo Japan Uniform; The dark area of the paint chips either a mix of black and dark brown or Vallejo German cam.black/brown. The muddy bits of the bridge were sprinkled with sand whilst the primer was wet; once all the other stuff was painted a lot of brown earth tones were painted, brush shreddingly dry brushed; followed by a liberal dose of pigments - varnish to taste.
That's quite the recipe. But it's really cool that people who have this talent / experience are willing to so openly share.
I'm going to have to work w/ and experiment w/ the salt / sponge method. Having only a few days experience w/ it I'm still in the absolute novice stage. Wrapping my mind around reverse exposure is going to take a little while.
I'll be posting my Mordheim stuff as a "step-by-step" WIP w/ plenty of opportunity to C&C. I'm already thinking about dimensions and structure. This is going to be a good project to experiment with new construction ideas and apply the new painting techniques I've been learning. And yes, I'll be looking for terrain that can be on the table almost every game and still provide enough diversity as to not make it a static / boring layout.
@ Galorn- Wife said the package arrived today, pics tonight! And just to be sure we're talking about the same bit, let's verify w/ dstein which thing he's talking about. I thought he was talking about the large silver box, but I don't know for sure.
@ dstein- Wow man, thanks for the compliment. Just to be clear, which bit were you asking about?
Ok. That is a great video for information and process, but there's absolutely no way you'd ever convince me that it isn't a man in drag. It reminded me a lot of a Monty Python skit. I kept waiting for the Spanish Inquisition to appear.
I'll watch it again though. Thank you for sharing that.
Well, everything rusts in different ways, and location and environment and humidity obviously play a part. I have see metal storage boxes rusted in just this very way before. With maybe a wash, and some rust streaks coming down the sides, it will look great!
@ RSJake- Thanks for the words of encouragement! I know I've been running you all around today. Bottom line is I'n highly motivated to find new and effective methods to create the best terrain I possibly can, and this is another example of how that process is going for me. I'm making better terrain today than I did a month ago. That terrain is better than the stuff I did 6 months ago. The terrain I make in 3 months from now will be even better. Attention to detail, more "real world" effects, and practicing the techniques my role models use will get me as far as I can go. I'm feeling really good about all of this, and it's been a long time since I've genuinely felt this way.
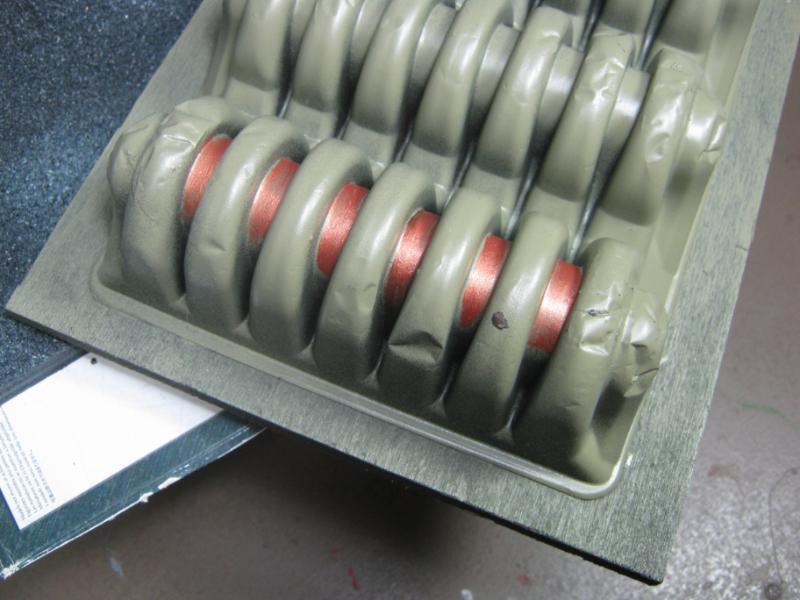
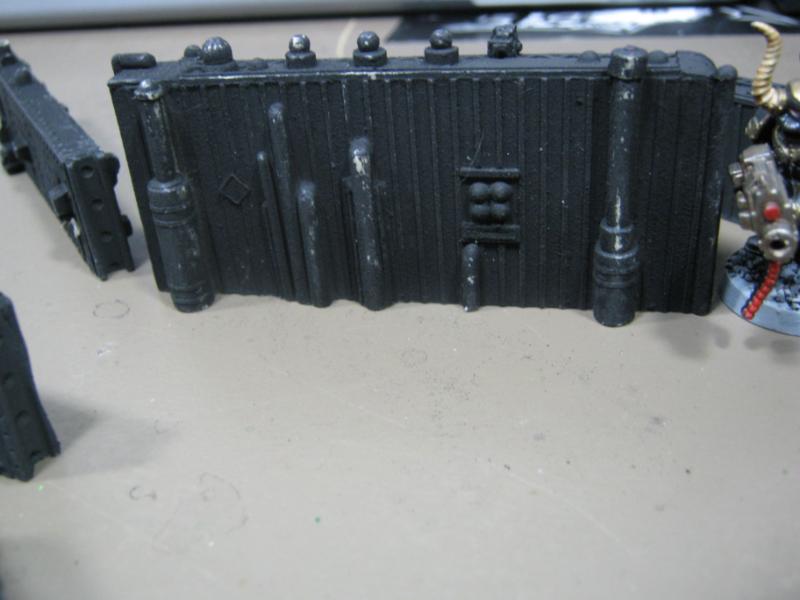
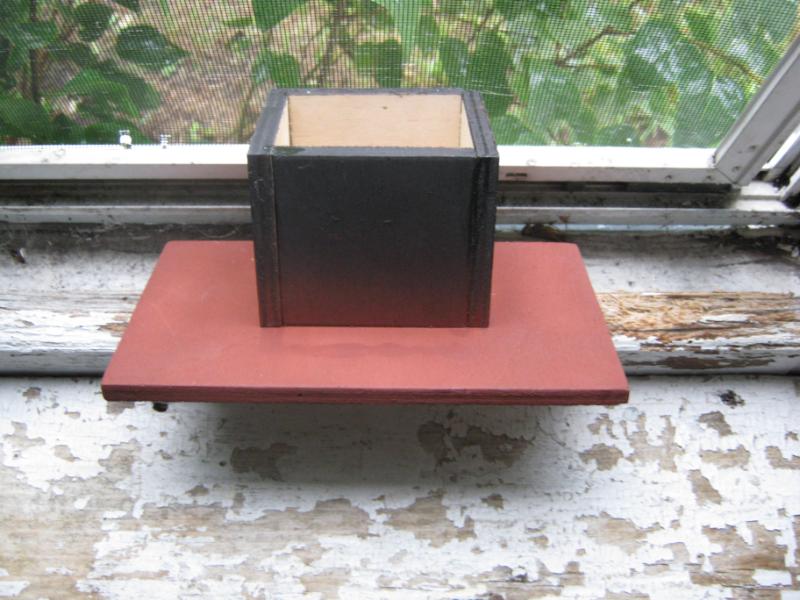
SUPPLY DROP!!!
So the other day Galorn asked if I'd like him to send me a wall section. I said "Sure, that would be cool!" because who doesn't want a free sample of terrain goodness?
A few days went by and then a few more went by because my wife only goes to the PO once a week (or less)... but today she sent me a msg that I had a huge heavy box. Hmm. Ok.
I got home tonight and indeed there was a huge box w/ my name on it sitting on the kitchen counter. The return address didn't say Galorn, but I figured out all by myself that it was from him. I picked it up and woah... yeah, it was heavy. $13 USPS heavy. I took into my hobby room and opened it up.
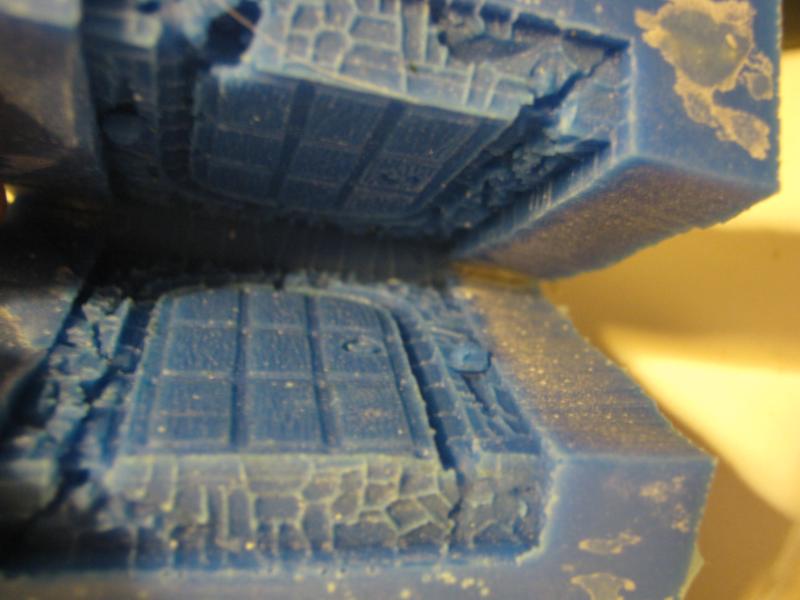
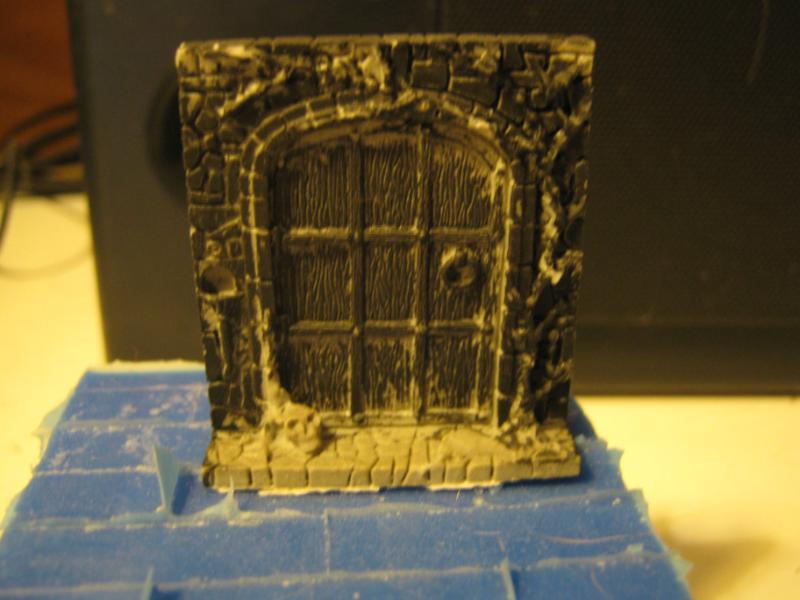
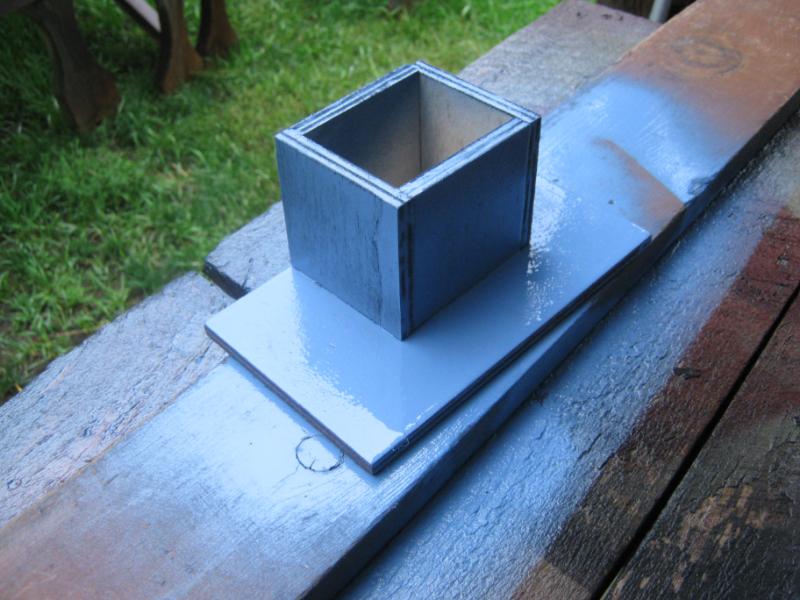
This is what he sent:
Unsure if the USPS broke this or if it was a "factory 2nd" casting. Either way it is an easy fix and I'm all over it later tonight.
Looks like the Mordheim project just got bumped back a bit. I recently accused dsteingass of 'project schizophrenia'. I think I'm in good company.
More coming later. I'm off to wash some resin and prime some plaster!
Skalk Bloodaxe wrote:@ RSJake- Thanks for the words of encouragement! I know I've been running you all around today. Bottom line is I'n highly motivated to find new and effective methods to create the best terrain I possibly can, and this is another example of how that process is going for me. I'm making better terrain today than I did a month ago. That terrain is better than the stuff I did 6 months ago. The terrain I make in 3 months from now will be even better. Attention to detail, more "real world" effects, and practicing the techniques my role models use will get me as far as I can go. I'm feeling really good about all of this, and it's been a long time since I've genuinely felt this way.
SUPPLY DROP!!!
So the other day Galorn asked if I'd like him to send me a wall section. I said "Sure, that would be cool!" because who doesn't want a free sample of terrain goodness?
A few days went by and then a few more went by because my wife only goes to the PO once a week (or less)... but today she sent me a msg that I had a huge heavy box. Hmm. Ok.
I got home tonight and indeed there was a huge box w/ my name on it sitting on the kitchen counter. The return address didn't say Galorn, but I figured out all by myself that it was from him. I picked it up and woah... yeah, it was heavy. $13 USPS heavy. I took into my hobby room and opened it up.
This is what he sent:
Unsure if the USPS broke this or if it was a "factory 2nd" casting. Either way it is an easy fix and I'm all over it later tonight.
Looks like the Mordheim project just got bumped back a bit. I recently accused dsteingass of 'project schizophrenia'. I think I'm in good company.
More coming later. I'm off to wash some resin and prime some plaster!
That broke in transit... not the USPS's fult I probably could have packed it better. On the plus side the best adhesive to fix it easily is Elmer's glue.
dsteingass wrote:Galorn gives hefty samples!
I need to build up the ones he sent me...bad Dave!
Skalk Bloodaxe wrote:
This is a couple bitz I had for my Necromunda terrain way back. I've made what I hope looks like a node or panel box or something like that. The smaller round thing I was envisioning as a generator or an AC unit. The barrels are there because I can't make myself throw them away but man I am really starting to hate those things. I think before this piece is done it will have different barrels. But yeah, I'm pretty psyched on it so far:
Hey Skalk! Sorry I've been away for a while - just finished my finals, so I've been a bit off the radar This piece is absolutely fantastic - i immediately thought of one of those power junction boxes or small generators you always see off main streets. The mini on top is pretty ace too - home brewed spyrer? What don't you like about the barrels though? They look good!
The hair spray technique I have heard great things about and have been meaning to try - I've heard you can get some great effects if you concentrate the salt on edges and surfaces that would get chipped. Yours looks brill anyway, especially if you haven't even touched it up yet! Can't wait to see what you do with all the wall sections
@ RSJake- Yeah, a "sample". It's like going to the ice cream shop to get a taste of Crunchy Frog and having them give you a gallon. I am wicked psyched.
@ dstein- oh man. Yeah, you really should. It's really awesome stuff. The "gothic arch" piece has so much potential w/ a project I already started... I think my first few games of Mordheim are going to be on a cardstock table.
@ Galorn- Dab of Super Glue and I was back to action. See below for more info!
@ Scarper- No worries man. It's Dakka, not life. Glad you are liking the "mystery utility company box". I have no idea what it is or what it is other than some random thing that looks cool on the table. Ha. As far as the salt thing goes, absolutey try it. You already have mad modeling skills, this is something you'll pick up quickly and master within a few pieces.
Last night I spent some time cleaning up and base coating a few pieces. I took pics of everything and I'll upload tonight if I can. Things are getting a bit hectic here again and it's messing w/ my bike and modeling time.
I started working w/ the large wall sections. I realized after starting them that I am missing a "back wall" so I'm likely going to cut one of the broken pieces and make it work to fill things in. I based black, sprayed silver, hairspray / salt, rust, more hairspray / salt, sprayed gray, then light spray white. Will know how it went tonight (if I get the chance).
In other news, I'm picking up the 6th Ed rulebook 07/01. I know 6th will have challenges and issues, but the fact that is isn't 5th Ed already makes it better by default. I've been reading leaks online and am loving what I've seen, such as a vehicle can move up to 6" and still shoot ALL of its weapons. That was driving me mad. Nothing like having 220 points of Land Raider playing the role of static Lascannon battery, or as an "assault vehicle" that does NOTHING to soften up the target before my Plague Marines charge into certain death. Feh.
Buh-bye 5th. Take your well-deserved seat next to Windows Vista, Ubuntu anything, and the default Android email client.
@ inmygravenimage- I did. Not sure what that is exactly yet (meaning how it works) but looking forward to seeing it. Looking forward to all of this.
Just text this morning, which is too bad becasue I managed to get a lot of modeling done last night. I did some more work on the Galorn walls, and I also really cranked on my Mordheim buildings. I'm going to 90% finish the buildings and then start work on scaffolding / walkways / bridges. That part I am expecting will be awesome fun because it will go fast and look great. Then I'm going to bring it all together get to playing!
Tonight I'll be taking a bit of a break from building / painting so we can roll up new warband sheets. Getting pretty excited about playing this game again. I haven't played in 13 years.
Automatically Appended Next Post: Been spending a good part of the afternoon surfing images for ideas / inspiration, and man I found plenty. Really looking forward to this.
One thing that was really cool was I found a map of the city of Mordheim. Very similar layouts but each district has at least one distinctly unique landmark. I'm going to focus on general / generic buildings at first, but if I keep going on this project I'm eventually going to try try building a couple of the more interesting ones like Cemetery of St. Doffer and Middle Bridge (that would be an awesome scrap... bridge battles are brutal and unforgiving).
Another thing I am liking is that the buildings aren't towering spires of of ridiculousness. Vast majority of residential / commercial buildings seem 2-3 stories, 4 at most (and those are rare). Government and specialty buildings are larger, but they are the extreme minority. Most of the city seems to be made up of reasonably sized building. I'm also noticing that the most significant damage is in the vicinity of the Pit and it doesn't seem to spread outward a lot. What that means for me is a lot of regular buildings w/o having to make the CoD- Old World layout to have a decent table. I'll have the random ruins, but they won't be the majority of my available pieces.
Anyway, just sharing what's on my mind. Will make a point of pics tonight.
Skalk Bloodaxe wrote:@ inmygravenimage- I did. Not sure what that is exactly yet (meaning how it works) but looking forward to seeing it. Looking forward to all of this.
Just text this morning, which is too bad becasue I managed to get a lot of modeling done last night. I did some more work on the Galorn walls, and I also really cranked on my Mordheim buildings. I'm going to 90% finish the buildings and then start work on scaffolding / walkways / bridges. That part I am expecting will be awesome fun because it will go fast and look great. Then I'm going to bring it all together get to playing!
Tonight I'll be taking a bit of a break from building / painting so we can roll up new warband sheets. Getting pretty excited about playing this game again. I haven't played in 13 years.
Automatically Appended Next Post: Been spending a good part of the afternoon surfing images for ideas / inspiration, and man I found plenty. Really looking forward to this.
One thing that was really cool was I found a map of the city of Mordheim. Very similar layouts but each district has at least one distinctly unique landmark. I'm going to focus on general / generic buildings at first, but if I keep going on this project I'm eventually going to try try building a couple of the more interesting ones like Cemetery of St. Doffer and Middle Bridge (that would be an awesome scrap... bridge battles are brutal and unforgiving).
Another thing I am liking is that the buildings aren't towering spires of of ridiculousness. Vast majority of residential / commercial buildings seem 2-3 stories, 4 at most (and those are rare). Government and specialty buildings are larger, but they are the extreme minority. Most of the city seems to be made up of reasonably sized building. I'm also noticing that the most significant damage is in the vicinity of the Pit and it doesn't seem to spread outward a lot. What that means for me is a lot of regular buildings w/o having to make the CoD- Old World layout to have a decent table. I'll have the random ruins, but they won't be the majority of my available pieces.
Anyway, just sharing what's on my mind. Will make a point of pics tonight.
Here's pics of the Galorn walls from the other night, and a few WIP pics from the Mordheim project last night and this morning.
Salt and light wash on door / under windows
Salt method, nothing else:
I really like how the layered look is coming. The 'bubbles' of paint remind me of corrosion that happens under the paint, hasn't eaten through the paint yet but is definitely corroding underneath. I also really like the different degrees of "reveal" I have achieved. Again, much of this was happenstance, but it was part of what I was trying to do and I paid attention to what I was doing, so now I remember and I can replicate this. Still a bit of a challenge to get the color layering right, but I'm thinking I'll do this a few more times before I nail the technique and can intentionally reproduce the same results over and over.
More work on these walls (as well as most of the remaining pieces from the Galorn collection) is going on hold for now because I'm shifting my entire focus to
Here's some WIP shots. These are just the 'blanks' that I'll be adding detail to once the standard builds are completed. C&C is always welcomed and encouraged, especially when I'm at the start of something that I can change for the better. I'll explain the process I'm using a bit in case anyone has questions about what I'm doing here.
Note up front- all the rough edges are going to be hidden by something else. This is the rough-in, finish work is going to hide a lot of the shortcuts I'm taking right now.
Here I'm adding planking to one of my larger buildings. I know it would have looked more "real" if I had cut the 'boards' to look like they were pieced together like a real building. The idea behind these builds is to slap them together as quickly as possible and then create the illusion of detail later. If what I have in mind doesn't work I will have many examples of what not to do next time.
Another quick and dirty time saver. Glue the sticks on way too long, let dry, score w/ an Xacto blade on inside corner edge, bend over next facing wall, glue, and clamp. Move on to next project while this dries.
These two small houses I found in my Woods last night so they didn't make it into the original "group shot" but since I've decided to not use the O-Scale plastics they can take that spot. I'm taking the two and building them into one:
More random WIP shots of progress here and there. Note the marker points on the middle building- those indicate levels measured from the Necromunda bulkhead. This "stock" building will not stay that way long after I get the basic facade finished.
This is the first bit of detail I've done. I did the same thing on both sides. Yes, I've cleaned up the excess / smeared glue. I really like these pics because it's an example of the very minor changes I can employ in my building techniques that is going to make the scale and detail really pop out once I get to the painting stage.
Group shot of the work I've gotten done so far (with Necromunda bulkhead and miniatures added for scale).
That may be if for the weekend, but I'll be back if I can. Thanks for looking, C&C always welcomed and appreciated.
The painting on the Galorn Walls looks great! It really looks like old weathered concrete wall! It even looks like someone got fragged by a shotgun on one of them.
And those birdhouses look GREAT with the sticks added! Nice one!
good to see that the salt and hairspray methode is totally versatile for so many things...
and the mortheimer houses look very good... tho one has to wonder why you cut after glueing? why not measure them and then cut them before glueing... i would have been afraid of ruining the sticks ...
Oh Dood! I KNOW how much fun you are having! Theyre looking great!
hey..a tip for you..with those craft sticks..they are really soft, so if you carve irregular chunky slices out of the edges with a sharp knife..it really gives a great hard edge detail later in painting!!
@ RSJake- I really like how the weathering came out. A bit more practice and I'll start getting semi-consistent results. And thank you for the compliment on the bird houses. I don't doubt that more than just a few people said "huh?". I've made three of them before this and know they will come out decent for WFB, right now I'm curious how the will work for Mordheim.
@ Bruticus- Once again, that completely cracked me up. Were I a more 'diorama' inclined modeler I would completely run with that idea. Thanks for the link, it got me thinking about the stuff I have here and I went digging. See pics later in update.
@ Vik- Hope you had a good holiday. The hairspray / salt thing is going to get used a lot more now that I see the results. Even as a novice with limited application experience I can already see a significant improvement in how my terrain is going to look overall. I will be revisiting some old pieces w/ the method after the Mordheim project winds down. On that note, I cut the sticks after gluing for a couple reasons, but most significant is because it is way faster. This is the 'rough' work part. It doesn't matter if I have a 5mm gap or a .0005mm tolerance, it's all going to get covered up with trim and edging. So I'm ripping through this part to get it done and then move on to the bitz that make people go "ooooooh!!" and "awwwwww!!". As far as ruining the sticks go, the vast majority of time they break where I want them to when they are properly scored first. And for those moments that they do not, that's just an added detail feature!
@ dstein- There's a part of me that has been 8 years old during this project... I used to glue Popsicle sticks together for my army men. Then I did it in school to build dioramas for class projects. Now I'm doing it again. If I ever grow up I am going to be so very disappointed with myself. Regarding the sticks and detail, right there with you and what you are looking for is coming. Check out the walkway below, it's a test of a technique I hope works out because it is quick and really easy.
Havn't had a lot of time to work on this, but wanted to stop by and offer something because I know you are an impatient fickle lot and I need to continuously earn your readership.
First up are some doors I've found. I also have some GW stuff but I didn't include those here today. I am thinking about making molds of these and casting up some. If another else would be interesting in taking on that task I'd be happy to drop any of these in the mail (even the painted ones) and send them along.
This is one of my favorites. Never painted it because I never got around to it, was using these for AD&D. It has finally found a higher purpose. I absolutely need to some impression molds of this.
front:
back:
Next are smaller doors I once had completely painted, THEN decided I wanted to make molds of them, had no idea what I was doing, squished them into a splop of latex caulk, ruined my paint jobs, took a long time to clean up the damage. If anyone would like to try it the PROPER way, PM me.
These didn't get the same treatment as those above.
This I would sacrifice the paint to have a few copies of it. It's wicked cool.
These walls are pretty awesome. Low and thin, nice for walkways, etc.
I have a bunch of this stuff. not looking to cast more, just adding it here as an example of the level of detail I'll be adding here and there once I get to that phase of this project.
Here's a pic of something I'm actually working on. It's a walkway w/ some detail work. Believe it or not, the planking was 1 single piece of wood that I cut grooves into to make 'boards', even cut a few out to show wear / disrepair. The nail holes were done w/ one of my sculpting tools, just a sharp point. As you can see, this technique would look awesome on my buildings as well. That part is coming soon.
To answer the question of "why so big?", it's a game play issue. These guys have to fit on at least SOME of the walkways:
Last pic is something my son made for me in '09 while he was sitting w/ me doing some modeling stuff. I'm going to put this out there somewhere 'as is'.
I have a lot more stuff coming. Getting really excited about making my first walkways and scaffolding. Thanks foir reading, more coming later!
Skalk Bloodaxe wrote:@ RSJake- I really like how the weathering came out. A bit more practice and I'll start getting semi-consistent results. And thank you for the compliment on the bird houses. I don't doubt that more than just a few people said "huh?". I've made three of them before this and know they will come out decent for WFB, right now I'm curious how the will work for Mordheim.
@ Bruticus- Once again, that completely cracked me up. Were I a more 'diorama' inclined modeler I would completely run with that idea. Thanks for the link, it got me thinking about the stuff I have here and I went digging. See pics later in update.
@ Vik- Hope you had a good holiday. The hairspray / salt thing is going to get used a lot more now that I see the results. Even as a novice with limited application experience I can already see a significant improvement in how my terrain is going to look overall. I will be revisiting some old pieces w/ them method after the Mordheim project winds down. On that note, I cut the sticks after gluing for a couple reasons, but most significant is because it is way faster. This is the 'rough' work part. It doesn't matter if I have a 5mm gap or a .0005mm tolerance, it's all going to get covered up with trim and edging. So I'm ripping through this part to get it done and then move on to the bitz that make people go "ooooooh!!" and "awwwwww!!". As far as ruining the sticks go, the vast majority of time they break where I want them to when they are properly scored first. And for those moments that they do not, that's just an added detail feature!
@ dstein- There's a part of me that has been 8 years old during this project... I used to glue Popsicle sticks together for my army men. Then I did it in school to build dioramas for class projects. Now I'm doing it again. If I ever grow up I am going to be so very disappointed with myself. Regarding the sticks and detail, right there with you and what you are looking for is coming. Check out the walkway below, it's a test of a technique I hope works out because it is quick and really easy.
Havn't had a lot of time to work on this, but wanted to stop by and offer something because I know you are an impatient fickle lot and I need to continuously earn your readership.
First up are some doors I've found. I also have some GW stuff but I didn't include those here today. I am thinking about making molds of these and casting up some. If another else would be interesting in taking on that task I'd be happy to drop any of these in the mail (even the painted ones) and send them along.
This is one of my favorites. Never painted it because I never got around to it, was using these for AD&D. It has finally found a higher purpose. I absolutely need to some impression molds of this.
front:
back:
Next are smaller doors I once had completely painted, THEN decided I wanted to make molds of them, had no idea what I was doing, squished them into a splop of latex caulk, ruined my paint jobs, took a long time to clean up the damage. If anyone would like to try it the PROPER way, PM me.
These didn't get the same treatment as those above.
This I would sacrifice the paint to have a few copies of it. It's wicked cool.
These walls are pretty awesome. Low and thin, nice for walkways, etc.
I have a bunch of this stuff. not looking to cast more, just adding it here as an example of the level of detail I'll be adding here and there once I get to that phase of this project.
Here's a pic of something I'm actually working on. It's a walkway w/ some detail work. Believe it or not, the planking was 1 single piece of wood that I cut grooves into to make 'boards', even cut a few out to show wear / disrepair. The nail holes were done w/ one of my sculpting tools, just a sharp point. As you can see, this technique would look awesome on my buildings as well. That part is coming soon.
To answer the question of "why so big?", it's a game play issue. These guys have to fit on at least SOME of the walkways:
Last pic is something my son made for me in '09 while he was sitting w/ me doing some modeling stuff. I'm going to put this out there somewhere 'as is'.
I have a lot more stuff coming. Getting really excited about making my first walkways and scaffolding. Thanks foir reading, more coming later!
Wow you have some cool stuff there. The plank scoring looks very good and the tiny furniture is great. Have you got an old copy of Heroquest? It comes with a bunch of cool bits like a torture rack, alchemists desk and treasure chests.
I got very tempted by a Mordheim board after seeing the one on Iron Archives (it looks even cooler than his Necro board) but I don't think I can store another tiny city.
@ Bruticus- Oh man, yes I have a BUNCH of that stuff and had completely spaced it. I am giong to dig through it and see what looks cool to use in this project.
@ dstein- you know, every time I *don't* take one more look at the thread before posting, someone sneaks in one last post. Ha. I am really enjoying this new technique stuff. I'll be taking my first try on wood in the next few days. I'm going to try to replicate that "rainwater stains / decay" look on the sill and try sponge work on the roof shingles. See photo:
For the salt method I'm going to try is base flat gray, salt, spray black, salt again, drybrush brown / red / whatever the primary color is going to be, rub salt from baseboards, wash / touchup detail as needed. For the roof I'm going to try basing slate and add moss / rot afterwards.
Text update for now. Got a lot of work done yesterday (lots of WIP pics) but no change to upload or update yesterday. I focused on finished the "rough in" on 3 houses, they are now based black and I've started to cut rook shingles. I have a lot of trim / edging to do.
It may seem like this process is really dragging on but it's really not, it's flying by when I have the chance to work on it. If I could dedicate 4-5 hours to this I'd have a lot more done. Most of what I'm doing right now is 1 hr here, 45 min there, etc. Too much stuff is going on to offer me much modeling time, but this is something I am enjoying and genuinely want to do, so I'm taking as much time as I can to work on this.
Looking at this project realistically I'm guessing it'll be a few months worth of work to have the layout I'm hoping for. Knowing that 6th Ed is here adds a bit of stress to that becasue my modeling time is likely going to shift back to miniatures instead of terrain. I will find a way to strike a healthy balance that keeps me motivated and interested in working on projects. I've been active and productive since coming back, and in the last couple weeks I've taken the next step towards becoming better at what I'm doing. I'm not going to let that new skill atrophy.
More coming soon, not sure if it will be tonight or whenever, but I will have something new up this week for sure. Thanks for reading!
One way is an "army display board" (they come in handy at tournaments and such like) to carry your army about on. (no need to Pack/unpack for each game.)
@ Galorn- was that for me? If so, apologies, I'm completely missing the reference.
Ok. Taking the time to post those pics I mentioned earlier.
Here's some shots of work where I'm finishing up the "rough in" on a few buildings:
Here I'm pulling out the necessary items so start in on my equivalent of rivets in Warhammer Fantasy- shingles.
I'm cutting the box into thin strips, and then later cutting the strips into shingles with a serrated hobby knife. This is what I make my shingles out of.
In this pic I've also created a shingle strip. I really like these as they go on very quickly, and I used individual shingles as fillers or to break up patterns.
Here are my first three "roughed in" buildings. I'm really excited about having reached this stage because quite honestly I thought these things were going to wind up as kindling for my wood stove 20 years from now when I finally accepted that I wasn't ever going to get around to finishing them. It's a weird energy. I'm nowhere near done but already feel a sincere sense of 'accomplishment' because I've taken something else off my metaphorical Shelf of Shame. I'm actually finishing an idea I had a long time ago.
This is pretty cool. This is my "triumph" so far w/ this project. Check it out. It's not much to look at yet, but it's a pretty important stage for me.
Also take a moment to say "hello" to our new official Mordheim Terrain Project scale representative Mr. Kvlt Grymdark! Kvlt's interests include spilling blood for the Blood God, collecting skulls for the Skull Throne, and enjoys long walks on the beach...of 1,000,000,000 CORPSES!
BLOOD FOR THE BLOOD GOD!!! SKULLS FOR HIS THRONE!! RRRRRRRAAAGGGHHHHHHHH!!!!!!
Perhaps you ought to start a league of extraordinary shinglers. It looks like everything is going very well so far although I think you ought to be doing Necromunda stuff I can't really hold it against you for doing Fantasymunda instead. What do you plan on doing for doorways and windows?
By the way I remembered another awesome link that might be useful: Zuzzy gaming mats - I was planning to get this flagstone mat for bloodbowl but it would be the perfect way to transform a regular gaming board into a Mordheim townscape.
Skalk Bloodaxe wrote: Knowing that 6th Ed is here adds a bit of stress to that becasue my modeling time is likely going to shift back to miniatures instead of terrain. I will find a way to strike a healthy balance that keeps me motivated and interested in working on projects.
Galorn wrote:One way is an "army display board" (they come in handy at tournaments and such like) to carry your army about on. (no need to Pack/unpack for each game.)
@ Bruticus- LoES? I'm hoping to not be on this project long enough to qualify a following for shingles. I'm enjoying it and looking forward to getting in a game this weekend if possible, but my main goal interest is still the grimdark of the far future. I'm going to be doing a lot of shuttered windows (there's monsters outside after all) and doors will be taken care of w/ resin / plaster cast items or scratch built.
@ Briancj- I said 'billion' because I remember what happened to Dr. Evil when he said 'million'.
@ Galorn- Ah. Sorry. That is a good idea. I've seen a few that I really liked, and have always thought it would be cool to have a carrying case w/ some character instead of just base utility. I'll keep that in mind.
The houses are looking great! I'm really impressed with the breadth of different materials you use for scenery making - really inspiring stuff! The salt weathering on the walls at the top of the page is particularly well done - I know exactly what you mean about the bubbling paint, as it exists in almost every student flat in Edinburgh. It's very realistic - did you just spray the blue over a salted brown layer? And I'm guessing the whitish parts are the plaster showing through underneath. It looks ace - I'm definitely going to have to try that out! Kvlt seems like a friendly chap too.
When I'm in my new flat in a few weeks I'm actually going to have space for a table - it's going to be idea stealing season
@ dstein- Yup. Hoping to really sell the "weathered and unmaintained" look. Really excited about moving on to that next step but I have a lot of work to do first. The temptation to jump ahead is pretty strong. I'm resisting so far.
@ Scarper- Thanks for the compliment! Every $ I save on projects like these is another $ I can use for beer. Or other modeling things. Or whatever. Ha. The blue was brushed on, it's a "color match" of Shadow Grey. I have a gallon of it. The whitish parts are actually silver paint, I wasn't sure what to do at first and may have to dot those out w/ a more gray concrete look, there's a lot of 'afterthought' when I'm doing these projects. Steal away, I love it when people can pick something up from what I am doing. Most of what I am doing is stuff I learned elsewhere (salt being the most recent, just started that and sponge painting). The cardboard shingles came from a White Dwarf many years ago. But the birdhouses were all my idea. I originally got them to paint black / drybrush brown / done. Yeah. it looked like a brown birdhouse. A few coffee sticks and strips of cardboard later and I had a wee house for Fantasy. It's been evolving from there. The bird houses cost anywhere from $1 to $5 each, the sticks are free (thank you Starbucks!) and the cardboard is rescued from recycling. That's about as "on the cheap" as I can imagine for somehting like this.
Ok, update w/ photos tonight. Took some time to work on one building. This is a test of the salt method on my buildings. I tried a different process this time, which I'll explain as I go along. I don't know how it turned out, leaving that opinion to you all. I know some things worked out, some things didn't. Some things I'm going to fix, other things are what they are. I will say that this looks way better in person, but then most of my works looks pretty awesome from 3-5 feet away.
Here I'm setting up to get going. Cheap hairspray, cheap spray paint, and cheap salt. I really like the paint because it is FLAT, like "absorb the light around it" kind of flat, and the salt is almost like powder. I'll be using both of those a lot during my future terrain projects.
First I sprayed the lower boards on the building w/ hairspray and then randomly salted.
In typical Skalk Bloodaxe fashion I didn't let it dry, I just sprayed it gray, hit it w/ hairspray again again, salted again, sprayed w/ hairspray again. Mistake #1 for the evening. Won't be doing that again. Kvlt Grymdark did not approve.
I did however have the presence of mind to dry the last coat of hairspray. I used my hair dryer for a couple minutes and then drybrushed dark brown. Mistake #2 of the evening? I trimmed my paintbrush and didn't get all the hairs out of it before using it. But not to worry, as you can see they eventually did come off.
Feh. I hit it with the hair dryer again after drybrushing and then gave it a light rub to take some salt off and see what it was looking like.
Clumps. Ugh. Mistake #3. But I kept going with it to see what happened. I also used my xacto knife to scrape some simulated 'wood grain' into the boards:
Some of it didn't come off at all, some of it went all the way to the black undercoat. Really need to take my salting / hairspray in steps from now on. Lesson learned. Next I sprayed everything with a light dusting of gray again.
Next I drybrushed a light brown. I like this effect.
Next I gave it a light wash with Devlin Mud. I think this is where it started to come together. Yes, I know some of the scratches look terrible and I am going to fix them.
It needs more recessed shading and maybe some highlights on the wood to contrast, but it's not the worst work I've done. Kvlt Grymdark approves and said this house is on his Top Ten list of buildings he'd like to burn to the ground. I took that as a compliment.
That's it for tonight. Thanks for reading, C&C always welcomed.
dsteingass wrote:Dood- That is great weathering!! That would make great moss growing if you could make it green!
Take some sand, add green paint. smash back into sand after paint has dried... (methods for smashing range from "extra" blender to mortar and pestle.) glue in place using dilute white glue, drybrush lighter shade of green.
@ Galorn- Thanks for the idea. I looked into those, likely not going to order them becasue the packages have thousands of sticks and I'm already expecting to have material left over once this project is done.
@dstein- Right there with you. Already using NATO Green for the base, will highlight Goblin Green and touch up w/ Bad Moon Yellow if I get the chance tonight. Also goung to be adding a foundation to it. Much more awesome is coming.
@ Galorn- Yup.
Going to try to get some more work done tonight. I put about an hour into that building last night, should have this completely done w/ a few more hrs of attention. I'm also going to put it on a small base so I can add Fantasy bitz to it and really give it that Old World feel.
Picking up my 6th Ed rulebook tomorrow night after work. Wicked excited for this. Hoping to find some gems in it and get playing soon.
I have vegetation and other neat details on the roster. My new challenge is figuring out how to make a stone foundation. It'll only be appx 1/4-1/2 inch high but I'm havbing a difficult time figuring out what to use. Tried real rocks last night (slices of slate from the brook out back) and it was immediately obvious that it was going to be way way more work than I want to put into this (with ambiguous expectation of results)... so I'm open to suggestions.
One thing - the reason people use salt and hairspray is because it flakes off easily and dissolves when it gets wet, makes it easier to reveal the layer behind it. If you want to leave some grains on your model to give texture I would suggest using sand mixed in the paint or glued on instead.
A friend of mine used salt to texture a building and whenever it gets wet the salt dissolves leaving white blotches. And it flakes off all the time. Although it looks like yours has been painted over more I still don't think it is worth the risk.
Have an air-dry clay? That is the stuff to use for stone foundations, whether you just glue blobs on for stones, or make them like sandbags and build them course by course. You also might try peeling one later of card from a peice of foamcore and carving the pattern in..I find that way the fastest, cleanest, and cheapest myself..
@ Bruticus- When I did the Galorn walls I used Mixed Up Salt, so I had many different and random shapes. This salt is just slightly more granular than powder. I'm not a huge fan of foodstuff being used as terrain but like you noted, I've sealed it pretty well w/ multiple layers of hairspray and spray paint. Mind you that was not the intended result, I'm still in a 'trial and error and error again" phase of learning this stuff. But the happenstance of technique / result is teaching me new ways to do things. I'm really excited about the breakthroughs I've been making and with practice I'll start getting results intentionally.
@ RSJake- I have, just not sure if I have what it takes. That's a lot of intricate carving, and my carving techniques usually involve a hammer and a kitchen knife.
DSTEIN FOR THE WIN! Dude Yes, I have a bunch of FIMOair! Ok, wow. Duh. So simple but completely eluded me. Yup, that's what I'm going to do. You rock.
i know you said you were gonna build more fantasy esq style scenery, but i could see some space marines or plague marines looting/converting? a tiny little village like this!
@ Wh40kPicasso- Oh yeah, absolutely. I've always been of the mindset that WFB and W40K exist on the same timeline in the same universe. The Old World is just a lost feral world that has been lost from record to the Imperium and manages along by itself. Back when WFB and 40K used the same stats (2nd Ed) we played a game w/ Orks vs. Orcs. Scenario was the Orks found an entire colony of what they considered Wild Boyz and wanted to have them join the Waaagh! The Orcs were having none of it and threw down. In the end the Orks were victorious (ranged weapons carried the day) but it was a very interesting game.
Plus there's always the scenario that some hapless feral world becomes an unwitting participant in the wars of the Imperium when CSM and IG land to have it out.
I wouldn't mix my Fantasy stuff w/ 40K stuff very much though. It looks weird and w/o a cohesive theme. I'm all about tying things together. The days of throwing miscellaneous terrain on the bale are long gone for me.
oh man i had to postpone my reading your thread for now... and boy did you bring masses of cool updates since my last comment... there is so much potential use for my own project with this kind of weathering you do... your mortheim stuff looks really cool...and is developing very quick and effective!!!
and galorn and dave... i really like your carved bricks i can now apreciate these with much more personal expieriences!!
@ dstein & Galorn- Ok, that looks amazing and well within my abilities. Question about durability- I've been moving away from foam as much as I can becasue of nips and chunks taken out here and there, eventually I wind up with a nice piece of garbage. Not so much anymore, but in your experience how does it hold up over time? I'm not rough on my terrain becasue I built it, but sometimes things happen. Just wondering.
dsteingass wrote:Once it is painted, you can spray it with rattlecan clear.
Galorn, that is a Great Inn man!! The barrels look great! And what is that used as the windows?? The bell tower of the chapel is badass too!
BEFORE you paint the Foam of the foam core walls soak it in 50/50 water Elmers. (it dries hard as a rock).
The barrels are a precast/prepaint product sold by pegasus hobbies. The bell cupola was snapped off by a numbnut forcing it into a shelf that was exactly too short to hold it... (ignoring the shelf that had plenty of space next to where dumbass shoved my building.) If I ever find out who did it they win a free donkey punch. But I digress. yep it came out really nice.
The windows were made by applying drywall mesh to another piece of foamcore, then gluing the "window screen" panel to the interior of the building over the window hole that was cut into the wall. the window sills and top piece was simply a length to coffee stirrer placed into a notch in the foamcore.
@Galorn- Will do, and thank you sharing that inn! I'm ripping your idea off as soon as I get some other work done. I think. Who knows what I'll be doing tomorrow. I can't (squirrel) concentrate on (beer) one thing for any (Dreadnought) amount of (stapler) time.
@ Wh40kPicasso- I understand what you are saying and if I could get someone else to film, edit, format, and upload I'd be all set. I work in technology and have grown incredibly tired of using 'techie nerd' stuff on my own time. I get annoyed simply by uploading pics to Dakka sometimes, and I genuinely like doing stuff here. I am not going to put a video together on my own.
Pretty excited about this next bit I'm going to share. Last night I picked this up simply to move it out of the way and somehow it turned into my project for the night.
It's a burial mound I made for my Undead army. I used to have a lot more of these in various stages but they were all tossed when I went through the Great Cleanup of 2012. This survived because of how much work I already had on it and it has seen quite a few games already "as is".
The bulk of it is made from foamboard insulation, cut to rough shape w/ a serrated kitchen knife, used a wood rasp to create the rounded shape, and then sanded to make it as smooth as possible. Cut out where door would be, mounted on a balsa wood base, made door and stone blocks out of balsa wood, slapped it together, painted it the colors you see here, and that was that. Perfect for my game table.
Since I'm setting my standards a little higher these days, I fixed it up a bit. I really like the results:
How I did this: repainted the blocks and door to make them more distinct, nearly soaked the 'mound' portion w/ hairspray, sprinkled / shook / tapped flock, added lichen as vegetation (yes, all lichen is glued and permanent), used a rock from my driveway (washed in Grif Sepia), used a twig from my apple tree out back behind my house to make the 'dead tree" that I jammed in behind the rock, for the dead tree behind the rock, made 'mud' from a combo of a couple different paints that are past their prime for painting but apparently really awesome for texture (yes they still look 'wet' now thanks to a clear gloss coat), and a few other fiddle bits here and there. I'm really happy with this and can honestly say that THIS is the expectation I've had of myself for a long time. I see things I could have done different / better, but I'm really happy w/ this and I really do believe I've improved terrain building skills.
Also please note that Kvlt Grymdark is sporting a new base. He says he likes it.
*special thanks to ktbb22 for hanging out w/ me while I did all this*
I would like for you to build me a Huge castle for my Knights of Kaldor. I.e. awesome as usual Skalk, i believe you've inspired me to make my tree into terrain. But in all seriousness i'm gonna have a go at building something tonight maybe. You are inspiration my friend. also, in refrence to that video idea, i understand where you're coming from, in substitution are there any tutorial videos you would personally recommend? As always, much appreciated.
@ Briancj- Thank you! I have a feeling I'll be revisiting a lot of my older terrain now.
@ Galon- Sorry I've been so lame. Will do my best to get a supply drop inbound tomorrow, ABSOLUTE latest on Monday.
@ Wh40kPicasso- Thank you for the compliment, and I'm glad you're trying your hand at terrain! I've always felt it is is too frequently given the least amount of time and effort and is the most important stuff on the table. Your Chapter Master can die on the first turn but the hill he was standing on will be there for the entire game. So good luck, and know that you have a wealth of knowledge and support! The comminity is tight decent and people are very cool. About the castle though... by the time I finished that caste, your kids would have died from old age. I don't know of any videos because I have been lacking in that aspect as well. Bruticus / dsteingass / Galorn / Briancj would be better educated on that and would likely help you out.
@ dsteingass- Thanks man! I had a lot of fun w/ this and expect I'll be doing some more stuff w/ similar techniques. The lichen is going to appear a lot more.
I've been looking at the pics more and more, so of course I'm changing my mind about stuff. I think the mud needs to go and get covered w/ flock. What do you guys think?
@ dstein- Another reason why you are legend in the modeling community. At least I think so.
@ Wh40kPicasso- Probably nothing new until middle of next week. Going out tonight, riding tomorrow, 40K 6th Ed tomorrow night, riding again Sunday. The season here is too short to spend nice days inside w/ toy soldiers. But no worries, it'll rain for another 2 weeks straight before long. *sigh*
I have the rulebook, I have the official GW errata, and will say without hesitation that so far I like what I've seen a lot. There's still the same nonsensical bass-ackwardsness such as cover saves instead of "to hit" modifiers, hitting the enemy with the butt of your Plasma Pistol in CC instead of burying the barrel into them and blasting a solar hole in their guts, Chainswords are still no different than a bare fist... gahh... stuff like that is still annoying as ever and someone at GW still needs to come play at my house over a few beers. HOWEVER, there is much awesomeness like charge response, Feel No Pain gets a save against almost everything, wounds are allocated on the closest model, grenades can be used as offensive weapons in the Shooting phase again, REAL Psychic Powers are back, and most importantly... most excitingly... most "Skalk Bloodaxe is so stoked his head might asplode"... is THE CULT HAS RETURNED!!!!!!!
So yeah, I'm ok w/ 6th Ed so far. I'll keep you updated.
Didn't get a game in this weekend, but my buddy Daichallar came over on Saturday night and we went through the new rules one at a time. It took a lot longer than expected, and we had to have a few "example scenarios" to put the picture together. Here's an action shot of us figuring out the new CC rules:
Who can attack, who can't, how they have to move, etc. There are a lot of changes, and I'm really excited about learning the rules and getting some basic games in soon. There's a new Tourney starting up at my FLGS and I'm in the mood to get out and play a couple games / meet some new people.
There's a chance that as soon as the new Codex comes out I'll be taking a break from Terrain and getting back to either the Cult or the Death guard. Or I may restart my World Eaters, have been wanting to show them the same love I gave my Plague Marines. But lest we forget all of this started from my Black Crusade force... it could use some attention as well.
The possibilities are nearly endless. I'm pretty excited all around.
Ha, I used a divider to separate my own ranting.
Anyway, here's an update w/ pics. Last Saturday I was at the local flea market and scored these for $20:
They are 8" high from table to top platform. They appear to be O scale and are perfect for the table. Check out this awesomeness-
I blasted them w/ the garden hose and cleaned them up a bit:
They are both based flat black now and awaiting some conversion and paint. Ideas on what to do w/ them (besides covering up the Lionel plates) are appreciated.
I also bought these at the same place, $1 for 5:
I based them black, hairspray, salted, then sprayed gray:
Still a lot of work to be done, but I think they are passable as concrete supports for a pipeline system.
No, I won't be using a cardboard tube, it's just to indicate where I want to go w/ this. I'm going to use PVC pipe when I get to this project. It'll be modular and easily connected together.
Kvlt says "Hello". Actually, he screamed "BLOOD FOR THE BLOOD GOD!!!" but I knew what he meant.
So what does all this mean? Is the Terrain Project headed back to Necromunda / 40K? Well, hard telling. I have a lot of work to be done on the Fantasy buildings and I've not lost sight of that, but I'm also feeling a distinct calling to get back to work on my Necromunda stuff, especially since picking up the new towers I posted above.
At any rate, I'll keep cranking out terrain as I can because I have a feeling my attention is going to shift very significantly very soon. Between now and then I want to get as much QUALITY work done as I can on both 40Kish and Fantasy stuff because once the Cult has rules I'm very likely going to shelve everything and work on miniatures again.
Until then, expect more terrain goodness showing up right here, and since I'll never truly be done with this project I'll be putting new stuff up every now and then as the undeniable flash of inspiration strikes me.
Thanks for looking, comments welcomed, and I'll be back soon!
Those towers are amazing, totally perfect (assuming models can fit inside ok).
To make them more usable in games you ought to clip off the railings from a few sides so that walkways can go between them, and armour up the railings on some other sides - no-one will ever use them unless there is a chance at some hard cover somewhere. I've found the best balance is to offer hard cover two sides but never four sides, at least at the higher elevations. If you can get a nest with hardcover on all four sides then that's where every single vent team will go and you can't flank them.
Corrugated card with one side carefully peeled away makes great corrugated rusty iron and you could use that to armour up some of the railings.
You might also consider making a way for them to occasionally stack on top of each other because they would be so great for a game of Lord of the Spire.
They are so perfect though, the second most valuable bit of terrain is a tower that connects walkways together easily. I am jealous of that find.
If this is some sort of model train uber-awesome thing let me know. They have been sprayed black primer, but other than that no other work (a.k.a damage) has been done yet.
@ Bruticus- The guy I got them from wanted $25 each, I told him I was a wargamer and these would not see another train layout in my lifetime. Also asked him how sick was he of boxing up and taking the same stuff over and over. He told me I could take the pair of them for . I think I actually pulled a muscle from reaching for my wallet so quickly.
Models will fit inside w/o issue, likely 4 or 5 20MM round bases. Railings are going to be clipped in a few different places for easier maneuverability of models and to also facilitate walkways being attached. I haven't given thought to what to do w/ them yet, but I'm most likely going to keep one (with the radar dish) as stock as possible, the other I'm going to unleash my bitz box on. I still need to try that "corrugated steel" look from cardboard. This might be the first try. We'll see. Thanks for the input.
Those are...were...Lionel O Scale rotating Radar Towers, a Post-War accessory which one of them looked to be solidly in the $100 category, depending on how intact it was.
Alas, now that they're covered in black primer, they're worth...whatever you paid for them.
@ Jefffar- Thanks for posting, and thanks for the link! Even happier with them now knowing I paid less for 2 than I would have for 1 NIB.
@ Briancj- These were faaarrr away from NIB, they were actually quite used and one distinctly abused. I'm going to do some good stuff with these and forget that you told me how much I could have potentially sold them for had I not turned them into random 40K junk.
Yeah, I'm ok w/ it. No doubt I've done this many other times in my life. Hive Fleet Bloodaxe at your service.
Tonight's plan is to get as much "loose bitz" done as I can, I need the space. My "on deck" shelf is finite for a reason and since I have something new, something old has to be finished or has to go. No exceptions to this rule or I'm going to be buried under a mountain of stuff again, and I'm not going to let that happen.
EDIT!
Oh man, I forgot this already! Terrain Competition!
"You must scratch build some terrain feature utilizing at least one Lid from any type of household container" (probably plastic, but not required to be.)
Rules are as follows:
1. It must be based, and no you cannot use the lid as a base
2. You must provide at least 1 WIP photo, which makes it CLEARLY obvious it is an actual lid you are using, and at least 1 completed photo to be eligible
3. It must be painted
4. The deadline is 1 month from today August 2, 2012
-On August 3rd I will judge the winner, who will be rewarded with some sort of "fabulous" prize from my personal collection, the winner gets to set the parameters (and optional fabulous prize) for the next competition as well as become the judge for the next competition after he/she wins. The Judge does not have to stick to a material like I am, you instead may choose a theme such as "bunkers" or "sandbags" or whatever you wish within reason.
Judges are not eligible to participate in the contest that they are judging...EVER. Judges set their own judging criteria on a per-competition basis. The Judge's decision is FINAL, feel free to bitch about it all you like, but know that it won't make any difference.
I am so doing this. So yeah... distractions abound, but all productive.
OMG! THose are perfect! Paint them and go! -Maybe cut off the Lionel logo instead of covering them up, cut some of the railings to facilitate walkways, and replace the 1960s radar dish with an AA cannon or something.. Very good find on the concrete pilings too!
I am totally on "on-deck" mode. I HAD to clear out those valks and such, before I started on painting the "Big O". I still have tons of terrain projects and whatnot. My terrain building is now fully-enabled by the 6th Edition terrain rules. Let's GO!
@ tipios- Thanks! I try to find stuff that will work on the table w/o a lot of extra work trying to get it to fit in. I've changed how I collect things. I used to find a huge box full of broken toys and offer a lowball price on it. If they bit, I'd take the whole thing and if I was lucky would find 2-3 bitz to use. Now I dig through that box and find the few things that are worthwhile. Model train pieces are awesome. Old models (military, cars, etc) are pretty cool as well. I'll keep looking for more stuff, but my #1 rule nowadays is it has to have a use and a home. If I can't justify something I don't pick it up.
@ Dstein- I know that you've had that feeling before while at a yard sale or something similar. I saw it, freaked out on the inside but offered a calm facade while inquiring about and dickering final price. I waited until I was out of sight before I started dancing around. I'm going to leave one of them mostly stock and keep the radar dish (I'm thinking 'objective' for a game, everyone wants the communication center) and the more beat up one is going to become a defensive point w/ a lot of hasty defensive plating and a huge gun.
@ Briancj- 6th Ed is going to change a lot for me. I'm glad I learned some new techniques before it came out because I'm going to do all I can to catch up on my GW stuff.
Those Cawdor gangers have filled many positions for me in my wargaming years. They are my most favored Necromunda gang, they serve as Conscripts in my Imperial Guard, they are Brood Brothers in my 40K 2nd Ed. Genestealer Cult, and very soon they will join the ranks of Chaos Cultists.
A quick update on what next, and I'm sure it'll be no surprise- the Fantasy / Mordheim terrain is going back to the storage bin. It's been a lot of fun to build but we haven't played a game yet and probably won't for a while. I've re-organized priorities to match the anticipated needs of the new 40K release.
My Imperial Bastion has moved to the top of the list. Next is some of the Mysterious Terrain I started a while back (as 'normal' terrain). Once those projects are done I have some options. I have Necromunda towers that I could finish modeling and repaint to match the table, the Pegasus Hobbies Gothic Ruins that can be painted, and I have enough .060 to make at least 3 scratch build Imperial buildings. I'll likely get started on the Pegasus pieces before jumping into another construction project except for participating in the -=]_,=- contest. I have a piece in mind and should be able to start that this weekend once I get the last bit of material I need for it.
I really feel like there's many good times ahead. 6th Ed. has really energized my interest in all of this. I'm looking forwards to playing a few games soon.
That's it for now, more later!
I need a stiff drink, and someone to paint the rest of my miniatures for me.
Those buildings are so cool. I'm trying to resist looking at O Scale stuff online now.
It's too smooth at the moment though, needs a rough coat or some glued on texture I'd say. I had a similar issue with plastic toys, they look too smooth.
And you should change the name of one of your gangers to Lionel, that way you could keep the sign.
@ dstein- Yes. I know it sounds weird, but I can't 'see' a model as well when it's a mosaic of color. Painting it flat black helps me look past the individual parts and see it as a 'whole'.
@ Burticis- Condier this the Tale of Two Towers. One is going to remain clean with minimal conversion and look like it is functional and in service. The other is going to be old, ruined, and heavily converted to meet the needs of life in the Underhive. I'll likely finish up the 'clean' version first as it has a more immediate home on my table. Also... hmm. Maybe the tower was built in honor of a Primarch?
One does not simply join the LoER. Its riveted gates are riveted by more than just rivets. There are rivets there that do not sleep. The Great Rivet is ever riveted. It is a riveted wasteland, riddled with rivets, rivets, and rivets. The very air you breathe is riveted. Not with ten thousand rivets could I do this. It is folly.
Skalk Bloodaxe wrote:One does not simply join the LoER. Its riveted gates are riveted by more than just rivets. There are rivets there that do not sleep. The Great Rivet is ever riveted. It is a riveted wasteland, riddled with rivets, rivets, and rivets. The very air you breathe is riveted. Not with ten thousand rivets could I do this. It is folly.
Lookin good skalk, always got your eye out for something. As for your cult.... would they like some coolaid? My grey knights will buy it for them. Also lookin forward to what you plan on doin with those towers, those ladder wells seem a bit small to me but maybe its just my horrid eye for terrain pieces.
GW Heads and hands and weapons are too big, everything else is normal O Gauge. Gw has brainwashed us all into thinking their oversized scale is "normal"
Skalk Bloodaxe wrote:One does not simply join the LoER. Its riveted gates are riveted by more than just rivets. There are rivets there that do not sleep. The Great Rivet is ever riveted. It is a riveted wasteland, riddled with rivets, rivets, and rivets. The very air you breathe is riveted. Not with ten thousand rivets could I do this. It is folly.
@ Vik- I wasn't flying the LoER colors because I felt I hadn't earned them yet. It's kind of like an honorary degree- looks nice, but isn't worth the paper it was printed on because it wasn't earned. I'm in the process of earning my place right now. The League will see my work very soon and I feel confidant that they will find it worthy. I have a lot more Necromunda stuff if you'd like me to take pics of it.
@ Briancj- Um, I guess? I have no idea what that is.
@ omgitsduane- Hey man, decent seeing you. I need to head over to your thread and check for an update, it's been a while. Thanks for the compliments. I'll have more before long, just have to finish this terrain piece I'm doing for the LoER contest.
@ HAZZER- It's getting better. I've learned a lot in the last few weeks. Stay tuned for more!
It has begun:
This is the first of many WIP shots for my LoER terrain entry. I won't be sharing WIP as I go because I want it to be a secret and then spring it on you all after judging has been decided. It's one of the better pieces I've done in a while. I'm particularly proud to say that it's going to wind up around 95% scratchbuilt and it has rivets. I repeat, IT HAS RIVETS. Lots of them.
This weekend I played my first 2 games of 6th Edition. I like it.
A lot.
Here's a few pics I took during the game. I really enjoyed the game, learned a lot, and I'm looking forward to many more in this edition. Many years of fun wargaming are ahead.
Apologies for the fuzzy pics. Also please note- my table doesn't look anywhere near as washed out / light as it does in these pics. It's actually quite awesome. The light on my table it pretty intense and apparently pictures are much lighter than they really are.
1- Table setup
2- Deployment
3- Game in progress
4- End of game
This was a huge game for me. 1st win in 6th Ed and 1st win in a long time. Enjoyed it quite a bit.
More terrain goodness coming. #1 focus is the contest piece, and it will have a place on my game board too.
Thanks for reading, thanks for taking the time to comment, and know that more terrain goodness is coming.
@ Vik- I joked about the LoER in the beginning, but it was based on sheer jealously. I've finally found a method that works for me- 1/16th hole punch. Right now I'm punching cardboard, but I know I'll move up to plasticard once I get the right stuff. The only local place that sold it went out of business a couple months ago and I have SO many 12x12 .060 sheets left that I can't justify another online order for a while. I'm looking forward to sharing my work as soon as I'm able.
@ madmartykmf & dsteingass- Thanks for the compliments! You have both been hugely inspirational for me and I deeply respect the work you do. My Necromunda terrain is getting a huge facelift once I finish a few other projects on deck, and I may have figured out the future of my Pegasus Gothic stuff. You'll both be getting proper credit when I start posting that work.
@ Hmelrose- Thanks for the compliment and taking the time to post! I took some time to check out your work and I really like your CSM and terrain! Just subbed to your thread, you'll be seeing me around more.
@ Wh40kPicasso- Ok, but if you submit something better based on the same idea I'm going to increase my 'bad advice' to speed up your irredeemable corruption. PM sent.
@ HAZZER- It was the most fun game I've had in a long time. I really like the rules change for Rapid Fire weapons. They were horrible in the last edition. They finally make sense, and are a lot less complicated. 0-12 inches, double tap. 12+ - 24, single tap. Movement doesn't matter. You still can't charge if you use a Rapid Fire weapon in the Shooting phase, but all my guys carry Bolt Pistols as well, so that's not a problem. I'm really excited that Plasma Guns are finally worth something again. Having the options of move AND shoot again makes me think that a ST7 ball of sunlight blasting through the chest of my opponent might be worth the 1/6 chance of Gets Hot.
No pics to share today, but know that I am quite busy and I'm looking forward to completing this piece I am working on. I've really stepped up my scrathbuild skills and I have a feeling I'll be doing a lot more things like this. There's a good chance a "counts as" Skyshield Landing Pad is in my near future. I've read what they do for Deep Strike. Summoned Daemons use Deep Strike. Hmm. HMMMMMM.
I've been thinking about what I'm doing regarding terrain lately, how all this got started, my overall goals, my prioritization of projects, etc. The first thing I thought about was how much I think about things. Not just terrain- everything. It's overwhelming to the point of inaction sometimes. With so many possibilities, which is the right course of action? Gaaahhh!!! *head asplode*
But since this is my Terrain thread, I'll talk about terrain. I've been thinking (really? ha) about what it is exactly I'm trying to accomplish. The overall and easy answer is "to build a better battlefield". My main challenge has been to focus. I'm really trying to stick with my "on deck", but I've noticed that has changed quite a few times since it was set up in April. I've given some stuff away just to be rid of it. I've gathered other things I had not intended (but and quite pleased with). I'm building somehting I likely would not have ever gotten around to if it hadn't been for the terrain contest. I want so much to work on my Necromunda terrain. I feel bad about getting my Fantasy stuff out and then putting it back so soon with nothing actually finished. I'm feeling a distinct need to work on my 40K terrain (specifically my Aegis walls and my Bastion) because it has a direct application to the game now instead of just being "scenery'.
I'm actually tempted to throw my 'plans' out the window and work on whatever I feel like. But I know what happens when I do that. I have dozens of unfinished projects to remind me what my directionless efforts yield. But then there's the constraint of creativity. Painting a Bastion really isn't creative, it's work. Tedious work at times. I was really excited when I bought it, but when I was finished building it my interest in it dropped off significantly.
Now that I'm doing rivets I'm rethinking my Necromunda terrain and I really want to get back to work on it. In 3 months this thread will have been around for a year, and you know how much Necromunda terrain I've finished? None. Zero. Nothing. Not one piece of my Necromunda terrain has been finished. Sure, a few walkways came of it, and they are decent enough, but there's not a single main structure rebuilt. I've cut things up, I've measured, I've taken notes... and I've had a few Sisyphean moments:
I have accomplished a lot of things though, so I'm not going to rage on myself too much. I'm just frustrated that the main reason I started this thread still hasn't happened, and the main reason I got back into building terrain isn't being addresses as quickly as I had anticipated.
I want to take a couple days off from work and just hammer on a few projects. No distractions, no housework, no obligations... just blasting Metal and high productivity!
My current project is a lot of fun. I started with a very general idea and as I've worked on it I've enjoyed watching it unfold and take directions I hadn't considered when it was just an idea. I'm using most of the techniques I've learned recently (huge credit to Bruticus for showing me the way) and in the end I'm going to have a piece I'll be proud of.
So what does all this mean? If all I have to worry about is I can't decide which piece of terrain I want to do next, it means my life is awesome and I'm definitely doing a lot of things right.
So thanks for being awesome, Dakka crew! You are all part of the inspiration and motivation that I don't get from the folks I know IRL.
That's it for this rant. Will offer some new pics soon, I have a couple 'side projects' I might work on tonight between glue / paint on my main project. If I get anything significant done I'll share it here.
i can´t recall how many projects i have had to postpone or stop entriley... the shelf of shame is always full... but i have found that this is all good and right because it is all just a learning process... you live and learn and well i am not the guy that looks for productivity in the hobby but for the fun... and this is that sometimes you get something finished and most of the time... at least for me... it gets ruined... tho that always pains me... but funnyly my wife even more looks disturbed when i have to start anew... for me it is always good as long if i have fun doing what i do... when i get frustrated to a certain point i have to change the project... but that hasn´t have to work out that way for everyone...
that
1/16th hole punch.
is still high on my to get list... the way to massproduce rivets is still with a punch set... the rodslicing methode dave uses is only for smaller runs... and i think that holepunch with that diameter is in dire need for me too... *shuffels over to ebay*
Why have I not seen that canal piece before? That is absolutely perfect Necro scenery, I can imagine gangs sneaking along the canal bed to avoid a sentry... Can you place that on top of your gaming board? Would give a great change of elevation.
You could fill that with a layer of water effect and mud, like Neil did with his awesome canal. I found a pretty cool product called Envirotex Lite that ought to work well.
Automatically Appended Next Post: Also, Rowboat Girlyman is still a poon, and skalk is still a pro! even though GW got new poster boys. Its got nothin to do with your terrain post, but i figured you'd want my 2 cents!
Thats my rant for the night as well! also, only genius's rant. as one i should know! you know the whole takes one to know one? well its true. So good luck on your terrain projects for the future. as such, what did you have in mind for future projects?
Skalk Bloodaxe wrote:@ Vik- I joked about the LoER in the beginning, but it was based on sheer jealously. I've finally found a method that works for me- 1/16th hole punch. Right now I'm punching cardboard, but I know I'll move up to plasticard once I get the right stuff. The only local place that sold it went out of business a couple months ago and I have SO many 12x12 .060 sheets left that I can't justify another online order for a while. I'm looking forward to sharing my work as soon as I'm able.
@ madmartykmf & dsteingass- Thanks for the compliments! You have both been hugely inspirational for me and I deeply respect the work you do. My Necromunda terrain is getting a huge facelift once I finish a few other projects on deck, and I may have figured out the future of my Pegasus Gothic stuff. You'll both be getting proper credit when I start posting that work.
@ Hmelrose- Thanks for the compliment and taking the time to post! I took some time to check out your work and I really like your CSM and terrain! Just subbed to your thread, you'll be seeing me around more.
@ Wh40kPicasso- Ok, but if you submit something better based on the same idea I'm going to increase my 'bad advice' to speed up your irredeemable corruption. PM sent.
@ HAZZER- It was the most fun game I've had in a long time. I really like the rules change for Rapid Fire weapons. They were horrible in the last edition. They finally make sense, and are a lot less complicated. 0-12 inches, double tap. 12+ - 24, single tap. Movement doesn't matter. You still can't charge if you use a Rapid Fire weapon in the Shooting phase, but all my guys carry Bolt Pistols as well, so that's not a problem. I'm really excited that Plasma Guns are finally worth something again. Having the options of move AND shoot again makes me think that a ST7 ball of sunlight blasting through the chest of my opponent might be worth the 1/6 chance of Gets Hot.
No pics to share today, but know that I am quite busy and I'm looking forward to completing this piece I am working on. I've really stepped up my scrathbuild skills and I have a feeling I'll be doing a lot more things like this. There's a good chance a "counts as" Skyshield Landing Pad is in my near future. I've read what they do for Deep Strike. Summoned Daemons use Deep Strike. Hmm. HMMMMMM.
I've been thinking about what I'm doing regarding terrain lately, how all this got started, my overall goals, my prioritization of projects, etc. The first thing I thought about was how much I think about things. Not just terrain- everything. It's overwhelming to the point of inaction sometimes. With so many possibilities, which is the right course of action? Gaaahhh!!! *head asplode*
But since this is my Terrain thread, I'll talk about terrain. I've been thinking (really? ha) about what it is exactly I'm trying to accomplish. The overall and easy answer is "to build a better battlefield". My main challenge has been to focus. I'm really trying to stick with my "on deck", but I've noticed that has changed quite a few times since it was set up in April. I've given some stuff away just to be rid of it. I've gathered other things I had not intended (but and quite pleased with). I'm building somehting I likely would not have ever gotten around to if it hadn't been for the terrain contest. I want so much to work on my Necromunda terrain. I feel bad about getting my Fantasy stuff out and then putting it back so soon with nothing actually finished. I'm feeling a distinct need to work on my 40K terrain (specifically my Aegis walls and my Bastion) because it has a direct application to the game now instead of just being "scenery'.
I'm actually tempted to throw my 'plans' out the window and work on whatever I feel like. But I know what happens when I do that. I have dozens of unfinished projects to remind me what my directionless efforts yield. But then there's the constraint of creativity. Painting a Bastion really isn't creative, it's work. Tedious work at times. I was really excited when I bought it, but when I was finished building it my interest in it dropped off significantly.
Now that I'm doing rivets I'm rethinking my Necromunda terrain and I really want to get back to work on it. In 3 months this thread will have been around for a year, and you know how much Necromunda terrain I've finished? None. Zero. Nothing. Not one piece of my Necromunda terrain has been finished. Sure, a few walkways came of it, and they are decent enough, but there's not a single main structure rebuilt. I've cut things up, I've measured, I've taken notes... and I've had a few Sisyphean moments:
I have accomplished a lot of things though, so I'm not going to rage on myself too much. I'm just frustrated that the main reason I started this thread still hasn't happened, and the main reason I got back into building terrain isn't being addresses as quickly as I had anticipated.
I want to take a couple days off from work and just hammer on a few projects. No distractions, no housework, no obligations... just blasting Metal and high productivity!
My current project is a lot of fun. I started with a very general idea and as I've worked on it I've enjoyed watching it unfold and take directions I hadn't considered when it was just an idea. I'm using most of the techniques I've learned recently (huge credit to Bruticus for showing me the way) and in the end I'm going to have a piece I'll be proud of.
So what does all this mean? If all I have to worry about is I can't decide which piece of terrain I want to do next, it means my life is awesome and I'm definitely doing a lot of things right.
So thanks for being awesome, Dakka crew! You are all part of the inspiration and motivation that I don't get from the folks I know IRL.
That's it for this rant. Will offer some new pics soon, I have a couple 'side projects' I might work on tonight between glue / paint on my main project. If I get anything significant done I'll share it here.
I'll be back!
You are welcome I do really enjoy seeing the massive amount of creativity that goes into your work.
Bruticus wrote:Why have I not seen that canal piece before? That is absolutely perfect Necro scenery, I can imagine gangs sneaking along the canal bed to avoid a sentry... Can you place that on top of your gaming board? Would give a great change of elevation.
You could fill that with a layer of water effect and mud, like Neil did with his awesome canal. I found a pretty cool product called Envirotex Lite that ought to work well.
or alternatively texture the "sediment" using spackle, and fake the depth using shades of paint... ( ie go "Old Skool")
@ Vik- You and I have discussed the countless projects we have started. I posted pics of what I have going on recently, have added a few items to that w/o finishing anything else. Need to change that soon, my "on deck" shelf is getting cluttered.
@ dsteingass- Yeah, I'll never posting pics of it again.
@ Bruticus- That was one of two 4x4 board I made that I was really excited about when I first made them but even after a few games our group consensus was the canal was really annoying because of how it limited terrain placement, and the only function it wound up serving in the end was a place to roll dice. Both 4x4 boards have been stripped. 1 remains as a board for 4x4 games (Necromunda, Mordheim, small 40K games, etc) and the other one has been traken outside for other uses. I was really into the idea of layered terrain but the reality of it was more annoying than useful.
@ Wh40kPicasso- See below
@ Galorn- You know I respect your work, I really appreciate the compliment. More awesome work coming soon!
No work last night, a friend of mine got back from vacation yesterday so we hung out.
But my mind is still grinding away. I had an idea last weekend for a Chaos Alter that 'counts as' a Skyshield Landing Pad. I think we'll be seeing many different instances of that idea coming along very soon. It will have a specific application for me as I'm really starting to take an interest in Chaos Daemons as allies and as an army choice. I have enough Plaguebearers to make 2 units of 7, and I have enough Bloodletters to create an entire army. The ones I have are from 3rd Ed, the huge buffed out ones w/ the massive axe:
I'm going to try them w/ the Axe because (so long as there's not a specific rule for Hellblades) it confers a +1 ST bonus (total ST56!) and AP2 so no armors saves, but also comes w/ I1. If the I1 just allows my opponent to crush me before I get to hit back then I'll have to rethink how I deploy / employ my Bloodletters. If I attach a Herold w/ a sword on the model I'll at least get a few 'initiative order' shots in against most models I'll be facing on a regular basis.
I also have 2 Bloodthirsters, 2 Great Unclean Ones, and 6-8 Daemon Princes. I think the 1-2 punch of Death and Destruction is coming back!
So anyway, back to my Chaos Altar idea. Here's a sketch:
What do you think? It's a rough sketch, and of course I'll have chains and spikes and skeletons / corpses / wargear strewn about.
I have been kicking this idea around for almost 3 years now, was going to build one for a campaign game but it never happened so I never made the altar. Now it's way more than an objective in a 'one off' game, I can use it in every game. Give my opponent somehting to shoot at while we wait for my Daemons to arrive .
Skalk Bloodaxe wrote:@ Vik- You and I have discussed the countless projects we have started. I posted pics of what I have going on recently, have added a few items to that w/o finishing anything else. Need to change that soon, my "on deck" shelf is getting cluttered.
@ dsteingass- Yeah, I'll never posting pics of it again.
@ Bruticus- That was one of two 4x4 board I made that I was really excited about when I first made them but even after a few games our group consensus was the canal was really annoying because of how it limited terrain placement, and the only function it wound up serving in the end was a place to roll dice. Both 4x4 boards have been stripped. 1 remains as a board for 4x4 games (Necromunda, Mordheim, small 40K games, etc) and the other one has been traken outside for other uses. I was really into the idea of layered terrain but the reality of it was more annoying than useful.
@ Wh40kPicasso- See below
@ Galorn- You know I respect your work, I really appreciate the compliment. More awesome work coming soon!
No work last night, a friend of mine got back from vacation yesterday so we hung out.
But my mind is still grinding away. I had an idea last weekend for a Chaos Alter that 'counts as' a Skyshield Landing Pad. I think we'll be seeing many different instances of that idea coming along very soon. It will have a specific application for me as I'm really starting to take an interest in Chaos Daemons as allies and as an army choice. I have enough Plaguebearers to make 2 units of 7, and I have enough Bloodletters to create an entire army. The ones I have are from 3rd Ed, the huge buffed out ones w/ the massive axe:
I'm going to try them w/ the Axe because (so long as there's not a specific rule for Hellblades) it confers a +1 ST bonus (total ST56!) and AP2 so no armors saves, but also comes w/ I1. If the I1 just allows my opponent to crush me before I get to hit back then I'll have to rethink how I deploy / employ my Bloodletters. If I attach a Herold w/ a sword on the model I'll at least get a few 'initiative order' shots in against most models I'll be facing on a regular basis.
I also have 2 Bloodthirsters, 2 Great Unclean Ones, and 6-8 Daemon Princes. I think the 1-2 punch of Death and Destruction is coming back!
So anyway, back to my Chaos Altar idea. Here's a sketch:
What do you think? It's a rough sketch, and of course I'll have chains and spikes and skeletons / corpses / wargear strewn about.
I have been kicking this idea around for almost 3 years now, was going to build one for a campaign game but it never happened so I never made the altar. Now it's way more than an objective in a 'one off' game, I can use it in every game. Give my opponent something to shoot at while we wait for my Daemons to arrive .
Actually the Invuln save makes the I 1 bit largely moot. and you forgot they have furious charge as well.
Hmm roman style columns you say... Dave should be sending me some that would be easy to tweak for your purposes...
@ Jake- Thanks! It was a really good game, very close up to the point that I was able to get the starboard flank to collapse. From there it went my way pretty well.
@ Galorn- Yes, send me more stuff so I can feel like and even bigger loser for not having sent you back anything yet.
@ Briancj- What are you doing the weekend of ... July 28th? 40K 6th Ed, 2,000 pts. Batrep w/ pics absolutely mandatory.
If you're up for a 4 hr drive to the sticks for a game of 40K after a week of brain-numbing techbabble upsell, the invite is open. If not, we'll pick another day.
Recovering from my week-long VMware certification class.
OMG, You'll be ready to kill something.
I'm already ready. Already. The fact that I have to shell out $3,500 because you can't get the cert without taking the class has made me angry. Very, very angry. Like, "Illudium Q-36 Explosive Space Modulator" very angry.
Chaos stuff would be growing real teeth, or have lips and tongues sculpted all over their surface, or maybe just spiky gak growing out of infected tank traps?
@ Briancj- So that weekend doesn't work? PM me w/ your schedule. If Galorn can come as well he's totally invited.
@ Galorn- Dude you're totally invited to come to VT for a game.
@ GiraffeX- I need to stop by my DIY store and pick up some hardboard. I thought I still had some left but I used it all. I'm thinking I'm going to build some larger buildings out of it as well. I'm really excited about this project, hopefully it goes quickly. I don't need another 3/4 finished project sitting around.
@ RSJake- Hmm. Not sure. Will have to check when I am home, I'll give you measurements.
@ alabamaheritc- Thanks for stopping by! I'm really looking forward to the portal project.
@ dstein- Aside from the Summoning Altar ('counts as' SLP) I try to keep my terrain looking 'Imperial'. It works for every game no matter who is playing. I can see Orks and Tyranids scrapping it out on an abandoned Imperial firebase, but not so much across a Chaos-imbued landscape. The Imperium is the constant common denominator on my table. It works for everything I have and everything I plan on doing in the future.
@ loota boy- Yeah, I have to say those Bloodletters are the best version of them GW ever released. I have had this discussion before w/ other people, and I just don't like the spindly Bloodletters from RT metal and current plastics, and the 2nd Ed Bloodletters just look goofy. The 3rd Ed Bloodletters w/ axes look like miniature Bloodthirsters, and that's just awesome in my book. Sadly, the Hellblade counts as a Power Sword, rules are quite specific on that, so my models have awesome looking axes that are ST as user and AP2. Could be worse, I'm just disappointed I don't get that +1 ST for using an axe. Flip side is I'm not hitting on I1, so I'll stop complaining.
Last night I finished my "mystery project" and I think it came out pretty well, even took pictures. I put my camera on the computer bench, went to the living room to catch a part of 5th Element, and instantly fell asleep on the couch. Opps. So pics tonight.
The clarion call of Chaos is tugging at me once again. I had to do some work on my Death Guard to ensure WYSIWYG last night (combi-weapon swap, etc) and put my 2nd Ed Daemon Prince of Nurgle on a round 40mm base (instead of square). Have to admit I'm looking fwd to the new Chaos Codex coming out. Rumor is it's being released in August. I'm really hoping it has some CHAOS in it this time, like weapon upgrades for vehicles and better character options (such as...a Chaos Champion choice that Aspiring Champions can aspire to).
But I'm still focused on terrain. My contest piece is coming along nicely and I expect to be finished w/ it sometime next week. I've got a few other projects that could be finished w/ minimal work, I just need to finish them. I have only a few loose barrels / crates left and have decided that I'm going to keep them loose and use them as "filler" for my tabletop, and alos consider them 'bitz' for any future projects I have. I have a LOT of GW plastics that need attention (tank traps, etc). I really need to get working on the Bastion, but unless I find the 4th Aegis wall for the top turret I'm not as excited about that project. :(
I'm looking at MicroMark for plastic sheets. Not bulk, just detail sheets like diamond plate and corrugated siding. I know I can replicate the corrugated siding w/ cardboard but for my Imperial buildings I've decided against this and will go w/ the manufactured sheets.
Any recommendations for where to buy plastic rod / girders / etc? I know that Evergreen is a good source but it's a bit $$$ for my wallet right now.
As always, thanks for reading and I'll be back tonight w/ some pics.
Skalk Bloodaxe wrote:@ Briancj- So that weekend doesn't work? PM me w/ your schedule. If Galorn can come as well he's totally invited.
@ Galorn- Dude you're totally invited to come to VT for a game.
@ GiraffeX- I need to stop by my DIY store and pick up some hardboard. I thought I still had some left but I used it all. I'm thinking I'm going to build some larger buildings out of it as well. I'm really excited about this project, hopefully it goes quickly. I don't need another 3/4 finished project sitting around.
@ RSJake- Hmm. Not sure. Will have to check when I am home, I'll give you measurements.
@ alabamaheritc- Thanks for stopping by! I'm really looking forward to the portal project.
@ dstein- Aside from the Summoning Altar ('counts as' SLP) I try to keep my terrain looking 'Imperial'. It works for every game no matter who is playing. I can see Orks and Tyranids scrapping it out on an abandoned Imperial firebase, but not so much across a Chaos-imbued landscape. The Imperium is the constant common denominator on my table. It works for everything I have and everything I plan on doing in the future.
@ loota boy- Yeah, I have to say those Bloodletters are the best version of them GW ever released. I have had this discussion before w/ other people, and I just don't like the spindly Bloodletters from RT metal and current plastics, and the 2nd Ed Bloodletters just look goofy. The 3rd Ed Bloodletters w/ axes look like miniature Bloodthirsters, and that's just awesome in my book. Sadly, the Hellblade counts as a Power Sword, rules are quite specific on that, so my models have awesome looking axes that are ST as user and AP2. Could be worse, I'm just disappointed I don't get that +1 ST for using an axe. Flip side is I'm not hitting on I1, so I'll stop complaining.
Last night I finished my "mystery project" and I think it came out pretty well, even took pictures. I put my camera on the computer bench, went to the living room to catch a part of 5th Element, and instantly fell asleep on the couch. Opps. So pics tonight.
The clarion call of Chaos is tugging at me once again. I had to do some work on my Death Guard to ensure WYSIWYG last night (combi-weapon swap, etc) and put my 2nd Ed Daemon Prince of Nurgle on a round 40mm base (instead of square). Have to admit I'm looking fwd to the new Chaos Codex coming out. Rumor is it's being released in August. I'm really hoping it has some CHAOS in it this time, like weapon upgrades for vehicles and better character options (such as...a Chaos Champion choice that Aspiring Champions can aspire to).
But I'm still focused on terrain. My contest piece is coming along nicely and I expect to be finished w/ it sometime next week. I've got a few other projects that could be finished w/ minimal work, I just need to finish them. I have only a few loose barrels / crates left and have decided that I'm going to keep them loose and use them as "filler" for my tabletop, and alos consider them 'bitz' for any future projects I have. I have a LOT of GW plastics that need attention (tank traps, etc). I really need to get working on the Bastion, but unless I find the 4th Aegis wall for the top turret I'm not as excited about that project. :(
I'm looking at MicroMark for plastic sheets. Not bulk, just detail sheets like diamond plate and corrugated siding. I know I can replicate the corrugated siding w/ cardboard but for my Imperial buildings I've decided against this and will go w/ the manufactured sheets.
Any recommendations for where to buy plastic rod / girders / etc? I know that Evergreen is a good source but it's a bit $$$ for my wallet right now.
As always, thanks for reading and I'll be back tonight w/ some pics.
Done deal. I'll have to figure out timing... What day(s) of the week work best for you?
ok... now i feel the need to myself for not undersatanding right away the use of that piece...
bay i add that i particularly like the downleading door?... i think i need to do that soon too... it adds a cool idea to the table... one could device rules for these tunnel entrances... like... if you roll dices you choose to get out in another tunnel entry... of if you fail you get lost and the spinning wheel of misfortune decides where you get out then...
@ Vik- sometimes seeing something in use helps define the perspective better.
@ Hyenajoe- Thanks! It's my first Necromunda Terrain part of the project that I actually completed! Yay!
@ dstein- Thanks! Your set needs one of those I think, I don't remember seeing one.
Looking at those pics there's a huge glob of wash that pooled up and looks sloppy. I'm going to scrape it off and reapply soem rust effect, maybe drill out some slug gun impacts, etc. Hardest part about doing thins sort of thing is where do you stop?
All my projects have taken a back seat for some IRL stuff but I'm still planning on having my -=]_=- piece finished before 08/02. Looking forward to sharing that. As it is right now it's playable on my table, but I'm striving for a higher standard this time, especially since my results will be judged.
Huge globs of wash = oil leaks or congealed ooze. Just act like it is deliberate and you are good to go. I give all my scenery to a friend to look after, makes it easy to stop but I am always itching to add more details every time I go round for a game.
@ Bruticus- I get what you are saying. I feel on this piece it is out of place becasue there's no apparent source for it, but then again it could have originated a few hundred feet above this tunnel entrance. I'm still likely going to change it, or at very least outline the globs with a black wash to give it a more deliberate look. I'm still learning, this is another step in that evolution.
@ dstein- Don't make it easy for him.
@ Vik- Here's the Necromunda Rules from GW website. Print it out and study it this week. There's a test on Monday.
well skalk... i have them already on my comp... just was always too lazy to read... but as i am about to restart the working life style soon... D-day is the first of august... so i will have plenty of reading time from door to door then^^... so if you are a good teach... postpone the test...i will of course then need mentors for my rules related questions
Some mysteries are best left to the great unknown of the Warp.
Got a huge amount of work done last night on my -=]_=- project. I know... 'pictures or it didn't happen'. Good news is I've been doing a WIP photo series so once I submit my piece I'll be showing a 'step-by-step' process from start to finish, including my bad ideas and my mistakes. It should be much fun. If all goes well I should be finished with this before Saturday, which means the first game it gets used will be with other LoER members! Briancj and Galorn are coming up for a game on the 28th. Really looking forward to it .
Skalk Bloodaxe wrote: If all goes well I should be finished with this before Saturday, which means the first game it gets used will be with other LoER members! Briancj and Galorn are coming up for a game on the 28th. Really looking forward to it .
Not a lack of confidence, being realistic. Briancj and Galorn are brutal circuit players that would throw a (kitten / puppy... take your favorite) into a wood chipper right in front of you if it meant they would gain a tactical advantage. I've heard rumors that Briancj eats raw meat as a sacrifice to the unknown Gods of Chaos before playing. Yes, I know he plays IG. I'm thinking it's just a front to cover the massive Chaos Cult he is part of.
@ Hyenajoe- I'll write up a battle report if I win.
Otherwise I will...
Skalk Bloodaxe wrote:Not a lack of confidence, being realistic. Briancj and Galorn are brutal circuit players that would throw a (kitten / puppy... take your favorite) into a wood chipper right in front of you if it meant they would gain a tactical advantage. I've heard rumors that Briancj eats raw meat as a sacrifice to the unknown Gods of Chaos before playing. Yes, I know he plays IG. I'm thinking it's just a front to cover the massive Chaos Cult he is part of.
It's going to be a brutal fight.
Thanks I've never been called a "brutal circuit player" before...
Wh40kPicasso wrote:wish i could throw my lot in. ;(
Skalk Bloodaxe wrote:Not a lack of confidence, being realistic. Briancj and Galorn are brutal circuit players that would throw a (kitten / puppy... take your favorite) into a wood chipper right in front of you if it meant they would gain a tactical advantage. I've heard rumors that Briancj eats raw meat as a sacrifice to the unknown Gods of Chaos before playing. Yes, I know he plays IG. I'm thinking it's just a front to cover the massive Chaos Cult he is part of.
It's going to be a brutal fight.
“Supreme excellence consists of breaking the enemy's resistance without fighting.”
― Sun Tzu, The Art of War
lol... you guys make me feel so envious... be sure to drink a beer on all those that can´t take part in that slaughter... looking forward to such a cool report... maybe you do them all...and we get to read reports form three perspectives...
Being that we're playing 6th Ed I'm going to be playing a more 'vanilla' force that is troop-heavy. I haven't decided if I want to go w/ a straight Plague Marine force or if I want to have some of my Berzerker buddies show up for the fun as well.
I'll definateely be running a couple Dreadnoughts. Yeah, the whole Fire Frenzy thing can be annoying if the Multi-Melta is right next to my Vindicator or Rhino filled with Plague Marines, but it's a chance I'm willing to take.
I'm likely going to take a Daemon Price w/ Wings plus a full 10-man Terminator squad that will Deep Strike. My Plague Marine units all have Icons so they will drop where they are most needed. I've been converting my models to Power Mauls so that extra +2 ST will take out some of the harder targets and my Lord w/ a Daemon Weapon should rage through the softer targets.
Or... this entire post could be intentional misinformation. Hmm. HMMM.
Tunnel entrance looks awesome, Skalk! Great weathering, and I love the choice of colours. How on earth did you do those stairs at the backside? They add so much to it as a terrain piece!
I should really, you know, think about what to bring up to Vermont. I have no idea. I mean, NONE. Do I even have a fully painted army at any real points level? Guess those Valks are going to get their trial by fire...
@ Scarper- Thanks! I really enjoyed this piece. Made a few mistakes but I'm still learning w/ the new techniques I'm using. The ladder is a pre-fab I took from a model train set, used to have a bunch of them and now I have no idea where they are, likely lost them years ago, only have 1 more left.
@ Wh40kPicasso- Yes, exactly.
@ Briancj- Gah! I completely forgot about Flyers. I need to look up shooty rules to see what I have to bring them down.
@ dsteingass- Sure, take sides. I see how it is.
Meant to get some work done last night but was completely beat when I got home and fell asleep at my desk. So no updates. On call for work this weekend so I'll likely get some work done on the project and if I finish it I'll post pics here.
Im loving your necromunda terrain skalk! after seeing yours, daves, and bruticus', im finaly pushed into starting necromunda terrain! ( oh and i must say i am incredibly jealous by all those awsome bulkheads you have! )
Yes it was quite the awesome time. And thanks for the Marine Swap!
@ Rogue Wolves- That is great news! You certainly have all the inspiration and support you'll ever need. Make sure you tell me when you get that project started.
Ok, so here's the update I've been talking about for the last couple weeks. A while back I posted about the LoER Terrain Contest and that I was going to do a project. Below is the entire process, including the bad ideas and the mistakes. I learned a lot from doing this. If I were studying how to build terrain, this was my mid-term exam. I put a lot of work into this (some of it completely unnecessary as you'll see later) and I'm posting everything from start to finish (including mistakes and bad ideas) because it was a huge process for me and to also save the ideas that have value but didn't make it to the final piece on this particular project.
When I saw the theme of the contest (lids) I decided to finally try an idea I had for making Necromunda terrain from paint can lids. I started my project on July 7th.
...and immediately had an idea:
I have no idea what I was thinking when that happened, but it didn't take me long to realize that I had just rebuilt the paint can. Tore that apart, fiddled around with a few ideas, and realized this was a much better idea:
Based black:
Starting to figure out how I'm going to make this work. Used drywall mesh again because I like how it comes out, and was very careful when laying it down. You really have to look for the the lines where it connects / overlaps. Also experimenting with plasticard and seeing what it would / would not allow for flexibility. Also started actual fabrication (ramp / etc) for the first time in a long time. Off to a good start!
RIVETS!!!
I finally figured out how to make rivets that didn't drive me mad (1/16 hole punch and cereal box cardboard) and placing them was a lot easier once I figured out how to line them up before the glue set (I glue the rivets to the support brace and then glue the brace to the hull of the defense turret). I'll be doing this a lot more in the future.
Final build! Base coat, picture of deatil on the support, paint job, almost done! Yes, this is where I thought I was almost done. I was simply going to hang a chain across the 2nd opening, and I like the Shadow Gray look for everything I do that's Imperial-based. And this scheme matched my Bastion and the two small bunker buildings I made back in October '11 so I felt the family just got a little bigger and it was a worth addition. I was trying to figure out the final little bitz when I took a look at Kvlt and he shook his helmed head ruefully at me as if saying 'so much potential, so little discipline, so little attention to detail, may as well add this to the list of failed projects'.
Ouch.
So I dug deeper, looking for that scheme that would take the feeling of applied failure away and push my limits. Apply the things I've learned and dig up long-lost skills that atrophied over time. Don't 'settle', CREATE!
Took a long hard look at what I had and decided the idea was sound and the execution so far was worthwhile, the problem was in the details. Most glaring of them all was I wasn't careful when laying down the mesh for the ramp and it just looked weird. So up came the mesh inside the turret. I also added hazard stripes inside the ramp, and I think that was a huge success.
Tried to weather / shade the sides but failed miserably.
However, weathering inside the turret was going quite well. I used the sponge rust method here, and it blended some of the graph left behind by the mesh tape and motivated me to look for better ways to apply weathering to everything else.
The interior looked a bit bland to me, and suddenly I thought I'd try adding an Aquila to the floor. I got things set up to go, sat there a long time staring at it, and finally accepted the fact that this was above my skill level and I was too intimidated to 'try' and fail on a piece that I was so close to finishing. The idea remains but I didn't try it here.
I needed depth and detail. Started adding rust to the outside. Experimented a bit with outlining as well. This is a technique I'll work on a lot more because I can see the application having a huge impact on what I do w/ modeling overall. This particular bit didn't completely survive but it's still there on the final piece a little. It was during this process that I was wishing I had done the salt thing earlier. I will try that on the next one I build, but at this point it was too late to ruin the work I'd already done. if I'd only known how much it was going to change from here I would have done it at this point. Another lesson learned.
The 2nd opening in the defense wall was bugging me. I was an unintentional result from rushing the project early on, and now it needed to be managed. I was going to put a chain across it w/ a caution sign, but it looked stupid when i did the mock-up. Then I thought about a permanent fixture like a gun, but that was equally lame. Then ktbb22 told me to make stairs. There;s an inside joke w/ this now. Sorry, can't share it because it's horribly offensive, and I'm only mentioning it so she knows I remember. Ha.
I was going to make the stairs out of wood but didn't like the look so I made them out of plastic instead. It turned out to be way easier than the wood, more symmetrical, and looked a lot better.
To finish the stairs I needed a base to measure from, and had been using a random terrain base I hadn't used for anything else yet. I even went as far as flocking and painting it:
...but when I tried to mount the piece I realized it simply would not fit properly, it was just that much too small where it just barely didn't fit. So it's off to Home Depot to pick up some hardboard (I needed some anyway, this was just the motivation I needed to actually go because I hate that part of VT, strip mall madness and the mass of humanity... ugh) and made a base specifically to fit my project:
Next photos are of the finished piece and were submitted for the contest:
I considered putting add'l detail to it, but decided to leave it as it so I can use separate bits to add the detail and keep the versatility. CSM model painted by ktbb22:
I'm adding this pic simply because it looks awesome and I think she did a great job w/ this miniature. It's her first paint job EVER. I have a feeling if she keeps at it she'll surpass my skill in no time.
And a couple more "action shots".
So there it is, my 'top secret' finally on display. One of the cooler things about this this piece is genuinely scratch built. The only 'pre-fab' I used was plastic I-beams and a jewelry necklace. Everything else was cut from plasticard, wood, and cardboard. That's a huge change for me. I've been relying heavily on pre-cast items to achieve the look I've been going for. I'm glad to have stepped out of that comfort zone and I'm quite pleased w/ the results.
I had the idea to make platforms w/ paint can lids a long time ago and this project was the perfect opportunity to try it out. This project is my "intermediate terrain mid-term exam" so to speak. I employed almost every new technique I've learned in the last few months. This is the new direction for all of my terrain- to look distinctly Imperial, heavily used, and showing signs of neglect / disrepair. I'm going for an overall "abandoned Imperial outpost" look, or possibly still occupied but severely undermanned / contested. The need for maintenance is overridden by the fight to stay alive.
I'm planning on building two more of these and place them on the board w/ similar stats as an Aegis Defense Line. It will make a great objective (or place to put an objective) and will be some of the more contested piece of real estate on the board because it will be difficult to remove whoever is already in there as it has only 2 entry points and I'm counting the rest as Difficult Terrain (meaning up and over the side). The main platform holds up to 21 models (w/ 20mm round bases) w/ 5 more on the ramp. That's a huge blob, and all w/ 4+ cover save (2+ gone to ground).
Regardless of what happens w/ the contest, I've already 'won'. I feel great about this piece, know what mistakes I can avoid for next time, and it's really got me kick-started to finish up some other projects using similar techniques (as well as go back to others and tie them in w/ the overall look I'm going for).
Now that this is over, I can get back to work on other things. The "on deck" shelf is a bit backed up right now.
Good stuff, really nice work and possibly your best yet. I like the steps, they show great attention to detail, and it's surprisingly rare to have ramps like that as well.
It looks like you could place another bit of scenery in the middle (like that tunnel entrance maybe) if you ever wanted to.
cool, and i like the fact that you showed almost every single step in the making of that awesome piece... good luck with the competition (for me you certainly don´t need luck )
@ Briancj- You broke the code! Yes, that's exactly what we were laughing about. At very least you have to respect the Imperial Guard for being an Equal Opportunity Conscriptor.
@ Hyenajoe & Bruticus- Thank you both very much. You know I respect your scratchbuild skills and strive to reach the level of quality you both produce with regularity. This is the first of many like it. As I continue w/ terrain my skills will improve, but this piece is a huge leap forward compared to some of my other things, even my most recent. Once I have a few more of these pieces done I'll set up the table and post some action shots.
@ Vik- I talked it up so much that I sort of had to do that. I haven't posted any real work here in a while.
@ Styrofoam04- It's an illness. I'll be walking on the side of the road or through a parking lot and pick up small bitz left over from collisions, things that were dropped and broken, etc. My wife rolls her eyes and calls me a hoarder or a nerd. But she does it w/ a smile.
Skalk Bloodaxe wrote:@ Briancj- You broke the code! Yes, that's exactly what we were laughing about. At very least you have to respect the Imperial Guard for being an Equal Opportunity Conscriptor.
@ Hyenajoe & Bruticus- Thank you both very much. You know I respect your scratchbuild skills and strive to reach the level of quality you both produce with regularity. This is the first of many like it. As I continue w/ terrain my skills will improve, but this piece is a huge leap forward compared to some of my other things, even my most recent. Once I have a few more of these pieces done I'll set up the table and post some action shots.
@ Vik- I talked it up so much that I sort of had to do that. I haven't posted any real work here in a while.
@ Styrofoam04- It's an illness. I'll be walking on the side of the road or through a parking lot and pick up small bitz left over from collisions, things that were dropped and broken, etc. My wife rolls her eyes and calls me a hoarder or a nerd. But she does it w/ a smile.
The next one will look even better with your most recent improvements in painting. It looks VERY good.
It's both very imaginative, well built, and your paintjob is absolutely great (the brown weathering you're using gives a realisitc rust aspect )
A whole themed table of this quality is something I'd love to see!
I agree with everything Joe said! A whole Table! YES! Also I want to add that I am completely blown away by the sheer amount of character it has, oozing with it!
It's an illness. I'll be walking on the side of the road or through a parking lot and pick up small bitz left over from collisions, things that were dropped and broken, etc. My wife rolls her eyes and calls me a hoarder or a nerd. But she does it w/ a smile.
i know that scene^^... happens to me quite a lot... tho my wife and kids drag stuff to my collection too^^... we are now all horders^^... hell on his first day in school now my son made a scratchbuild walker tank... with bobbins and hot glue... i am so proud!
@ max / Galorn / dstein / GiraffeX- Thank you all very much. Your work staggers me every single time (and you already know that from my rabid fanboy posts on your respective threads). Knowing I've caught your attention w/ my own work is inspiring (starting to truly believe I'm getting much better at this) and somewhat intimidating (can't slack off anymore, everything I do has to show progress). I really appreciate that you guys follow my threads and leave feedback. Looking forward to having new work done soon.
@ bigfish- It passed a Difficult Terrain test.
@ Vik- That's really cool that your whole family is part of what you do. My wife amusedly tolerates my hobby and my kids have absolutely no interest whatsoever. Luckily my friend ktbb22 has a strong interest, so as soon as things get up and running I'll have a full-time partner in this.
SUPPLY DROP!!!
Huge supply of spikeys and skull bitz from RSJake! Dude you are awesome.
I haven't seen it in person yet, wife sent me that photo. I am going to try to make time tonight to take a better pic and post here tonight (so please someone reply to this so I don't have to do an amended post later )
In other Terrain news, if you didn't already know this I took 2nd place in the first LoER Terrain Contest. It was a brutal competition and I'm proud to have placed in the top 3. I was selfishly hoping to win simply becasue if I had I could be working on my other terrain projects right now because I can't enter a contest I'm judging. But alas it was not to be and I'm struggling along w/ the next contest. Link to that thread HERE
I'm going to say something that I won't say it on the contest thread but I'll say it here- I want to strangle Vik for his choice of material- cookie containers / wrapping / etc. Its been an exercise of frustration to find something that works and I've already ragequit Skalk Smash two projects that I didn't even bother mentioning because they survived less than an hour each. But I finally found something that I'm going to see all the way through, even though I'm really not digging it that much yet:
This doesn't look completely horrible like my 'cookie cups' did, but if it were any less durable it would collapse under its own weight. People have offered suggestions for how to improve that, but since I have no idea how long this one is going to make it I'm hesitant to mix plaster or spend $$$ on it. If I wind up liking it I'll pop it off the base and fill it in after the contest is over.
I'm thinking turbine / warp generator / etc. I have an idea how to paint it and how to weather it, and I've already put 2 coats of spray on it and it is on a base. I do not know if I'm going to do another 100% scratchbuild model for this contest or if I'm going to use some GW prefab stuff. I'd sooner go 100% prefab since it's a terrain building contest and it's a display of modeling as well as painting skill. I'll know more as time wears on. At very least I know it will have rivets.
That's it for now. Thanks for reading, thanks for commenting, and thanks for being what makes Dakka so cool. You all rock.
hey skalk... don´t smash that attempt.... i think it has lots of potential... seems like really tiny cookies tho... and...you needed think you have to use a complete intact cookie container for the comp... you are allowed to do all horrible deeds to the materials... as long as you can describe and explain what´s what... everything is allowed....just a hint^^
Automatically Appended Next Post: oh... by the way... soon i will be posting my sons very first attempt of a scratchbuilt... he has started school life recently and there they have a workshop called strange creations.... and he built a walker...
Yeah man, It aint easy, that's for sure, but step back a minute, breathe, and look at the textures, not the flimsy plastic, you're right, it'll never even stick to the base right, so the generator idea is really out unless you can find some way of filling it for $0. Look at the crumpled parts, that looks like excellent damaged sheet metal to me. Try cutting one row of cookie slots off, then reinforce it by building a plasticard box around the bottom or something, or just use one slot for a generator or industrial tool of some kind, or even cut it lengthwise and make them giant exhaust pipes from some ancient archaeotech machine or something., just think about it differently.
I am secretly testing to see if the foil packaging can be embossed myself, I have the same kind of packaging as tat, but it has a corrugated metal patten in it, I'm thinking I can slice off the sides and just use it as decorative sheet plastic too. Once it's painted, no one will know the difference.
secretly testing to see if the foil packaging can be embossed myself,
lol... spilled the beans too early^^
tho i like that idea!!! if it doesn´t work then please share your findings nevertheless... i think there is still much value in them... think think tank here... someone might know a way around!!!
No time to reply tonight, just stopping in to post this because I said I would. More pics in my gallery, and I'll be back for a proper post / review soon!
Skalk Bloodaxe wrote:No time to reply tonight, just stopping in to post this because I said I would. More pics in my gallery, and I'll be back for a proper post / review soon!
@ GiraffeX- I was thinking OSL as well, then decided that I'm terrible at it and was going to skip it. However, I've given the idea ,ore consideration. See update below for more.
@ Vik- I'm going to stick with this one. Already have enough work on it that I have to keep it anyway becasue I'm out of ideas and my hobby time is limited these days so I'm making the best of what I ahve. more on that line of thought below.
@ dstein- Agree 100%.
@ RW- Yes, me! I want a lot more. Like as many as I can. Well, I don't mean thousands, but hmm... I could resurface my 4x4 table w/ them and play all my games on a Chaos world.
@ Galorn- Exactly.
@ Wh40kPicasso- I prefer to think of it as exercising my independence from the tyrannical Imperium.
Ok, lots of pics coming up in a moment, but first a long rant about an epiphany that struck me last night. I thought about pressing charges, but then realized I deserved it.
*waits for that to sink in*
Anyway, I got to thinking last night about the whole cookie thing. I also thought about the whole contest thing. I realized that I was missing the point and have been going about this all wrong. The spirit of the contest is to be a fun project that we can all engage in. Not sharing my WIP is denying me feedback, and it's denying ideas to my contemporaries.
The materials chosen for the contest are (consciously or otherwise) taking people out of their comfort zones. The 'lids' thing was easy for me because it was metal and I'd already been thinking about paint can lids for a loo push limits and break out of comfort zones. The cookie wrapper stuff has been driving me mad... but why? Because it's something I haven't worked with and never would have. I have to think differently, and in that I will find new ideas, techniques, and applications that will translate to future projects and the evolution of my work will continue. To that end, I'm going to try techniques that I do not even attempt, like OSL, gemming, blending, etc. I have no experience w/ any of those other than a few failed attempts that made me run headlong back to my comfort zone. I intend to face my fears of failure on this project and move forward.
I know I am capable of more than I have been producing. Examples of successful tackling challenging techniques would be rust and rivets. I think I've gotten to a point where I'm using both techniques well, I remember just a few months ago when I struggled with both.
Being a dedicant to Nugle I naturally resist 'change'. But even Grandfather Nurgle has to admit that without change there would be no disease, no rot, no death. With that in mind I will slowly and purposefully move forward to achieve my goals.
Now that I have my whining out of the way, on to the AWESOME!!!!!!!!!!!
First off, I have to say that RSJake is a wicked awesome guy. He started out by sending me some MkI Predator parts (side sponsons/ w/ lascannons, autocannon turret, and turret baseplate that converts the Rhino into a Predator. Didn't ask for anything in return, just sent it. Then he sent some 2nd Ed metal Chaos Terminators. This was a trade agreement, but sent them w/o requiring anything from me first. This was just before my most recent 'crash' and when I dropped out I dropped out of Dakka, gaming, almost everything that wasn't directly related to staying alive and staying employed (even crazy people have bills to pay ). Many months went by. I finally came back to Dakka, made good on our past transactions last month and sent what we agreed on for trade. This is what he sent me back:
SKULLS!!! Look at the detail! These are amazing! I want more of these than I'd ever be able to afford or use in my lifetime.
BOTTLES!!! Now when my Plague Marines finish up a hard day of stomping (inset opponent's army here) they can now relax with a tall frosty and celebrate everyone's favorite time of day... beer:30!
CHAOS STUFF!!! Not sure if he sculpted / cast / etc these or not, and don't care. They are awesome. I'll take better pics once they are on a model.
GUNS!!! The detail on these came really out well! I'll be putting these to good use once I get my Cultists project fired up again.
SKULL PLATES!!! This was the only thing I was expecting. All the above was bonus. Really surprised and really happy. But back to these plate... amazing! Awesome! I can only imagine where all these skulls would come from...
I am wicked happy and really excited about using these things in so many different ways. Thanks a lot Jake, really appreciate this and no doubt I'll be buying / bartering more of this stuff from you as soon as you're back in business!
That's a nice haul there! I knew you could put them to good use. And I had been feeling like I had gotten the better side of the trading so far, so I threw some "Kharma" chips in the bag!
I am still making stuff, at least for the next few weeks. If you need more right away, let me know.
@ Jake- Man I was stoked when I opened that package. I am so so so itching to open up my Cultists drawer and start putting some of that stuff to use, but then there's the whole Khorne Berzerker thing... I have a Rhino I've been saving for a rainy day... so many ideas, so little time. I need to win the lottery and take the next 30 years off.
@ RW- Yeah, I have to say I'm a pretty lucky guy. The -=]_=- takes care of its own.
I also thought about the whole contest thing. I realized that I was missing the point and have been going about this all wrong. The spirit of the contest is to be a fun project that we can all engage in. Not sharing my WIP is denying me feedback, and it's denying ideas to my contemporaries.
that my friend is the very essence of the comp as is and why we started it... and why i really stressed myself to that degree to win the first one... to get this thing raging on^^ i think your thoughts will lead you on a very good path for winnership^^
oh and a truly sweet suply drop...the guns jake by the way look very good... a scaleshot to a marine wold be nice...
@ Vik x3- Scale shot when I get the chance, thanks for posting the link, and glad you like my LoER logo. Anyone that likes it may use it. If there's any interest I can make others. I've already made an Ork one just for fun, but it's on my work computer so I'll have to link it some other time.
@ Styrofoam04- RSJake is the man to contact on those.
@ RW- Yeah, was pointed out to me a couple times. Nothing personal about not flying the catpirate anymore, I just finally decided to add some Chaos to the LoER.
A few updates. First is my LoER contest piece. My progress is sucking hard and I'm already rehearsing my concession speech for when I drop out of this one. There's no way I'm going to finish this in time.
However, still going to post this because I like the design and I'm looking for some feedback. Consider this piece to be a power generator of some kind. I offer example A and example B for the paint scheme.
Example A- Plasma Core
I am thinking OSL on the enclosure frame from the main plasma core. I have no idea how to do OSL but I've read some stuff online and many of the examples looked absolutely ridiculous. In fact, I've only seen OSL done well a few times (even some of my revered Dakka heroes don't seem to pull this one off). I can definitely see the application for OSL here, but if I go with this it'll be an experiment only and you can bet it'll be subdued and understated.
Example B- Electric Generator Coil
No OSL on this one, just dirty gritty old-fashioned archeotech. Up front I'll say I like this one much better. It's more in theme w/ my tabletop, lends a lot of possibility to the dented / smashed / 'may or may not still work' look, and would be a lot easier overall. I know, I know... not reaching for the stars. Right now I'd rather be reaching for a beer.
Your thoughts / feedback please.
In other news, Galon sent me another cast. This one is specifically for my Mordheim stuff and it's really neat!
It looks like this on the outside:
inside:
and makes these:
That's not an actual cast, it's the master that I sent him. I'm looking forward to getting back to my Mordheim terrain before 2037.
And finally, the project I was working on for the couple days in between submitting my 1st LoER project and starting my 2nd. This is going to be my Altar of Summoning, which oddly has the exact same points cost and stats are a Skyshield Landing Pad.
Nothing else has happened w/ it, and it may be months before you see it again. But it's a start and I wanted to share what I got started.
@ dstein- Much coolness will be coming from this soon. I have a friend that's going to start playing Daemons and I can use it for Allies.
@ Vik- Sorry Vik, going to stick w/ the copper coil. Abused and abandoned matches my table better than functional and shiny. And the Altar will have a lot of detail specifically plasticard overlays. Going to have a huge Chaos Star and each Chaos God will be represented, kind of like this:
Notice that each god has their opposite on... you guessed it, the opposite side of the star.
I've always thought that GW got it wrong. Khorne should hate Tzeentch for relying on magic instead of martial prowess, and Slaanesh should hate Nurgle just because he's so icky and yucky. Of course Khorne would still disregard Slaanesh for being so... uhm... Slaaneshi, and I doubt Nurgle and Tzeentch would ever get along because Tzeentch freaks out about the whole "all things come to an end" thing that Nurgle has going on. Khorne would barely tolerate Nurgle, but would at least have some grudging respect for the fact the Nurgle happily wades into battle with a grin. I doubt Nurgle would be terribly upset by the fact Tzeentch and Slaanesh don't like him, but he would wonder why. Because really, who WOULDN'T like Papa Nurgle? He just wants to be your friend. Really. Ask him for a hug sometime.
i understand the decision of yours... makes sense... tablewise.. but i think i will nick that idea...
and the star makes really much sense for me... and i liked the lil discription... also... makes papa nurgle sound a bit like a pitbull... he just wants to play
Skalk Bloodaxe wrote:
I've always thought that GW got it wrong. Khorne should hate Tzeentch for relying on magic instead of martial prowess, and Slaanesh should hate Nurgle just because he's so icky and yucky. Of course Khorne would still disregard Slaanesh for being so... uhm... Slaaneshi, and I doubt Nurgle and Tzeentch would ever get along because Tzeentch freaks out about the whole "all things come to an end" thing that Nurgle has going on. Khorne would barely tolerate Nurgle, but would at least have some grudging respect for the fact the Nurgle happily wades into battle with a grin. I doubt Nurgle would be terribly upset by the fact Tzeentch and Slaanesh don't like him, but he would wonder why. Because really, who WOULDN'T like Papa Nurgle? He just wants to be your friend. Really. Ask him for a hug sometime.
Always thought the same thing. The opposition would be much clearer.
I love the concept of your altar! How are you going to represent the gods specific branches?
I was thinking along similar lines for my (on hold) summoning alter. I may wait until yours is done, and steal a few ideas!
For mine I was thinking Ooze, Puss, Worms and Flies for Nurgle; Skulls of course for Khorne (I should have that production mold done in the coming weeks if you need skulls ); I guess Tentacles and leather straps for Slaanesh; and what for Tzeentch? Feathers? I draw a blank there...
Anyway, I can't wait to see what you do with yours!
@ both- Each 'section' will be carved / etched into the plasticard instead of large raised lumpy things like skulls, etc. Khorne will of course have skulls. Nurgle will have a high corroded section, Slaanesh will have spiky bits on the side and probably some channels carved out for shains etc, and Tzeentch will have swirling madness. This is not a project that will be done in a week or so. I have a lot of practice to do on junk bitz first, and then take my time w/ the final product. I'm looking forward to starting it.
In other terrain news, I'm stopped dead right now. Going to be busy for the next 9 days, no hobby or Dakka time at all. I'll be back online by the 27th / 28th. Still going to enter 'best effort' into the LoER contest but I'm already stomped by the other entries. If I had the time to make effort...
Swirling Madness! Why didn't I think of that? I actually plan to have lots of the raised surfaces, skulls, etc., but in a shallow depression, or bowl. And after it is painted, I want to fill it in with clear resin, to give it a "window" appearance.
I swear, Real Life is a real pain sometimes. I wish we could just be left alone with our madness....
Excellent stuff Skalk, not sure why I wasn't already subbed. Some very nice pieces there, especially fond of the last comp entry and the 'scaffold' towers.
Wow. Epic Skalk.
I love to make terrain too. I went on a rampage making a set of terrain that was modeled to look like a chaos invasion of Stalingrad. Smashed buildings and chaos graffiti everywhere.
Keep up the good work and the casting you are doing is awesome. Love to see the works in progress.
I've always thought that GW got it wrong. Khorne should hate Tzeentch for relying on magic instead of martial prowess, and Slaanesh should hate Nurgle just because he's so icky and yucky. Of course Khorne would still disregard Slaanesh for being so... uhm... Slaaneshi, and I doubt Nurgle and Tzeentch would ever get along because Tzeentch freaks out about the whole "all things come to an end" thing that Nurgle has going on. Khorne would barely tolerate Nurgle, but would at least have some grudging respect for the fact the Nurgle happily wades into battle with a grin. I doubt Nurgle would be terribly upset by the fact Tzeentch and Slaanesh don't like him, but he would wonder why. Because really, who WOULDN'T like Papa Nurgle? He just wants to be your friend. Really. Ask him for a hug sometime.
They used to be the other way round before the fluff was changed which is why the Realm of Chaos books were khorne/Slannesh and Nurgle/Tzeentch.
I'm going to be working on a portal for my Tzeentch daemons at some point as well, looking forward to see what you do with yours.
Honestly, I forgot what I sent you guys, and I like to see the pics so I can remember what I sent! Yours and Max's were a blast to look at! Skalk is slacking over here..blaming RL and all that BS..
@ RSJake- That sounds very cool. I haven't worked enough w/ resin or whatever that water effect clear stuff is yet to trust it on a 'real' project. Perhaps this coming winter I'll find time to figure some of those things out. And yeah... I have felt that way before as well. It is what it is.
@ Wh40kPicasso- Trust me, no one would be happier to see that completed summoning altar than I would be. It still looks exactly the same as the last picture you saw of it. Also, thank you for the link. I finally got to see one of those at my FLGS a couple months ago after seeing pics of it online for months. Great bit of scenery, way too small to be SSLP.
@ Some_Call_Me_Tim?- That is one of the reasons I'm doing this as a project log instead of toiling away at home. Plenty of inspiration here. And thank you for the compliment. It's the most (literally) rewarding piece I've ever done.
@ monkeytroll- Dakka is a big and busy place. You're here now, all that matters. Thanks for the compliment. I really enjoy that piece and I'm looking fwd to it being on the table a lot more.
@ sennacherib- Do you have any pics of that Chaos Stalingrad setup? I'd love to see them. Thanks for the compliment on the casting. It's not hard to do when you have high-quality molds. Just need to get the mix perfected and eventually start using resin instead of plaster.
@ GiraffeX- I'm wondering if I need to change the dimensions a bit. Looking for one of my friends to get (or FLGS to display) a SSLP to measure and compare against.
@ dstein- I'm back, and yes it is now 'later', although later than either of us would have preferred.
@ DemetriDominov- So do I. Not sure when that will be, see below.
@ Viki- Hi.
I feel like I haven't updated this in a very long time, much longer than it has actually been. Perception of time is relative indeed.
Anyway, a few things to share. First up, and apologies to Vik, I'm out of the LoER contest and likely won't be participating in the next few either. I need structure and focus for something like that and I have neither right now. Once it's darker and colder things should slow down a bit and I can get back to the things I want to do.
But on to the awesome! First up is my massive incredible awesome prize package from dstein.
Here it is broken out into lots. 7 sheets of plasticard. Being the awesome and attentive person he is, Dave chose the holy number of Nurgle. I'm guessing these are .040, and one is super thin, won't even guess what it is. Bottom line- SCORE!
But wait! There's more! 3 sheets of TEXTURED plasticard!
texture closeup:
The treadplate is so perfect for a couple things I want to do. This will not be living in my supplies drawer very long once I get going again.
And the list continues! Really neat plastic fiddly things!
I have no idea at all what they are, but I can see multiple applications for them. Sci-Fi wall section separators, hasty barricades, fodder for the junk pile, etc. They will see use for sure.
The next bit of awesome is way over the top. Resin walls.
Does anyone recognize these / know the manufacturer? Also, see model in last pic (far right) for scale ref. I want so so much to say "these are next" but I can't. However, they have my interest and I'll be using them for something as soon as I can.
He also sent me some plastic rods. In an ironic twist of humor, he sent the holy number of Tzeentch. There are hollow tubes, hexagonal rods, etc. All of it awesome. It looks old enough to have been on my grandfather's train table in the '70's. It'll be getting some use on my next few scratch builds.
As if any of the above was not enough, I also rec'd somehting I'd likely have never bought on my own- weathering powders!
I have no idea how to use them, I will be looking for some tuts online.
I'm really happy and really impressed / overwhelmed!!! Thanks so much Dave. I'll make an effort to do something with this that does it justice.
Next piece is somehting I have been looking at for years. It has been discontinued for years. I was so happy to find these. Believe it or not, I found them in a podunk general store while I was on vacation.
I don't think I need to explain how I'd use them, they speak for themselves.
Last bit for this update- massive eBay haul from Hordes O' Bitz!
My brain hurts from the possibilities here. Ouch.
I won't be working with any of this for a while, but I have it and the possibilities are amazing. I'll post up whatever becomes a WIP and share it w/ you all. I'll be back.
The Resin walls are old Armorcast, OOP for several years, maybe even worth some money now, who knows??
The red plastic thingies are rails for mounting laptop solid-state hard drives, I have TONS of those things, I figured they looked like something that would fit in your little corner of the underhive!
The cobblestone sheets probably are from the 70s! I found them on clearance at a train shop years ago, it's very brittle plastic, but it holds paint and glue very well.
Automatically Appended Next Post: .>As far as the weathering powders go, that little paper in the box is about right, brush it on dry, or mix with some thinner and make a wash, then seal it with clear coat, future, hairspray, etc. any kind of clear sealer will do the trick so they don't rub off when handling. It's just pigment powder, the same thing that is in your paint, but just without a binder or medium.
Automatically Appended Next Post: They still have a picture on their site, but they don't sell the product anymore it seems
those red thingies really look useful... for me they look like tech buttresses...like the wall supports on space station/ships and so on...
and those weathering powders must be due to your excellent weathering and rust methods... dave is really into the thing to bring our talents to be trained to further levels! i currently feel a bit like a padawan^^ (which is the best thing to be when you have a master at your side that really cares about your skill development!)
and to the competition thingy... well it will be a blow to have you not competing.... but i see what you mean by structure... and how this can affect your hobbylife...there will be more competitions hopefully... of that i am sure...
my wife recently got me the second lil thingy of a pice for supporting something on a printer... her description was fuzzy and my understanding of where it was used earlier too... but i think i will take a pic of that piece tomorrow...tech bitz that are just "junk" can be quite valuable for us hobby geeks^^
@ dsteingass- Thanks for the detailed response, I appreciate it. And yes, I found the LoER logo.
@ GiraffeX- I'll post the dimensions as soon as I get them. And I'll send out those guitar strings this week, apologies for the delay.
@ Viktor von Domm- I'm genuinely bummed about dropping because the level of craftsmanship in this contest was intense and I'd have liked to see where I ranked. However, all is not lost and the piece I started will be finished. I've already started the re-work and I think you'll be impressed w/ the results. I'll try to catch the December contest at the latest, I really like being part of the LoER and want to participate / contribute when we're doing something.
Nothing 'new' to share except some good news- because of my shift change (10:30am-7:30pm M-F) I'm finding I have time in the morning that is just mine since everyone else is already gone. Today I took some time to work on the Armorcast walls Dave sent me. I'll post some WIP pics once I get a bit more done.
When I was growing up, my Dad worked second shift. When I was first out of high school I worked second shift, for 15 years I have worked on first shift, and I tell you, once you are in that routine once, your body always stays a second-shifter, even when you have to work first shift.
@ Dave- 2nd shift is already getting on my nerves. Mass outages lately (2 storms and one core router failure) so I'm not getting the time I was hoping for. Law of averages will work to my favor eventually since I have 8 more weeks of this and it won't stay this busy all the time.
Small update to show my heart is still beating. I've been looking for a rattlecan spray that is as close to Shadow Gray as possible. I finally learned that I need to start carrying a Shadow Gray swatch with me, but here's my latest test. Honestly I kind of like it.
Here's the test shots I took while doing this. First up is the last test I did. I've been using this piece for my testing lately. Eventually this will find its way to my table, but for now its going to get more of this treatment.
Single coat, waiting to dry:
Dried. This is its permanent color.
Shadow Gray color test. Opps. Better luck next time.
And a rust / weathering test. I did this fast and dirty just to see if I would like it at all:
C&C on the color is what I'm looking for. Close enough, keep looking, or just shut up and buy an airbrush already?
Skalk Bloodaxe wrote: @ Dave- 2nd shift is already getting on my nerves. Mass outages lately (2 storms and one core router failure) so I'm not getting the time I was hoping for. Law of averages will work to my favor eventually since I have 8 more weeks of this and it won't stay this busy all the time.
Small update to show my heart is still beating. I've been looking for a rattlecan spray that is as close to Shadow Gray as possible. I finally learned that I need to start carrying a Shadow Gray swatch with me, but here's my latest test. Honestly I kind of like it.
Here's the test shots I took while doing this. First up is the last test I did. I've been using this piece for my testing lately. Eventually this will find its way to my table, but for now its going to get more of this treatment.
Single coat, waiting to dry:
Dried. This is its permanent color.
Shadow Gray color test. Opps. Better luck next time.
And a rust / weathering test. I did this fast and dirty just to see if I would like it at all:
C&C on the color is what I'm looking for. Close enough, keep looking, or just shut up and buy an airbrush already?
Thanks for looking.
hmmm. shadow gray you say... is that an old or new color?

 oh yes....^that!


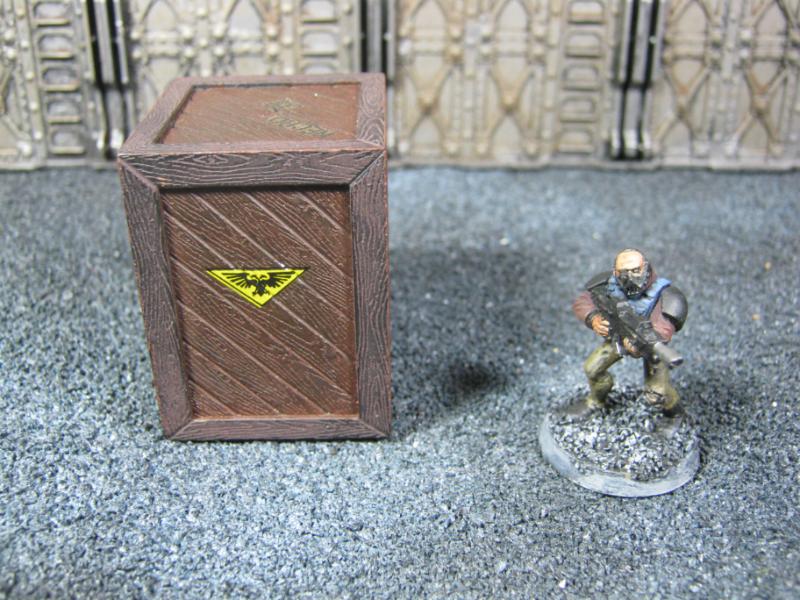
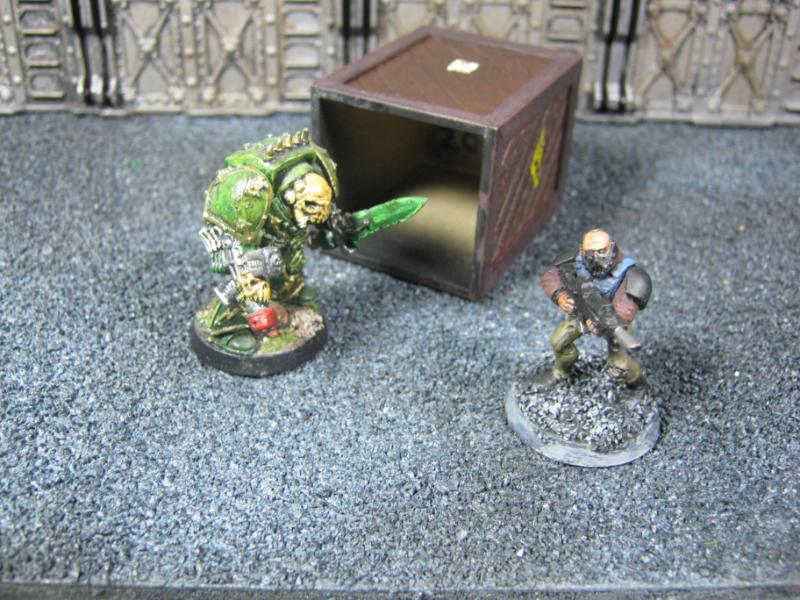
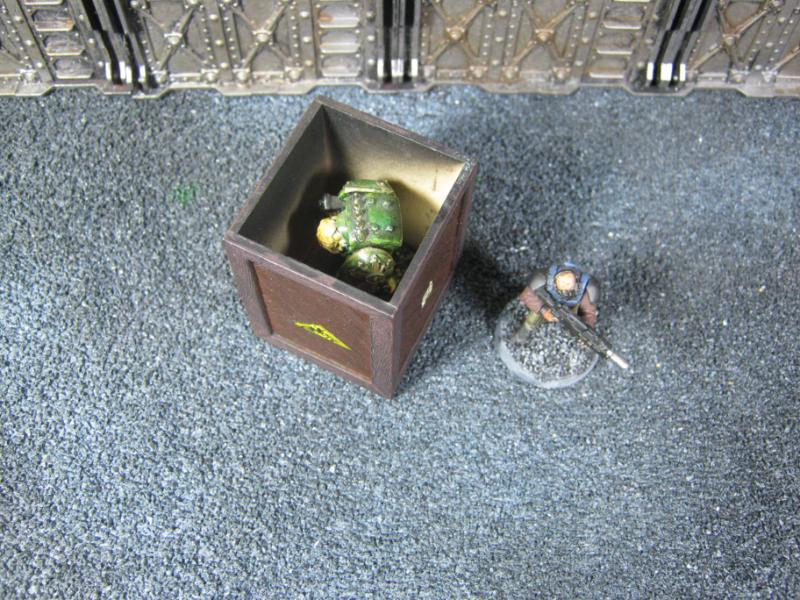


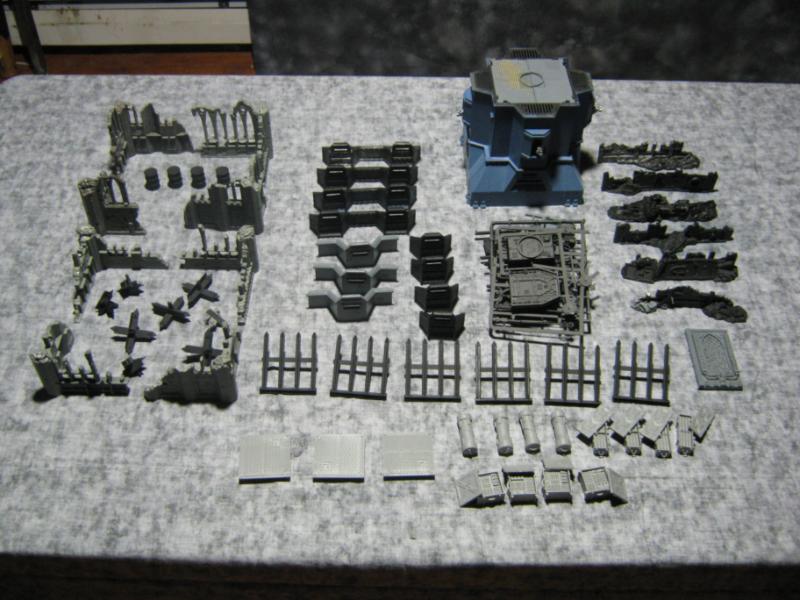
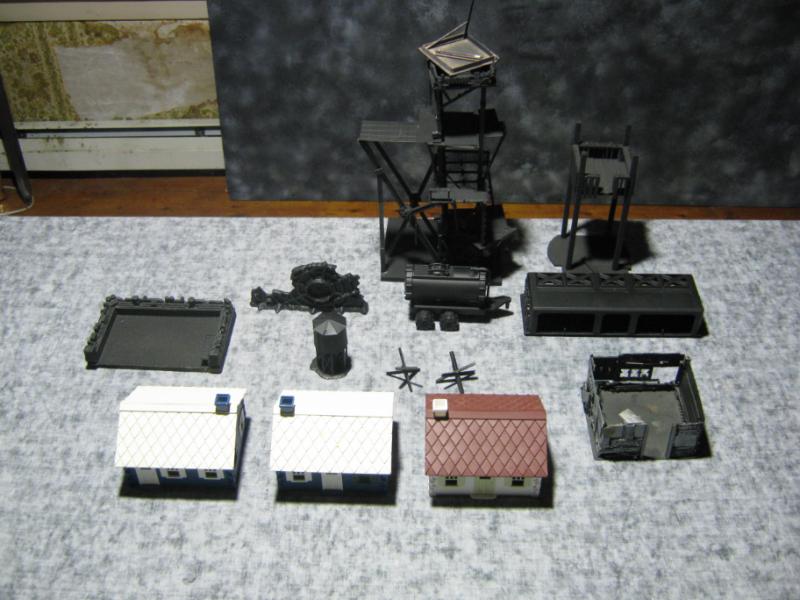
 But there are some definite keepers in this that would make interesting terrain. The tanker I picked up recently at a yard sale. It based up nicely and I can see what I'm going to build with it. The multi-level tower I posted a few days ago, it's staying for sure. In fact I found the roof I made for it back when it was a different model I made for Necromunda, so that was cool. The control pad is going to be part of the same piece as the tanker. I like this stuff and I know I'll get to it.
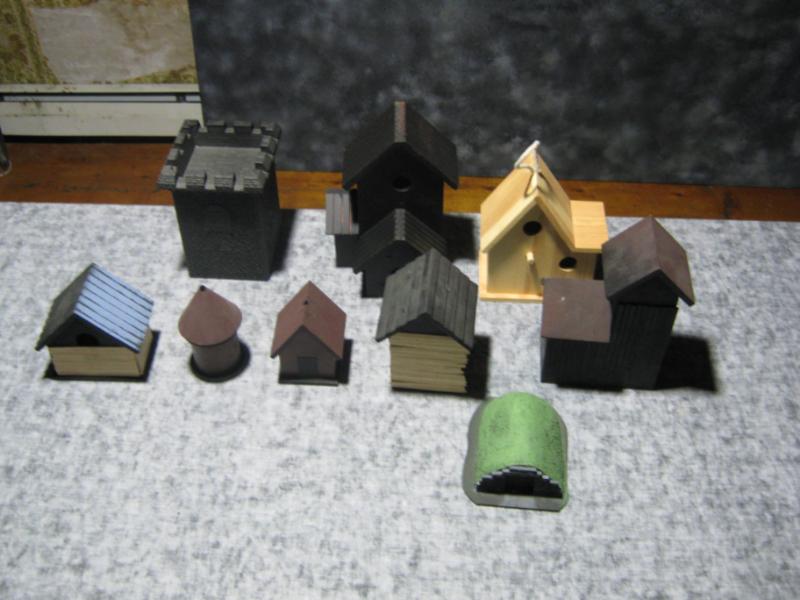
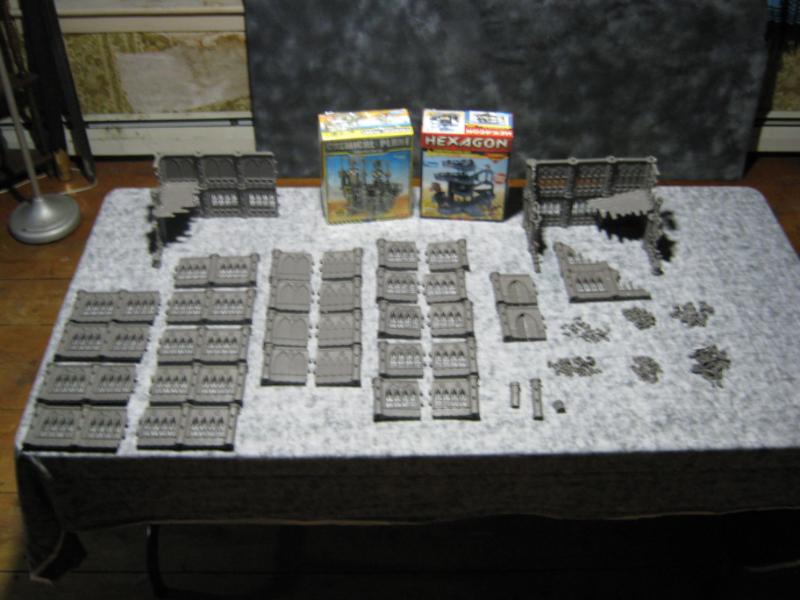


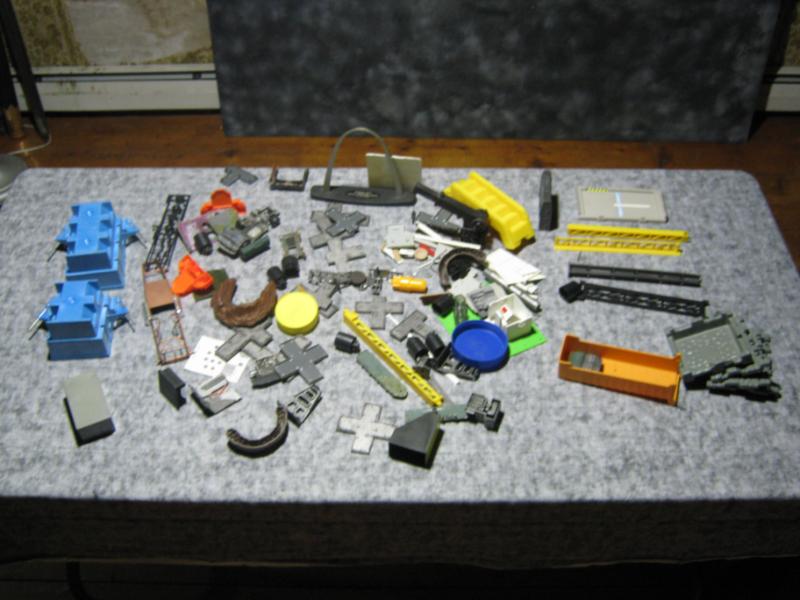

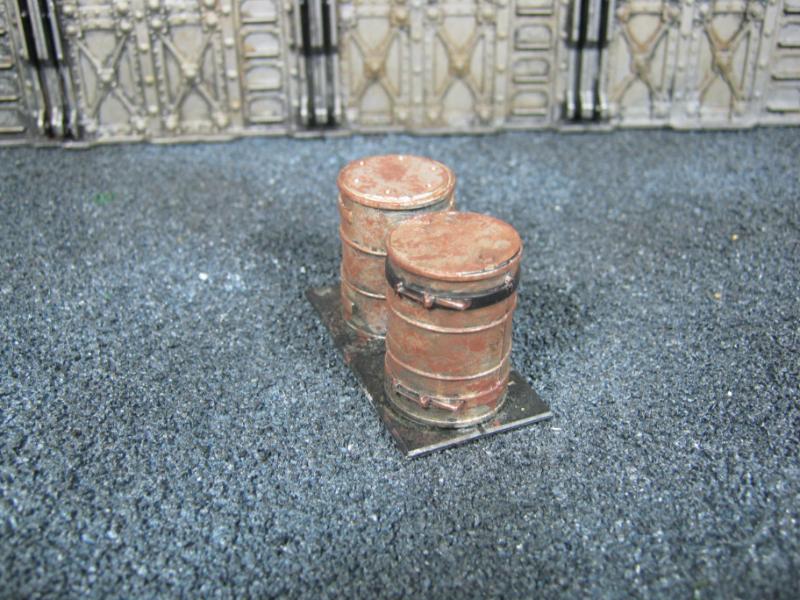
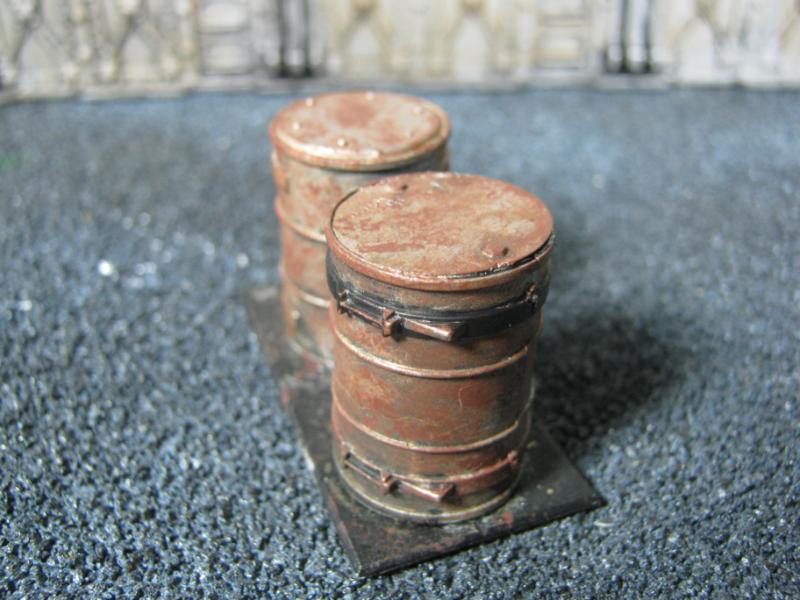
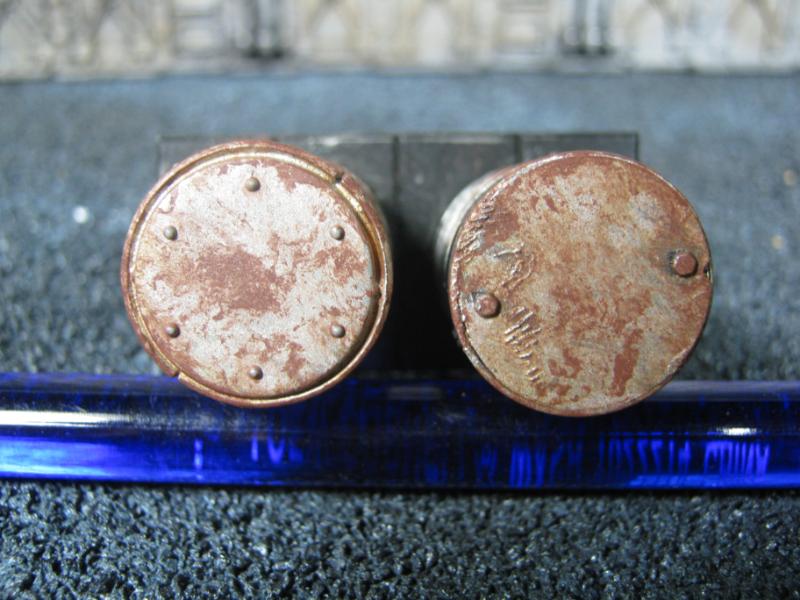
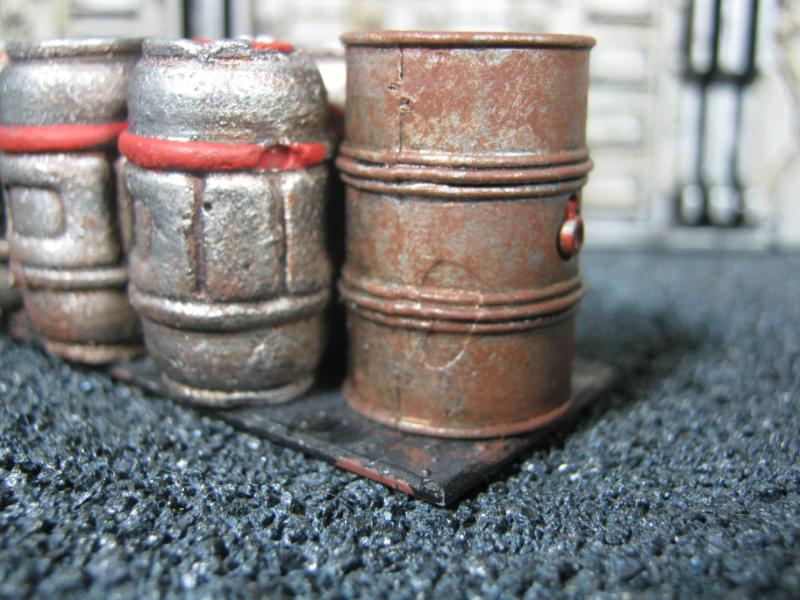
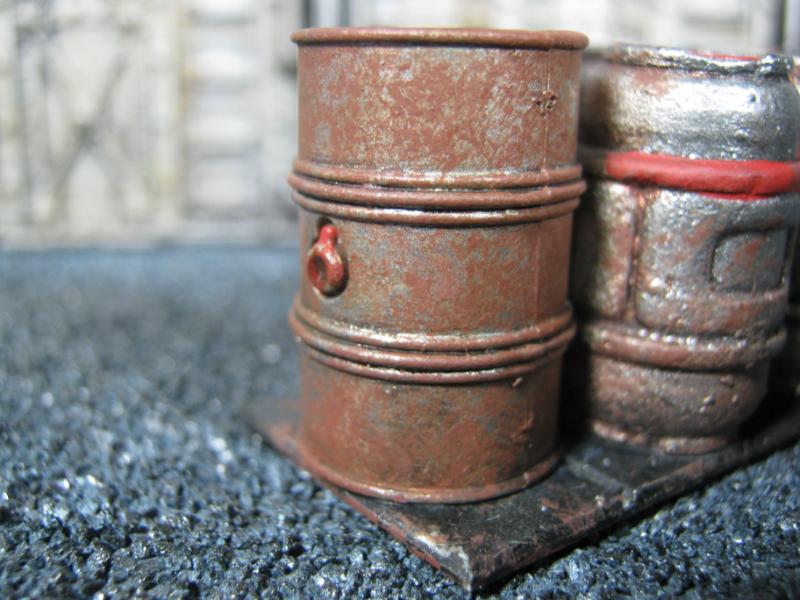

 I'll post pics as soon as they arrive.
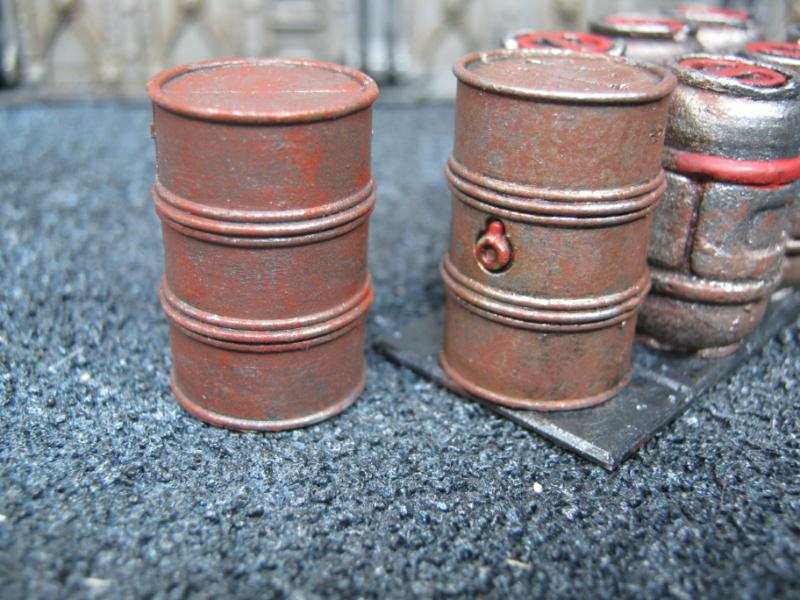
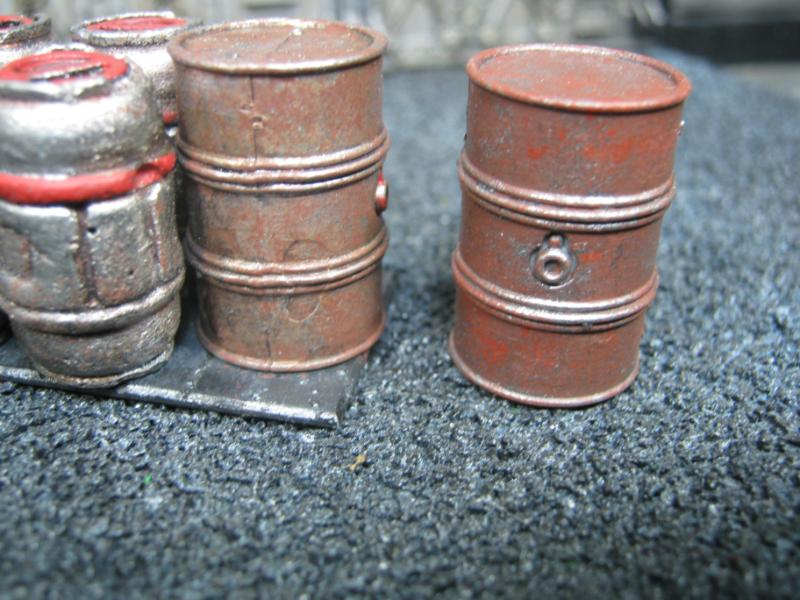

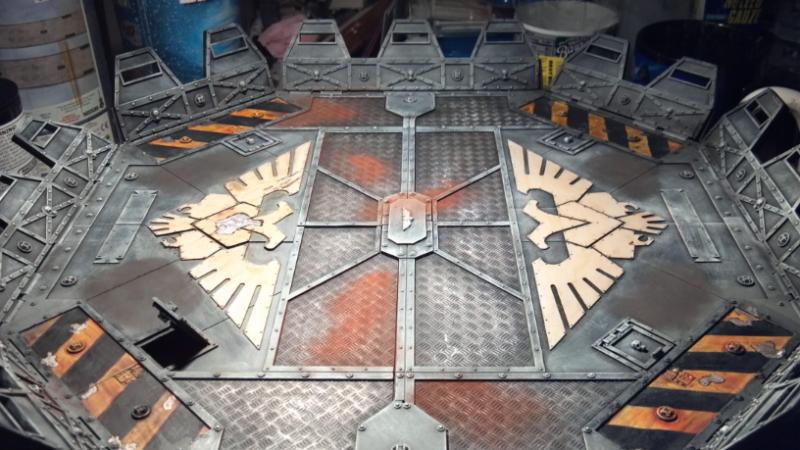
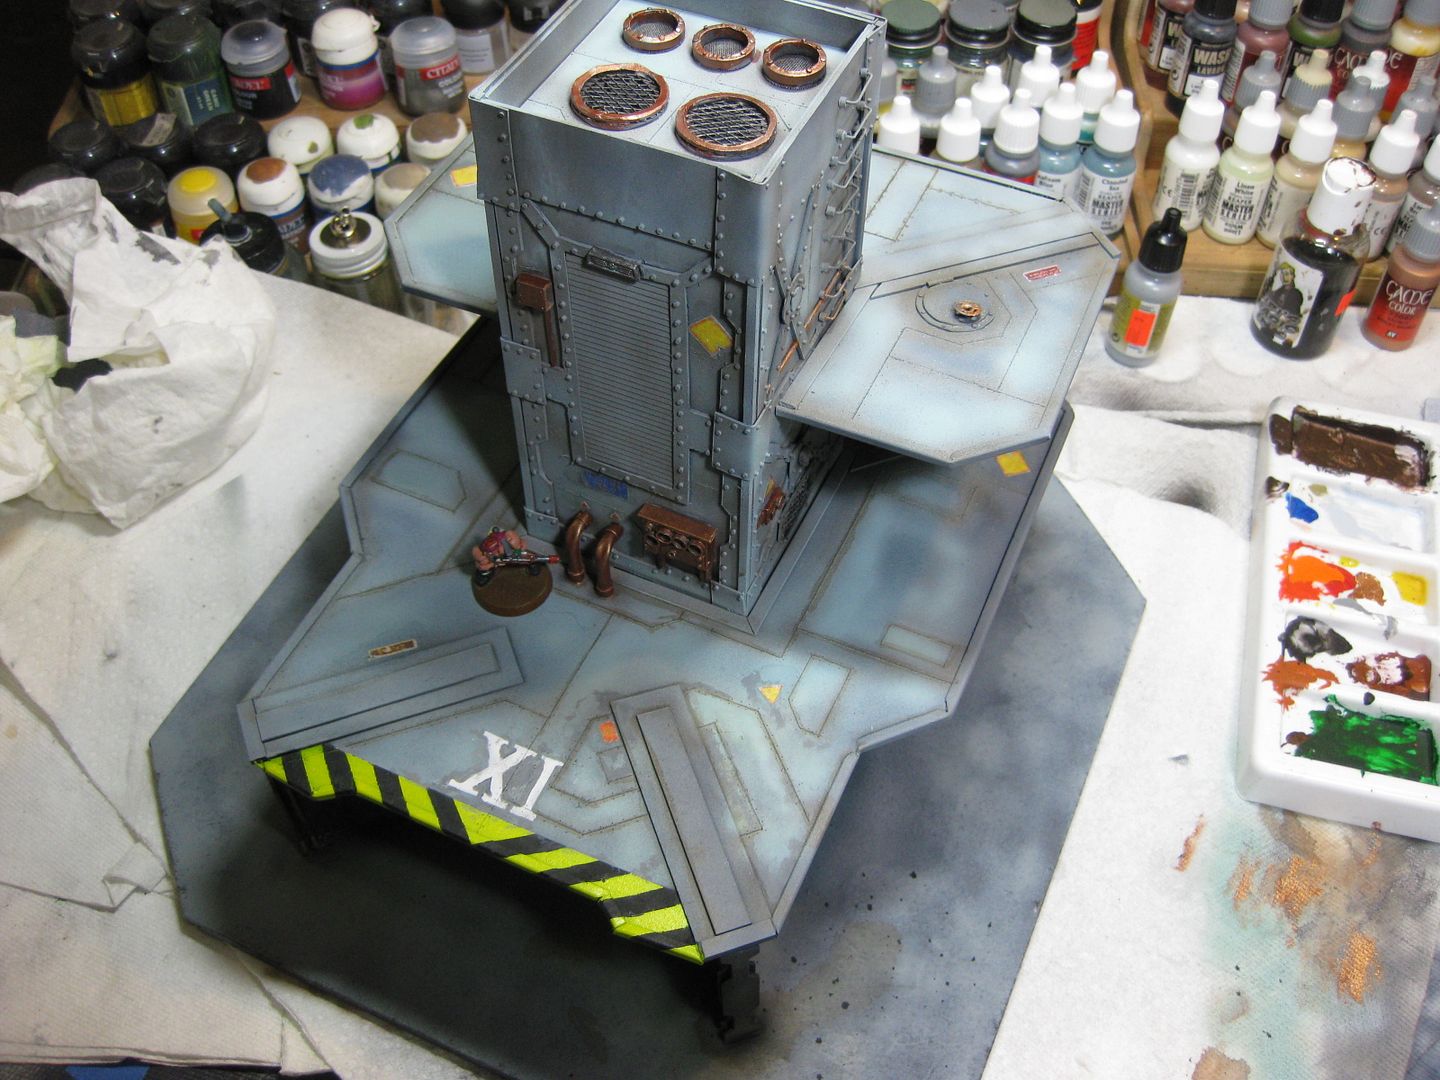

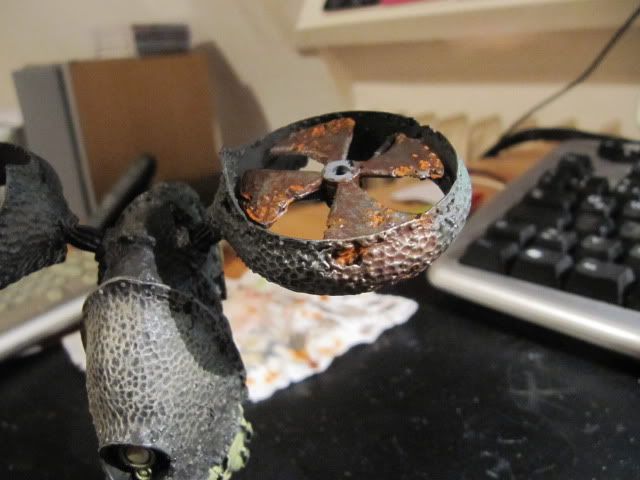


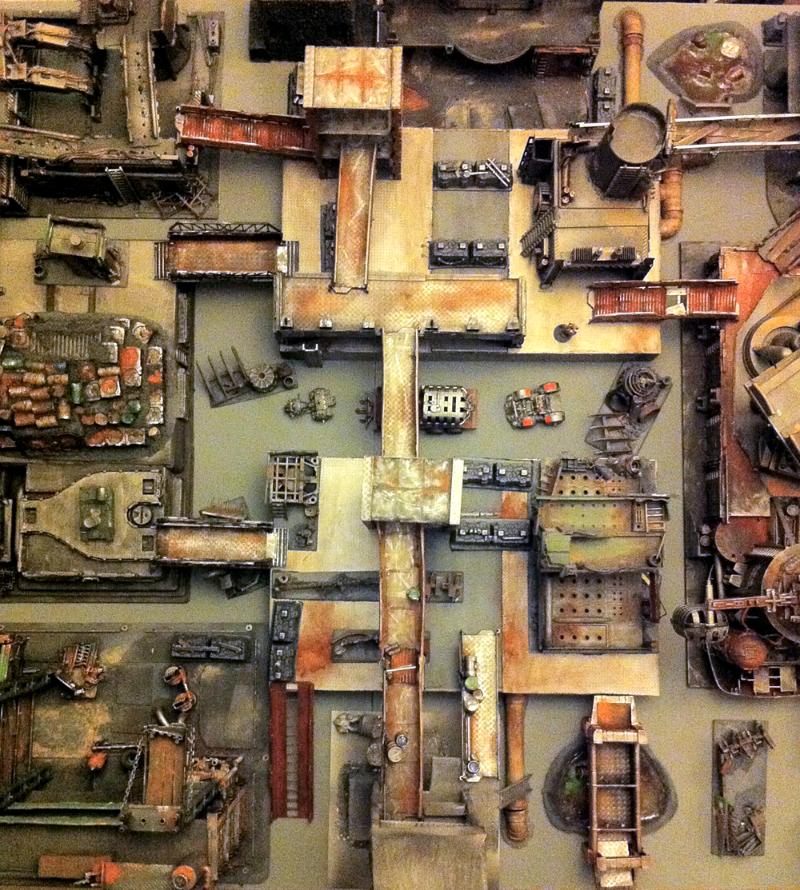
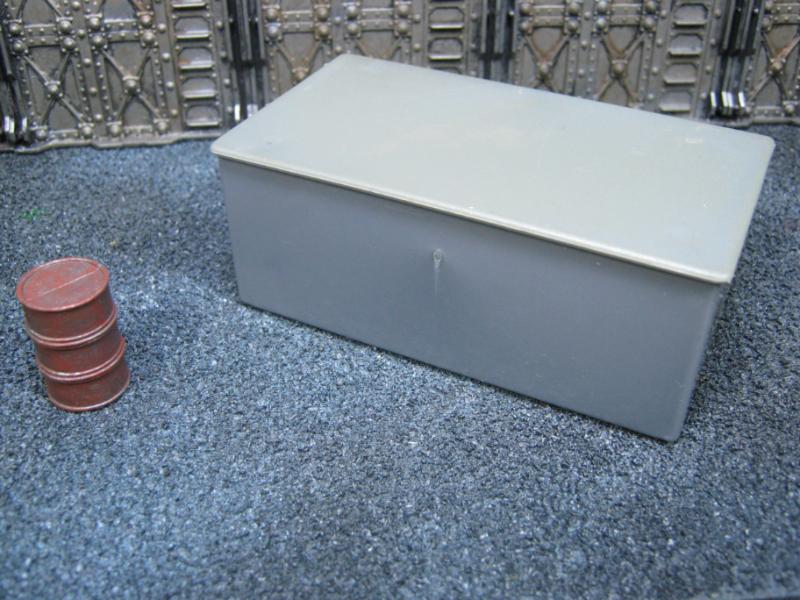
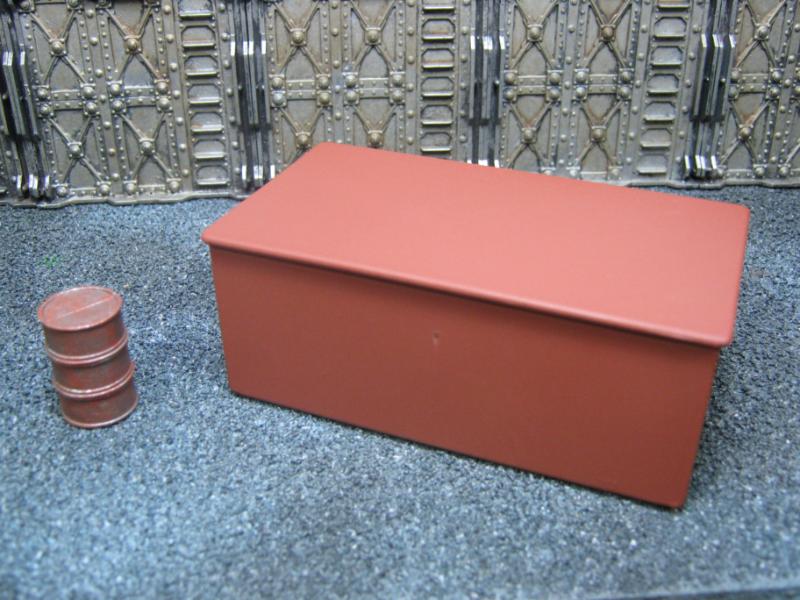
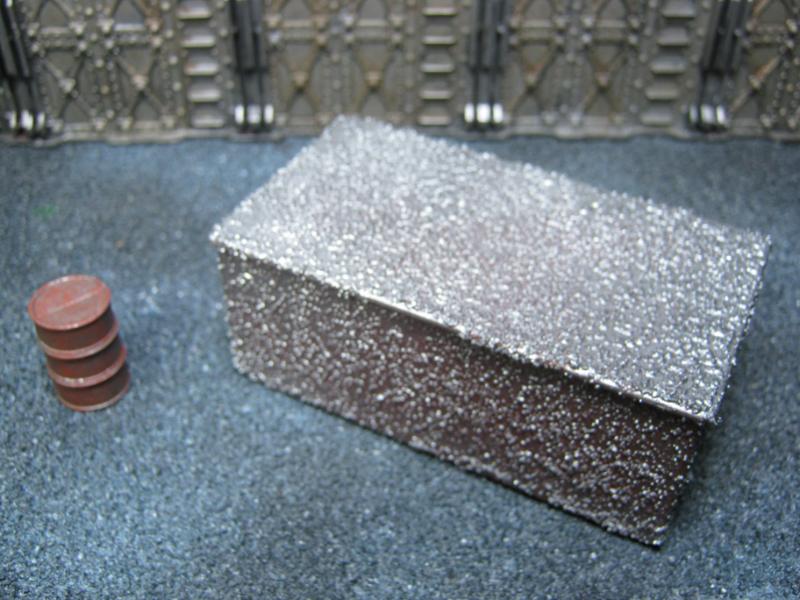
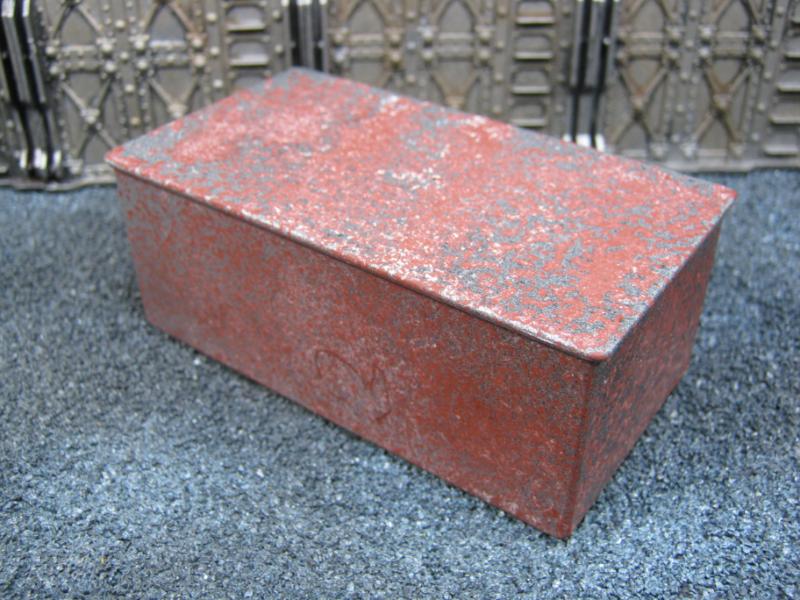
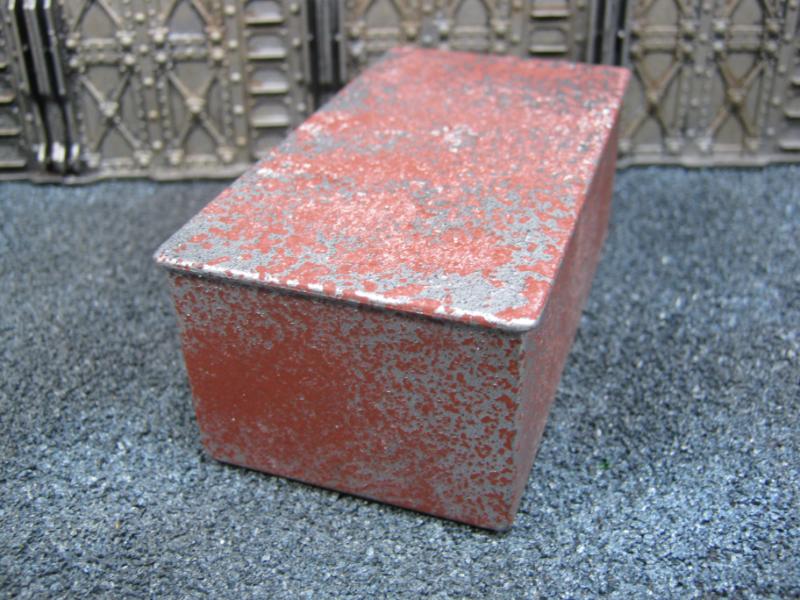
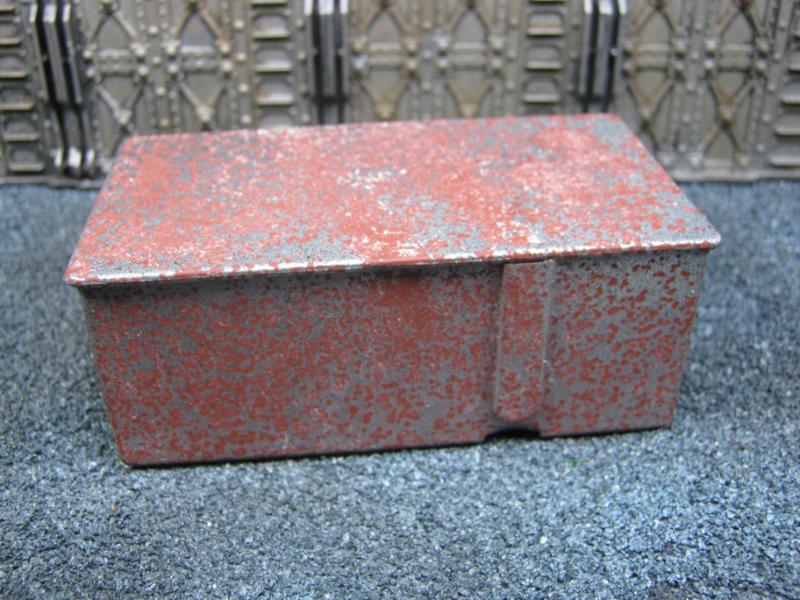
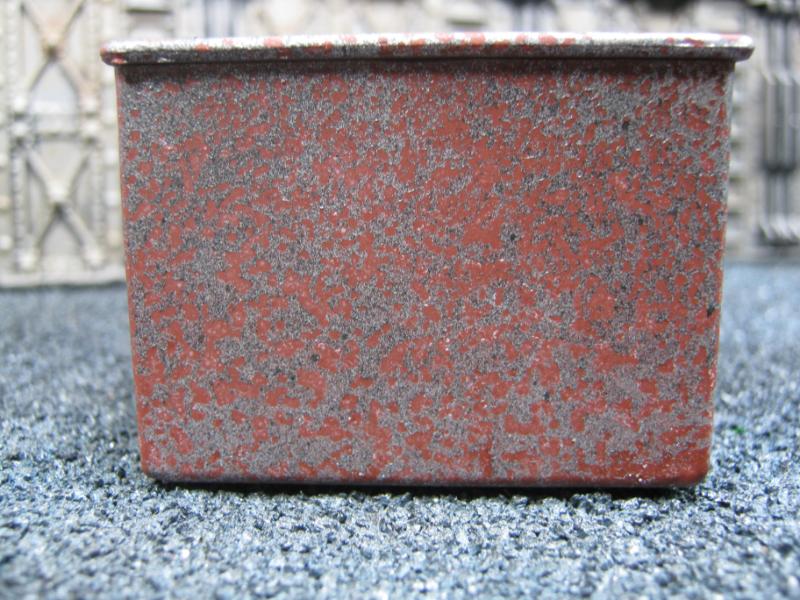
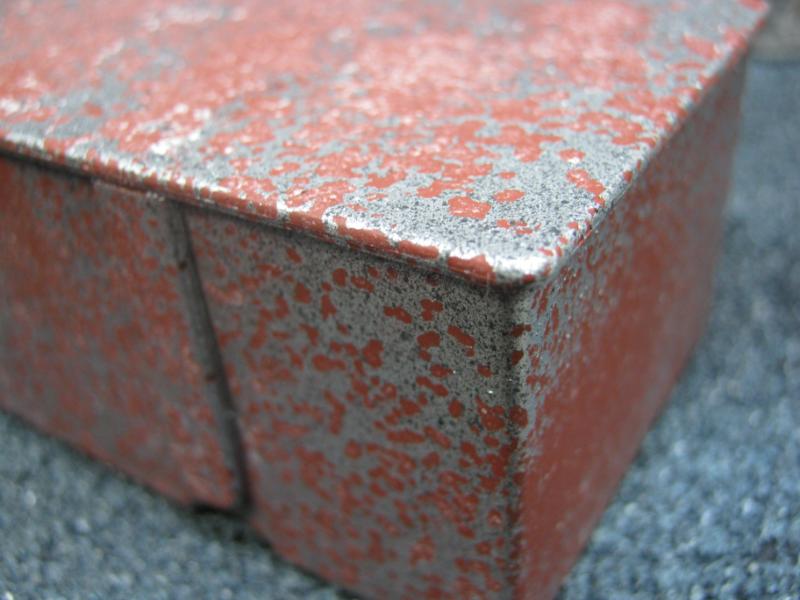
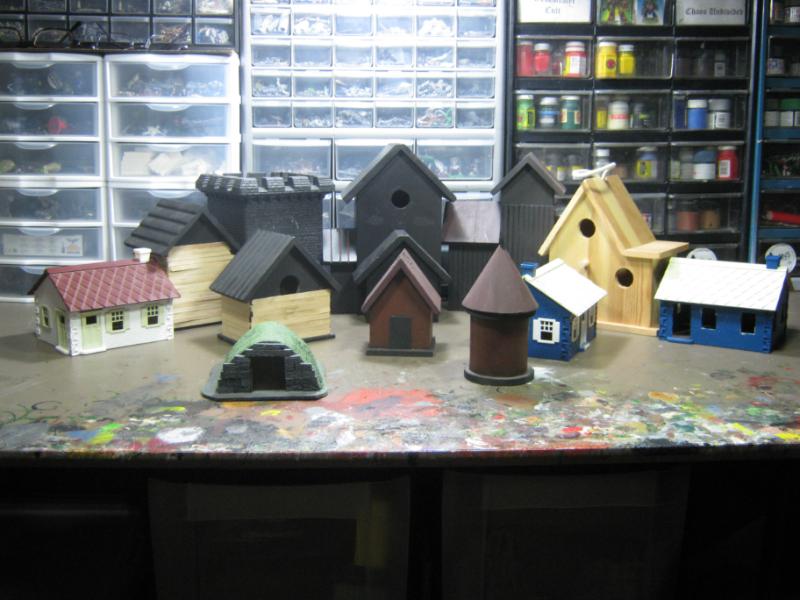
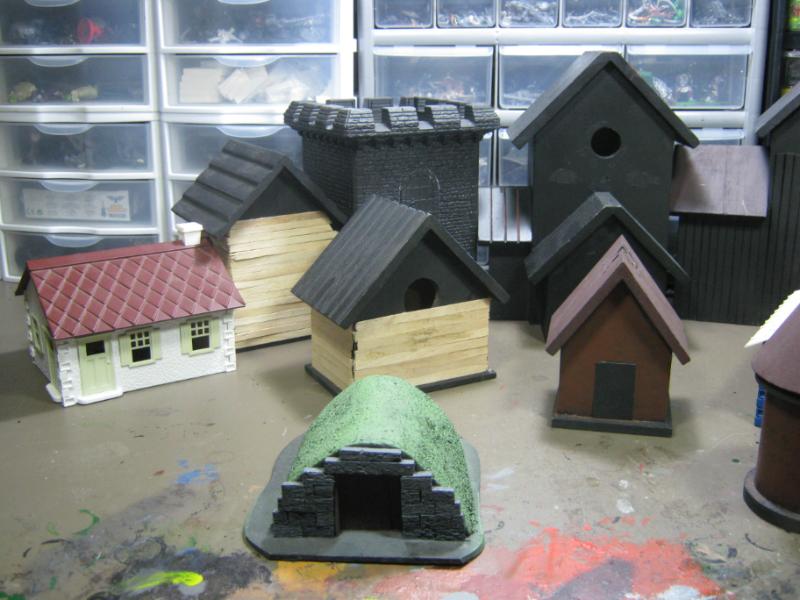
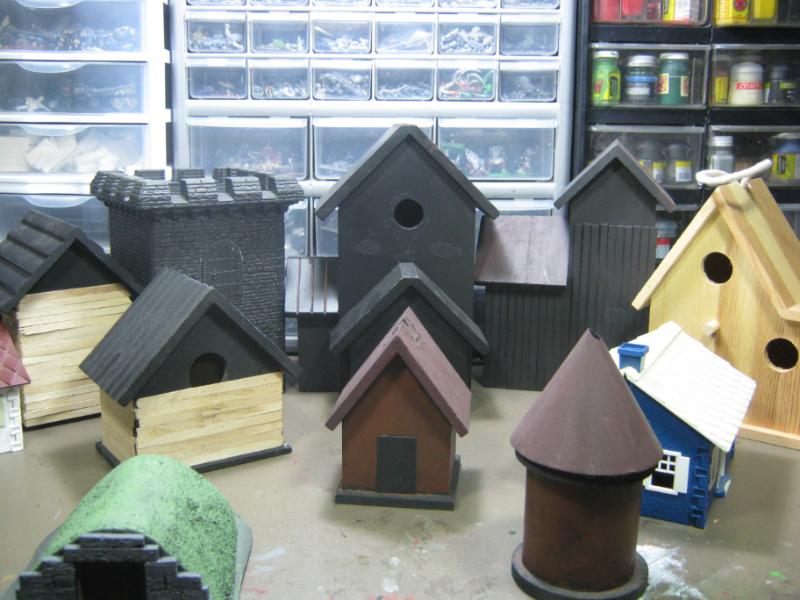

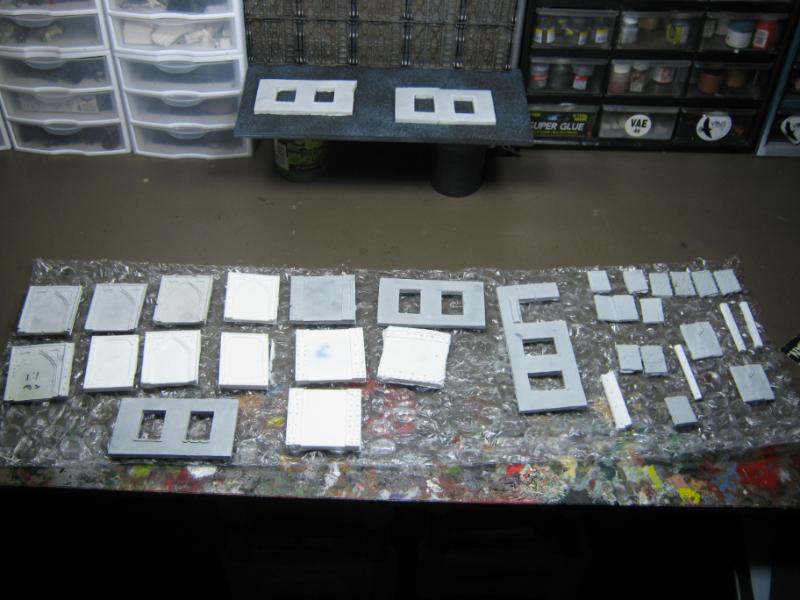
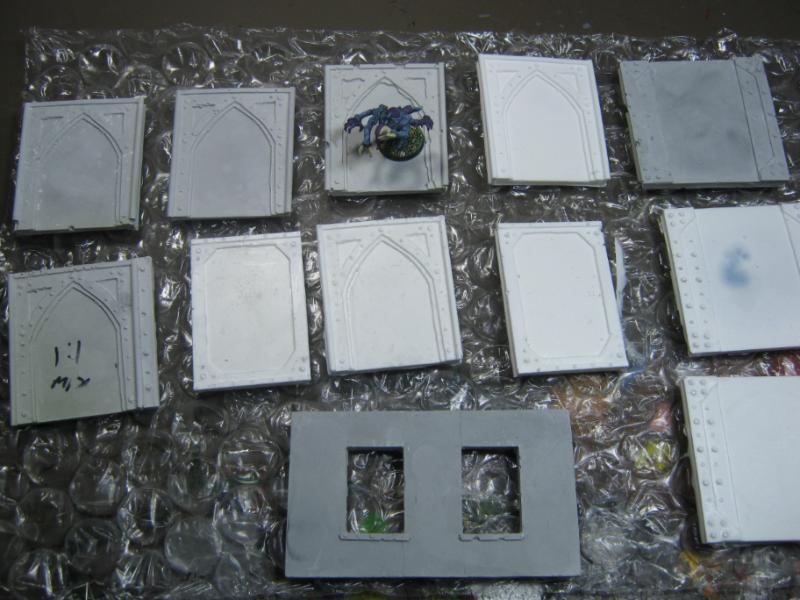
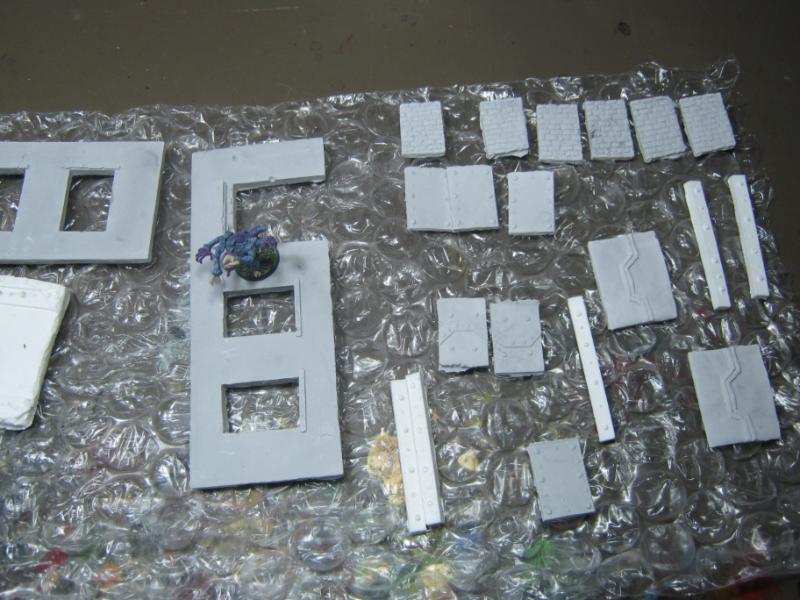
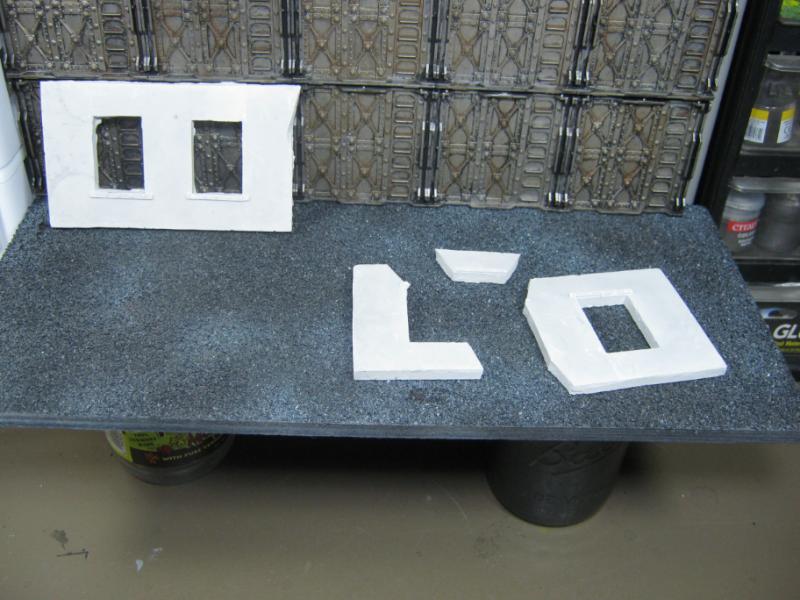


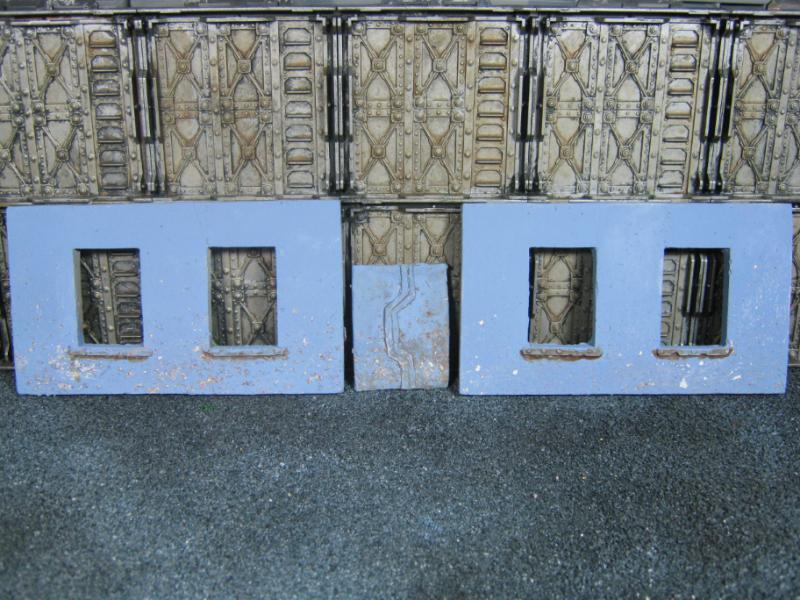
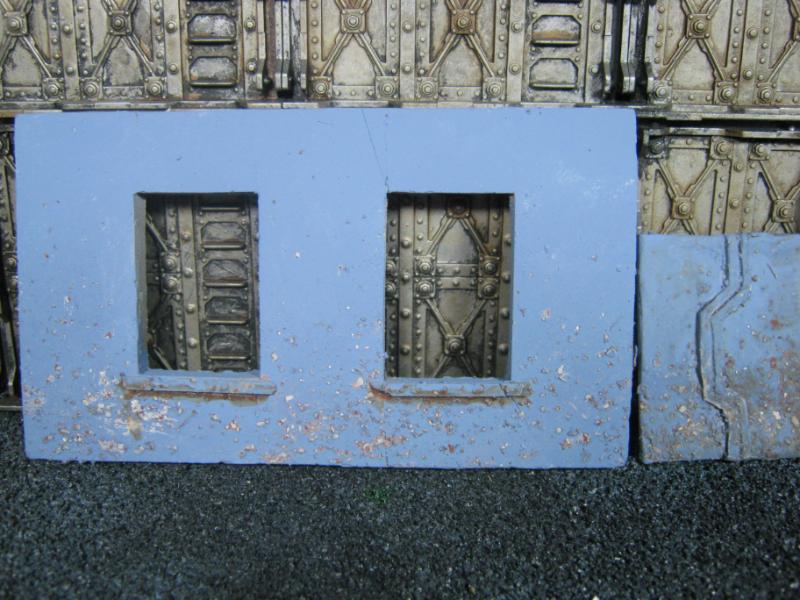
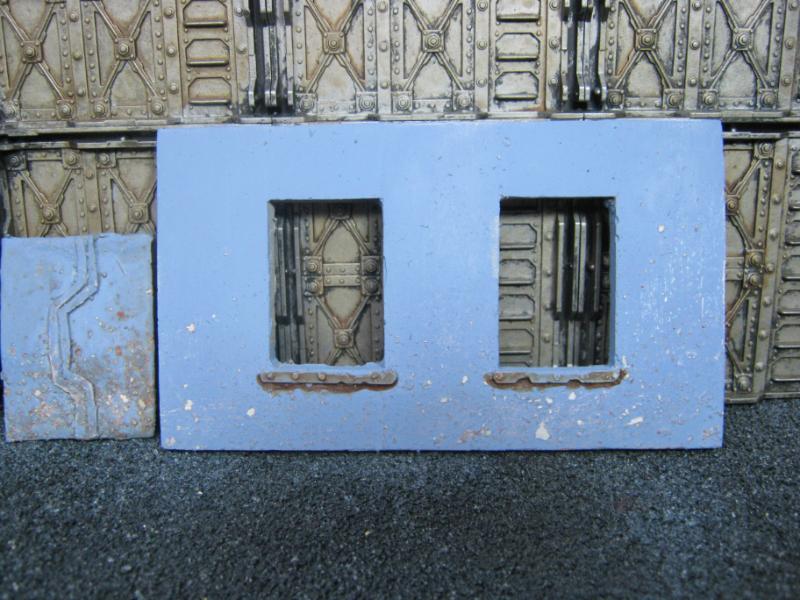
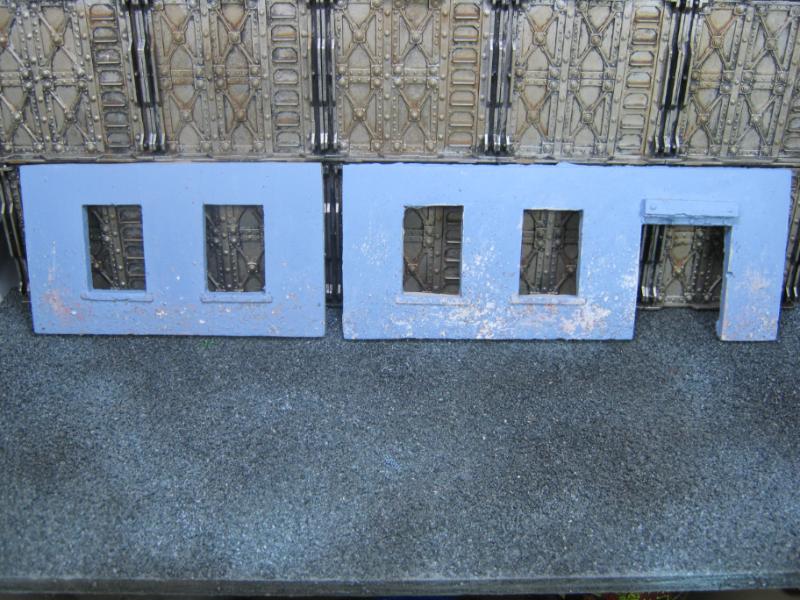
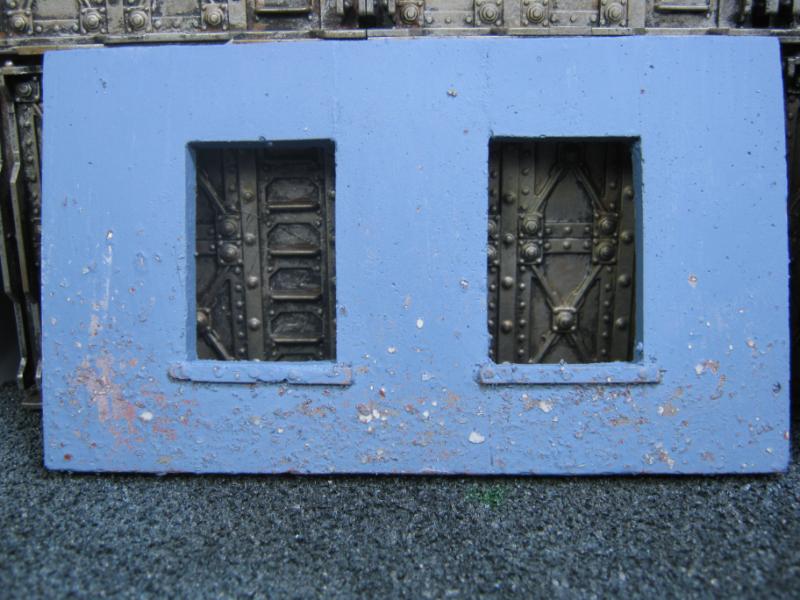
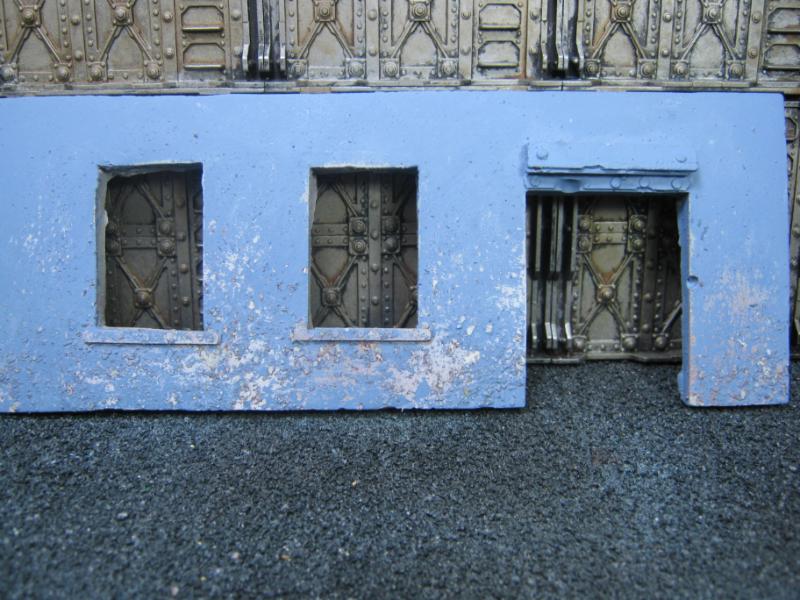

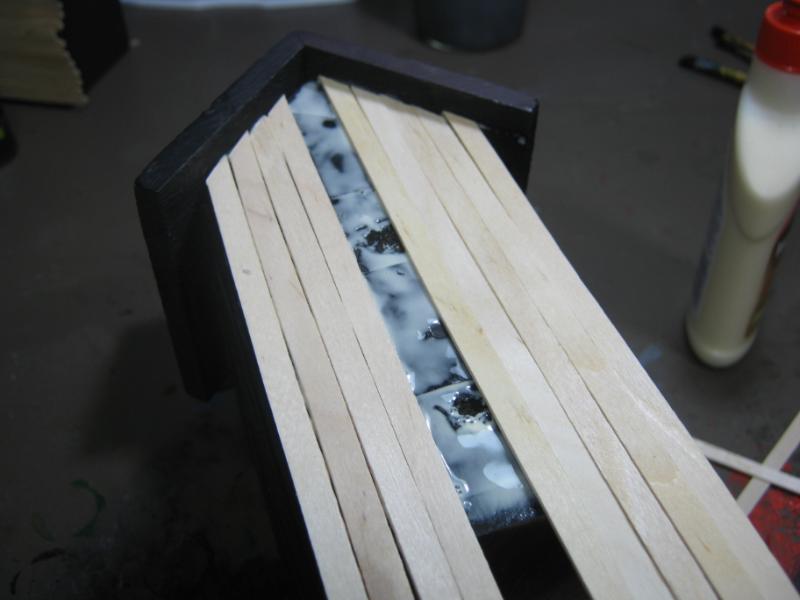
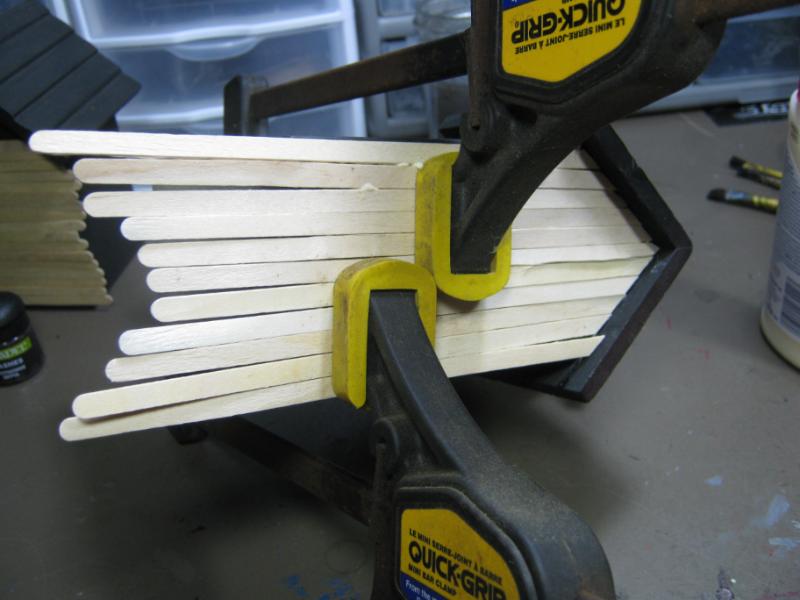
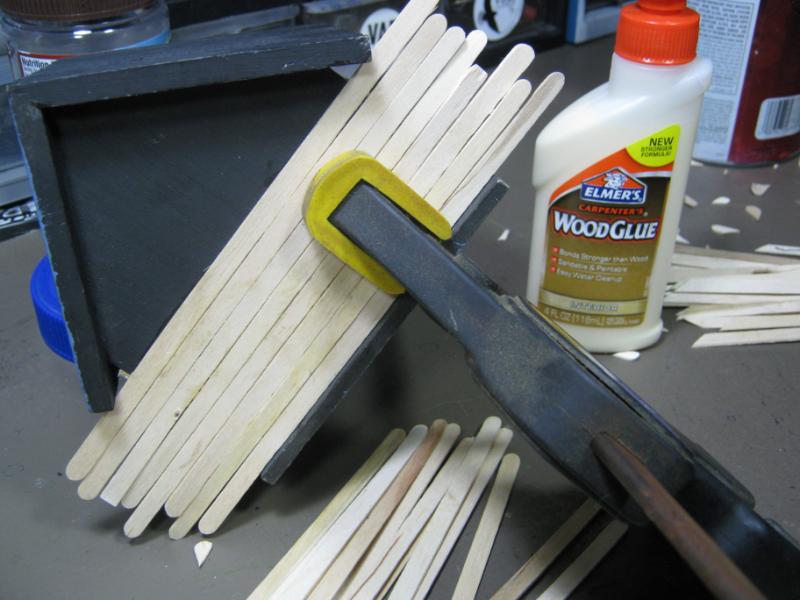
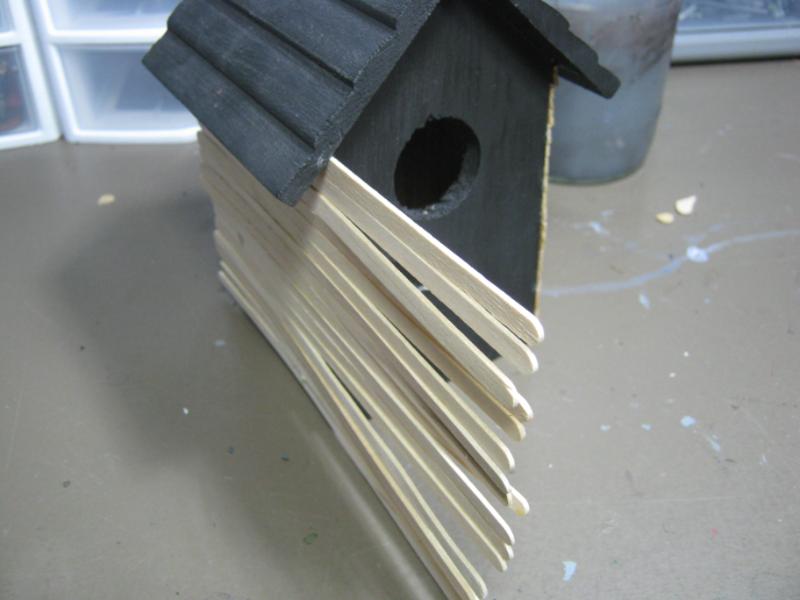
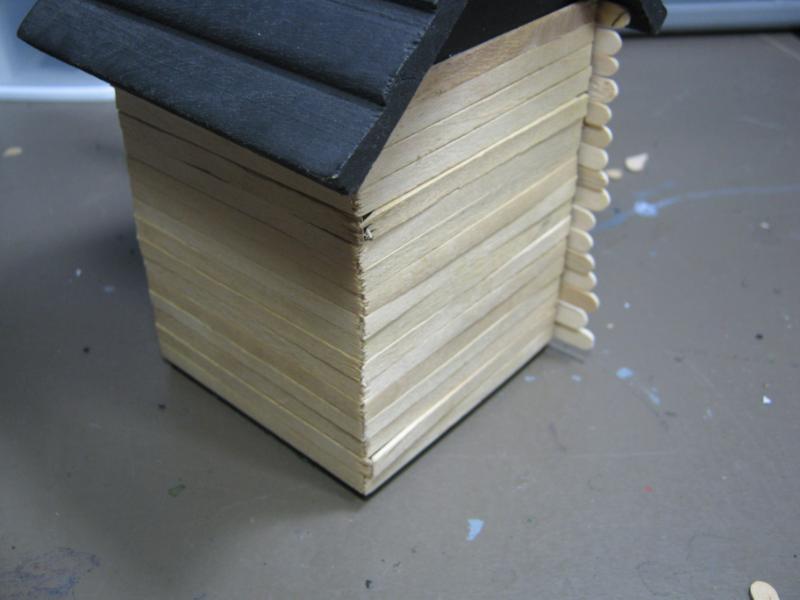
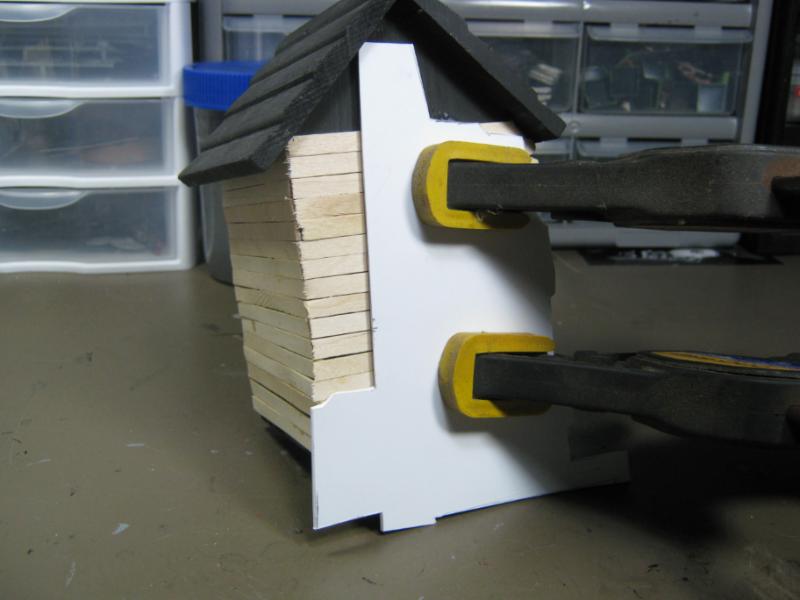
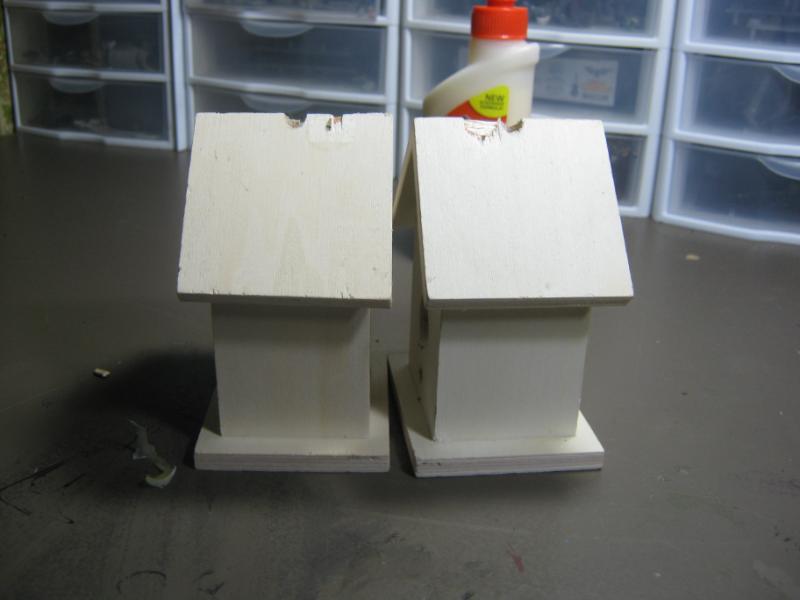
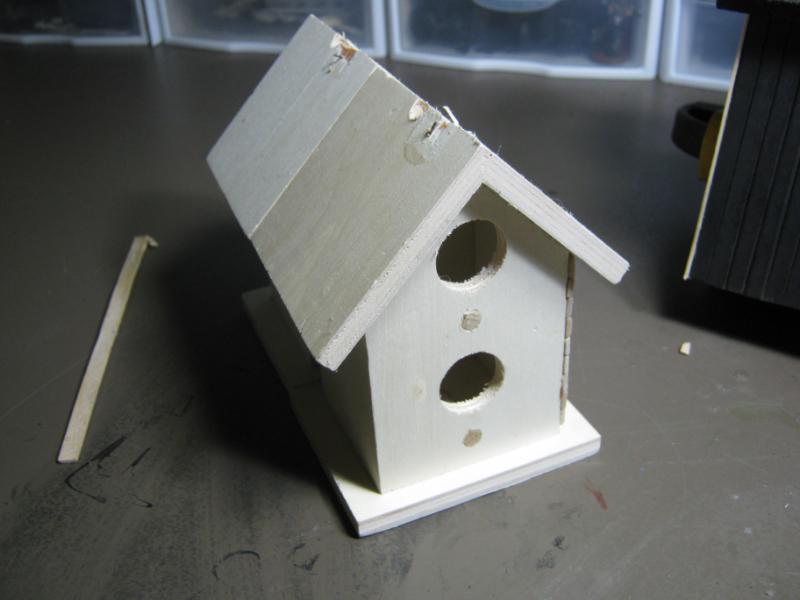
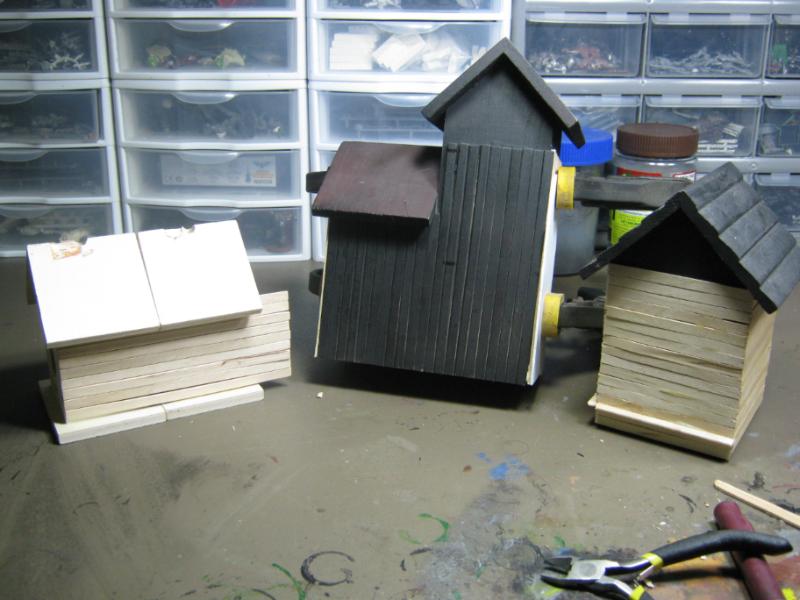
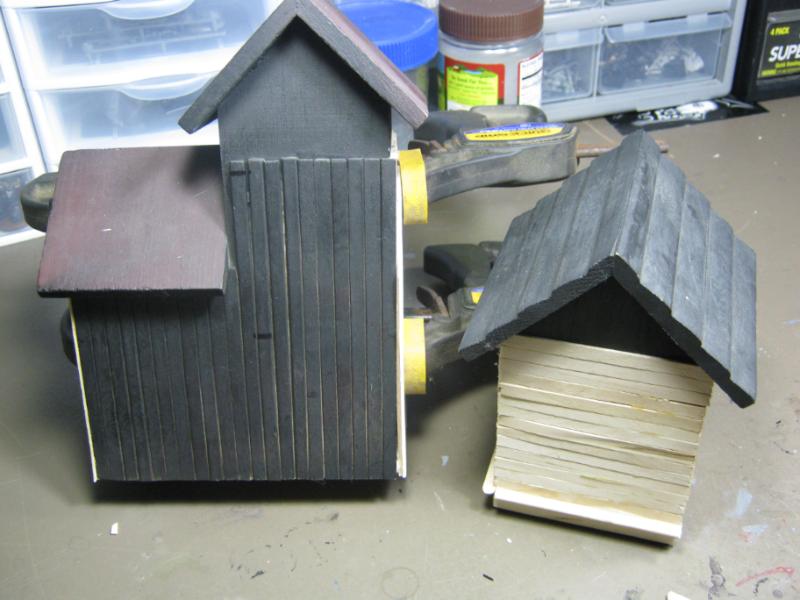
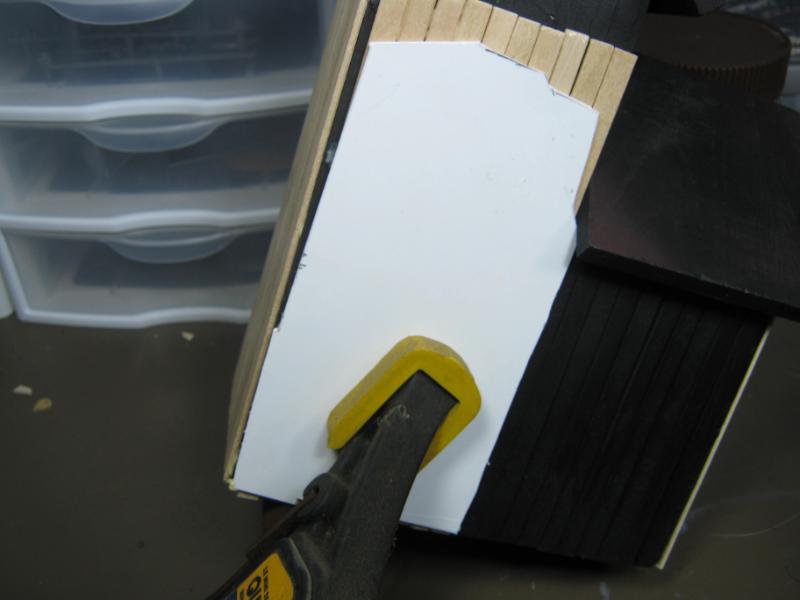
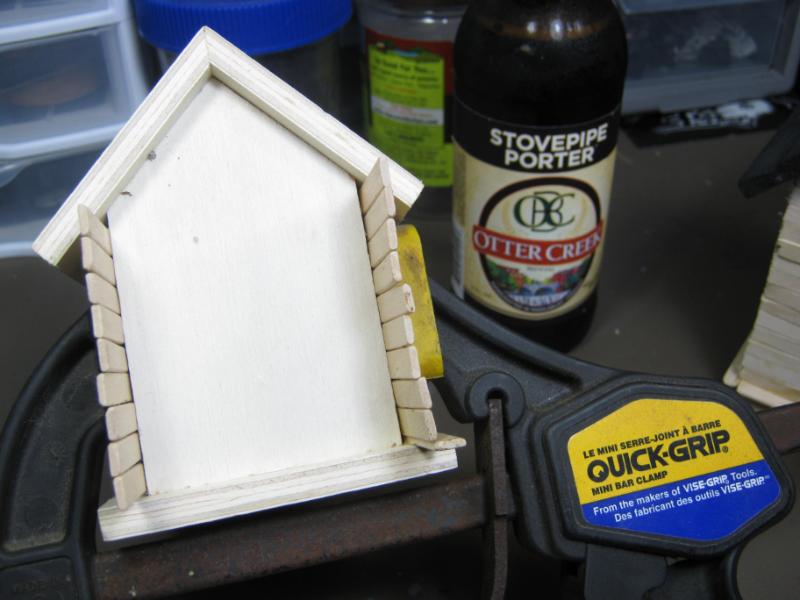
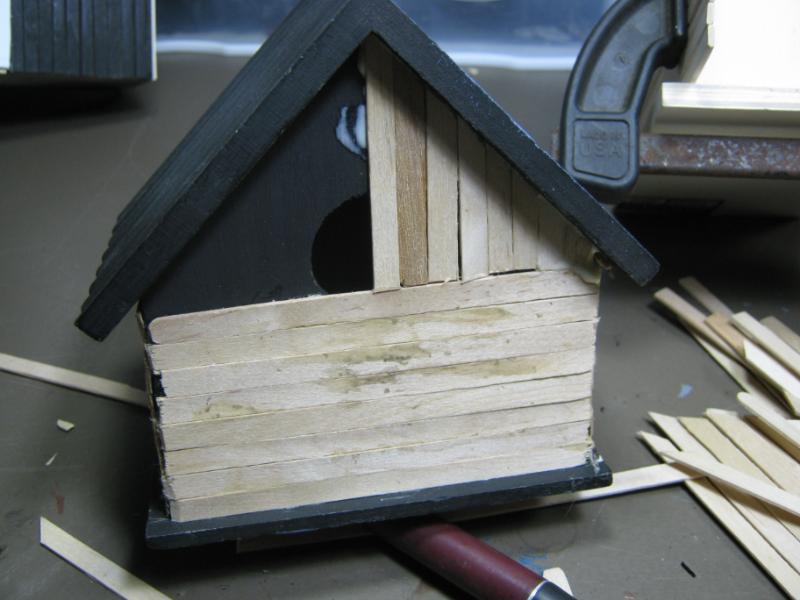
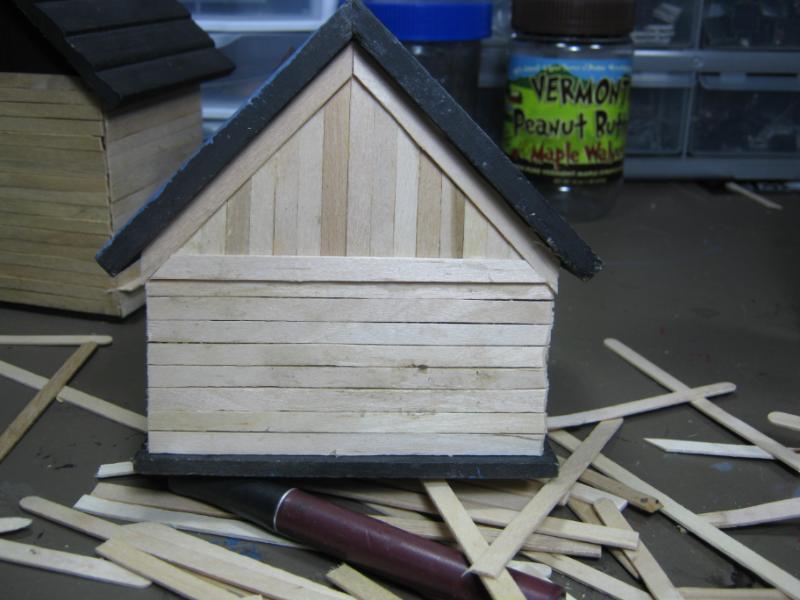
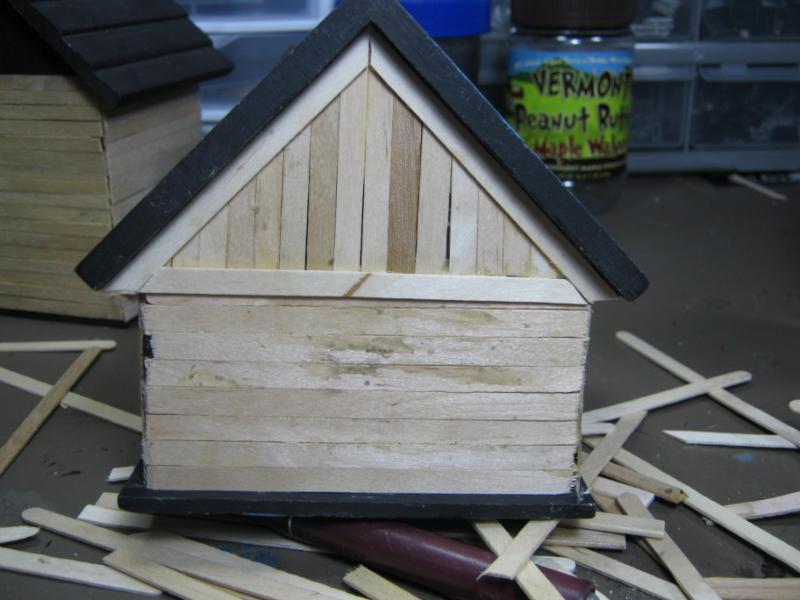
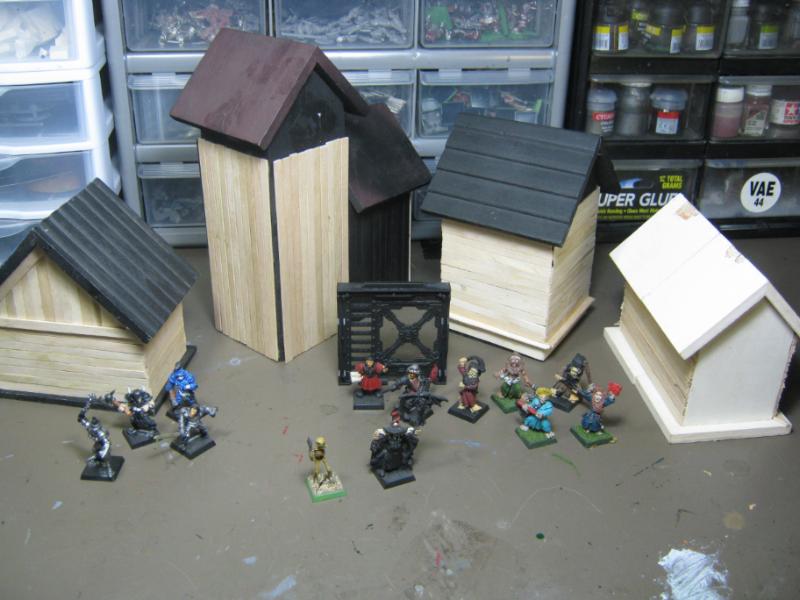
 It even looks like someone got fragged by a shotgun on one of them.
  Nice one!
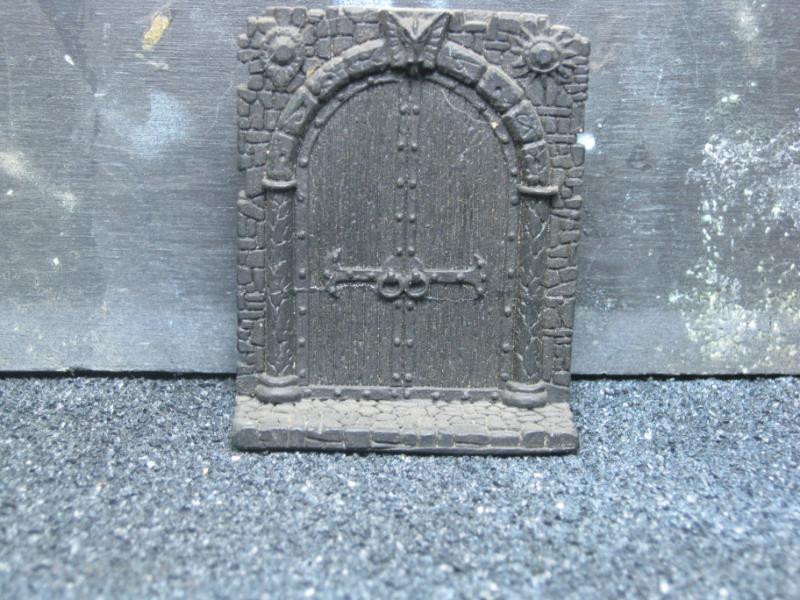
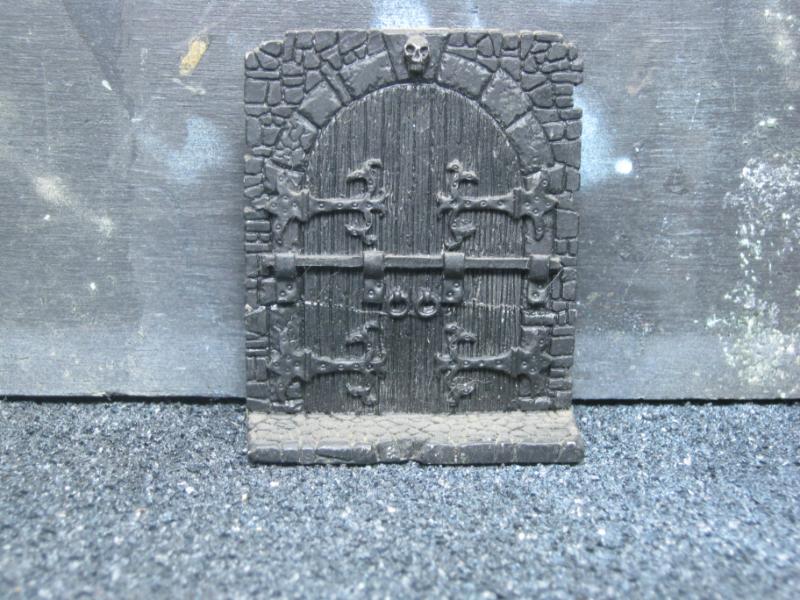
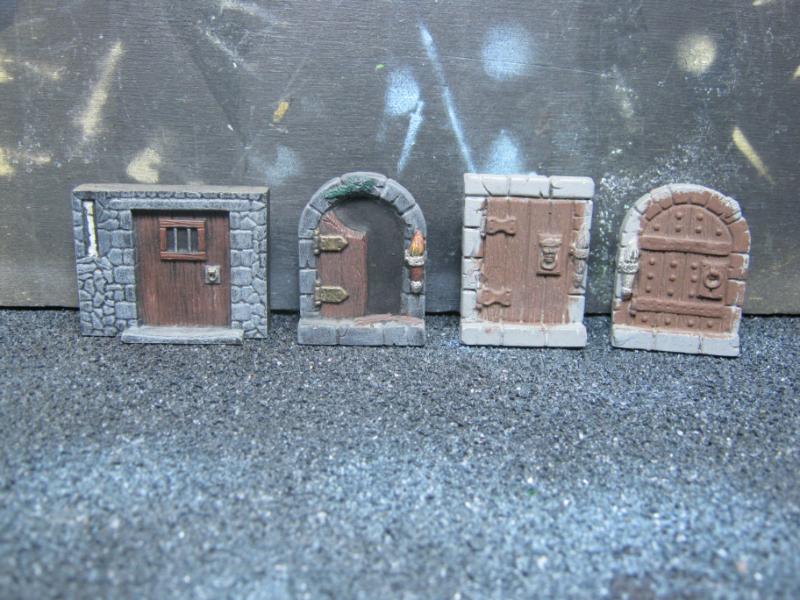
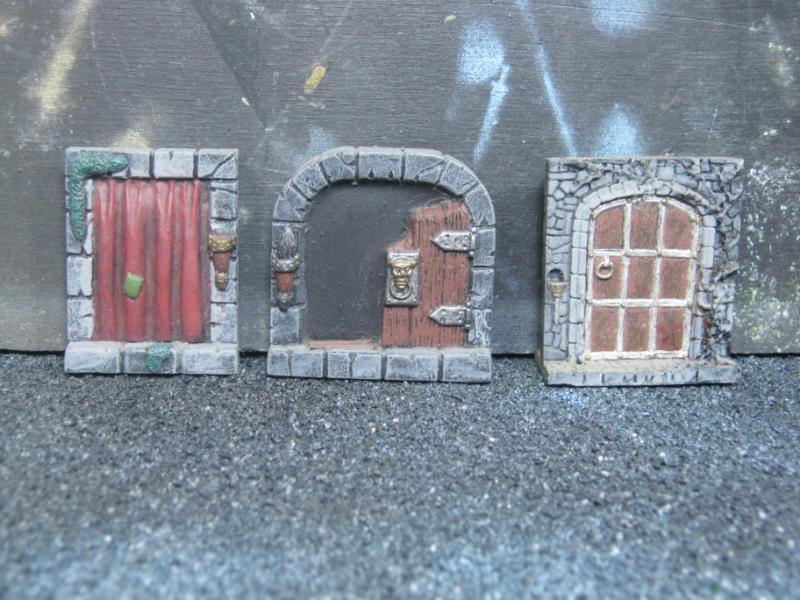
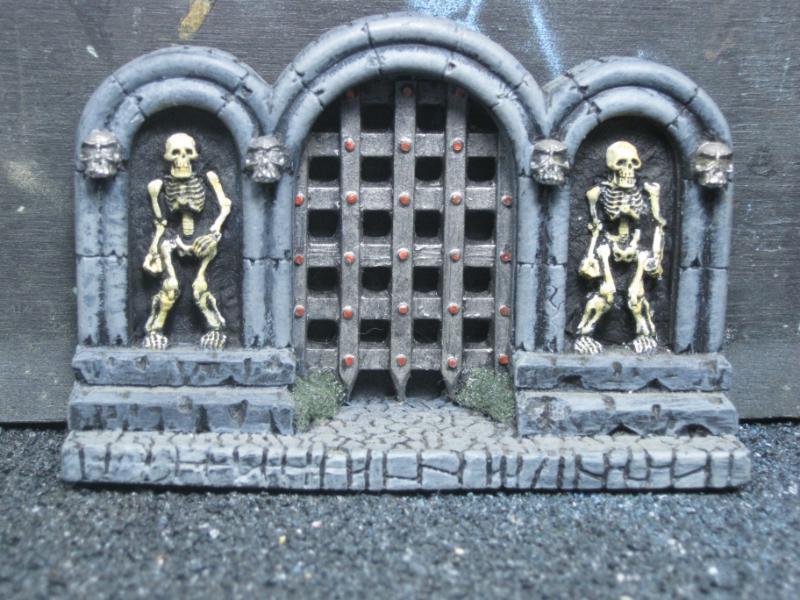
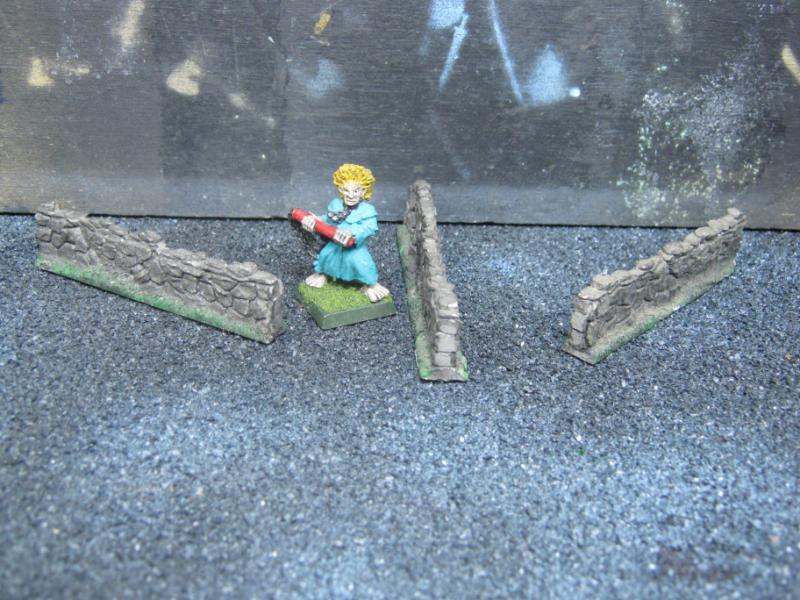
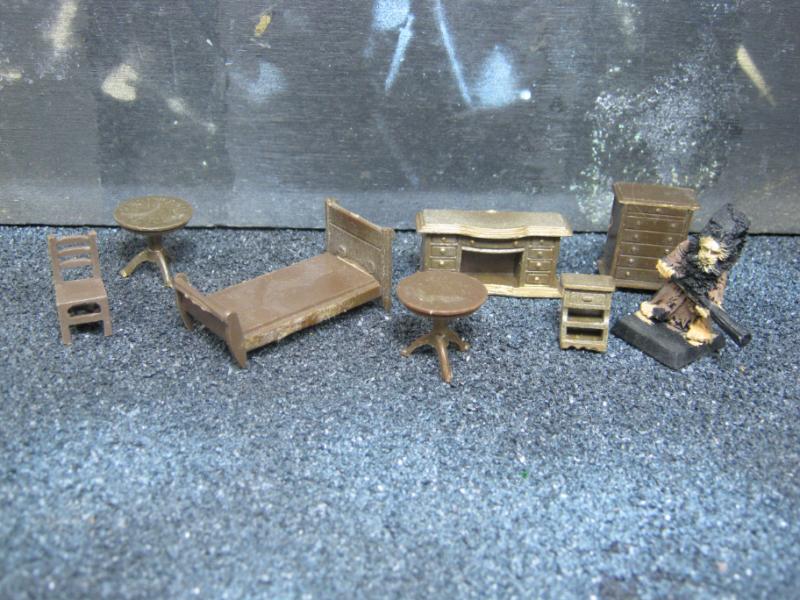
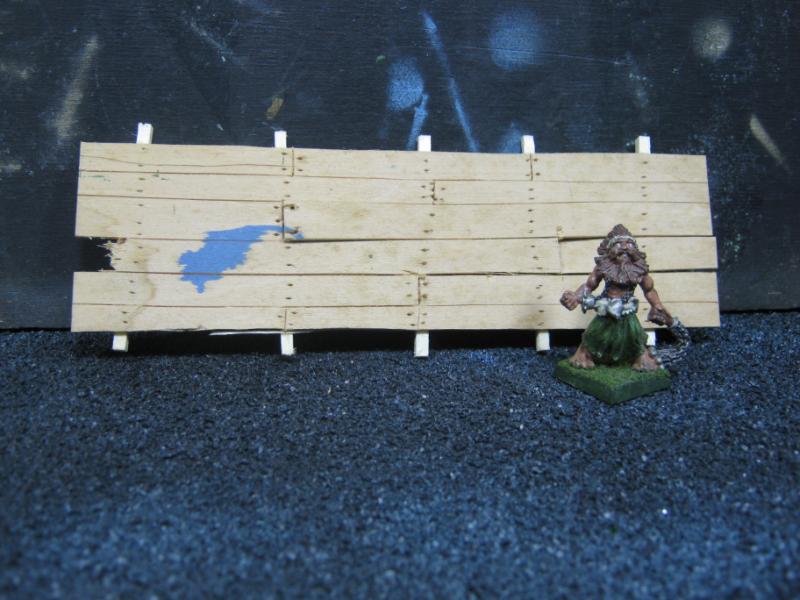
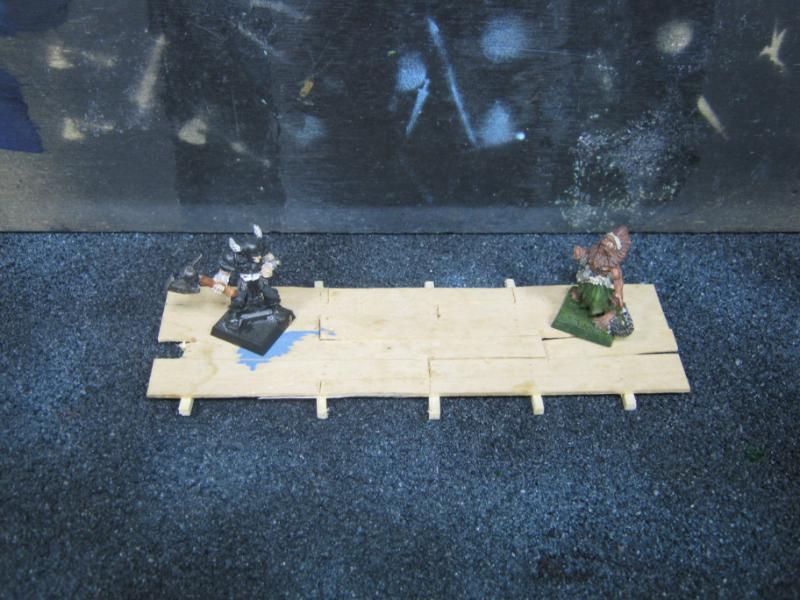
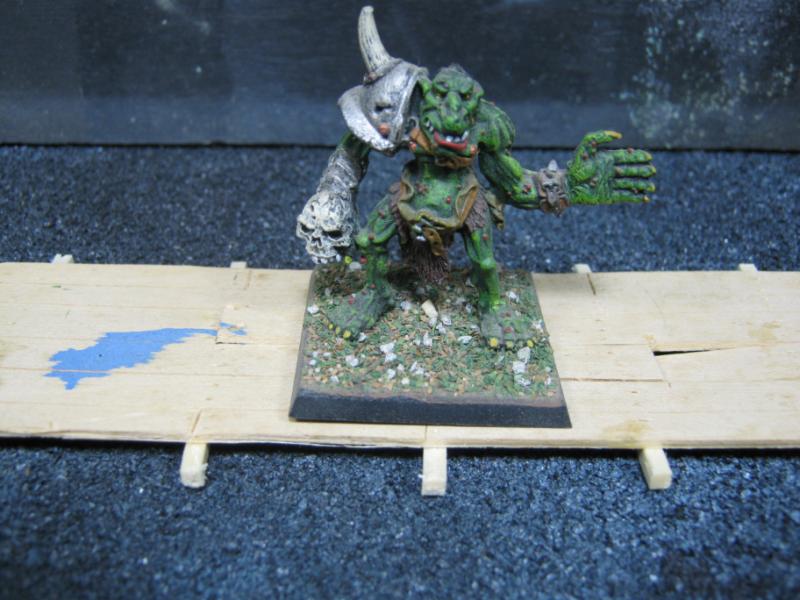
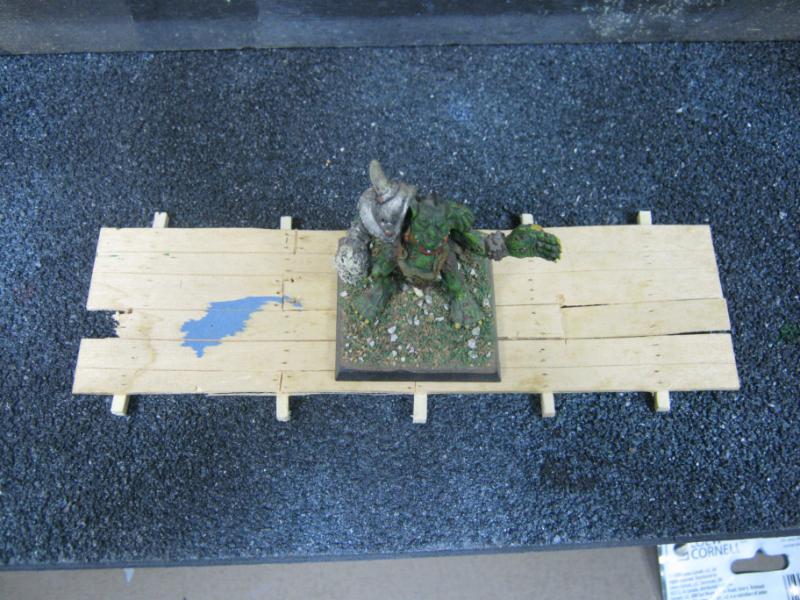
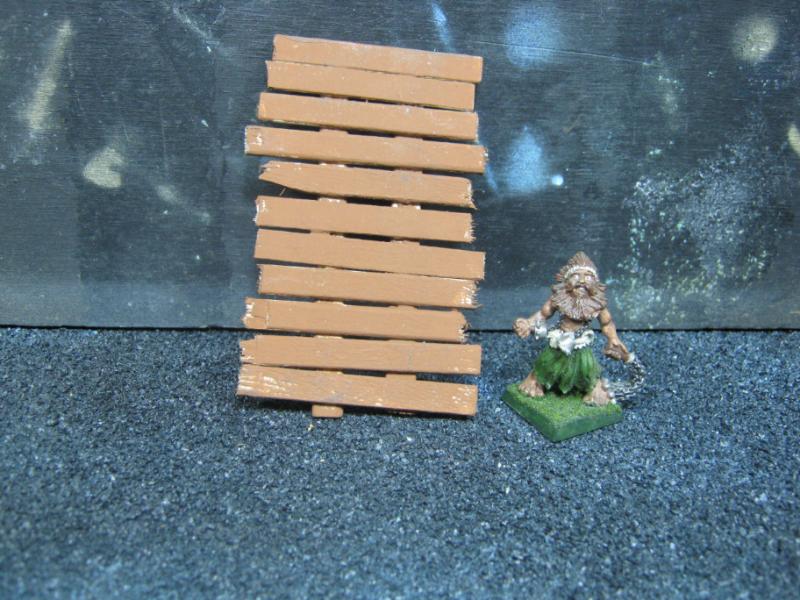
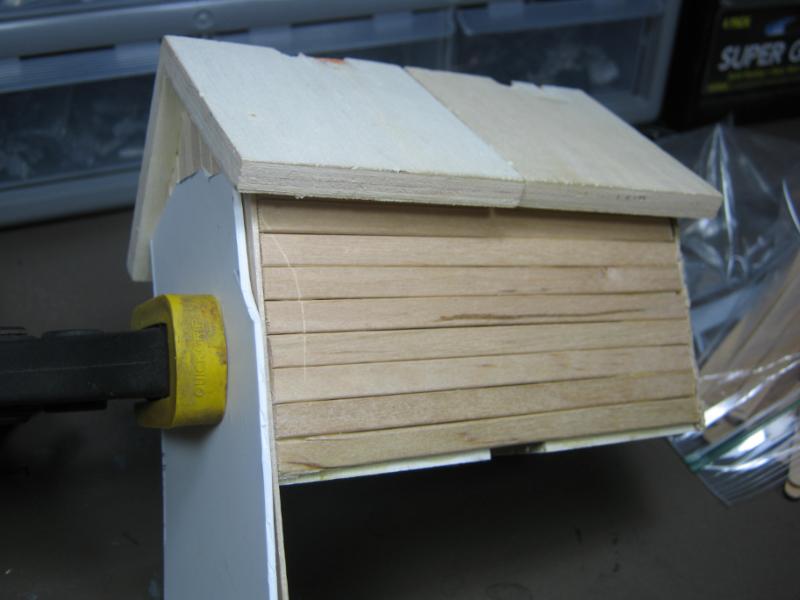
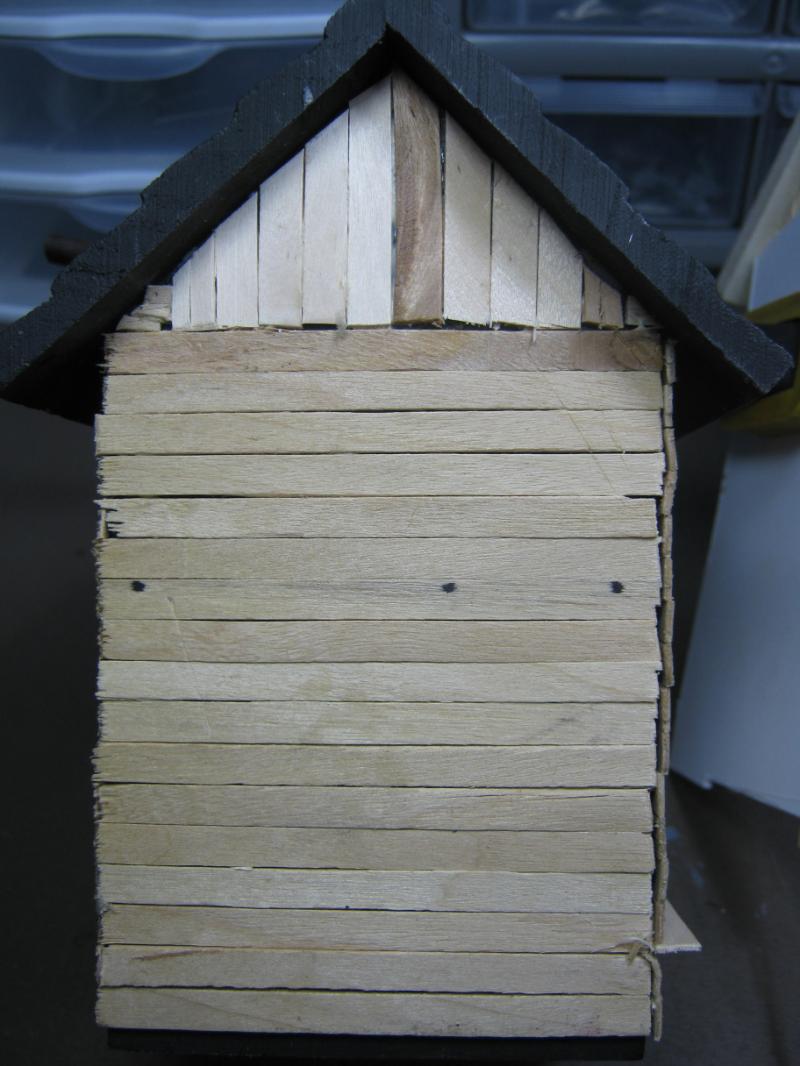
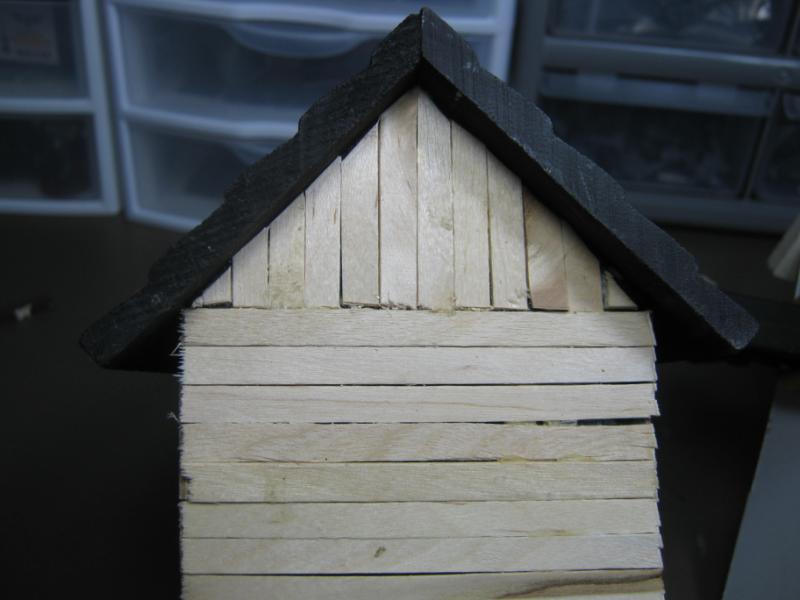
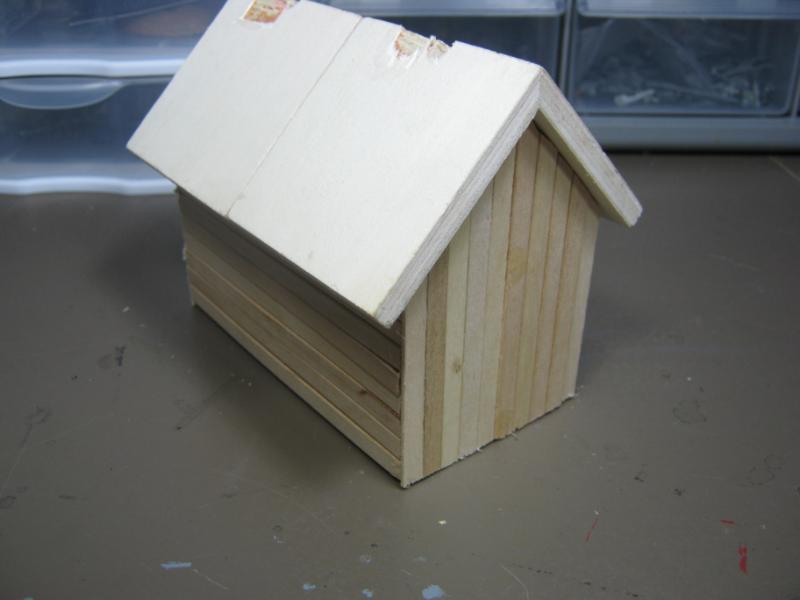
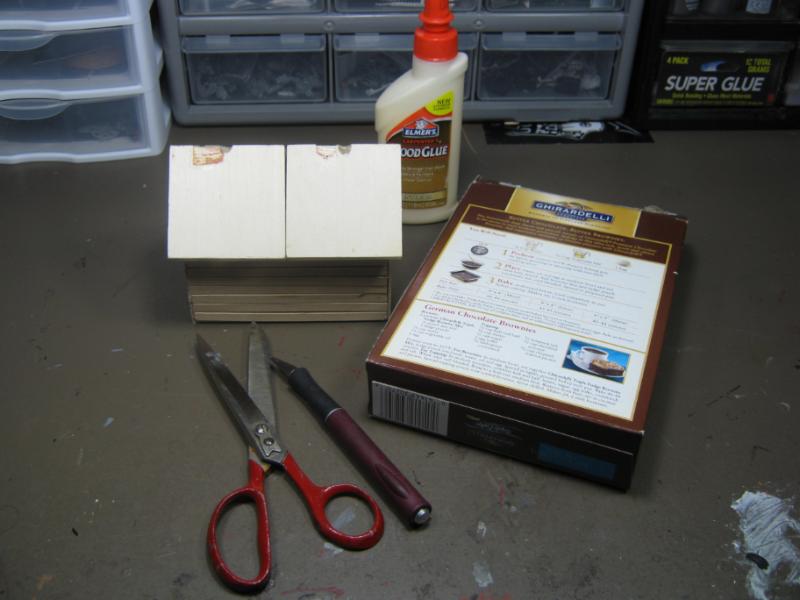
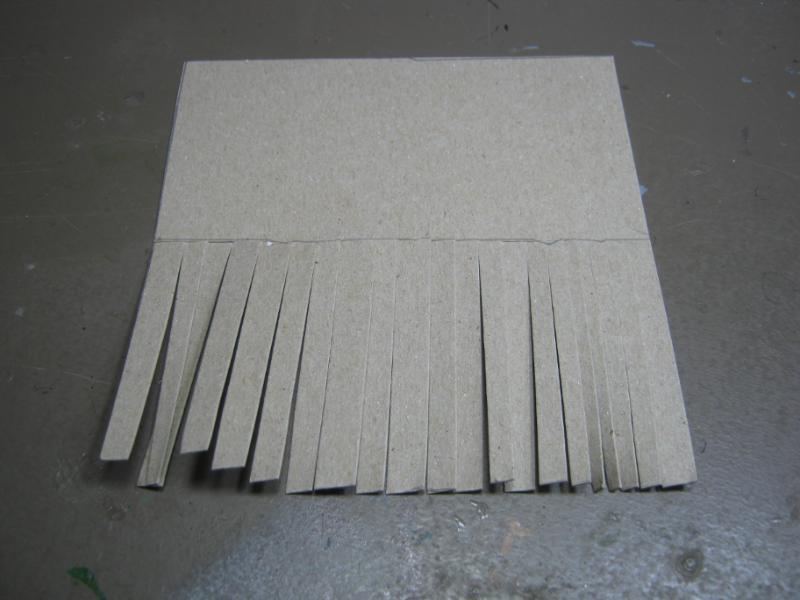
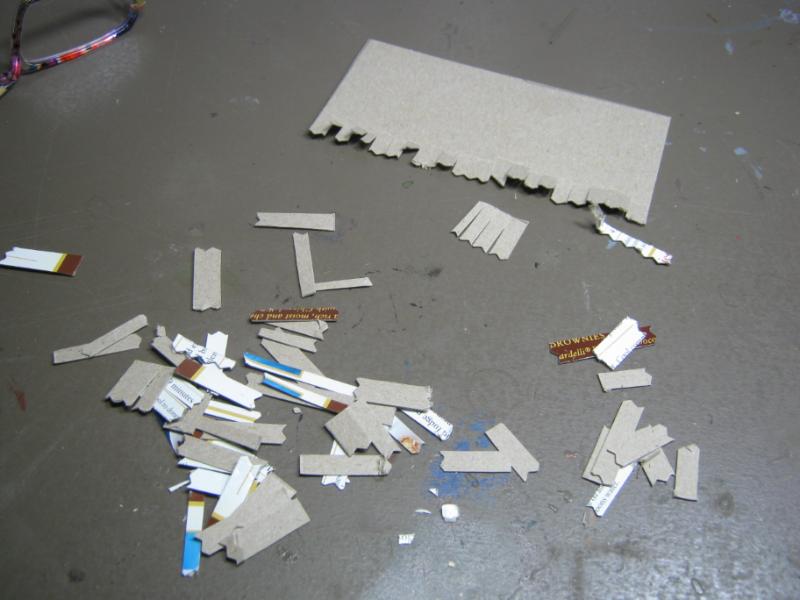
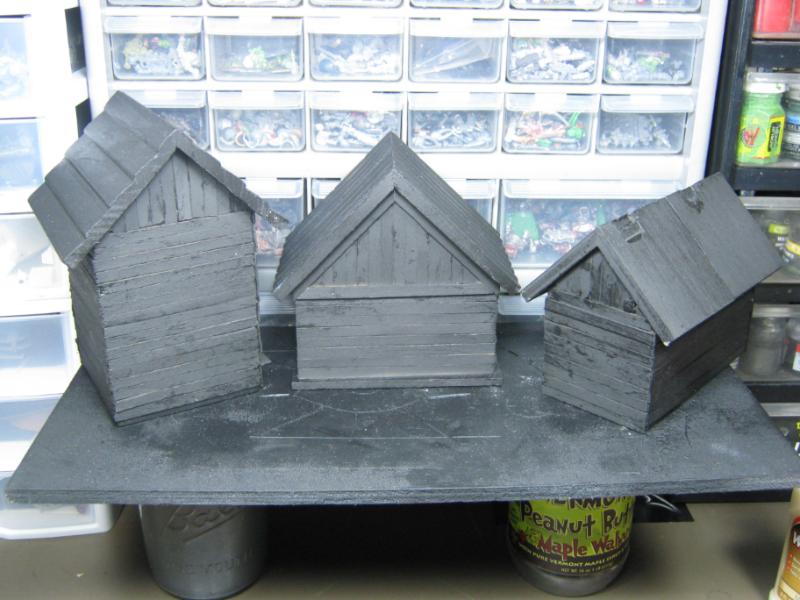
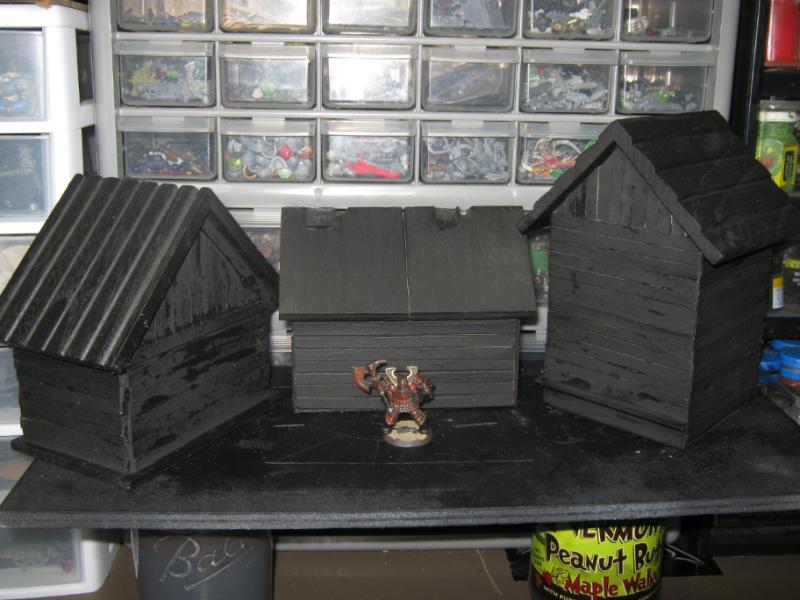
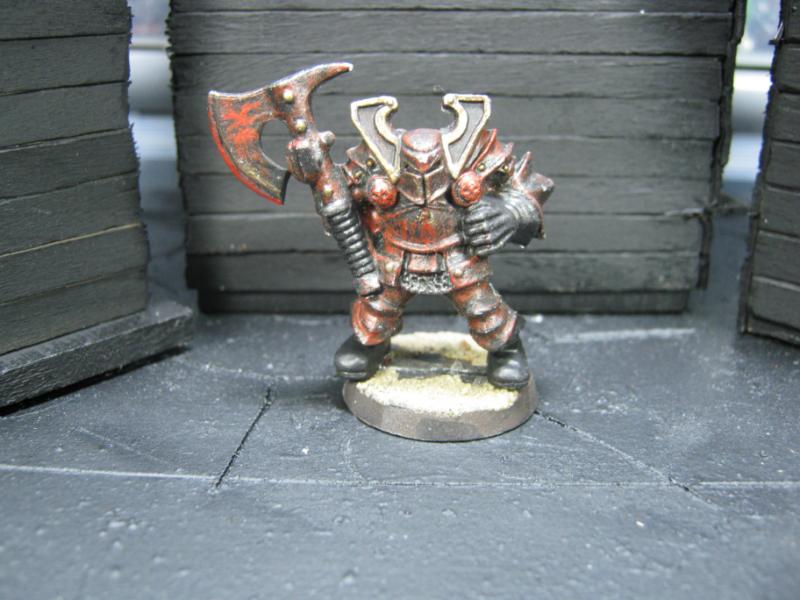
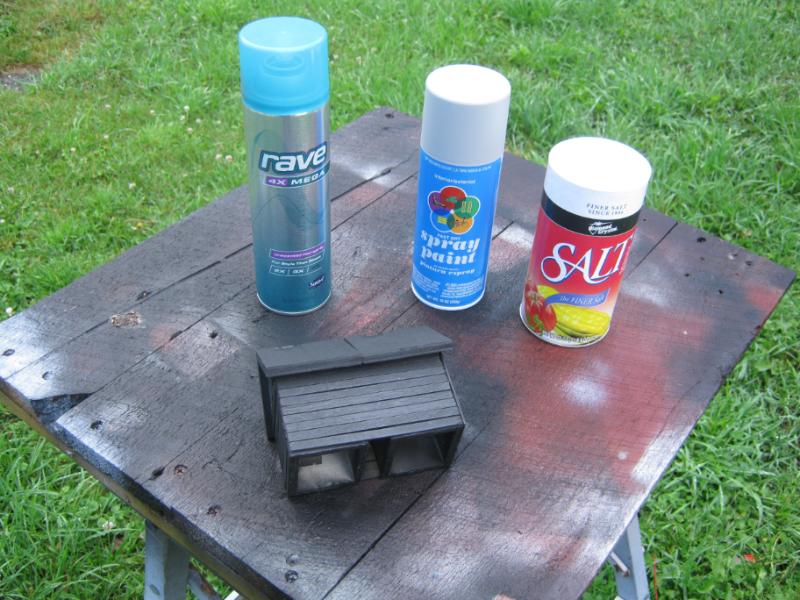
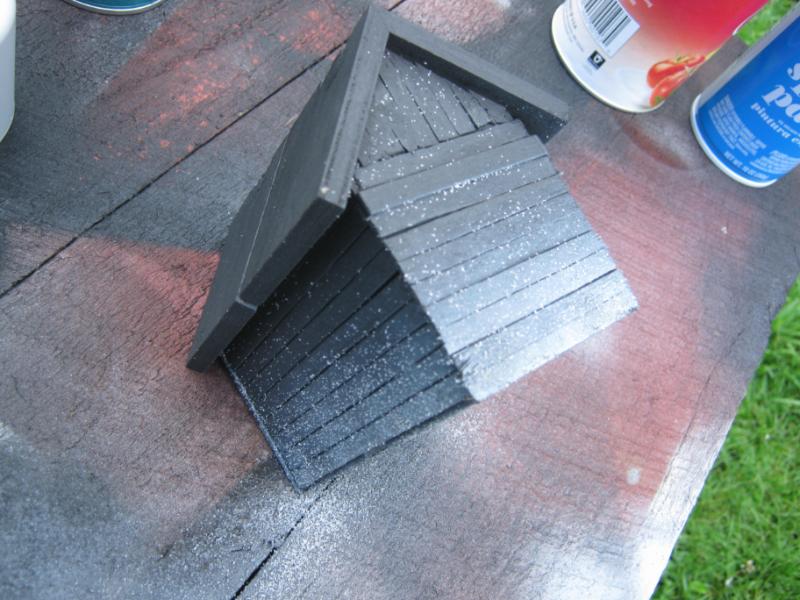
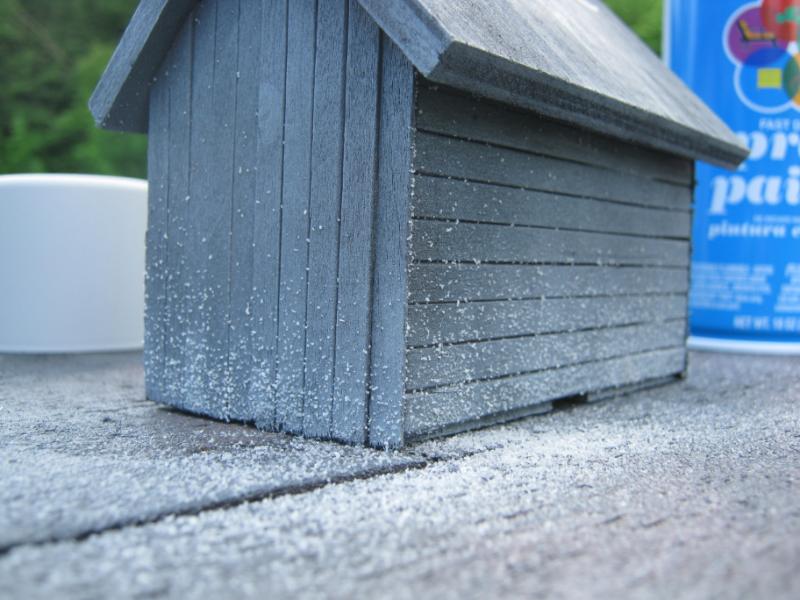
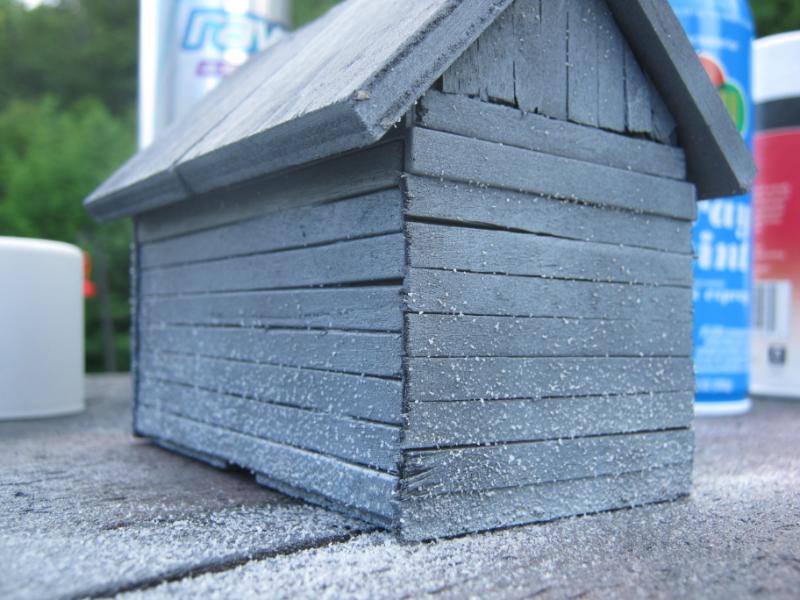
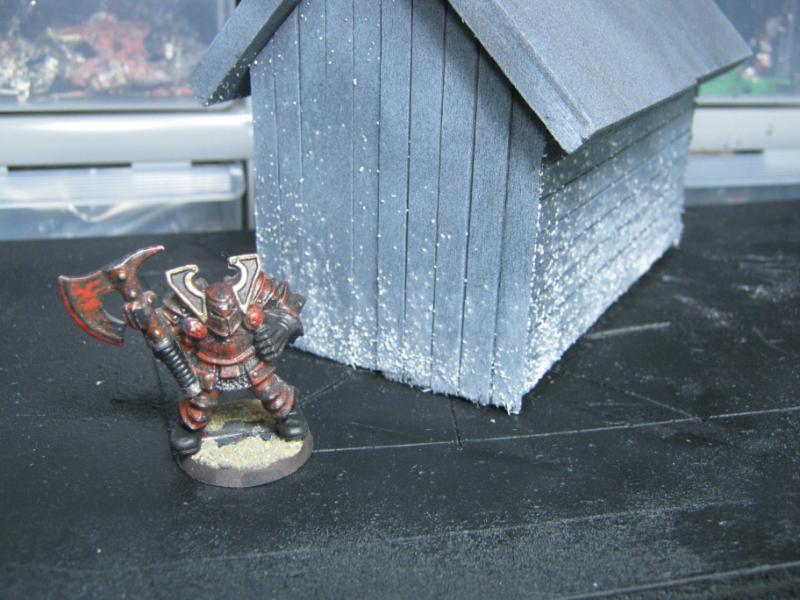
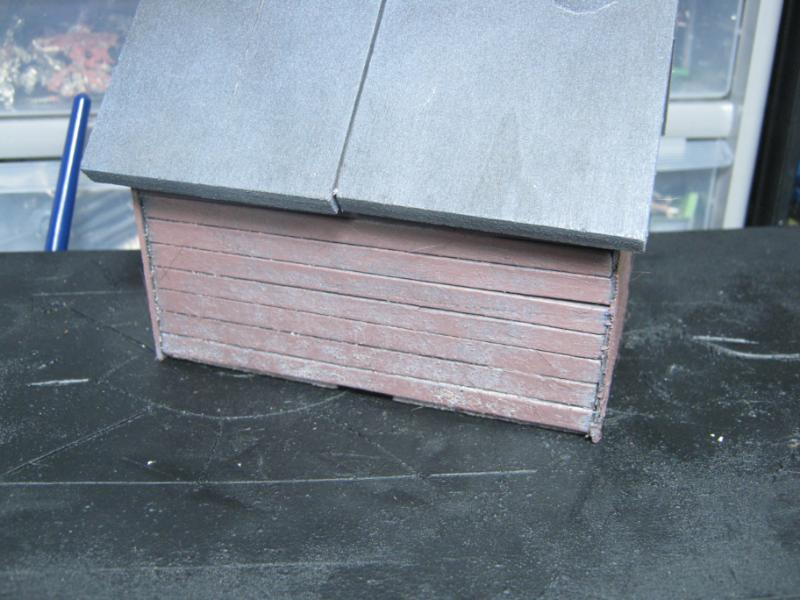
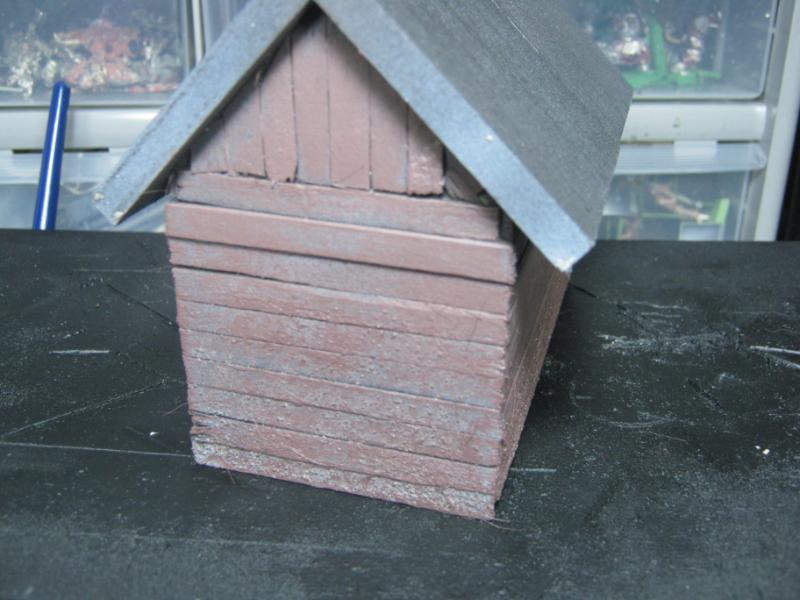
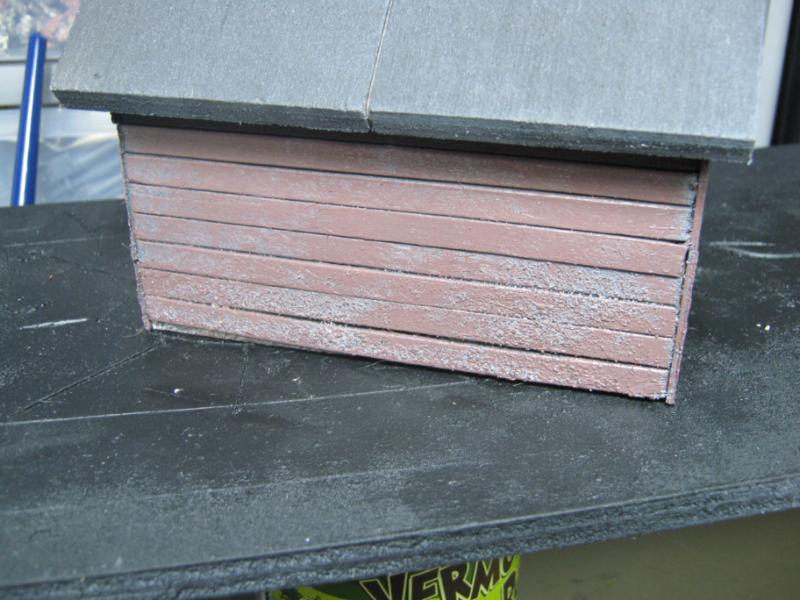
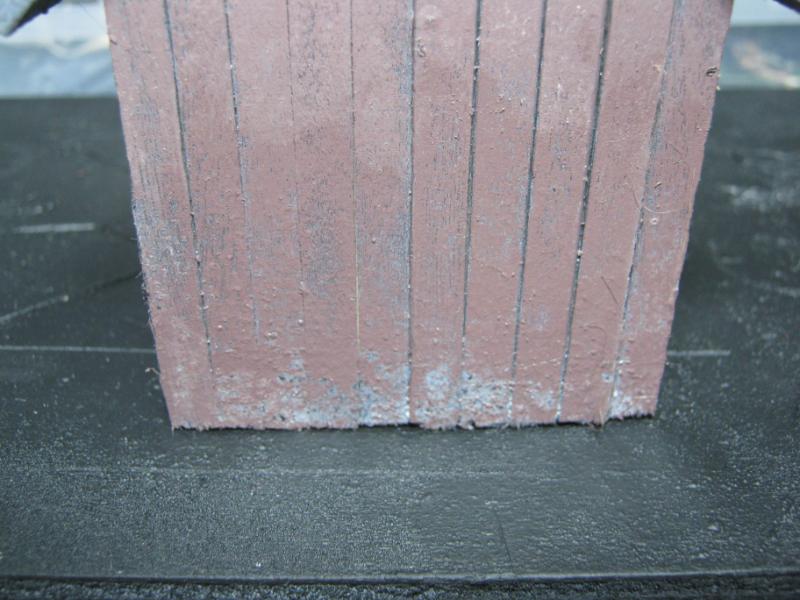
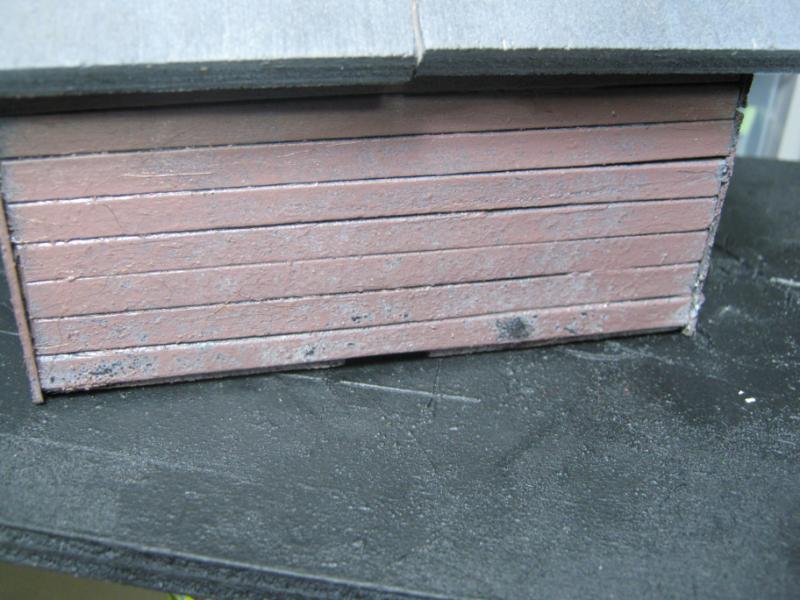
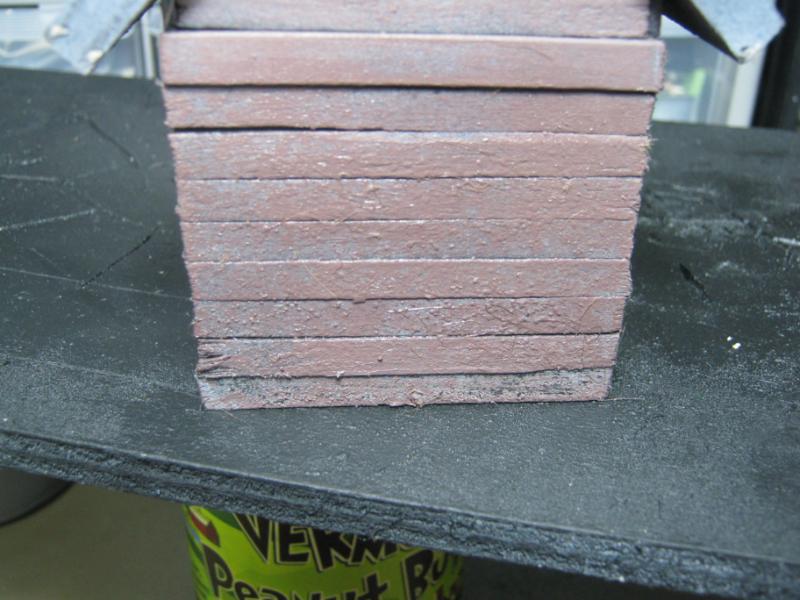
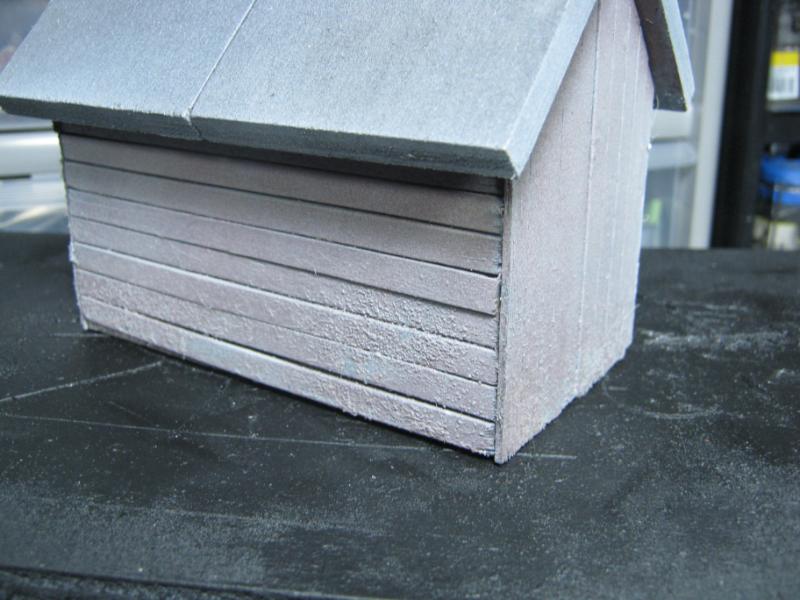
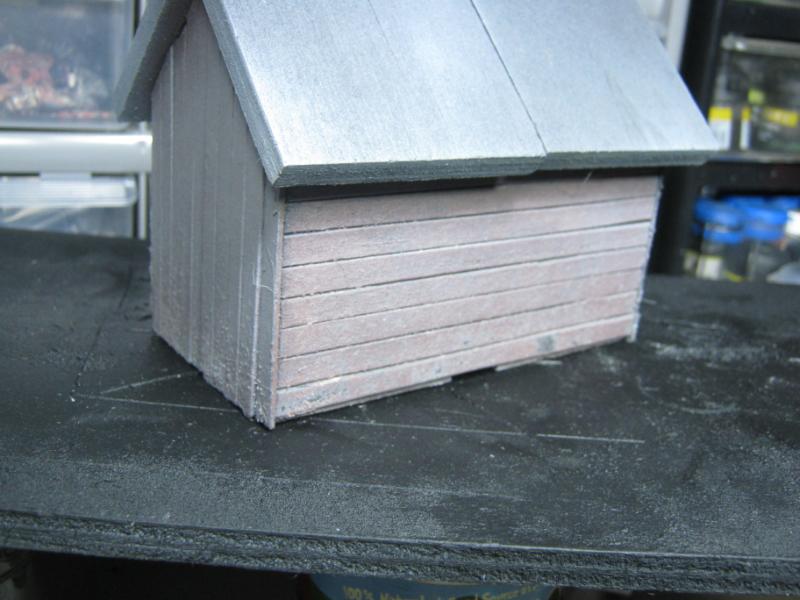
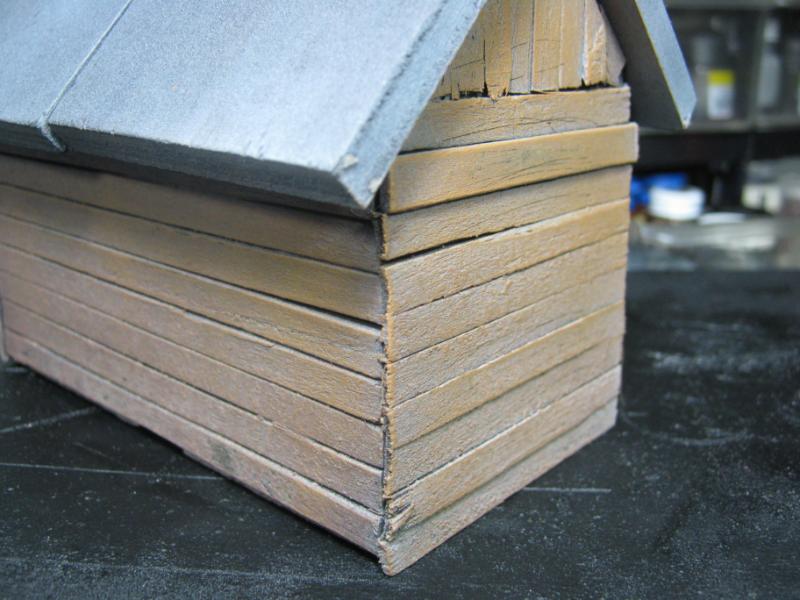
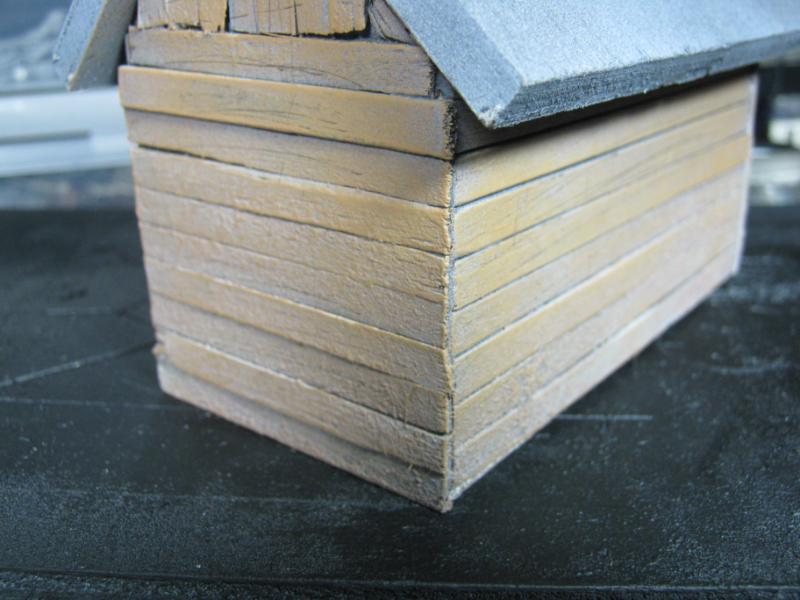
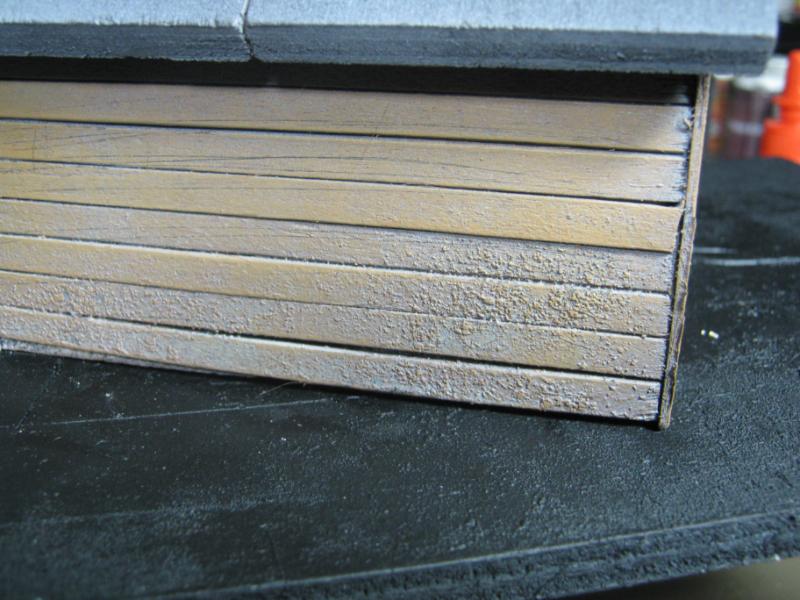
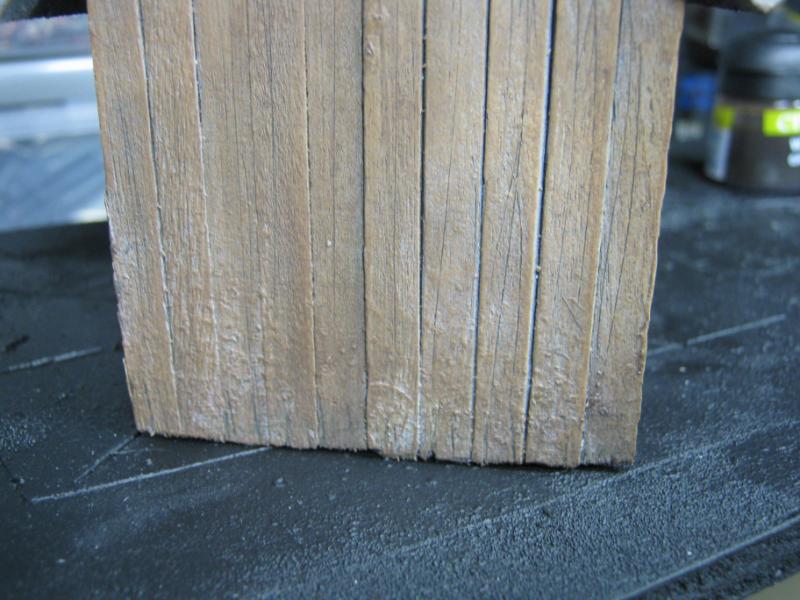
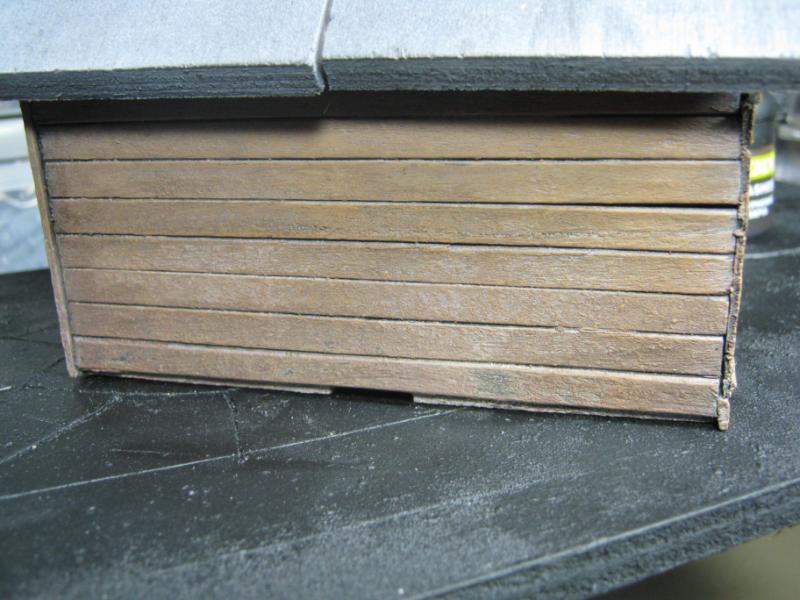
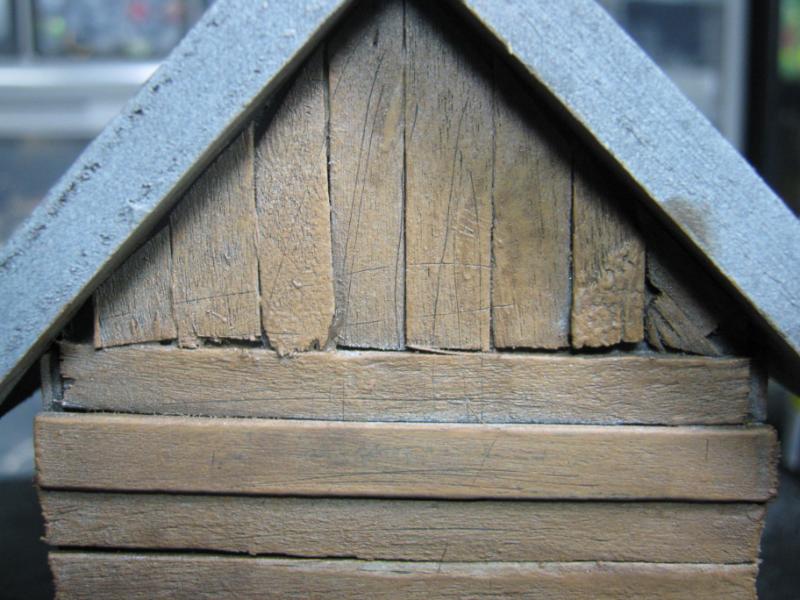
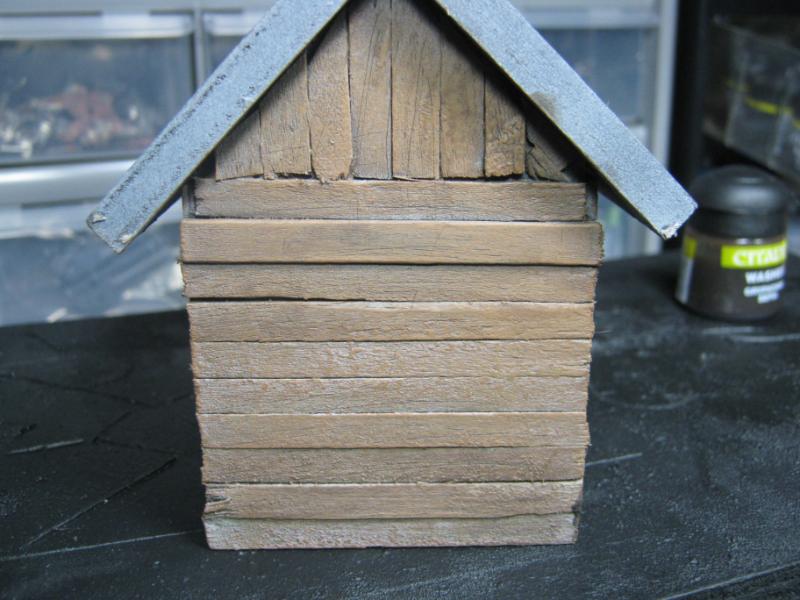
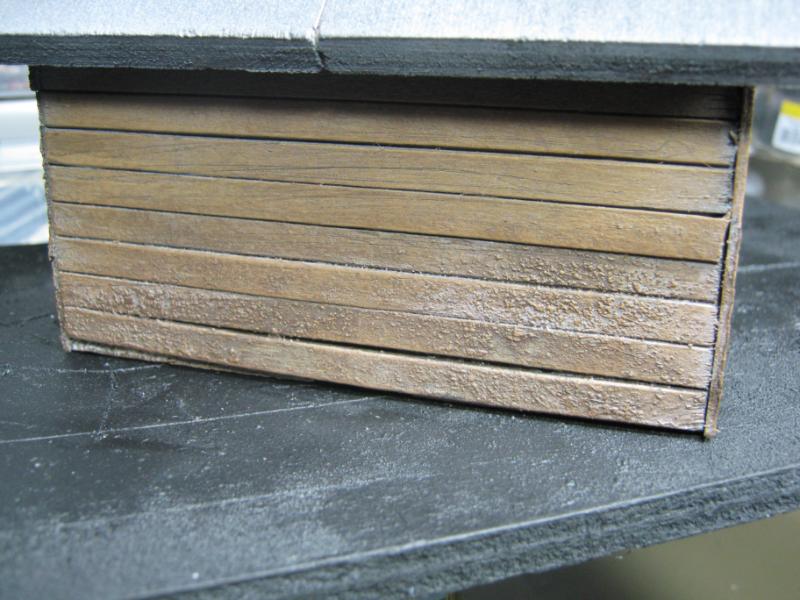
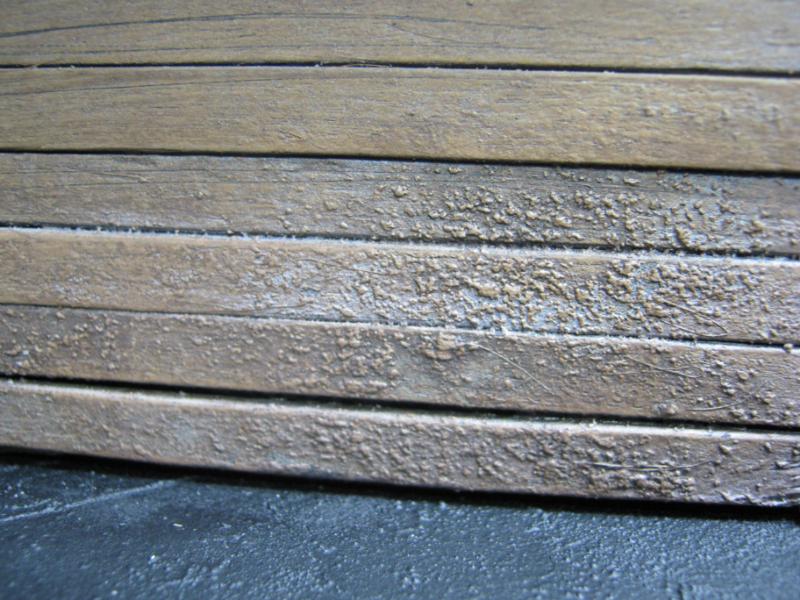
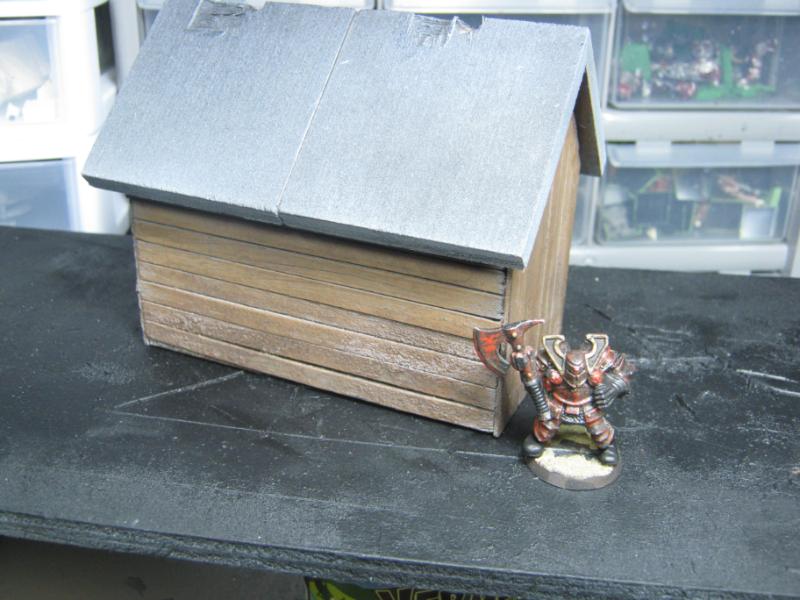
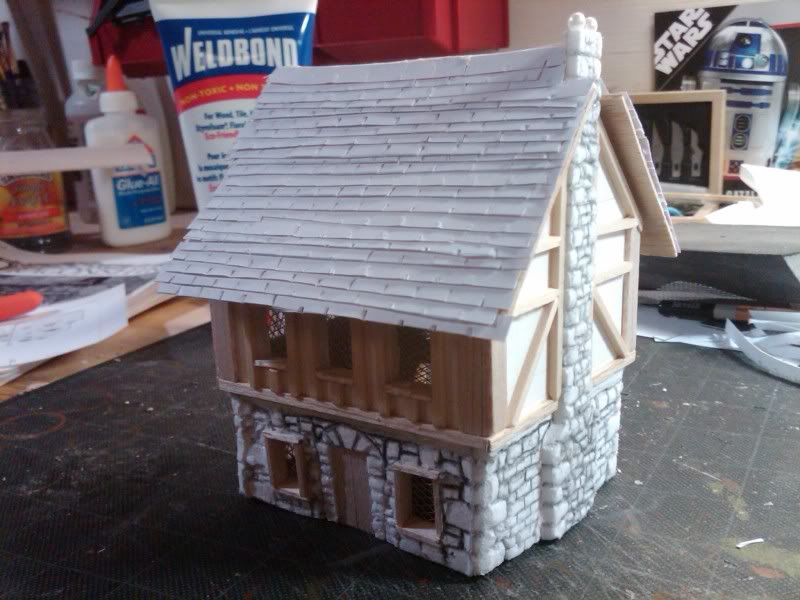
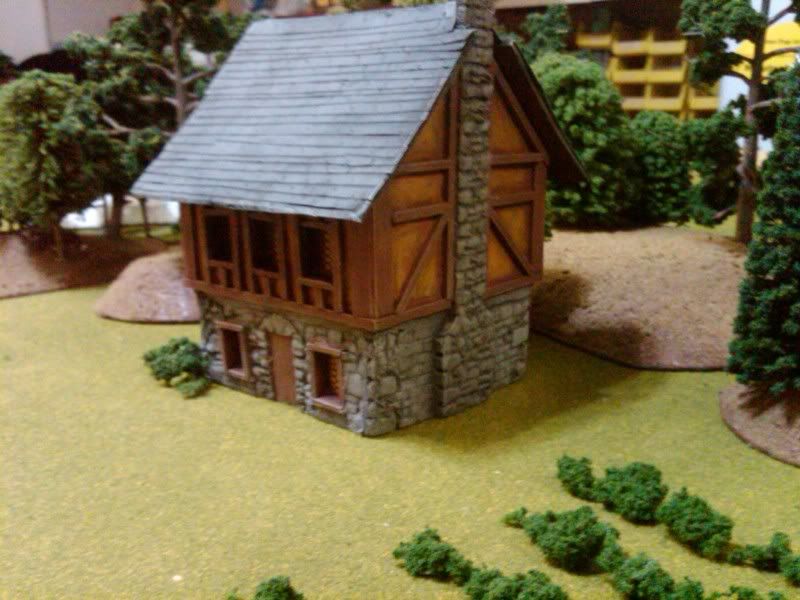
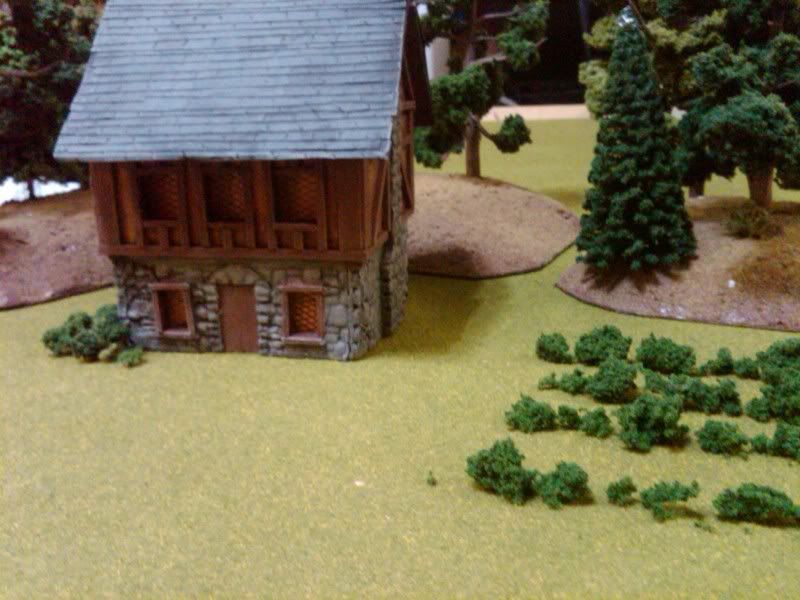

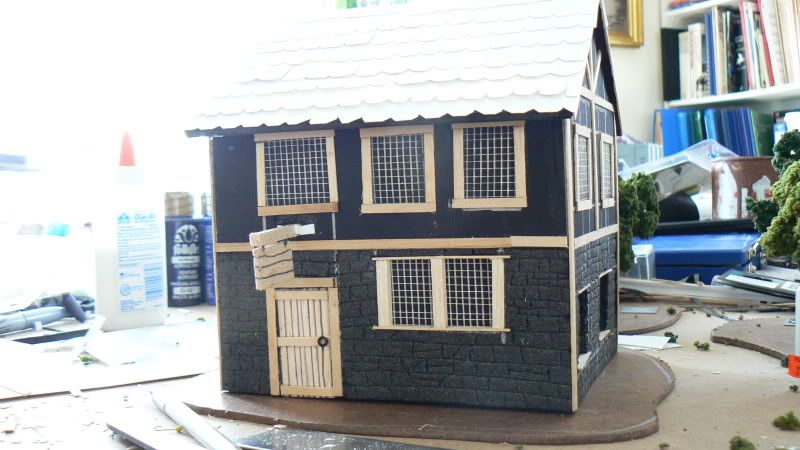
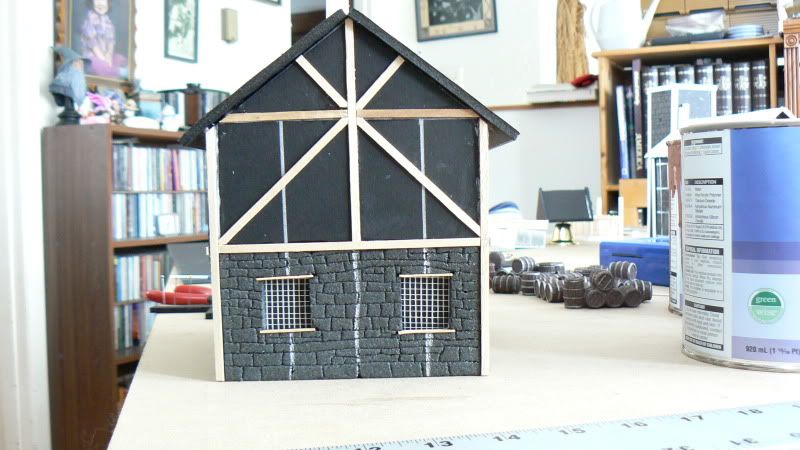
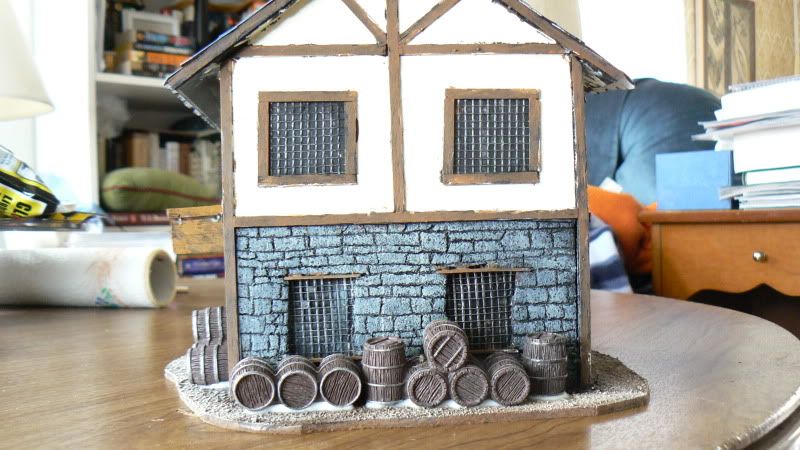
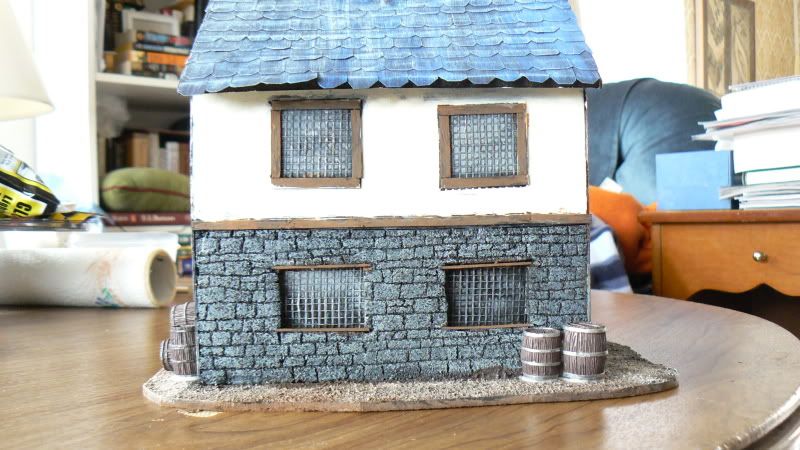

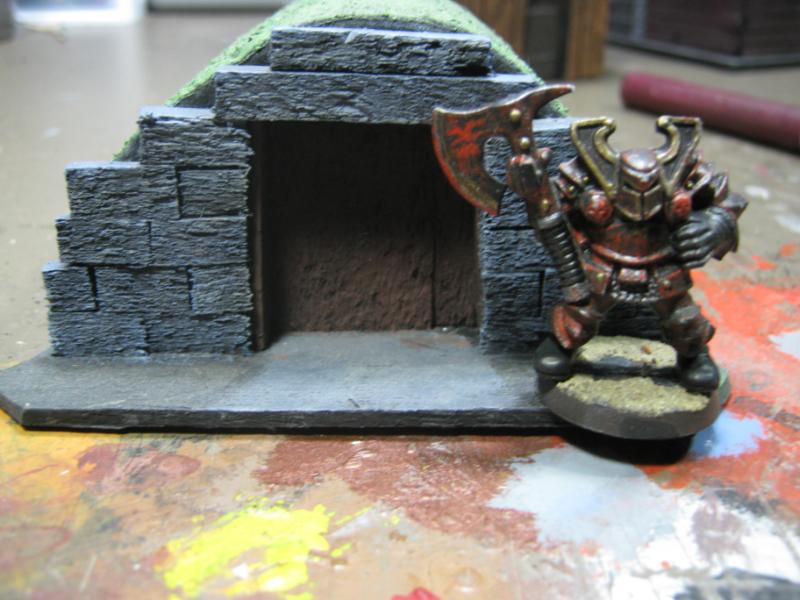
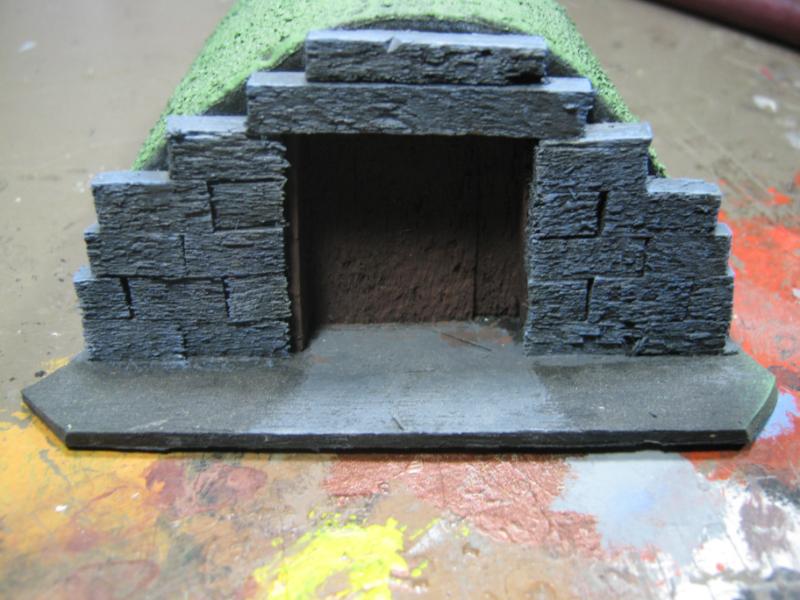
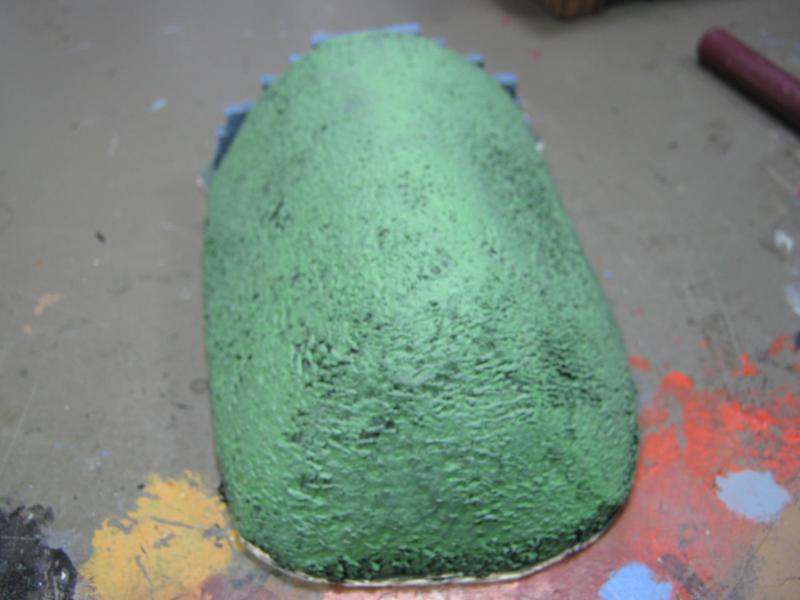

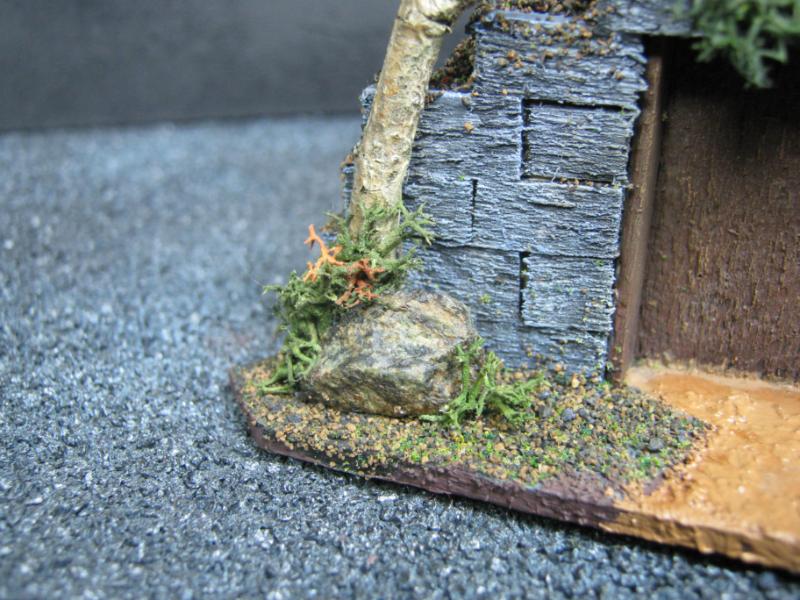

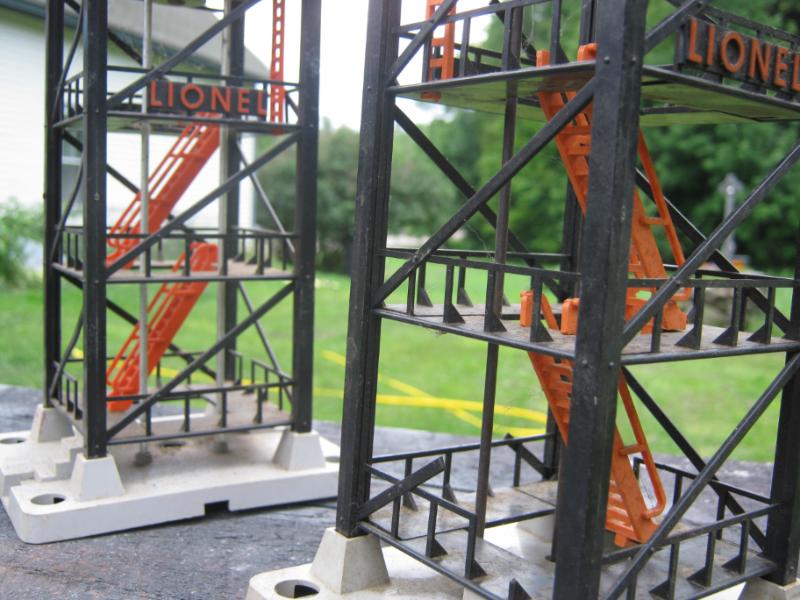
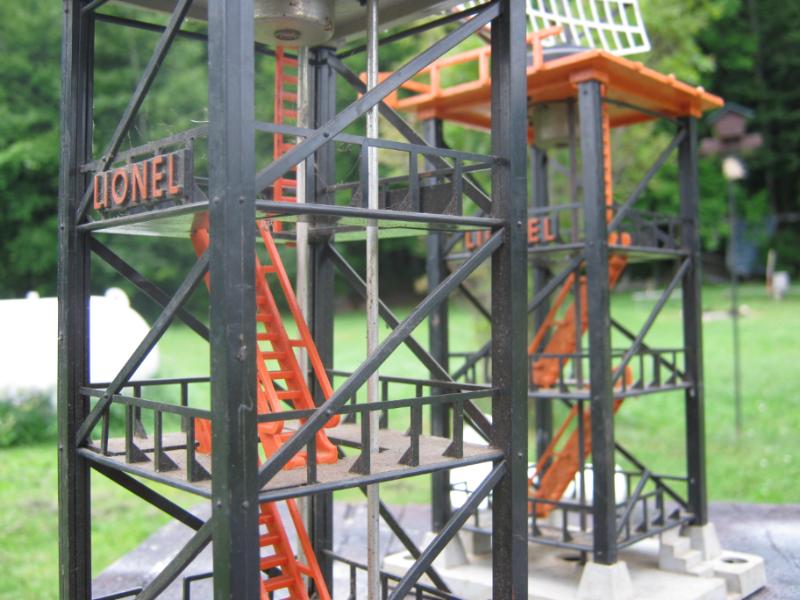
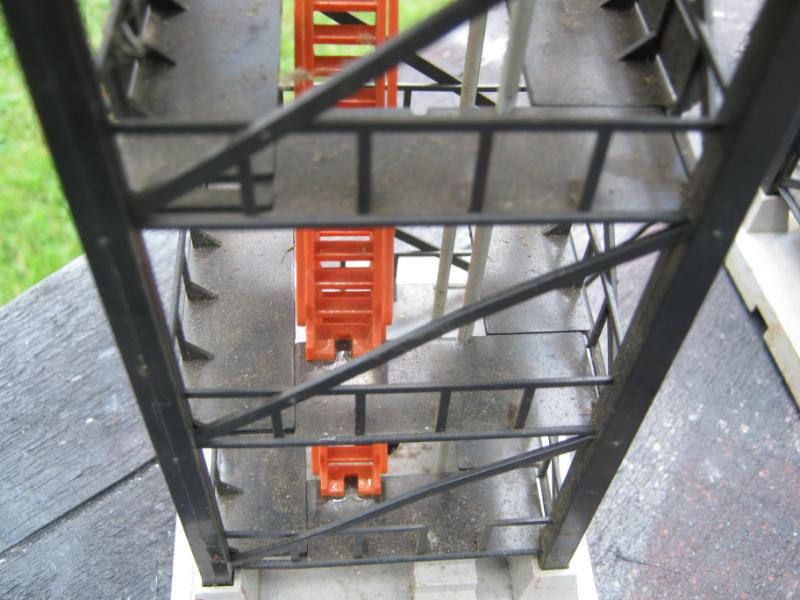
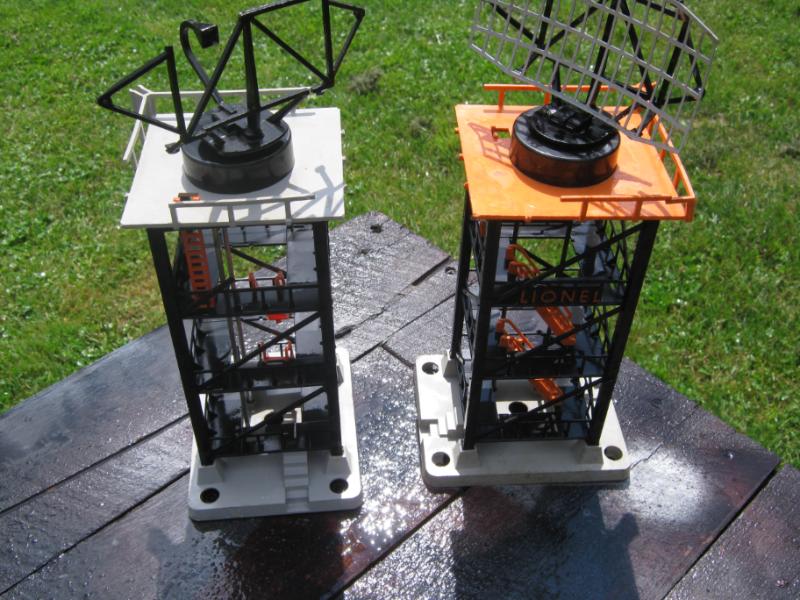
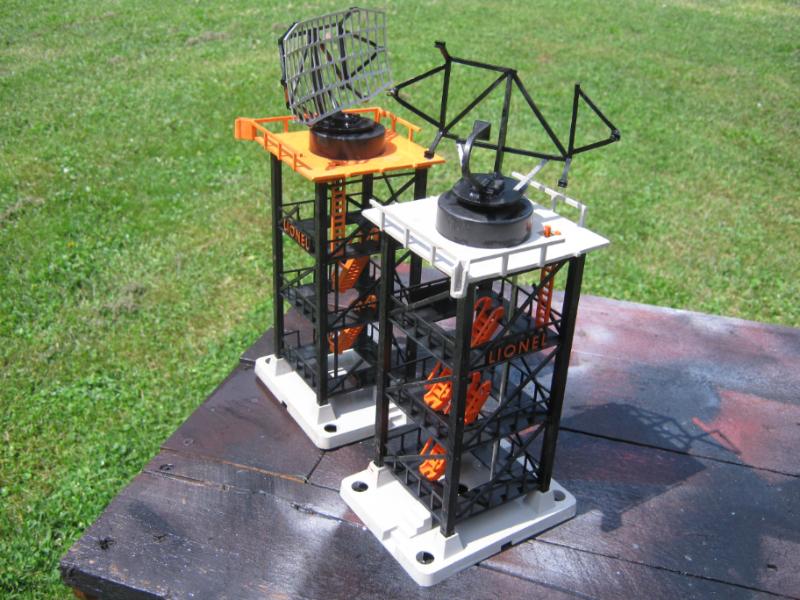

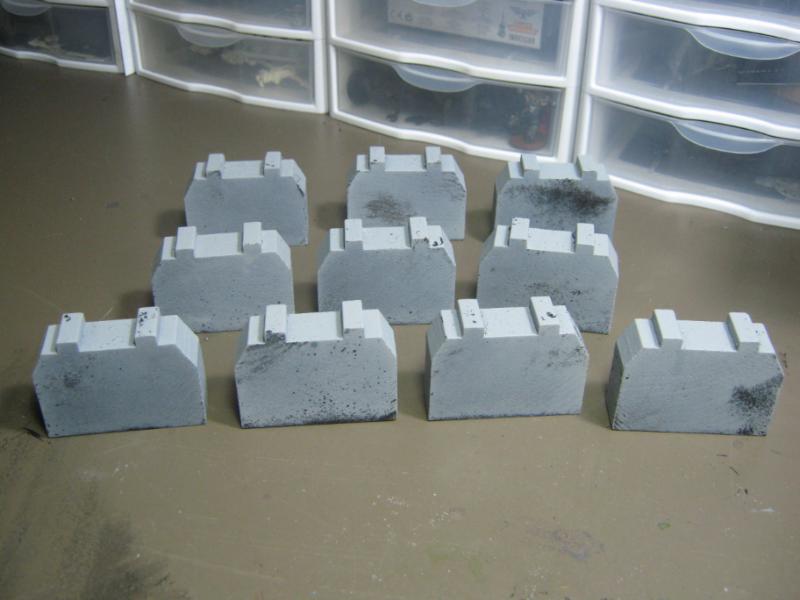
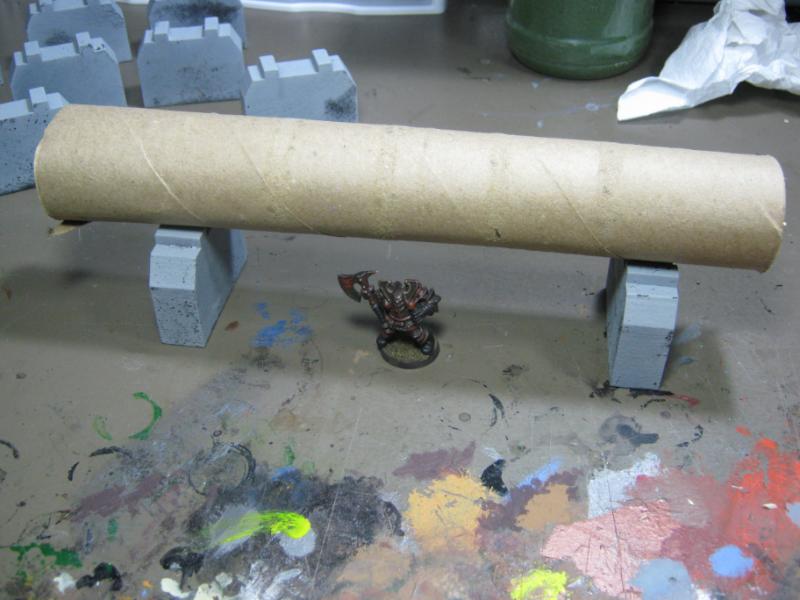


 feeling before while at a yard sale or something similar. I saw it, freaked out on the inside but offered a calm facade while inquiring about and dickering final price. I waited until I was out of sight before I started dancing around. I'm going to leave one of them mostly stock and keep the radar dish (I'm thinking 'objective' for a game, everyone wants the communication center) and the more beat up one is going to become a defensive point w/ a lot of hasty defensive plating and a huge gun.
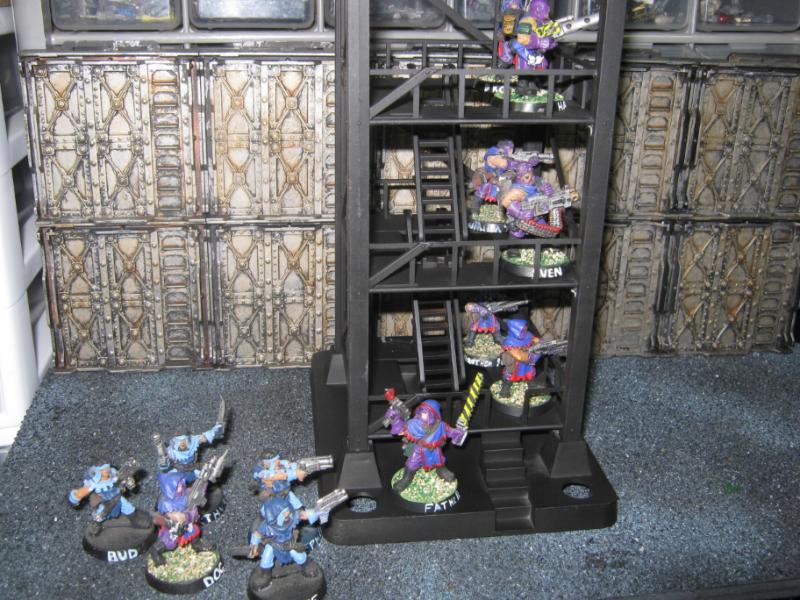
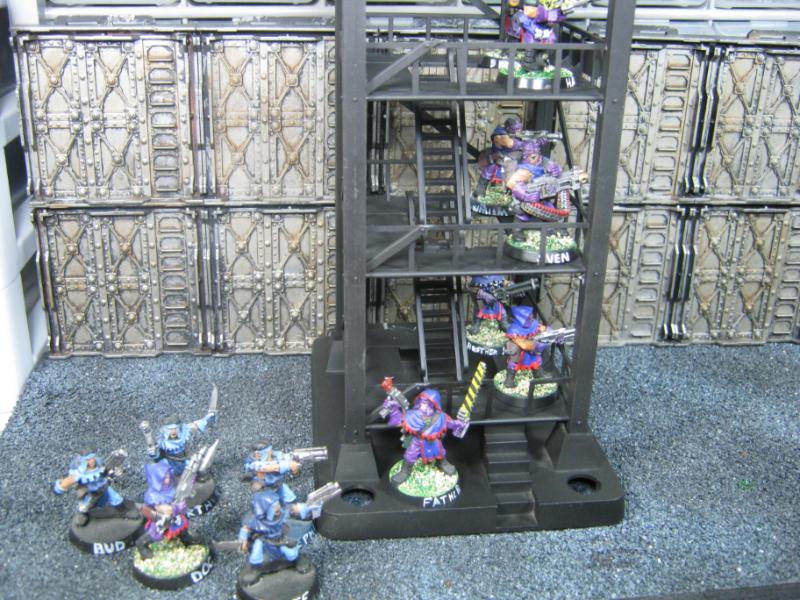
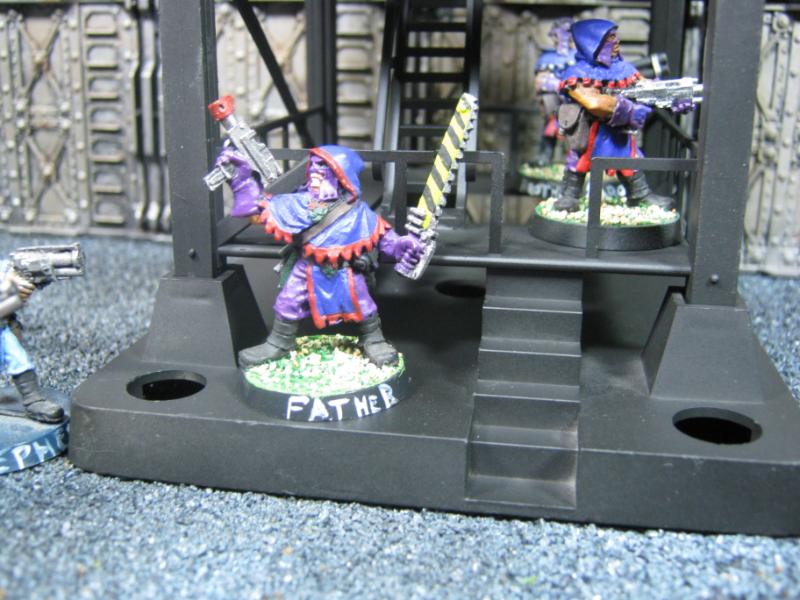
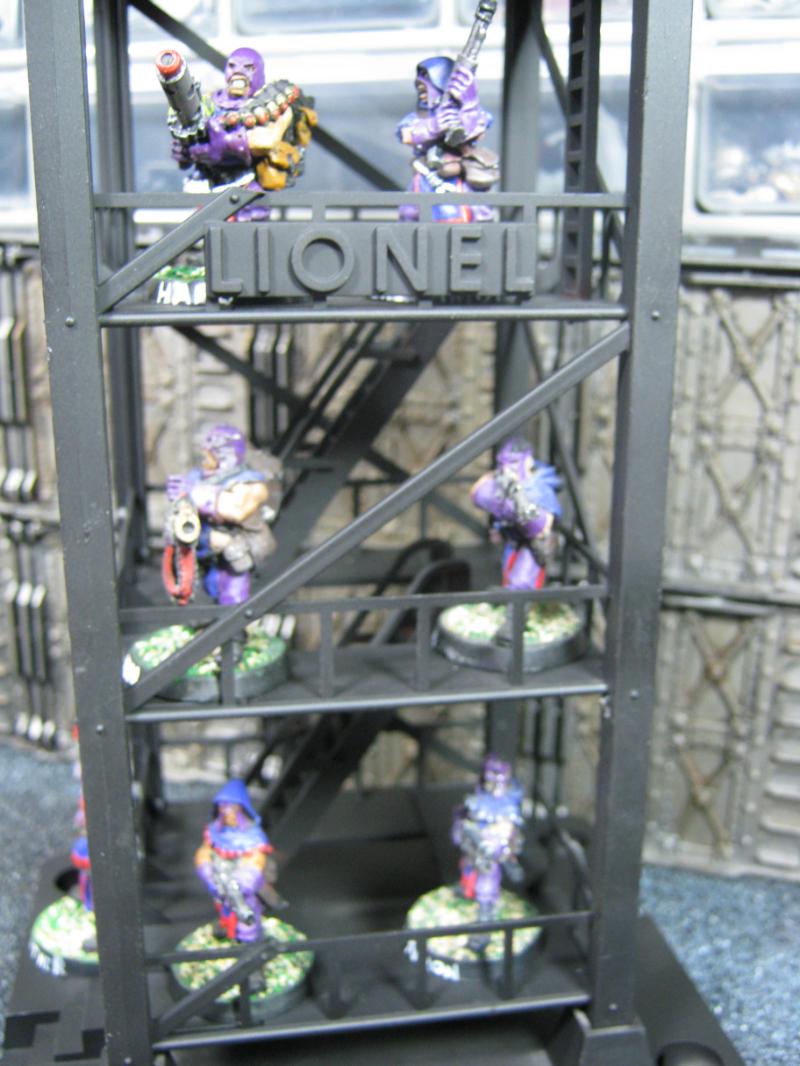


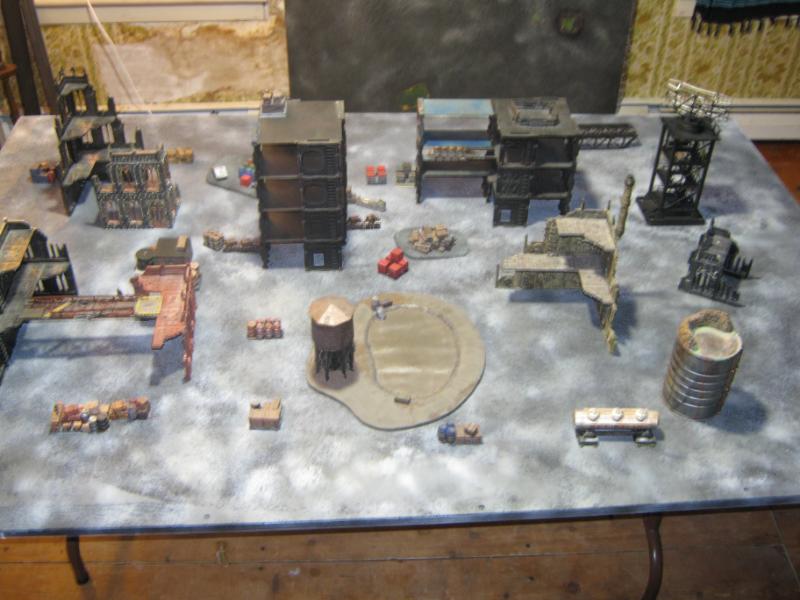
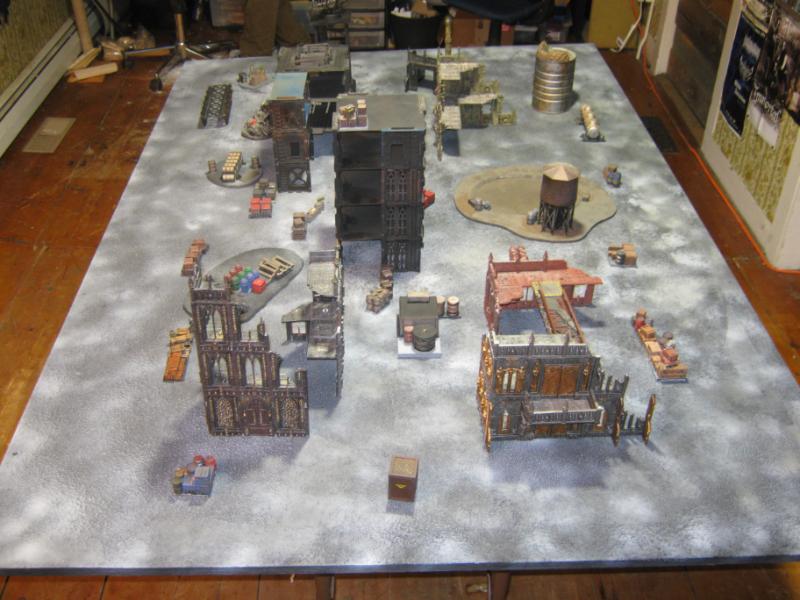
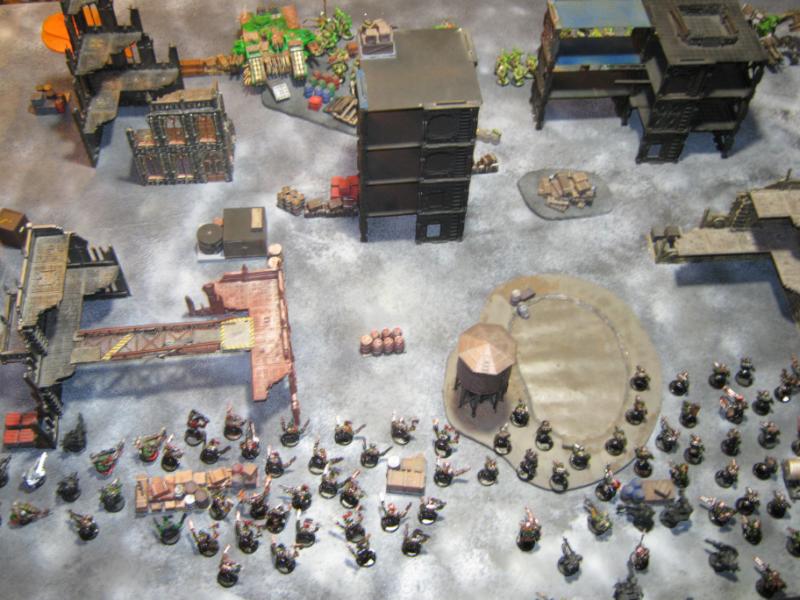
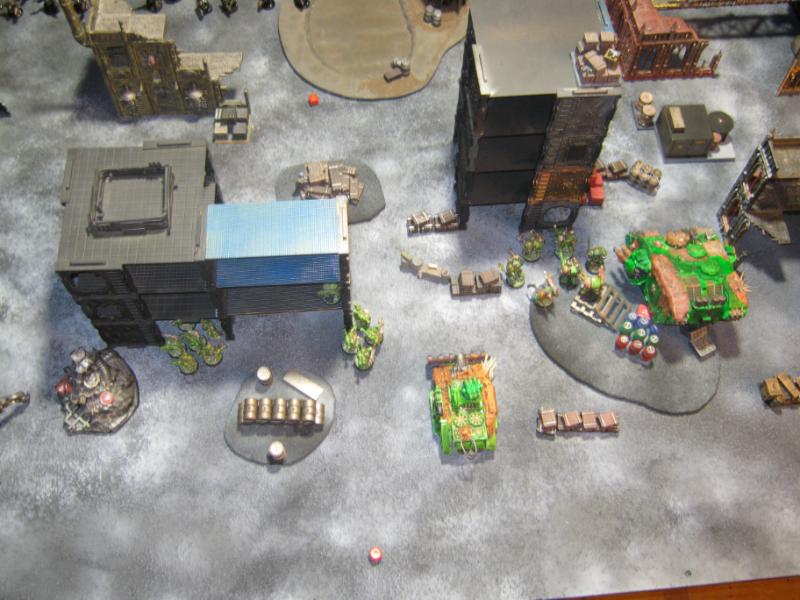
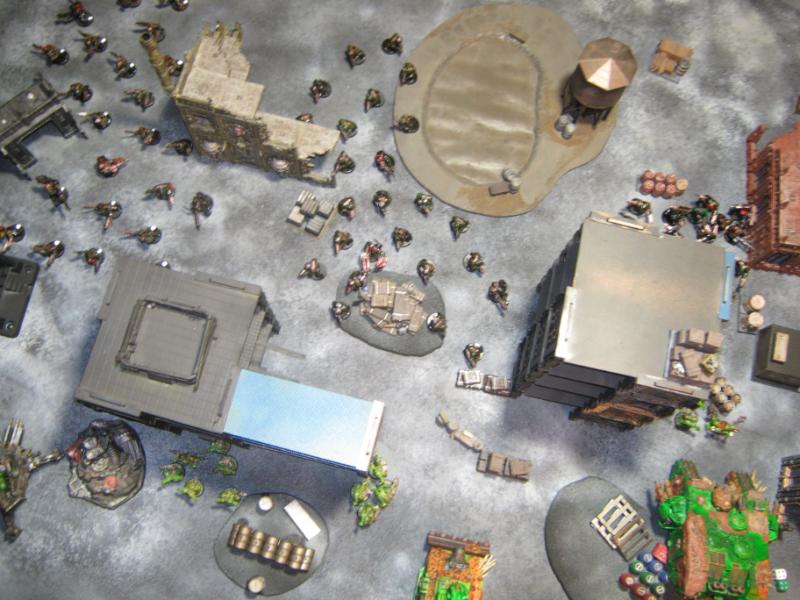
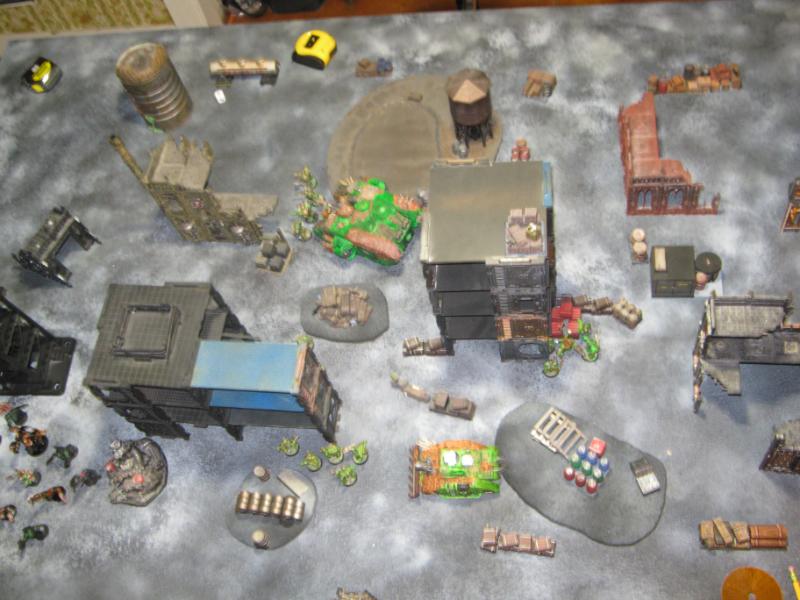
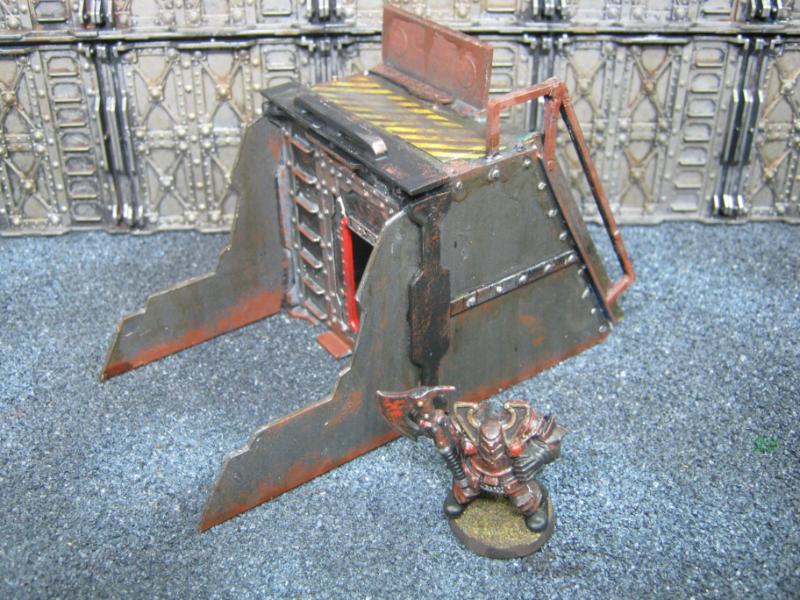
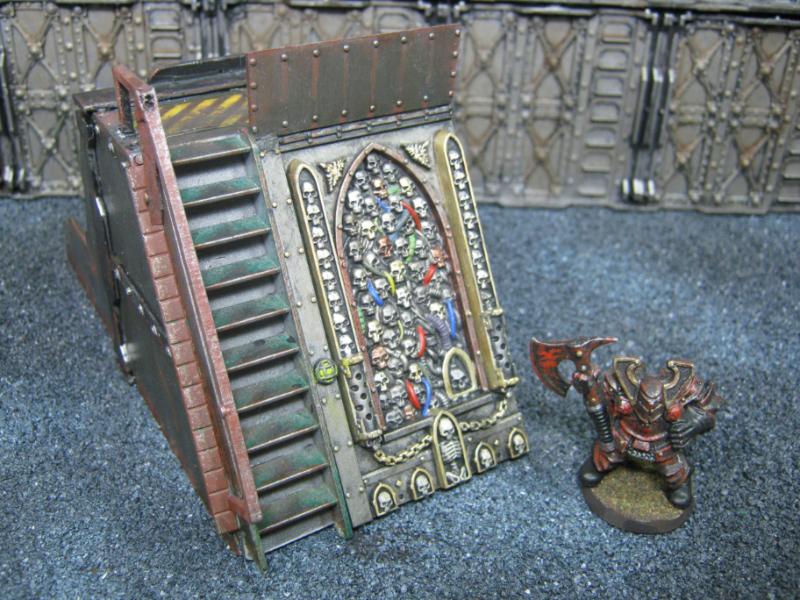
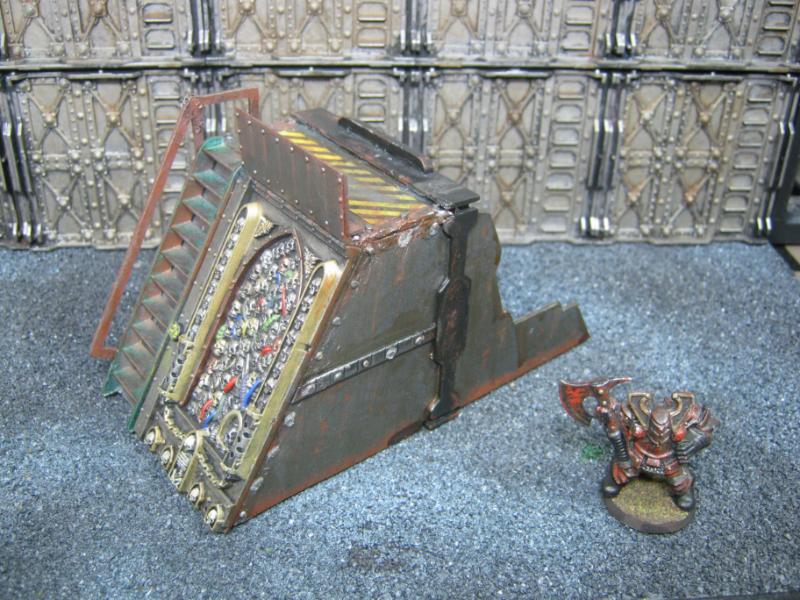
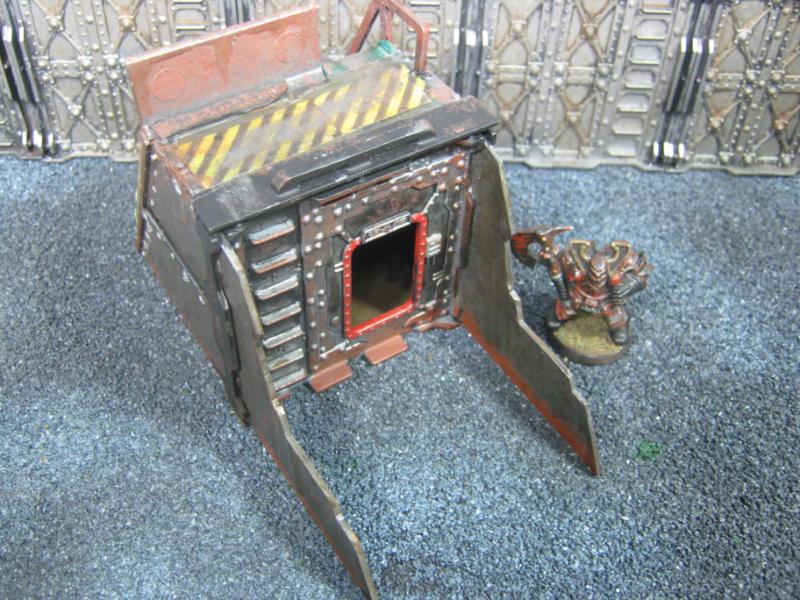
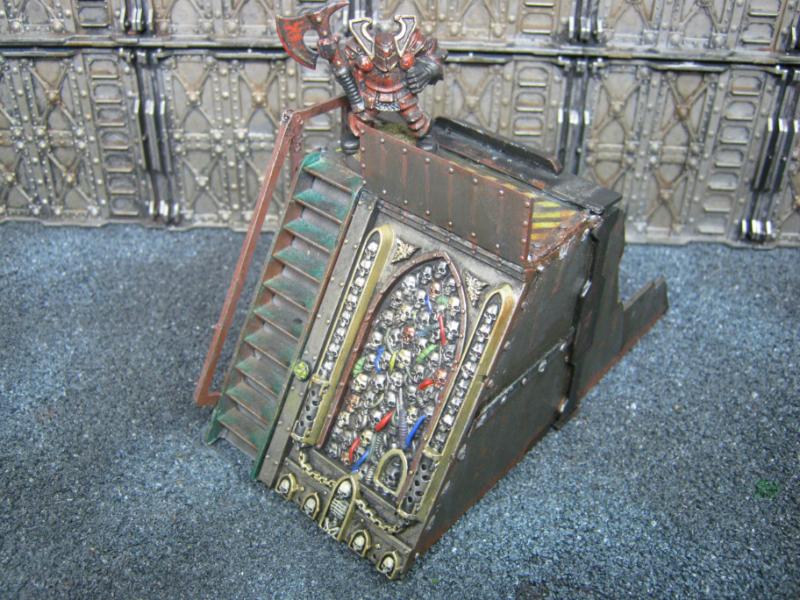
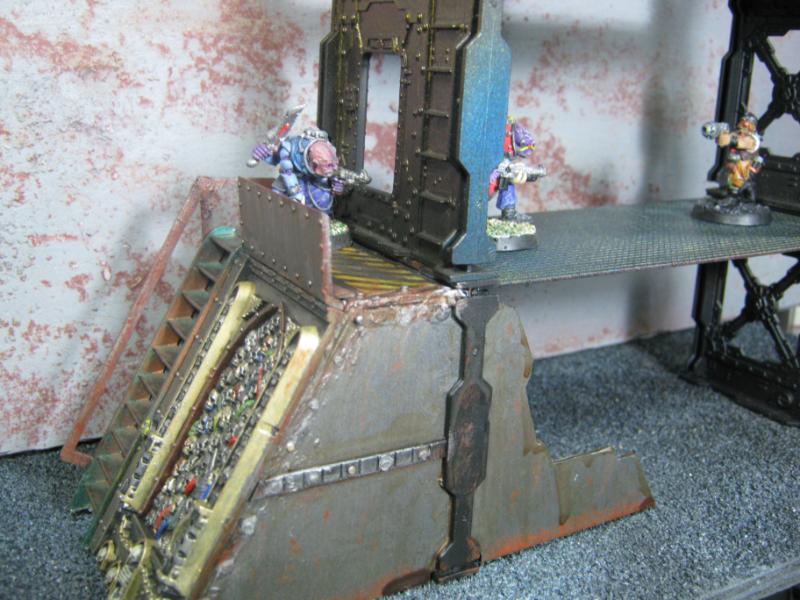
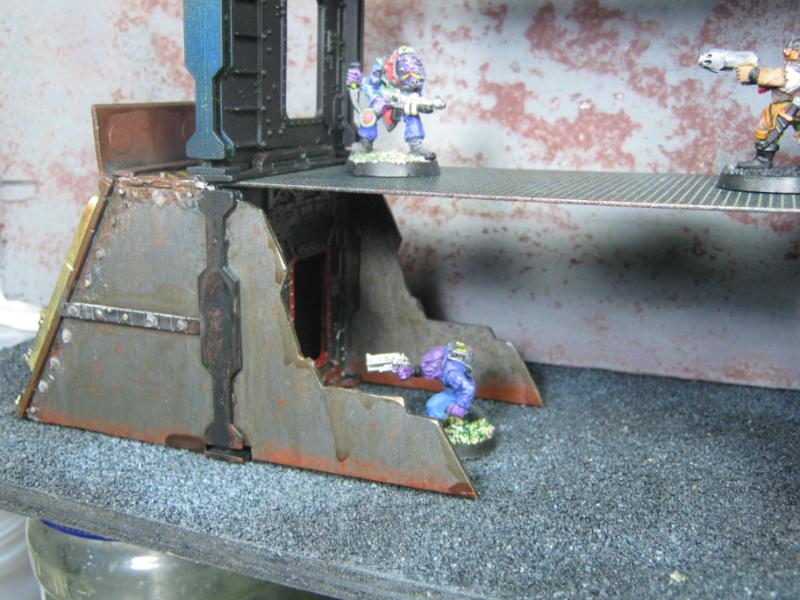
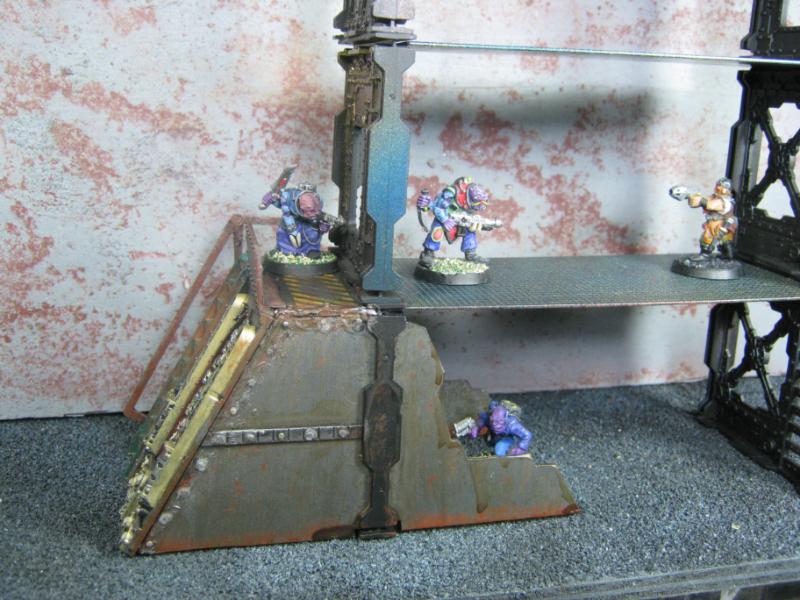
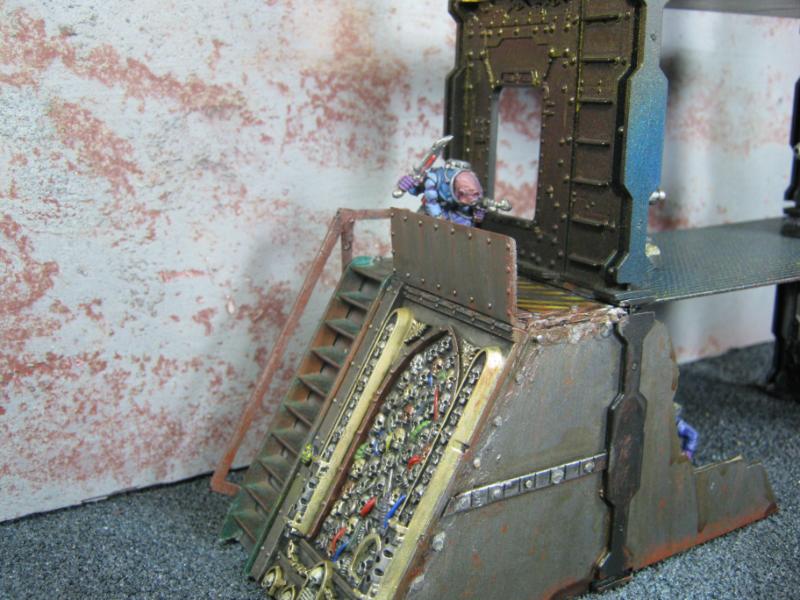
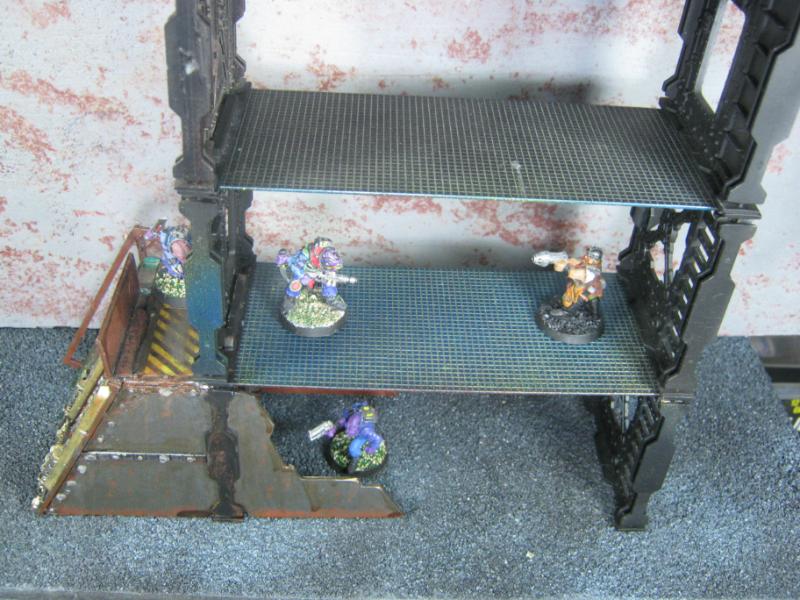
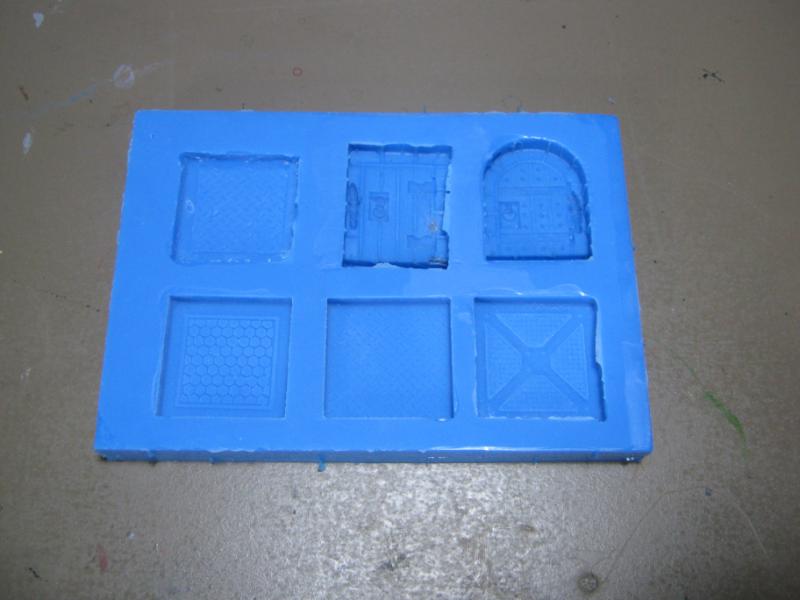
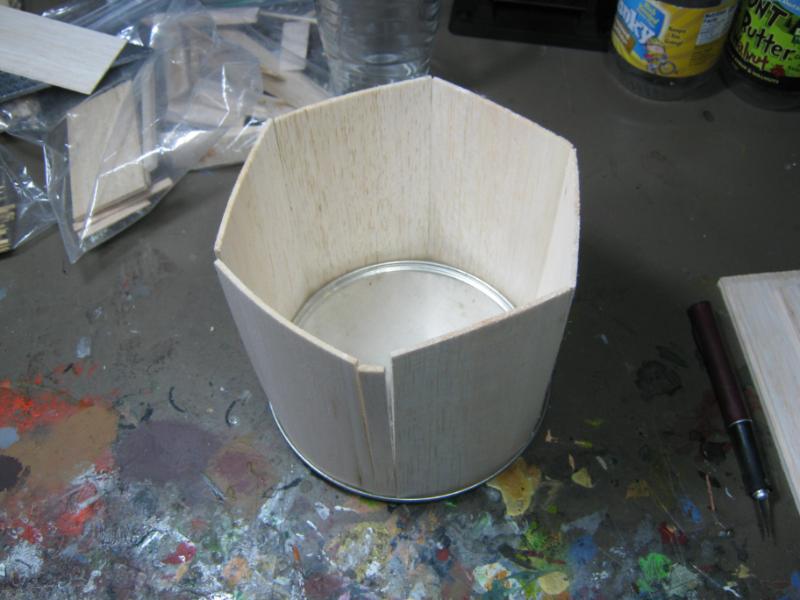
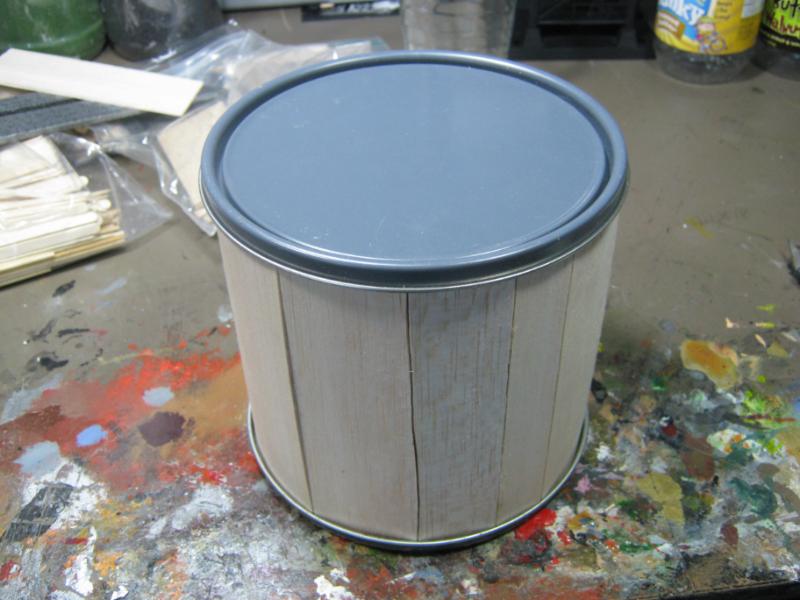
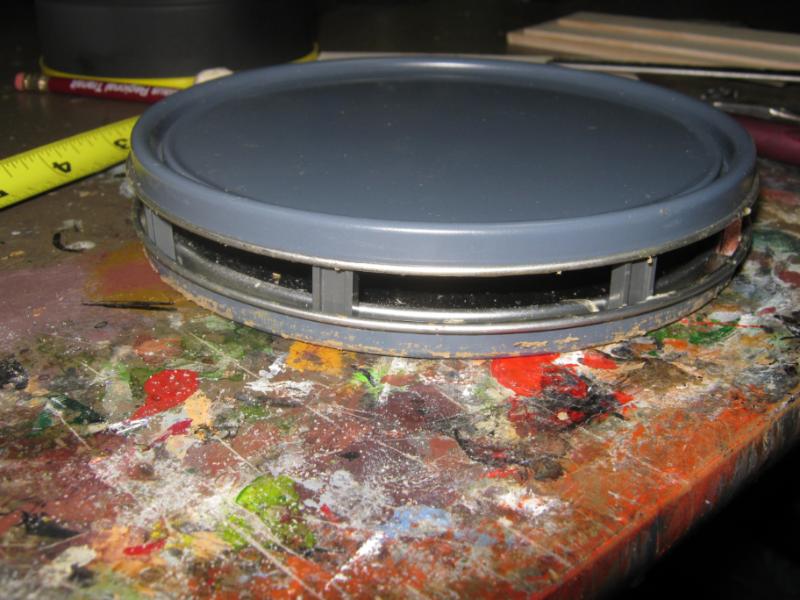
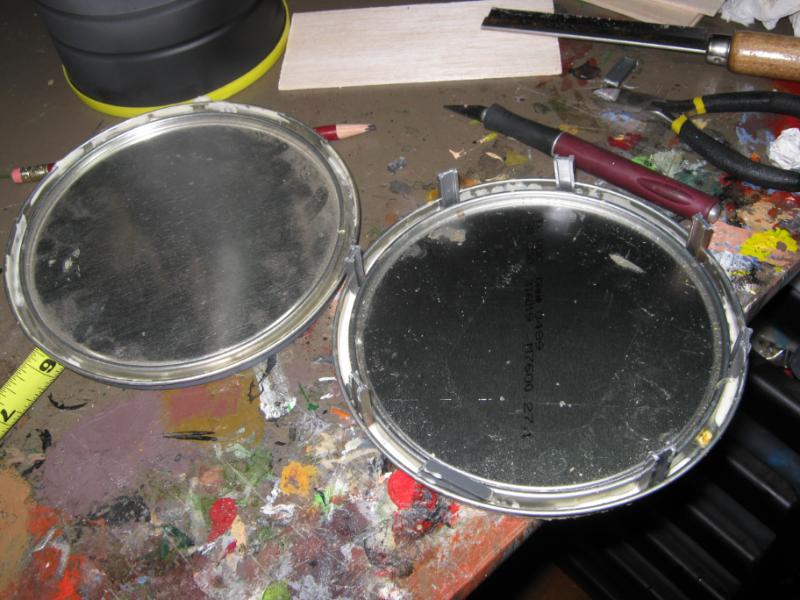
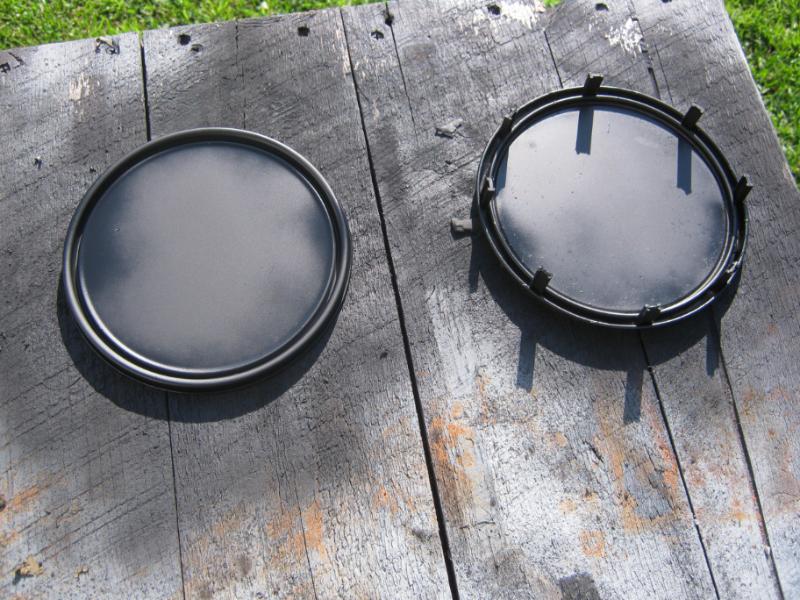
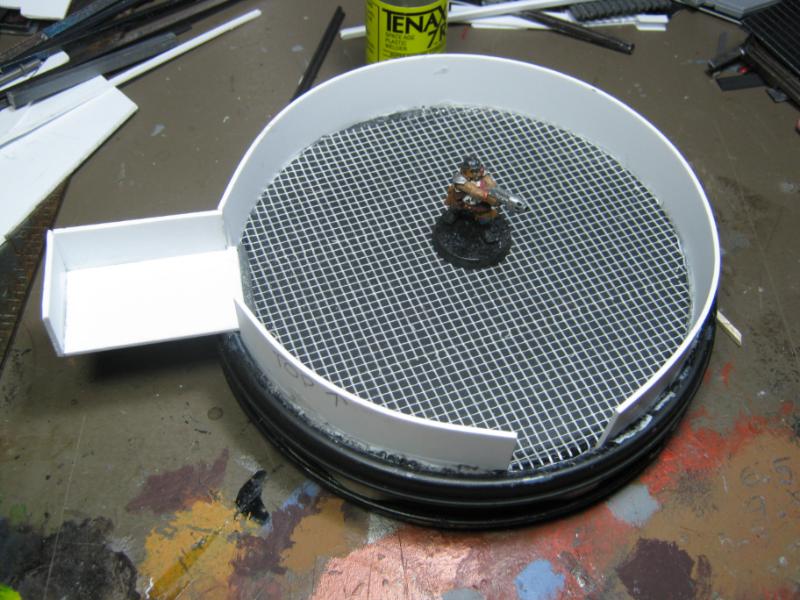
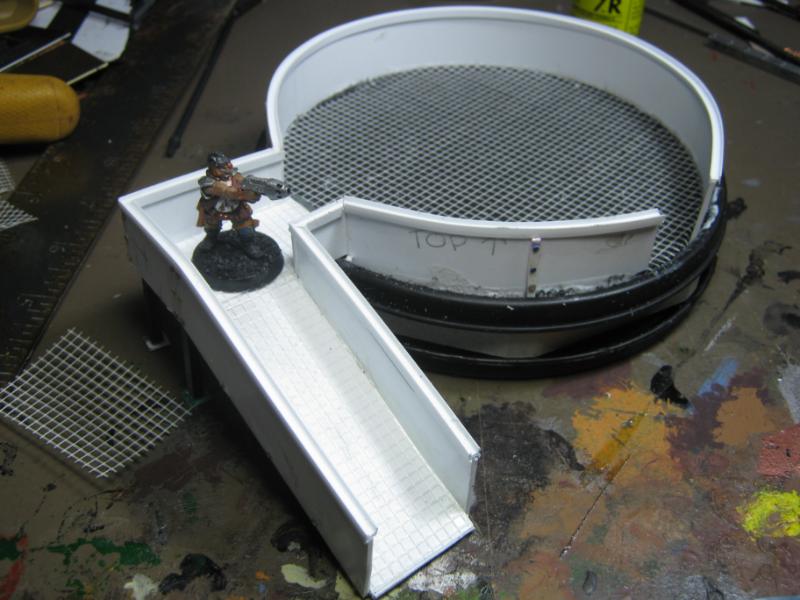
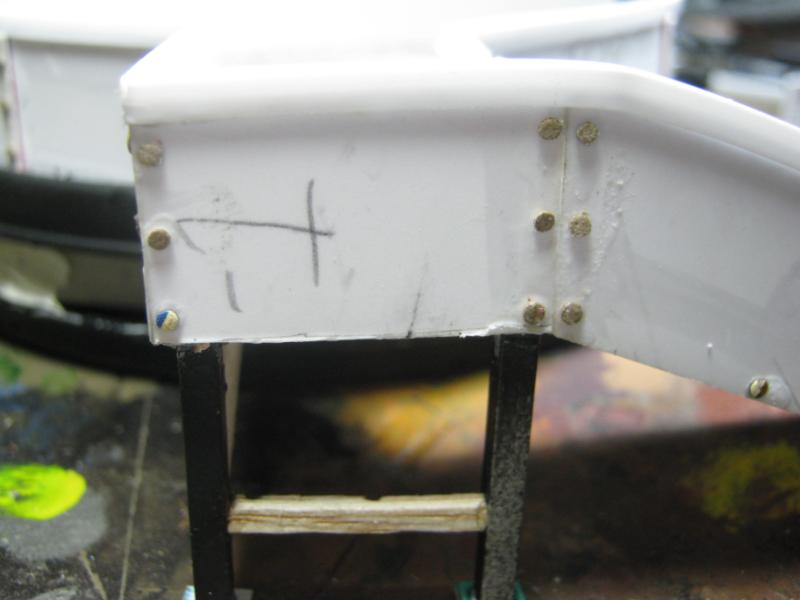
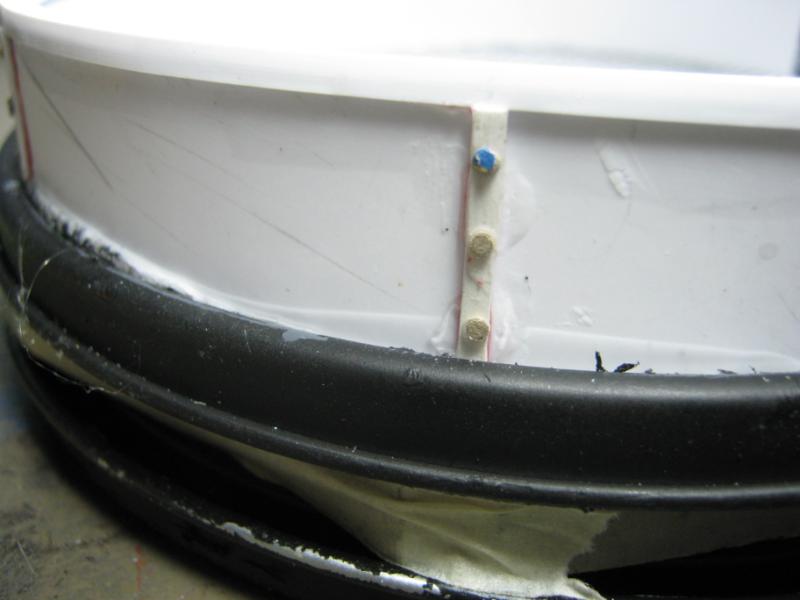
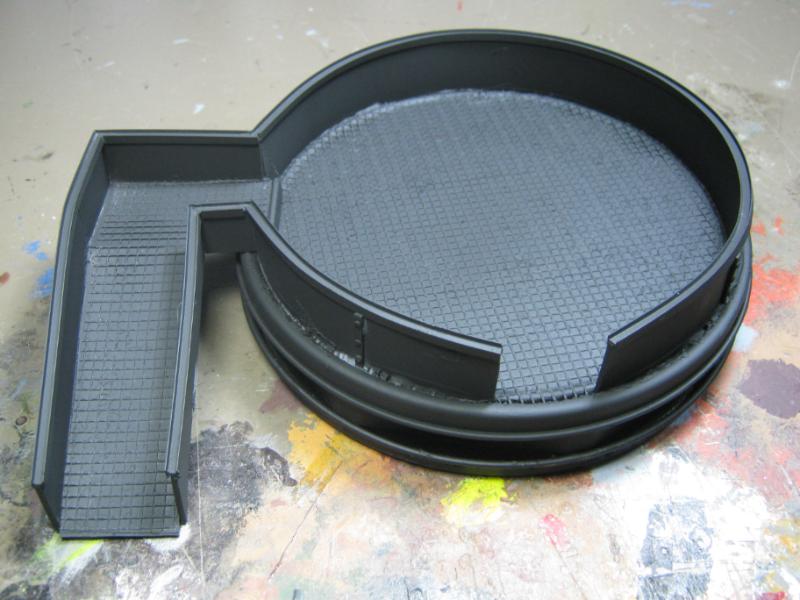
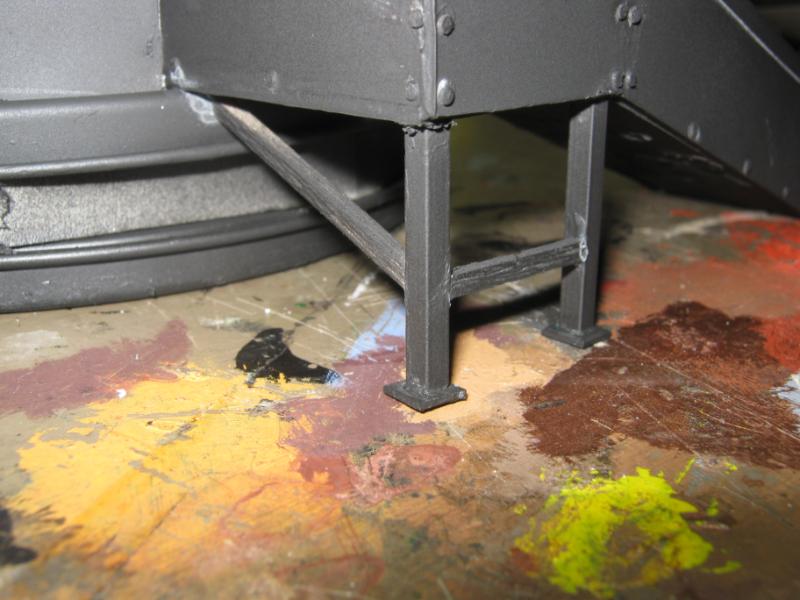
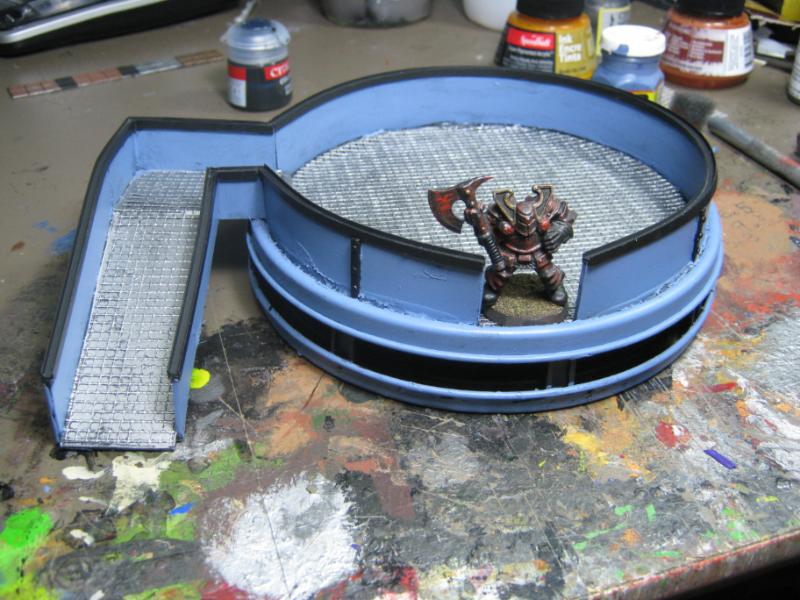
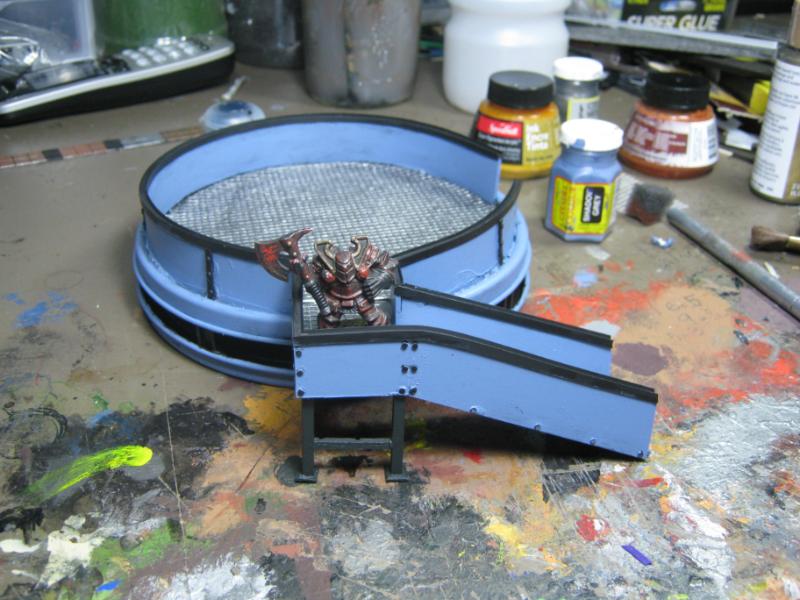
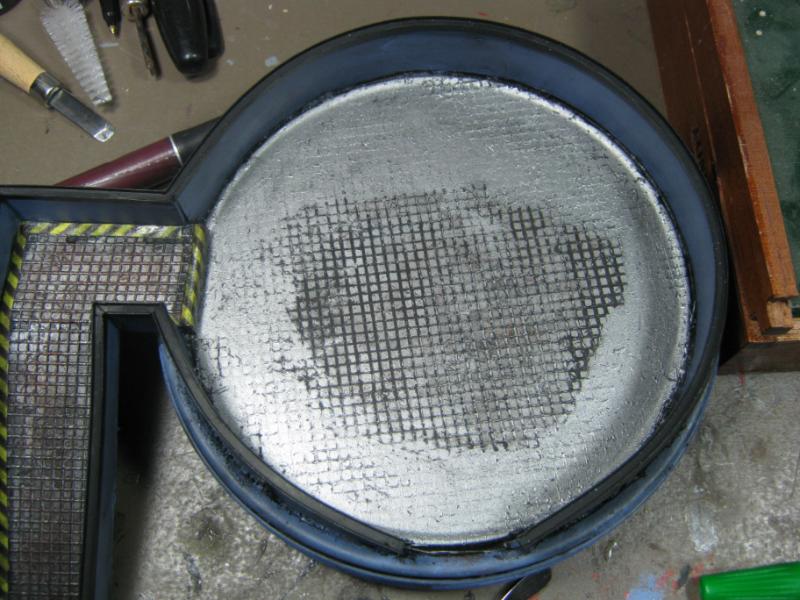
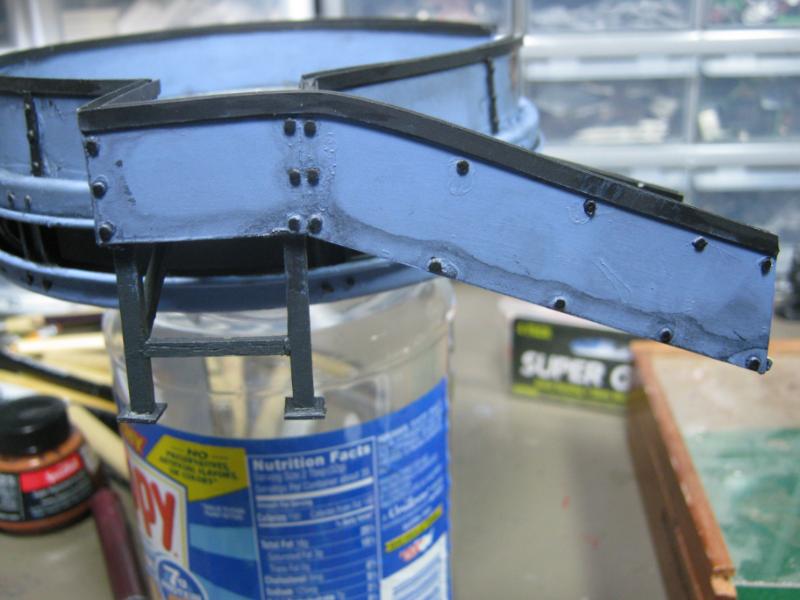
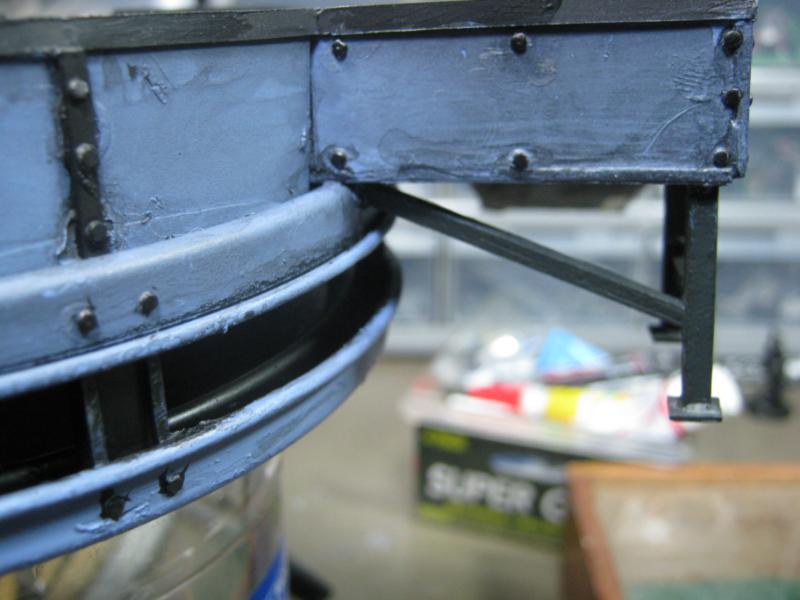
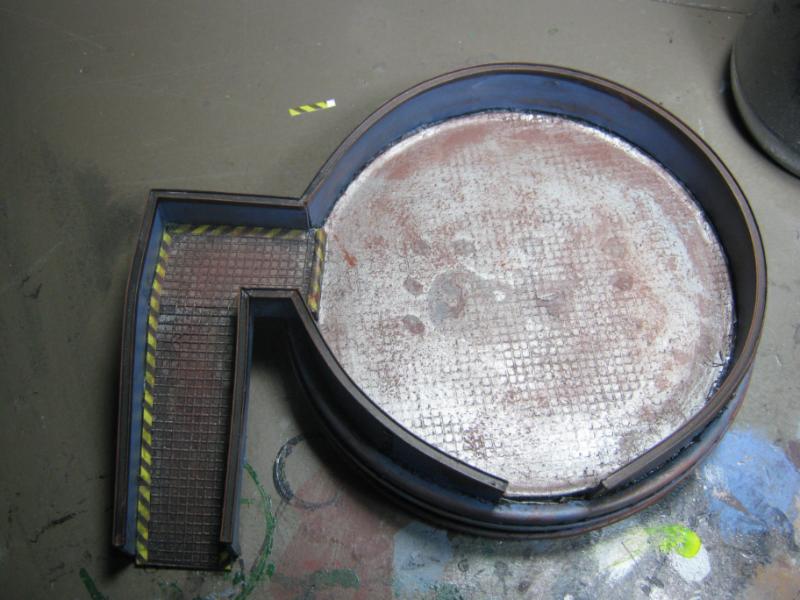
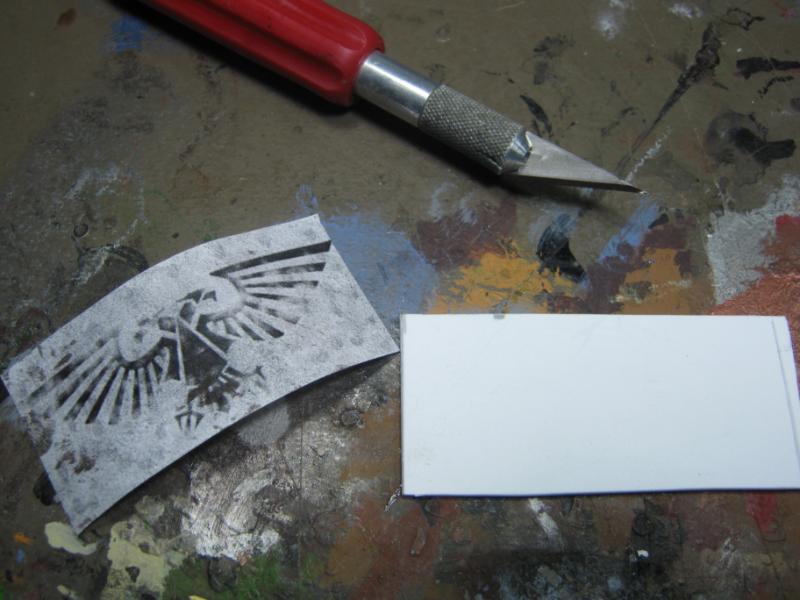
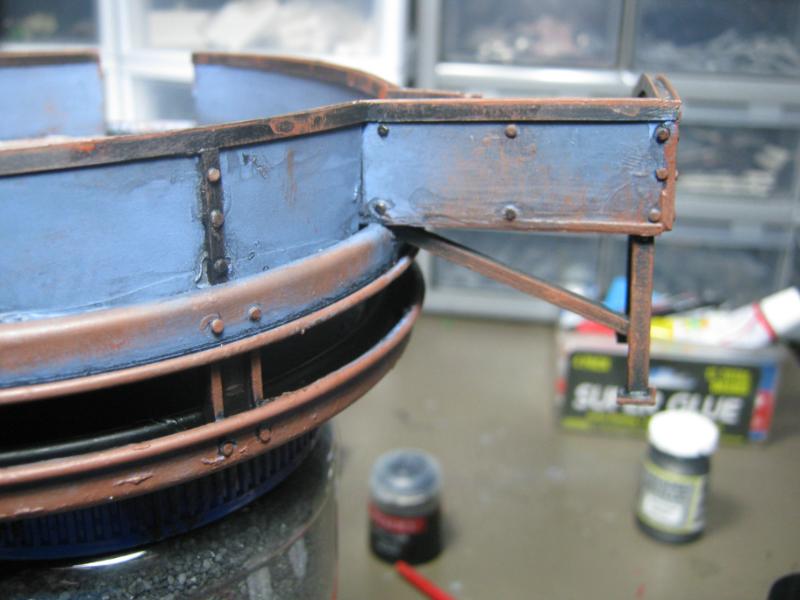
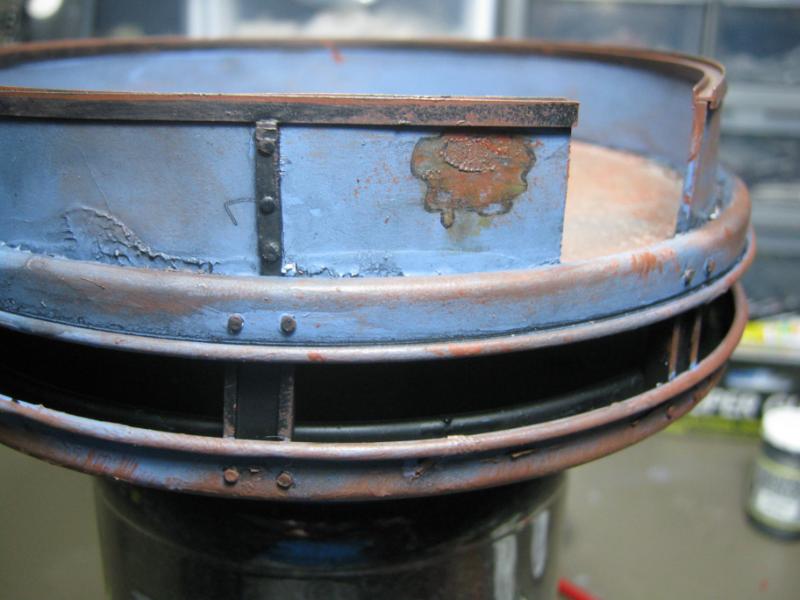
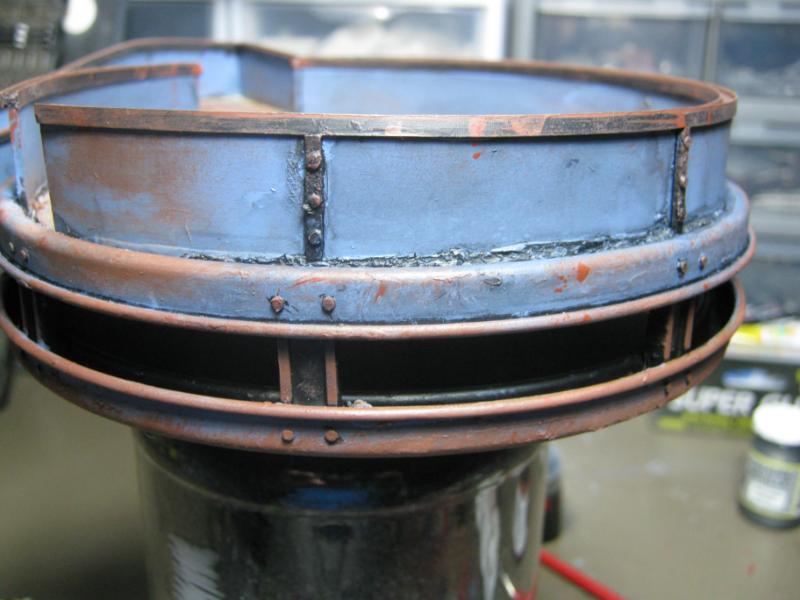
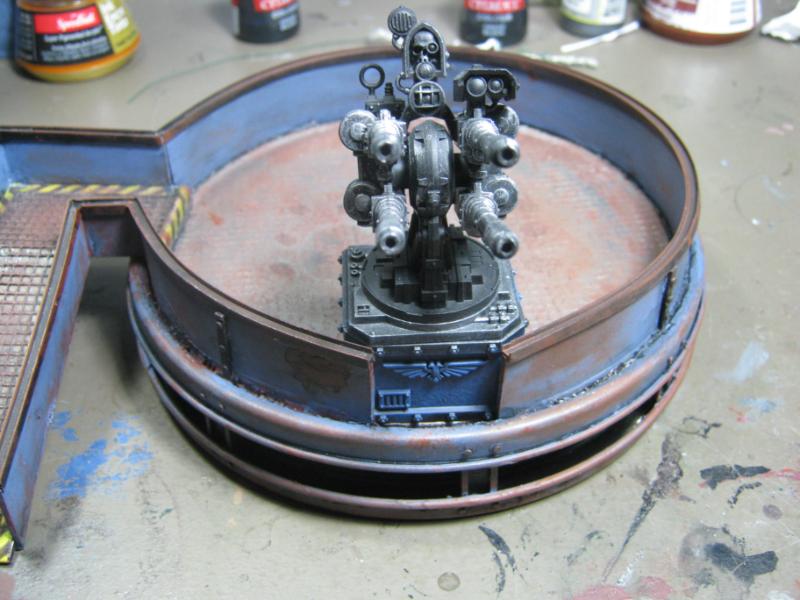
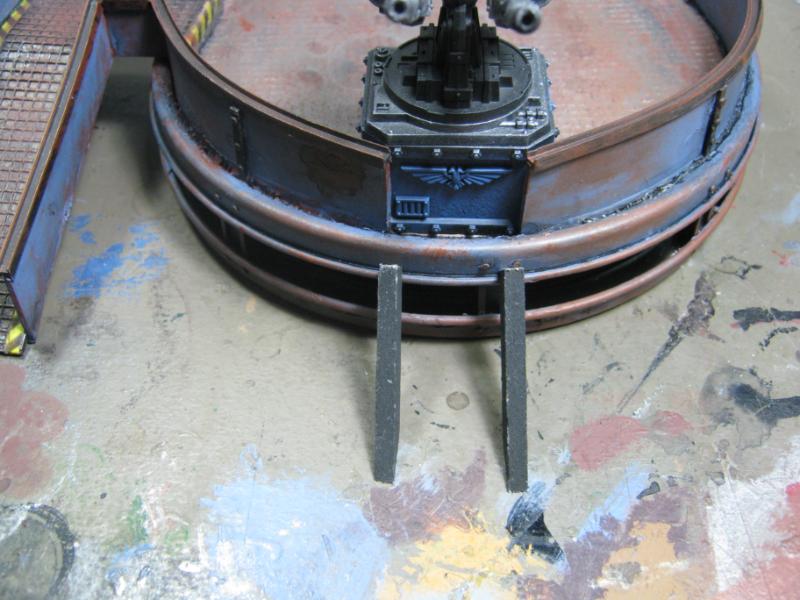

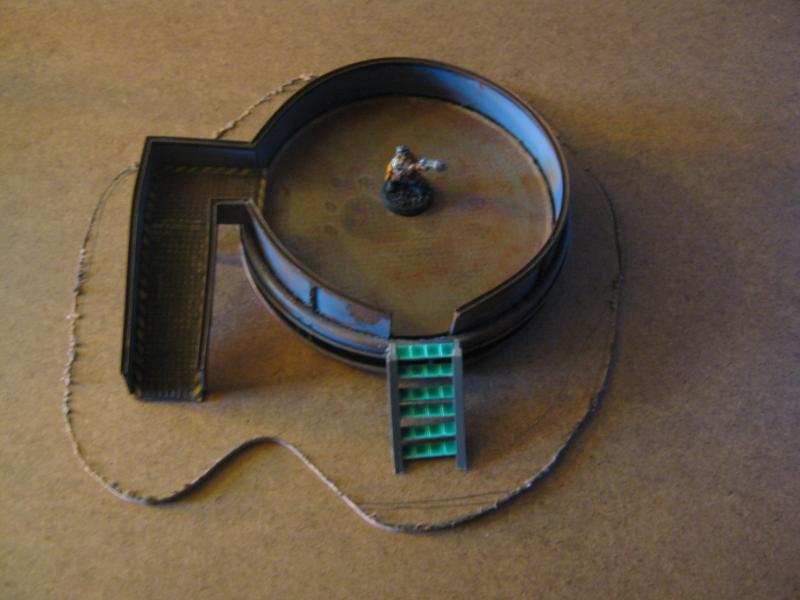
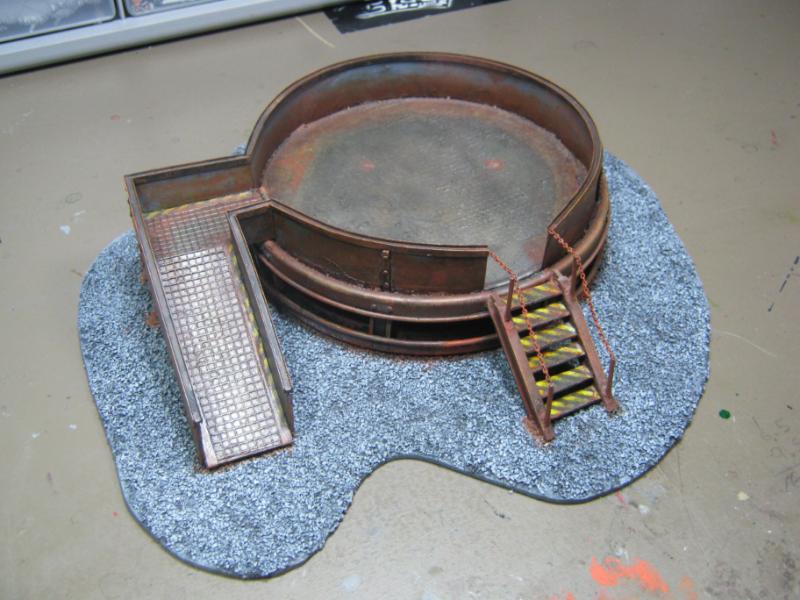
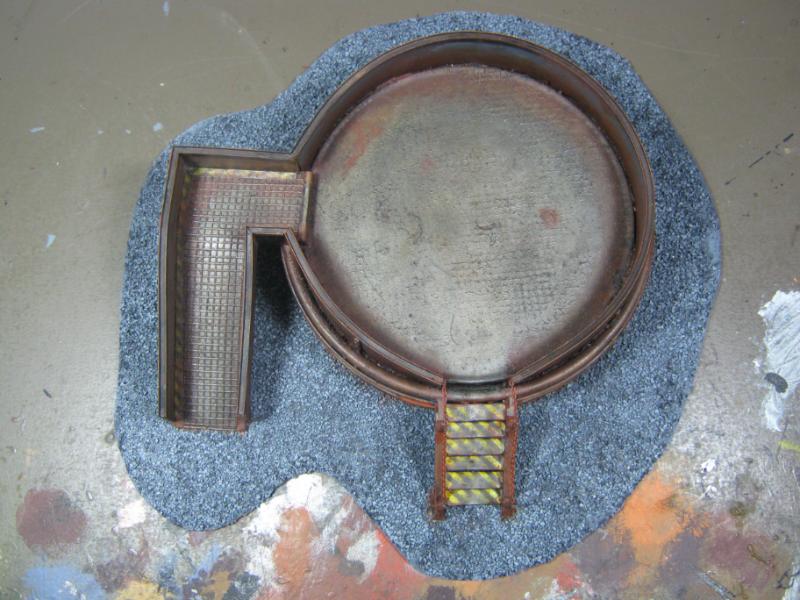
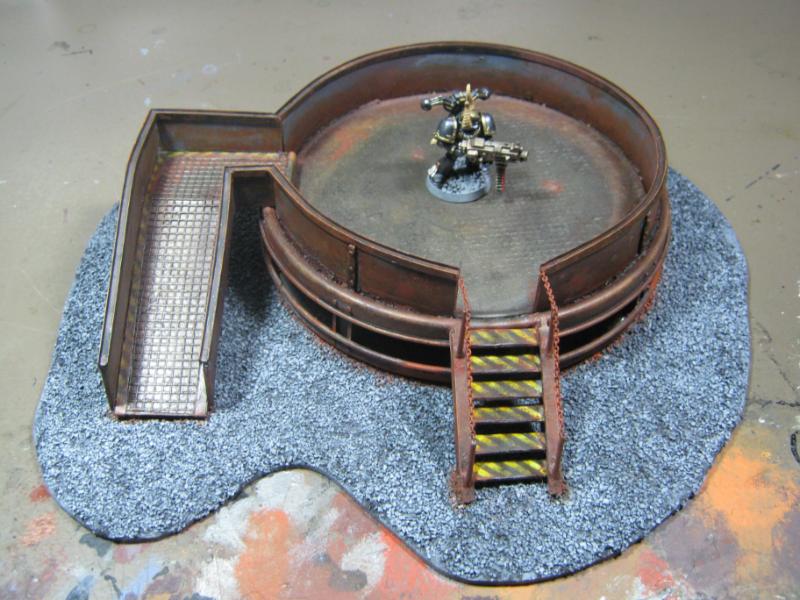
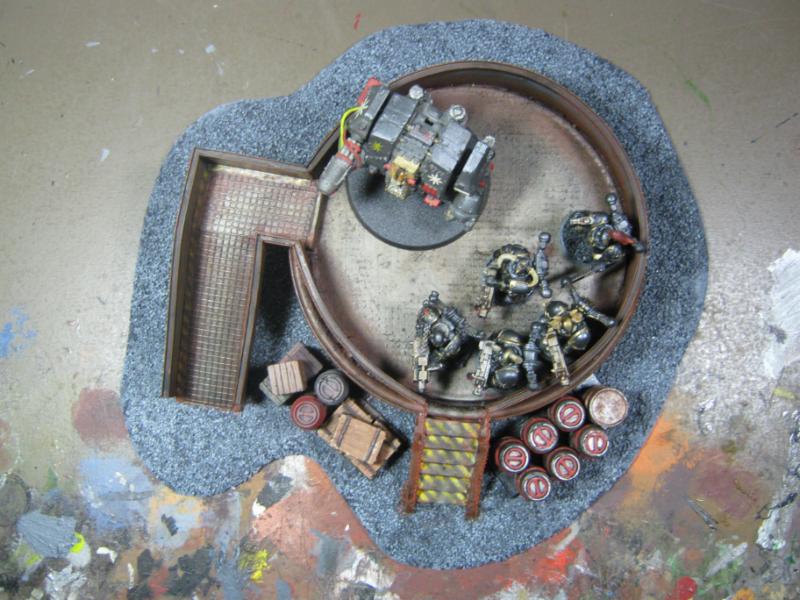
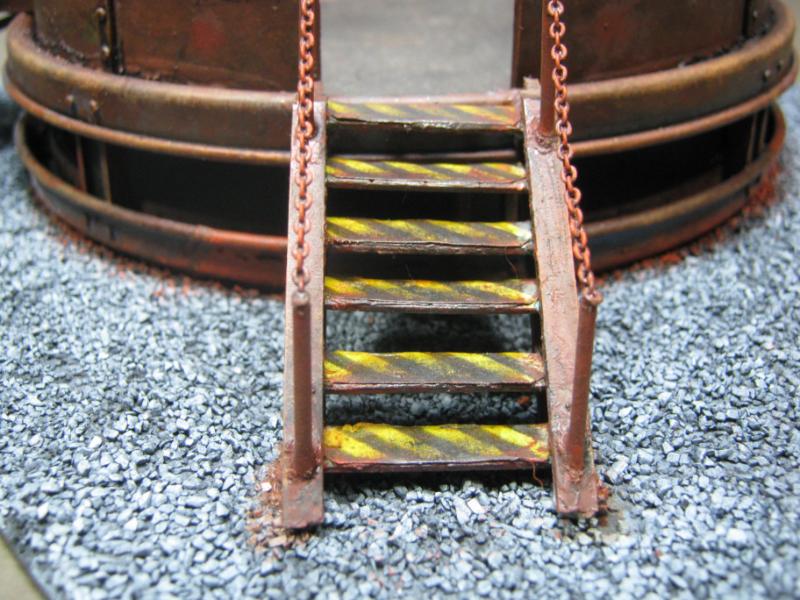
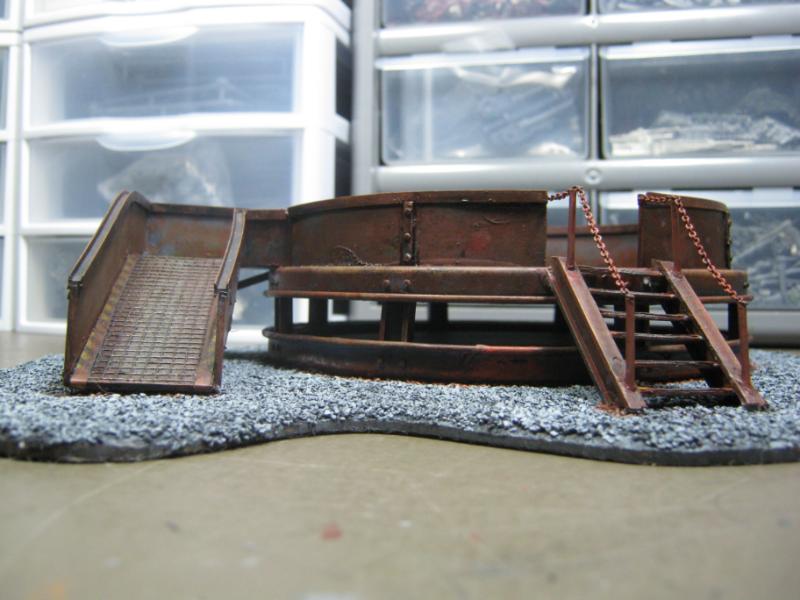
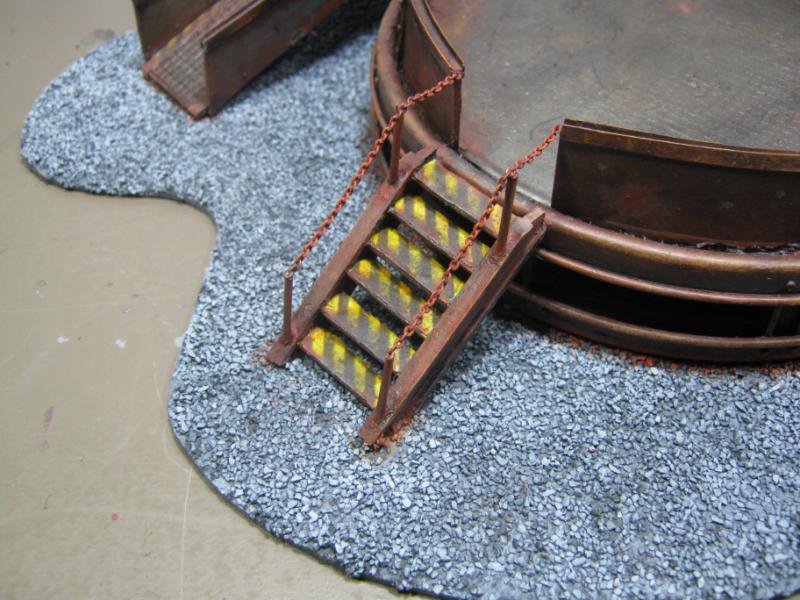
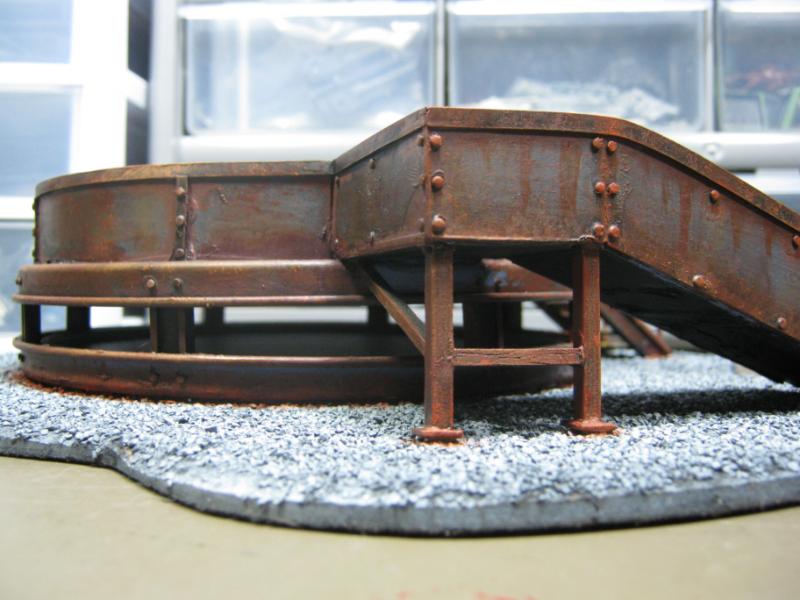
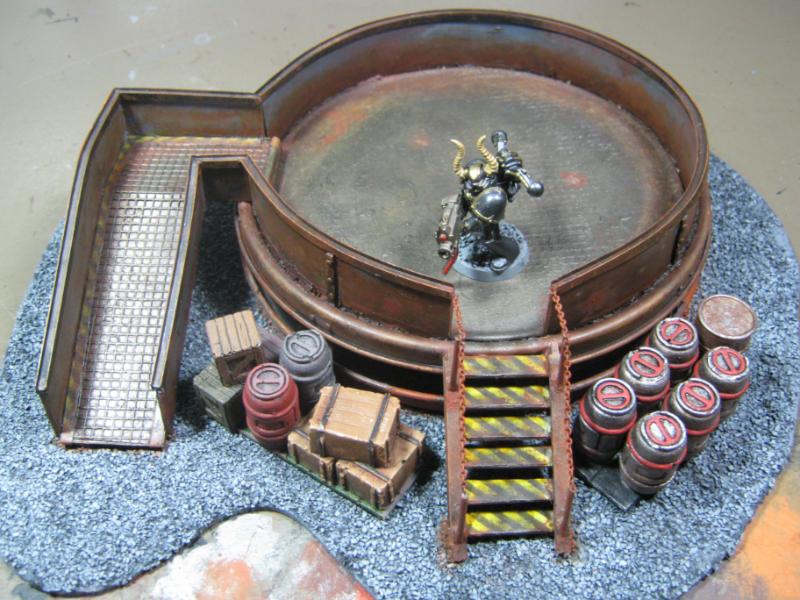
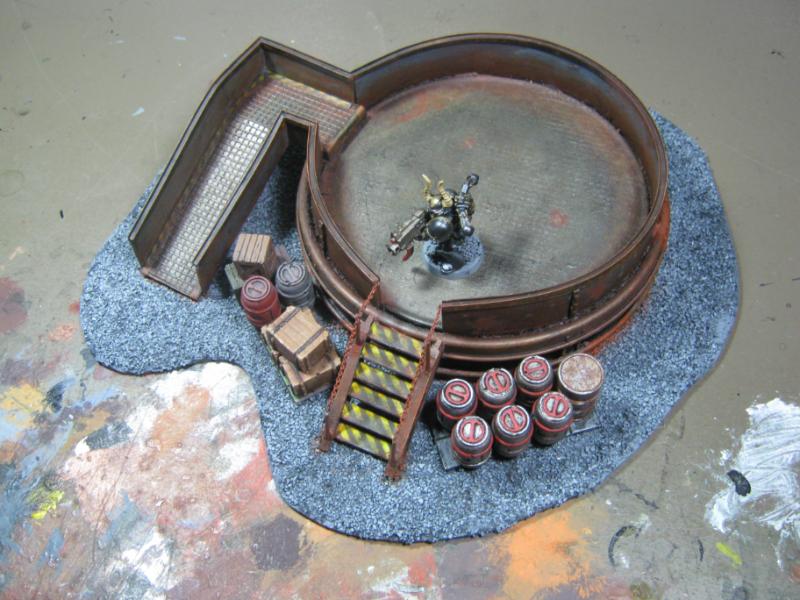


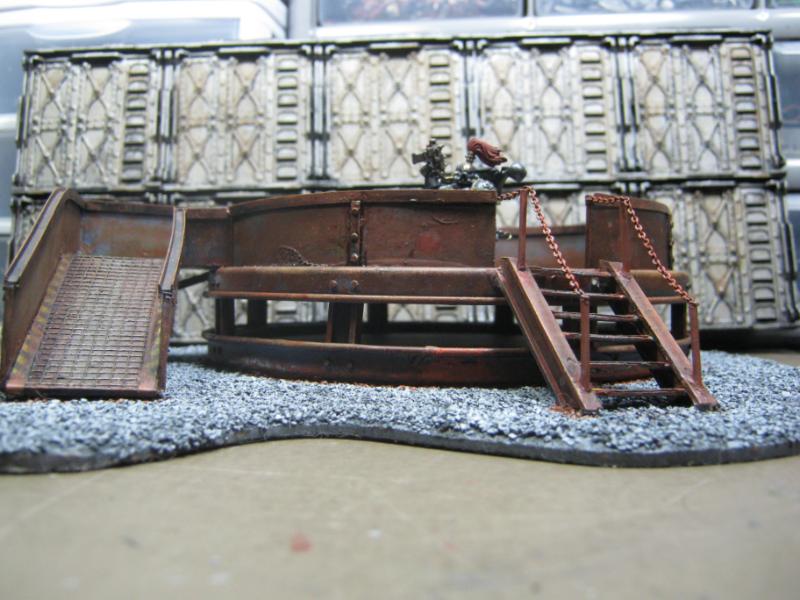


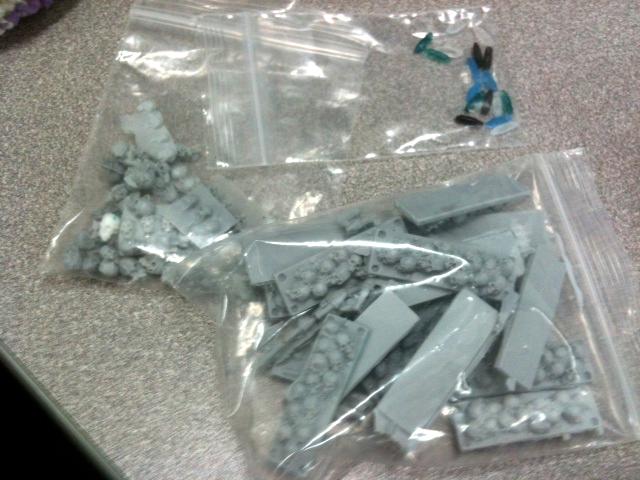
 ragequit
  Skalk Smash