@ dsteingass- Salt is easily overdone and ill-applied by even skilled modelers. I follow a thread from a specific modeler on Dakka who is *very* skilled, has won some GW sponsored events and been featured in WD Armies on Parade. He uses the salt method to show weathering on armor, battle damage, etc. Recently he's run into a challenge with some Space Marines. No matter what he does with the salt the results come out horrible. Some models need a different approach.
As for rust from the outside, do you mean literal IRL rust or modeling rust? If IRL, bare metal or painted metal?
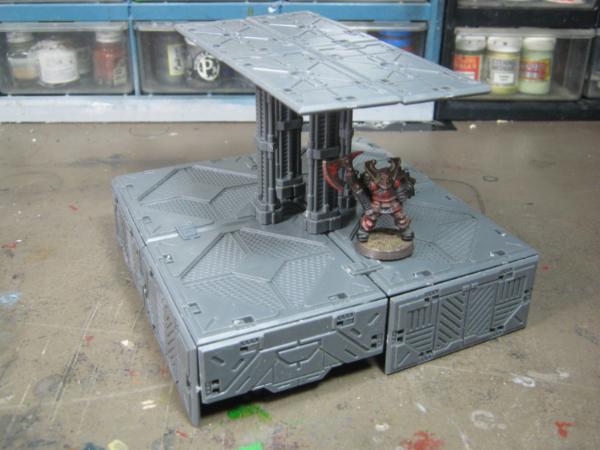
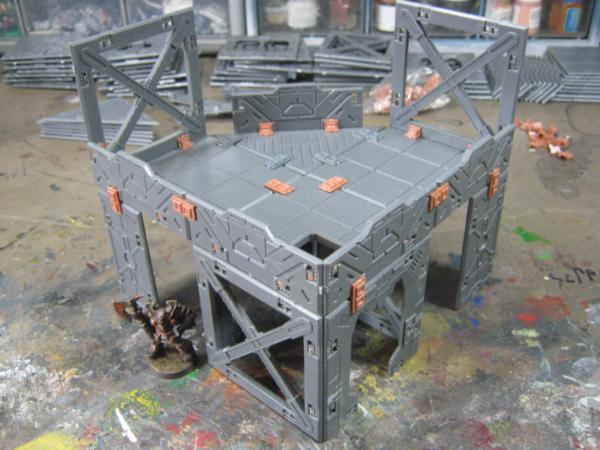
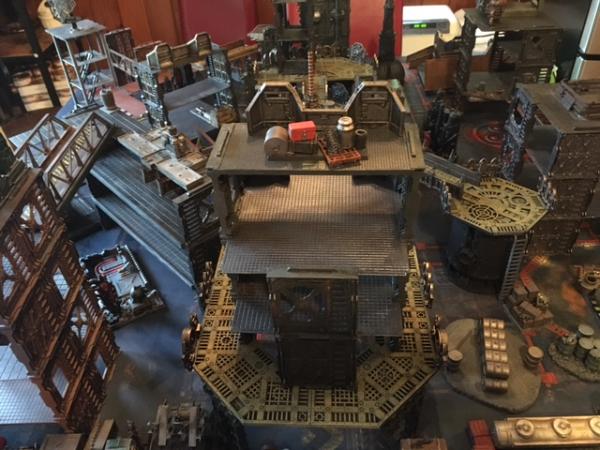
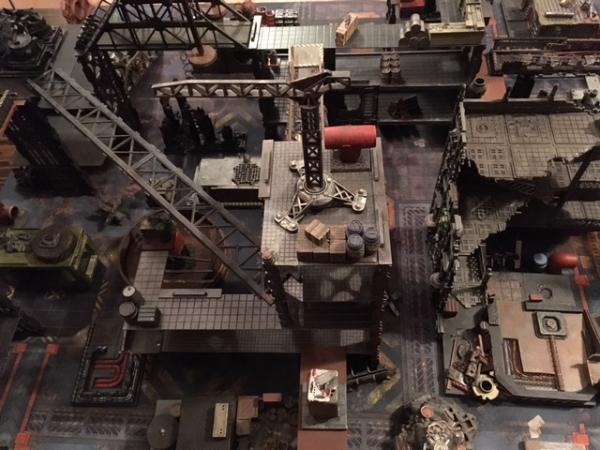
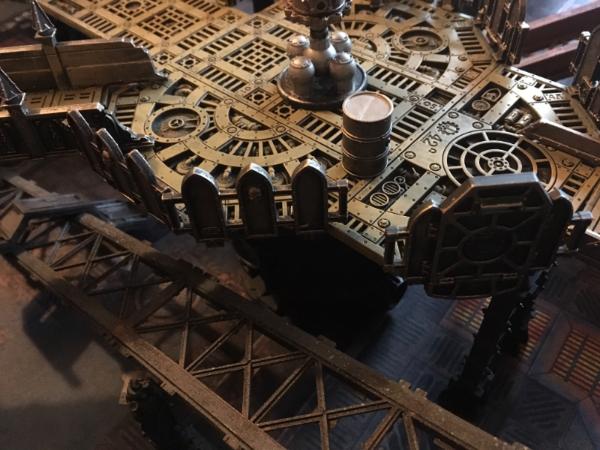
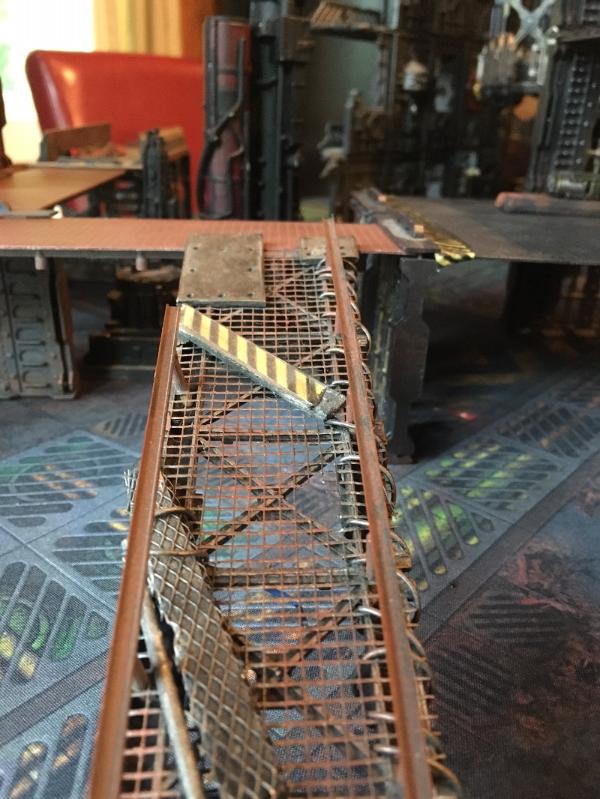
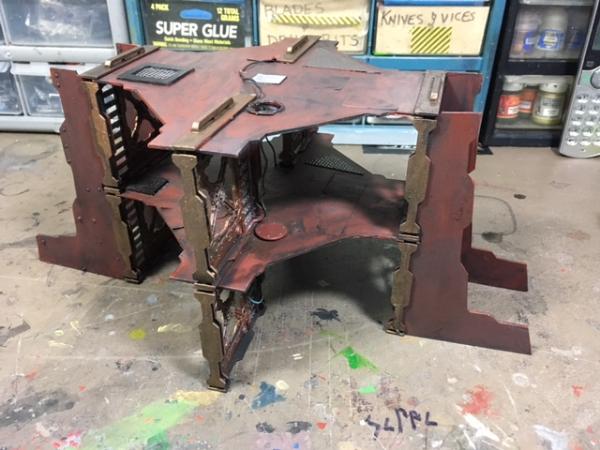
ALSO: Teaser shots from my newest project. I expect this is going to be par with my Fuel Depot when finished, and should qualify as my annual LoER membership renewal project :
If you look around industrial sites and equipment in rainy areas like mine, you'll often see rust growing in clumps as it blisters through cracks in paint. It will often look like a boil on the surface. So sometimes, yes it does really grow on the outside of painted metals It's usually due to not properly sandblasting before painting of parts.
It's an anomaly, but it does happen.
If it wasn't raining NOW I'd take a picture of my Jeep bumper, which has the same thing happening to it.
edit: you are a lifetime member of the LOeR- you don't need a renewal project
The 'boil-over' still comes from beneath somewhere. The only example of 'not from beneath' I can imagine is bare metal.
BTW, the image will not load even with a direct URL, I tried.
And yes I know I do not have to 'renew' my membership. I say it as a joke now and then when it has been a long time since I riveted anything at all, let alone extraordinarily. If you want me to stop so I don't confuse anyone I will.
Also worth thinking about for rust (good tips ) is the colouration. Take some time to look for pictures of the kind of rust you want (e.g. old Vs. new rust), and look really really close at the colours involved, you may be surprised to find it's not all brown and orange...
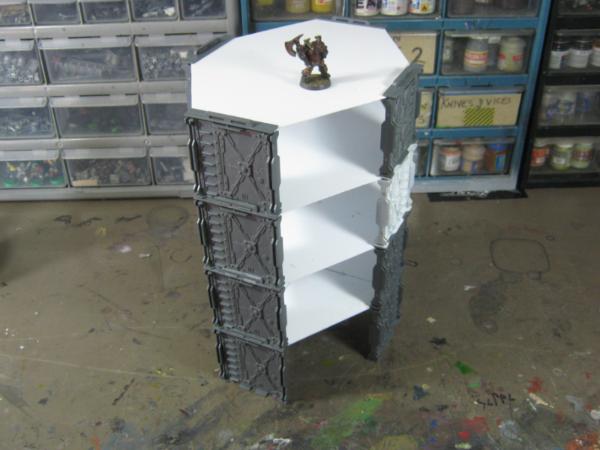
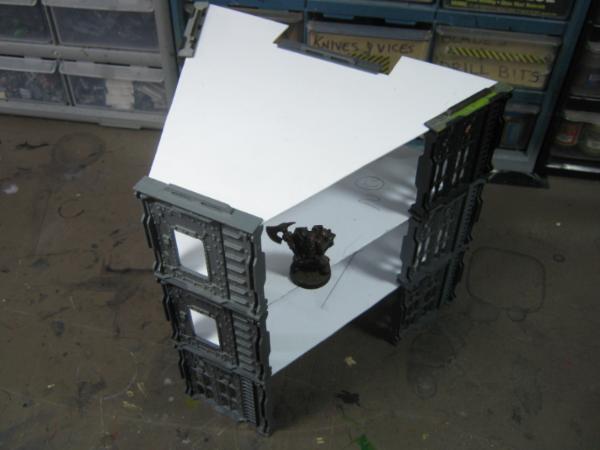
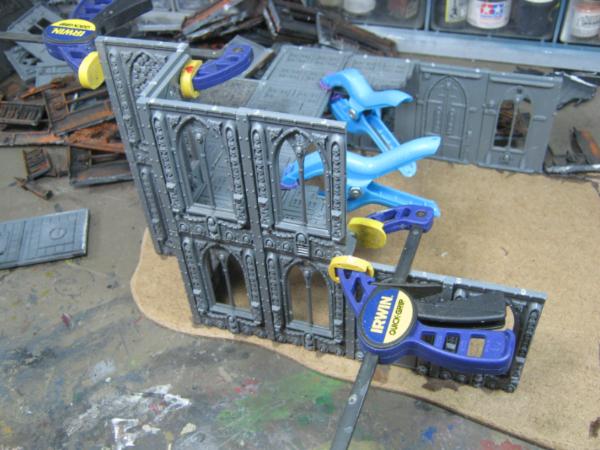
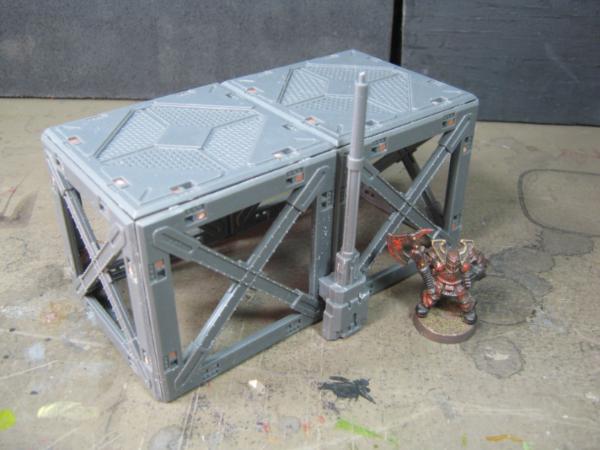
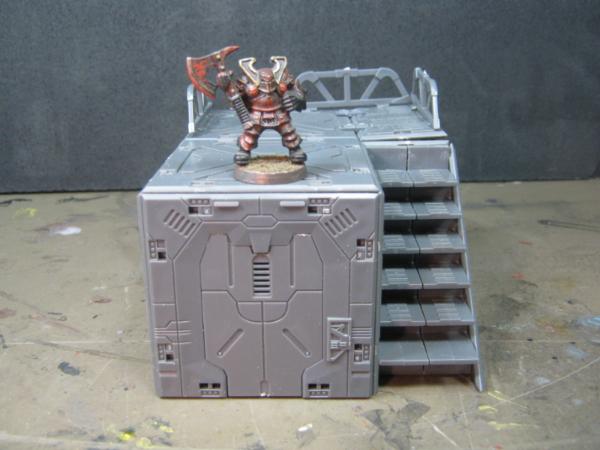
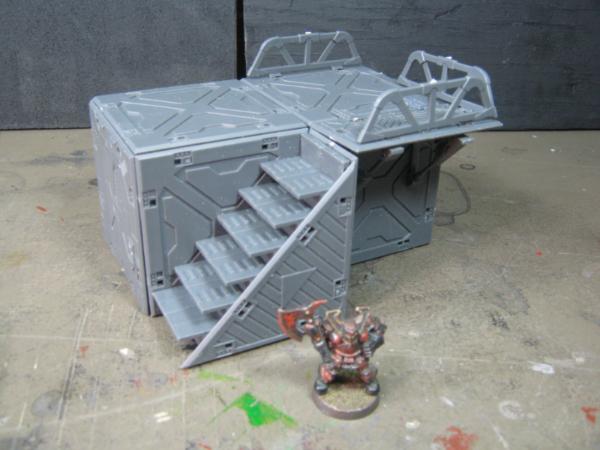
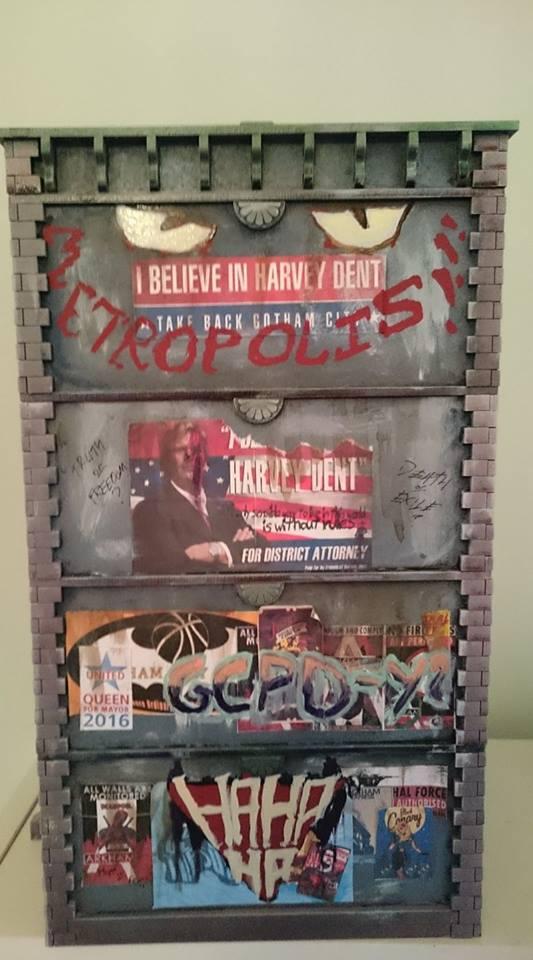
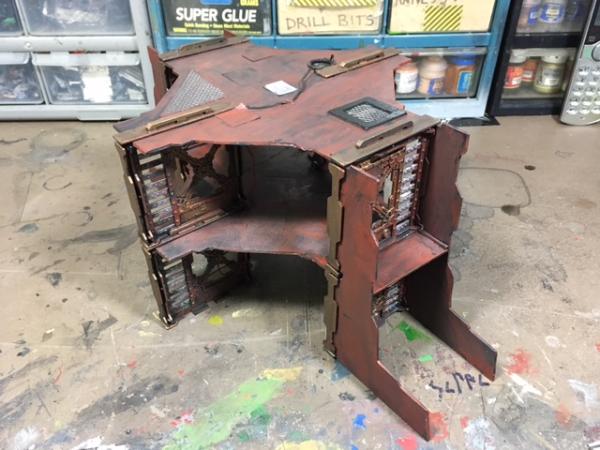
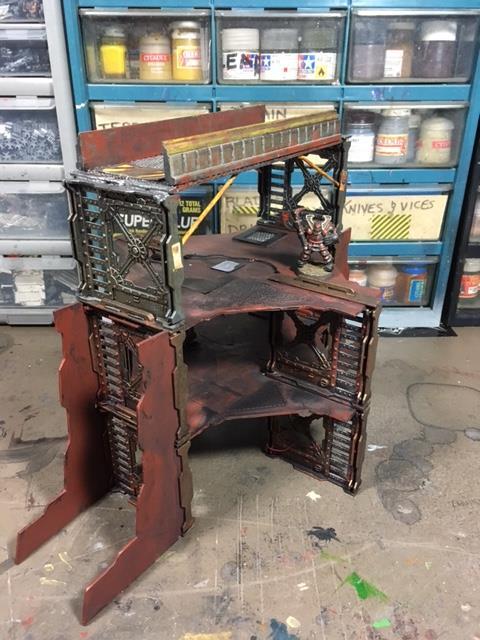
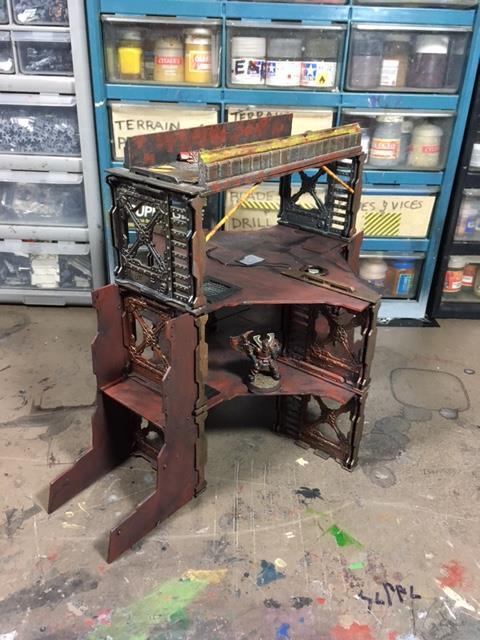
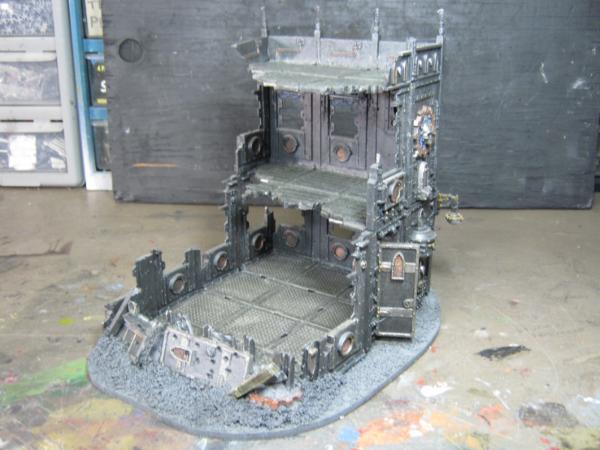
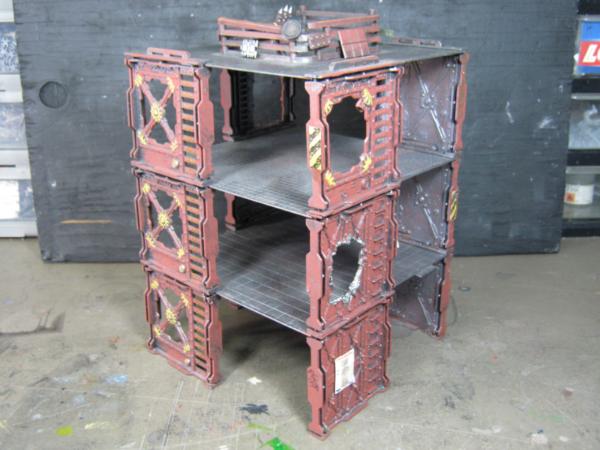
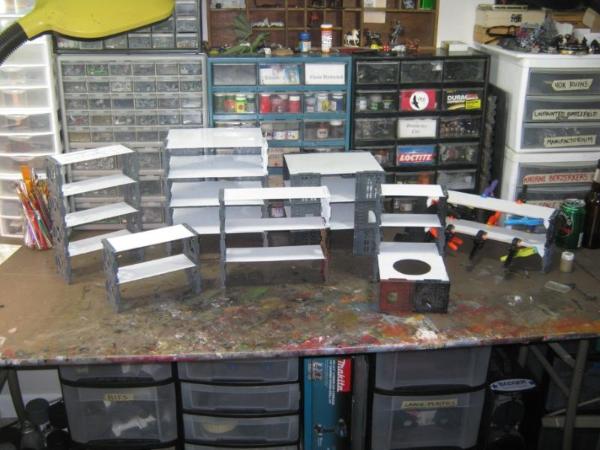
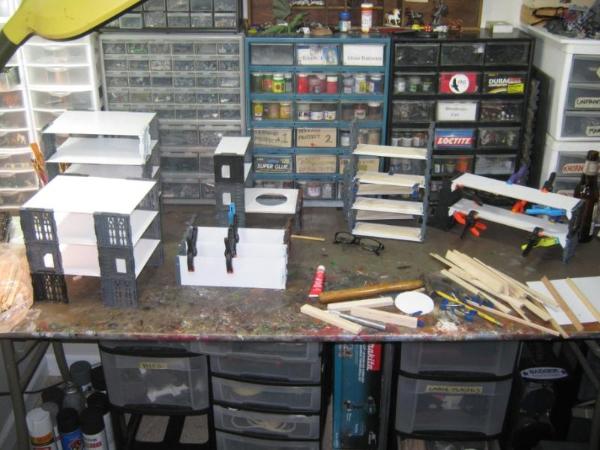
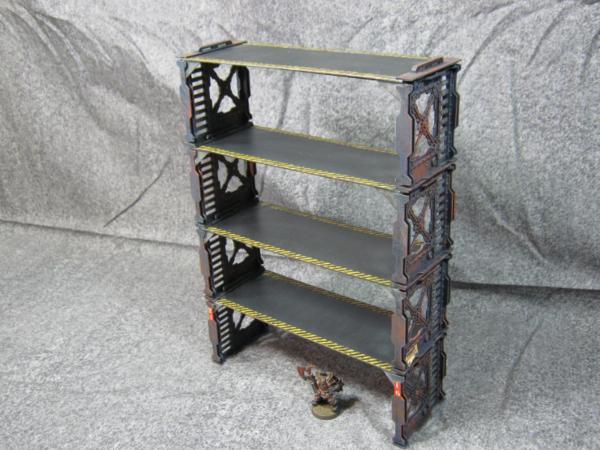
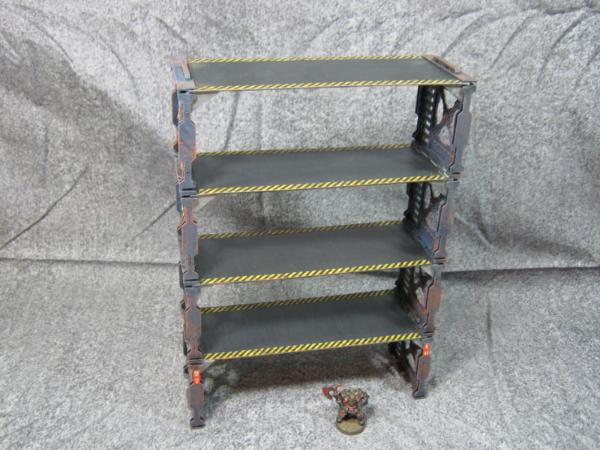
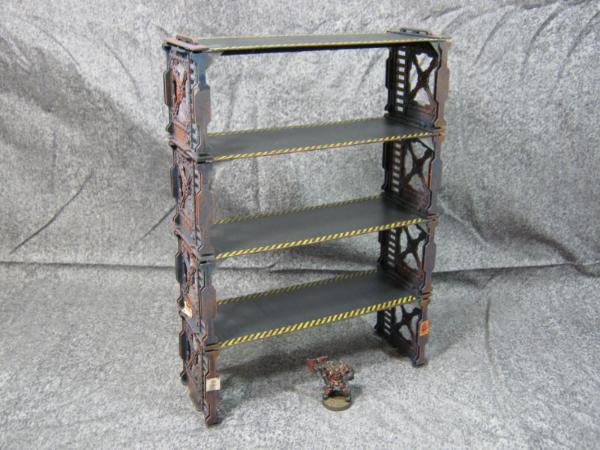
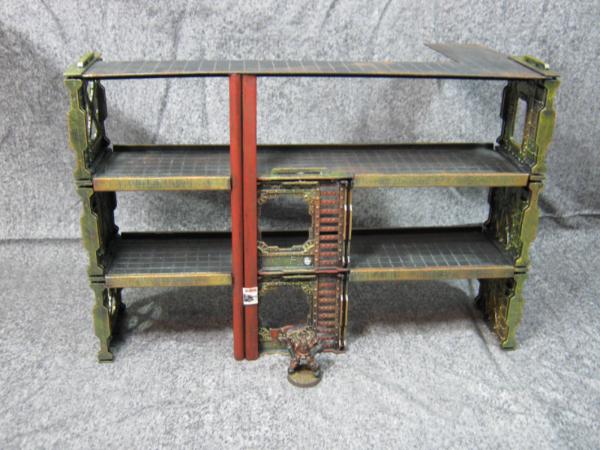
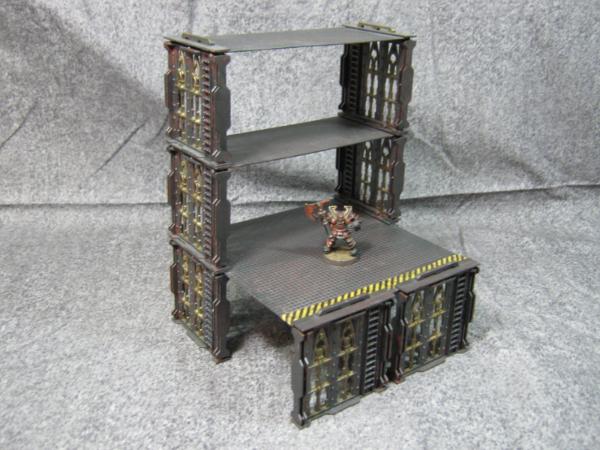
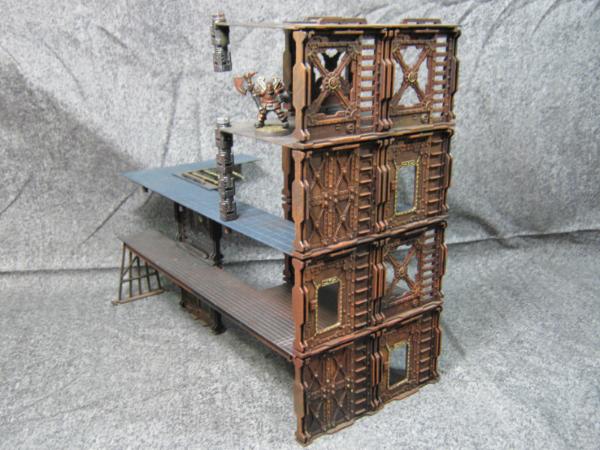
I've been going through my collection of unfinished terrain projects and decided to finish up one of my oldest ones. I started this project as my first post on this thread (October 2011).
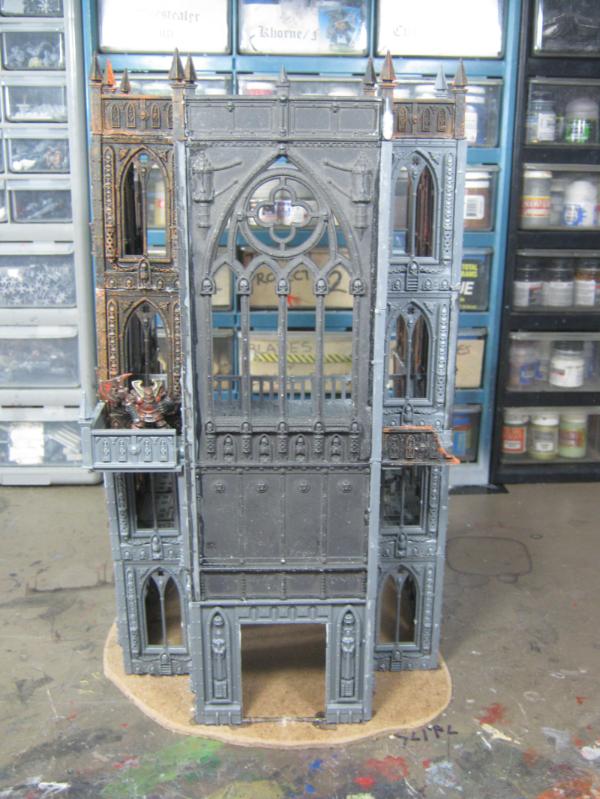
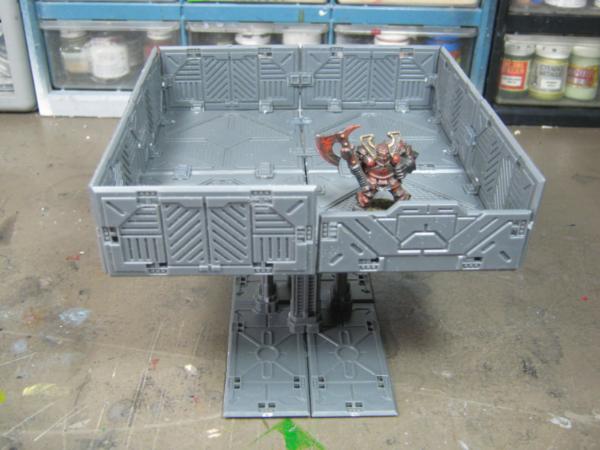
Last night I decided to do some work on it. Here's the current WIP:
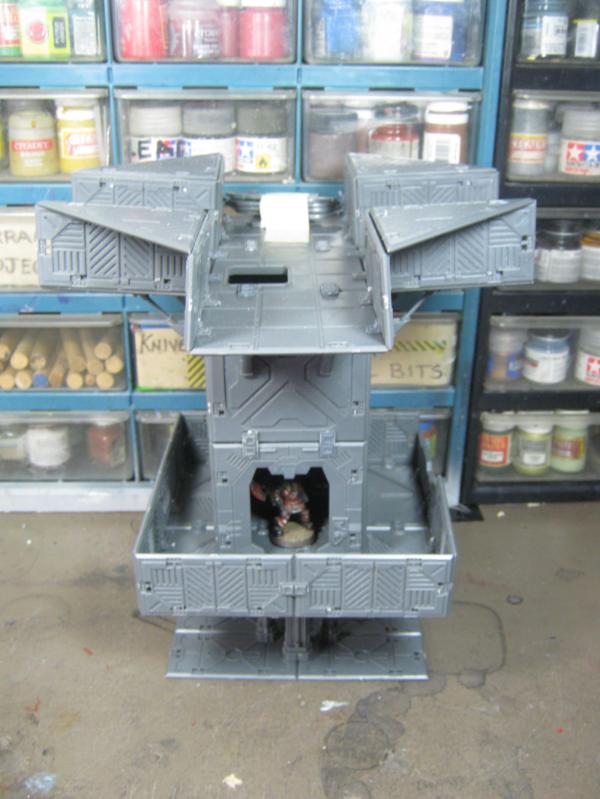
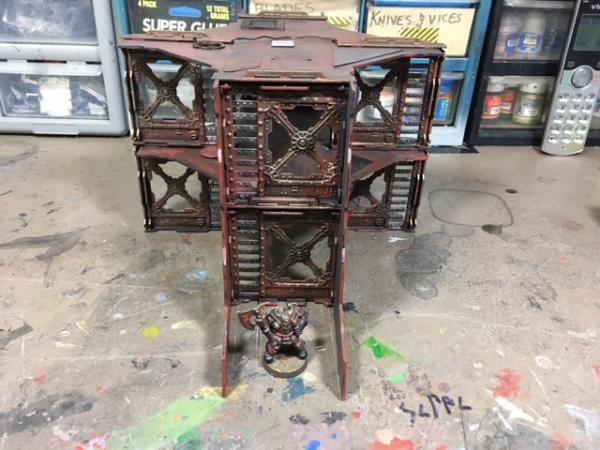
The third level for this was done a few days after I built the main structure. It and has been a "stand alone" piece since then:
I'll be permanently attaching it tonight and blending the paint styles for cohesiveness. More updates to come.
Welcome back, and good idea with the Necromunda terrain. I should probably do the same since my old cardboard terrain is starting to look rather worn...
Dr. H- Wanted to let you know my son is in his 2nd year of Mechanical Engineering w/ a minor in Electrical Engineering. I still can't get him to model though.
CommissarKhaine- It is a rewarding project, and full credit for my inspiration goes to dsteingass in 2011. If you haven't checked out the beginning of his thread it is recommended.
Llamahead- I've not had the opportunity to check your threads yet, still doing Epic?
Vik- I'm simply a figment of your imagination. None of this is real.
graven- It's good to be the OP
Camkierhi- Home. I do enjoy this place. I expect to be here for some time.
Gits- Hur, jus' some naff git whuts come back fer sum muckin' about.
Theo- I've not yet tried the new Necromunda. Made the purchase, opened the box, cried a bit on the inside, closed the box, put on the shelf. I'll revisit it later. Shadow Wars, however...
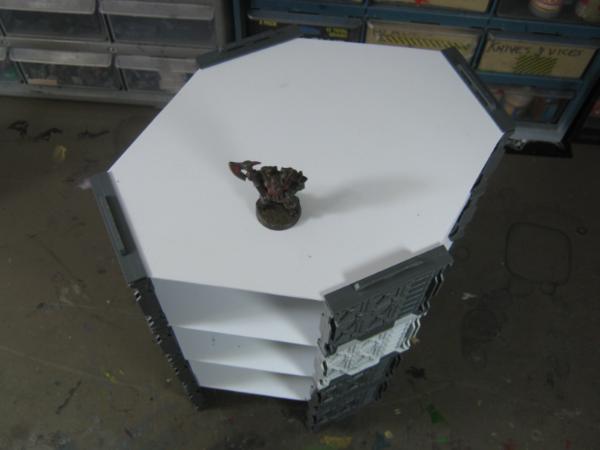
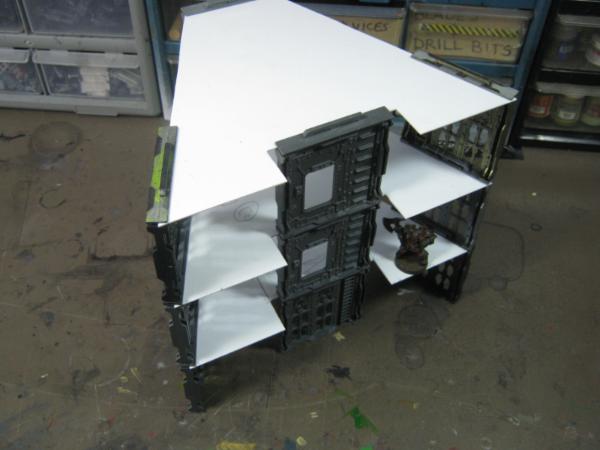
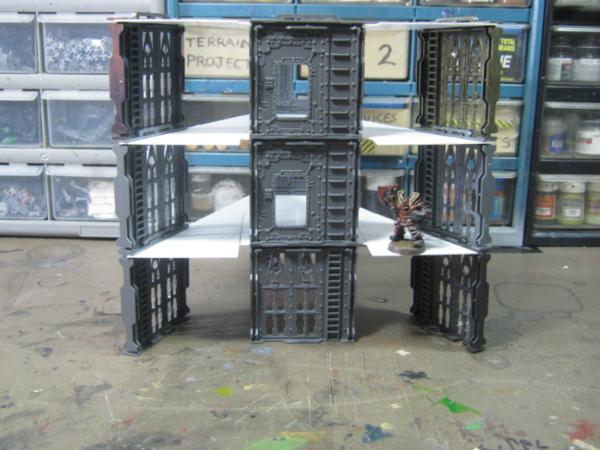
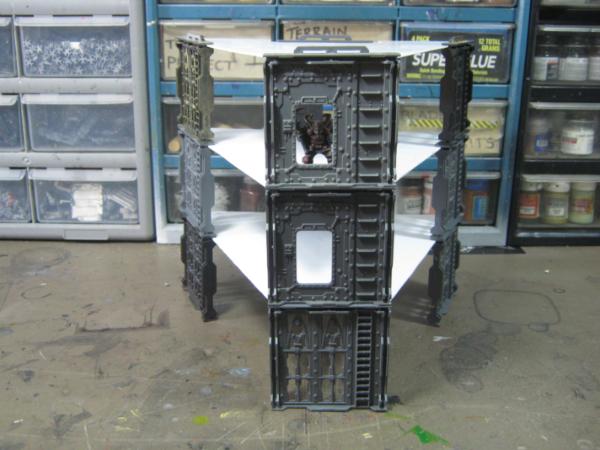
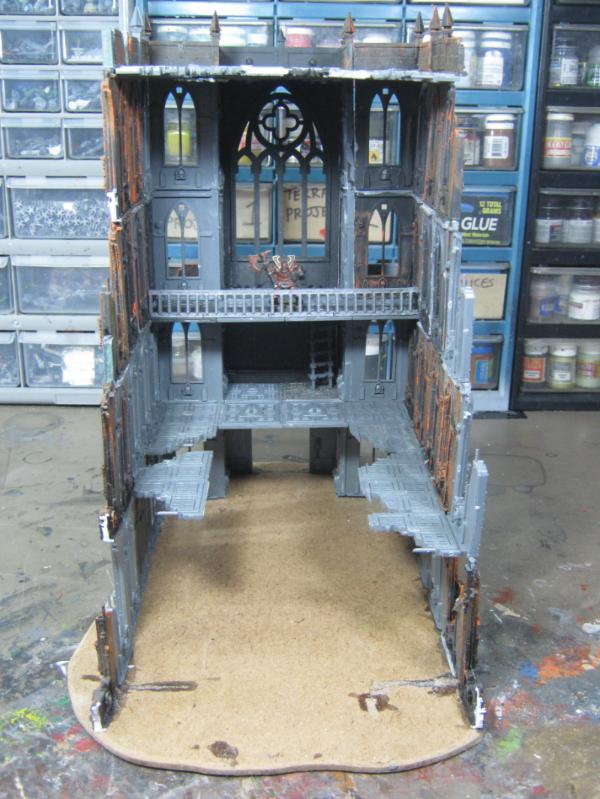
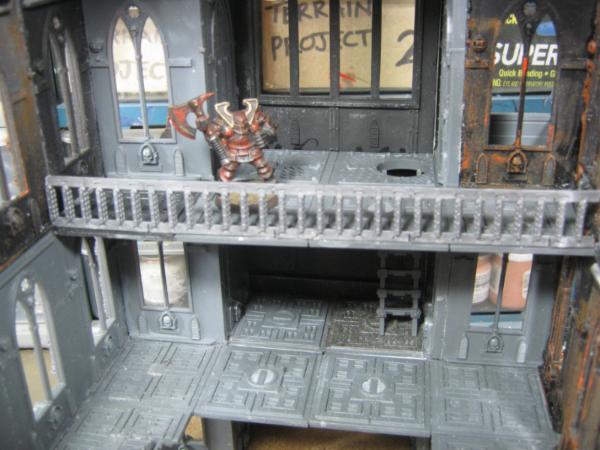
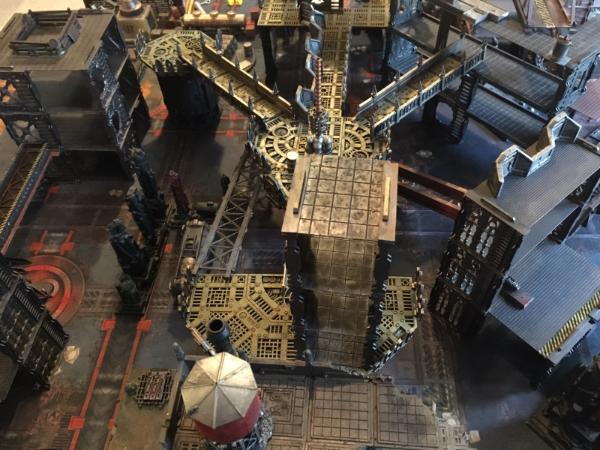
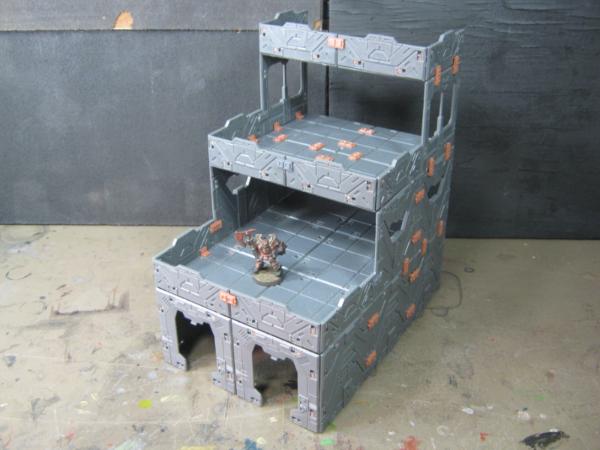
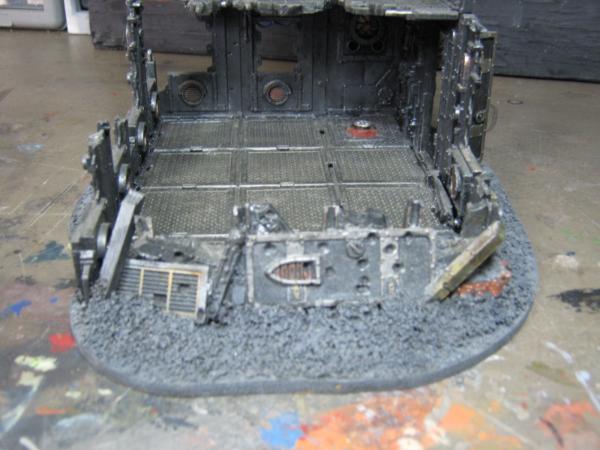
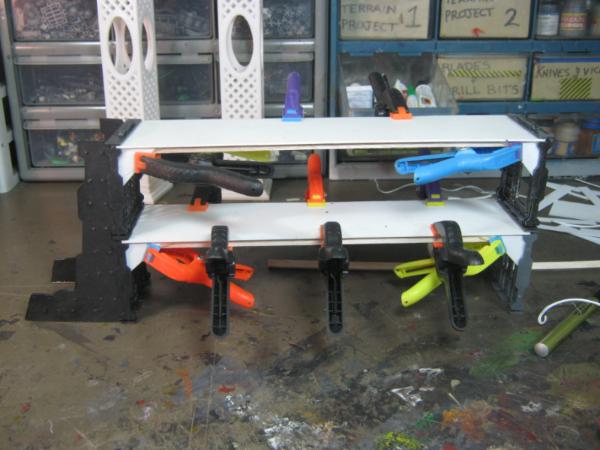
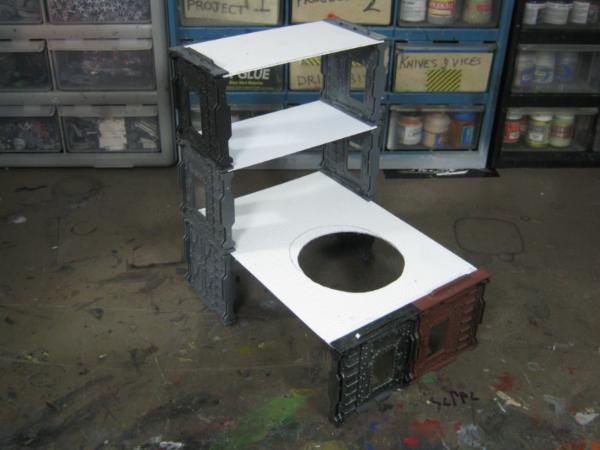
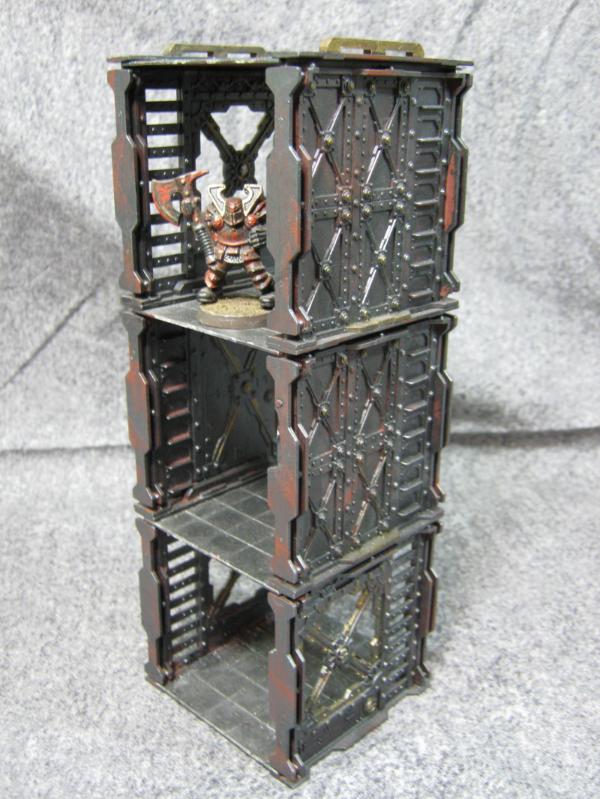
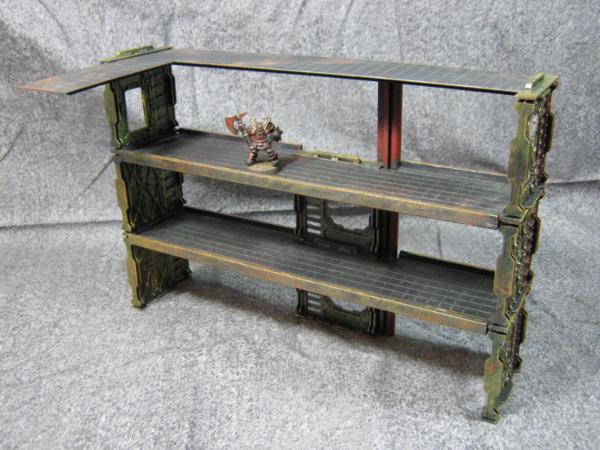
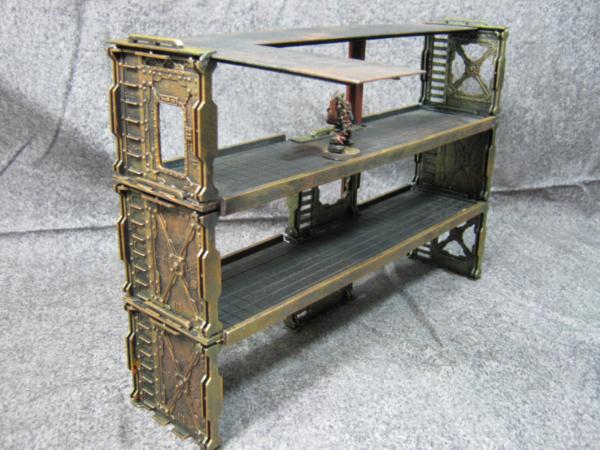
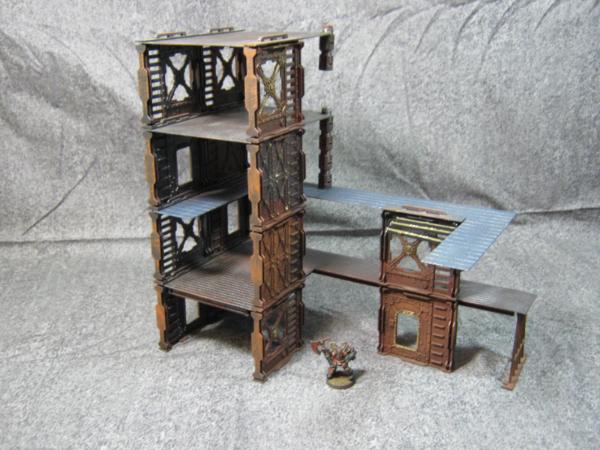
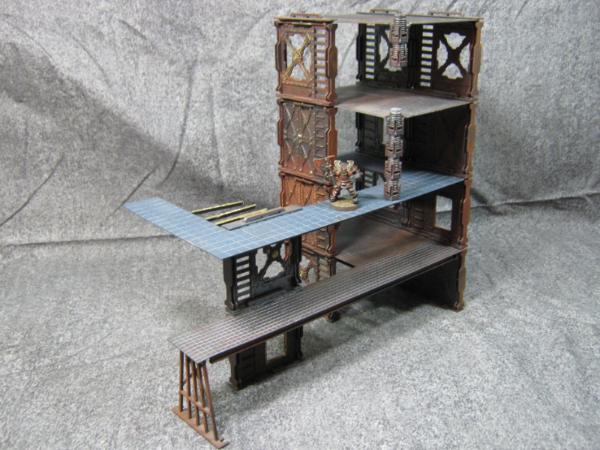
Progress was slowed when I found that I had built the 3rd level walkway with one bulkhead backward, the tabs were facing inward and would not match up with the rest of the model. I struggled for some time with my options, finally deciding to tear apart the original model instead of building a new walkway. I'm unsure if I'm happy with the results as there was enough damage to one side to keep it from being a functional connection to another walkway. I will likely say it's ok because it's the Underhive and there's plenty of broken dead-ends.
Construction is complete, next is finish the paint. I've been experimenting with my airbrush but I'm not confidant enough with it to use on this project yet so everything you'll see for a while is still the old-fashioned way. I'm also searching for my Cannon A480 to take photos, so far these have been with my phone and I'm not happy with the inability to zoom in for detail.
My next post will be of the projects I completed in my absence. I wasn't here but I didn't stop modeling.
As always, thanks for checking this out and be assured that much more is coming.
Skalk Bloodaxe wrote: Dr. H- Wanted to let you know my son is in his 2nd year of Mechanical Engineering w/ a minor in Electrical Engineering. I still can't get him to model though.
Well there's 2 ways children can go with parental activities: "I want to follow in Dad's footsteps", or "Parents are soooo uncool" Good luck to him. He'll come around to the models eventually; we all know it's the right thing to do.
Progress was slowed when I found that I had built the 3rd level walkway with one bulkhead backward, the tabs were facing inward and would not match up with the rest of the model. ...
Dr H- I bought the lad a 3D printer for the holidays and he's been looking for terrain to print. I'm hoping to showcase something soon.
Llamahead- I've seen Frostgrave and Zombicide, both look very cool. Frostgrave almost became our group campaign game in 2015 but Mordheim won the day instead.
Here are some of the pieces I worked on. Apologies for any blurred pics.
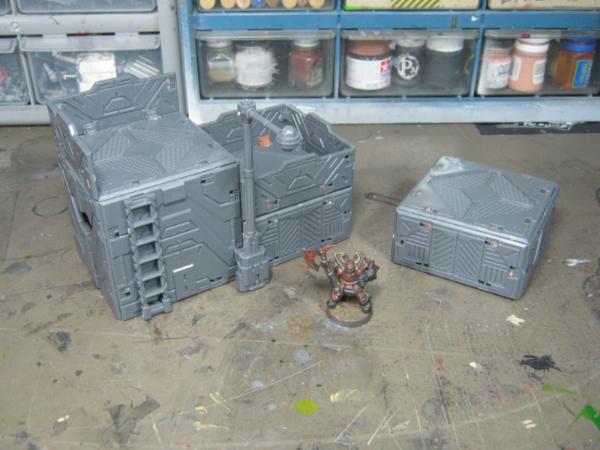
First up are my Imperial city buildings. I put a lot of thought into the design, layout, conversion, and painting. The smaller buildings were built to offer a more diverse layout for the tabletop and also fit better on my display shelves. They all have a "clean" look to them and the debris is an aesthetic representation of damage. This is intentional as the end result of all my terrain is to simulate the war-torn future but remain functional for models to be placed in and upon. I feel I strike a fair balance between the two standards.
This is a smaller building designed to offer some cover outside as well as inside. The footprint is indented on one side which was a change from most of my square / rectangular building. Pics of the roof did not come out but it is scratch build plasticard and I-beams with cork board surface to give the appearance of a tarred roof. You will notice the support beams from the main structure are all bent to face the same direction. The intent was to simulate damage from an explosive force that took part of the building down. Color scheme is similar to other buildings already in my collection to maintain cohesiveness.
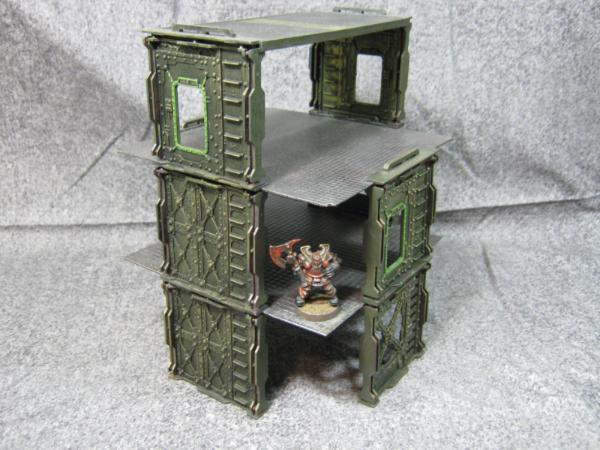
Next up was a built that was surprising quick because I knew exactly what I wanted to do, built this in the same period I built the model above. Paint is a slight departure from my usual color scheme, it's a metallic blue exterior and metalic green interior. I picked up both to experiment with and I'm pleased with the results. I haven't used it again since but it's likely to come back out at some point. Roof construction has same concept as model above. The third picture shows a large pile of debris in the lower right. This was my solution to running out of floor tiles and I think it worked well enough.
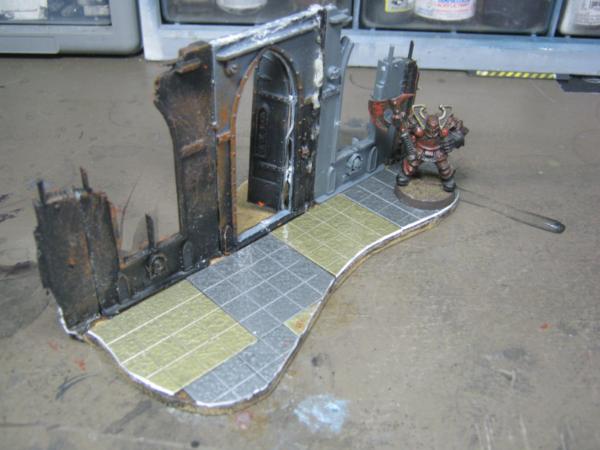
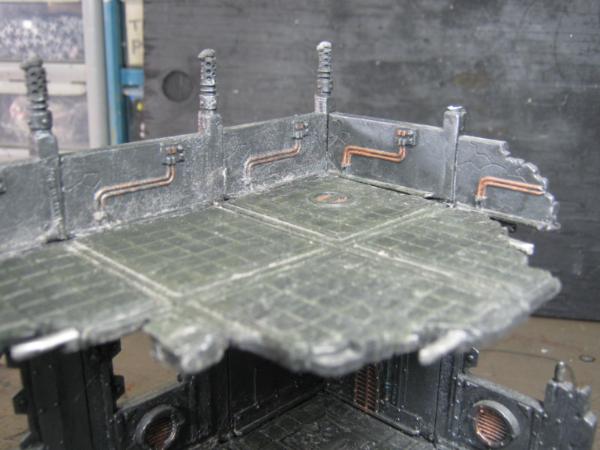
Next is a small Manufactorum. I put a lot of attention into details such as the ajar door and damage to the walls. The barricade is from the ForgeWorld set with a few broken Imperial bits to fill in gaps and create the appearance of a hastily fortified position. Because this model has more intricate detail in the casting it received more attention when i was painting, such as weathering on exposed pipes and picking out cables in the mold. Of the small buildings I've posted so far this is my favorite.
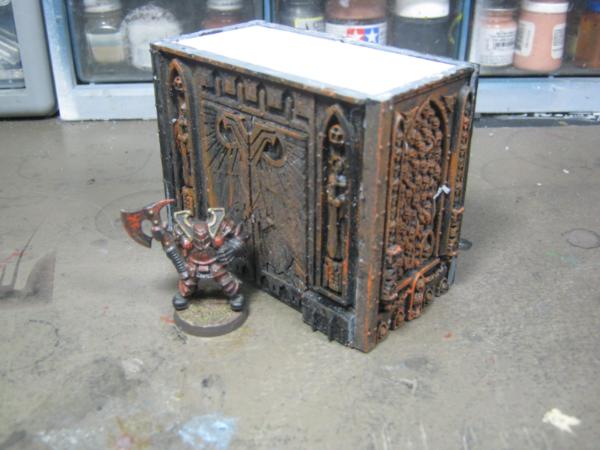
Next is my favorite of the lot. It took a very long tome to build this because of the amount of conversion and customization, and again in the painting detail. I really like how this model completed. It's tall but has a small footprint so it is easy to store and more versatile on the tabletop. The attention to detail on the skull wall plates really makes this model stand out without looking out of place.
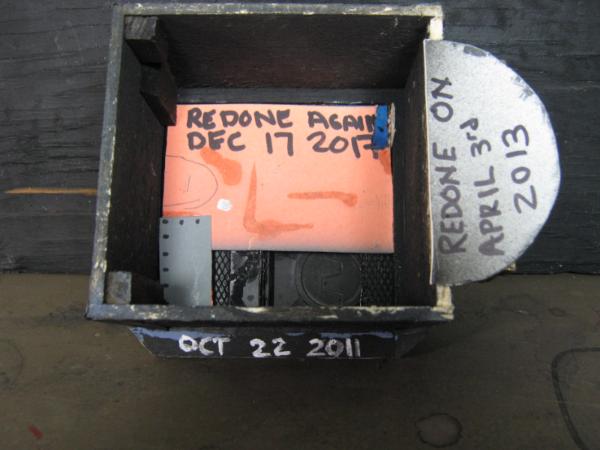
Next is a segue between my 40K table and my Necromunda table. Some people may remeber this from the beginning of the thread. This building has been reworked three times now and I'm hoping that I've found a style that will last a few years,
[
The last pieces became relevant again when Shadow War-Armageddon was released. Both of these models were either bare plastic or simple base coat when SW-A was released. I enjoyed modeling and painting these. Admittedly not my best work but it looks good from 3 feet away, especially when surround by a dozen other similar structures.
My primary modeling interest keeps shifting between improving paint and detail on existing models and using collected materials to finish building others. My preference is to finish models and I'm trying to focus on paint and weathering of existing models but frequently shift back to building other things. In either case I'm modeling, and that's just fine with me.
Thanks for looking. I'll be back with more finished terrain next time, plus some progress on paint for builds I'm trying to finish.
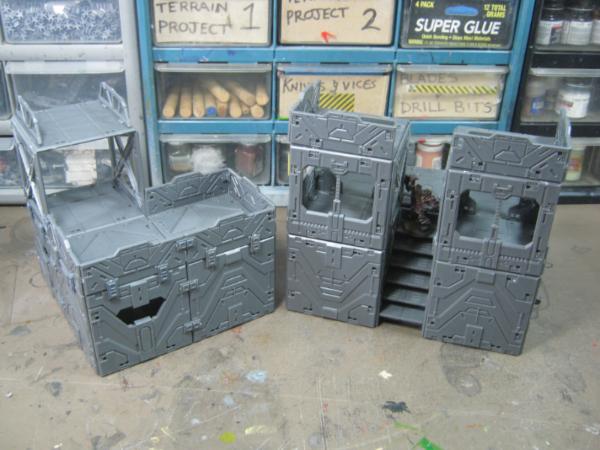
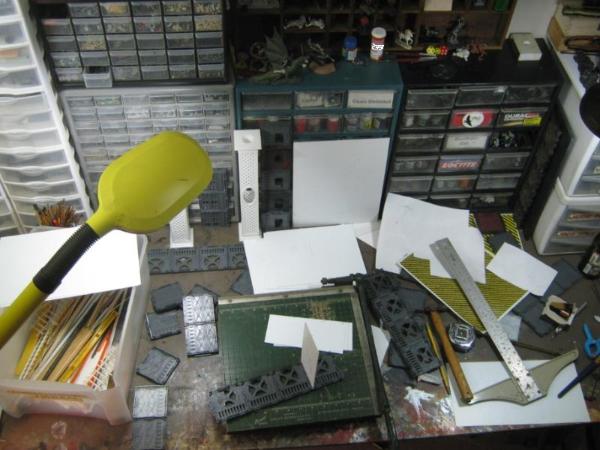
Decided to build today instead of paint. I didn't intend the amount of work I put in, but it is a project that sometimes drives itself.
This is a couple hours of work. These structures built quickly. I used a paper cutting board instead of a hobby blade, it's much faster and better results for me. I truly enjoyed the process of measuring, cutting, and piecing together.
Everything is being reinforced. I don't feel the 040 plasticard is firm enough for gaming by itself, it needs bracing and underlying supports. I do this through a few different methods, but my most common is using Testor's model glue and basswood. I've tried many other methods and have found this to a fast and easy application with solid long term results
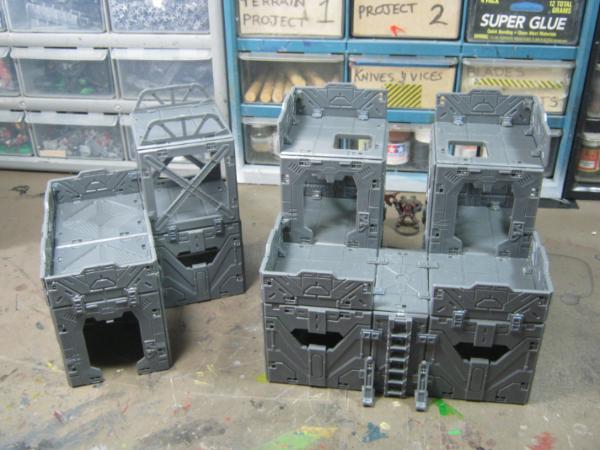
This model has the last piece of the Necromunda terrain I cut from .060 at the beginning of this thread. I cut the cards channels on additional 2 bulkheads to accept the .060, but only on one side. The other remains as it so .040 walkways can be connected.
I'm particularly happy with this piece. The hole was cut for a model I had started at the beginning of this thread but abandoned the idea. This is what the idea became and is also the last of the last. I am out of card .040 card.
The build part of this project is wrapping up. I have 10 bulkheads left for random walkways and a lot of walkways to connect, but the main buildings are built. From here I will be adding bits for detail like wires, hatches, and miscellaneous items that will help force scale perspective.
...Something stirred in the old man's bones. He' waved his arms to clear the cobwebs from the long-abandoned workshop, then immediately got straight to building a damn underhive!
Dave- You are mostly correct. The workshop is brand new as of Jan 2017 and has been used many times. What stirred in my bones was desire to finish project and nostalgia for Dakka. Pics of my new space at some point.
Gits- Absolutely. I have flat plenty of flat plasticard walkways for game use but they are lacking in proper Underhiviness. I'll be changing that over time with random bitz and also a lot of stuff from the Shadow Wars terrain.
CommissarKhaine- I completely agree that the aesthetics would be better if I had irregular shapes. Due to finite storage space reaching capacity I had to cede to practicality. I will be creating parallelogram walkways (with 60 to 30 degree angles) to offset the buildings and break up the appearance of orderly 90 degree angles.
No new work to share today, just pics of old projects I haven't posted yet. They are "done" in that they meet my minimum tabletop standards and I have no immediate plans to detail them further but I know they could be taken to another level with some attention to detail.
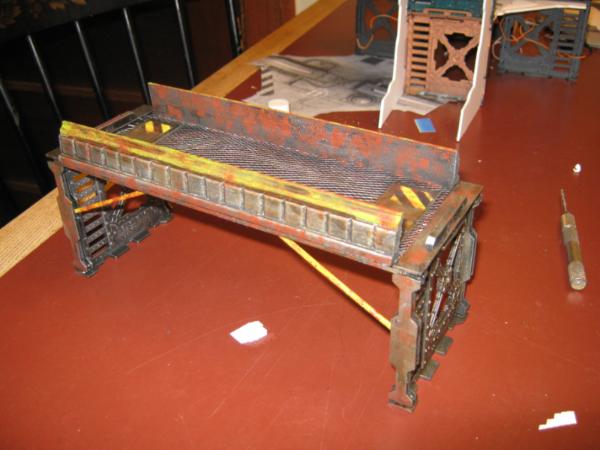
Here's my most recent "finished" peice from July '17 and one of my favorites. It was intended to just be walkways to connect my other buildings. I'm happy I decided to turn it into an individual piece. The finish is clean because I was using it for SW-A and I'm keeping it like this to add diversity on the tabletop.
This is the only one I built and I don't imagine more would be coming
Next structure was built at the recommendation of Bruticus. I had 3 others but I wanted the bulkheads for a different project. This is the one that survived.
Many rebuilds over the years created this structure. This is the final build and I am happy with what it finally wound up to be. I would have preferred to rebuild it as it was originally but 6 moves and 20 years made that not possible.
These buildings were put together at the same time and years later all painted at the same time. They have been revisited for minor detail work but are playable "as is" and I do not expect a lot of future work.
This is another original '97 model that has been reworked multiple times. I really like this one for it's open spaces and overall size. I've played games where multiple combats were taking place on different levels simultaneously. This is a piece I know I'll be going back to for more detail.
I know I can put more work into these and probably will once I have the newest pieces painted to minimum standard but for now I appreciate how they theme and fit together on the tabletop.
CommissarKhaine- I completely agree that the aesthetics would be better if I had irregular shapes. Due to finite storage space reaching capacity I had to cede to practicality. I will be creating parallelogram walkways (with 60 to 30 degree angles) to offset the buildings and break up the appearance of orderly 90 degree angles.
Fair point, and the parallelogram walkways are a stroke of genius! I like that you are actually making the choice to move on in order to get things finished, kudos to you! It's a pitfall for all modelers I guess. And I would love to play on such a table, it all comes together very well on the tabletop.
CommissarKhaine- My driving motivation is to be done with my terrain projects and everything I'm doing is moving that decision forward. I'll never stop building fiddly piles of junk on 40mm square bases but (aside from one last grand project I have my my "to do" list) my large builds are over.
Dr H- Square, rectangular, uhm... square... yes, I have quite a collection of shapes.
Dave- It doesn't travel well. Come visit and we'll get a few games in.
Cam- I appreciate acknowledgement from anyone on Dakka, but it's a different kind of compliment when it comes from someone who's work I respect and admire. Thank you.
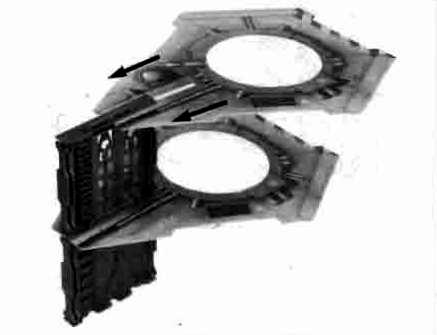
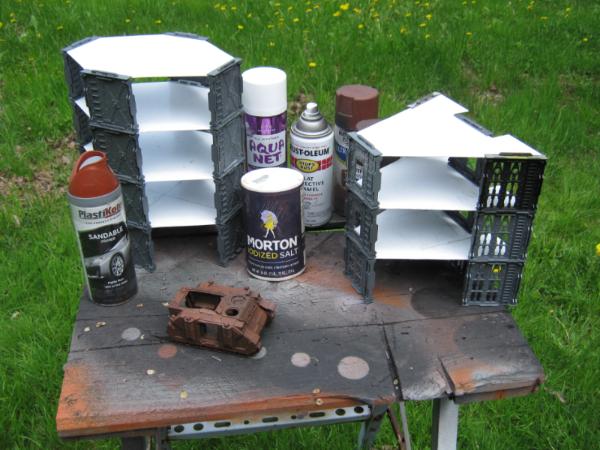
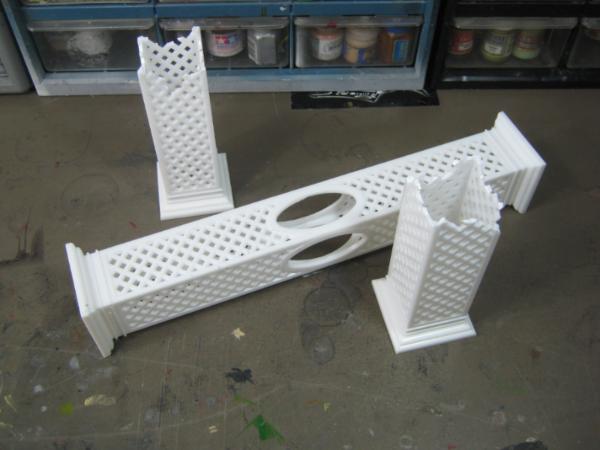
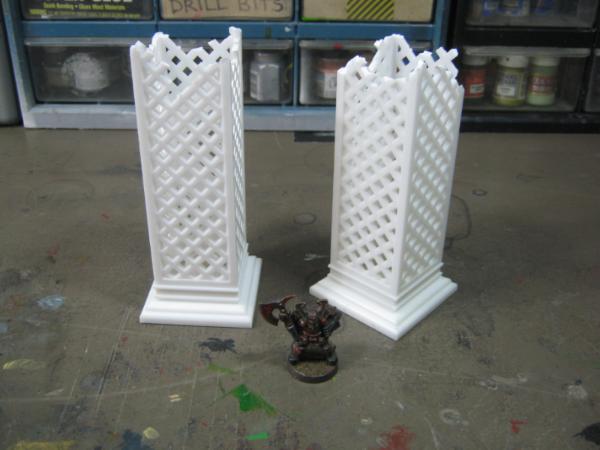
If necessity is the mother of invention, then desperation must be the mother of inspiration. Long ago I found a 40K fan site that had a section dedicated to building terrain. A portion of that was Necromunda, and many of the models were built using a cross-lattice cake decoration that looked perfect for the Underhive. I searched for them online and at local retailers but found nothing. Later I discovered the company that made them had gone out of business years ago and finding those pieces was unlikely.
By pure chance I found some in the free pile at a yard sale a couple years later but they were quite large and had an oval in the middle of the column that gave the piece an unwanted aesthetic. I simply could not figure out what to do about it so I put it in my supplies drawer and there it sat. Over the years I've pulled the out many times trying to find a way to finally put them on my table. Every time they would wind up back in the drawer.
About a year ago I started culling my supply collection down due to limited storage space for completed projects. Last night I hauled out my building supplies drawer again. It wasn't long before I realized the supports were never going to be used and had to go. That's when my hoarder separation anxiety went into panic mode and inspiration struck- just break them in half:
10+ years of this stored in my bitz bin and all I wound up doing with them is breaking them in half. I think it's a brilliant idea.
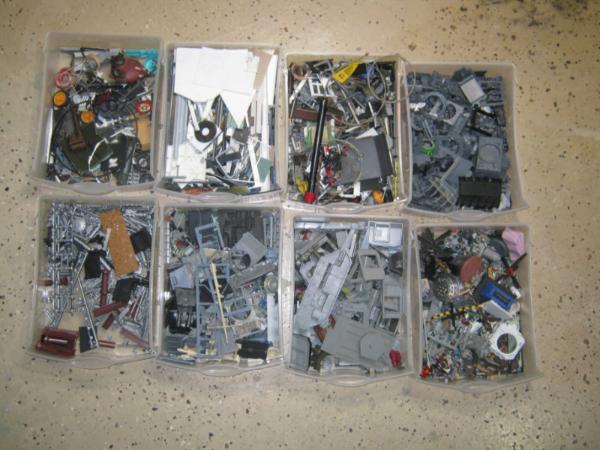
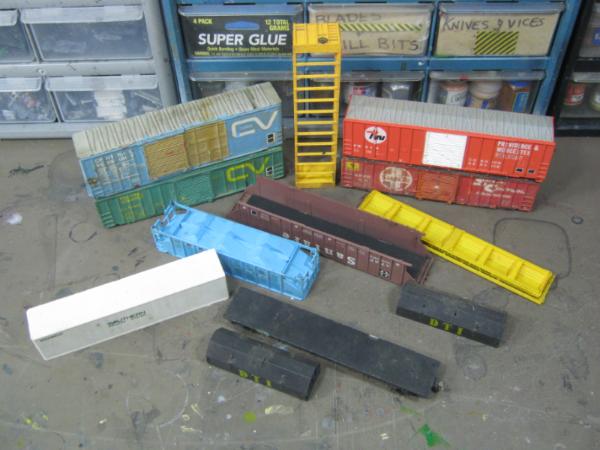
I also went through the train set bitz bin that I've collected. I'm considering what to do with these. I'm thinking Necromunda Underhive shanty town / 40K post-industrial collapse survivor camp.
I have some time off coming next week and I'm planning out a couple projects that will fill the last few spaces of storage / display for my 40K universe. Once those are built my efforts will focus on detailing everything I've done to this point. This thread is far from over but it will end someday and honestly I'm looking forward to it. Building and collecting are exciting activities but ultimately it is the satisfaction of completion and displaying on the tabletop that I strive for.
Snapping them in half is perfect! They look just like metalwork lattice pillars sheared off. You could even encase most of them in resin and have them looking like the reinforcements of ferrocrete pillars
bobbuilder- Hello, and thank you for the compliment. I checked out your power generator and I'm impressed. Excellent modeling and paint. I appreciate that you checked out my thread. I'm hoping you have the opportunity to post more of your work.
Ynneadwraith- I gave some thought to doing something similar to that, may revisit them in the future. For now I'm giving them three colors and some weathering to get them on the table as is.
Dr H- No doubt this will happen many more times. I'm looking forward to more and as progress continues.
I do appreciate the feedback you all offer, and I do consider it. One thing that stuck with me was this:
CommissarKhaine wrote: Looking promising. I would've added some more non,-square buildings though, but I'm a sucker for irregular shapes
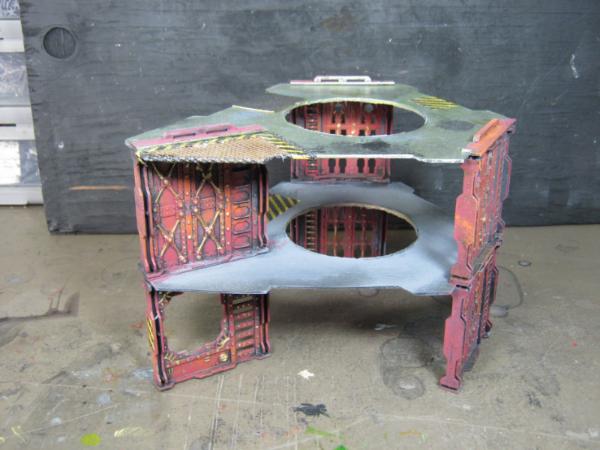
I agreed with you but it didn't seem practical. I thought more about it today and realized I had to do something different. After a while this is what I came up with:
Same storage footprint, much cooler "sci-fi" feeling, walkways can connect at 45 degree as well as 90 degree angles... I like this so much I'm doing the same to the remaining large piece. Having two of these on the board is going to offer so many setup opportunities and now that I have these I'm going to pass on the parallelogram walkways- I don't need then anymore. Today has been a good day.
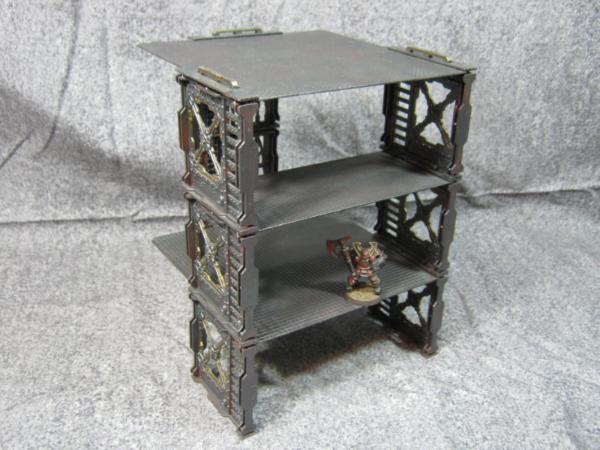
** later last night I realized that I also made these last pieces modular- they all have the same dimensions for I can stack the main platforms on top of each other and then add walkways. I stopped once I reached 24" but could have gone higher. Pics later. **
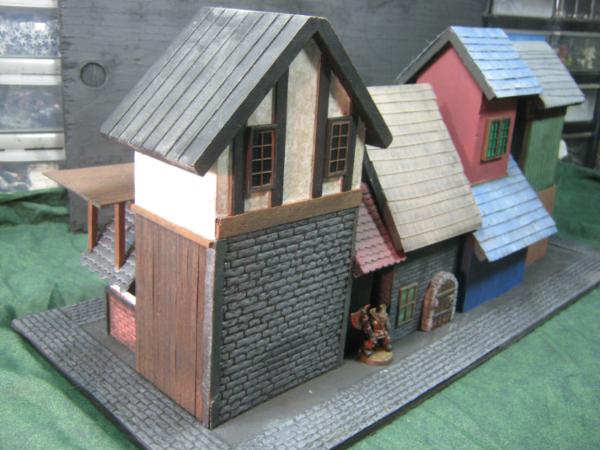
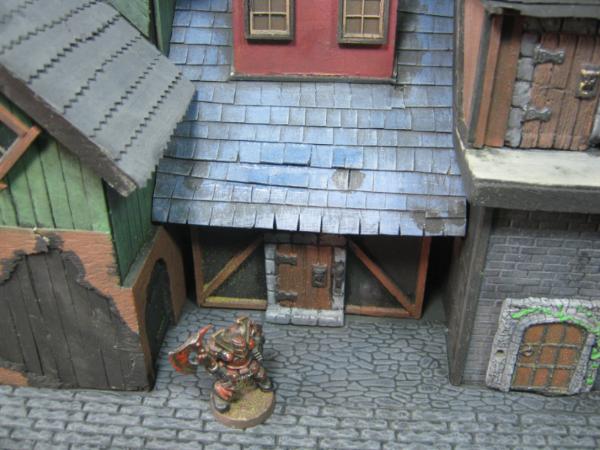
Winter 2015 the game group I'm part of decided to do a Mordheim campaign and we immediately ran into an issue- no scenery or terrain suitable for the game. One person had a few of the cardstock buildings. Good enough to get a game in but we needed a lot more terrain as we usually ran 2 tables at the same time. Being the only person in the group that builds terrain I took on that massive task. Almost everything I'm posting is still WIP and needs a lot of work to finish but considering the majority of work and paint was done in about 2 months I'm happy enough with it to share it here. I will be revisiting these over time to finish them.
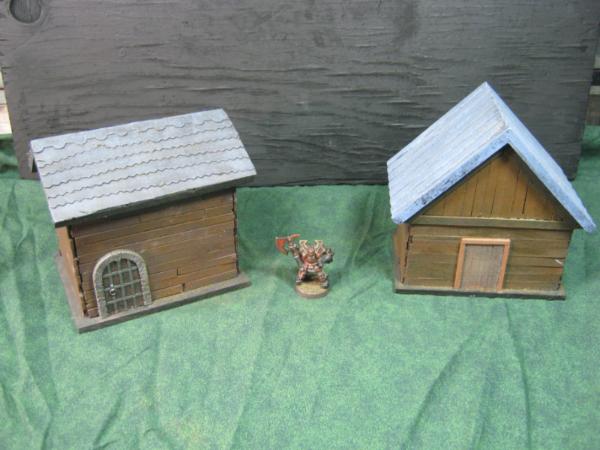
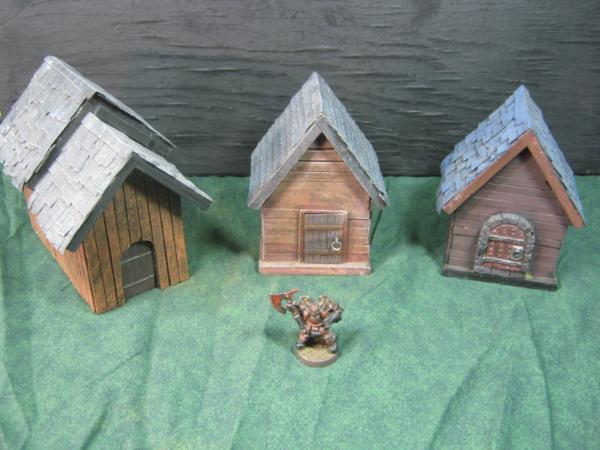
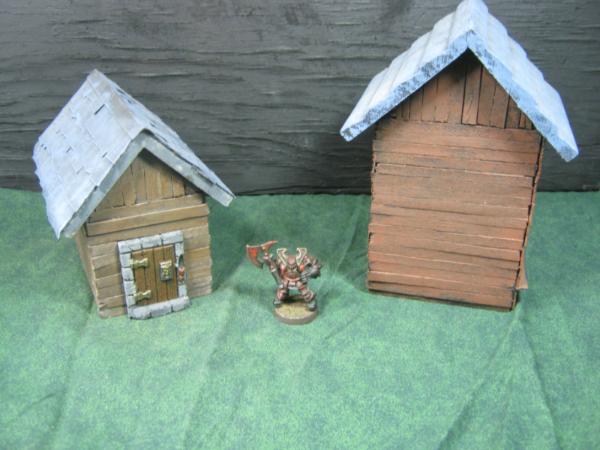
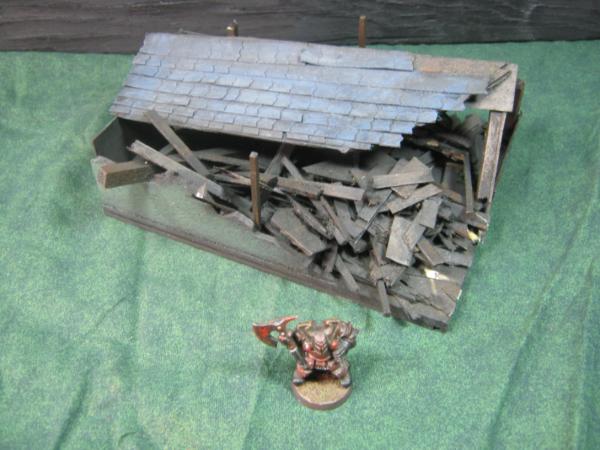
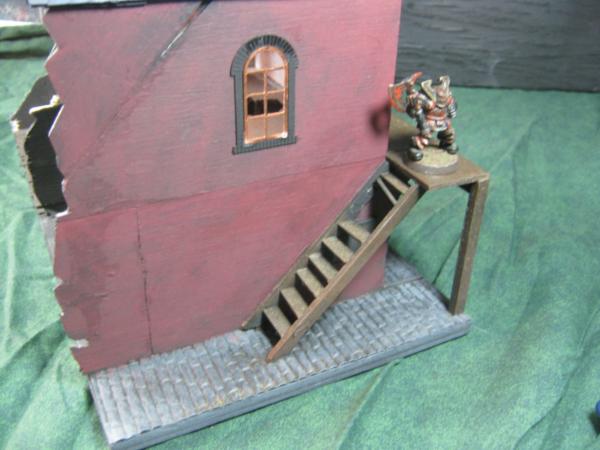
First up are a buildings originally intended for WFB. 3 were already done (2nd pic), the rest in various stages of build before the Mordheim project started. Many were without paint and a couple were just bare wood. They are all made from cheap bird houses from a chain craft store covered with coffee stirrers from Starbucks and cardboard shingles for the roof (when applicable).
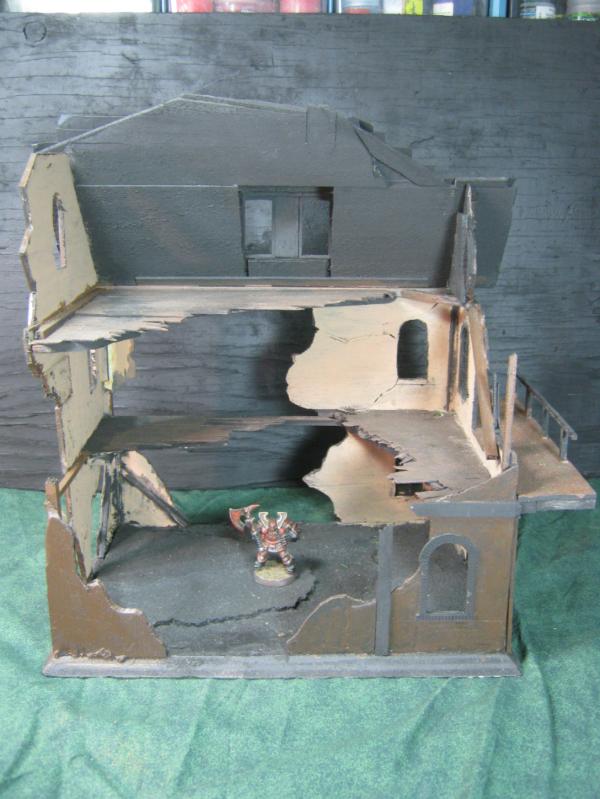
Everything from here onward was built specifically for Mordheim. Posting the buildings in order that I made them. Many are damaged right now and I haven't made the time to repair them yet.
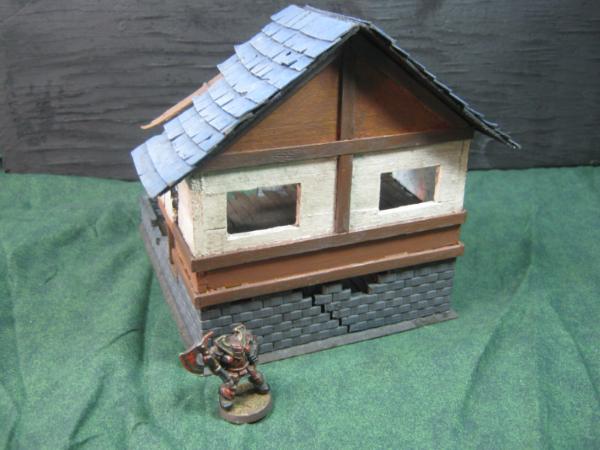
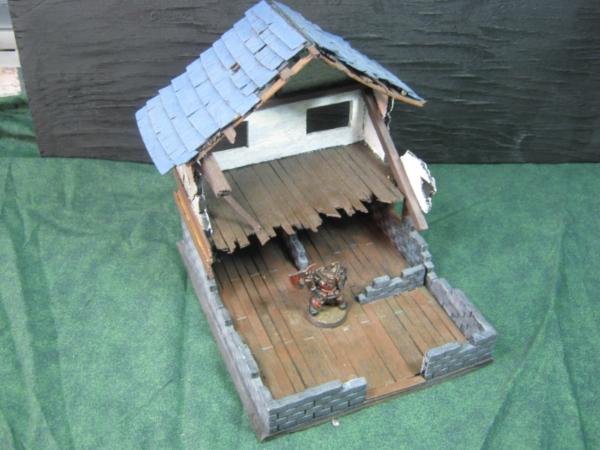
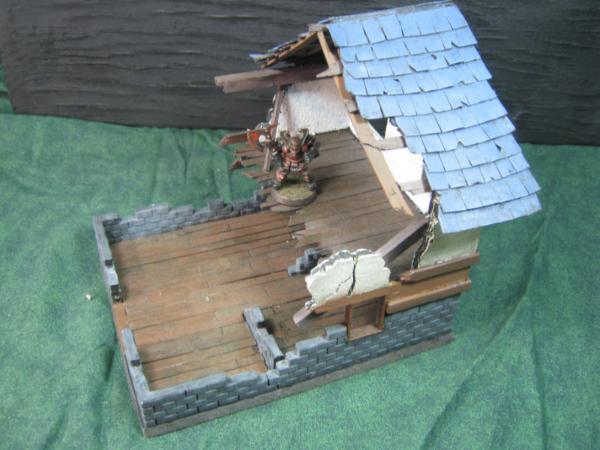
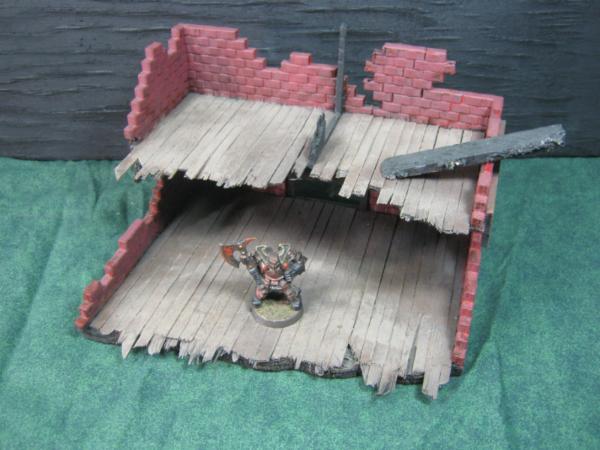
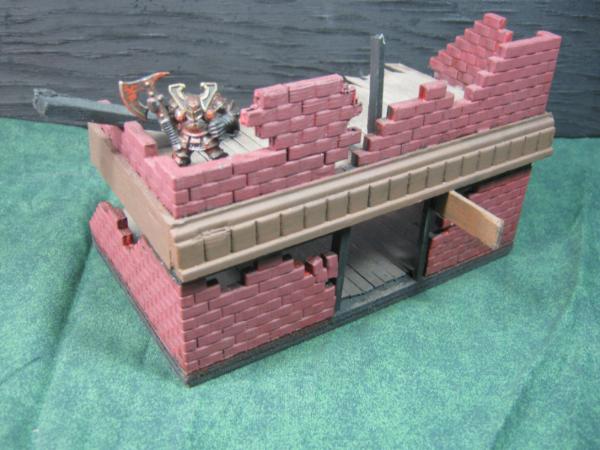
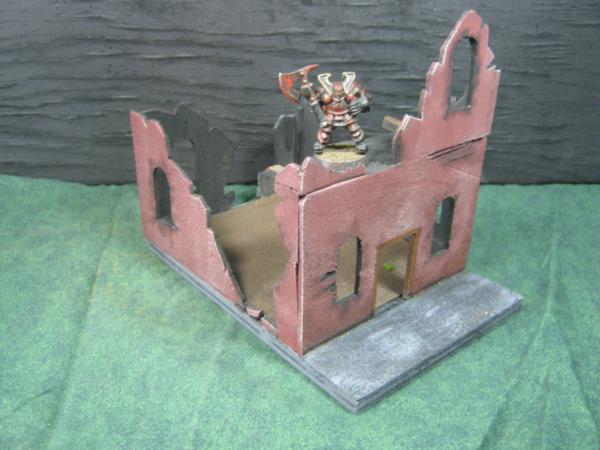
My first ruined building came out very well except the windows. I wasn't thinking about it and didn't realize what I'd done until it was too late. As a result I'm not as happy with the piece as I would have been had I done the windows correctly but I already have an idea how to correct that when I revisit this piece to finish it.
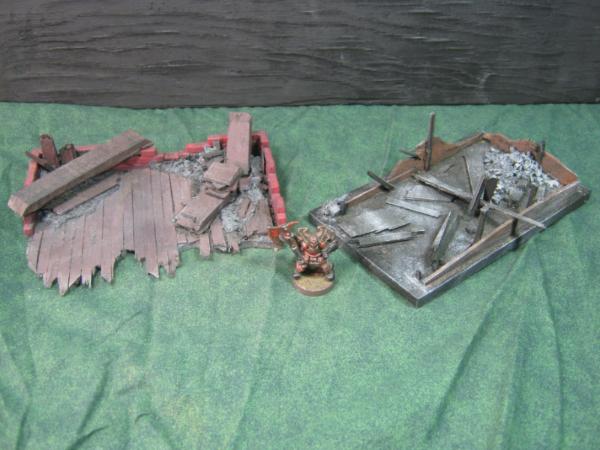
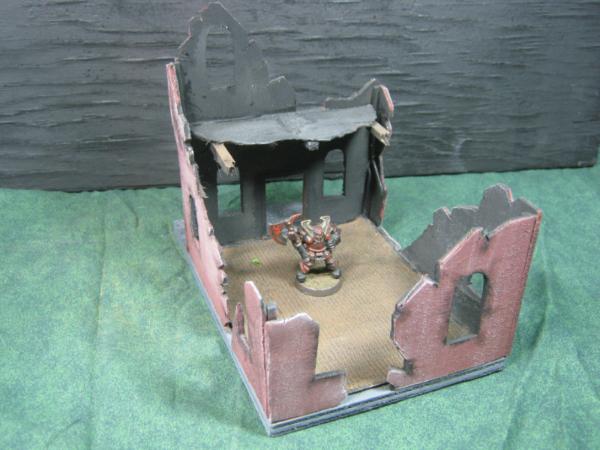
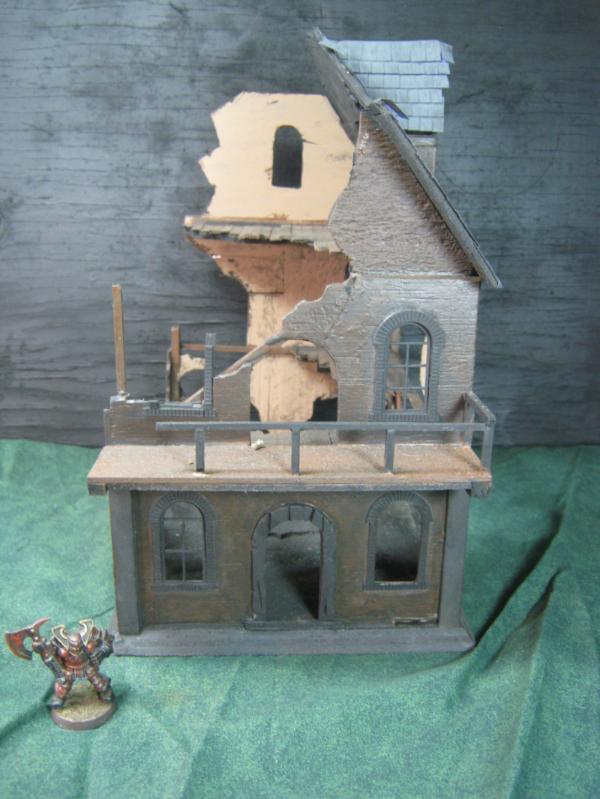
The next 2 buildings I built at the same time and frequently used them as one building with debris in the gap between them. I like how these came out. Not sure why I added the other ruined building to this picture but there it is. Another very fast build.
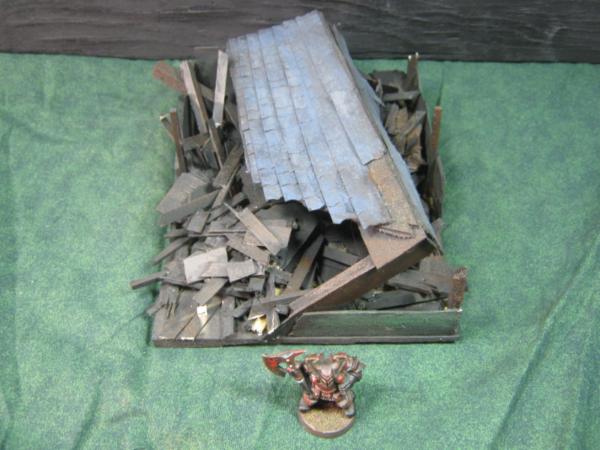
The next building is a couple failed projects combined. I like how it came out.
This needs a lot more work but it served a purpose and went together quickly.
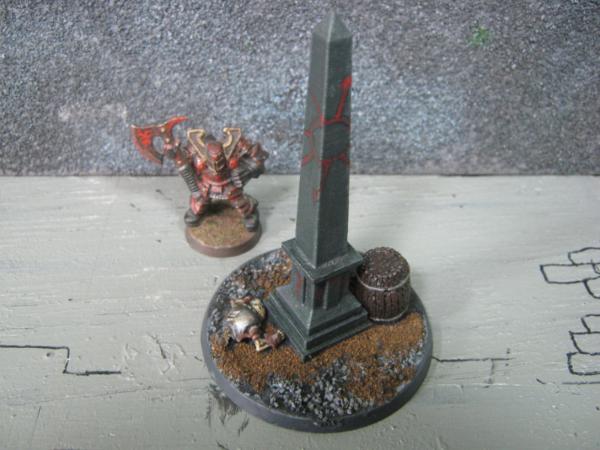
Next is one of the rare finished pieces I have. I really like this one a lot.
It frequently wound up being placed in the middle of this next piece. It made for an excellent town square.
Next up are my grand projects, the terrain that made our Mordheim games awesome. Yes, a LOT of work to be done still but I'm quite impressed with myself for building these as quickly as I did with the results I achieved.
This next piece is my 2nd favorite of everything I did during this project. I really enjoyed building this and it's going to be an awesome piece when complete.
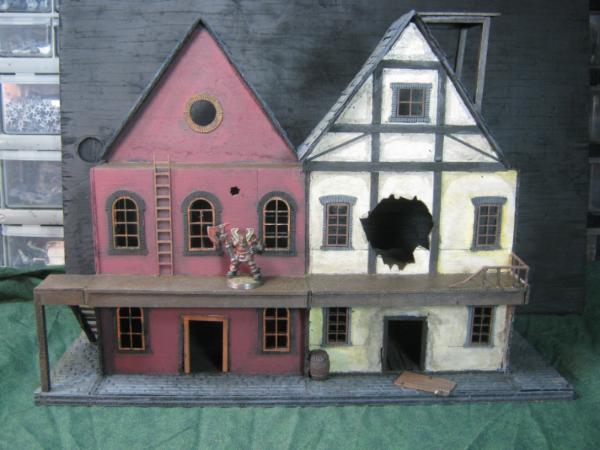
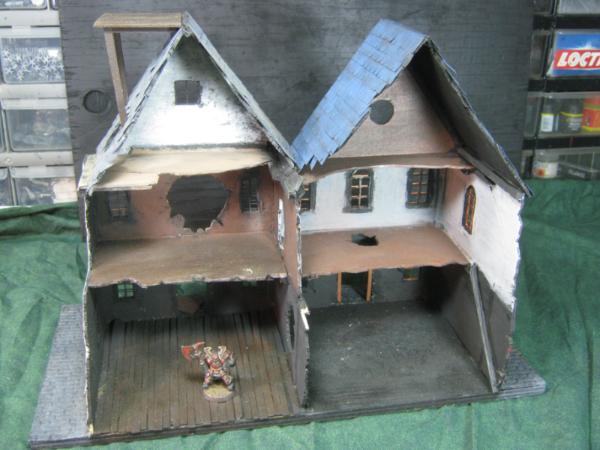
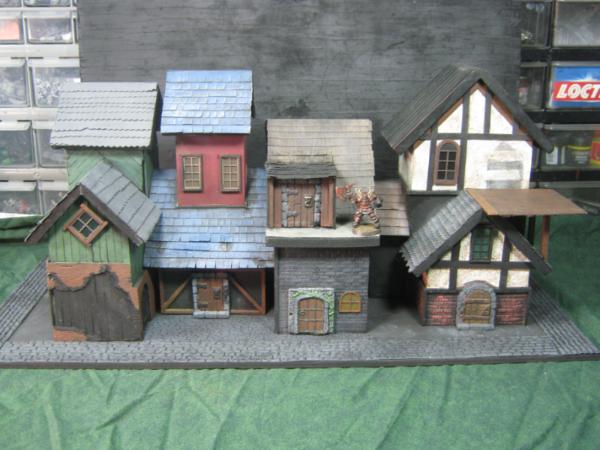
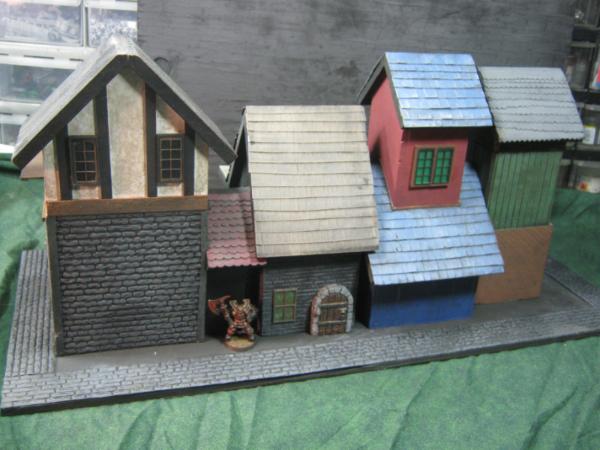
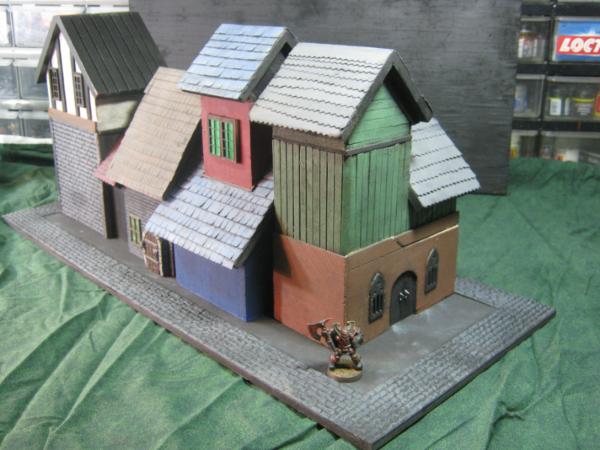
And finally, the flagship of my Fantasy collection. I put the most work in of any other piece, and there were many nights that turned back into day when I was working on this. They are all bird houses and are modular, the set comes apart into 4 separate buildings. I haven't decided if I want to keep it that way but for now it makes things a lot easier to work on. There are stairs, doors, and walkways missing but I have a few of them built already, they just need to be added once the rest of the building is ready for them.
I really like these models and I'm absolutely going to revisit them at some point. Right now they have nowhere to live in my hobby room so it's back the box for now but they will be back.
great work skalk.
i wanted to ask about something that you use.
it looks almost like screen and when applied to flat flooring looks a lot like grates or diamond plate, what is that?
i was also wondering what you use as a good source of scifi doors and windows?
Lots of nice stuff in here, and I think the non-square building will add some nice variation. That Mordheim stuff is awesome, let's hope they'll find a use at some point!
usernamesareannoying- I have a few things like that so I'm not sure which one you're asking about. If you post a pic or link I'll figure it out and gladly answer your question.
CommissarKhaine- Thank you for the compliment. Another non-square building is below.
Gits / Dr H / Dave / OneManNoodles- Thank you. Fantasy terrain has always been the most challenging for me because I can't gob together a pile of techno sci-fi looking stuff and drop it on the table. That said, I genuinely enjoy it because it's one of the few times I will completely scratch-build something.
Dave- re: lattice pillars- I'll be honest, those pillars won't see rivets while under my ownership. I did consider it after I read your post and while I completely agree it would make the pieces exponentially cooler, my skill set with rivets would make it look like they were drilled and hammered in by an Ork hopped up on Squig juice. Maybe I should just give them to you. As in to have, to keep, do something awesome with.
Clarification of phrasing- when I say "final build" or "last one" it isn't cryptic foreshadowing, it's simply due to my collection having reached the absolute limits of available storage / display space. Because of that I'm very focused on building right now. I've figured out what can go where and that's what I'm building. Also, I'm building because I've owned most of these models for *years* and all they have done is sit unused in a box or a bin. If it is built and primed I'll have the opportunity to put it on the table.
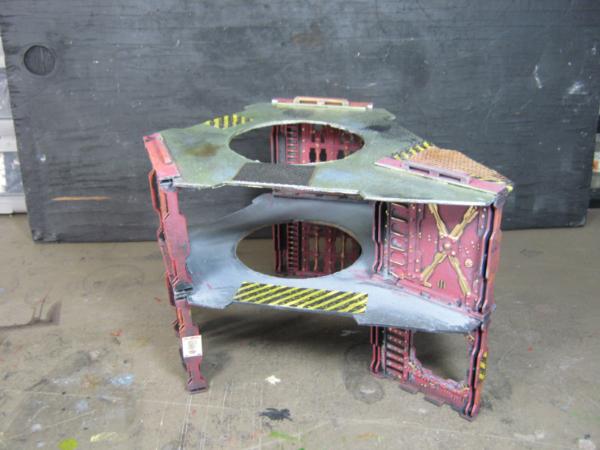
Lots of stuff to share today. First up is my final Necromunda structure. Originally I had planned to make this piece another oblong hexagon building but decided to make something truly different. I think this design will help break up the visual of 90 degree angles on the board and also provide more opportunity for crisscrossed walkways.
Next is a small side project I'm working on between my other projects. I found these while cleaning out a box of unfinished scatter scenery and thanks to some inspiration from Flinty's industrial terrain thread I decided to get started on them. You'll see these show up again in the next couple weeks.
Next is from the Mantix line of urban warfare terrain I'm building for a friend. I'll say directly the finished product looks excellent but the build is even more annoying than the Pegasus Hobbies kits and will require glue if its going to survive being used frequently. This is the least enjoyable project I've worked on in a long time and the frustration with the build is redoubled when considering how absolutely cool this line could be if it wasn't such a hassle to build. My recommendation for this product is to avoid it unless you are really into the appearance and functionality of the model, that might make the build process less infuriating. I'm only finishing this because I said I would. The lesson I learned from this is to not offer to build a kit for someone if I don't already have experience with it.
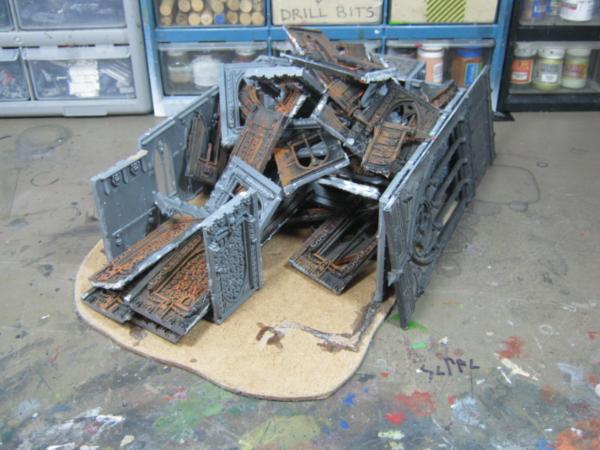
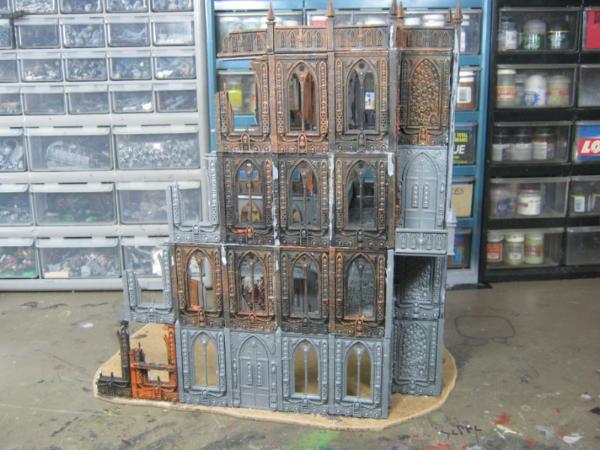
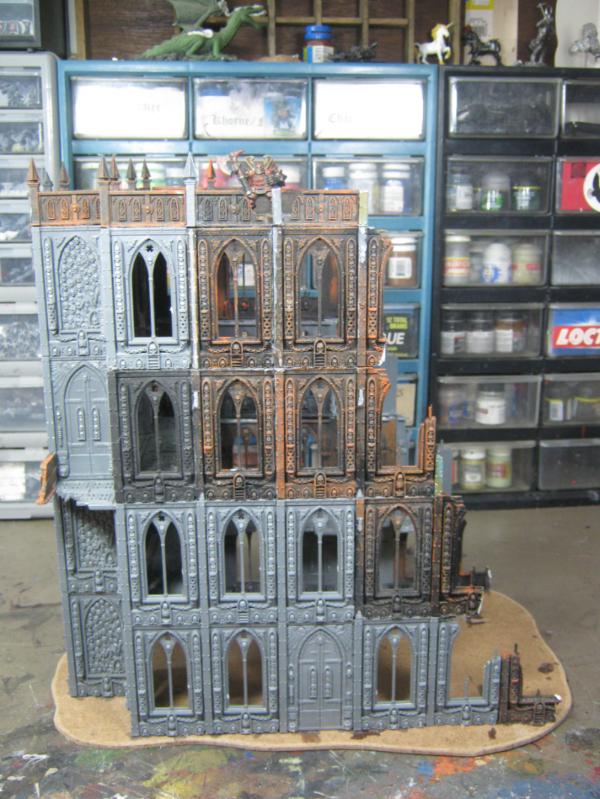
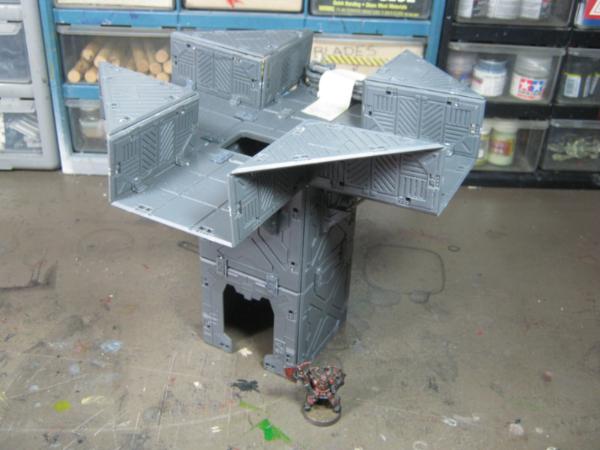
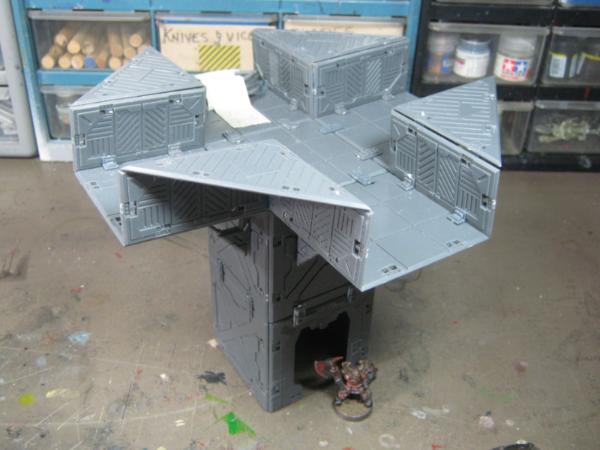
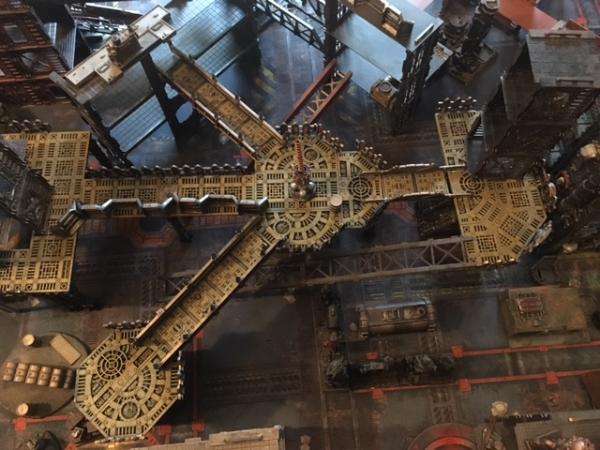
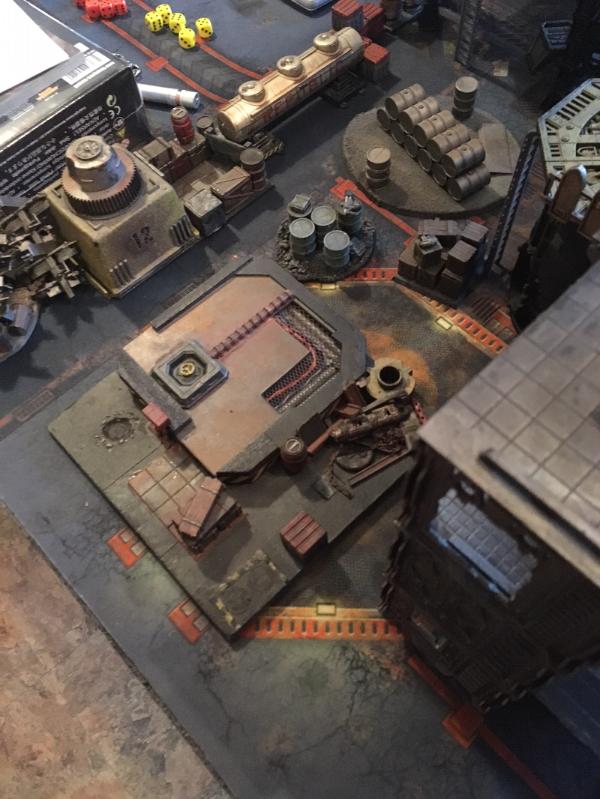
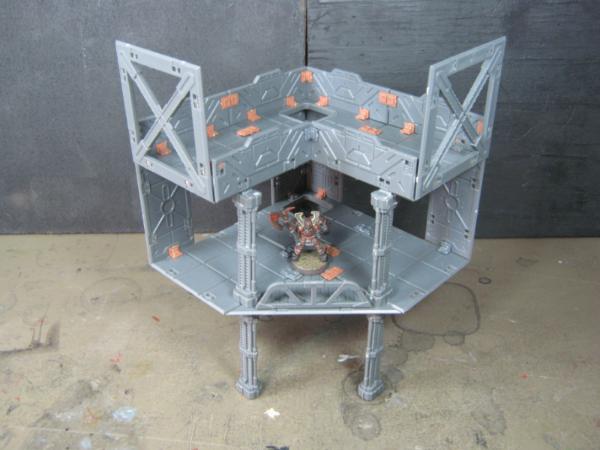
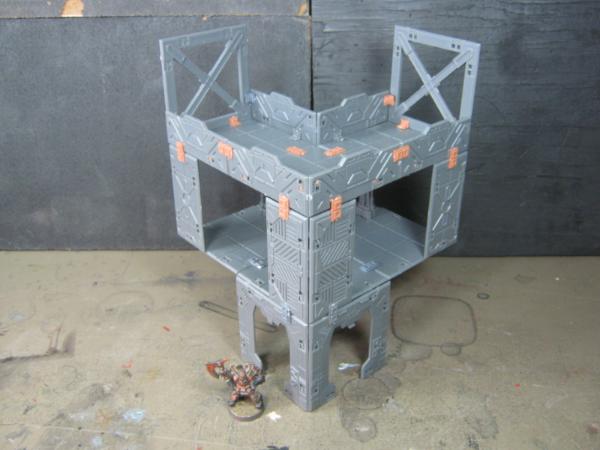
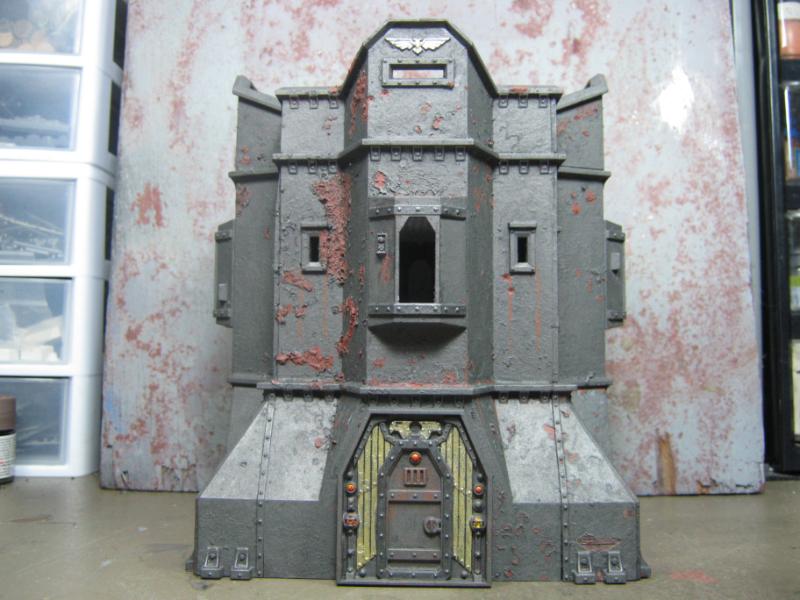
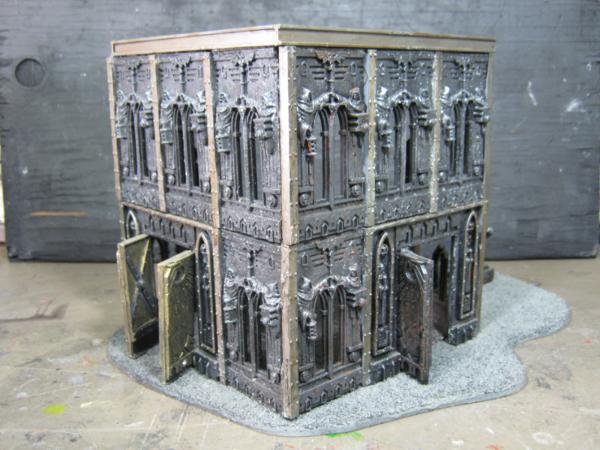
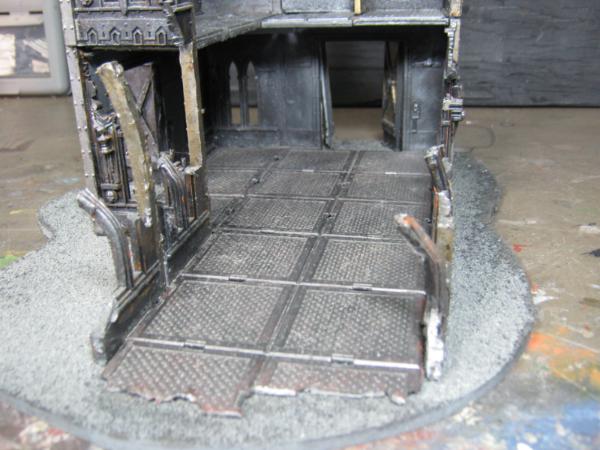
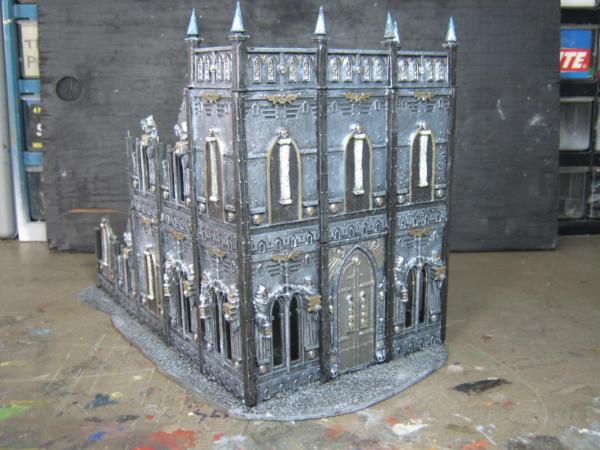
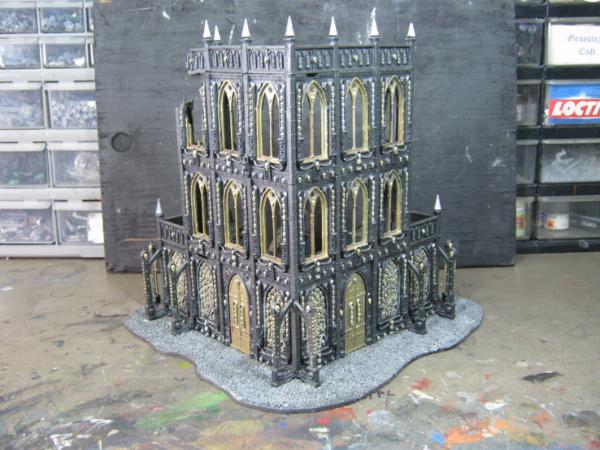
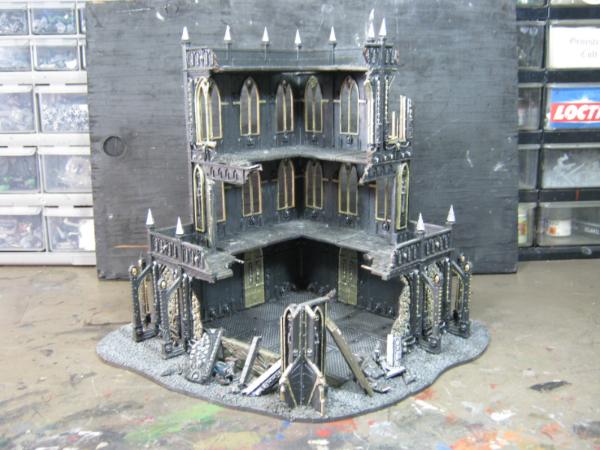
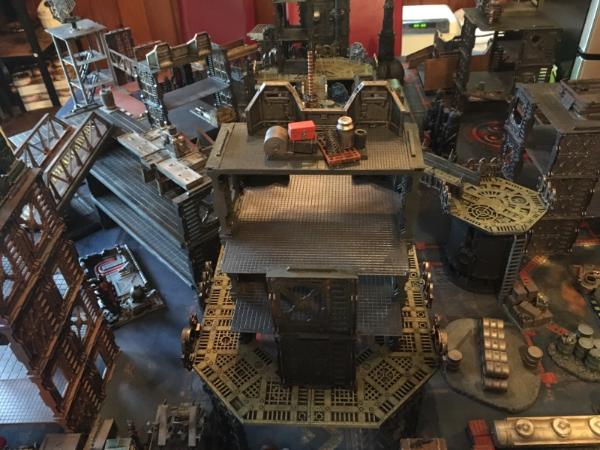
My last offering for the day is the complete opposite of the Mantix kit. This is likely the last GW kit I'll build for myself and decided to go big. Really big. I started this back in '13 and about 1/2 way through the build. When I'm doing my initial builds I usually only tack the plates with a couple drops of super glue because I change my mind frequently when building. Once I'm satisfied with it I go back and glue everything in place for a strong bond. I hadn't reached that point yet with this model and applied too much pressure when I was trying to cut a channel into a plate. The model collapsed into multiple pieces and my reaction was less than optimal. A week or so later I scooped up the pieces and here it is 5-ish years later:
I had already designated the space for this model by the size of the base and decided it was time to build it. I had an excellent time building this, no question the most fun I've had modeling in quite a while. I've missed working on GW buildings and it was great to see this again:
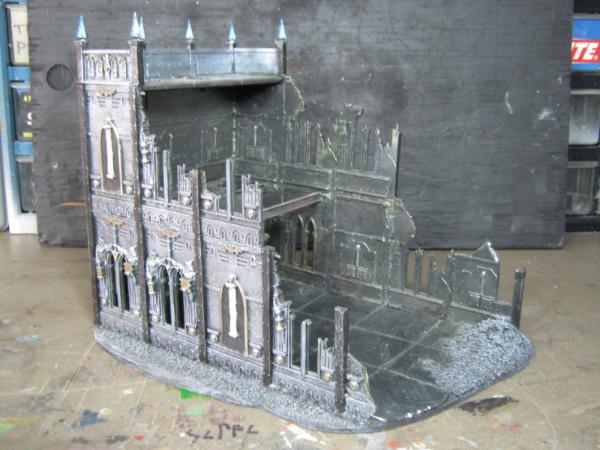
The end result of this build is outstanding. Flooring etc still needs to be done but the main structure is complete. I'm very happy with this model:
[/url]
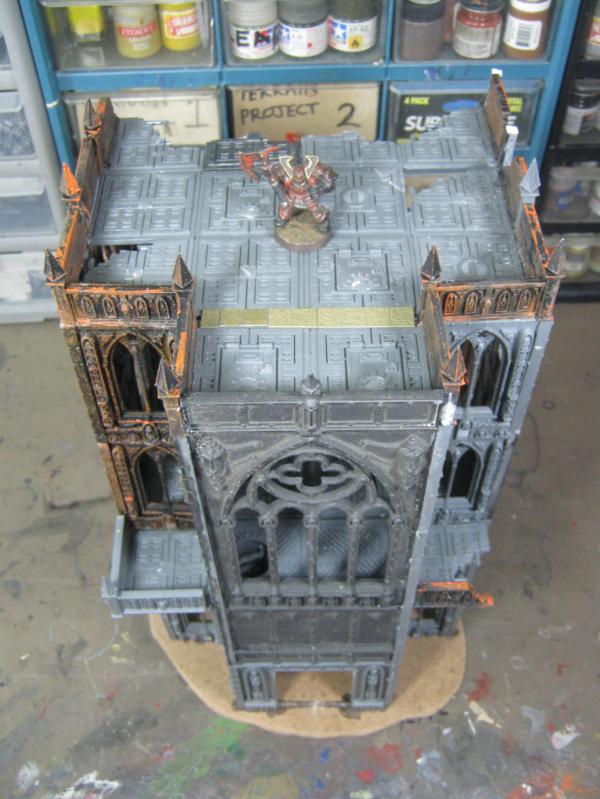
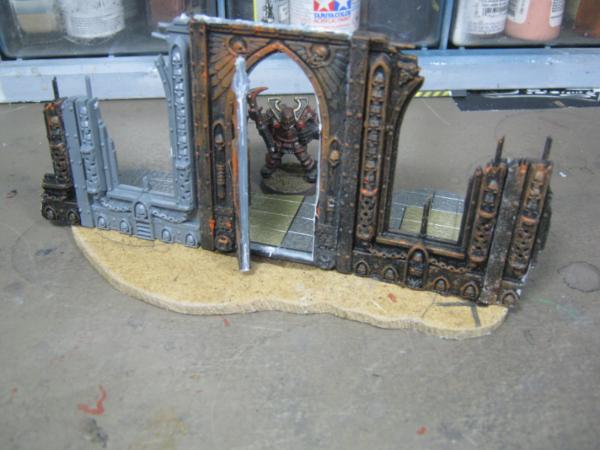
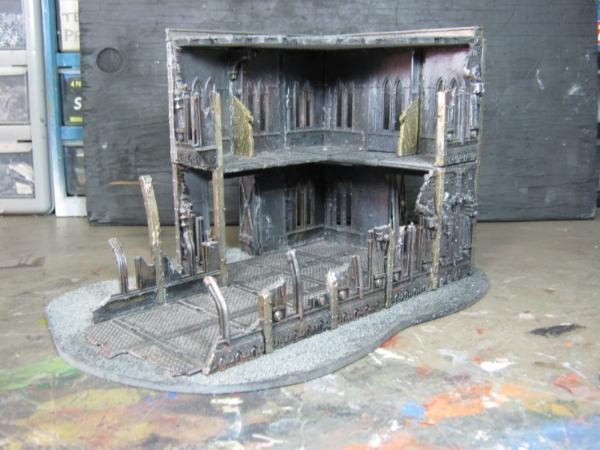
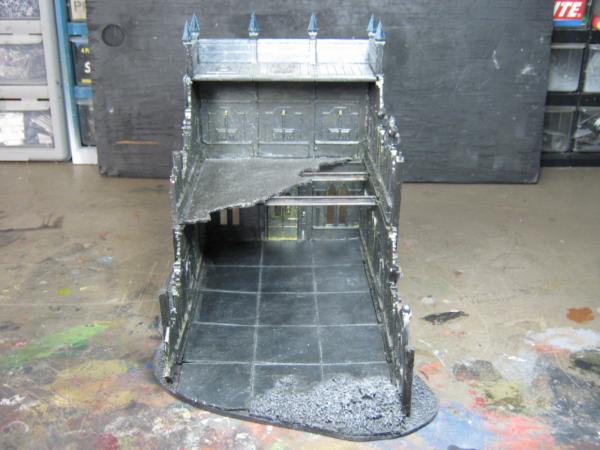
That's a long way down:
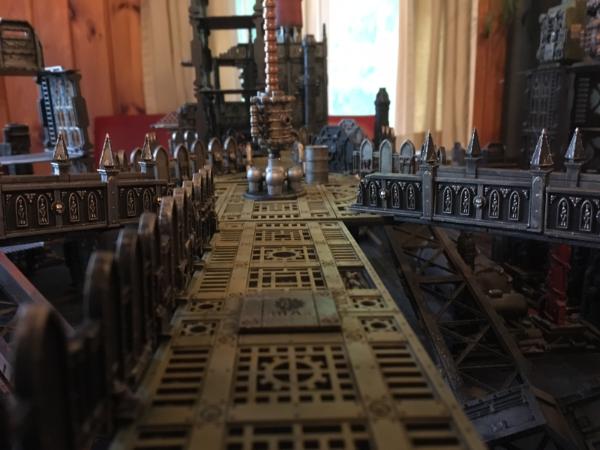
The next pieces are going to be scatter scenery made from the remaining bitz I have left over. I'll have at least 5 or 6 more, all will have the same flooring, idea is to simulate a *gigantic* Imperial building that was savaged centuries ago and only bits of the foundation remain. I'm already thinking I made a mistake by shaving off the floor plates to match the cut of the base. If enough of you agree with that I'm going to redo the flooring so it has overhang, maybe some re-bar or piping exposed... you know, real modeling hobbyist stuff that real modeling hobbyists do.
That's it for this update. More work coming soon. I'm never sure what I'll be working on but no matter what I'm working on, it's progress.
I feel I should point out that when I said about the variety of shapes you were building, I wasn't being sarcastic: While they were mainly rectangular in footprint they had a good variety in profile, height, etc.
Most buildings are rectangular to aid fitting together and by roads and paths.
Cathedral looks awesome - I really like that tiling floor you've got. What is it made from? Overhang might be better, but you could also edge it in debris if you don't want to pull it up.
Cam- I'm going to use the salt weathering method on them once it warms up here. I've been having issues with hairspray and -12 degrees (c).
Dave- I started to put rivets on one this weekend. It does look better but I'm not committing to it just yet. If the next LoER contest challenge is "use as many rivets as possible" I'll for sure have a project for it.
Dr H- Text is a poor form of communication. I was attempting humor as an acknowledgment the compliment.
Llamahead- You're welcome. If you have any questions feel free to ask.
kestral- The tiling is a square tile sheet from Plastruct. I don't remember the gauge but it's available at most hobby shops I've been to and certinally online. The squares in mine are maybe 1/2 inch by /2 inch? re- overhang, I'm going to junk the edge up on this one and overhang the rest.
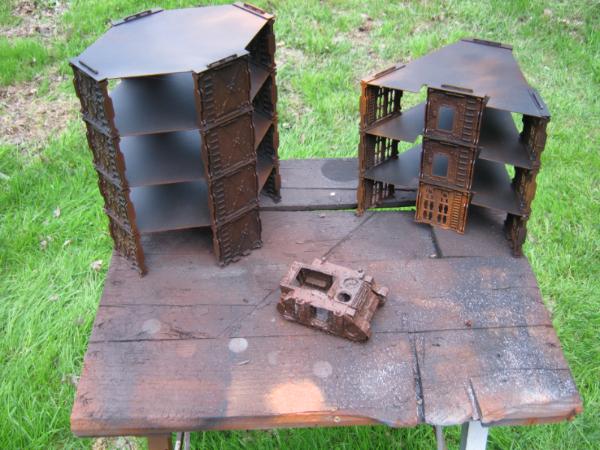
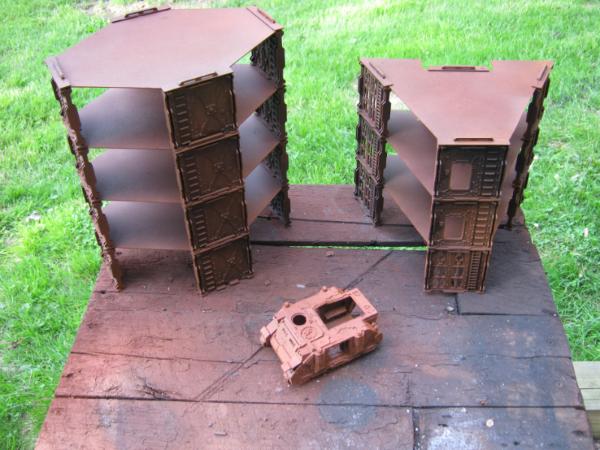
No photo updates today, forgot my camera at home. Got a lot of work done this weekend but it was spread out over many projects. My Shadow War terrain saw some detail to a walkway and platform, I based all of my new Necromunda terrain black and then criss-crossed different colors of rust to add variety to the salt weathering I'll be doing later, put some rivets on the lattice pillars, built another Imperial Sector ruined wall bit, and primed a base I'll be using for some Necromunda / 40K scatter scenery.
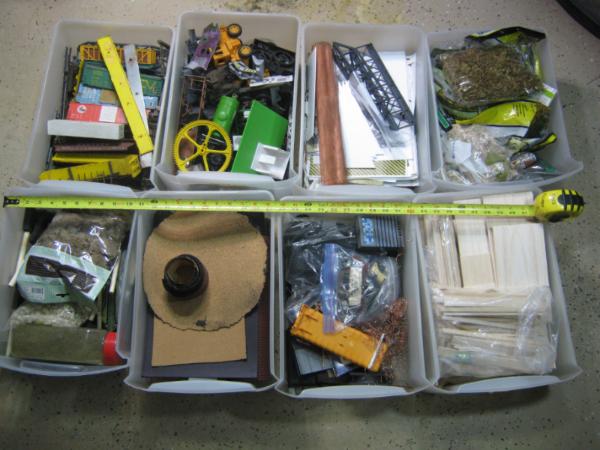
I've been going through everything I own lately. This weekend was no different and I came across another bucket of terrain supply junk I had forgotten about. I have decades worth of bitz and pieces of supplies that I'm not ever going to get around to using. I've gotten rid of the easy stuff (things like empty soup cans, cardboard tubes, etc) but having a harder time throwing the "cool" stuff in the recycle bin when I know someone else would love to have a go at some of these failed projects.
I've been thinking about this next part for at least 2 years and have finally decided that I'm going to do it. I'm offering the bulk of my supplies to my terrain-minded Dakka friends. DCM LoER members have first pick (membership has privileges) but I won't be saying "no" to anyone so long as I have stuff left. My collection varies from wee bitz like brake pads for a 1:35 scale tractor trailer to large chunks of plastic. It'll be a grab bag of surprises (not listing specifics but it'll include HO train junk, broken kids toys, Grecian cake pillars, 1/35 military stuff, just lots of stuff). Disclaimer- it won't have GW plates etc, it's is all genuine reclaimed junk. If anyone likes working with wood (balsa / bass... Llamahead this might be what you're looking for re: Mordheim stuff) let me know, I'll be sure to send a few sheets. I know I could try selling this on eBay or giving it away on Craigslist but I'd really rather see it go to someone that will use it. All I ask in return is that once it has arrived you cover my postage if you can.
Clicking submit, no backing out. Let the purge begin.
Skalk Bloodaxe wrote: ...Dr H- Text is a poor form of communication. I was attempting humor as an acknowledgment the compliment. ...
That's alright then. I didn't think too much about your initial reply, but then you started on non-rectangle footprints and thought I should clarify.
Keep doing what you're doing.
Good luck with the clear out.
I would jump at the chance of more building materials, but I'm struggling to house all the useful junk I already have (I don't go through it quick enough). So I don't need more... at the mo'.
MajorTom- Thanks for the compliment. Of the entire hobby, terrain is my passion.
More Mantic progress. I have buildings #3 and #4 to offer. These buildings are the result of having no idea what to do. When I'm simply stuck for ideas I'll do prep work like filing burrs off the edges, sort plates together in separate piles, etc, Eventually inspiration strikes and I start building. These are both from last night. The first structure intended to be a hub for walkways I'll be making later.
Second structure was intended to be a power-station sci-fi whatever, it just looked cool so I built it..
When I turned it upside down to add clips to the wall and interesting thing happened- the model completely transformed into something else. I'm going to paint both sides of this so it has maximum versatility as a model on the game table.
I have some builds left. Once I'm done with those I'm going to trade my glue and pliers for paints and brushes. I have many models that need at least basic colors to see the tabletop, and they will require multiple hours of detailed attention to be finished. I'm far happier when I'm building, but the paint defines the model and it's worth the effort if done well. The next phase of this project (fine detailing and paint) is going to be my terrain thesis. Everything I've learned will be going into these models. I'm intimidated by the scope and expectations of the project, and also excited to have made to opportunity to see old models finally finished and used on my tabletop.
That's it for this one, thanks for reading. I'm headed back to the hole to get some more work done today.
I don't know how I never knew about this before, but I found your blog recently and am enjoying going through it. I'm on page 11 so far, very impressive work back in 2012.
Gits- HA! I took a pic of exactly that but after seeing it I said "it's too dorky" so I didn't post it. It's also a bit blurry, but here it is:
Spoiler:
graven / Dr H- I can't take any credit for this one, it's just my old friend serendipity coming to visit again.
Syro_- Thanks you for the compliment. I'm hoping 2018 will have similar shining moments. Once I'm done with these builds I'm going to get back to painting. That's when the real work begins.
Geez man, I'm only 50. . As far as inspiration goes, thank you for the compliment. The same can easily be said of you. Not only do you have amazing (even bizarre) ideas, you are an absolute machine when it comes to building and painting. If I worked half as fast as you I'd have double the results I have now.
Slow progress on the Mantic buildings this weekend, ran out of clips again. This entire line frustrates me. The look is completely sci-fi but the assembly is unnecessarily complicated and I have little confidence in the longevity of any build because the clips can pop out easily, To get the model to feel sturdy at all I'm using double the number of clips needed. Without the extra clips the model feels loose and wobbly, just waiting for the opportunity to fall apart into pieces. I'm going to go through a lot of super glue on these.
When I wasn't spewing profanities about Mantic terrain I was working on my continuous reorg / space reclamation project and since no one has taken me up on my offer yet, here's some pictures:
Here you on the Mantic stuff, much prefer to build from scratch.
I could put in a request here, though I feel a bit daft, so will you accept trade, anything you are after? Did I read somewhere you are after some Chaos bits?
Anyway, I have a couple projects coming up, and could do with a few small embellishments, they are both Imperial, one is a Forge World Table, and the other is large Admech thingy, so if you have a few bits onm those lines we could arrange a swap!
To be clear, the Mantic stuff is completely my fault because I told my friend to buy it and I would build it for him. He bought it on my recommendation (it was an incredible deal on eBay), and since he's not as active in the modeling side of the hobby I also offered to build / paint it because I love to build and paint terrain. It is poor form on my part to be complaining about it, and the only reason I'm not going to edit my post is because if nothing else it may serve as a PSA for fellow modelers.
Cam- I'm not asking for anything in return except postage. That said, if anyone wanted to send back any of the following I'd be grateful:
- Helmeted heads from the original Imperial Space Marine plastic set (I need 6 total to finish my Ferrum Malleus chapter)
- "Khorne Skull" axe from the original GW Chaos Warriors plastic set (I'll take as many as possible, finishing my Chaos army)
- 40mm and 50mm square bases (I'll take as many as possible)
- Going way, way out here: if anyone has an empty (no foam) old-style GW case.
But again, NOTHING is expected in return, just asking postage be covered if possible. I'm glad to have the opportunity to see my stuff go to modelers that would have a use for it.
Just finished this thread through from the start - got to admit, the first few pages I was pretty "meh" but from about page 20 onwards I've been retrieving my jaw from the floor and taking all the notes I can. Some incredible work here and great to see the progression of skills - I hope I can accomplish the same.
So having seen what you've done here, I've cut myself a big chunk of MDF and am about to go glue a bunch of junk to it to create Research Station Skalk Six Alpha - hats off to your ingenuity and endeavours, sir!
Skinflint Games- Thank you for the compliment. I agree the thread does pick up pace as you go along. I'm surprised at where I am now compared to where I started. I enjoy your work as well. I especially like the basing effects in this photo. I've not been able to accomplish anything close to it:
Research Station Skalk Six Alpha - now that I've seen that name I'm disappointed I didn't think of it first. I'm sure you'll do something excellent with it.
Spoiler:
Looking for recommendations on which solvent / glue is best for working with polystyrene sheets. Please post here or PM if you can help me out. Thank you in advance.
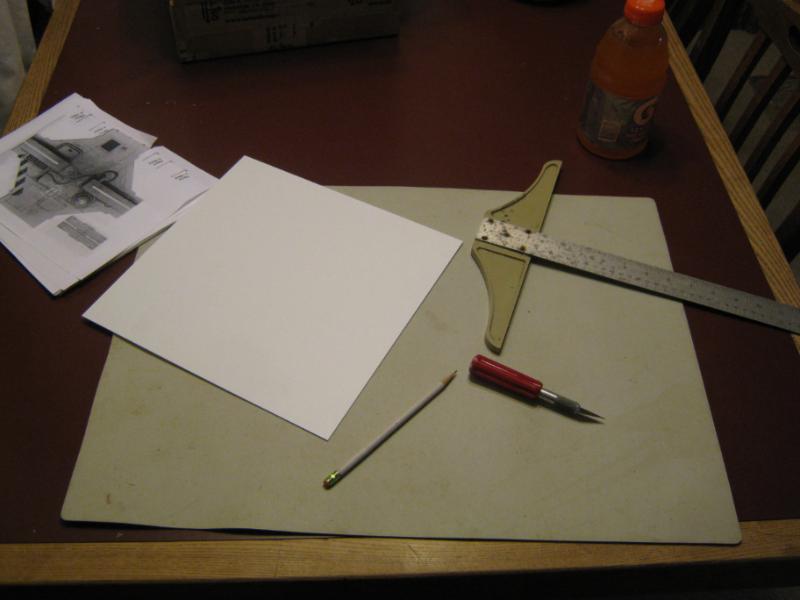
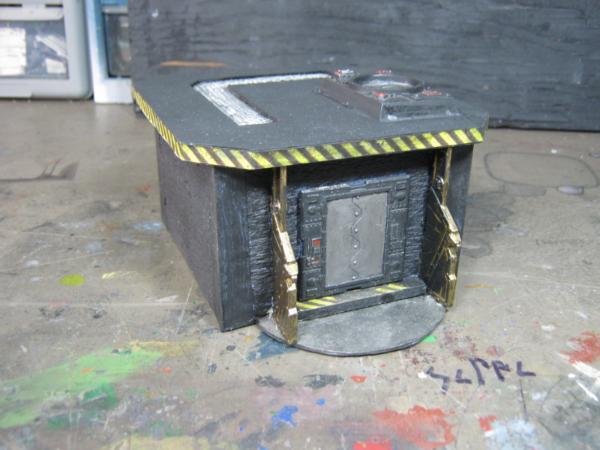
I've decided to join the newest LoER competition. If you're not familiar with it, link is in my sig below. I'm entering the competition to challenge my skills and gain experience. I have never tried creating a 100% scratch built and I've never used my airbrush. I've committed to do both in this contest.
The theme is "For The War Effort". The model should be something that would strengthen a military force and be a target for an opposing force. Examples given were supply cache, fuel/ammo dump, etc. In addition to competition requirements any project I work on must have relevance to my terrain collection, my ongoing gaming interests, and available storage space.
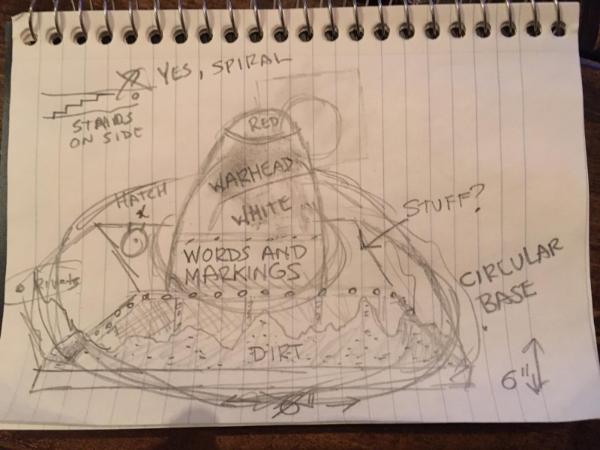
The concept I've chosen is to build an active and functional Imperial missile silo. This is the sketch I made while working out some possible details:
I decided on a square base. I'm unsure if I'm going to flock it like the rest of my models, I'll find out when I get to that phase. I'm building one staircase that will lead from the game table to the top of the launch platform. The platform will have individually cut plates and be heavily riveted. The silo doors will be "folding" doors that yawn open. The missile has challenged me and I have only one idea so far.
I worked on a "proof of concept" last night. I am happy with the results:
I haven't chosen which method (plastic rod or drilled / stamped recesses) I'm using for rivets.
I'm going to make an "emergency launch control" station that is connected into a utility access box. Partly for detail that exceeds my previous scratch build efforts, partly for an atmosphere of mystery to the model.
Because this is an armed and functional Imperial missile silo, it is going to be a clean build. Paint will be weathered for age. I'm going to find purposes for pipes and wires so I can add them for detail.
I'll be doing an extensive WIP here during this competition and I'll be sharing the minutia of my work here and a condensed version of the same update on the competition thread. I expect it will be an interesting project and look forward to seeing what comes of the next 2 months.
Skalk Bloodaxe wrote: Skinflint Games- Thank you for the compliment. I agree the thread does pick up pace as you go along. I'm surprised at where I am now compared to where I started. I enjoy your work as well. I especially like the basing effects in this photo. I've not been able to accomplish anything close to it:
Cheers Skalk, praise from a master is praise indeed! For reference, my flocking technique is stolen almost entirely from Mel The Terrain Tutor's flocking video - 45 minutes, but well worth a watch. He uses a 3 tone system, which I've pimped slightly using Garage Floor Dust - literally, swept up miscellaneous dust and grit from the garage floor, and it actually makes for a great effect when lightly mixed with flock. Give it a go, if I can do it, you can! Good luck with the LoER piece, can't wait to see this
Skinflint Games- Thank you for sharing that. I've bookmarked it for review later. It is something I'd like to try once I start repairing and replacing my fantasy hills and mounds.
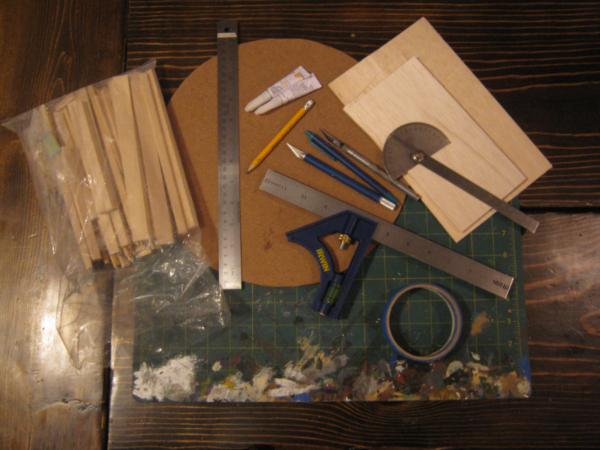
This evening I started working in plastic.
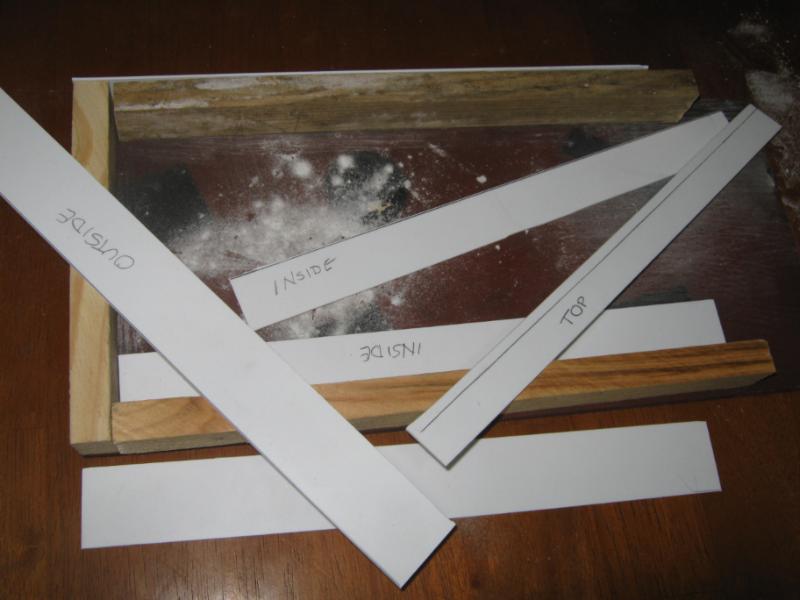
WIP tip- scrape cut edges. I always run a steel ruler over the edges of cut plasticard to scrape away the plastic that raises up and away from the cut. Scraping smooths the plastic flat and makes connecting joints easier and more effective.
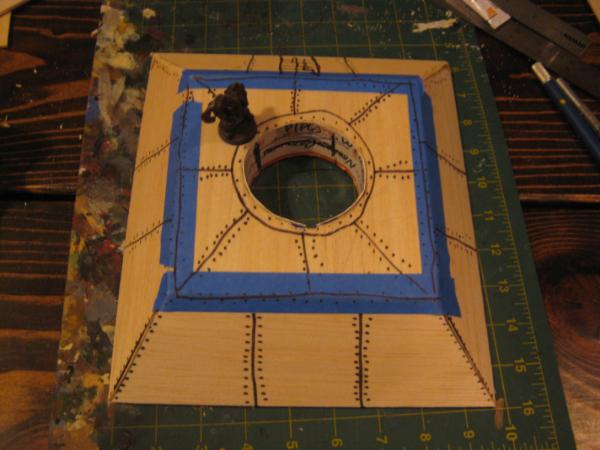
Basic shapes cut out and arranged:
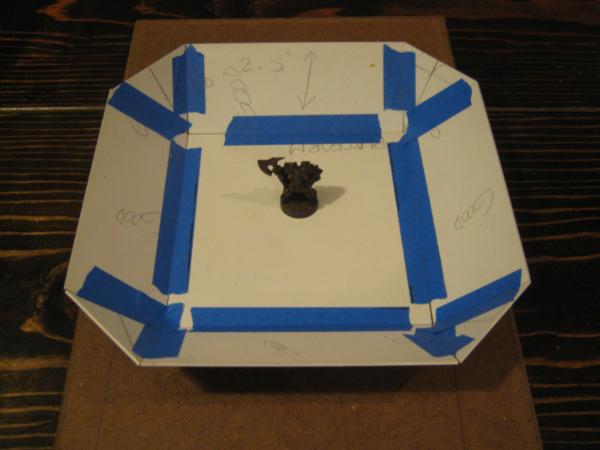
Temporarily connected plates using painter's tape:
Mockup of building:
I'd like to offer an acknowledgement of past advice that I've used in this project. From dsteingass - change blades frequently on my hobby knife.
If you are following the LoER competition thread you'll see that exact post there. Which means there's no reason for anyone to follow this thread anymore if I'm not providing some additional content.
Maybe a "behind the scenes" blog?
02/21-When I built the balsa PoC I knew I had made a mistake when measuring the wall angles, but instead of figuring out what was wrong I made adjustments to the sides and made it look right but it was an asymmetrical model. I knew I didn't like it but it was good enough to submit the idea.
02/22- This evening when I first pulled out the plastic I actually worked with cardboard for about an hour before I figured out what I was going to do. After that it went along quickly. I very happy with all the clean straight lines, proper angles, and a feeling of accomplishment. I've already taken a flat sheet of plastic and turned it into a 3-dimential structure.
I have a lot of challenges ahead. Biggest of all is I have only 1 idea on how to make a symmetrical nosecone for the missile I'm going to make, and that is to use a wood lathe. I may have one available to me and I think it would be awesome if that's what I did because I know it will be perfect. But if i do not... what do I do? It has to look clean, I cant have this looking like grain silo. I'm not using any prefab on this, even things like soda bottles etc. Everything I put on this model will have been made from sheet or rod.
Another challenge is long nights. I will start doing "next day" updates after this weekend. And on that note, goodnight. I'll pick this up again tomorrow.
You want a plastic finish. But you can always make a "frame" and line it in plastic. This gives strength and enables you to make adjustment.
For your nosecone. By extension, the above can be applied to this. Make a former. This can be from anything, a block of polystyrene, balsa wood, foam. Shape it and sand it into perfect shape. Then using either thin styrene. Or thicker material and applying heat. Skin the former. You could use fibreglass, you could also use putty, milliput would work. Then you can sand it down to perfection after.
Alternative to a former would be to build a framework.
Daft alternative would be to make a solid lump of laminated plastic and sand it down.
Providing you do not have anything too heavy going on. You can use a drill to rotate the item and sand it into shape. Similar to a lathe, but less hassle.
For the nosecone, I would get a large plastic easter egg, like a giant kinder egg toy or something (not an actual kinder toy, because as we know they're really dangerous in America... unlike some things). And I'm commenting on this here, rather than LOER, because I have different things to say
Vic- Having wasted reams of plasticard in the past and only having 5 sheets left in my collection it has to be perfect the first time I cut. The balsa wood and cardboard was a great experiment. It proved the idea, and also allowed me to make my hack and slash mistakes on something cheap. And speaking of cheap, other than glue this is a 100% "not buying anything" project. I'm using materials I already have. Also, glad the WIP tip was of use to you. I'll be trying to offer something every time I update my progress
Cam- Thank you for the foam idea. The balsa block is a possibility as well, I have some large pieces of it. I have thought about making a "lathe" with a drill and a bench vice. I also considered the skinning idea. The only option I'm not going to pursue is building it with strips of card. It is not a skill I would master in time to use in this competition. I have a vision of the finished model and I'm not settling for anything less than "mostly perfect". Mistakes will happen and compromises are inevitable but no matter what challenges arise the end result will be clean, straight, and appear intentional.
Graven- That is an awesome idea and under different circumstances I'd be on it (was actually thinking Leggs stocking egg) but my personal challenge for this competition is to do everything scratch build. The only things I'll be using on this model that I didn't create from sheet plastic or rods will be things unquestionably beyond my ability to replicate, such as jewelry chains and transfer decals.
Graven & Cam-
Spoiler:
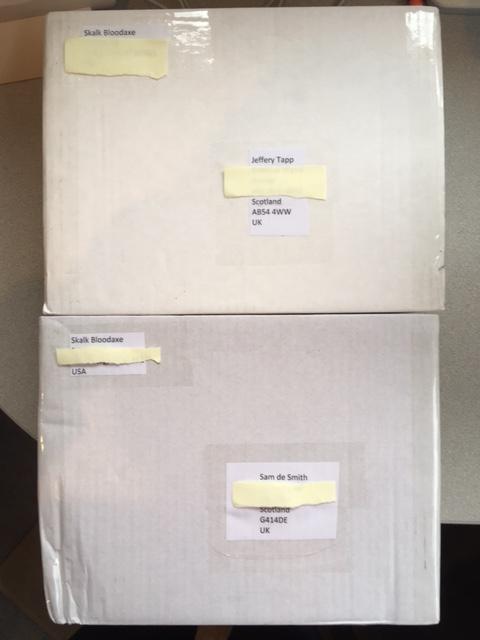
Supply drop inbound. I put "drugs and handguns" in the items description field. I'm sure it'll have no issue clearing Customs.
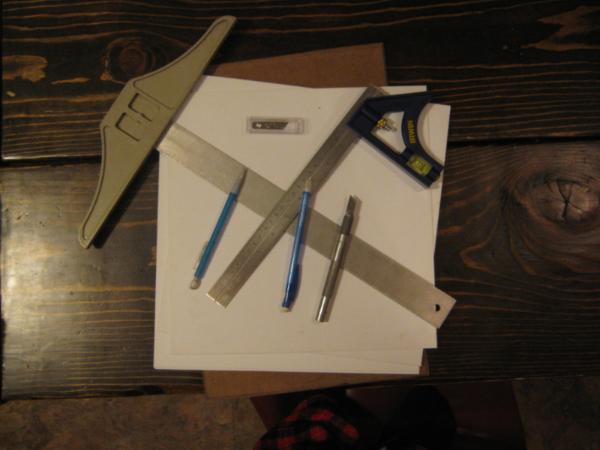
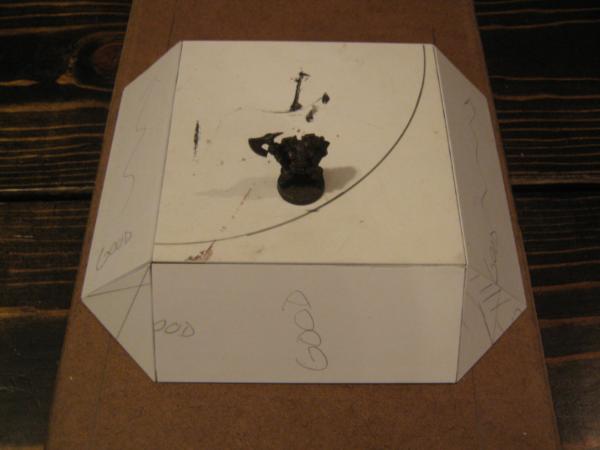
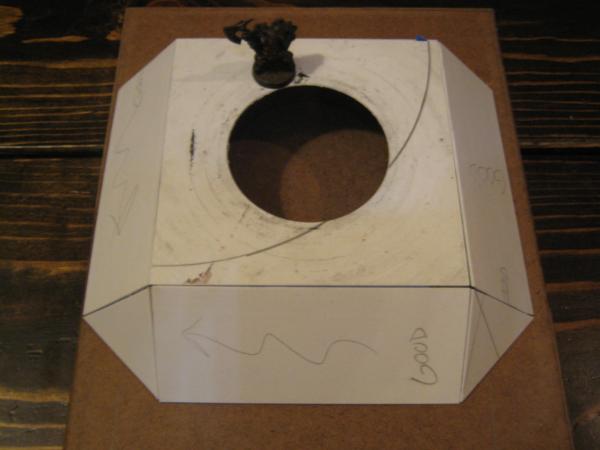
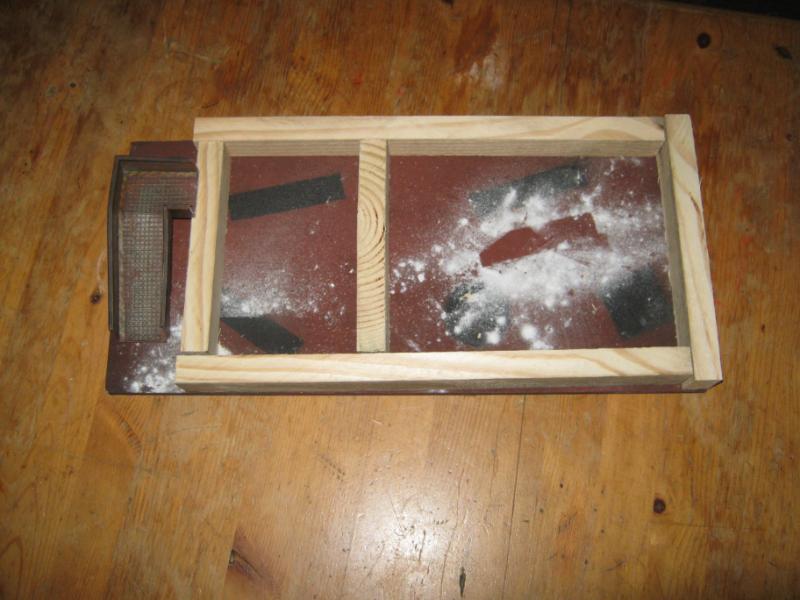
My next task is one that I've done before- cutting a circle from the center of sheet plastic. Here's how it went the first time I tried it. This post is from October 17, 2011:
Skalk Bloodaxe wrote: No pics in this "update" because I'm at work, but I got a lot of work done last night. I am working on this currently:
...and let me tell you, there's nothing that has made me hate doing this project quite as much as that piece. It drives me mad to think I'm going to cut 2 more of them. If you're curious why I hate it so much, try cutting a perfect circle out of the middle of .060 plasticard. Yup. That's why I am hating it. But I am sure the result will be completely worth it in the end and I'll forget all about the process involved to build it.
:
I did not forget all about it.
I'm sharing this bit of history to show that I'm not backing down from a challenge. I'm making this project my modeling thesis. I will draw from every experience good and bad, every lesson taught and learned, and push myself to master new processes. Everything I can control at this stage of the project is being managed as efficiently as possible. I've made sketches of all the different features I'll have on the finished model, created a step-by-step process to ensure nothing is skipped or done in an order that makes other tasks difficult, have listed necessary parts and tools for each task, and have a timeline of where I feel my progress should be at the end of each week. Some weeks I will surge ahead, other weeks I'll fall short. In the end I expect to have a finished product ready for display by the deadline.
I conquered a nemesis this evening.
WIP tip- circle cutters are excellent at exactly that- cutting circles. Worth considering if your builds involve portals and covers.
Mine is a drywall circle cutter and I used it on a scrap piece of pine (in this case my entire bench is scrap pine). I've pressed the center pin through a hole in the plastic and into the wood. The hole was pre-drilled in the center of the circle.
It took approximately 10 minutes of pressing and turning the cutter. I did most of my cutting on one side, flipped the plastic, easily finished. As perfect a circle as I've ever made. I bought this circle cutter at a yard sale with this specific purpose in mind. I'm happy with the results.
The "10 minutes of pressing and turning" part seems long but I was being cautious. I used moderate pressure and went around the circle dozens of times. Likely the same results could be made in less than half that time.
This evening was a combination of something I hadn't ever done and something I hadn't done in a long time, which was math. It seems my brainy parts still work. Figuring out how to do this was fun, and seeing the results validating.
While I was doing thinky stuff I also determined the circumference and converted into liner inches to start work on the interior of the missile silo. I'm using a thin plastic sheet that will easily roll into a tube. I'm using the circle plug I cut out of the platform as the base of the tube. It will add stability and camouflage the true depth. I'll also be starting my first detail work of the project in the tube.
I am very happy with this. It was an excellent evening.
For the missile nosecone: I'd either find something in one of my junk boxes that fits "close enough" or cover a "something" in putty and shape and sand it to perfection.
The "something" would be a piece of junk that is not quite "close enough" or a lump of foil / card / scraps of plaster etc.
Dr H- Thank you. More options = higher probability of success.
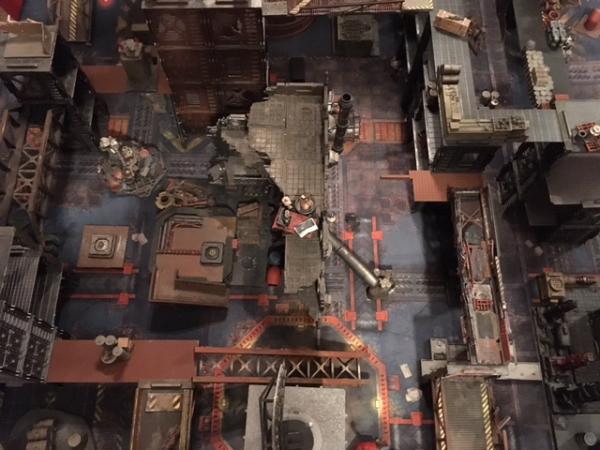
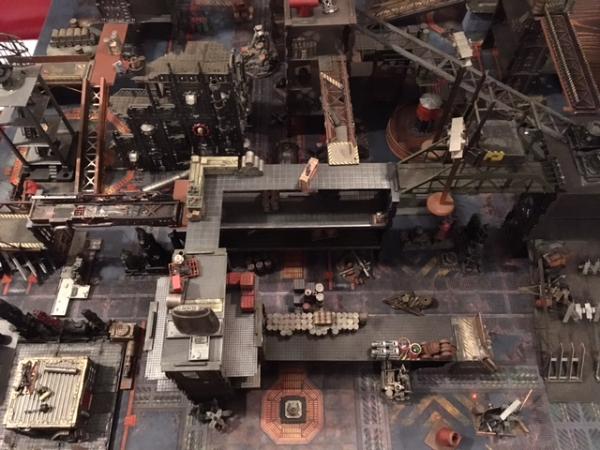
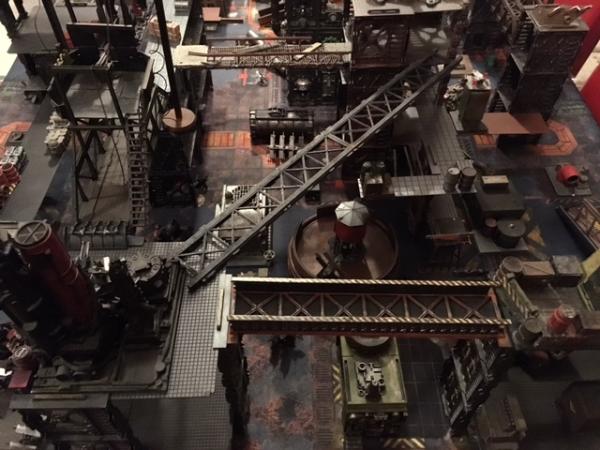
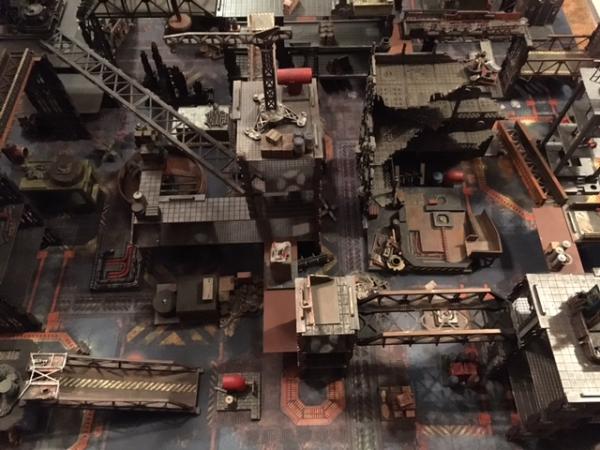
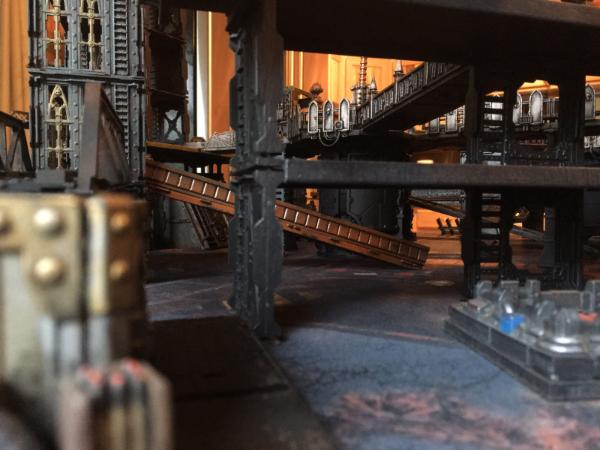
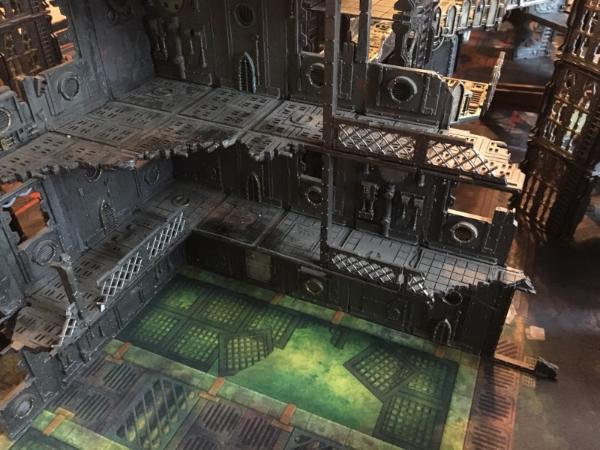
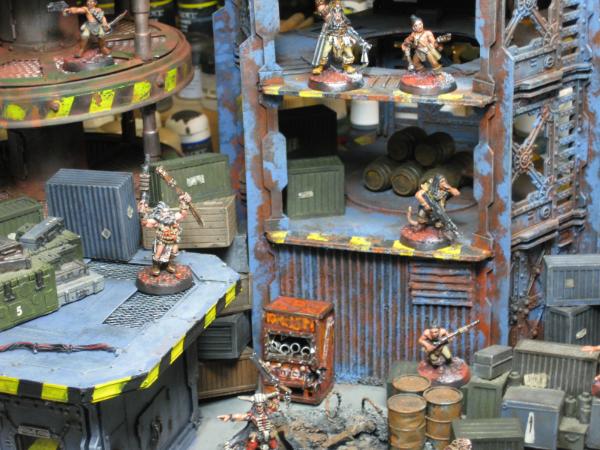
No progress on my entry and the Mantic clips just showed up today so nothing new to share. Sharing some old stuff instead. Here's a series of shots from different Shadow War- Armageddon games. Almost everything in the photos has either already had more work done or work pending once I get back into painting mode. Much of this was done just to get it on the table for a game. The mat is from Frontier.
That's very impressive. Mats and scenery don't always gel well together; these look like they're part of the same set, especially the bottom right pic.
graven & bob- I agree that many mats don't work for such things, thank you for noticing my effort to make it as cool as I could. I have embraced the age of mats for quite a few reasons:
1- Storage. You've seen me mention this before. Storage space a premium and it's far easier to store a 4' x 4" tube than a 4'x6' table. I still have my original 4x4 Necromunda board that that I refused to let go of and that is property flocked with ash waste gribbly dirt. I also have three 4'x2' plexiglass sheets that fit on my kitchen table. I roll the mat over that.
2- Variety. I play a number of different games that have different settings. I prefer to have my table match the settings. Having a grass-flocked table would be great for AoS but not so much for Necromunda. And again, storage. Even if I had the inclination to build tables for different games I'd have no place to store them.
3- Accidents. Drop a miniature from 12" onto my Necromunda board and it's broken bits and scratched paint. Drop same miniature onto the mat and it's a bounce. Super glued bits might pop but the damage is always less than same incident on a hard table.
4- Presents. Someone won't buy a new 4x6 sheet of plywood and flock it for me, but they will buy me a mat.
5- Portability. My game group is playing an AoS campaign and to mix things up people bring different mats to play. It's a quick way to totally change the landscape from game to game.
6- I can't think of a 6th reason but I'm sure there is one.
7- See #6
Of course I'd rather a permanent war-torn Hive World ash waste tabletop (quoting myself from the very beginning of this thread- " I wanted my terrain to look like the Grimdark had partied in my game room and passed out on the table." My circumstances do not include a permanent game room that can stay set up 24/7 like I used to have. This is my best case scenario and I'm fortunate that it's as good as it is.
No photo update, just some info- almost finished w/ the Mantic build which means I'm about to transition to painting and detailing. I'll still be working on my LoER entry but I'm really trying to push to Mantic models out of my hobby room.
And on completely unrelated note, happy anniversary to me! I joined Dakka 8 years ago today.
Game Mats UK really has some nice designs... but I've not contacted them because of what I assume would be crazy shipping costs. I should probably see if they have a US distributor...
I solved the perfect circle problem by using very thin MDF instead of plastic for the actual floor. The MDF will be the sturdiest part, so you just trace, cut and sand all the copies together
That was the ONLY way I could make the removable top roof also out of MDF, the MDF kept everything else true. All the bulkheads do is keep the layers level.
Oh, and I made my shape more hexagonal, got rid of the longer side.
Your table is STILL the absolute best-looking table I've seen! and you Keep improving it!
Gits- Thank you for that company name. It's $76 for a 4x4 mat with 5 day shipping. It's comparable with other mat prices I've seen. Really cool designs. I almost bought this when I was on that site.
Dave- How did you cut the MDF? And thank you for the compliment.
Dr H- Thank you.
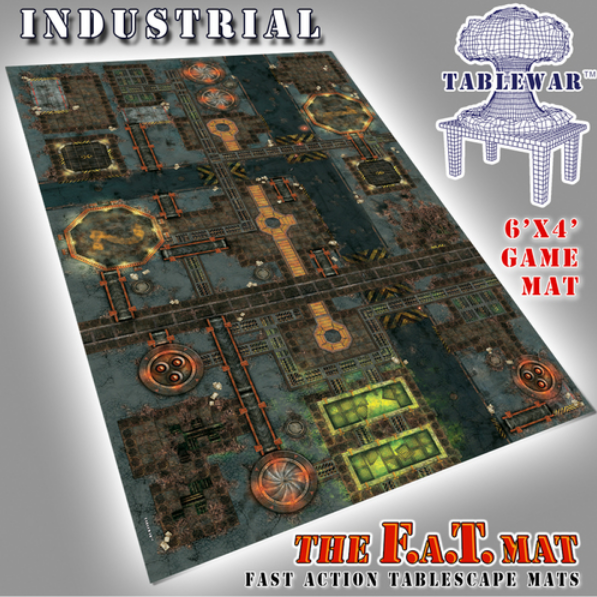
In case anyone is curious, here's the mat I use for Shadow War (and soon Necromunda)
I'm happy to say the main build of the Mantic project is complete. Last night was supposed to be game night for my regular group but with poor weather and other considerations I stayed home and used that time for hobby work.
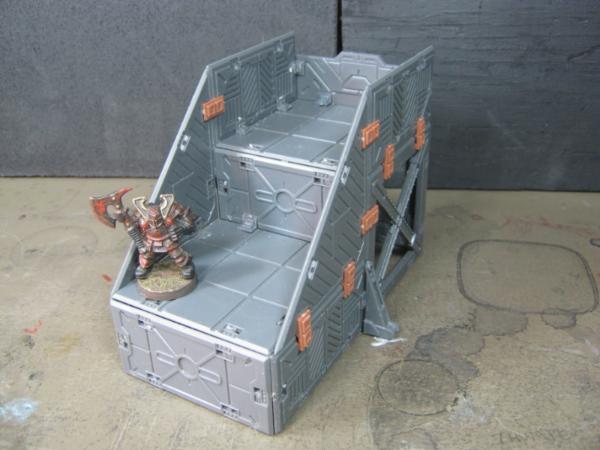
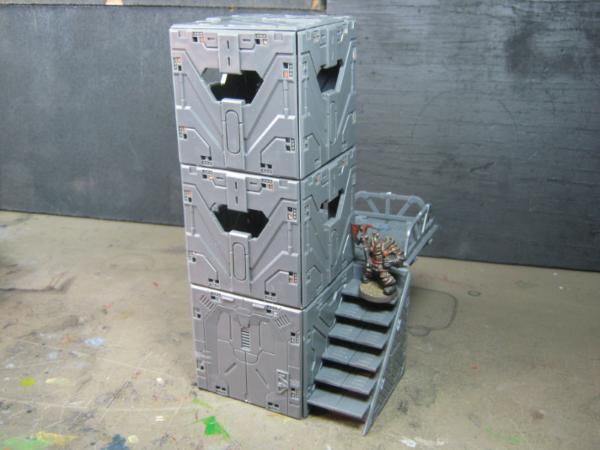
First thing I did was tear this ridiculous thing apart:
and rebuilt it as this:
I am much happier with this result. The intent of this was to make it look more Shadow War / Necromunda than the other pieces I've build.
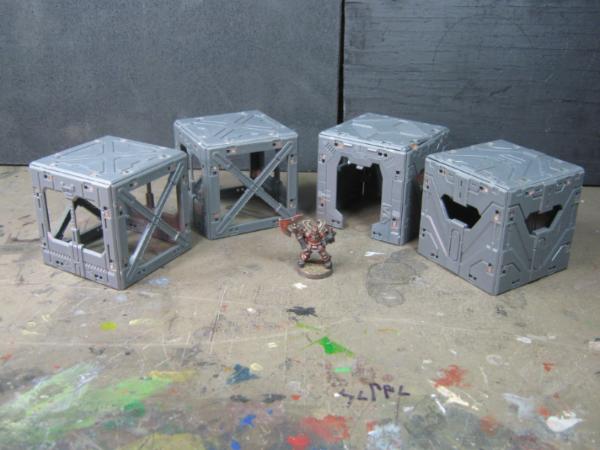
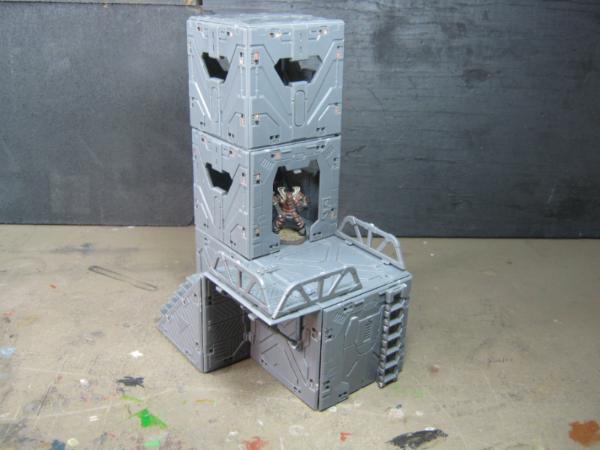
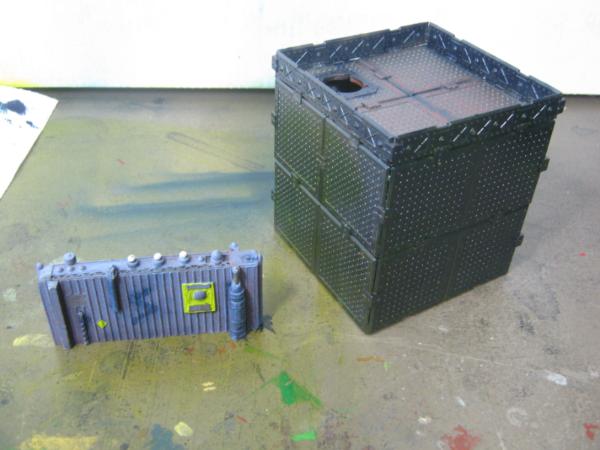
I also tore apart this ridiculous thing:
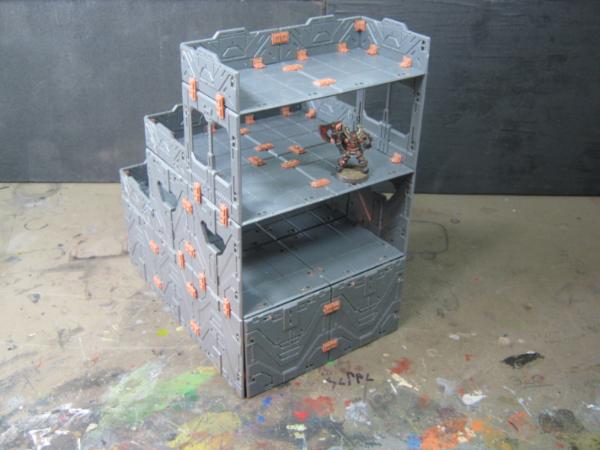
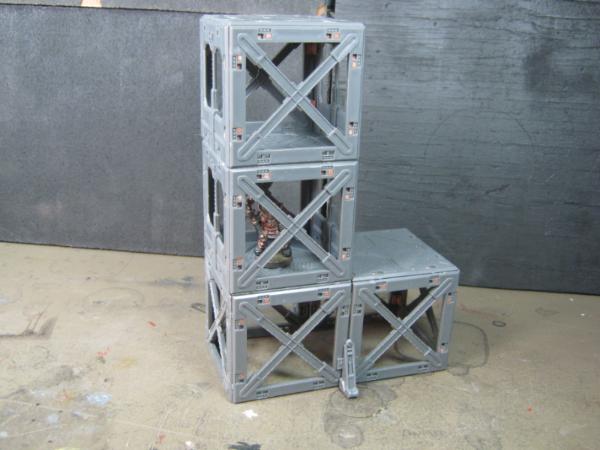
and reused everything from that model and spread it out over the next few builds that I like much better. Intent of these is to block LoS for "Hiding" and offer cover. The cubes were built because I was short on flat clips and suitable floor / roof panels.
I really like this one so I took a few extra pics of it:
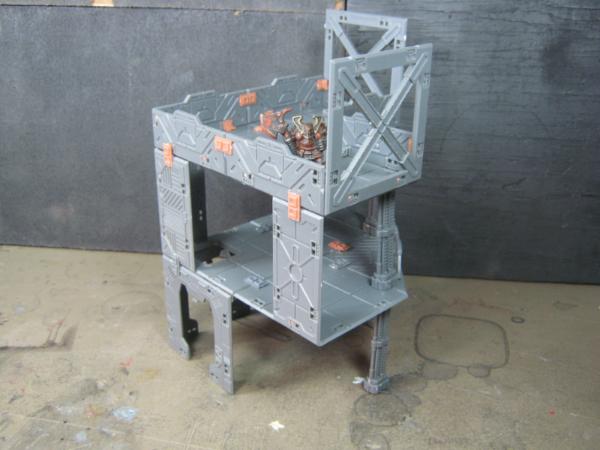
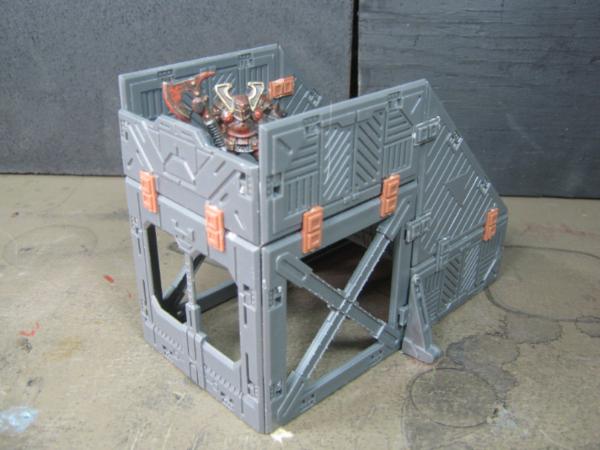
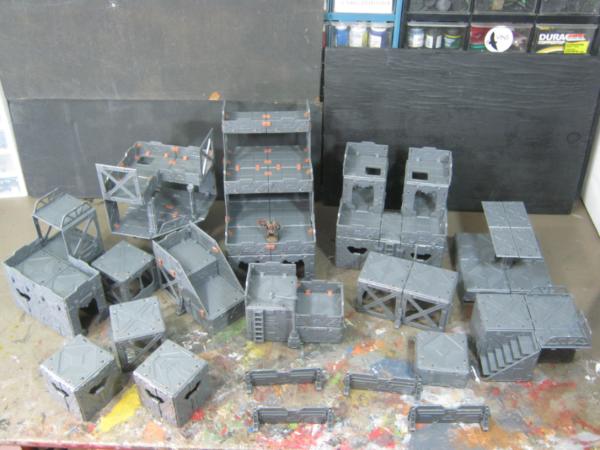
Next is the largest piece in the collection. I will be reinforcing the interior of this model with some rod.
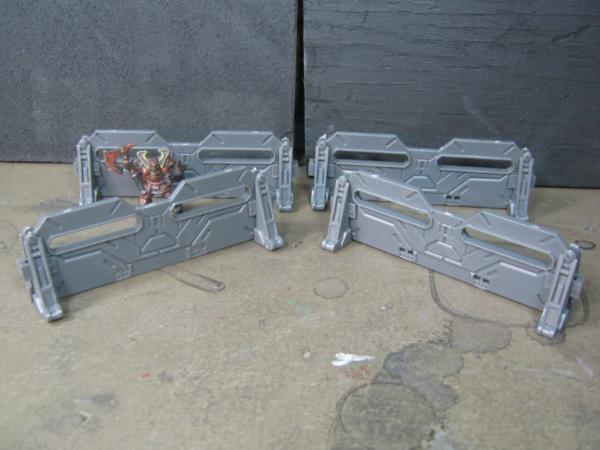
And finally, barricades. I could have used these in the buildings but I made one of these to satisfy my curiosity and decided to keep it this way:
You know I'm faily organized and do not like "bomb blast" clutter, so no surprise that I cleaned up my desk after I was done. While I was moving things around I stacked the completed builds on one side of my desk to clean the other and I suddenly realized that completely by accident I had built the pieces for awesome modular terrain that can change every game:
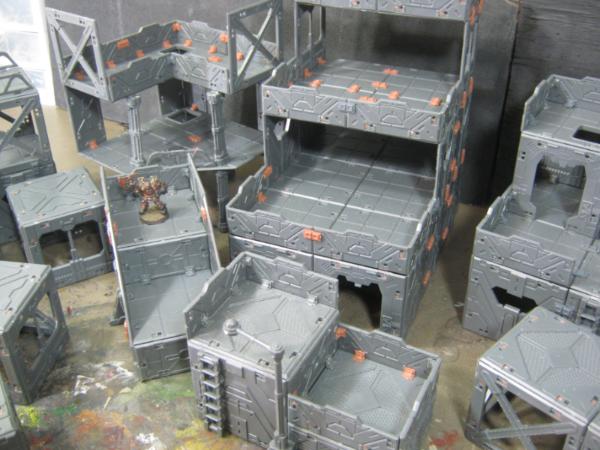
Here it is all together. Plenty of W40K terrain for sure, and with his other terrain this is a great setup for Shadow War and Necromunda.
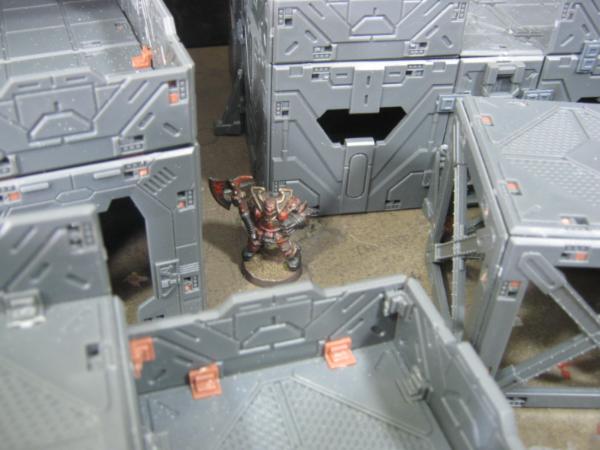
And because I enjoy doing this, a few "live action" shots:
So that's that- build phase really is complete. This was not a great build but I am sure the result will be completely worth it in the end and I'll forget all about the process involved to build it.
I still have all the gribbly bits like crates, barrels, and random junk piles (anything that didn't get used in the build is becoming scrap). Once I have those sanded I'll post a pic and then get to work painting.
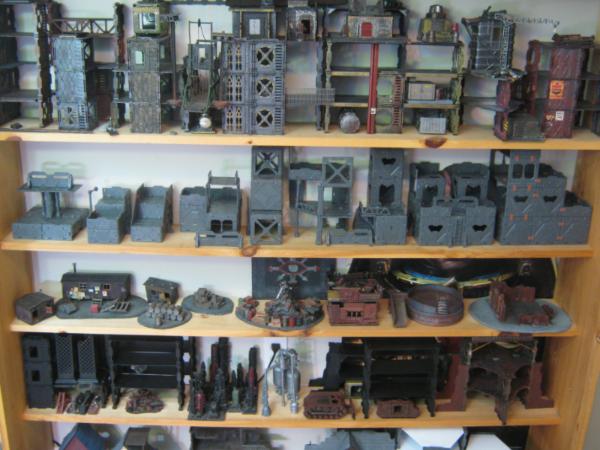
I have cleared off a shelf where I'm storing these until they are done. Exciting news of this is I got rid of enough stuff to open up this much space (an entire shelf) so once the Mantic project is done and dropped off for my friend I'll have an entire shelf to fill up. I'm not done with terrain quite yet it seems.
And a full shot of this shelf:
Usually I prefer to keep my completed and WIP projects separate but in this case it was necessary to make sure everything had a home before it was built. It does lend some motivation to finish projects. The more I finish the better my display shelves look. I'll take pics of the other shelves at some point.
Firing up the airbrush today. Not excited about it but it's time to start practicing. I have a lot of catching up to do for the LoER contest. I'll update with pics later.
Apollinaire- I appreciate that. Carpentry has always been an interest of mine but I tend to build everything "Da' Orky Way" because I lack proppa tools. This was a circular saw and a regular drill w/ a Phillips bit. This spring I intend to add quarter round (for support) then haul it outside and stain it. Something light that doesn't obscure the natural wood, but give it a "finished" look instead of a rough build that's going on 6 years of "good enough for now".
Cam- Thank you. I would call it the Shelf of Awesome but it has too many unfinished projects on it. That is going to change in 2018 though. Read on, dear friend, read on....
graven- Once I've earned that tag I'm going to sig it.
Alaricuk- Thank you for the compliment, and offer one in return. I checked your gallery and I cannot find the words to properly express how stunning your work is. I'm looking forward to seeing whatever you share next. Hoping to see the Craneblade w/ some paint.
Syro_- More stuff coming for sure. Finishing old projects is my main focus going forward.
On 12/14/2012 I posted this:
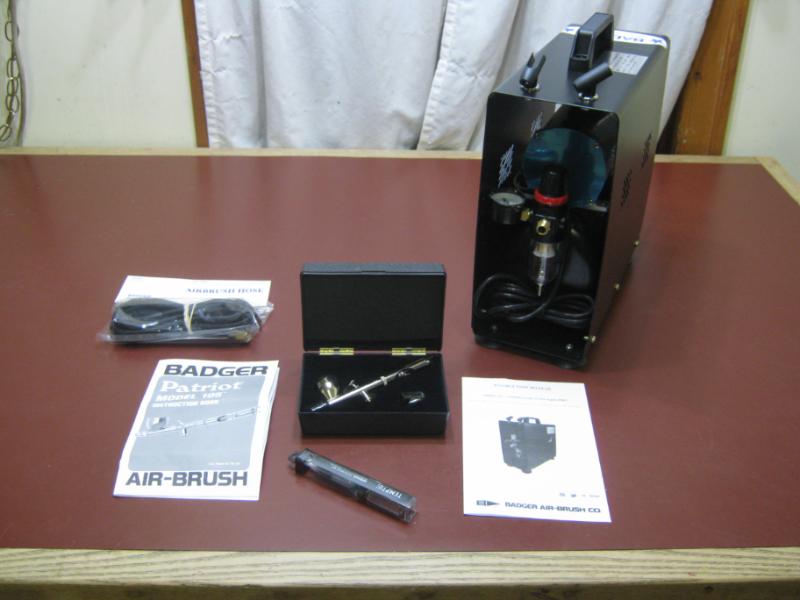
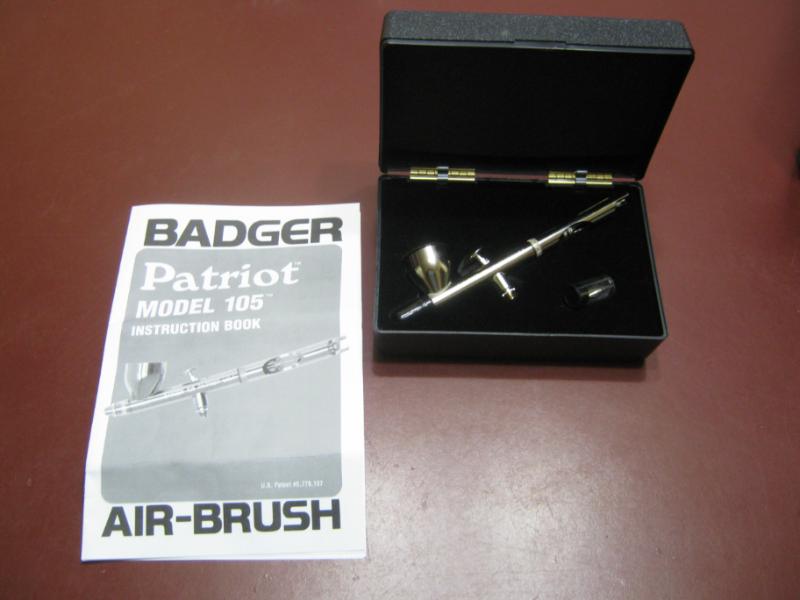
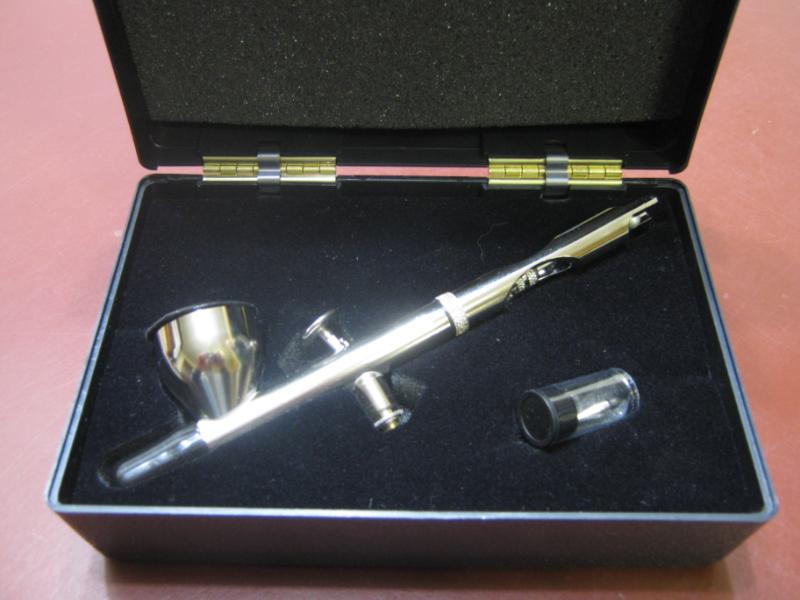
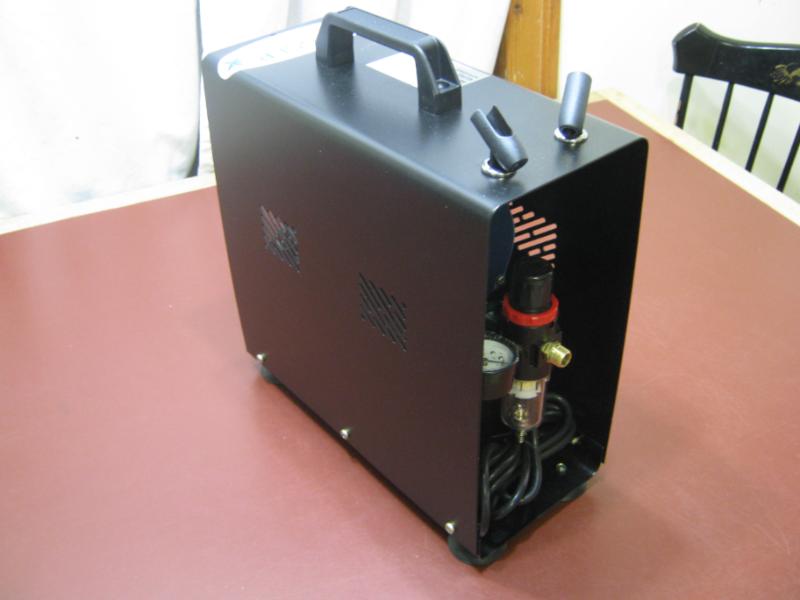
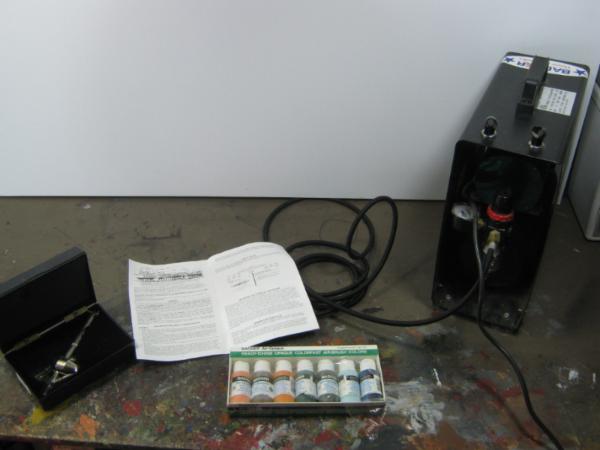
Gentlemen, I proudly present the tool that will catapult me to the next level of modeling:
The compressor is a Badger TC910 ASPIRE PRO, the airbrush is a Badger PATRIOT 105 (in case you didn't see the name on the manual, ha), the hose is Badger 10' Heavy-Duty Braided Air Hose, and the cleaning kit is from Temptu.
Hopefully I'll avoid some of the airbrush n00b frustrations because I invested into a high-end product. All I need now is time to practice practice practice. I'll share my failures along the way so there's a history of my improvement as I become more familiar and skilled.
HUGE thanks to Dave for his recommendation, advice, and support. He truly exemplifies the spirit of community I enjoy on Dakka. LoER forever!
As always, thanks for taking the time to check this out and I appreciate the interest. C&C always welcomed. The experience you share helps me (and anyone that reads this blog) become a better modeler.
Today is a good day.
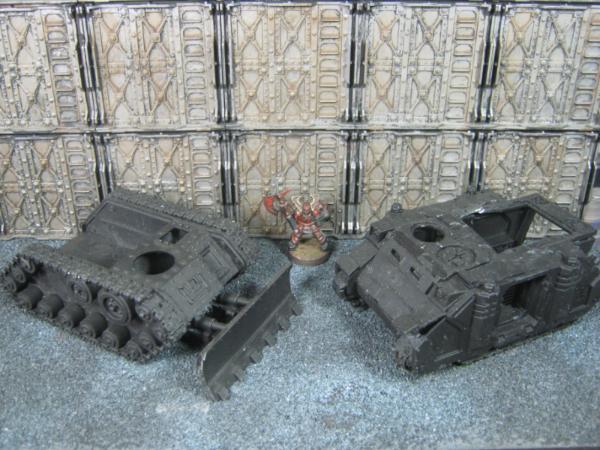
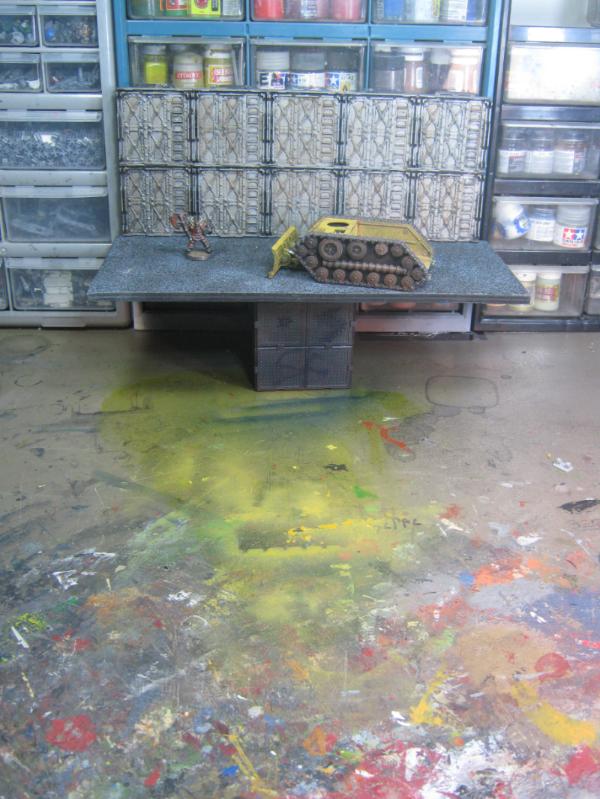
I tried it once in Jan '13, failed, put it away. This weekend I decided to have another go of it, this time with proper paints.
Before doing anything else I took advice from my IT idol Roy and RTFM from cover to cover. Once I was done went back through it step by step. This is what I tested on. Yes, I should have tested on paper like the instructions and helpful people advised, but I didn't. This was the result:
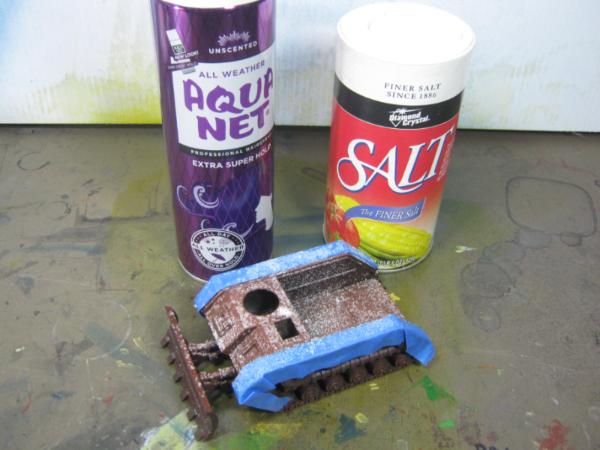
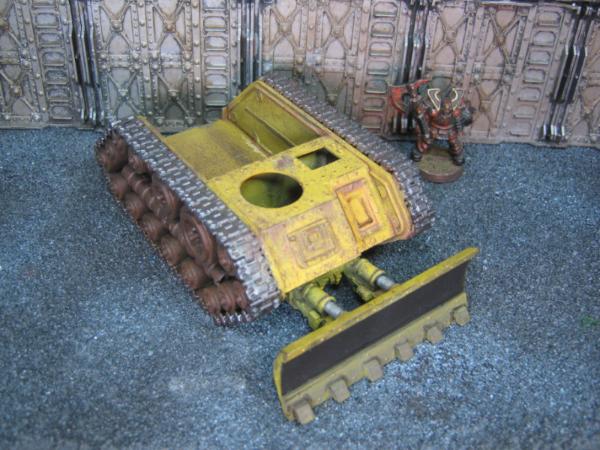
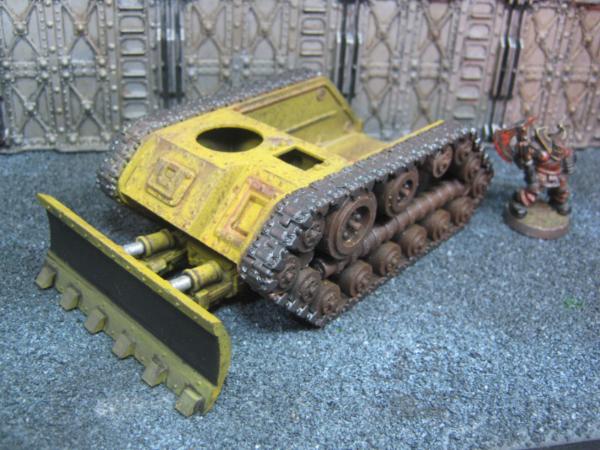
With that 5 minutes behind me I knew I was ready for the big time. I grabbed a suitable candidate for some work and pulled out some old weathering friends:
This is how it came out:
I used rattlecan anti-rust primer as my base (ironic I think) and Vallejo Filthy Brown paint. I used a yellow tone becasue it's industrial heavy equipment and I like to think that 38,000 years from now CAT yellow is still the standard. Next pics detail weathering etc
Mistakes-
(1) tried to remove salt too soon and washed off paint as well as salt
(2) defaulted to a brush too soon and "weathered" the tank in illogical locations
(3) used fine grain salt, forgot about this from the first time around
(4) should have painted the entire thing but I didn't think of it at the time.
Triumphs-
(1) IT WORKED!!!
(2) old wear / tear weathering technique still gives decent results
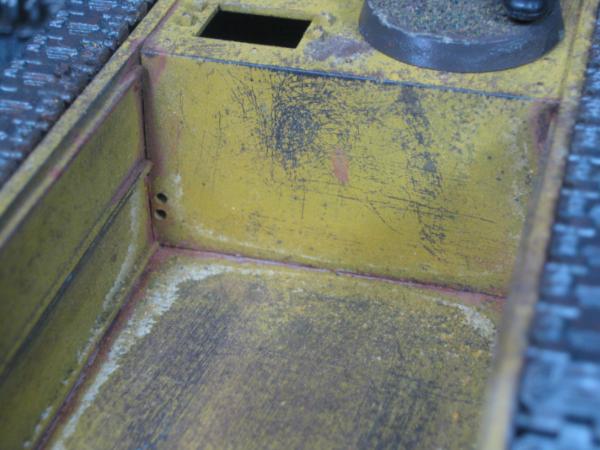
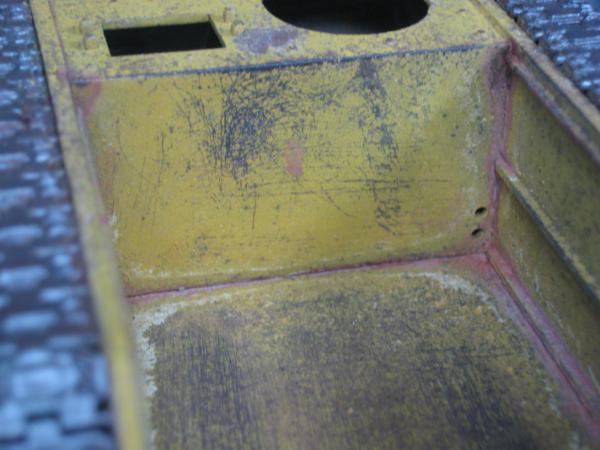
(3) homemade "rust" wash with a bit of salt in it leaves a really nice effect (see cargo bed)
I'll be going back over this model again when I start painting the Mantic stuff. I'll be spraying caution lines on the barricades and will do the sides / blade/ fix other stuff at the same time.
My hobby world has again changed forever. Everything I've been waiting to finish, everything I've wanted to improve, everything I've been afraid to try... it's all within an easy reach now. I could lament the time I didn't use this tool but no good comes of that. Instead my energies are dedicated to motivation and results. I've been happy about a lot of things lately (cutting a perfect circle, finishing the Mantic project, etc) but this is far and away the most awesome modeling thing I've done in a long time.
And finally, a pic of the new mess I've made on my painting desk. I'm looking forward to it becoming worse and worse. I'm very happy with everything right now.
congratz mate... for me the first time AB usage felt like using my virginity anew too
when tech and skill work in unison it feels like a true leap for the hobby ...sadly often it doesn´t...but when it does...my mood is through the roof^^
OneManNoodles wrote: My airbrush has been a real game changer for me when it comes to painting vehicles and terrain.
The tank looks great! After reading: dsteingass's tutorial I've been itching to give the salt technique a try.
completely wasted my time with cheap ebay airbrushes, couple hours on youtube looking for the best one for all round and found badger 501, godsend, so easy to use and clean, when I think of all the frustrations of blocking, cleaning etc etc wished I had gone straight for a higher end one,
Excellent first go. Really great on the weathering. Yes there's room for improvement, but it's a great start.
I invested some time ago and enjoy using it, but find it to be a tool, nothing more. It is not the gift of the gods. I mean I know its good, and there are things that can only really be done with an airbrush, but it has issues. I use it the same as any tool. When it is the tool for the job. Still the vast majority of my work is painted by brush. Maybe that's why I am so crap.
That's a great result for a first try. Airbrushing does get easier the more you use one.
As for the paint lifting off with the salt removal, remember that a layer of airbrushed paint is much thinner that what you will do with a hairy-brush. It's easier to scratch through to the undercoat, so you need to account for this in handling, varnishing, and curing times.
I just finished getting through your entire blog. A lot of enjoyable terrain to see. As a relative newcomer, I didn't realize how just how long you had been away from dakka, since I read lots of old threads. Keep up the great work, and I'm off to read your "junk wall" terrain challange
Still haven't got an airbrush for me the way I like to paint, little and often with several different batches of sometimes wildly different things at seperate stages makes it less useful to me. Although I am hoping to see your Nurgle return with this!
I'm blaming you for this, Skalk - this is what we've spent the last month and more on!
Behold - Skalk Point Plasma Substation, named for it's inspiration:
The build was a hell of a job, and I have a new found respect for all you terrain builders out there - we learned a lot, but there's definitely more detail we can add, so this is a "finished for now but ultimately WIP". Wanted to share it here as it was this thread that inspired us!
Vik- I agree. When creativity and technology join forces the results can be excellent. My resukts have been decent enough to keep me interested in continuing.
Noodles- Thanks for the compliment. Salt weathering has been my friend for years. Dave perfected it in his last tut and I'll be digging into that again once I get back to my 41st Millennium terrain projects.
bob- I read a lot of horror stories re: inexpensive airbrushes. I'm glad to have avoided those issues by jumping ahead. It's said that a bad carpenter blames his tools, but sometimes it really is the tool.
Cam- Thank you. It's been a while since I tried detail, I've been busy finishing builds and getting basic colors on the model for "good enough for now- it's game time" play but detail is my goal for winter 18-19.
Gits- I'm sticking with it and I'm looking forward to learning some of the advanced tricks for weathering and highlights.
Dr H- thank you, and I've at very least learned that "mostly dry" is not dry enough for any sort of handling. I have quite a few models right now that could be used to positively ID me via fingerprints. But if I ever need to prove a model is mine I'm all set!
Syro_- Wow. Thank you for that, I do appreciate it. A lot happened here in the past and I expect I'll have more to share in the future. I'm not always here but Dakka is my wargame modeling home.
Llama- Nurgle... man I would love to go that route again but I've actually culled that collection massively and I don't see myself returning to it. Mad fun when I was in the middle of it but I really do consider that one done.
Monekytroll- Thanks friend Great to see you around again. Sorry it took me a month to get back here.
SFG- Wow! That is really cool! I really appreciate it. I especially like how you made somehting functional out of random bitz of this and that and made it into functional and great looking terrain. I am genuinely honored by the dedication.
Cam (again)- Sorry. See below.
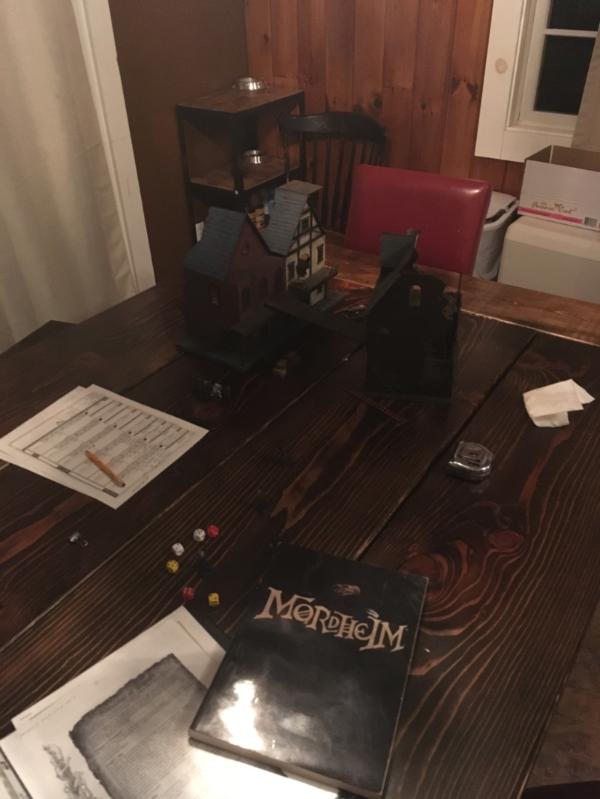
For anyone that read this on my "everything else" thread, apologies for the dupe but I should have updated this thread a long time ago and am just getting to it now. I have been flat out in the best ways possible. My game group is finishing up the AoS Firestrom campaign (I am dead last with not one victory... ) my buddy Jayce and I have been dabbling in Necromunda (hereafter referred to as N17) and I've gotten over my complaints of it, it's an excellent game so far and we're going to be moving to 3D soon. Shadespire is an occasional distraction, I'm not into it much (again, no victories and I don't like the models) but a buddy of mine bought it for me because he really wanted me to play it. So I'm at least respecting his gift and really, it's about the camaraderie. Another friend has started a D&D 3.5 campaign and really needed someone to fill outn the party so there's that as well. We just finished up Blood Bowl seasn 2 and season 3 is right around the corner, we're all playing goblin teams this time and I expect it to be frustratingly hilarious.
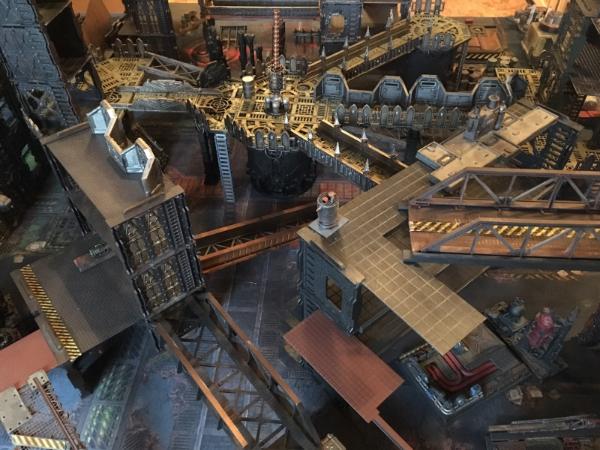
Let's see... what else... oh yeah. There's this going on...
I merely mentioned to my game group that I'd like to try it again at some point. The response was immediate an unanimous- a first for us for anything! I am so happy right now I can barely contain myself. Sleeping has become a nuance (I have modeling to do!) and the only reason I go to work is so I can continue a revenue stream to support my addiction hobby.
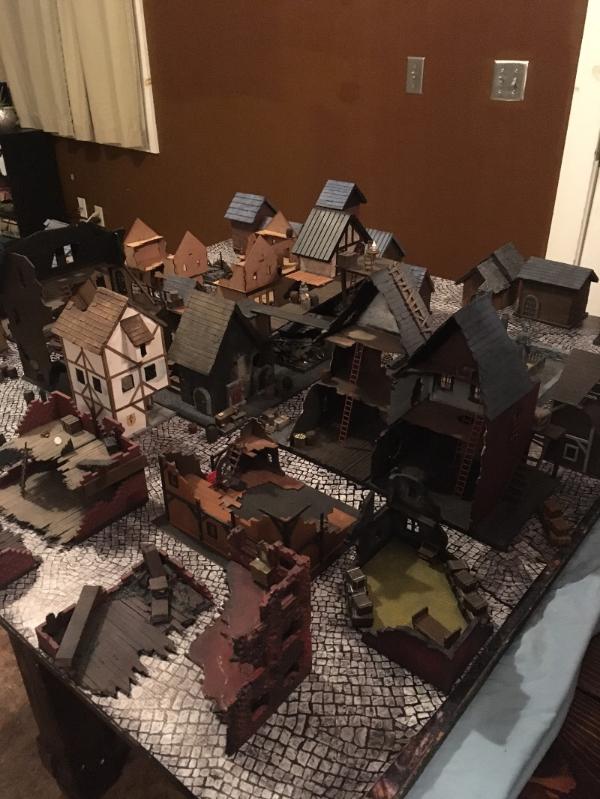
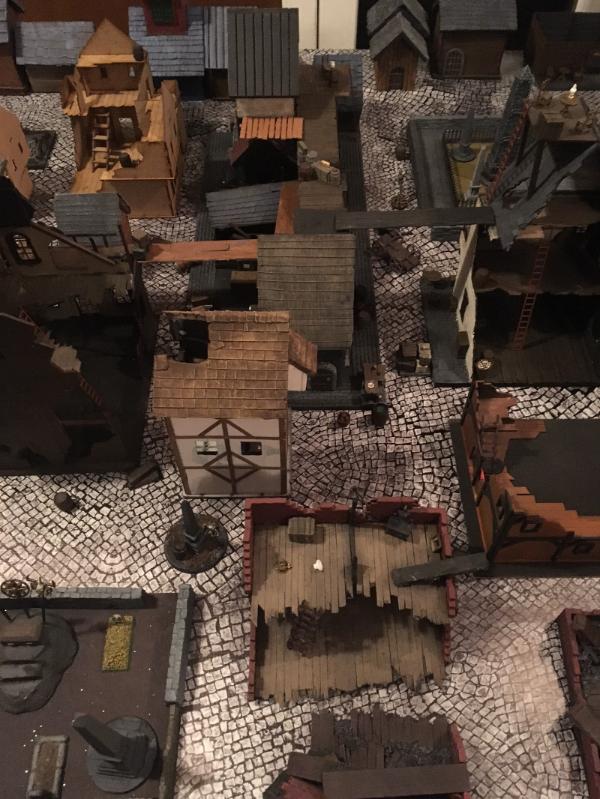
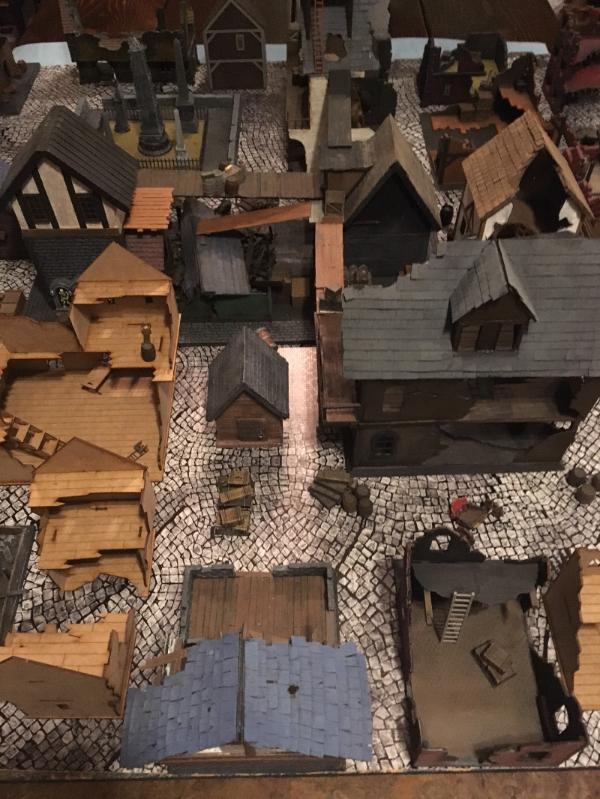
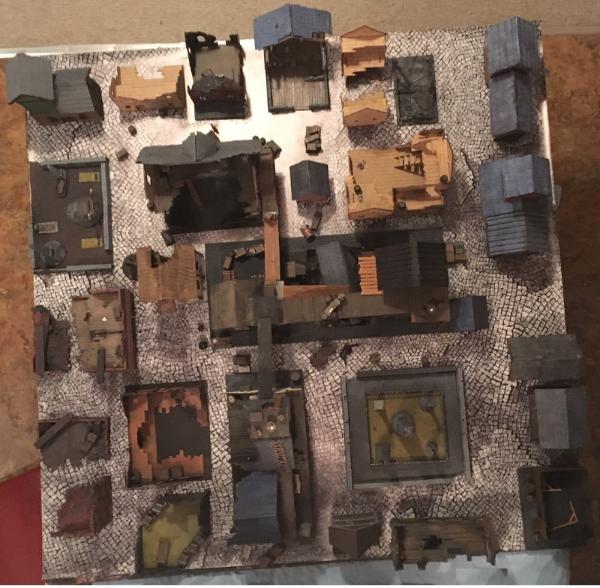
Here's a few glory shots of a table setup form about a month ago:
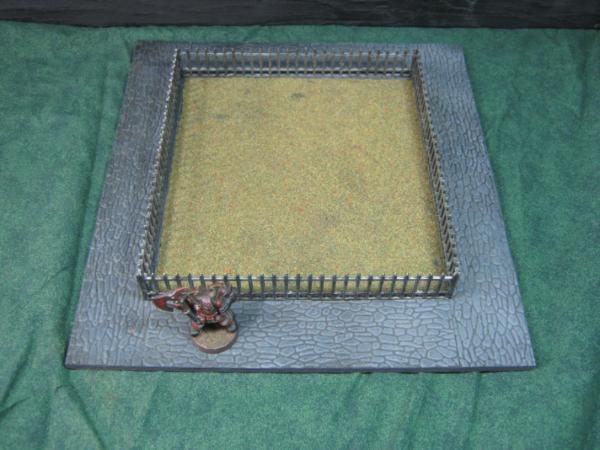
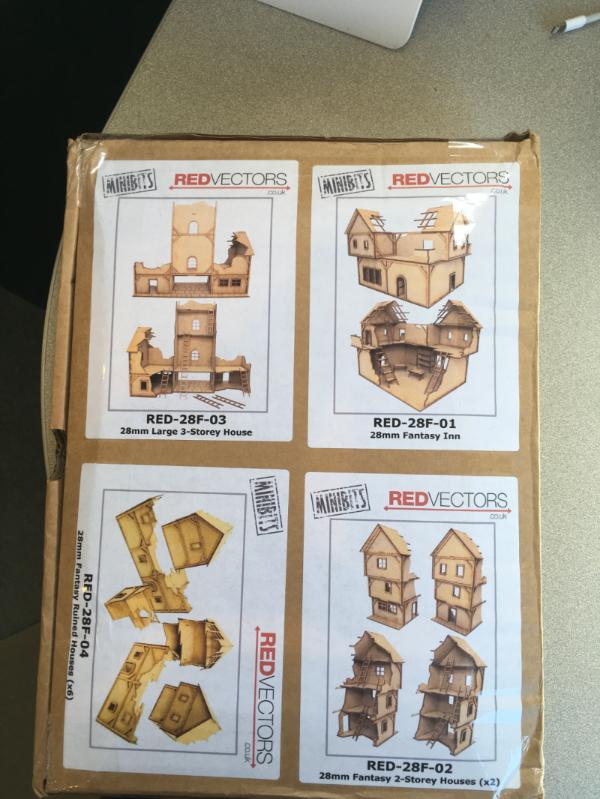
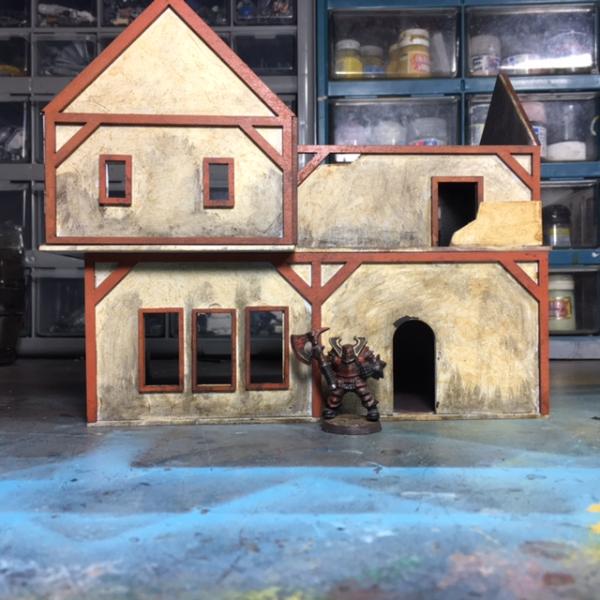
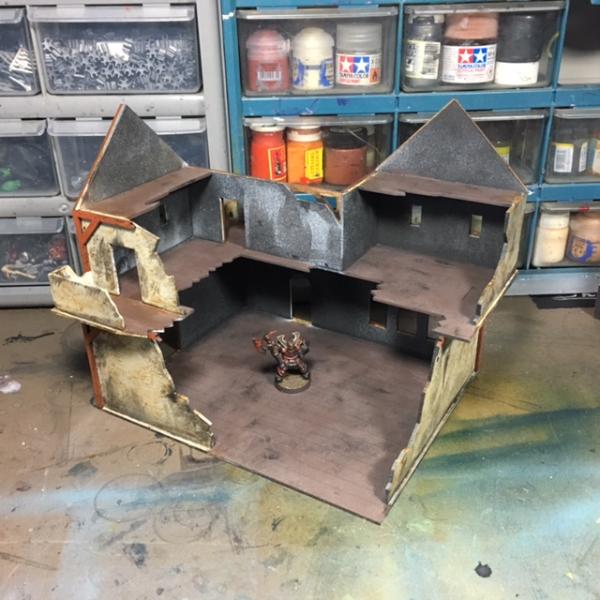
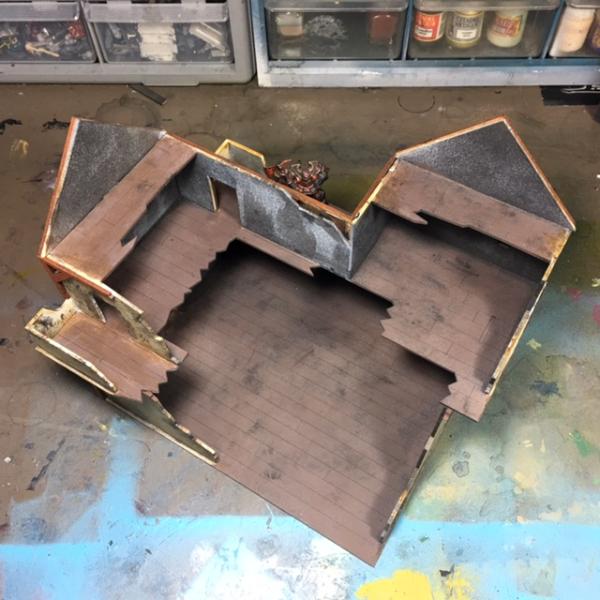
A couple building in the pics above are from this MDF kit:
It's fairly awesome, only complaints are no instructions, and it's not true 28MM, more suited for 25/20mm.
That said, no one is going to care about a doorway they have to duck through, the models are awesome.
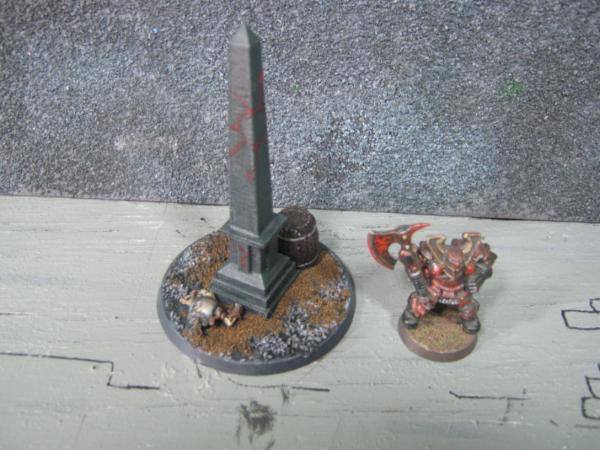
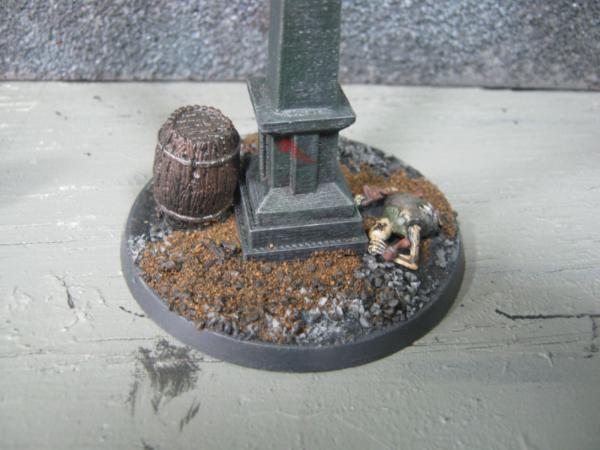
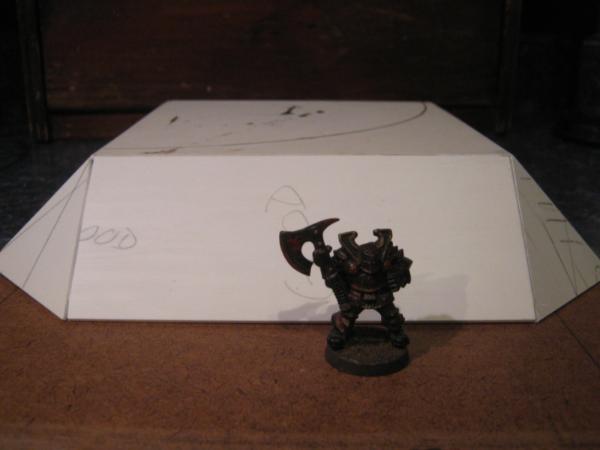
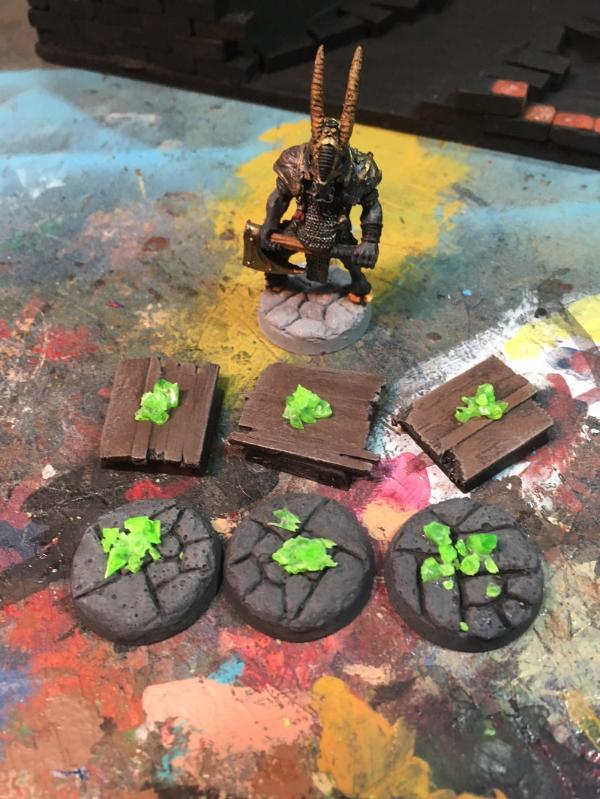
Speaking of awesome models (ha) I made some wyrdstone counters:
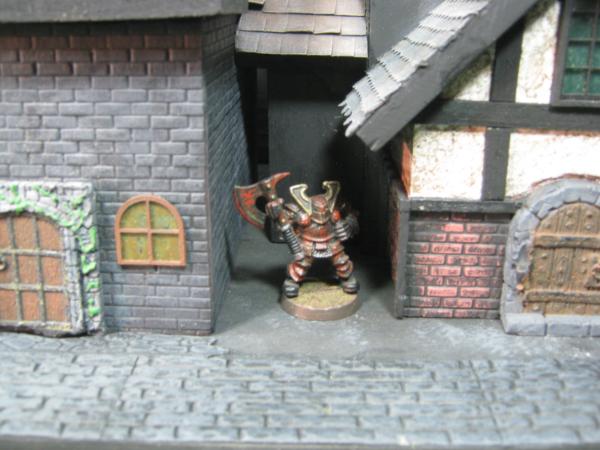
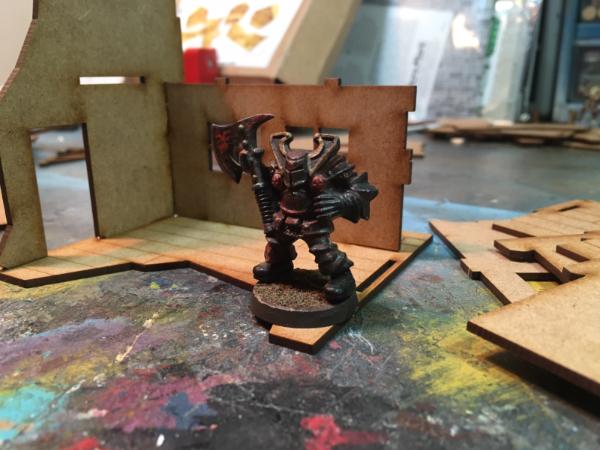
Pay no mind to the Beastmen Chieftain with the massive axe. He's more afraid of you than you are of him.
Or not.
Finally, heads up regarding my next update- after 8 months of miserable weather, spring unexpectedly arrived and that means motorcycle season has returned. I don't know how much I'll be sharing on this thread because of all the above but I'll at least make more of an effort to visit your threads. You guys are why Dakka is such an awesome place for me.
Gits- I'm getting too much mileage out of "here's all my toys" shots. I need to get some actual modeling done.
Syro_- So many games, so little time. Even with the benefits of modern chemistry I still need to sleep every now and then.
Master Azalle- Thank you for the compliment. It's a never-ending WIP to provide the best table I can for my gaming groups.
monkeytroll- It's going to get worse. With Adeptus Titanicus and GorkaMorka returning I know I'm going to dive head-first into both.
Dr H- Thank you. I'm a poor to moderately fortunate gamer so I fill a different role in my group by producing fun tables to play on.
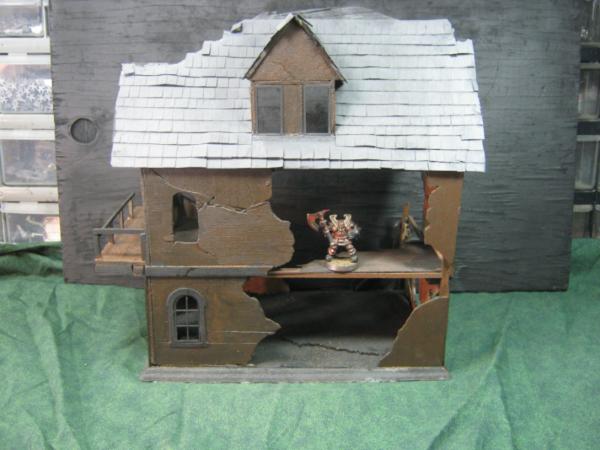
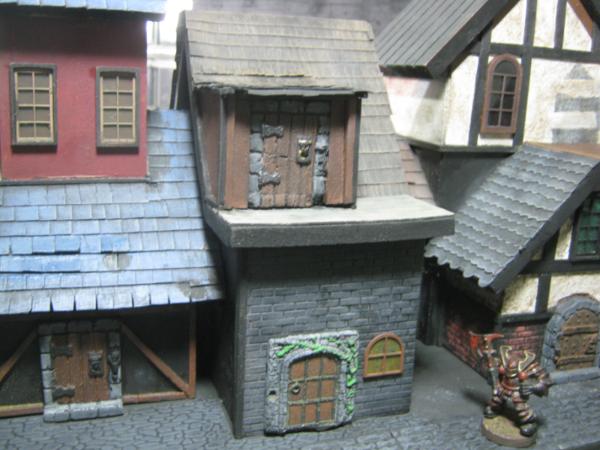
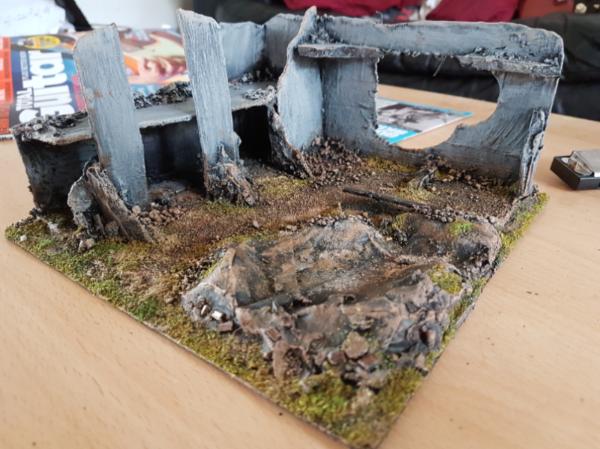
Started some weathering on my Mordheim MDF stuff. I'm using a mix of Griffon Sepia and home-brew black wash. The GF was stippled in for a "plaster" look, and the wash was slathered on a bit too enthusiastically, I'll be doing some cleanup for sure. My end result is to make the building look rain weathered and abandoned. I'll also be doing a scratch-build roof for this using the techniques I've posted earlier (I can pull those up if anyone has an interest).
C&C directly requested, I'm having a mental block on how to do the things I need to do to make the building look the way I want. Sounds ridiculous I know. My brainy parts aren't wrapping around weathering and detail right now.
More to come. I still have one MDF building left to build / paint and everything needs weathering. That plus roofing on each one and fiddly bits (barrels, etc) should keep my terrain work going for a while.
I have almost no experience with weather models, so I probably won't be much help, but you're saying you want this ruined building to look rain weathered and abandoned?
Except for the black wash, a lot of the building looks crisp and beautiful to my eye, especially the Tudor style beams. No idea if it's just the photo or not, since camera flash can change things quite a bit. In my experience wood gets very gray from heavy weathering so maybe get those beams more gray? Also maybe even do a very light (application not hue) green wash in the places where you did the black wash to make it look like some algae is growing along with the mold colors you've already done?
Hmm, been a whils, but
light sponging of a darker brown and possibly some very thinned green on the wood, followed by a light Derbyshire grey?
some random light slinging of a grey mixed up from that cream base colour on the wall to signify some dodgy plaster patches?
very thin dribbles in greens, browns and yellows down the walls for water runoffs?
some tiny detritus caught in places in top of the beams. I'm thinking dust, fluff and tiny plastic chips that I seem to find in bits boxes and around cutting mats.
adding some cracks to walls, and/or beams
fire or smoke damage around the damaged areas - dark browns and greys and black sponged and dry-brushed
I like it very much. One thing I've done before on buildings is a top line of vj smoke (it's naturally pretty thick) and then a very wet brush from paint water running a long it to create multiple trails.
As the others have said, water runs are a good thing to add.
Start with a light brown, add a darker brown run inside those, and then a black run in that. Gives them the look of a build up of dirt over time and seeping into the surface.
Don't get too carried away with them though. Just one or two here and there in select places.
Beyond that, research.
Have a google for the sort of buildings you want to replicate ("old", "industrial", "run down"...etc.) and look for things you want to add to yours. Reality can give more ideas that nobody would have thought of.
everyone- Thank you. Pics of progress posted when I have more to share.
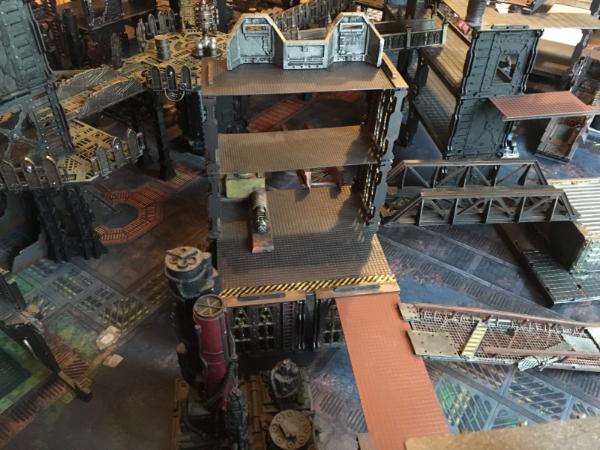
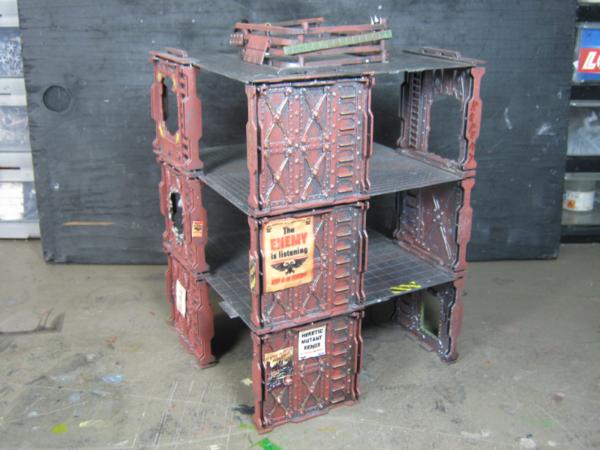
Grinding gear shift, went back to the 41st millennium for a quick visit because I got sick of seeing the same bare plastic models sitting there for months and months. Plus I needed some instant gratification results so I resurrected some bad old habits and I'm satisfied with the results so far:
This is all still WIP but it's a step towards completion and far beyond where they were they day before. As they are right I would put them on a table for a game but it'll be a while before the reach the standard I want before calling them "finished".
sandable primer?...that is a thing? i would have feared it would obscure details...but it didn´t...looks almost playable even now...
also...the magic of necromunda bulkheads...with these bitz...everything gets an instant convincing finish

 :
:


 .
.
 ) is the colouration. Take some time to look for pictures of the kind of rust you want (e.g. old Vs. new rust), and look really really close at the colours involved, you may be surprised to find it's not all brown and orange...
 It's good to be the


 and
and  as progress continues.