26139
Post by: Skalk Bloodaxe
@ Galorn- old color, just recently axed by GW w/ the new range. 
@ Dave- have you found a comparable color? I took a swatch to Home Depot a few years ago and still have most of the quart I had them mix for me, color was a really close match. I kist need something I can spray, brushing large areas is becoming less and less ideal for my desired results as I learn to model and paint better.
 
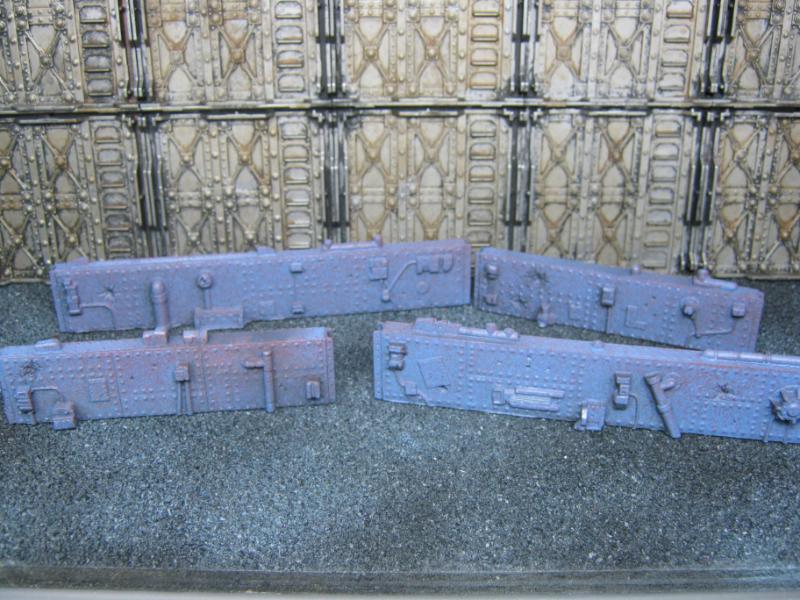
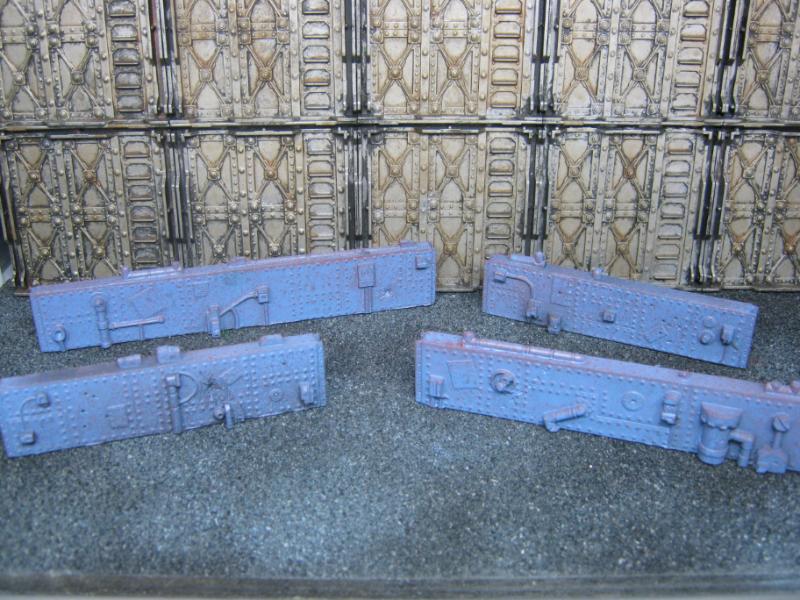
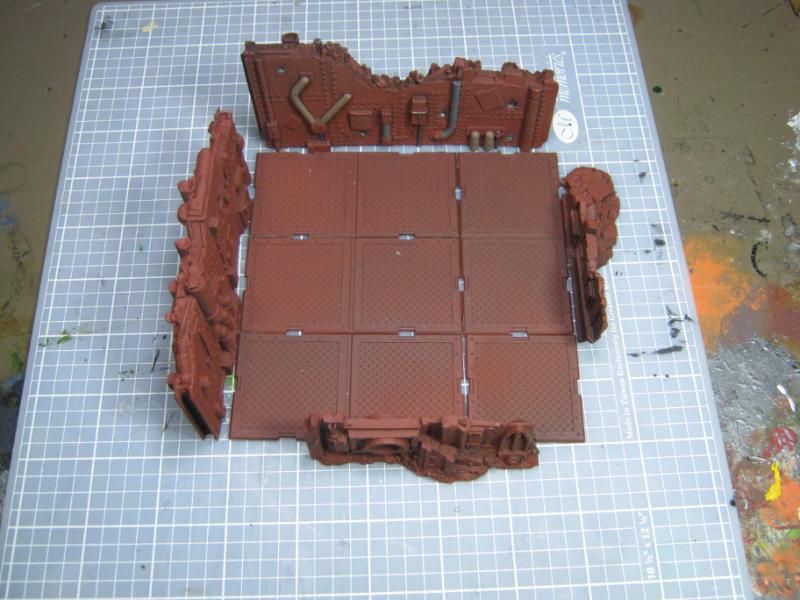
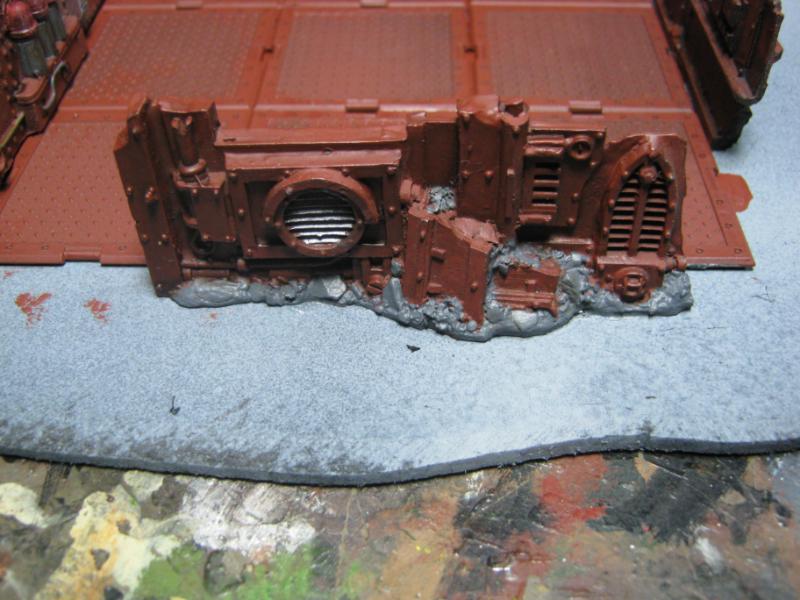
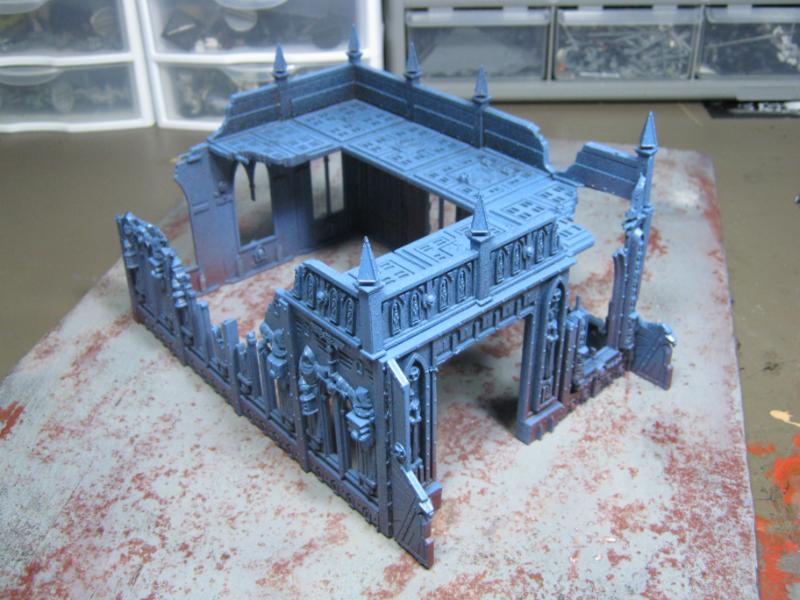
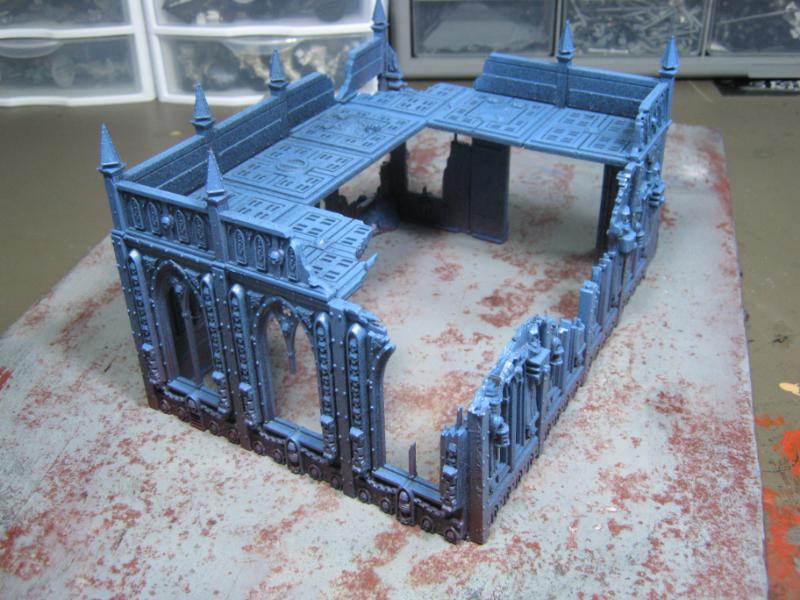
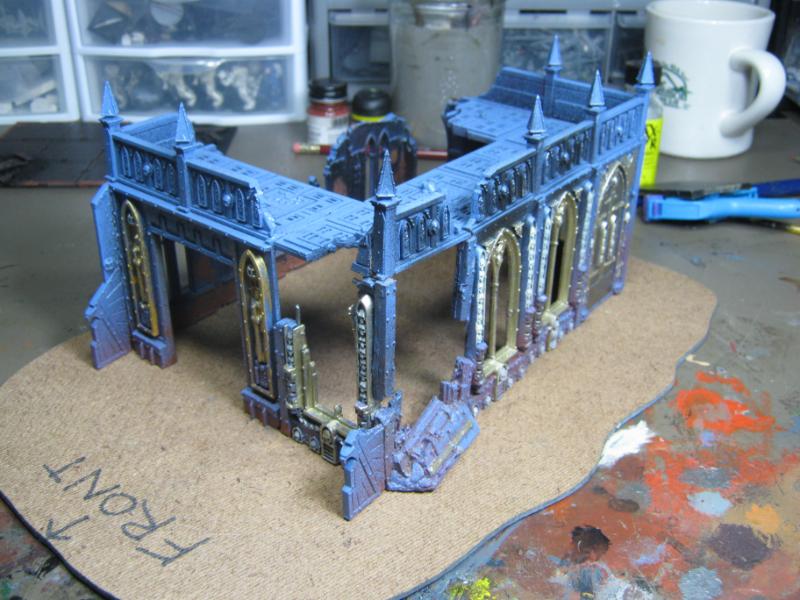
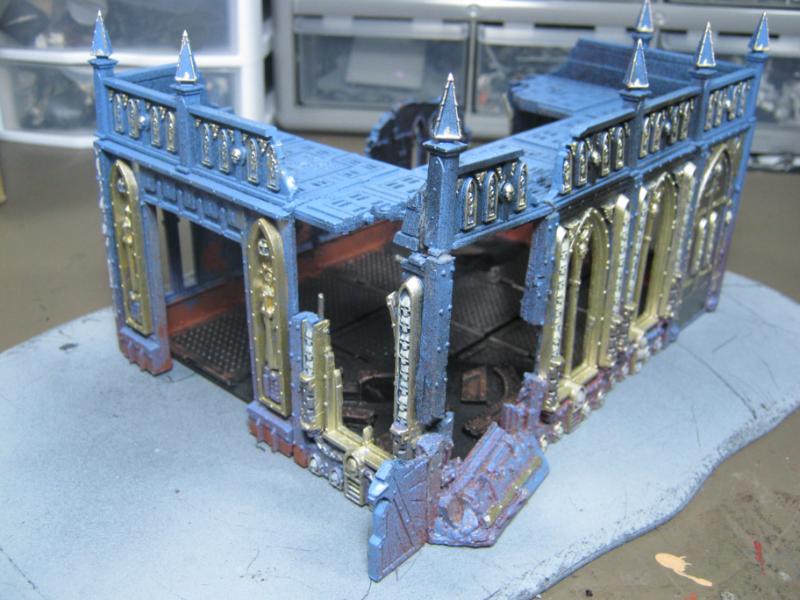
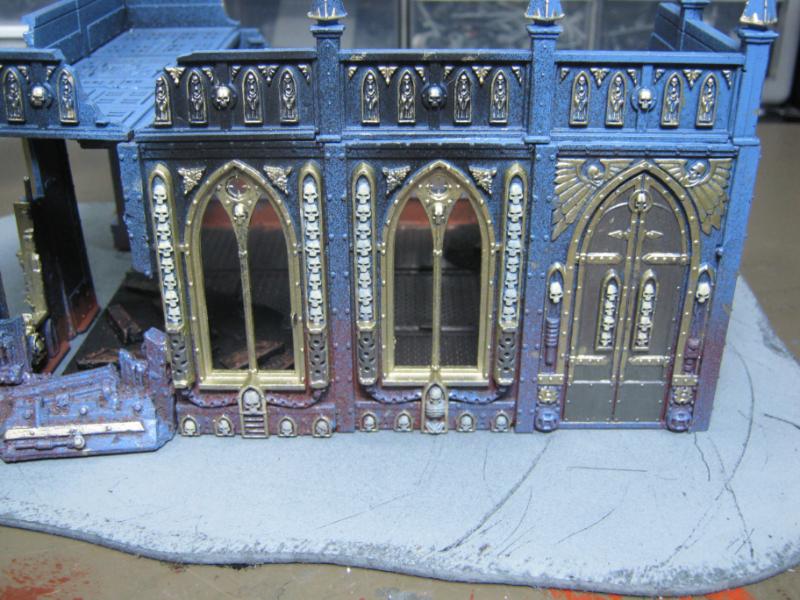
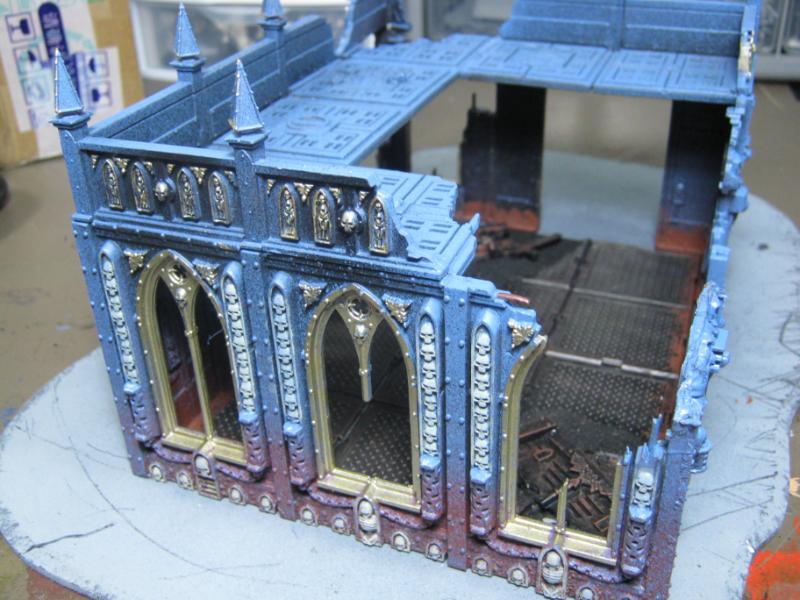
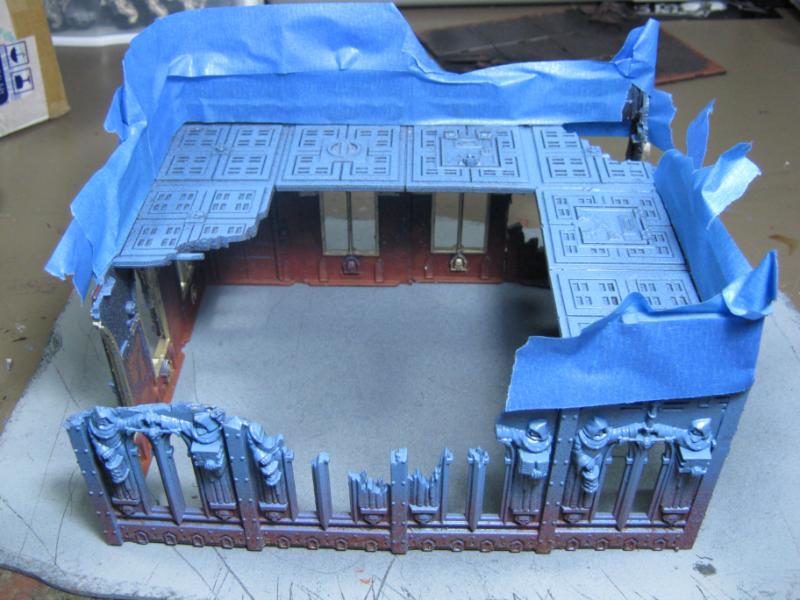
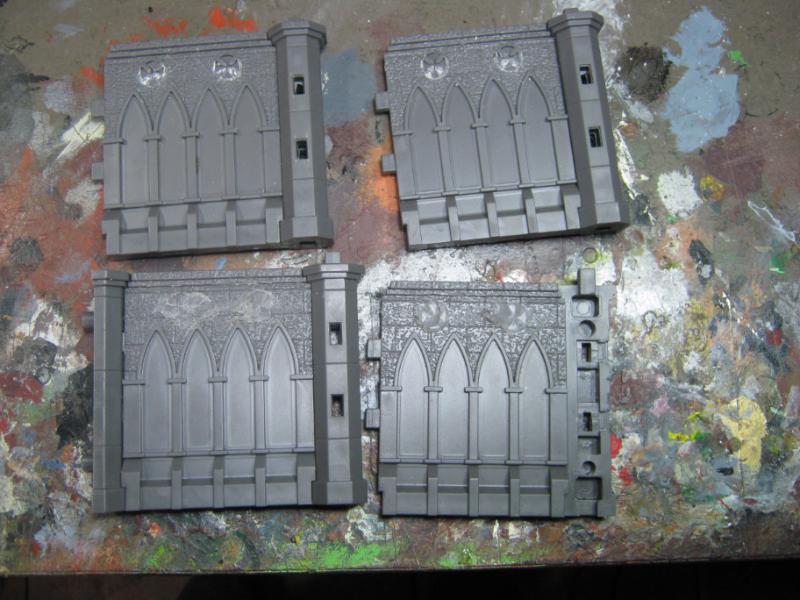
Small update, but it's better than complete inactivity. Here are the pics of what I've been doing w/ those Armorcast walls Dave sent me. I tried two different methods, both with the same rattlecans. First up are the smaller walls that I based blue and misted w/ rust:
Front:
Back:
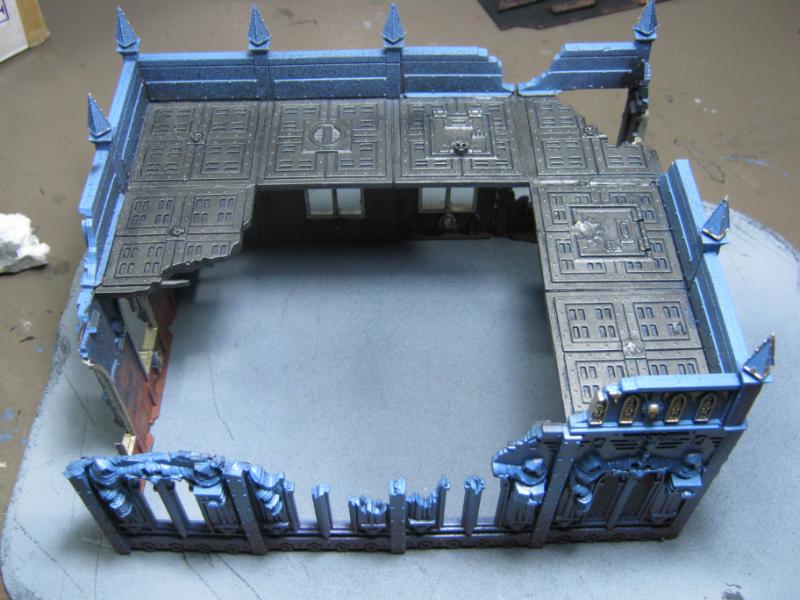
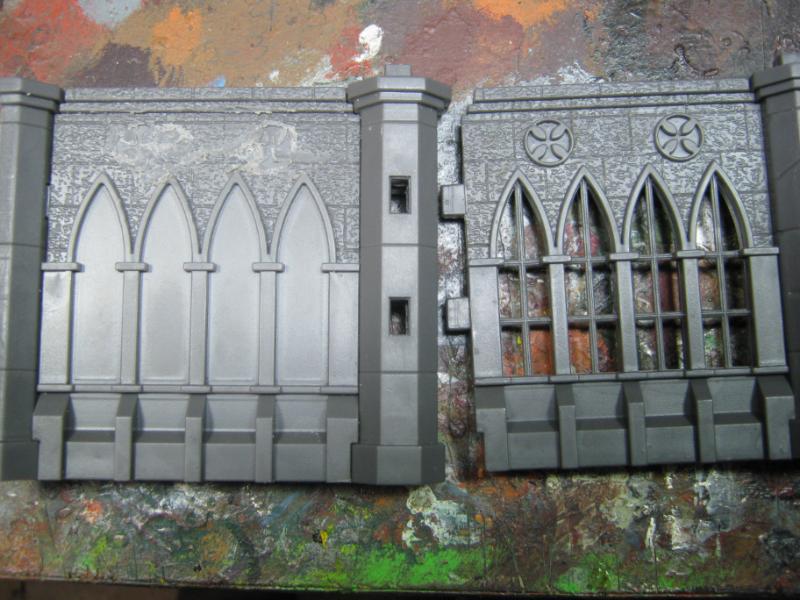
Second set (Larger walls) was based rust and misted blue:
Front:
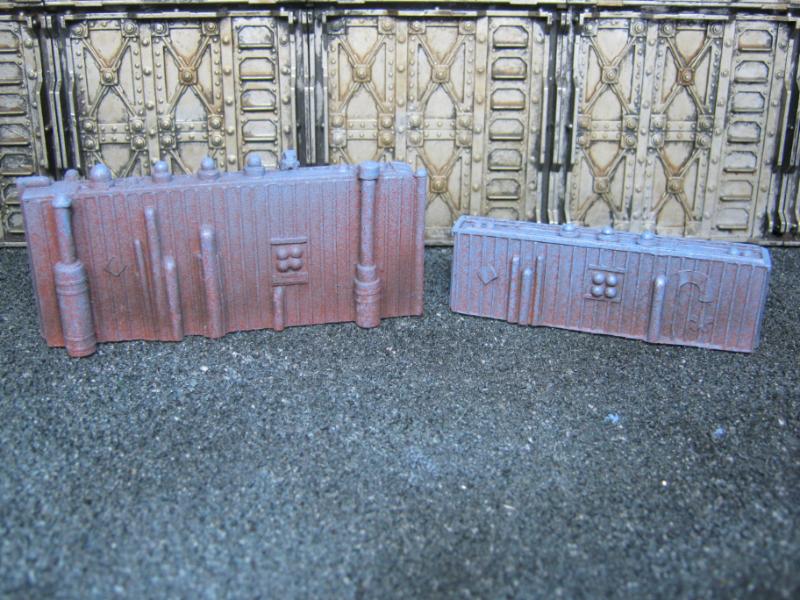
Back:
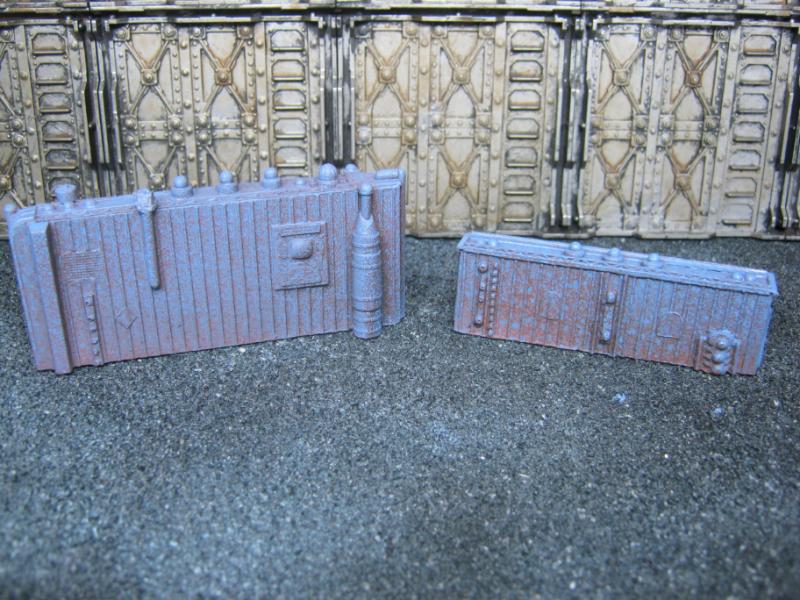
I'm undecided which I like better. Opinions? Keep in mind, this is JUST spray, no other detail has been added. C&C welcomed and requested.
48594
Post by: dsteingass
Sweet-looking!
Yeah, Vallejo makes a shadow grey, and I think GW has a new base and layer paint that matches it. I always basecoat with a primary blue first, then mist and blend in the intermediate blue over top of it, with a few greys for highlight.
However, nowadays rattle cans scare me more than the airbrush does. It used to be the other way around. Too much potential for heat and humidity to ruin a rattlecan job. Your latex paint can be sprayed through an airbrush too, you can get some really cool effects with latex by wiping it for streaks or by spraying rubbing alcohol over the paint to mottle and mist it. Latex just takes a lot longer to dry, so it's workable a lot longer than acrylic.
Automatically Appended Next Post:
Just for fun, try adding some of the blue weathering powder to water, make a wash, and try it out!
53783
Post by: MauS
Rust first Blue second Skalk... Looks waaaaay better in my opinion. Nice walls too 
48594
Post by: dsteingass
See, I prefer adding the rust afterwards myself, painting highlights around the chips for a forced depth effect, but that's just preference.
20018
Post by: Hyenajoe
I agree with MauS, the rust first solution seems perfect and looks really close to the original necromunda blue passageways 
30344
Post by: monkeytroll
As a technique I'd generally agree with Dave, but as a quick and easy spray (which is what I'm guessing you're looking for) the rust-blue mist method looks the better of your tests.
22619
Post by: inmygravenimage
I love the front of the second set. The blue walls always jarred slightly to me but that really, really works.
26139
Post by: Skalk Bloodaxe
@ Dave- The end result of either technique will have add'l rust built up via sponging and washes. I really want to practice the technique Ash uses for his 'chipped paint' effect on these walls.
@ Maus / Joe / monkeytroll / graven- I have to admit I liked this one better as well. I am looking for 'quick and easy' for sure, but without sacrificing a noticeable degree of quality. There's *much* to be done still, but overall I feel I have a reasonable grasp of the basic technique.
Thanks to all who commented so far. I really appreciate the feedback. Now that I've improved my overall skills and I have found the theme for my entire tabletop (heavily damaged / abandoned Imperial outpost) I have a lot of re-work to perform on previously 'finished' pieces, and I have a lot of ideas for what it coming next.
Just throwing this out there in hopes of a few responses- have been exposed to salting, sponge weathering, and washes. Does anyone else have a technique they have used w/ success that they would like to share? If you have a thread w/ your work, feel free to link it here.
18867
Post by: madmartykmf
You've come a long way buddy! Good work and remember sometimes the simplest techniques are still the best techniques. I like to think that with terrain a lot of times less is more. Good on you for trying different approaches and keep up the great job!
26139
Post by: Skalk Bloodaxe
madmartykmf- Thank you for the compliment. I'll keep pushing my limits and changing up my techniques. Today's update is about exactly that.
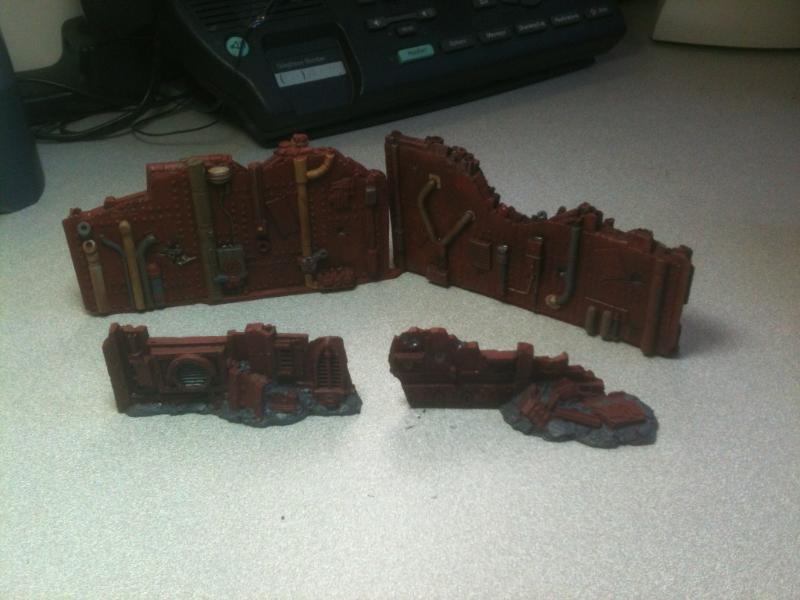
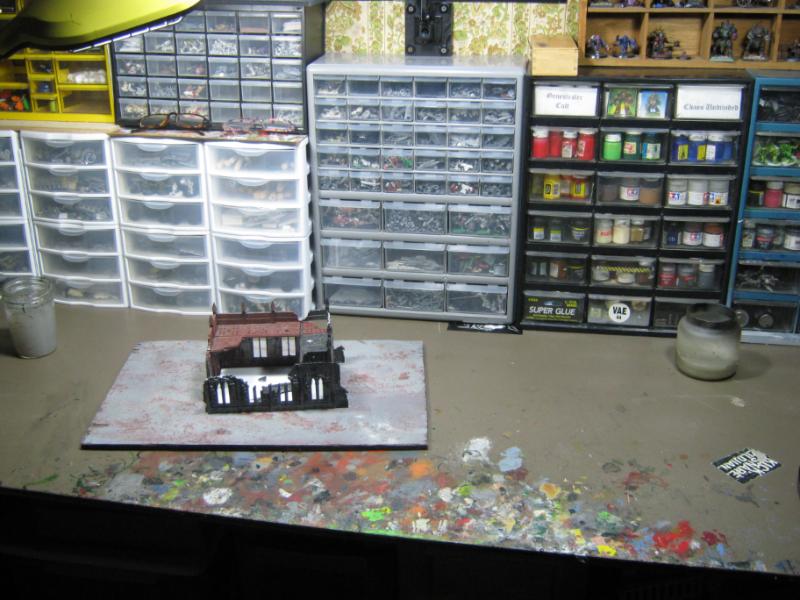
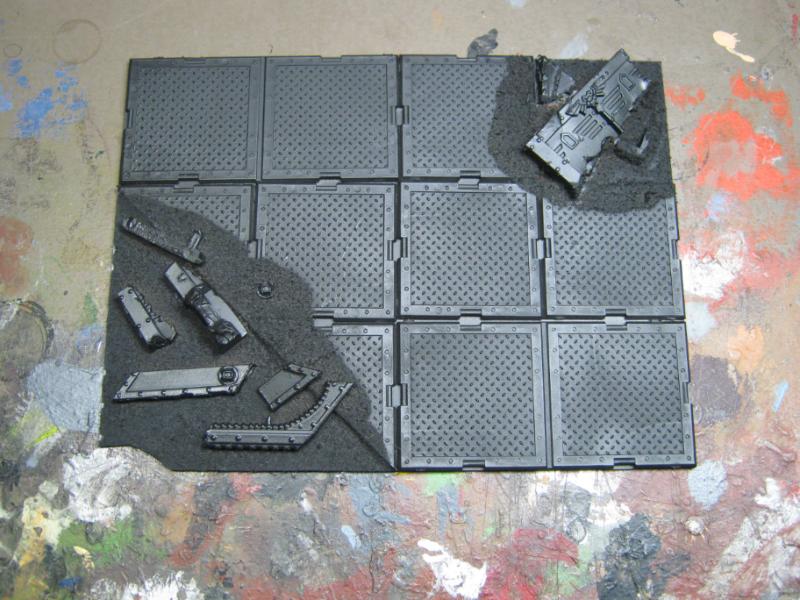
Not much of an update, but I'm sharing what I can when I can these days. First up is a collection of things I've had for a while mixed with things I just recently acquired.
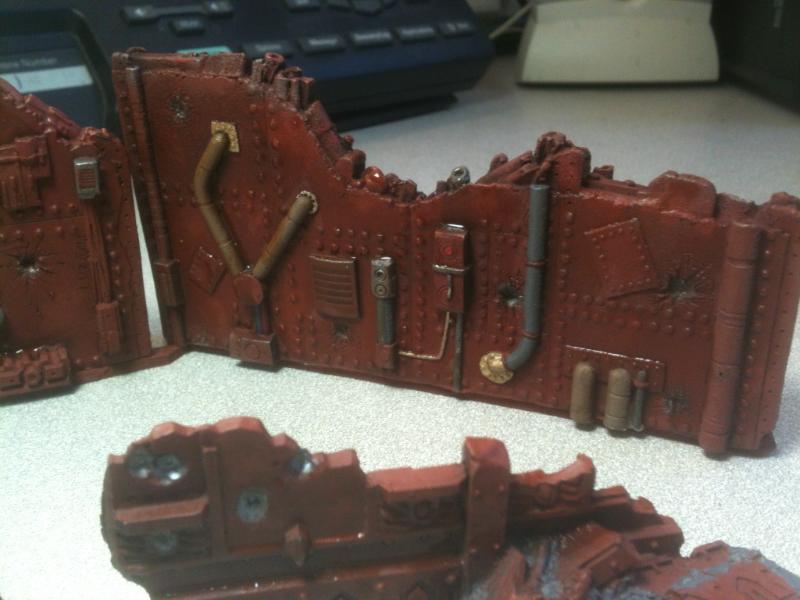
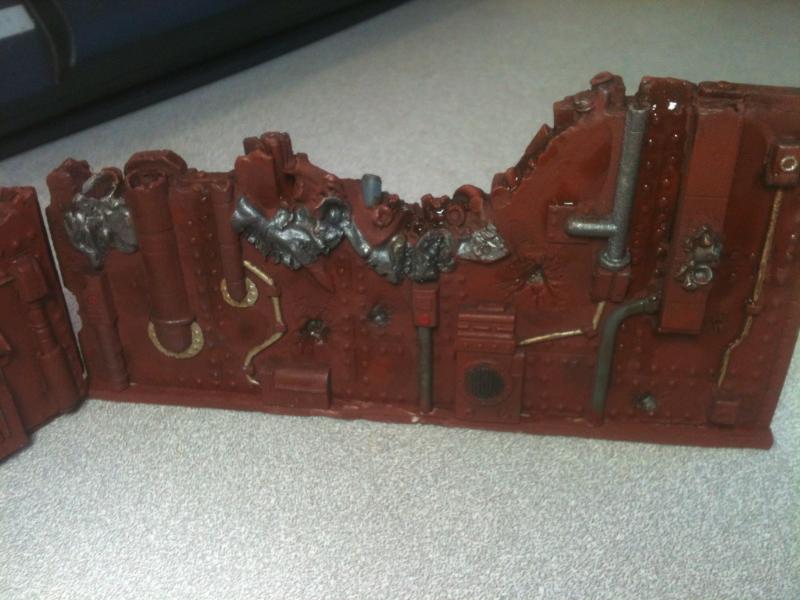
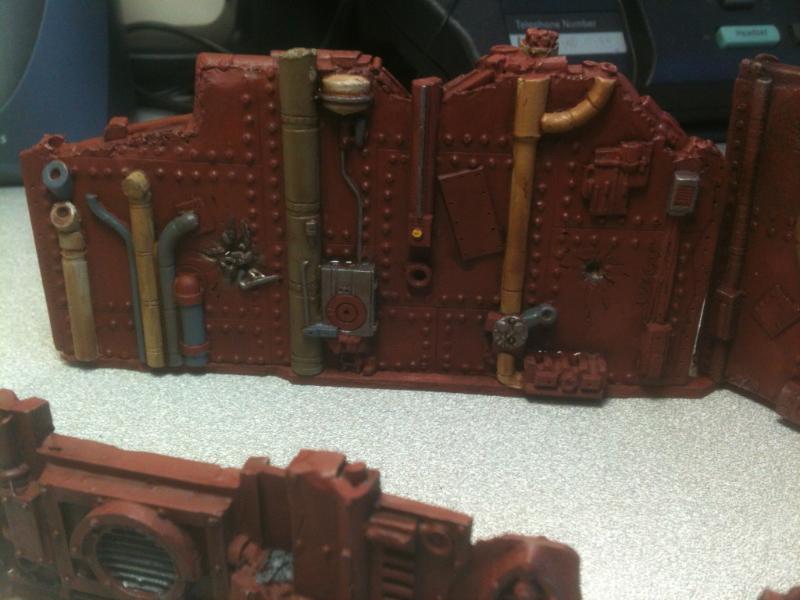
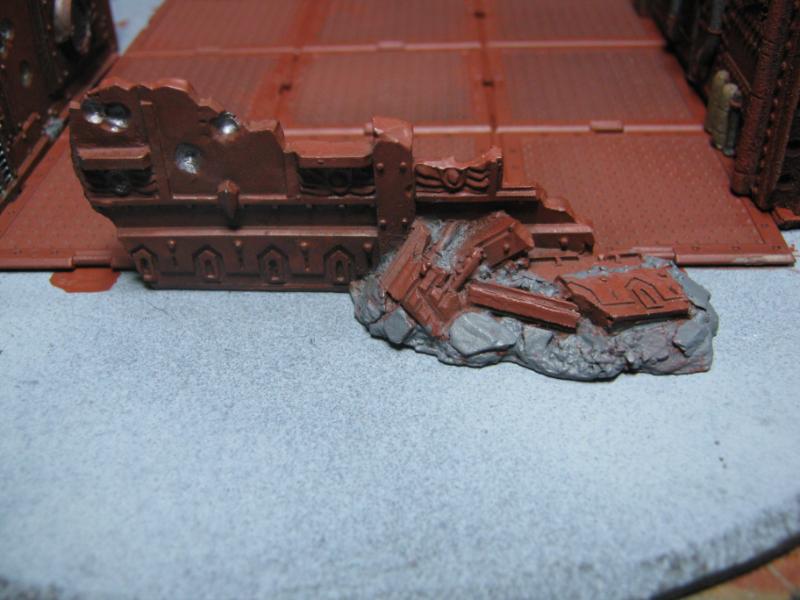
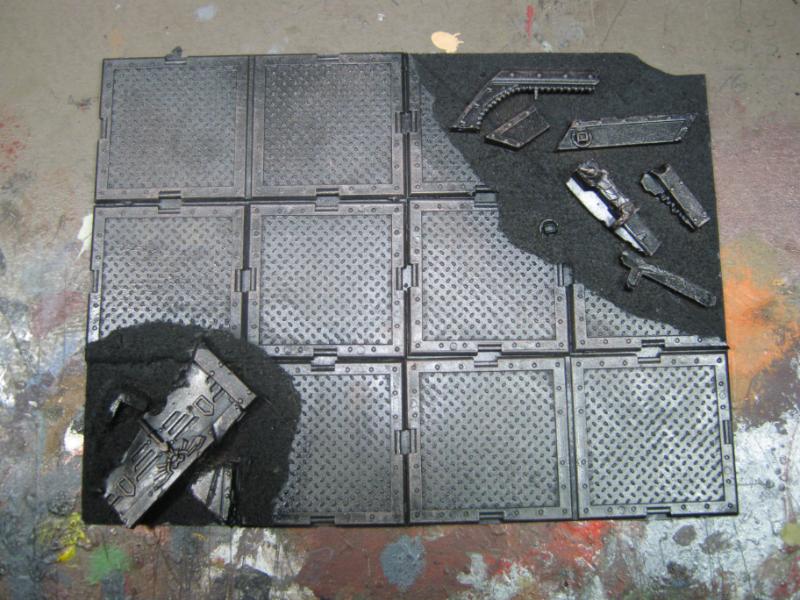
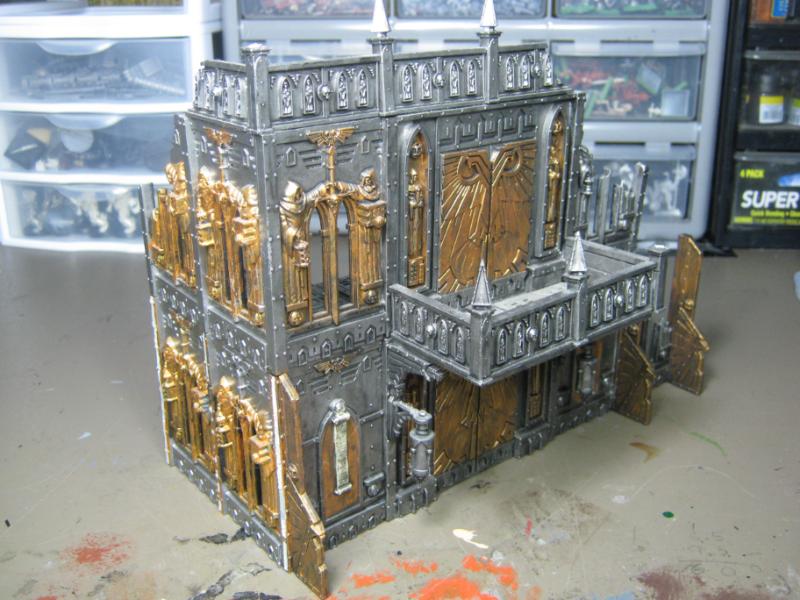
These are the two larger walls Dave sent me as part of my LoER Terrain Contest package. I apologize for the poor pics, I was in a hurry this morning.
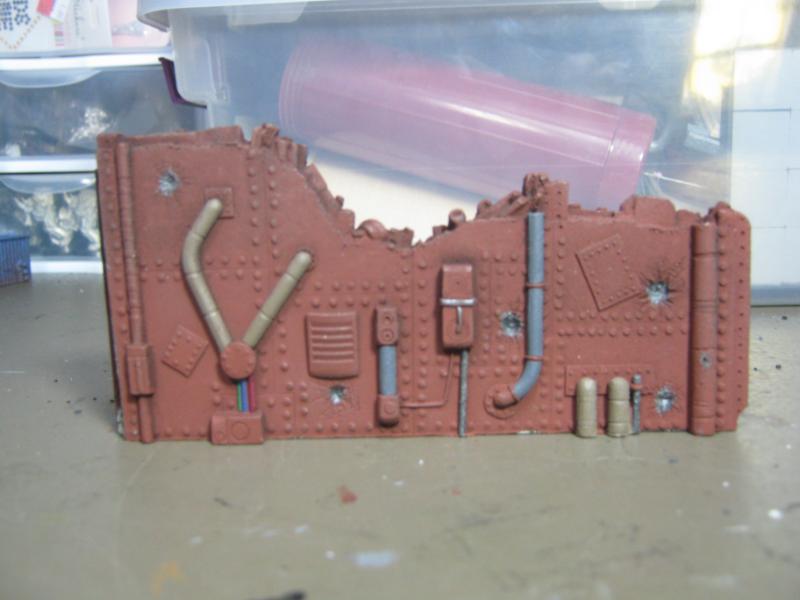
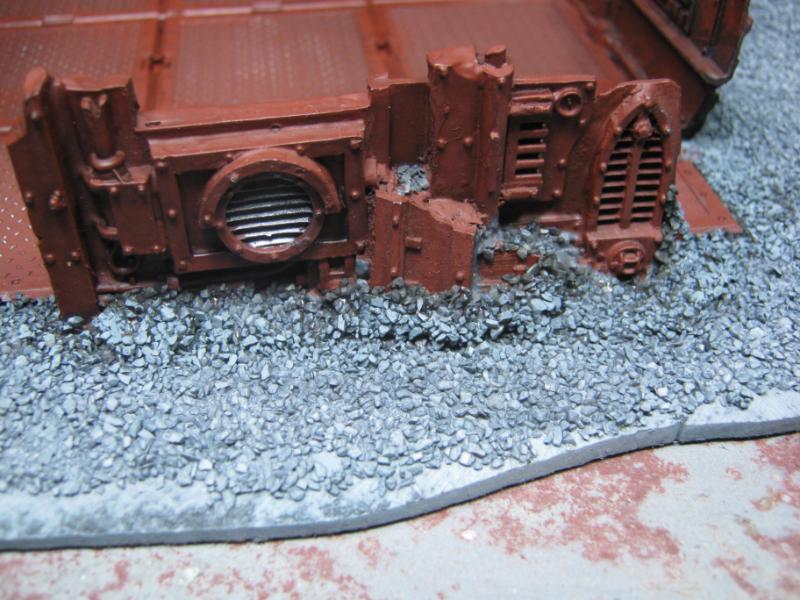
Side 1 (first pic) I'm going to put some time into this because I really like it. Same of the 2nd section of wall. I've been picking out small details, like how the electrical conduit would still be gray, how different electrical lines would be color coded, etc.
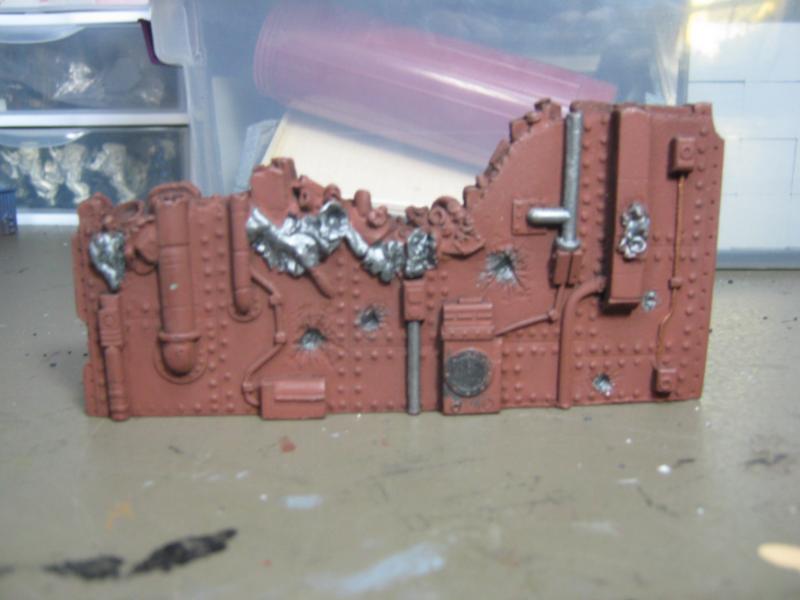
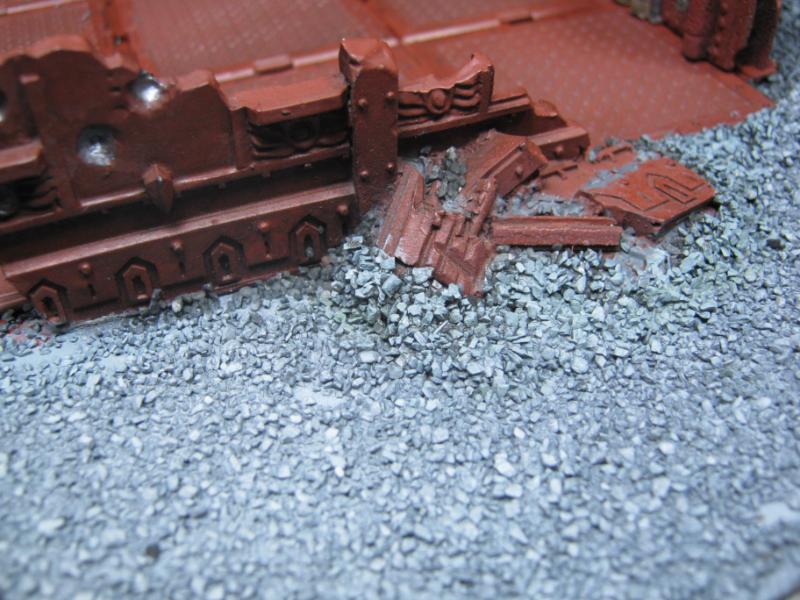
Side 2 (2nd pic) This is my external facing side, and it's taken a lot of damage. The fresh metal (non-rusted) is due to impact craters from Heavy Weapon fire, and the top is almost like it was hit w/ a Melta of some sort. I'll be picking out more detail on this as well.
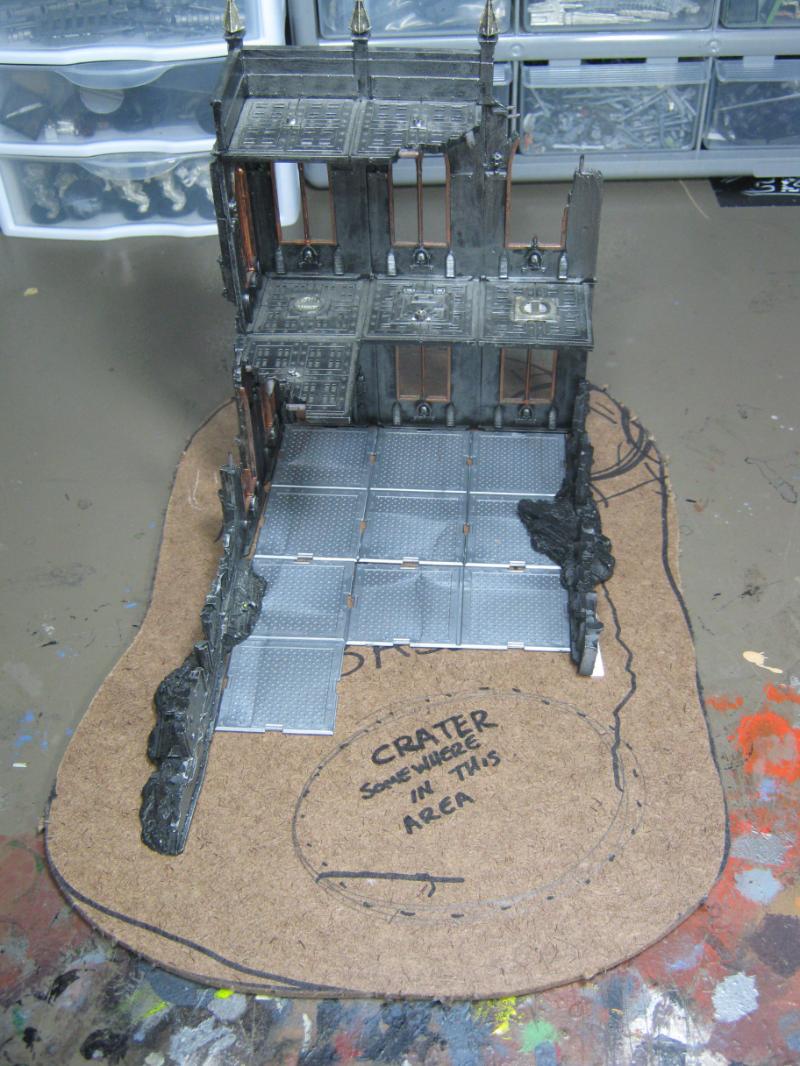
Here's a shot of everything (minus base it will be on)
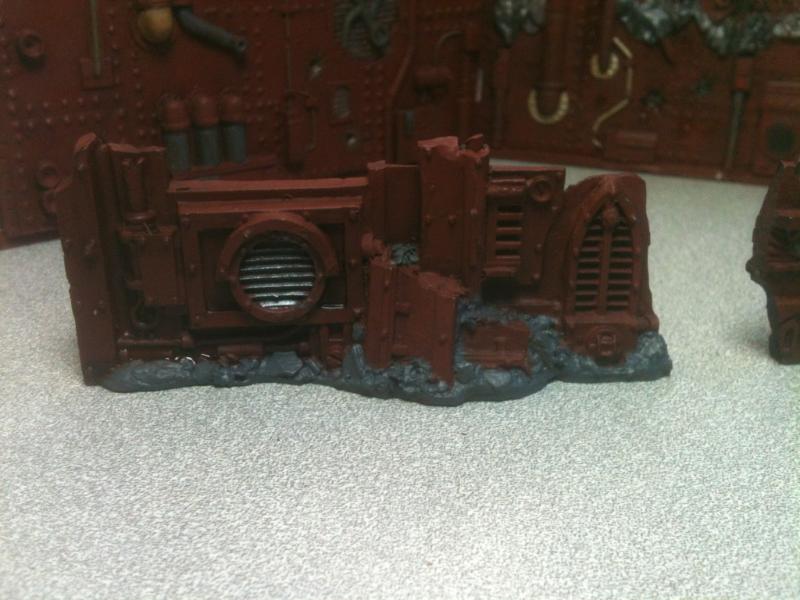
The big walls are old Epicast stuff that Dave sent, the small 'walls' are from some GW thing that was around before I got back into gaming. They are resin and somehow I wound up w/ a lot of them. Both have been cut to fit the flat edge of the building.
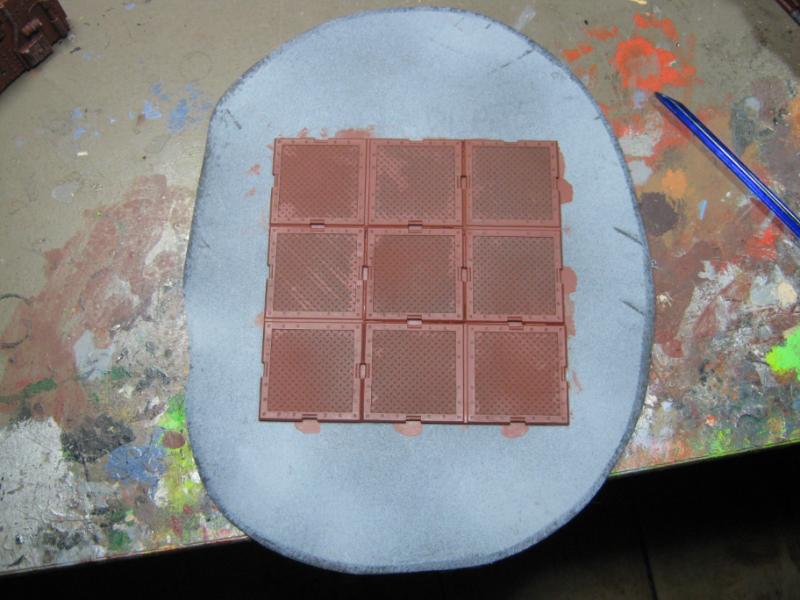
The floors are bitz from the Pegasus Hobbies Platformer servies, bought handfuls of them from Hoards 'O Bitz on eBay.
It's a really simple and very effective build, will be quick to assemble once painted, and will be a valued addition to my game table. I'll share more pics as I make progress.
One more things to share, special for Vik- I didn't have a real chance to enter into your contest, but I wanted you to know that the inspiration was not lost and eventually I will have a finished piece from my prior efforts and your idea was directly responsible for that:
Eventually it'll have rivets and bitz etc. My ultimate goal is to send it to Galorn for a non-IP cast of a futuristic power generator. A lot of work between now and then, but I wanted to share at least this much.
That's all for now. I'll keep going as best I can.
48594
Post by: dsteingass
That is gonna be cool Skalk!
24297
Post by: Viktor von Domm
gotta agree... that will be a nice addition once finished to galorns shop!
and the walls look very neat... all clean and so on^^... now dirty´em up boy!!!
32169
Post by: Rogue Wolves
no.. fraking way.. where are those walls from? I was helping dig through someones bits box the other day at my local GW and not one of us could figure out what these walls where.. and those are the walls!!
48594
Post by: dsteingass
Armorcast, GO BUY THEM! They are oop and worth gold.
32169
Post by: Rogue Wolves
Wtf he didnt want them... he's the guy I'm getting the oop squats from.. I need those walls too! I'll try my hardest to!
48594
Post by: dsteingass
I still have some left if you strike out...
26139
Post by: Skalk Bloodaxe
@ Dave- Yup, it really is going to be cool. I've been working on a different project though, and it's coming right along as well. Pics and details below. Also, once again... thank you so very much for sending those Epicast walls! I hope I'm doing them justice. I can guarantee they have found a happy and very appreciative home with a game table they will see quite often.
@ Vik- I'm going to give them some special attention because I want ot to be a salable item people woud have interest in, plus it's pride / bragging rights to know something I made is being produced and sold to others.
@ Rogue- Hi 
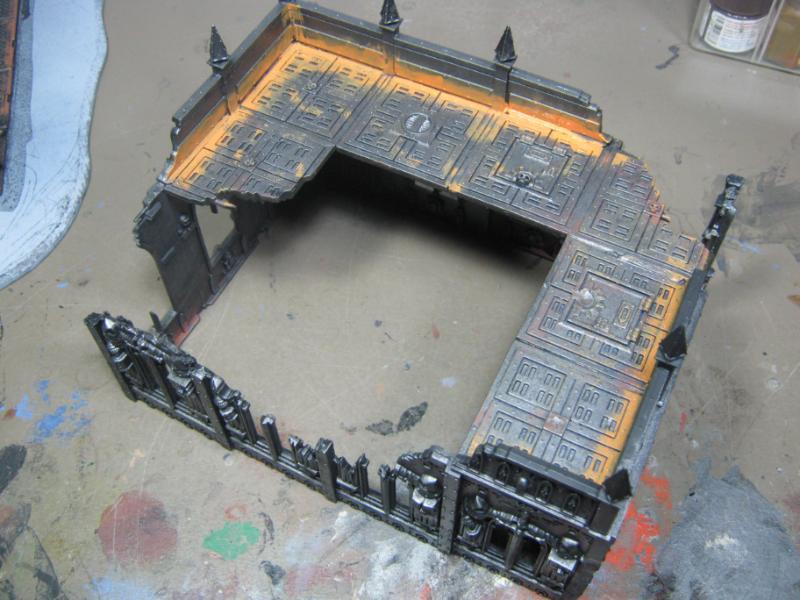
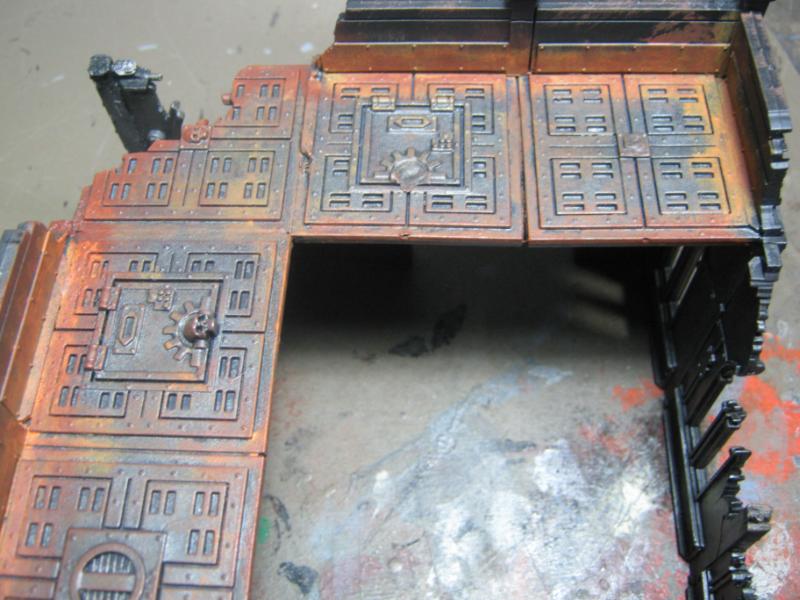
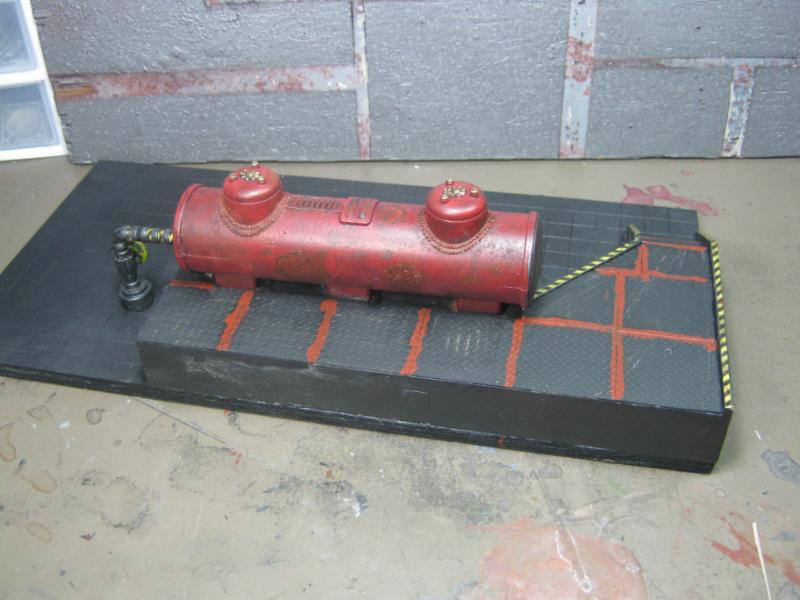
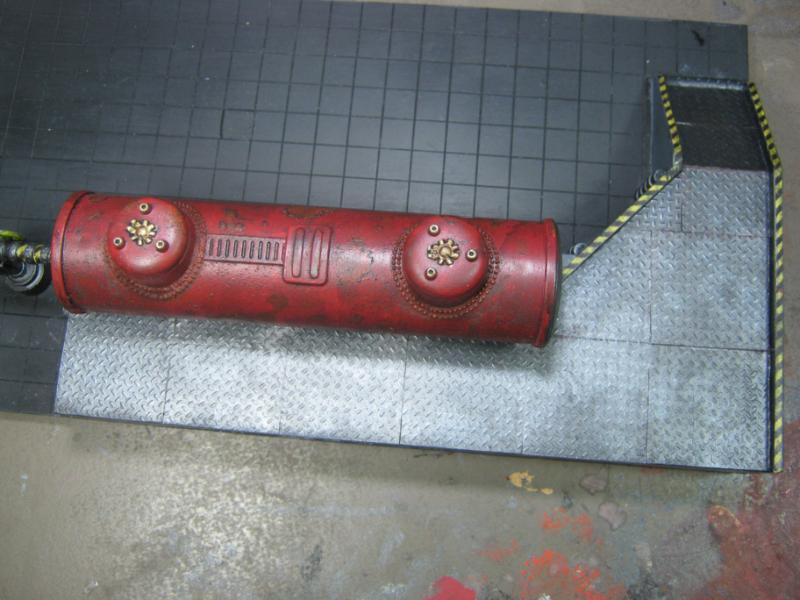
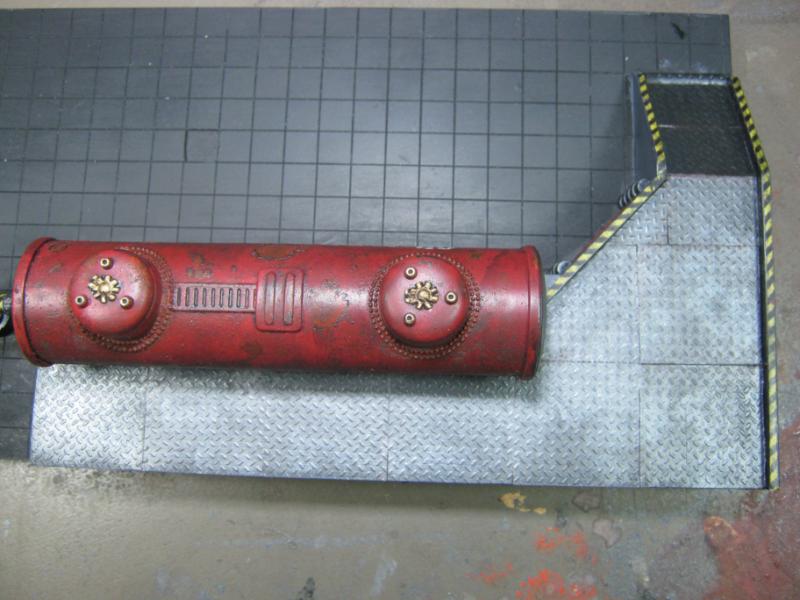
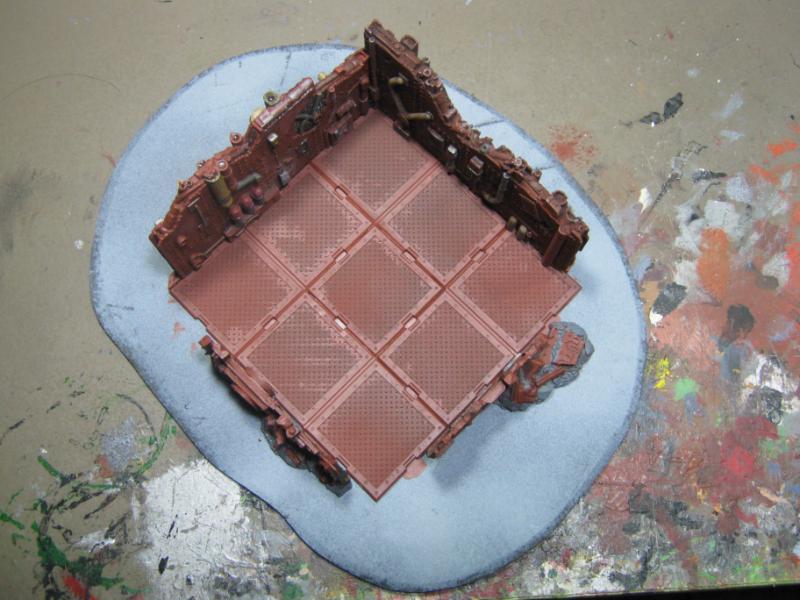
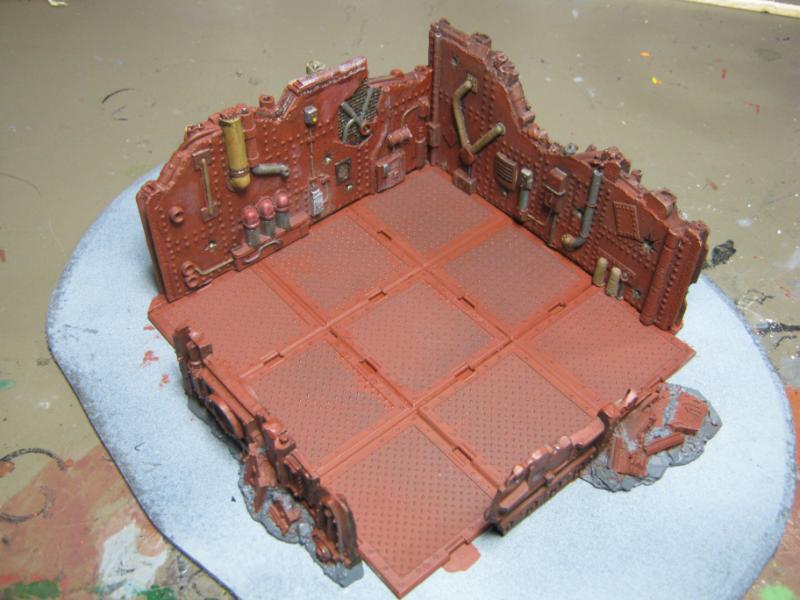
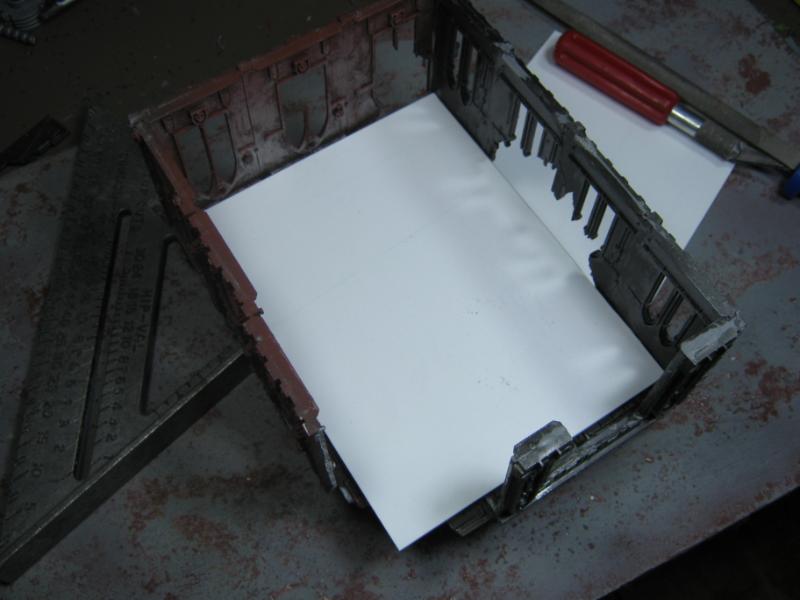
Somewhat decent update this time. I decided to take my paint box back to work but instead of working on my Cultists I focused on the project I gave a sneak peak at in the last post. Here's pics of where I am so far. Apologies for the bad photos, I had to take them on my phone as I left my camera at home.

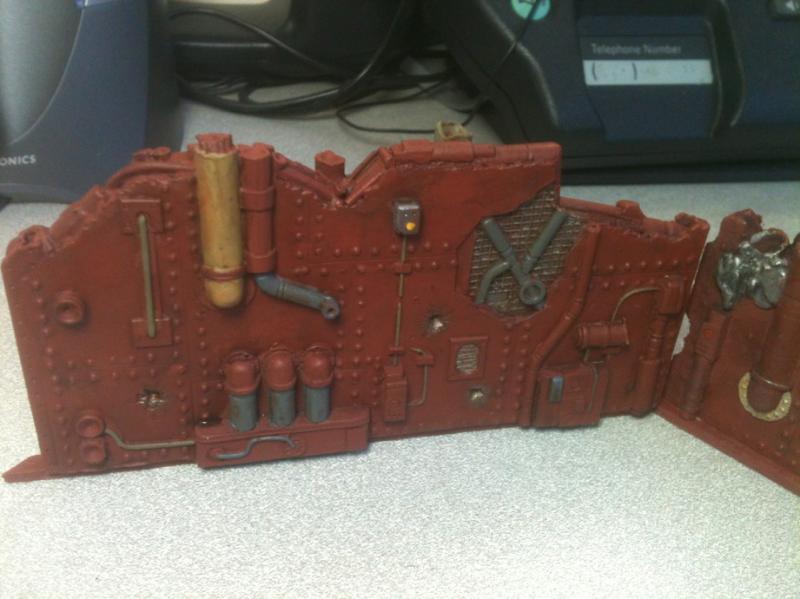
Details aren't done, but you can see I'm putting a little effort into this one. I've been even more critical of my work since building the 'lids' platform and I'm hoping my attention to detail will help sell the idea of what I'm trying to do a lot better.
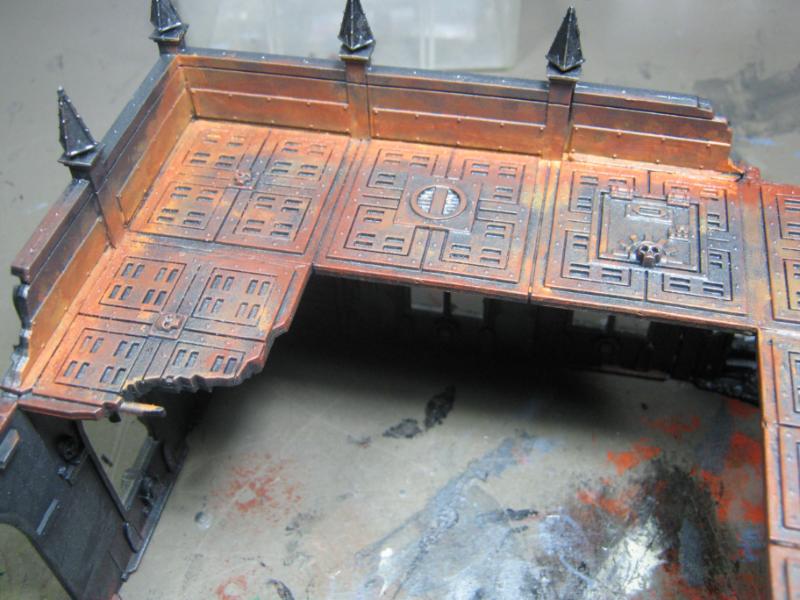
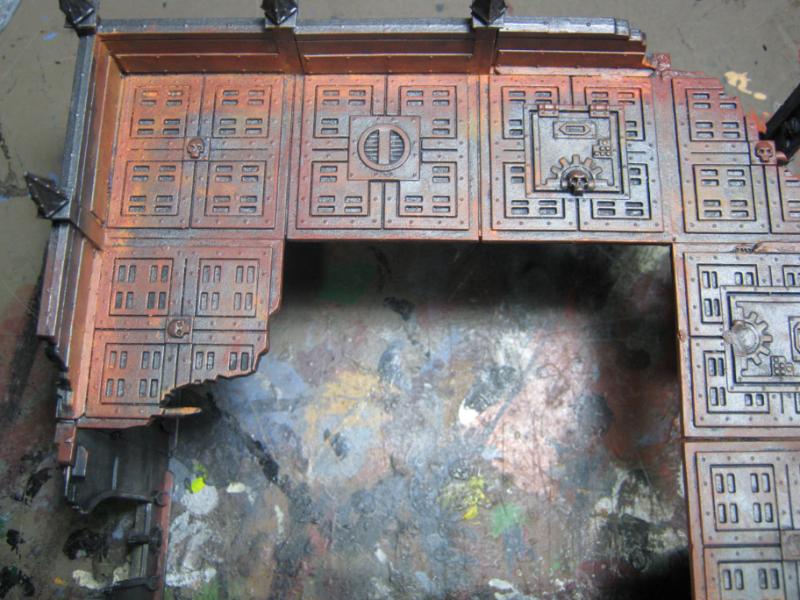
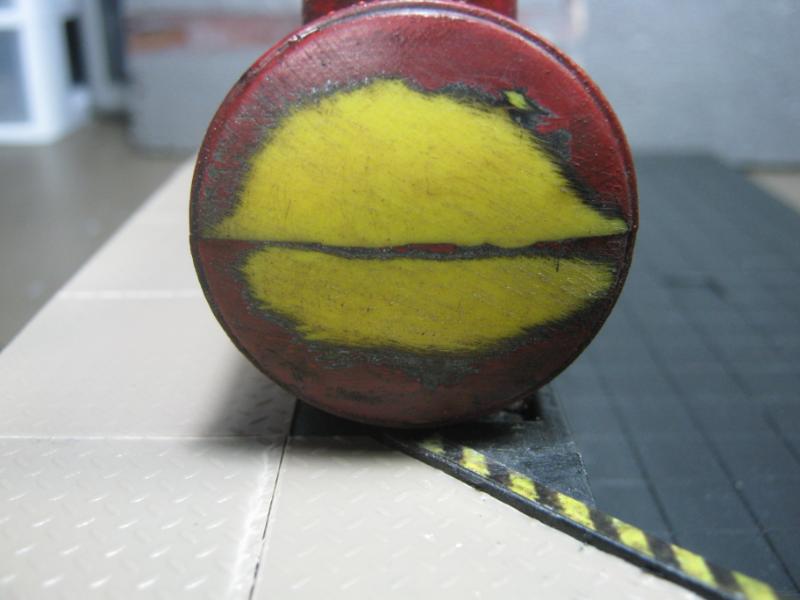
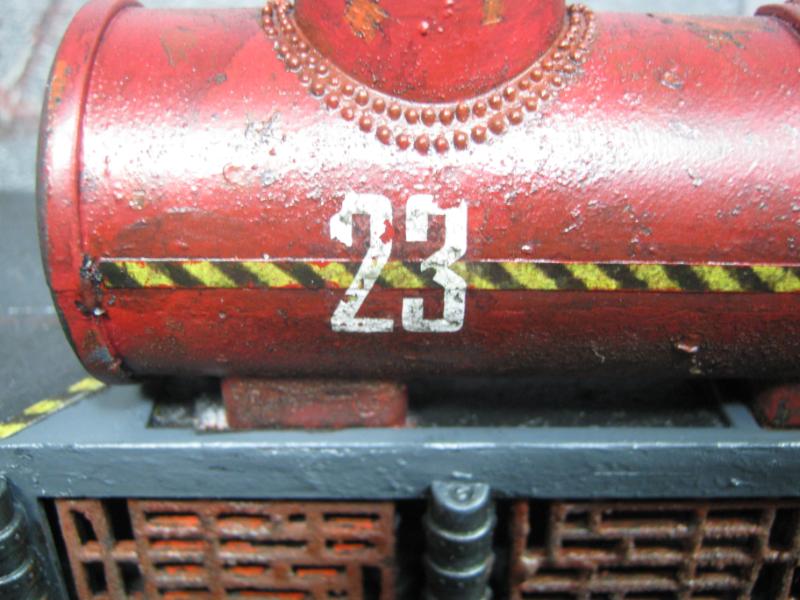
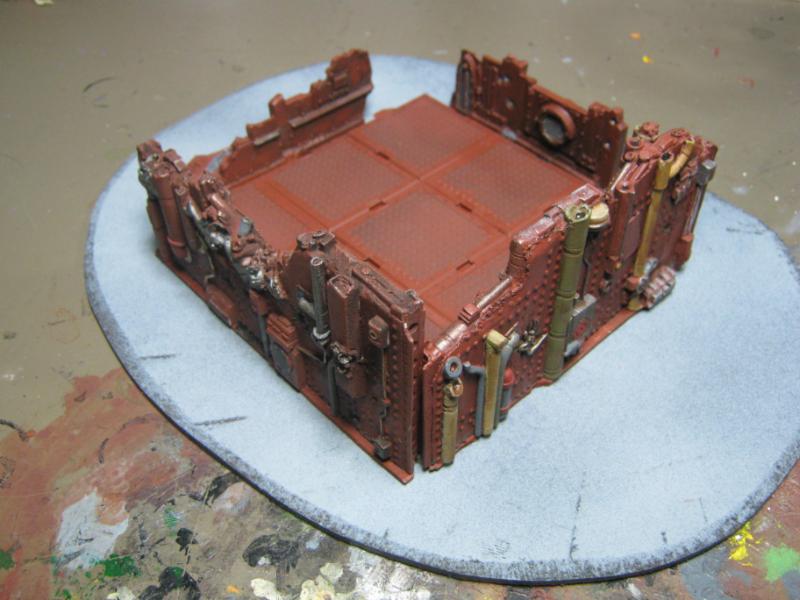
The colors I added were unnecessary, I could have sprayed the entire thing rust and left it at that. Booooorrrriing. So I've picked out some conduit, pipes, freshly exposed metal, button / levers, etc. More is coming, but note that it's all complimentary and subdued. No screaming bright "HHHEEYYY!! LOOK AT ME!!!!" parts at all.
I considered putting some Shadow Grey on it, but have decided to not. I will put that into the mix on another piece. This is an experiment in 'mostly rusty'.
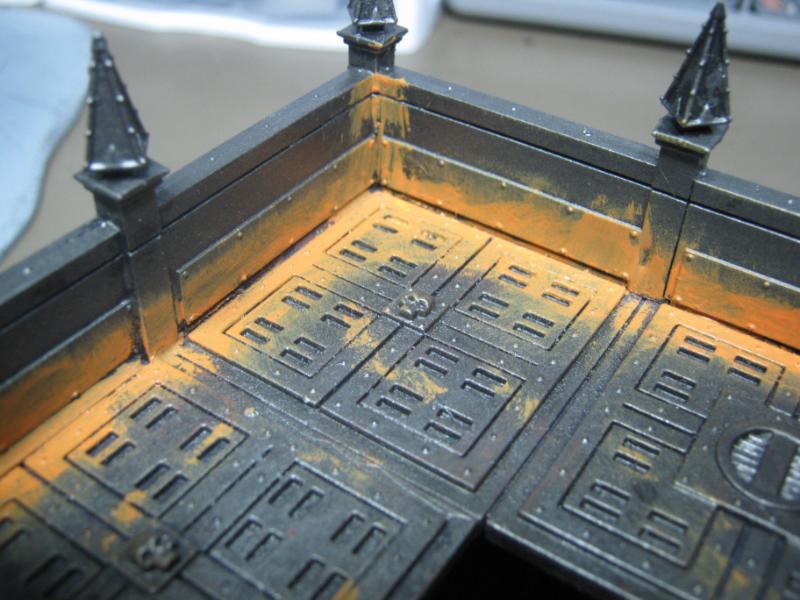
I would try the weathering powders Dave gave me, but this piece is already detailed enough (look at all the rivets!) so I'm saving that for a more bland / plasticard piece.
I'll post more once I have somehting to share. With any luck I'll have time enough to finish this up soon but this weekend is straight out so don't expect anything before... Tuesday?
Thanks for looking, C&C always welcomed, and I'll be back!
30344
Post by: monkeytroll
Looks good, like that you picked out the details, it is too easy sometimes to not bother with stuff like that.
Don't discount the powders just cause it's a detailed piece, a light touch with the rusts will just add further texture, which is no bad thing for rust.
Or try making a wash with them and applying it around a few of the rivets. Some gentle brushing once it's dried should look nice, wih the odd little dribble.
48594
Post by: dsteingass
Just try some streaking of rusty stains with the powder/water wash and then tell me you're still scared of the powders! Automatically Appended Next Post: Soon, you'll have each rivet leaving a stain! Automatically Appended Next Post: If you first gloss-coat it efore applying the wash, it will pool around the rivets with no effort from you.
24297
Post by: Viktor von Domm
i know there is no chance it will stay that warm reddish color... but i like it atm as is... has for me a bit of a steampunk vibe... even tho it is riveted steal it reminds me from the general look of clinker...
48594
Post by: dsteingass
Vik, did you have Hogan's Heroes on TV?
39973
Post by: Galorn
Klinc : HOOOOOGGGAAAAANNNNNN!
Sgt. Schultze: Oh boy.... I Know Nothing. Noooothing!
Hogan: Yes Boss?
24297
Post by: Viktor von Domm
at dave... of course
and galorn... wasn´t it serg. schultz? i am a bit touchy about this name as it is my true RL last name
32169
Post by: Rogue Wolves
hey skalk... skalk...
.. skalk...
those walls are like.. cool and stuff...
39973
Post by: Galorn
 Viktor von Domm wrote: Viktor von Domm wrote:at dave... of course
and galorn... wasn´t it serg. schultz? i am a bit touchy about this name as it is my true RL last name
I believe it was Sgt as Americans were making the show... I could be wrong. but im pretty sure it was sgt.
29449
Post by: weetyskemian44
Hooray for skalk! So much terrain its coming out of his ears
Trying to catch up with peoples plogs but I always seem to arrive late.
33919
Post by: Moltar
New pieces are looking really good, bud. The subdued colors used on the wall accents really works. Just keep in mind that your heresy grows bigger each time you tote that Hello Kitty lunch pale.
24297
Post by: Viktor von Domm
 Galorn wrote: Galorn wrote: Viktor von Domm wrote:at dave... of course
and galorn... wasn´t it serg. schultz? i am a bit touchy about this name as it is my true RL last name
I believe it was Sgt as Americans were making the show... I could be wrong. but im pretty sure it was sgt.
i was more referring to the schultze vs schultz... the namefamily is quite big and with lots of variety...
39973
Post by: Galorn
Viktor von Domm wrote: Galorn wrote: Viktor von Domm wrote:at dave... of course
and galorn... wasn´t it serg. schultz? i am a bit touchy about this name as it is my true RL last name
I believe it was Sgt as Americans were making the show... I could be wrong. but im pretty sure it was sgt.
i was more referring to the schultze vs schultz... the namefamily is quite big and with lots of variety...
well according to the great Wikipedia... S ergent Shultz (no e)
24297
Post by: Viktor von Domm
ah... see i had that thought too^^
26139
Post by: Skalk Bloodaxe
@ monkeytroll- Thank you for the compliment. It's all in the details.  And I'll look up weathering powders tuts online. I want to do better jobs on my stuff, the 'next level' so to speak.
@ dsteingass- Yup. That's th3e goal. Just need to see it done. Will show results when i have some, good and / or bad.
@ Viktor von Domm- The color is WYSIWYG, it was already dry when I took those pics. Different shades of brown / rust.
@ Rogue Wolves- Yes they are. I wish I had an inside line to get a few more of these. They look great, paint up moderately easy, and the build is about as simple as it can be.
@ weetyskemian44- Nice to see you again. You know, I really need to check out your thread again. It's so overwhelming sometimes.
MOLTAR!!!! Dude it's good to see you on Dakka again! Hope you can hang out a bit more when you have the time. Anyway, thank you for the compliments and rest assured that Hello Kitty is all about kvlt grimdark bitterness. It's wrapped up in a cute kitten face in a pink box... but trust me... Hello Kitty is pure death.
re: Hogan's Heroes- I used to really enjoy that show a lot. Interesting note- Sgt. Schultz was a toymaker before he was pressed into military service. I'll bet he did historical wargames as a hobby.
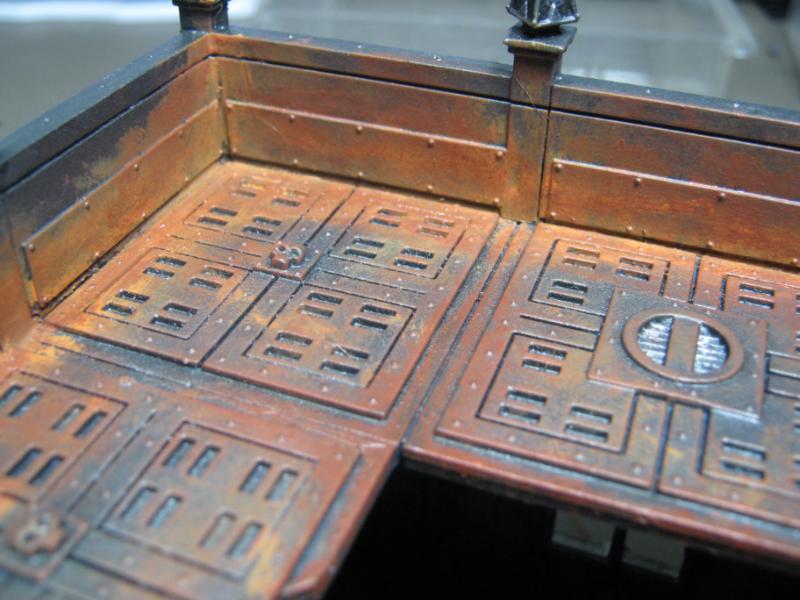
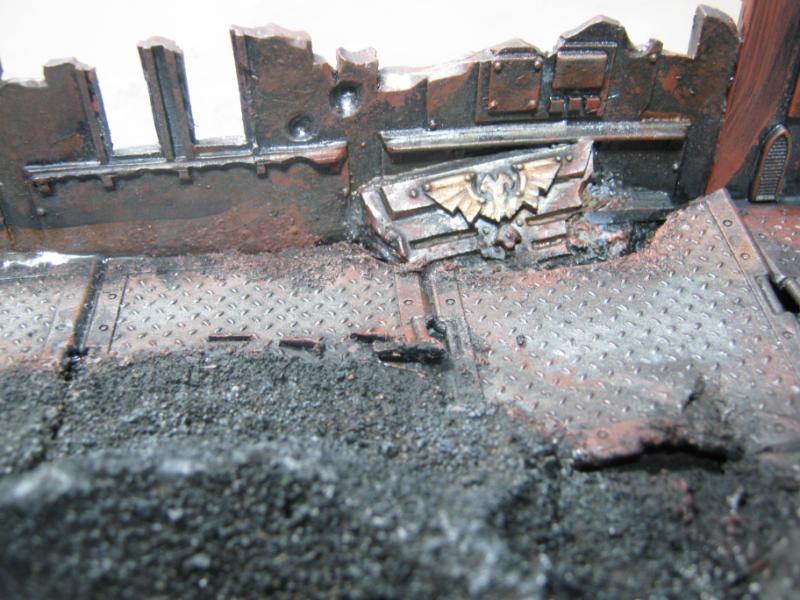
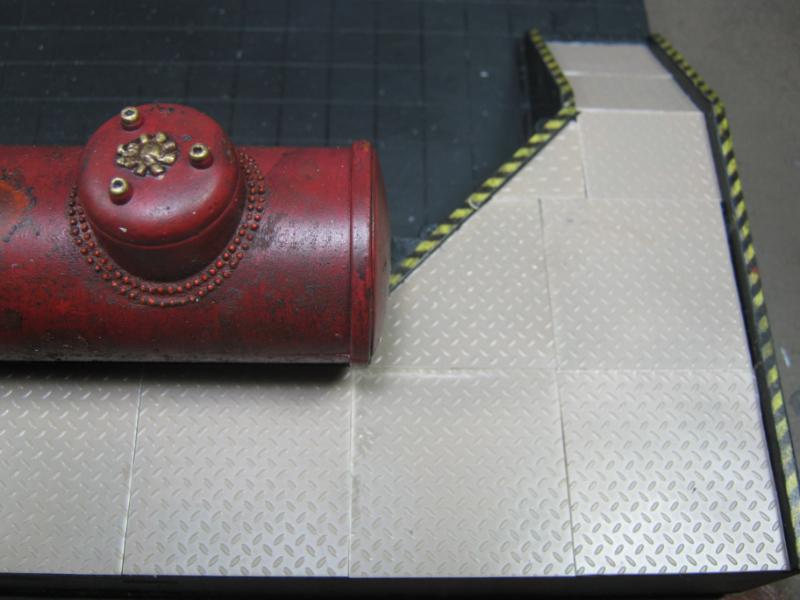
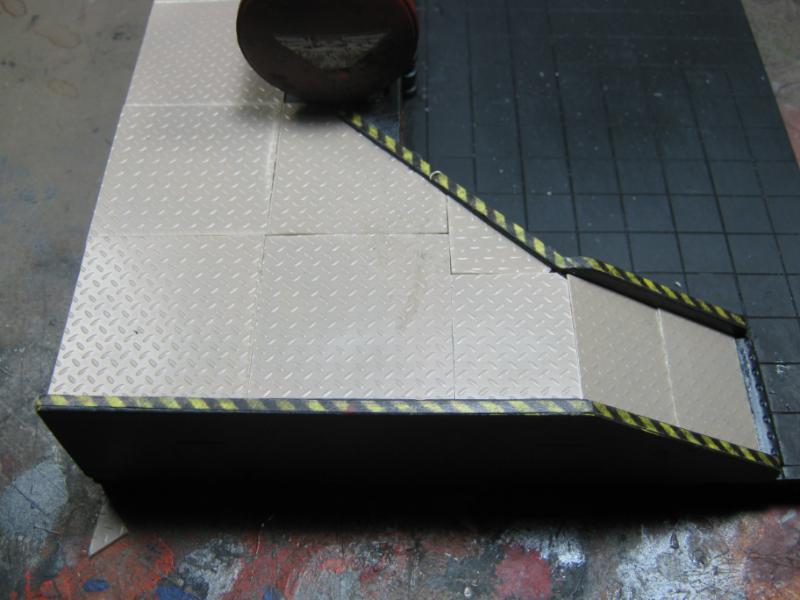
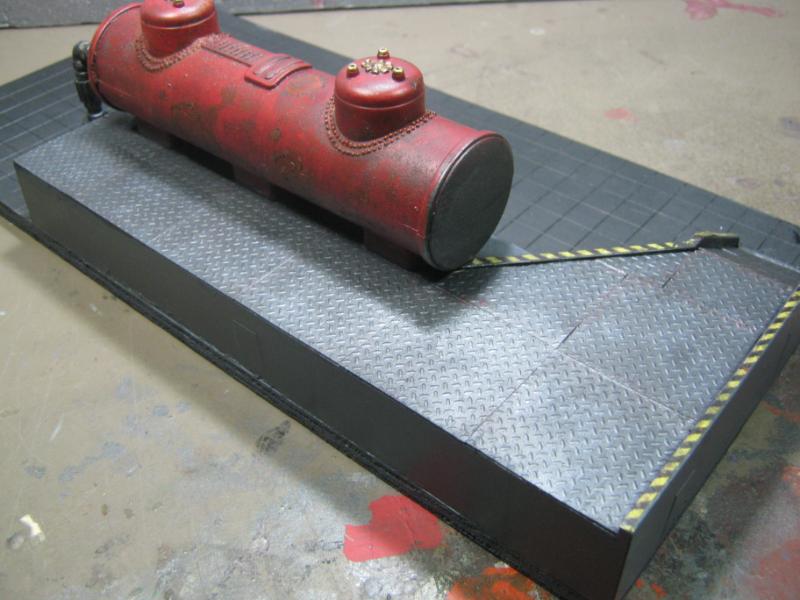
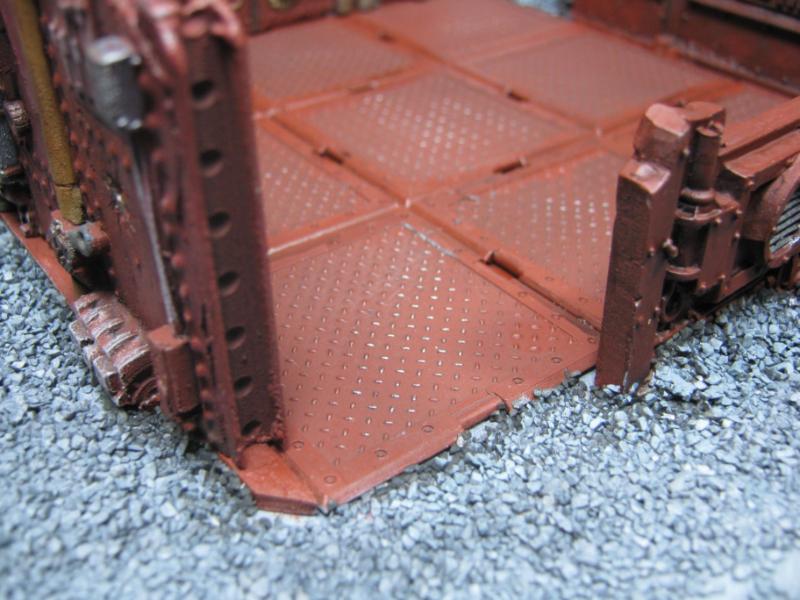
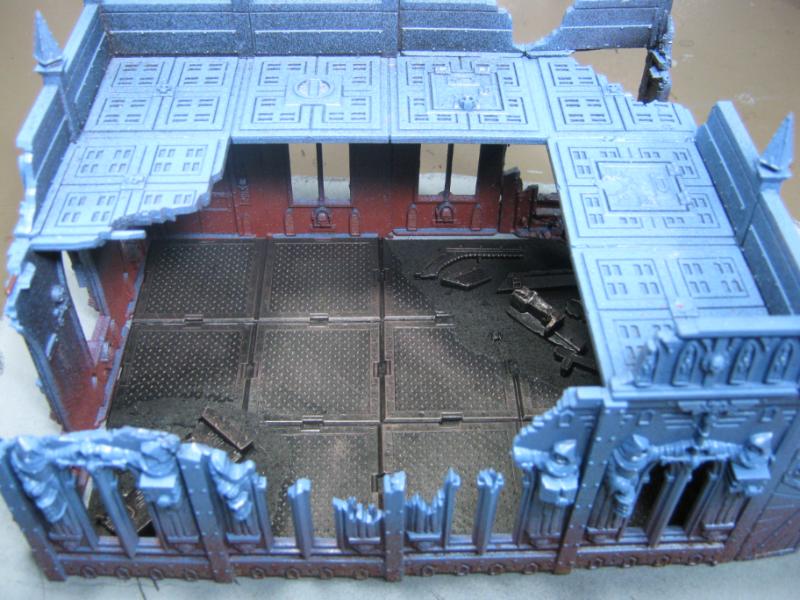
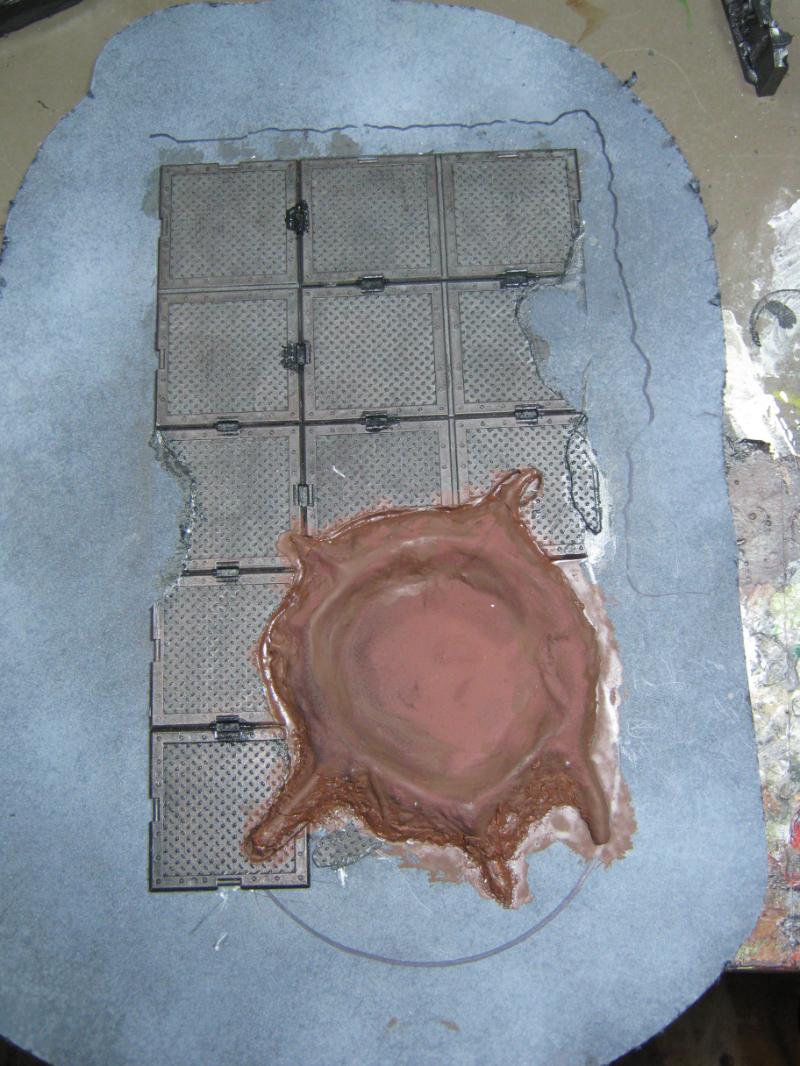
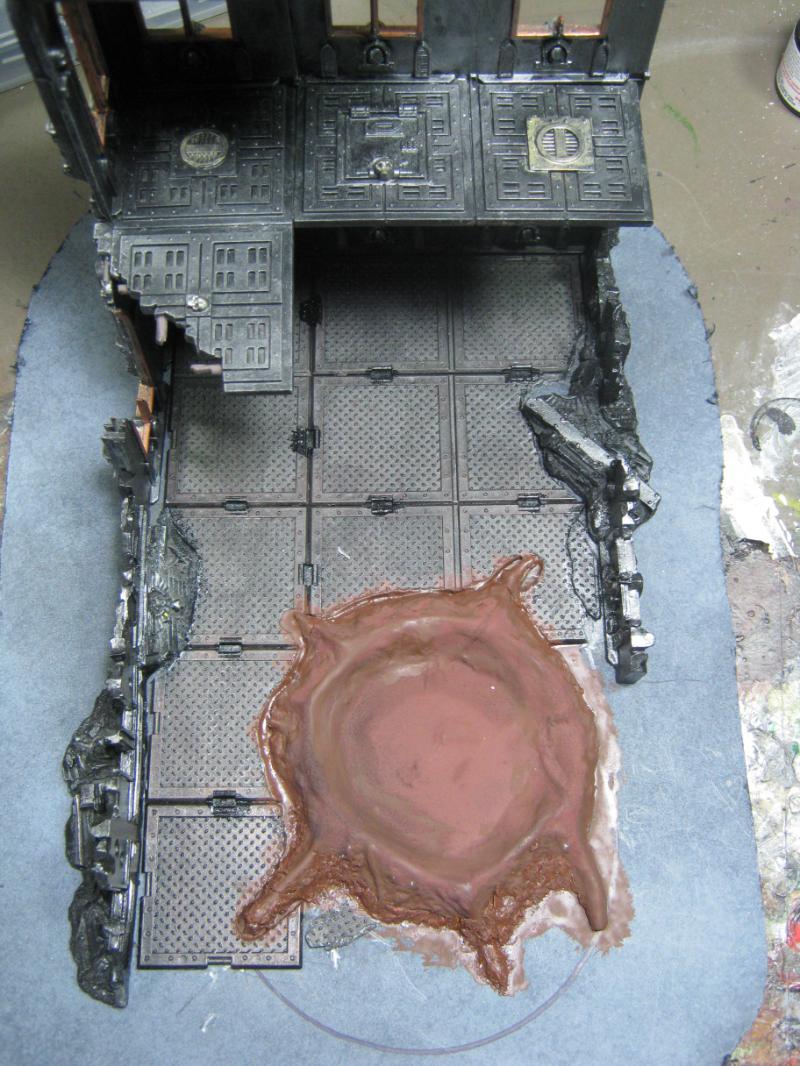
Ok, decent update coming today. First up is the continuation of the Epicast walls Dave sent me. The floor is made from Pegasus Hobbies treadplate panels I picked up from Hoard O Bits and glued to my usual piece of hardboard (best thing every for terrain bases). I based the... uh... base... with black (then gray) rattle can spray. It's not finished, it's just there to give me some perspective while I work on the model. Note that I painted the gaps the same rust color as everything else, but used a lighter color on the edging of the tread plate. It's a subtle difference but it shows up nicely and gives that 'degrees of decay' look.
Walls are done but I didn't take any new pics before gluing them to the base. So, here's everything glued and ready to move on to the next stages:
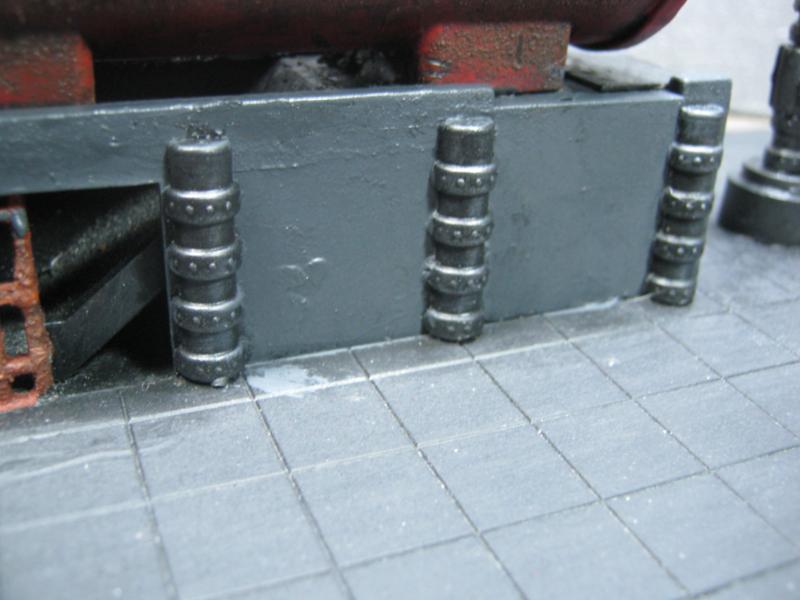
Closeup shots of the smaller walls:
It'll might be a while before this is done because of a bunch of things, most specific is the flocking and finish work. But rest assured this is huge on my list because it's very close to being done and it looks really cool. C&C welcomed becasue it's not quite finished and if anyone has an awesome idea I'll give it a try. Yes, rust powder will be attempted.
But wait, there's more!!!
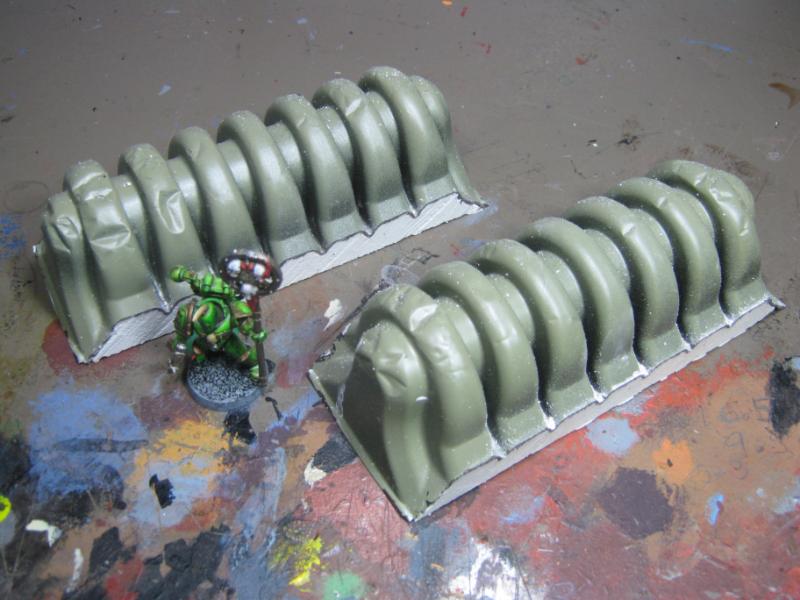
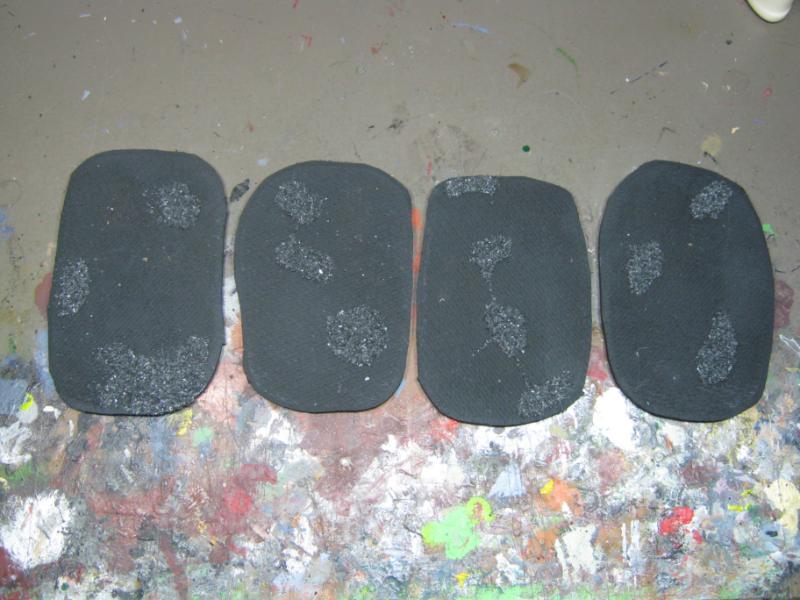
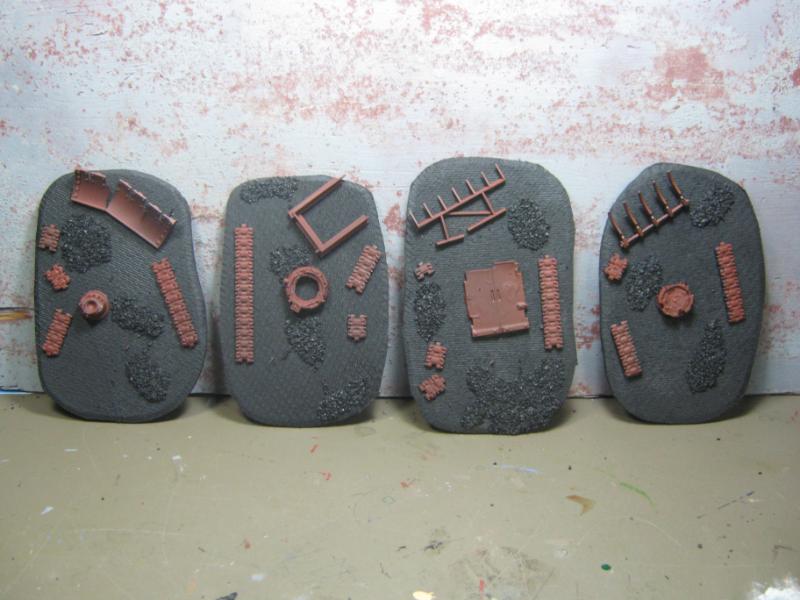
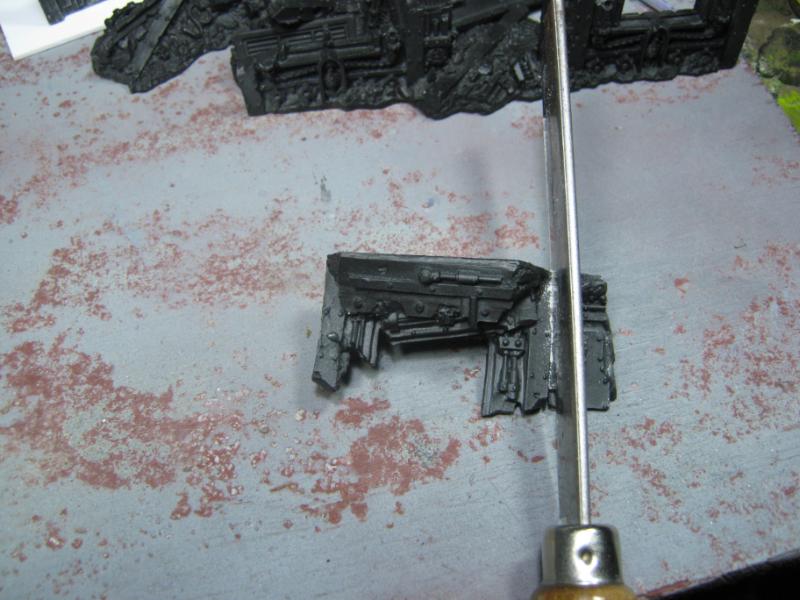
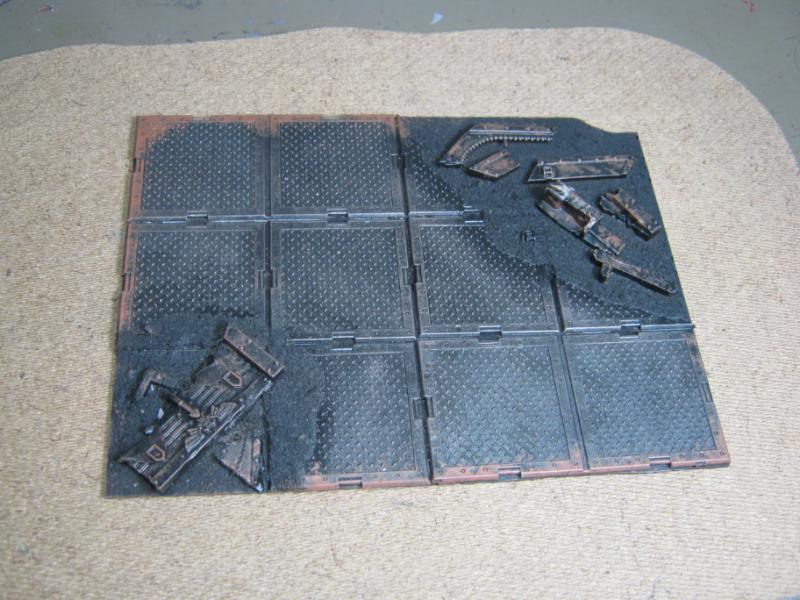
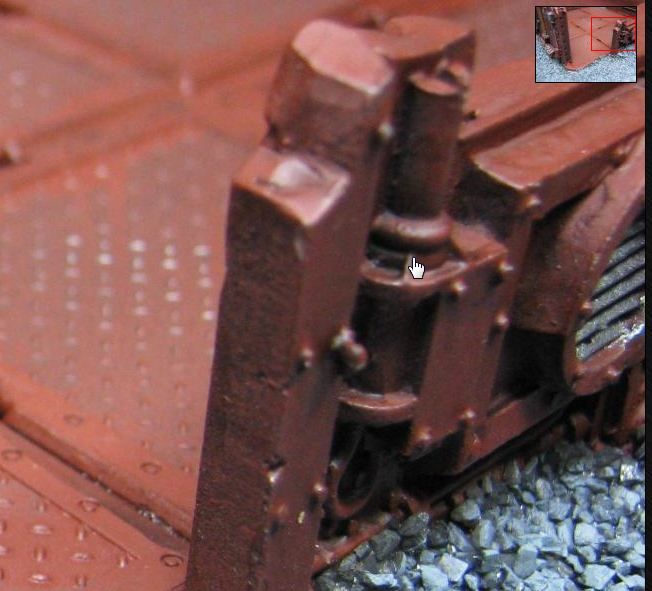
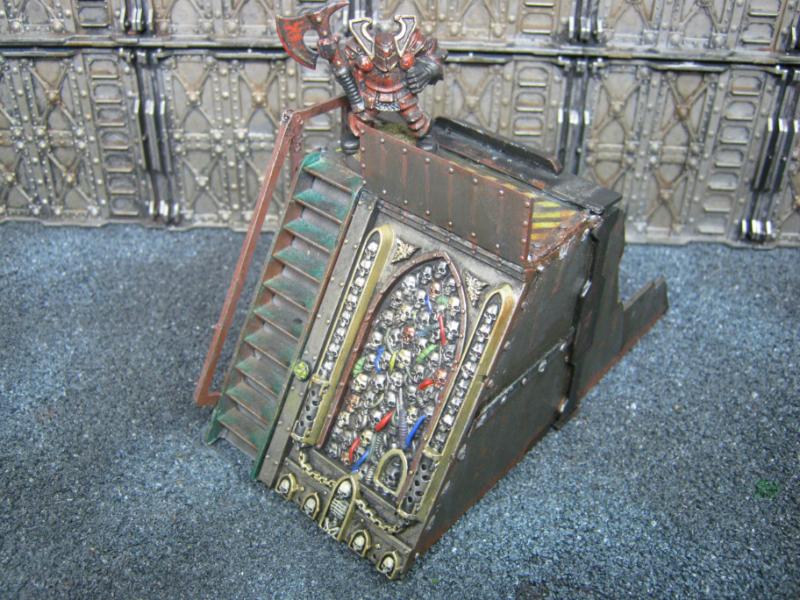
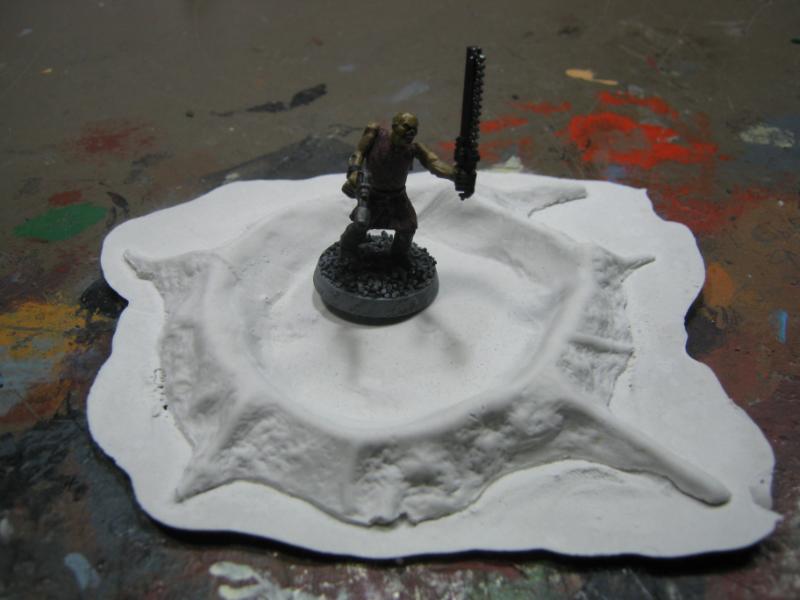
These are pieces that I don't want to put on my table at all, but I know they will. I decided to FINALLY make my 'destroyed vehicle' markers. I made 4 Rhino markers as I usually run at least 2 Rhinos and generally have a variant (Predator, Vindicator, etc).
Hardboard bases cut to size:

Getting some texture. I used Elmer's Wood Glue.

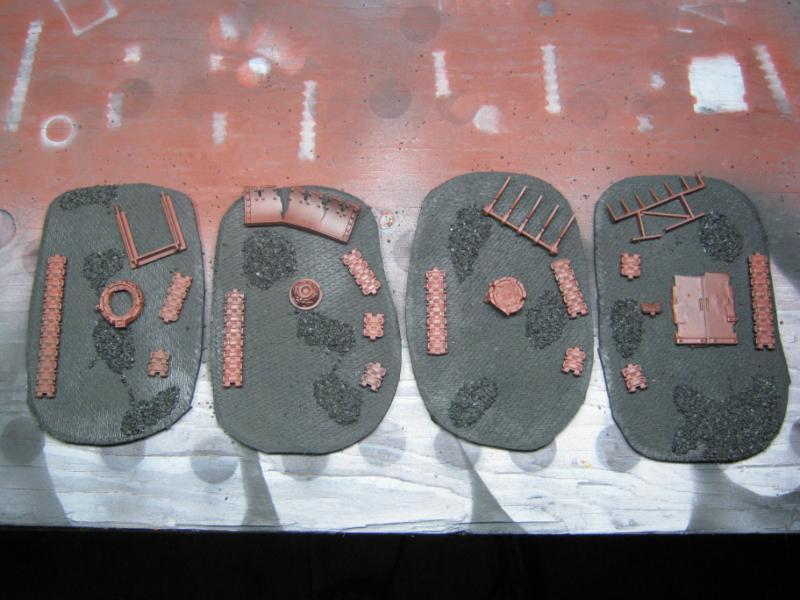
Flock complete. It is sparse on purpose.
Based black,and first shot of parts I'm using. All of the bitz are from my massive collection of Rhino parts. I only used items that I have a lot of, or are so messed up I'll never use them, even on a Nurgle Rhino.

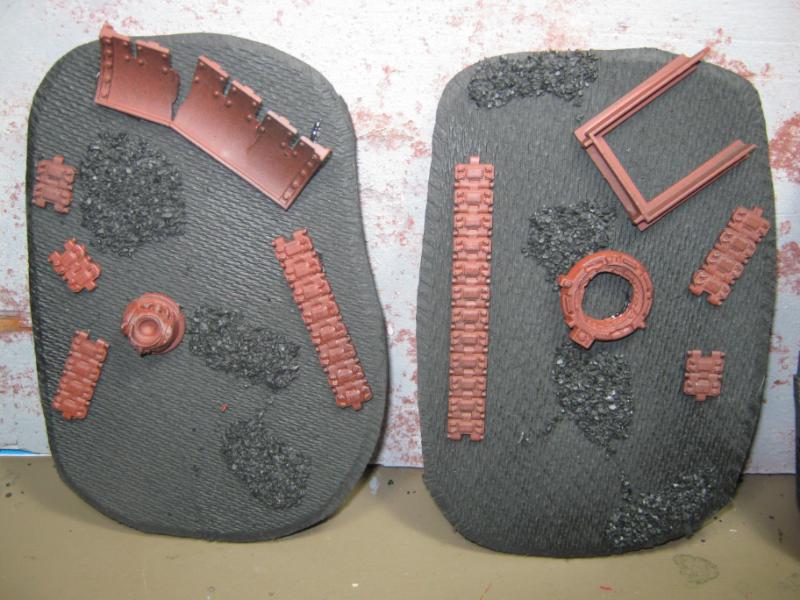
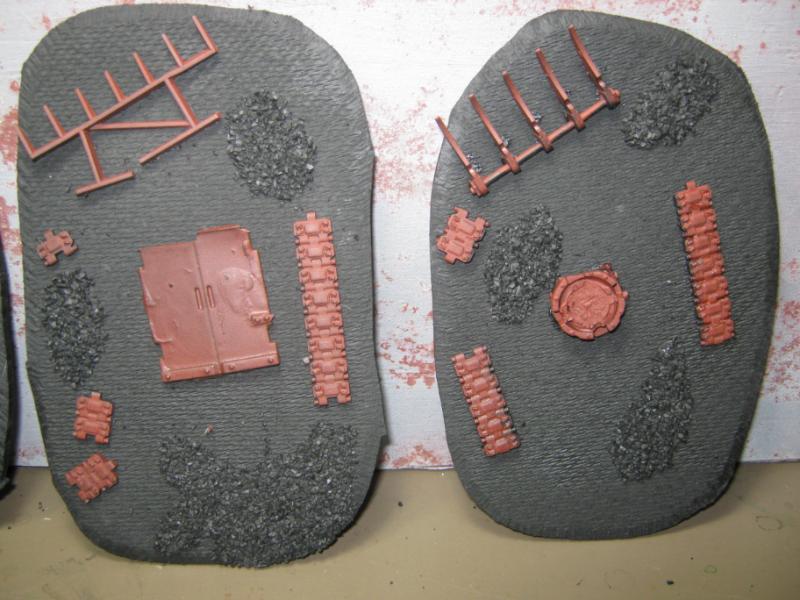
Mock-up of how I'll lay out the parts. Nothing is glued yet.
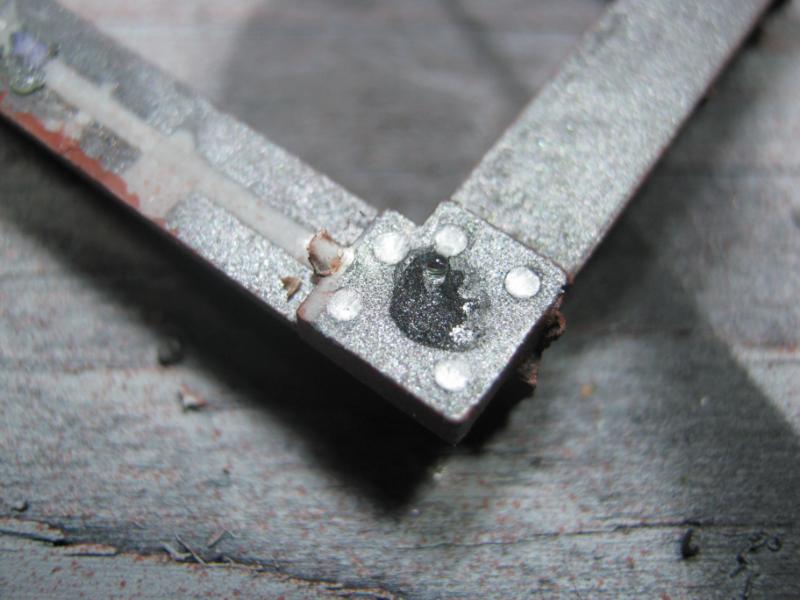
Supporting evidence that I genuinely belong to the LoER. I had to trim these rivets and was thinking "man, what a waste of good rivets".
Complete. Stood them up on their side to show that yes, they do have glue.
I put a lot more consideration into these than it may look. My primary goal was to make a marker that looked decent enough and clearly showed the 'difficult terrain' created by a destroyed vehicle. I avoided using a huge wrecked / burnt out shell of a vehicle because I wanted two more things from my markers- practical application (having miniatures stand on it after the wreck for armor save / pin test) and storage / transport considerations.
Nothing I'd enter into a contest, but 100% awesome for my personal use.
C&C always welcomed and encouraged. Thanks for looking and I'll be back as soon as I have something more to share.
24297
Post by: Viktor von Domm
had to look back of your recent post as to what these parts on bases should stand for... ruined tanks... ok... then the bitz fit the purpose... tho i am not sure to the rhino gunners torso... that looks wrong...
but a nice idea!
26139
Post by: Skalk Bloodaxe
Skalk Bloodaxe wrote:These are pieces that I don't want to put on my table at all, but I know they will. I decided to FINALLY make my 'destroyed vehicle' markers. I made 4 Rhino markers as I usually run at least 2 Rhinos and generally have a variant (Predator, Vindicator, etc).
Sorry Vik, but had to point out that I made sure to include that info in the post. As for the gunner torso, I added it because I needed somehting from the hatch and that was a bit I have about a dozen of. I suppose I could chop it up a bit to make it look less like what it is, but aside from your keen eye I doubt anyone will notice either way.
24297
Post by: Viktor von Domm
well... how about adding a dead head? some rotten zomie one?
Automatically Appended Next Post:
tho that would probably ruin storability...
30344
Post by: monkeytroll
Armorcast ruin is looking pretty cool. Like the practicality of your destroyed vehicle bases I was also wondering about the rheen's torso, maybe some wires hanging out of the neck? I know it can be disguised with paint (I've used them as part of trukk suspension) but in that position with the neck hole it looks a bit obvious/weird to me.
Then again, I may be thinking too much about a destroyed vehicle marker
36327
Post by: GreyDeathOne
Hey Skalk my chaotic friend! it's been a while, I am loving your terrain pieces you built for your gaming table. He'll you got a good variety of pieces to make your battlefield interesting.
33919
Post by: Moltar
Armorcast piece is coming along really well. The functionality of the wrecked rhino templates is very smart thinking. Glad to be back in the Dakka-scene. Unfortunately, as soon as I'm back, I get sucked into the warp again. I leave for China tomorrow, but managed to move houses and keep my nerd goods in tact. Excited though, upon my return I'm actually going to begin building small forces to actually play 40k with. Yay for months of getting creamed on the tabletop by 14 yr olds.
Good to see you still cranking away. Don't think I'll have many chances to pop on dakka while overseas, but once I'm back I'll have some fun stuff to post.... Chimp Fists, perhaps.
26139
Post by: Skalk Bloodaxe
@ Vik- I've decided to take a blowtorch and melt the torso down a bit so it looks like slag instead of a torso. Will show pics when I'm done.
@ monkeytroll- Thank for the compliment. Hope you like the pics below. And agreed w/ the torso thing. It's going to change.
@ GreyDeathOne- GD1!!! Man it's like an 'old school' homecoming party! Were have you been? Off doing somehting cool no doubt. I thought you forgot all about your Dakka buds. I stand happily corrected. Appreciate the compliment, and rest assured that more good stuff is on the way.
@ Moltar- Wait. You are moving to China or just visiting? I didn't quite get that. But in either case, glad to see you around Dakka when you can visit. Cool to hear you're going to start playing. Looking forward to seeing more Imperial Chimps. Always a good laugh, and the artistry of it is excellent.
So yesterday I took the day off. It was planned out about 2 weeks ago so no I didn't just ditch work. It's nice to have a random day off to look forward to now and then.
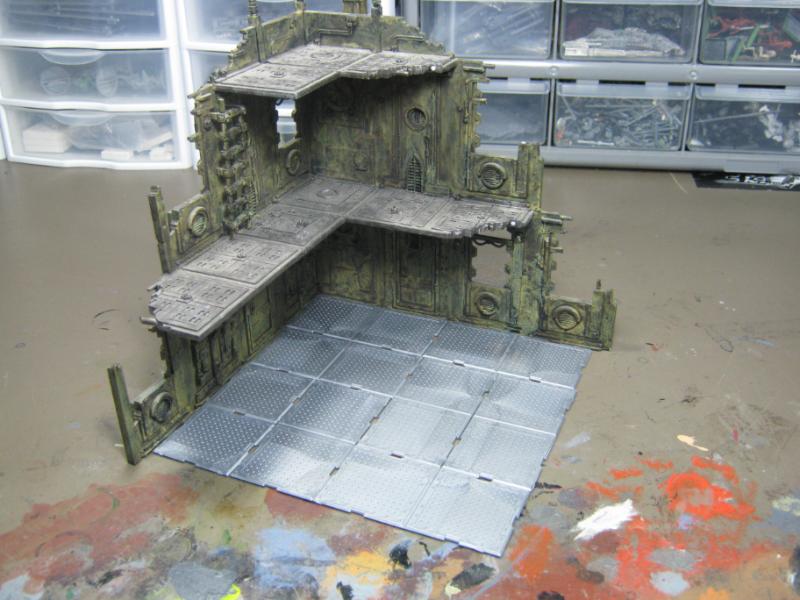
I sat at my table from about 8:15 am to 5:15 PM. It was awesome. Got a bunch of fiddly things done (like clean off my desk) and also 'finished' my Epicast / Pegasus Hobbies ruin.
I said 'finished' instead of FINISHED because there's a bit of work I could do, but I'm waiting to get some practice / skill w/ powders first. I don't feel like practicing on something I like this much.
Anyway, here's the pics. C&C welcomed, but be kind re: powder etc. It will happen becasue I want to continue my quest for continuous improvement.
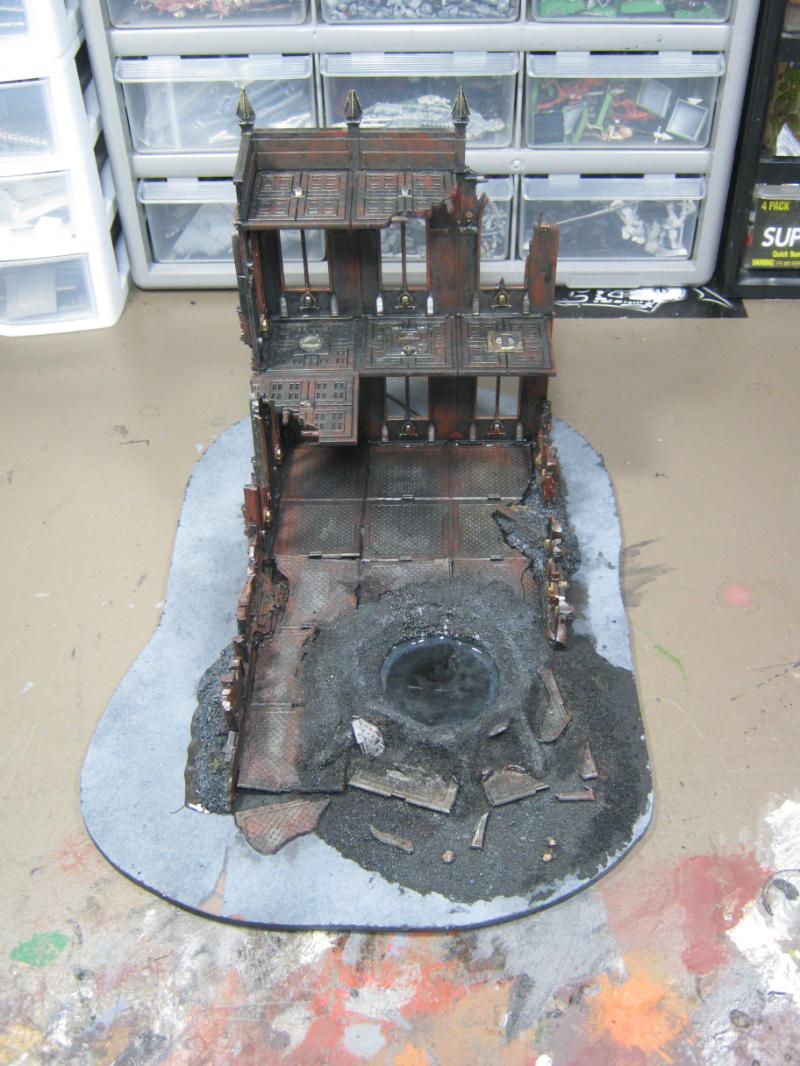
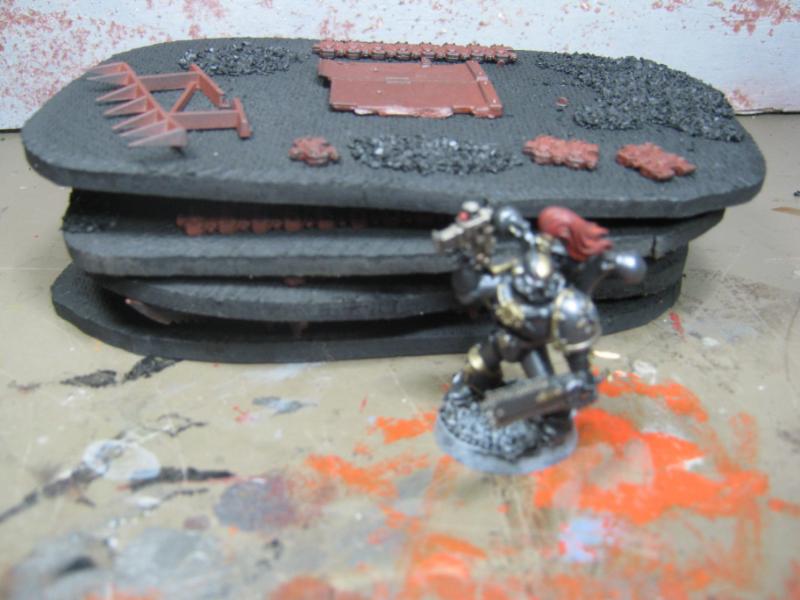
Here I'm flocking w/ the standard little crushed rocks I use for everything. The base is covered w/ Elmer's Wood Glue. I like it better than regular because it makes in iron-strong bond. The only way that stuff comes off after it's dry is w/ dynamite.
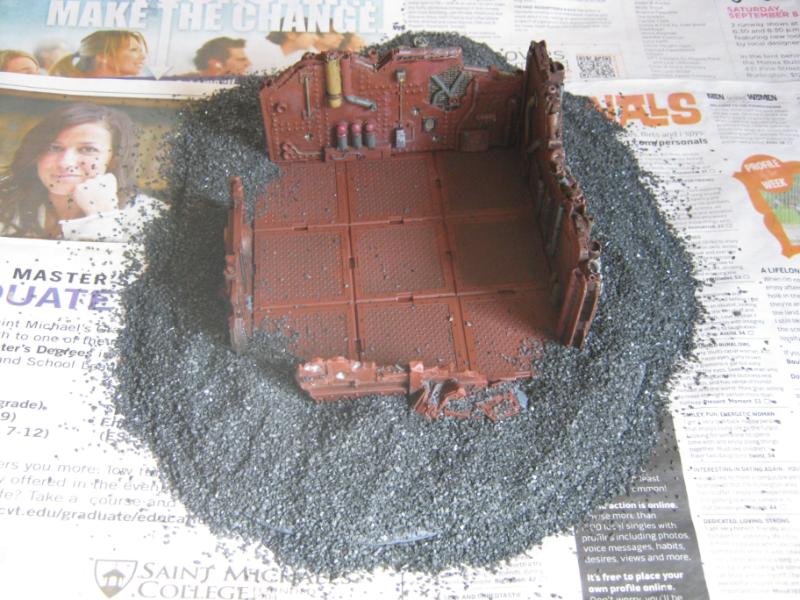
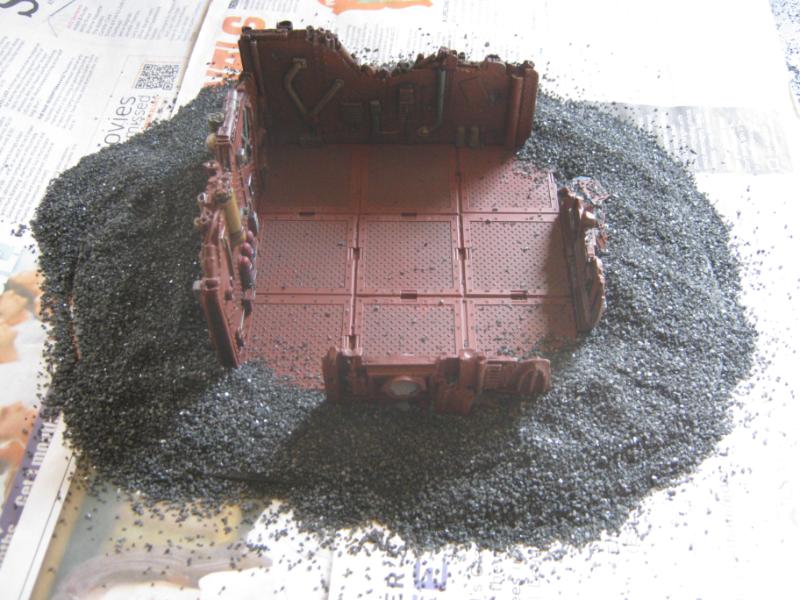
I use a newspaper when I flock so I can recover the stuff that falls off. I pour so much on it because I press down hard on the pile to get as much texture into the glue as possible. And yes, it has occurred to me how very cool it looks with the huge pile of scree around it. Maybe I'll make one like that out of foamboard someday.
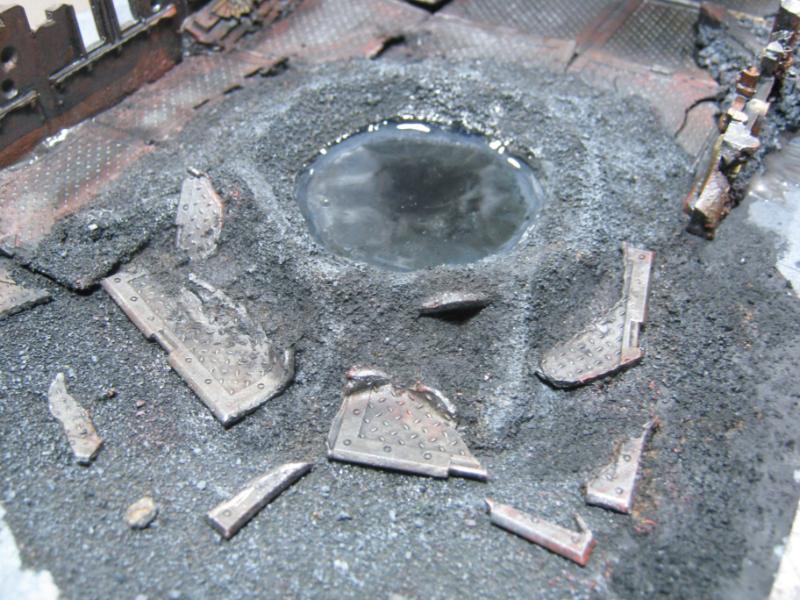
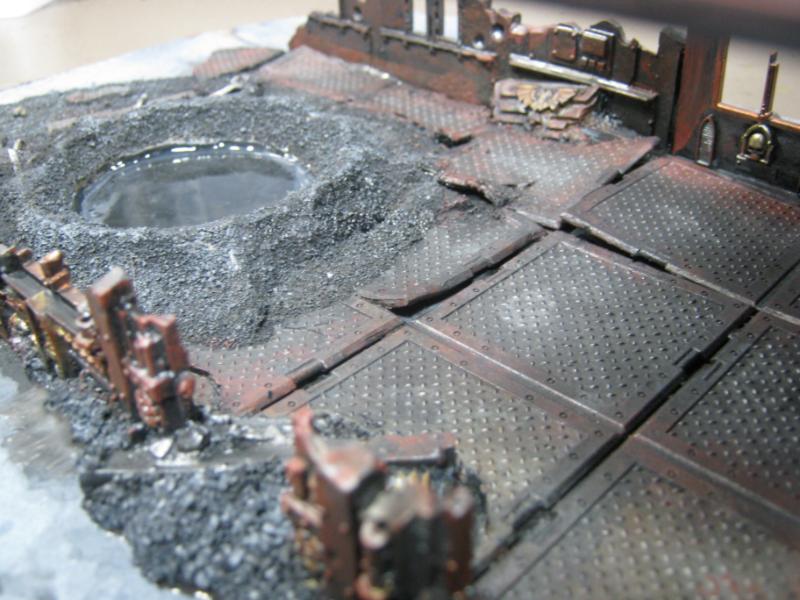
And here it is, 'finished' and ready for the tabletop!
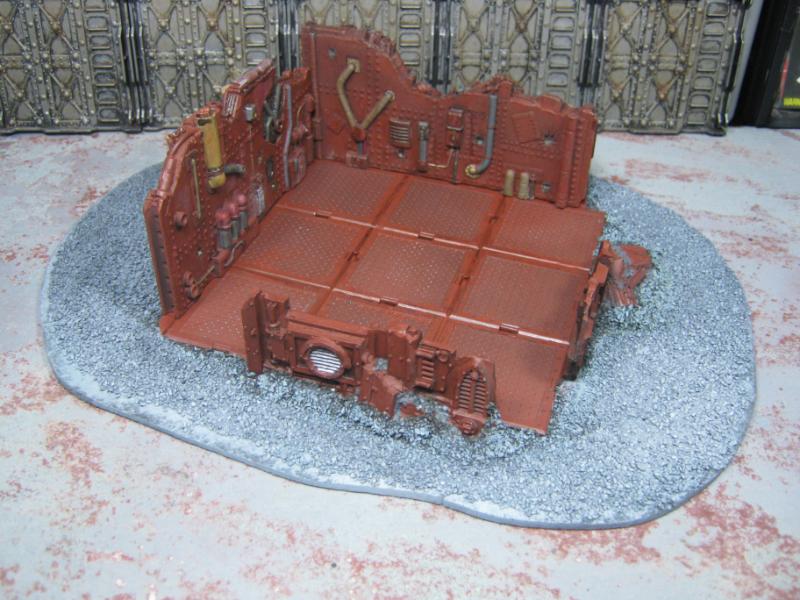
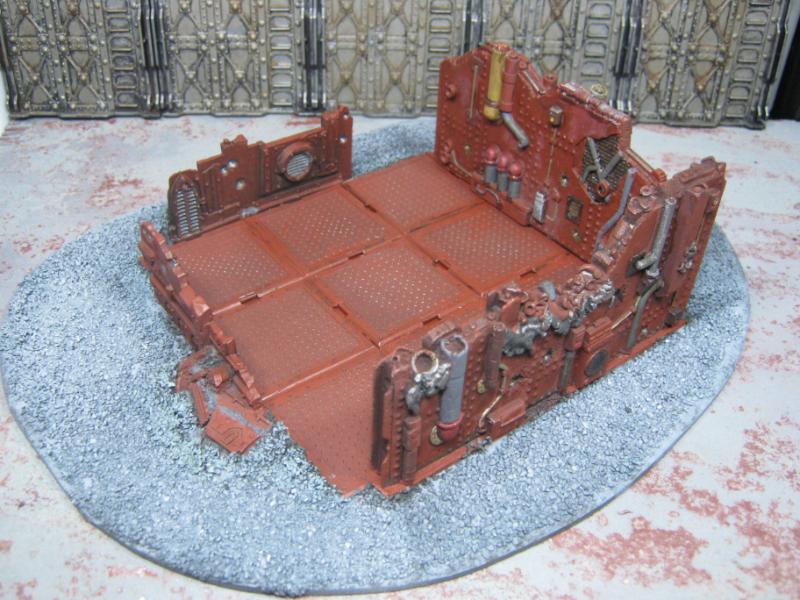
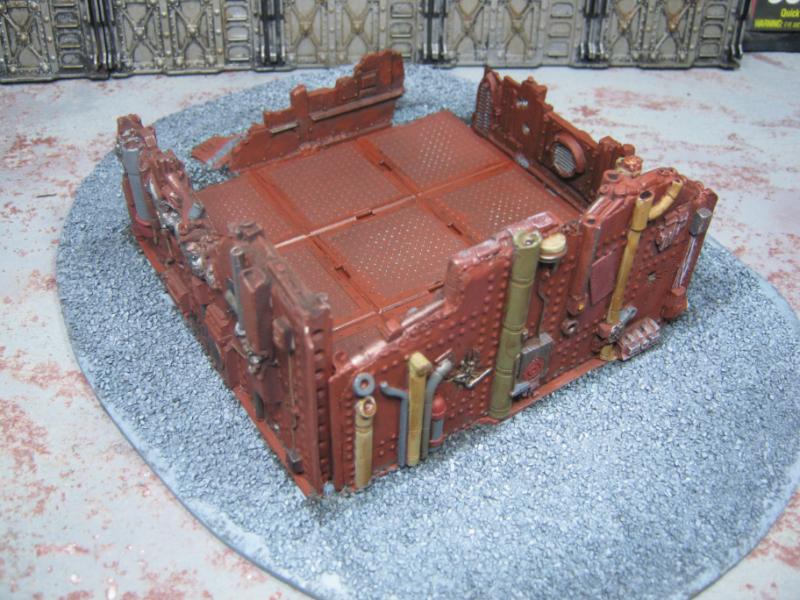
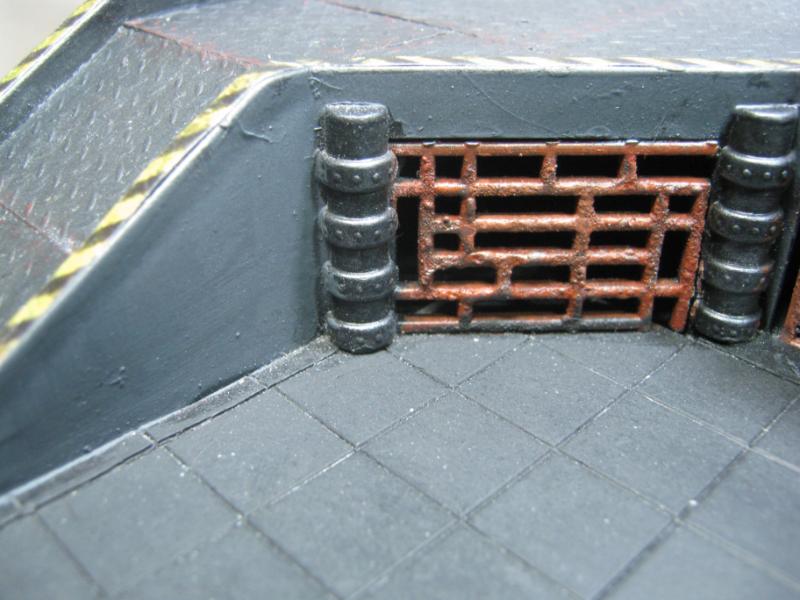
And some detail shots. I really like how the smaller walls came out. Comparison pics provided. But first the floor. Note the 2nd shot for wear. How did that come out?
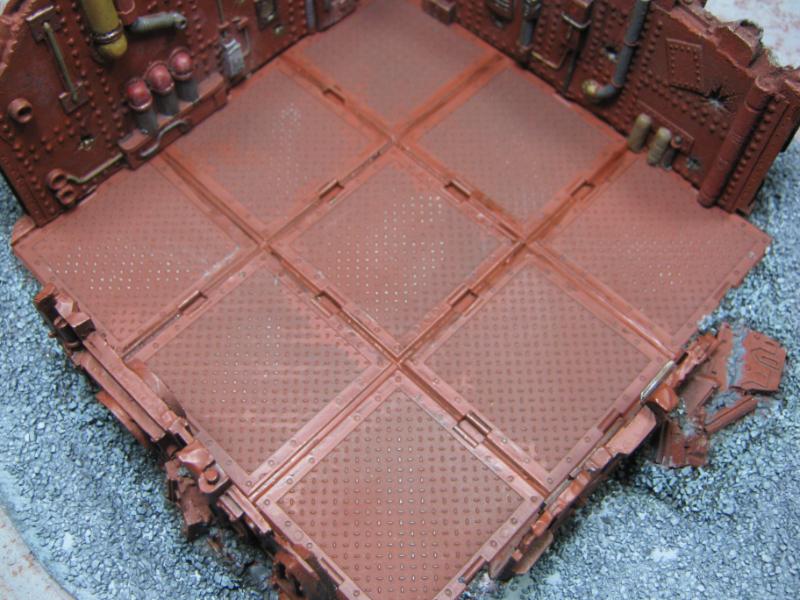
There's more I could have done, but I'm holding off until I know what I'm doing.
Here's the detail closeups of the smaller walls:
Before:
After:
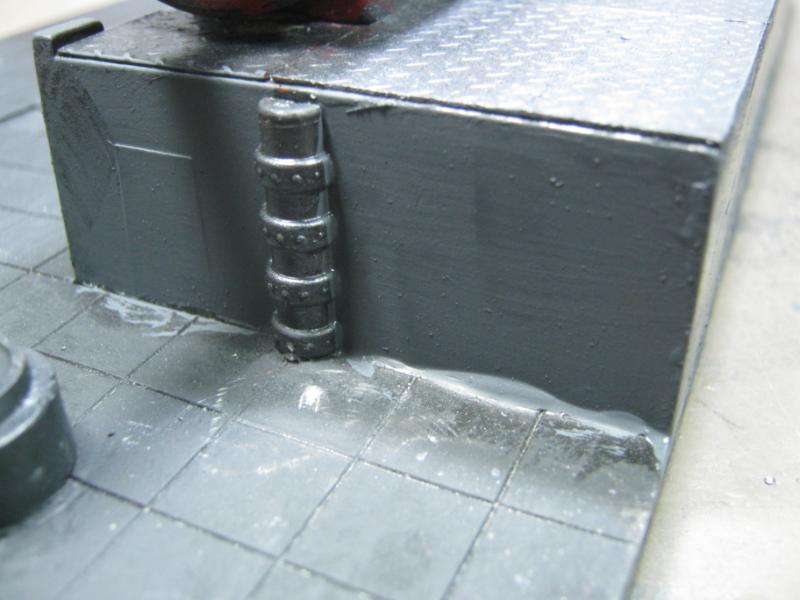
I'm not terribly happy w/ the obvious line between wall and base, may go back over that to grade it down a bit. But overall I'm pleased withe the outcome and I learned a couple things doing this so I'll have them in my 'tool box' for the next piece I'll be working on.
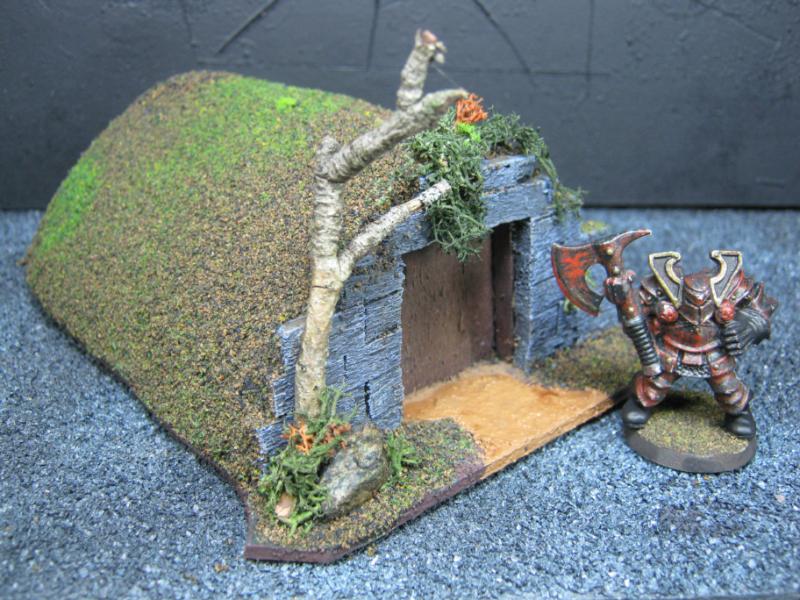
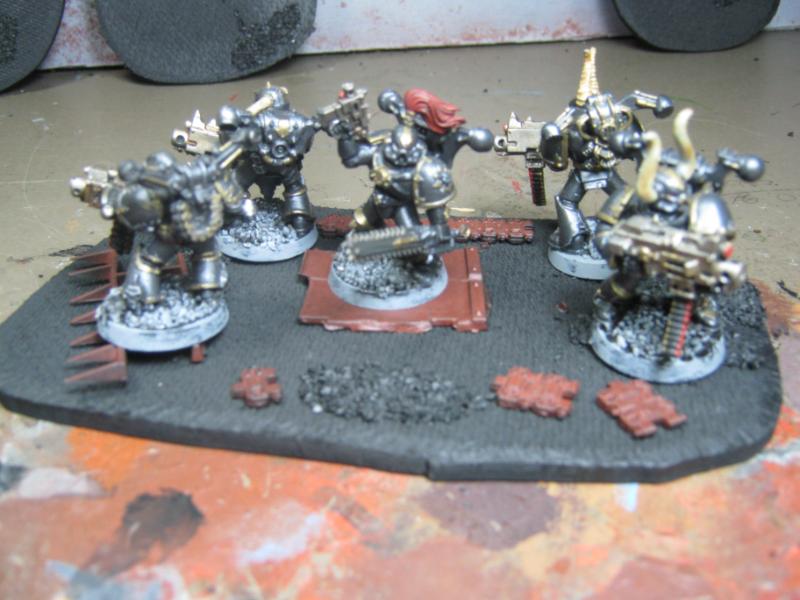
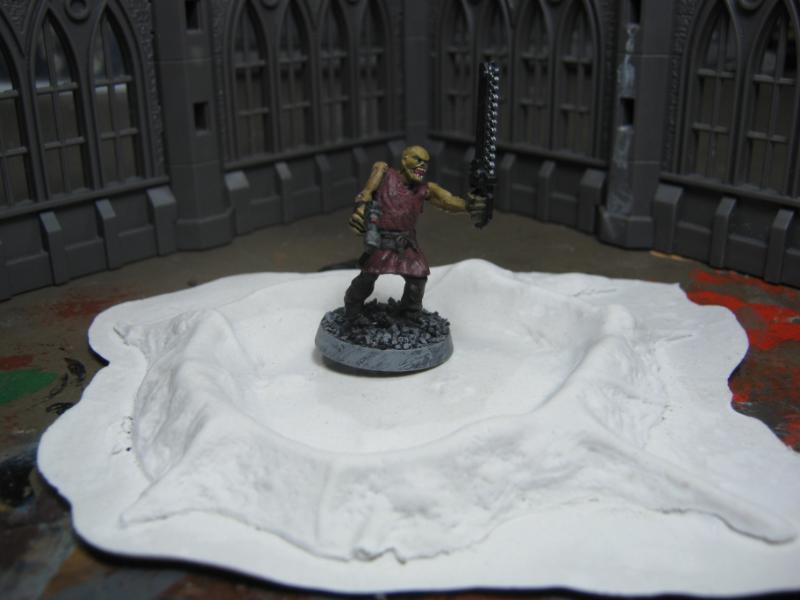
To finish things up, the obligatory 'action shot':
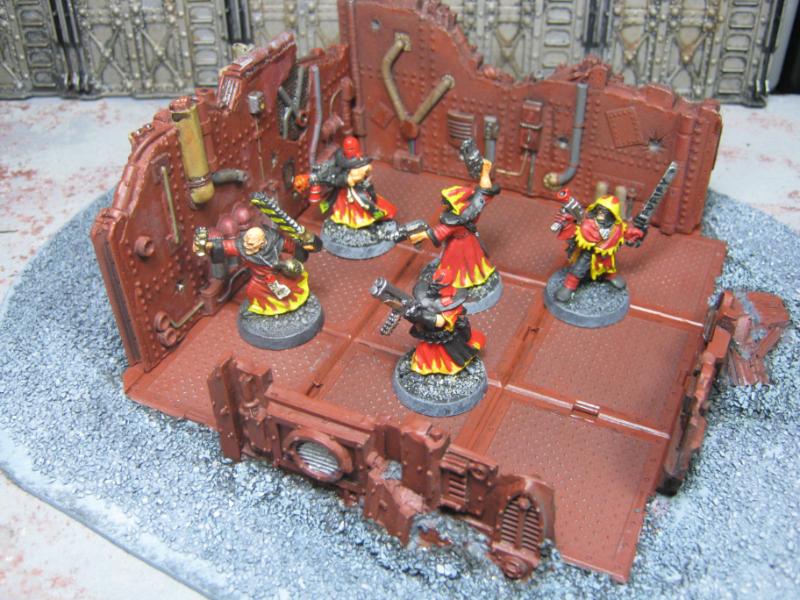
They are obviously hunting Mutants. Or Chaos Cultists. Or anyone that isn't a Redemptionist... that is part of THEIR group. Or maybe they'll just shoot each other if they don't find anyone else. Had telling with psychotic Imperial Cultist fundamentalists.
That's it for now. I'm looking for a break in terrain as soon as the new CSM Codex comes out. I've seen pics of the new rules, looks like I have a *lot* of things to learn. Looking forward to it.
Life is good.
24297
Post by: Viktor von Domm
I've decided to take a blowtorch and melt the torso down a bit so it looks like slag instead of a torso. Will show pics when I'm done.
that sounds like s splendid idea!!!
and so manyl as you used fire
and the redemtionists are looking damn fine... makes me want to get them yet again too... always thought i would use these as priests for my IG...
48594
Post by: dsteingass
Dood! Looks nice!
( btw, it's Armorcast, Epicast was a different company )
26139
Post by: Skalk Bloodaxe
@ Vik- There's so much awesome packe dinto the Redemptionist models. They fit in IG and Necromunda and would make great Cultists. I really like them a lot.
@ Dave- Thanks for the compliment. I'm psyched that I could take your old stuff and turn it into something awesome for my table. I'll tell you, it was a huge motivator for me. It is a project I enjoyed a lot. Nice to know I did it some justice.
Epic, Armor... both were put down by GW. I think they were just R&D for Forgeworld. But I'll make the connection from now on.
30344
Post by: monkeytroll
Came out looking great Skalk, especially with the redempionists in place 
Nice bit of wear on the floors
33919
Post by: Moltar
Haha I'm visiting China. On my way there now. I was moving just across Charleston. New terrain pics are still looking great, bud! Keep it going!
22619
Post by: inmygravenimage
Colour contrasts are excellent. Nice job chief.
26139
Post by: Skalk Bloodaxe
@ monkeytroll- Nothing like a few Redemptionists to bring some color (colour?) to any 'action shot'. Thanks for the comment on the floors. The technique came from me having Bolt Gun paint on my thumb. Ran it over the plates, instant roughshod wear. Weird, but it worked.
@ Moltar- Phew. Ok. But you know... since all of GW's stuff is made in China, maybe you could score the 'bulk rate discount' by bribing one of the homeless orphans they force to work there with $20. Or go dumpster diving for the miscasts. Yes, I know they just dump the miscast plastic back into the vat and recycle them, I just thought it was funny to tell you to go dumpster diving in China.
@ graven- Thanks man, I really appreciate that. I was so tempted to just leave it all rust, but I knew that would get really boring really fast and look lame on the tabletop. I like this way better.
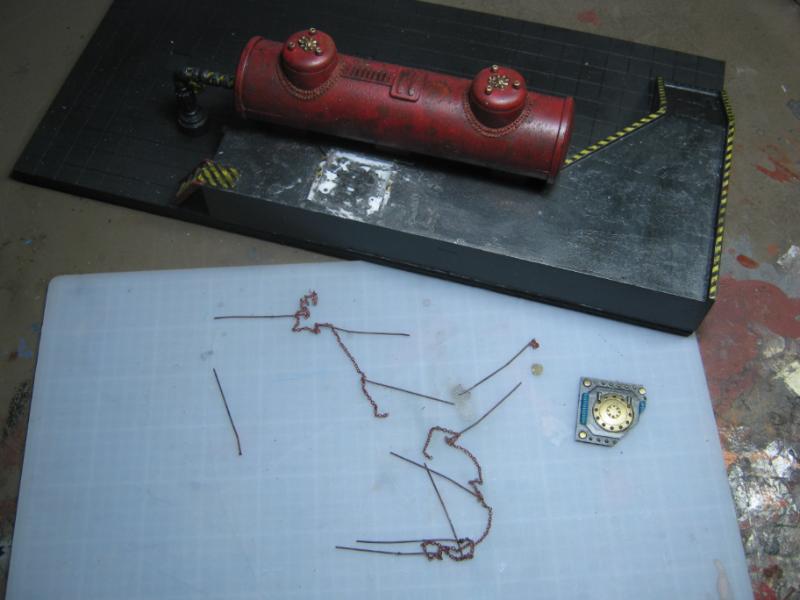
Not an update per se, it kind of is, but I'm looking at it more as a glimpse of the madness that races through my mind every time I try to do anything.
So last night I decided to keep the momentum going and work on some more terrain. I immediately went for the Pegasus Hobbies stuff I have and tried to figure out what to do w/ them. I grabbed some of the 'mock up' buildings I test painting techniques on, thought I would used them as a frame for the PH panels.

That wasn't working so I dumped out a few things so they could all stare at me while I was waiting for that burst of inspiration to hit me. That was my first sign of trouble- wandering ideas that go nowhere. Here are a few things I tried before figuring out what I wanted to do. The next pics posted represent a few hours.
Thought this base was a good idea. Scrapped that idea quickly, just wasn't feeling it.
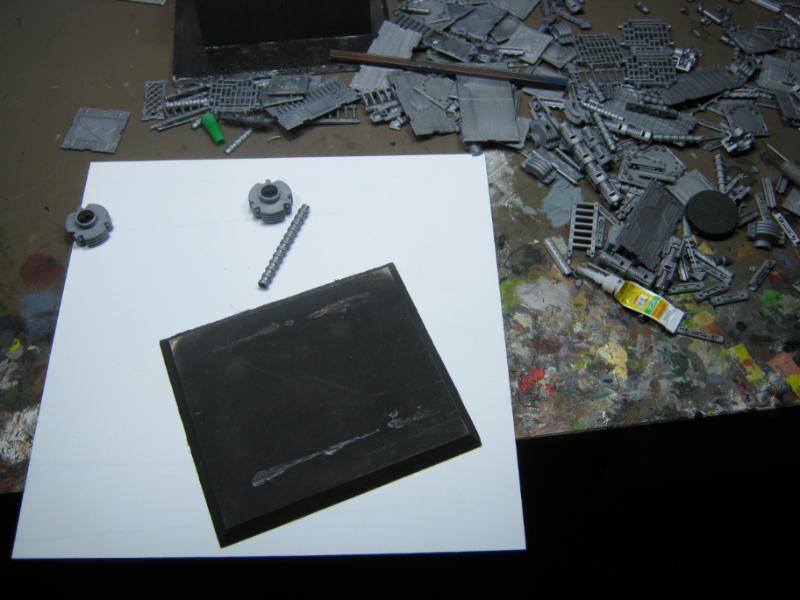
Grabbed another base off the shelf (I have a few of these done up in case I need them for area terrain on the table) and put together some of the PH pipe flanges. Put this together, didn't like it, scrapped it.
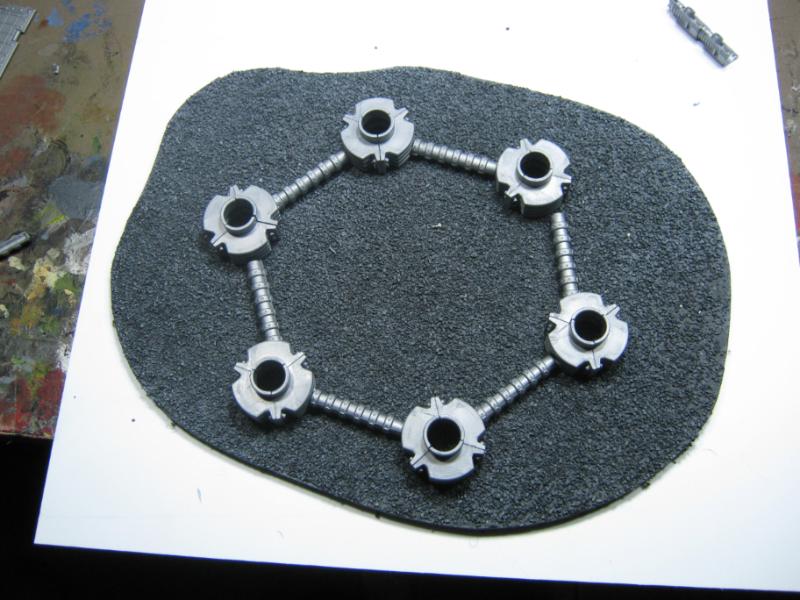
Put together some whatever those things in the back are, tried to use them w/ the pipe flanges, didn't fit, idea scrapped.

Then I realized those whatever they are things are *exactly* 3 inches, the magic number for Necromunda terrain. I started envisioning platform risers and walkways and towers and all sorts of awesome stuff, realized how much work that would be, idea scrapped for now but absolutely will revisit later.

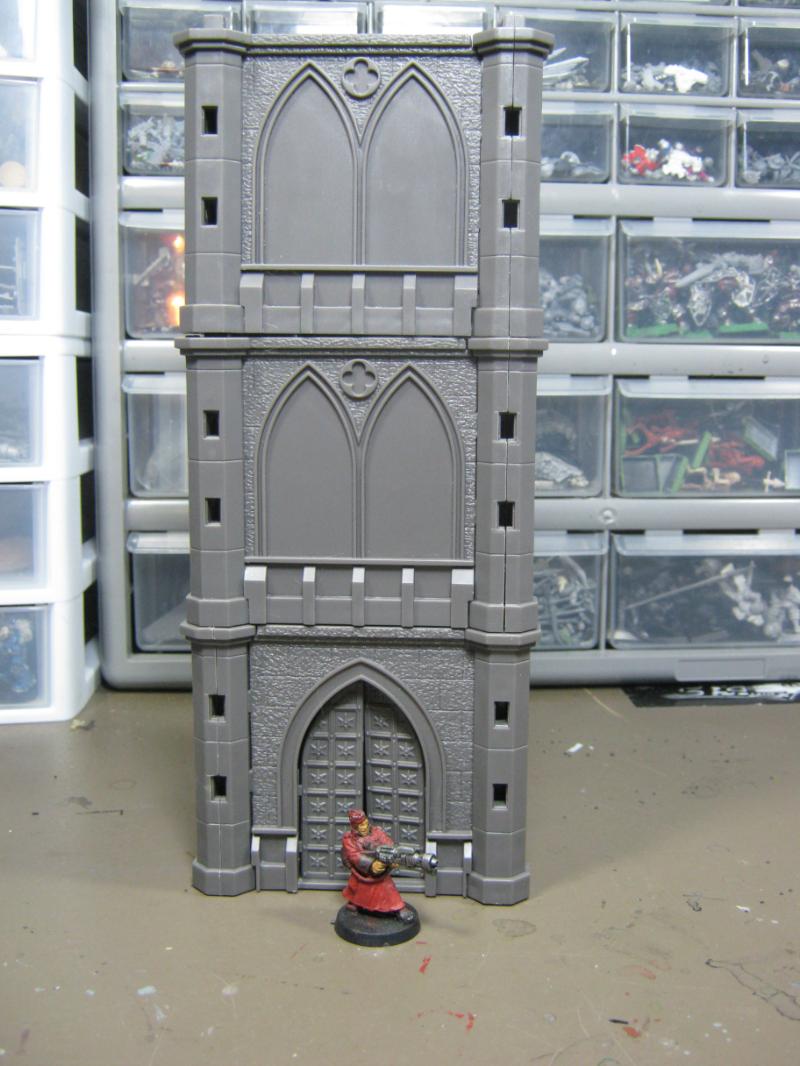
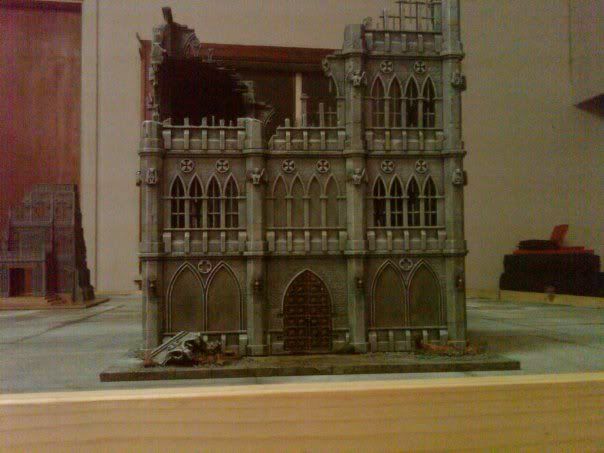
Here's the idea I had. I hate this building. It just isn't functional or practical on my tabletop. it's bland, boring, doesn't serve a purpose, and doesn't have a base.
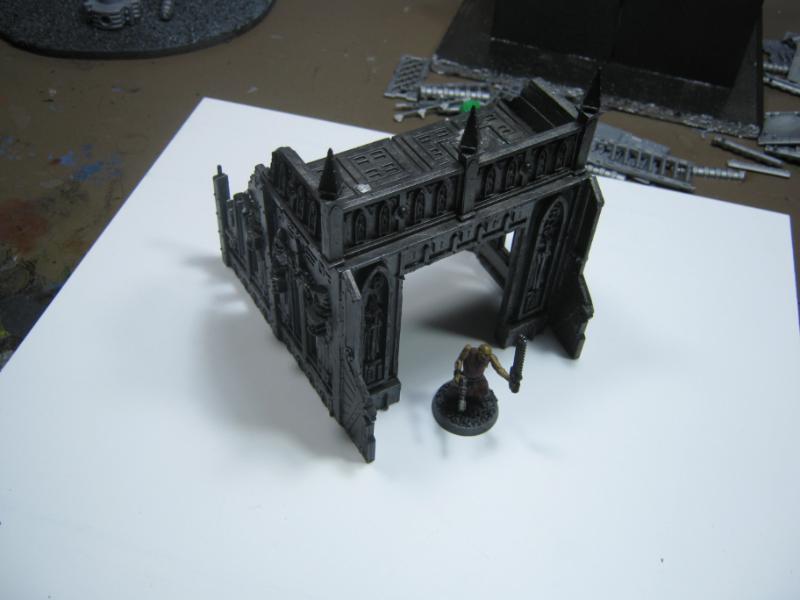
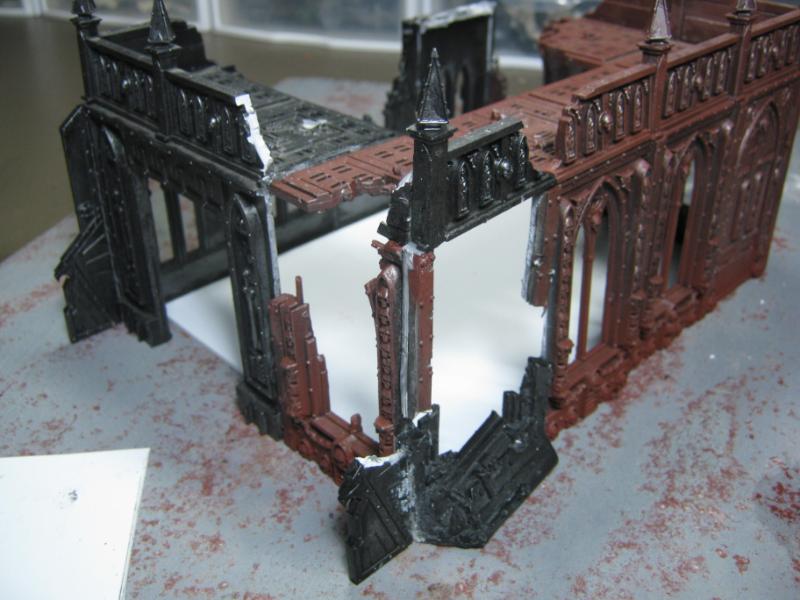
...so I tore it apart and started to put it back together...
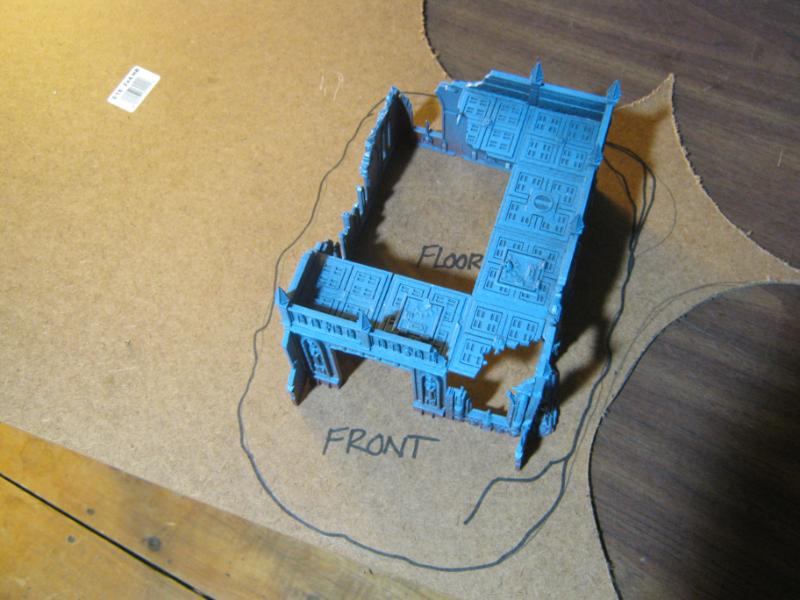
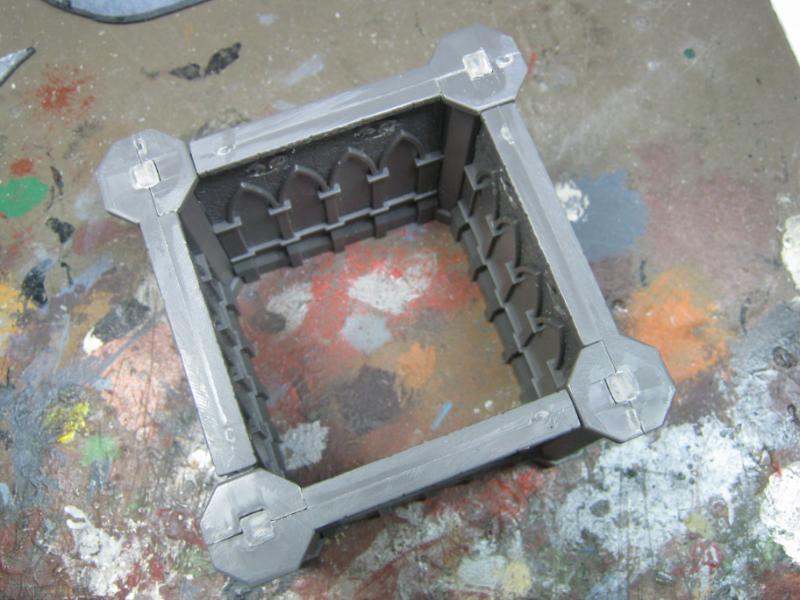
...which got the gears turning all the faster and I decided to make a genuine building with a real base and distinct features. I took another smaller piece I had been using as a spray test a while back. And since it also had little use on my table in the past I wasn't bummed to tear it apart.
A quick mock-up. It's going to work.
This is how it fit together after breaking apart the appropriate pieces:
Following my last bit of terrain, this one has a floor as well.
Cut to size and ready to go:
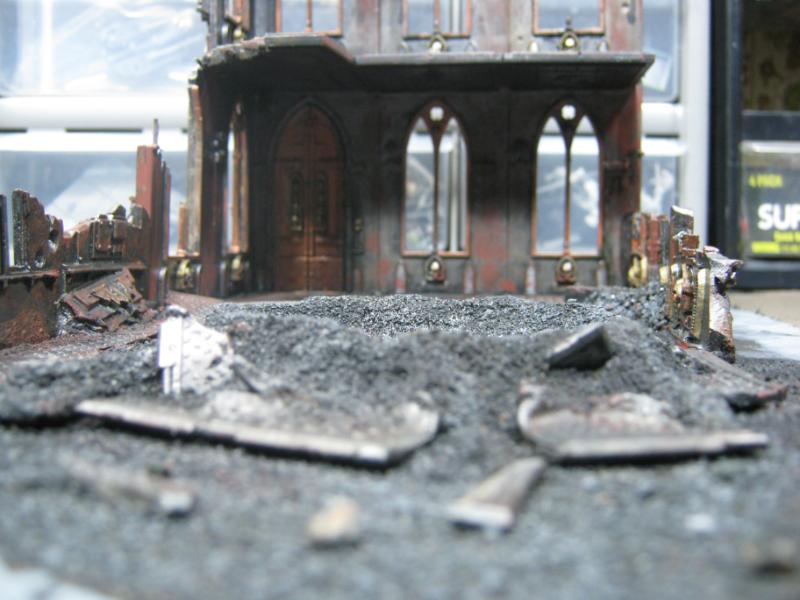
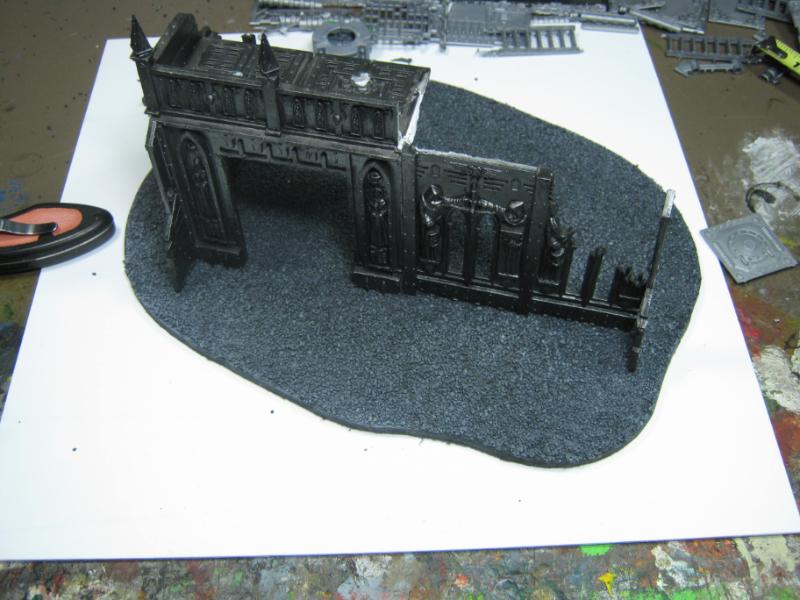
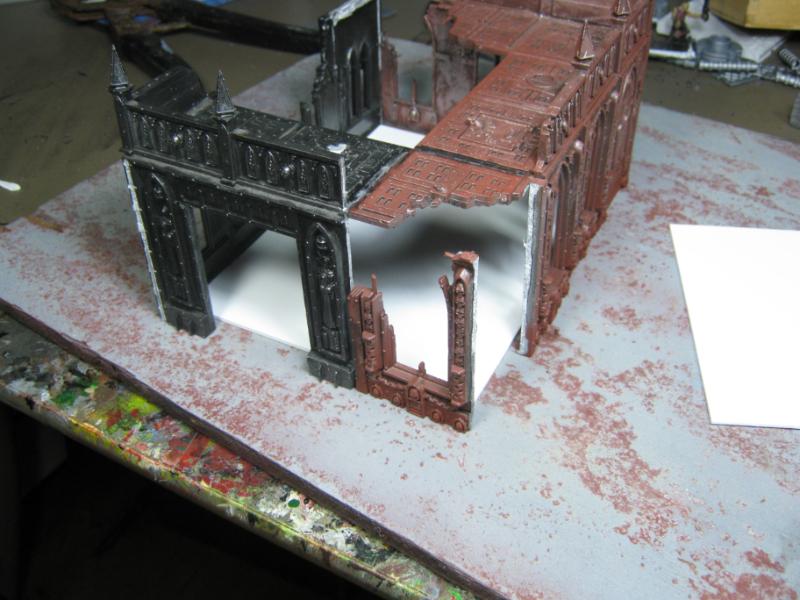
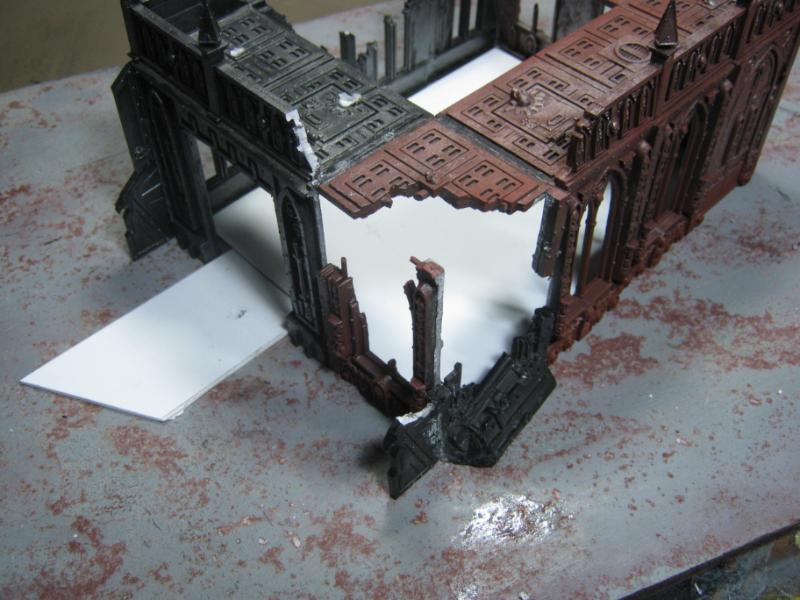
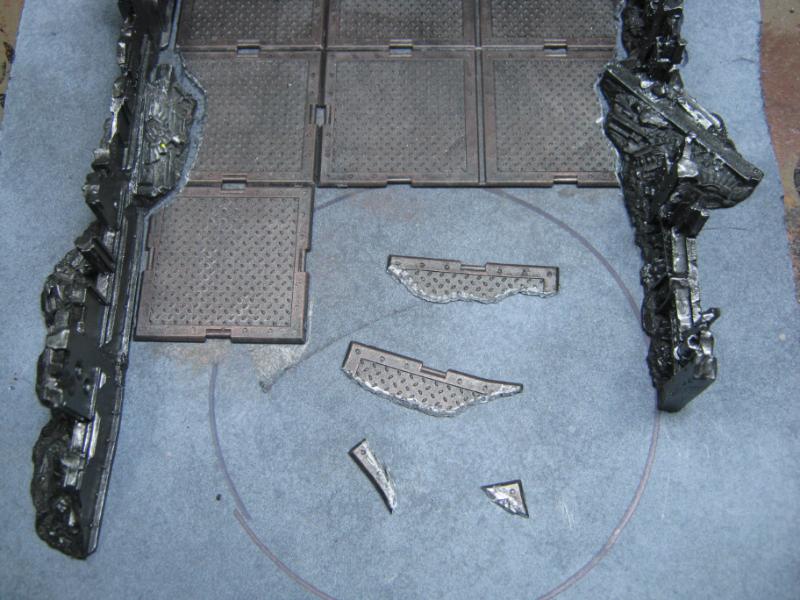
After looking at it a bit I felt it was too "blah". Just wasn't liking those huge gaping holes in the front and the one huge undamaged wall panel in the back (surrounded by everything else blown up) and misc etc bitz. Here's a series of photos showing the evolution of the piece as I made changes to it.
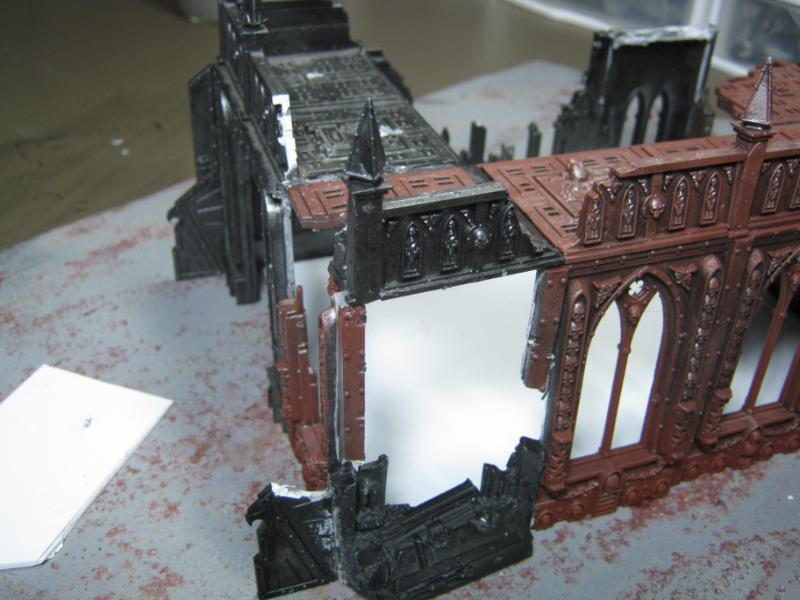

Almost 4am by the time I got all this done and I was nodding off at the workbench. It was time for bed. But before I went to get a few hrs of sleep, I made sure to pick up the chaos that I had created earlier. A clean desk is a happy desk.
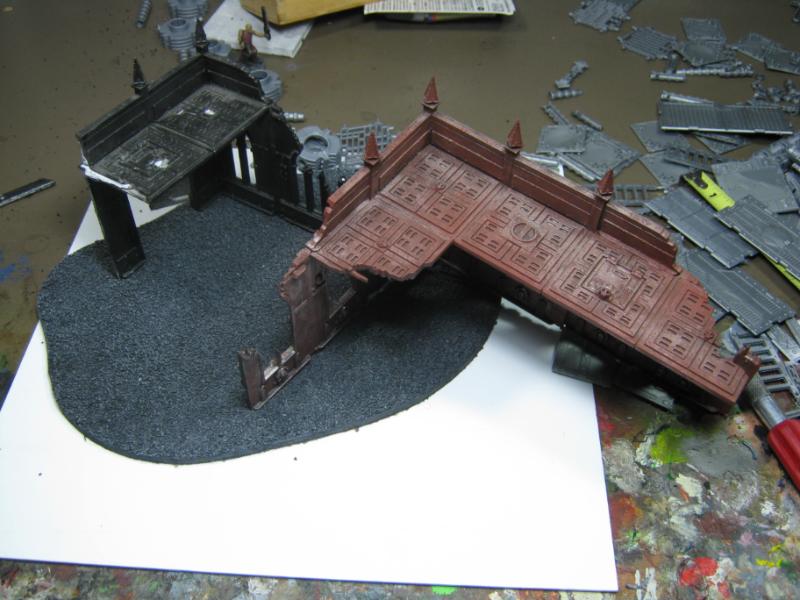
Fast forward 5 hours (yep, I got up at 9) and I've tried a blue spray on the ruin. C & C greatly encouraged. Yes, I know the rust spray is lame and needs to be fixed. It's far from done, it was just a color test to see if I was going to like it or not. I'm thinking 'yes' but still not completely sure, especially since all my other buildings are a gray steel color. Maybe I need to repaint them as well?
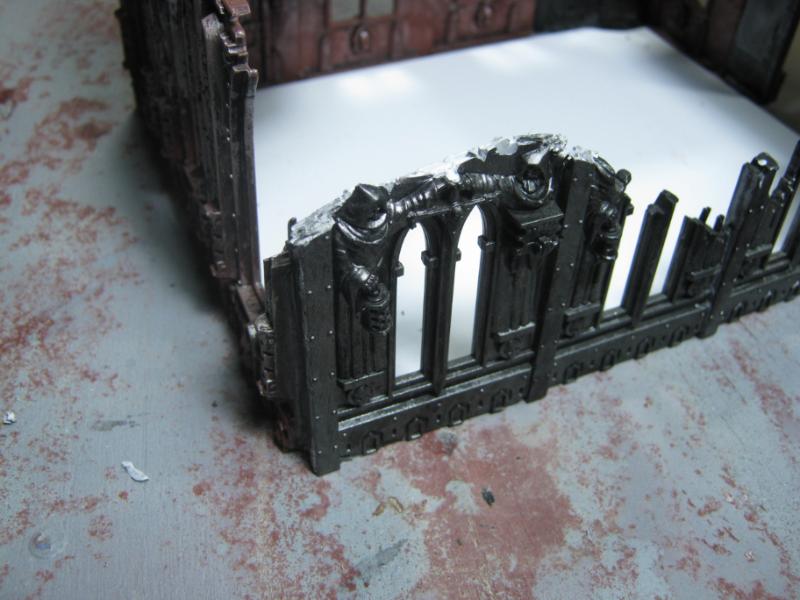
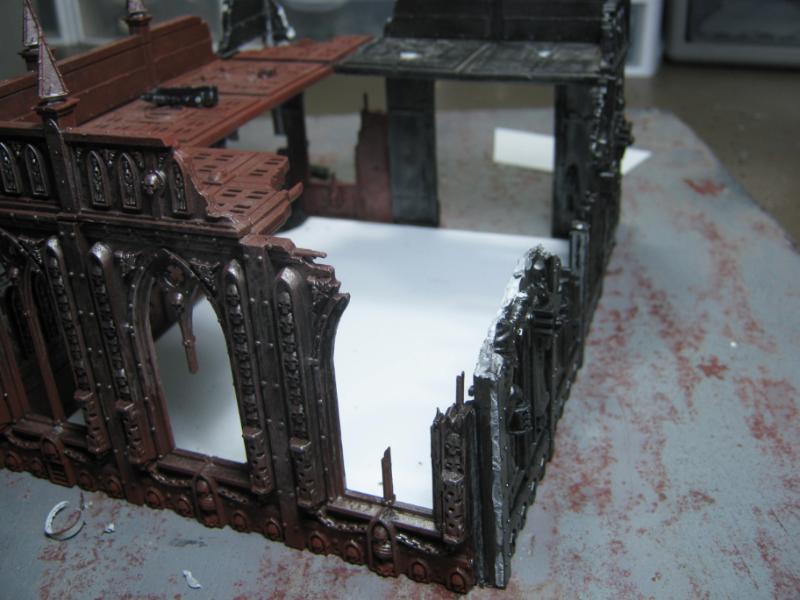
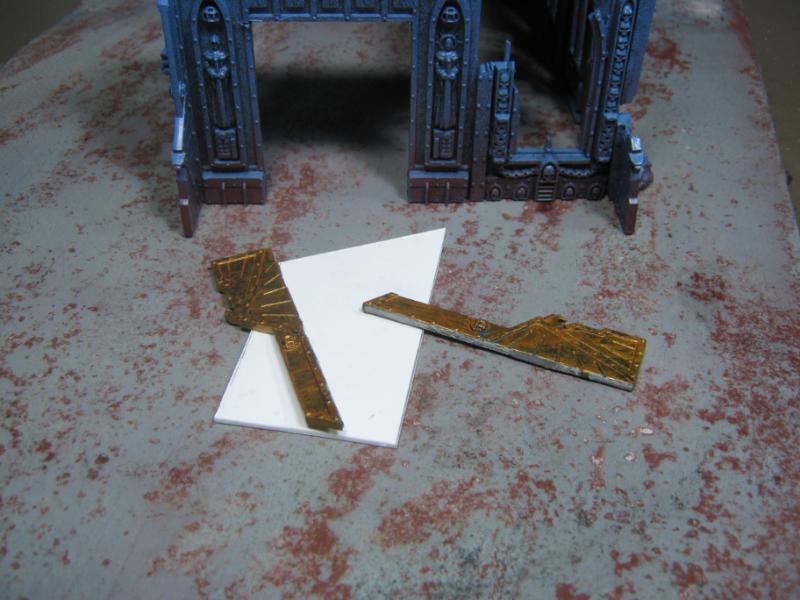
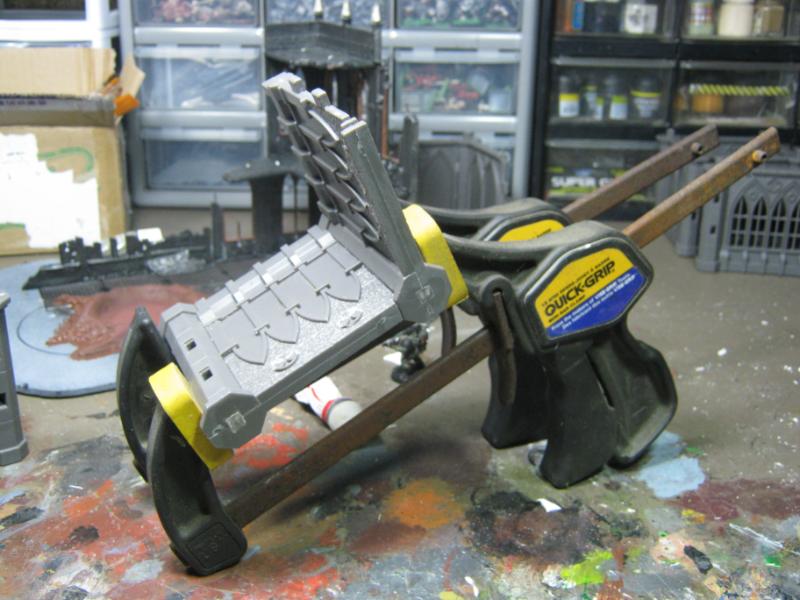
Decided I didn't like the gaping hole where the door used to be and started to make a new door.
Gluing first support, found a spur that needed to be trimmed off:

...and that's not all I trimmed. Amazingly I didn't feel it, I just saw this after I had been holding the bitz together so the glue would bond faster:.
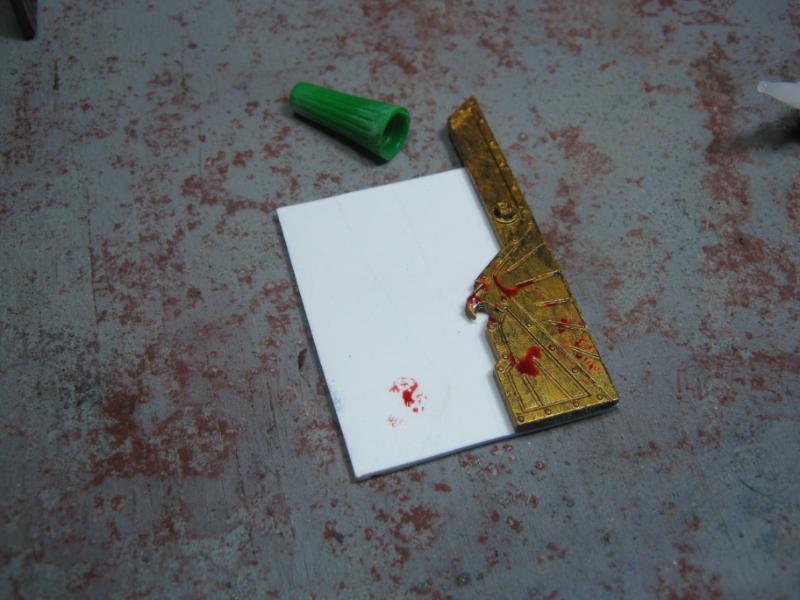
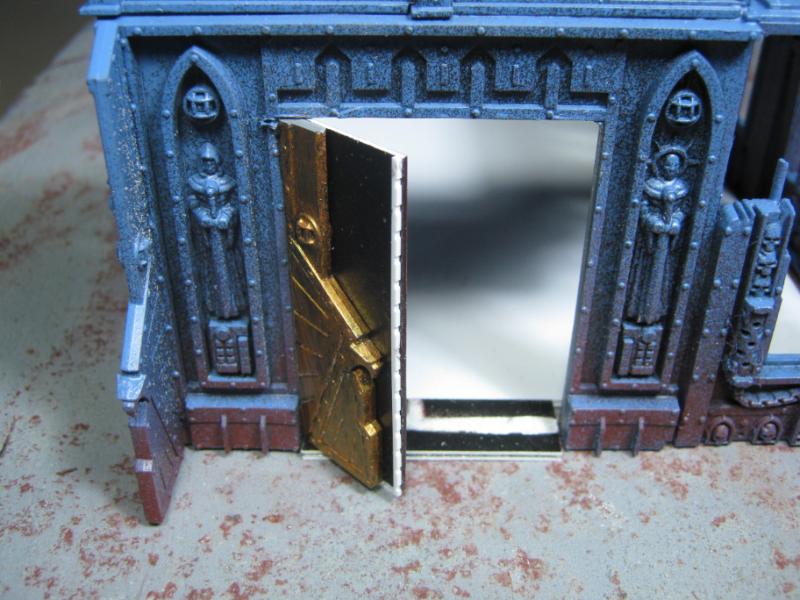
It takes more than that to take down the mighty Skalk Bloodaxe. I kept going and made 2 different doors. Looking for opinions. Do you prefer.....
Door #1...
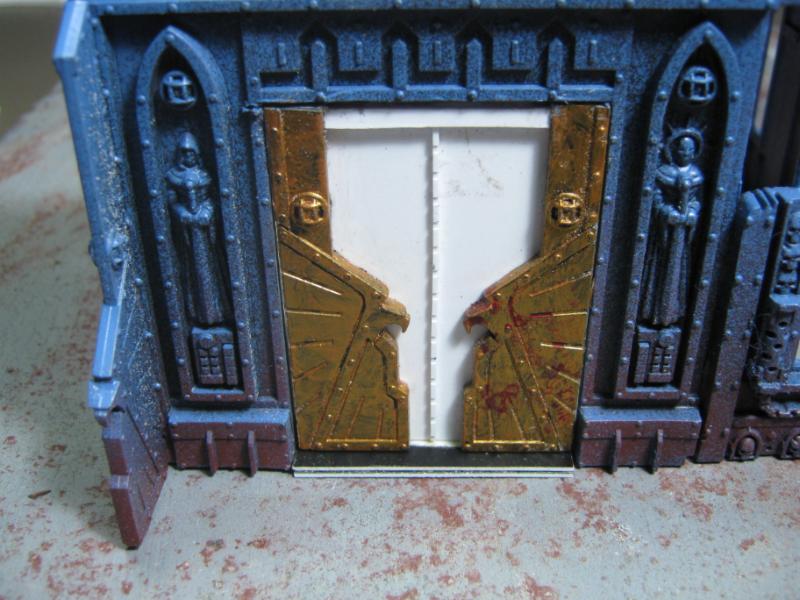 Or Door #2?
That's it for this one, but be assured that more is coming very soon. I'm taking a break from working on this so I could come post here. I've already cut out the permanent base and I'm thinking about respraying the entire model black and just drybrush some gray steel on it like the others I have. Or I could repaint all the other ones I have to match the table. Hard tellin' not knowin', and I ain't knowin' just yet.
I'm off to do all sorts of fun modeling things. Will check back now and then tonight.
Thanks for your time, and extra thanks to people who leave some C&C on the doors and the colors.
30344
Post by: monkeytroll
"Yes, I know they just dump the miscast plastic back into the vat and recycle them, I just thought it was funny to tell you to go dumpster diving in China."
I thought they passed those on to us as Finecast 
That looks pretty sweet so far Skalk. Great to see the 'evolution' shots, it's always interesting to see how others work. Staring at random bits is one of my favourite inspiration moves
For the door I think #2 has it, it's just a shame that #1 has the added grimdark of the builder's blood blessing the butress bit
Colour-wise I don't see a problem with the blue sitting amongst the gray steel, although more rust is needed, like your earlier tests where you sprayed rust then dusted with blue.
39973
Post by: Galorn
Door 1
32169
Post by: Rogue Wolves
cool stuff, like the terrain bits man and im going to have to say door 1, I like door 2 especialy since you can walk between it, but I like the look of the doors you made too much!
22619
Post by: inmygravenimage
Door 1 is boss! The whole thing is really excellent. You are the emperor's own demented architect.
48594
Post by: dsteingass
Thanks for showing your brainstorming process! He is right, Door#1 is now sanctified, you have no choice
24297
Post by: Viktor von Domm
i vote for door two... but do give it a treatment with a heat blower... to make it bended looking...
and i concur... A clean desk is a happy desk.
... i know for a fact it is the other way round 
37519
Post by: bigfish
door one!
that is a sweet looking uilding, i like the way you filled in the gaps with rubble and damaged bits rather then just leaving it. very cool keep it up
26139
Post by: Skalk Bloodaxe
@ monkeytroll- The 'evolution' shots were fun because I was so completely scattered. I did a lot of work, but for a few hours none of it was actually connected. Up side of that is I have a *lot* of PH bitz built and ready to go as soon as I have a need for them.
@ Galorn- Thanks for voting.
@ Rogue- Thanks for the compliment. I really like both doors. The one that I pass up will see use soon enough on a different model.
@ Graven- If I were truly the Emperor's demented architect I'd have waaaaaaaaaaaaaaaaaaaaaaaaay more Basilica / Manufactorum / etc bitz.
@ Dave- You are welcome. I know I don't have to explain it in much detail, I imagine most people (like us) model that way. A distraction every time you look for something, ideas that change so many times that eventually you wind up back doing what you started with originally, etc.
@ Vik- I should make an addendum- "My clean desk is my happy desk". Organization and space to work isn't for everyone.
@ bigfish- Thanks for that. I really like the 'damaged' look. A lot of my earlier terrain was too 'clean' around damaged walls etc. I'm going to work on trying different things here and there to give my terrain a more realistic look.
Another update with a lot of pictures and a bit of work. ha.
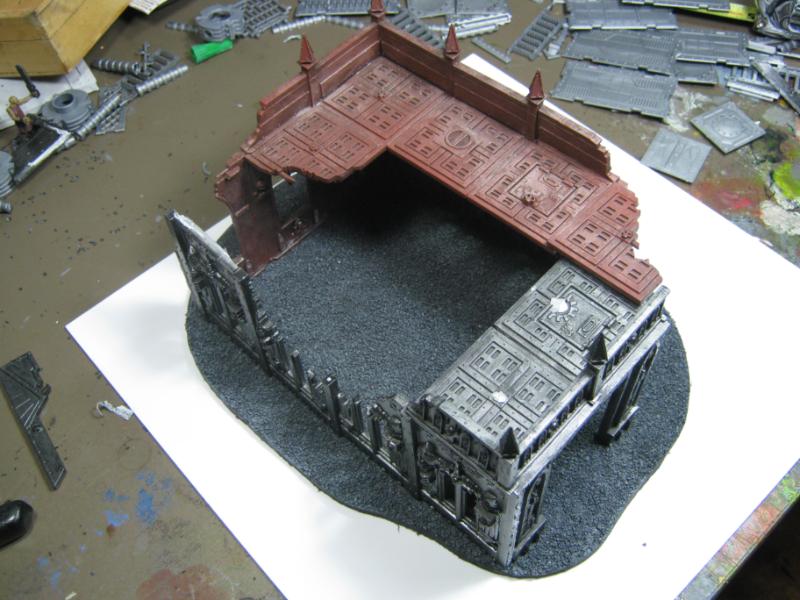
First and foremost, Door #1 wins by a landslide!
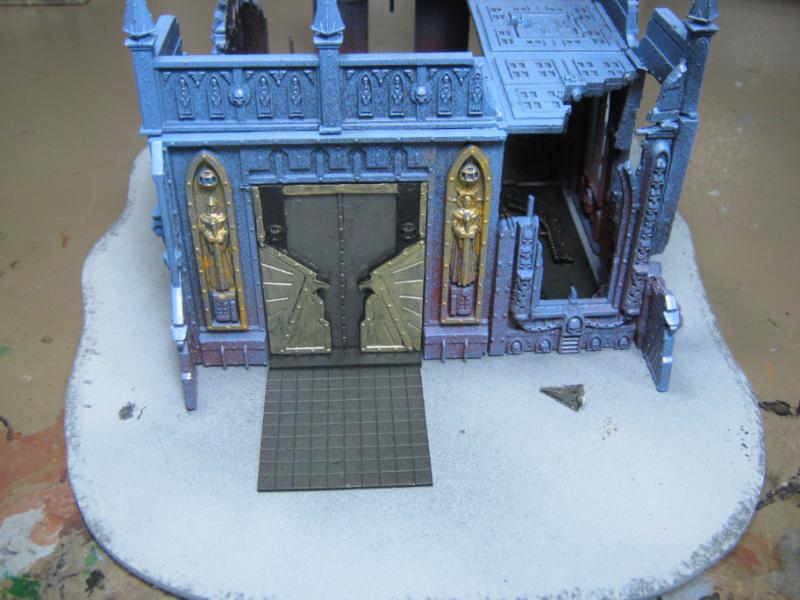
Lots of work needs to be done still, but it's a start.
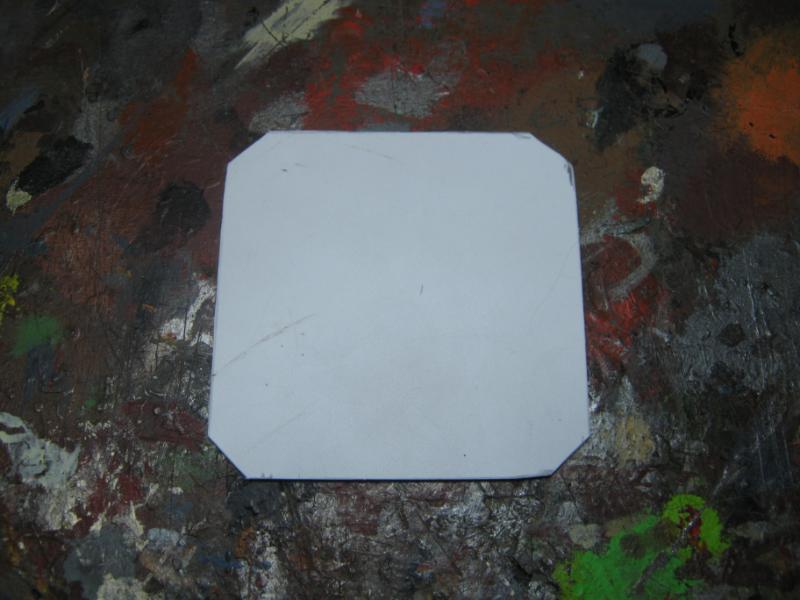
Ok, on w/ the rest of this. Cutting out the base:
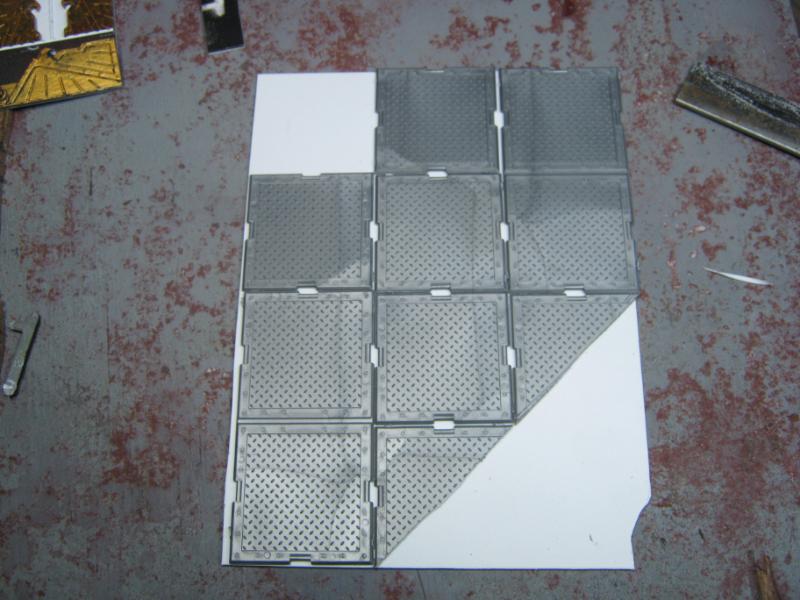
Making the floor. I was 4 squares short to cover the entire floor, so I had to cut one square in 1/2 and leave 2 spots blank. I just bought 40 more of them on eBay for future projects.
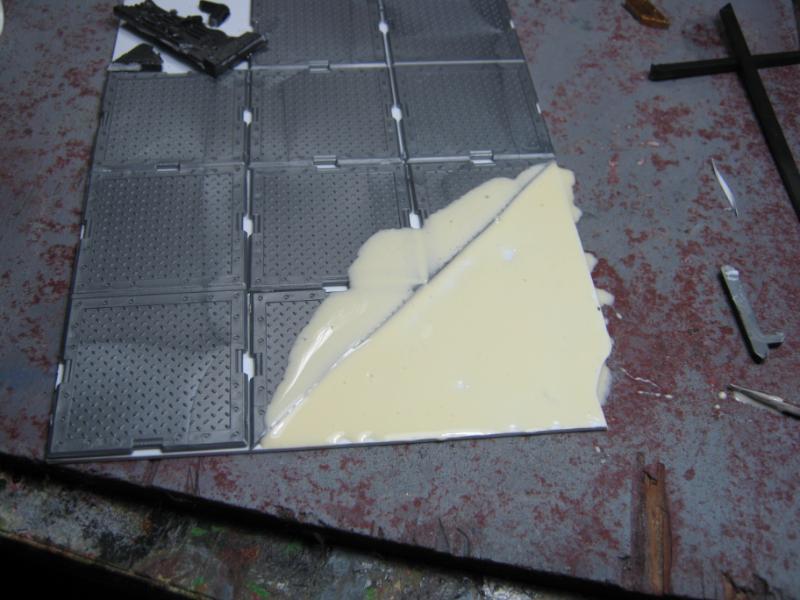
This is what I did to make the floor look less weird. Again, Elmer's Wood Glue. Love that stuff.
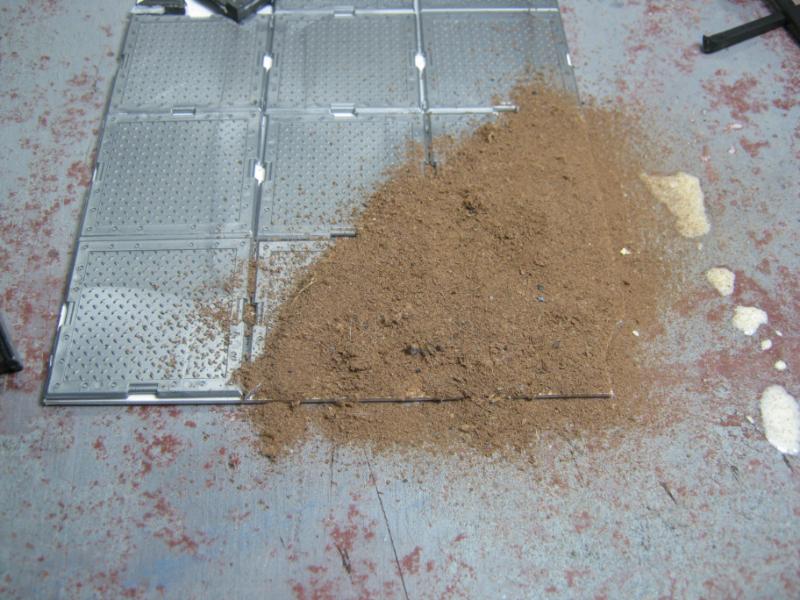
Didn't want to use my regular scree for texture in the ruined part, so I used the sawdust from the base I cut out earlier and added some broken stuff to simulate a rubble pile while still maintaining serviceability for gaming.
Here is it based black. Looks pretty good if I do saw so myself.
Spraying the bottom edge of the building again w/ rust. Alas, this was the last spray for this can. I'm completely out. That's the second thing that project has run me out of.

Drybrush of Tin Bitz. It shows up better IRL, and maybe somewhere in the next pics. Not sure. let's find out!
Mockup of building and floor after I made an adjustment to the walls so the floor fit better. No more gaps.
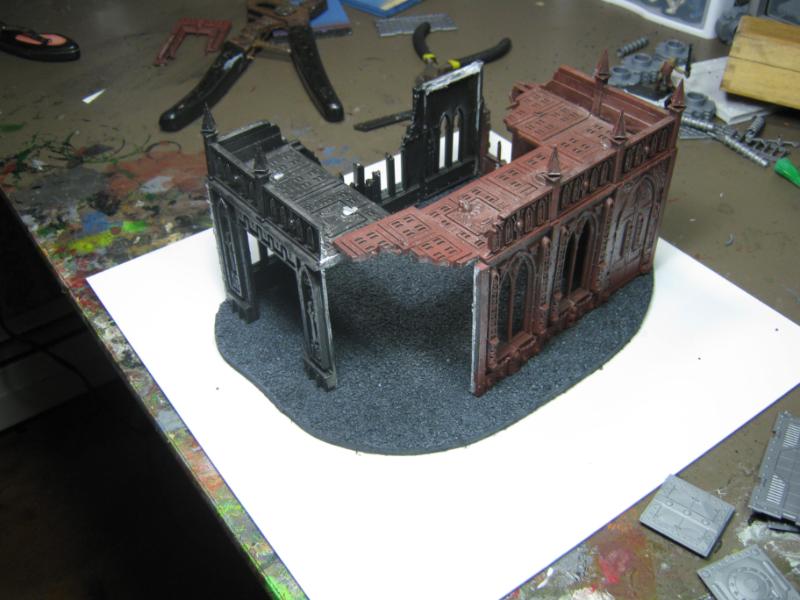
Starting detail work on the building.
Side shot after some more detail work and a major repair I had to make after breaking off most of the front of the building. Opps.
Rust effect on edges of floor where it meets the base of the walls. It looks cooler in the building, but (duh) I didn't take a pic of that apparently. It'll come in the next updates.
Thanks for the feedback, thanks for looking, more coming as soon as I have something to share.
39973
Post by: Galorn
Looking Really good so far Skalk.
48594
Post by: dsteingass
THat's great man! I like the fact that you are painting the little detail Bitz, even GW gets lazy when painting their CoD panels for their publications, same color drybrush over everything.
24297
Post by: Viktor von Domm
i gotta ask... this is all pre wash, right?
the base is looking really cool tho...
26139
Post by: Skalk Bloodaxe
@ Galorn- Thank you. I'm hoping for more awesomeness soon.
@ Dave- Painting the fiddly bitz is really slowing me down, but the end result will be totally worth it. Going back through my old terrain I'm really starting to see how far I've progressed. I'm pretty psyched to keep the learning curve steep.
@ Vik- Yes, pre-wash. Once the entire bit is done I'll give it a couple washes. Badab Black and Griffon Sepia to be specific.
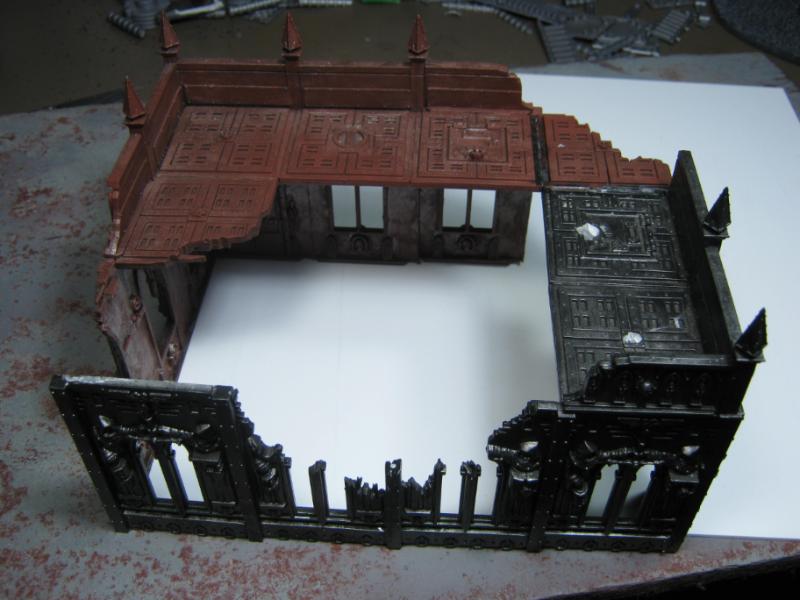
Well, here's the pic that I was supposed to post in the last update, but somehow missed it.
 Skalk Bloodaxe wrote: Skalk Bloodaxe wrote:Rust effect on edges of floor where it meets the base of the walls. It looks cooler in the building, but (duh) I didn't take a pic of that apparently. It'll come in the next update.
It matches up w/ the rust on the interior walls really well. I'm trying to avoid slathering the entire piece in rust, and yes I'm going to back to my LoER entry #1 to 'blue it up' a bit. Sometimes a little goes a long way, and I know I way overdid it on that piece.
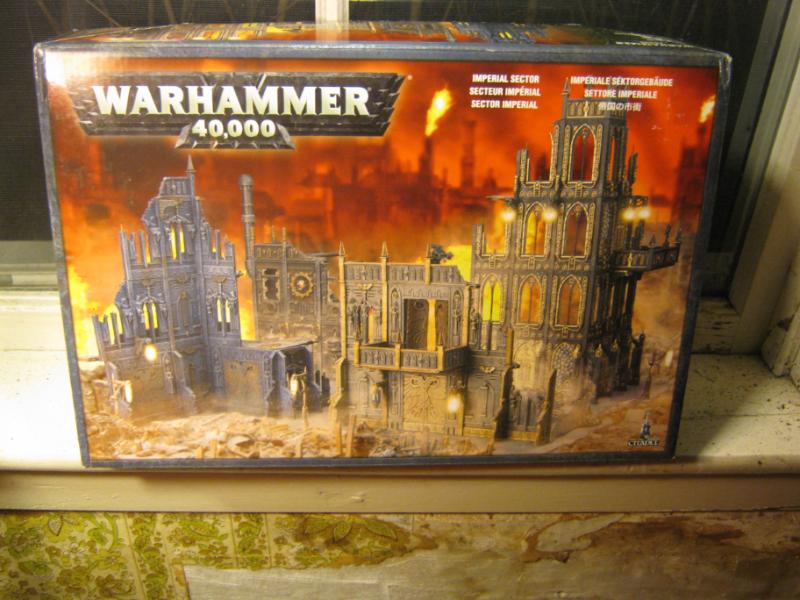
On to other things. I ordered 40 more treadplates from Horde O Bits on eBay, and my aunt got me a box of Orks from GW that I've already sent back and I'm going to roll the credit into a Imperial Sector box set. I was thinking about the DV box but eh, I have more miniatures than I'll paint in 2 lifetimes and I know w/o doubt I'd get to those IS buildings WAY quicker than I would anything else.
This is what I want:
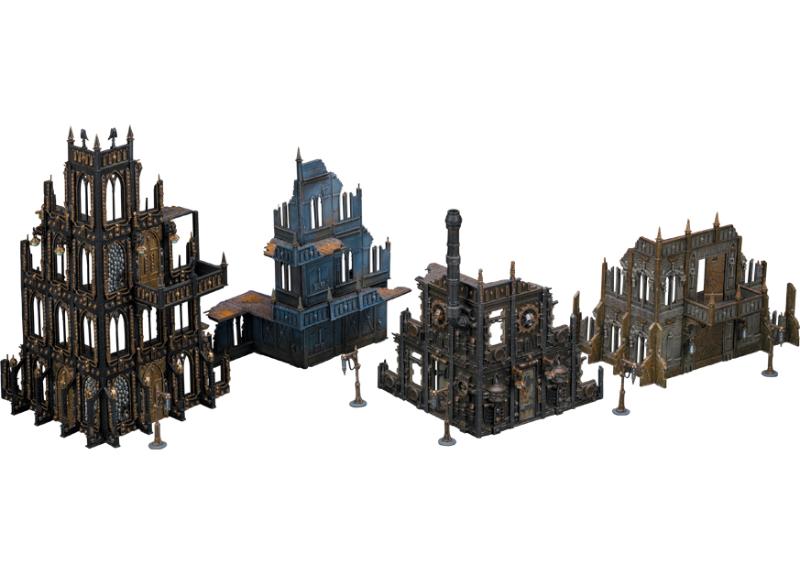
I could do a lot with that kit.
More coming later. I'm really stuck in w/ terrain right now and I expect it'll be that way even after the CSM Codex comes out. I have enough miniatures to play with. Right now my focus is to build a better battlefield for them to play on.
24297
Post by: Viktor von Domm
i have a very good feeling for that piece skalk... the way the base already looks is speaking volumes!!!
17738
Post by: Briancj
It will soon be time for another "Drive the heck up to Vermont" 40K weekend, methinks.
26139
Post by: Skalk Bloodaxe
@ Vik- I really appreciate that. Good things are coming.
@ Brian- Yes, please do. PM me for date / details.
So a short update of something that just occurred to me...
FACE
PALM
!!!!!
I just remembered, just now, that I have literally DOZENS of Pegasus Hobbies Gothic building plates that I've had for over 2 years, plus a Chemical plant and a Platformer set I've had sinc emy birthday last year.
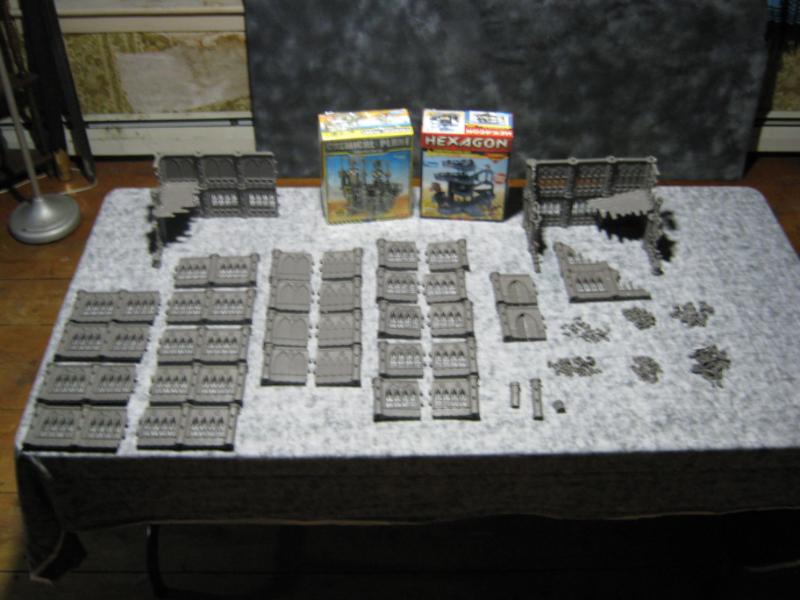
What the hell is wrong w/ me? I've been digging through garbage cans looking for new terrain bitz and I have ALL THAT sitting in a  box???
Man, my head is not working right these days.
Feh.
So yeah, anyway... after I finish this piece expect to see some work on my Gothic stuff.
24297
Post by: Viktor von Domm
that can happen to the best of us... us horders are allowed to loose overview of our stuff from time to time
30344
Post by: monkeytroll
Hah! I love it when I suddenly find/remember some bit if kit really relevant to whatever the feth it is I'm doing at the time, that's been sitting in a box for years, patiently waiting for me.
26139
Post by: Skalk Bloodaxe
@ both- thanks for the support. It's a bit maddening to have this happen, I'm sure you both get that. I'm in a massive terrain project to make my table look better, and I have an insane amount of really cool stuff just sitting in a drawer. Gah.
No update today, will share new work as soon as I can.
30344
Post by: monkeytroll
But if you'd just dived straight into the drawer you may not have had the cool ideas you've had. Swings and roundabouts my friend, swings and roundabouts
26139
Post by: Skalk Bloodaxe
 monkeytroll wrote: monkeytroll wrote:But if you'd just dived straight into the drawer you may not have had the cool ideas you've had. Swings and roundabouts my friend, swings and roundabouts
QFT, and taken to heart. You are absolutely right. If I had worked on those bitz earlier (even 6 months ago) they would have been sprayed black and drybrushed gray. Whee.
I'll do them much more justice as soon as I get cracking on that. Have 3 more Imperial Sector buildings to detail / floor / base, then it's time to rip into the PH Gothic buildings.
57210
Post by: DemetriDominov
Cool stuff. My mouth went dry when I saw the cubbys full of bitz.... its a nice collection lol.
24297
Post by: Viktor von Domm
cool stuff just sitting in a drawer
see? there is the flaw... litter everything on the floor...everything is accessable every time... also great filing system for getting new inspiration
ask my wife... that´s mostly how my mancave looks like
30344
Post by: monkeytroll
Now, although I agree with my learned friend from Germany there, I have to point out that there is a caveat.
When it gets to the stage where you have a hole in the sprue pile to put your feet when you're in the chair, and swivelling the chair is slightly hazardous to the mountains of bit-boxes and sprues surrounding you, it MAY be time to do a bit of sorting.
Although where I'm going to sort it to I have no fething idea.
24297
Post by: Viktor von Domm
i like your modus operandi... saves bitz and still perseves the insporation
39666
Post by: GiraffeX
Wow Skalk your buildings are coming along wonderfully.
48594
Post by: dsteingass
ha, you were buying those Platformer floor plates from ebay and you had a big box of them? I've done that too many damn times myself!
24297
Post by: Viktor von Domm
whatever strengthenes the economy i guess^^
26139
Post by: Skalk Bloodaxe
@ DemetriDominov- Thank a lot! Those bitz bins are the result of collecting and keeping bits since 2nd Ed. And yes, the are sorted so I know what is where.
@ Vik x2- It's 'my' room but it's available to anyone to use (for M: TG games, board games, homework, etc) so I really do have to keep it picked up, plus the chaos of disarray makes me a bit nutty. As for strengthing the economy, I dount my $30ish dollars is going to be the tipping point for anyone (until I need gas, then it's MY tipping point).
@ monkeytroll- I laughed out loud (at work) when I read about you having to carve out a place for your feet. That's what I had before the massibe haul-out of 2012. I'm amazed I've kept it up for 7 months now. Wow.
@ GiraffeX- Thank you a lot. I have a lot of respect for your modeling / painting skill and vision. Compliments like that are a sure sign I'm doing something right.
@ Dave- I didn't buy any PH Gothic panels, I bought HOB treadplate (which I am out of 100% right now). The furstration is I have that huge collection of stuff that hasn't seen one bit of attention. But like monekytroll pointed out, perhaps that's for the best. Now I can use the things I have learned and practiced instead of the old SOP of black spray / Boltgun Metal or some sort of grey drybrush. I've evolved way past that and I'd hate to go back to re-do work.
Thanks one and all for the feedback. As a reward, I found this on eBay. I hope someone here gets it.
http://www.ebay.com/itm/Necromunda-terrain-walls-building-blocks-/261106447960?pt=Games_US&hash=item3ccb283658
Really hoping to get some work done tonight. Sooooo close to being finished, but it's all the fiddly detail and such right now. Man I need like a week off to stay home and model. Just raise my fist against the entire world in defiance and loudly declare that I'm going to lock myself in my hobby room and not leave for a week. I'll be sure to stock up on beer and munchies before closing the vault door.
48594
Post by: dsteingass
Open that platformer box..there are more of those treadplates in there!
I am still waiting on my 4 sets of Russian Robogear building sprues from Russia ebay.
Automatically Appended Next Post:
btw Skalk..not a crit per se, but think of it as a "challenge"
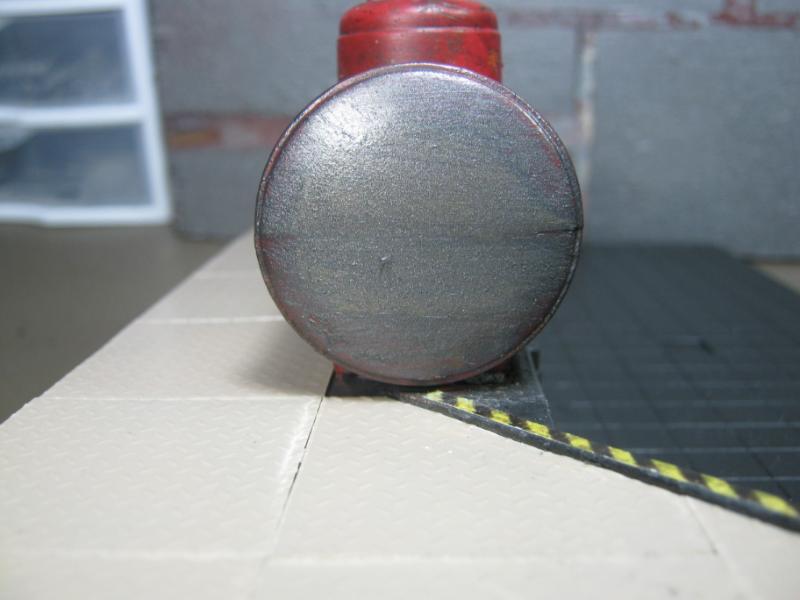
This ppe would be made out of different metal than the walls, so it would rust and corrode differently, and have a different color!
If you are going for realism, your balls should be out and leading the charge!
26139
Post by: Skalk Bloodaxe
@ Dave- caught me again! Challenge accepted, and I'll post new pics when I have it done. I might even have a surprise.
22619
Post by: inmygravenimage
My mate metropolis built a gladiator pit out of one of those builder sets. Worked a treat. Great find mr skalk!
24297
Post by: Viktor von Domm
actually my mancave is in the middle of our living room... i still clutter around with my stuff but in essence i too have to keep it passable...
26139
Post by: Skalk Bloodaxe
@ graven- I was so psyched to see those bits online. I had no idea, I just stumbled on them by happenstance.
@ Vik- Viktor von Domm wrote:actually my mancave is in the middle of our living room... i still clutter around with my stuff but in essence i too have to keep it passable...
... your wife hasn't smothered you with a pillow yet for destroying her living room? Wow. She sounds like a keeper.
24297
Post by: Viktor von Domm
lol... well she screams occaisionally at me to clean up...which is mostly handy as i need to do that to keep productive anyway ...
and she is indeed a keeper... after all she keeps dragging stuff at home for me to build with too^^
36327
Post by: GreyDeathOne
Hey Skalk let's see a wide shot of your table soon! I would love to see what it looks like put together. BTW how's my Huron doing? I got another one to build with my Dark Vengeance guys. Call it Huron 2.0
26139
Post by: Skalk Bloodaxe
@ Vik- I have to admit I laughed at the idea of an angry woman screaming at you in Deutche.
@ GD1- That's my goal in the near future, a full table shot. Trying to entice Galorn and Briancj back to VT. Ha. Huron has a special place on my display shelf. He's only seen action once but it was such a crushing victory I almost felt bad. Even funnier is that Huron never actually saw combat, he was too far back. I only lost total 1/2 a squad in that game. Good luck on Huron 2.0m I hope it's as awesome as Huron 1.
Short update, and an idea of where I'm going next.
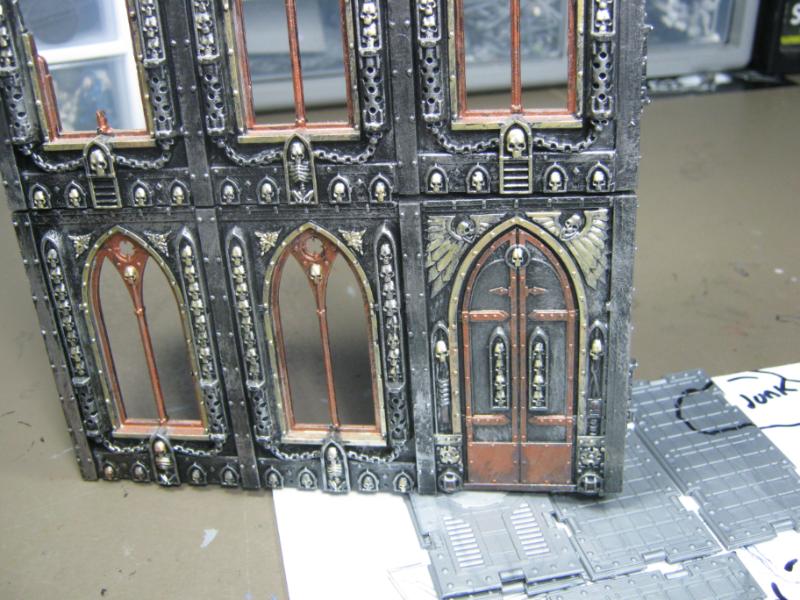
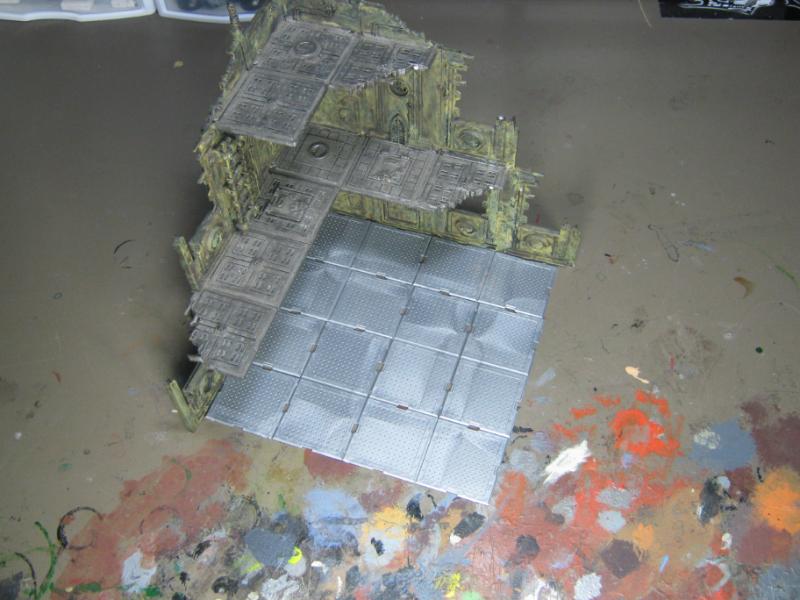
First is my current project. I've been doing more detail work.
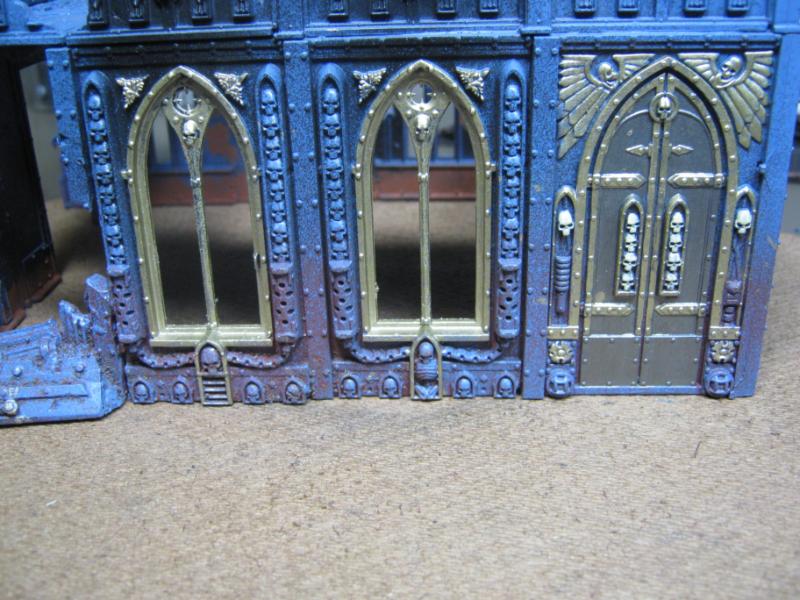
I know there are bits I didn't 'finish' like some of the trim work I painted gold on the face but not the edges. I'll get to this via painting in the edges, or see if the wash I'm going to use will 'fill in' and shade so it doesn't matter.
I also realized what was 'wrong' with the walkway panels- not enough contrast. So I did this:
Sprayed black and painted w/ Tamiya Gunmetal. I really like how this came out and once I get the rust / wash done it'll look pretty awesome I think.
While waiting for that to dry, I decided to lay out my next phase of the Imperial Sector project. I'll be trying a couple new things with this one.
Here's the rest of my IS buildings. I've decided to not repaint them. I've already put a lot of detail into them and at most I'll do some touchup work.

I'll make an exception is this one and repaint. Colors are ugly and detail is lame. BTW, I didn't paint this one, it's still same / same from when I bought it on eBay.
That's it for now. Will post new progress as it happens.
22619
Post by: inmygravenimage
Looks tremendous and that boom just made my day!
24297
Post by: Viktor von Domm
exactly... that bom reminded me strongly of the incredible hulk... "hulk smash!"
and all those differently colored ruins... looks like a candy shop... in a very cool way
and skalk... it is only funny if you are lsitening to that from afar...
23897
Post by: Scarper
Hey skalk!
Sorry I haven't had much time to post lately (on my iPhone in the mess room during a lull right now) - I have been neglecting your fantastic updates.
Thanks a bunch for posting that evolution of your ideas - its really really interesting to see how your mind works and how your terrain bits take shape. Your CoD stuff is some of the best I've seen - I really envy your patience putting that much detail into those sets. You're going the extra mile when it comes to realism too - they're looking like buildings that might have once had a purpose, rather than generic battlescape, and the way they've been damaged sEems logical and fitting. Hard to do with those kits!
This blog is really inspirational, and I'm always looking and absorbing ideas, even if I'm not getting to compliment you as much as I'd like!
39973
Post by: Galorn
Looking good chief. I'll definitely be up for another run up to play... I'll have to look at my schedule for the coming months to do so tho.
48594
Post by: dsteingass
That painting REALLY makes those panels look awesome man, the effort is soo much worth it with those GW panels. I love the blue and brassy color.
Scarp, I LOVE the new DCM title, you should change your avatar to Griffon!
26139
Post by: Skalk Bloodaxe
@ Vik- and skalk... it is only funny if you are listening to that from afar...
That made me laugh at work. Ha! And yes, I imagine it is. Also, thanks for the compliment on the ruins I'm working on now. Always nervous about adventures away from the known, especially when it comes to colors.
@ Scarp- Never any worries about posting. This thread isn't going anywhere. Thank you for the descriptive post and the high compliments! The fact you typed all that on an iPhone is impressive. I really appreciate your feedback, it's the sort of thing that helps me check my course and make sure I'm on the right track. My time for modeling these days has diminished but I'm still making an effort to put in an hour or so every couple days. I'm really glad you saw the way I've been 'directing' the damage. I looked at a lot of IRL photos and in all of those ruins there's hardly a level place to stand. With consideration to game mechanics and physical realities of miniatures (the fall over a lot on flat surfaces) I went for a look that would be an ascetically pleasing model while maintaining 100% tabletop functionality. Sounds like I'm reaching that goal. Thanks for your time man, always appreciate it.
@ Galorn- Probably November at this point. I've got a lot of stuff to get done very soon (all those super fun 'pre-winter' things like haul / cut / stack firewood, fix the broken window I promised to fix all summer.... that sort of stuff). First weekend I know I'm (mostly) available is Nov 3-4, I'm on call for my job so I know I'll be home all weekend by default. We can all PM about it, but wanted to give you a heads up here. We'll figure it out.
@ Dave- Remember when I posted this:
And you said this:
 dsteingass wrote: dsteingass wrote:Nice job with those steps man!
CoD panels aren't usually seen painted up to that level of detail, it's good to see.
I remembered that when I started this new project and put some attention into the detailing. I still credit you as being my final motivation to finally start this thread. You're more of an inspiration than you likely know. I have a lot of respect for your work and knowing I have the attention of those I respect does motivate me to work harder.
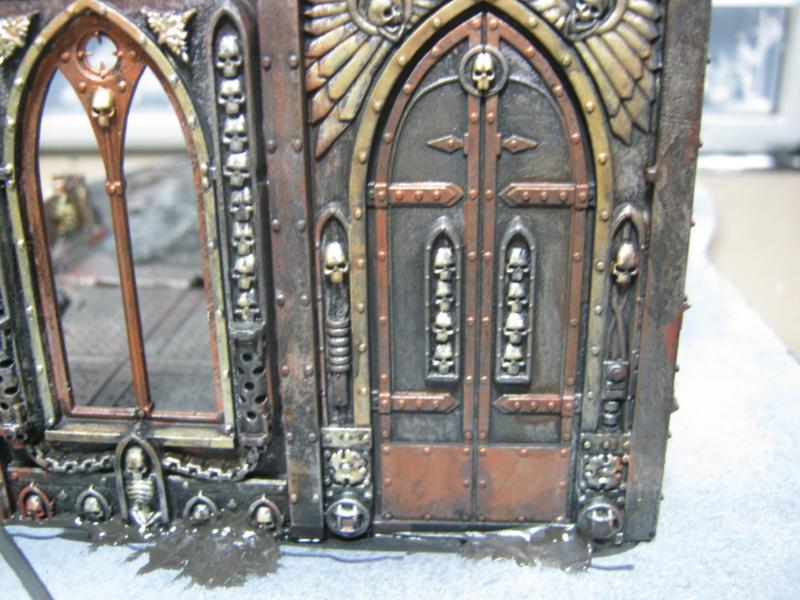
Another small update tonight. Did some more fiddly detail work on the piece I'm working on. Nothing so great that I feel it needs to be shared individually, but I couldn't remember if I took a shot of the door since I started painting it so here that is. if you've seen it before... well, here it is again:

I think the build came out very well. The paint will look better before it is done.
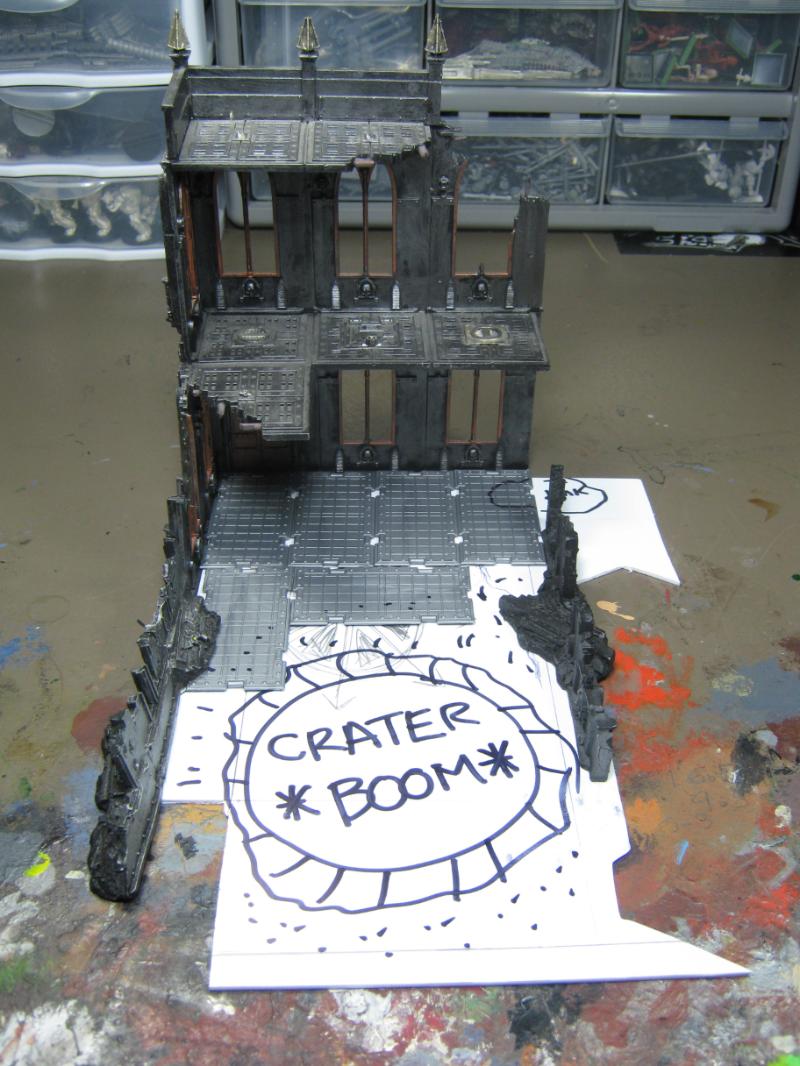
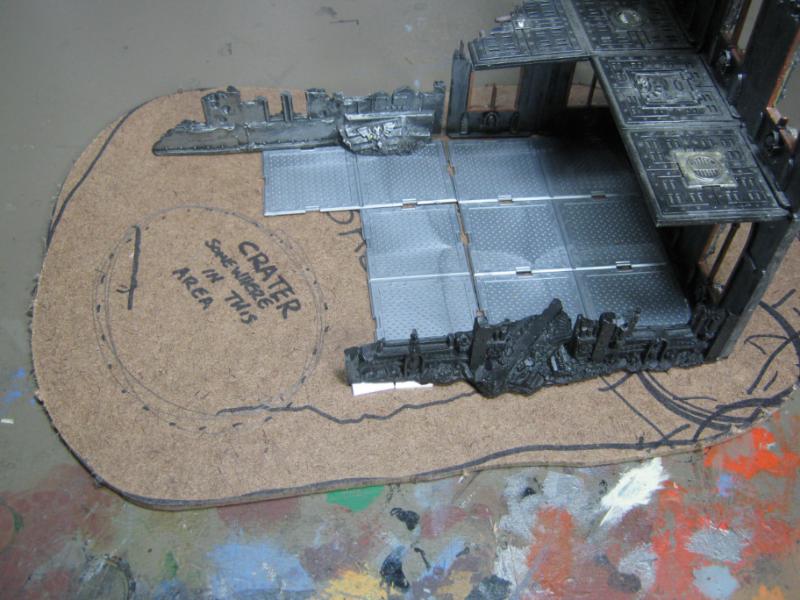
I also got some work on Building #2. The layout and design is directly influenced by madmarty. I really like the long narrow ruin look and now that they are getting actual bases that's how the will go on the table. With all the walls separate / no base it's easier to just make a jumble. This will add order to the chaos.
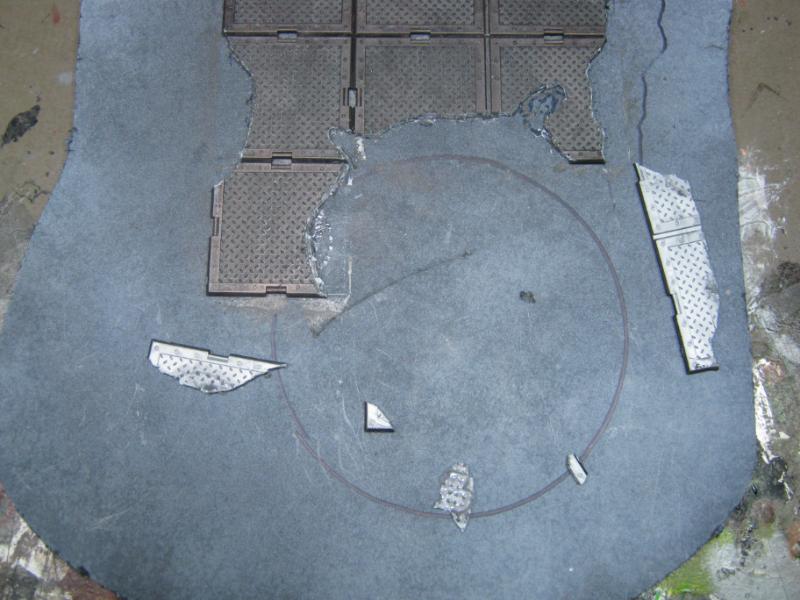
You'll also notice a change up. The *BOOM* crater had to be moved back a couple inches, and I found the piece that finished the footprint of the building. I'm looking forward to working on this one.
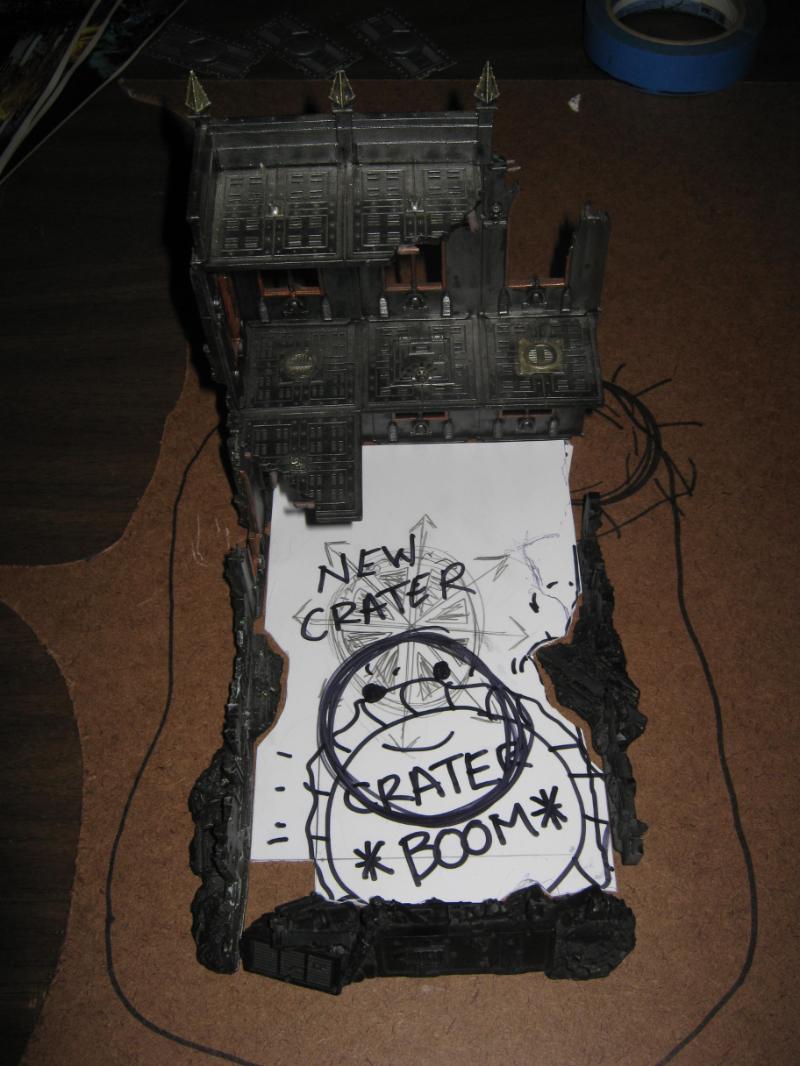
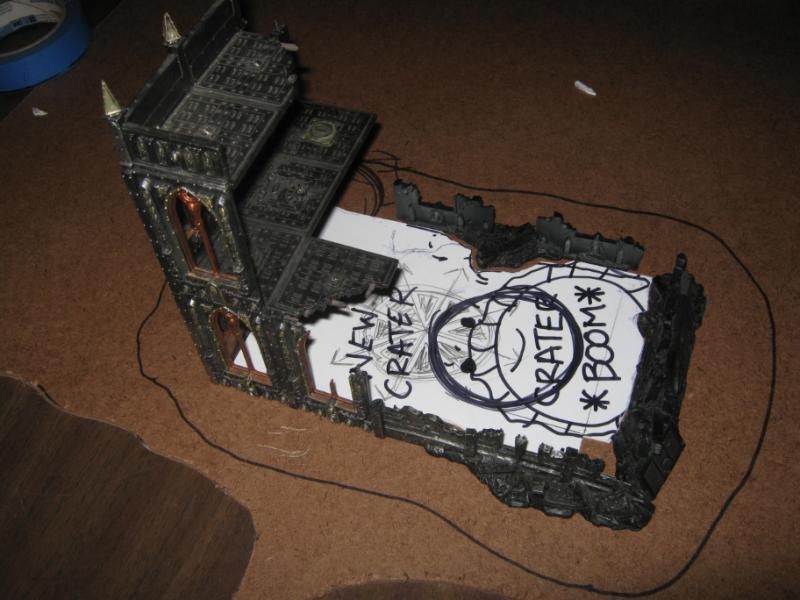
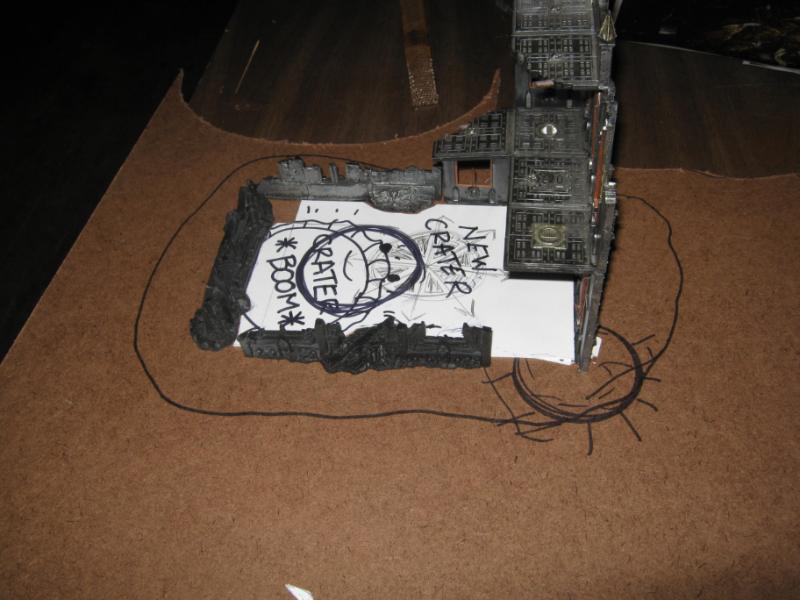
Hmm. After seeing that last pic something occurred to me. The circle / crater thing on the hardboard (dissected by the outline for the base I'll be cutting out soon) was a crater in a different design. Seeing it there now... hmmm.... HMMMM...
I have some more thinking to do. And that's why I like WIP projects so much. The possibilities are limited only by my time, resources, skill, and imagination.
That's it for now. More coming!
48594
Post by: dsteingass
Thanks Skalk!
Just remember forensically where the dirt and rubble would've landed after that crater was made, and you'll have an awesome look there!
24297
Post by: Viktor von Domm
hey skalk... while the walls looks very good...weathering and peeled paint and all... but now the door leaf looks ale in comparrision... is there something you could do about it?
by the way... i really like that chaosy marine standing next to the door!
26139
Post by: Skalk Bloodaxe
@ Dave- Oh yeah, all over that. Looking at actual photos of wartime damage to civilian construction. I have some good ideas how to pull it off.
@ Vil- Not sure what you're pointing out. If it's the paintjob on the front door, it's not finished but the door is constructed from forged steel and the eagles are solid gold. The door will have a couple rust spots, but it will endure the elements and the passage of time much more readily than the rest of the building.
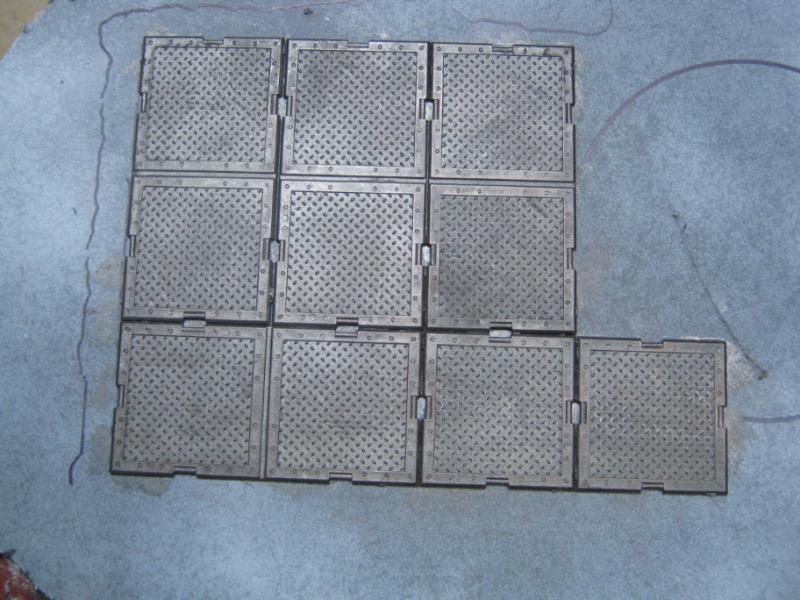
SUPPLY DROP!!!
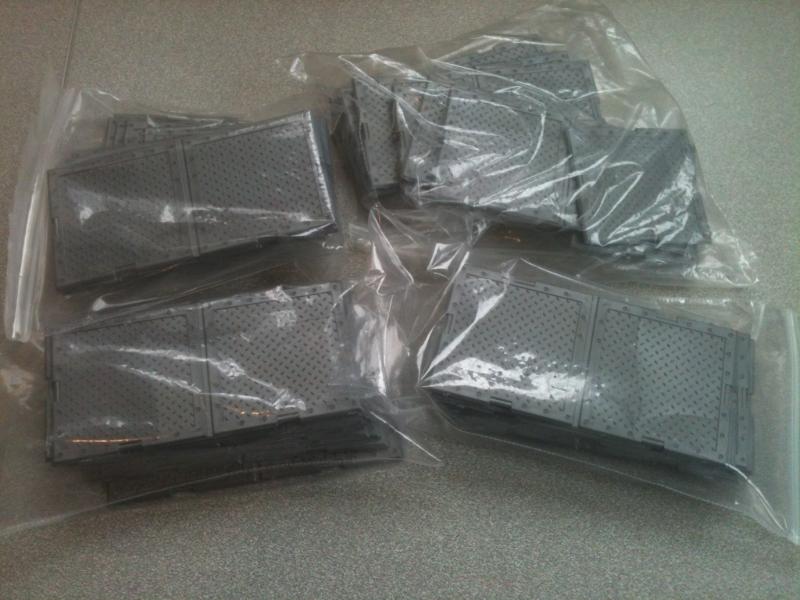
Whooooo! Yeah! Man I am WICKED psyched! Wish it were Friday, but I'll do what I can when I get home.
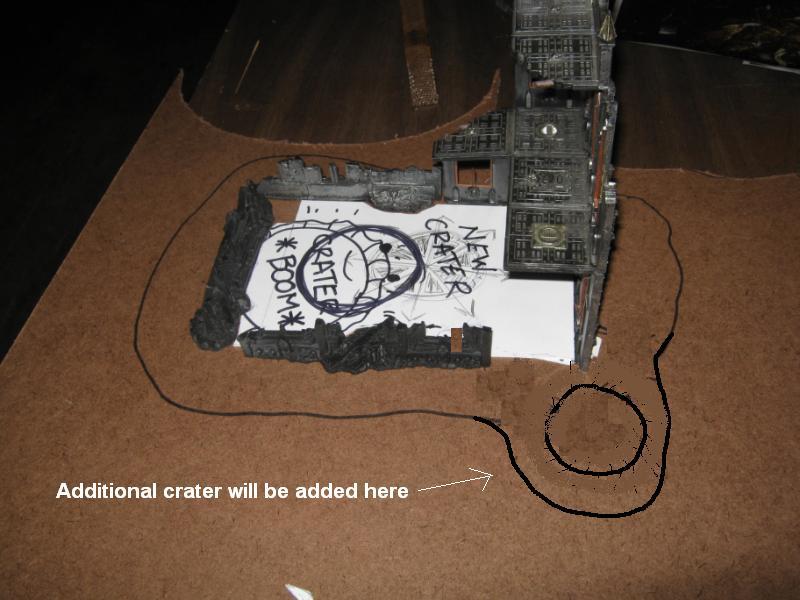
Also, wanted to share a bit of an update on an idea. Check this out.
24297
Post by: Viktor von Domm
the additional crater will make everything way more convincing...!
and niice suply drop !
gotta love those floor tiles!
and The door will have a couple rust spots, but it will endure the elements and the passage of time much more readily than the rest of the building.
i was hoping for just that!
22619
Post by: inmygravenimage
Looking forward to seeing your detail work on this! What I like about your updates is you can really track every stage of the process.
26139
Post by: Skalk Bloodaxe
@ Vik- Well... you know how things change? Yeah. Keep reading.
@ graven- Glad to know my mini-updates aren't lame. Stay tuned, more coming!
Another 'almost nothing has changed but I'm posting pictures anyway' update. I am really excited at the modeling possibilities my new tread plates are offering. For what my opinion matters, anyone that builds terrain should try these at least once. They have completely changed how I look at my Imperial Sector ruins, and as I continue w/ this project I'm certain they will have applications I haven't even considered yet.
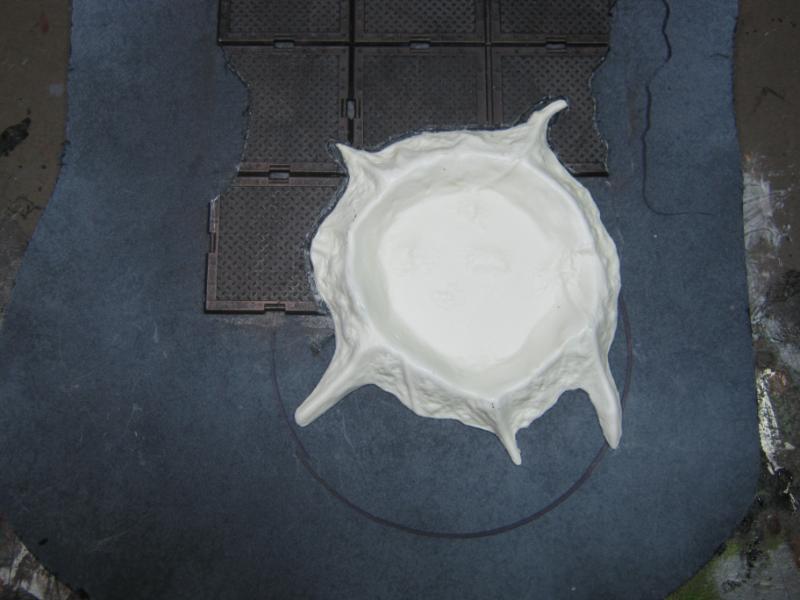
Last night I had a chance to do some work and after drawing out the base for the extra crater I realized that it wouldn't fit properly where I store my finished terrain. So I'm doing this instead:
Likely going to use this old plastic sheet of craters that GW sold back in the day. Waaaay back. Briancj should recognize this.
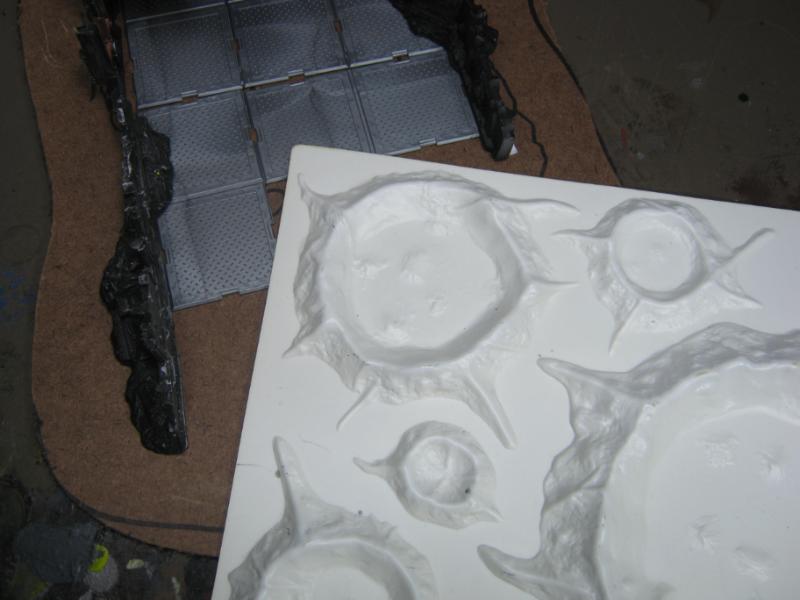
I decided to not use the ruins on the front like I had in the prev pictures, it's from a Manufactorium ruin.

And a couple shots of treadplate tiles on the Manufactorium I'll be working on soon:
Hey... I just realized this... the panels are the exact same size as the IS panels... I could use these for walkways as well as floors! The ideas keep coming.
This is the most fun I've had doing a terrain project in a long time. Pre-fab materials RULE! Whooo!
More coming as soon as I have somehting to share.
30344
Post by: monkeytroll
Like where you're going with both pieces. No issues with the mini-updates here, the process is a very interesting state to consider. Watching how others shape and change their ideas is always fascinating to dedicated modellers.
Blast from the past with the vac-formed crater sheet
24297
Post by: Viktor von Domm
if you use those floor tiles... then i suggest you ruining two at least to look all torn and stuf...
the vacuum formed craters look very cool... will you cut them up to have multiple craters on many terrain pieces? probably!
*keeping on reading *
48594
Post by: dsteingass
Dude! You should make a press-mold of one or two of those! Thay would look badass spammed all over a city board! A few will look like a small accident!
26139
Post by: Skalk Bloodaxe
@ monkeytroll- I'm glad the glimpses into my particular brand of modeling madness are interesting. I get what you are saying, I really enjoy seeing the process as much as (if not more than sometimes) then end result. Ash1 is a great example of amazing 'end result' (I love his work) but no real WIP information.
@ Vik- That's exactly what I'm going to do. Bits of the treadplae jutting out of a crater mound, rocks / etc spread out randomly over the treadplate that survived, etc. I'll be pretty awesome when it is done. Promise. And as for multiple craters....
@ Dave- Oh man you know it. The reason I still have that sheet is for YEARS (like since ... 1996?) I've been meaning to mold the entire sheet. And that exactly what I'm going to do. I have no idea how to use / make a press mold, but I do know how to use that 'brush on' stuff. I'm finally motivated enough to do it, and the work I put into it will be paid back over and over again instead of making individual craters every time. Gaaahh. That just gave me a headache just thinking about.
Not likely that I'll have another update before Monday / Tuesday. I'm going to be flat out this weekend doing pre-winter stuff. Early to bed tonight because I have some friends helping me w/ firewood tomorrow, starting @ 7am and working until we get tired, drunk, or it's dark outside. I'm guessing 'dark outside' because no one is going to be the first person to say "I'm done" and 3 of the 4 people working are prior military. Ha. By the end of the day I hope to have at least 2 full seasons in the back yard, if not 3. A lot of work in one day, but much like making a mold for the craters, it's an effort that I'll be able to enjoy for a long time to come. However, that means tomorrow night I'll be going to bed around... oh, maybe 7? Sunday I'm heading to my FLGS and picking up the new Chaos Codex!!!!! I won't be home for many hrs after that though because it's a 'responsible adult' day out (groceries, etc) and I'll likely still be beat from Saturday.
Thanks for the views / comments. Always appreciate feedback. More coming, you can bet on that.
24297
Post by: Viktor von Domm
Promise
taken!
and keep all your limbs during that hard work!
39666
Post by: GiraffeX
Looking really nice and also very inspiring.
I remember when those plastic craters came out.....now I feel old lol
39828
Post by: mekbadzappa
Some really high quality work going on here. I like the work with rust and the use of weathering on the building in the most recent pic is very cool. Looks like its had a bad time on a rainy planet.
What plates are those that you are using for the floors, cant seem to find the spot where you posted about them.
22619
Post by: inmygravenimage
I like your use of the treadplates as floors. Not enough folk pay attention to floors on buildings.
18867
Post by: madmartykmf
Bravo buddy. Love the titles for flooring it's a great touch. I am, as usual jealous of the progress your making and look forward to seeing more.
The crater in the building is always fun. Are you going to fill it with water effects or is it fresh?
When ever I think about craters I love the feel of older ones that have been filled with muck and mud and whatever else makes it's way in.
Anyway top notch as always and keep up the great work and pace!
26139
Post by: Skalk Bloodaxe
@ Vik- Yes sir. Fingers are surprisingly important in this hobby.
@ GiraffeX- Thank you, I'm really digging this project and I'm always happy to know that I'm spreading the inspiration. A few of these ideas are organically my own, but most I've gleaned from others. Sooner or later I'm going to amass another list of those who have inspired me and who's work I genuinely respect and appreciate. Most of the credit for my terrain goes to them. I'm just the guy w/ the paintbrush and hobby knife. They were the inspiration that made it happen. And as for the plastic crater sheet... I prefer to call it 'experienced'.
@ mekbadzappa- Hey, thanks for the compliments. My goal is to make the entire table look exactly like that- abused, abandoned, and completely miserable. The 'fluffy' idea behind it has really started to come together. I'm envisioning a PDF outpost on an Imperial planet well within the safe confines of Segmentum Pacificus. Planetary law mandates that all citizens must serve in the Imperial Guard, but it does not mandate that all Guardsmen be deployed. This particular outpost was designed for the sons and daughters of the the Elite Class to fulfill their Imperial commitment without the unnecessary exposure to hostile engagement. All was well until the Night of a Thousand Rebellions. Now the outpost is in ruins and only the scattered rubble stands as a monument to those who died here. It's former glory is still visible in some places, but in most it is a mere echo lost in time and space.
@ inmygravenimage- The floors are actually to resolve a ruling issue we've had here before. With no base there was an occasional discussion on how we determined what was 'ruins' and what wasn't, and TLOS came into that as well. Now there won't be any question at all of what is what. But yes, I could have gone the lame way and just slapped it directly to the hardboard and called it good enough. I'm really glad I decided to put some effort into it. I really feel that this is some of the best stuff I've done. Now all I have to do it maintain or exceed this level. Yeah. No problem. 
@ marty- Glad to see you back around. Hope you saw the influence you've had on some of these pieces. Your work w/ Pegasus Gothic and Imperial Cities of Death has always fascinated me, and now I'm finally giving it a try. With any luck I'll be the lucky owner of a brand new Imperial Sector box set soon. In fact I need to call GW tomorrow and find out what is going on. I'm supposed to have a $60 credit for stuff my aunt sent back to them after she bought Orks for my b-day. Ha. At least she tried, which is more than I can say for anyone else in my family. Anyway, yeah, i have that going on and I'm pretty psyched. I'm also really looking forward to pulling out my Gothic plates and seeing how I want them to go. I've considered making one massive piece but I know it wouldn't get a lot of table time so I'm likely going to go with smaller base footprints and multiple stories. I could make quite a few of those, and I think they match up w/ the GW IS pretty well. We'll see in the coming months. The craters will have to be more mud / mud puddle than pooled icky slime because I want it to be just a regular plain 'ol bombed out building. Difficult Terrain, 4+ Cover Save, that's it. I specifically don't want it turning into 'mystery terrain'. I'll make it as old and mucky as possible.
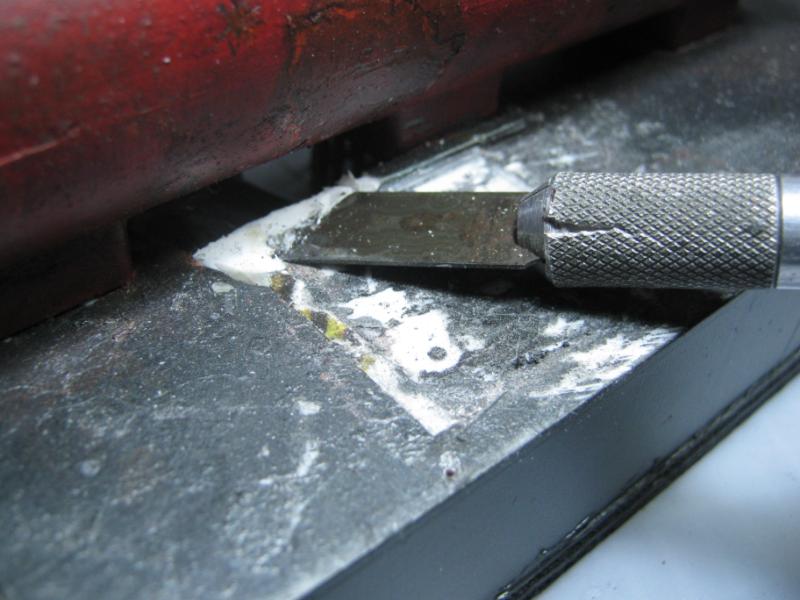
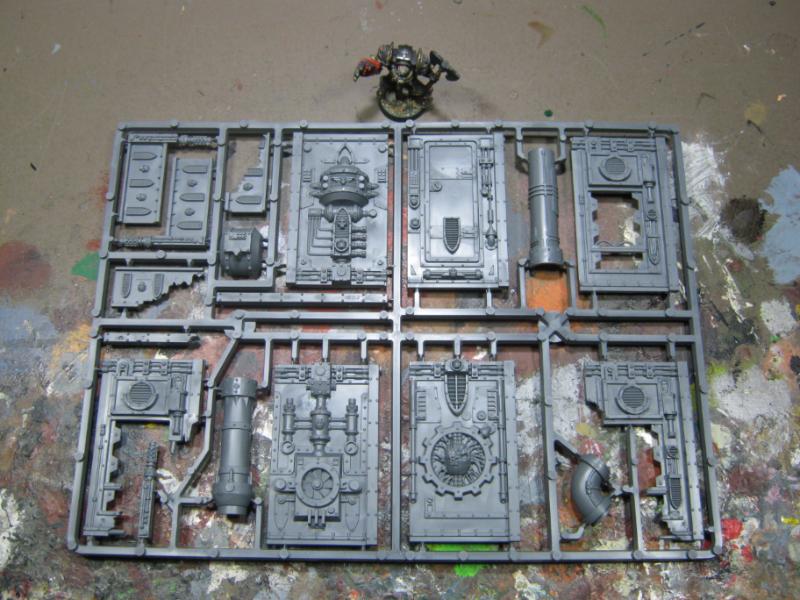
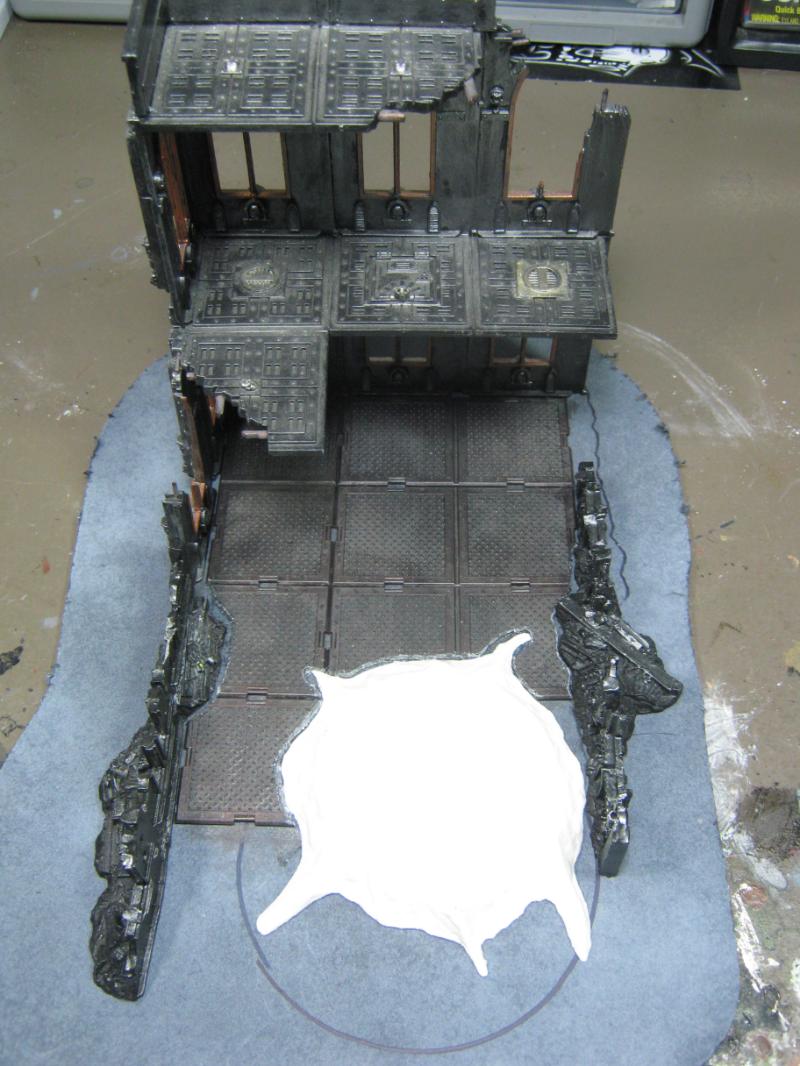
Ok, short update again tonight, but a pretty cool one. This is going to apply to many future projects as well as the one I have in mind currently. Tonight I finally cut a crater out of my last sheet.
I cut this part out with a very dull hobby knife. Why... WHY do I wait months of use to change blades? Far and beyond dull, I usually only change them after thay have broken off in the chuck. I have at least 5 or 6 packs of xacto blades that I haven't even opened yet, some of them from years ago. How many times have I posted "duh, cut myself again"?
...
So yeah, here's the end result of the hobby knife cutout:
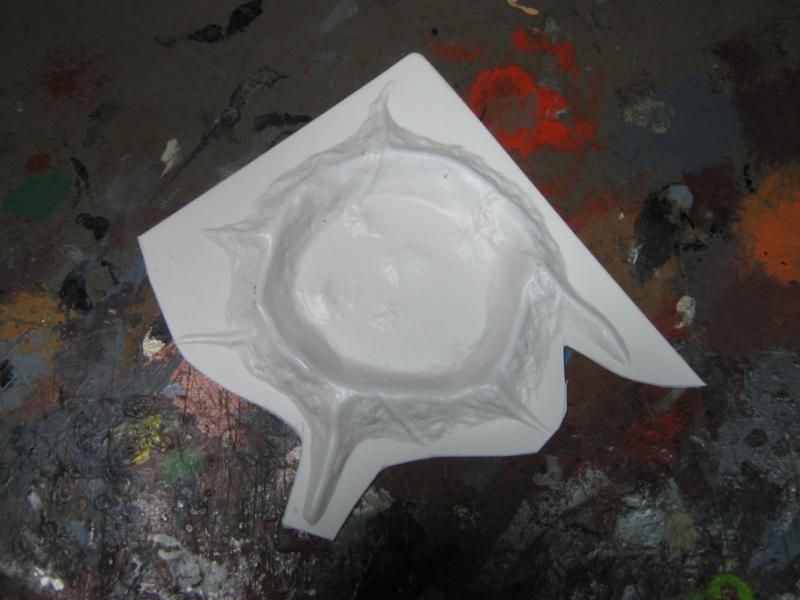
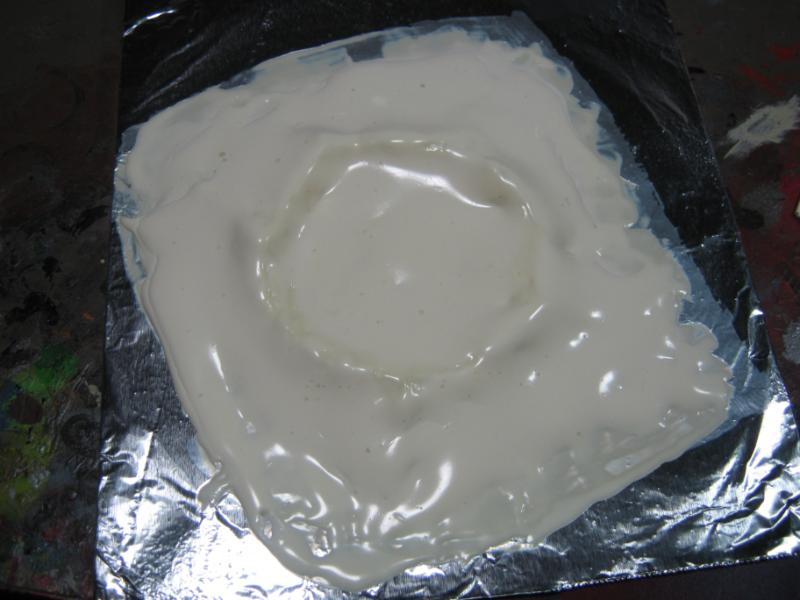
I was so dreading the next part- trimming the excess plastic away from the detail of the crater. I knew it was going to be an annoying process that would take forever and yield substandard results. Just as I was resigning myself to wallowing in Wargame Modeling despair I had an absolute flash of brilliance!!! I decided to use my Wonder Cutter that I usually use on pinkboard insulation. It worked amazingly well and took about 3 minutes. I took a file around the edges to smooth it out more, but I am *really* happy how this came out. Horray for technology!!!
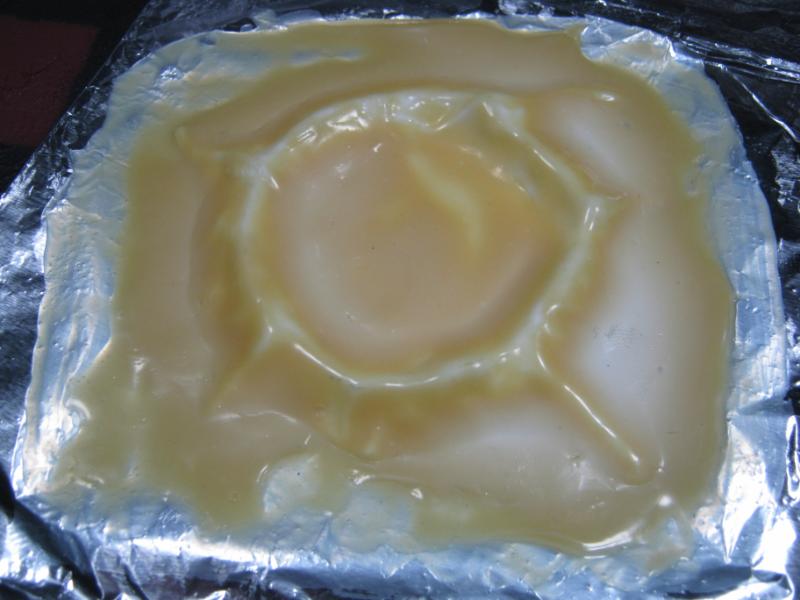
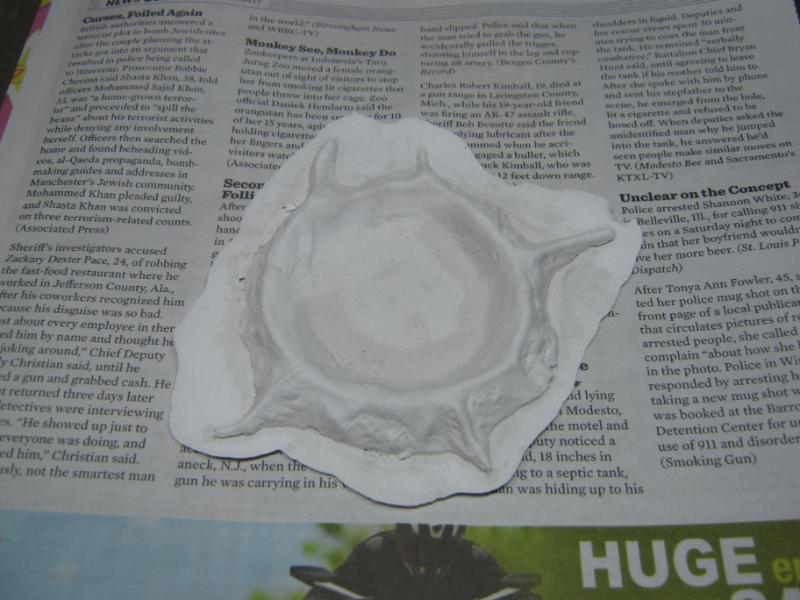
Next pic is of the last time I'll ever use a brush-on mold maker. It's not terrible, but I know there are better ways of doing this and I've gained enough experience with things to know I could do casting with a bit of practice. My next mold will be one of those cool ones with Lego blocks and everything. But for now here's crater mold #1 after a few coats. I used tinfoil only because I was out of wax paper and I'm getting mighty impatient these days and I figured the worst that could happen is I'd have a bad mold. On that note, the mold might look too thick but I was drying it w/ a hair dryer between coats. I figure I'll have the mold done in a few days. I'll pour plaster first, but my goal is to cast these in resin for durability over the years.
And that's it for this one. I'll be updating it when I can. As always, thanks for the views and for the C&C. I'll have more to share as soon as I have something done.
24297
Post by: Viktor von Domm
cut this part out with a very dull hobby knife. Why... WHY do I wait months of use to change blades? Far and beyond dull, I usually only change them after thay have broken off in the chuck. I have at least 5 or 6 packs of xacto blades that I haven't even opened yet, some of them from years ago. How many times have I posted "duh, cut myself again"?
the only person i know of to change constantly is dave... all the other guys tend to be as lazy as you in that regard... seriously... count me in on this as i even can underline this statement partcular...:
I usually only change them after thay have broken off in the chuck
LOL silly me^^
and what is a wonder cutter then? it worked like a charm tho
and what is that ugly mess on the last pic supposed to be? yucky^^
48594
Post by: dsteingass
LOL..I don't understand why anyone would use a dull blade, it's harder to cut, more resistance, more jerky motions, more danger. To me it's lie driving with a flat tire, it'll only cost you more in the end
24297
Post by: Viktor von Domm
see... the master of them sharp knifes has spoken
and nice analogy...^^
30344
Post by: monkeytroll
It's weird Dave, but certainly true. I change my scalpel blade regularly, but for some reason the other blades have a horrible tendency towards the 'change when snapped' party
48594
Post by: dsteingass
I dunno..losing a finger would sure put a damper on my hobby time.....
33919
Post by: Moltar
Terrain is still coming along nicely, Skalk!
I only saw one store in either Beijing or Shanghai that sold any Warhammer stuff. Believe me, even as drunk as I was, dumpster diving never crossed my mind. Nerd stuff seemed a little bit cheaper, but not enough to appeal to the average Chinese income. So all in all, just like the rest of the world. It was fun to see a store front crammed with Anime models, AoBR, an ork trukk and a big 40k window decal, though. Glad to be back state side, but had the time of my life over there. Now I just have to focus on unpacking my new place and I can FINALLY get back into painting and modelling.
26139
Post by: Skalk Bloodaxe
@ Vik- that ugly mess is the start of my new crater mold. It'll be done in a few days once it has a few more coats and has completely cured. It's a bit of a process but the end result will be worth it. The Wonder Cutter is this:
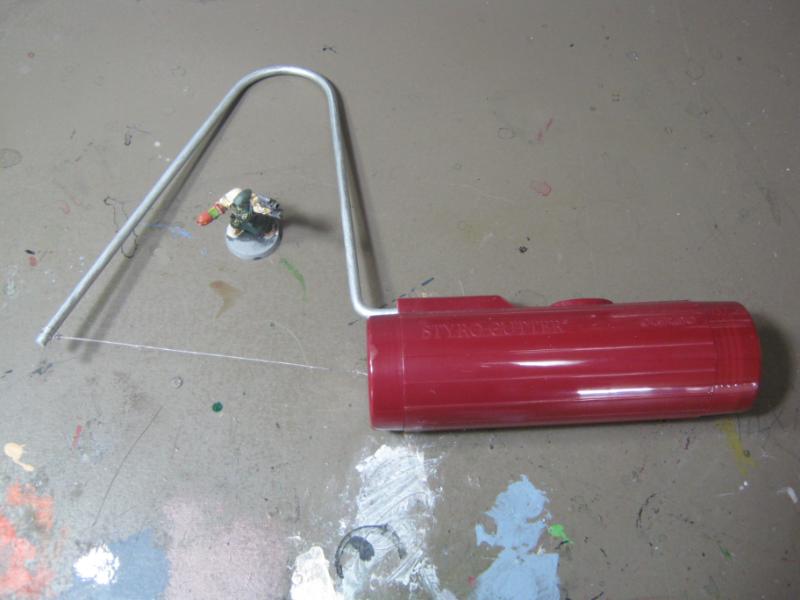
Miniature provided to show scale.
@ Dave- I don't know either. It's not like I don't know better, or I don't have replacement blades. It's a mystery.
@ Monkeytroll- See? I'm not the only one. I'd offer that I'm in the majority. But so are stupid people. Hmm. I think I need to make a point of changing my blades more often.
@ Moltar- Welcome back! I was worried you'd be abducted and sold into the slave trade to make iPhones and whatnot. That's really cool to hear about the game shop there. You almost have to wonder how a GW product would sell there (maybe Tau? Ha!). Looking forward to you getting settled in and sharing your new work.
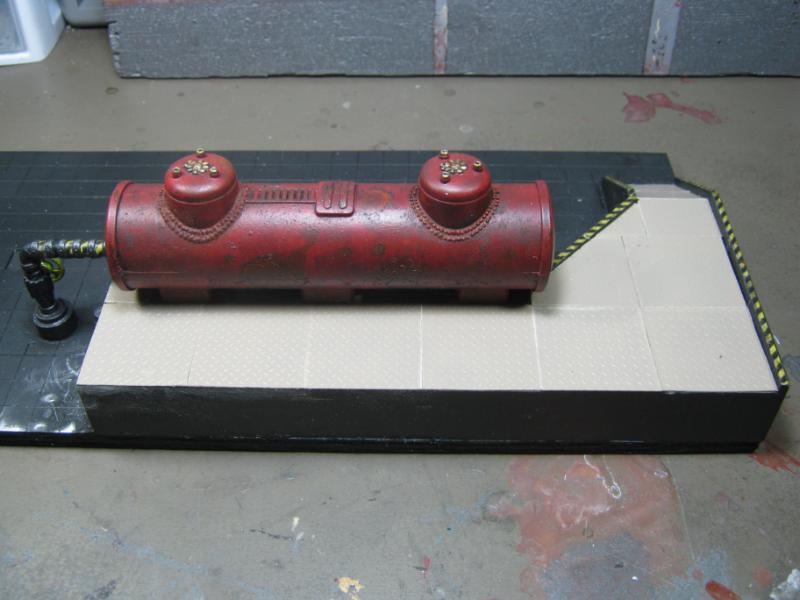
Another short update, but a decent one. Progress is skipping right along on the 'crater building'. Depending on how this one comes out I may make another, but no more than 2, I don't want to ruin the uniqueness of each individual piece.
I haven't had the chance to sit down and get the detail work done on the first building I started so I've been hammering away at the 'bulk work' on the 2nd building. This morning I sprayed the base, sprayed the tread plate floor, glued to the base, painted Tamiya Gun Metal, and light drybrush w/ a mix of Gunmetal and Flat Brown:

I glued the tread plates directly to the board on this one instead of on a sheet becasue there's already so much going on w/ overlap that this will be a lot easier and look better when it is done. You'll notice the circle that some of the plates overlap. This is where the crater will be, and I'm going to cut out the bits of tread plate where the crater will go w/ a Dremel tool and use the leftover bitz of tread plate as rubble around the crater. There will also be bitz that come off for the rubble overhang from the resin pieces I'm using for damaged walls. I may have to pick up another set of those actually. They make pretty handy fillers for my lack of actual wall pieces.
I think that's it but I'm at work and my mind is scattered, it's taken me hours to get this much typed out. Questions / comments welcomed.
24297
Post by: Viktor von Domm
thanks for the pic mate! what did you have to pay for that tool? if you still remember as i think this tool you have for quite some time now?
and the base looks promising! did you forgot about the torn plates or will the be done later and then added?
and... yes... moldmaking... understood
26139
Post by: Skalk Bloodaxe
@ Vik- This is the exact one I have- http://www.benfranklin.com/item.php?id=MP-FA601/4/3&c=a&s1=Graphics+And+Cutting&s2=Miscellaneous+Cutters&s3=Styro+Cutter&gclid=CLD726nh9LICFQZnOgode1MAJA
There's others that are higher quality for sure, but I've had this one for 3 years now and no issues other than you absolutely *must* remove the batteries because the 'off' switch doesn't work.
As for the bits... yes.
Skalk Bloodaxe wrote:You'll notice the circle that some of the plates overlap. This is where the crater will be, and I'm going to cut out the bits of tread plate where the crater will go w/ a Dremel tool and use the leftover bitz of tread plate as rubble around the crater. There will also be bitz that come off for the rubble overhang from the resin pieces I'm using for damaged walls.
.
I'm on it, trust me. Entire idea here is to make this look better.
24297
Post by: Viktor von Domm
oh boy... i need to find that here...endless possibilities... it´s dead cheap!!!
i trust you ...tho asking never hurts
39973
Post by: Galorn
Next time I come up do remind be to bring my "Travel Kit" of tools would you?
26139
Post by: Skalk Bloodaxe
@ Vik- Nope. Asking never hurts.
@ Galorn- Oh man that would be awesome! I'll swap you some stuff if you show me how you make those awesome molds. The technique I'm using right now is functional but it takes forever and is not what I would prefer.
Update on pending supply drop- I have an Imperial Sector box set enroute as of 4pm today. I am so psyched I can't hardly explain it. This will be my first ever opportunity to build my own stuff w/ my own vision instead of fixing the mess of someone else. eBay is awesome, but this is a treat indeed. Really looking forward to this.
A LOT!!!
33919
Post by: Moltar
"You almost have to wonder how a GW product would sell there (maybe Tau? Ha!)"
Given their dislike of the Japanese, the Tau probably are the least popular army over there. They seem to be into orks from what I saw. Which makes since, with their pseudo-mob mentality and lack of enforced laws.
Glad I didn't get abducted, but they seemed to be pretty intimidated by my beard. Excited to hear you're getting that imperial sector. No doubt you'll crank out some sweet stuff. Look forward to seeing your progress.
24297
Post by: Viktor von Domm
congratz for the upoming suply drop
30344
Post by: monkeytroll
All those bits - looking forward to whatever you come up with.
26139
Post by: Skalk Bloodaxe
@ Moltar- Welcome home.
@ Vik- Thanks, and see below.
@ monkeytroll- More incredible awesomeness coming soon!
Text update. Nothing new going on, have been slammed at work and at home. Hope to change that soon. Getting a game in this weekend, will take pics.
And oh yeah... my Imperial Sector box arrived today.
*head asplode*
48594
Post by: dsteingass
Awesome! I think that box set has the best sprue to value ratio in the entire GW line. Usually, GW swiftly corrects that sort of customer-friendly thing by either increasing the price or discontinuing the set.
39973
Post by: Galorn
dsteingass wrote:Awesome! I think that box set has the best sprue to value ratio in the entire GW line. Usually, GW swiftly corrects that sort of customer-friendly thing by either increasing the price or discontinuing the set.
or both.
24297
Post by: Viktor von Domm
dsteingass wrote:Awesome! I think that box set has the best sprue to value ratio in the entire GW line. Usually, GW swiftly corrects that sort of customer-friendly thing by either increasing the price or discontinuing the set.
if it weren´t so sad and true i would laugh... moving on....
39973
Post by: Galorn
to start Legos for the box to hold the RTV sillycone.
26139
Post by: Skalk Bloodaxe
@ Dave- I agree, it's a pretty awesome set. I'm not sure I'd pay $120 for it, but the $62 it cost me was pretty fair.
@ Vik- Hi.
@ Galorn- I am going to get some for sure.
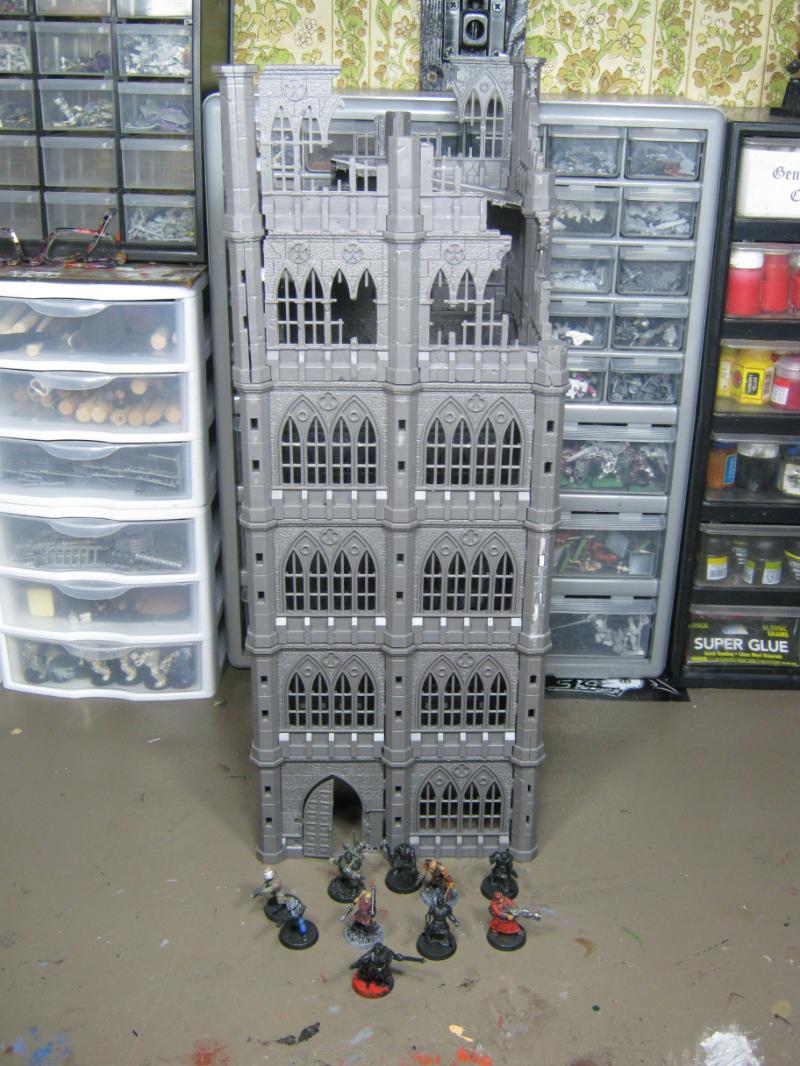
Biggest update in a while, and another example of hobby ADD. First up is my Imperial Sector. It's a massive haul and I'm really excited about it.
Look at the size of that box!
Look at how much sprue comes in it!
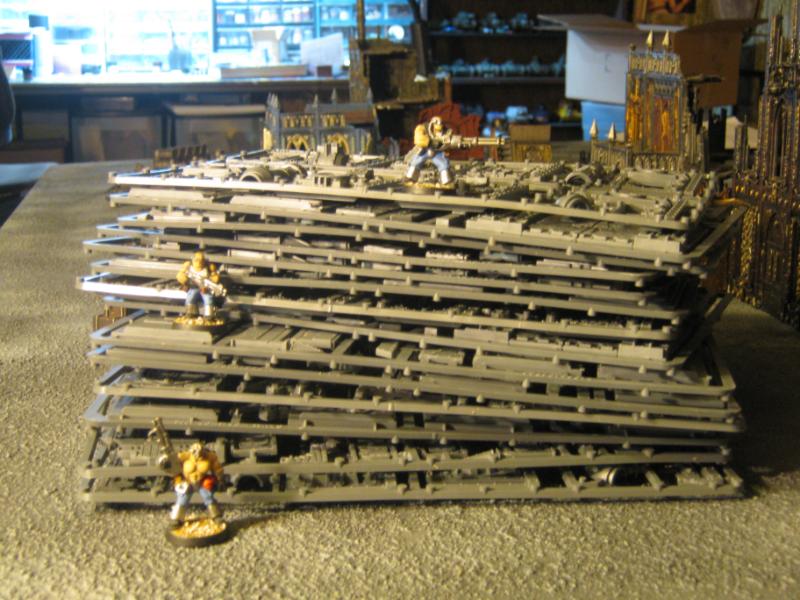
Look at the incredible detail!
There's some amazing things coming w/ that set. Will take me a LONG time to do this so be patient, it's not going to happen overnight. But it will happen.
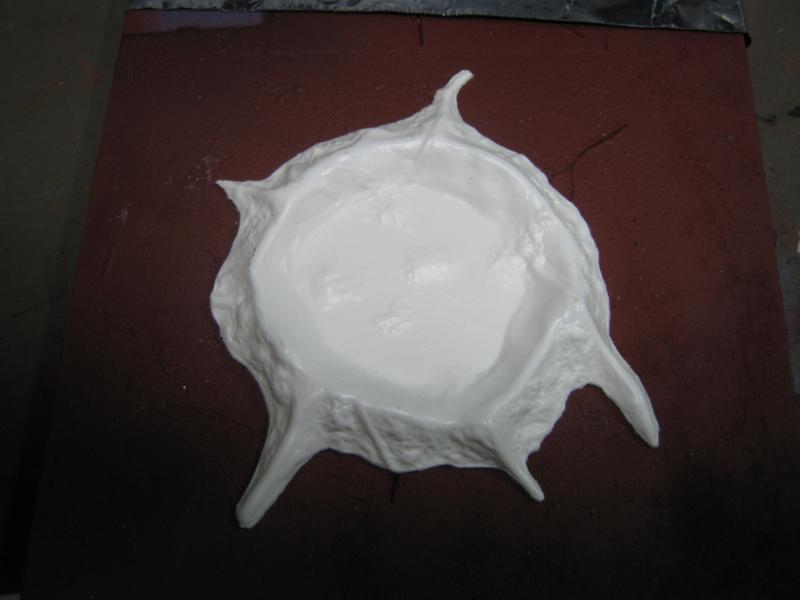
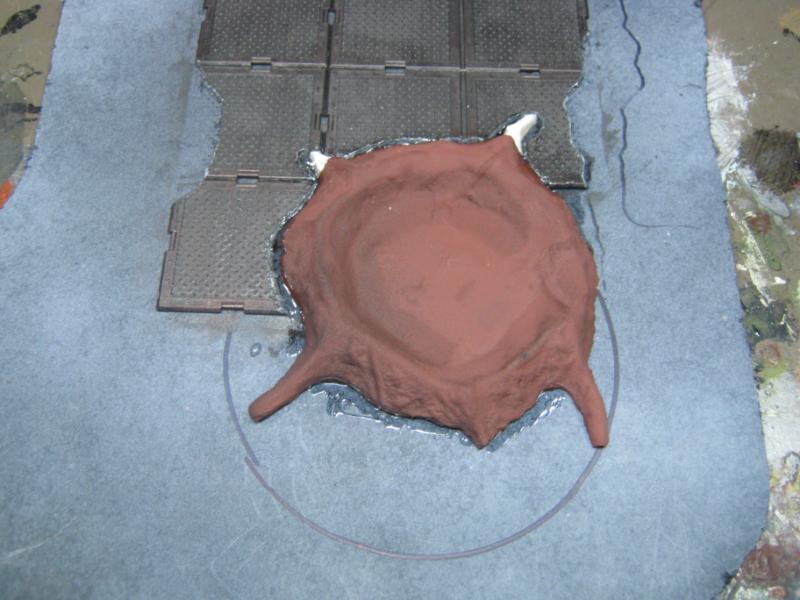
Next up is a series of my crater mold process. I think it came out really well overall.
Ready to peel off the master:
Mold and master. Came apart really easy, no problems at all.
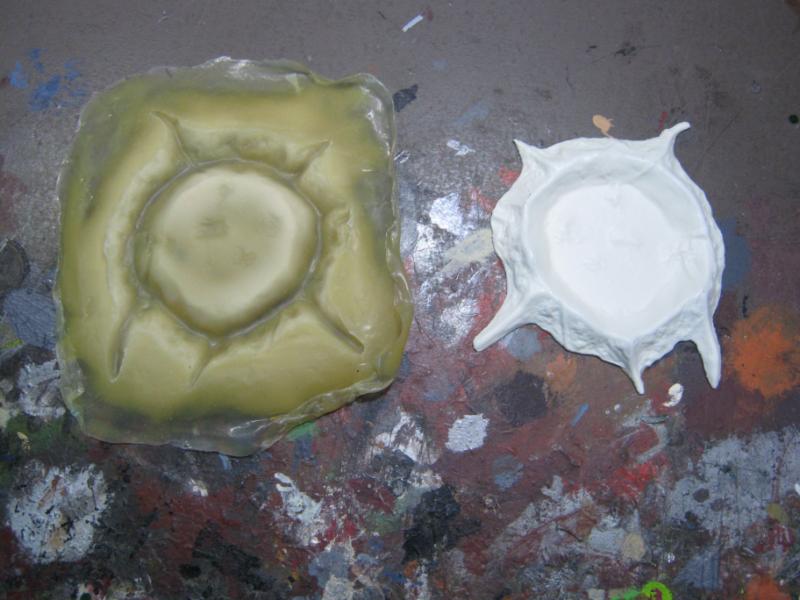
Poured and drying. I used plaster for the first test. I learned today that resin is expensive.

First cast is done!

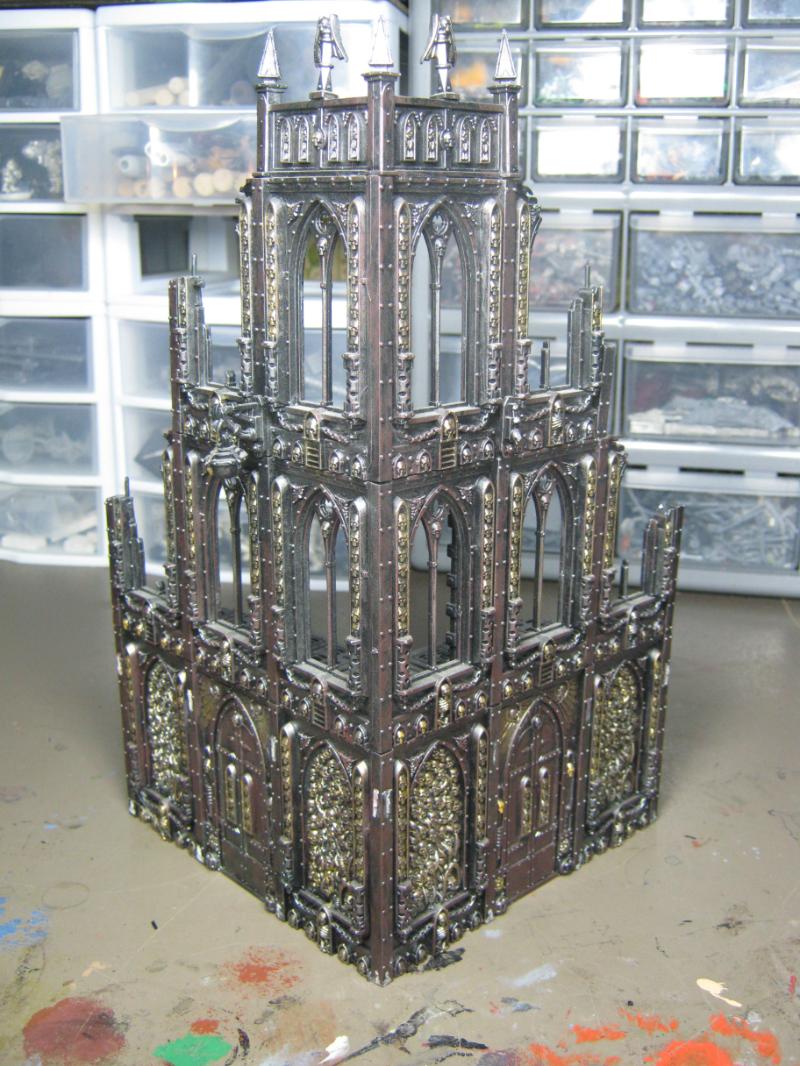
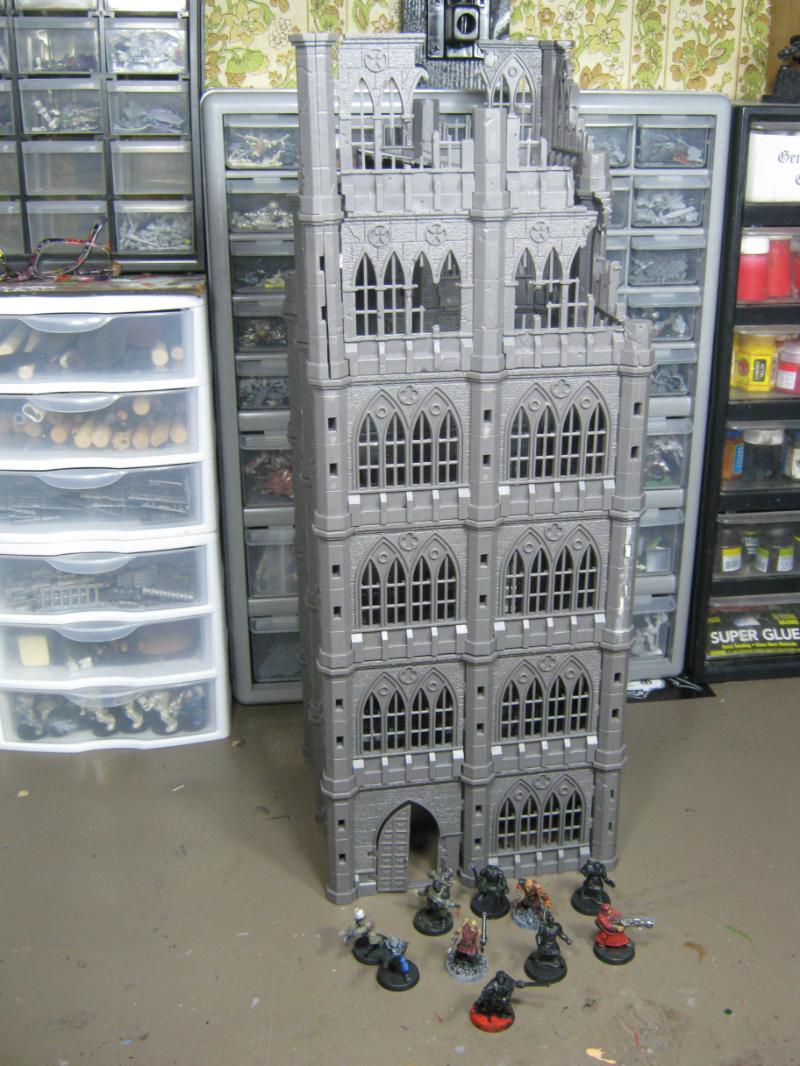
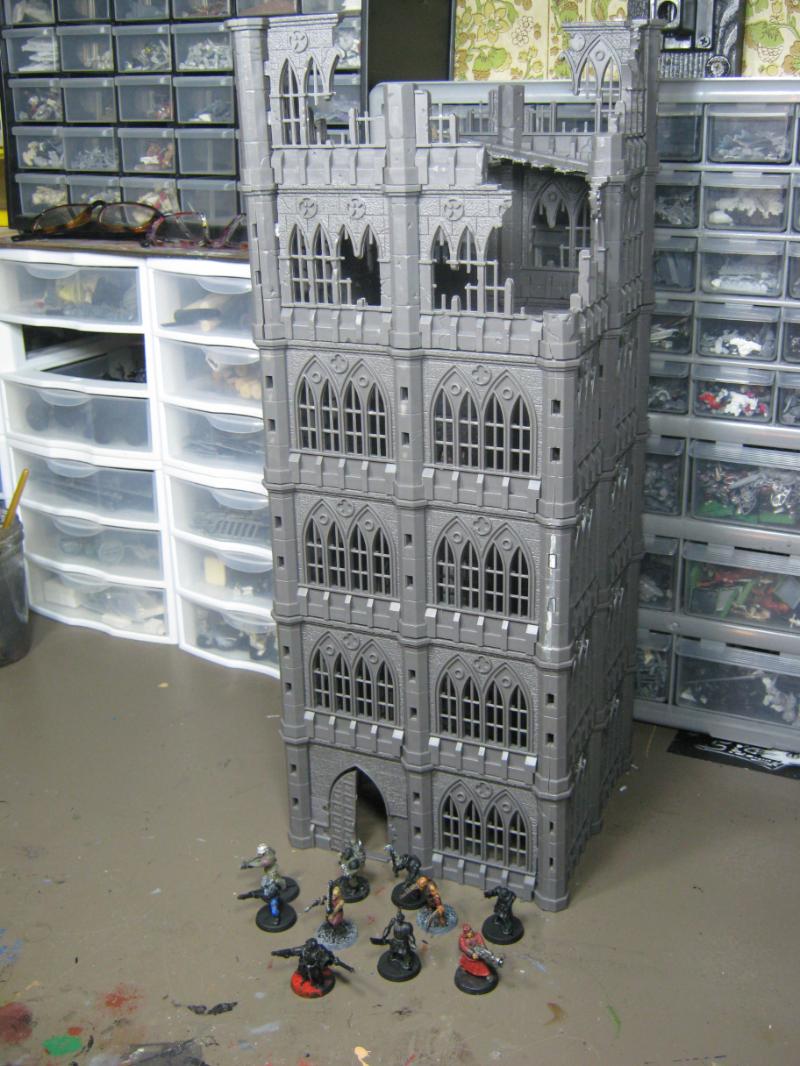
Last up is me messing around w/ my Pegasus Hobbies Gothic buildings. Building in first pic I'm going to keep and turn it into a watch tower or somethings.
Next pics I was just goofing off but I think it looks really cool. Not going to keep it like this but man I really did think about it.
That's it for now. More later when I have something to share.
32169
Post by: Rogue Wolves
those pegasus buildings are nice!
48594
Post by: dsteingass
Love the crater dood! Soon, you will have millions! MUHAHAHA!
.>A word of advice tough..IF you do make a full building, 3 panels wide is still tight to get your hands in and move models around
24297
Post by: Viktor von Domm
wow...look at the size of that thing
and the casts cam out pretty well too!!!
30344
Post by: monkeytroll
That large tower-block would be great with some platforms, for joining to multi-level walkways
18867
Post by: madmartykmf
I like it but it becomes an expensive line of sight blocker. I think I'd rather see you make a building with a larger horizontal footprint.
Love Pegasus hobbies!
48594
Post by: dsteingass
Lascannons would be very useful up that high though.
26139
Post by: Skalk Bloodaxe
@ Everyone that posted- I AM NOT BUILDING A 6 STORY RUIN. It was a goof-off thing I did while waiting for glue to set on a different model.
Today the Terrain Project thread is a year and day old. I was going to put together a 'trip down memory lane' selection of my favorite projects and show how my skill has progressed in the last year, but I decided to get some real work done instead.
First up, a few links to some really cool stuff I found on eBay. If you're working on bringing up the standard of your table, this stuff looks like it could be great. if I hadn't scored so hardcore recently I'd be diving into this stuff.
Cool Chaos-looking ruins:
http://www.ebay.com/itm/Ruins-of-Baletemple-gothic-plastic-terrain-for-fantasy-gaming-/251160294764?pt=Games_US&hash=item3a7a51f56c
Decent ruined cuty wall sections:
http://www.ebay.com/itm/Scorched-city-28mm-modular-wargaming-terrain-set-Sci-fi-Historical-1-48-1-56-/251160294768?pt=Games_US&hash=item3a7a51f570
And the monster hookup pack- 60 city wall sections!
http://www.ebay.com/itm/Scorched-city-FAT-PACK-28mm-modular-wargaming-terrain-SciFi-Historical-1-48-1-56-/251162126607?pt=Games_US&hash=item3a7a6de90f
So anyway, here's what I've been up to.
Prepping the floor for cutting:

Floor cut, kept the scraps for later:
Traced out the base of the crater and cut again:
Fits perfectly. This is the master crater, the cast is coming in a minute.
Another mockup to make sure I'm still on track. As you'll see later, I wasn't.
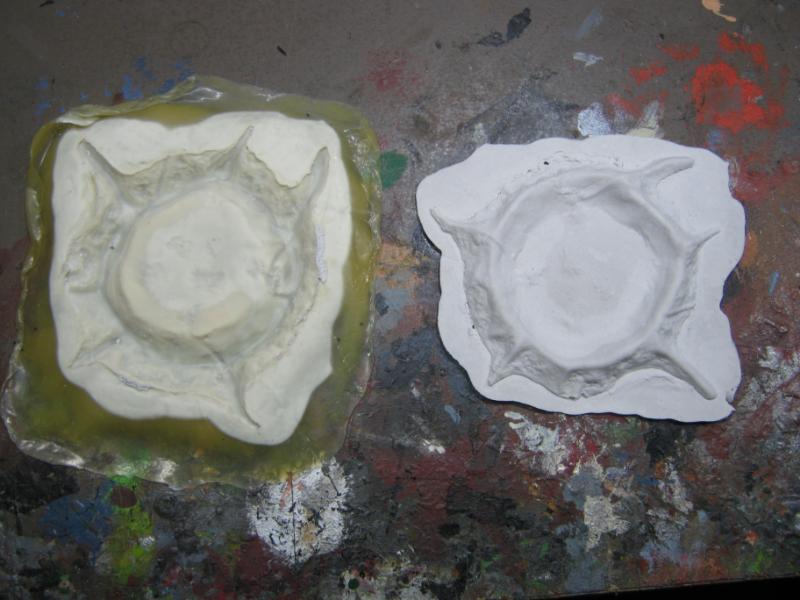
Trimming the excess off the cast crater:
Cast crater sealed w/ 3 coats of primer (for better durability) and glued the base:
Air-dry putty to fill in some gaps. It was also here that I realized I made a couple mistakes.
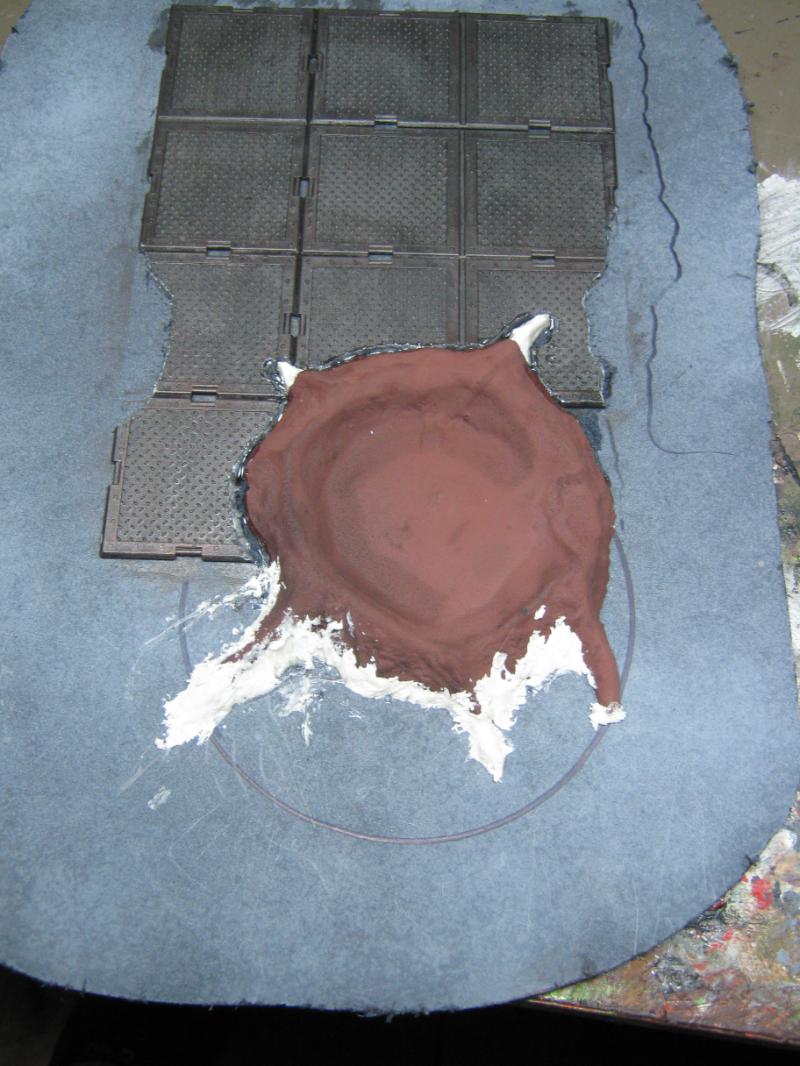
Putty dried and another layer of paint for durability. Mistakes I fixed were adding a missing treadplate (lower left) and moving the ruined wall (upper right) to the correct position (only a cutout in this pic)
And a final look at the corrected mockup. A lot more work is needed here but it's coming along and I'm really liking it a lot.
I got bored working on the Imperial Sector building so I started working on the Pegasus Hobbies tower. Not going to complain a lot here, but let me tell you this was a LOT harder than it looks and it took a lot more time that I could possibly have expected. Really tested my modeling skills.
These walls will be the interior top of the tower. I'm cutting out where the rooftop will sit.
Shot of after and before. I know, it's backwards.
Checking things out to make sure they fit properly. These Gothic plates are really cool but they don't match up all that well w/o cutting and filing.
Gluing first sections. Did another one just like it to make overall gluing easier once I got the rooftop done.
Rooftop. This was not easy to figure out as the inside is larger than the outside and it took a long time to get right. But I did and here it is.
Putting something awesome to good use. Thanks again, Dave. This stuff is excellent. Gluing tread plate to the rooftop piece.
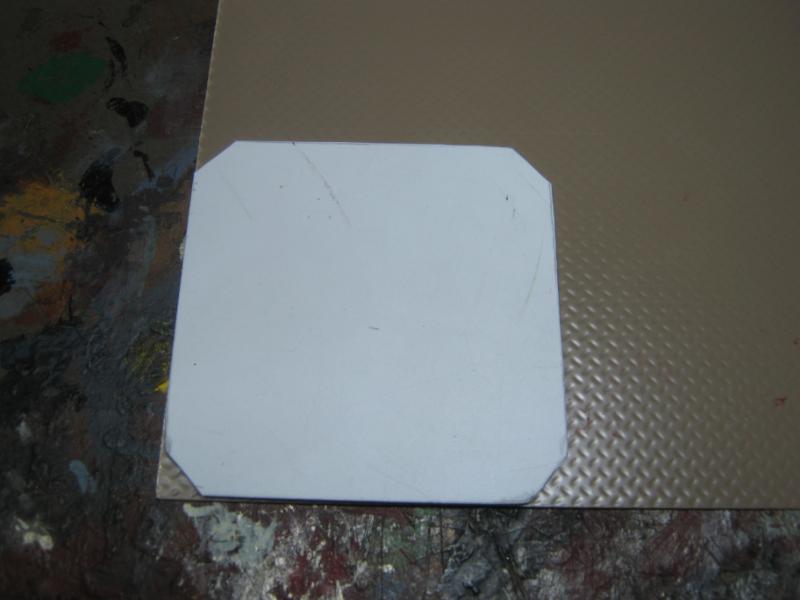
Ta-da! Instant rooftop.
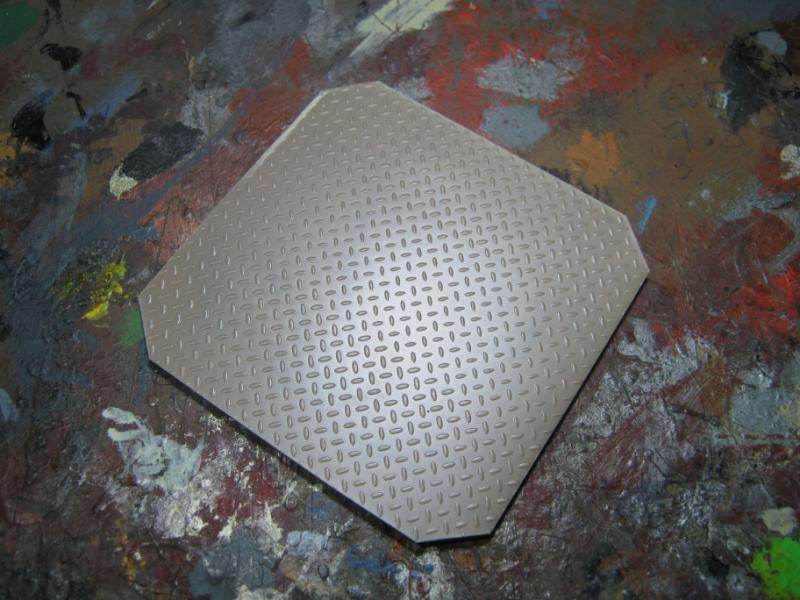
Gluing the walls and rooftop together.
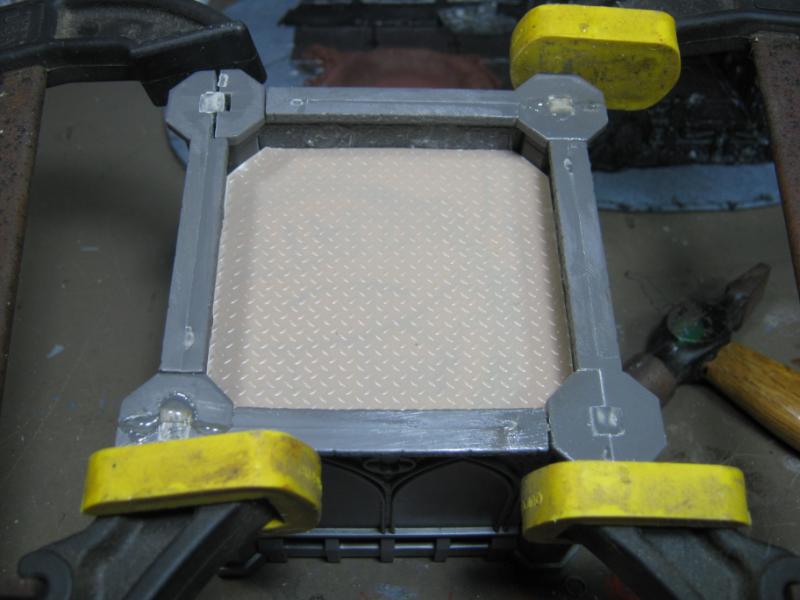
More gluing and clamping. I wish I had 4 clamps. These pieces do not like staying together and need to be crushed into submission w/ a healthy amount of polystyrene glue.
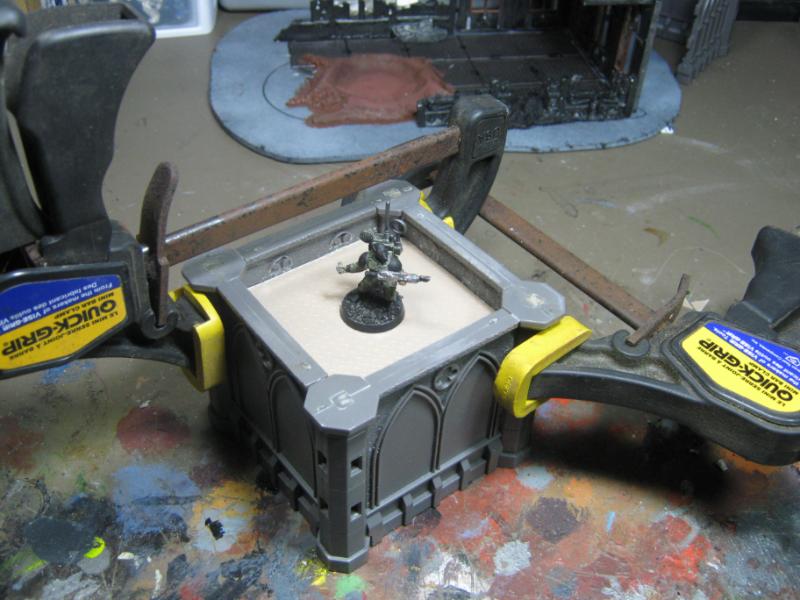
Added a hatch to the rooftop because eventually someone (hi Daichallar ) would ask how the models get to the rooftop.
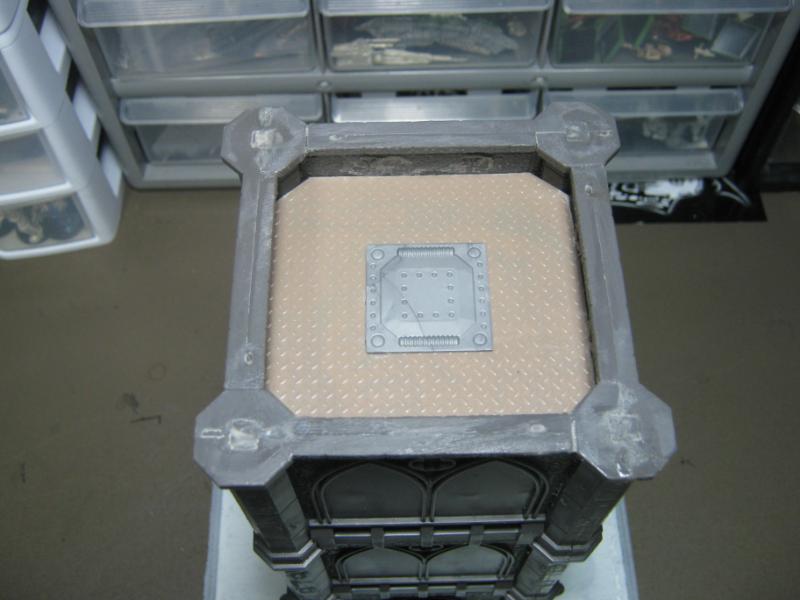
Primed. I see a couple joints that didn't fit right. I'll be filling them later.
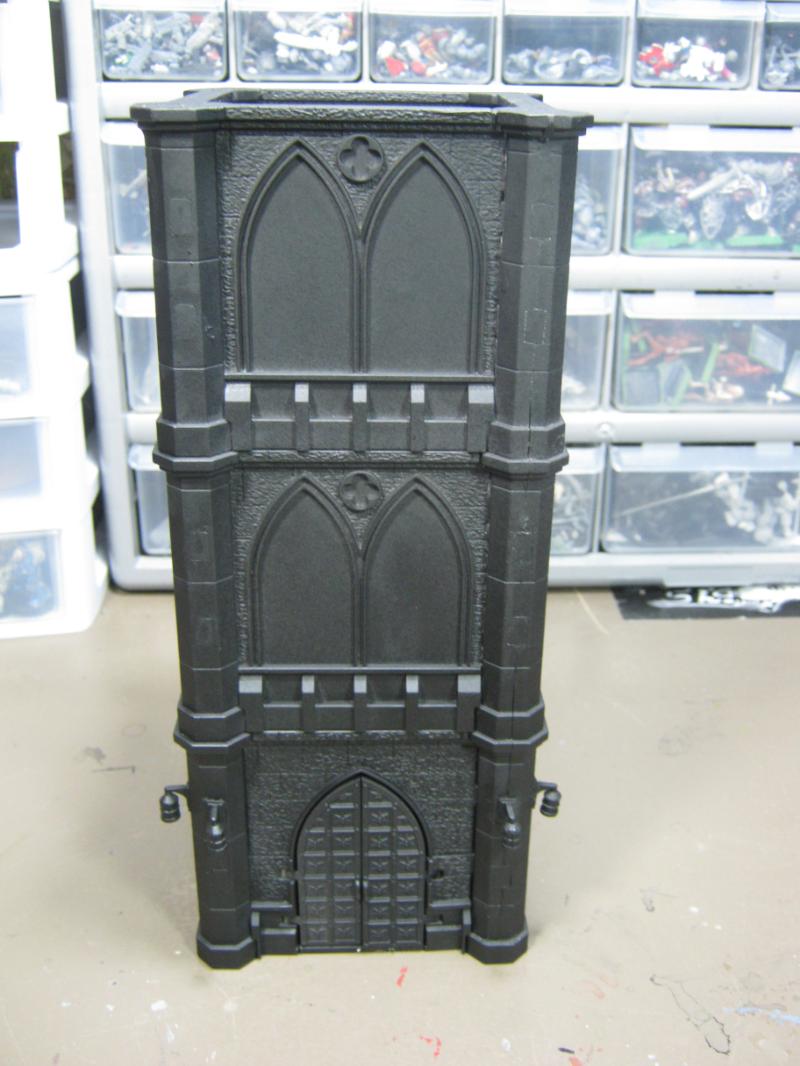
This building will not be a 'ruin'. It's simply abandoned and lacks aesthetic maintenance, but still fully functional tower. My wife bought this spray paint the other day for a crafty project she is doing, and I tried it on my regular 'spray test' piece.
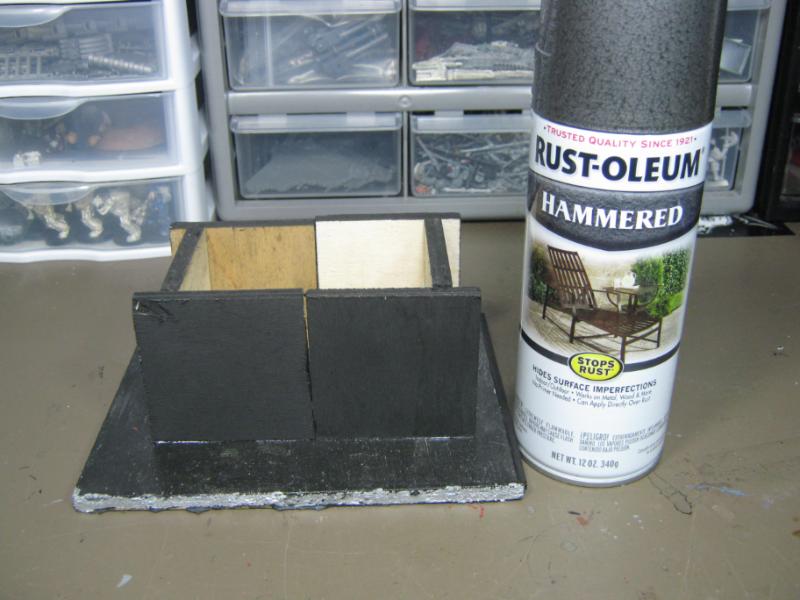
Hrrm. Not sure I like it. What do you guys think?
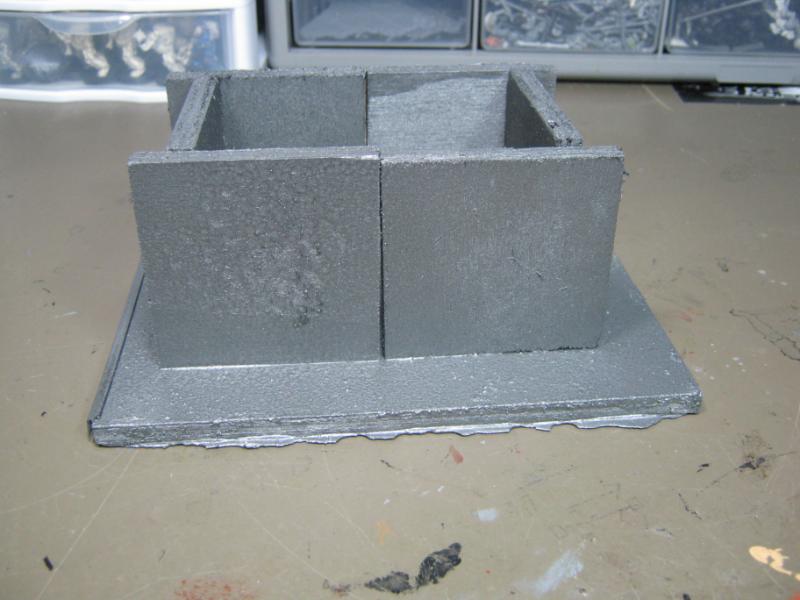
And just for some fun.
Decided to see if I could get a squad of Havocs on the rooftop. No problem at all.
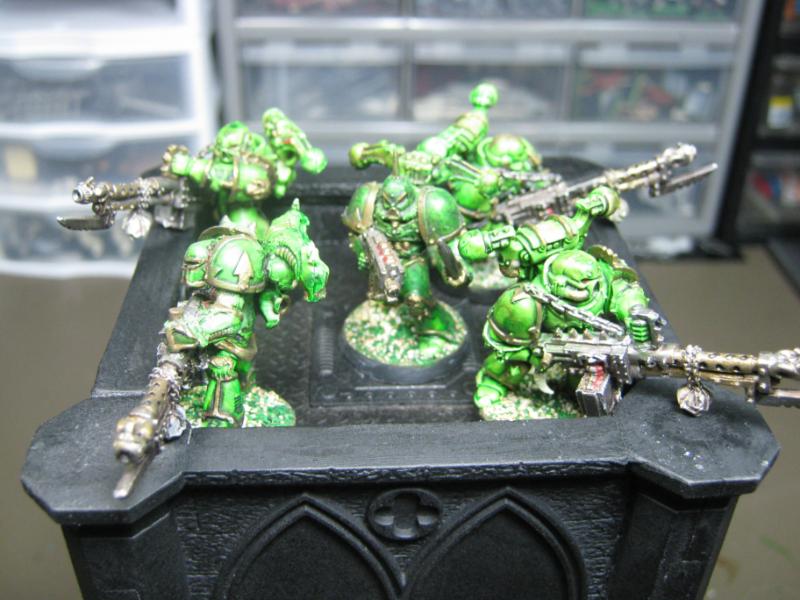
In fact, I can 9 20mm bases up top. If this tower ever winds up in my deployment zone I am so doing this.
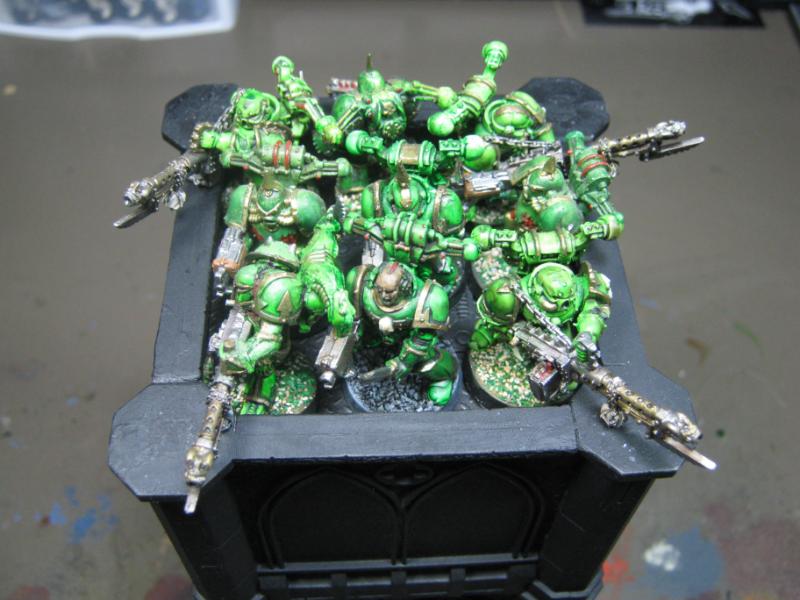
... or, maybe not.
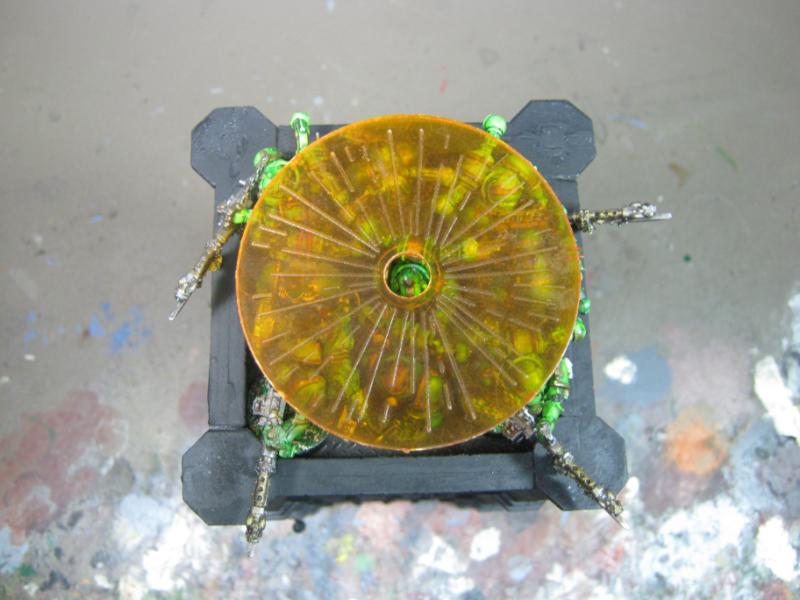
That's it for this one. Thanks for checking it out. C&C welcomed. I'll be back when I have more to share.
57468
Post by: Bruticus
That's similar to the rust-oleum I use (aged iron). The colour doesn't matter so much as you can paint over it, but the texture is awesome. I would like to try all the different rust-oleums personally, spray on texture - what's not to love?
65170
Post by: ENOZONE
Very cool stuff here. Look forward to seeing more.
47395
Post by: UMGuy
Wow, great tower. I just wanted to say thank you for the 25 pages of inspriation and that this is one of my favorite blogs on this site. tons of good stuff and great ideas I will be borrowing for my own terrain.
22619
Post by: inmygravenimage
Cool as, bud. Did lol at nurgle-pie though. Quite like the Hammered spray. And as for the crater, damn nice. Just be sure to add some dents to the otherwise undamaged flooring.
48594
Post by: dsteingass
Very cool! Remember, the pile left from the explosion would have covered some of the plating with debris, especially where you are trying to make it fit exactly.
24297
Post by: Viktor von Domm
how to comment on so much good looing work of yours?...
well firstly the last pic with the blast template made me LOL so hard!!!
the treadplate for the roof looks excellent! and might i ask where the trap door is coming from? looks very neat up there!
also... the hammered spray is too bright... if this could later on be fixed by washes... i dunno... further tests are needed i guess...
as for the crater work...the whole process... thanks for all those in detail pics... it is rather a step by step tut... very handy and entertaining!
many thanks mate!
30344
Post by: monkeytroll
Oh, it's raining so the nurgly marines put up an umbrella so they didn't get inadvertently washed?
Looking good bud, the ruin and the abandoned building. I'd say the rustoleum should be fine unless it's thick enough to hide detail - and I'd guess from Bruticus' comment that it's not.
26139
Post by: Skalk Bloodaxe
@ Bruticus- I'll try a few different things w/ it to see how it works out for me. Your 'endorsement' carries some weight, I'll have a decent go at it.
@ ENOZONE- Hey, thanks for checking this out. Lots more coming. I'll be doing this for the next few years at this rate.
@ UMGuy- Wow, thank you for the high compliments! There's a lot of really great Terrain blogs on Dakka, and a lot of the authors post here. I've taken a lot of ideas from them, and I hope I've offered some inspiration in return. Keep checking back, there's more and more and more coming.
@ graven- Thanks as always. And be assure that the crater and surrounding building will look appropriately blown up.
@ Dave- Yup. Been doing some research to that end. See below.
@ Vik- The hatch is from a haul I picked up from Horde O Bitz, it's made by Pegasus Hobbies.
@ Everyone- check this link out!!! I found it while doing online research for 'bomb crater'. The entire site is amazing and I want to spend my next 4 paychecks there.
http://www.hobbylinc.com/htm/pls/pls91695.htm
Just a text update tonight. Been doing research for bomb craters and have an idea of what I want to do. As I was doing research on 'real world' examples so I can make 'realistic' model buildings for my toy soldiers to fight pretend battles on, the pictures became more than inspiration for wargame terrain. These are pictures of real craters made by real explosives and real people died. Maybe it's where my head is at these days, but that really hit me. For all the various excuses and justification, man's inhumanity toward man will be our ultimate legacy, but no one will be left to engrave our pathetic epitaph.
Anyway, here's what I found as examples:


I have a much better idea how to create directional scree, how to incorporate the chopped bitz I kept from the floor plates into the debris, and how to blend the crater in with a convincing effect.
One of the challenges (and the reason why I cut the crater into the floor) is because the crater is higher than the level of the surrounding building. I do not have the ability to go 'deeper' so I'm going to have to work with the lack of depth to create the 'huge gaping hole in the ground' look I'm going for. I'm thinking about a water effect, but even then it's going to be noticeably higher than the floor around it. Still thinking about that one, but I'll find a manageable way to do it.
The crater (and surrounding blown up stuff) is going to be textured with a fine gritty sand that will simulate the look of dirt scattered from the impact and explosion. The floor will be strewn with debris, and it's likely I'll melt and peel back some of the plates to simulate the concussive shock the building received when the shell hit it. I'll probably leave some Imperial equipment around as well, like broken ammo boxes, abandoned weapons, etc.
I'm trying to decide still if the table will be a ruined and long abandoned Imperial outpost, ruined and recently abandoned Imperial outpost, or if it will be an entrenched battlefield still held by whatever force is currently occupying it, enduring the ravages of constant war.
That's it for tonight. Thanks for checking this out, thanks for posting, C&C welcomed, and I'll be back as soon as I have something to share.
*edited because I keep screwing up the hyperlinks*
48594
Post by: dsteingass
This is gonna be cool!!
30344
Post by: monkeytroll
With a bit of thought you can probably arrange all three of those options Skalk - most of the terrain is ruined/abandoned, then one or two specific pieces to be used for whatever mood you're in for that game. Multi-purpose terrain is the way forward - I'm now wondering how to create some of my 'silo terrain' in a mega-city one stylee, to go with the 40k /inquisimunda feel I have been going for (Yep, now I'm making terrain for three systems I don't actually play  Although there's a part of me wondering wheteher a huge bunch of Dredd minis will get me and my mate back into gaming).
Good crater references you got there - fine sand and dry filler powder sprinkled on a wet base makes great texture for churned/exploded scree.
I'm ignoring your link to goodies as my willpower is very low at the moment and I'd just binge-buy a whole bunch of plastic crack to go with the stashes I've been organising to reach me over the coming months
24297
Post by: Viktor von Domm
hey skalk... yeah, hord of bitz is a cool site... they have an ebay shop and an own shop now too...!!! trusty and quick if i may add too
and well i keep my eyes peeled how you translate those referrence pics to your terrain then... the broken street pavement is particular something i look forward too!!!
26139
Post by: Skalk Bloodaxe
@ Dave- Yes, it is.
@ monkeytroll- Point taken and applied. See below.
@ Vik- HOB has been my #1 resource for bitz. It's rare that I cannot find what I am looking for there, even when I wasn't aware of exactly what it was I needed. Regarding the broken pavement etc, it hasn't happened yet but is on the list of things to be done before I sign off on this one as 'finished'.
Small update today. I've been doing some work on the 2nd piece I started (no idea where the motivation for #1 has gone) and on the Pegasus Hobbies tower.
I didn't take a pic of the first stage (repainting the crater) but here's the next step- flocking:
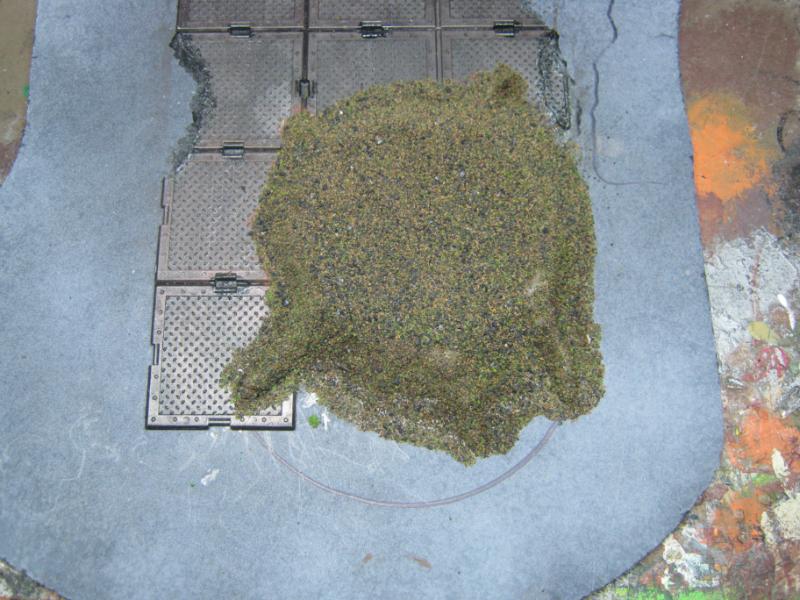
Don't worry, it's for texture, not color. All of this is stuff I swept off the table after a different project. Remember this?
That's where it came from. I'm not wasting anything on this project.
Anyway, here's what it looked like once the flock had dried:
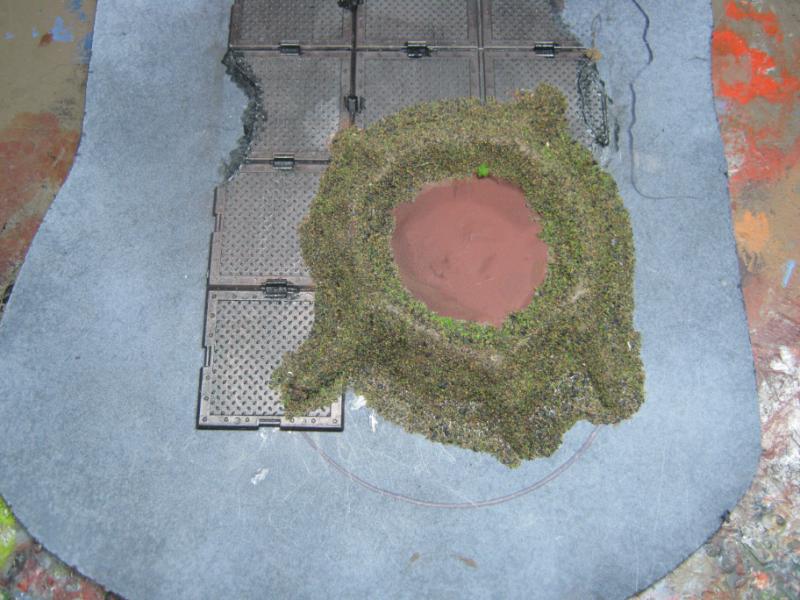
I added another layer of paint to give it the right color and make it more durable:
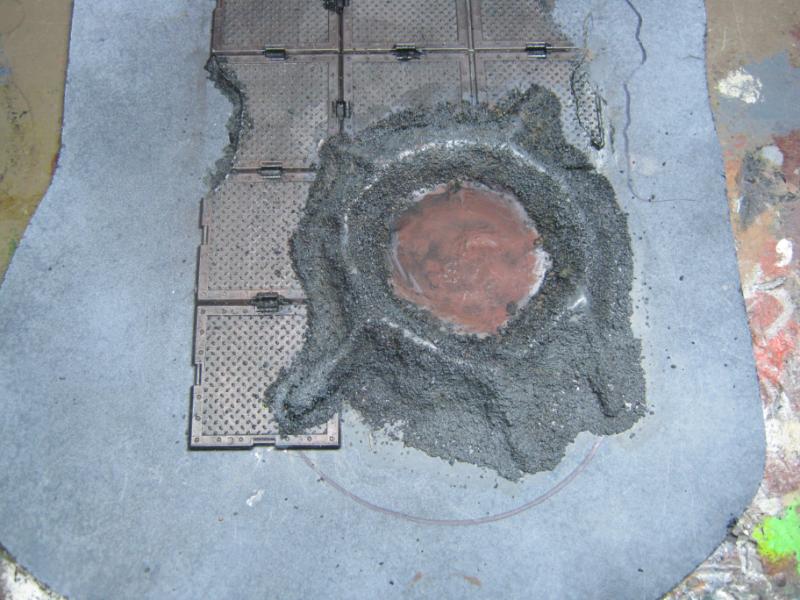
I couldn't get past the fact that the middle of the crater was noticeably higher than the surrounding 'flat' areas. I thought about it a lot, like fill w/ water effect, ramp up the rim of the crater more to minimize the height issue, etc. Then inspiration hit me. Wasn't sure I had the skill or the stones to do it, but it occurred to me that if I hollowed out the center of the crater it would be lower than the surrounding 'flat' areas, even if only by 1/16th of an inch. I figured if I really messed up I'd find a way to fix it, and if it came out the way I wanted it would be awesome. I grabbed a small chisel and chipped out the bottom of the crater. Here's the result:
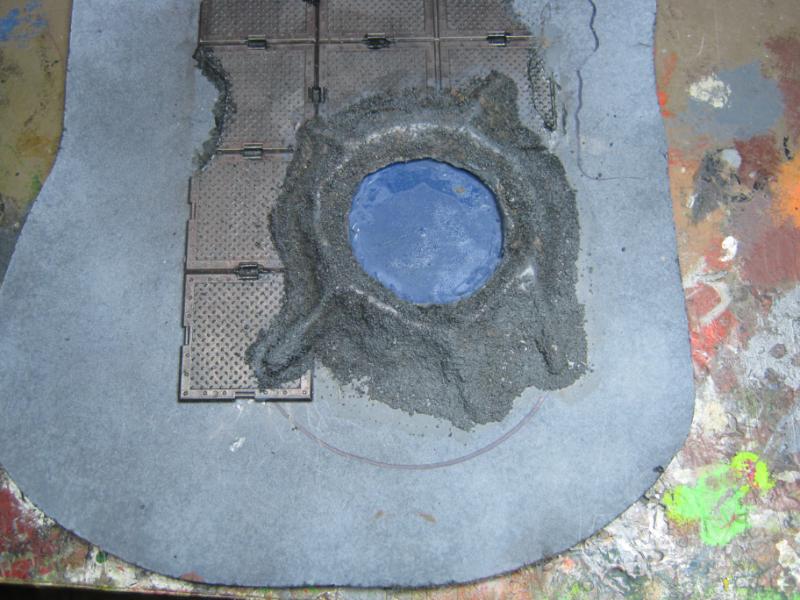
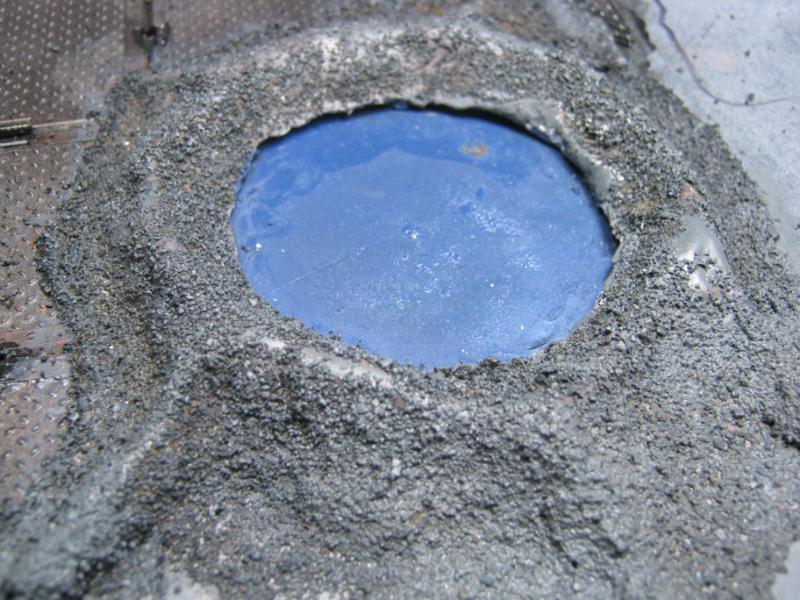
Base painted blue in these pics because the contrast was really low and I wanted you guys to be able to see what I did.
I used a few different things here until I found what I was looking for w/ a 'depth' effect. Tamiya Smoke. I like this stuff.
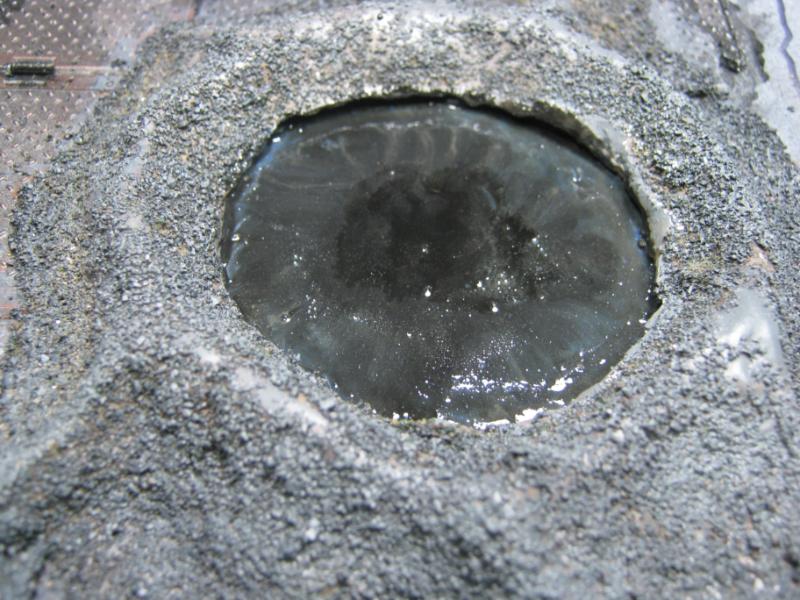
I'll be using this stuff for the water effect. I got it for free so if I screw this up I'll only be out the time it took me to get this far, and to fix it.
Annnnnndddd... slam on the brakes for this piece, nothing else has been done. Looking forward to having the time to work on it more.
I've got more work done on the Gothic tower. Note that it is stone grey. That happened on purpose and it will not be receiving the 'rustification' effect as a result becasue ... well, it's stone. HOWEVER, that does not mean that it will remain unblemished by the ravages of alien weather and passage of time. I'm going to be trying a new weathering effect for stone. It will look cool, I promise. And not all of it will be stone. I'm going to have gilded arches, iron hinges / door stuff, etc. I'm not taking the easy way out just becasue it's a stone building.
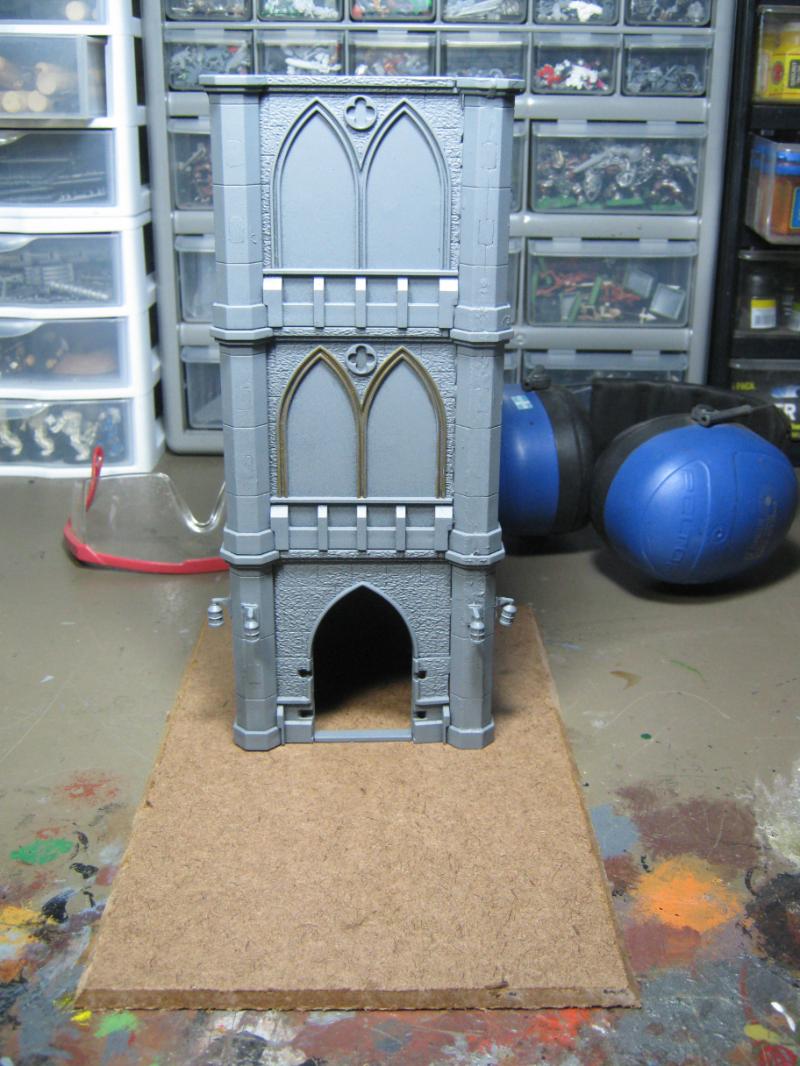
Also note the base. It's been a new issue on the table recently- what is 'difficult terrain', and what is not? I base everything the same way for aesthetic effect. While it makes for a better-looking table, it does create some confusion. Solution? Shape of the base. If it is symmetrical with a building on it (square, rectangle, round) it's normal terrain. If it is asymmetrical base with a building on it it is considered Difficult Terrain from the edge of the base inward. Small bases like this:
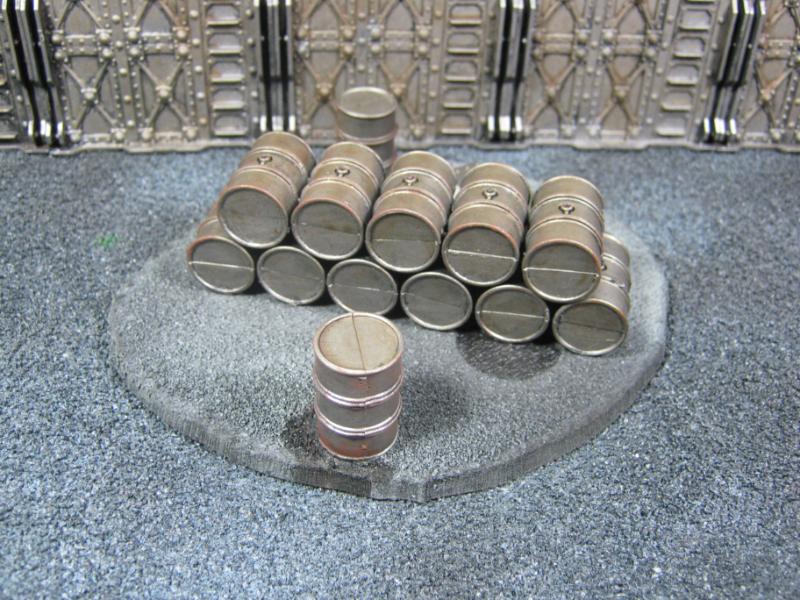
...are just terrain.
So another issue solved. Give me another 30 years of this and I'll have it just about right.
That's it for this one. I'll leave you with a glimpse into the far future, and I'll be back when I can. Don't expect much coming from me for the next couple weeks, tomorrow is 'cut day' for the conversion at work. I'll be pulling 12-14 hr days minimum and might be working the next couple weekends. Depends how it goes. Bottom line is my life is chaos and I'm trying to duck and cover as best I can.
Enjoy.
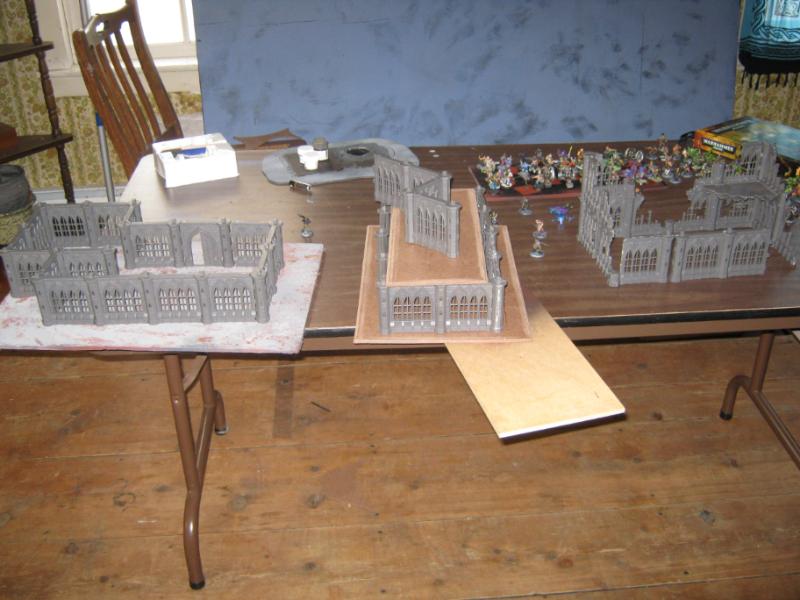
33919
Post by: Moltar
I like where both the crater and the stone tower are going. Quite interested to see how the water effect turns out in the end. Good luck with work over the next few weeks.
48594
Post by: dsteingass
You work in IT, so your hard work and dedication will go unnoticed and unappreciated, but we will always appreciate your terrain work
24297
Post by: Viktor von Domm
^that!
and the texturizing of that crater looks very good!
39973
Post by: Galorn
Looking good skalk. next trip to the Home Despot you might want to get some "playground" sand as it has a nice mix of grades of sand in it. gives a very nice "dirt" look.
24297
Post by: Viktor von Domm
despot
LMAO....sorry galorn
39973
Post by: Galorn
the alternatives in the NE USA is "BLowes"
26139
Post by: Skalk Bloodaxe
@ Moltar- Water effect will likely be the last thing I do on this before gluing the building to the base, so it'll be a while. I'm hoping it turns out well because I really want to do more of this (water / slime / sludge effect).
@ Dave- True, but I'm HPP instead of salary, so I'm making $$$bank$$$ right now. 6 hrs OT yesterday, 2 on Tuesday, 1 on Monday. Probably 3 today, 3-5 tomorrow, and possibly working this weekend depending on how tomorrow goes. I'm going to pay off a bunch of stuff that been riding me for a while. Nothing like a clean slate.
@ Vik- Thank you! More greatness coming. Trying to figure out the 'destroyed / disturbed floor tile' look. It's not asphalt or concrete, it's metal, so I'm still trying to figure how to make it look realistic. Thinking about peeling it back and rolling the edges over, and then having the bits that were blown off or buried in the crater sticking up in other places.
@ Galorn- Hmm. I have a sand pit up behind the house. I'll check that out. Free is my favorite price.
Nothing new to report. All work and no play makes Skalk a dull boy

This weekend is looking rainy but warm. If the weather isn't too bad I'm going to saddle up and take the 48 out for a putt. If it's all hurricaney like they are shock and aweing about I'll stay home and do some modeling. If I'm not working.
Gah. I need a break and I need some genuine modeling time. So many achievable goals, so much raw material to work with, no time to do anything w/ them.
'Excusez-moi, garçon. Could I please have some cheese and crackers with my whine? '
Ha.
I'll be back with something soon. I'm highly motivated, incredibly well stocked, and have some great ideas. All I need is time.
Thanks for looking (at nothing this time). I'll be back.
65170
Post by: ENOZONE
Cool stuff. And I'm learning!
48594
Post by: dsteingass
You are a lucky bastard Skalk! I am supposed to care about fattening our already lopsided $13 million/year contract with the customer, adding more services, doing more work, putting in more time without a dime being offered to me. I don't care, nor will I until they throw me a crumb. I don't understand why Corporations expect employees to accept a business deal that the company would deem an "operating loss".
26139
Post by: Skalk Bloodaxe
@ ENOZONE- Me too! Stick around, a lot more is coming and if you're the kind of person that learns from other people's mistakes you have a wealth of information here.
@ Dave- The only thing I have going for me right now is OT. I'm not liking work at all right now. Everyone is stressed, management is riding people because they are getting ridden by other people, customers are freaking out... the bonus at the end of this will be sweet but the 'right now' it seems not worth it.
This is a HUGE update. Even if you're just looking at pictures, you'll be busy. I'm sharing 40 of them in this update.
First up is me bragging and showing off my passion. I just got new pipes, high flow air breather, and a chip upgrade.
http://www.withstrengthweburn.com/terrain/48_01.jpg
http://www.withstrengthweburn.com/terrain/48_02.jpg
*pics are links instead of displayed here because they are HUGE*
I didn't wind up working Saturday so I went riding during the late afternoon. The only reason I turned around and came home is because I have my kids. Someday I'm going to saddle up and leave. I'll warn you guys before I go.
Anyway, on to the modeling!
I got to take a massive chunk of time over the last couple of days and got some genuine work done. I'm really happy with the stuff I was able to do and I'm that much closer to having an absolutely awesome table. There are limitations I'm working within (skill, storage, general functionality of a game table) but overall I'm really pleased with the progress I'm making and I truly feel I'm a better modeler than I was when all of this started.
The first thing I did was sort out the madness. Nothing junks up my table (and surrounding area) like a terrain project in full swing. While I was cleaning things up I decided that it is a bit early for the Pegasus Gothic buildings to be out on the 'on deck' shelf so I disassembled them all. But before I tore them apart and put them away I decided to take pictures of them because it took a lot of thinking to figure this much out. You'll see these again someday.
Large building:
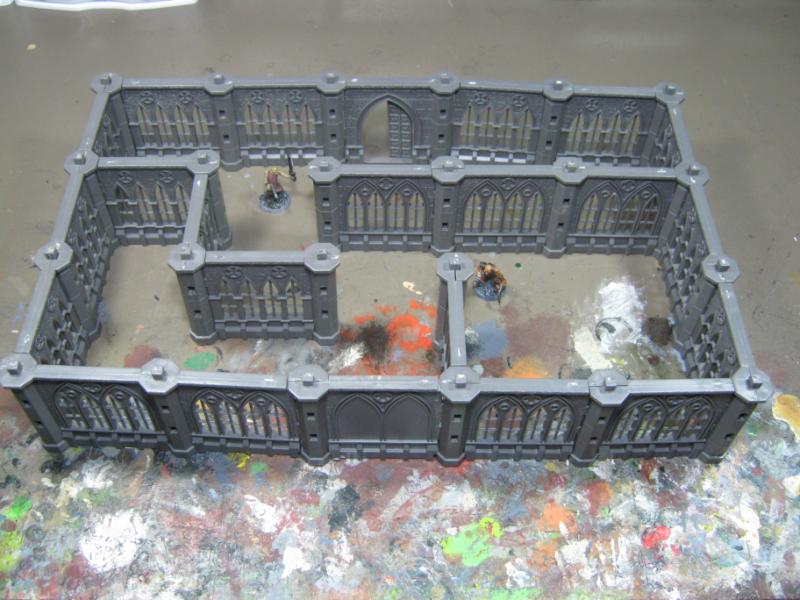
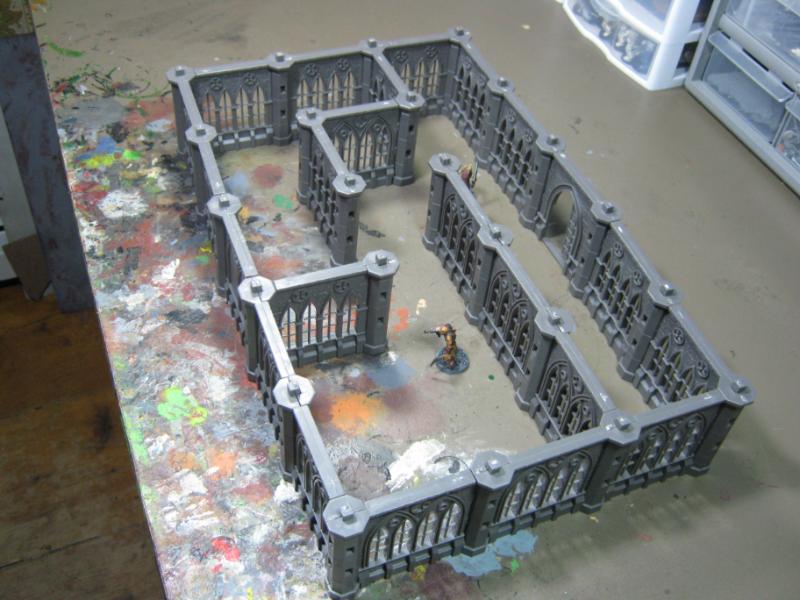
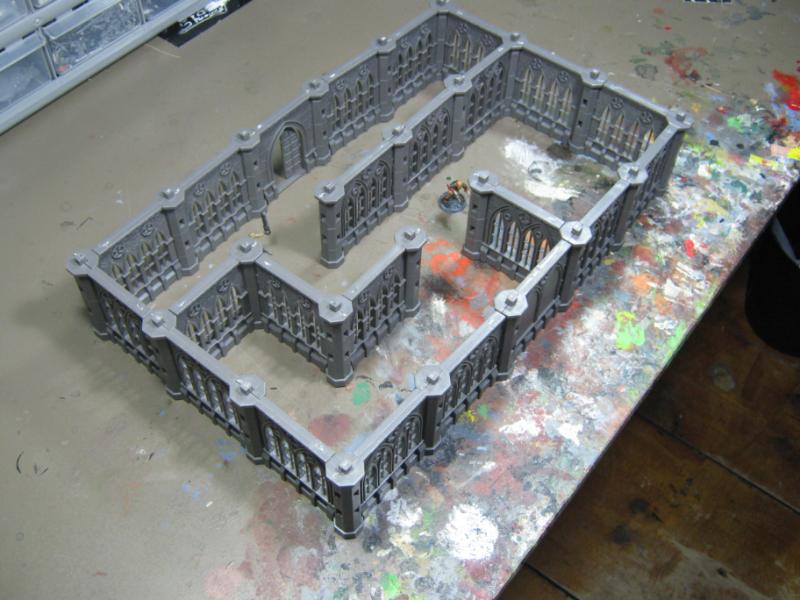
Small building:
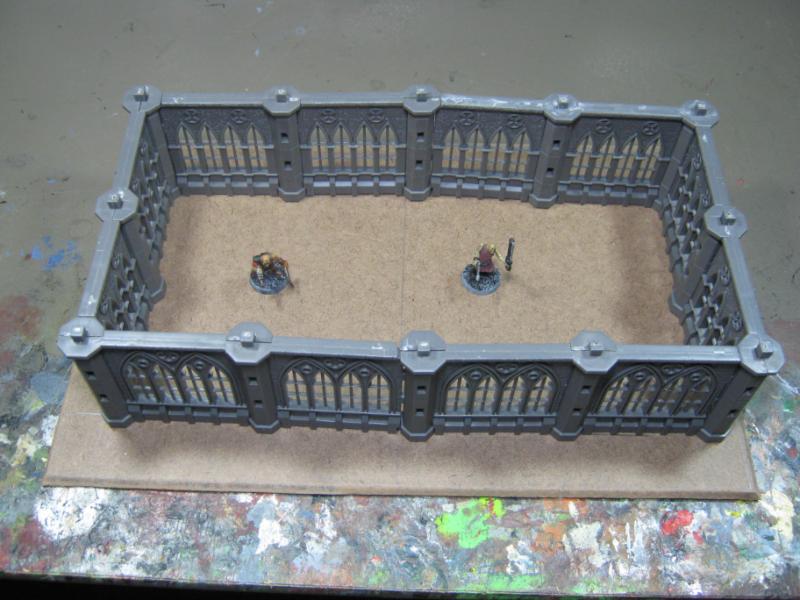
Both will have more doors and will have roofs. More on that later.
While I was packing up the Pegasus stuff I stopped and took a hard look at my Gothic Ruins and an idea struck me. If I put them together as they are made I have a small box with a weird gap of ruin in between.
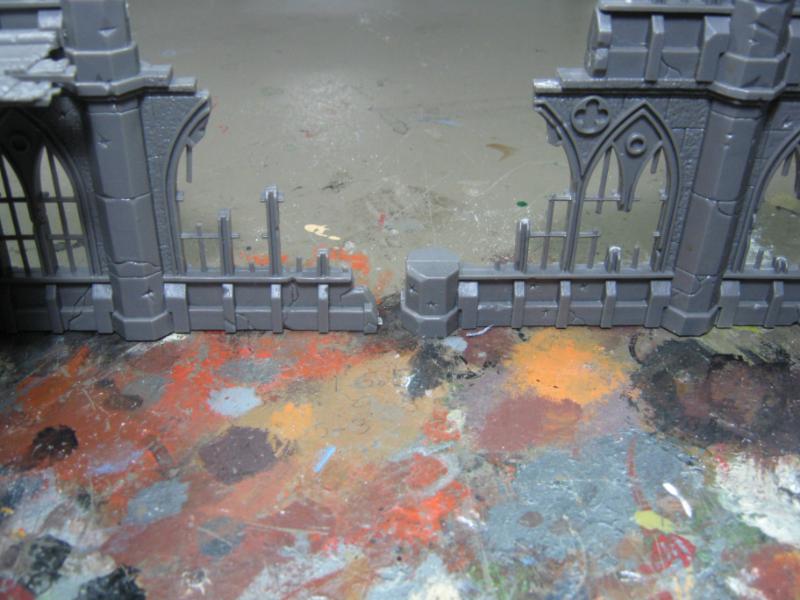
I had an idea and got to work; Basically all i did was take out a clamp and my saw:

A bit of fiddly stuff later and I had this:
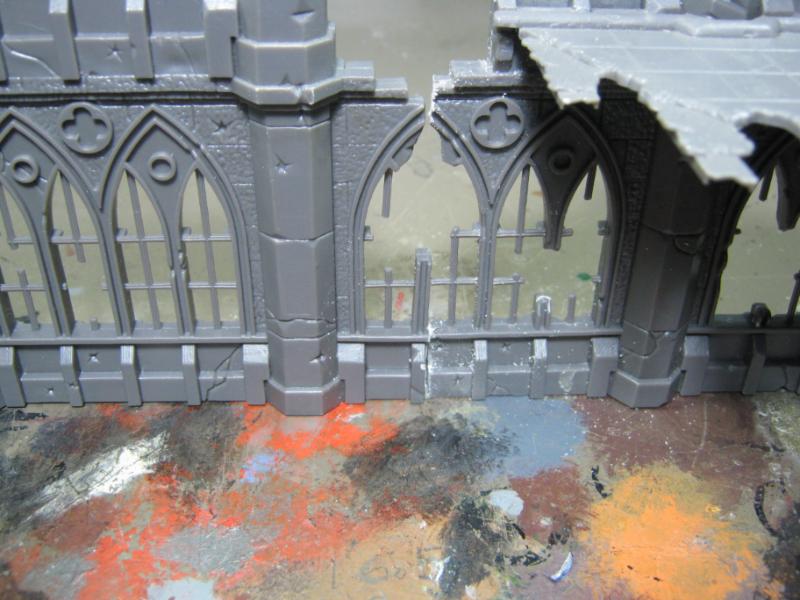
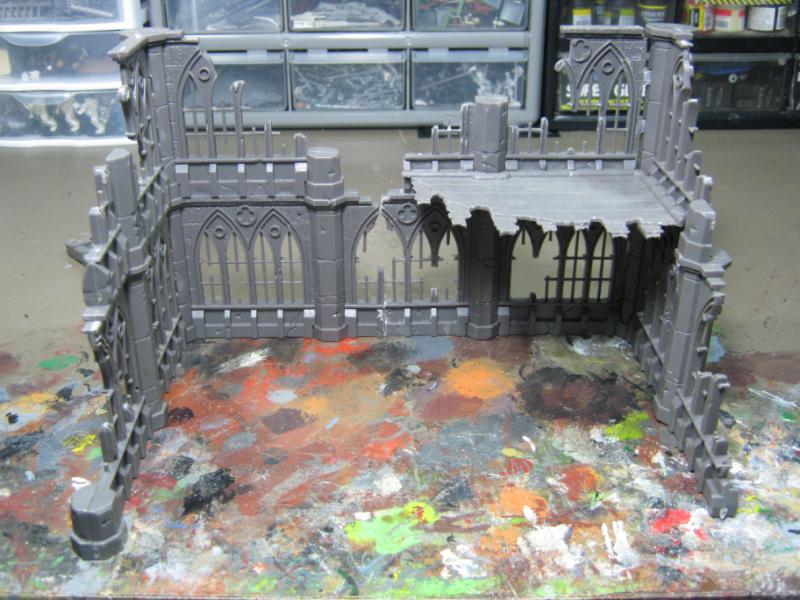
I was really impressed with myself until I noticed this:
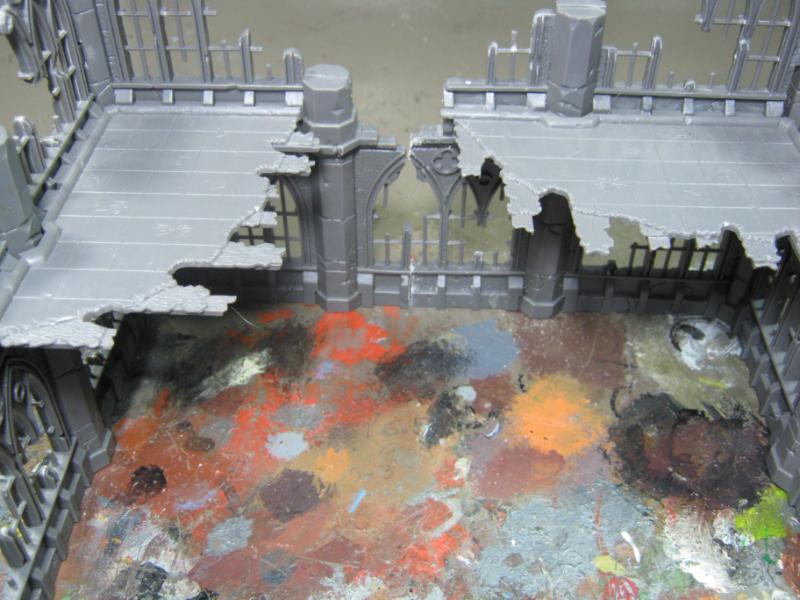
Oops. But no worries, I figured it out.
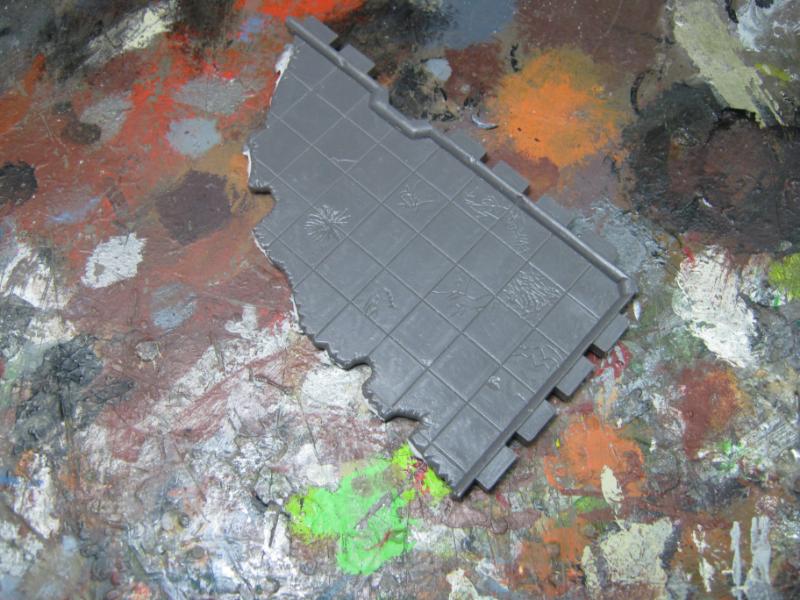
...and for that awesome 'ruined blown up building' look, I'll be doing this when I'm ready to get to work on this piece:
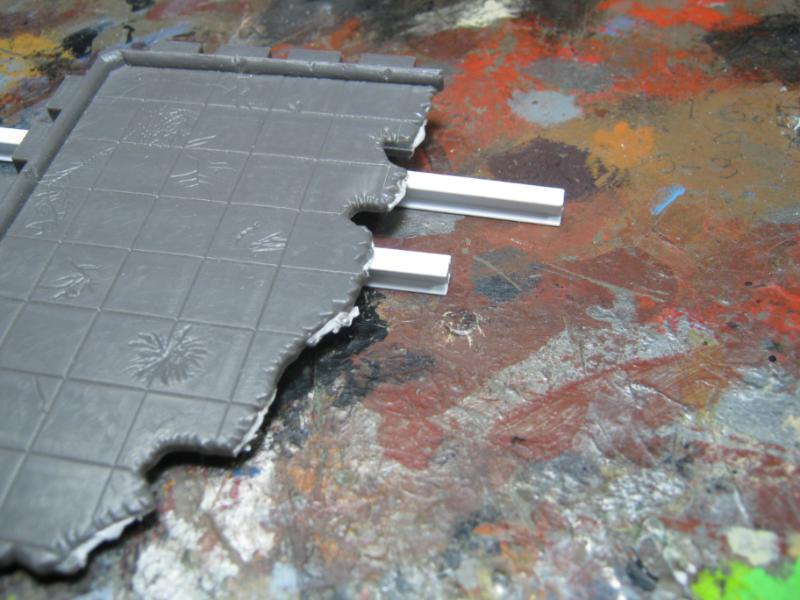
Moving on to other things, I got a bit more work done on Imperial Sector building #1 again. Glued the floor to the base:
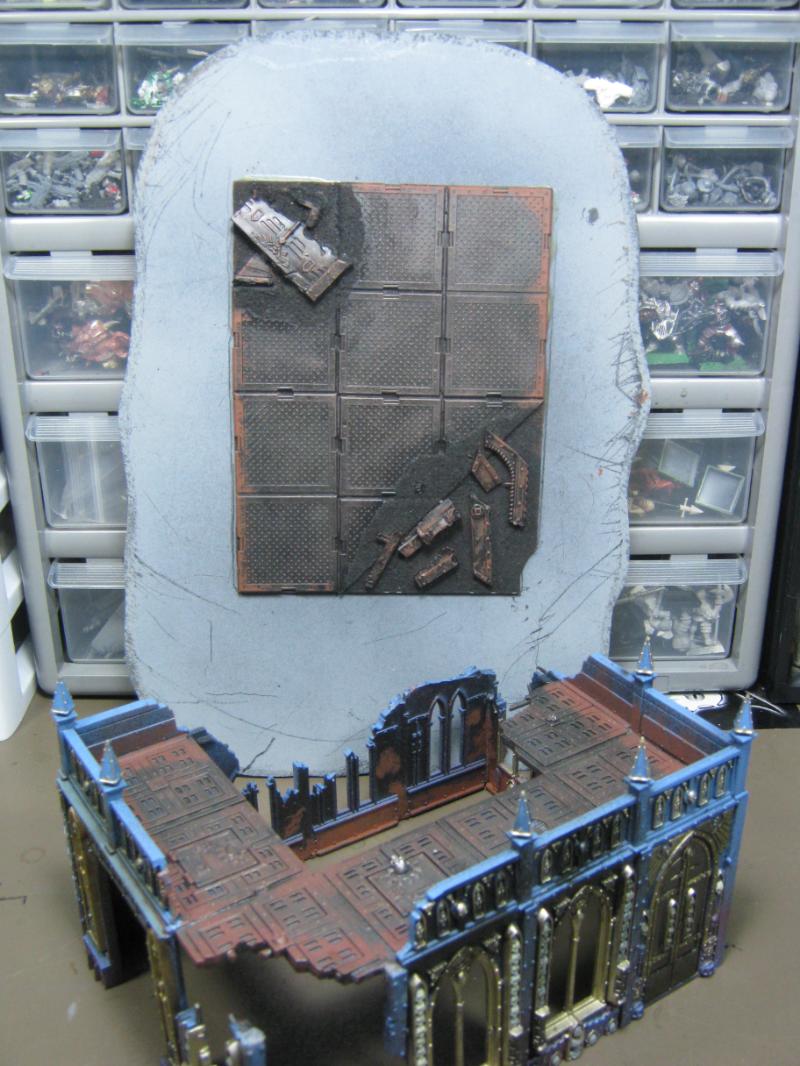
I started looking at this piece and wondered why I wasn't working on it anymore, it was going along great and then stopped dead. usually when something like that happens there's a reason above and beyond IRL. So I put some thought into it and realized that I completely hated the piece and wanted to throw it against the wall to make it go away.
Since that wasn't an option, I tried to figure out what would make me happy w/ the piece and realized it wasn't the piece I hated, it was the color. It had to go. So I did this:
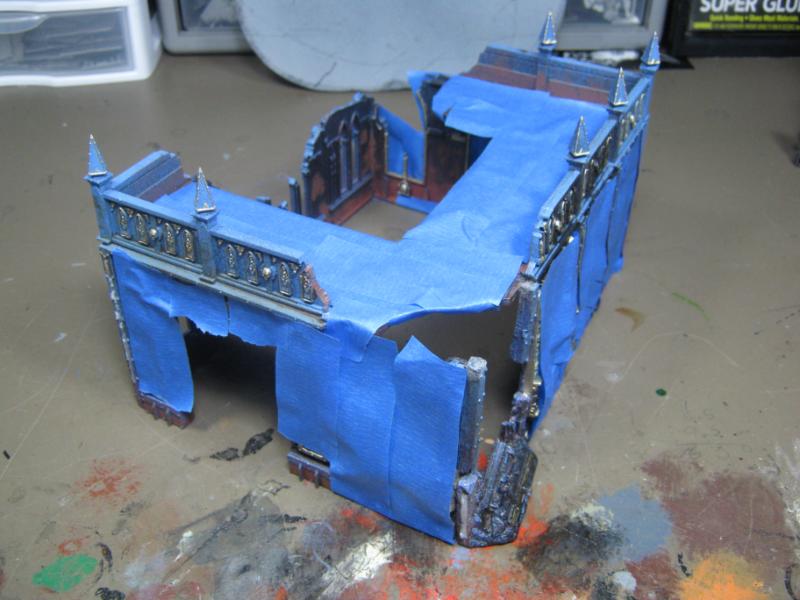
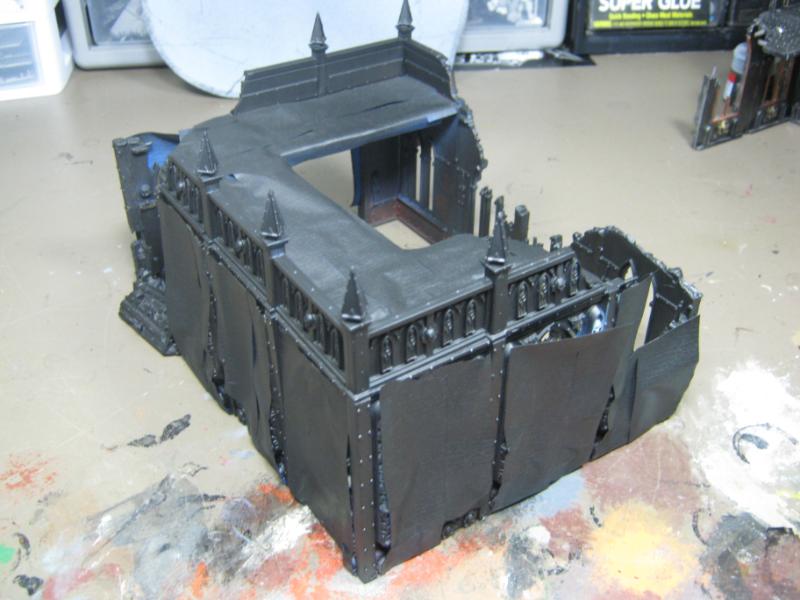
and here's how it came out:
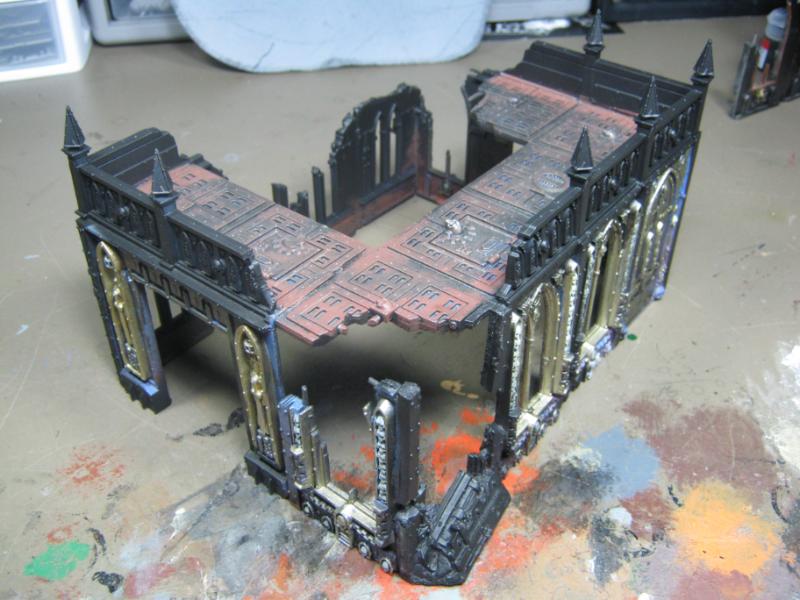
And with a bit of metallic paint:
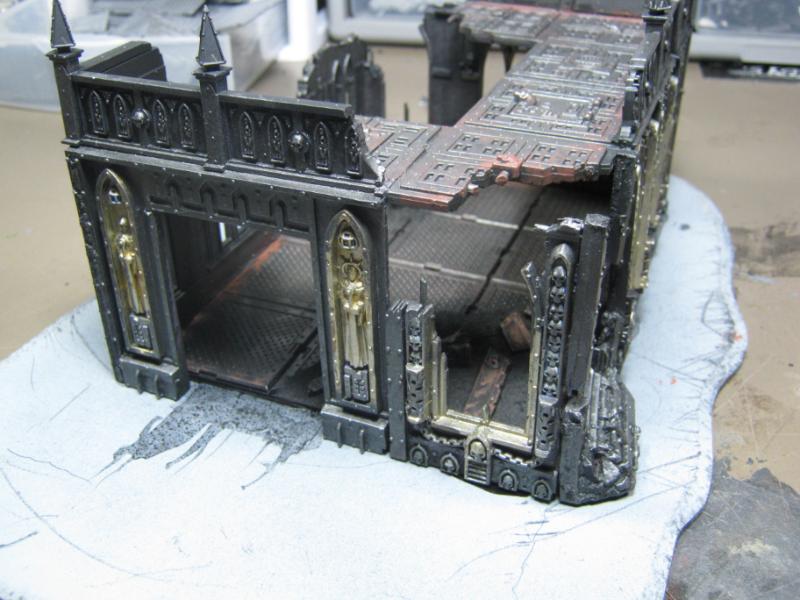
For those that are disappointed that I painted it blah and generic, consider this- rather a piece that fits my table than a piece that eventually finds itself on the Shelf of Shame. And I'll get some cool detail on it later. For now I am liking it WAY better and this project will be finished in the next few weeks.
Speaking of SoS, here's a project that has been on my 'on deck' shelf for MONTHS, and I know I made this over a year ago, just never finished it. Now that I have the Pegasus Gothic buildings / ruins on deck, this now has a place on the table and with a little more work will look right at home on my table:
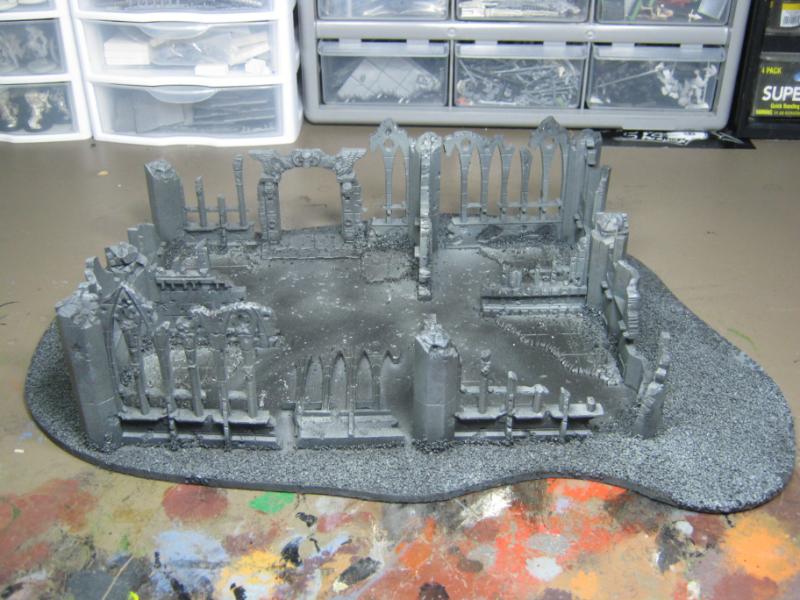
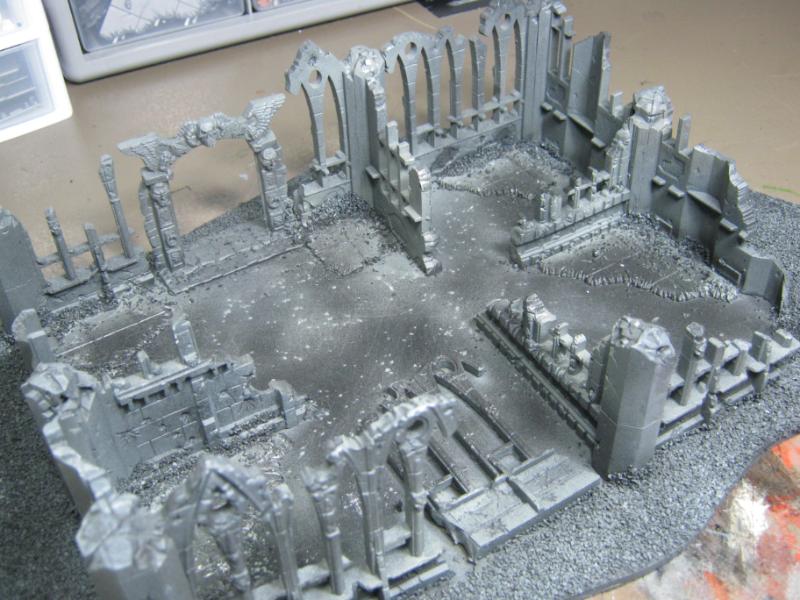
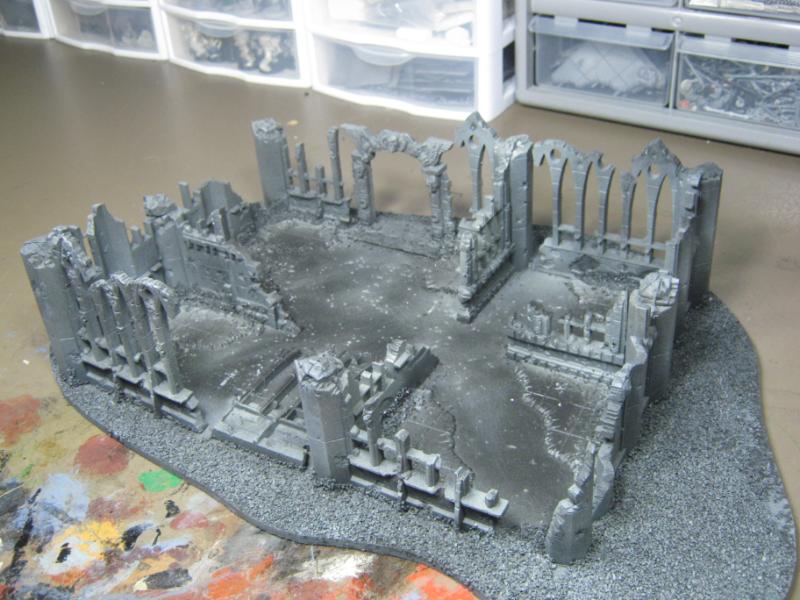
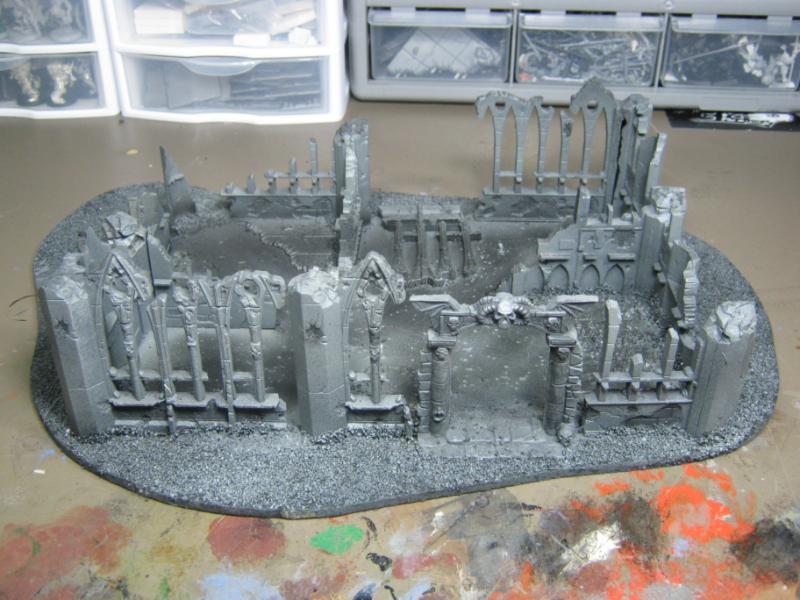
Everything is from the old GW ruins set, long time ago, can't remember when it came out, and the door arch is from the old Warhammer Quest set. I did a lot of hacking and cutting to make this, and you'll see this done over the next couple months.
More hobby ADD! I got to work on Imperial Sector building #2 again, and was really in the mood to get some work done on it. First thing I did was draw out the 'blast' area bit more.
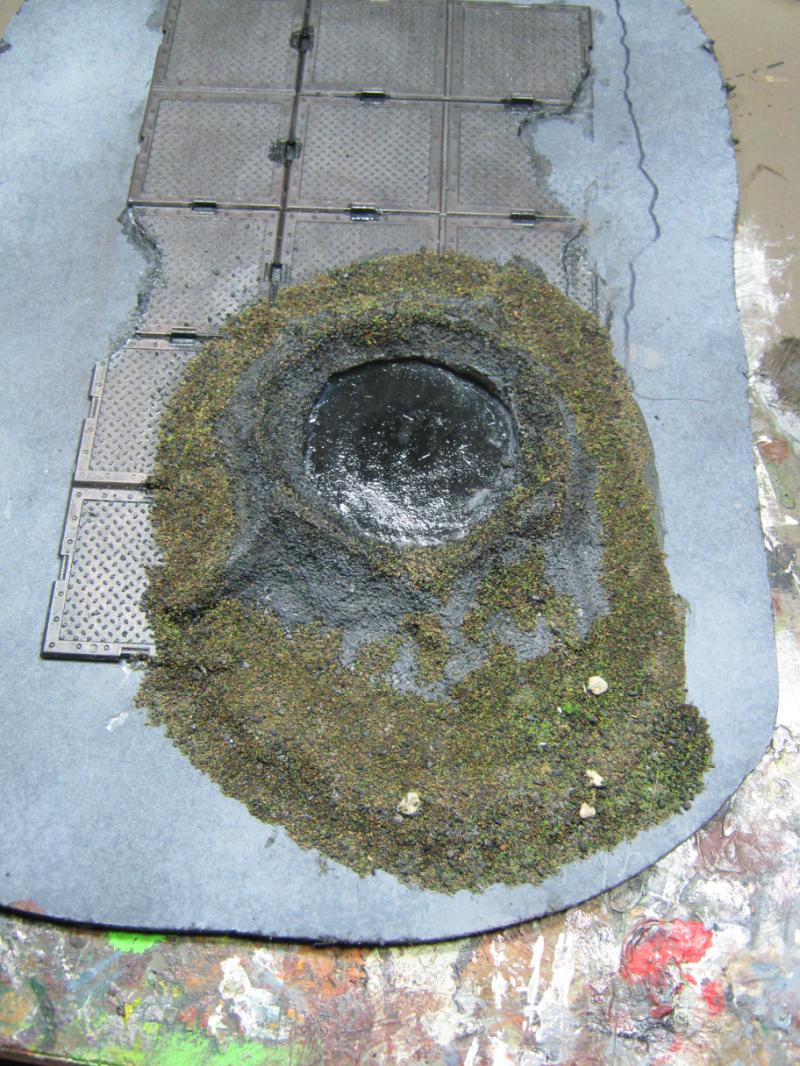
Here it is a bit more bulked up and soaked w/ a 50/50 black paint / water mix:
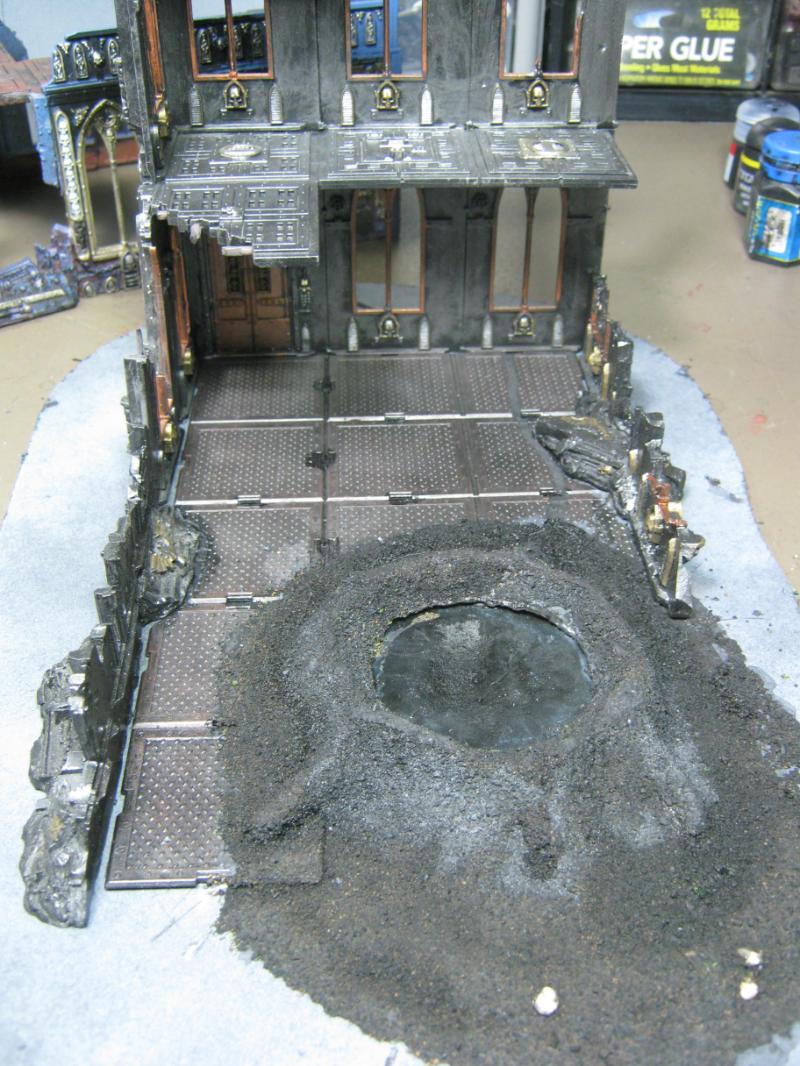
Also got working on the lower walls. notice how I bulked them up w/ the crushed stone stuff I use. Hides imperfections and looks great. Used Elmer's wood glue and that was it. Should have taken 2 pics for details, but this is what i have to share:
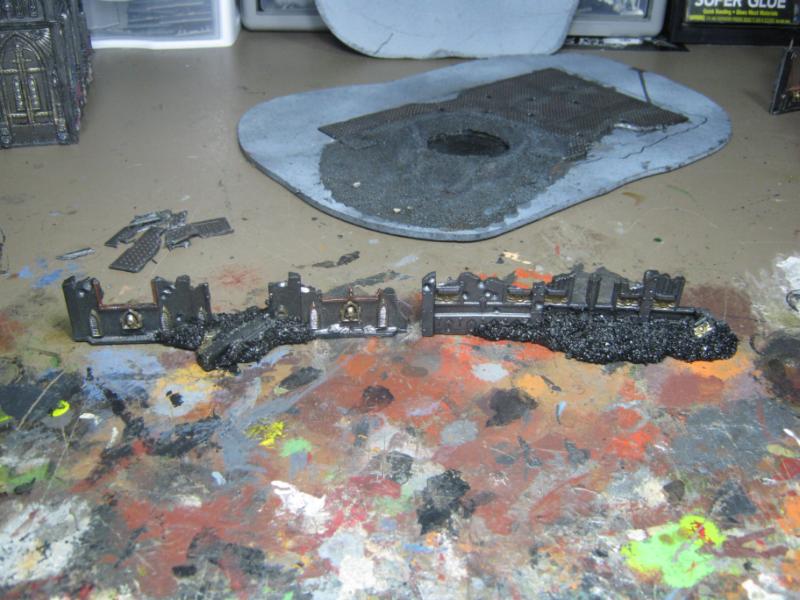
Also got to work on the debris for the crater. Notice the curled edges and bits sticking out from the crater:
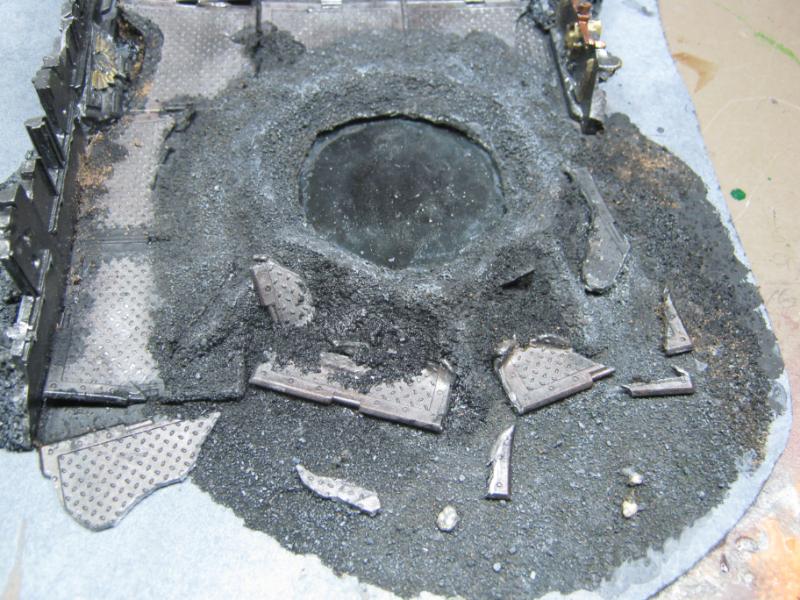
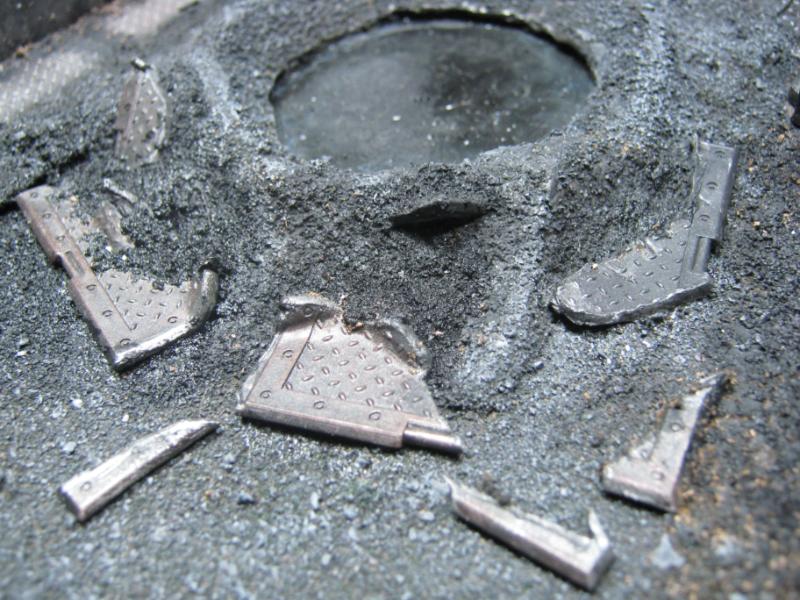
I decided that I had enough work done that I could glue the building to the base. From experience I know that it'll be grabbed from the top many times and it's quite heavy. Perfect recipe for broken terrain and hurt feelings. To avoid unnecessary tragedy I used a 2-part epoxy for the building and walls. It came out really well (look at right side of model in next pic, you can see some of it). After I had it bonded to the base for all of eternity I decided it was time to try my water effect stuff.
...
I tried to open the jar w/ my hands. Fail. Tried a piece of rubber that I use to open really difficult jars. Fail. Tried almost everything else I could think of. Fail. Finally invoking the names of Odin, Thor, and Magni I grabbed my favorite pliers and CRANKED on that lid. It's stripped and ground down but it finally came off. The entire time I was worried it was going to shatter in my hands and it would be another ER trip to ruin my day of modeling. My efforts were worth it.
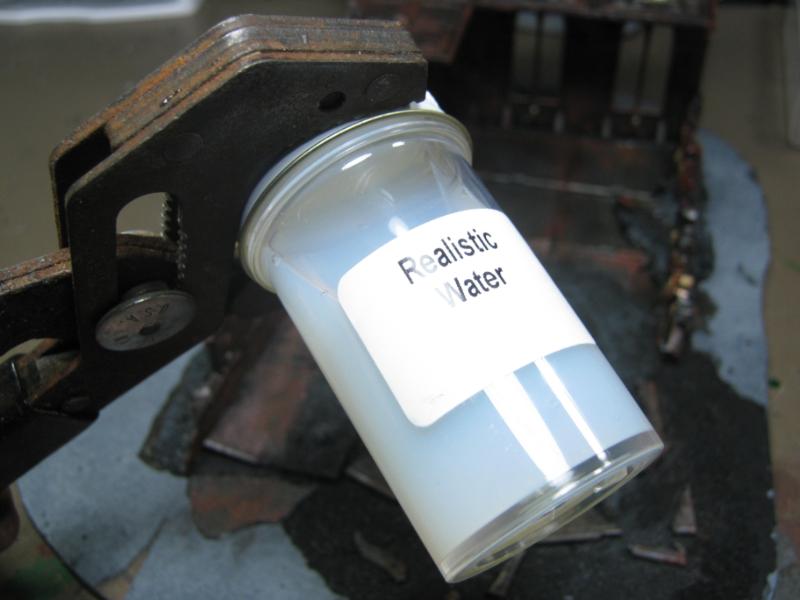
Take a look at the entire piece, not just the water effect stuff. it's not that blue, it's just how it looks when it is still wet. Check the start of my rust effects, the torn up floor, the tight fit for the lower walls, etc. I've put a lot of work into this.
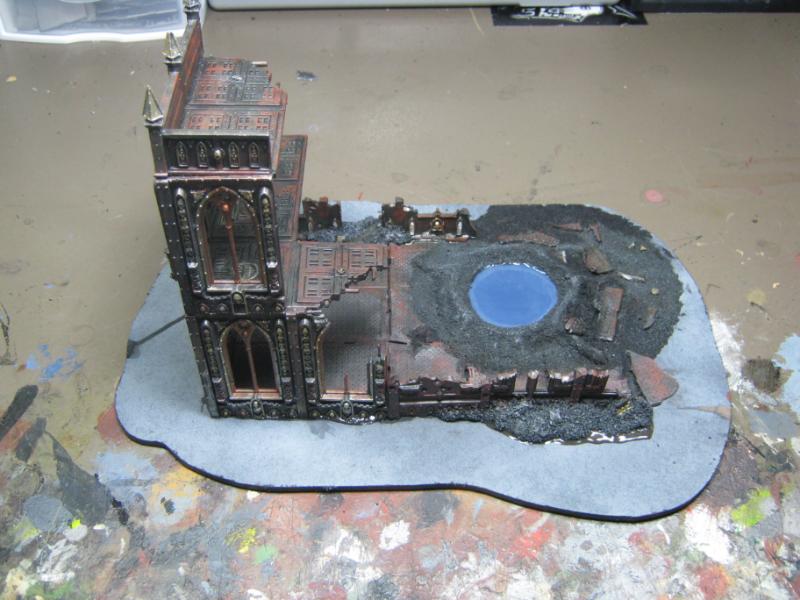
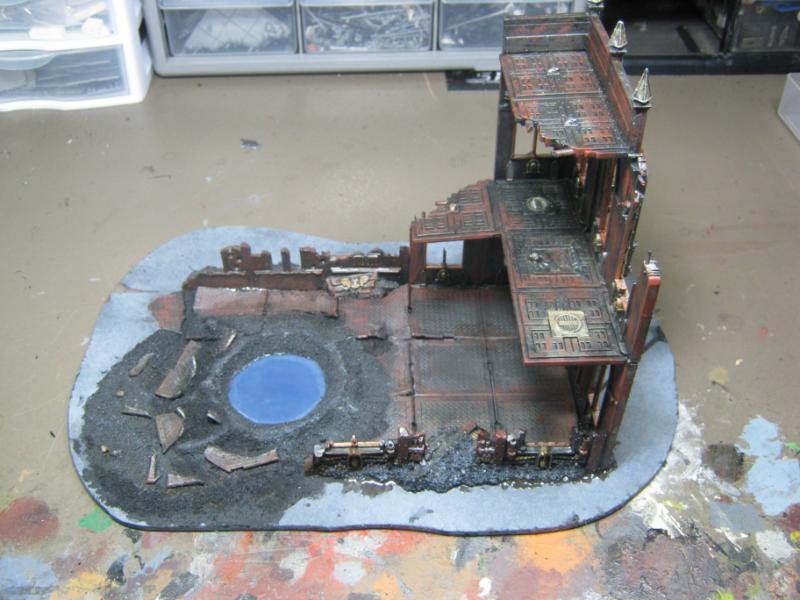
And.... SUPPLY DROP! BAM!
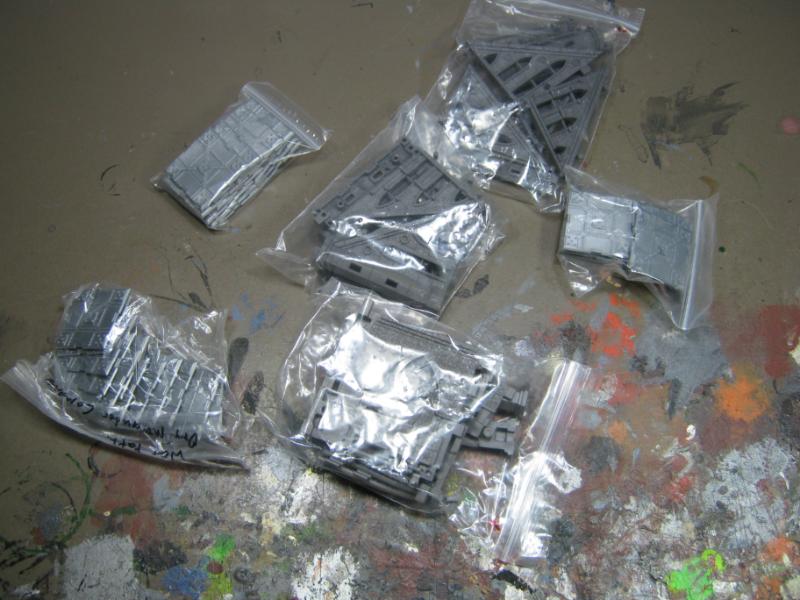
I picked up a LOT of these. They were on sale and I decided to give them a try. I'm sure I'll find something awesome to do w/ them. Look at all the rivets!
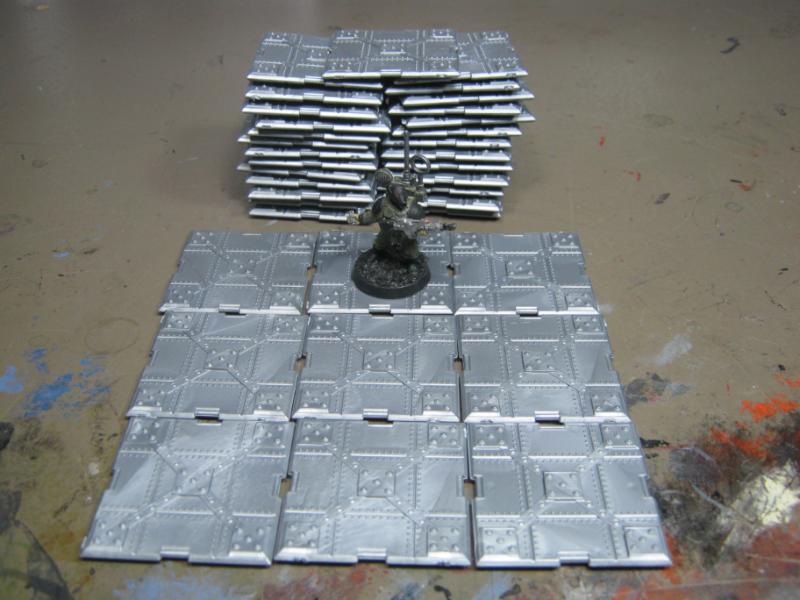
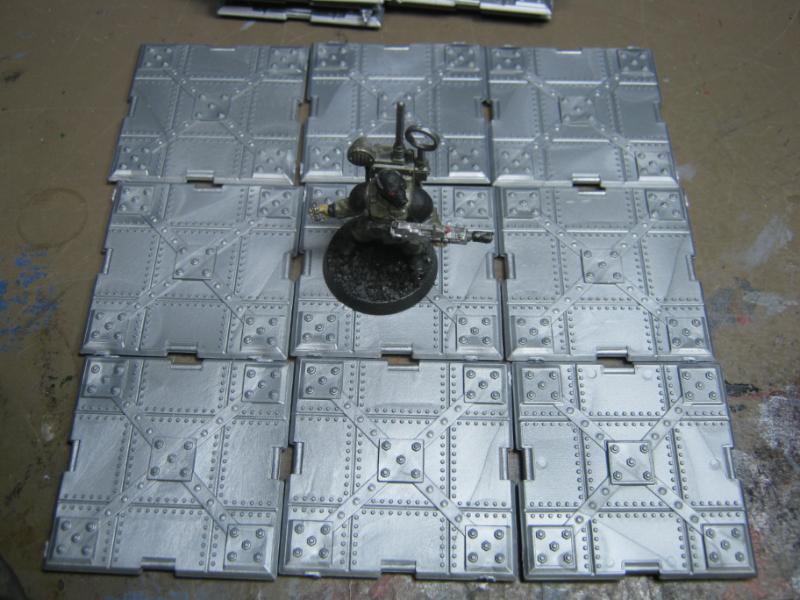
I also picked up two doors. I'll be needing 2 more of them, but that will be later as I get closer to doing the Pegasus part of this project:
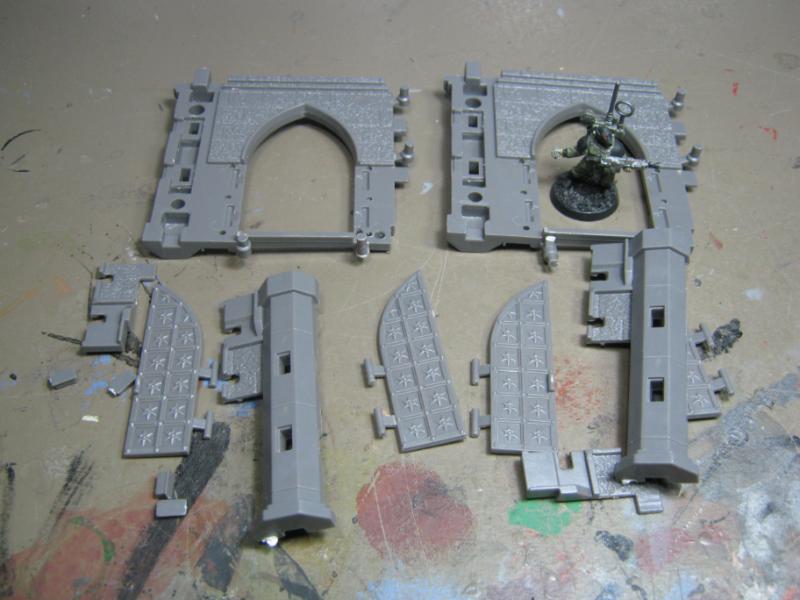
Of all the cool stuff that came in, here's the biggest score of all:
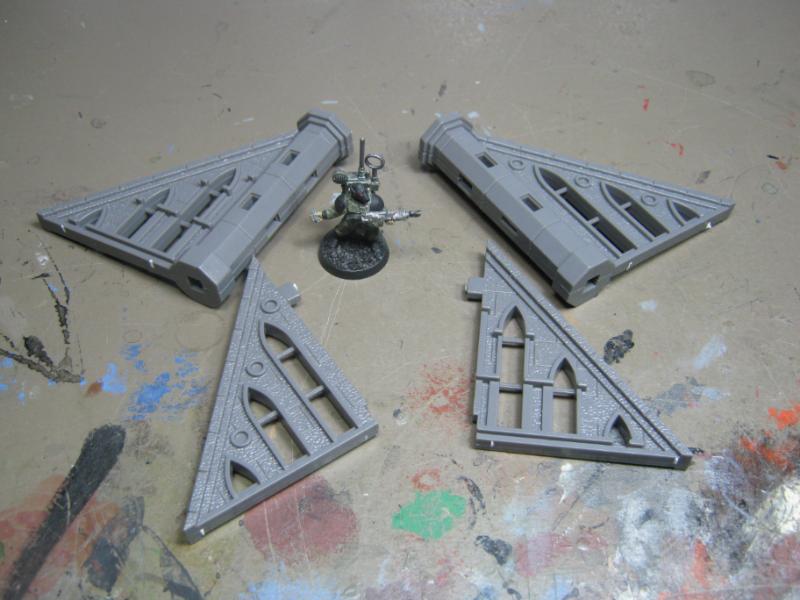
... because I can do this with them:
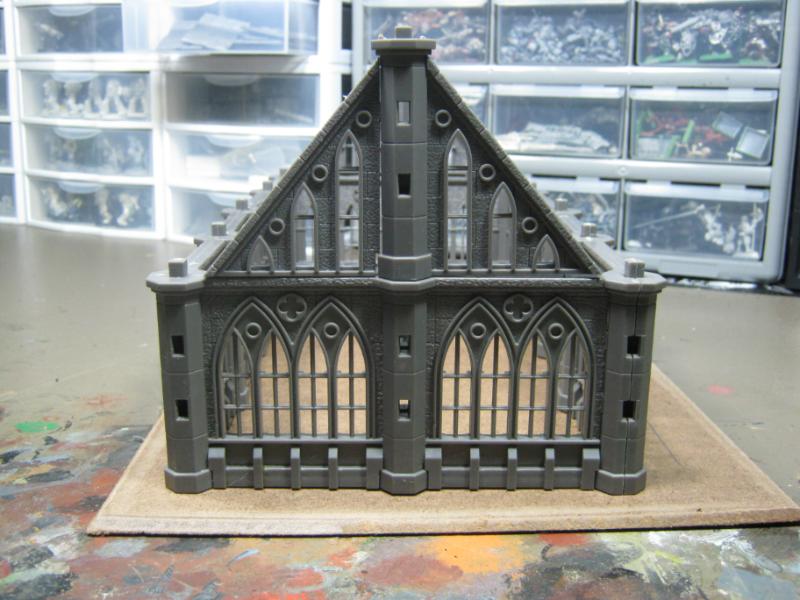
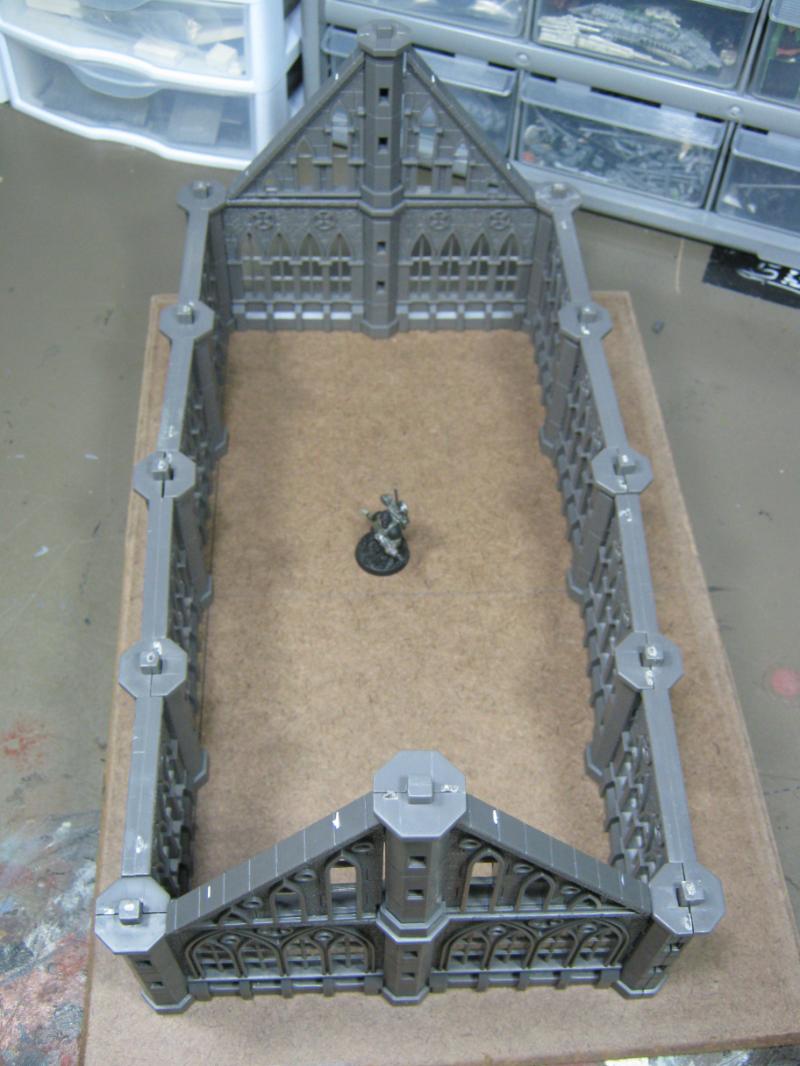
Hmm. There's a wicked storm heading this way, so with any luck I'll get a call that work is closed tomorrow. A full day of glorious modeling!
Great stuff will be coming soon. I can't remember the last time I was so motivated on a project. I know I'm just taking a lot of pre-fab stuff and putting it together, but I'm putting it together with an overall vision and I'm not just throwing random projects onto the table.
Thanks for looking. I really appreciate the feedback you folks leave because I'm always looking to improve so your C&C is welcomed and considered.
I'll be back when I have something to share.
48594
Post by: dsteingass
First, stop downgrading your fine work repeatedly as "using prefab parts" There is no shame at all with that. Scratchbuilding something that is already easily and cheaply available is a waste of time and effort IMHO. No need to re-invent the wheel, your ideas are awesome, your troubleshooting skills and resource management skills are showing with these latest photos. Fear not dood, you are doing it right!
17738
Post by: Briancj
I wanna second Dave, here. You're mashing and bashing parts, making great-looking (and, more importantly PLAYABLE) terrain.
Don't be down on yourself!
33919
Post by: Moltar
Echoing the others. Your stuff is looking better and better with each new project and each new post. Imperial Sector looks awesome. It's pretty obvious you put a lot of work into it and that's what counts. It's playable, it looks good, and it is a labor of love. All things show and you should be more than happy with it.
Stay safe with all the wind and nasty weather.
18867
Post by: madmartykmf
Looking good buddy!
31765
Post by: eldartau1987
Reminds of me of Diablo 2 a good bit! I really like this. Consider me subbed!
32545
Post by: Element206
obviously this thread has been going for awhile now....but its the first time ive seen it. First, I want to start by saying that I have nothing but admiration for hobbyists who try their hand at scratch building terrain. The roots of tabletop gaming come from terrain like this....anyone can buy a bastion and paint it. Your terrain is great and judging by what your using, relatively inexpensive (which is always nice). I love the detail you have included in your pieces, the signs, the wires and mesh....its all great. The paint jobs are also real good, you definitely gave the terrain a sense of age with your weathering techniques. Great looking pieces!
26139
Post by: Skalk Bloodaxe
@ Dave / Brian / Moltar- Thank you for the compliments. Text is a poor form of communication, and I assure you I'm not beating myself up for what I'm using or what I'm doing w/ it. madmarty is a great example of of taking pre-fab and making into something totally unique and completely amazing. And you (Dave) are working on stuff now that I can only hope to achieve. Bruticus is another great example as well, and he's a huge inspiration for me.
I mentioned pre-fab because I've seen two other threads where people have given the OP some flak for using all pre-fab (mostly money spent and how 'anyone. I was merely acknowledging that yes it's pre-fab but it's not at all 'stock' and I'm doing some unique things with it that is not something you'd get straight out of the box. I am very happy w/ how my skills have improved, my vision has narrowed to focus on a specific theme, and I'm making use of long-forgotten bitz and pieces that could have been done a long time ago but through the intervention of fate I've come to them when my skills are rising. I'm going to put some great stuff on my table and I will be the envy of my local gaming group (all 3 of them).
@ madmarty- Thanks! You probably already know that you are my #1 inspiration w/ the Pegasus Gothic buildings. You make them look like aerial photographs of WWII. You are the standard I'm hoping to reach (or at least come very close w/ 'best effort')
@ eldartau1987- Thanks for checking this out, and welcome to the club! There will be a lot more coming as time allows.
@ Element206- Thank you for the in-depth post, it's obvious you spent some time going through my past work and that's really appreciated. I dig through this blog every now and then to re-discover old ideas that never got used and lost in the mad rush. There's some bits I did that I really do not like anymore (like this):
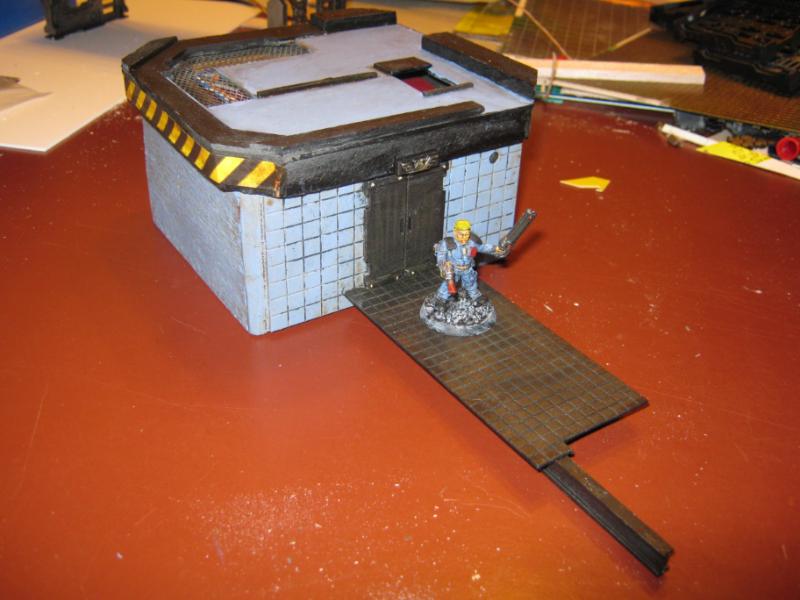
But even in 'failed' projects there is always something worth keeping and expanding on, like this:
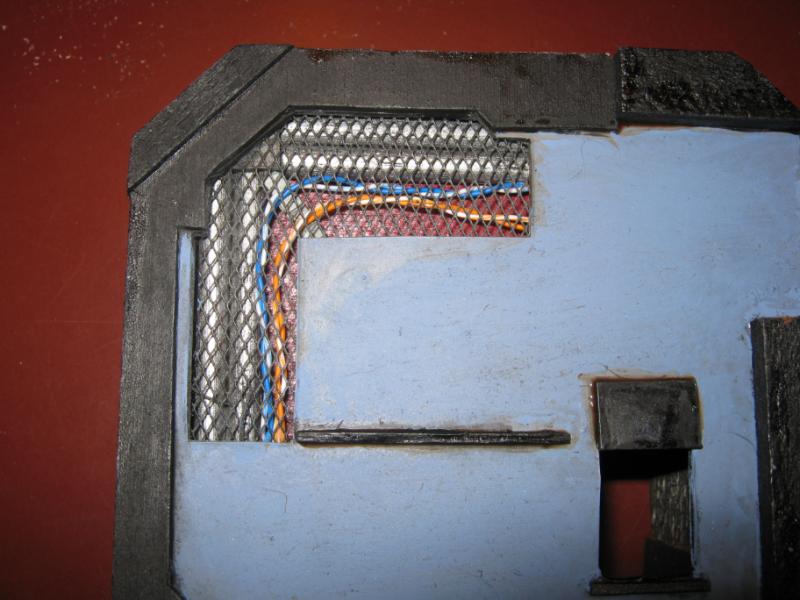
Idea came from dsteingass and my attempt at replicating what he did was a good effort but was limited to my skill at the time. I am absolutely certain that if I tried this again it would look a lot better. I may have to test that theory. . Again, I appreciate the compliments and the time you took to catch up on this blog. A lot more great stuff is on the way. Once I finish the things I'm posting now I have 3 other pre-built eBay rescues that need to based and brought up to the standard of the rest of my work, and then I have a NIB Imperial Sector to play with. And if that isn't enough, I have enough Necromunda bulkheads to choke a 4x4 table. There are many great things coming, I just need the time to do it.
48594
Post by: dsteingass
If you add rivets to that, it can be salvaged you know
Keep up the great work bud!
26139
Post by: Skalk Bloodaxe
36327
Post by: GreyDeathOne
Looking awesome Skalk!
39973
Post by: Galorn
for the Rust WIP hit it with a wash of thinned up choas black with a VERY light boltgun drybrush follow up and I'd call it GTG.
48594
Post by: dsteingass
It looks good, but try those weathering powders before you call it quits
22619
Post by: inmygravenimage
That's some potent rusting, mate. Very cool. My favourite in the recetn updates though is the wall that's wall horizontally in on itself. Simple, elegant and most effective.
33919
Post by: Moltar
I agree with Dave. If you have weathering pigments you should definitely play with them before calling it, "done." That being said, it still looks pretty solid.
26139
Post by: Skalk Bloodaxe
@ GD1- Thanks man! I really wish I would just bite the $$$ bullet and get an airbrush. You and Dave make it look like the best thing to happen in the modeling world since Super Glue (I don't know which came first, I'm just using that for comparative purposes)
@ Galorn- It needs to be tones down a bit, yes. I'll be putting my 3/1 black wash mix on it, it's what I have all over Imperial Sector #2 and it looks pretty decent.
@ Dave- Ok. I'll do it. There's no point in having them if I'm not using them. I need to watch some tuts online first, I have no idea how to do this.
@ Graven- I really like that you noticed (and mentioned) the one flat wall. It just gave up, fell inward, and there it is. I thought about chopping it up a bit to give it that 'landed flat and then shattered' look, but I went for the more subtle approach of 'just fell over'. The interior of that building needs a lot of rubble, but not so much that it turns it into a diaorama instead of a functional game piece.
@ Moltar- I'm going to. Also, have been thinking about this lately- your first post (that I saw) on dakka was that NDD (Not Damage Damage) you did on that Space Marine Scout. I'm wondering if that would work for larger terrain pieces?
Bad news- I'm on day ... I forget... of 14 hr days (that's 14 straight, no lunch, just two 10 min breaks). Add my 1/2 hrs to get up / ready, 45 min commute commute each way, obligatory 'chill' period when I get home... we're up to 16 hrs. Wind up w/ eat somehting, chill out, shower, get ready for tomorrow, etc... 5-6 hrs sleep if I am lucky. I'm starting to feel a bit disconnected and a little woozy.
Good news- Got to leave early for Halloween w/ my kids last night. We all dress up and go Trick and Treating. It's Trick 'and' Treating becasue we trick them every time. I'm 45 years old and still filling my candy bag. Muauhhahaaha!!!
SUCK news / AWESOME news- I'm on call this weekend and will likely be doing a straight shift from home via VPN. That's the suck. The awesome is I'll be getting paid so much I should be embarrassed, and I get to model ALL WEEKEND!
I am so beat tired. ANd I'm bummed wicked bad becasue I sooooooooooooo want to be working on my projects that are >...< this close to being done, but just SIT THERE waiting for my return.
Gah.
So anyway, no update at all, just rambling a bit before I get back to work.
Thanks to everyone that posted. I will be back on Dakka soon and I'll catch up with all your threads. I know good working is going on right now, and I don't like missing out on it.
I will be back.
48594
Post by: dsteingass
Just mix a couple drops of water with some powder and make a wash. It'll change everything. Then try a brush and some of the white dry, best highlight ever.
39973
Post by: Galorn
dsteingass wrote:Just mix a couple drops of water with some powder and make a wash. It'll change everything. Then try a brush and some of the white dry, best highlight ever.
an alternative to water is 90% iso propyl alcohol. (it dries faster, but to move pigments around just moisten the brush with more alcohol.)
26139
Post by: Skalk Bloodaxe
@ both- you guys rock. Thank you. I'll still try a tut vid, but at least I have an idea now.
48594
Post by: dsteingass
He's right, you can then overspray it with alcohol or thinner after the initial has evaporated to dull it down a bit. When you are happy wit it, spray it with clear. A gloss coat before hand really helps it flow into crevasses and pool around rivets too.
33919
Post by: Moltar
Skalk Bloodaxe wrote:
@ Moltar- I'm going to. Also, have been thinking about this lately- your first post (that I saw) on dakka was that NDD (Not Damage Damage) you did on that Space Marine Scout. I'm wondering if that would work for larger terrain pieces?
It would... the bigger the area the more time consuming it would obviously be. I also did that on the grey panels of this base (Pic is Zoomable):
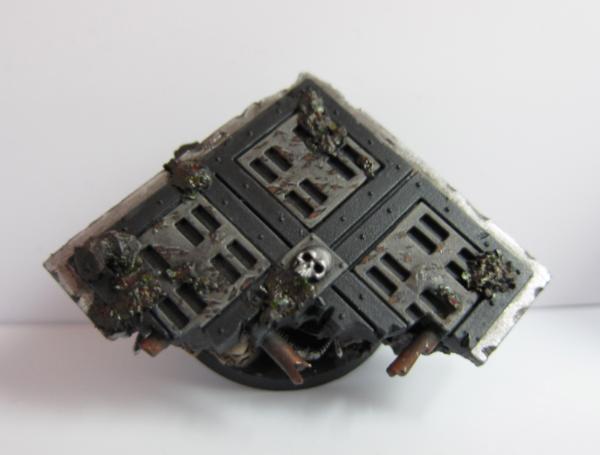
I think if you wanted that effect, you would definitely want to sponge it on with an actual sponge. It would essentially be the same effect and take way less time.
44875
Post by: deffskulla
WOW!
Just to let you know Skalk I'm almost completely free on the weekends this month to come over and play on this most awesome and bodacious terrian!
PM me to give me a heads up on when is good for you and we'll do the swap...
26139
Post by: Skalk Bloodaxe
@ Moltar- Hey, I remember that base! I have some hobby sponges, maybe I need to pick up some regular ones? I'm open to suggestions.
@ deffskulla- Man, talk about timing. We're doing a platform conversion at work and it has failed miserably. See below.

So... yeah. That whole 'stay home and model all weekend' thing I was mentioning a while ago? That status has been changed to 'working all weekend at work at my desk doing the same job I've been doing all week' to be closely followed up with 'another full week of 12-14 hr days M-F' and possibly 'work again all weekend'.
I refrain for even alluding to profanity on Dakka because it is (for myself) bad form, but man... I gotta tell you this is about as tempted as I've ever been. Upside is the pay. Downside is my family has put out 'MISSING" posters all over town.
I need a break.
Thanks for sticking w/ this. I'll be back.
33919
Post by: Moltar
I think the more porous the sponge, the better, to an extent, for terrain. A lot of fine sponges are going to create a lot of smaller scuffs and scrapes, where a more porous one would give you more variety in the markings. They make those sea sponges that are just dehydrated (they kind of looks like a block of khaki-colored swiss cheese). I think that is taking it too far, but a typical yellow sink sponge should do the trick just right for your needs. I could be wrong, though, but that is I think a better bet. Doing them by hand like I did, will work, but it will take a long, long time.
39973
Post by: Galorn
Skalk Bloodaxe wrote:@ Moltar- Hey, I remember that base! I have some hobby sponges, maybe I need to pick up some regular ones? I'm open to suggestions.
@ deffskulla- Man, talk about timing. We're doing a platform conversion at work and it has failed miserably. See below.
So... yeah. That whole 'stay home and model all weekend' thing I was mentioning a while ago? That status has been changed to 'working all weekend at work at my desk doing the same job I've been doing all week' to be closely followed up with 'another full week of 12-14 hr days M-F' and possibly 'work again all weekend'.
I refrain for even alluding to profanity on Dakka because it is (for myself) bad form, but man... I gotta tell you this is about as tempted as I've ever been. Upside is the pay. Downside is my family has put out 'MISSING" posters all over town.
I need a break.
Thanks for sticking w/ this. I'll be back.
Dude that SUCKS... Hope things ease up a titch soon...
32169
Post by: Rogue Wolves
^ agreed , being that Im too young to have experienced that all I can say is good luck to you sir
48594
Post by: dsteingass
Just focus on the hobby stuff you plan on buying, it's good motivation
2326
Post by: shasolenzabi
Looking good, and Pegasus makes nice terrain eh?
26139
Post by: Skalk Bloodaxe
@ Moltar- Stole one from the kitchen. Results pending.
@ Galorn & Rogue- Thank you. See below.
@ Dave- Oh yeah buddy. See below the first below.
@ Shaz- Thank you, and yes they do!
Rather than complain about recent events, I'll employ a meme:

Don't expect anything from me for the next few weeks unless I snap and have to take some administrative leave.
HOWEVER, not all is bad new. I scored this on eBay today:
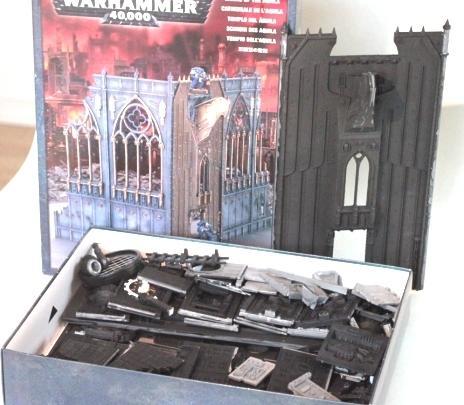
$36!!! I'm really happy for this. Even more awesome stuff I have no time for. I will be going flat out at least until the end of December. I'll work as I can, but it's 20 minutes here, 40 minutes there.
Thanks for sticking with me during the flat moments. It'll be worth it once I get cranked back up. I'm going to choke my table with some much Grimdark awesomeness that I'll rip open the fabric of reality that separates us from the Warp and create a new Eye of Terror.
48594
Post by: dsteingass
Haha Skalk! I have this taped up at my desk

And Roy is my hero!
24297
Post by: Viktor von Domm
too much has happened since last i had time and energy to look... and boy... awesome work and totally cool stuff you got and did...
and yeah... don´t you ever dare to short sell your work here mate... you are truly devoted to your hobby... and you want to learn and test new stuff too... you can be sure of my admiration of your stuff!!!
and that diablo like cathedral... wow... very hot!!!
20018
Post by: Hyenajoe
Skalk, just a short post to tell you that:
1) Your latest terrain are really badass, and the concept of the one made with the old citadel ruins kit makes me drool.
2) you should seriously think to move to France (ever heard of the 35h week law? and our social security?)
3) keep in mind that this terrible working period will finally slow down and that you'll finally get the break you deserve.
Sois fort! (Be strong!)
24297
Post by: Viktor von Domm
you french still have the 35h week? ... we seem to have forgotten all about that one by now... greedy capitalists ruled by a screw pretending to be a human...
30344
Post by: monkeytroll
35 hour week? Disgraceful, we're working towards the 35 hour day here
Your pain is felt Skalk, we'll all be hanging around somewhere whenever you get to do some stuff
26139
Post by: Skalk Bloodaxe
@ Dave- now it is on my desk as well.
@ Joe- 1) thank you very much. Maybe my son will finish it someday. 2) Je ne peux pas parler français et aurait besoin d'embaucher un traducteur 3) Rumor is we're all getting comp days once this is done. Free time off (meaning not spending vacation time) and getting paid for it! Whoo!
@ Vik- I may be a wage whore, but I'm a wage whore with a LOT of toys.
@ monkeytroll- Thanks man. Looking forward to getting back on track. I expect things to calm down in a month or so.
Ok, that's it for now, won't be stopping by Dakka for a while. If anyone wants to contact me directly just to say 'hi', email me. skalkbloodaxe@gmail.com
48594
Post by: dsteingass
Bah..mods deleted it. I've been bad.
24297
Post by: Viktor von Domm
^bugger!
Vik- I may be a wage whore, but I'm a wage whore with a LOT of toys.
LOL... aye.... it´s the use for that money we earn under the baddest circumstances that brings us to the "coalmine" each day anew^^
26139
Post by: Skalk Bloodaxe
@ Dave- no problem, I saved it.
@ Vik- The last few week$ have $ucked. $o little Dakka or modeling time and a huge amount of $tre$$. However, it ha$ been manageable, i$ almo$t over, and I have been properly compen$ated for it.
Ok. Hi. Said I'd be back, and I am. Will admit to having had a few moments where I could have been on Dakka, but I think you'll appreciate my decision to model instead. I'll catch up w/ everyone in a few weeks or so once I can start slacking off at work and surf Dakka again.
I've been stealing time here and there as I could, and the result is a have a LOT of work done and have a HUGE update to share. I'm going to start with the project I was working on when I left and move forward from there, but I'll be submitting my work in category format instead of serial because it was hard to keep track of even as I took notes (yes, I took notes as I was doing the projects). Also, I'll be splitting this into at least 3 posts because there's simply too much to look at and I don't want to overwhelm people w/ 100+ photos in a single post.
First up in an idea I had when Dave was advising me to try the weathering powders. I wanted to practice with something before wasting my powders, and all I could come up with that I already had at the house was baking soda:
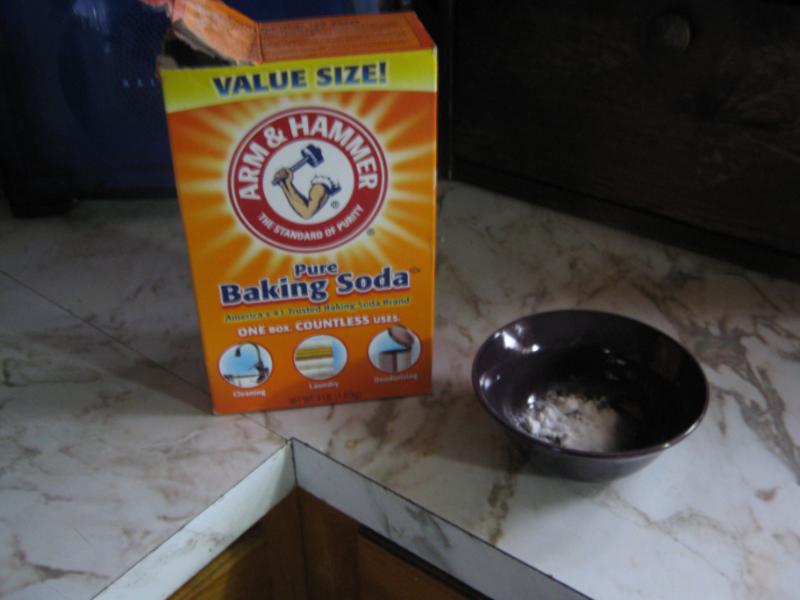
The idea was to brush the baking soda on whatever I was going to work with and then color it with a wash. Results were not so good. Didn't even bother with a picture. My next idea was to mix baking soda into rust paint and apply that w/ a small brush to at least create texture. Again, not wanting to waste my 'good' supplies on a test, I decided to make my own rust paint.
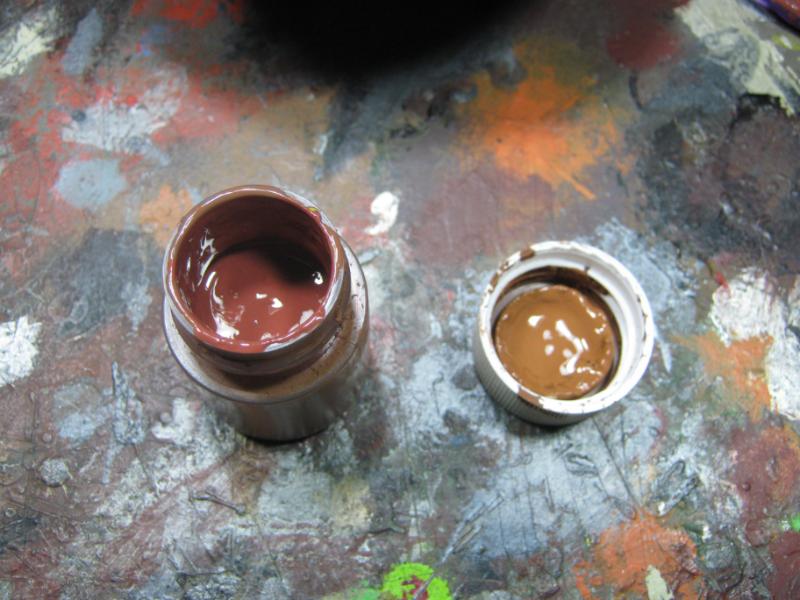
Paint on left is end result. Paint on right is what it looked like when I first started mixing. Yes, I know it's backwards, but didn't realize it until after I took the pic. Anyway, I used a lot of different colors to mix this, and I really like it. It's a 'mid-range' rust tone, between the bright oranges and the deep reds.
Mixed some paint into a spare pot w/ some baking soda, mashed it all up, and did a color / texture test. Here is my first run:
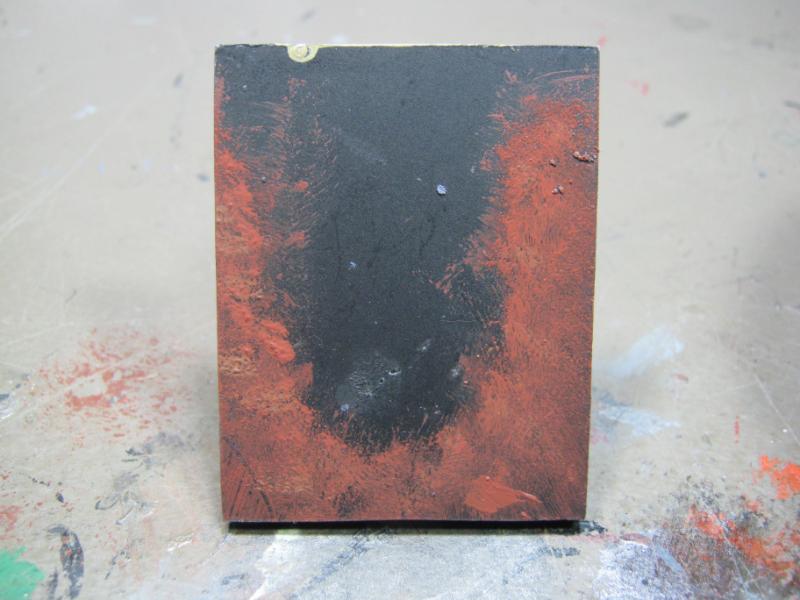
I liked the results enough to keep going with it and started to apply it to Imperial Sector building #2 which was almost finished, just needed that extra effort to make a really good model instead of simply a good one. Here's how it came out:
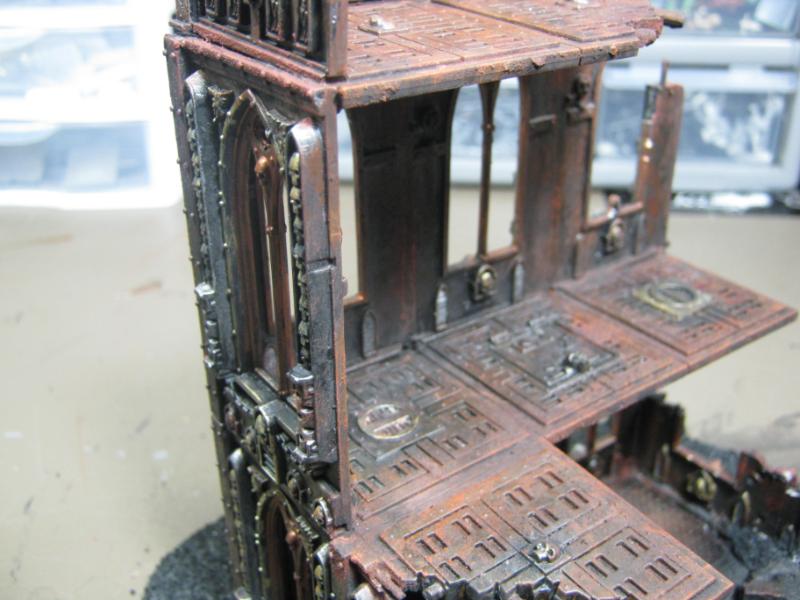
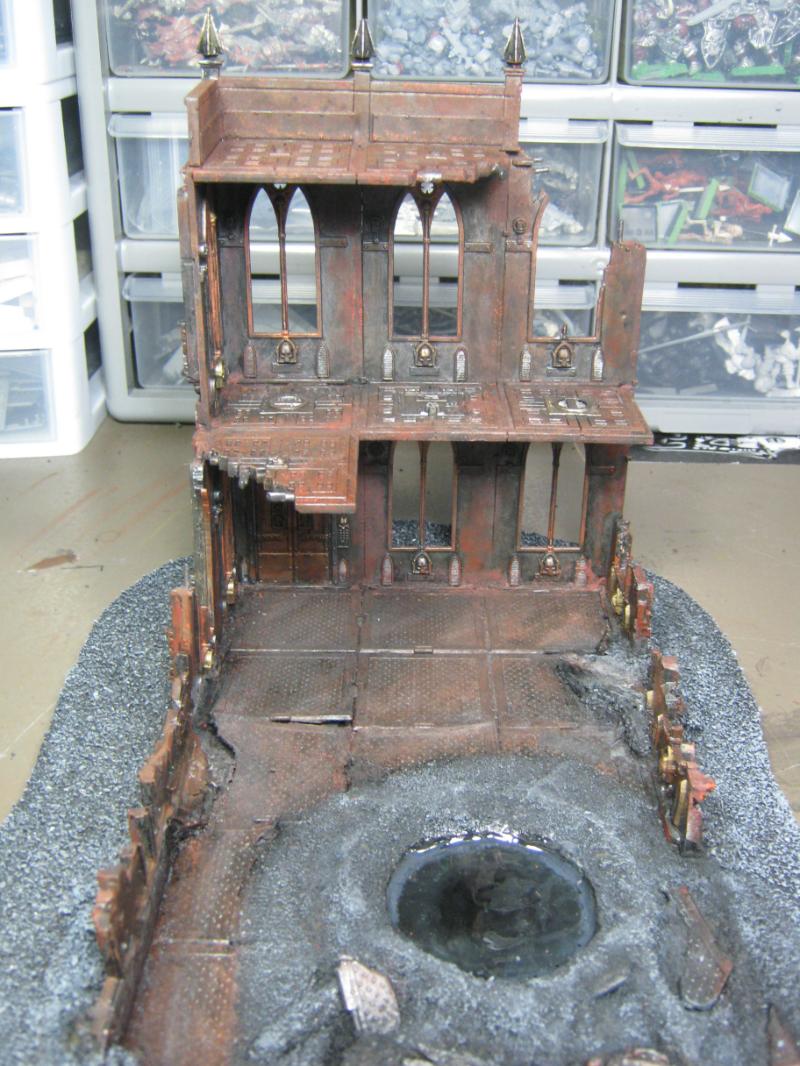
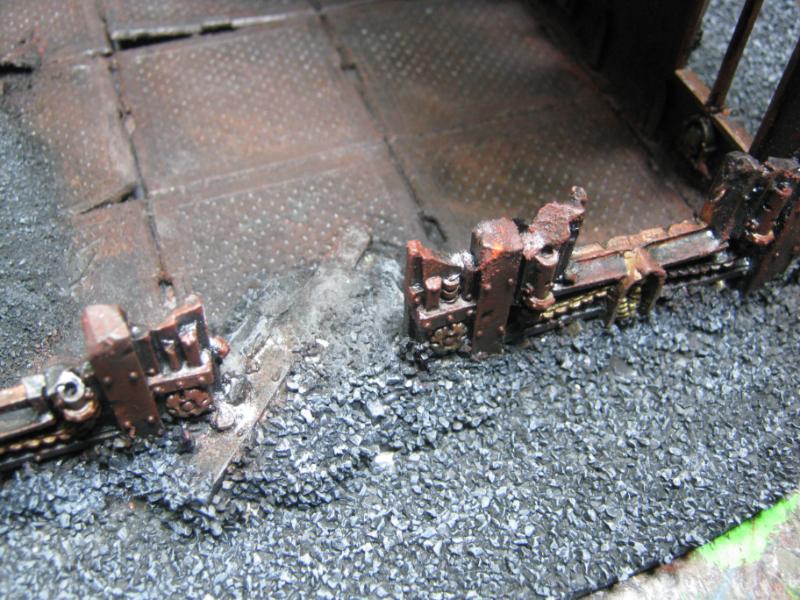
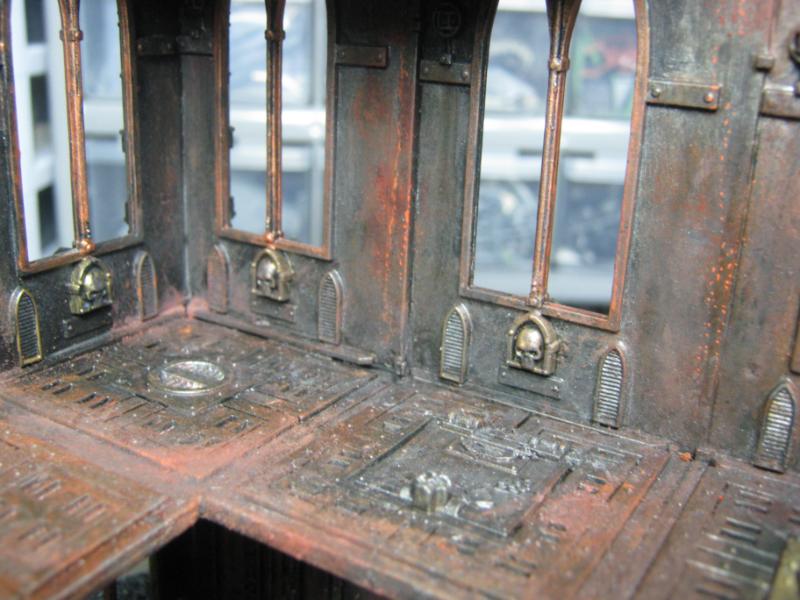
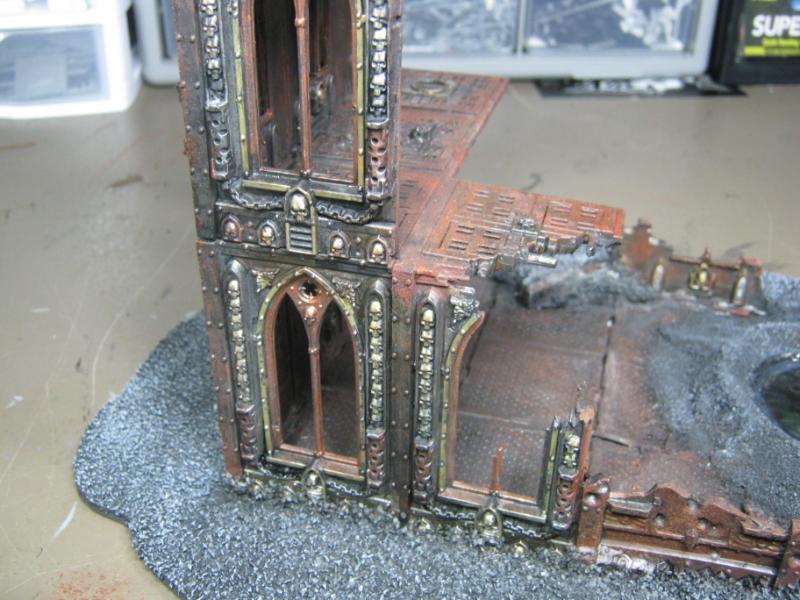
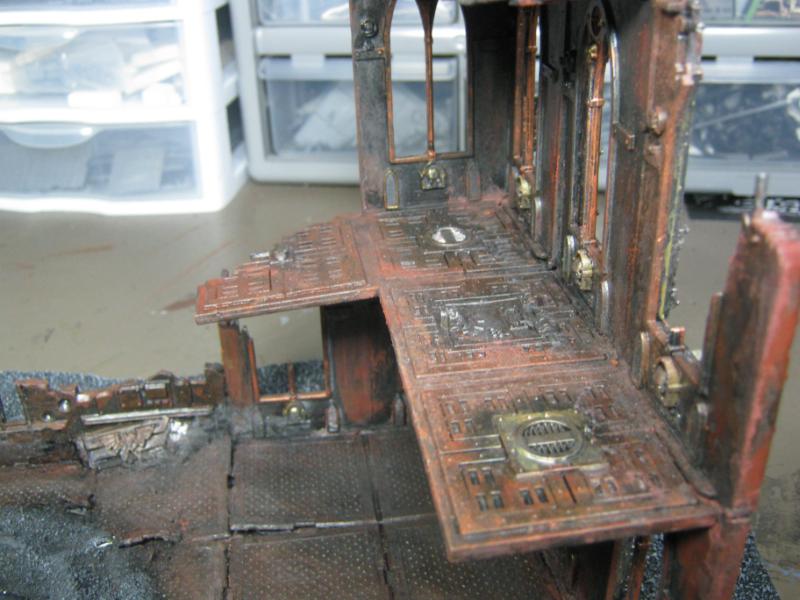
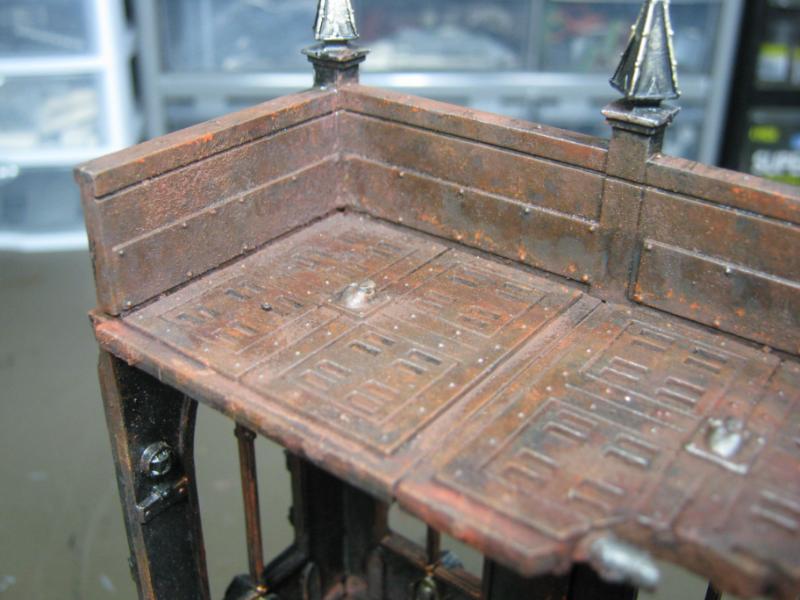
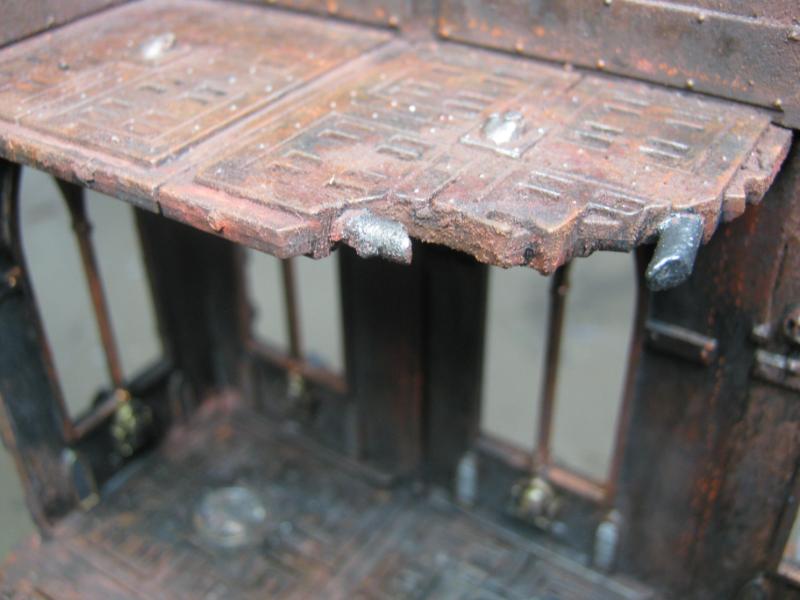
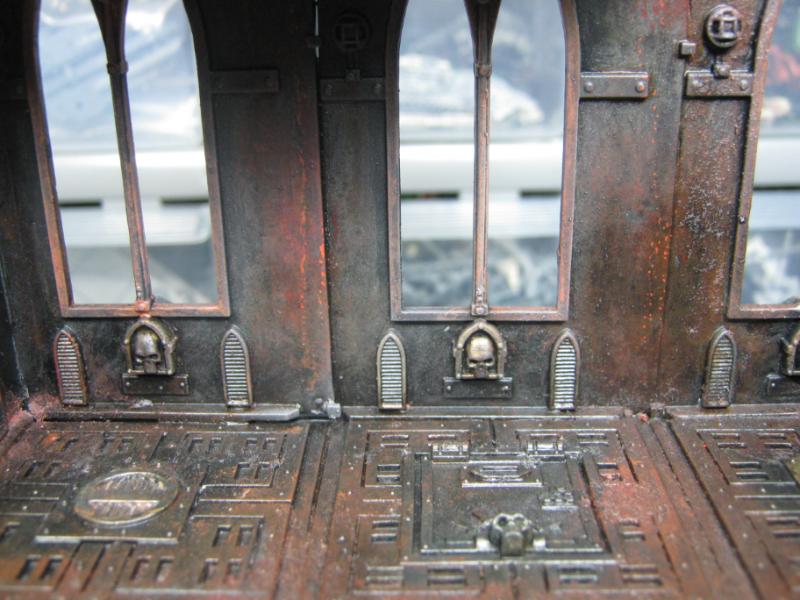
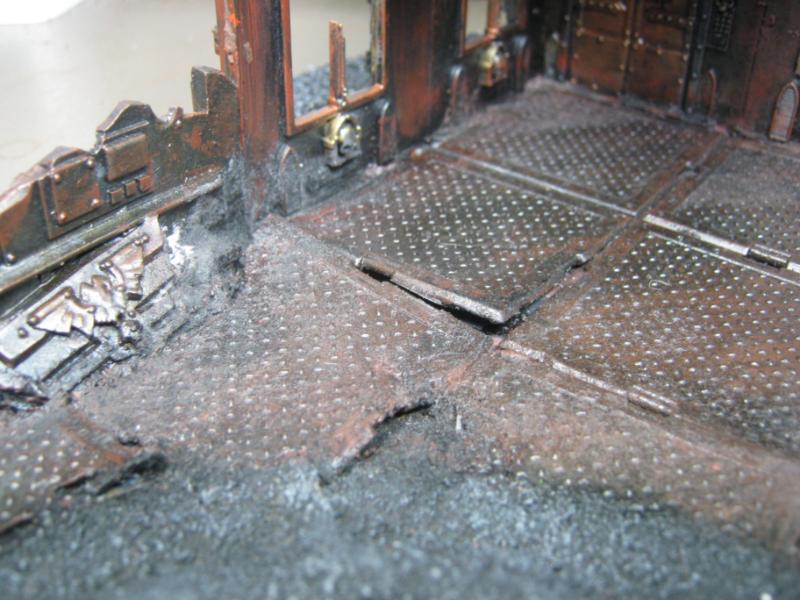
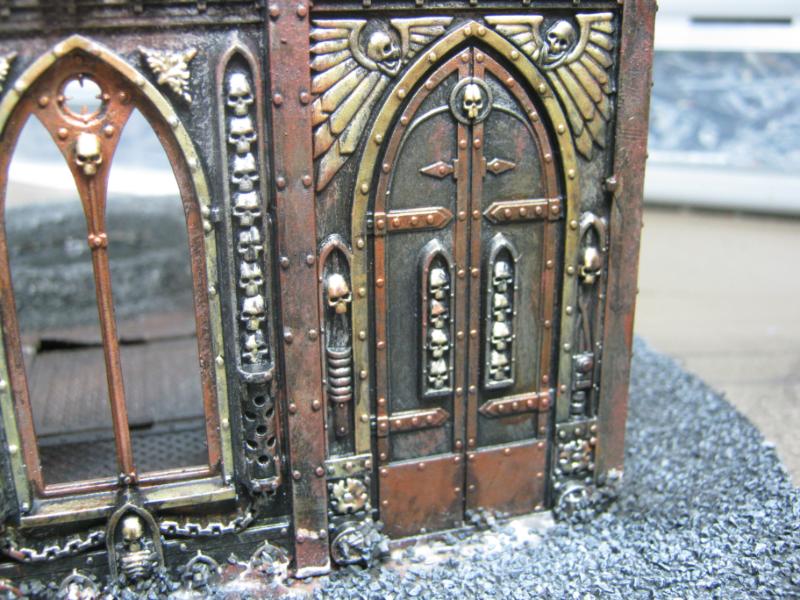
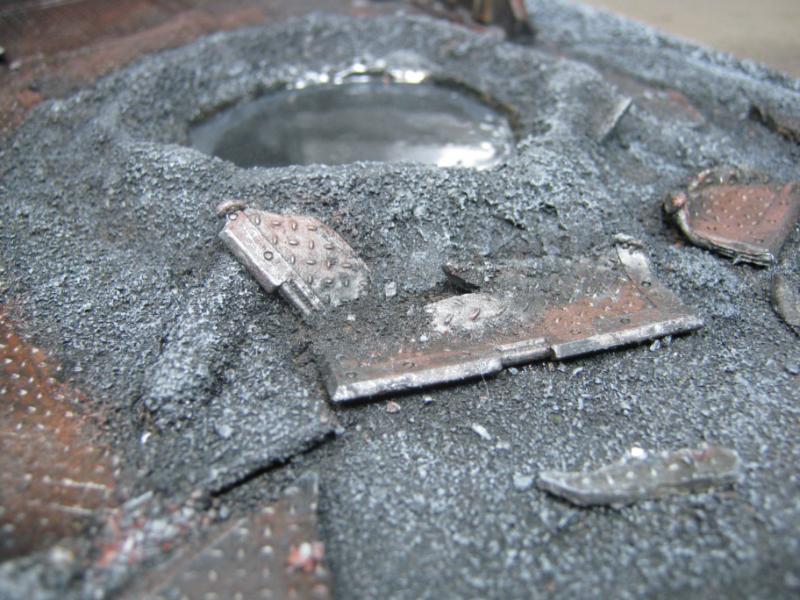
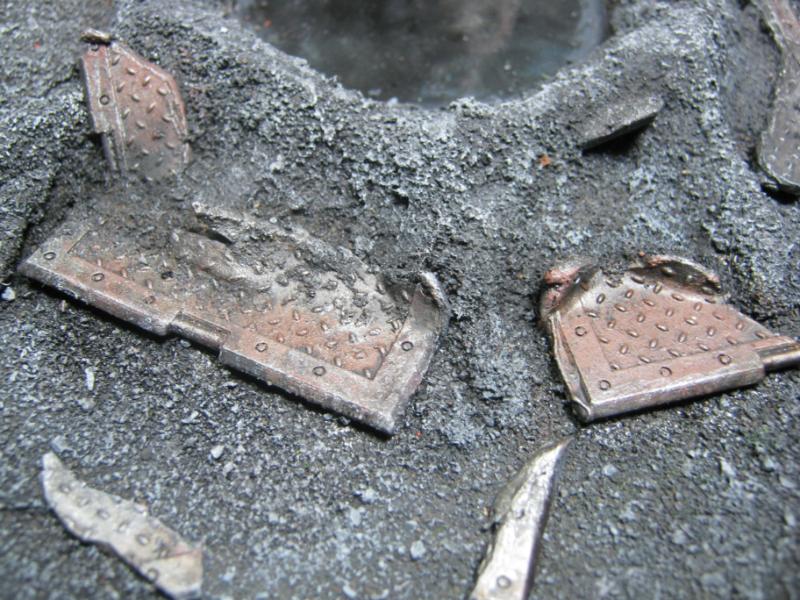
I really like how that came out. A lot. I'll be revisitng that idea as a base and will highlight over it.
Once I finished a few more bitz here and there I officially delared this piece DONE. Here are the final shots:
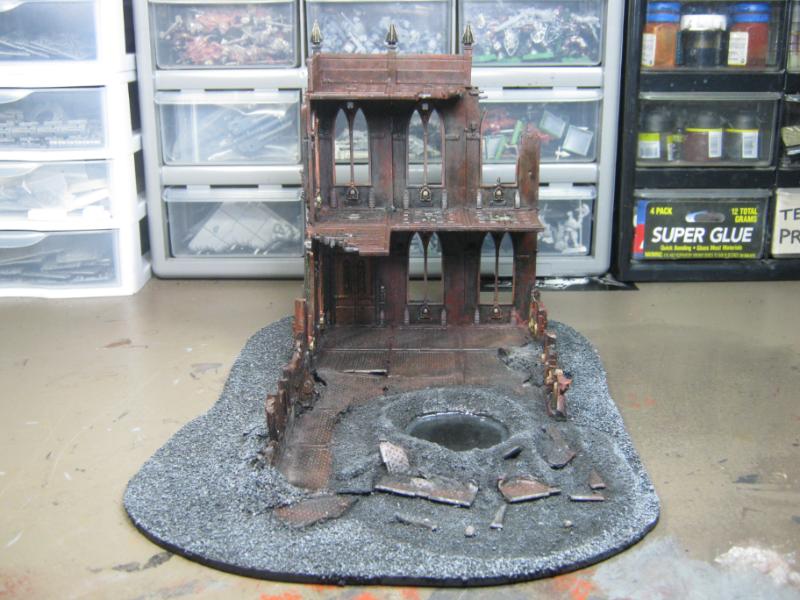
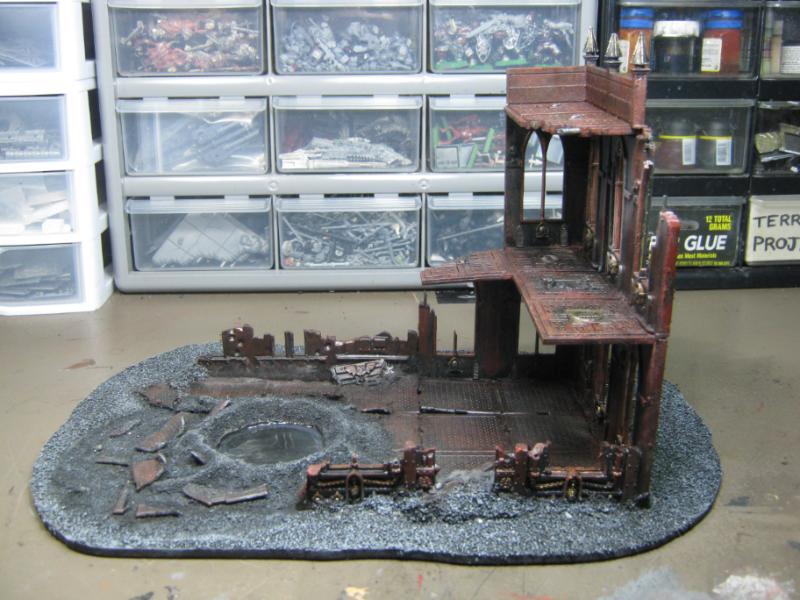
Apparently I didn't take any of the other sides. It is a small matter, I'm sure you'll see this again in the future.
Next project I'll share is a bit off the current track but was fun and functional nontheless. I looked up the maximum number of Objective Markers that could come out in a 6th Ed game and found 9 (and if that is wrong please correct me). I did not have any 'real' objective markers, we'd just use random bitz from my Necromunda terrain, and a few times we lost track of what was what. So I decided to slap together a quick project in between prokjects I was waiting for to have glue dry, paint dry, etc. My friend Kaitlyn was hangout out w/ me at the time and wanted to help, so we figured out how to make it happen and then got to work.
Materials were all stuff I already had, and I would likely never have used the 25mm square bases or the WFB Zombie grave stones. This was a win all the way around.
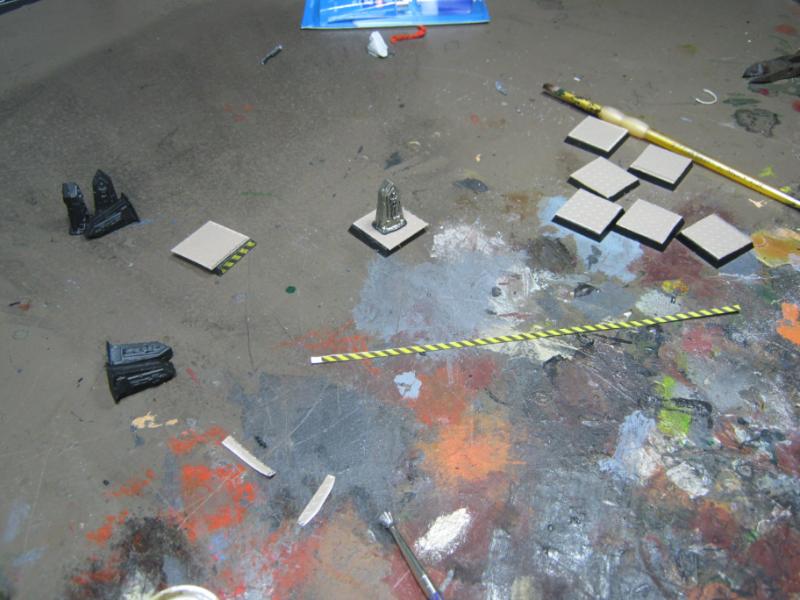
Once again, the treadplate from Dave is being used for something functional on my game table:
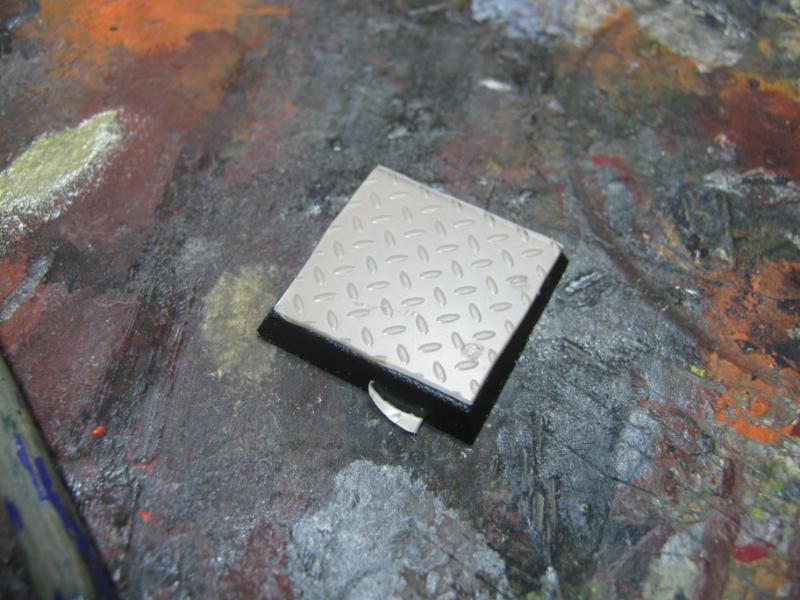
Quick mockup of what the end-result idea was:

Kaitlyn being indoctrinated into the creatively bizarre world of Wargame Modeling:
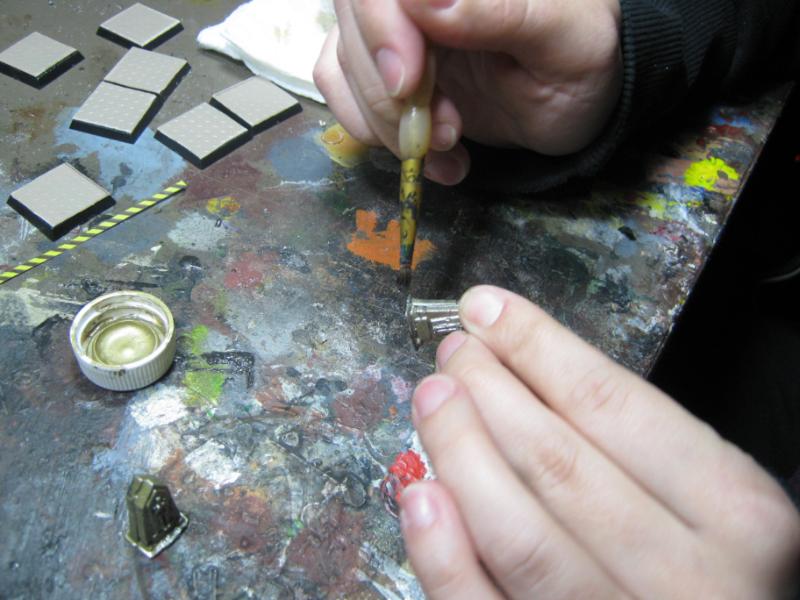
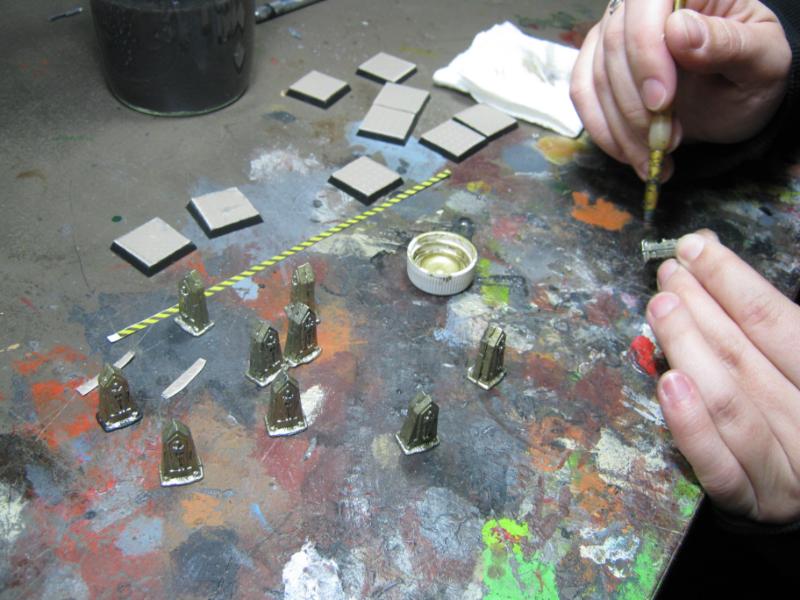
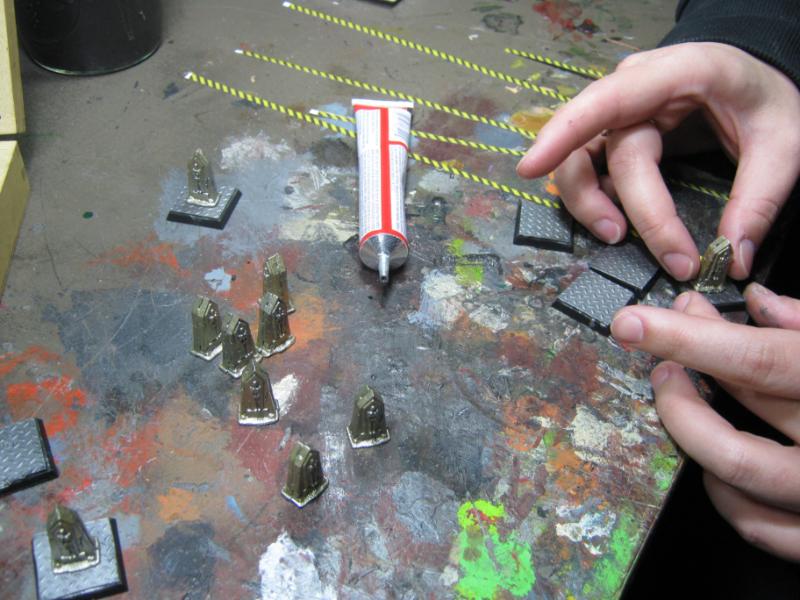
annnnndd.... DONE!
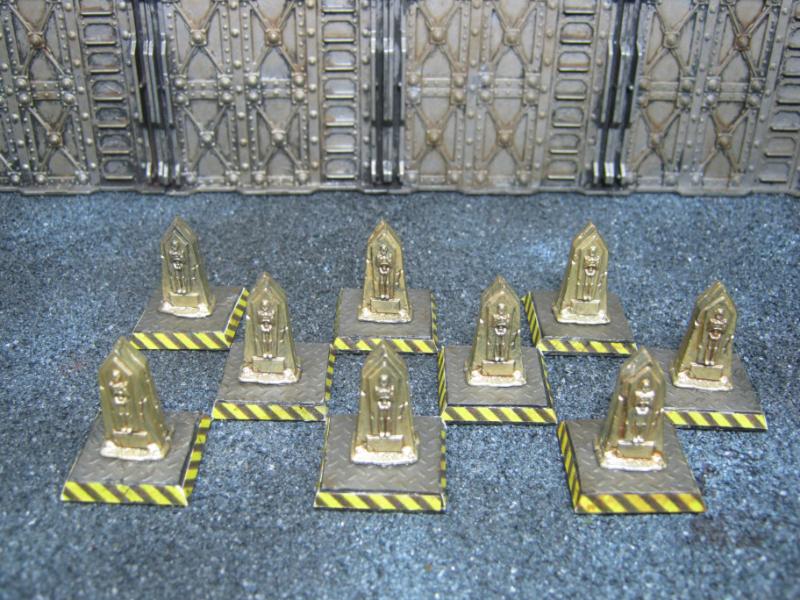
Model for scale comparison:
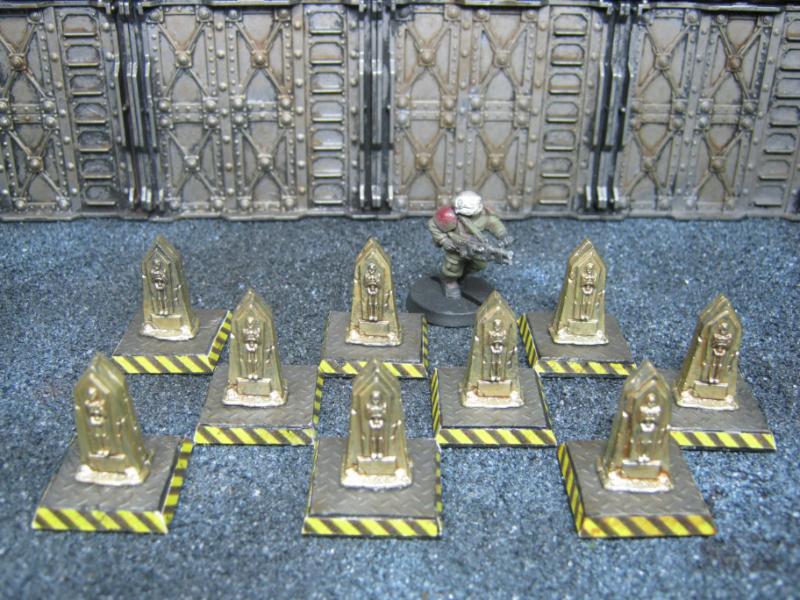
Entire project took about an hours. They are not perfect, nothing I'd ever enter into a contest, but they look good on the table and are functionally efficient for my future games.
That's it for this one, but I'll be back very soon. I have a LOT of stuff to share. And before I go, here's a teaser for the next update:
Thanks for looking, C&C welcome, and I'll be back!
327
Post by: tinfoil
Nice stuff. The rust effects and, more generally, the various textures on the metal tones create a very evocative setting.
33919
Post by: Moltar
I agree with tinfoil. That rust effect turned out awesome, Skalk! I like your simplistic objective markers too. Glad to see you finish up that piece of terrain. It looks really good and I'm stoked to see what you crank out next.
2050
Post by: Anung Un Rama
Here's what I don't get: You have tons and tons of really great buildings here, a lot of skill and, appareantly, even more disposable income. So why are all your buildings so low? If I had acces to this ammount of parts I would reach for the sky!
Serioulsy, I loved that 6 level tower.
17738
Post by: Briancj
Because anything more than a couple of stories is pretty much unplayable.
26139
Post by: Skalk Bloodaxe
@ tinfoil- Thank you. It's what I am going for, and have found a technique to create more texture w/o it looking 'added on'. Will show some examples later.
@ Moltar- Thanks, I genuinely appreciate your compliments. The rust is still a learning process, but I know I'm getting better. The objective markers were fun to make and didn't take up much time (the best part of it was I used things I 'had no use for'). I feels good to completely finish up a project and move on to the next. I enjoy that feeling of accomplishment, and it helps clean up my desk at the same time.
@ Anung Un Rama- Briancj is right, and there is the additional consideration of my space available to store them. At most I'll go 3 levels. They have a huge footprint and my shelves are only w 12" x h 12"-16". If I had the space I might go higher, but as it is I'm going to go longer / wider.
@ Briancj- Yup.
I haven't done anything since 9am except model. I had today off (company holiday) and spent it doing what I wanted to do. Wicked updates coming.
39973
Post by: Galorn
We really will need to get another raodtrip/game session in at some point... your stuff is looking better and better. I'd love to have you down here to show off my workshop once its "done" also take you to my local harbor freight tools... (heh)
26139
Post by: Skalk Bloodaxe
@ Galorn- Yes we do, and I have no idea what 'local harbor freight tools' are.
The next installment was complete just a couple hrs ago, wanted to finish it up so I could show the whole story from start to finish.
You may remember this picture if you have been around for a while. I took it on January 11 2012:
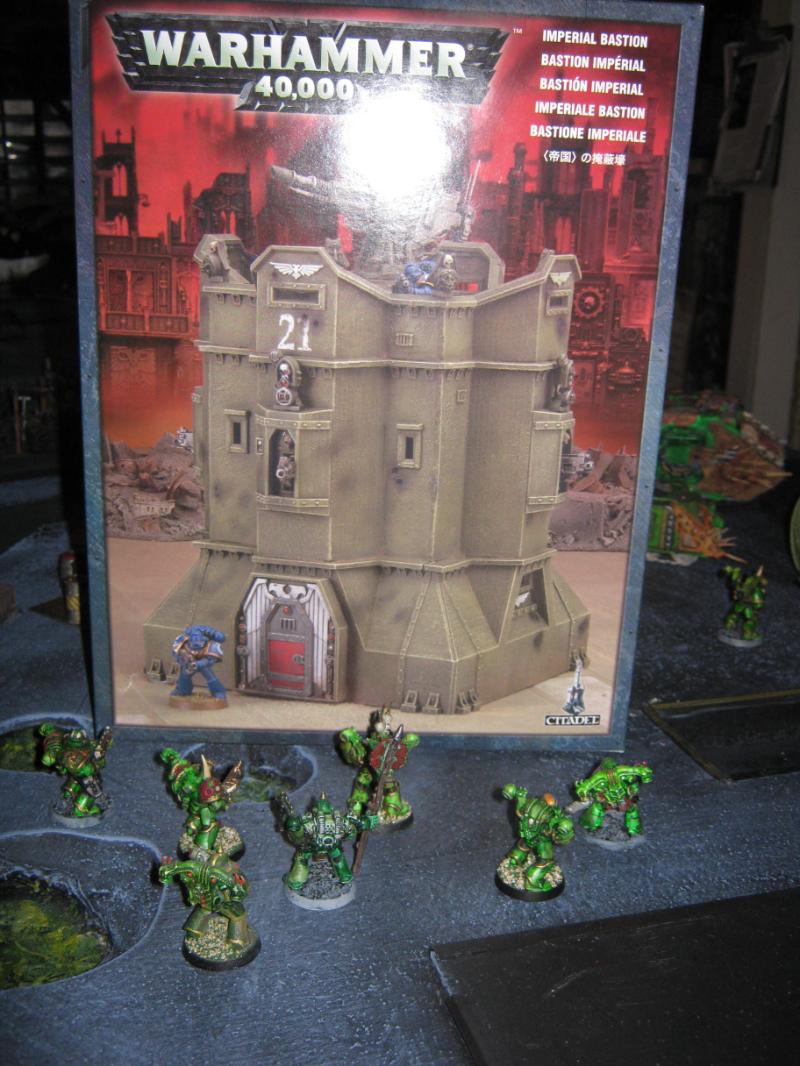
I promptly got to work on it that same day:
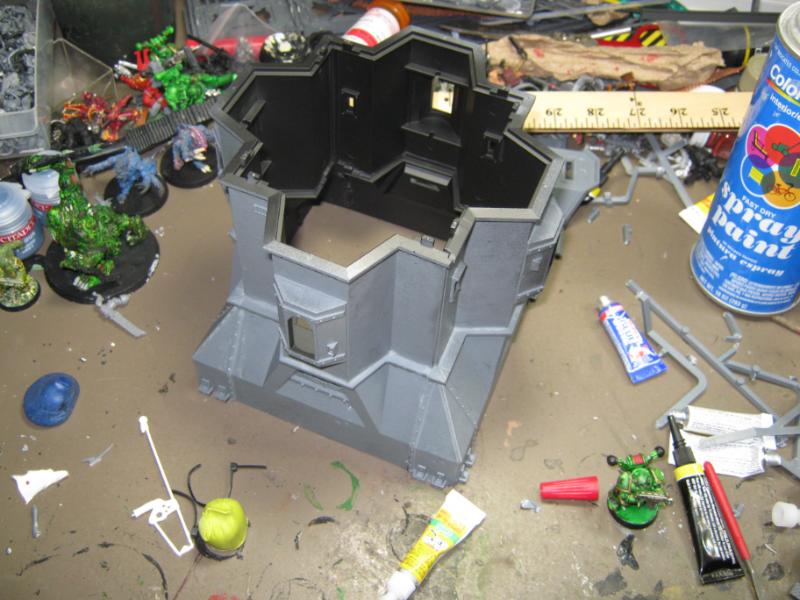
... and here it is again 6 months later in a group photo of unfinished terrain projects taken June 13. Really moving along!
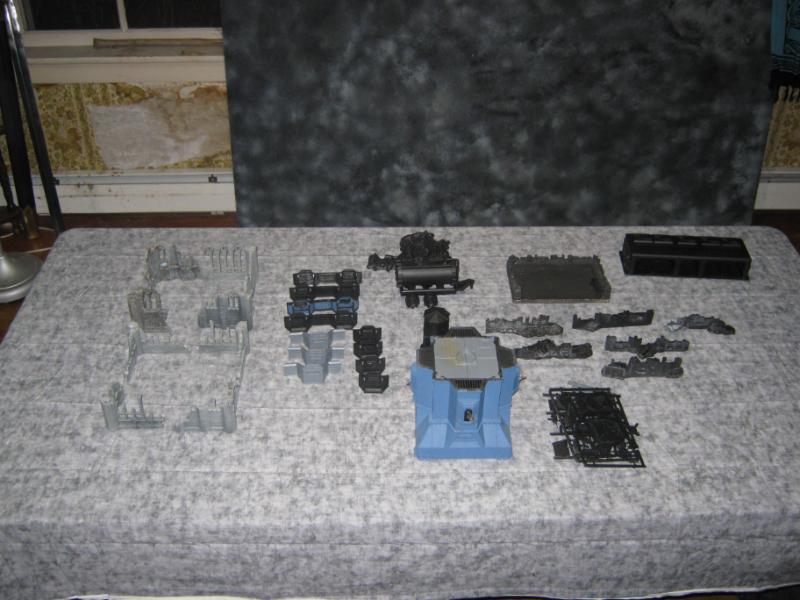
Doesn't show up again until November 22:

Here's how this happened- I was working on another project, and I had to move this to get at something I wanted. I put this on my desk instead of back on the shelf. The piece I was working on needed to dry, and I was looking at the Bastion thinking what a horrible job I did building it, and since I had a moment I could at least seal up the gaps.
Then I decided to glue the ramparts on, just because they were there. This brings me to a short rant about GW models if you care to read it:
I glued on the bunker door and suddenly this became an active project even though I really didn't have any specific interest or need for this piece at the moment. The blue absolutely had to go, and I wanted to try salting this for a different rust effect. I gave it a nice clean undercoat, and officially ended the color blue on my tabletop. Sorry Dave, but it had to go.
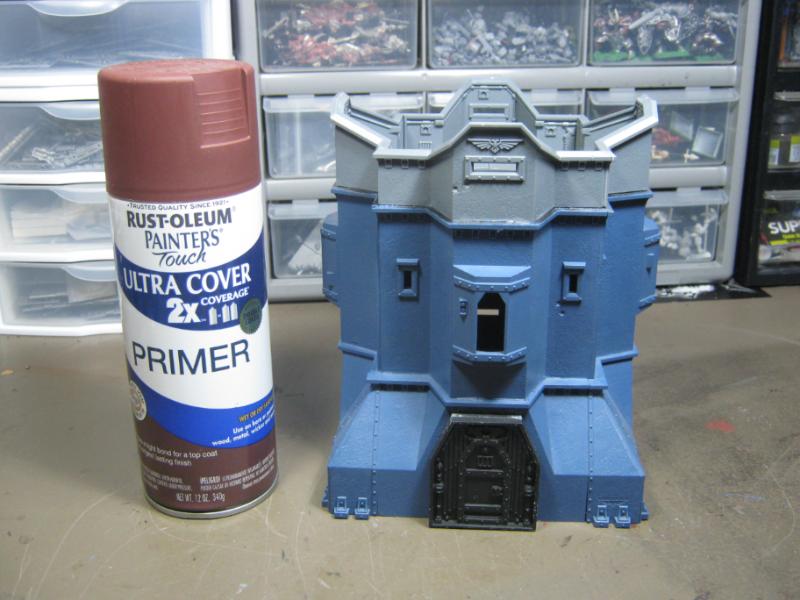
Next I added some black streaks to break up the rusty spots. Had I thought of it I would have used streaks of different colors of rust as well, or painted in sections (orange top, light red middle, deep red bottom) but of course that only occurred to me much later:
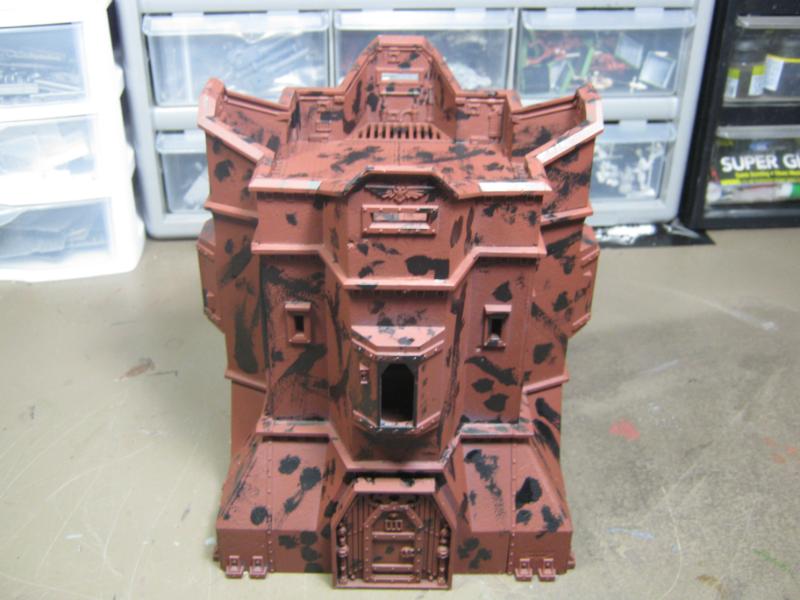
Now it was ready for a soaking in hairspray and sprinkle of salt. I had read online about trying Margarita salt but I couldn't find any, so I tried coarse sea salt. The results were disappointing to say the least:
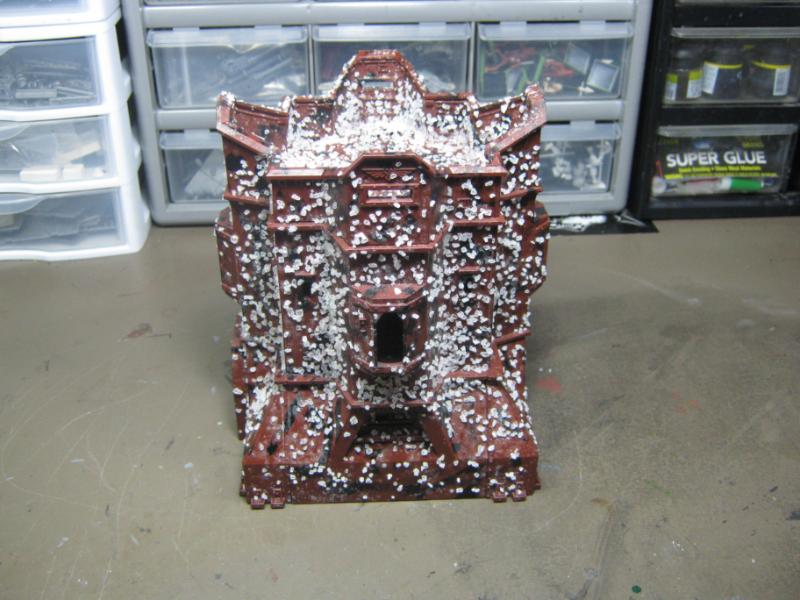
Problem #1 above all else was the salt simply would not stay adhered to the Bastion. Problem #2 was there was way too much of it. I did my best to solve the problem by re-soaking it with matte sealer.
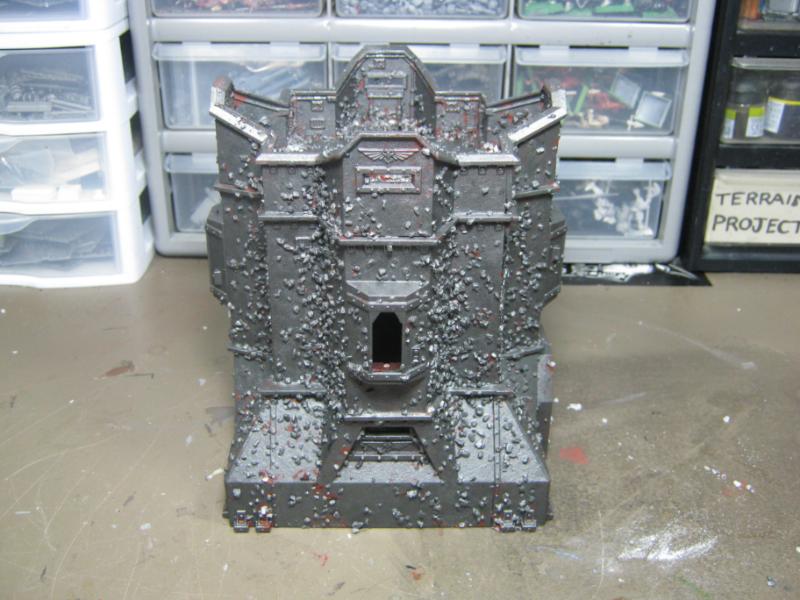
Word of advice for anyone that models- never never EVER use matte sealer when you are working on a slat effect. While it did solve one problem (salt not sticking) it created an entirely new one. The overcoat of paint and the salt underneath were nearly impossible to brush off and ultimately I had to put the model in the shower and use the hand-held shower head w/ hot water and a stiff brush to finally rub off or melt the salt. Unfortunately it also took off most of the overcoat as well. Tally so far- Bastion 2, Skalk 0. (by the way, this is the 'good' side. The other sides look much worse)
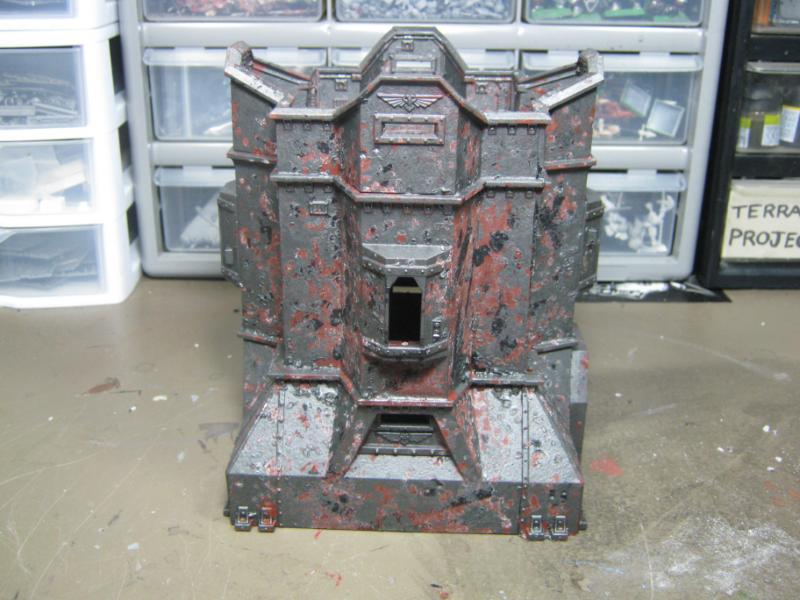
By now I was rather annoyed. At least a couple hours had gone into this already (though I was working on other projects when I was waiting for things to dry etc) and so far complete fail. My next idea was to re-salt it (this time without matte sealer) and see what happened.
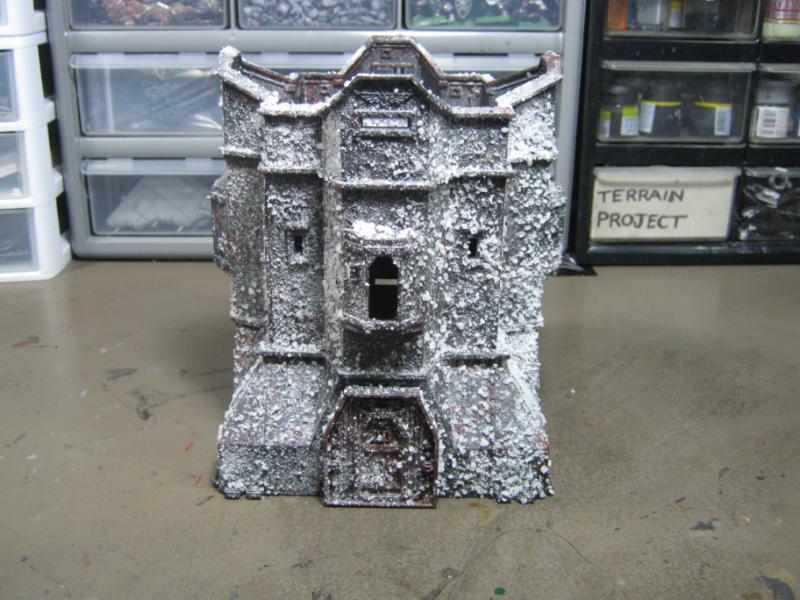
I repainted the overcoat but didn't take a pic for some reason. Anyway, this is after I brushed the 2nd coat of salt off:
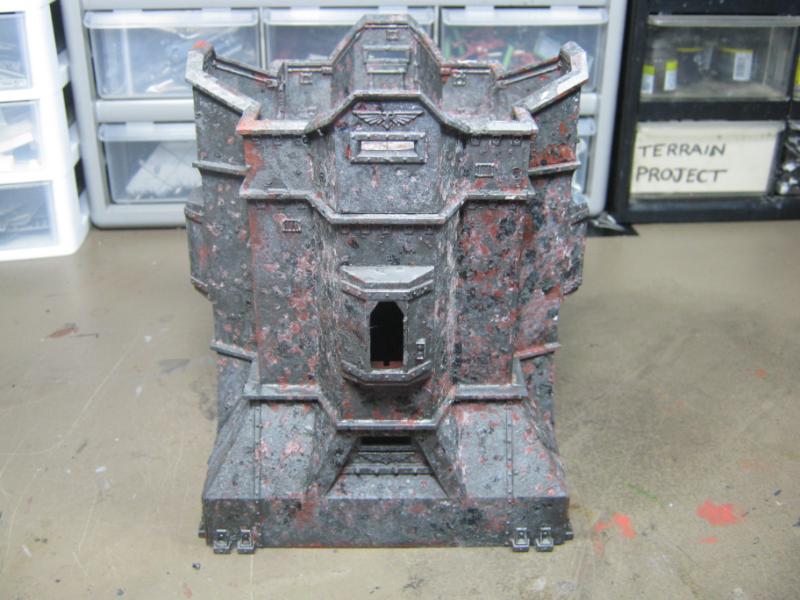
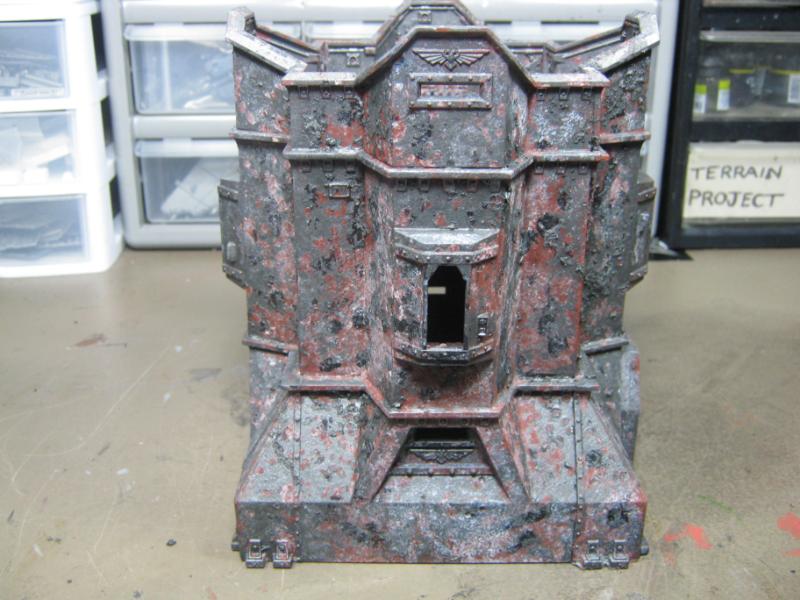
Total disaster, and I was mad. All that time wasted, and probably ruined a good model. At that point I didn't care what it wound up looking like, I just painted it the overcoat and was going to sponge rust all over and call it done and not ever show it on Dakka. The idea to paint the model again is what saved this project. I started to really look at it, and decided it was salvageable.
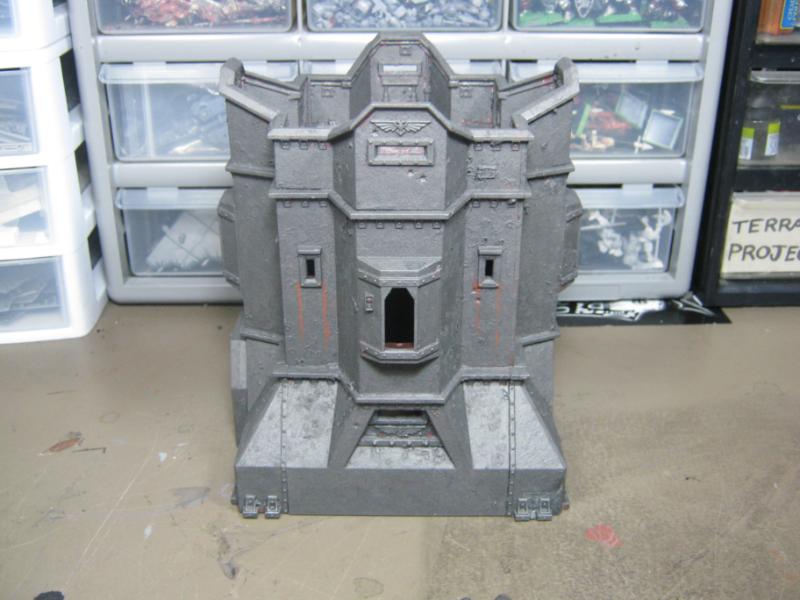
The rust streaks were only the beginning. As I looked at the model more and more I realized I had done something incredible w/o having any idea that I was doing it. The rust was there staring back at me, it just needed to be painted to bring it out. I had inadvertently taken a serious step forward in my modeling evolution:
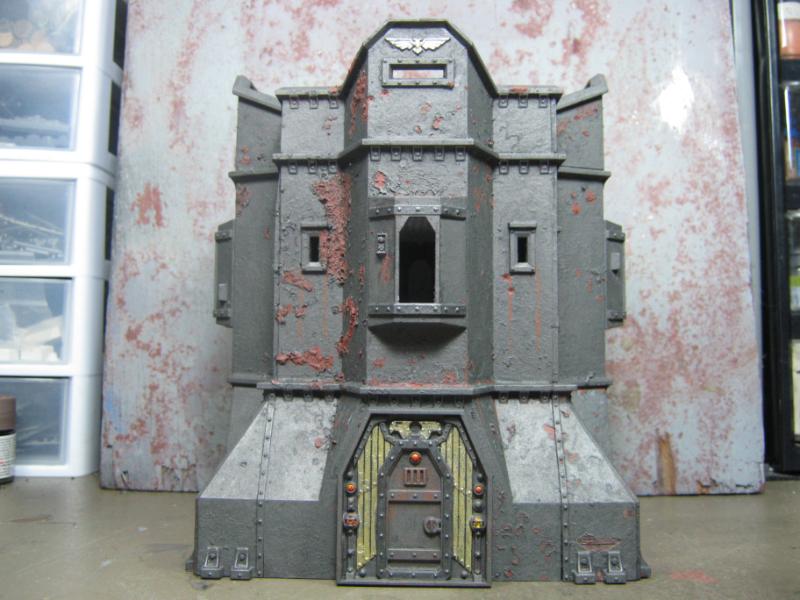
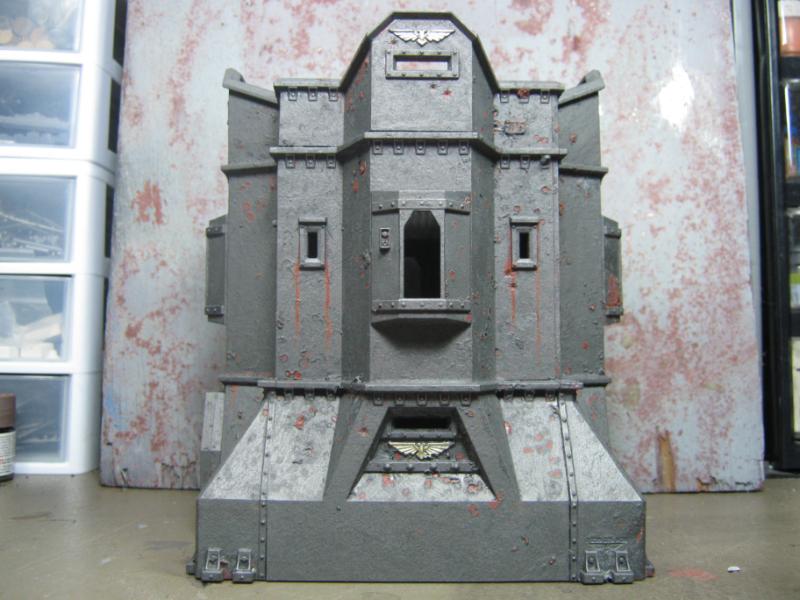
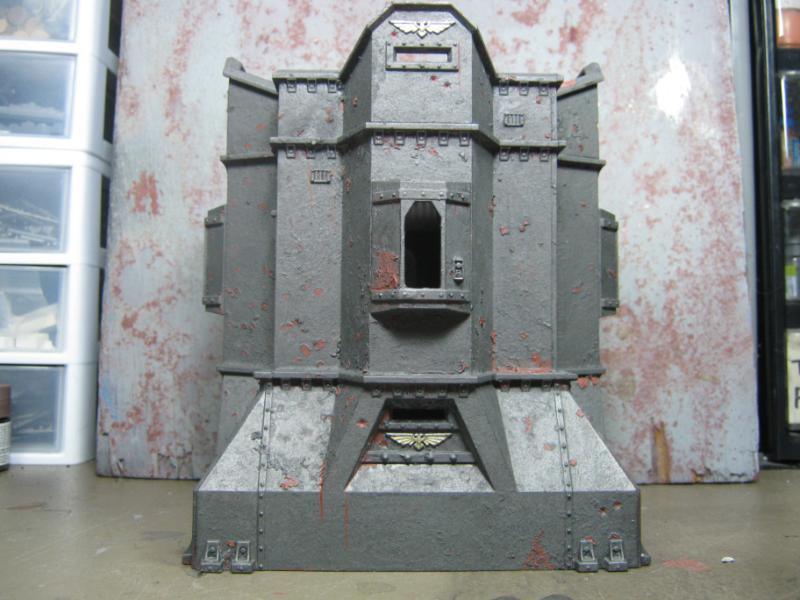
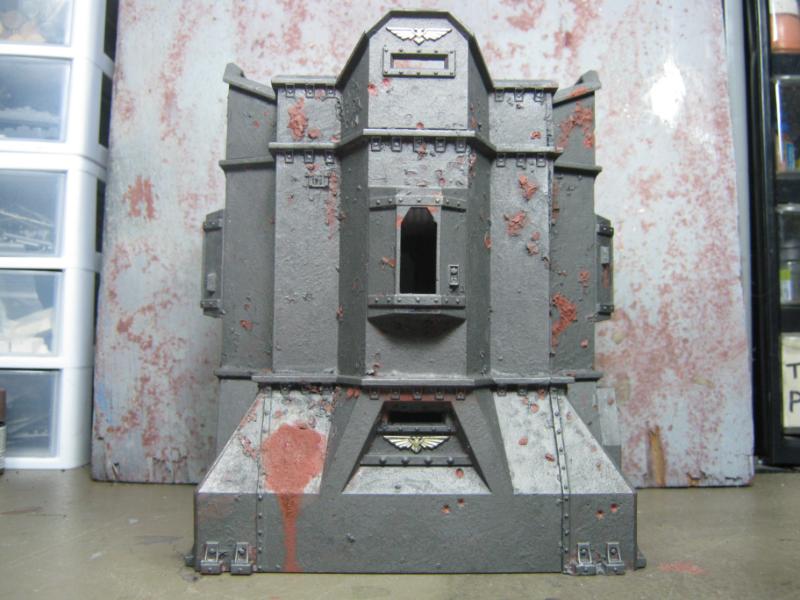
Closeups of the detail:
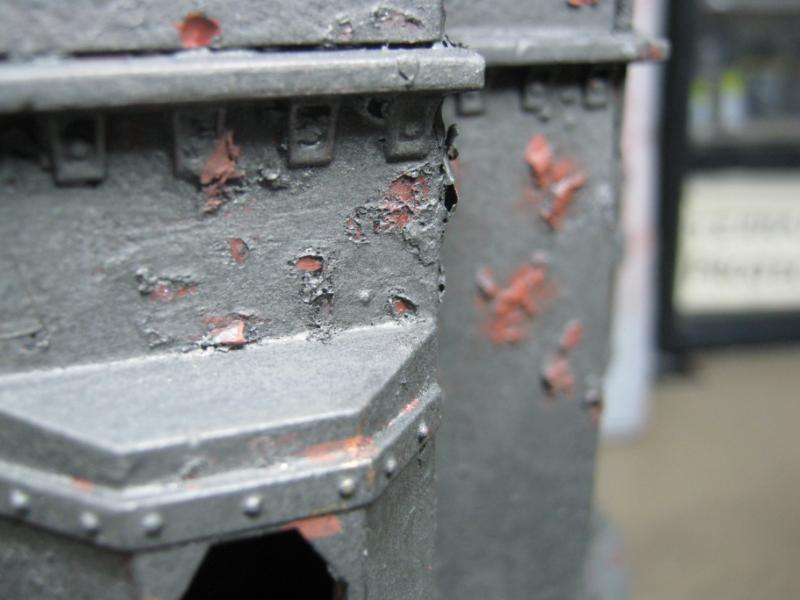
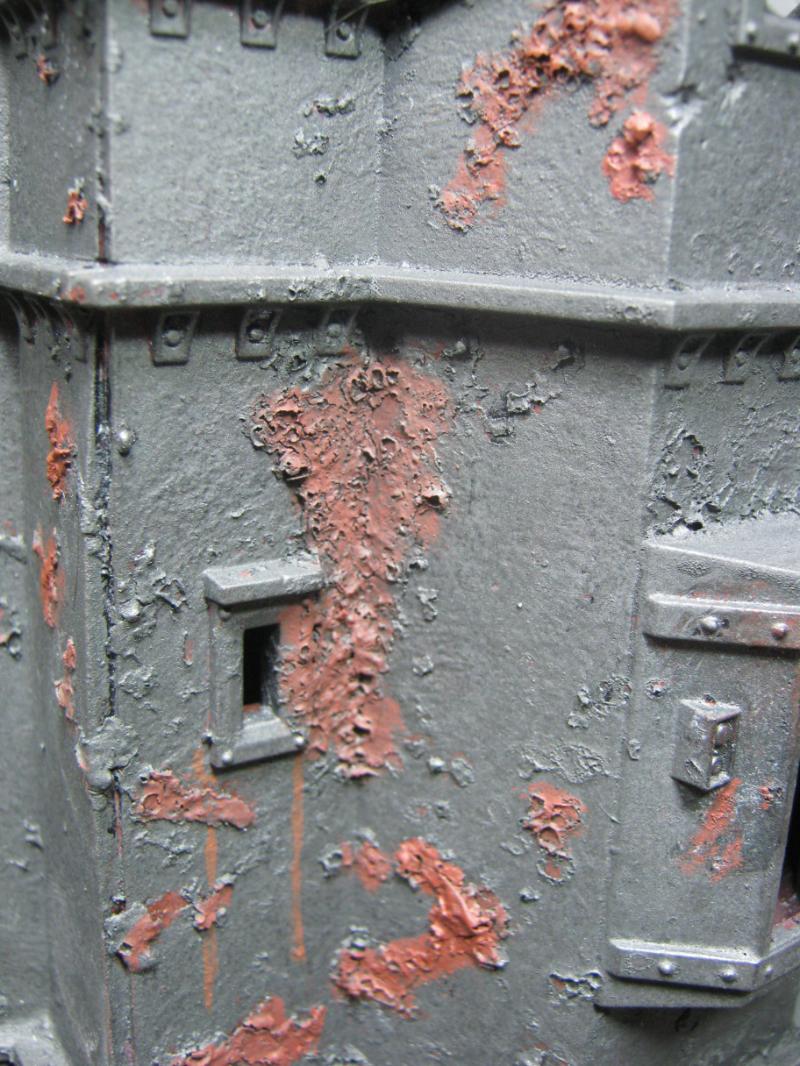

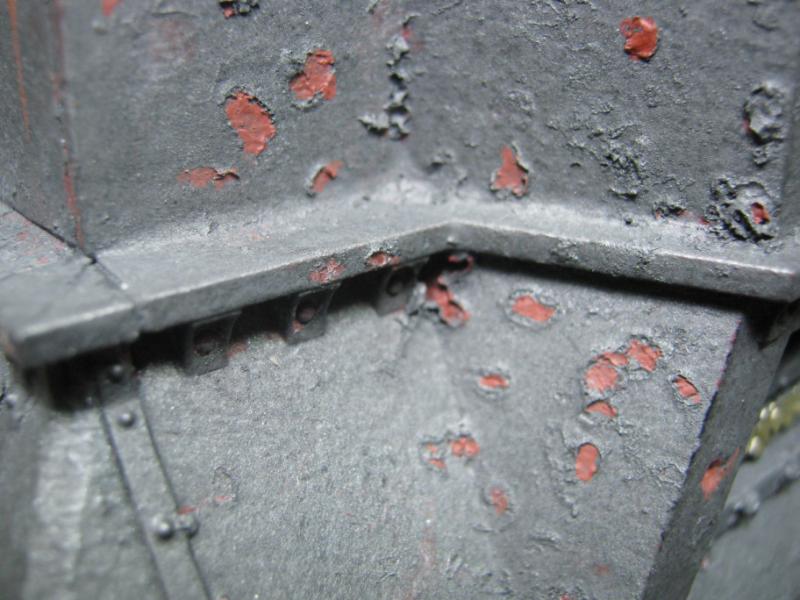
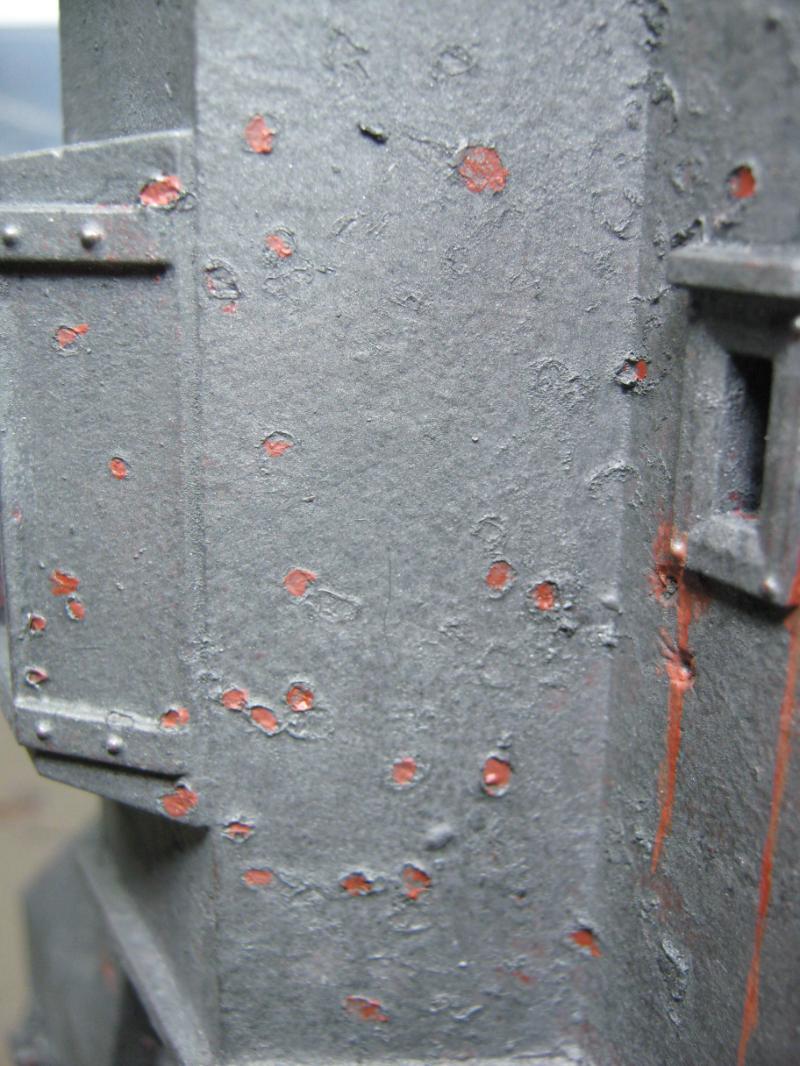
Before getting to the next bit- I forgot to take a pic but I applied the 'finishing touch' for the building by applying a very light black wash to bring out the grit and take away the last vestiges of 'clean'. I really like how it came out. Then I got to work on the base. I did consider skipping that part but a few months ago a wise hobbyist said that all completed models have a base. Plus it also helped me to reinforce the new standard on the table for buildings and bases- geometric shape = functional building, asymmetrical shapes = ruins. I used some more Platformer bitz for the floor. I can't emphasize how handy these things are to have around! They will be part of every project I do from here on out. I applied some 'baking soda' rust to the base as well and then glued the bastion to the base. I used regular modeling glue as both base and building are made from the same stuff.
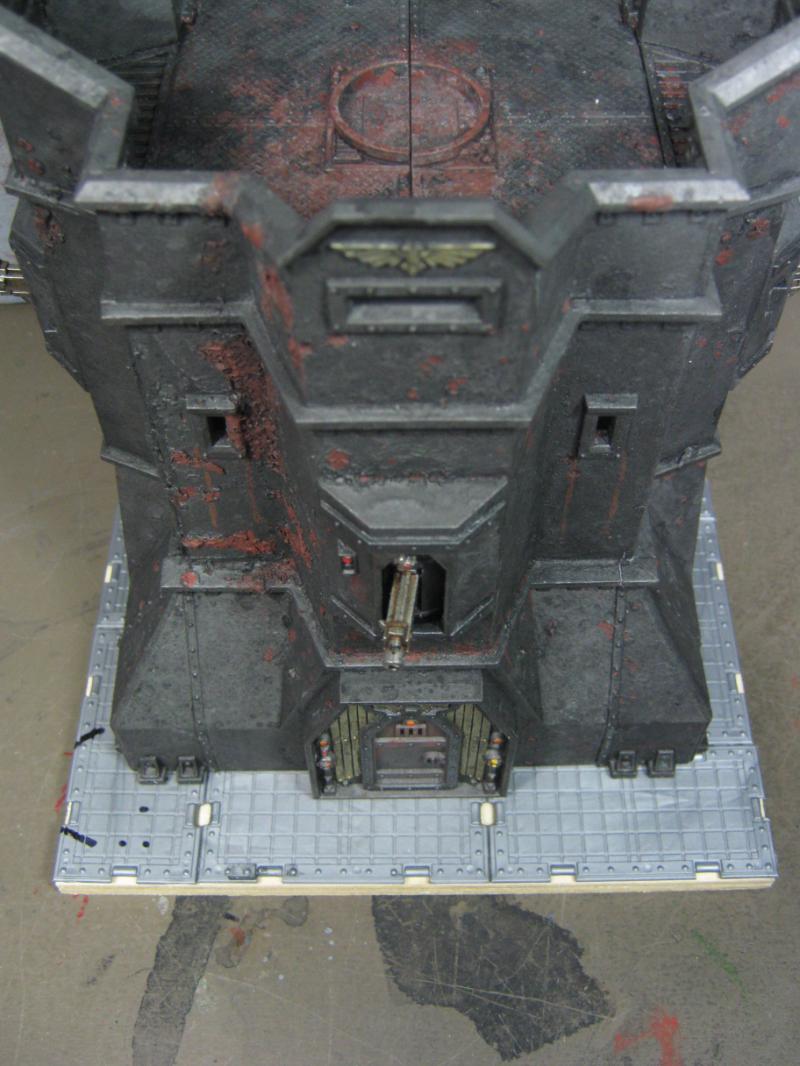
While waiting for the glue to dry I decided to get started on the Icarus Lascannon:

Once the glue had dried I 'tied in' the rust from the platform to the building and from the building to the platform.
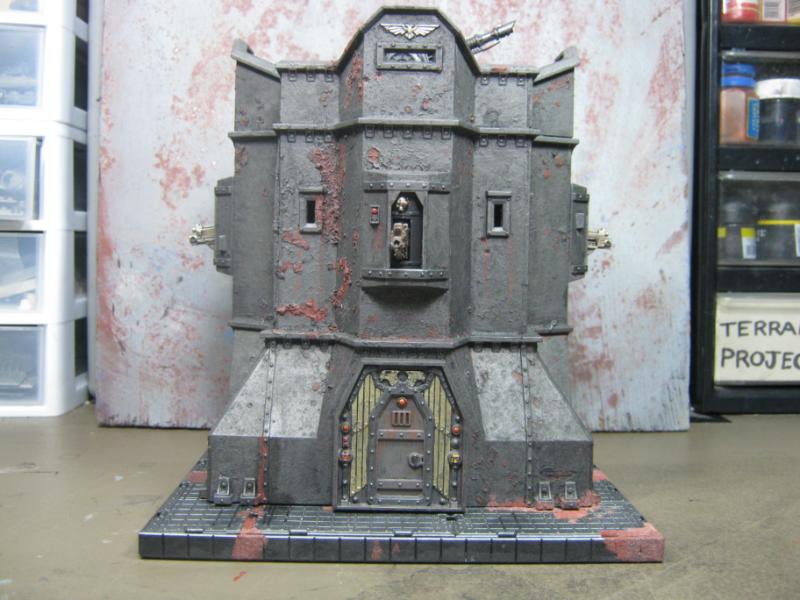

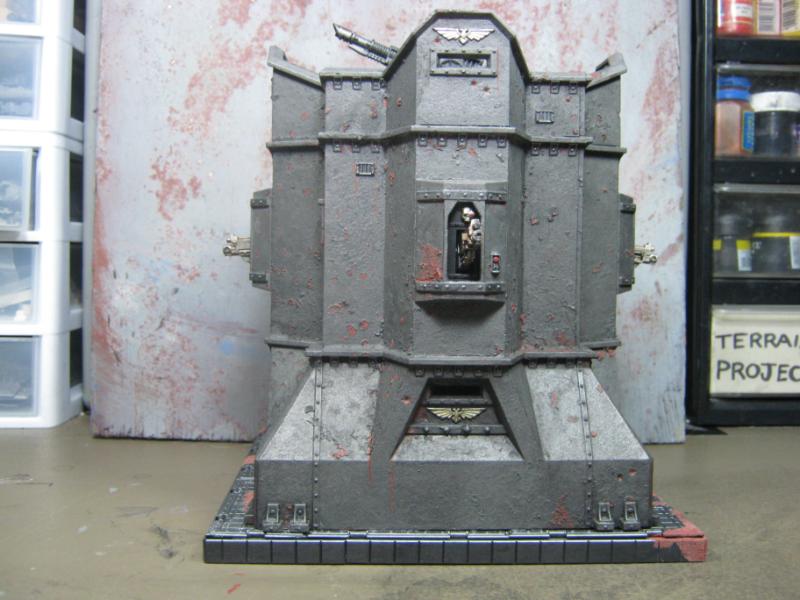
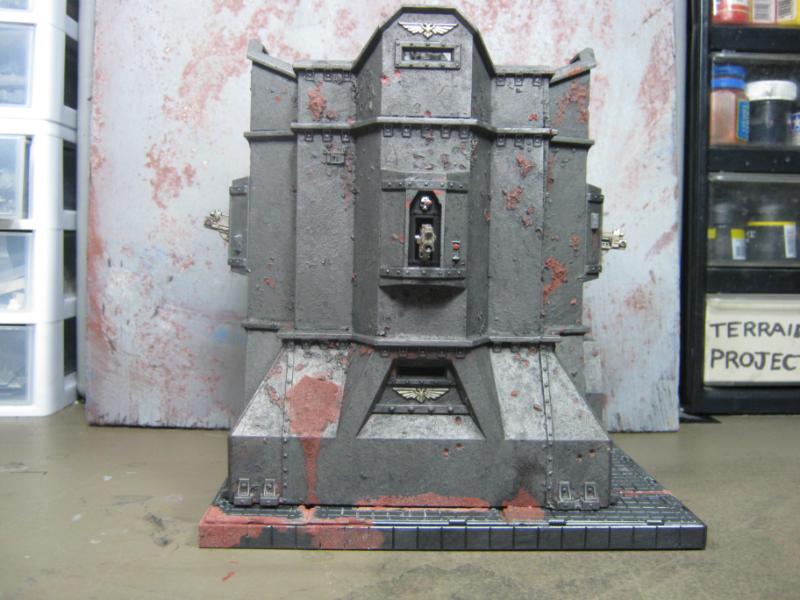
Check the detail on the lights (front door). Another first for me.
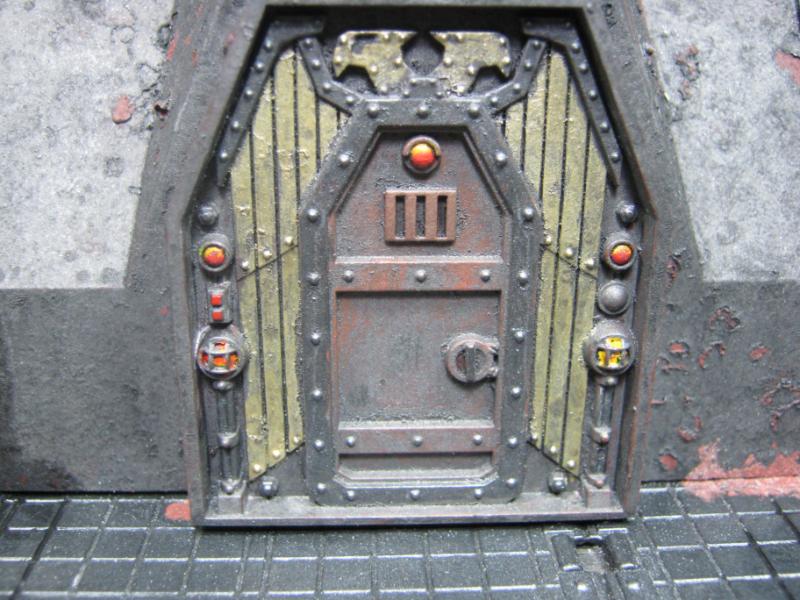
Skipped the painting process on the Icarus gun since it is so small compared to everything else I have been working on. Here are the end results. Note the leaking oil (black, sides), hydraulic fluid (red, right rear), coolant leakage (green, front bottom). Also notice how I was subtle w/ the rust so it would tie in w/ the rooftop regardless of direction the gun is turned:
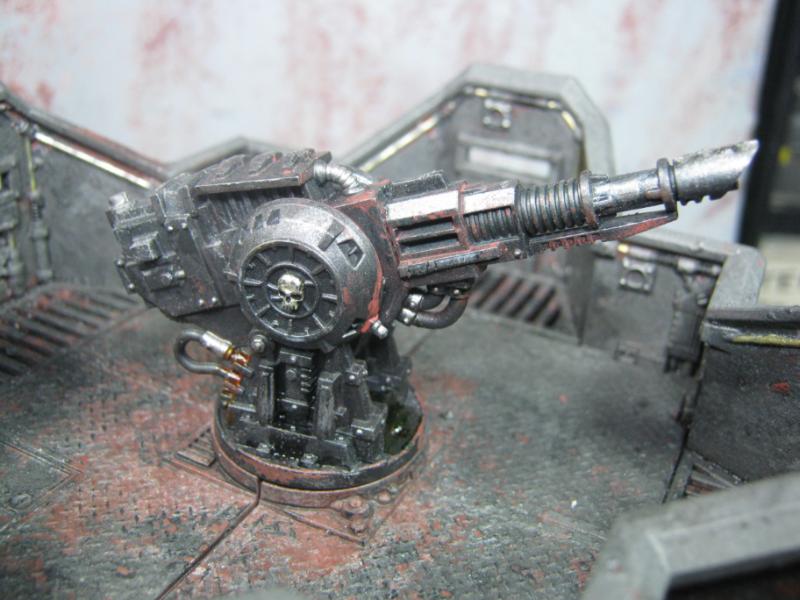
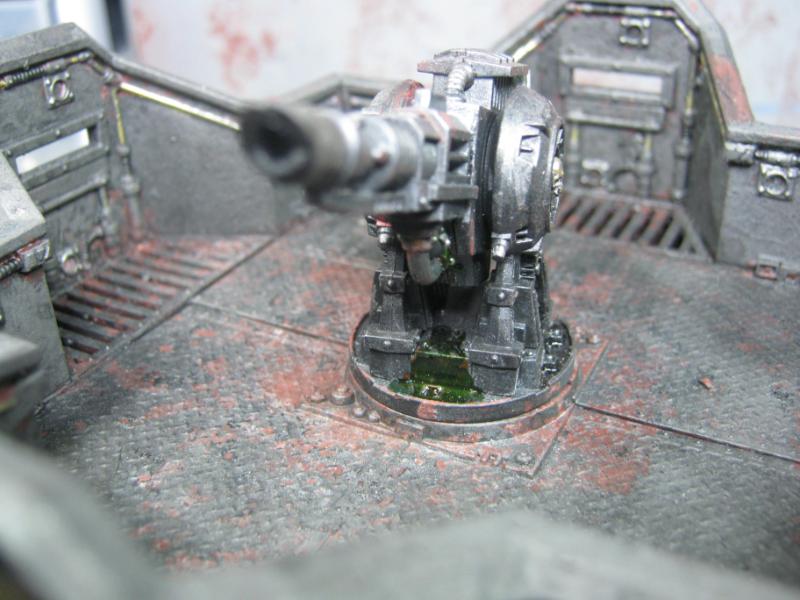

...and the entire thing, one last shot. I am officially declaring this model FINISHED!
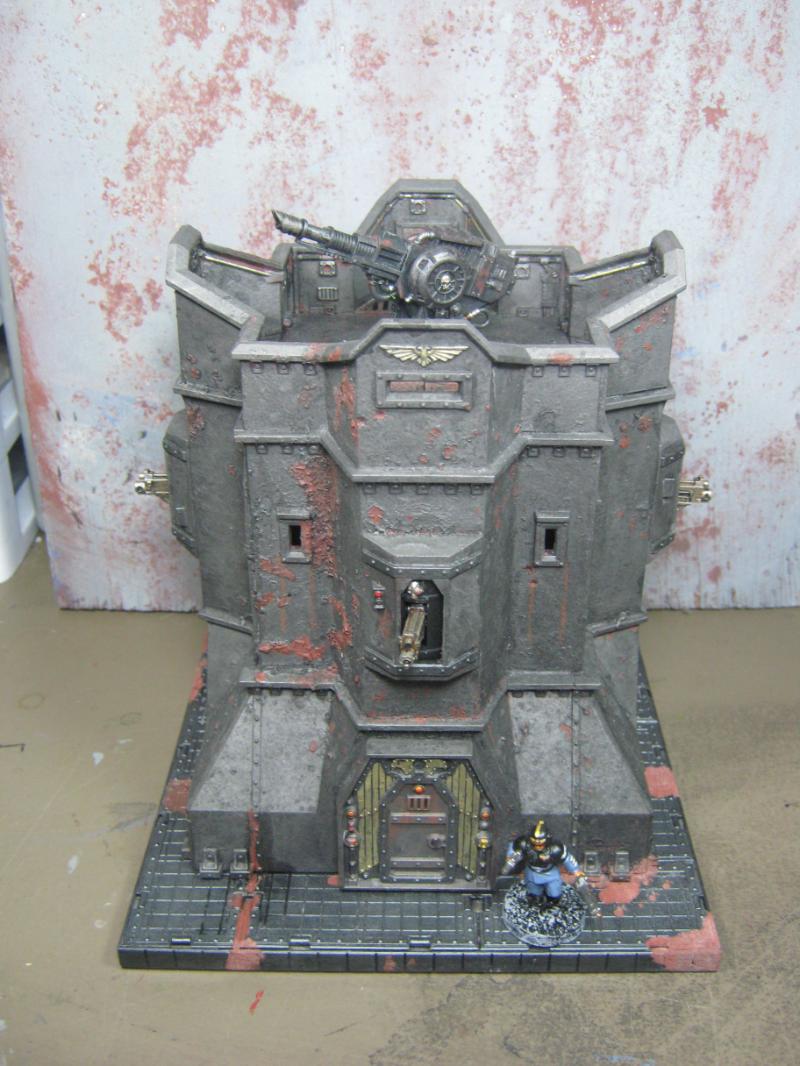
I know I made a lot of mistakes on this, but the important part is that I see them and know how to avoid (or use them more effectively) next time. I'm leaving it 'as is' so I can use it as a measurement of my progress, because there was a time not so long ago where I thought these were good pieces of terrain:

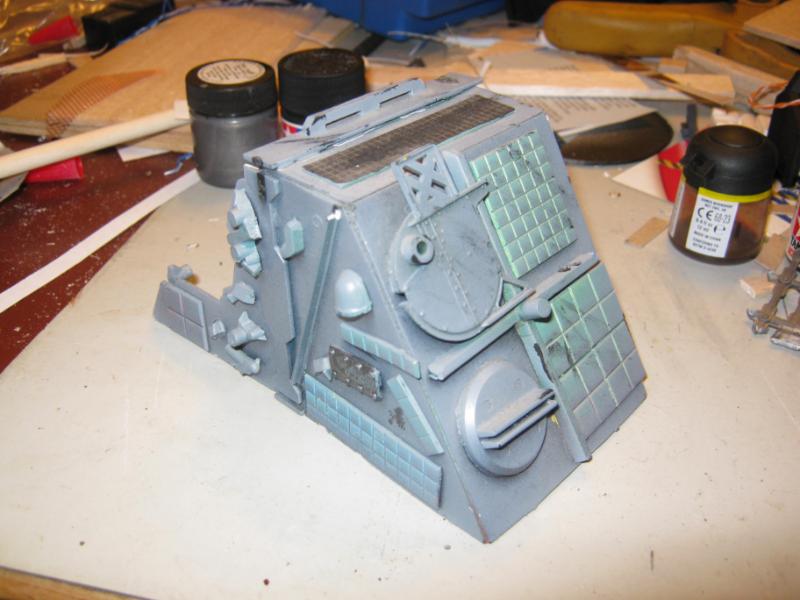
Thanks for looking. More coming soon.
33919
Post by: Moltar
That bastion is dope! About 3/4 through your post I could start to see the texture coming together and I was afraid it would end with you pitching it. It looks awesome and should fit in with the rest of your terrain perfectly. Wish I had more time to comment, but I gotta close shop and head out for dinner. Thanks for posting, Skalk!
24297
Post by: Viktor von Domm
honestly...i think you are a brave man to show all that work and the process... most would have kept it quite and would only show the true sucesses... but then again you turned the wheel again and it came out really well...looks even a bit nurglish with all those puslike craters of rust and so on... the green sloshes on the base of the gun are also a nice touch...
oh...and one thing i gotta ask... that head of yon guardsman in the last pic of the bastion... where is that head from?
thanks mate!
17738
Post by: Briancj
I believe they're all good pieces of terrain. In fact, I happen to like the scratchbuilt pieces more. They have more CHARACTER. My $0.02.
39973
Post by: Galorn
 Briancj wrote: Briancj wrote:I believe they're all good pieces of terrain. In fact, I happen to like the scratchbuilt pieces more. They have more CHARACTER. My $0.02.
hear hear.
Google "harbor freight tools"
they have a retail location near me.
39666
Post by: GiraffeX
The bastion came out amazing after all the problems you went through.
48594
Post by: dsteingass
I think you turned a problem into a Happy Accident Skalk! Good job, it looks great. The effect of peeling paint exposing the rust spots works very well. Please do me a favor though, before you go to that seemingly labor-intensive and messy trouble again, just try those weathering powders I sent you?
Oh, and one other thing, You can use 10 gloss coats if you want, it's a tool to make decals hide their clear sheen, and to make oil washes flow into cracks and around rivets, but a matte coat only needs applied once, at the end if you ask me. It will dull down any gloss coat below it and no one will ever be able to tell.
21481
Post by: Lordjig6
Gotta Say man, the bastion came out great i was suprised myself seeing the end result after all the mishaps from before but well saved buddy
22619
Post by: inmygravenimage
Nice job chief. Great salvage job. I agree absolutely about your rant on these bloody gaps, it's a menace. Almost puts me off building more crazy sized buildings... Almost. For some reason though your rant made my phone crash. Clearly it didn't want to be tainted by your heresy!
31765
Post by: eldartau1987
I hate bastions. My time at GW as a redshirt was spent building and painting about 200 of those darn things. You did well. I would have thrown the thing out.
30785
Post by: Styrofoam04
I hate when a model doesnt turn out the way you plan. Like you, sometimes you have to step back to see that your mistakes actully make your work better! Most of my triumphs were mistakes... I just dont tell anyone.. wink, wink
good work.
26139
Post by: Skalk Bloodaxe
@ Moltar- If I were going to pitch it I'd likely never have shown it on Dakka (since all my other recent work has been above my normal average). I have a few failures that you've never seen, and won't unless you drive to VT. They are in the closet with the rest of the skeletons. I really like how this came out, and it's highly likely I'll pick up another one . So much that I may buy another one and use the same effect on purpose this time.
@ Vik- I enjoy the WIP so the Vet's can see the struggles and offer advice, and so the young bloods can see my mistakes and hopefully avoid them as they come up through the ranks. The Guardsman head is from the basic kit, nothing special.
@ Brian- Well, I'll agree to the extent that if I had not made those pieces, I would not be maing the ones I am not. I haven't given up on scratch build, I'm just immersed in pre0fab right now and I'm really liking the results. And what I am learing now will be alloied to my next scratch build. I'll win a LoER contest yet.
@ Galorn- same as I said to Brian, and dude I looked up HFT... I could spend a full paycheck there and still leave a lot of things I wanted behind. Wow. That place looks awesome.
@ GiraffeX- Thanks, I really appreciate the compliment. Having those problems make me a better modeler, so long as I actually learn something from it. And trust me, I really did this time.
@ Dave- I have tried the weathering powders but haven't shared those attempts because so far my only results have been to make a muddy mess of things. I've been looking at videos online and I'll have another go at it soon, I just haven't figured them out yet. And I've learned my lesson regarding matte coats. It's for one thing and one thing only. I won't make that mistake again, it was a horrible times trying to fix it.
@ Lordjig6- thanks for commenting! I'm thinking you are no less surprised than I was. I thought this one was marked for the Shelf of Shame. I'm really happy w/ this project and am looking forward to using these techniques on other projects I have coming up.
@ graven- I've been working on a couple other build projects concurrent with the Bastion and my opinion is unchanged, even with brand new straight out of the box pieces. It's annoying, but a bit of work and perseverance has (so far) yielded worthwhile results. My table is looking progressively better with the completion of each new piece, and the shared similarities on each building (color scheme and detail) has really tied everything together. I've alluded to the 'fluff' behind the overall theme before, it might be time to write something up that gives a distinct definition to what I'm doing, and why. As for your phone crashing... not sure on that one. Perhaps a data transmission intercept by the Inquisition?
@ eldartau1987- Wow. 200 Bastions? I can completely understand why you hate them. I can't even imagine that. Congratulations on maintaining you sanity (be that as it may ) and interest in the hobby. Your story is a great example of why I would never consider doing this for a living, even if it was only supplemental. I'd go mad and wind up hating one of my true joys in life.
@ Styrofoam04- You've seen my other projects so you already know the majority of my 'successes' are due to dumb luck and fortunate happenstance. Someday I hope to produce INTENTIONAL results, but until then I'll be satisfied with the gifts bestowed upon me by the Dark Gods of Modeling.
Not an update (yet... one is coming this weekend though), this is a 'thank you'. You all keep me going. I'd be do this anyway, I don't need to be on Dakka, but it's nice to receive the compliments and attention from fellow gamers and modelers, most of whom I feel are far more accomplished than I am. That's not false humility, it is a genuine compliment to you all and great appreciation for your suggestions, points, and continued interest in my project.
I have 5 other projects in the background that I'll be sharing more of over the next couple weeks. Dakka time has been gutted again by work, but modeling time at home has increased enough to where I feel I'm moving ahead instead of stagnating. I'm really looking forward to sharing my latest efforts.
I'll be back w/ a LOT more to share. I'm dedicated to this project and I have nothing else on my radar except choking my table with so much awesomeness that there will hardly be room left for the armies.
37733
Post by: ktbb22
You've put a lot of work into this project and it shows. Keep it up.
48594
Post by: dsteingass
Aha! -I'm glad you're playing with it. Just get it wet, slop it on, and let the water/thinner evaporate, then you can do all sorts of manipulation with a dry brush. It doesn't look right until it's dry. Remember, nothing is binding it, when you're happy seal it. Or just use it dry. Try the white powder over one of your bulkheads or other already painted bitz.
30344
Post by: monkeytroll
Good to see you rollin' again Skalk. Nice recovery job on the bastion, turned it around real nice like. Rather like that last piece you showed too, even if if you consider it old and not-up-to-scratch.
39834
Post by: Feldenglas
Damn, dude. If anything, that mistake-turned-success makes that bastion look hard as nails. It's really been way too long since we had a game!
26139
Post by: Skalk Bloodaxe
@ Dave- I appreciate the thumbs up, I'm really putting some effort into bringing up the quality of my terrain and I know I'm on the right track.
@ monkeytroll- I'm really happy I was able to save it. If nothing else I could have Nurgled it up, but to date I have no interest in buying fortifications, I'd sooner choke the board w/ infantry and support. As far as the scratch build, see below.
@ Feldenglas- it looks better in person. We'll have to get a game on soon.
Small update today only becasue I'm burning time during lunch (I got to TAKE lunch, so that's a step in the right direction).
To everyone that likes my scrathbuilds, check these out. They are mostly made from bitz that I would not have used, and they are slotted for practice pieces for my wife and ktbb22. They couldn't beat me, so apparently they are going to join me.
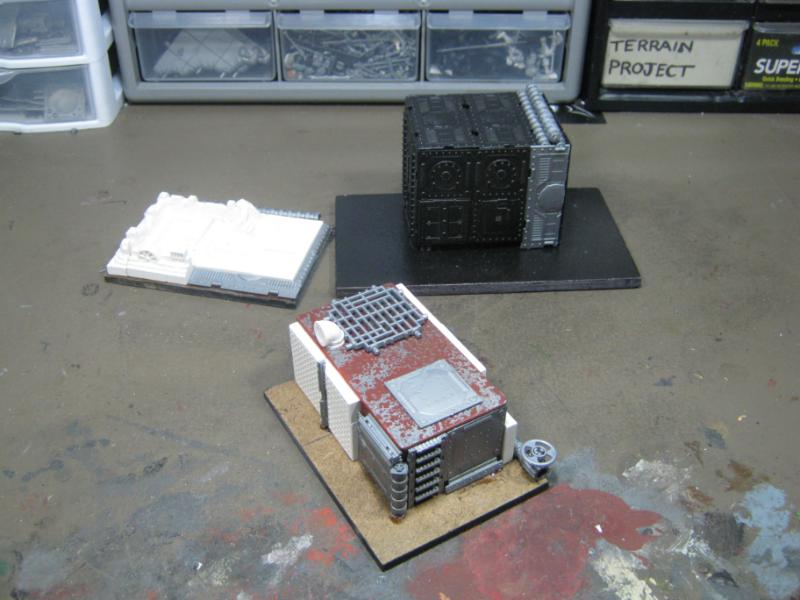
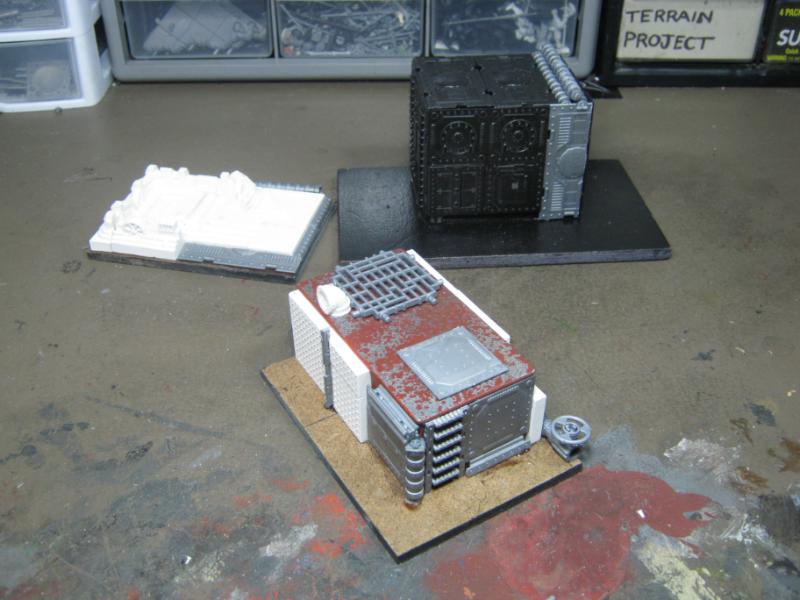
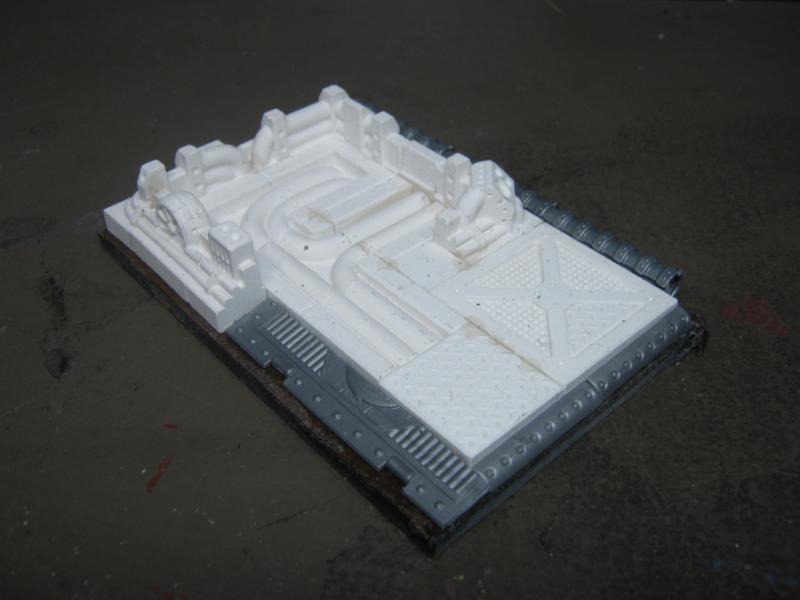
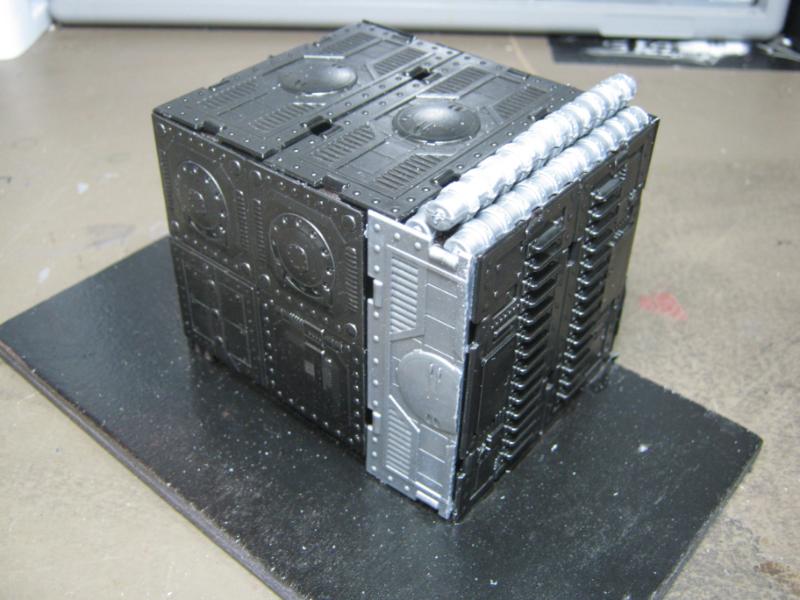
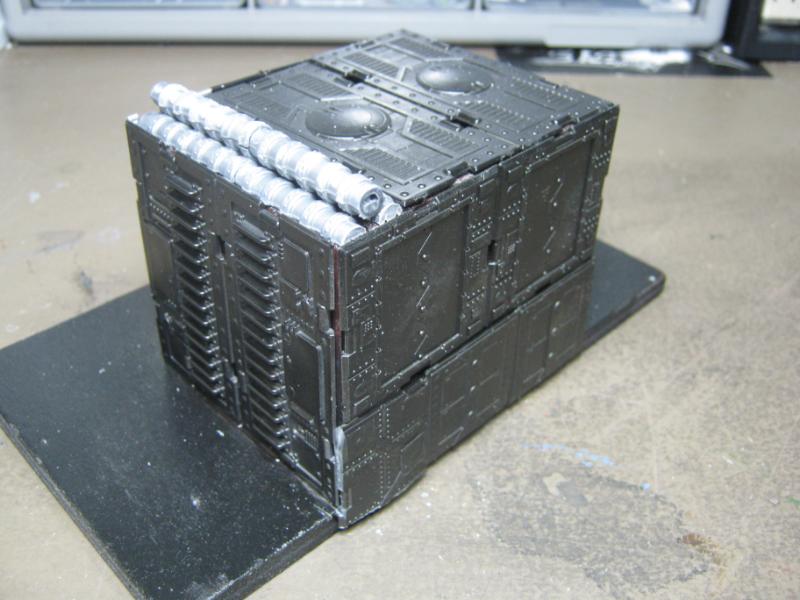
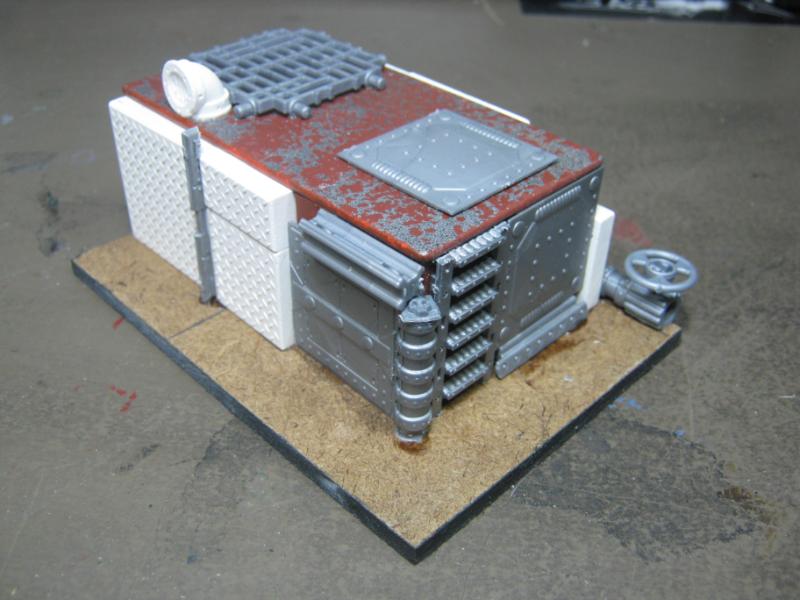
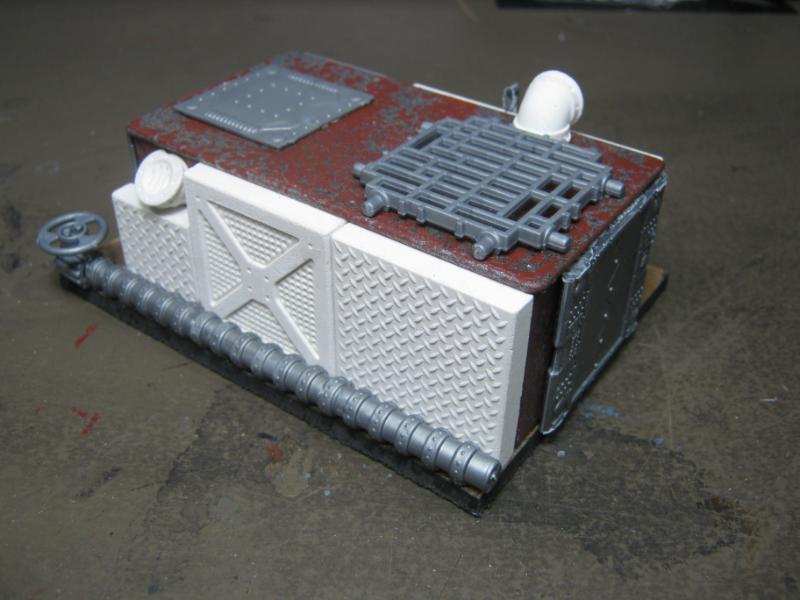
Lots of Hurst and Pegasus on those, so technically it's not scratch, but it is an artistic application. It also reminds me of the stuff that Bruticus builds, and that's a good thing. I don't expect to see these on the 40K table but they would be perfect for Necromunda (which I'm going to start steering people towards. I'm sick of not playing it).
Last but not least, here's a shot of my best work to date. Note that my LoER piece is missing from these photos. Had to change the base to meet new base regs for the 40K table, it will be back before too long.
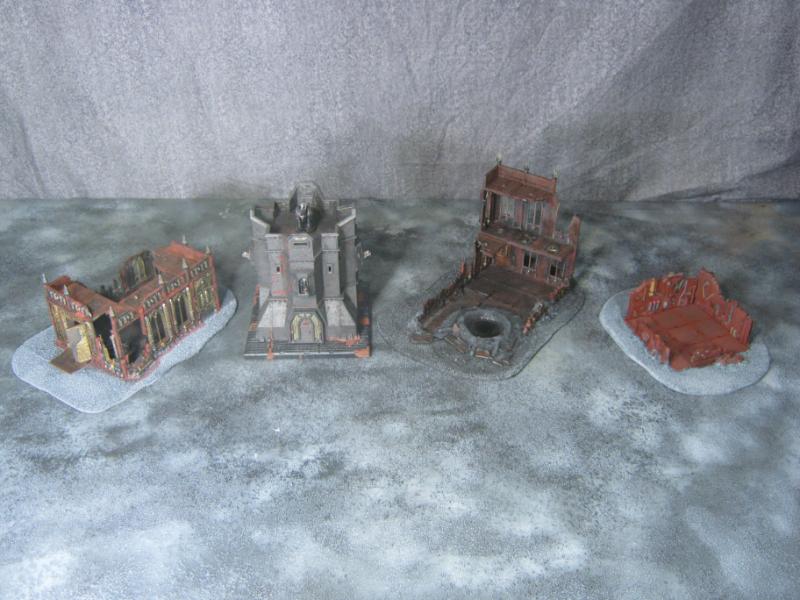

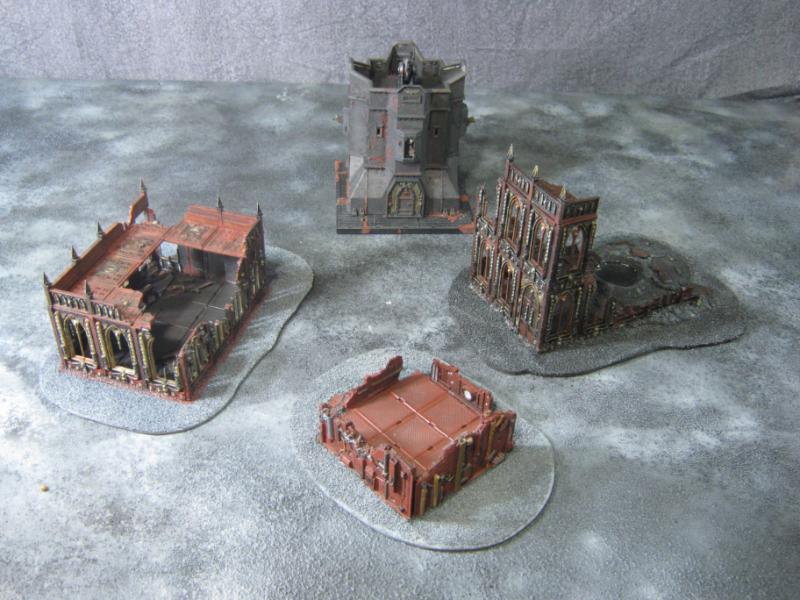
Thanks for looking, and I'll be back soon (I hope).
26790
Post by: Gitsplitta
Impressive work Skalk.
30344
Post by: monkeytroll
Nice! I like the small pieces, I see no reason not to use them with 40k - although that's speaking with 20 yar old 'logic' towards what should be on a table
But the thought of more 'munda styled terrain from you is certainly appetising
48594
Post by: dsteingass
They look great Skalk!
Find me one city in the entire world where all the architecture matches...Now, since you can't... Let's un-brainwash ourselves to think all 40K cities should look alike.
26139
Post by: Skalk Bloodaxe
@ Gits- Thanks! Appreciate you stopping by. I'm really trying to step up to the next level. I'm getting closer w/ every piece I do, but I still haven't broken the barrier. Too many of my successes have been due to fortunate happenstance. Even with what I've learned so far I still find myself tripping over the same old mistakes. I can't tell you how many times I've built something, gotten to the primary color base, and then tore it apart because I realized I'd made a n00b mistake.
@ monkeytroll & Dave- I'm kaing the board match with a specific and deliberate purpose. I'm not opposed to throwing out more random pieces for a game, but I'm really trying... ahem... "forge a narrative" with my primary terrain. I'll work on the fluff and it will make a lot more sense. However, in a Necromunda game I'd be a lot more eclectic and that would match the spirit of the game 100%.
if you need truly varied terrain from me, I re-submit this:
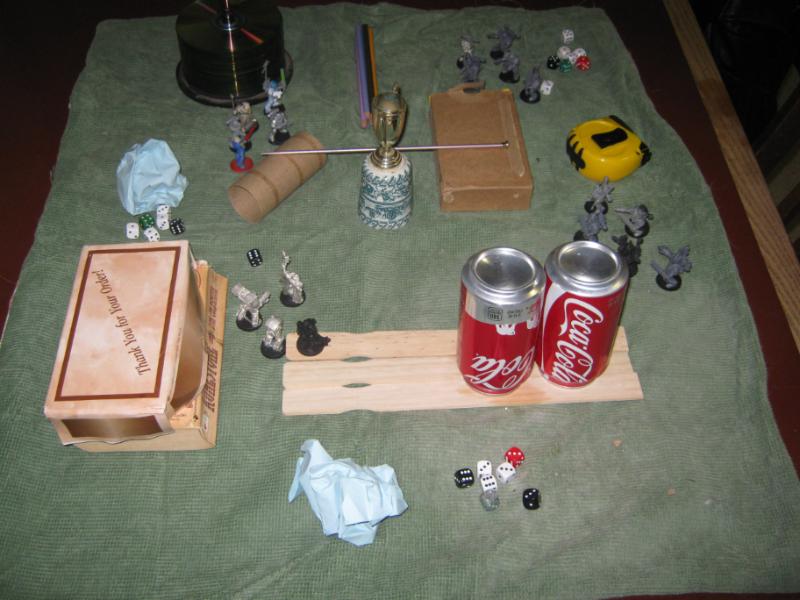
Muuahhaha
26790
Post by: Gitsplitta
What's the straw lying across the boxes & bog roll behind the cup on the cup thingie supposed to be??
22619
Post by: inmygravenimage
That's looking very nice indeed, and the shot of the four finished buildings is great!
24297
Post by: Viktor von Domm
those three small terrain pieces look really damn fine... lots of rust i expect there? for what fluffy use these might find a prupose i can´t figure out ... but i think it isn´t really needed to find a purpose for these... the look cool and thus they have purpose.... imagine if all the cool looking people out there would have to be for a certain purpose...and lacking that... would have to be done in .... well... ok... that theory has it´s flaws...hell... death to cool looking people i say! 
26139
Post by: Skalk Bloodaxe
@ Gits- I have no idea. Really.
@ graven- Thanks, I really enjoyed setting that up. Only 'problem' now is what to do about the rest of the table. Look at all that open space! I guess I'll have to do more modeling.
@ Vik- I have no idea what will become of those, all i did was build them. The artistic expression that will be visited upon them will not be from my hands. As far as the fluff goes, I agree that not everything has to match, and in the 'real world' it normally doesn't, but on this project I'm drawing from my military experience where (at least from installation to installation) everything looks like it was stamped from the same cookie cutter ( STC anyone?) and that is the idea here. There will of course be the variances in each design, and 'important' buildings will at times be significantly different in design, there's always a distinct and unquestionable cohesion that ties it all together with .
Not an 'update', just a 'catch up'. I'm so far behind in posting here. I have nothing new to offer but I have some things from a couple weeks back I wanted to share.
SUPPLY DROP!!!
I posted a while back I had won this. I really scored on this auction. Check this out (also note the newly designated paint pot tray )
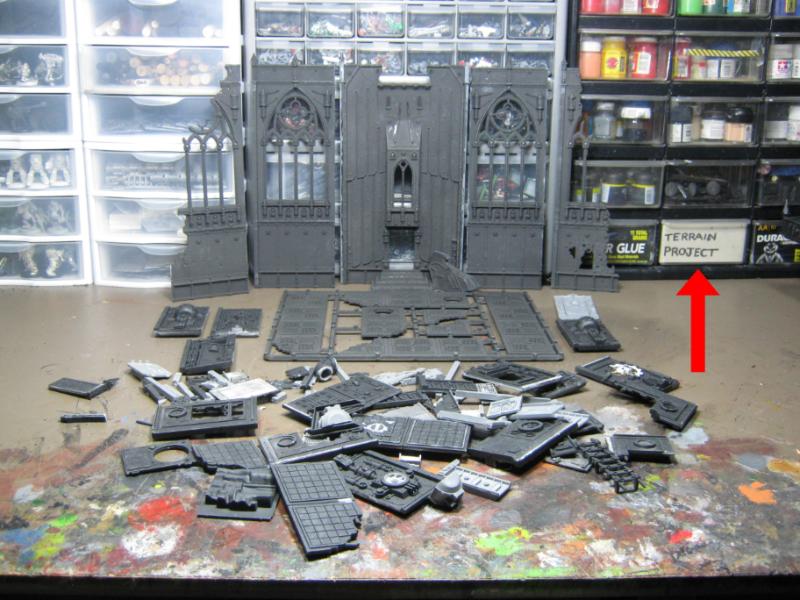
Shrine, and I think all the pieces are there? Not sure. It's wicked cool for what it is though. And there's more!
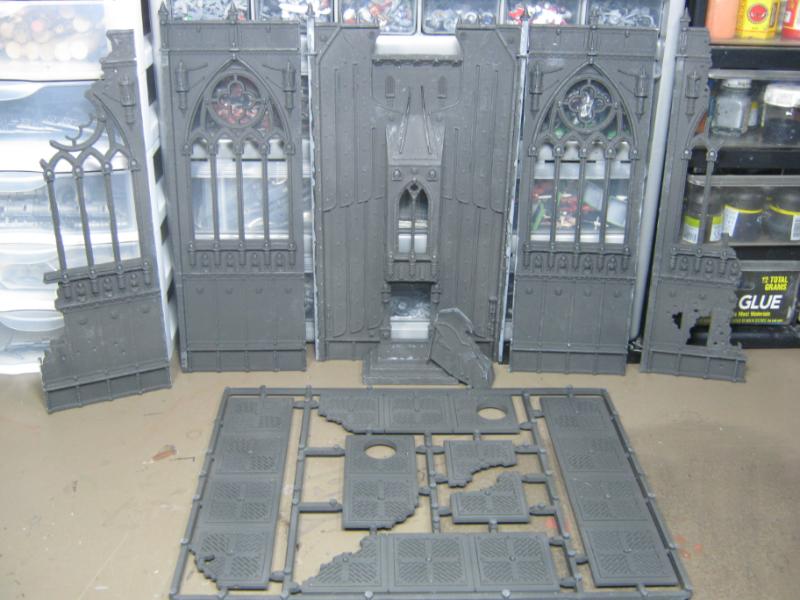
Manufactorum bitz:

rooftop / walkway bitz:
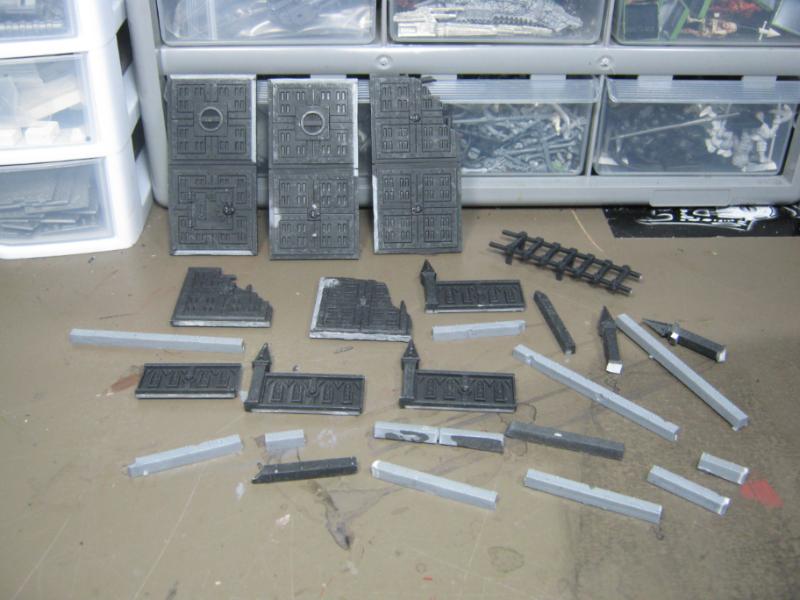
Random vehicle bitz:
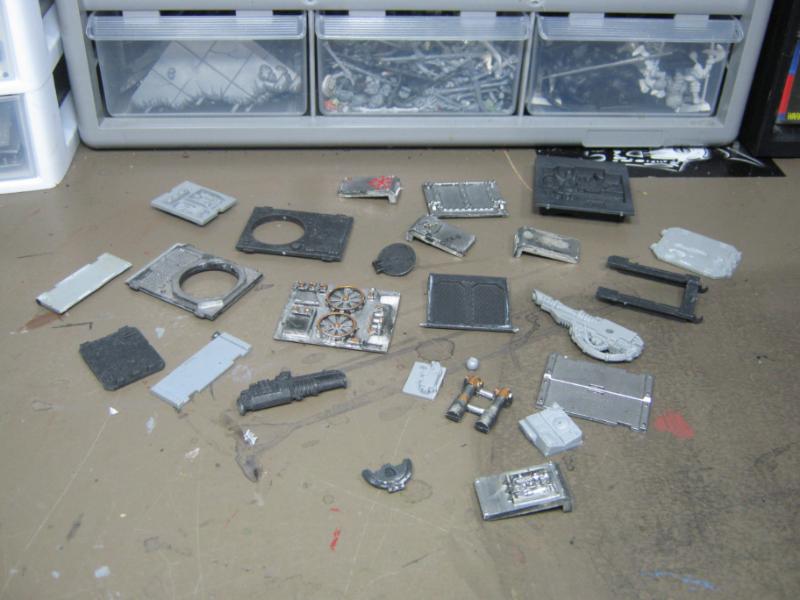
That was all in the same box. Plus on the same day this showed up:

All together, this is what I picked up:
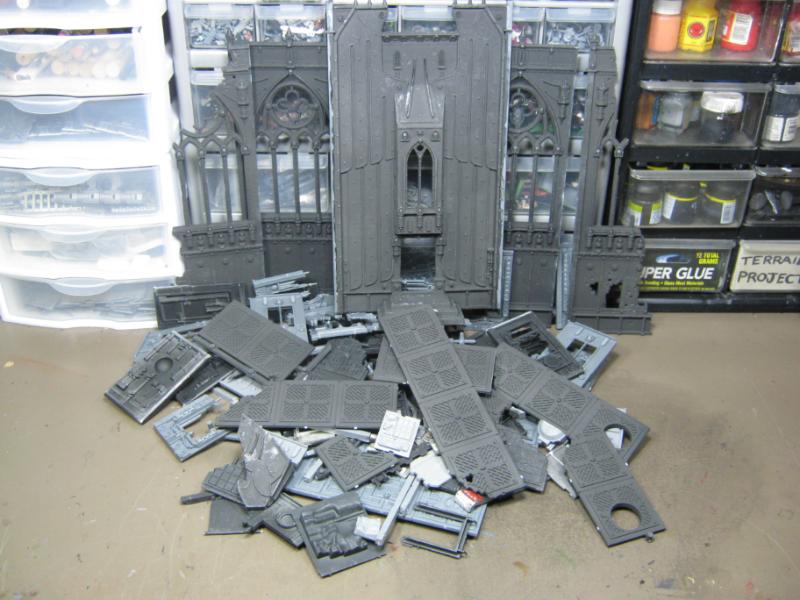
I thought about just gluing it all together and calling it done, but I decided to do something a bit more creative with it.
I've got some more work done but need a full day to sort through pics and upload a post that makes a bit of sense. I'm buried in pictures and notes to sort out.
Last night I could have modeled but did a desk reorg instead. I went through old paint pots, brushes, glue tubes, blades, etc. I threw out a lot of stuff and created a decent amount of space... FOR NEW STUFF! Naw, just kidding. Ok, sort of not. I found a Bastion at my FLGS for $30 instead of the $40+ it's selling for nowadays, so I bought it. Not going to be opened up soon, but I will get to it and will be happy for the $$$ I saved when I do.
I have 1/2 day off on Monday. I was at a 'use it or lose it' w/ my time off so I'm burning up 6.5 hrs and will hopefully get some modeling done.
Thanks for looking, I'll be back!
24297
Post by: Viktor von Domm
color me envious with that suply drop...!
and:
I thought about just gluing it all together and calling it done, but I decided to do something a bit more creative with it.
lol.... yeah glue it... prime it and then just drybrush it^^...
48594
Post by: dsteingass
H
E
R
E
S
Y
!!!
Nice drop there Skalk! GW terrain kits are best bought like that then stashed away for a later project. What makes you think that just because you have it that it needs assembled right away? I say save them until you have multiples. Bastion bitz are some of the most useful bitz GW makes, they are compatible with ALL of the other CoD panels in your wonderful pile there.
24297
Post by: Viktor von Domm
26139
Post by: Skalk Bloodaxe
@ Vik- sometimes I feel like that's what I'm doing anyway.
@ Dave- Everythng I have is marked for a project. I have no idea what that project is or when I'll get to it, but it's all going to be used for... uhm... something. Eventually. Probably. And no, my new toy has not arrived yet. Here's the latest update:
Date Time Location Status
December 7, 2012 18:16:00 CHICAGO, IL 60647 DISPATCHED TO SORT FACILITY
*twitch*
I had 1/2 a day off yesterday and decided to take a break from the Imperial Sector stuff I've been working with, have hit a bit of a snag w/ staying focused so I worked on an old piece I've had for a few years.
This is what was showing up on my table. The platform is from a MircoMachines set I picked up in the 'free' pile at a yard sale. The base is a small piece of plywood.
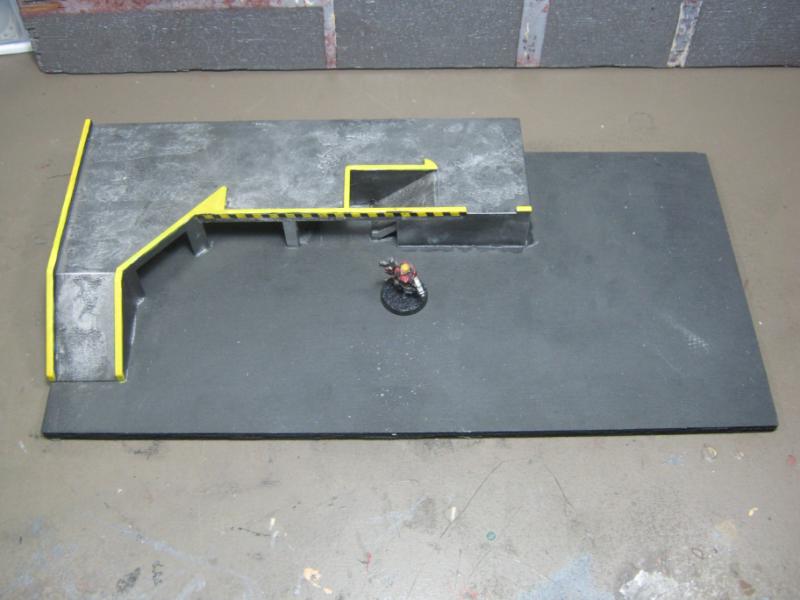
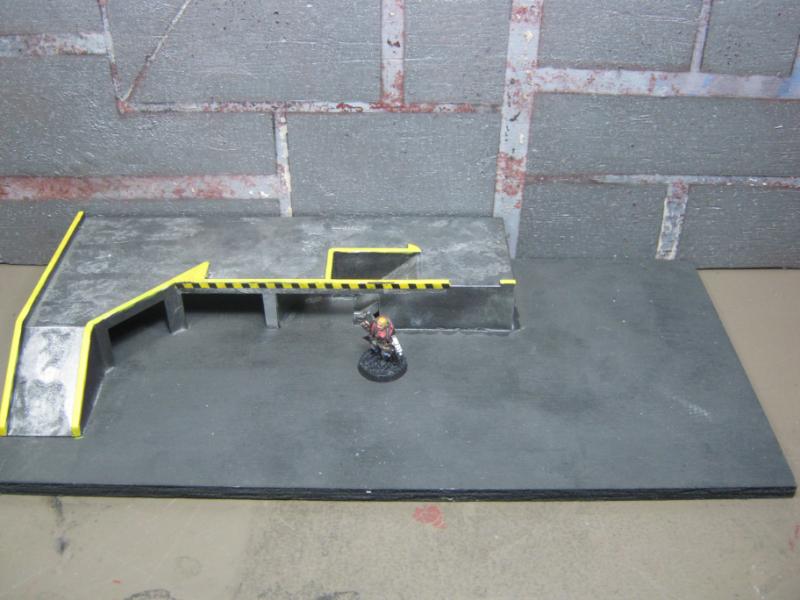
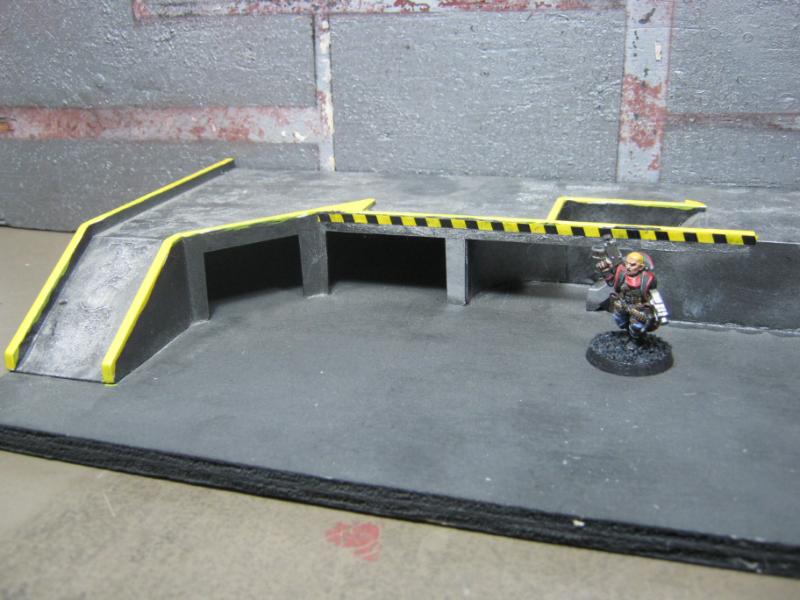
Functional and sort of cool, but bland. I would put a few things on it like crates or barrels to liven it up a bit, but overall it was still pretty basic. Time for a renovation. First step was to cover the plywood. I used this style of plasticard because it was the only stuff I had enough to cover the entire base.

Fast forward a bit, didn't want to bore people to death with the minutia of adding little bits here and there. Here's the final build completed. The tank is from an HO scale train (and was frequently used on this piece so it was a slam dunk to make it permanent), the other bits are random Pegasus Hobbies sets. There's also a WFB shield and a Leman Russ track roller in there.
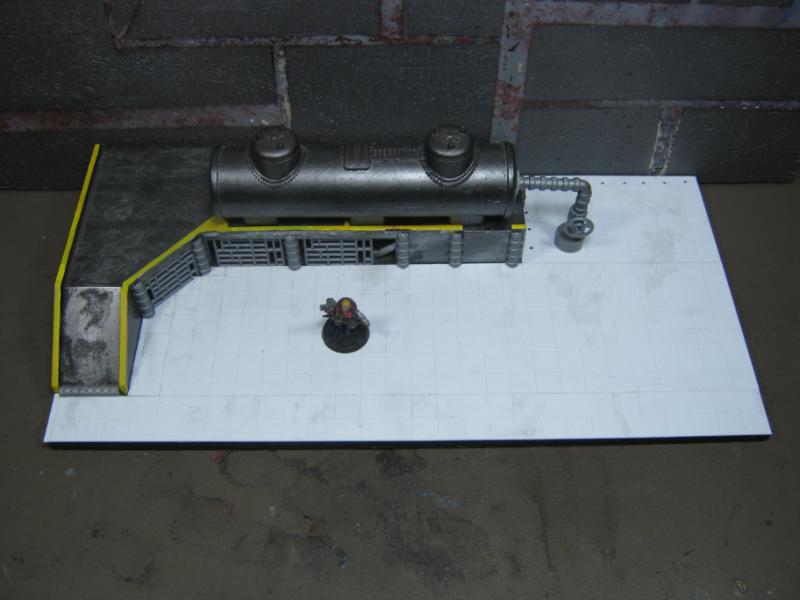
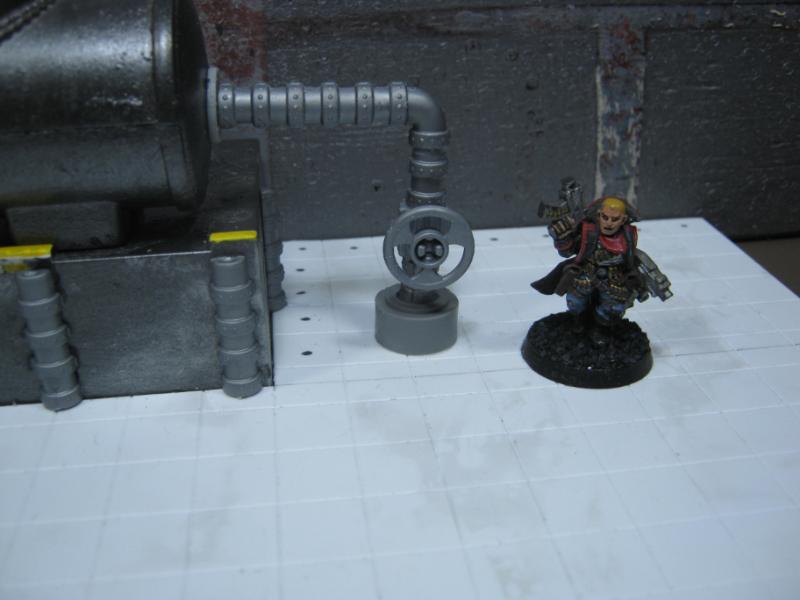
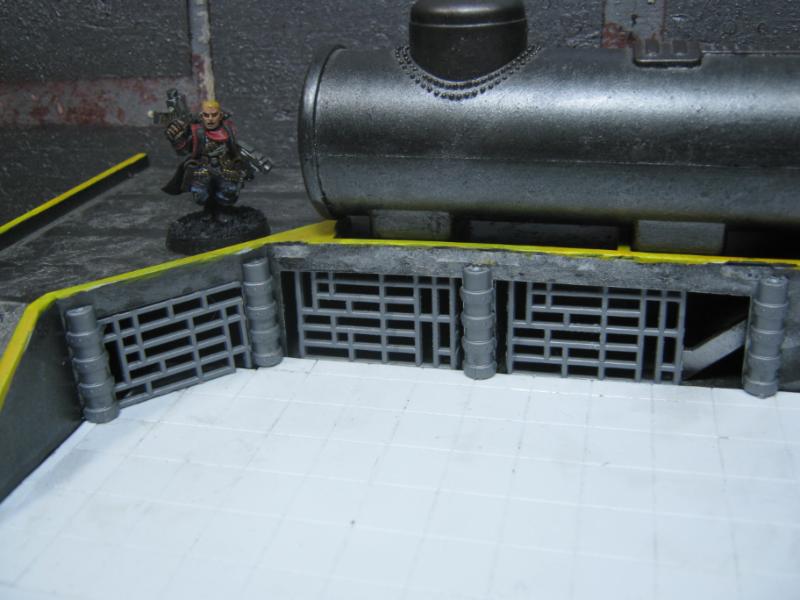
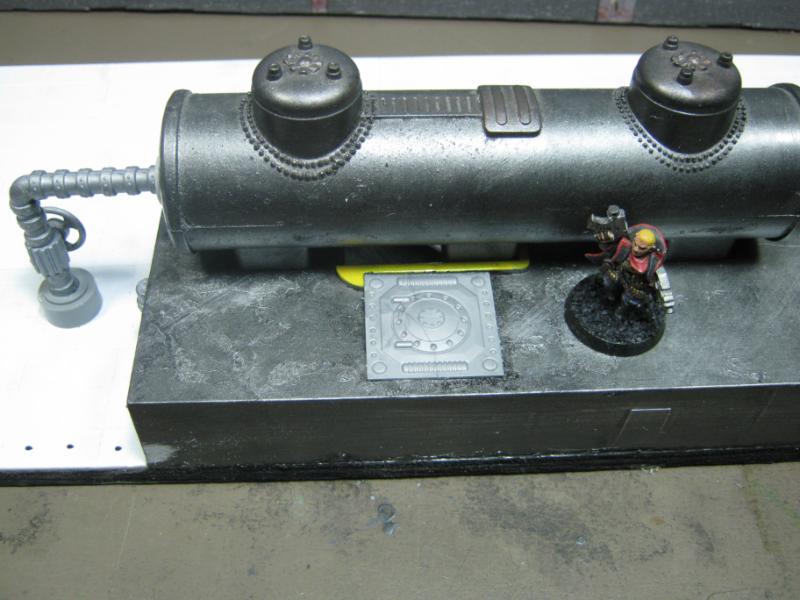
Fast forward again. This is where the project is at, I took these pics about 20 min ago. Please understand that the glare from my lamps is making this REALLY shiny, IRL it looks much better. Not sure how to dim the glare. Any suggestions?
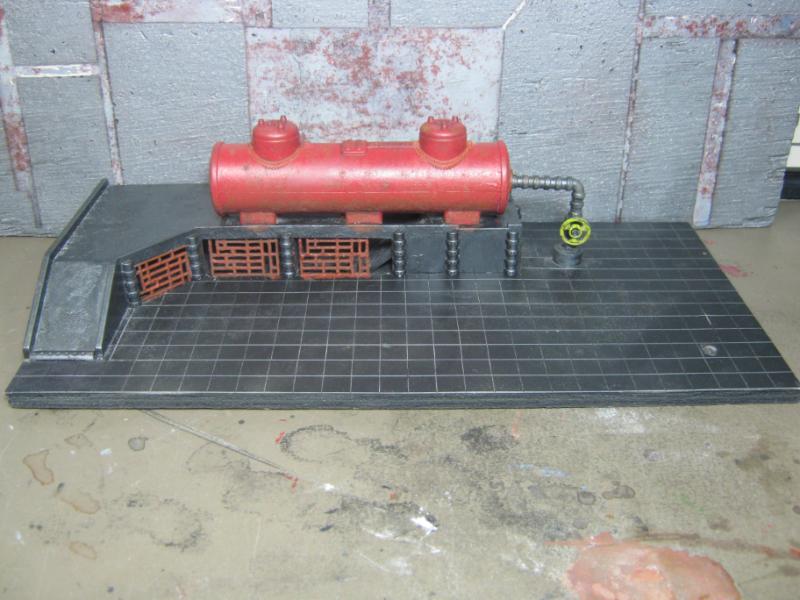
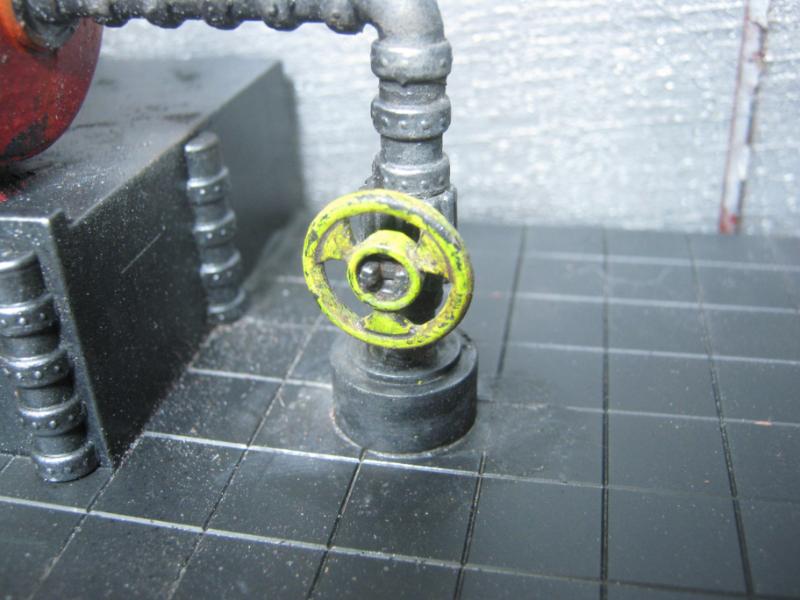
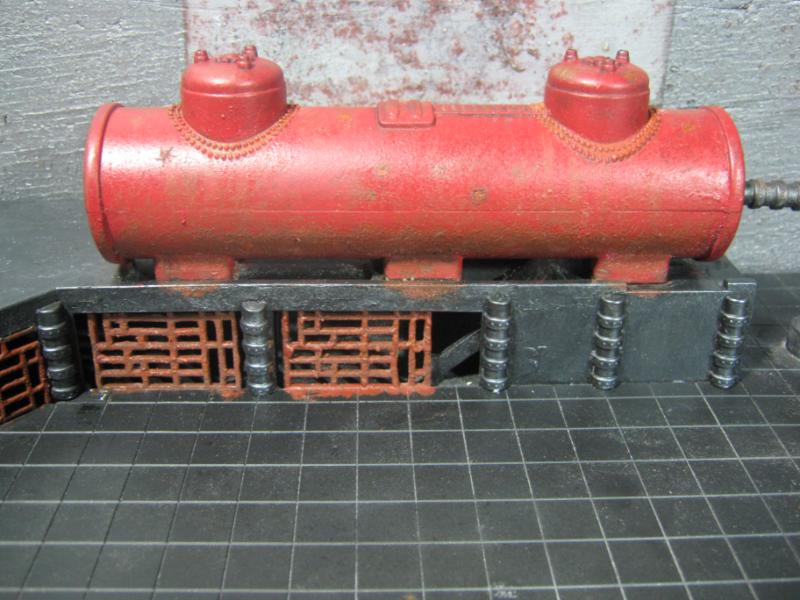

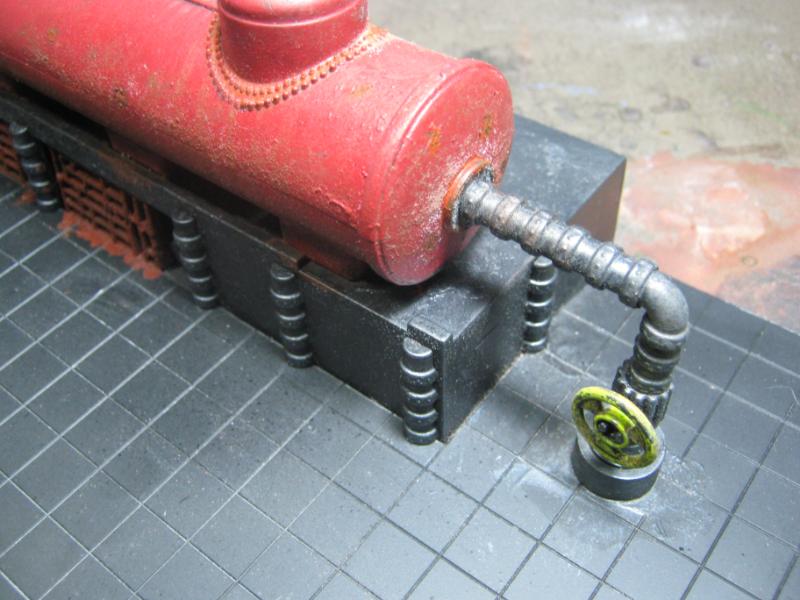
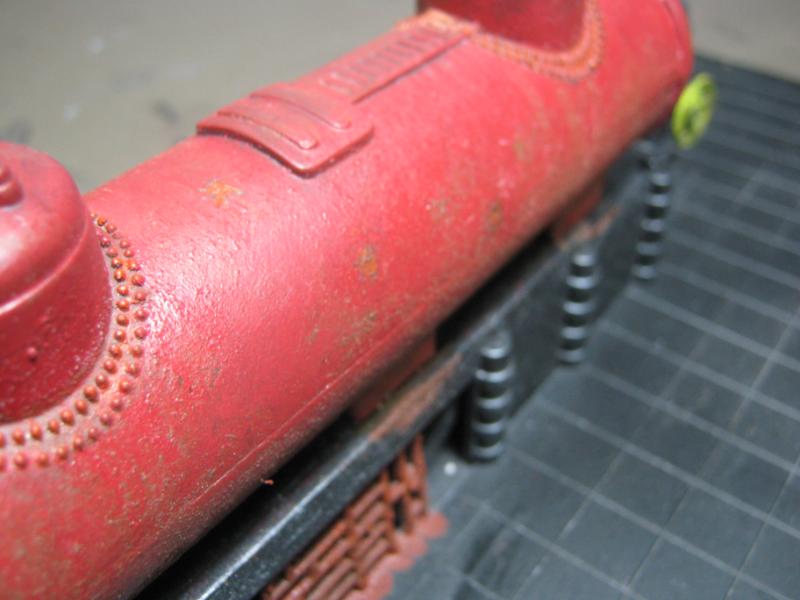
I really like how the valve wheel came out, and the rust on the grates is decent. The small pitted rust spots on the tank are coming along as well. I have NO idea what to do w/ the base or the platform. I don't want to slobber rust all over it, but I don't want it looking too clean either. Suggestions?
Work and home are still beating me down. I'm not on Dakka anywhere near what I would like to be. A lot of you have great projects that I'm totally missing out on, and when I do have some unexpected free time I'm modeling instead of posting. I will catch up as soon as I can. Until then, know that I'm thinking of you guys and I miss being part of the fun. Really looking forward to getting back here and catching up.
Thanks for looking, C&C directly requested as I'm running low on ideas on what to do w/ the platform and the base. I'll check out comments at work during break and I'll be back as soon as I can.
18867
Post by: madmartykmf
Your work is just getting better and better buddy!
Did you use movement trays for the flooring?
My only critique is more weathering on the tank. It needs a accent color or something like aggressive weathering to break up the giant red tank. maybe even hazard stripes.
Keep up the great work!
48594
Post by: dsteingass
Looking awesome! HO scale stuff like that works well because it doesn't have any scalebuster details. Rivets are universal. I'd crack or damage a few of the tiles, make them look like industrial or concrete tile with some variety then at least hit the recessed parts with a wash or two.
53783
Post by: MauS
Garbage all over i say... and matrasses and sofas
26139
Post by: Skalk Bloodaxe
@ Marty- Thanks for the compliment! I'm really trying to step up, and I'm glad it is starting to show. As for the tank, I agree that overall it needs a bit more obvious corrosion, and I'm going to do hazard stripes that cover the seams of the tank, like this:

@ Dave- I really try to avoid things that ruin scale perspective. The floor might have to come up in the areas where vehicles pulled in for refuel and I'll rout is out just slightly and use a hair dryer to mold the plastic into the ruts. I would really have preferred asphalt, and of course now that I am thinking about it if I had used a single sheet of blank plasticard I could have replicated that surface, with the obvious repave and fill-ins. It also just occurred to me that I need to have caps for the underground tanks, each a different color, discoloring on the pavement to show fuel spills, maybe traffic markings to show where to pull up, where to not drive, etc. Hmm. (thinking about how to make that happen... looks like I'll be tearing up some stuff)
@ MauS- I'll leave the garbage, mattresses, and sofas to this guy. But you have given me an idea. Debris like crumpled papers, etc in the edges of the platform... a Nuka Cola machine for refreshment while the vehicle crews are taking 5 during the refuel, the bottles RSJake gave me... that would really bring the detail and scale to life. Thanks for the idea! Now I have to go buy a Nuka Cola machine.
Thanks guys, really appreciate the feedback! It's given me some genuine inspiration.
30344
Post by: monkeytroll
Looking sweet there Skalk!
I feel your pain at being off dakka atm, similar situation here and I know I'm missing loads. I'd leave some feedback, but tbh I'm not in a fit state to be in charge of a laptop atm, so really shouldn't be trying to critique anything
Incidentally, where was the valve wheel from - is that from the chemical factory set?
22619
Post by: inmygravenimage
Skalk, loving your work as always. You inspired me to get off my backside and finish my Sanctum Sororitas, pics up in my blog. Thanks for pushing the terrain love!
39973
Post by: Galorn
Hmmm next time I'm at work I'll try to send you pics of the industrial tile (damaged) in front of where I work.
8745
Post by: Llamahead
Really liking the micro machine loading dock simple effective and unusual. Talking about the unique table you showed further down I still remember with fondness the Daemon World of coffee cups me and a mate played over when it was raining between us and the society terrain locker.
26139
Post by: Skalk Bloodaxe
@ monkeytroll- It's getting better. Work has been downgraded from "overwhelming" to "barely manageable". Looking forward to "almost normal" but at least I'm getting back to posting on other threads again. As for critique, this thrad will still be here once you're in a better state of mind to be operating your laptop
@ graven- I checked out your Sanctum Sororitas and my only critique is there wasn't a dead Space Nun. Other than that it's absolutely brilliant and if you'd be awesome enough to share your color technique I'm going replicate is once I start working on my Pegasus Gothic buildings.
@ Galorn- That would be very cool of you, thank you. As it is I have to stick w/ the tiles as I cannot remove them w/o destroying the entire sheet, apparently I glued it quite well.
@ Llamahead- Thanks for stopping by! It's always good to see you on Dakka. When I saw the loading dock in that free pile I instantly knew what I wanted to do with it, an unusual experience for sure. Usually I see something, say "wow, that could be something cool" and then it sits in my bin for 3 years.
The crown jewel of this post is likely going to overwhelm anything else I share, so it's coming last. I'll share the models first so you at least get to see them. Ha. I worked a bit on the Refuel Depot (that's what I've decided it is) and specifically put some wear on the tank. Remeber it's still a WIP and I know the hazard strip is too wide and messed up in a 'poor application' sort of way. It will be relaced. The underlying rust is going to be highlighted with a more orange around the edges and will also have some subtle colors (darker / lighter) in the larger patches. C&C welcome as always. Open to better ideas than what I'm doing at the moment.
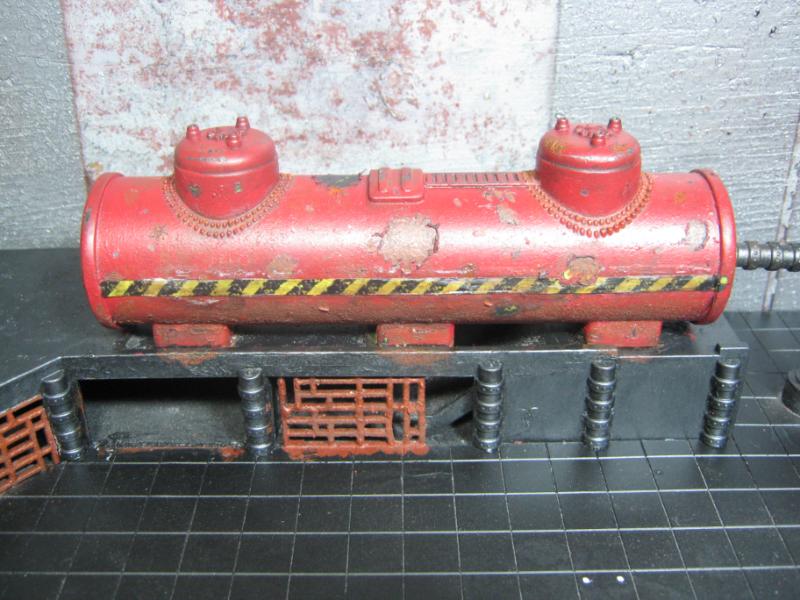
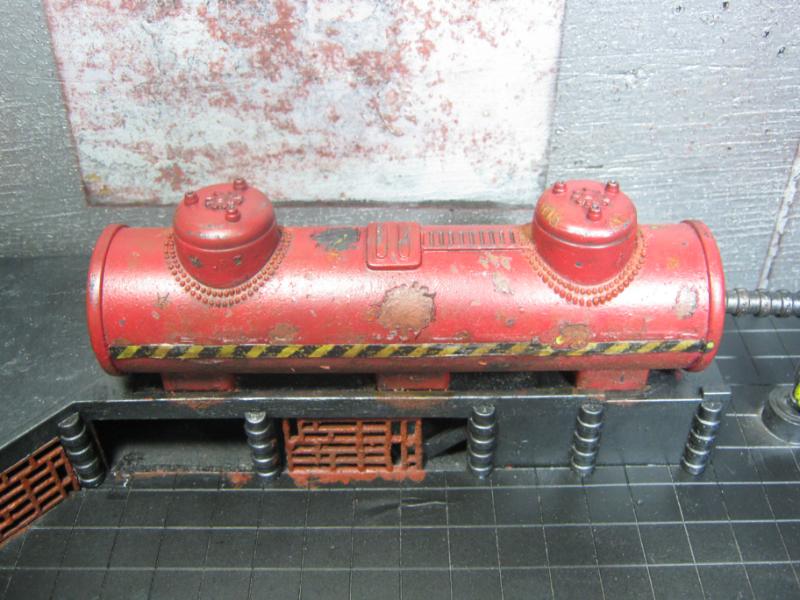
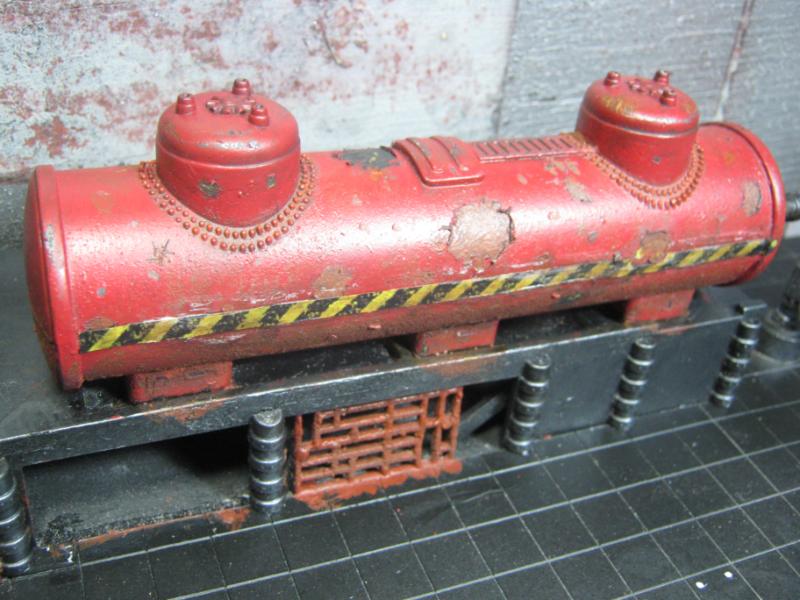
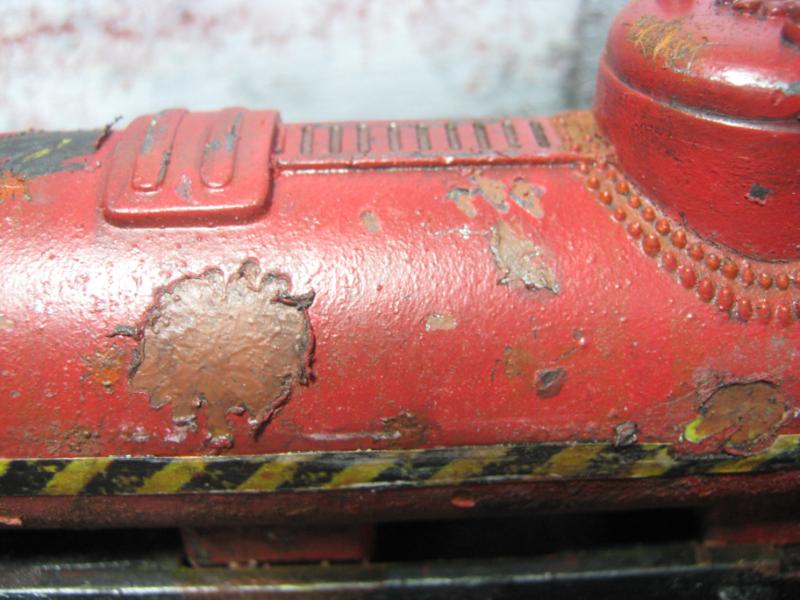
I also made a trash can out of a fuel barrel. The bottles are from RSJake and are not glued in yet, they are just representational of what the final product will be. The inside debris will be painted. The can is going to get another 'once over' w/ coloring, will likely paint it yellow or a different shade of red. I really like the rust effect, it was actually a tester for the rust I was dabbing on the fuel tank. I added a tiny bit of GS to make an oily rag and there may be more GS on the bottom to show stuff that fell out. I may also cut a gap in the bottom w/ a Dremel tool (from the inside) to make the can look like it is rotting out. The cat hair was contributed by my cat Daemon (yes, that really is his name).
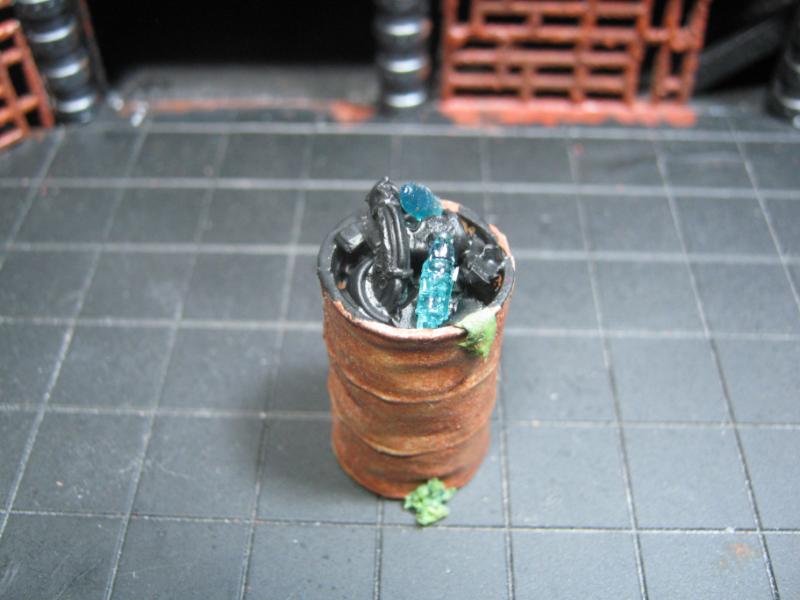
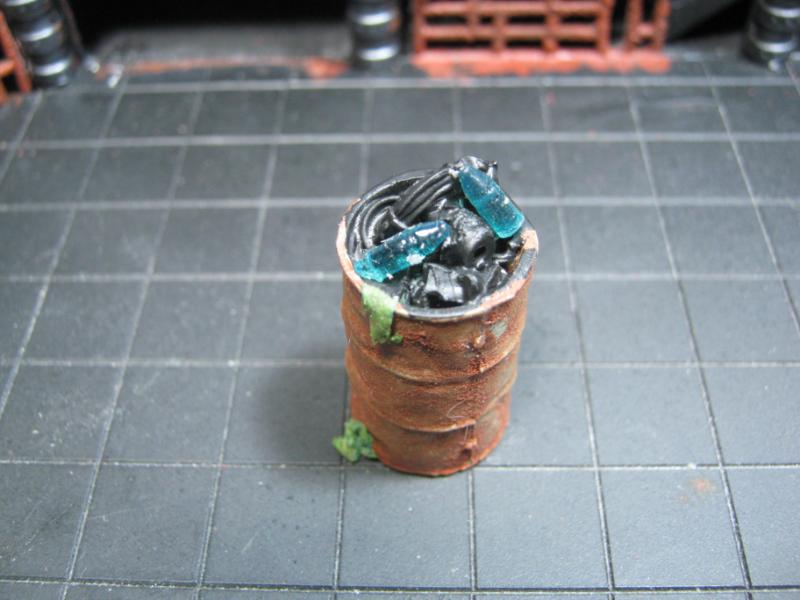
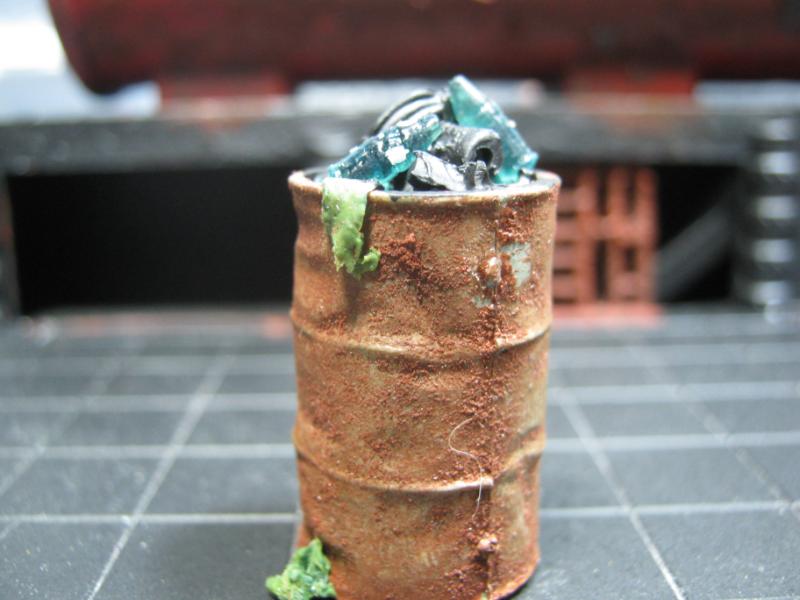
So that's the modeling part. The next is me finally able to share a 'secret' that only Dave knew about. I bought it based on his recommendation, and I am very much looking forward to learning how to use this. I have been working a ridiculous amount of OT at my job so I don't feel even one tiny little bit guilty about the expense. I have finally done somehting I've been talking about for over 2 years. I consider it a present from myself to myself because I am just that awesome.
Gentlemen, I proudly present the tool that will catapult me to the next level of modeling:
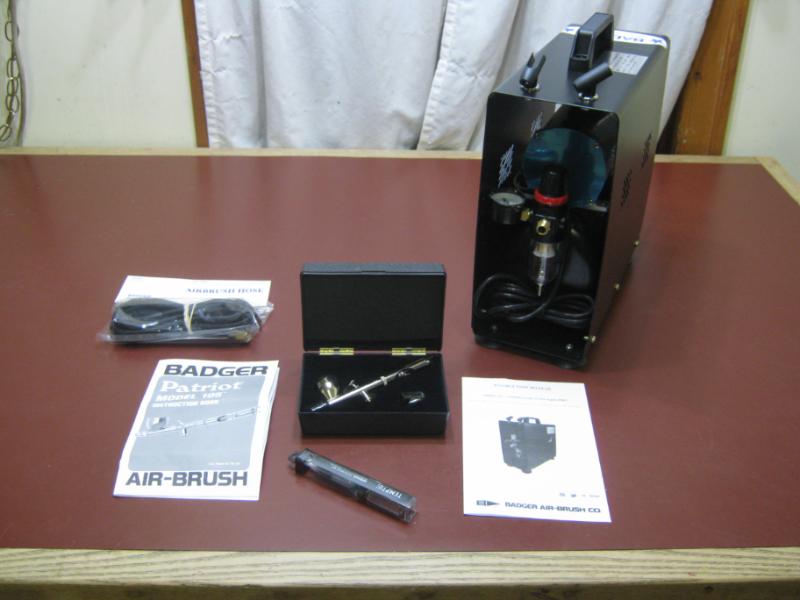
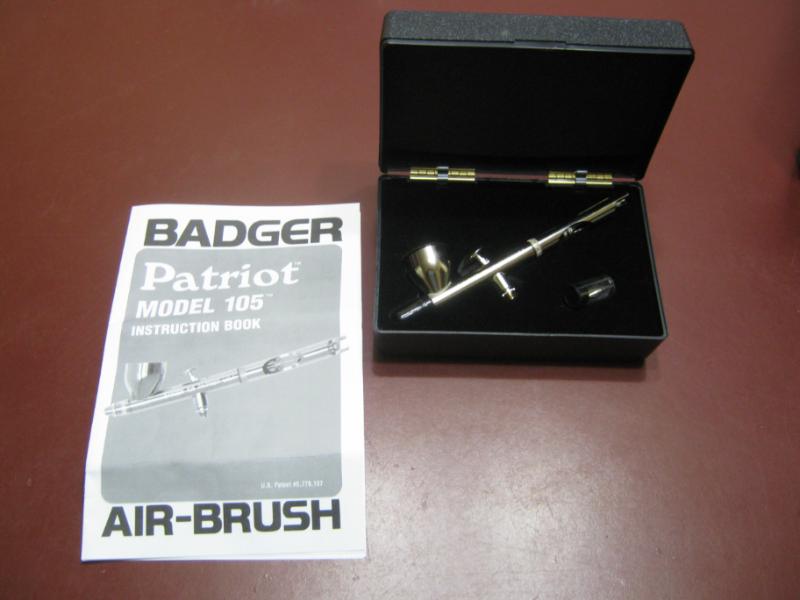
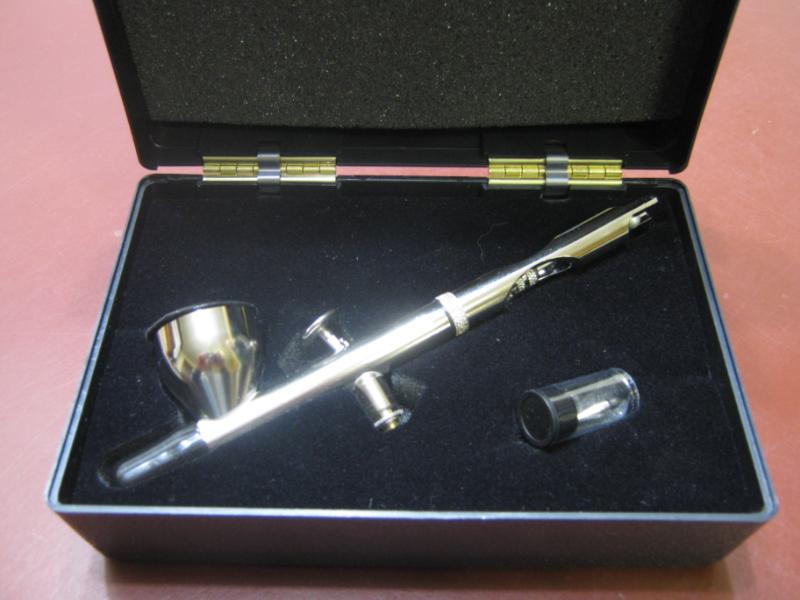

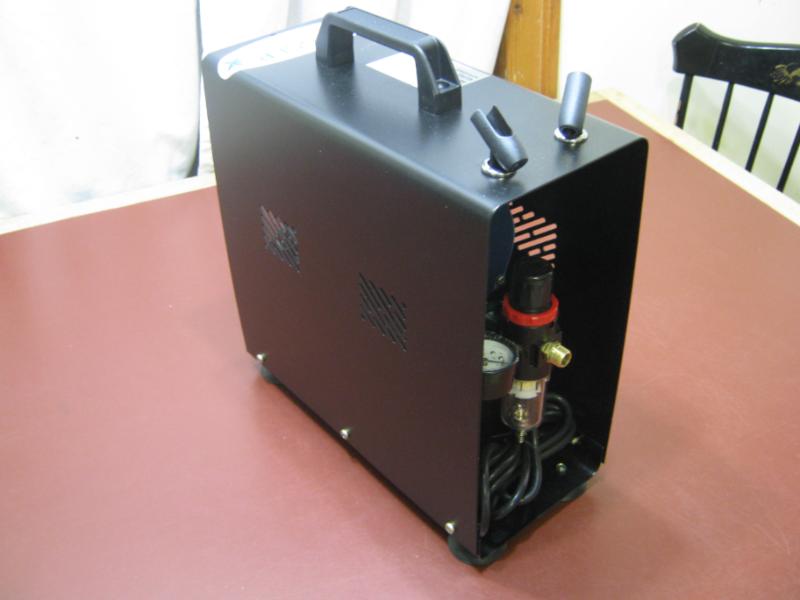
The compressor is a Badger TC910 ASPIRE PRO, the airbrush is a Badger PATRIOT 105 (in case you didn't see the name on the manual, ha), the hose is Badger 10' Heavy-Duty Braided Air Hose, and the cleaning kit is from Temptu.
Hopefully I'll avoid some of the airbrush n00b frustrations because I invested into a high-end product. All I need now is time to practice practice practice. I'll share my failures along the way so there's a history of my improvement as I become more familiar and skilled.
HUGE thanks to Dave for his recommendation, advice, and support. He truly exemplifies the spirit of community I enjoy on Dakka. LoER forever!
As always, thanks for taking the time to check this out and I appreciate the interest. C&C always welcomed. The experience you share helps me (and anyone that reads this blog) become a better modeler.
Today is a good day.
26790
Post by: Gitsplitta
I like the carrier for the compressor. Reminds me that I need to figure out how to get my compressor hooked up to a proper tank.
48594
Post by: dsteingass
Now that's an awesome update!! I can't wait to see your first painted project!
Automatically Appended Next Post:
Let me know how noisy/quiet that compressor is too!
30344
Post by: monkeytroll
Ooh, shiny!!
That compressor looks very cool, with the handle and the brush holders, all the best with getting to grips with the new toy, and looking forward to seeing your progress with it.
Love the peeling paint on the tank, nice work indeed, and the trash can looks very cool too - it's the gs rag and the gunk at the bottom which bring it to life - 'rotting out' the bottom is a great idea
Keep it coming man!
33919
Post by: Moltar
Great update, Skalk!
That trash can looks great. I like the rust effect and Dave's bottles will really set it off, once it is complete. The refueling depot is coming along nicely. I see what you mean about the hazard stripes, so I'll hold off on commenting about that, but I really like the red color of the tank, itself. I think the rust and chipped paint is looking good.
Big ups on getting an airbrush! Very excited to see what you start cranking out, now that you have the versatility of an airbrush to aid in your modelling. Congrats!
44814
Post by: alabamaheretic
That's a sweet kit you have on that airbrush looks very solid skalk!
on your modeling stuff really like the cans and the rust on the tanker is spot on. the cat hair is kind of a nice touch to like something is growing outta the can of stuff. just a thought if you decide to shave your cat for more hair
37519
Post by: bigfish
Nice rust. I like the way youve made the paint peel, works well
39973
Post by: Galorn
NO problem. I'd love to get in another game with ya, but I'm not sure when my time will free up...
30785
Post by: Styrofoam04
Excellent stuff, your terrain skills are amazing and now with the new badger its going to quadruple!
26139
Post by: Skalk Bloodaxe
@ Gits- I really like the case / carrier as well, because it is heavy. Gave me a surprise when I picked the box up at the PO.
@ Dave- I'll let you know how it sounds as soon as I set it up. Yes, I know... but read on, you'll see why not.
@ monkeytroll- Thanks for the compliments on the tank. I hope you like the finished product. The trash can didn't get the 'rotted out bottom' effect since I couldn't get the stuffing I out into it earlier. Kind of an 'after the fact' idea that I'll try on something else soon, Very soon. And I'm really looking to practicing w/ the airbrush.
@ Moltar- The trashwork on the fuel tank is a culmination of everything I've learned to date. See below for more awesomeness. And yes, the airbrush is going to change everything. Next level, here I come!
@ bama- Thanks for the compliments! As for the cat hair, no need to shave. He spontaneously donates every time he comes to visit me. So thoughtful. If you go through any of my threads you'll see plenty examples of this.
@ bigfish- The peeling paint was a different technique for me and it worked quite well, I'll be doing it more as new projects come to the fore.
@ Galorn- Whenever you guys can come up. It'll be a long winter and I'm not going anywhere.
@ Styrofoam- Thanks for the compliment! I'm really excited about the Badger and I'm looking forward to finally getting it going!
Ok, so in case you hadn't figured it out yet, I did NOT fire up the airbrush rig this weekend, but for good reason as you'll see below. I really wanted to finish my Fuel Depot piece and knew I wouldn't if I started in on the airbrush, so I left it alone and instead spent my modeling time finish up what I feel is my best piece to date.
Before I get started, PLEASE understand that it is NO WAY near as shiny IRL as it is in these pics. Very soon I am going to build a light box so I have more control over my pictures. I'll still use my 'dynamic background' setup for small pieces and miniatures, but the larger stuff I'm making / taking pics of deserve better exposure to show the true work and detail I've put into them.
That said, here's my finished piece. Yes, i know the base could have taken more detail and the platform is a bit bland. I think it's ok and it'll work overall. The base is a nice open space for other things to go on (barrels, crates, etc) and the fuel tank would overwhelm the minor detail I'd have put on the platform. My opinions. I am still open to discussion / recommendations. All I have to do is add stuff, I don't have to undo anything.
First pic is of a brilliant idea I had for something completely different. I had been thinking about rivets again on another piece I want to get started somewhere in Jan / Feb that is HEAVILY inspired by inmygravenimage's Sanctum Sororitas but again I found myself not looking forward to it because my rivets still seem a bit wonky so I found an AWESOME substitute in the form of Beading Closures from my FLCS (Friendly Local Craft Store). Rather clever of me I thought at the time, but I had no idea just how clever it would turn out to be..
As I was working on the final touches of the Fuel Depot I realized I needed something on the back of the platform, it was just too underwhelming. I was putting a lot of responsibility on the tank to be the focus point and knew someone would call me on it so I started to reach for my Pegasus Hobbies bitz tray (my recent 'go to' for all things filler and detail) and while I was reaching saw the remaining piece of chain I used on my LoER contest piece hanging from my lamp. It didn't take long to figure out what to do next.
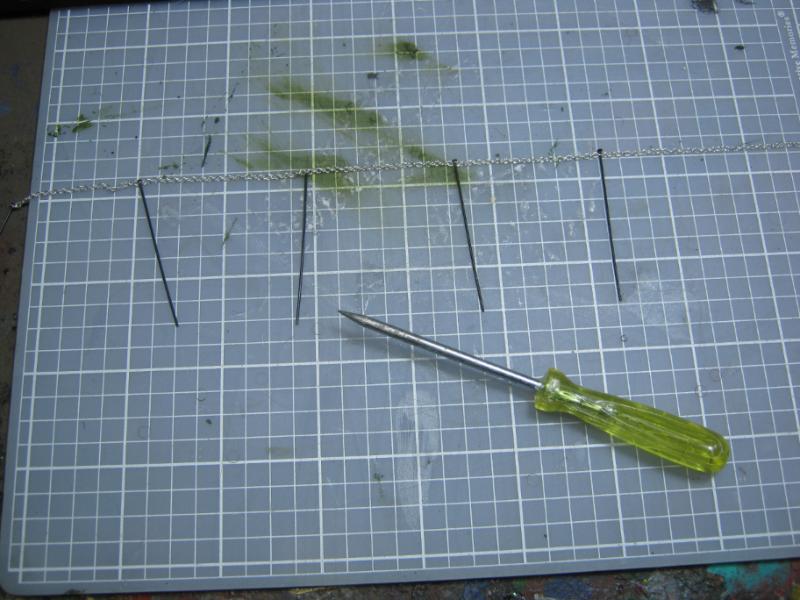
I had to work the openings on each link where I was going to use a Bead Closure. Other than that it was a quick and easy process. Expect to see this again.
Ok, blah blah blah etc... on to the pics!

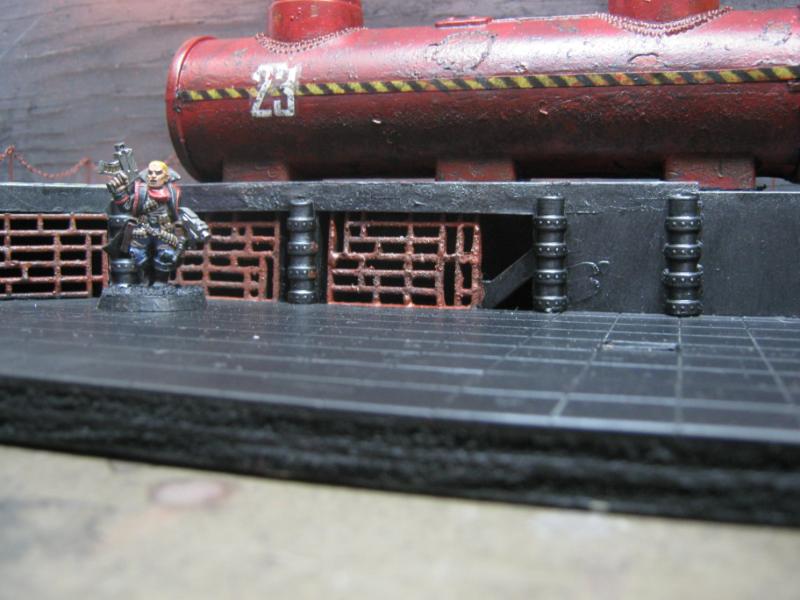
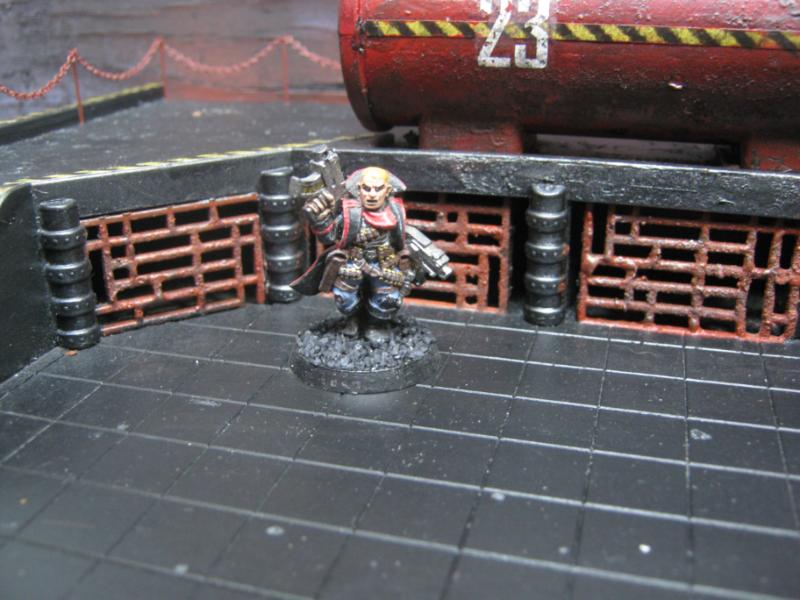
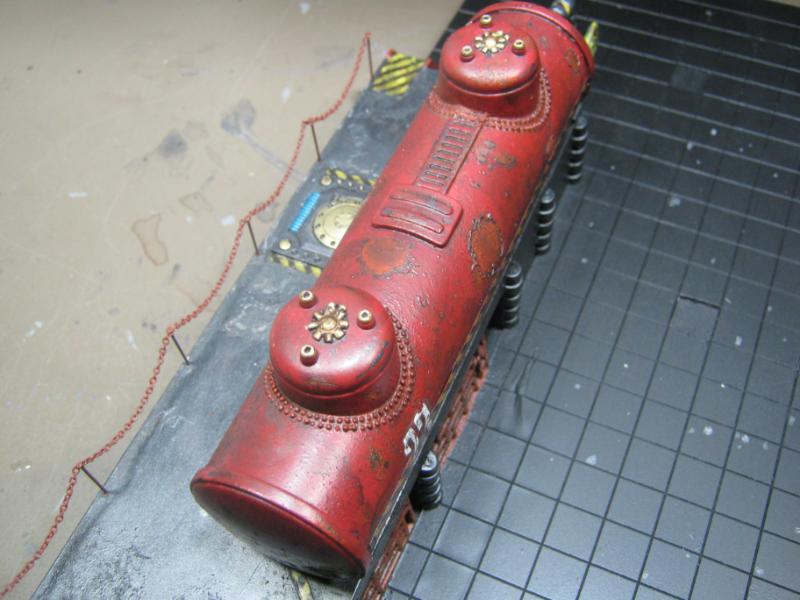
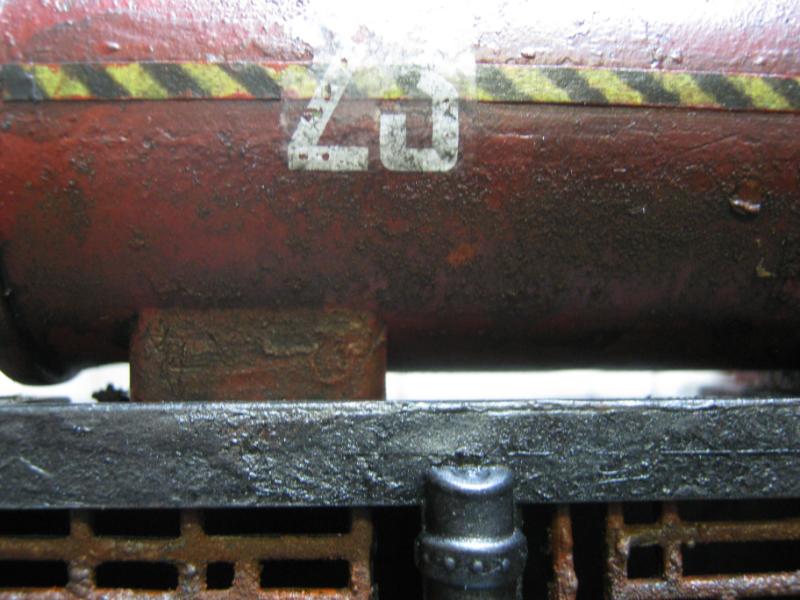
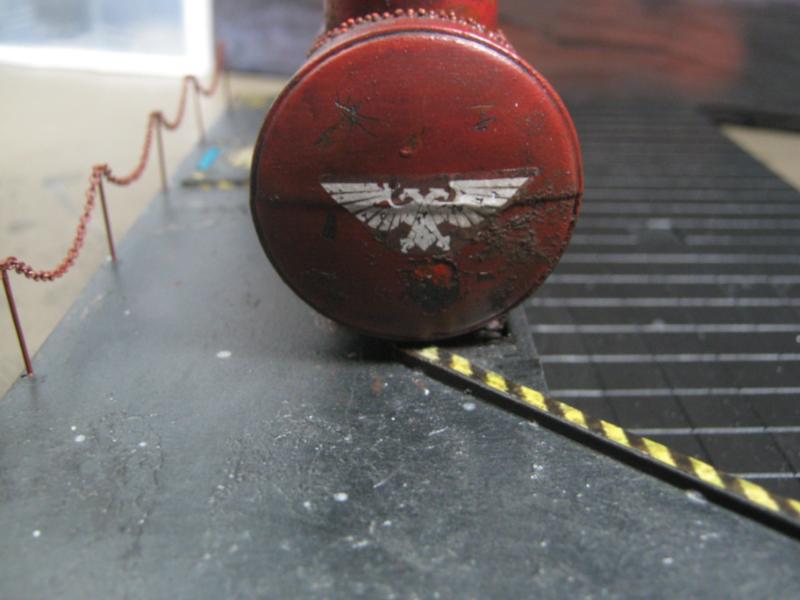

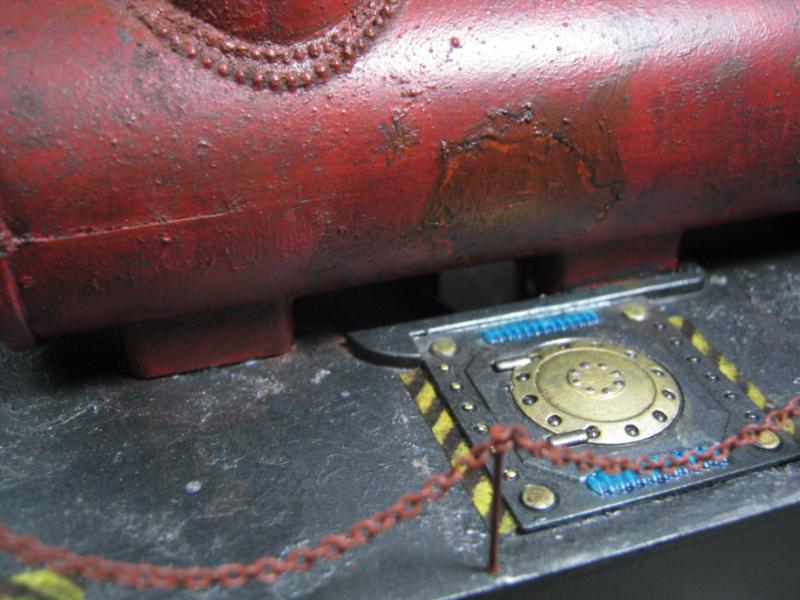
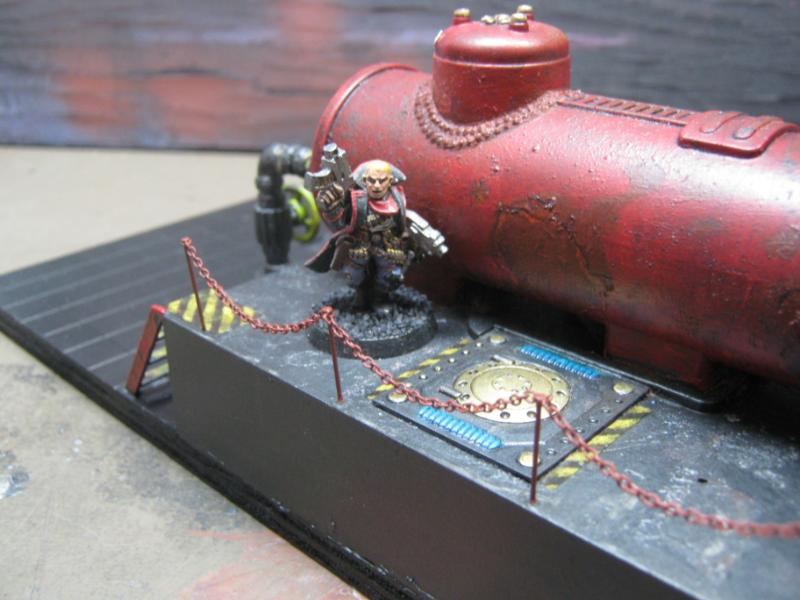
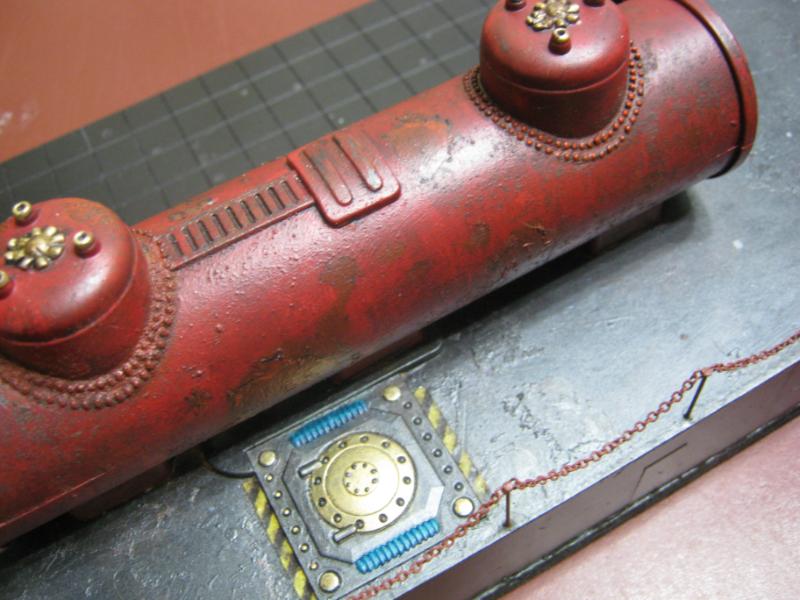
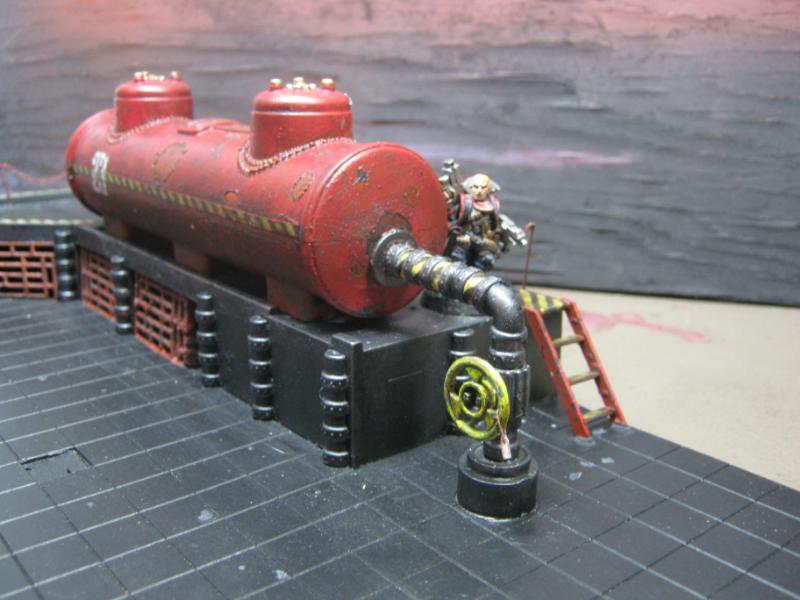
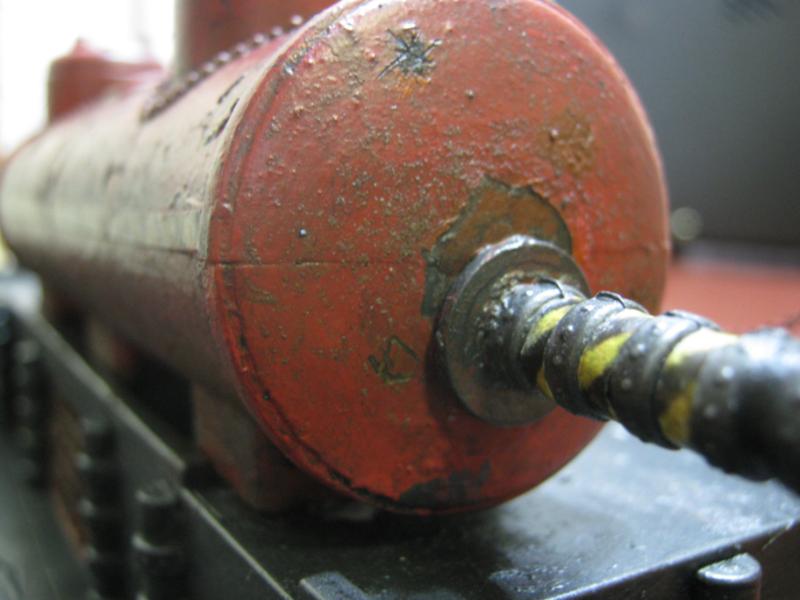
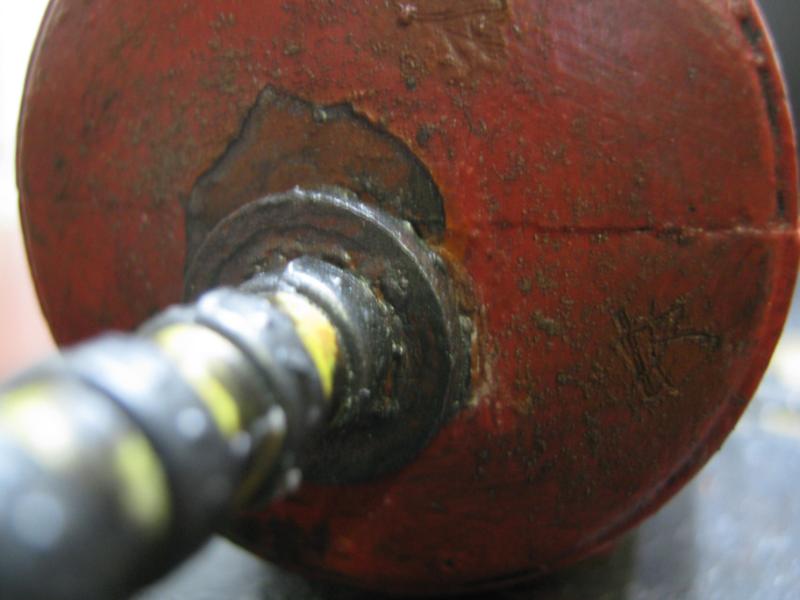
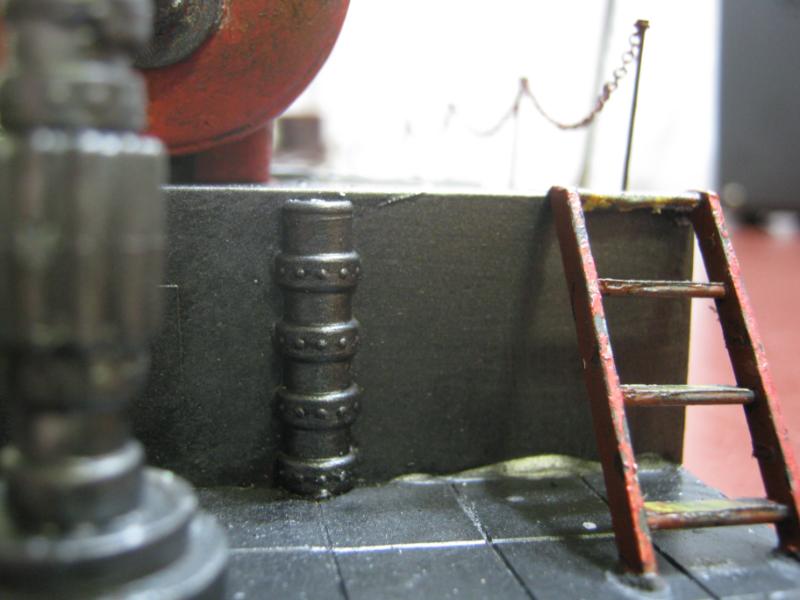
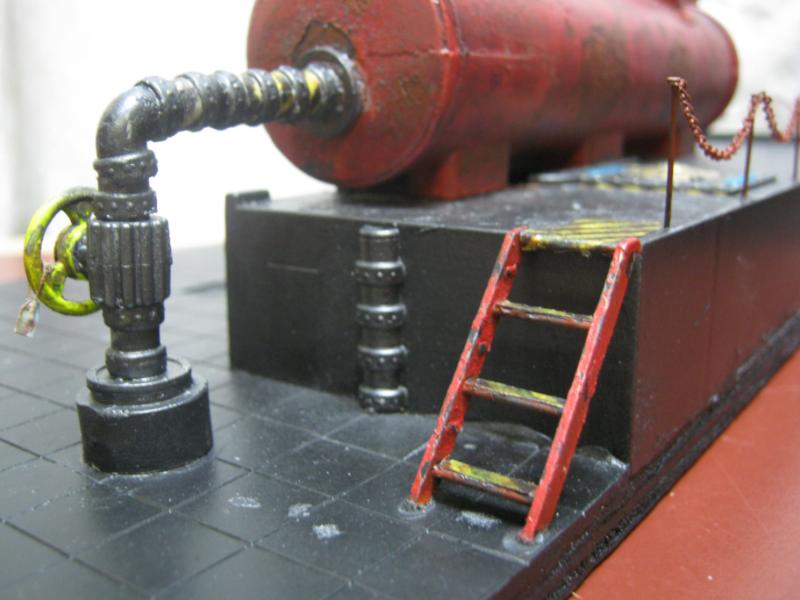
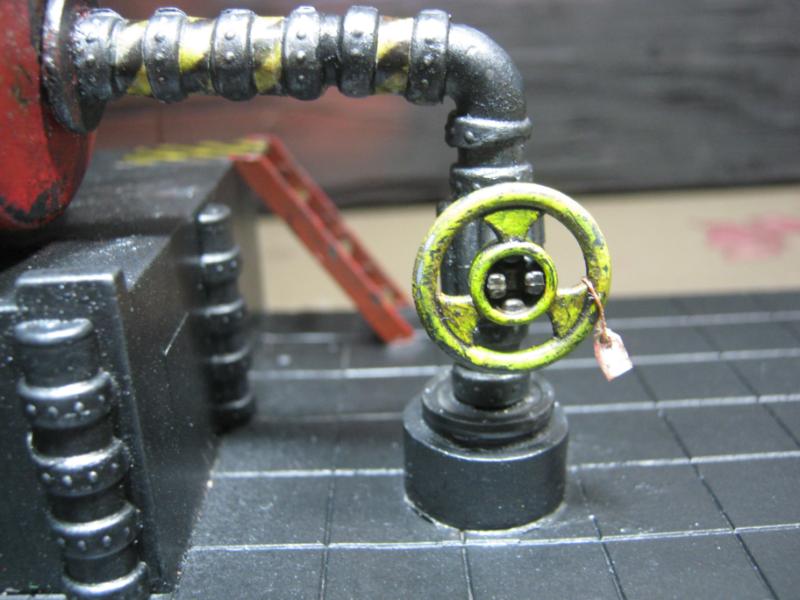
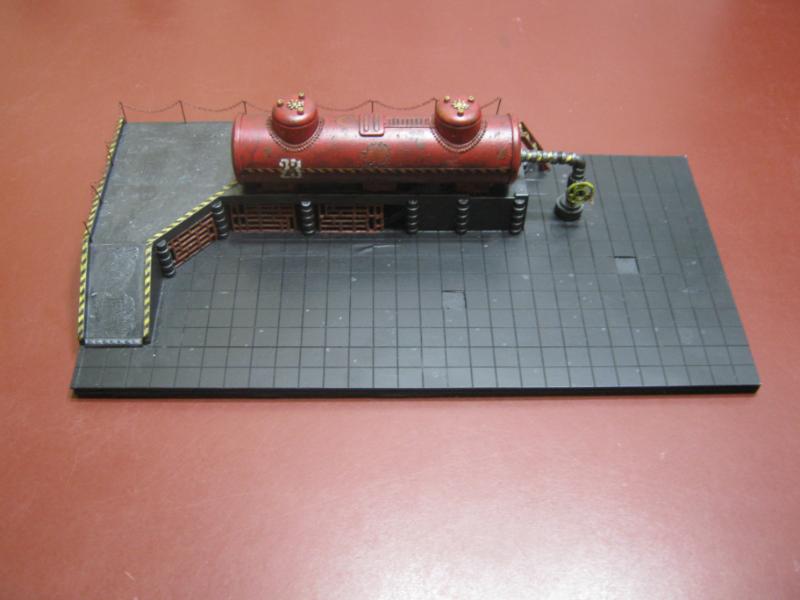
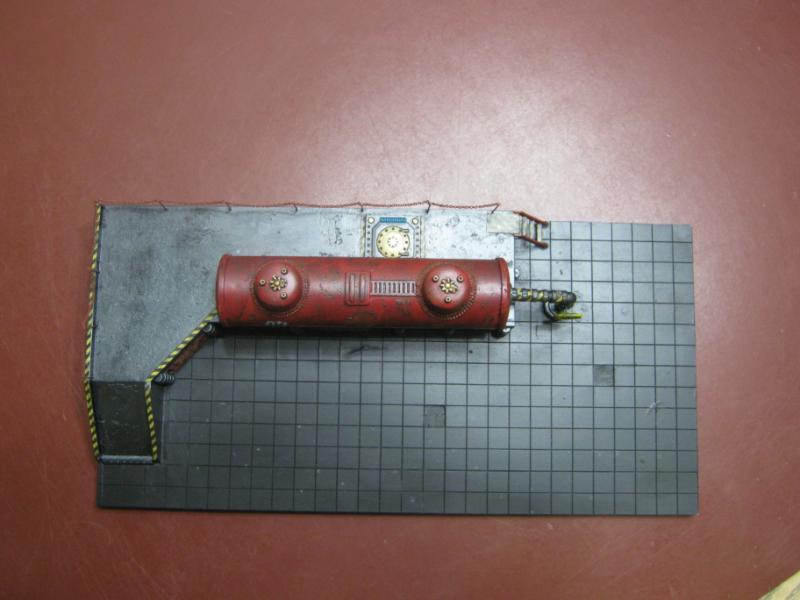
... and saved the best for last. I'm getting better.
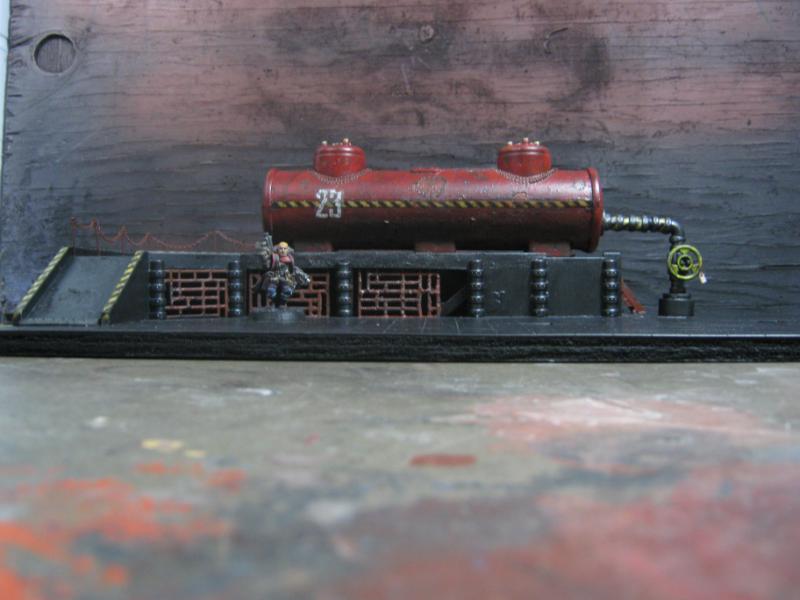
Now of course as I was posting this I saw GLARING oversights and avoidable mistakes. Aquila on end of tank is just slightly askew. I could have blended the edges of the decals better. I should have made little rusty drips / runs from my chain railing. I didn't use any of Dave's weathering powders on anything. Again. I really should have done / do something more w/ the base. I completely over-rusted the grates. I should have pushed myself for even a bit of OSL on the hatch lights. So many things I did wrong or could have done better. For all my advancement and learned skill, I'm still making mistakes and slacking off toward the end of every project.
BUT... all that said, I'm very happy with this piece and it finally has a place on my table as part of the story instead of just being a thing that breaks LOS. I put a lot of work into that piece and I'm as proud of the accomplishment as anything else I've done. I really like the tag on the valve wheel, I think it adds a lot (and for some reason seems really funny to me). I like the chain railing a lot, the wear on the decals is excellent, the hazard stripes are straight and add to the scale perspective instead of draw away from it, the stairs are decent, the rust on the tank is some of the best I have done... so yeah, I'm not running myself down at all. I see mistakes, but I also see success.
I'm still learning and I'm still working hard toward a goal. I know I'm not making diorama-quality terrain and I'm ok with that. My requirements are that anything I build has to be playable, durable, and look as good as I am capable of producing. Every new piece is another opportunity to apply known skills and to expand my 'comfort zone' each time I model. My 'comfort zone' is about to be shattered by that airbrush. Ha.
I don't know what my next project will be. I'm slowing down on the Imperial Sector stuff right now as I'm waiting for a couple things to happen before I dive into more work on them (specifically I need more 'themed rubble' and I need more hardboard for the bases). I'm starting to dig back through my old terrain so maybe I'll drag another piece of it out for an overhaul. Hard telling right now. All I know for sure is whatever I do next I'll put in a solid 90% effort on it.
That's it for this one. As always, thanks for looking, and C&C is openly welcomed.
39973
Post by: Galorn
Well my time has freed itself up quite nicely... I quit/was fired from one part time job, promoted to management at another... (I'll be writing the schedule...) I'll ping ya after Xmas about scheduling that game.
53783
Post by: MauS
Magnificent piece of terrain Skalk! Love that storage tank to death.
Thats why it pains me to see the silvering under your decals... you can prevent this by coating your model in a thin layer of P+ before adding the decals. This will give a smooth polished layer with a little shine, so the brightness of the decal is cancelled out. Afterward the piece will be shiny as all hell though, so you would have to matte varnish it.
After that matte varnish your decal will have easily blended into the P+ coat, and you'll never ever get those shimmering clear decal edges again.
And as an added bonus... after the P+ layer decals are a lot easier to place right due to the smooth polish.
So really you should just do a new storage tank altogether... and send this one to me
57468
Post by: Bruticus
Looks cool to me. The tank itself looks great, nice detailing and texture. The floor and metal areas look a bit plain - I would suggest maybe a dark ink wash and some rust pigments dabbed around floor edges and pipe and you would be sorted.
As the base is a lot larger than the object on it, I would take the opportunity to make the most of it. Paint a design on it or do something cool with rust, tile patterns etc. The missing tiles area good start. Giant industrial numbers stenciled with the airbrush would be pretty damn cool though!
21481
Post by: Lordjig6
That is truely amazing. Looks absoloutly amazing. Love the rust. The design just everything.
I inow youve pointed out faults, but honestly the only thing id of said is the glue stains under the stepladders... On the tiles. It really does look impressive man :-)
22619
Post by: inmygravenimage
I love this tank it's so... tanky! My favourite details, aside from the astonishing weathering, are the little label and flooring, actually. And thanks very much for the shout-out, can't wait to see what you to with the glory that is VJ Turquoise.
40878
Post by: Meade
Cool tank terrain, textures and rust effect came out nice.
I also picked up a badger for christmas... although I went for the renegade as I already have an Iwata HP CS.
And here's a cool vid on airbrush use if you want to check it out if you haven't already: the president of badger talking about cleaning and stuff.
http://www.youtube.com/watch?v=tsW-vN0_lHw
26790
Post by: Gitsplitta
Fantastic work on the tank skalk. A really good military modeler gave me a hint about how to make the decal edges disappear. Coat the decal (or at least the edges) in gloss coat first, when that's dry... hit it with dull coat. It really does a good job at making the decal edges disappear.
48594
Post by: dsteingass
Man, I LOVE the peeling paint, the chain railing, and especially the lockout tag on the valve wheel!
30785
Post by: Styrofoam04
The weathering on the tank Is incredible. Every new piece gets better and better. I esp. love the tag on the valve.
26139
Post by: Skalk Bloodaxe
@ Galorn- That is excellent. Keep me posted and when you're available I'll make sure I'm freed up.
@ MauS- The decals are really bugging me. I really like the weathering on them, but they look like decals instead of stenciled numbers / symbols. I went back through my post before checking comments, and everyone is right about all the things they mentioned. I'm going to revisit my revisited Fuel Depot and try to fix the flaws. Do you think the P+ would still work now? And if I ever get rid of that tank you'll be the first to know. I'll let my kids know to not sell it as part of my estate sale.
@ Bruticus- I agree that the floor is much larger than the platform / tank. The intent was to have an open area where vehicles could pull in and refuel, but also presented a challenge that demanded more flat detail than I have worked with and I know I did not meet that challenge. I've been thinking about this and at minimum I'll be going back over the platform floor with dreadplate flooring (like what I did here except it'll be a larger area, and it will not be one massive hunk, it'll be cut into rectangle sheets w/ rivets and joints. I think that will make a significant improvement. As far as the base / flooring, I'm stumped. I don't want to go for a 'ruined' look, it's a beat up facility but it is still functional and in use. I just thought about what I could use as a real-world example, this sort of thing came to mind:

I don't know exactly what to do, but I do agree something needs to happen. Perhaps I can do that via coloring (airbrush) instead of physical construction.
@ Lordjig6- I agree. I'm thinking how to remove / improve that. It was a sloppy job and I should know better, that's a genuine n00b mistake.
@ graven- I always try to promote the work of those I am inspired by. It helps with the sense of community and gives everyone the opportunity to learn new techniques and gain inspiration. I'm going to wait on the Shrine until I have at least a moderate skill w/ the airbrush. I see a lot of applications for it on that Shrine.
@ Meade- Thanks for the compliment and the link. I'll be checking that out for sure.
@ Gits- As for the gloos before matte, now that I think of it... Dave told me the same thing a while back. Maybe I need to take notes instead of trying to remember everything.
@ Dave- I knew you would have appreciation for that tag. It's specifically why I made it. You did not disappoint.
@ Styrofoam- I'm really psyched to be improving the way that I am. Glad you liked the tag. It was really easy once I figured it out, but stupidly difficult the first way I tried it. The first was to cut out the shape, make the hole, and then thread it. Ugh. The it occurred to me to drill the hole in the paper, thread the ...uh... thread, and THEN cut shape out. Worked WAY better.
I want to say 'thank you' for the compliments, it always means a lot to me. You all have incredible skills that I respect. What I also respect is your honesty about the errors I made and the the recommendations for improvement. The things you share make me a better modeler.
I have a few days off coming up, I'm hoping to spend a decent portion of them doing modeling. My goal is to re-work the Fuel Depot w/ ideas above and maybe get some work done on my Manufactorum.
As you can see, work has been getting back to a manageable load and I'm able to sneak over to Dakka a lot more than I have been for the last few weeks. Looking forward to *finally* getting the chance to catch up w/ your work as well as post my own.
I'll be back.
66563
Post by: rustbucket
Your tank came out awesome! The inspection tag on the valve is great!! I love seeing the little details like that on a piece. It really makes them seem more realistic. Have to agree that some sort of stenciling on the open space of the deck or weathering the tiles will really make that pop. Maybe some crates/barrels/trash if you're going for a abandoned look? Looks really good though.
26139
Post by: Skalk Bloodaxe
26790
Post by: Gitsplitta
Excellent work.
22619
Post by: inmygravenimage
Love that obsession to details! Glorious crusty work. I really like the tiled floor, but maybe some cracked/loose tiles and grates perhaps?
66563
Post by: rustbucket
MUCH improved Sir!!! I have to agree with inmygraveimage that you shouldn't necessarily scrap the tiled floor, I would recommend as said "cracking/chipping"; some tiles, dry brush a lighter gray over, highlight with a really light dusting of white and wash it down with a thinned out muddy color ( I use Asphaltum by Americana from Micheal's > alot like Devlin Mud but you get soooo much more at a fraction of the price) You can also use some clear gloss to make small pools of standing water/ dripping down from an above source? Doing stuff like that would bring the flooring more in line with the corrosion/ neglect seen on the tank and chains. Just some ideas
64081
Post by: hdbbstephen
yay for the airbrush! I have one on my Christmas list...
33919
Post by: Moltar
'Atta boy! Get back at it! Love the dedication.
26139
Post by: Skalk Bloodaxe
@ Gits- Thank you. More to come soon.
@ graven & rust- I think the tiled base was doomed from the beginning, I didn't like it in the first place and now that I'm this deep into the project I'm genuinely regretting it. Tiles are for floors, not industrial park loading areas. I knew I should have gone w/ something different when I first put it on but I hoped I'd find somehting to make it work and now I'm dealing w/ this mess. It's going to be removed / replaced, AND I finally know how to do it. You've seen that 'crackle' paint stuff you can get a craft stores. I'm going to try that, and I'm hoping it will have the effect I'm looking for. I'm thinking that I'll tear the current tiles off, leave the base intact 'as is' (plain plywood), use the crackle paints, base it black, give it grey / etc highlights, add some traffic markings / grit / etc to force the scale perspective, and it'll be done. I'll test this idea on a couple test pieces before I slap it direct to the model I am working on.
@ hdbbstephen- Thanks for stopping by! Checked out your stuff, the Word Bearers are decent! And congrats on the airbrush. I've heard they are really cool, but do not have any first-hand experience myself...
@ Moltar- My best work always comes after I post a 'finished' piece on Dakka.
So like I posted above, that's what I'm going to do for the base of the terrain piece I'm working on. I'm going to scrap the 'hatch' idea altogether but add more debris / junk / etc.
On call this weekend so I'll have some time to get more work done.
22619
Post by: inmygravenimage
Good luck with crackle medium, I've never had any joy with it! PVA can be used to achieve similar effects to what it purports to do. If you manage to succeed, though, I really want to know how!
48594
Post by: dsteingass
Dude!..It's tits! It even has the little red grommet so the string doesn't tear the paper! That rocks!
39973
Post by: Galorn
Skalk Bloodaxe wrote:@ Gits- Thank you. More to come soon.
@ graven & rust- I think the tiled base was doomed from the beginning, I didn't like it in the first place and now that I'm this deep into the project I'm genuinely regretting it. Tiles are for floors, not industrial park loading areas. I knew I should have gone w/ something different when I first put it on but I hoped I'd find somehting to make it work and now I'm dealing w/ this mess. It's going to be removed / replaced, AND I finally know how to do it. You've seen that 'crackle' paint stuff you can get a craft stores. I'm going to try that, and I'm hoping it will have the effect I'm looking for. I'm thinking that I'll tear the current tiles off, leave the base intact 'as is' (plain plywood), use the crackle paints, base it black, give it grey / etc highlights, add some traffic markings / grit / etc to force the scale perspective, and it'll be done. I'll test this idea on a couple test pieces before I slap it direct to the model I am working on.
@ hdbbstephen- Thanks for stopping by! Checked out your stuff, the Word Bearers are decent! And congrats on the airbrush. I've heard they are really cool, but do not have any first-hand experience myself...
@ Moltar- My best work always comes after I post a 'finished' piece on Dakka.
So like I posted above, that's what I'm going to do for the base of the terrain piece I'm working on. I'm going to scrap the 'hatch' idea altogether but add more debris / junk / etc.
On call this weekend so I'll have some time to get more work done.
ah but skalk this is the imperium.... that may have once been someones foyer... you could easily break up the sameness of the tiled floor by adding discarded crap here and there (old newspapers, takeout containers, beverage cups, and other general crud.) you can also chip up some tiles by hacking at em with a small chisel to show crush wear and tear. also with the application of minute amounts of GS to the seams between tiles make "patches" where broken tiles were replaced with tarmac, concrete or what have you. also you can add a hatch or "vent cap" (like at the gas station across the street from ya) to the floor to imply sublevel access.
48594
Post by: dsteingass
That is genius Galorn!
26139
Post by: Skalk Bloodaxe
@ graven- Hmm. My heart just sank a bit reading your post. If you couldn't get it to work, chances are it isn't going to work. But maybe you were using it in a different application? Maybe I'm heading for a huge mess? I'll let you know in any case.
@ Dave- Thank you. My efforts feel rewarded. Hopefully I'll manage that again soon. I have another idea.
@ Galorn- Uhm...
This is what I did tonight.
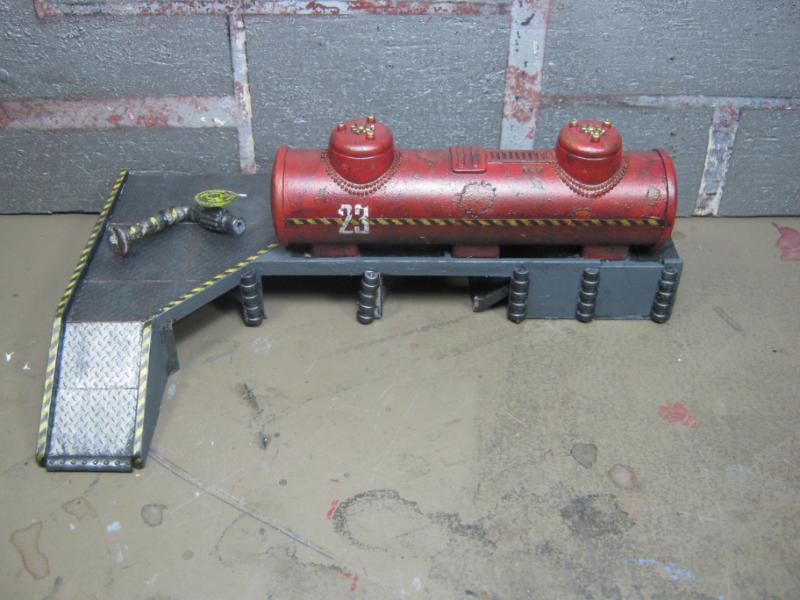
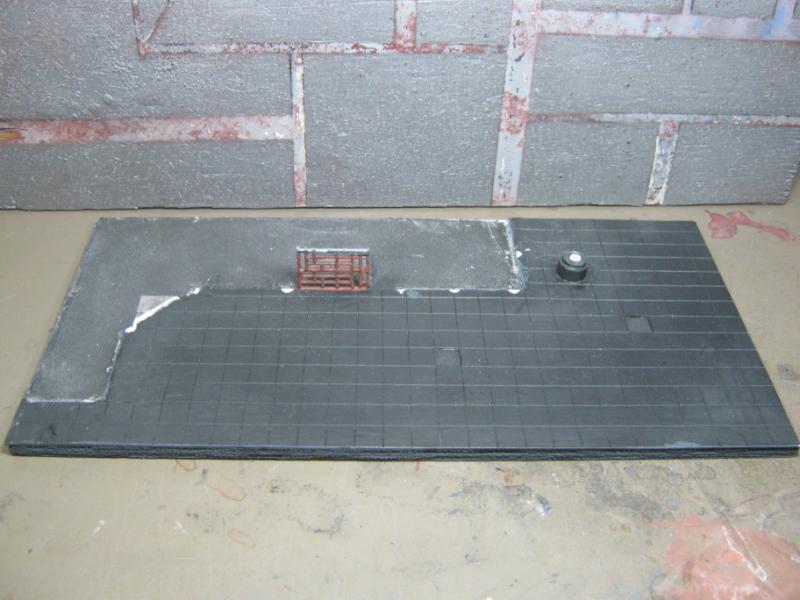
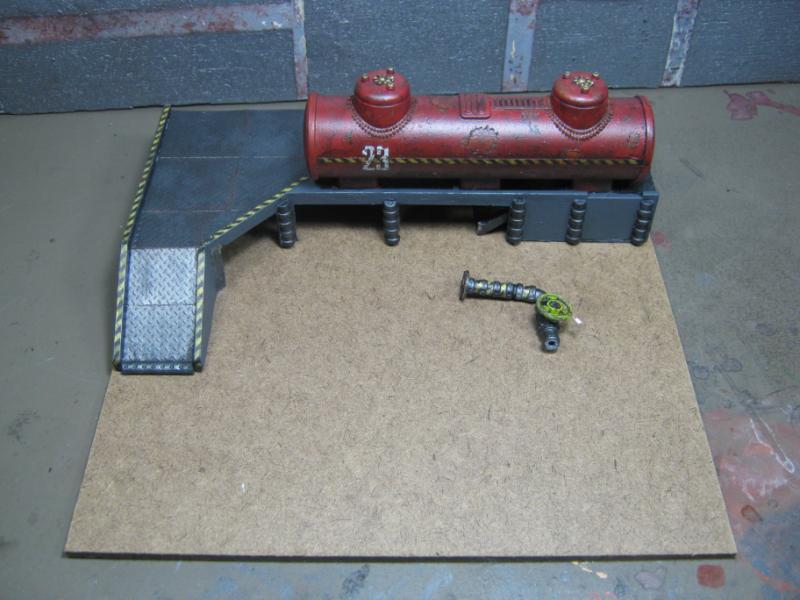
Also, fresh blood on Dakka. Check this guy out. It's his first post and I'm wicked impressed by his ingenuity. Drop by and show some Dakka love.
http://www.dakkadakka.com/dakkaforum/posts/list/495614.page
Also, good news! My daughter has turned into an FM station w/ a fever of 102.7! You all know what that means- day off to model tomorrow! Whoo!
Hoping to get some modeling done between catering to her every whim and cleaning up whatever horrid Nurglesque functions she suffers through.
57468
Post by: Bruticus
crackle medium is used for modelling flaking paint, and as it would be unusual to paint the floor I am not sure it would be suitable. It's also not especially durable and might even chip off if you move models around on it a lot. I actually liked the tiles you had I just thought they were a bit plain in a uniform grey colour, whatever you put on this base I would say you should just try and add extra detail - think along the lines of 'what is the point of this base compared to having no base and just placing my scenery straight on the board' and you will be OK - either have extra visual details, added bits of cover for gameplay, hiding places etc, mounting points for more scenery, etc.
48594
Post by: dsteingass
I've tried the really thick crackle medium in the craft paint line with little success. It's too thick to work right or I'm not doing it right..
66563
Post by: rustbucket
I was sorry to see the tiled floor go to be honest, there were so many possiblities there for breaking up the vacant spaces and adding in character
[quote=Bruticus 403974 5095129 2563d92dde9f071d8dffe46c0da80a5e.jpg... as it would be unusual to paint the floor I am not sure it would be suitable. I have to disagree with you on this. I've been a Manufacturing / Industrial Engineer for over 10yrs in a lot of different industries, and I can't tell you how many concrete floors I have had maint. crews (and myself) come in and paint. They inevitably get chipped/ gouged/ cracked/ scuffed by fork trucks, by dragging pallets, dropping junk on them, scuffed by tires, drilling anchor bolts for equipment/ work benches/ etc. In fact I just painted a work area a month ago and it looks as though it was painted 5yrs ago. People are rough on things. Welding shops are the worst for wear and tear!
I also agree that you MAY have tile in an area - Because I've seen it and had to remove it from a floor. In a factory nowadays you can't always say that something is going to be permanent. Buildings are full of random things: Walls, columns in strange places, abandoned offices/ labs/ storage, abandoned/ obsolete equipment. There is no telling what you're going to find in a building. I once had a couple of deer that were living in section of a plant we didn't use. And rats.... where there are people there will be vermin.
The great thing about making the type of terrain you are doing is that there really is no wrong way to represent it. You have imagined certain things to build, but more than likely its because you have seen it somewhere before right? Chain for guard rail, diamond plate flooring, tile, etc...
You are doing great work and no matter what you decided to do with the pieces you make we are probably all in agreement that they are incredible and would LOVE to have it on our own tables!!!
64081
Post by: hdbbstephen
Thanks, I've been away from the hobby for a while and I am so inspired by the creativity that I see here. Looking forward to upping my game.
26139
Post by: Skalk Bloodaxe
@ Bruticus- I've completely given up on the crackle idea. Pity, ity seems like it would have made excellent 'ruined pavement'. the checkered floor isn't 'gone', I could still put the platform back on the same base but I'm still having a go at something unique (for me) instead of going w/ the old standard of tiled plasticard for flooring. I am probably going to use plain plasticard and detail it better.
@ Dave- I've scrapped the crackle idea.
@ rust- I've worked in a few warehouses before and know what you are talking about. All it takes is 1 forklift to back into something w/ anchor bolts and you suddenly have a nice impact crater. My favorite was a way overloaded cart being drawn by a lift. Tire blew, ground to the rim, rim broke, jagged edges of rim gouged a 1/4 - 1/2 inch deep grooves almost 3/4 the way around the faculty. Thankfully I wasn't one who did that as the guy that did was sacked on the spot.
You are right about the inspiration. Every idea I have is inspired by other peoples work or some IRL thing I have seen. I have seen interior tiled floors but never exterior (except snooty rick folk hand-laid driveway stone, but that doesn't count. This a PDF designed refueling depot and I want it to reflect that. Although the fluff might support something . I'll figure it out, even if I go back to the original base.
@ hdbbstephen- Dakka is a great place for inspiration. There is so much amazing work going on all the time from so many incredible artisans / craftsmen that it's impossible to keep up with them all. Almost all of my attention is in the P&M sections because I'm always looking to learn new things.
I haven't had much time to model today. But I did take some time to get a bit of stuff done. These are tests for possible flooring solutions. Keep in mind I did these VERY quickly so please don't critique the result, critique the idea.
LARGE STEEL PLATES
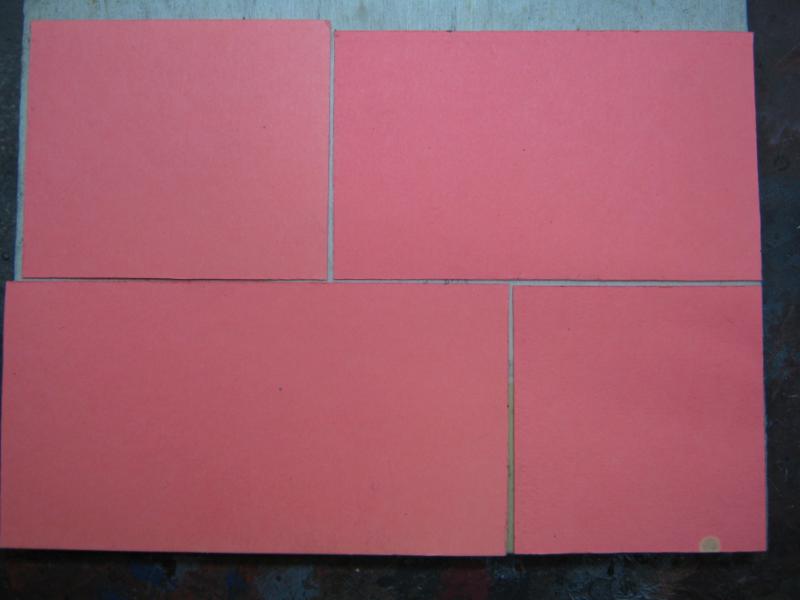
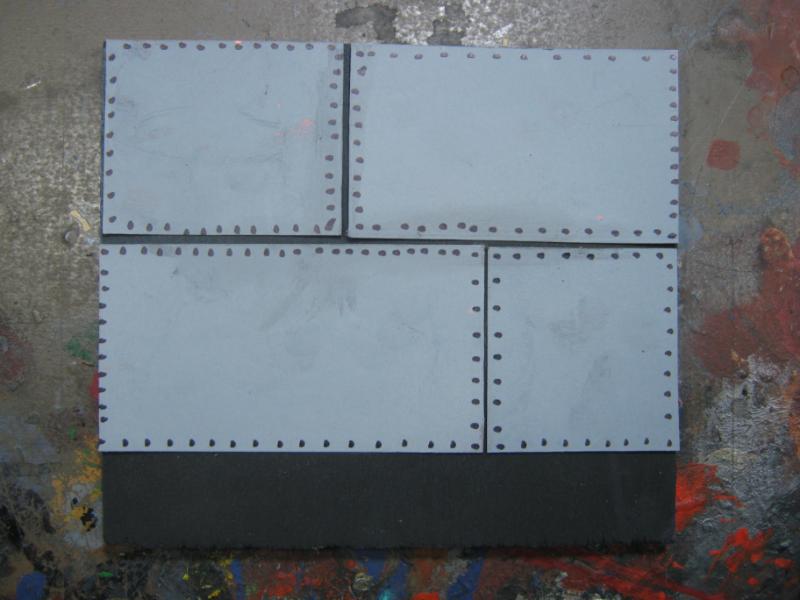 WORN ASPHALT (paper)
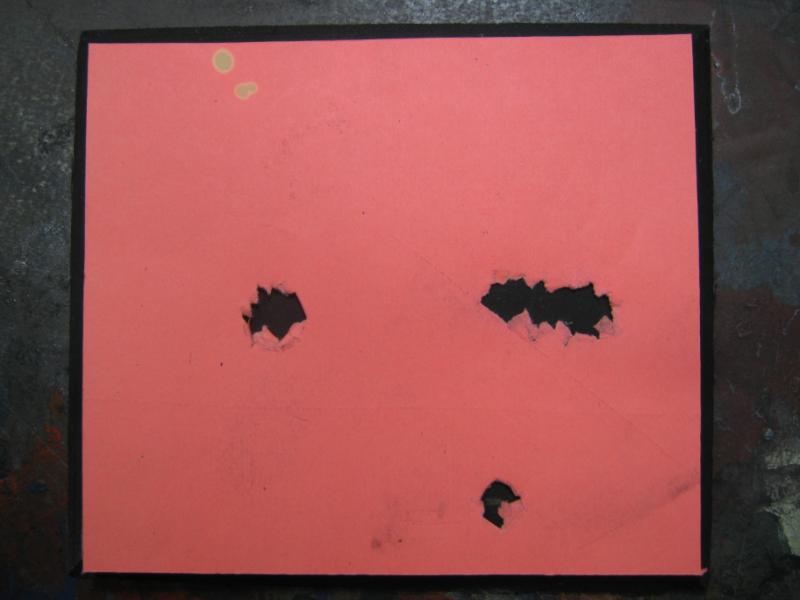
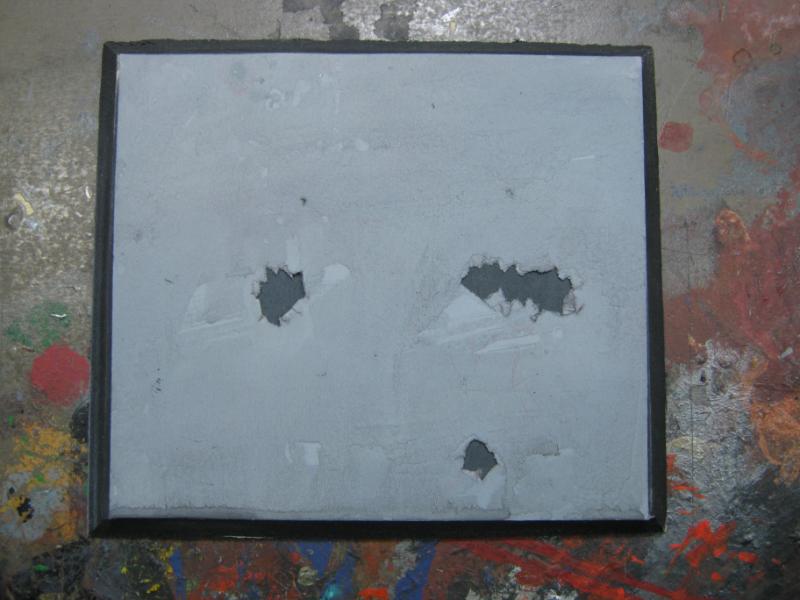 WORN ASPHALT (wood)
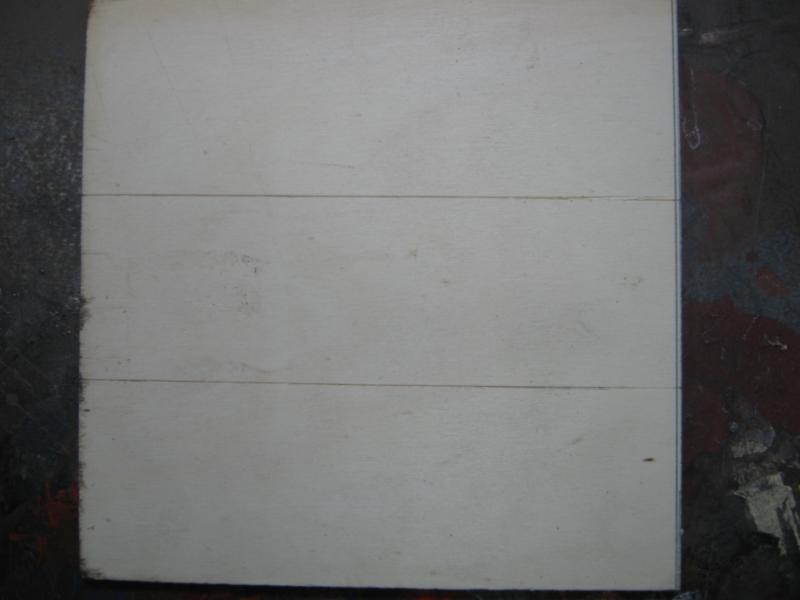
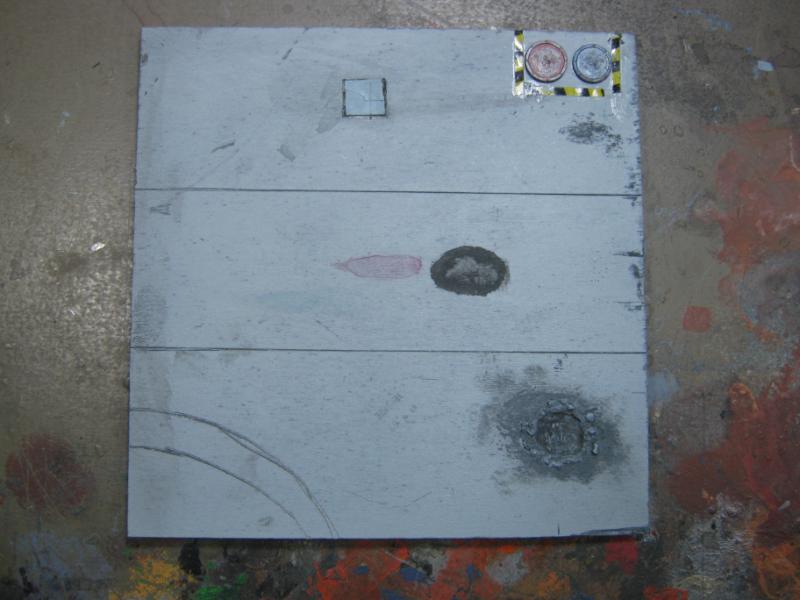
Obviously I like the last one best, but the first two have application. First would be great for a building wall, 2nd could work on anything including the asphalt if I made both of them out of plasticard instead of paper.
Ideas / comments / advice? I'm open to the idea of putting the platform back on the tiled base. In case anyone is wondering, I do not consider any of this to be wasted time / effort. I've learned a few things I did not think of before, and taking the platform off gave me the opportunity to do something cooler w/ it.
I'll be back.
57468
Post by: Bruticus
I like how you keep experimenting, keep up the good work. I think a painted floor is fine but I misunderstood I think - I thought you wanted the crackle paint to look like old peeling flaky paint on the floor which I didn't think would look right as it more looks like it is the paint on a long neglected wall that is flaking off from the damp, rather than paint on a well worn floor which I think would be more scraped and eroded.
The tiles looked good to me, but were a bit plain. Whatever you do with the base I think you ought to include a lot of visual interest to justify having a large base, otherwise it may as well not have a base at all.
39973
Post by: Galorn
Pic of the damaged tiles by my workplace...  The discolorations are where the rubber mats with the diamond plate texture usually rest to cover the damaged areas. Another option for an interesting texture option is 1/2 foamcore (remove the paper from one side) then carve in details... (works really well for "mixed" surfaces, or cobbled.) you'll need to "seal" it after you carve in your details. I reccommend a 50/50 PVA water mix.
48594
Post by: dsteingass
I've used cereal box card for pretty effective cracked asphalt before. Riveted Steel is of course, my favorite though
66563
Post by: rustbucket
Diggin' that last option too. Love seeing your various idea experiments, it's giving me a bunch of great ideas (at some point I really need to post my own work...) and I'm sure that it's certainly helping out others who are trying to figure out how they want to do things too.
After seeing all of your cool stuff Dave, yeah, I'd have to say that you definitely seem to like rivets!
Just as an idea, I've used this and it's worked pretty well, using cup cake bead sprinkles to represent rounded rivet heads. Drill a shallow pilot hole on the surface and glue a sprinkle to it. Once painted its very convincing.
26139
Post by: Skalk Bloodaxe
@ Bruticus- I was thinking about the crackle paint to simulate the type of damaged an asphalt drive takes from the seasons and from wear (hot dry wet cold / heavy weight / pressure / friction). After reading up on it it's pretty obvious that it would not work in this application. Certain glues might do this better, but I'm finished with searching for solutions right now. I'll revisit later if the need arises.
@ Galorn- that's almost funny, being it's all 3 of the surface types I'm looking at replicating on my models. I'm keeping that pic for next time.
@ Dave- it's amazing how many applications cereal boxes can be used for in terrain building. They are what I use for roof shingles on my WFB buildings, they have been used as floor panels in Necromunda, have been used to makes doors in both games... they are a great 'general purpose' item.
@ rust- I like sharing my ideas and mistakes as it shows the 'human factor' behind the finished work. There are guys on Dakka that only share the 100% A+ end result, and while I admire their talent I wish they would share the techniques they use w/o having to be directly asked. I know that I don't always how the minutia of my work but I'll share as much as comes to mind and hopefully seem happy to explain anything specific if asked.
Ok. A lot of consideration went into this. It isn't done by far, but what you are looking at is going to be the base I build up from. I decided to go back to the tiles for a number of reasons, but this time they will represent concrete and will have plenty of markings / scuffs / debris scattered about / etc to show why I have the open space and to further define what the terrain piece is and how it relates to the narrative I'm forging.
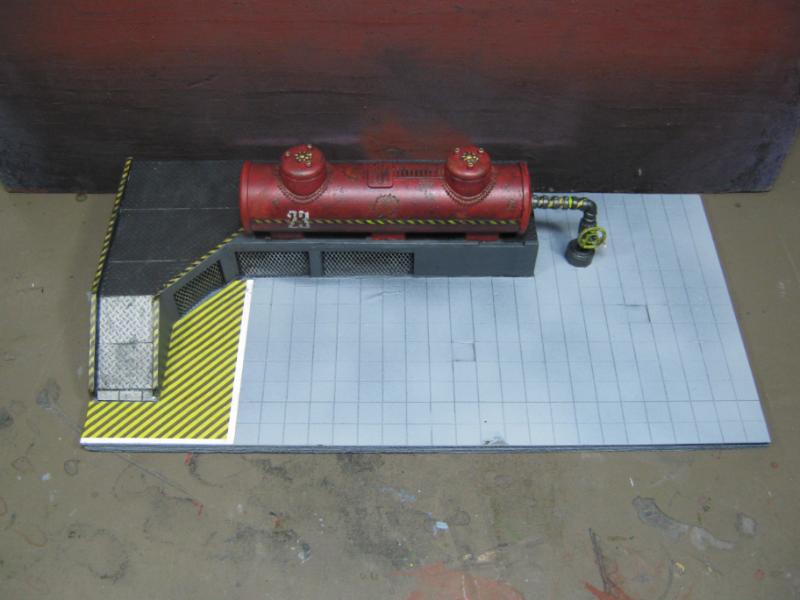
I'm very happy with the area hazard stripes. The intent is to create a 'use caution' zone for pedestrian traffic and also indicate a 'no zone' for vehicles. There will be more trafic markings soon, and of course the entire thing will receive multiple washes of different shades to show grit / usage / neglect. I'm also proud of myself for doing an almost perfect cut because I'm usually very "dimensionally challenged" when it comes to cutouts. This is one of my better jobs, so yay me.

I replaced the pipe and valve but not the stairs yet. I have a better idea for the stairs.
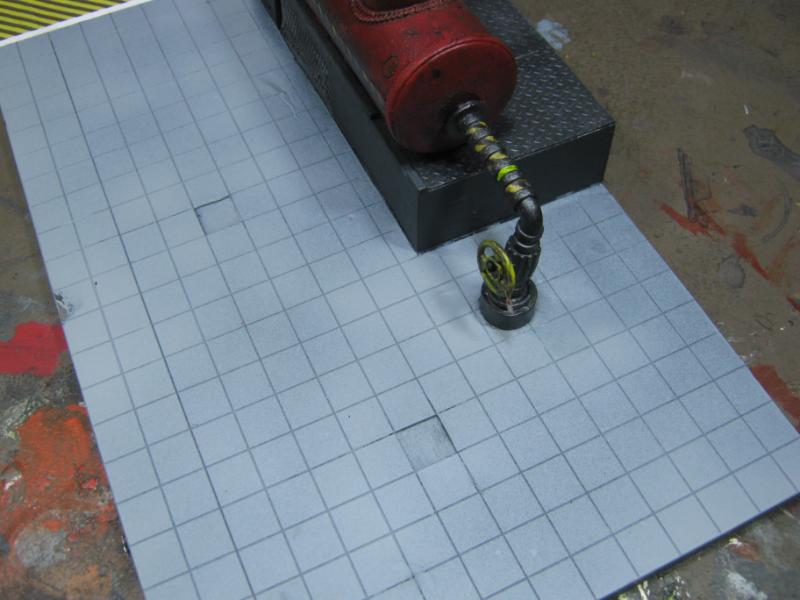
I replaced the overly rusted grates and replaced with mesh wire that is much cleaner and provides a better scale reference. I'll be rusting these up a bit, but not nearly as much as the other ones. Keep in mind that the effect intent here is 'functional but ill-maintained' instead of 'ruined and abandoned'.
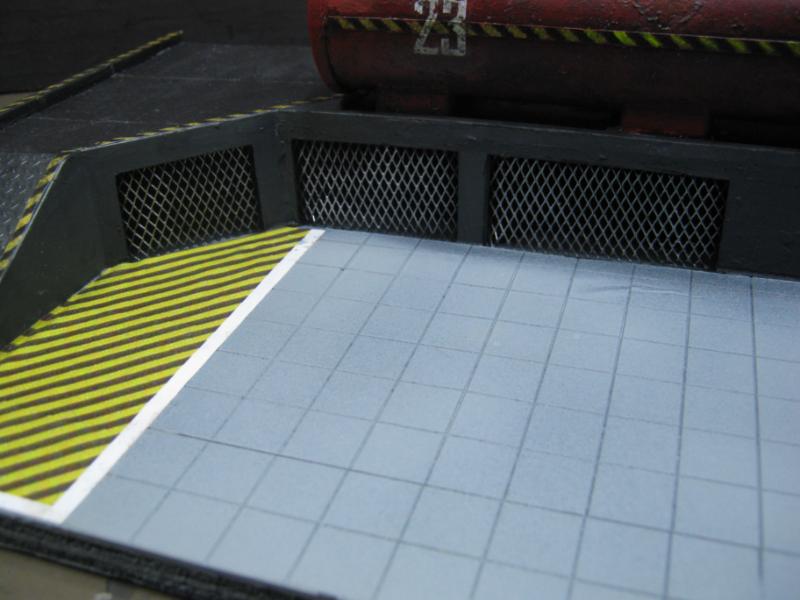
Slight gap will be repaired before floor is washed.
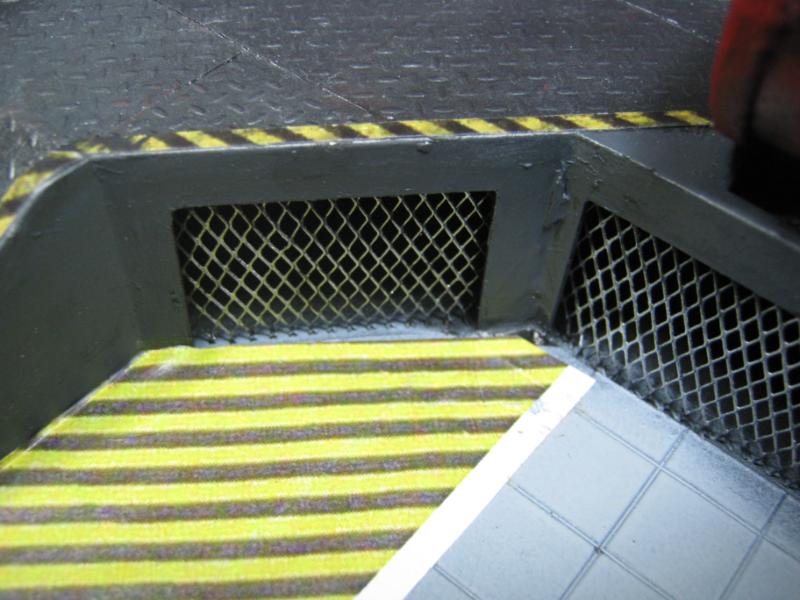
End of tank looking very clean. Not replacing the Aquila, have a much better idea.
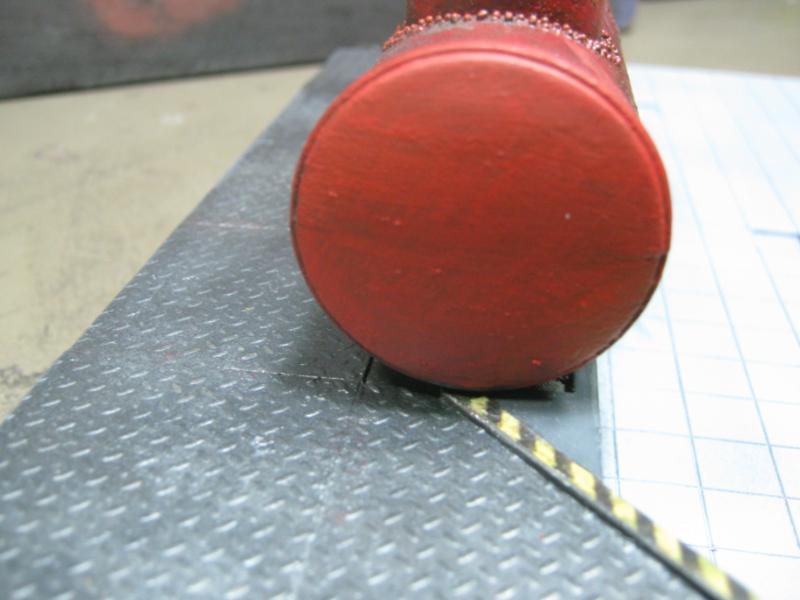
Treadplate is a bit cleaner right now due to cleaning up after a few mistakes (drips from other colors, etc) but it will get dirtied up again. I won't be pealing any up or adding any more damage here.
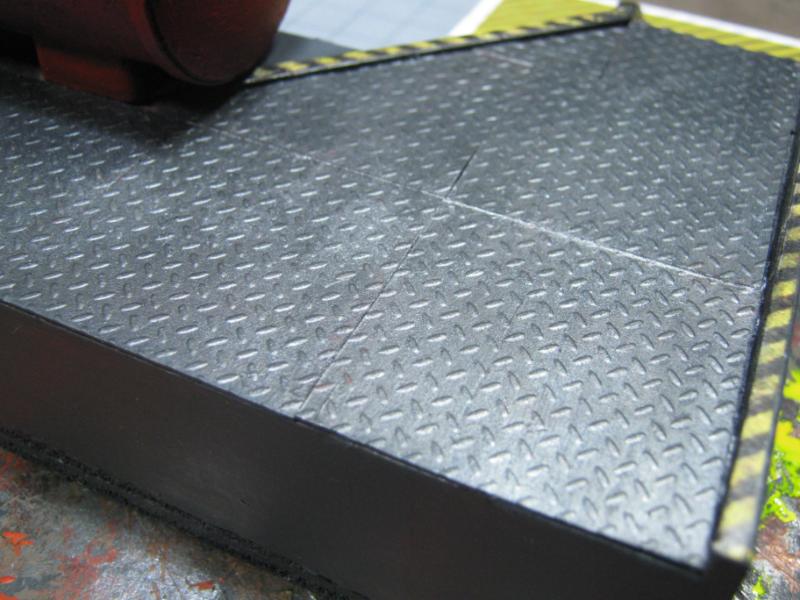
The concrete is very dark on purpose. It will be drybrushed w/ a lighter color and washed to give it a weathered / gritty look, may also use my Dremel to make shallow damage marks as bolter or stubber hits. And again, the stairs I'll be replacing the old ones with will be much cooler.
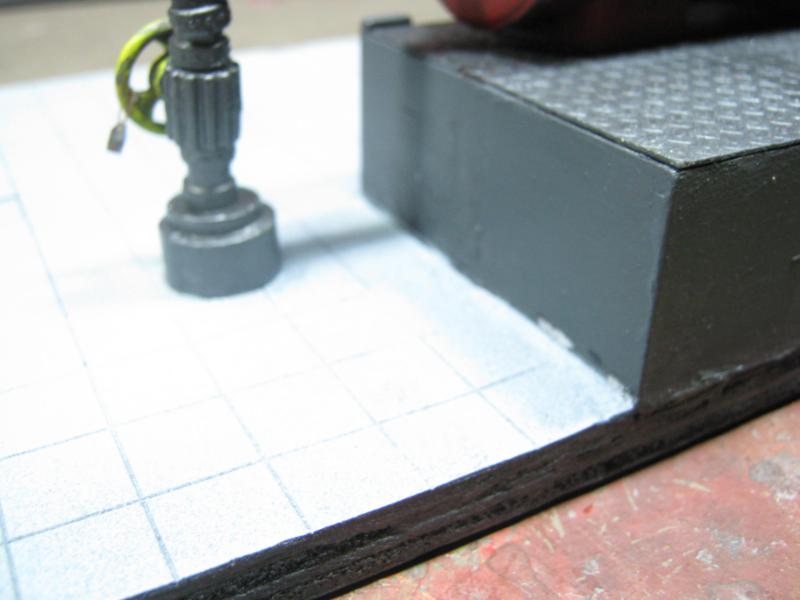
Ending up this post w/ action shots. It appears the PDF is having a bit of trouble today. 
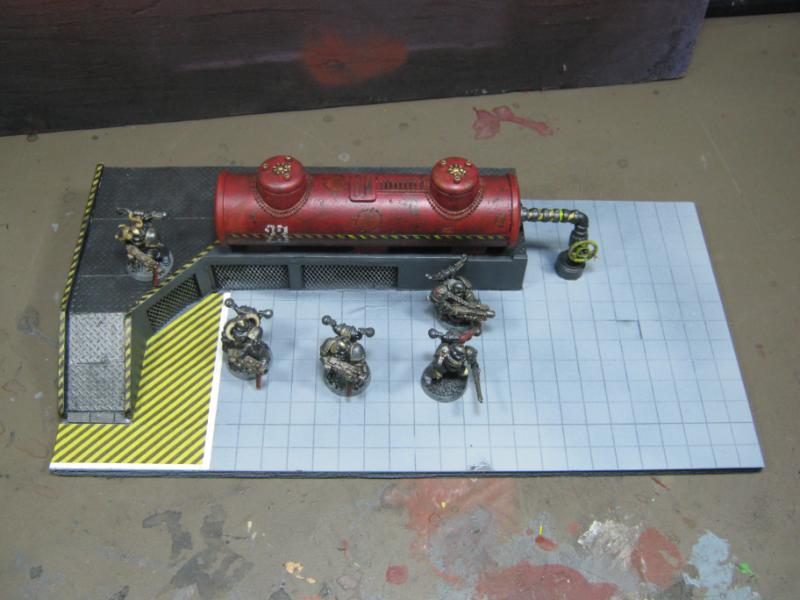
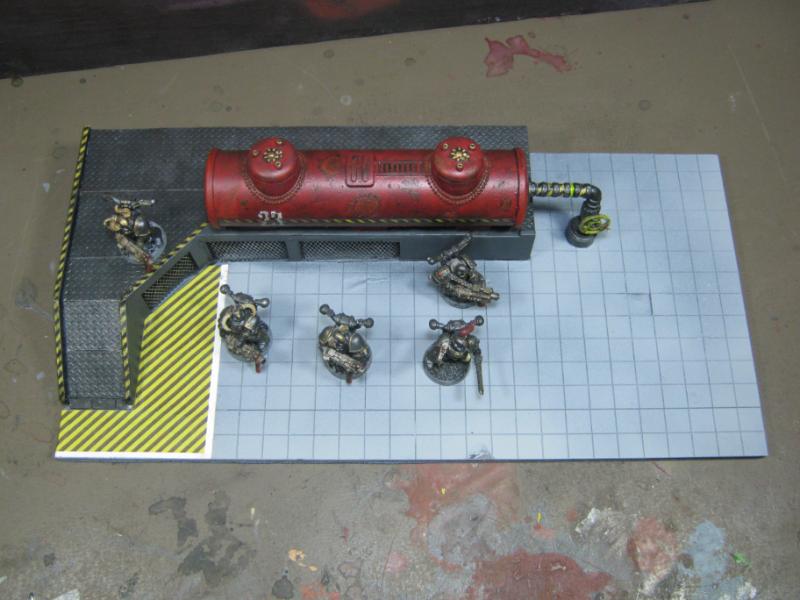
C&C welcome.
48594
Post by: dsteingass
Looking sweet! Just make sure you sponge your concrete color over those hazard stripes on the floor and it'll be 100% real! -Amazing job Skalk!
26139
Post by: Skalk Bloodaxe
I'll likely scratch some of the striping up to show wear and will dab some concrete color to indicate wear.
66563
Post by: rustbucket
Looking good Skalk! Liked the old grating but the new version is pretty kick ass! Every reiteration of the layout makes the gears in my mind turn and makes me wonder what direction you're going to take it next! Love it!!
8745
Post by: Llamahead
Only thing to say is it's looking far too clean would drains and a manhole be an idea as well?
26139
Post by: Skalk Bloodaxe
@ rust- You're not the only one wondering where I'm going to take it next. The more I look at it the more I think of different things.
@ Llamahead- That is an awesome idea!! I literally for not thinking of it myself, and I'll be doing that tonight. I even know what to do for it to happen. Sweet idea man, really like it and appreciate it!
48594
Post by: dsteingass
Now fire up that air compressor
26139
Post by: Skalk Bloodaxe
I will as soon as the Fuel Depot project is done. If I fire up the Badger first I'll jump onto other projects and this will just get put on a shelf and sit there for who knows how long. Next weekend at the latest. I have something I really want to try it on.
22619
Post by: inmygravenimage
Looking very nice sunshine. Moar!
26139
Post by: Skalk Bloodaxe
@ graven- Uhm... ok
Got a bit of work done on the Fuel Depot tonight. First I went with the idea Llamahead had about installing a grate. As luck would have it, a tile I removed from the baser earlier on in the project was in the exact place I wanted the grate to go, so I dug down to the last layer of plywood on the base and then painted the inside black. Grate gets a dark rust treatment, covers the hole, instant drain with a depth effect that I am pretty happy about.
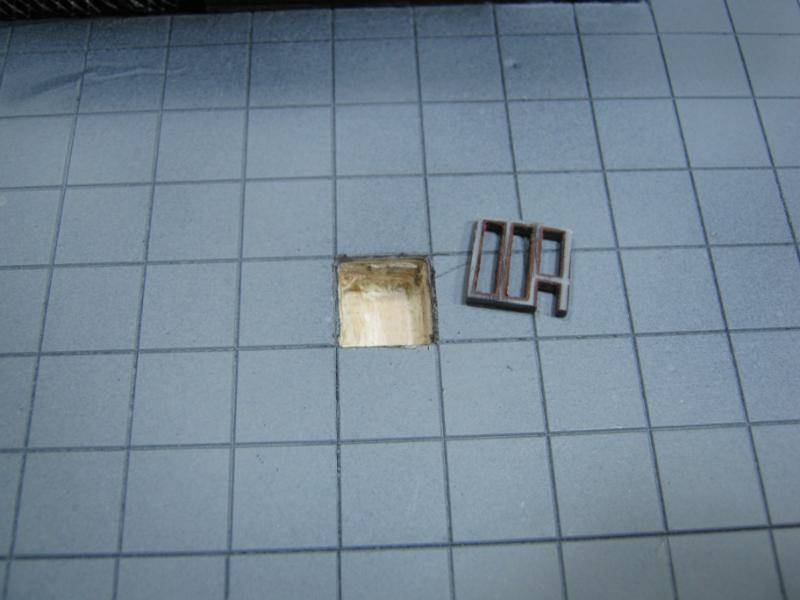
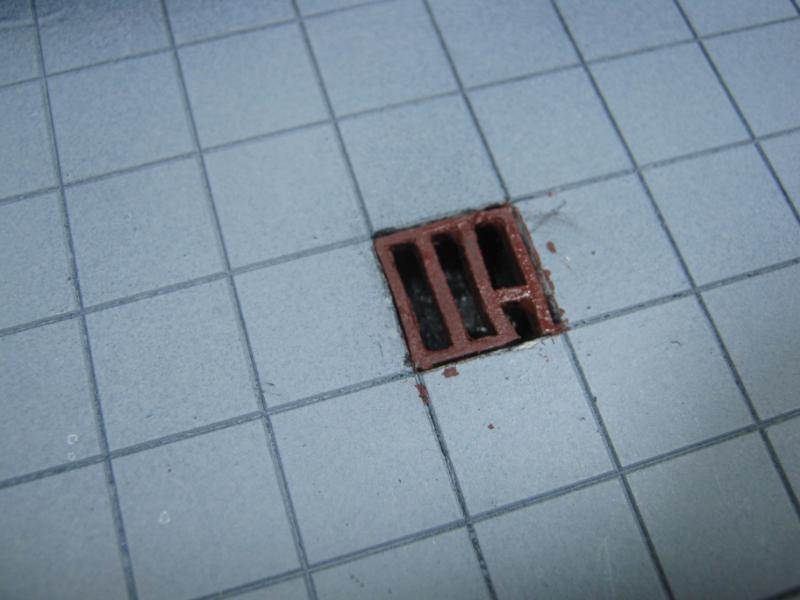
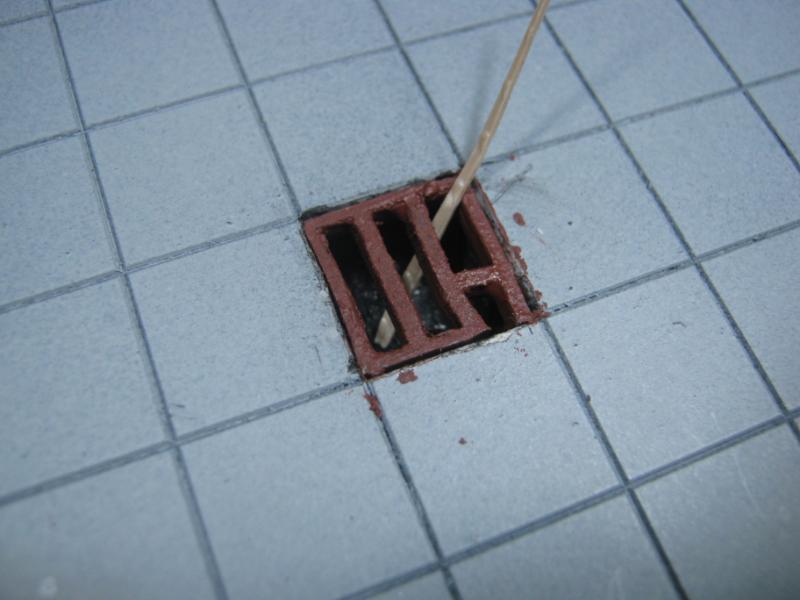
I also replaced the chain railing. I was going to do a really cool pipe railing with 1/32 rod and lots of fiddly bitz like connection joints and all that. But then it occurred to me that when it is broken it will be difficult to repair, and it will be broken because accidents happen. The chain will be much easier to re-splice or replace a single metal pin.
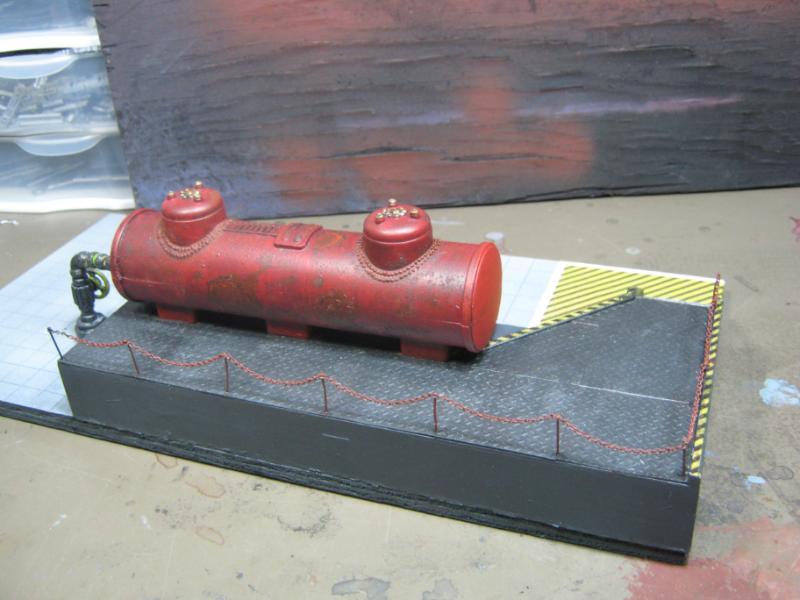
I extended the chain to cover an area it was too short for earlier.
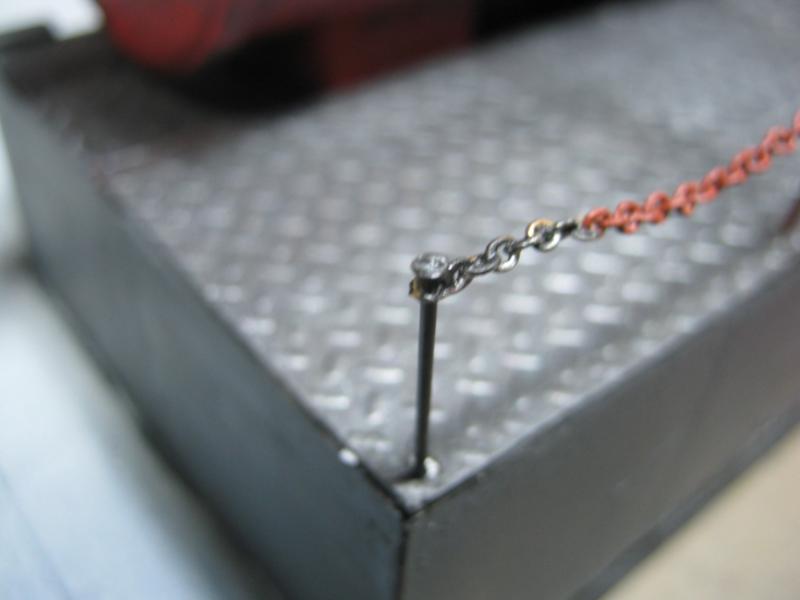
One last shot of everything so far.
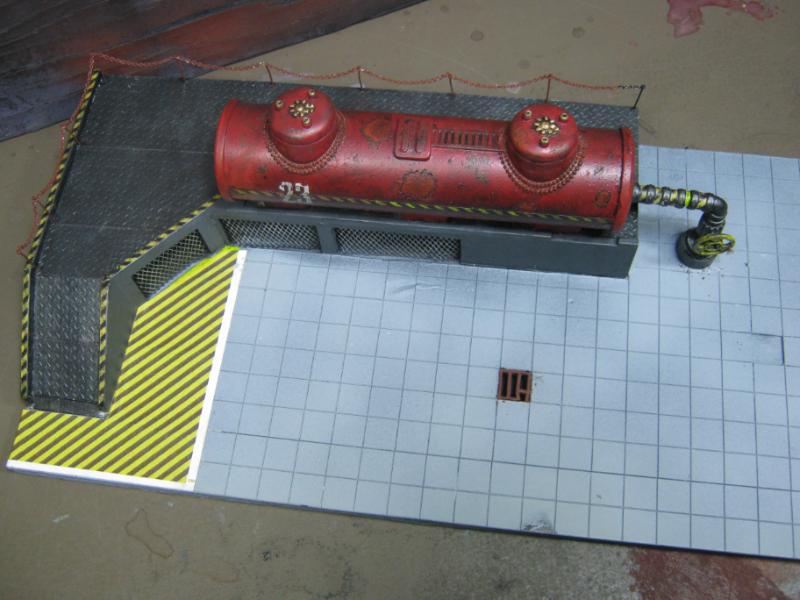
C&C welcomed and encouraged. My piece has been getting better with your ideas.
I'll be back tomorrow with an update.
39666
Post by: GiraffeX
Wow Skalk this keeps getting better and better, love the drain idea.
26790
Post by: Gitsplitta
How about an electrical access panel somewhere in the concrete? Something to control the internal mechanisms of the tank (temperature control, pump, fill gauge, etc.)?
30344
Post by: monkeytroll
Wow Skalk - impressive going there....just caught up on the last few pages.
Big shout out for pulling it apart and re-doing sections, always a brave call to make
Loving the look of it so far, great details coming out with each iteration. I agree totally with what you said about showing wip...that's the real interesting stuff, seeing other people's ideas and solutions, getting a feel for their thought processes - that's what I love about this place.
That drain - Yes!! Fantastic.
Really enjoying watching this take shape and looking forward to seeing it progress..
64081
Post by: hdbbstephen
The drain is the icing on the cake, little details like that, and the inspection tag on the wheel, really make this piece special.
22619
Post by: inmygravenimage
The guard chain is very effective, and the strong colours really offset the piece as a whole. Too often - and I'm guilty of this myself - the grimdarkiverse shies away from that, especially in terrain. Great work sir!
26139
Post by: Skalk Bloodaxe
@ GiraffeX- I think this piece is going to turn out to be a lot more than I had originally intended. It's taking on detail like I've never done before, both volume and detail.
@ Gits- Hey, that's a great idea! Thanks!
@ monkey- Tearing this apart was one of the more difficult modeling decisions I've had to make this year. I am very happy that I did. I'm really liking this piece and it's amazing how far it has come from what it once was. Funny thing about this piece- it was supposed to be a 'side project' while I was waiting for some panels on my Basilica dried. Ha. Now it's my #1 focus.
@ hdbbstephen- Thanks for the compliment, and I completely agree. I expect more of the same will be coming on this piece and the pieces to come.
@ graven- I've been afraid to use bold colors for a long time because the reason you pointed out- grimdark. I've been putting a dark theme together on my table for some time, and now that has been challenged by a single red tank. It will stand out, but it won't look out of place.
Huge thanks to Gitsplitta for this next bit. He is 100% the inspiration for this. I'm hoping I did the idea justice.
First hurdle was to decide how I wanted to do this. Went through my bitz boxes one at a time and took out things that could have potential application. I didn't find exactly what I was looking for, so I settled on rear top hatch doors from an old Chimara. Then I had to figure out how to fit them properly on the board, so I made a hatch frame out of tiled plasticard that would be the same size as the plastic coming out so it would sit flush. Here I'm making the hatch frame.
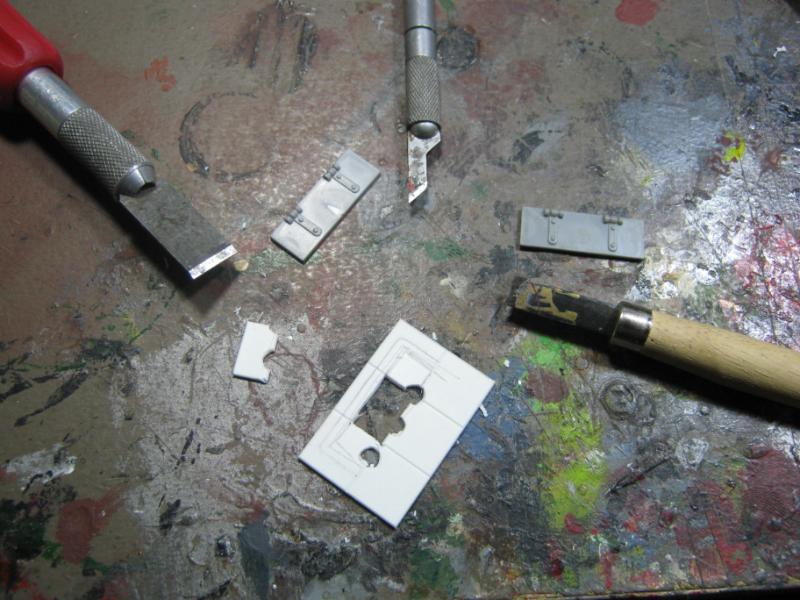
Hatch frame done. I made a mistake and took out some plastic I intended to keep (and by default kept some plastic I intended to cut off) so I had to file out the obvious parts, and by the time I was done it was larger than the doors were wide. To fix this I glued a piece of paper over the hatch frame.
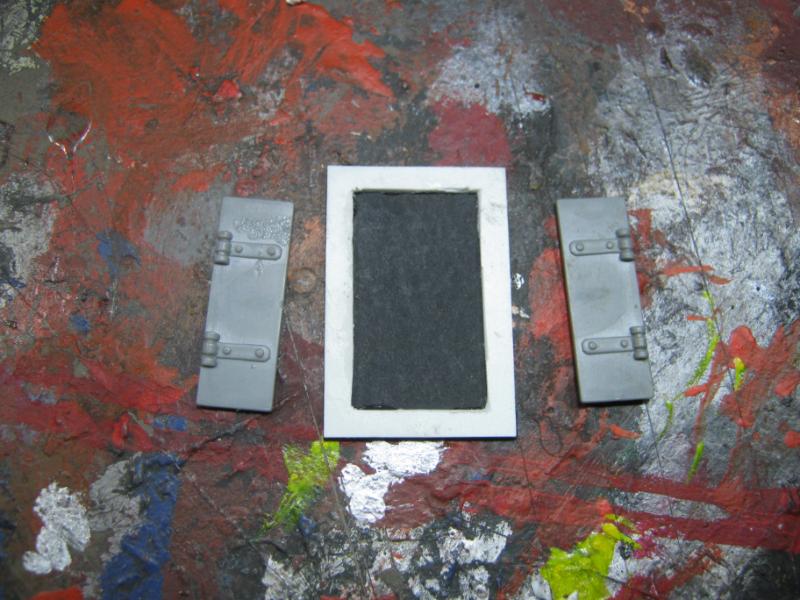
Hatch frame looking better, but had to really file out what would later be the closed side of the box.
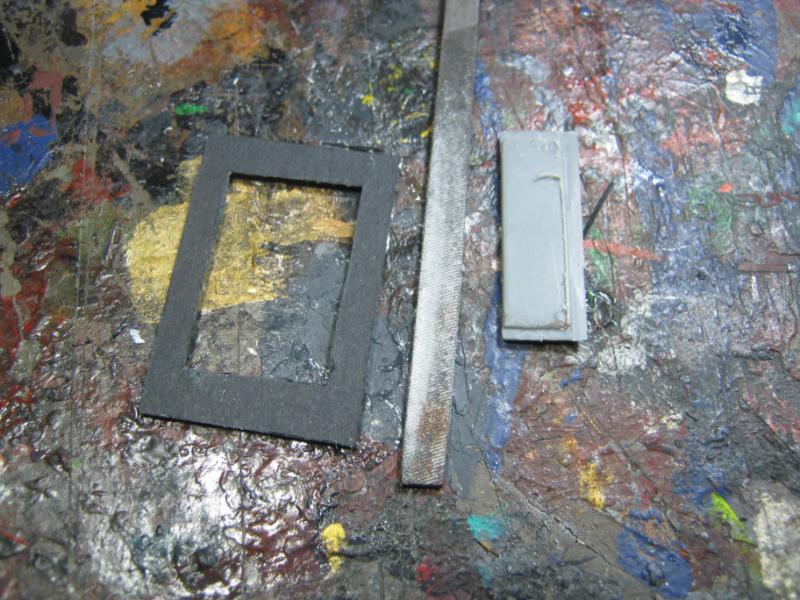
Hatch frame done and 'closed' hatch glued on. I also cut very deep into the board because I had an idea earlier for using plastic rod but couldn't. This time I could, and did.
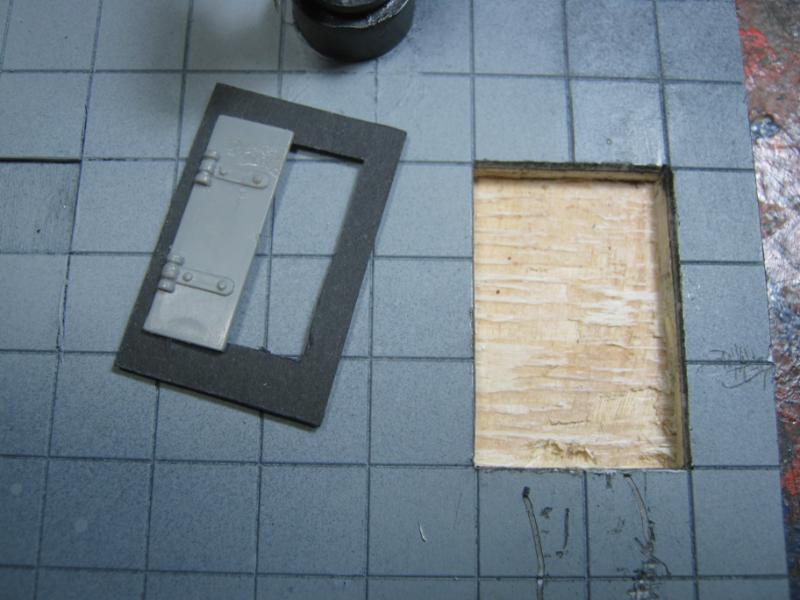
Officially in my fluff it's a control box thingy of some sort. It's former life was a unused magazine for a Storm Bolter on the old Imperial vehicles. I drilled it through both sides and threaded the rod. I really like the results:
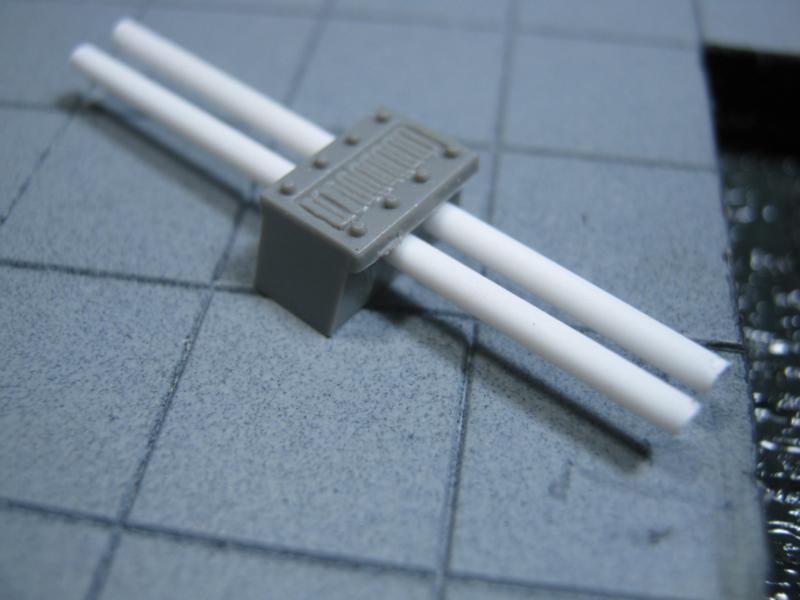
With some paint on it. It's not finished yet but I snapped this shot before i started putting it together:
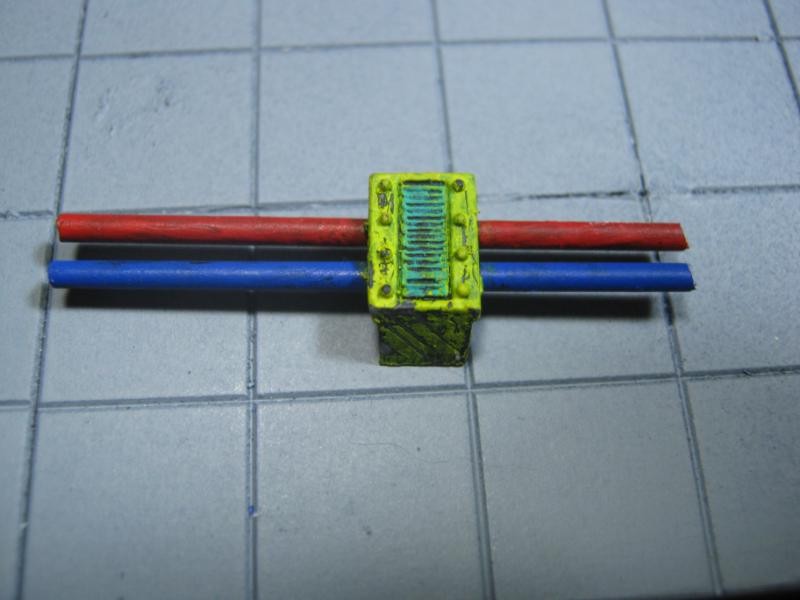
Utility Lock Box interior done. The control box now has a wash of turquoise gloss to make it 'pop' a bit more. I decided to run another cable over the top of the other two for some randomness in the utility box. I think it came out decent.
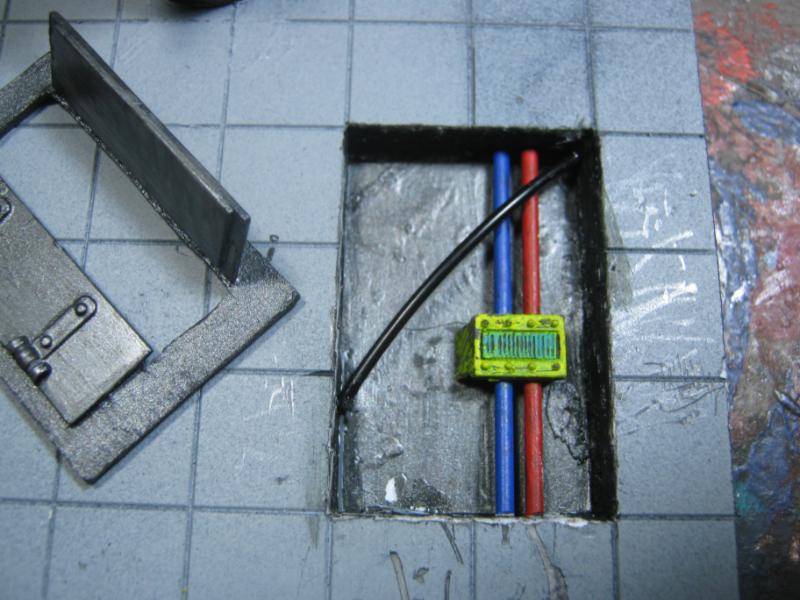
And done. I'll likely wind up doing something more on this (improving the rust comes to mind right off) but it's way above what I normally do. I really enjoyed this step of the project. Don't focus too much on the glossy finish from the superglue, it is going to be matted down toward the end of this project. Here are the 'final' (for now) photos:
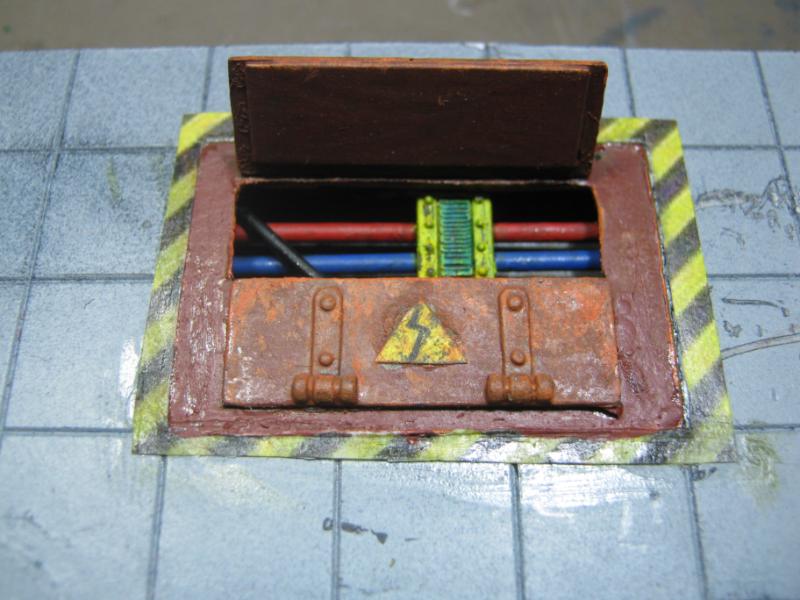
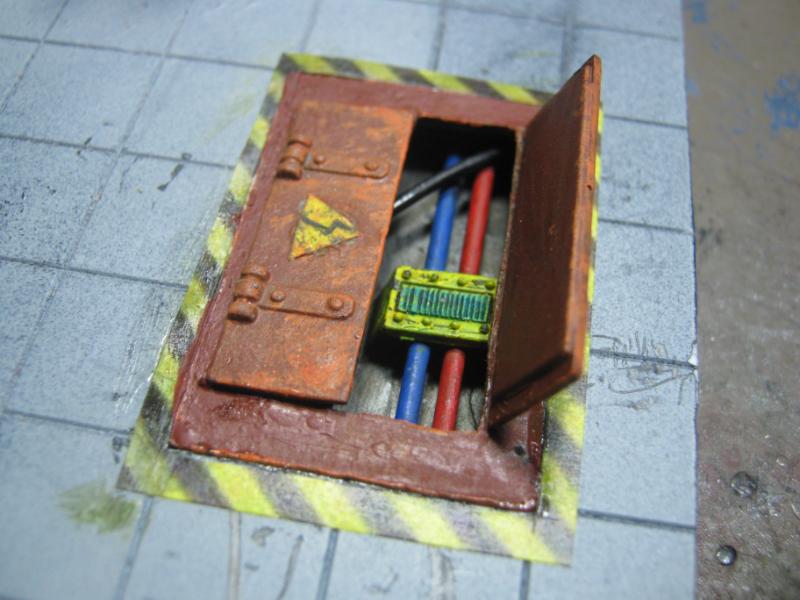
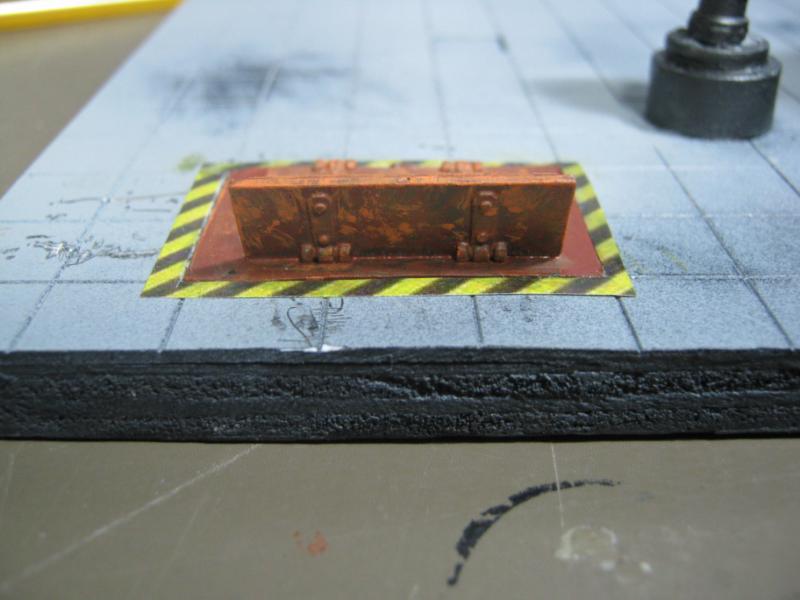
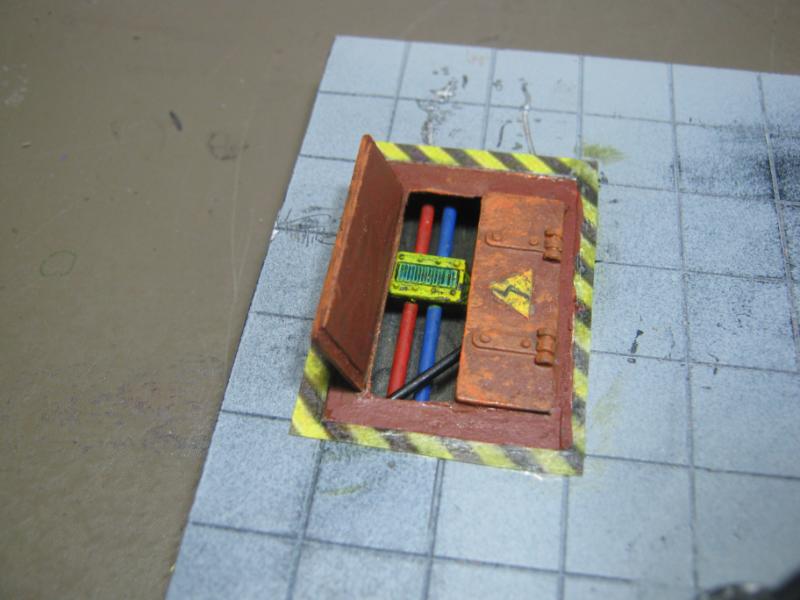
I'll end this one w/ the obligatory 'action shot':
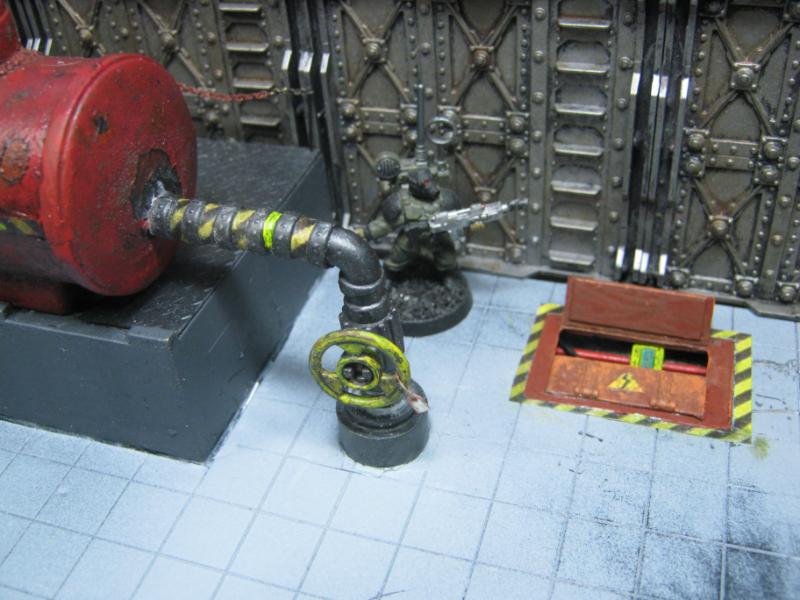
This project has been a challenge, no doubt. And not only to improve my standard of work. I'm trying to overcome many years of bad habits. I still need to focus on that last bit of detail that finishes a piece instead of rush through just to be done with it. I finish a model to somewhere around 80%-90%, and then it's done. Not finished (completed), just 'done'. I'm not doing that this time, although I did try.
However, I also want to say that I am having a lot of fun w/ this project. It's been a while since I've been this into what I am doing. There are likely more projects of similar kind coming in the far-off future. For now, I need to finish this and then get back to the other projects I'm trying to finish up, but I'm not going to rush.
That's it for this one. As always, C&C welcomed and I always appreciate the feedback. And sometimes... it drives to action.
I'll be back.
39973
Post by: Galorn
Hmm that looks like it would be relatively simpe to conceal some lights for a "shorting out /fire " fx in the lower level pipes bit. very nice job so far Skalk... now add the old discarded papers and suchlike...
22619
Post by: inmygravenimage
Very nice indeed. Only quibble would maybe wash the junction box in sepia to even out the tone. Beautiful build though.
24297
Post by: Viktor von Domm
now that is what i call a piece that tells us a story ...or at least is a good canvas for a story to happen upon...
so many nice and thought through details... the chain is an awesome idea... and you planned it very thourough...
the tanks seal...the small item on the closing wheel... that is a nice detail if i ever seen one! i dare say...you out done yoursefl with this one!
64081
Post by: hdbbstephen
Beautifully done!
I know exactly what you mean about getting a project to 90% and calling it a day, "good enough" for play purposes but not eye-popping. I am definitely going to apply that lesson to my big projects in the future.
BTW (and I apologize if you've already mentioned it) what colors/blends are you using for that rust effect? Is there a tutorial that you recommend?
Age-ing and weathering are techniques that I need to work on.
Thanks, and Merry Christmas!
44814
Post by: alabamaheretic
looks mighty fine man. thats a really inspired bit. I think that makes this project look even better and it looks very easy to do.
Happy Holidays to you and yours Skalk!
Bama
30344
Post by: monkeytroll
Good job Skalk!
Definitely bringing the piece to life now.
I love those old storm bolter mags, use 'em all over the place.
26790
Post by: Gitsplitta
Fantastic job mate... that box is an excellent addition!
48594
Post by: dsteingass
The recessed bit is Genius! really..genius!
..However, I have to ask why use so many special knife blades? Your no. 11 blade would've done the job? You only need the lightest scoring.
26139
Post by: Skalk Bloodaxe
@ Galorn- I don't disagree about the lights (would be white and blue LED), but it's a task I'm not up for. I am however up discarded papers and suchlike.
@ Graven- perhaps it is the lighting in the pic, or I applied too lightly, but it was washed. Small matter though, it has been washed again.
@ Vik- Thank you for the compliment. I agree that this is way over the top of my regular terrain. I expect there will be more before this is over.
@ hdbbstephen- No apology, you didn't ask. By complete coincidence I inadvertently created a small 'how to' in this post.
I can't recommend any tuts specifically because this has been trial and error (and error and error) for the most part. I've been given some good advice from people who are accomplished well beyond what I am doing. Here's some of the things I have learned (brush only, salting is a list in itself)
- Paint the primary color of your model and then create some damage to the paint job that leaves empty patches (see my post for example)
- Start with a darker color brown and work your way lighter to the edges. You can also start dark and drybrush light over it to bring out highlights from the texture. You can create texture simply with your brush - stipple it as it becomes 'tacky' when drying.
- Wash your entire model with a watered-down black wash. I mix mine 50/50 water / paint or 60/40 water / paint. Experiment with this to find your preference.
That's it. Everyone that does it better than me could offer their method as well.
@ Bama- Thanks, really appreciate the compliment. There's more of the same coming on this project
@ Monkey- It was easy and fun to do. Chances I'll be doing something similar w/ same idea on other pieces soon, really happy how it came out and creates a 3D effect of sorts that could bring a flat wall to life.
@ Gits- It was your idea, and I'm glad I did something decent with it. I didn't even consider gluing a hatch down and that be it. I did this on purpose with a specific vision. It's not often I set out to create something and wind doing exactly what I wanted instead of wind up wherever to project took me.
@ Dave- All I did was take your idea from the Necromunda building you built about a year ago. But I'm psyched that I did a decent job with it. About the blades- I was cutting out firmly glued tiles. I used the 11 to score the seams and then used the 18 to 'pry under' and dig it out slowly. The chisel was for gouging out the wood, and the 18 was handy for that as well w/ cutting the sides of the trench down flush before prying the plywood layer up.
Lots to share in this update. Spent the last couple days getting to where the project is right now. I did a lot of experimentation on it this time, and I'm hoping some of the rust ideas help other people. I don't have the painting technique down completely, but I have figured out the modeling aspect.
Here's an 'action shot' to show what this facility is for and to offer some scale perceptive. It also helped me w/ the width of the tracks and figure out where the track damage would be from the vehicles pulling in:
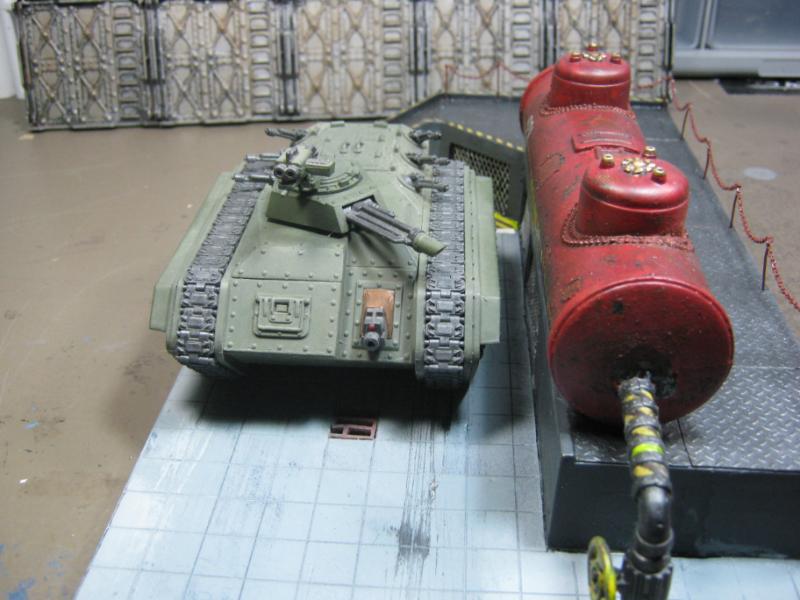
Then I had the great idea to use the Chimera to actually make marks on the tiles. I scraped it back and forth until I had clear makings:
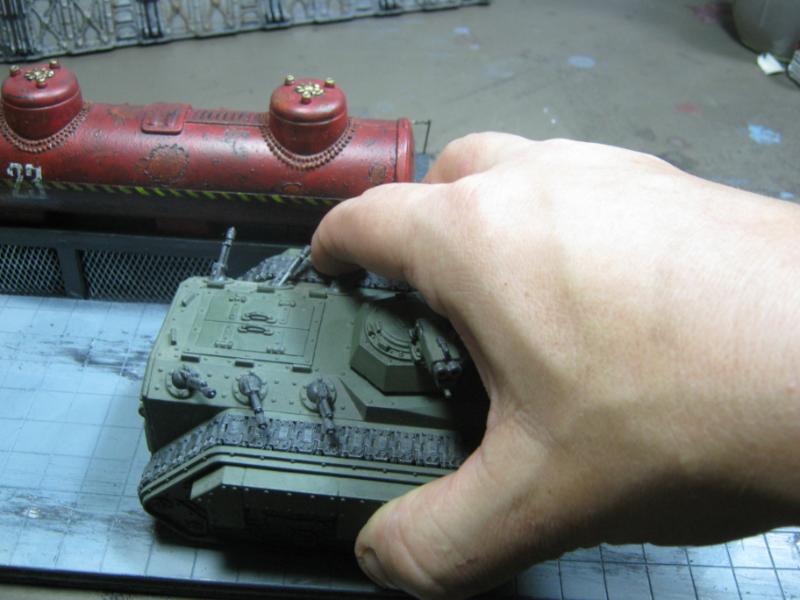
Here's how it came out. Pretty rough, but gives me an area to work with later:
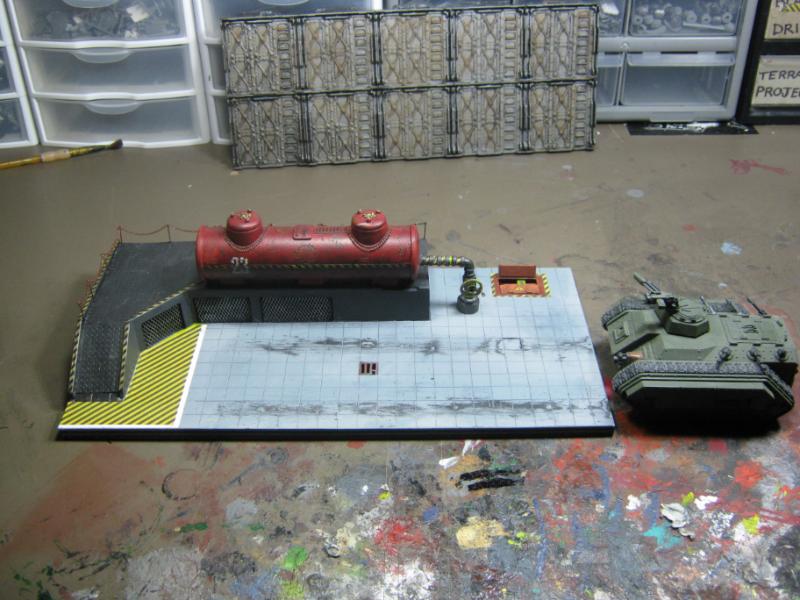
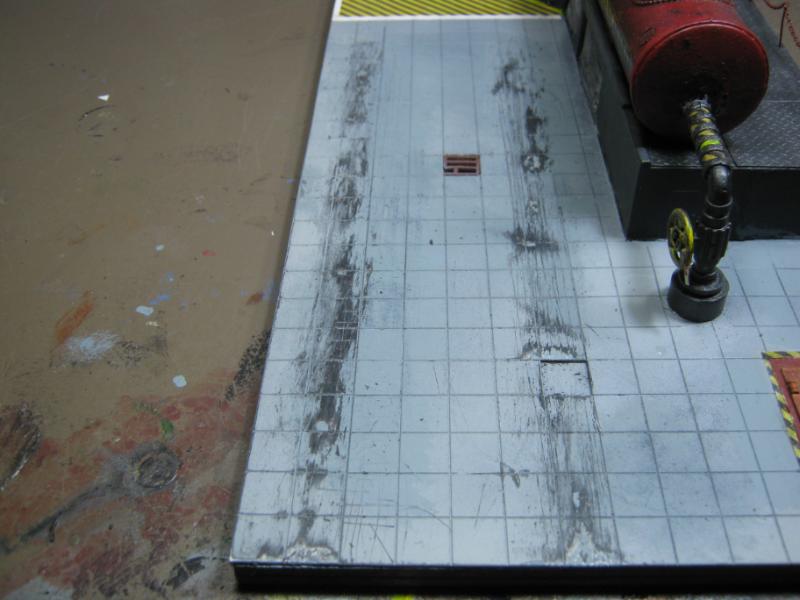
I also repainted the concrete platform and gave it more texture along the way to try for that 'concrete' look:
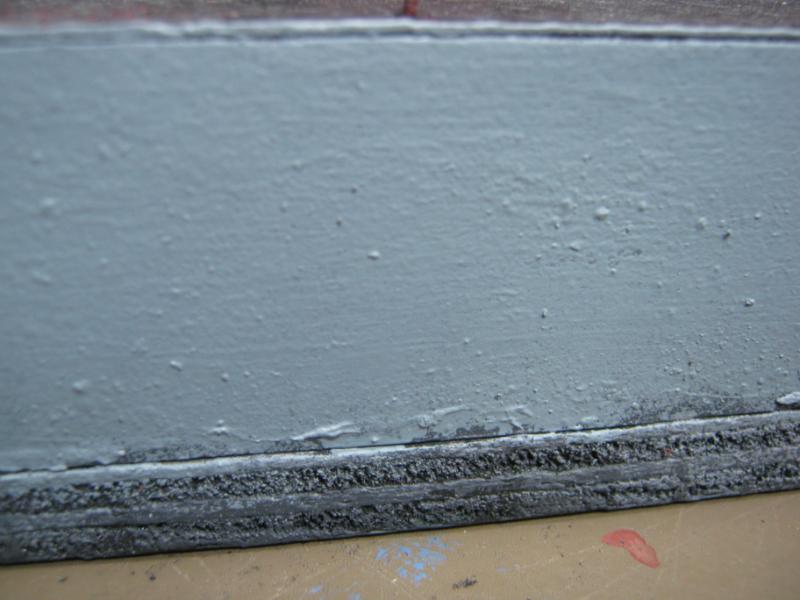
And I finished the chain railing (minus wash). It was annoying to have to keep going back over the chain as there were shiny bits here and there all over the chain as it twisted from being painted. Took quite a while to get this done correctly:
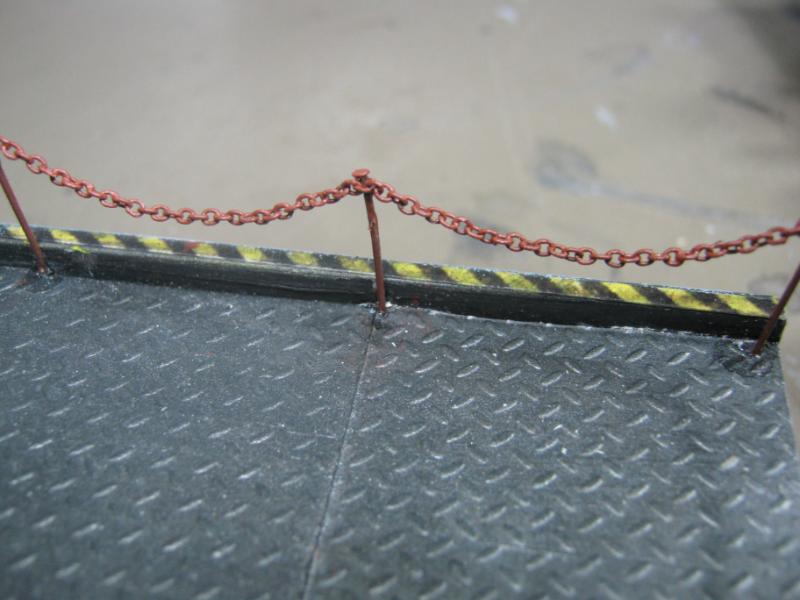
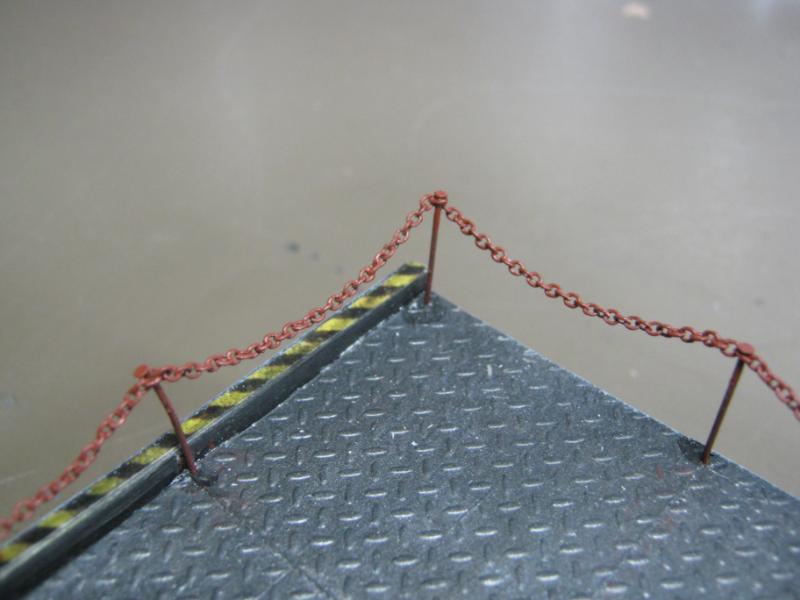
I started the end of the tank where I had the Aquila before. This time I went for what I envision as an instruction sheet sticker like you see on industrial tank, fuel trucks, etc. I like this a lot better:
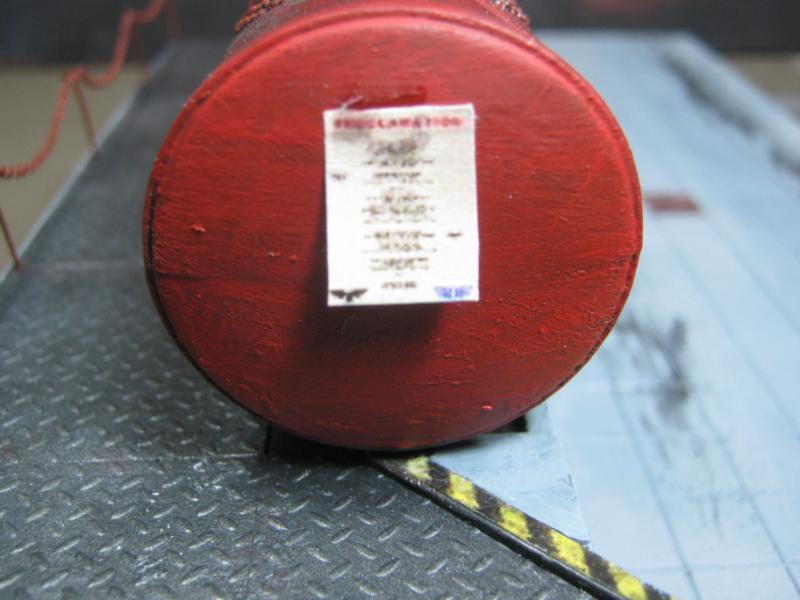
I messed it up a bit to look like rust had started beneath the sticker and is pealing off.
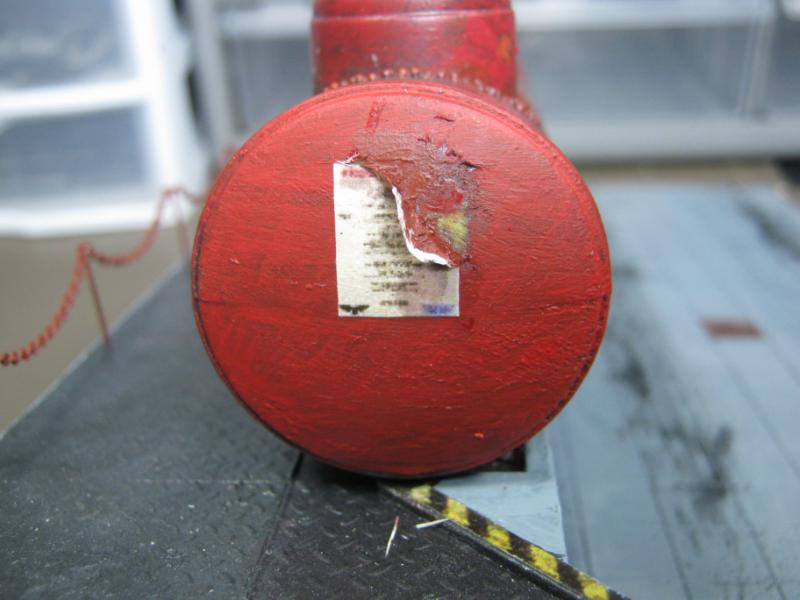
The 'border' I have been making for my rust spots was really difficult on this one for some reason, so I tried something different. I globed on some thicker paint (in this case Vomit Brown) and waited for it to almost dry:

It turned out to a bit more messy than I had intended, but now I know how to do it and just need some practice. I'll be trying this again soon:
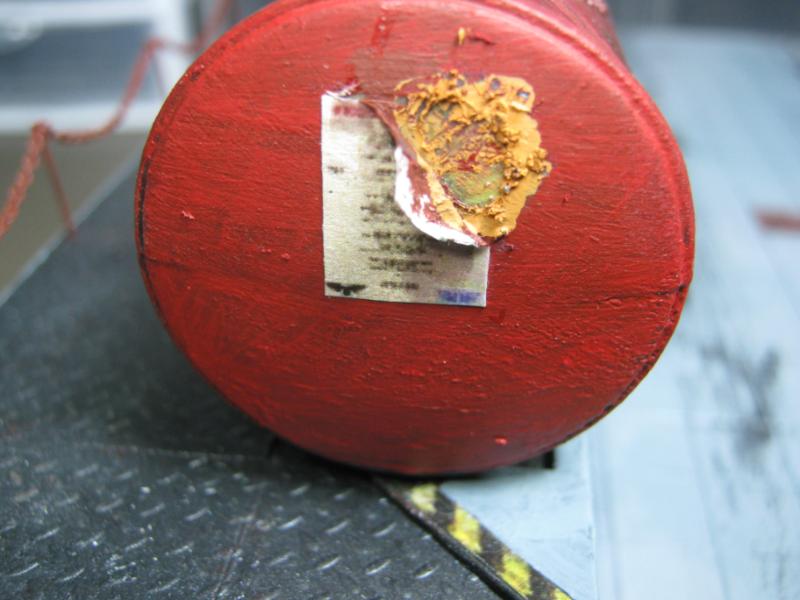
I smoothed it out a bit and then painted the dark base:
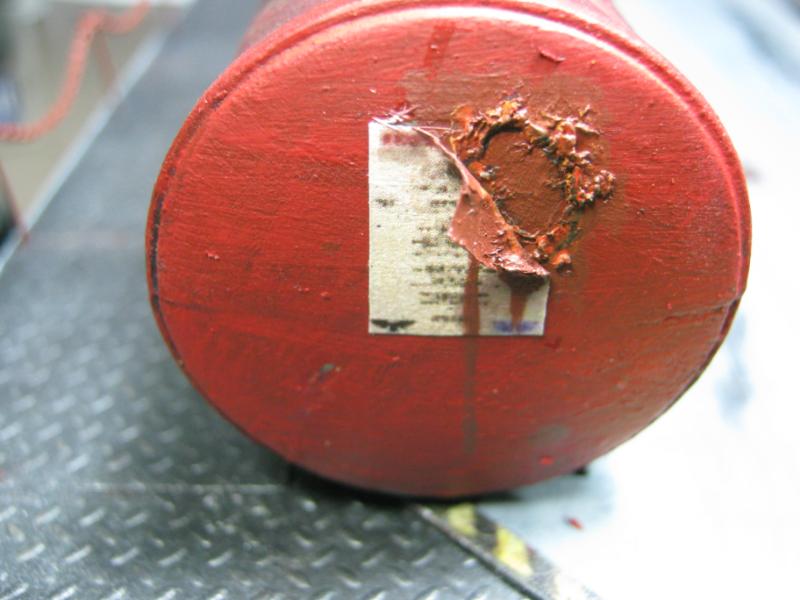
Here's a bit of experimentation. You'll see what works and what doesn't as I go along. I noticed something earlier when I was working with the fuel pipe on the other side of the tank. When I had to take the model apart I pulled it off (the beauty of superglue) and it took a huge chunk off down to the basecoat. At first I was really bummed, but then I realized it was an awesome rust effect. So this time I tried it on purpose. Here's what I did:
First I glued some matchsticks to the paint. Here are the before and after pics:

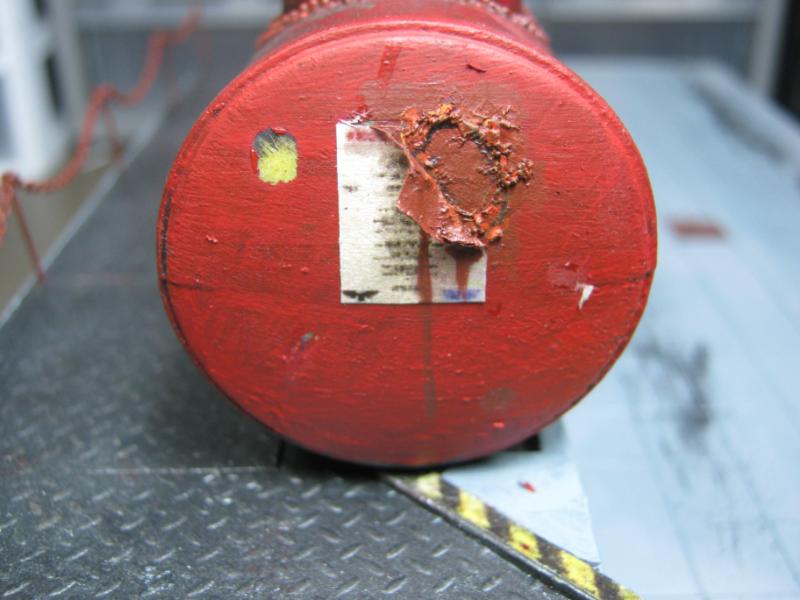
Not what I was looking for, but I also kept in mind there are only two coats of paint on this instead of my 3-4. So I tried paper instead. This was a mistake. Never do this. I had to do a lot of work to fix this, and I didn't bother to show the end result. Suffice to say it took me about 20 minutes to fix the damage I cause to the main tank.
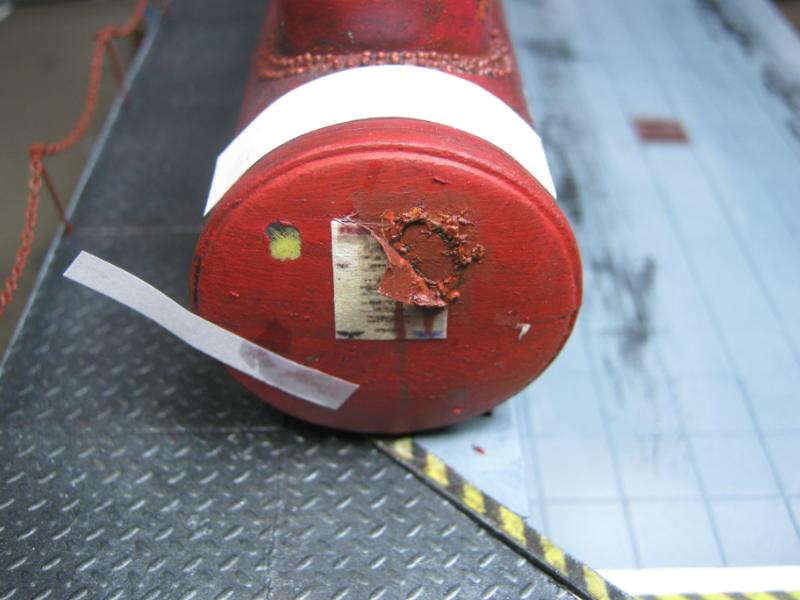
The next test was something a bit more manageable- coffee stir stick. Here's the before / after. I really like how this came out:
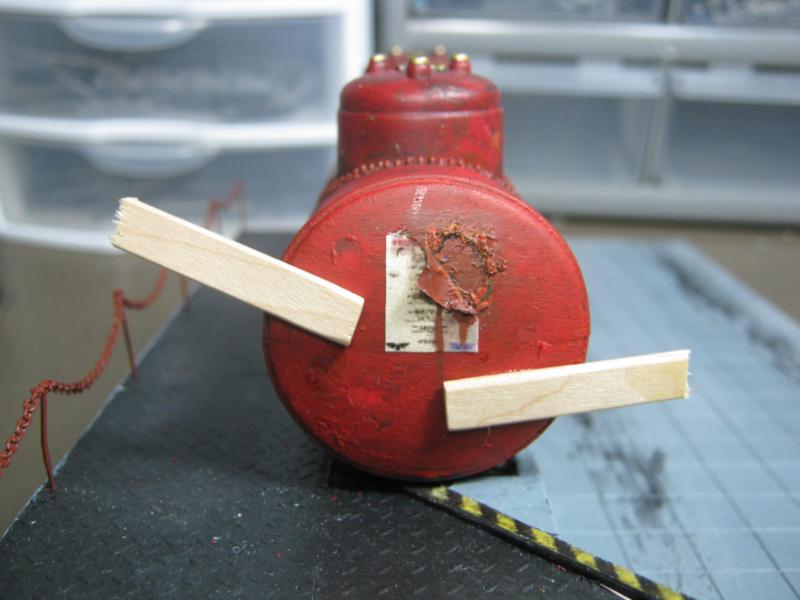
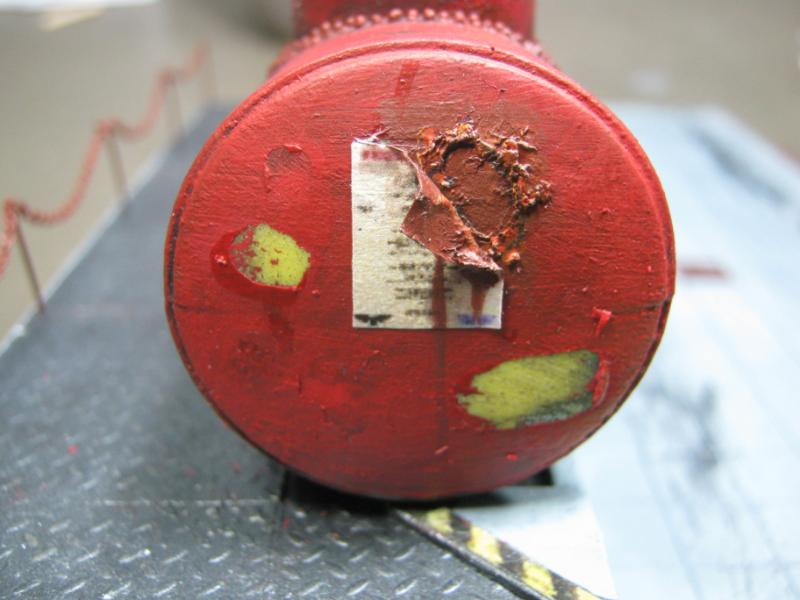
I put a bit of rust on it to see how it would look w/ color. I like this a lot.
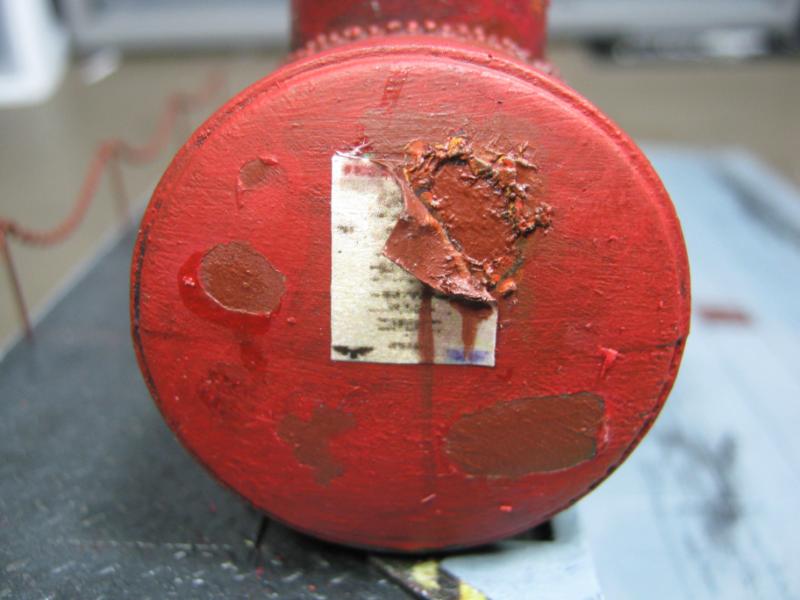
Here's an 'after' shot from the paper debacle, except with paint on it. I'll admit that once I had it cleaned up the efft was pretty cool, but I still recommending not doing this.
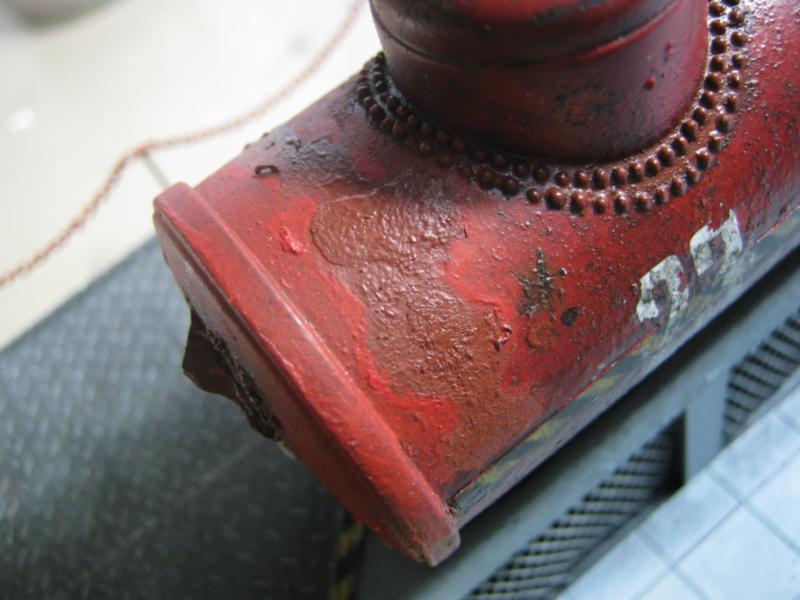
Also tried a stipple effect on the rust spots. Came out well I think:

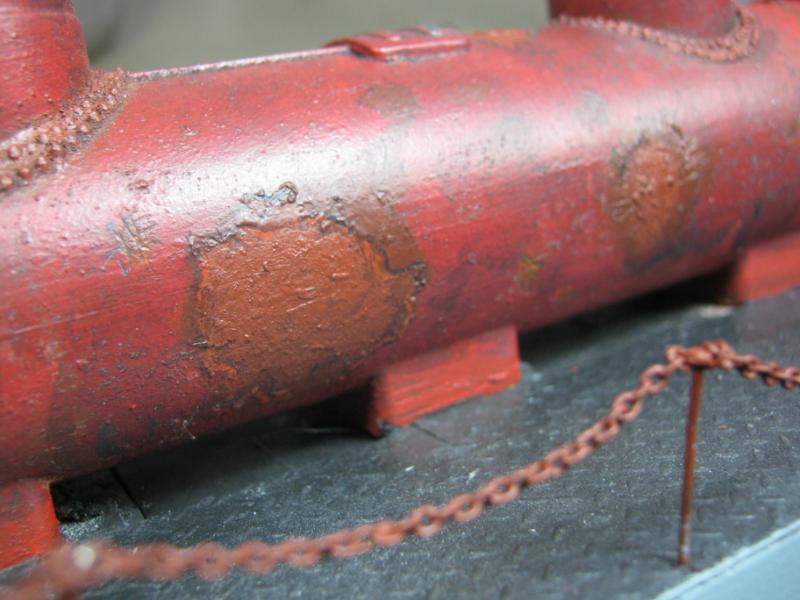
In between waiting for things to try I was busy on the trash can. The paint pot is not part of the model. I put a lot of thougt into this and I tried to make things as varied as I could while staying within a realistic idea that someone would throw that away, with a couple twists. I kept adding to it more and more until I really liked how it looked, and knew it would get even better once i could put it on the base and add more things.
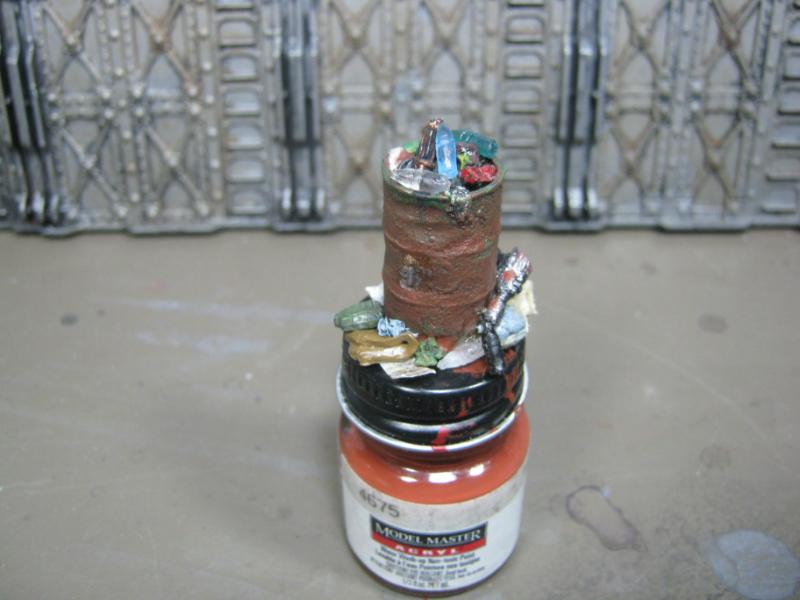
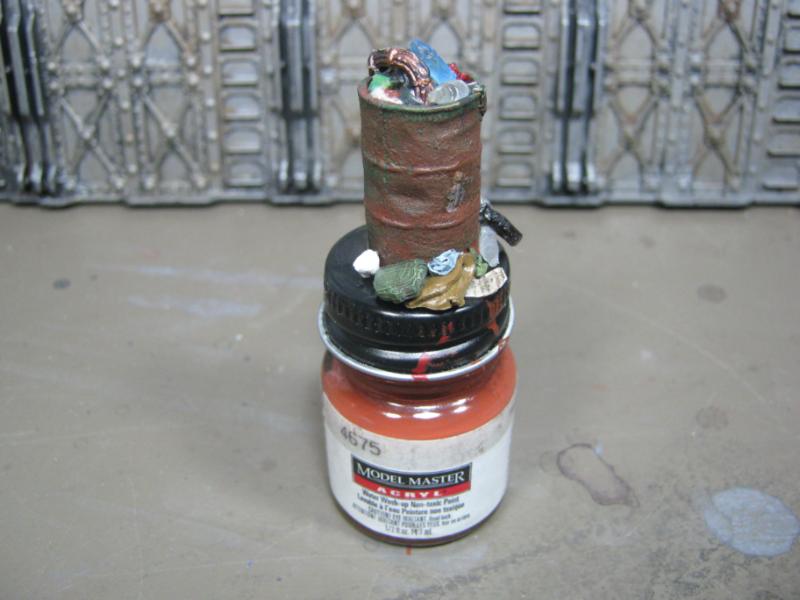
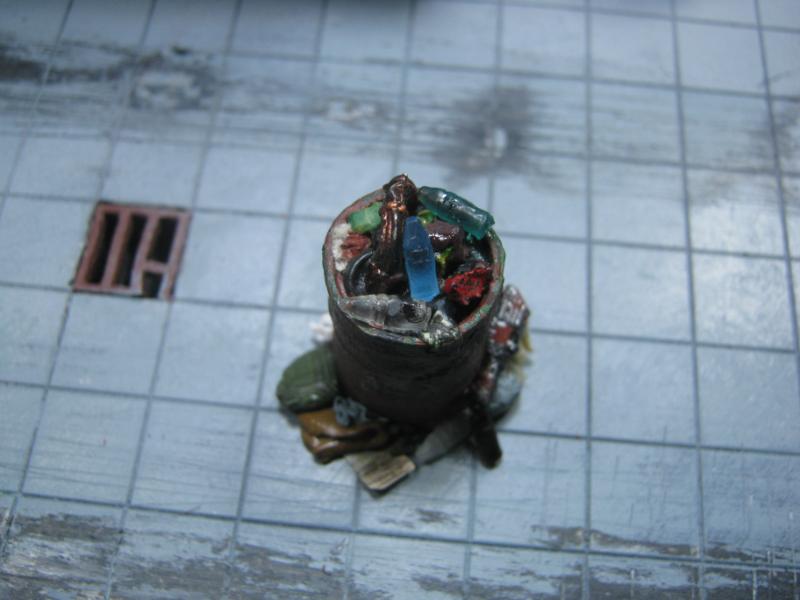
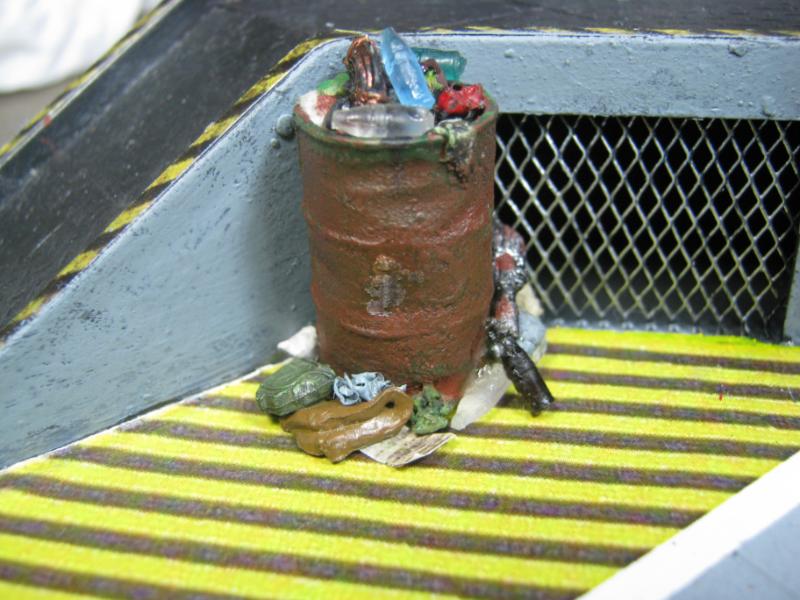
First black wash. I like the subtle shadows that are created by layers of light washing instead of drowning it in one huge glop.
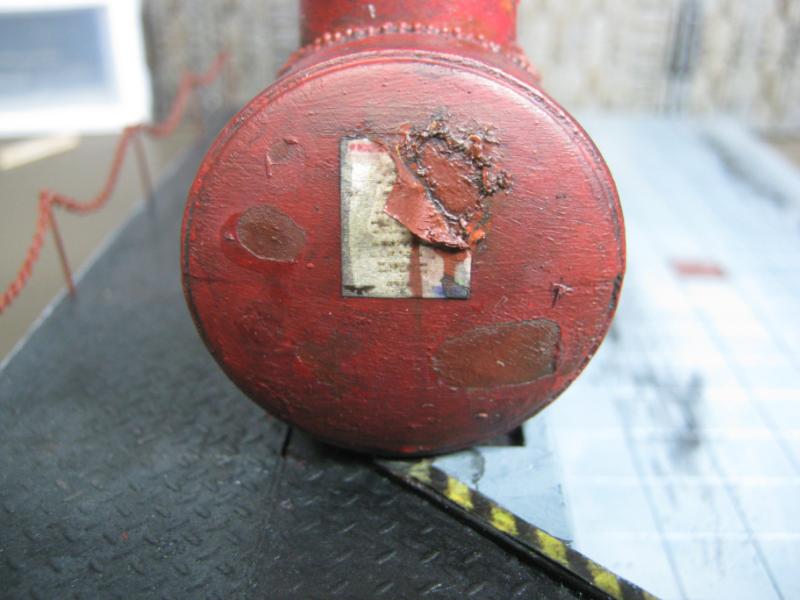
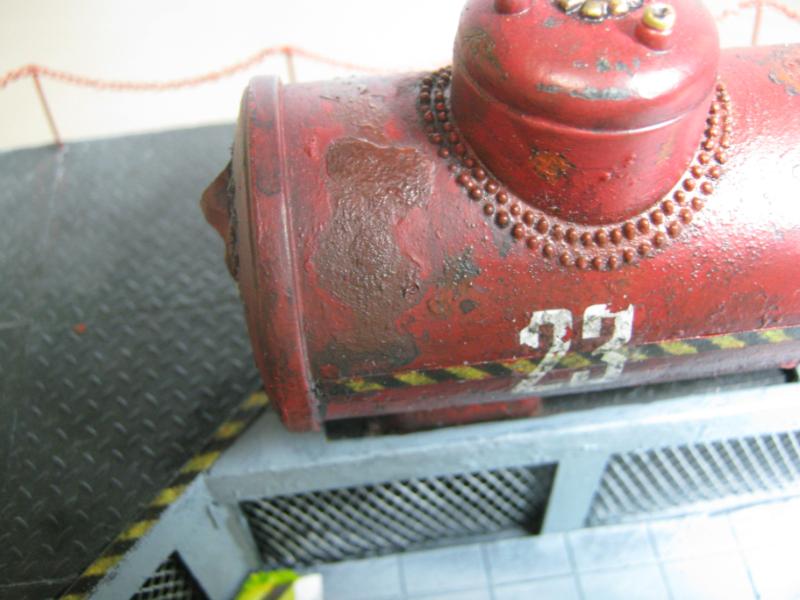
And back tot eh trash heap. It just occurred to me that I didn't take any WIP shots of how I wore down the caution stripes, but you can see the end result in the same pic. But that's not what this shot is about. I really put some attention into this, and as you look at the pics you'll notice a lot of small things just 'there', and not all of it is trash. Everything is glued in place now, so what you see if what will be staying (unless I decide to tear it all apart again). Also notice the stiff against the bottom of the wall on right side of pic. It's foam. Showing both pics here:

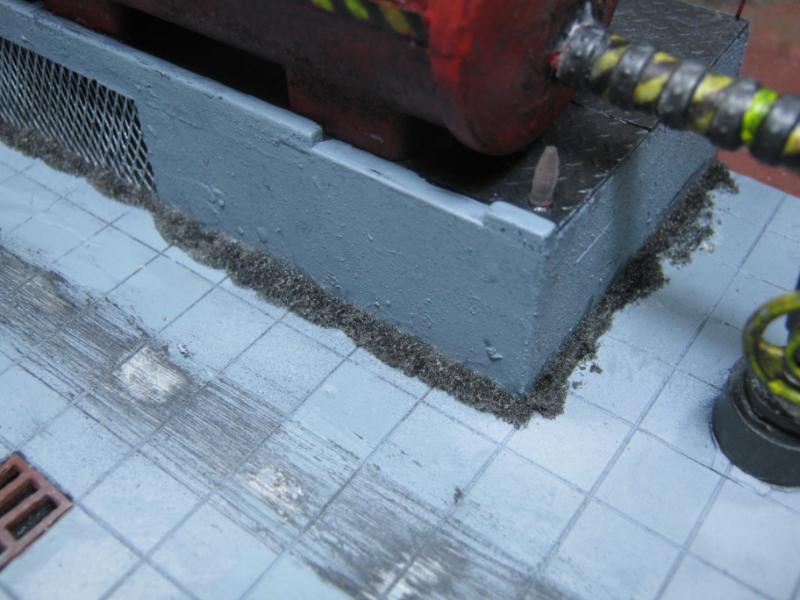
Still a lot to be done. Need washes, drybrush, weathering, etc. I think the build is almost done, just a few more 'little things' here and there. The true challenge to finish this properly will be in the paint. We'll see how that goes.
Thanks for looking and your C&C. I'll be back soon I hope.
|
|