32724
Post by: fiorehellheart
Welcome to my Project log, I'm Rory. I've started this project log as one last attempt to build myself a Warlord Titan before I head off to university in 3 months time. I've intended to build one before, but never quite had the motivation, nor time, so it didn't get beyond the planning stage. However, last night I finally started on my Warlord for the first time and now I hope I will be able to see it through to the end. This project log, which is being posted on the Ammobunker, Warseer, Work in progress and Dakka Dakka simultaneusly is intended to both inspire others like myself, and to ask you guys to give me to motivation to complete this project, by not letting me give up. This is why I will be writting as much as I can about why I'm going about it the way I choose, if this rough guide helps just another person to go on and make a titan I'd consider it worth the time.
I'm going to warn you before hand that even though there are only 8 photos in this post, I discuss each quite thoroughly, I'm sorry if you get bored. I'm suspicous that even among fellow 40k players i'll go into so much detail that you'll look as bored as 'normal' people do when I try to explain warhammer to them. So just feel free to simply subscribe and look at the pretty pictures, I won't be insulted. The same will probably be true of the whole project, if you like detail though, then I hope you'll enjoy it too.
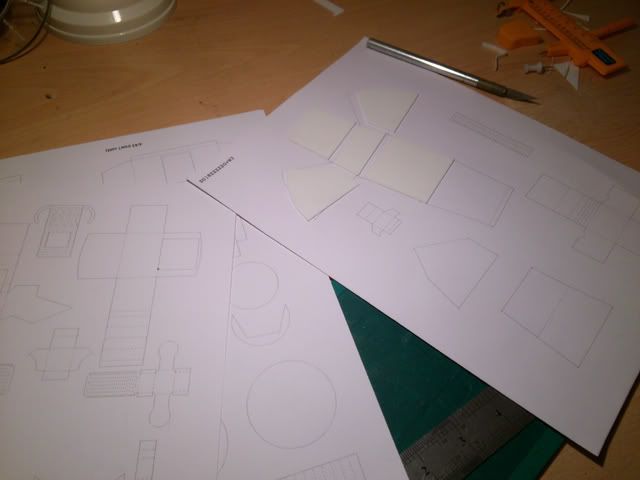
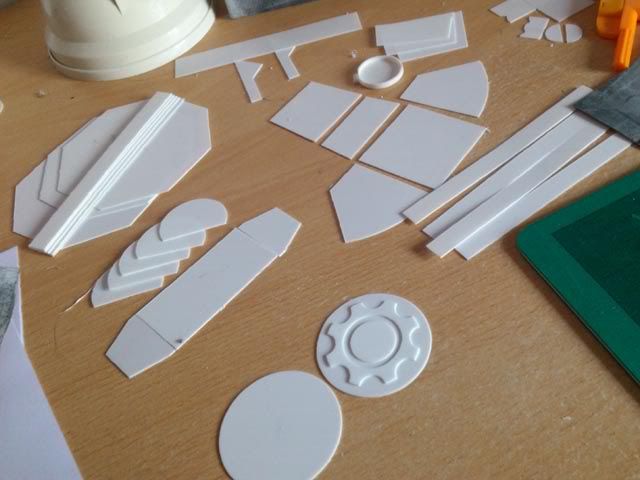
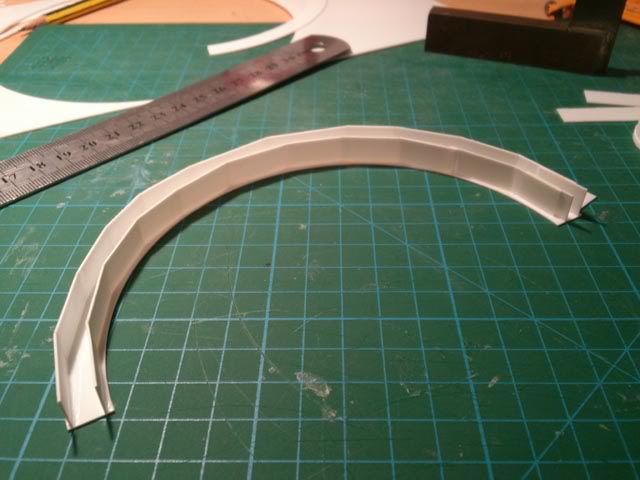
Okay, so this is my progress so far, I've printed my first copy of the templates off onto some card (180gsm) and traced onto my plasticard (0.5mm) to cut the first shapes. To trace onto the plasticard I've tried various things, the best of which I found was to poke a sharp pin (I actually use the end of my circle cutter) through the card whilst holding it securely to the paper, the only other possibly improved method is using sticker based A4 paper to print the templates onto directly. This would then be fixed to the sheet whilst cut, then removed afterwards. Rather irritatingly I've been unable to find any printable A4 sticker sheets, if anybody has a link to anything decently priced I'd be greatful. The pieces laid out onto the card in the picture are for the toe, in another post when I begin to assemble the structure I'll explain more about how I intend to achieve the toe shape. There isnt really much to go on right know, I'm waiting to order some glue. The rest of this intial post I'll explain the rest of the design as a starting point.
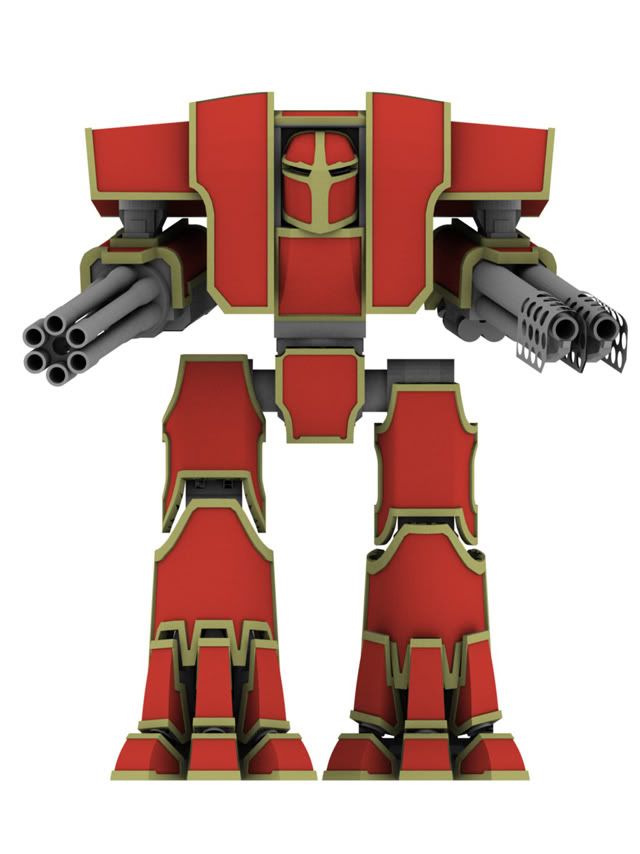
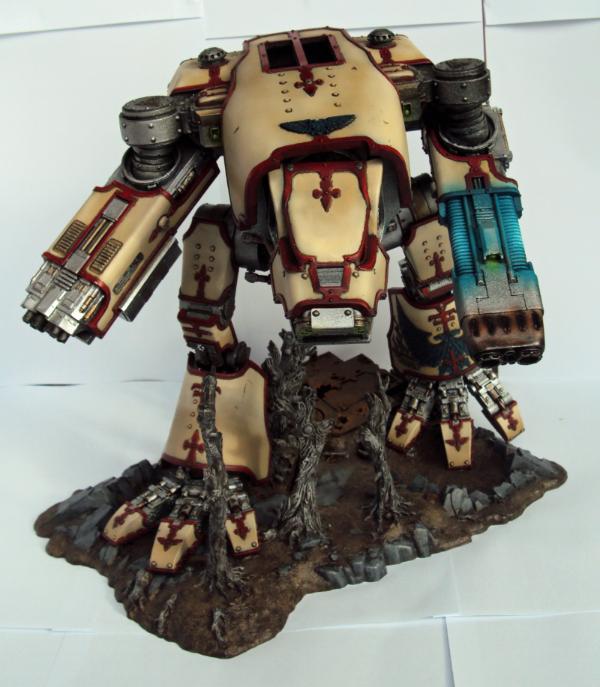
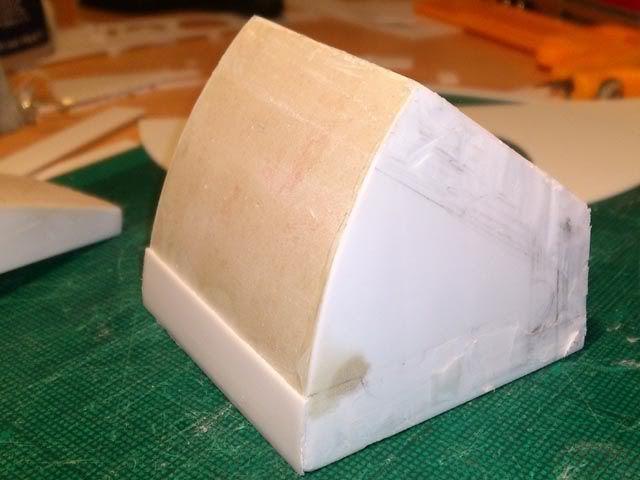
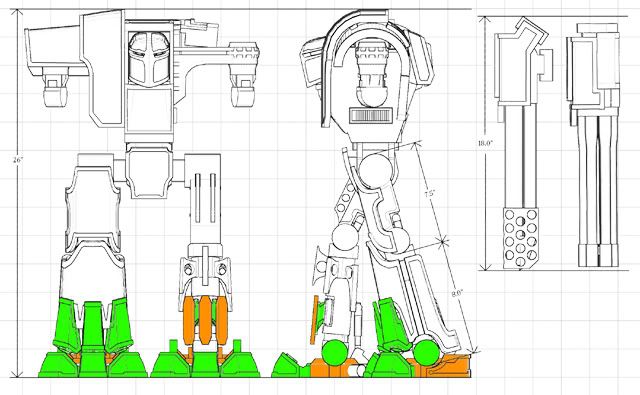
This is the latest image of my planned Warlord titan. It's quite obviously just a 3d model, and this is what I spent the last few years tweaking and adjusting in my spare time, whithout actually building it. I think the most obvious thing, as I intended, is the departure from the classic Warlord profile in the Epic model. Mine is curvy, makes it a bit sexier I thought. It's more than that really though, from the outset I wanted to be able to make something that would fit in with, at the time, the Mars pattern Warhound titan. But my first designs were not too curvy, and it was only when the Reaver was released that I begun to be able to change the design getting it to fit more with that aesthetic. From that I pulled stuff such as the gun shapes, the leg design and the toes. Although the toes are more from the gamesday prototype and other parts from the Warhound, ie the crotch armour plate. The part of the titan that I was most able to seperate and begin to design on my own was the torso. shoulders and head.
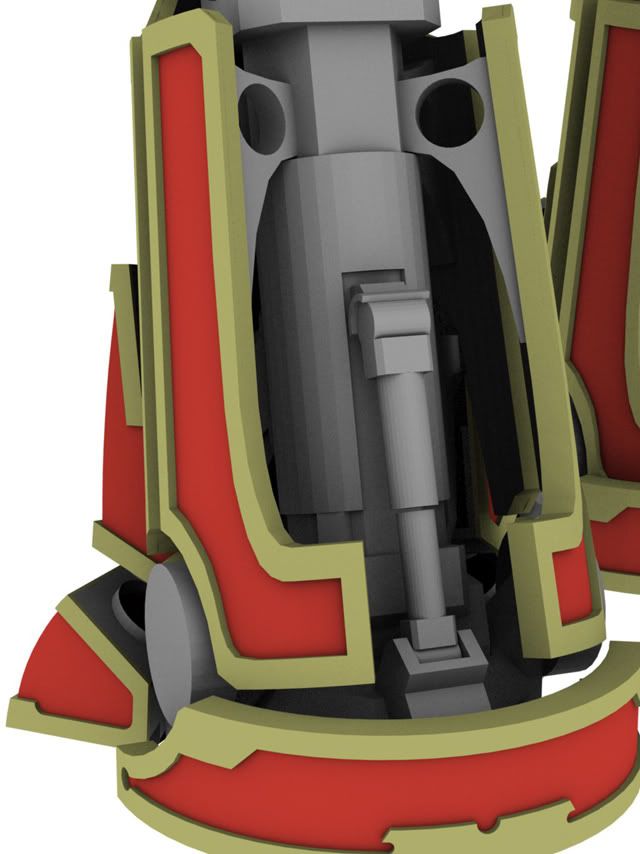
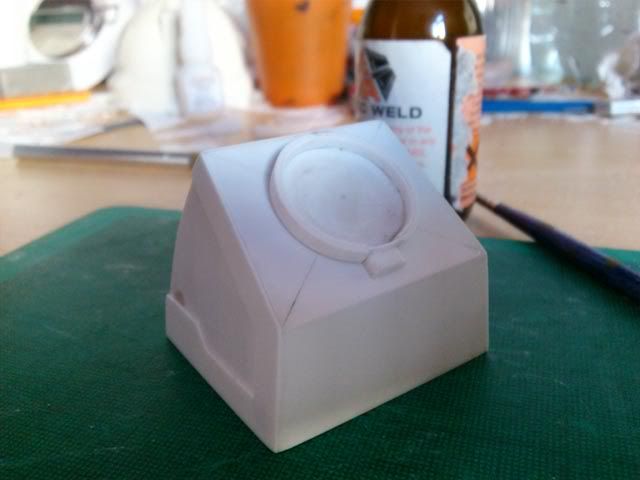
This picture shows much better my attempt to blend the boxy Epic Warlord into the curved Forgeworld titans. I took the inspiration for the abdomen from the apocalypse rulebook Warlord illustration, although mine now curves at the edges rather than being a simple extruded arc of a circle. The large upper shoulder plates were inspired by converted dreadnought I found online, credit to Vaaish here. From that model I really liked the style given and after altering the shape but maintaining the same impression, I got what I wanted. The render doesnt have the carapace weapons on yet and they will be added to the flat section of each of the top shoulder plates similar to the Reavers carapace weapon, with a similar style.
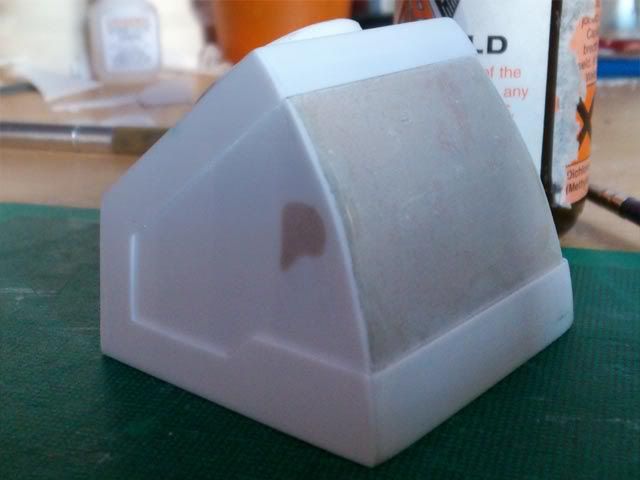
The 'lower' shoulder plates that extend further out are the most differently designed component to any other titans I've seen. I decided to slant both them and the upper shoulder plates so that the silhouette of the titan further lost the boxyness of the Epic model, whilst keeping the hulking proportions. This picture also shows the gun and arm better, the gun quite obviously 'borowed' from forgeworlds Reaver. The arm on the otherhand is similar to some of my favourite titan models, the very limited production dreamforge levithan mortis blockhead and crusader variants. A good interview with some decent pictures of the titans can be found here. I hated that I was never able to get my hands on one of these as they're fantastic, thankfully the designer has made some new titans, of which I definitely recommend you look at. The other part shown is the head. This was probably the hardest part to figure out, and I'm still not entirely happy with it, I simply don't think I can do better. In my opinion the Forgeworld heads are easily the best parts of them, both have complicated compound curves which my overly analytical mind can't understand to well, as I can't model them on a computer so I can't easily build them. Yet both look great. In making mine I felt that copying a knights helm had the right kinds of straight lines and curves that made it look noble enough for a titan.

This shot of the back of the titan shows most of the block detail I plan to add to the technical parts. I've obviously excluded stuff like rivets and a lot of plate detail though, especially on the caps to the cylindrical joints and gun ends which I intended to have a combination of cogs and circles layered on. I also haven't included multitudes of small pipes and cables, things that add detail when loosly scattered about mechanical surfaces. I'm not going to be sneaking any bits of building in, instead I will rely on layered sheets of plastic card to form evenly detailed surfaces across the model. I've always been of the opinion that a model with only one or two detailed areas looks much worse than a model with a lot of mediocre detail because of the contrast. So I don't intend to add anything like parts of plastic model kits unless absolutely necessary.
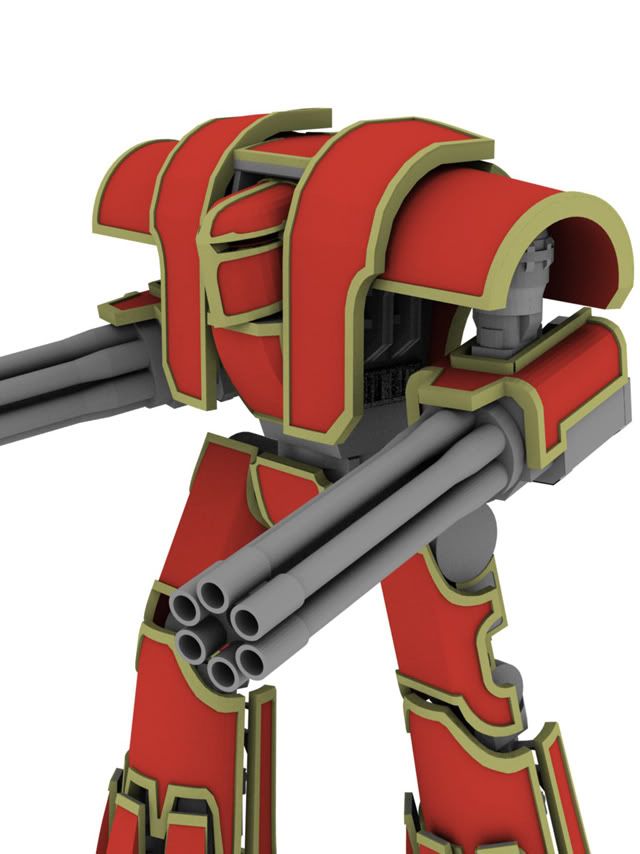
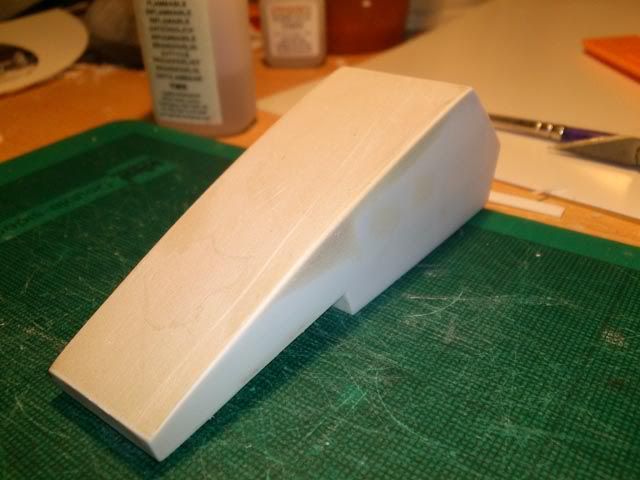
The last design picture is showing the part I'm intending to build first. This also borrows heavily from the Reaver, with the curved armour surfaces, but is still quite different, for one thing i'm not using a ball joint on the ankle. I know that the ball joint is much better for stability, but I didnt want the hassle of loads of pistons. Instead I only have a couple on each leg, at the ankle and back of the knee. A different departure in design the the curved heel plate, this was something I had from the begining on the intial model thanks to the picture of the Warlord in the Apocalypse rulebook. Something too interesting to leave off I thought.
On the Reaver titan the armour plates on the 'toe' part of the leg were attached to pistons fitted on a line to the base of the foot. From seeing in build photo's it's always appeared to be incredibly awkward to position correctly. Instead of this on my titan the toe armour plates are attached by a connector to the core shin piece alone, with the intention of raising or lowering along this plate as the leg tilts. I'll be able to explain this better one built. I do however intend to attach some form of ribbed tubing between the toe and toe armour plate but this again is something that I can do at a later stage so isnt on the render. This was all part of my intention to reduce the number of pistons I would need to build and position, it also solved a problem I've seen on one or two reavers, where the join of the toe armour piston doesnt appear fit correctly due to the angle they're posed at, it isnt designed to rotate along one axis where the position of the leg means it should, so doesnt fit correctly. I may see if I can find a good example picture of this for another posting.
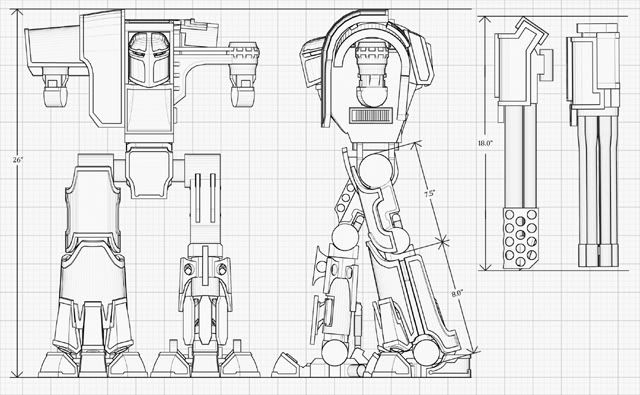
This is a schematic styled picture I threw together for fun. It does however bring me to the issue of scale. As you can see I decided that 26 inches, excluding carapace weapons, was sufficient. There are several reason for this, but the biggest I found wasn't a matter of converting the scale from epic, or from converting the scale from fluff, but instead going with what looked best in comparison to everything else. Whenever I see people attempt to calculate scale from fluff or models it always seems flawed given that no uniform scale exists across everything, everybody knows that marines aren't truescale, and that a rhino couldnt fit 10, and nobody agrees on fluff sizes, so I see these calculations as almost impossible to reasonably argue for. On the otherhand it's quite easy to take a look at a rhino, a few men and a reaver, then to scale up or down to the best fitting size for a game. It's even what the guys at forgworld appear to do, check out the reaver titan design video by will hayes where he talks about printing different scales to find a best fit compared to other models. Part one here, and part 2 here.
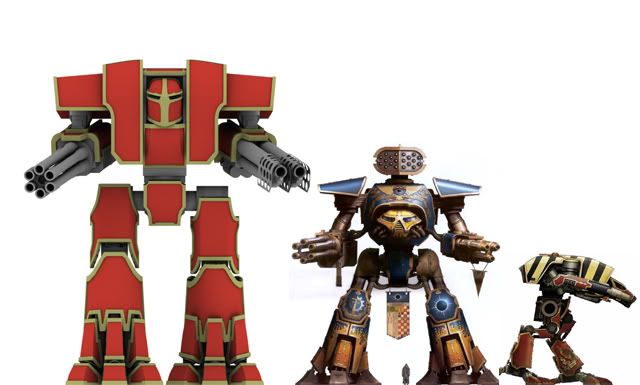
These last two pictures help to demonstrate what I mean, it puts the 10.5" Warhound and 16" Reaver alongside my Warlord scaled to 26". This size just appeared the most managable but fitting too. Much bigger made the others appear too small, and much smaller didnt fit either.
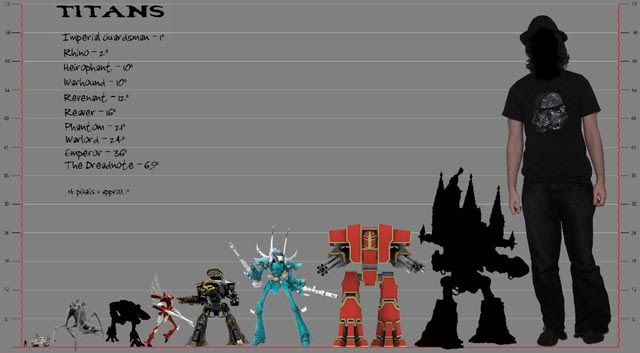
The final picture is an edited version of The Dreadnote's scale diagram from Dakka Dakka, taken from The Dreadnote's gallery here. As it's the best scale picture I've found online I hope he doesn't mind that I'm using it to justify my scale, although I would suggest the Imperator titan is a tad small. Thanks to him for making the image. My only ptoblem is that the heights of our Reaver titans differ, I believe it's because I measuered to the carapace top, and he measured to the weapon top, but if anybody has a reaver would they mind measuring and posting a picture here so I can figure our which is correct. You might also notice that it's listed at 24" inches on the left hand side, but it's still scaled correctly anyway.
Now I suppose I should thank anybody who made it through all of my rambling, well done! If you have any questions please ask me and I will do my best to answer them. Other than that feel free to give me your opinion on my design, I can still change things if I haven't built them yet and I'd love to see how this goes. And if I forget to update this thread within the week, just send me a PM, which should hopefully reach me and get me to do my best to show some progress.
11914
Post by: Nephilem
Looks good! Curious though, is it a feature of your particular variant that it not have the shoulder/top mounted weapons, or just something you wanted to avoid on your build to keep the curviness of the model?
Eager to see how this build turns out.
32724
Post by: fiorehellheart
Nephilem, yes, the shoulder weapons should indeed be there. But I just keep on forgetting to put them there, it's just something that I'll get around to towards the end of the model. I need to decided on weapon choices first and it wasn't important for the scaling, as i only measured to the top of the shoulders.
9217
Post by: KingCracker
Cool, another Titan build. Ill keep watch for sure 
41111
Post by: Daston
Very interested in seeing how this goes! Good luck
34644
Post by: Mr Nobody
I look forward too seeing more.
60173
Post by: Frostbitten
I enjoy seeing these come together, looking forward to seeing progress!
36040
Post by: Rhich
oh am I soooo going to be following this !!!! Great work so far.
55324
Post by: bibblles
That's quite an ambitious project. Looks like it will be just a bit taller than my titan.
60129
Post by: Scout Sniper J.
I'll definitely be keeping an eye on this project! (=
32724
Post by: fiorehellheart
Thanks for the response so far, really encouraging, I've just got to try and not disappoint anybody now  Also, nice titan bibbles, classic, but well built. In terms of progress I got some more of the templates cut out yesterday, I'm going to be doing a bit more cutting, but I should hopefully be able to start building soon. Later I'll try to get some more pictures to show you what I've done, and hopefully some renders to show you more of the foot area being broken down as I intend to be building. Please continue leaving questions, nice comments, or even nice questions
55324
Post by: bibblles
Yeah, just so long as you avoid the mistakes I made, don't start with the torso and expect to just stick legs on it... that will not work. Build up, feed first like blackadder did.
514
Post by: Orlanth
Nice you are trying to scale it properly, its about 2" too tall, and that height includes carapace weapons, 24" is right, as Dreadnotes wallchart says.
You could use torso mounts for the two other weapons, it could also be used to explain away the extra height of the model.
32724
Post by: fiorehellheart
@ bibbles, That's pretty much why I first decided to use the CAD route unlike most people. It lets me have a complete understanding of my model far before it's even started. I'm totally happy with stuff like proportions after a lot of testing, and testing with the computer is so much easier than it would have been if I made mistakes and had to do things repeatedly. If I can manage to be even partly as detailed as blackadders i'd be pleased. His models are just remarkable feats of engineering, that Thunderhawk, Warhound and Warlord. I think it's mostly about layers, and layering simple detail over and over, a little like layers in a painting I guess. But that's not saying it's easy, we'll see how it goes when i get started constructing I guess.
@Orlanth Check out what I said before. I know that 24 is the generally decided height by most scratch builders, but I felt that it could be just a bit bigger and still come out good. That said I largely based my chosen height on comparisons with the Reaver and Warhound, and if I should have measured the Reaver to the top of the gun rather than the carapace then it might need to be smaller. But on the other hand, even if I am wrong in measuring, I don't think the extra couple of inches will look bad, and will just make it look a bit more imposing than I'd intended. Still within the realm of acceptable with either height. The guns will also be on the shoulders, I just need to model them. Think I need to do that soon, a few people aren't noticing what I said on the other forums too.
Right, I've got another update, so on with the pictures.
Thought I'd start off with a scale image tonight, it's not going to be the smallest of models really.
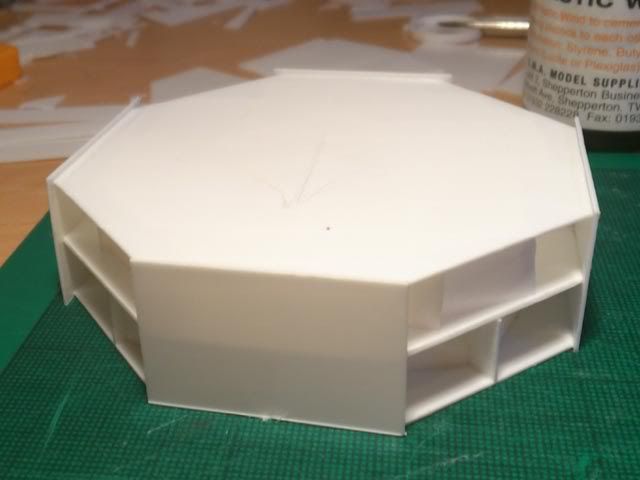
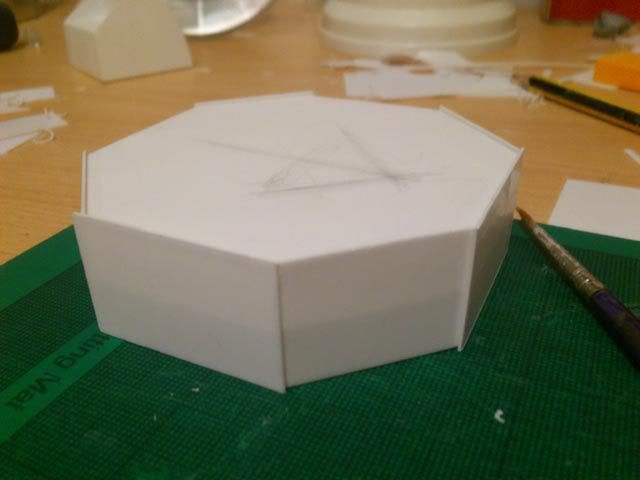
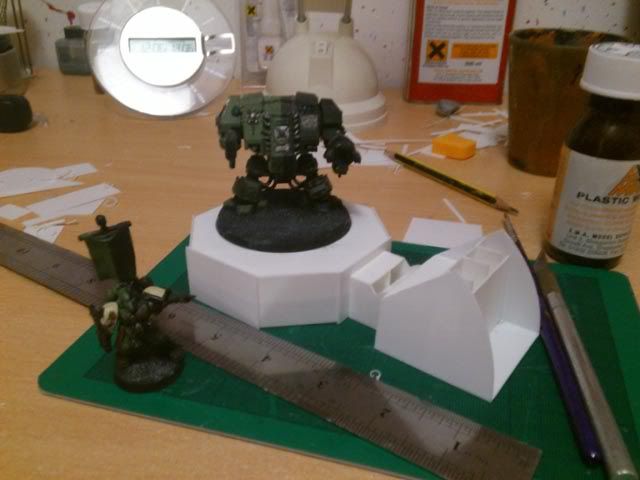
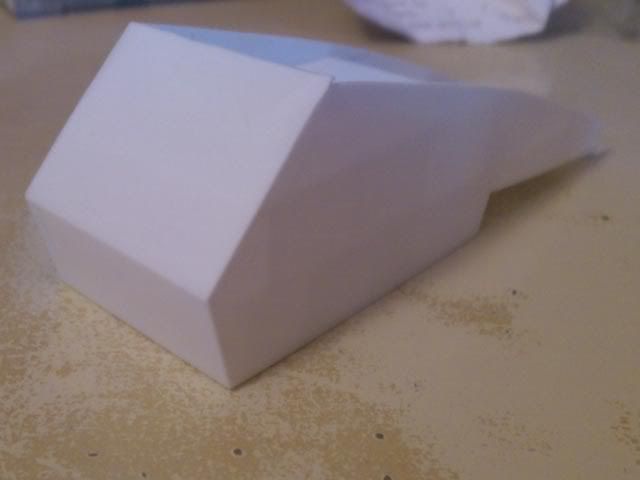
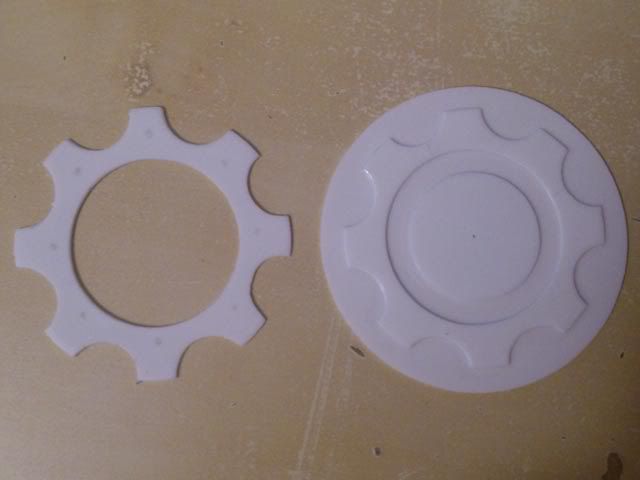
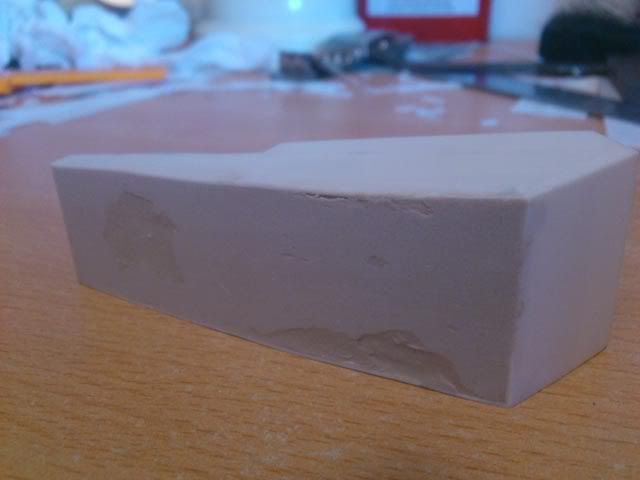
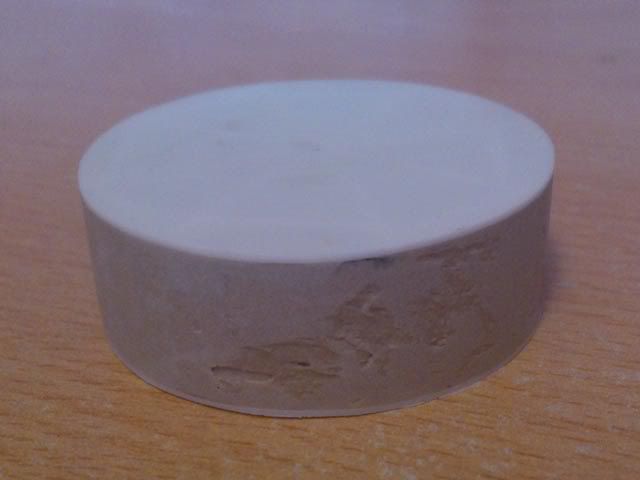
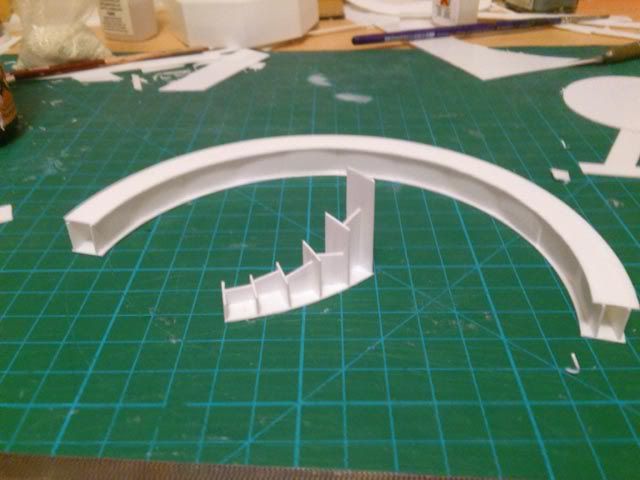
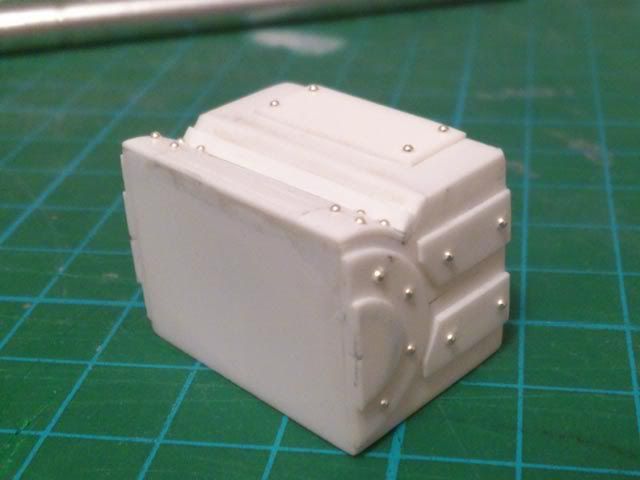
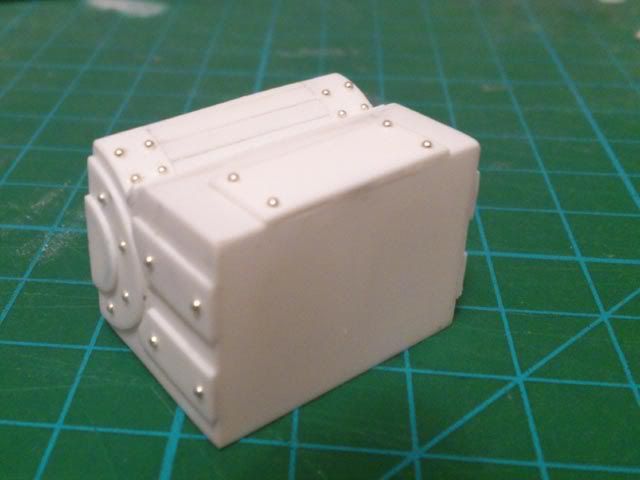
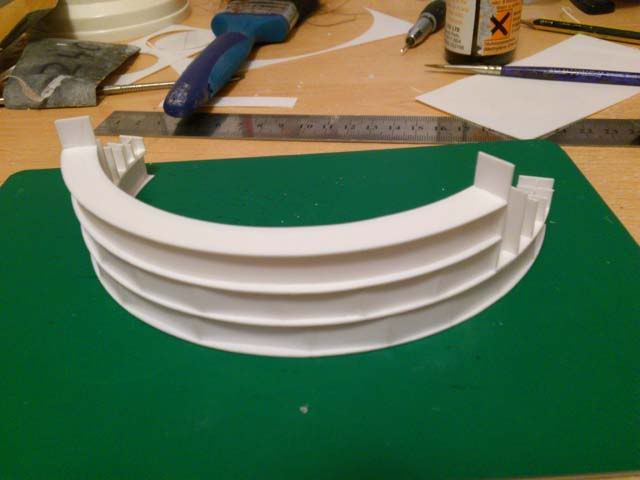
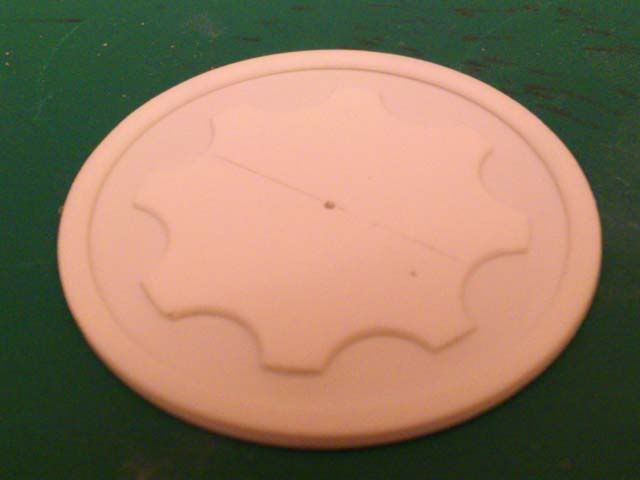
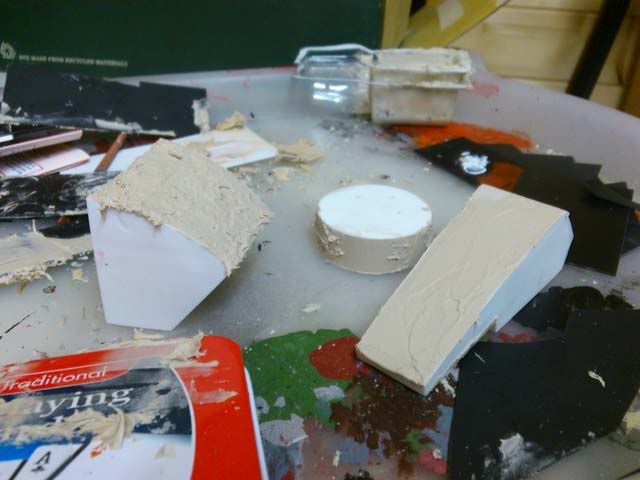
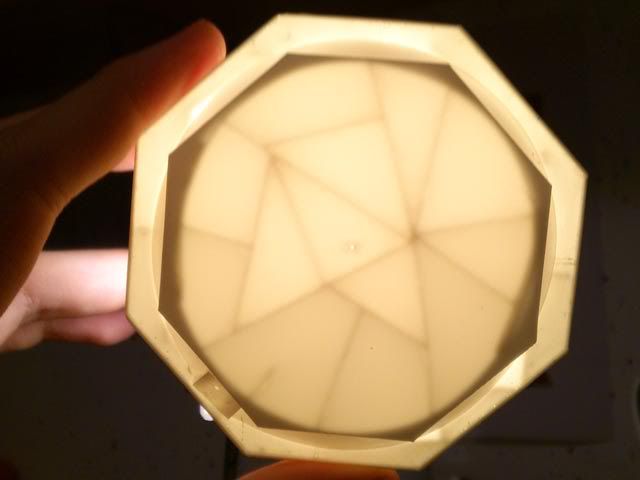
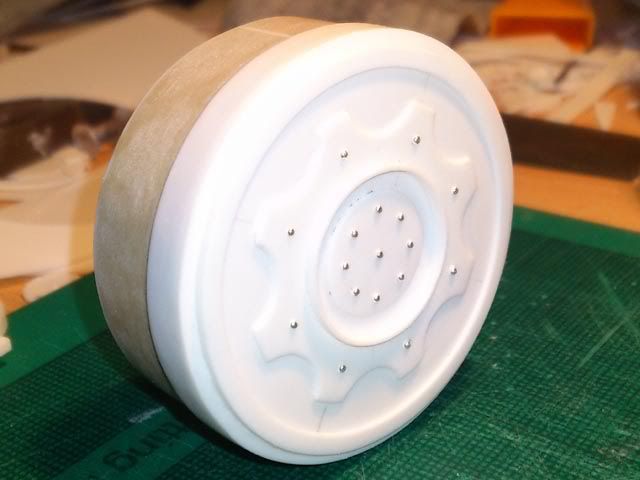
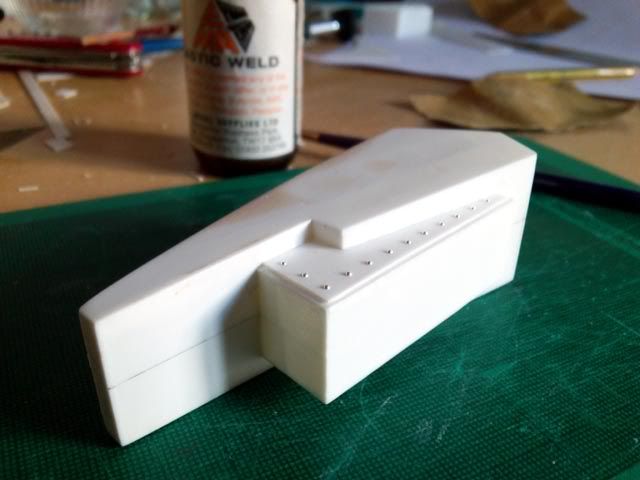
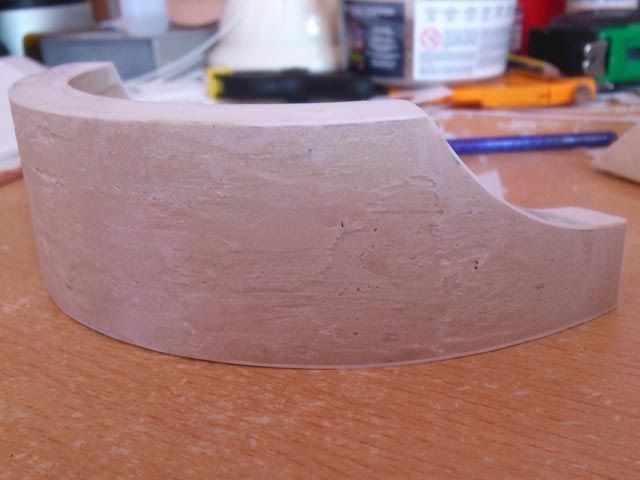
This one actually shows what I've been up to. I continued with cutting out templates, as I'm still waiting on my glue to arrive, hopefully it'll be here within a few days. This shows the first pieces of the base of the foot, that's the octagonal plates to the left, they along with the strips on top will form the inside of the foot. Basically being the strengthening structure within. The 'male' part of the ankle joint, that's the series of 5 circles beneath that. The ankle caps, that's the circles with cog detail placed on top, they will have a spacer between them before being smoothed using car body filler. A technique I will use on all the curved surfaces. The parts of the toe middle have also had some detail cut out for them, and a bit of detail for the toe end built. Not loads of progress I suppose, but I work slowly most of the time, everything has to be perfect.
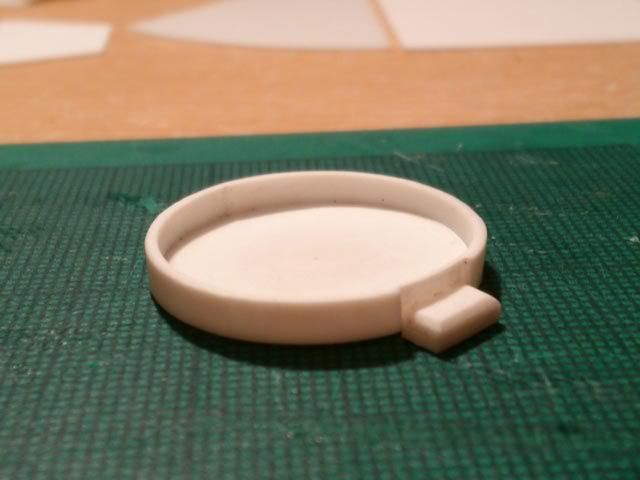
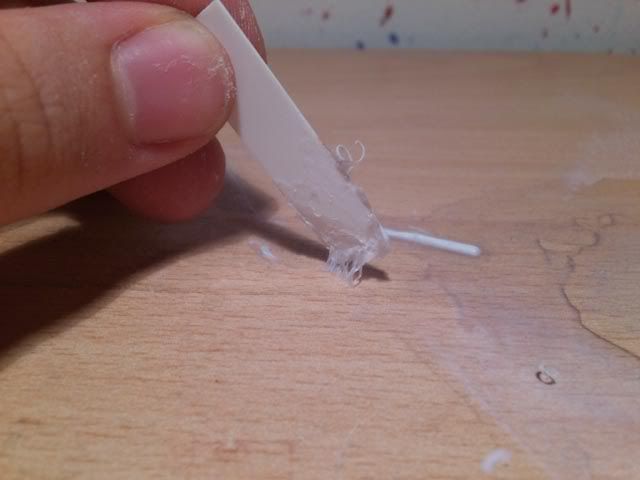
I built this using superglue, it's the circular pipe connector that can be seen on top of the toe ends. A piece of pipe will stretch between this and the toe armour plates. I cut the inside circle and then wrapped a strip around the edge which I glued. This is also raised a little with another circle underneath, and the small bit of detail was made with a bit of thicker plasticard I had lying around. It's not much but I wanted to actually build something rather than cut pieces out.
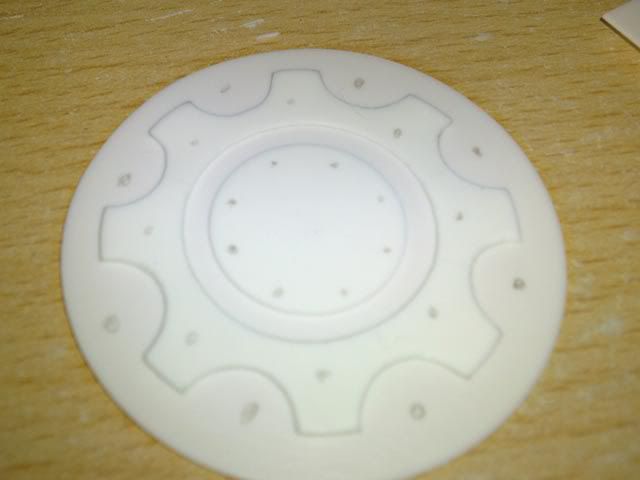
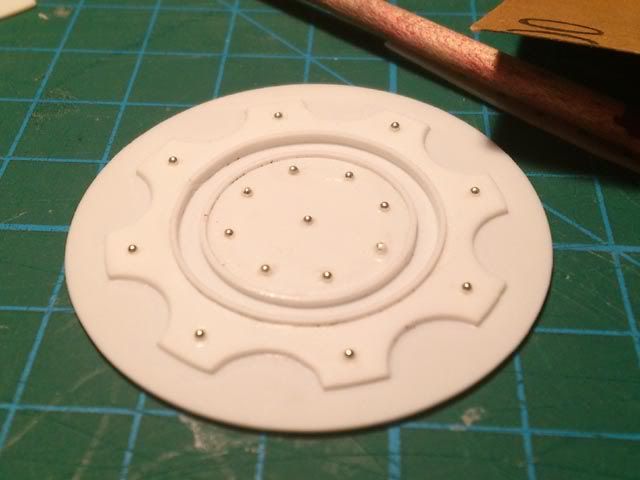
This is just showing the cog detail, where I've also penciled in the placement of rivets. To make the rivets I have a bag of 1mm diameter steel balls which will be superglued in, I only haven't done this as I want it to be the last thing I do on the part.
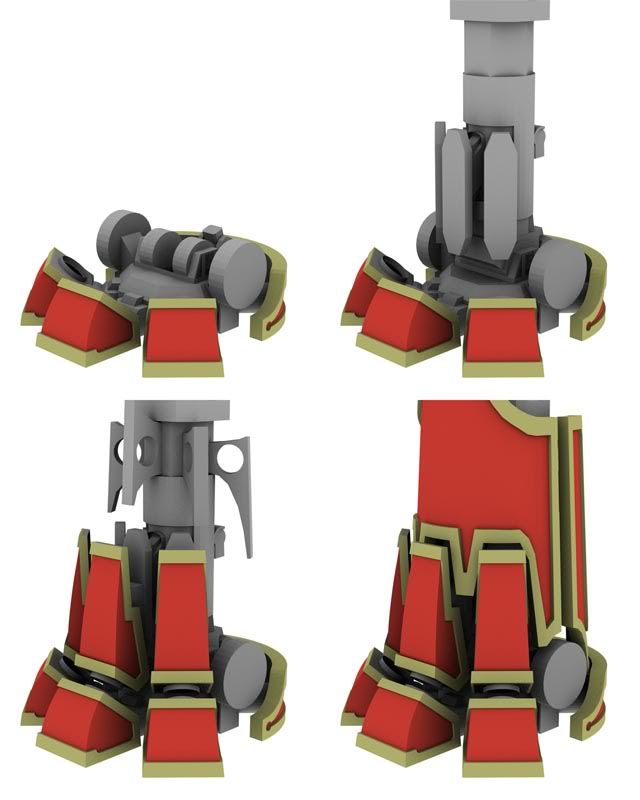
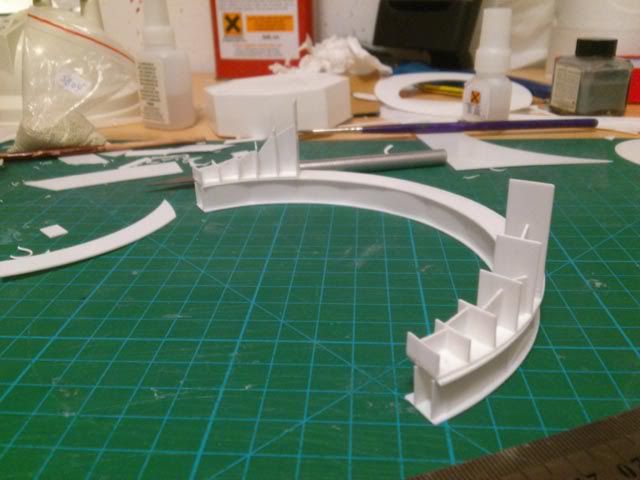
I also made a new render which should show the breakdown of the feet a little more. In the first picture it's just the base of the foot, octagonal with a beveled edge. The toe end and middle. The Heel plate and ankle caps, which will have that cog pattern on. The second bit shows the addition of the leg column and the toe armour connectors. Those connectors are fixed, and the toe armour plates will move up or down depending on the rotation of the leg. The last two show the armour plate connectors, toe armour pieces and the full armour plates. I just thought it was handy to show you it in more pieces than before.
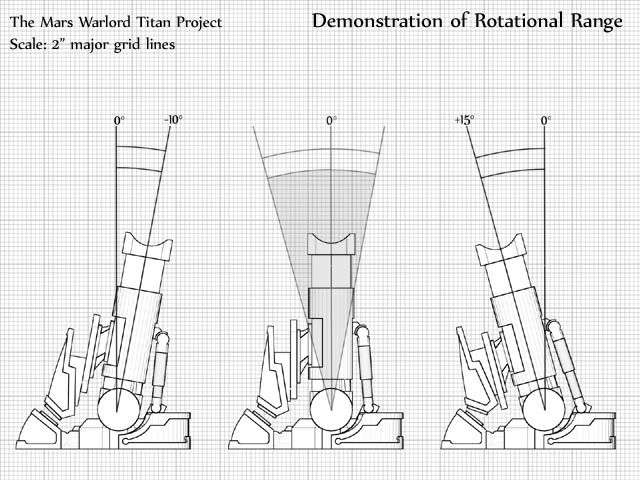
A few people liked the technical drawing so I made another one. This has the scale of about 2 inches to every square. It's intended to show the various angles that the leg is able to manage. If rotated much more to either direction there's intersection with the leg armour plates and the other parts of the foot, but I'm happy this should be enough articulation for the stance I want.
That's pretty much it for now though, really needing that glue to arrive soon. Because it hasn't I've been doing some work on the templates I use instead, I need to unfold the model for the thighs and upwards. I also haven't gotten around to modelling those shoulder weapons, but when I do i'll be sure to update my images to show you how they change the silhouette of the model.
48376
Post by: Capitansolstice
I officialy am following this! Epic
17738
Post by: Briancj
I like the THOUGHT that is going into this project, Sub'd! Good luck meeting your deadline!
53085
Post by: Kiryu Mk 3
these plans look legit as hell.
60129
Post by: Scout Sniper J.
I can't wait to see it painted!
23828
Post by: eledamris
Your titan is far better thought-out than mine. I built mine around materials that were available from the local Lowes and around the house. Give a bit of thought to the materials you're using, however. It may not look like it, but they get very top-heavy when you add the weapons, and plasticard won't stand up to it. I suggest a wooden frame for at least the lower half. If not that, then at least some sturdy PVC with resin poured through the center to strengthen it.
32724
Post by: fiorehellheart
@capitansolstice, epic? not quite, different scale 
@briancj thanks, I'm quite doubtfull I'll manage to meet the deadline, but I can hope
@kiryumk3, Can't say if I'm sure that's a compliment or not, I'll take it as one though, so thanks
@scoutsniperj, Paint wise I need to figure that out, I think I'll go with red and gold, as in the render's I posted. Other than that 'm not too sure how I'll manage it, If anybody has any good tutorials for strong red's and gold's I'd be grateful, also weathering both moderate and strong. I'm also thinking about getting an airbrush or some kind, I know that I'll have brush lines all over the massive plates otherwise.
@eldamris, In terms of strength, the lower half should be cast in resin, which I expect to provide sufficient weight and strength. Further to that I've always seen people say that these things need a wooden or pvc support because they're collapse otherwise, but I've yet to see one where somebody built one that actually collapsed in plastic. If I saw something like that which suggested to me I am doing something wrong then I'd be inclined to change materials, currently I expect that as long as I keep to the planned internal supports, effectively a grid, it should easily be strong enough.
I finally got my glue and another big sheet of plasticard, so I'm going to be able to start constructing now, hopefully I'll have something nice to show you soon.
If any Mods are reading is it possible to move the thread into the more appropriate painting and modelling blogs section, I didn't realise it should have been there instead when I made the thread, thanks.
32724
Post by: fiorehellheart
Finally some decent updates and some progress, as having gotten the glue I began building things. Picture heavy post ahead.
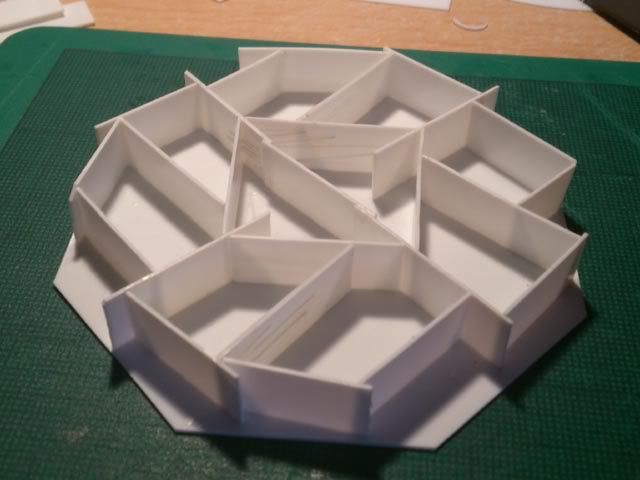
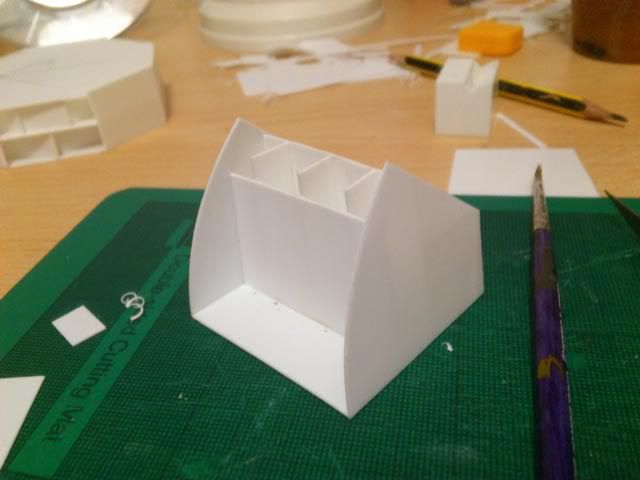
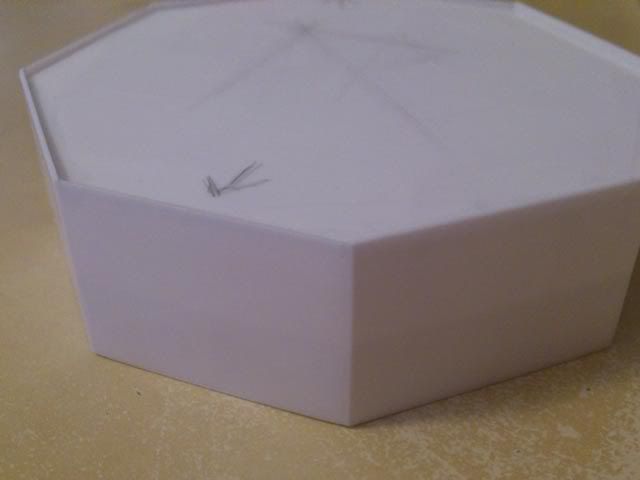
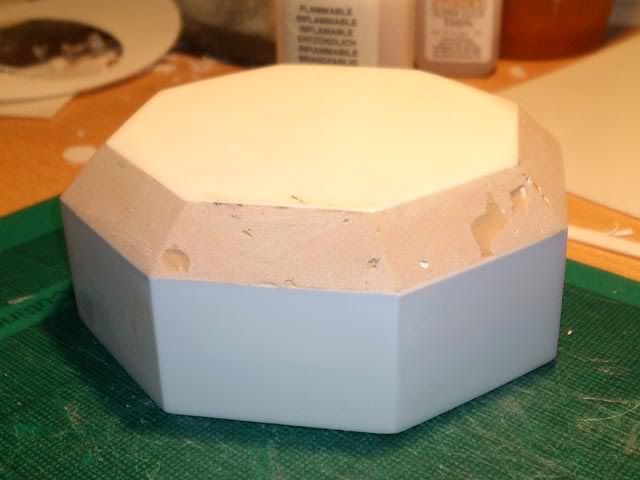
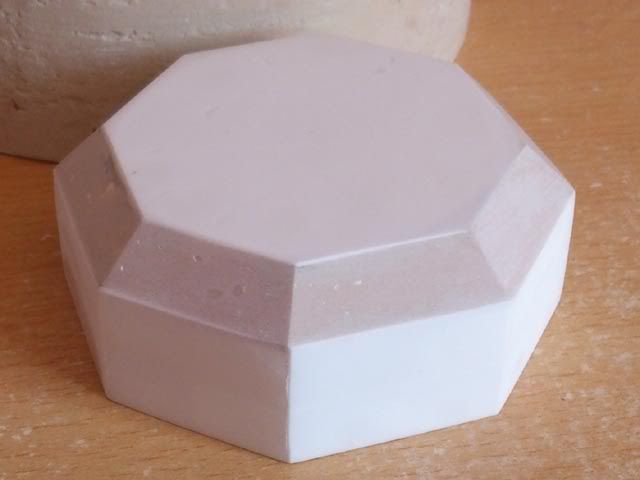
I started by building the base of the foot, I plan for most of my parts to build a form of internal structure, for support. With the base I Cut spacers of an even width and an extra few octagonal plates. These were used to build a weblike structure inside that's used to add strength.
This is the assembled internal structure for the main base part, I took special care to align the 3 octagons on each edge. Didnt work that well though so I had to sand it perpindicular.
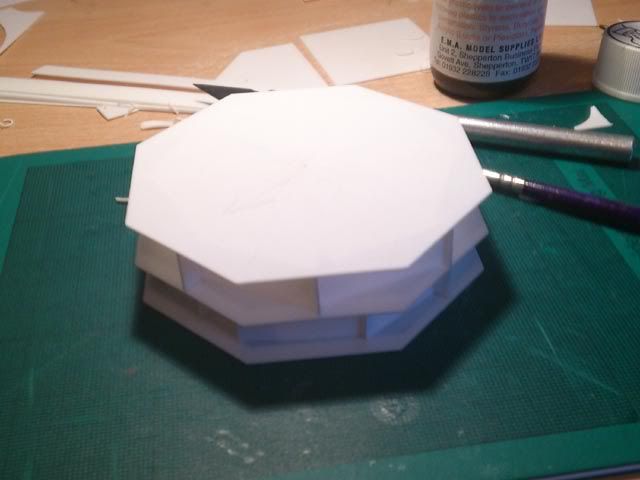
When adding the side plates I leave an edge over where I intend the final edges to be. This then gets sanded down and leaves a neater finish than I can manage by cutting first.
After sanding those edges flat to the next edge, the next ones are placed over those, these will be sanded next.
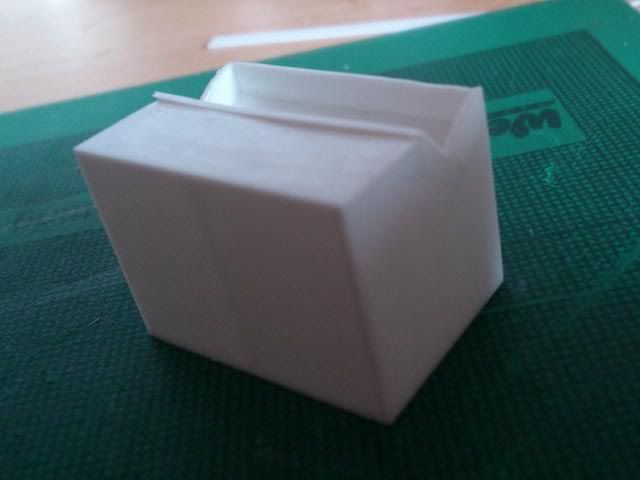
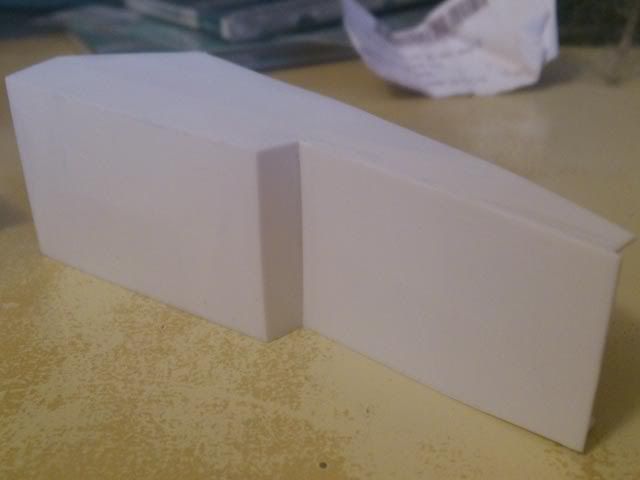
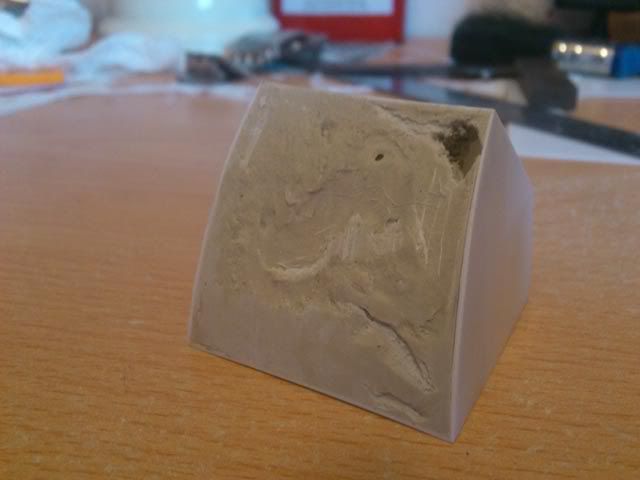
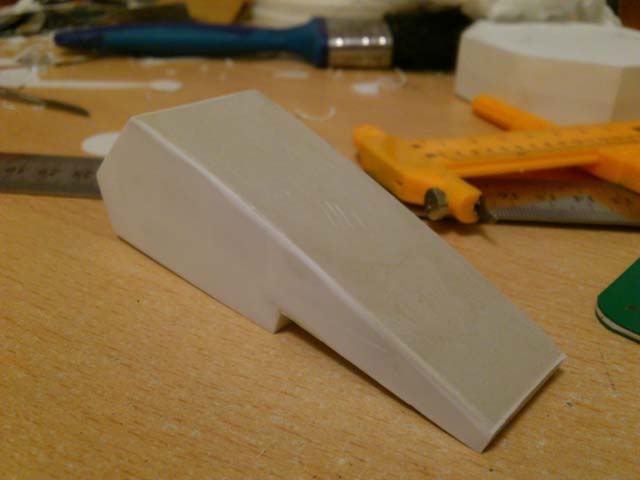
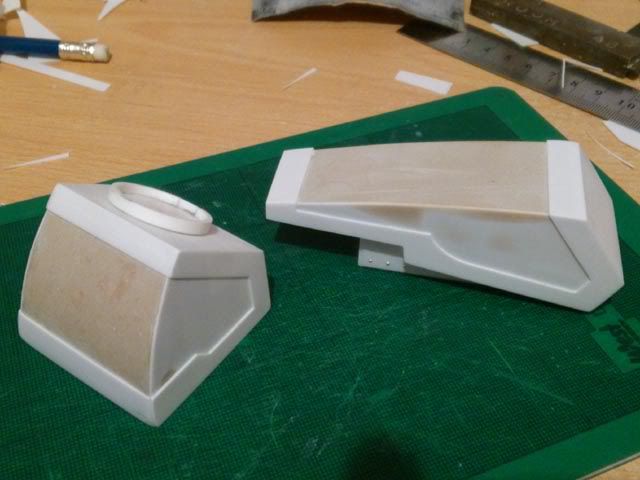
The next part I built was the toe mid piece. Same as the other piece, it involved using an internal structure, parts slightly bigger and sanding them down again. I still need to put some surface detail on, but first I need to give the curved surface of the joint part using filler.
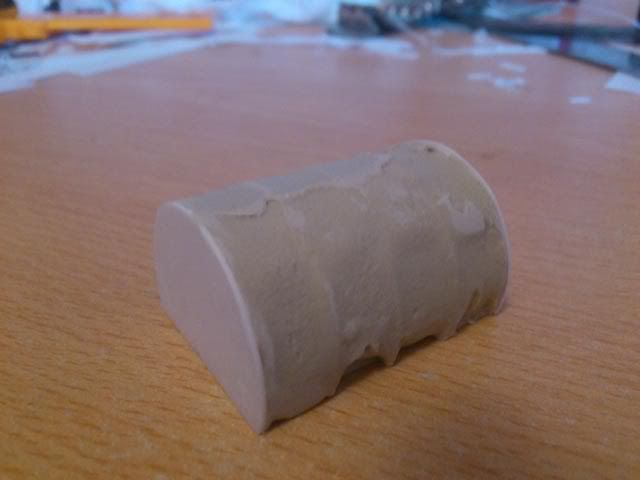
The toe end. Internal structure, sanding down again, this needs another plate on the top, and then the filler over the curved area, then the plan is to put edging and rivets on.
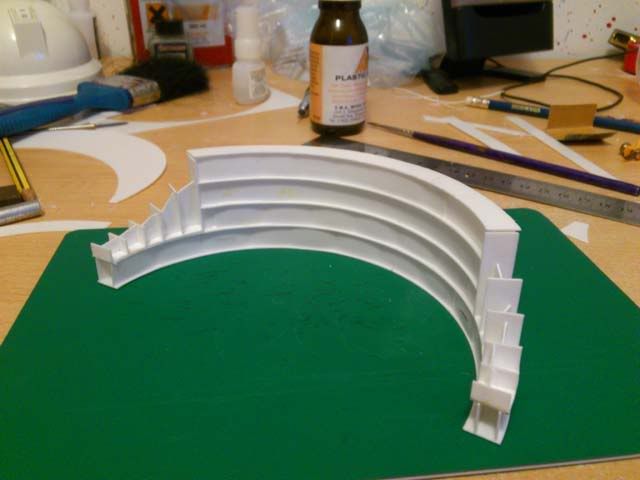
Bit of scale shot of the foot, it's getting quite big, and I still havent begun to build the curved heel plate or done the ankle circle things.
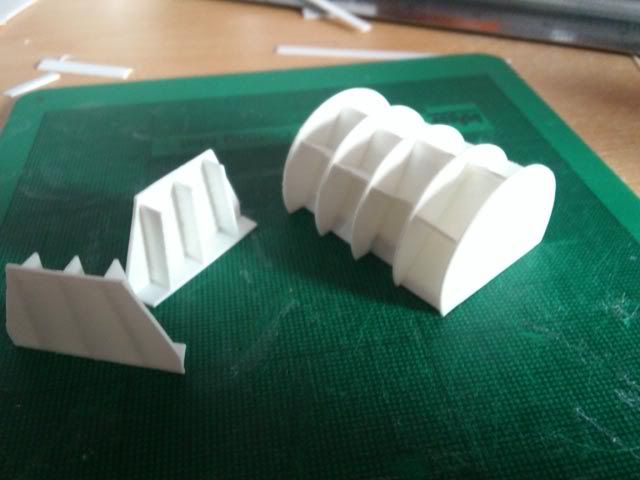
This is the jointed part of the ankle. I've done the internal structure and the curved circles, I have yet to sand the edges even and then I'll be able to add filler to give the curved joint. Onto this I'll put plasticard detail. The two other pieces to the left will cap of either end and need to be edged, and need to have detail plated on.
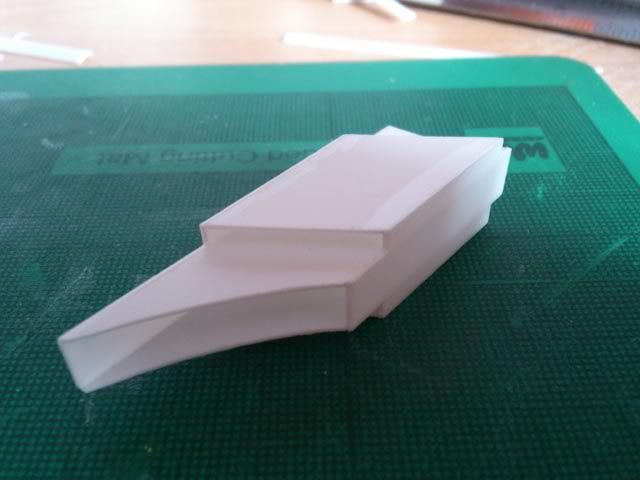
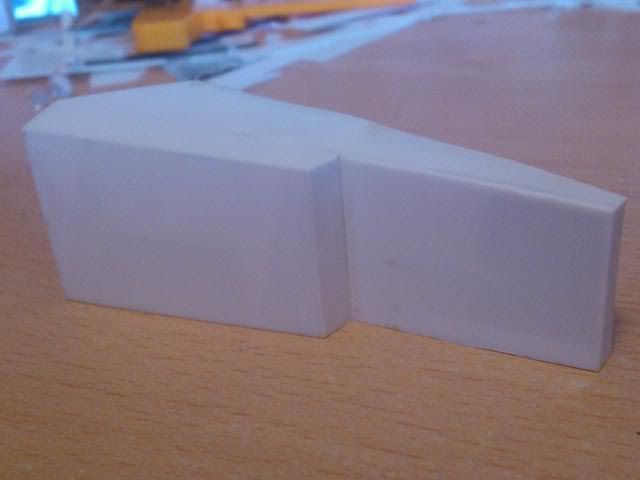
This is the part that connects the toe armour plate to the leg, I fancied something different to the foot parts, and I know this is an interesting piece so I built it. Still in need of sanding and edging and detail though.
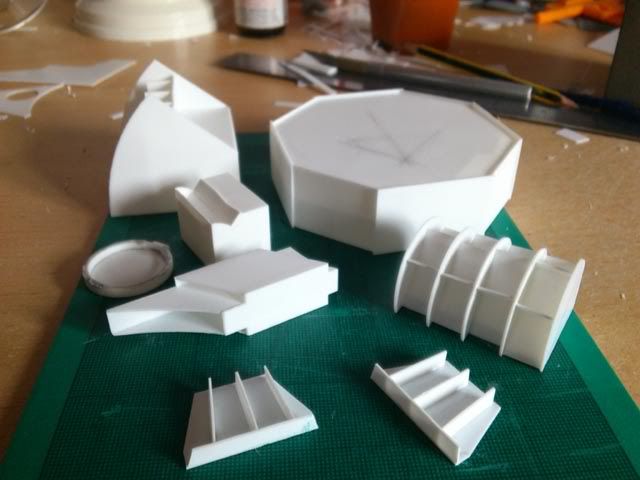
Just the complete shot of all the work I got done yesterday, one thing visible is a sort of grey paste on the circle piece for the top of the toe end, this is a plastic paster i'm using to fill some gaps and even it out.
I'm progressing forward as much I can and hopefully I'll be able to update soon with the real interesting work when I get to forming curved pieces with the filler material. As usual, ask question if you with or just leave helpful comments, thanks.
14062
Post by: darkkt
1) Im amazingly impressed by the work done here.
2) Im not sure how this is going to work on the table-top (wont it take up all the table, and be brushing its head on the ceiling!??!)
Sitll, awesome in concept and design - love it.
36535
Post by: Midnightdeathblade
Im glad you plan on adding shoulder weapons, it adds much needed bulk to the main torso, but I do like its sleak streamlined curves. It almost looks agile. Great concepts. Keep it up!
55324
Post by: bibblles
darkkt wrote:
Im not sure how this is going to work on the table-top (wont it take up all the table, and be brushing its head on the ceiling!??!)
He raises a good point, the lucas patern warlord (like mine) is 24 inches (26 with carapace weapons), you are aiming for what? 26 before carapace weapons, so nearly 30 inches once those are installed...
I hate to say it after you've gotten started, but your scale may be too large.
That said, it probably won't matter at your FLGS but it WILL matter for transporting it because 30 inches is going to be immense in a car.
44232
Post by: DijnsK
subscribed! i wanna see where this awesome stuff is going!
40213
Post by: DiDDe
DijnsK wrote:subscribed! i wanna see where this awesome stuff is going!
I totaly second that! really great work so far!
32724
Post by: fiorehellheart
@darkkt & @bibbles, thanks darkkt, In terms of using on the table I'm not entirely sure how I'll manage either. From the beginning this wasn't a model I wanted to build for the gameplay, and still isn't. Instead it's something I greatly enjoyed designing, am greatly enjoying building, and hope to enjoy painting it too. Afterwards I'll have a model that's far more for showing off that anything else. That said I would like to be able to use it in a few large apocalypse games. Usability wise I'll probably put a base on the thing, which would add strength at the cost of room, but is something I think I'd need to do, I doubt it would move all that much during a game however so this might not be too bad. Also, I took some parts into my flgs to ask the opinion of the manager, too small he says, but I think he'll still let me use it.
@midnightdeathblade, Thanks for the compliments, the agile thing I like, it's something that the mars Warhound captured really well, same with the Reaver too.
@DijnsK Thanks for the encouragement
Some more progress and pictures.
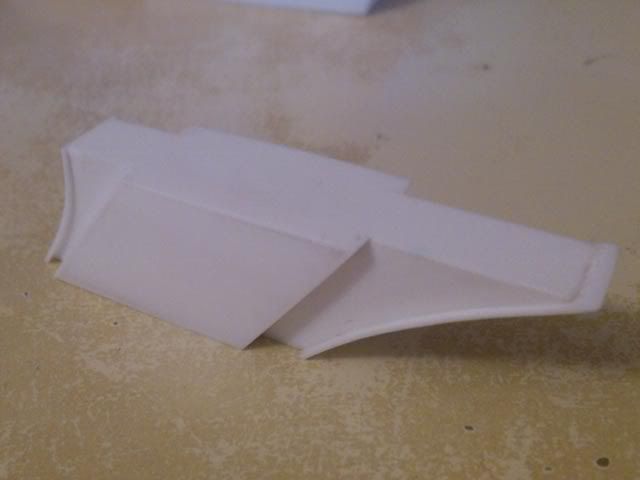
The toe armour piece has now been mostly plated right, I have a panel I intend to redo however. In the last photo of the two you should be able to see that the narrowest end to the right doesn't lie flat. When I sanded the rough edges down I didn't notice it hadn't glued properly, letting me over sand it down, I tried to get it to work but having looked at it I'll just redo the plate there. Shouldn't be too difficult.
This is the connector piece I showed before with the edging added. I still need to sand down the edging at the ends, but the middle parts I'm satisfied with, I need to put rivets on this afterwards then should have my first finished part.
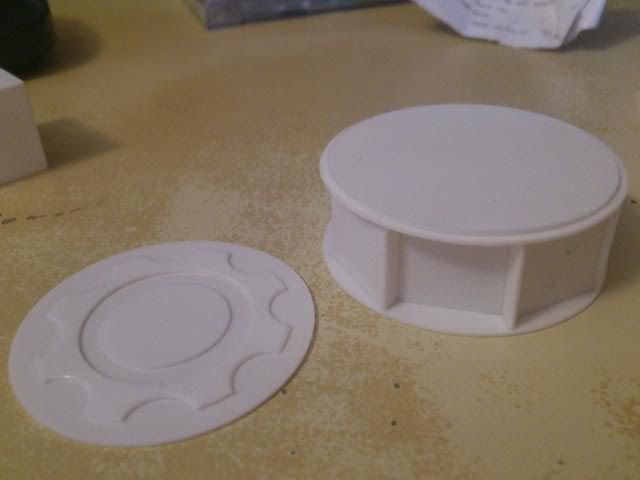
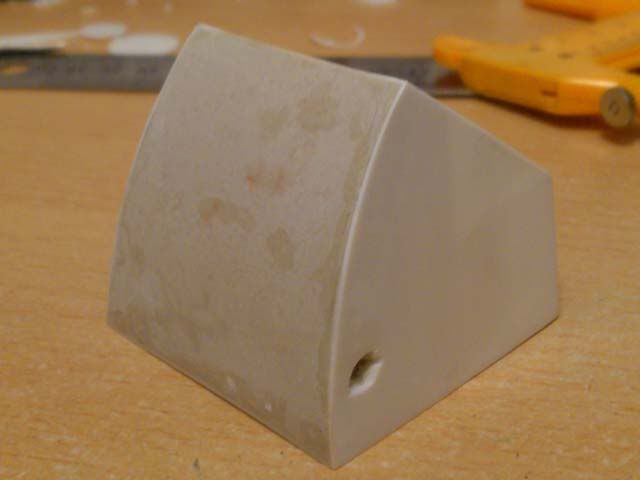
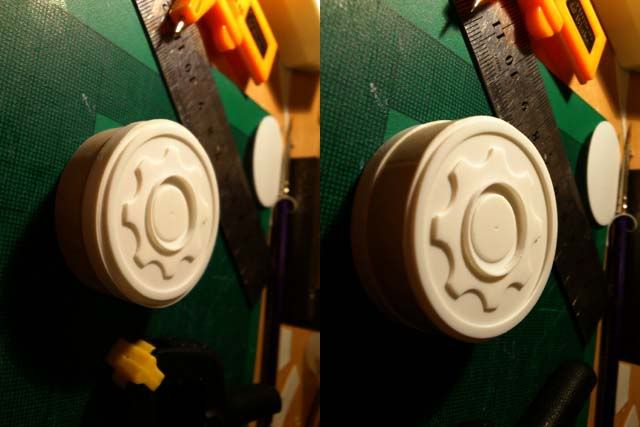
This is the ankle cap circle thingy, I could really come up with a definitive name for this part... It's been reinforced with spacers between the two circles and is waiting to have the filler applied so that it is sanded down to a cylinder. The cog detail is glued onto another circle which will go on the side, as the other circle has been placed. The detail on the cog itself was redone because I wasn't quite happy with how even the smaller indented circles on the edges were. Hence the comparison shot, I know there isn't a huge change but felt more comfortable with it a little neater.

Somewhat blurry picture of the toe mid piece, I only need to apply the filler now, it's been sanded down on all sides and I'm happy with the seamless appearance. I've been using my phone for the photo's, but I might need to steal a camera that can handle a bit of macro in order to show some of the finer detail when I get started.
I've blutacked in place the circle connector thing to show the placement. The grey plastic paste stuff, which is a mixture of old sprue and some of the liquid solvent I use, makes it appear unsmooth, but it actually is. Again this is showing the more seamless effect of the sanding, and is another piece that's awaiting the filler before I can add the last detail to it.
The Edges on the foot base have also been finished, now I need to begin to build another slightly raised section on the part to give the beveled edge. This is why I've left a lip to the edges. This will let me push the angled plates into the edge so that they have some extra support, and that when it's sanded it appears even.
Not sure how much work I'll have done today. It's my school's leavers ball so I'm occupied for the evening. But I'll try to do some stuff during the day.
28261
Post by: RutgerMan
this is SWEEEEEEEEEEEEEEEET! keep up the good work ;D
32724
Post by: fiorehellheart
Thanks rutgerman
Short update for today's stuff
I fixed the problem mentioned before with the over sanded plate. Didnt take long as I expected which was handy.
I also got around to using the filler, this first application is more of a rough coat. After sanding this down, hence the smooth parts, I'll apply another coat and sand that down, hopefully that will leave me with a very smooth curved surface, onto which I can build the edging and the box for the connector to attach to.
The ankle cap was also filled, here you can see another part that's lower than the desired level hence needing a top up before sanding again.
Same again with the toe, although this is much more roughly filled as I didn't mix enough to completely fill the cavity, I should have reduced it's size really, but it will be fine after a second coat another day.
The ankle joint. This needs the second coat obviously, but I may decided It's easier to search for an appropriate diameter tube, that's if this doesn't work well enough, but I have hopes it should suffice.

The toe midpart has been filled in enough, this will now get close to me finishing it as I need to add some small detail now and it's effectively done.
That's what I've been up to this morning, I may get some more work done when I return from my prom. I often stay up to between 4 and 6 in the morning doing work, I find I think clearer then. So there might be an update tomorrow morning or if not, then the evening.
17738
Post by: Briancj
Out of curiosity, why are you using filler, instead of, say, thin plasticard, shaped around?
32724
Post by: fiorehellheart
Good question, it's largely because when I've tried plasticard curves I could never shape it properly. It always creased where I wouldn't want to, and it was horrible to try and glue down. If I used thinner plasticard to reduce this, then other problems arose like the glue making it sag when using layers to give strength, or slight sagging where it glues to any internal support vanes. On top of that it sands amazingly, the filler, so it's far easier to adjust if something does go wrong. In terms of the cylinders it's so difficult to use plasticard too because you have to eventually join the two halves that wrap around the piece together, the filler gives a seamless finish. The only problem I'm aware of for filler, is that it soaks up the solvent like a sponge, and it then doesn't dry properly, it becomes rubbery, I think this is because it's partly styrene and porus. It means I can't use much solvent afterwards, and none on the surface of the filler, but superglue should suffice. Hope that all makes sense
17738
Post by: Briancj
Makes sense to me. You seem comfortable with the process, and are making fast headway.
Eventually, someone's going to come in here, and ask you to cast up a copy for them.
43845
Post by: Skipphag da Devoura
Dat iz purdee!
Gotz ta git me spannaz an' mekboyz ta staht up me Gargant pictures!
Very cool.
32724
Post by: fiorehellheart
Well, If I seem comfortable in what I'm doing it's probably because I've tried to think of every possible detail as well as I can. I have a tendancy to 'over analyse' in that way, probably one of the reasons I'm naturally good at physics. It just means I can feel I understand every part of the model in great detail, and because it's taken me such a long time to design I've just slowly absorbed tons of information online in how to do things and which parts of my model they apply to. The filler technique for example, although I did link to the Will Hayes video where he talked about it, it's not where I learnt it. I learnt that several years ago through a website called the 405th, which is a halo replica prop forum. They use this technique to strengthen and detail the costumes they build. The reason I was on that website in the first place was that they use the same technique that I use to create the basic templates I construct from. This very long chain of knowledge has just been built up over the years to a point that I'm very comfortable to use as much as I possibly can, and whilst I know that there are bound to be parts of which i could do better. I think I should at least be able to manage a satisfactory level with the knowledge I have. That probably makes me sound cockier than it should, but I'm just saying I've done my research
Well, if somebody did ask, that would just be cool that they think that highly of the model. Yea, I'm going as fast as I can, It's been a long time coming this project, and I'm not going to waste the time that I'm inspired enough to run at full speed. I also anticipate large delays when I get into the casting and the large armour plates, so I intend to give as much time as possible to those.
Thanks skipphag da devoura, much appreciated
Also, Dakka Dakka's fast becoming my favorite forum, you guys seem much more enthusiastic and involved than other places, and whilst I appreciate it might be because this thread is in what I anticipate as a high volume sub forum, being the general P&m compared to P&M blogs section, It's been really friendly and welcoming, thanks 
I just got back from my prom, at 3ish, good night, but I'm going to see what I can get done whilst I'm still awake, I don't need sleep... Much...
17738
Post by: Briancj
As long as you stay in the Painting and modelling section (and the DCM section), you're fairly safe. The various game sub-forms are good, but stay out of the YMDC threads.
*ALL* good hobbyists, all good modelmakers learn from a long, long chain of events.
For example, my skills are from making regular models, some prop work, and Model Railroading, as well as a light background in "Fine art". Which, of course, makes me laugh when people "Discover" something like Verdigris of "Zenithal" airbrushing...and claim them to be new, or just discovered. These techniques have existed for decades, if not centuries (Verdigris).
Anyways. I really enjoy the fact that you ARE writing out the "Thought process" with step by step examples. Unlikely folks are going to follow your steps, but for the ONE PERSON who does...you're there for them. I try to do the same in my plog, when I do something 'weird', like salvaging clear plastic canopies.
Keep up the work, get some sleep, glad you had a great prom!
32724
Post by: fiorehellheart
Yea, I guess you're right about the learning thing. Thinking about it, it's normal, but just seems such a different way to the school learning I've spent most of my life receiving. What you mention is also why I'm doing it the way I am, because I know that this is the kind of thread that I myself would love to have found being done by somebody else.
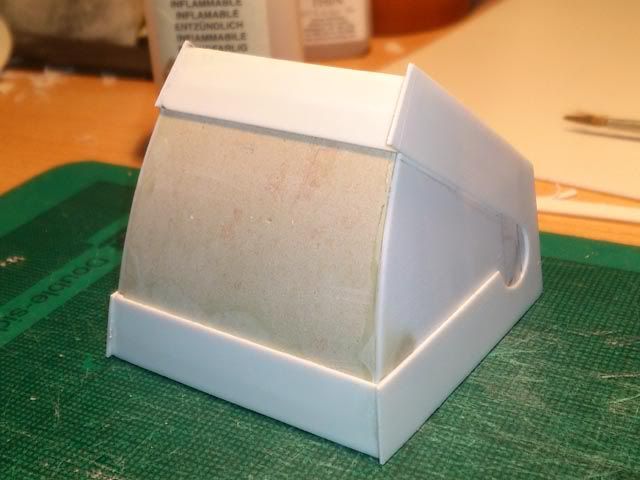
I started of tonight by beginning the curved heel plate, it was quite daunting and I think I was avoiding it slightly, but I pressed on. This is the way I'm choosing to give it internal structure, the two walls are assembled from lots of fixed width rectangles. Because I was sure to make all the angles, right angles, when I joined two of the plates together to make the curve, they stand perpendicular, meaning the entire wall has a uniform height. This just means I can easily build another layer on top. The walls are slightly behind the edge of the true curve as I will fill the created gap with the filler, smoothing to give the curved plate.
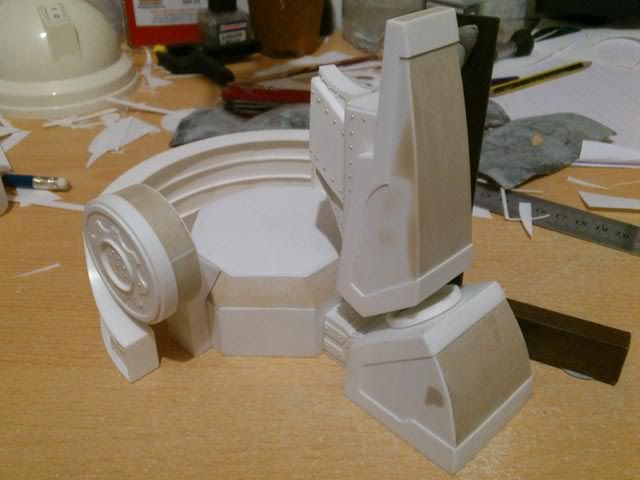
This shows the end curve where a gap exists so that the ankle caps don't intersect. To build this I cut each of the vertical pieces according to my templates and spaced them correctly before adding spacers between to provide support. The spacers also guarantee they are perpendicular. I built two of these, and this is just showing the placement on the heel piece. Compare this to the back plate of the foot on the renders if anybody wasn't sure what I meant.

I will be continuing to build the centre part to match the height needed. This is just using the same wall method as before, take ages though so it shall be completed another day. Once that is completed I'll begin to apply filler just as in the other curved pieces.
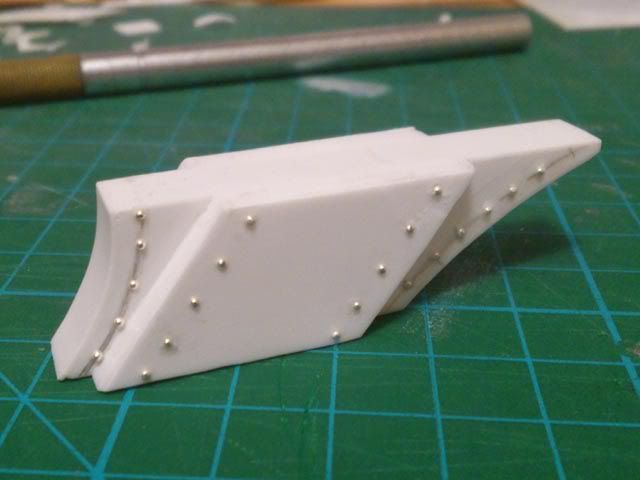
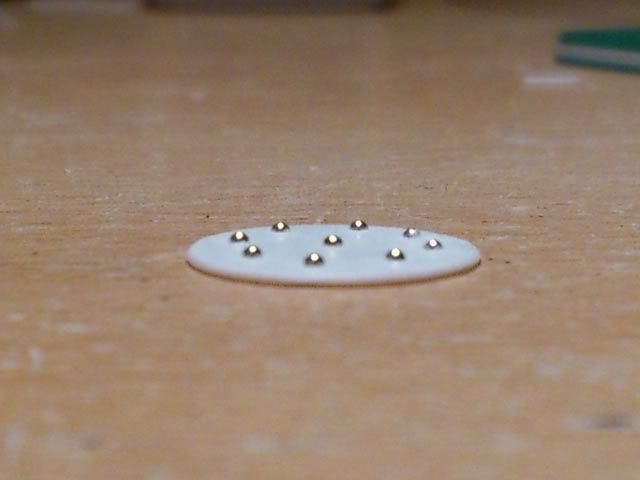
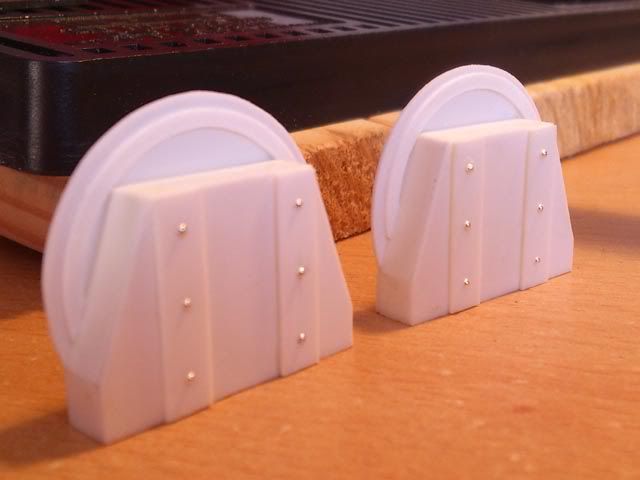
I have finished a piece, just the toe armour connecter, but it is detailed as much as I wish. For the rivets I'm using some 1mm diameter steel balls. I got them on ebay on some craft shop. To place them; I drill a hole with a 1mm drill bit of sufficient depth, then I place superglue in the hole, put the rivet in the hole, then use a 0.5mm piece of plasticard with a hole in it as a spacer to level the height of the ball using a ruler. If this method isn't clear just ask and I shall try to make a picture tutorial. Also, as a tip, when drilling the holes I used a template, with pre-measured holes drilled in, this way I wasn't measuring on awkward pieces, or just guessing.
I feel comfortable enough to say that I have completed the toe mid piece too. Although there are slight details on it I would wish to change, the effort to re-do the piece wouldn't be worth it. Instead I'll accept it was an early piece and that I made some possibly avoidable mistake, but shall just have to learn for in the future. The curved section on the top with the slats is a style I intend to reproduce on the the joint for the ankle. I like the way it looks and think it should scale up well enough. The only problem with that style of curve is making the slats appear individual enough. To achieve that I had to cut individual slats and then sand the edges so that they more resembled a trapezium. The slanted sides meant that the gap was much more visible. I did these ones by hand, but I shall try to assemble some form of jig for sanding the larger slats down when I reach the ankle joint.
I also completed the ankle cap detail. In addition to the rivets I added a raised trim around the edge of the cog and inner circle. It was just a bit more detail that I felt helped to make it seem more 3 dimensional. It was difficult to achieve however and took a long time with gluing parts and holding them in place to dry, as I had no suitable sized clamps. The effect was worth it however...

...Not that it matters. This is just a picture of some plasticard stuck to my table. If you haven't guessed it yet I managed to knock over the small bottle of plastic weld that I use. It flooded over my plasticard covered desk and stuck loads of loose plasticard onto the table, even my speakers were melted into place. In terms of damage to my model it could have been much worse. Just managing to splash over the octagonal foot base. As the ankle cap detail was on top of it though, it glued them together and effectively melted all of the detail on the ankle cap piece. The foot base fared better, with just slight cosmetic detail and no lasting structural damage. I may choose to only replate the part which shouldn't take long and will fix it easily. The rest of the parts were saved as I was storing the pieces with the filler on in a plastic bag, and the two finished parts on my shelf just above the desk. As a side note I use the plastic bag as for a while after setting the filler gives of an unpleasant smell, so I bag them up when not in use. The bag itself was splashed but saved the contents.
I will hopefully manage another update tomorrow, but after that I'll disappear for 5 days on a short holiday. Soon as I get back though I'll be working away, and no doubt I won't be able to stop thinking about the model whilst on holiday
34644
Post by: Mr Nobody
Rivets, rivets everywhere.
32724
Post by: fiorehellheart
Well, That's the plan
53821
Post by: AnUnearthlyChilde
Are those ball-bearings your using for rivets? If so, bloody ingenious method, wish I thought of it lols!!!
32724
Post by: fiorehellheart
Yea, they are. I also have the contents of a water filter cartridge, but because they're mixed in terms of size I find that the predefined diameter ball bearings are easier to use. Still not exactly very easy to use though, as drilling a hole in the wrong place is a lot worse than gluing a flat backed rivet in the wrong place. Really I'd like to buy some of the premade ones from the grandt line but these will do for now. The other method I have tools for is the hole punch, I use a leather punch. The only problem with that is that the rivets are directional, as they are rough on one side. So I have to take more care when placing them down. Also the diameters available are 2mm and above, so it wasnt suitable. Something I might have a go at trying though is some of the lion roar rivets from here, http://www.antenocitisworkshop.com/wargaming-materials-tools/augmentables-nuts-rivets-bolts.html, They might be the best of all of them.
17738
Post by: Briancj
Well, if you would just read some of OUR threads you'd see that cheap rivets are best done by buying a NWSL or Micromark Chopper, getting some plastic rod of the appropriate size, AND GOING TO TOWN.
It allows you to make any size rivet, as well as full-on bolts, using hexagonal stock from Evergreen or Plastruct.
--B.
32724
Post by: fiorehellheart
Ahh, if only i could buy a chopper, I've wanted to get one of those for years, could never quite justify the price, I'd rather spend the money on something like an airbrush instead. That said it would massively increase the speed if I were able to use one. Takes me ages just ensuring all my angles are right angles...
In terms of rivets though that's how I first did them, sort of, by using a knife and some rod, I could never regulate the height of the rivets well enough and although it would be easier I quite like the uniformity I can get with the balls. The other rivet method I've seen, but don't know much about is a type of hand held punch that's got a spherical shaped hole in the end of the tool, so it digs out hemisperes, something like that atleast, as I said I can't remember much about it.
17738
Post by: Briancj
From Micro-Mark:
Was: $23.95
Sale Price: $20.75
Item #: 84046
Way, WAY less than an airbrush.
53821
Post by: AnUnearthlyChilde
Dude, your looking at roughly £20 for the micromark version including delivery!!! Invest in one, you won't regret it
44232
Post by: DijnsK
im soooo glad i subscribed to this thread! looking good so far
60129
Post by: Scout Sniper J.
How are you going to lug around the Titan when it is finished? (especially if you ever try to take it on an airplane...)
22413
Post by: mwnciboo
Wow, it might be quicker to build one of these for real than out of plasticard. Honestly I admire your perseverance on this, never mind the cost of the materials, this is a labour of love.
58484
Post by: Doofry
It is all looking awesome, to say i am impressed is an understatement!
Just a thought and i know it is too late now, but for your templates, you could have bought a can of spray adhesive to mount the templates on the plasticard, and the good thing about it is that you can reposition it.
Keep up the fantastic work!!
57210
Post by: DemetriDominov
Epic stuff. Following this for sure.
32724
Post by: fiorehellheart
@briancj and @anunearthlychilde, I looked on their website and whilst it is only $20, it's another 20$ for shipping to the UK. Which puts it back to being expensive. I did still end up ordering something though. What I got admittedly isn't as nice as the NWSL chopper or the micromark chop-it as it's made from plastic. That said though it doesn't look like a bad product at all, and at £8, I'm happy to get it instead. Bought from here, http://www.proopsbrothers.com/acatalog/Online_Catalogue_Paper_Card_Cutting_12.html, and pictured below. I intend to be doing a complete review as soon as I receive it, I don't think many of the warhammer modellers will have heard of this, the only references I found to it were crafty and model railroads. If it works well It'll be fantastic value. One downside is the stops are different, and I may have to figure a way to place a ruler along the back like on the chopper, but this is something I think I can manage.

@dijnsk, I'm glad you're happy so far, I'm hoping for it get much better though
@scout sniper J, I haven't thought too much about that so far, but I expect I shall want to buy some custom foam packaging from somewhere like battlefoam. This way I can figure out the best layout and then have it professionally finished. Something similar to these two examples I hope.
http://www.dakkadakka.com/gallery/347523-.html
http://www.dakkadakka.com/core/gallery-viewimage.jsp?i=329874&m=2&w=800
@mwnciboo, Thanks, You're right about the love thing, but I may turn to hate this thing if I manage to spill my glue again
@doofry, Thanks as well. Regarding the spray mount though, I have tried it but it wasn't strong enough to stick properly, and just ended up ripping away mid cutting. Which wasn't great and just made it worse. The pin method I'm using now feels the most effective for the low effort required, don't have to wait to glue and don't have to cut out parts ect. That is unless I'm able to find these A4 sticker sheets.
@demetridominov, Thanks for tagging along with me on this
Well, I'm back from holiday, aside from trying to find a job and then doing that job, I'm intending to spend most of my time on this for the next few months. Whilst away I had a good chance to think about the construction of parts, and I think I'm going to buy some acrylic pipe. I've figured out that by combining different wall thicknesses and overall diameters I can minimise the cost of the piping by using parts for more than one place. For example I intend to use a 34mm OD piece on the male ankle join section, paired with a 40mm OD piece and a 3mm wall thickness for the female part. This gives an 34mm ID which means the two will 'telescope' to use evergreens terms. The The 40mm OD piece will also be used for the axle part of the hip. On the hip it will slot within a 50mm Od piece with a 5mm wall giving a 40m ID, again telescoping. This 50mm OD piece will also fit in a 60mm OD 5mm wall 50mm ID piece to give the biggest diameter section at the top of thigh. As the knee will also use the 50mm OD for the male part, the female part will be the 60mm OD part. Also the inside of the calf will use the 50mm OD piece. In this way I only need 4 pipes, instead of the probably 7 or 8 diameters I was going to be making using the filler. This does mean that the diameters are slightly different to those on my original plans, but I'm sure that nobody else but me will have noticed, and that plasticard detail would have altered this anyway. It's going to be interesting figuring out how to effectively cut the tube accurately, but I'll get around to that once I've received the order.
In other news I've been able to turn more parts of my 3d model into templates, so I'll print those and begin on stuff like the thigh and hip whilst I wait on the pipes. I'll also attempt to finish the toe and toe armour pieces as soon as possible along with repairing the foot base to completion and the heel plate. Lots to do for now but I will update as soon as I'm able to. Lastly, Anybody have any thoughts on names? If people can give me suggestions I'd take the ones I most enjoy and do a small poll.
32724
Post by: fiorehellheart
Update as I promised then

I continued with my work on the heel plate, with the intention to reach a point at which I could begin to apply filler to give the main shape of the piece. When I returned to it I realised that my previous method of cutting rectangles and forming a wall was very time wasting. I get the exact same result by just bending a single piece in a curve.. Felt smart realising that half way through the part. Well, I continued in that manner and had completed the internal structure as shown in the pictures.


I then placed an edging onto this, going all the way around the part. This was done wider than the internal structure so that when I smooth the filler out it sands evenly. Where the plasticard peeks through the filler it can sand slightly uneven because the filler and styrene are different materials. It will sand like this at the edges but it won't be as noticeable here, and I intend to be adding an edging onto the piece anyhow which will go over any unevenness at the side. This part is now done until I begin to apply filler, I may need to buy some more however as it is a large part.

I also got around to rebuilding the part that was melted when I spilled the glue. This time hoever the cog is slightly smaller and I fancied adding a thicker edging around the edge and keeping the same edging on the inside of the cog, except only on the cog part, not on the central circle. Unless there's significant protest /i felt this looked better and intend to stay with it instead. The parts aren't currently glued together, but I will do so when I add the rivets to the piece.
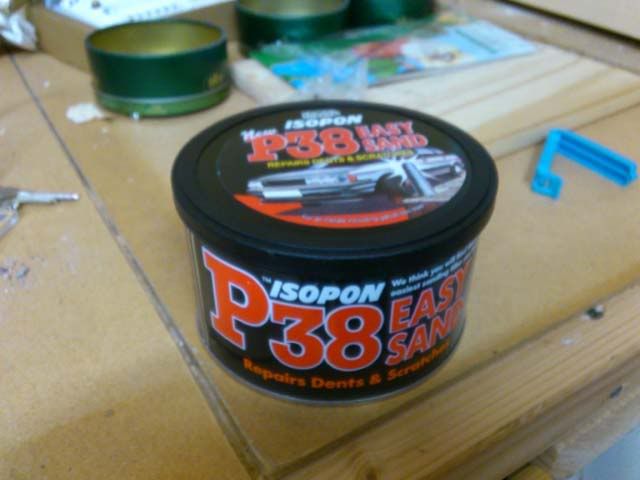
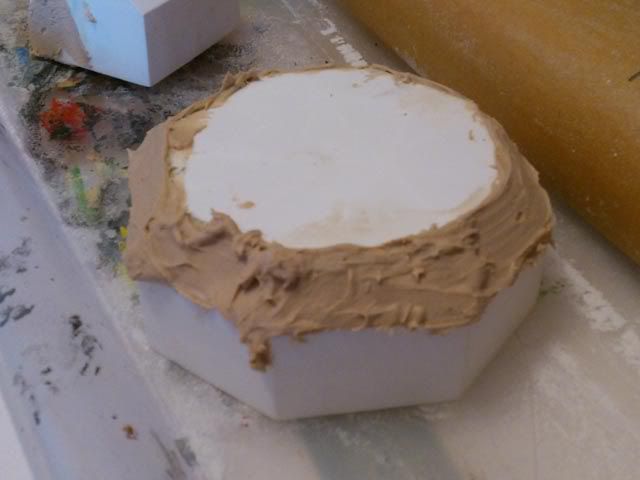
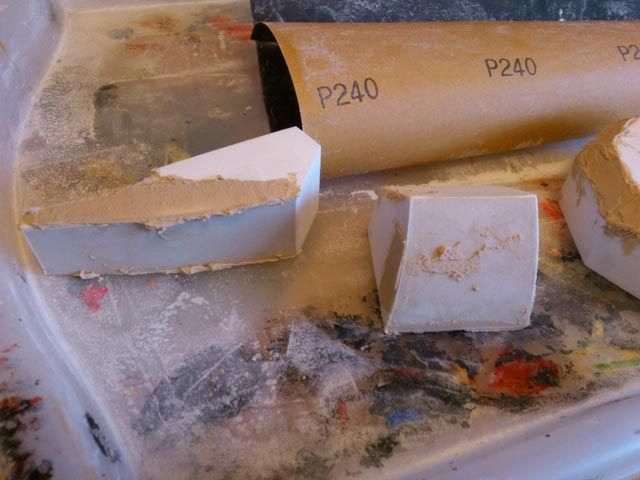
This is the filler I use, having just picked it up at halfords one day. I may try other brands in the future, but this stuff seems good for now. Today I did however realise that I hadn't been using enough of the catalyst. The material on the parts such as the toe end that I had already done was not completely mixed and as a result it softened part of the plastic along the edge of the toe end. I plan to use the filler to repair this but it is a little annoying. I hope that it's because I haven't mixed it well enough with enough catalyst, the material under the softened plastic parts was still soft, so I think I'm right. The second picture is just the parts right after applying the filler. I applied it to the toe armour piece, then the ankle cap then the toe end, and you should be able to see that as it has hardened in the 15 minutes or so of work time it's become less smooth to apply. Which is why I did it in the order I did, doing the most desired smooth piece first.
The two pieces are now sanded and very smooth to touch, smoother than the plastic in the case of the toe armour piece even. Aside from the gouged holes in the toe end piece, I'm slightly unhappy with the toe armour piece too. Where I used supports on the inside the outside plastic has bowed inwards, I think this is because I haven't used enough supports. You can just about see this on the photo where, at the edge of the filler and plastic, the sanding didnt give a straight edge but a bowed line, this is because the join is uneven due to that bending between supports. In order to fix it I think I should be able to apply some of the filler and then sand this down into a right angle, but I have already attempted to minimise the visibility by sanding some of the plastic down too. I think I'll spray paint the piece white too in order to better see how smooth the joins are and where I can improve the piece, likewise with the toe end.
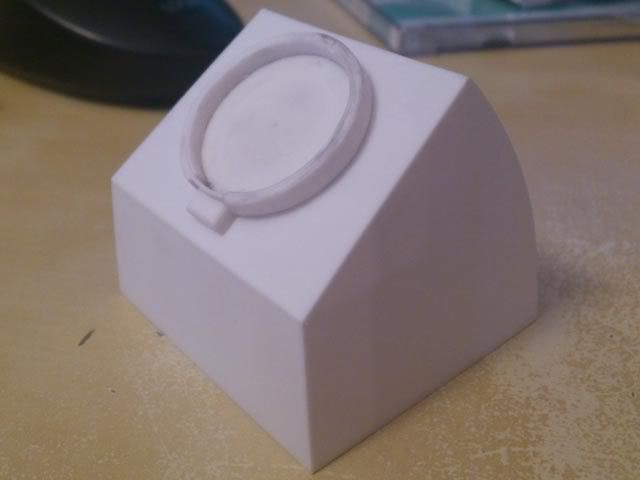
This is the sanded down ankle cap piece with the detail placed on top. The two variations are so that I could see which way is best for the positioning of the edging I've placed on the part. I prefer the edging at the top as in the left picture, but I would like other peoples opinions too, bearing in mind the positioning from the earlier renders.
I still have a long way to go, but I intend to begin working on the main thigh part and the hip soon as I've only got to print the templates out before I can begin. Tomorrow I hope to have been able to get some work done on the base of the foot, and possibly the filler work on the heel plate. Hope that satisfies everybody's interests for now
17738
Post by: Briancj
Hope the chopper works out for you! Again, thanks for showing us the FULL development process. While most people won't follow your lead, seeing the design-in-progress shows us all the techniques you're using, and hopefully someone will use them in THEIR project.
Good luck with the job search!
57210
Post by: DemetriDominov
There's more detail in that ankle than there is in some armies....
32724
Post by: fiorehellheart
Haha, thanks guys again. I've been a bit busy the past couple of day's, I'd forgotten about going to a theme park so I missed most of a day then and I've been job searching too. I do have some updates however.
To continue on the foot base I begun by building the spacing and then placing the top part of the foot base. I had intended to use plasticard to do the angled edges, but I considered that this would end up weaker than the alternative use of filler, so I used that instead and plan to sand down until I have crisp edges. In terms of detail I plan to add riveted plates, but little else as other things will need flat spaces to attach to the foot base.
I also used the filler to attempt to repair the edges on the toe armour piece, and to fill the holes in the toe end piece and level the base of the piece too. Once these two have been sanded down I think I'll complete them in just a few days as the detail is minimal.

I thought I'd run down the rivet process for anybody who's interested in it. First I drill the holes in the part, I go all the way through as otherwise they won't all fit to the same height. Once drilled I force the balls into the holes, but without glue yet. I also make sure to press each through so that the bottom of the ball is level with the bottom of the o.5mm plasticard. This ensures that half of the ball is above the surface, and half beneath, and means that all the rivets will be of equal height. Once placed I flip the part and then I apply the super glue on the bottom, this stops and from bleeding over the surface which happens if the glue is placed and then the rivet placed in the hole. Once this is done the piece is finished, and provided the spacing between rivets is even, they will look good. Even heights go a long way to adding a manufactured feel.
Also, I went to collect the chopper from the post office today, and I'll try to upload a review and some pictures soon. It seems suitable so far.
5462
Post by: adamsouza
This is coming alongnicely. Looking forward to seeing how it turns out.
53821
Post by: AnUnearthlyChilde
Dude, I could kiss you... you know, if it wasn't for the fact a) your a man (possibly?), and b) I have no idea where you live 
keep up the awesome work!!!
12975
Post by: thesilverback
Great job and very informative can't wait to see more and finally the finished Warlord Titan.
61163
Post by: Brother maximus
Hey can you pm me a link to the templates
53960
Post by: warboss skul-krak
I'm very impressed by your work. cant imagine scratch building anything that big cant wait to see your progress.
28327
Post by: mullet_steve
your doing really well so far but be cautious about how much hardener you add to your body filler because the more hardener the more it shrinks and shrinking may seperate the body filler from the plastic
32724
Post by: fiorehellheart
@adamsouza, thesilverback, warboss skul-krak, Thanks guys.
@anunearthlychilde, Haha thanks I guess...
@brother maximus, Won't do I'm afraid, the templates are a mess to say the least. Because of the way I work they're very incomplete, having no tabs or complete layouts, in many places just including a single profile panel type from which I figure the rest out through knowing the model really well. On top of that I'm just not all that comfortable releasing the past 4 years of work on this one model for other people to play with, somewhat selfish I understand, but I'm simply not very comfortable with it. Sorry, I have released templates in the past, and they should still be on either the bwc 1 or two. They're much older warlord templates, and aren't as mars smooth as my current ones, and are still badly designed, but they should still be good enough to build something from given enough determination.
@mullet steve, Thanks, I'll admit I wasn't aware of the shrinkage problem, having mixed too little catalyst and destroyed stuff with unset filler I've attempted to put as much in as possible without being silly. I'll try to be more cautious though. Given you sound to have more experience with it is there anything else that might catch me out? Like I mentioned before about it seeming to melt parts of the styrene, is that common?
More updates
I glued the ankle cap detail on, so the piece is completed for now. I next need to begin building the connector that holds this onto the foot base part.
I used the filler to fix the edge on the toe armour piece, so it's now straight enough. I'm pretty happy with it and I will start to put another part onto it, which is a box at the back, after which I will rivet and add plating.
I also sanded down the first coat of filler on the foot base, the edges are all crisp and I'm pleased with them and don't think I'll need much more than just one more coat of filler then a bit of detail, as I've said before however this is going to relatively sparse in detail.
I also started on the armour plating, however I'm not too happy with the design I've done and think that I will remove it and go with the detail I had in the 3d model. I didn't expect a departure from that to look any worse, but I'm not as pleased with it.
Not loads of updates, but something. I'm waiting to get a job before I begin the main parts of legs as I need to order acrylic pipe, and just don't have the money for it now. But I will try to do any detail that will go onto the parts, and much like when I waited for glue, will do as much as possible. Also, is anybody able to confirm what I believe and tell me that the solvent weld, dichloromethane, will bond acrylic to styrene? I did a small test which seemed to work but if somebody can confirm more thoroughly I'd be happier for it.
23695
Post by: J99Pwrangler
Very awesome fiorehellheart. Yes, is there a way to view the templates/ plans you used to make this?
53821
Post by: AnUnearthlyChilde
Fiore, I sincerely hope your casting these parts as you go, because it'll save you from making them twice
28327
Post by: mullet_steve
the chemicals in the filler will soften the plastic which is very common... I'd leave them to reset before you do too much sanding to be honest.
to avoid dipping (where the filler sands away quicker than the plastic ribs) I'd suggest making yourself some snading blocks... Take a piece of flat material which you can comfortably hold and spraymount onto it and the sandpaper then trim the sandpaper to fit.
32724
Post by: fiorehellheart
J99Pwrangler, See my last post, whilst I am roughly using templates myself I'm not going to be releasing them. Sorry for that, but thanks for the compliment
Unearthly, Yea, that's the plan, not just because I don't want to have to make them twice, but more because it means they'll all be the same. I'd prefer identical pieces even if it was more effort, which casting may well be. Even on parts of the stuff I've made it bugs me how imperfect they are, the octagonal base for example isn't exactly octagonal, which isn't noticeable, but annoys me to just know it isn't. At least if I cast them they'll all be the same. On top of that though casting looks like an interesting skill that I'd love to learn and have a go at.
That's what I'd expected mullet_steve, just something I'm going to have to work around then. With regards to leaving them a while to set IIll probably give a longer wait time on the larger filler areas, such as when I start the leg plates and shoulders ect, but I want to get as much done as possible so I've rushed of sorts so far. Nothings gone wrong yet and I'd like to keep it that way so I might slow down a bit before I get overly cocky. I'll also look into the sanding block, I intend to make some irregular ones when I do the legs plates anyway, so that I can sand the filler on the inside of the leg, but I'll get to that later.
More updates today, more pieces essentially finished.
I decided I really didn't like the plating look, so it was scrapped. Just thought I'd show what a mess I made of it. I'd used the plastic solvent so it was welded together, in future I plan to do the edgings all with superglue. It's much easier to separate the join of superglue and the residue can be sanded down more easily. The new plating is more angular than the other stuff, but it's closer to the render and I'm much happier with it. I'm also not too fussed about the angular edges as the Reaver toes are very angular in their edging, whilst the rest isn't. So I don't feel like I'm making too large a departure in style here. I also glued the housing for the connecting pipe between the toe armour plate and toe end piece. I'm not entirely sure how I'll do the connecting piece itself, but I at least doubt I'll put another housing on the underside of the toe armour piece, it would take up too much room and won't be seen due to the angle anyway.
This is the connector between the base of the foot and the ankle cap piece. I'm undecided on how much detail and riveting to put on this part, but I may have to do it heavily riveted to match the rest of the pieces, in the picture later on in this post it looks a little sparse. I've left the end unplated as I plan to use filler in order to match the height of the part to the position on the foot base as best as I can. It also isn't noticeable in the picture but I need to use some filler to repair some melting from overzealous glue usage, and uneven sanding. It's not the bst part I've made but I'll try to improve it.
For the plating on the toe armour piece I decided to start to introduce the curves into the edgings. I'm quite happy with the effect and depending on how I feel whilst edging other parts, my titan may end up more angular in terms of the edgings than the forge world ones. I still need to decide how and where to place rivets onto the edgings before these are finished though. Ideals I need a set of 2mm spheres that don't cost a lot of money, so far the only thing I've seen is ball bearings which are more expensive than I can use. I could use the leather punch pressed rivets, that are flatter and more disk like for the 2mm upwards rivets I want. I'll try some things out and come back with the results another time, but if anybody happens to know where I could get some 2mm spheres that aren't very expensive, I need a few hundred I think, I'd be grateful.
Lastly just a blu-tacked shot of the parts so far. I'm pretty chuffed at how stuff's going so far, although it is slower than I'd need to meet the deadline of October, it's faster than I'd actually expected to achieve. There is a larger image that's 1024x768 in resolution in my photobucket gallery here:
http://i852.photobucket.com/albums/ab86/fiorehellheart/Warlord%20Titan%20Project/Update%2010/10_08.jpg
If you want to check it out in more detail that the small images I use for the forum posts.
If anybody has any questions, just ask, thanks again.
32724
Post by: fiorehellheart
Ahh, fantastic, trust the hive mind to succeed where I'd missed. Although,you're technically wrong It's under 6 quid, excluding VAT still not too bad though.
It doe leave me undecided now on what to do. If I buy a lot, 500 odd, then I could use them with the holes, in which case I'd be making some big holes to make them flush, which could go wrong. Or whether to get only a few or so and make some green stuff molds of hemispheres so that I can just superglue the greenstuff parts on top. I'll need to look into some greenstuff mold tutorials, and try something out first, but I'ts nice to have the choice now, thanks.
On warseer somebody also suggested I look into a solvent dispensing pump bottle. I guess most of you won't know what one of those is, and I wouldn't blame you, but I've wanted one for a while after I found a you tube video demonstrating one. https://www.youtube.com/watch?v=myh8-zpJt9Q
I did a quick search and found one on ebay that I fancied as it was much cheaper at just 1.50, compared to the 22 I'd seen at my plasticard suppliers site. Just as with the chopper I intend to get one and try it out partly because It's something I haven't seen other wargamers use.
http://www.ebay.co.uk/itm/200ml-Cleaning-Chemical-Agent-Alcohol-Makeup-Remover-Pump-Push-Down-Dispenser-/390422022379?pt=UK_Health_Beauty_Nails_Manicure_Pedicure_CA&hash=item5ae6f748eb
27896
Post by: blood red 1
i plan to build a knight class titan one of these days, im gonna keep an eye on your project and see if i can get a few good ideas from what your doing
32724
Post by: fiorehellheart
Awesome blood red. Personally, I'd take inspiration from dreamforge if I were to make a knight. His new models are pretty much perfect and would just need the mars style armour plates and edgings to look complete, certainly all the working parts are there and it looks sufficently mechanical.
http://www.dreamforge-games.com/forum/index.php/topic,62.0.html just that thing with edging on the plates, at least that's what I'd look towards, hope that you might get what want with a bit of inspiration from here though
53821
Post by: AnUnearthlyChilde
fiorehellheart wrote:Unearthly, Yea, that's the plan, not just because I don't want to have to make them twice, but more because it means they'll all be the same. I'd prefer identical pieces even if it was more effort, which casting may well be. Even on parts of the stuff I've made it bugs me how imperfect they are, the octagonal base for example isn't exactly octagonal, which isn't noticeable, but annoys me to just know it isn't. At least if I cast them they'll all be the same. On top of that though casting looks like an interesting skill that I'd love to learn and have a go at.
Don't worry I'm the same, and so is Blackadder (another titan builder on here, he's doing a lucius warlord with interior currently). I've learnt to let go more though these days, as if I am the only person who see's the imperfection, then I can let it slide... otherwise I'd resculpt/redo pretty much all my models
keep up the awesome work dude, I am really enjoying seeing this come to life!!!
32724
Post by: fiorehellheart
I'm in total awe of blackadder, I followed his warhound build, which was amazing, and I really like his warlord even if it's the style I like less. We present pretty different methods me and blackadder, his is a somewhat more gung ho take it as it comes and build just the next part in the line before thinking about the one after that, where as I've planned almost every detail as well as I can, I even have a head interior planned already. His stuff's more detailed though, and I envy how he manages to do that stuff so well.
But yea, the perfectionism is annoying at times, when I can't let go of some tiny detail for example, but it does push me to do the best I can which I appreciate. And I hope it's likewise with yourself
53821
Post by: AnUnearthlyChilde
Lols Blackadder is far from gung ho tbh, he's OCD like myself so needs to do things ina logical step before going on.
oh of course, I wouldn't consider a model finished if I ever thought it was sub par... I love to convert more than anything, scratch builds less so as they are more time consuming, but as my entire Tyranid force requires converting in some form or another its get a tad tedious lols
32724
Post by: fiorehellheart
Hmm, after a google gung ho doesnt mean exactly what I'd thought it did, just means over excited about something, which I suppose he is, but I meant it to mean how much he sort of tries things as he goes, designing along the way. Not sure I'm making my point very well, but he's great anyway.
haha, yea, I used to be a converter, that's how I began proper modelling at least. Then I started to go bigger when I tried a warhouond, after that I also have a few orky constructs. An old bomber and fighter I scratch built, and an orky thunderhawk, I might get a photo of them just to show what i've done before now. All of them are in pretty bad shape after so many years, but I keep on telling myself I'll finish them sometime.. I was always more of an imperial converter though, making converted techmarines and such rather than nids, which I've never collected before. Might have helped the shocking gap in greenstuff knowledge if I had done though.
58575
Post by: Wh40kPicasso
Looking good so far, updates few and far inbetween but quality assurance is always appreciated!
53821
Post by: AnUnearthlyChilde
haha, I kinda figured what you meant anyways Fiore, even though he does it as he goes along, the thought process he goes through is amazing, kinda like yourself with it all tbh!!!
GS ability is just something that comes with practice, no matter what army you do really, its just a matter of practice imo, I don't think its something that comes naturally to anyone. Having said that I'm an artist and love to sculpt but yeah, I don't think any of my tallent (or lack of it lols) is natural
6825
Post by: The_Blackadder
Now this is how to scratchbuild a Warlord. Well drawn and thought out plans. CG illustrations. None of the hit or miss fumbling that I employ. It's a pleasure to see this come to fruition. I found your work on another forum and referenced it to here where I can subscribe.
I like the fact that you meticulously plan out your work. Not only does it rule out mistake but it's easier to replicate duplicate parts.
I almost have a hankering to attempt a Mars pattern as well for your amazing effort but I have so much scrap lying about I think I might cobble together an Ork Titan.
53821
Post by: AnUnearthlyChilde
The_Blackadder wrote:Now this is how to scratchbuild a Warlord. Well drawn and thought out plans. CG illustrations. None of the hit or miss fumbling that I employ. It's a pleasure to see this come to fruition. I found your work on another forum and referenced it to here where I can subscribe.
I like the fact that you meticulously plan out your work. Not only does it rule out mistake but it's easier to replicate duplicate parts.
I almost have a hankering to attempt a Mars pattern as well for your amazing effort but I have so much scrap lying about I think I might cobble together an Ork Titan.
Build a megga Gargant!!! I double dare you!!!
32724
Post by: fiorehellheart
Yea, I intended to put some practice in with greenstuff but never got around to it.
Thanks blackadder, I noticed your post on the ammobunker as well, think I've commented on your threads in there before now too. I think its quite interesting our differing approaches, as you said my planning and your 'hit and miss fumbling', which really does it a disservice. I don't know how you manage to do what you can as fast or as detailed as you do, it's taking me huge amounts of time to do just little things on this, part of the reason my momentum's slowing a little. Still, I'll keep slogging on with the plan. My votes for a lucius reaver titan next from you, some blend of the epic forgeworld and the mars forgeworld one, but I can also see the appeal of heading orky with scrap. I've only been doing this a short while but my desk looks like I'm building in a miniature scrap heap.
It's been a while coming, but I've got some more updates, again, not much but I have an excuse. A couple of days ago I felt that the foot base wasnt good enough, when I first sanded I did it on a tray that had a lip on the underside I hadn't noticed, meaning the surface of the tray was slightly raised above the surface of the table. When I sanded it meant that it bowed downwards slightly, so all of the edges on some of my early sandings are slightly curved. I've sorted this now and put a piece of wood under the tray to raise it so that it doesnt sand wrongly, but I'd already done the foot base. Because of this I decided to rebuild the foot base all over, so spent a long day recreating it so that all of the edges were perfectly flat and perpendicular. After I'd done this though I spent a short amount of time sanding the original one, which I'd already put filler on, and after a short amount of sanding the edges are close enough that it's not noticeable anymore. So in effect I wasted a good deal of time duplicating a part for no reason. Which is why the updates taken so long. I intend to learn from this lesson though...
After that I decided to get started on some other parts. These are the two pieces that will cap the end of the ankle joint tube. I've cut the circles to slightly less than the 34mm outside diameter of the pipe. This is so that when I get the pipe I'm sure that it will fit within the tolerances of the pieces and happily fit onto the end without much fuss. If there is a slight increase in size It's just appear to be more edging and not matter. Building this I'll say that the chopper was really useful, I used it to ensure that both of the trapezium type parts were correct using the adjustable angle guides and it was a lot quicker when cutting right angles for the 0.5mm width edging.
I haven't got and earlier picture, but this is the second coat of filler on the heel piece. I'm pretty much out of filler now so probably need to get some more, but as soon as I have done I'll be able to get close to finishing this. The inside isn't as close and has only had one coat of filler, but I have figured out how to easily sand it now. Using a large diameter piece of tubing that my plasticard was shipped in, I just wrap it with sandpaper and sand using that. Because the curve is smaller than the curve on the part it isn't perfect, but it's better than any other method of sanding I have and has worked well so far.
I also put a second coat of filler onto the foot base part. You should be able to see that now the edges are all fairly crisp, I've also been careful to get a very similar angle on at least two of the faces opposite one another, as they will take the ankle cap support piece. The sort of P shaped one. On the left of the closest edge in the picture you might notice that theres a slight imperfection at the corner. This is because I've almost sanded all the way through the plasticard whilst trying to fix the curve and the slight slant. As luckily it's the same only on the opposite face, I'll add some extra plating to this which will act as a placement guide for the ankle cap supporting piece. this should solve the problem and make it clear as to the orientation of the part, given that some of the faces are slightly dodgey fits It'll avoid misplacement by accident.
I decided it might help to give a diagram of the progress, and I'll try to update this picture every few updates. That way people can tell where I am in the build without figuring out all the different pieces I've built so far. Things coloured green are finished, things orange are a work in progress, and I haven't started the white stuff. So I've got a lot to go.
43845
Post by: Skipphag da Devoura
Holy Crap!!!! This is turning out beautifully!!!!
As to your research... Where did you find the dimensions? I've been trying to scale up the image from the Apoc book, based on what I know from the the Warhound, and it's pic... but it's coming out a little wonky...
I am a mechanical engineer, so I do understand how to scale... but it's still a little off...
6825
Post by: The_Blackadder
At the risk of this turning into a mutual admiration society I feel I must state that I find your drawings fascinating. I wish I had the wherewithal (read patience) to produce such drawings for my Lucius Pattern. Right now I am scaling down the carapace from my posterboard mock up. I'm glad I saved it as many times I was tempted to toss it during my move to new digs but by scaling it down by 0.9 it has saved me a lot of re designing.
I notice from your text that you are having a bit of problem with sanding. Forgive me from stating what you may already know but the information may be useful to those who follow these threads. I use two methods to sand: first on a flat and true surface such as a formica countertop I lay a full sheet of coarse sandpaper; good stuff such as 3M aluminum oxide paper 60 grit. Next I sand only in one direction. If you sand back and forth you can't help but start rocking and end up with a convex cut. anytime you sand or file, only cut in one direction.
My second method of sanding is a square and true sanding block. I cut half a dozen of these 5/4 by 3 inch by 6 inch blocks many years ago and affixed the sandpaper (3M aluminum oxide) with 2 inch double back tape. when the paper wears out I peel it of and apply new. Again only sand in one direction and it is helpful to rest the piece to be sanded on the table so your cut is clean and true. I also use a steel emery board for tight places although I lost my best one in the move..........Drat!
Once the piece approaches the scribed or penciled line I switch to a medium grit paper for the final dressing. As the edge will probably have glue solvent applied it isn't necessary to use any finer than medium grit. Once glued and the edge is squre but must be beveled I use medium or fine paper on block to true the edge.
I also use a really good and clean single cut file with a medium and fine tooth again only file in one direction not back and forth.
I'm going to copy this to my own Warlord thread because although I have stated this tutorial before it bears repetition.
60129
Post by: Scout Sniper J.
You might want to pick up the pace if you have two months left to finish...
(just saying)
34385
Post by: doktor_g
Holy hell dude. Don't use bond-o for the whole thing... you won't be able to lift it! Or there will be so much torque on the skeleton that you'll need a metal internal structure. Good idea though if you just are keeping it on the feet.
Great work! Enjoying the progress.
48211
Post by: Luckless
Really loving the work here. Is there any way you could post a link to the template you based all this off of? I'd certainly be grateful.
32724
Post by: fiorehellheart
Thanks skipphag, I just took what looked coolest compared to the other large models made my forgeworld, check out a couple of the pics on the first post for this. It just felt right. In regards to proportions, which might also be where your plans are coming out wonky, it's just trying and trying again and again. I've been subtly changing the digital file for these over the past 4 years, it's changed a lot in terms of just proportions. I found it's the relative sizes that makes them look odd. Part of why I like the digital method, I can easily test different scales. Other than that I can't really suggest what sizes are best, but feel free to measure proportions from my technical picture if you want, and if you need a larger resolution version just ask and I could upload it.
Haha, thanks blackadder, that's some great advice there. I've already made some way towards that stuff though, eventually. Like I said I use a flat piece of wood beneath my sanding, and I have a block that 1 * 4 * 6 inches squared on all edges and I've glued sandpaper on two of the edges. It's with those that I've been able to 'fix' or at least make acceptable the base of the foot, the angled edges are also much squarer after this second coat of filler because this time I changed my sanding style, I was still using both strokes, which I will try without as you suggest, but went slower ensuring that I didnt rock and maintained a steady angle. This made a big improvement and taking my time more gave me much greater control.
In terms of the grit I use some 240 grit for the large material removal, then 400 or 600 to give a cleaner finish, like on the filler. I also have some 1200 which I'll probably not use much, but might run over the filler to give the best finish possible. I do need to get a few emery boards though, I have some from GW, not very good though, got them ages ago, but I can see some steel ones being useful, where did you get yours?
Yea, I'm very doubtful of meeting that deadline. I get exam results on the 16th, and shortly after that I expect I'll be contacted with work that I need to begin before term starts. If indeed I don't finish, it just means I'll have to stop and continue it in between term times.
Edited, people posted whilst I was typing...
doktor_g, I intend to cast duplicates of the lower halves anyway, I can't make exact copies any other way, but the top might be heavy, on the large curves. I'll probably be making the layer of filler as thin as possible, so it should be able to take it. If not, then I'm screwed, but that's not going to stop me going ahead.
thanks luckless, I talked about that a couple of updates back. Long story short though, nope, they're not really templates in the first place, and I'm not too comfortable giving them out. There are some old templates for a warlord of mine on the bwc paper archive, but they're not great, though the best I'll release. Sorry
43229
Post by: Ovion
What software are you using for the models?
32724
Post by: fiorehellheart
To build the model itself I use blender, not the best program for it really. It's more for animation that for technical model design, I can't measure distance for example. My skills at it are also relatively weak and I can only do a few simple things. If I could I would use something like rhino or a program from autocad. From the 3d model the templates are generated in pepakura, a paper modelmaking program. I don't use it as it's intended though and my 'templates' are made missing most of the panels, and nets, as I don't need them, and with no flaps. They're impossible to make something from unless you know it well like I do as I'm lazy and it takes time to arrange them into a workable set of templates. It's a fantastic piece of software though, links to both below if you're intrigued. I use the licensed version of pepakura, but you can still use the free version like I used to, by using a pdf printer to create template files without being able to save them.
http://www.blender.org/
http://www.tamasoft.co.jp/pepakura-en/
43229
Post by: Ovion
I'm familiar with Blender (well, I know it exists xD) and have Pepakura.
If you want to switch up to a CAD based program I'd reccomend Solidworks, it's what I use and it shouldn't be too hard for you to pick up (plus there's plenty of tutorials floating about.) which will help you make schematics etc.
But this is looking great so far and I look forward to seeing the finished product.
46982
Post by: MrMerlin
Amazing work so far dude, subbed for sure!!
32724
Post by: fiorehellheart
I've been tempted to change before to similar programs but always felt that beginning another learning curve would be more difficult than beneficial as I can manage to work around some of the problems with blender not being designed for this type of work already. but thanks for the suggestions and encouragement too.
thanks MrMerlin, and great avatar btw.
Another small update again, and a change in plan.
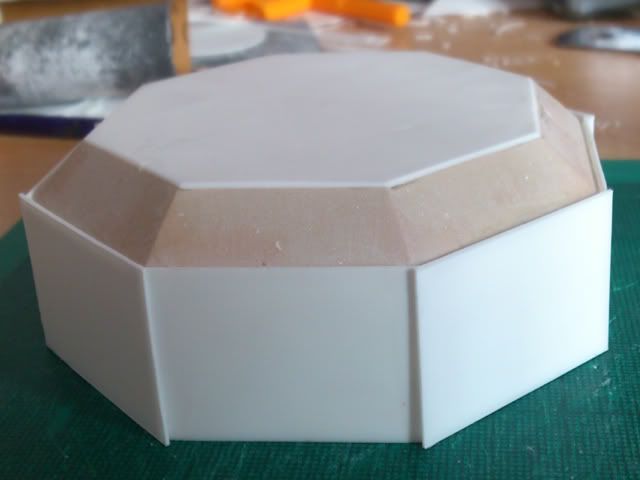
The foot part was still not working well enough. As I'd mentioned before the thinness of the 0.5mm plasticard and my early failures at flat sanding caused the faces to be worn down considerably. I managed to break one of the faces at the edge due to the thinness and decided to plat the part all over with plasticard instead of just the broken face. This is it just after initial plating and I'll sand it down to a neat finish soon. Then I plan to finish this most incredibly irritating piece once and for all.
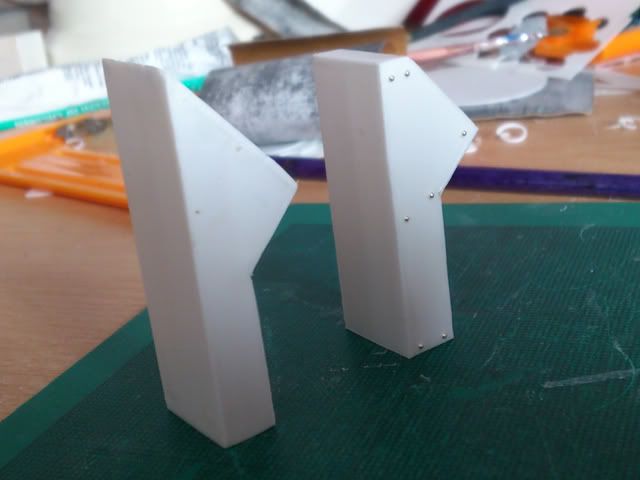
I also restarted the ankle cap connector piece. I was having trouble with the point, it wouldnt form as crisp as I wanted and looked slightly crooked when sanded down. So I redid the part without the point at all, I also improved the way I made it and sanded better this time so the part will fit better onto the model. I'm much happier with it now and the detail that I built into it works better.
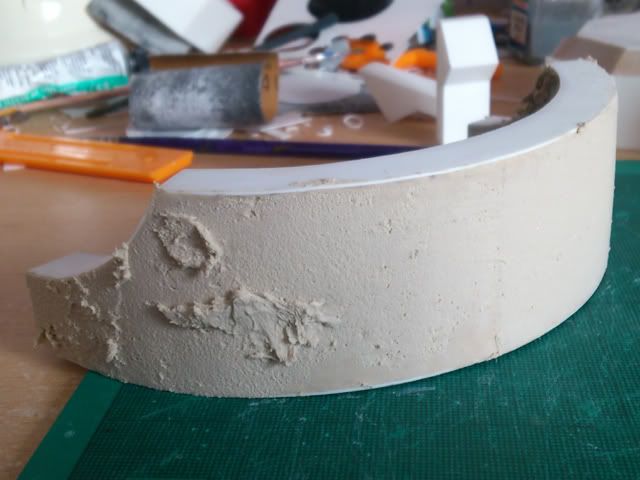
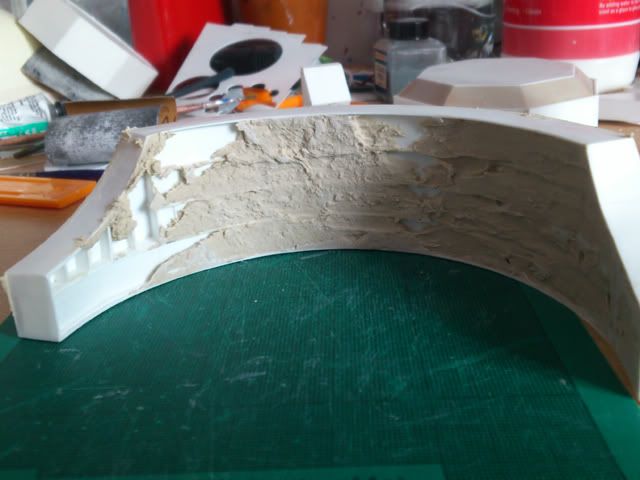
What I hope to be the last coat of filler on the external curve of the heel armour has been applied. As you can see though the inside is still incomplete, at only the 1st coat. It's not going to change soon as I've run out of filler, but I will pick some up soon and improve the part. More later when I've done the foot base I hope.
32724
Post by: fiorehellheart
I've finished as much as I can two more parts, but just a seemingly small update.
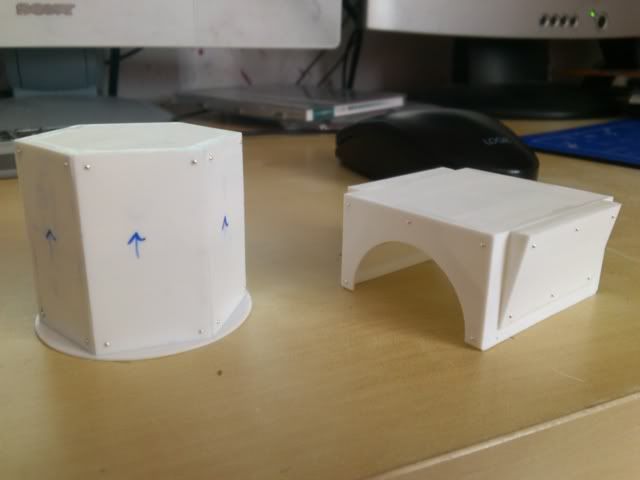
I've built the parts of the calf that I can do without having the acrylic tube. The part on the right is the ankle joint part and needs an acrylic insert to be completed. The part on the left is where the calf armour connectors are mounted. On top of this piece will go a part of the knee joint, which I will start next. Onto the faces go the armour mount parts, which I also need to begin. For the ankle joint part the design is different to what I'd intended, This is because I didn't like the idea of doing a very small beveled edge, so instead went for right angles and some plate detail. I don't think It's a bad change at all though, but demonstrates how my more practical build changes as opposed to the completely theoretical plans.
57210
Post by: DemetriDominov
Gorgeous. Keep up the good work.
60791
Post by: Sean_OBrien
This might come in handy as you get further down the road:
http://futchfactor.com/rivettool/prog1.html
GW Imperial stuff likes their rivets and this is one of the fastest, most cost effective and consistent techniques which I have ever come across.
It is a somewhat old technique (I recall seeing it in a magazine back in the 80s) but the info on that page cover it well. See page one for the tool, and page 3 for making the domed rivets.
32724
Post by: fiorehellheart
Thanks again demitri.
Yea, I've seen that rivet method before and liked the result, but I'd forgotten what it was called and couldn't find it again. I'd be tempted by it if I hadn't already progressed with the 1mm ball bearings, as I've started with them it seems odd to switch to a different method and reduce the uniform nature of the rivets, thanks for the suggestion though.
I have another part built, so another photo of that to show, and I built another mock up with the parts I have to show the scale of the calf.
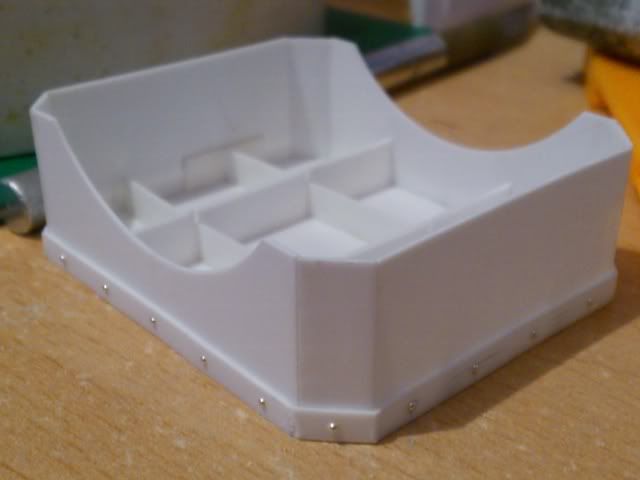
This is the 'female' part of the knee joint and will sit atop the hexagonal piece shown before. It like the female part of the ankle joint is awaiting the right acrylic pipe to fit the curve, before I plate of the sides to finish it. I'm currently in the process of determining the length of different tubes all over the titan. As said before I can use the same tube in different parts, and am taking the time to redesign the arm gun mounts and parts of the guns in order to make use of the acrylic tube I'll have spare from the legs.
In this process I've decided to increase the size of the shoulders to make them look beefier and to fill more space with the arm supports along the side of the body. I think I will also finally design the shoulder gun mounts so that I can again make use of the acrylic tube. I'm trying to find the best place that will cut the suitable parts to length and I think I have the right place, but I'm waiting for a reply to my email first. The necessary drill bits or saw blades are too expensive as I don't have any tools suitable now, so I need them cut for me if possible.
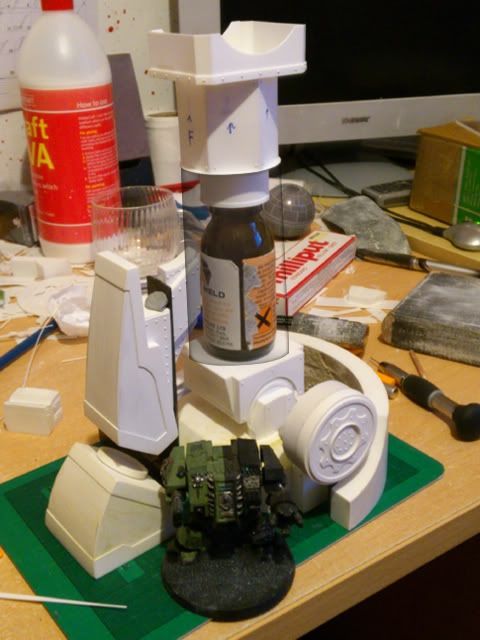
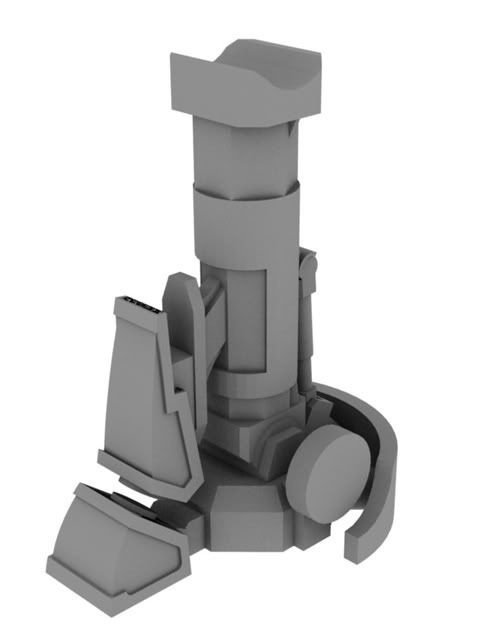
This is the mock up of parts so far, held together with bits of blu tack. The glue bottle is the right height for the main calf part so I've substituted it there for the shot. I can't start that part until I have the tube at hand because of the way it has a cutout. You should be able to make out that I've deviated from the design at both joints, on the knee joint I've increased the length to fit the pipe chosen, and to make up for this I'll ad some extra length into the hexagon part beneath the large overhanging lip on the front and back of that part.
All together it's about 23-24cm tall to the knee, and I'm quite pleased so far. Next up is the thigh and waist parts. I hope I can progress quicker with those, as the build is more straightforward and boxy.
58575
Post by: Wh40kPicasso
Are you planning on selling parts at all? I'm assuming you will be making a mould of all your parts.
32724
Post by: fiorehellheart
The plan currently is to make myself a set of molds to cast parts of the legs and arms that need to be duplicate for the mirror halves of the body. That is to say, everything coloured orange in this picture is going to be copied to either the same or opposite leg so that I have consistent parts.
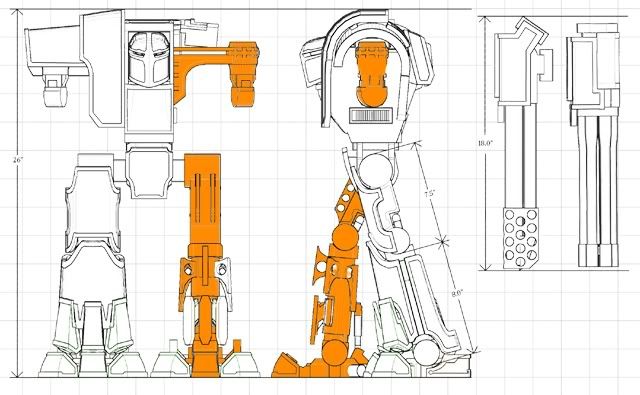
The rest will be custom made and not cast. Although I am considering casting the leg armour plates too, but that depends on how I am with making them. If once I've finished a few people want a copy themselves, then I would look into how cost effective it would be to hire a company to make a short run of them, selling the better quality casts to people prepared to buy them at a reasonable price. As far as selling parts, I assumed you meant selling the titan, as parts of a titan aren't much good incomplete.
I'd love to be able to do this in the future, but I expect that I'd only be able to actually do that next year, as I won't have it done in time this summer.
58575
Post by: Wh40kPicasso
That's what i meant. But casting it would be the only reasonable way to sell it. as i would not sell something i put that much time and effort into if it was going to be the only one! Automatically Appended Next Post: also if your project turns out as good as the first few bits have turned out so far, i would try to venture a negotiation with forge-world or something of the kind. for every model they cast/sell they owe your a percentage of the overall sale. Just IMO.
60791
Post by: Sean_OBrien
Wh40kPicasso wrote:also if your project turns out as good as the first few bits have turned out so far, i would try to venture a negotiation with forge-world or something of the kind. for every model they cast/sell they owe your a percentage of the overall sale. Just IMO.
More likely to recieve a C&D and a demand to relinquish all molds, as well as any profits gained...
In any case, molding/casting is a somewhat quick and easy way to do duplicates - but it is quite pricey when doing just one or two of them (especially when they are this large). That is a whole lot of rubber. You might instead look at doing a plaster buck and then build them up from that (you can paint layers of resin on to build up a shell or use various other methods like FRPs. Although the plaster buck is a lot more of a pain to move around than rubber molds are - they are very useful for larger items...and plaster is cheaper than any other compound you will come across.
Anywho, as I said before - excellent work so far. One of these days I may get around to doing my large scale Warlord. Other things have been occupying my time/space though. I had started one a few years ago for a customer - but once I had the small scale mock up done (right around 1/100) and the final price was calculated...he figured it would be better to buy a used car instead.
43229
Post by: Ovion
Sean_OBrien wrote:Wh40kPicasso wrote:also if your project turns out as good as the first few bits have turned out so far, i would try to venture a negotiation with forge-world or something of the kind. for every model they cast/sell they owe your a percentage of the overall sale. Just IMO.
More likely to recieve a C&D and a demand to relinquish all molds, as well as any profits gained... In any case, molding/casting is a somewhat quick and easy way to do duplicates - but it is quite pricey when doing just one or two of them (especially when they are this large). That is a whole lot of rubber. You might instead look at doing a plaster buck and then build them up from that (you can paint layers of resin on to build up a shell or use various other methods like FRPs. Although the plaster buck is a lot more of a pain to move around than rubber molds are - they are very useful for larger items...and plaster is cheaper than any other compound you will come across. Anywho, as I said before - excellent work so far. One of these days I may get around to doing my large scale Warlord. Other things have been occupying my time/space though. I had started one a few years ago for a customer - but once I had the small scale mock up done (right around 1/100) and the final price was calculated...he figured it would be better to buy a used car instead.
In this instance they couldn't really issue a C&D or make it stick. Because this is a custom built porject from the ground up. He's created the design himself, built it himself, it's all HIS property. Furthermore, there's no GW Warlord model in production for it to be in competition with. AT WORST, they could make a little fuss over the name, but ultimately, 'Mars', 'Pattern', 'Warlord' and 'Titan' are not, nor can they be, copyrighted terms. Even if they try it on with that, all he needs do is sell it as 'Hellheart Mars Walker' or 'Mars Titan' or something somewhat unrelated, and he's safe. Also - wouldn't making a 'spacer' thats the vague shape of the piece, filling the bulk of the mold box with plaster (putting the spacer on top), then making the silicone mold in the gap made by the spacer be a lot cheaper / easier?
40213
Post by: DiDDe
WOW! that thing's really going to be huge! now that you see it with the dreadnoth.. looks great!
60791
Post by: Sean_OBrien
Ovion wrote:Also - wouldn't making a 'spacer' thats the vague shape of the piece, filling the bulk of the mold box with plaster (putting the spacer on top), then making the silicone mold in the gap made by the spacer be a lot cheaper / easier?
Yeah, similar methods are used in making masks. In that case, you usually will paint over the surface with your rubber first till it is about 1/2" thick over everything. Then with the rubber still on the mold create a hard shell to support it. You can either build up the hard shell using fiberglass type materials, a plaster cast type form or use a plaster box mold. The rubber holds details a bit better - but you avoid the costs relating to a huge rubber mold. The specific method chosen sort of depends on the result you want in the end. On bigger stuff like this, I often prefer the result from a plaster mold - as each one tends to be more customized. Smaller and more detailed items are good candidates for the rubber.
You can see an example of the process here:
http://protagonist4hire.blogspot.com/2009/10/haloween-is-getting-closer.html
In that case they are making molds for some HALO armor - but the same principles apply here.
The legal action is irrelevant to whether or not they have a claim to it. The most likely response from GW would be a C&D if you were trying to move commercial and contacted them about it. If they decided to go to court - their likelihood of winning...well, there is enough about that in the Chapterhouse thread. Point being...there is no requirement for being right before sending a C&D letter. There isn't even anything that says they have to believe they will win before filing a lawsuit. It is a tactic used by lots of companies to stifle competition.
58575
Post by: Wh40kPicasso
I was actually trying to say that you could try to get GW or FW to buy the concept mold and designs and sell it themselves and recieve a royalties check. Not just make your own models and sell them on an E-bay store or something as a "warhammer 40,000 Mars Pattern Warlord Titan."
Just saying, game companies are always looking for good designs/designers!
32724
Post by: fiorehellheart
Thanks DiDDe, I look forward to plonking it onto the table to the horrified looks of other players.
Yea, I'm never going to make another one of these from plasticard, that's for sure. For casting I think a few different methods will need to be taken, here's what I plan to do, which is a combination of things already mentioned.
1part silicone molds:
I'll use these on flat faced parts without detail that can be extracted from a mold easily, Ie no major overhangs. The parts I intend to do this with are mainly those on the foot. If I ever did sell these I might even make a one pull mold of most of the foot anyway, as assembly of that would always be the same, but that's unimportant now. to make them I'll just build an enclosure about 1/2 an inch around the part and fill it to another half inch above the part, possibly thicker for larger parts to prevent any bending of the mold while casting.
2 part silicone molds:
I'll use these on mainly blocky shaped parts, so the calf and thigh pieces will be these, along with some more complicated shapes like the toe armour pieces that can't be one part mold based. To make these I'll assemble a box around the part again, and then will place the part into the mold and build plasticine up the seam between the intended halves. This leaves the top half of the model open and I pour silicone into that, then I flip the mold and remove the plasticine, and fill the other half from the other side, this leaves a seam where the first pour met the plasticine and ensures both halves fit, Into the plasticine a number of 'keys' which are locating bumps that interlock the two halves, will be moddelled to align the halves when casting.
brush on silicone/latex molds:
I'm not sure as of yet which material is best for this type, but I'll find out sometime, I'm sure you can get brush on variants of both. As in the link posted by sean_obrien, check it out if you haven't, I'll paint it over then thicken it and finaly use a plaster forming box around the whole thing. I'll use plaster rather than the resin retaining box as I expect it's quicker and cheaper to do. Even if it will leave me with a big heavy block of plaster. The parts i'd do this on are pretty much anything oddly shaped, like the armour pieces, and the big parts, like the body. of which I need to figure out how to make hollow so I don't crush the model beneath itself. I'm thinking of having a large hole from the bottom that will also be used an axle type thing from the waist to rotate on.
That's the plan at least.
In terms of copyright and selling to forgeworld. I don't think that they could do much apart from try to scare me off with the C&D or bankrupt me with legal proceedings... There's a group of people on facebook acting under the name titan manufactorum that cnc cut warlord titan and have been running for several months now with no outward sign of problems due to gw, they seem to be ignoring them for now. As mentioned before my design is original compared to anything they've made, so I assume it would be difficult for them to do anything which they might know. But as also pointed out they could just try anyway with the intention of bankrupting me or scaring me off.
I doubt that they'd take the model for a fraction of sales profit though, prefering to buy the model outright I expect, or just ask will hayes to copy and update it. Aside from that, as cool as it would be to have them sell it, I don't really want my model taken from me, this is my baby, It's been growing for the last 4 years and I've got little intent to just give it away.
Right, I've been busy the past few days with this.
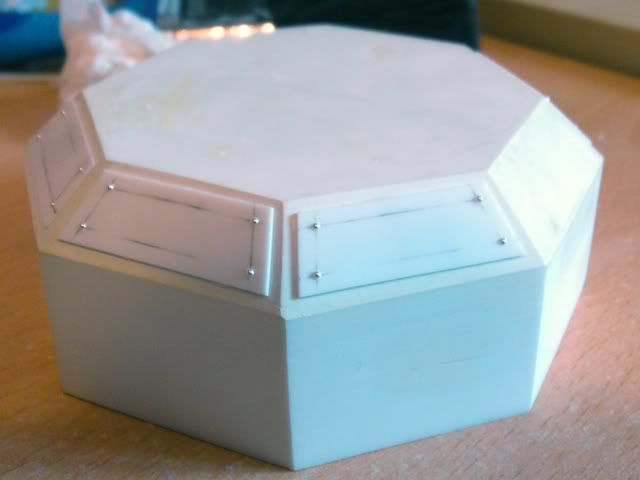
I've now finally finished the foot base, I'm happy with it now so it will remain like this. There's a slightly yellow tint that might be visible on it where I used milliput, I also used this on the heel armour to smooth out the surfaces.
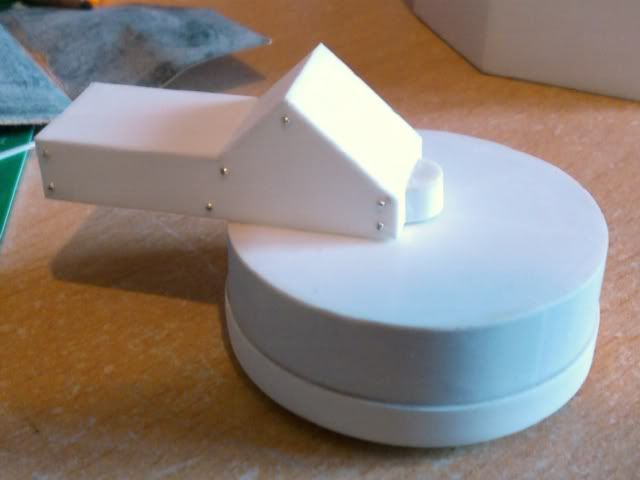
I made a small alteration to the ankle cap connector, just to give it a bit more height, really it should be positioned as in the photo, but will be changed on the model to fit however the spacing in relation to where the leg armour is.
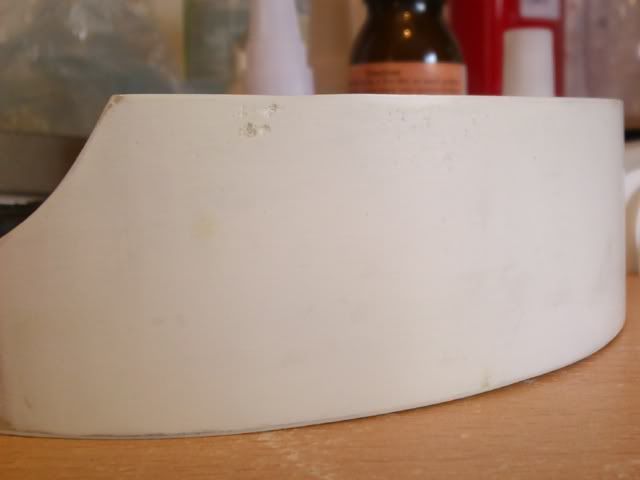

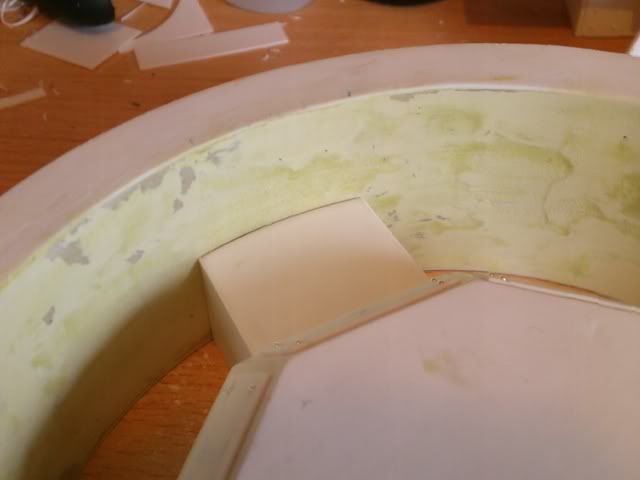
I'm now getting close to finishing the heel armour piece, I consider the outside done as I've said before, but now I'm also done with the inside curve. I'm going to try to finish this today by doing the plating work on the inside and outside. The different coloured filler is a new different type to my previous stuff. Aside from being yellow, this filler is much smoother than what I had before, and feels of a much higher quality, being denser I think. The upshot to this is that a large number of pinholes, which had to be filled with milliput on the old filler's curves, won't be nearly as common. It should make it easier for me to use and quicker.
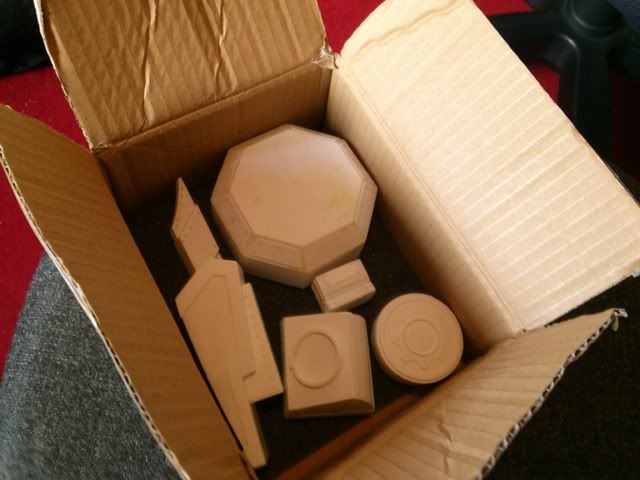
I'm also running out of space to put my finished awaiting casting parts, which shows you what's completed so far.
53821
Post by: AnUnearthlyChilde
looking good Fiore!!!
brush on silicone/latex moulds
my advice is do not use them or attempt them... they shrink as opposed to block moulds. plus the rigidity of a block mould lends itself better to casting large shapes. brush on moulds are for when your wanting to cast relief detail and so on.
block moulds will be expensive, but, if you cast to sell on you will make your money back with no problems.
Also I suggest using Oomoo Silicone for making your moulds with, unless you can afford the higher grade stuff the likes of which tiranti.co. uk sell.
22413
Post by: mwnciboo
I applaud you, but in all honesty how much is this gonna cost in Resin alone. Silicon Rubber Block Moulding will be expensive and you are barely at the large sections (moulding toes and ankles). It's going to cost hundreds unless you use a Metal Frame inside the model to help it hold it together.
I'm not naysaying, I want this to succeed, but given the fact this is enormous compared to a FW Titan, is your market going to be big enough to recoup the cost of the Silicon Rubber Block Moulds?
All things aside, as a Labour of love and endeavour, I've got to say this is inspirational.
53821
Post by: AnUnearthlyChilde
mwnciboo wrote:I applaud you, but in all honesty how much is this gonna cost in Resin alone. Silicon Rubber Block Moulding will be expensive and you are barely at the large sections (moulding toes and ankles). It's going to cost hundreds unless you use a Metal Frame inside the model to help it hold it together.
When something is worth doing, it is worth doing properly. Now sure Resin and silicone can be expensive. But it depends on what grade you use. I suggest a hard grade silicone as it will lower the chance of warpage during the casting stage (NOTE: a high grade will be firmer but sometimes will tear more easily) Now looking on ebay, I have found Polycraft GP-3481-F RTV Silicone Mould Making Rubber 1.1kg Kit Shore A27 @ £20 + 7P&P (eBay). now as for wastage you always keep left over hardened silicone to chop up to reuse as filler to save on more silicone in other moulds. But in regards to cost, as a rule of thumb, the more you buy the cheaper it'll get. Also, once you have gotten the skills down for casting you will learn how to make smaller block moulds to save on waste. Also, there is a high chance of making money from these moulds as most high grade silicone will have a high tear strength to it as well, which means multiple castings from one mould as for Resin, you can get Polycraft SG2000 - 2kg Fast Cast Polyurethane Liquid Plastic Casting Resin Kit for £30 +9P&P (also ebay). with Resin you hardly ever have wastage, so cost is less of an issue. sure, it will cost a fair chunk of money in the long run to buy, but weighed against the laborious process of building I'd rather cast>mould>reproduce. I'm not naysaying, I want this to succeed, but given the fact this is enormous compared to a FW Titan, is your market going to be big enough to recoup the cost of the Silicon Rubber Block Moulds?
All things aside, as a Labour of love and endeavour, I've got to say this is inspirational.
As I've worked in mould making for some time now, so I hope I know enough to get by (fingers crossed). In the case of both Fiore's and Black's titan's it is great to see the masters made, but in the long run, unless you are purely interested in making it because your the biggest geek in all of 40k-dom... you are better off casting to order and selling the parts. now for legal issues you can't sell it as a "Titan" obviously, but if you were to sell it, I think there is a niche out there for large scale warmachines of doom. either way, good luck in your endeavours Fiore, and don't hessitate to ask!
32724
Post by: fiorehellheart
Right, questions then...
You say that the brush on moulds are susceptible to shrinking, I assume this is because of the thickening agent. Having thought about it however I should be fine as none of the shapes are too complicated and I can relatively easily build even thickness enclosures for them. Just to check though, in the picture given below there's 3 possible methods for block poured molds. The first is an enclosing wall the shape of a rectangle block with just 4 straight edges, this is most wasteful, but easiest to do. The 2nd is the more form fitting enclosure, Ie the curved lines about an inch away from the part. The 3rd being the form fitting with the remainder of the shape being taken up by plaster, the most time consuming, as I need to cast both parts. Which would be best in terms of minimum mould material to maximum casting quality. I currently don't think that the 2nd option and the 1st differ much cast quality. Correct me if i'm wrong. But the 3rd seems the way to go if I intend to do many casts as it offers both advantages. That said as I know that the silicone can be re-used within a different mold the 1st option might not be wasteful once I've managed to mess things up and been left with excess silicone. What's your opinion on these three options?
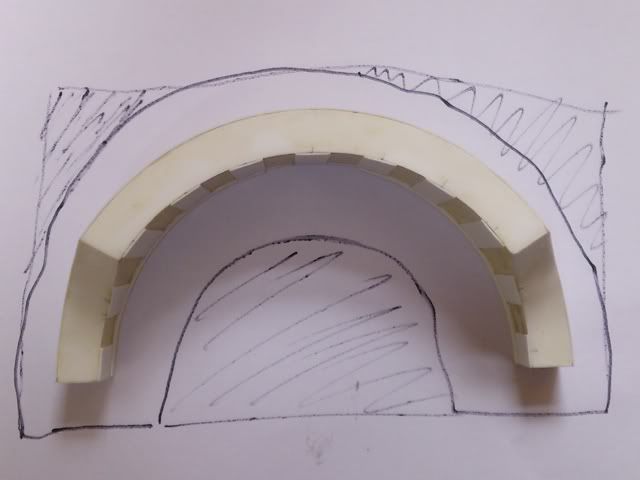
I never understood before now the shore values. From checking wikipedia it says it's a measure of hardness, with shore A being the type of hardness test and the 0-100 for the actual hardness, higher values the harder the substance. You mentioned that I want a hard grade to lower warping, I take this to be a higher value. However you also say that this would make it susceptible to tears. I wanted to know at what point the tearing becomes a problem, and as most silicone for molds appears to be in the range of 25-30, is it beyond this and not something to worry about too much?
Also, do you agree with what I'm thinking of now, which is going for as higher shore value that remains usable, and accepting tears, if they occur, but reducing their impact by using them as filler for other molds later on in the model. I was thinking of ordering the shore25 silicone from tiranti, oddly labelled T28, when I get around to mould making. Starting with a single kg then ordering more if I'm happy with the material. http://www.tiranti.co.uk/subdivision_product_list.asp?Content=T28+Silicone+Rubber+-+Silicone+Rubber+-+Mouldmaking&Subcategory=51&Subdivision=175
In regards to the casting material itself, are fillers recommended as a way to reduce the density and weight of the resin. I'm unsure whether using them will alter the finish on the resin itself and make it adhere much less well to paint, instead thinking that making the parts have cavities to reduce mass is easier.
The type of resin is also more varied than I expected. I've seen fastcast resins like that which you mentioned, those with short cure times. Are these advisable for beginner? Might it be better for me to gain experience with a longer cure time first, before speeding up. Same again with much lower viscosity resins, the easy pour types, should I get experience in general before I go onto something that seems trickier, but could reduce defects such as bubbles?
I think that's all the questioning I have for now.. as you said to ask away
You're right about what you said earlier though, if somethings worth doing it's worth doing properly, so I think I'm going to accept that to get the best results I may need to spend a bit more than I'd intended. As I still don't have a job, and doubt I'll get one in the next few weeks, I'm going to start diverting some of my time to some other 40k projects, with the intent to sell them soon. I have gaming board and a full set of cityfight terrain that I intend to repair, paint and sell along with a couple of ork vehicles, one which is going to be a 40k ork airship, and another the ork thunderhawk I built. I want to get these done as soon as possible, but don't know how long they'll take as I still want to do some work on the warlord alongside.
I'll upload pictures later as I begin working on them, and if anybody's interested pm me about them and we'll try to sort something out.
53821
Post by: AnUnearthlyChilde
fiorehellheart wrote:Right, questions then...
You say that the brush on moulds are susceptible to shrinking, I assume this is because of the thickening agent. Having thought about it however I should be fine as none of the shapes are too complicated and I can relatively easily build even thickness enclosures for them. Just to check though, in the picture given below there's 3 possible methods for block poured molds. The first is an enclosing wall the shape of a rectangle block with just 4 straight edges, this is most wasteful, but easiest to do. The 2nd is the more form fitting enclosure, Ie the curved lines about an inch away from the part. The 3rd being the form fitting with the remainder of the shape being taken up by plaster, the most time consuming, as I need to cast both parts. Which would be best in terms of minimum mould material to maximum casting quality. I currently don't think that the 2nd option and the 1st differ much cast quality. Correct me if i'm wrong. But the 3rd seems the way to go if I intend to do many casts as it offers both advantages. That said as I know that the silicone can be re-used within a different mold the 1st option might not be wasteful once I've managed to mess things up and been left with excess silicone. What's your opinion on these three options?
Having never tried the third option I can't honestly give you an experienced answer to that, but... Logically it does provide stability that you require from casting. as to my knowledge FW cast in silicone moulds with a rigid frame to lessen warping.
I never understood before now the shore values. From checking wikipedia it says it's a measure of hardness, with shore A being the type of hardness test and the 0-100 for the actual hardness, higher values the harder the substance. You mentioned that I want a hard grade to lower warping, I take this to be a higher value. However you also say that this would make it susceptible to tears. I wanted to know at what point the tearing becomes a problem, and as most silicone for molds appears to be in the range of 25-30, is it beyond this and not something to worry about too much?
The stuff I have used before can be found here: http://www.tiranti.co.uk/subdivision_product_list.asp?Subcategory=51&Subdivision= The lower the number, the more easy it is to tear, but the greater the detail quality will be, so if detail is not a problem then a high grade would be more suitable (I had the numbers the wrong way around lols  )
Filler won't be nessesary, because as I say, I got the numbers the wrong way around lols... If you want a mid range Silicone try then the T28 will be fine to use, but as I said before, if detail is not a problem then possibly try the T30. but as I say the T28 should be what you require.
In regards to the casting material itself, are fillers recommended as a way to reduce the density and weight of the resin. I'm unsure whether using them will alter the finish on the resin itself and make it adhere much less well to paint, instead thinking that making the parts have cavities to reduce mass is easier.
I have only used solid Resin before, so the only advice I can give is try it with a small part, if it works it works, if it doesnt it won't be much of a loss really. Trial and error is a massive part of learning to make moulds... and I've had a stupid amount of errors in my time.
The type of resin is also more varied than I expected. I've seen fastcast resins like that which you mentioned, those with short cure times. Are these advisable for beginner? Might it be better for me to gain experience with a longer cure time first, before speeding up. Same again with much lower viscosity resins, the easy pour types, should I get experience in general before I go onto something that seems trickier, but could reduce defects such as bubbles?
As you've never used Resin before I suggest using GP (General Purpose) resin, which you can find on Tiranti. Also Tiranti also offers a guide to casting on their site ( it costs, but is worth the money to have about as a refresher or for beginners)
I think that's all the questioning I have for now.. as you said to ask away
That I did... I may perhaps regret this lols
You're right about what you said earlier though, if somethings worth doing it's worth doing properly, so I think I'm going to accept that to get the best results I may need to spend a bit more than I'd intended. As I still don't have a job, and doubt I'll get one in the next few weeks, I'm going to start diverting some of my time to some other 40k projects, with the intent to sell them soon. I have gaming board and a full set of cityfight terrain that I intend to repair, paint and sell along with a couple of ork vehicles, one which is going to be a 40k ork airship, and another the ork thunderhawk I built. I want to get these done as soon as possible, but don't know how long they'll take as I still want to do some work on the warlord alongside.
I'll upload pictures later as I begin working on them, and if anybody's interested pm me about them and we'll try to sort something out.
Well I love seeing your work so these will be interesting to see.
A last point to leave you on... I'm sure your aware of this, but I thought I would state it anyways... A bonus of Alec Tiranti's site is you can get discount in bulk... I advise you do order in bulk once you know what it is you want, as it'll save on cost. But remember all prices on tiranti are shown with and without VAT. So be sure to make sure when ordering youhave the right price in your head... unlike me when I first did an order and wondered why I had no money left, as I said... I have made many mistakes... but at least I've learned how to do it properly lols.
22413
Post by: mwnciboo
Wow, this proves why Dakka is awesome. I have no desire to use resin or produce moulds, but with all the advice above I reckon I could make a decent fist of it if I chose too.
You need to turn this into an Article. EXALTED +1
53821
Post by: AnUnearthlyChilde
mwnciboo wrote:Wow, this proves why Dakka is awesome. I have no desire to use resin or produce moulds, but with all the advice above I reckon I could make a decent fist of it if I chose too.
You need to turn this into an Article. EXALTED +1
lols its all stupid information I learnt at uni making latex masks... and I don't think I have the patience to write it up... chalk it up to laziness lols
32724
Post by: fiorehellheart
That's some pretty useful information there, thanks, I second the article request, although I'll be writing something similar when I get casting I imagine. I'll go for the shore 25 rubber and some general resin, and see what I can do with the plaster surrounding boxes.
Yea, I promised some pictures of what I've been up to so here you go. Shamefully untitany...
The cities of death buildings I have, minus one I was spraying to test colour schemes on. there are 8 there which I plan to base on 1' square bases, giving 9 square feet of the 16 for a 4' by 4' board. As I'll buy some mdf for the tiles I'll be using the spare to create a set of 6" wide roads to go inbetween the buildings giving a very customisable board all together. I may even make some blanks to give open spaces if desired as the wood I'm ordering will be bigger than the 4' by 4' anyway. If anybody is interested in this and lives near enough to chester in cheshire, to pick it up pm me an I'd love to try and sort something out. If not it'll be up on ebay in a week or two once it's finished.
Also for sale, pm me if interested, is the ork thunderhawk. It has a wingspan and length of 45cm or about 18". Currently it's missing parts such as the cockpit and mini wings, but once I've repaired it I intend to arm it with a similar arrangement to the space marine one, just ork based instead. I don't plan on painting this and well spray it black for sale, the current paint job is from a fair few years back when I gave up deciding I need an airbrush, as I don't have one it'll be sold unpainted.
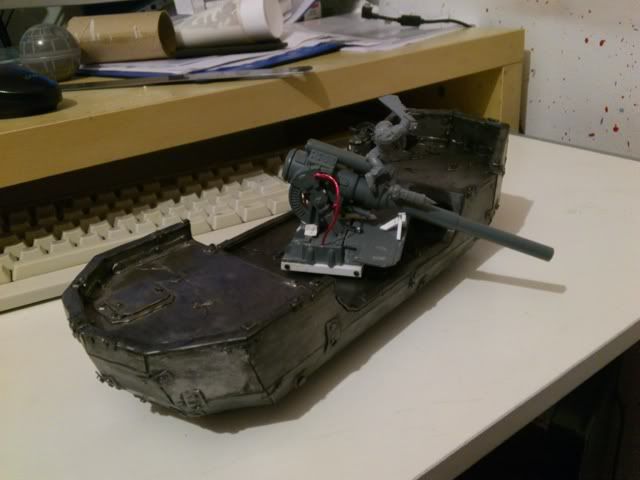
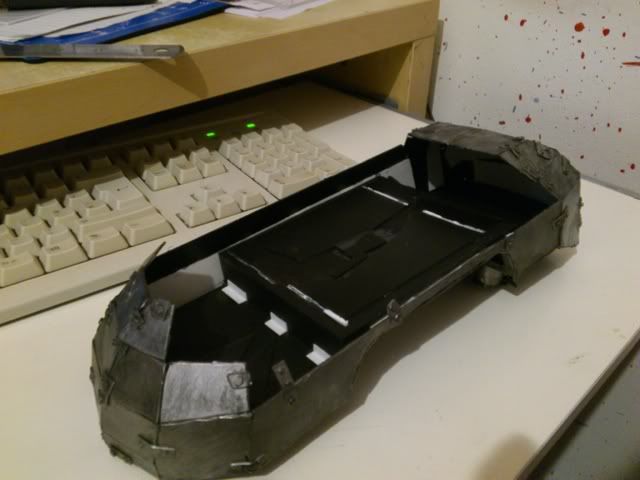
This is the soon to be ork airship. As you can see it lacks a hull which I removed because it was flimsy, the current plan is to support the underside with some filler and replate the hull. The balloon will be made with a cardboard internal skeleton and a paper mache skin. I'll also research ways of making a fabric appearance over that. If anybody has any tips please share them. Again, I don't plan on painting this but will sell it later on ebay of with a pm.
So yea, that's what I'm up to. If anybody fancies any of thse contact me and you'll be able to get a cool model and help me on my way to finishing the titan. Thanks
Also, I've pm'ed for this to be moved so look for me in the blogs section from now on
53821
Post by: AnUnearthlyChilde
Then I think I shall leave it for you then Fiore, I never was one for public speaking... ask me a question and I'll always give an answer to the best of my abilities, but make me write an article, and well... I forget
Interesting builds you have there, can't wait to see them evolve!!!
32724
Post by: fiorehellheart
I can't say I'm much for public speaking either, but if I get some time that I feel like filling with a writeup I'll get one out for the chopper I bought, which is great so far although I plan to make some custom guide rails for it, and write up something to do with casting. I should probably get experience on the casting and mold making first though so it will come later. Remind me if I forget, which I probably will.
I got back to working on the titan as I was finding the other stuff of mine a little boring, although I have now mostly repaired the thunderhawk and now need to figure out how to base it. I have figured out the balloon for the blimp, but that needs to be started. I'll get around to it when I'm motivated enough to give it a shot.
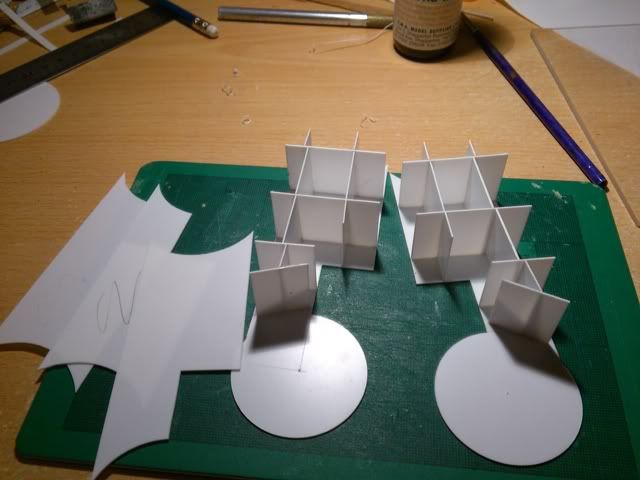

I've started on the thigh part of the leg. These just show the parts that I cut out to begin with. Just as with the foot I'm doing an internal structure for a bit of strength. Also as I'd built a spare foot base when I thought the current one wouldnt do, I decided to demonstrate to my brother the benefit of the internal structure. It took my full weight of 78kg with me balancing on my heel no problem at all, and wouldn't budge when I stamped on it. The parts should survive the mould process, and nonsense to people who say titans need big internal structures of pvc pipe or wood, just give it some structure, it still weighs next to nothing anyway.
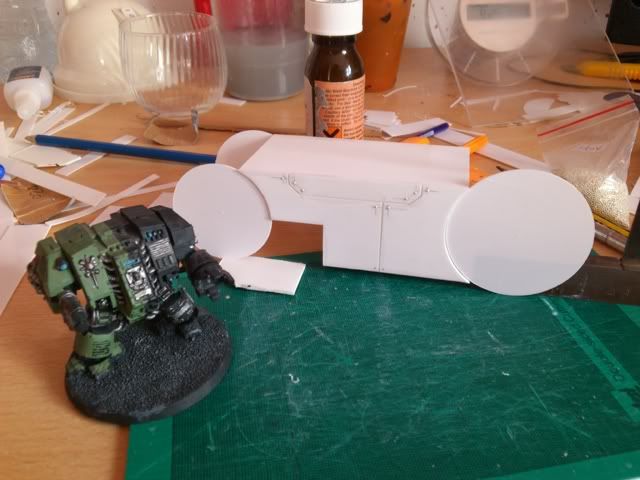 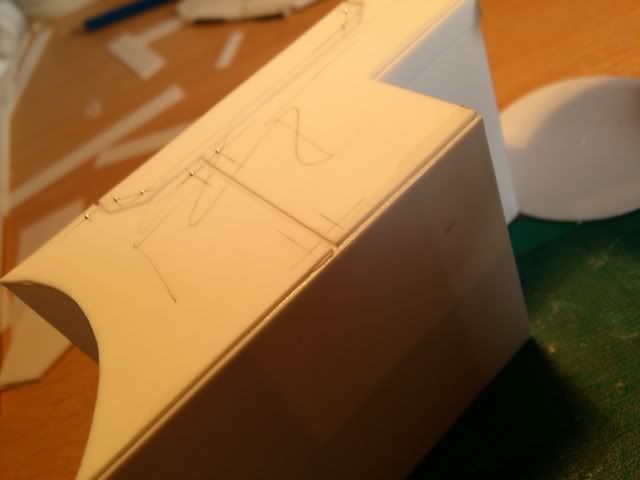 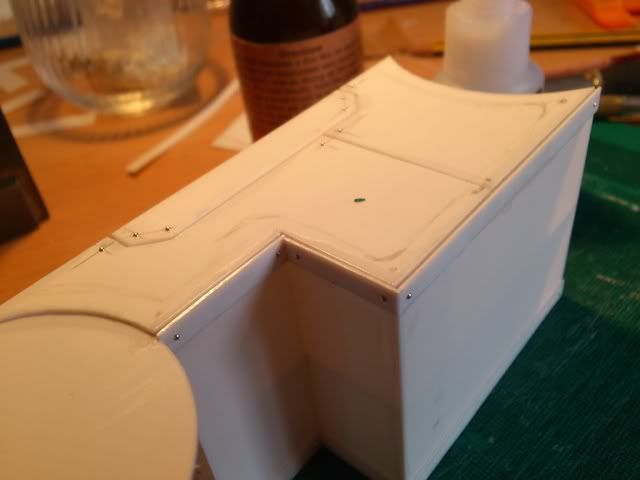
I then begun plating the detail on, which was designed to mimic some of the panel lines on the warhounds. It looks quite lucius style, It'll have a mars edging added. I've begun the edging as you can see in the last picture, this was also to cover an edge that appeared because I miscut the detail panels. The side edging will match the style of the penciled in line on the last picture and meet the edge to cover the edge. After that's done I'll start to do the detail on the cicular caps.
I'm changing my planned designs here yet again. Because I only want to have a single thigh to cast that can be used on either side, I need to change how the tube at the top is weighted. On my plans it was flush on the outside to the thigh piece, but extended on the inner side a little. I'm now going to make it extend outside of both edges by a small amount. I then intend to cast the part with a hole through that tube, for the axle, and completing the piece by capping of the outside edge with an appropriate diameter part to fit the open hole. The hole on the other side will fit along the central axle pipe through the hip. this way I can cast one part but use if for both sides of the model. Of If I find casting it is particularly difficult. I cast just 2 of the open pipe ones, chop up the mould and remake two moulds. On each of the casts that has been completed to make a left and right version. Hopefully I won't need to do this.
58575
Post by: Wh40kPicasso
May i ask something? it may sound like a stupid question as i am not a designer in any fashion, but why use an axle or a bi-directional arm mount when a ball joint would be much more manouverable and stable? also it would allow for better poses! Just wondering. Lookin great so far btw, and i totally agree with your structure, its kind of rediculous to build something like that out of wood or something similar, might as well be schepetto and he pinochio.
32724
Post by: fiorehellheart
A perfectly sensible question, and something I'd have liked to have done. I could have done ball joints at the ankle and at the hip, but decided not to based on practical stability of the model,. Whilst in design it would let it have more stability through a more flexible footing, I felt a thick axle extending from the left thigh to the right through the whole hip would be stronger for the model than two ball joints. It Also feels much easier to accomplish as I don't know how well I could make the receiving part of the ball socket. I would need to add pistons to make it believable as well, and I wanted to avoid those because they're fiddly and look annoying to scratchbuild.
Interestingly though I don't think that there's too much preventing me from later opting to change it to a ball joint. If I keep both parts of the ankle joint seperate from the limb and the calf, I can replace them with a ball set of joints. Likewise I could swap the axle for a ball joint by making a joint that slots into the waist on one side and the leg on the other with a ball joint. As I feel pressed for time I thought that I would go for simple, but quick and effective and leave it at that.
I would like the cooler poses though...
43229
Post by: Ovion
From a motion point of view, while a balljoint is better, for construction, an axle and simple mount will be stronger and a LOT easier to make.
32724
Post by: fiorehellheart
Yea, exactly as I thought.
Another update, I've almost finished the layered detail on the thigh piece, excluding the circular caps, which I'll do now, I didnt get around to finishing it because I was distracted by watching the curoisity rover landing (brilliant achievement) I will try to finish it now along with the other small pieces left on the foot, then I plan to begin on the armour pieces for the leg, having finished the necessary plans for them.
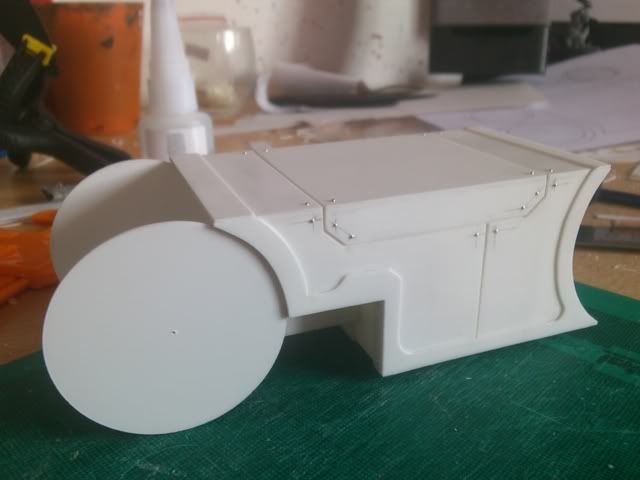
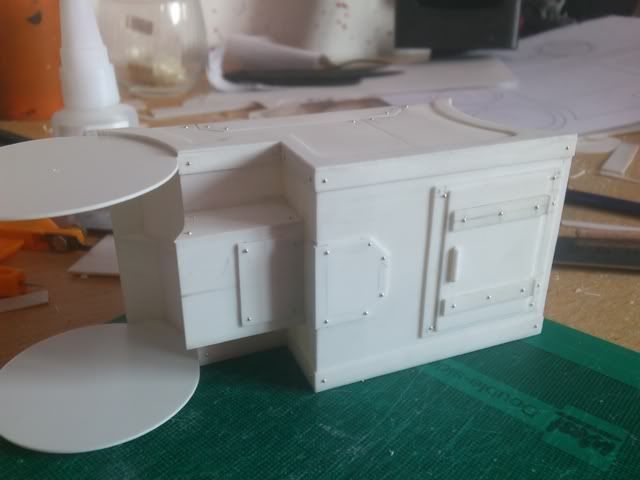
The detail speaks for itself really, and just needs to have a couple of gaps filled along the edging to finish it off. I hope the tube I order will fit the cutout on the detail, but I can gap fill if I doesnt or sand it down.
I'm also uploading a few pictures of the thunderhawk in it's current state with repaired panels awaiting rivets, it will be left along for a while from now as I wait to order that tubing, I'm still indecisive about some measurements on it but will try to experiment and order anyway as it looks like I have a job for a few weeks at my old workplace and can now afford to test more ideas out. I still plan to sell this and the blimp as I have little use for them, although I may be practicing some painting on the blimp.
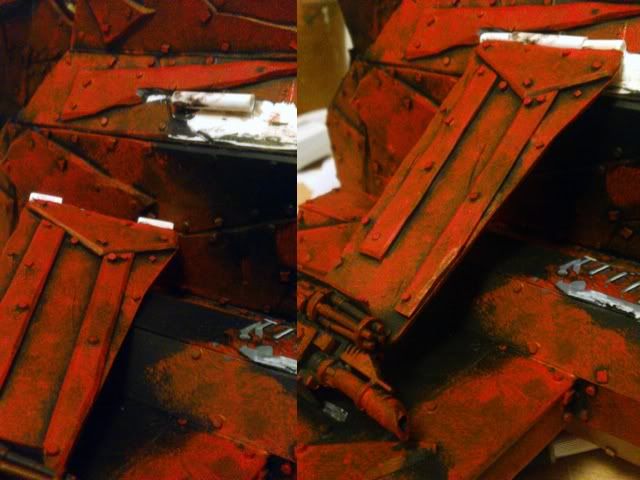
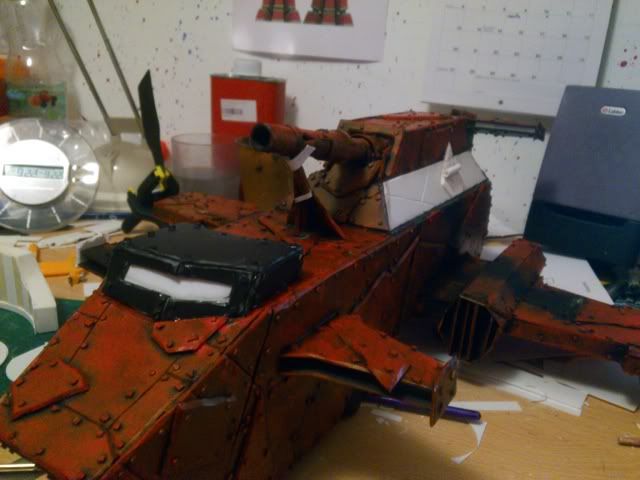
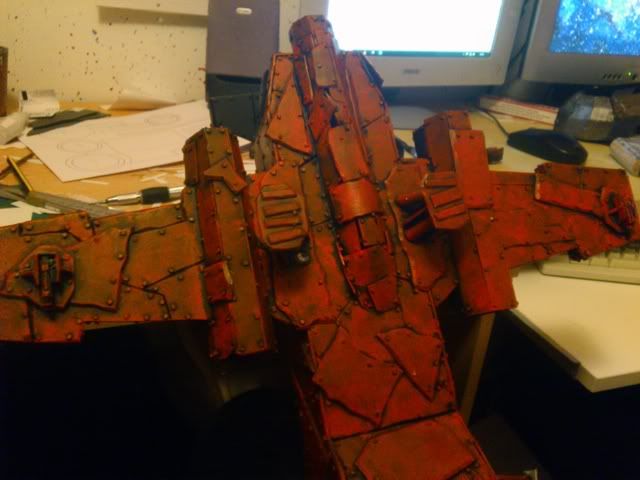
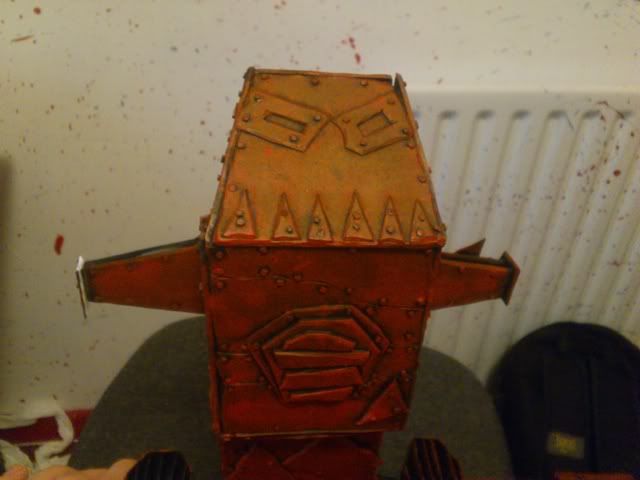
The top image shows the locating hinge on the small wings, which I'm not going to glue into place for painting, the rest just show various bits of detail and views of the ship. Ignore the paintjob please by the way, I painted the red right over black and it came out quite weak in person and very orange in the photo's although I did my best to colour correct them, going to be sprayed black though so it's no big deal.
44384
Post by: cjharrisman
Your styrene work is stunning, its good to see something built entirely from scratch, Do you do other model based work as its professional level
32724
Post by: fiorehellheart
Thanks for the compliments, but no, I've never tried anything anywhere near as ambitious as this before, and certainly not professional. I don't feel my work is near that level anyway, not yet. It's largely just about lots of practice and patience, and layers, lots of layers....
The only previous work I've done, besides the thunderhawk and blimp shown is another two ork planes, and then two warhound titan, which aren't fantastic in detail at all, but they're rather special to me as my first scratchbuilt titan.
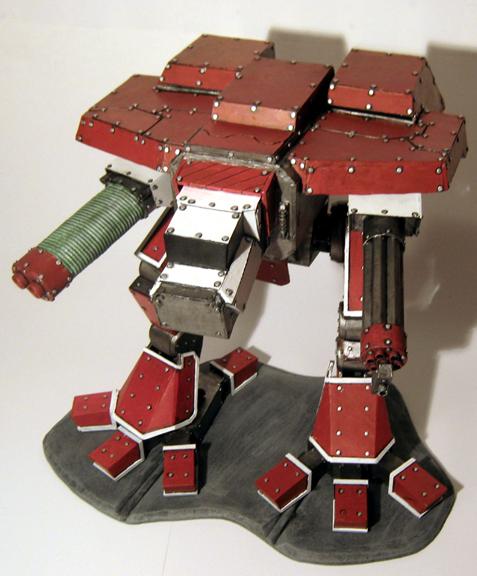
44384
Post by: cjharrisman
I have a HND in Professional model making and the crispness of your work and the accuracy of the cuts is what id expect from a high end model maker.
Awesome work
32724
Post by: fiorehellheart
That's a very cool qualification, and thanks again. I think the perception of quality is improved by the low quality cell phone camera I've been using for all my pictures. I tend to feel that there's a lot that could be improved although some of the things I think of improving are a bit unrealistic, like when I removed the inset part of the calf detail, the box that fits into the circle on one edge, because it was about 1mm off centered. It took me ages to figure out what felt slightly wrong about the part as you couldn't tell by looking at it. I still decided to remove and recentre it though. It's this kind of attempt at perfect that's making me take so long to complete it. Still, I'm glad you like it
28327
Post by: mullet_steve
I have a BA Hons in Modelmaking and spent 5 years doing it for a living and I can hand on my heart confirm that without a lasercutter I couldn't replicate the work you have accomplished here..
Ohh and possibly a detailed set of blueprints wouldn't hurt....
44384
Post by: cjharrisman
mullet_steve wrote:I have a BA Hons in Modelmaking and spent 5 years doing it for a living and I can hand on my heart confirm that without a lasercutter I couldn't replicate the work you have accomplished here..
Ohh and possibly a detailed set of blueprints wouldn't hurt....
I agree, his work is spot on.
34252
Post by: Squigsquasher
Subscribed!
58575
Post by: Wh40kPicasso
Well i'm glad my question wasn't completely off the wall. I was just thinking from a mechanical standpoint, i hadn't really thought about the building process of a ball & joint system and how complex it would be. i was just thinking from a view where an axle would completely take any kind of manouverability away from your gigantic warmachine. But i am certainly glad that you have taken all of this into consideration and understand what you mean by your building process. I like your detailing, are you going to put any cogs or aquilas on there? also are you going to put banners on your titan? i know these are way out on the to-do list, but i am just curious!
32724
Post by: fiorehellheart
Thanks guys, I'm just doing my best.
yea skipphag, go for it, and be sure to link across in here to it, I'd love to see what you can build. When I did mine I just roughed it out and it went well, so good luck if that's what you decide to do for yours
Thanks squig sqasher
It was a good question Wh40KPicasso, something I'd thought about but hadn't written about so I'm glad you asked. But yea, in terms of building one it's getting a smooth ball of the right diameter that's annoying, and then you need a retaining ring or set of pistons to maintain the connection. That ring or set of pistons is the difficult bit to produce and to recreate in duplicate too. They do look a lot cooler however.
The plan is to go with cogs on the thigh joint barrel bit, but generic circles on the knee joint. A bit like the ankle cap and the ankle joint parts respectively. Elsewhere I'd like to use aquilla's but doubt my ability to make them. As I intend to cast I don't want to be using a GW one either. I might give a bit of carving a go and will show anything successful on here for you. I definitely want to hang banners on this thing. I'm planning on a set of banner from the guns obviously, some flags on the ends of the shoulder carapace armour, and a series of flags on the shoulders or the tops of the shoulder guns along with the shoulder gun barrel flags. I might have a banner between the legs, but it might look silly and a lot like a loin cloth. This will probably change depending on what looks best for a completed model, and the shapes of the banner, triangle square rectangle ect and the dimensions of which will also change. So for now I only really have a vague decision on placement.
Your reply has prompted me to want to do a bit of work on the computer design actually. To that extent I'm going to make a blank render of the titan so that I can upload it and ask people to provide suggestions for the colour schemes, filling in a few myself. I'll also look into a logo for the legio, as whilst this is intended to follow the mars design, I intend to have it painted differently. In regards to getting it painted, I was thinking that I would like to get it properly painted by somebody else. I want to offer in exchange a cast of the titan in return for a decent paintjob on the titan. If anybody would be interested in this just subscribe and pm me later when I get around to casting it up and I hope we'd be able to sort something out provided I'm happy with your painting and you with the cast ect.
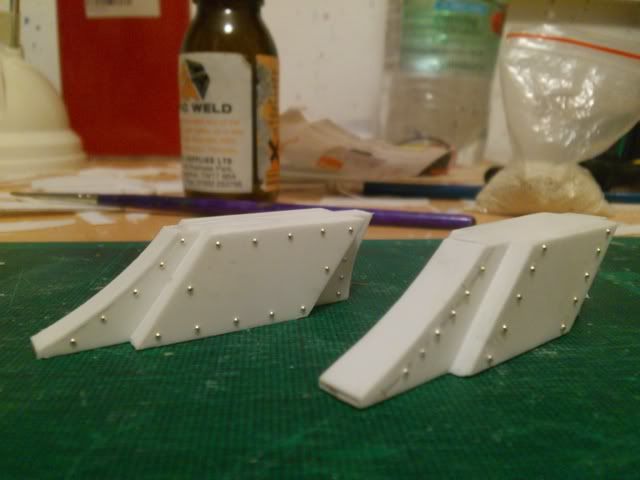
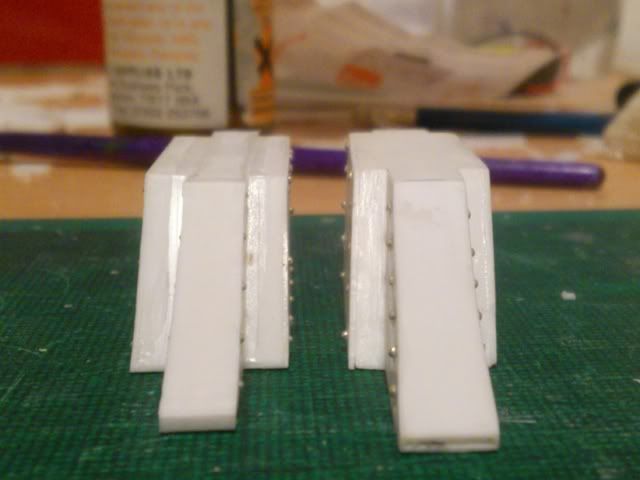
I decided that the connector for the toe armour part wasn't quite right. Beyond being unhappy with the rivet work I noticed that the whole part wasn't perpendicular and noticeably slanted along the edges, like a parallelogram. The new piece removes this slant and is also much flatter along the edge now that I'm better and sanding my parts evenly, thanks to blackadder's advice.

I've also finished the heel armour connector. Whilst it might look a little undecorated on the sides, I intend to leave it like that. I couldn't come up with any detail that I was happy with and felt that blank was best. It's not a part that will be seen much and will manage fine.
I'm finally down onto my last piece of plasticard now, shouldn't run out though, it's a bit big, and yea, that's the scale dreadnought there

As some people asked for templates before now I thought I might demonstrate a bit more what I meant when I said that my templates aren't really templates. These 3 sheets are all I will use to build the armour pieces for the legs. From the middle piece I can build the internal frame for the armour by measuring the radius at certain points from the centre line and using the width of the part on the left half to give me the distances between vertical braces and the size of the horizontal circular braces too. the distance of the vertical braces will be taken from the rightmost sheet, and the detail is freehand. I'll demonstrate this a little better in the next update if anybody's curious. The part on the left will be used for the thigh armour, and the horizontal cross section is beneath, the length of the vertical braces being measured from the larger face again. Both of these are going to be using filler.
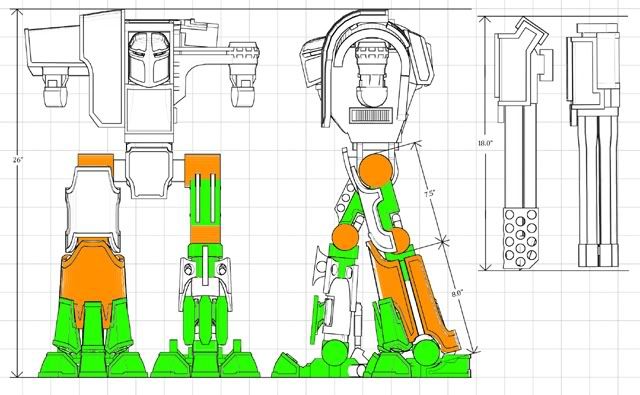
Lastly another of the update graphics showing where I'm up to right now. I'm waiting to complete the legs with the acrylic tube, but I'm having a small problem. The supplier I wanted to use, as they're the only people I can find who do the smaller 500mm length tubes, aren't able to cut some of the lengths that I wanted. Something to do with lengths equal to or greater than the radius. I'm trying to get them to bend this rule and cut mine for me, but the email communication is taking ages as they aren't replying very quickly.
In better news though I now have a job, or to be more precise, two. I've started work back where I had my last job part time, and am also working part time at a local supermarket. Both offers came within a few hours of each other when I expected neither to be in contact with me again. Because of this I'll be working most of a full week, and fitting in time to do other things with friends you'll probably see a drop in the rate of work on the titan. This does mean I'm able to order the best materials for the job though and I'll be able to order some silicone and be casting within the next couple of weeks I expect.
As usual if anybody has any question ask away. Also if anybody knows of any really really cool warhound titans out there then link me to them. It's always nice to see a great colour scheme and I could do with some more pictures for my inspiration folder. Thanks
123
Post by: Alpharius
The Warp Runners!
(At least, I think that's their name...)
warhammer40k.wikia.com/wiki/Legio_Astorum
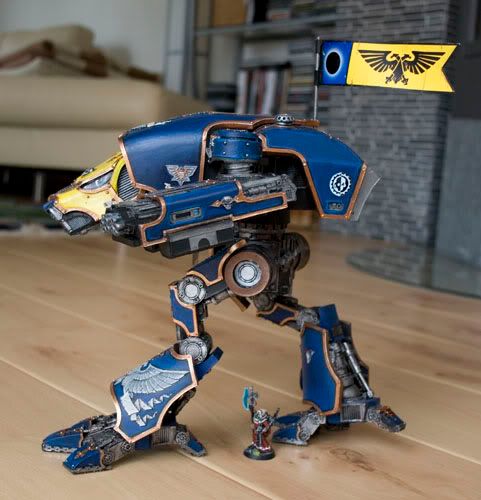 http://www.bolterandchainsword.com/index.php?showtopic=151315&st=0
I think tagsta is a member here as well... his work is fantastic!
15358
Post by: Vitruvian XVII
This whole project is rediculous! Ill echo how professional this looks.
fiorehellheart wrote:In regards to getting it painted, I was thinking that I would like to get it properly painted by somebody else. I want to offer in exchange a cast of the titan in return for a decent paintjob on the titan. If anybody would be interested in this just subscribe and pm me later when I get around to casting it up and I hope we'd be able to sort something out provided I'm happy with your painting and you with the cast ect.
Id be very interested in this, a chance to get my hands on one of these beauties is almost too good to be true!
fiorehellheart wrote:As usual if anybody has any question ask away. Also if anybody knows of any really really cool warhound titans out there then link me to them. It's always nice to see a great colour scheme and I could do with some more pictures for my inspiration folder. Thanks
As it happens i just finished my warhound:
More pics here: http://www.dakkadakka.com/dakkaforum/posts/list/570/342824.page#4615744
48376
Post by: Capitansolstice
I would be completely interested!
32724
Post by: fiorehellheart
Alpharius, I've seen those models before, some fantastic work on. I can't say I'm a huge fan of the colour blue though, I was thinking red, or, to be different to the generic red/blue a green or even black and white.
virtruvian, That's a pretty awesome warhound there. I like the use of bleached bone armour sections, considering most are blues or reds like I've said above, It's quite nicely unique, I'll keep you in mind for when I get around to casting them up and looking for a painter.
Same reply as I had for vitruvian really, capitansolstice, I'll consider people more thoroughly later, I just wanted to voice an idea and see if there was a reaction at all, given two people have shown interest already I'll be sure to do some kind of selection process later to determine who's best to take this on, but thanks for the interest for now
15358
Post by: Vitruvian XVII
Well there are these: http://wh40k.lexicanum.com/wiki/List_of_Titan_Legions#.UCQQ2M1mzRt http://warhammer40k.wikia.com/wiki/Titan_Legions_(List) Sadly most of the legions seem to not have a colour scheme pic. edit: Oh yeah almost forgot winterdyne's currently doing a warhound titan diorama: http://www.dakkadakka.com/dakkaforum/posts/list/456441.page edit: some of the cooler titan schemes i could find
123
Post by: Alpharius
I don't think red works well on Titans - the color itself seems to dominate the senses.
The 'cooler' colors often look a lot better on bigger models, and especially so on Titans...
53821
Post by: AnUnearthlyChilde
Alpharius wrote:I don't think red works well on Titans - the color itself seems to dominate the senses.
The 'cooler' colors often look a lot better on bigger models, and especially so on Titans...
Tis a shame you think that, I'm a Legio Moprtis fan
32724
Post by: fiorehellheart
Yea, I'm a fan with the red on most, although I do agree that sometimes the colour is too bold. Red has always been my favorite colour growing up, I was the red twin, my brother was the blue twin, everything our parents bought us being colour coded. I think it affected me as you can tell from the red carpet in my room and the paint on the walls.
One I really like is this one, which is somewhere on dakka too I think
http://www.coolminiornot.com/160054
As I've said the greens are cool, but I think I'm going off the pure white and black, the black is bland and the white too contrasted and odd looking. My favourite is the cloudy blue armour with yellow from the forgeworld one. More suggestions would be cool though. Automatically Appended Next Post: I've placed an order for some casting materials at last, I went for the following and I'll report on how things go when I get them.
http://www.tiranti.co.uk/product.asp?Product=1263
http://www.tiranti.co.uk/product.asp?Product=1277
http://www.tiranti.co.uk/product.asp?Product=3012
I'm excited to find out how this goes, and if everything goes well I'll be ordering more in bulk to cast the rest of whatever left over of the titan.
22413
Post by: mwnciboo
You are going to need alot of Silicon rubber. I mean an awful lot. I think you will make the titan, but will need crowd funding for the silicon rubber moulds (I wish I was kidding). Just do a couple of calculations based on a minimum of 3cm around all the your pieces, squared off into box shapes (unless you will make custom mould holders, I'm guessing you will use box shapes) then work through the Volumes, of say....the Femur piece and that will give you the volume of silicon rubber you need to encase the part (never mind the resin for the part itself).
It is a staggering volume of Silicon when you consider the size of this project, even if you are clever and halve the numbers of mould needed by making them ambidextrous so that you only need one arm and leg mould as it will serve both.
53821
Post by: AnUnearthlyChilde
btw, when it comes to casting, investing in a box of lego is the best thing you can do, as it is waterproof and doesn't seep at all.
34252
Post by: Squigsquasher
Just one question...Aren't Warlord Titans supposed to have a bigger shoulder/back area with 4 cannons on them? Or is that a specific pattern?
32724
Post by: fiorehellheart
Yep. This is why I have two jobs now... I know it's going to cost me a lot, and I want to be able to fund all of it myself. I don't like the idea of people relying me to use their money to finish something and then have to return their investment with a product. I'm much happier to not have that pressure to achieve and instead fund it myself and manage my own pace to complete it myself. Just means I have to pay a lot. As I've said before though, if it's worth doing, it's worth doing it well.
I will try to be as cost efficient as possible though. Things such as joinging multiple pieces together or in the same mold to reduce the cost of having a 30mm wall around each part. For example to plan is to make a small toe mould of the toe end and mid, cast it three times, chop it up and use it as filler in the mould for the whole foot. Because the foot is intended to be the same regardless of pose and side, I am going to just cast a single foot to reduce the cost of the wall thicknesses in rubber. I'll also try to keep grouped moulds the same height for that reason, to maintain the minimum wall thickness and being efficient.
In terms of calculating the volume I have been thinking about getting some high quality sand and using it to calculate the volumes necessary. I should be able to remove it from the parts after finding volumes and it would let me vastly reduce the waste. I'm also going to do some tests to determine the density and such of the materials so I can best work with it. None of the sites I found gave sufficient information as to densities or specific gravities. I'll determine this myself and from this calculate a projected cost. It won't be small but I'm just accepting that now
Yea, I had tons of lego as a child and know exactly where it is in the attic, I'll be hording that for the enclosures or using plasticard when I need an odd shape. I need to get some plasticine too
22413
Post by: mwnciboo
Superb point on the sand, at least you will get the volume and be able to calculate back using the density of the Silicon Rubber to allow you calculate exactly how much you will need +/- 10g or so which is pretty clever. I also like the idea of making a mini density mould, make several 1cm3 or know volume moulds fill them, let it go off and then weigh them on a scales and work it through. The advantage to doing several is that you can average them to ensure a few air bubble inside don't skew the figures. I understand you using the old moulds cut up, that is clever, but it might be wise to other materials as you might want to keep the mould themselves, especially if 18 months later you want to make another (everything is worth more as a pair!). Maybe even Plaster moulding? Anyway all told, I'm rooting for you, because you have thought this through and are committed. Well I'll just come on every so often and offer morale encouragement.
58575
Post by: Wh40kPicasso
Well i'm glad that i could "set the cogs in motion" for you. Blessed be the Omnissiah!
also i'd def be interested in a cast when you get done!
32724
Post by: fiorehellheart
I do like the moulding questions Keep them coming. When I refer to cutting up the old moulds that are no longer used I will only do this is I have another suitable mould of the part as well. For example.
With the toe the first mould I create will have a single toe within it, so for each of the casts made I get one more toe from it. After completing 3 casts I will be finishing them to a higher standard than the master. As I expect to be able to perfect a uniform material master more easily that the mishmash of materials and hollow parts of the initial master. Once this is done the three toe's will be attached to the rest of the foot second or first masters. From that I will create a mould of the whole foot. After I have a mould for the whole foot I no longer need the single toe mould, and It's added to the chop pile for the next mould. The key idea being that I will always have the original plasticard masters stored away so that if it is necessary for me to re-create a mould, I can do so. I hope that clears things up on me trying to be even cleverer at cutting waste and improving quality. Because I don't want to waste loads though I won't be doing this second master type process for all parts, only those like the toes where an intermediary mould is needed for the multiple parts.
I don't want to use another filler either for a couple of reasons. Firstly it will change the properties of the filer, both in terms of volume/density, and the flexibility or toughness. I'd like a consistent material throughout all the moulds. The second reason is that silicone will attach to nothing well at all, apart from itself. Because of this I shouldn't need a release agent, only some kind of surfactant to break the surface tension of the resin removing bubbles more easily, they go smaller ect. However, because it sticks to itself, provided the material is clean, it should form a bond to itself in curing, becoming a uniform piece once again. Giving good re-used moulds. The lifetime on these moulds seems due to the breaking and tearing of the rubber and loss of detail, rather than a chemical effect, but I might be wrong on this.
In terms of plaster casting I was considering using some dental plaster if it turned out strong enough. I've read plenty of stuff on bruce hirst's website and think it could be a good material, but not something I'm looking into right now. But possibly in the future.
Yea, I'm not entirely sure how expensive a cast of one of thses would cost, like in just resin alone. But i'll figure it out in time I guess
Thanks for the encouragement and morale boosting, that really helps
58575
Post by: Wh40kPicasso
i could always supply a casting material for you
15358
Post by: Vitruvian XVII
I do hope youre not intending to cast the thighs and lower legs etc as solid pieces?
32724
Post by: fiorehellheart
It would be interesting to see the cost of shipping it overseas to me and back... probably more than I'd want for it...
Yea, that was the plan, Might be expensive, but I'd like to try it first
15358
Post by: Vitruvian XVII
Fair enough, it would greatly increase durability. Hollow casting is a good way of conserving expensive resin though, not sure how you would go about cutting up the model for casting though
39973
Post by: Galorn
Sillicon isn't that expensive here... The stuff I use is apx 2cents (.02 dollars) a ML.
32724
Post by: fiorehellheart
Yea, I've taken quite a bit of thought to hollow casting so far, partly I don't want the drop in strength, or to make it difficult to pin, but the wight drop would be good. What I would ideally do is called rotocasting, where you part fill a mould and then rotate it to coat the surface with a layer of the resin. After I had a good thickness shell I'd then use expanding polyurethane foam to fill the remaining void within the model, giving good strength and low weight. That would add more cost though in terms of time. Seems very difficult and time consuming though so I doubt I'd take that route.
Another way I could lower the weight is to use the expanding foam in a seperate mould and then place that part within the detail mould giving a core part that is then coated with resin, sort of the reverse of the above. It would work well but I'd have a problem with alignment. It would also leave it difficult to pin giving a reliance on the surface glue strength. It is however a much easier way to maintain the strength and detail with a lower weight.
Prompted by my explanation above I've had a think and If I were to do it I imagine I'd cast the foam around a pair of plastic rods at the same location as the seam in the 2 part mould of the piece. Then I use grooves cut into that mould to align it within the centre of the void, clamp shut and pour around the part. giving only a couple of pins extending on one surface here there's a mould line already. Then it's common mould line cleaning and trimming of the sprue using sandpaper or a knife to get it flat. That would work very well but would necessitate extra moulds for the internal volume which would need to be two part in order to give the correct position of the alignment rod. Whilst I might not use it for everything I feel myself wanting to give this a good try because i've not seen it done before now as I describe, I think it'll be fun, and it's a challenge. I don't feel I'll be as good as I can be at this stuff unless I challenge myself enough, if it works though, it'll be very useful. For now though I'm going to do a couple of casts of the feet an learn the materials and their properties once my order arrives.
Yea, price here seems about £20-£25 per litre with even higher for some of the tougher stuff, that's what my brief research seemed to suggest. It's not that much of a difference really, the real cost being the sheer volume I'll need, probably well above 5 litres..
22413
Post by: mwnciboo
Wow, Maybe putting metal rods in there (rather than plastic rods) for reinforcement and structure?
32724
Post by: fiorehellheart
Initially I thought of metal rods, but then I realised that cleaning the excess coming from the side might leave more of a visible mark if its metal, which is why I thought of plastic. Plastic can be cut and polished flush with more ease, probably not requiring much extra work. Metal pins would probably need a bit of greenstuff work to clean up and smooth out.
I can see the argument for strength though, that they would suport any flexing over potentially a large face, but I think that it should be sturdy anyway. I need to try it obviously but I expect that although the expanded material is fairly weak when compressed and will crush, if it's as a core the force is spread by the thick resin skin, so it goes from being weak to strong because the force is spread. As I've said though this is just speculation and could still be a weak part, but is just something I'd need to test.
53821
Post by: AnUnearthlyChilde
Also a main argument against metal rods is they may rust, and as metal rusts it expands, and with pop open your resin like a wallnut in a nutcracker...
You'd have to use a non ferrus metal, which would get expensive, especially if you went with a decent thickness of rod.
32724
Post by: fiorehellheart
Ahh, good point, I hadn't thought of that, looks like it'll be plastic if I attempt it, thanks
53821
Post by: AnUnearthlyChilde
Your welcome... I only added that one as I've seen it done, and it wasn't pretty when it rusted lols...
it was a soul destroying sight 
22413
Post by: mwnciboo
You can get Stainless steel rods relatively cheaply from yacht Chandlers, I use them on boats as they don't rust and won't expand. Non- Stainless steel fittings on a boat or yacht will just disintergrate without painstaking maintenance.
But yeah otherwise go with the original plastic rod plan.
32724
Post by: fiorehellheart
I think trying to combat any rust problem isn't really worth it when I can just as easily use a plastic rod instead, thanks for the suggestion though.
32724
Post by: fiorehellheart
It's been a bit longer than I would've liked, but I've got a new update as I begun to work on the leg armour.

Initially I'd planned to do it like the middle part, using vertical parts measured to length and then the horizontal parts inbetween, of course this left it able to rotate oddly because there was no rigidity, so I changed technique.
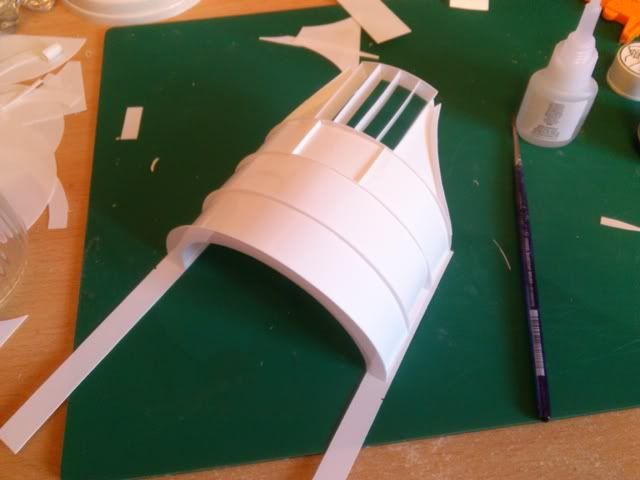
Much like with the heel I opted to use curved plasticard to give the strength which worked much better, because of the angle outwards it gave a sort of stepped effect, but still worked well.
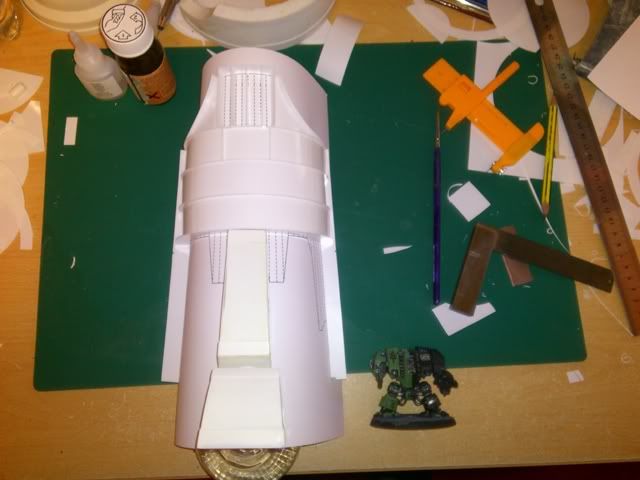
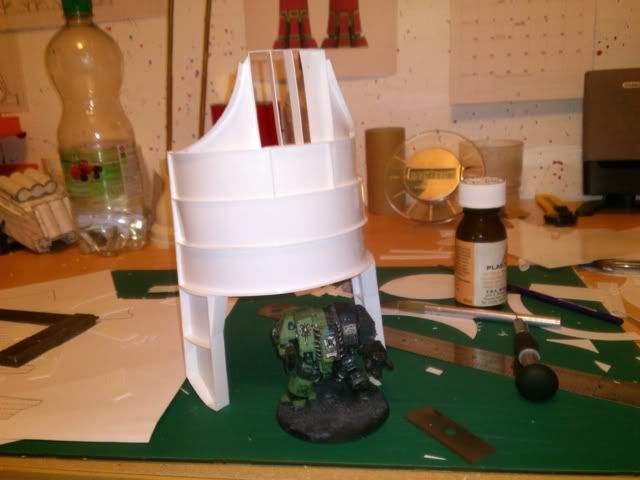
A couple of scale shots with the dreadnought. It's pretty large this part. You will also notice that when placed against the plan it is missing the two protrusions either side of where the toe armour piece is. I'm leaving these off as I don't think that there is enough clearance between the armour parts and feel that it should change the style by leaving them off.
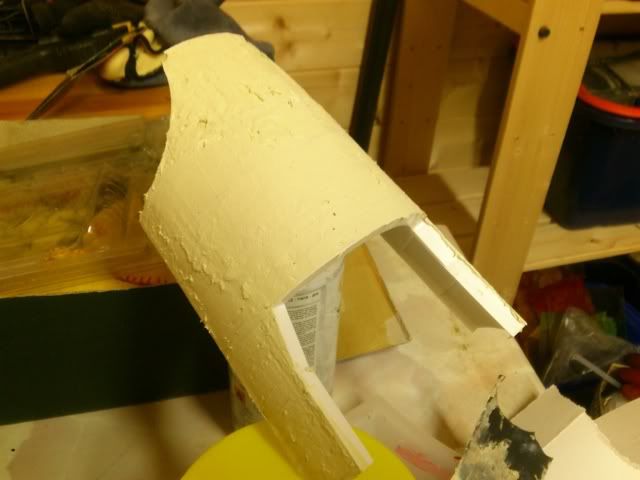
I've done the first two layers of the filler on the front of the part, I'll try to do some on the back of it tomorrow. It's shaping up nicely though. and will need a couple more layers and some sanding before I do the edging.
As said before I'm still waiting on the mould making material and will be doing that as soon as it arrives. Beyond that I've decided that waiting for the acrylic tube supplier is taking too long. The only place that sells at the length that makes it cost viable is very slow to reply to my contact so I'll be doing some of the tube shapes by hand and seeing how I can manage. If it doesn't work I might have wasted time but I can still order from them at a later date. If anybody has any question just ask.
cheers
15358
Post by: Vitruvian XVII
Such clean curves, its really coming along well!
53821
Post by: AnUnearthlyChilde
I always love seeing the construction method of your peices... and feel its such a shame to cover it when you do the filling stage... ah c'est la vie!!!
looking awesome as ever, and I truly cannot wait to see an entirely finished leg!!!
32724
Post by: fiorehellheart
Thanks, hopefully I'll have a couple once I get my casting stuff though
32724
Post by: fiorehellheart
Small mention, my casting order arrived today. I'll be taking my time with the casting so don't expect updates immediately. But I will do my best to try a few things and experiment with hollow castings and such with the toe piece.
53821
Post by: AnUnearthlyChilde
Pattience and breathing is key, just don't panic!!!
Good luck and I look forward to seeing the results!!!
25853
Post by: winterdyne
I really hope the steel rod I used in my titan doesn't rust. Hadn't actually considered that it might... :-/
58575
Post by: Wh40kPicasso
love how its coming together. so how stylized is it going to be? are you going to be putting inscriptions and stuff in the trim? Just minor details i'm curious about.
32724
Post by: fiorehellheart
Well, I suppose It'll depend on how well sealed it is, and whether ca glue is water proof. Even if it isn't I would imagine that the surface area vulnerable to erosion is going to be rather small, and that it should last a long while, provided it isnt in too humid an environment.
Thanks, yea, I had planned to leave that kind of stuff off the masters and the casts that I make. That way they can be added on layer easily enough with the option of making a second mould for some parts with more detail. Such as with forgeworld warhounds having two different types of leg graves. Because that kind of detail would require a much better level of greenstuff than I could do I'd need the practice first, and I can do that another time.
I started to do some casting last night. It didnt go great. I'll upload some photo's but basically I think I wasn't using the right kind of clay to seal the mould box to the acrylic plate the master toe was attached to. This meant that the box leaked slightly along the edges. To try and combat this I removed the plasticine I'd used rather than clay, and placed gaffer tape long the edges in an attempt to reduce the leak. They started to leak at a faster rate now though as the silicone was leaking into a layer between the tape and the lego. I sort of gave up in the end after I managed to get some clamps placed over the corners pushing it onto the plate. They press the lego down hard enough that it shouldnt leak to much now, but I've already wasted a good deal of silicone. Partly because I didnt catch all of it that leaked, but mostly because it leaked as it was nearing the end of it's workable pot life. Because I had small cups I did iit in three pours and by the third pour the first was getting a lot thicker. They will probably all have a large number of bubbles in too as I only got the hand of trying to knock out the bubbbles towards the last pour. I'l reserve judgement until it has set and I can remove the tape and lego, when I'll update here with the full message and photo's so you can see how I got along.
If you have any other questions just ask, thanks.
15358
Post by: Vitruvian XVII
Keep trying! It'll come good eventually
32915
Post by: Ghiest1
Legos definatly seem the way to go here, someone on here had a pretty good tutorial on thier use.
57210
Post by: DemetriDominov
Keep it coming, the progress is going great! We require more Titanicus!
32724
Post by: fiorehellheart
It's definitely all about practice this so I'm accepting a shaky start, but I'm getting more comfortable with it now. Gheist, if you check out what I've posted below it explains, but I'm going to avoid them from now on except as support for plasticard. I hope this update will do demetri, although ignore the repeated parts from what I said earlier, I'll post the main message on warseer too so it's covering some stuff I've already said.
The casting has begun!
Okay, a pretty massive and momentous post this one, I've finally started to cast parts. I'll go through the quite stressful procedure from master to duplicate for you guys to browse and maybe learn from, as there were a few mistakes. I plan to improve for the next mould and casts though.
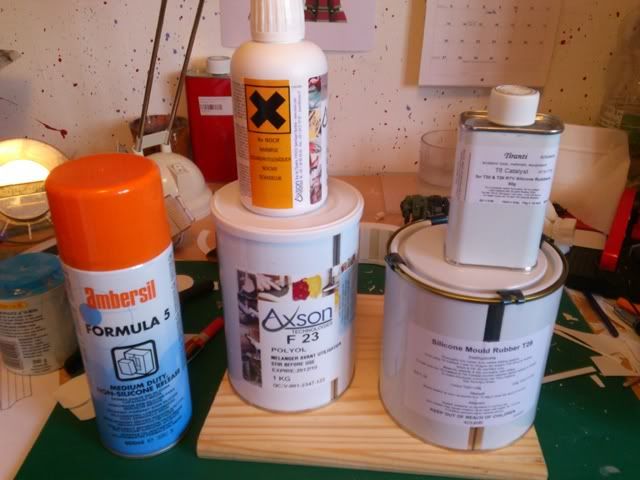
This is what I ordered and I'll list from left to right and top to bottom. The spray canister is the mould release agent, It's a wax and give a fine coating over the mould to help release parts. It's also quite easily smudged or rubbed off and I thin it might even take fingerprints that would show up on the cast, so I took care not to get any where I sprayed. The small bottle is the catalyst and the can beneath the main part of the resin. It's a 1 to 0.2 part mix of resin to catalyst by weight and although the catalyst is yellow it comes out white. The catalyst for the silicone is in the small can and the main rubber in the large can, this is a 1 to 20 mix of catalyst to silicone by weight. The service I got from Tiranti was really good, quick and well packaged (I have a load of foam peanuts all over my room though), and I'm intending to continue ordering from them.
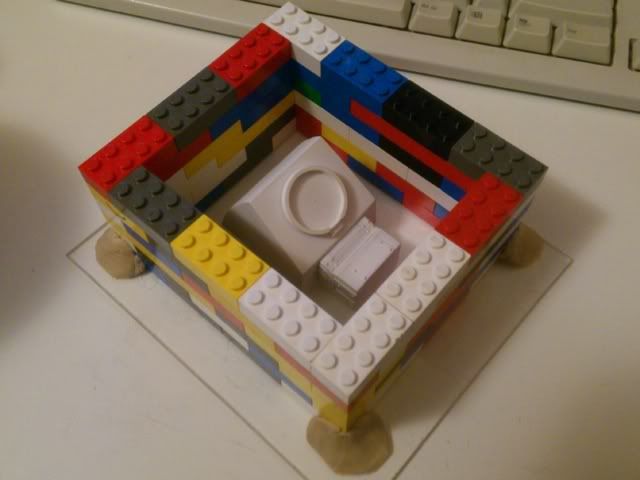
This is my mould box with the master within. I used superglue to stick the master to a piece of acrylic and then positioned my lego wall so that the part was centered. In hindisght there are several mistakes here, but I'll get to those later.
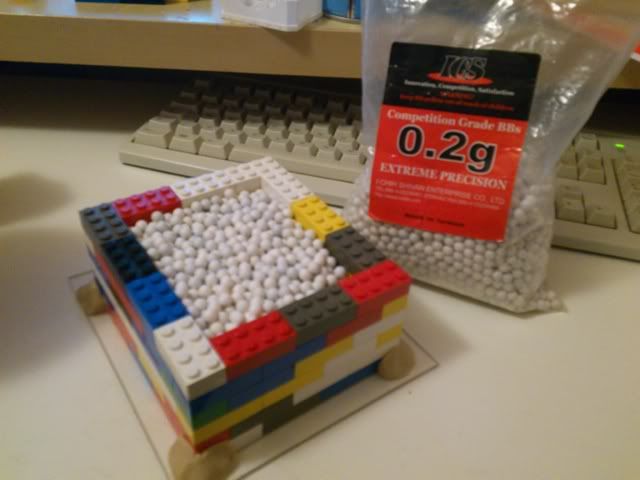
To measure the volume of the mould I used a bag of bb's that I borrowed from my twin brother. I have seen other people use rice too and might give this a go as rice is probably easier to get level reading from. I just fill it to the top and then put into a measuring jug to get a rough volume, I rationalised that rounding up is better to be a little over rather than a little under as mixing small amounts seems difficult. I had talked about making some small test blocks to measure the exact density of the material to better judge amounts but as the information was on the can already I just used that. because the catalyst is only a small volume compared to the silicone, I ignored the small change in property that would be expected after mixing them, because I think that information is only about the rubber without the catalyst.
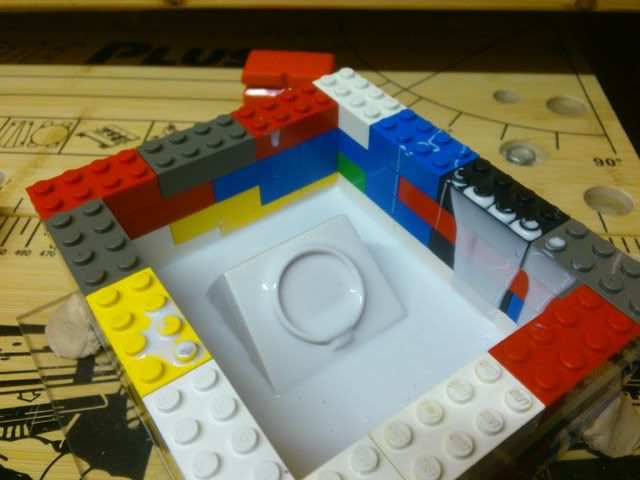
To mix my parts together I used s set of disposable cups and some wooden sticks along with a digital kitchen scale. To make sure the scales weren't damaged I just placed them in a ziplock bag and continued working. Because of the small size of my cups I have to pour the moulds in a few goes. After mixing the first pot I used a brush to paint the silicone onto the surface of the master which ensured that there were no bubbles in the surface of the silicone. To clean the brush I just put it into a little white spirit. After that I just poured it on at one corner and let it flow into the rest of the space. Whilst a thick liquid, the silicone managed to get into small gaps easily. One thing I hadnt done and will learn from is to seal where the master attached to the base plate. Because I used superglue at the center of the part the silicone bled under the edges and gave a lot of flash on the finished mould.
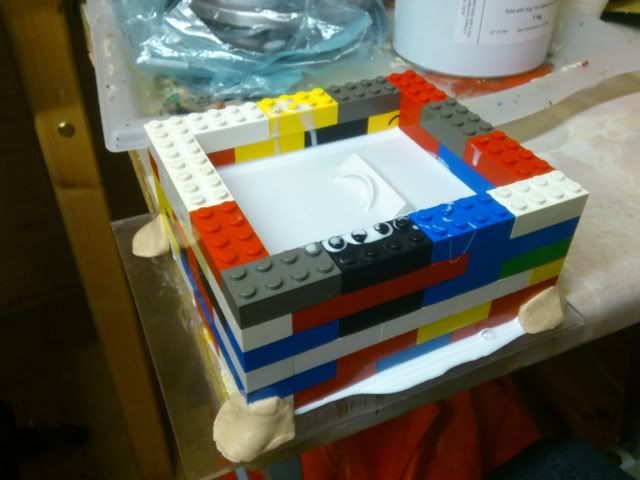

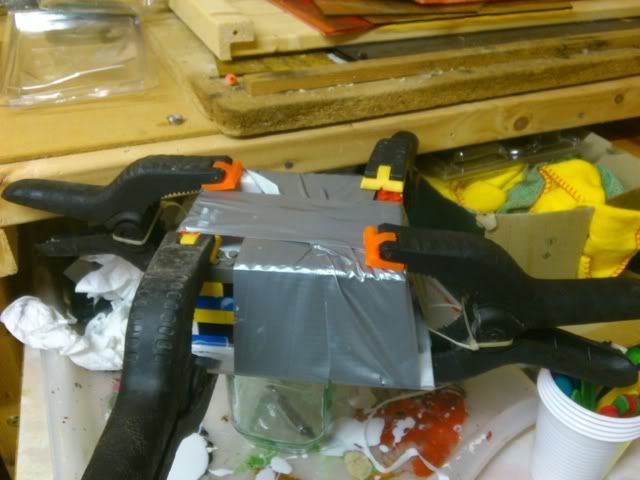
After the second pour the silicone started to leak under the lego wall. I had only used plasticine at the corners and although I had thought about putting it along the corners on the inside of the box I don't thin this would have helped. After the first picture I got more plasticine and put it along the remaining edges that hadn't leaked, and also onto the leaked one after clearing the silicone off. This still didnt work as the silicone began to force it's way in between the plasticine and the acrylic base, and the plasticine and the lego. After a large amount had leaked I decided to remove the plasticine, which made the mould box wonky, and try to stem the leak with gaffer tape instead. After sealing all the edges the same problem happened again, except that now there was a thick layer of silicone between the watertight gaffer tape and the wall of the mould box. Eventually I solved the problem but only by attaching several clamps to the corners and tightly wrapping tape which applied enough pressure to make the lego watertight with the base of the mould box. I managed to catch most of the leaking silicone in some cups and was able to re-use it later, but was left with an unfinished mould. After it had set all I did was place a few of the pieces of silicone that had set in the space I wanted to fill and made some more liquid silicone which I simply poured over it. This finally finished the mould off and I was left with a brick of silicone encased within lego.

This was the sight that greeted me after prising the lego from the mould box. Those parts to the left were from the base pieces of lego and had filled on the underside. This picture is my argument to anybody that casting with lego is a good idea, from now on I intend to just use some plasticard to weld a properly watertight box together. You can also see the bleeding on the inside of the mould where the parts attached to the base, and where the toe end attached to the toe mid. I cleaned this flash using a pair of scissors as a knife wouldnt cut the stretchy materials. Because this wasn't very accurate the parts cast from this need to be cleaned around the base by trimming down, but that is better than having to fill a gap in.
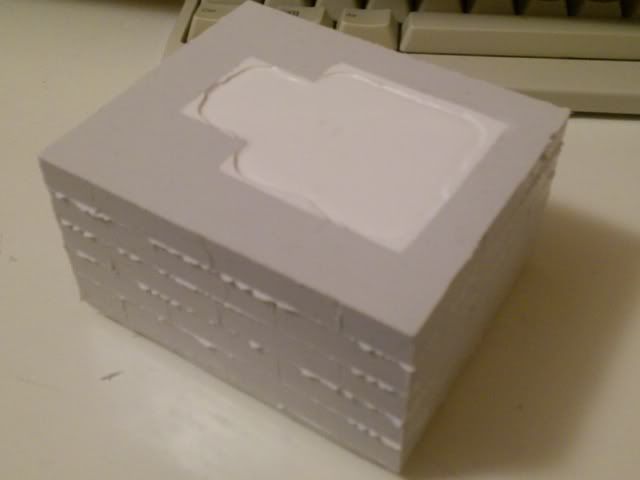
Mixing the resin for casting was much the same as mixing the silicone, only that it cures much faster and is much more liquid after mixing. I didnt quite mix enough but the cast is still usable because the surface tension pulled it up to the plate I placed on top. This means that the edges are all high enough.
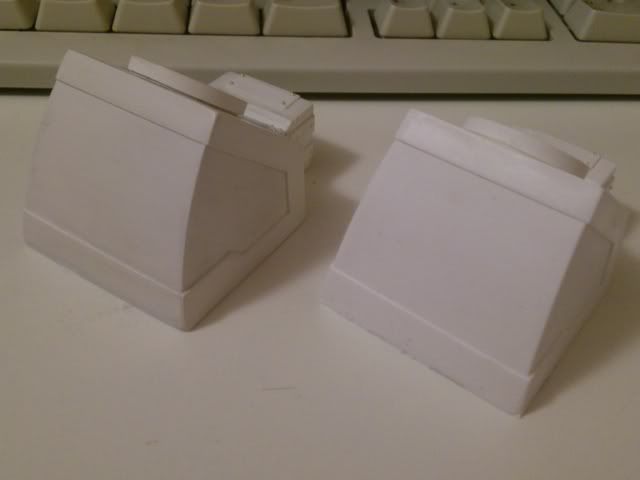
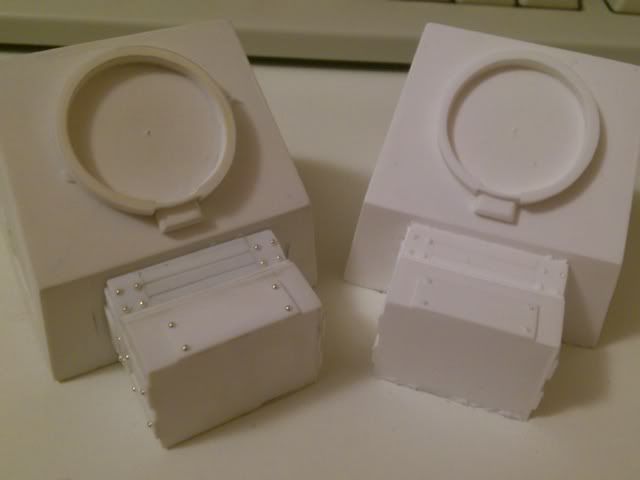
The cast part is a stunning duplicate of the original, even down to things like slight changed in texture where I found it difficult to sand for example. It does mean that every flaw that I can see on the master is duplicated, but I think I can make do with it for now The cast wasnt quite perfect though and some of the rivets haven't filled in properly. For these I''m going to chop the miscast part off and just drill a space for a new rivet instead.
There a small amount of progress I forgot to picture, which is that I've now finished the ankle joint tube having just scratch built it. I'll try to get another update done tomorrow night, which should be to do with what I've got to do in the next few weeks and what I have to do to improve the casting process for next time.
I'm sorry about the drop in progress, the jobs are taking a lot of my time, the girlfriend taking the rest, but I'm trying to make progress whenever I'm motivated enough. If anybody has any questions just ask away and I'll answer as soon as I can, thanks.
15358
Post by: Vitruvian XVII
Wow, trouble with the silicon aside, that cast is rediculously good!
53821
Post by: AnUnearthlyChilde
Nice work Fiore, my advice is you buy or get hold of one of those green trays that you build lego on which has the little nobbly bits on lols. then you shouldnt have any problem with seepage.
other than that dude, great work!!!!
btw, which supplier did you go with in the end?
55324
Post by: bibblles
So are you going to set up an assembly line for these and sell them at massive profit?
22413
Post by: mwnciboo
 bibblles wrote: bibblles wrote:So are you going to set up an assembly line for these and sell them at massive profit?
I would recommend against it, from a legal standpoint.
43229
Post by: Ovion
 mwnciboo wrote: mwnciboo wrote: bibblles wrote:So are you going to set up an assembly line for these and sell them at massive profit?
I would recommend against it, from a legal standpoint.
Why not?
I personally see no problems whatsoever.
A: This is a completely unique model, he designed it from scratch. He has built it from scratch. This is all his own personal IP. Call it a Mars Asault mech and there is officially no link to GW whatsoever.
B: There is no official Warlord Titan model available regardless, so there's no clash in properties, but as stated above - it's all his own personal, unique IP anyway.
53821
Post by: AnUnearthlyChilde
 Ovion wrote: Ovion wrote: mwnciboo wrote: bibblles wrote:So are you going to set up an assembly line for these and sell them at massive profit?
I would recommend against it, from a legal standpoint.
Why not?
I personally see no problems whatsoever.
A: This is a completely unique model, he designed it from scratch. He has built it from scratch. This is all his own personal IP. Call it a Mars Asault mech and there is officially no link to GW whatsoever.
B: There is no official Warlord Titan model available regardless, so there's no clash in properties, but as stated above - it's all his own personal, unique IP anyway.
Its not a question of whether GW produces a model of this kind... its to do with intellectual property as well as image likeness, and as he has based the look of it on the mars pattern or at least the legs being similar to the image in the apocalypse book there is infringement of intellectual property there... hence why Chapterhouse is having ongoing issues with GW as GW is suing the pants off of them...
55324
Post by: bibblles
 AnUnearthlyChilde wrote: AnUnearthlyChilde wrote: Ovion wrote: mwnciboo wrote: bibblles wrote:So are you going to set up an assembly line for these and sell them at massive profit?
I would recommend against it, from a legal standpoint.
Why not?
I personally see no problems whatsoever.
A: This is a completely unique model, he designed it from scratch. He has built it from scratch. This is all his own personal IP. Call it a Mars Asault mech and there is officially no link to GW whatsoever.
B: There is no official Warlord Titan model available regardless, so there's no clash in properties, but as stated above - it's all his own personal, unique IP anyway.
Its not a question of whether GW produces a model of this kind... its to do with intellectual property as well as image likeness, and as he has based the look of it on the mars pattern or at least the legs being similar to the image in the apocalypse book there is infringement of intellectual property there... hence why Chapterhouse is having ongoing issues with GW as GW is suing the pants off of them...
That would seem like a problem, except for the fact that people on ebay auction commissions for the regular warlord all the time usually around the 400 dollar mark.
15358
Post by: Vitruvian XVII
Guys lets not turn this into an IP discussion. Please dont drag this OT.
22413
Post by: mwnciboo
bibblles wrote: AnUnearthlyChilde wrote: Ovion wrote: mwnciboo wrote: bibblles wrote:So are you going to set up an assembly line for these and sell them at massive profit?
I would recommend against it, from a legal standpoint.
Why not? I personally see no problems whatsoever. A: This is a completely unique model, he designed it from scratch. He has built it from scratch. This is all his own personal IP. Call it a Mars Asault mech and there is officially no link to GW whatsoever. B: There is no official Warlord Titan model available regardless, so there's no clash in properties, but as stated above - it's all his own personal, unique IP anyway.
Its not a question of whether GW produces a model of this kind... its to do with intellectual property as well as image likeness, and as he has based the look of it on the mars pattern or at least the legs being similar to the image in the apocalypse book there is infringement of intellectual property there... hence why Chapterhouse is having ongoing issues with GW as GW is suing the pants off of them...
That would seem like a problem, except for the fact that people on ebay auction commissions for the regular warlord all the time usually around the 400 dollar mark.
That's still breech of IP, like buying stolen goods off ebay. The fact you don't know it's stolen goods doesn't make it a legal sale. The fact that something is available on Ebay doesn't make it Legitimate. GW will not close them down because it's not financially viable to do it, when someone is production lining Titan's using moulds and resin, well that's whole new ball game. Just because someone isn't prosecuting you or pursuing you, doesn't legitimise what you are doing. On the subject of OT, it doesn't matter because "fiorehellheart" is the driving force of this thread. We do however need to be careful about encouraging people to break the law.
43229
Post by: Ovion
It's a unique work inspired by something else, but not actually the IP of GW in any way whatsoever.
If they had an actual model for it, or held a trademark / copyright on 'Mars', 'Warlord', 'Titan', or this was a direct copy of artwork / models that GW had I could see it being an issue, but being not one part of this really has anything to do with GW in the realms of 'copyright' or IP infringement I don't see how there'd be an issue.
The reason GW went after Chapterhouse, is Chapterhouse was making models for Games Workshop units, that specifically attached to GW property and was using GW names.
Furthermore, the Chapterhouse lawsuit has been stretched out for so long due to the tenuous nature of it.
44829
Post by: Abyssel
Could you possibly send me that CAD file so I can use some ideas on a warhound?
15358
Post by: Vitruvian XVII
22413
Post by: mwnciboo
Ovion wrote:It's a unique work inspired by something else, but not actually the IP of GW in any way whatsoever. If they had an actual model for it, or held a trademark / copyright on 'Mars', 'Warlord', 'Titan', or this was a direct copy of artwork / models that GW had I could see it being an issue, but being not one part of this really has anything to do with GW in the realms of 'copyright' or IP infringement I don't see how there'd be an issue.
It doesn't matter if the model exists or not, that's the whole point of Intellectual Property (non-physical/ Intangible). The fact that Warlord Titan's exist, in both Models and in their stories etc etc. means you will have a hell of a job proving your work was unique, unless you give it a third leg or an extra arm. IP is a minefield you cannot make broadbrush statements along the lines of "So long as it's Unique" you are fine. It's not, you need proper legal advice from a suitably qualified person and equally this can be contested at every step. Look at SAMSUNG and APPLE at the moment, you simply cannot just say "Tweak it abit, look it's original and unique now, therefore I can sell it as my own product". Utter nonsense.
53821
Post by: AnUnearthlyChilde
Vit as much as I can see you are trying to help by saying this is OT, it's honestly not, I've followed this thread from the beginning and this debate has raged for some time and it will honestly help Fiore out once it is settled as if he was able to sell it on he would make money back from the silicone. Ovion wrote:It's a unique work inspired by something else, but not actually the IP of GW in any way whatsoever.
If they had an actual model for it, or held a trademark / copyright on 'Mars', 'Warlord', 'Titan', or this was a direct copy of artwork / models that GW had I could see it being an issue, but being not one part of this really has anything to do with GW in the realms of 'copyright' or IP infringement I don't see how there'd be an issue.
The reason GW went after Chapterhouse, is Chapterhouse was making models for Games Workshop units, that specifically attached to GW property and was using GW names.
Furthermore, the Chapterhouse lawsuit has been stretched out for so long due to the tenuous nature of it.
Wrong. Pleased read this, as it is GW's most current copyright disclaimer from 6th ed 40k rulebook:  mwnciboo wrote:
It doesn't matter if the model exists or not, that's the whole point of Intellectual Property (non-physical/ Intangible). The fact that Warlord Titan's exist, in both Models and in their stories etc etc. means you will have a hell of a job proving your work was unique, unless you give it a third leg or an extra arm.
IP is a minefield you cannot make broadbrush statements along the lines of "So long as it's Unique" you are fine. It's not, you need proper legal advice from a suitably qualified person and equally this can be contested at every step. Look at SAMSUNG and APPLE at the moment, you simply cannot just say "Tweak it abit, look it's original and unique now, therefore I can sell it as my own product". Utter nonsense.
As an artist I can attest to this, it is not minefield you want to walk into without protection. be very aware!!!
32724
Post by: fiorehellheart
Haha, nice conversation... well, here's where I weigh in on this.
I know IP is complicated as is all the other forms of trademark type laws, and I really have no firsthand experience of it, nor any actual legal know how, so I'm not going pretend I'm definitely right. What I can look at is the history surrounding GW and this kind of law, largely with regards to other companies such as dream forge when he tried to produce his leviathan titans, and see what happened.
The tactic of games workshop as far as I can tell is to issue a cease and desist notice as soon as they see somebody is providing a model that could in anyway damage sales, such as a possible fear that the dreamforge titans would reduce the sales of forgweworld titans. (Because I think that I wil try to sell these, I plan to frame my cease and desist letter and hang it on my wall, whether or not I will actually stop I don't know.) If I get one of these I have a choice to either fold and stop, or to continue and await legal action.
I wouldn't want to see myself face what happened to dreamforge and lose a large amount of money and time in producing the casts for people only to be stopped before sale, but at the same time I do not wish to be involved in a legal battle with games workshop, irrelevant of how valid their case is. If I don't choose to stop I would be in the same situation as chapterhouse studios, facing a lawsuit. I believe that even if they have no case, and are aware that they have no case, they will still intend to take me to court. Probably in an attempt to bankrupt me or scare me off, I reckon chapterhouse are only okay given that they have a lawyer working pro-bono for them, I wouldn't have that and wouldn't be able to support any case against their lawsuit.
The validity of any trademark or IP claim is a whole other matter. It is true that I have designed this myself, but I have also quite plainly taken parts of my design from forgeworld models. The elements I think they would be able to cite for being too similar are probably the curved armour and edgings, as the rest is fairly generic. If I did sell it I wouldn't call it a mars pattern warlord titan, even though I doubt you could trademark that... Instead choosing something like 'new human war walker' just to be generic. This doesnt stop them trying to sue me though.
Ultimately, I'll try and cast to sell once it's completed, but it will likely result in a cease and desist notice, at which point I will probably stop. Even if this is the case I think I'll be happy to have a completed model, and only disappointed that I can't make some money from it and see other people paint them up or convert them.
So, writing what I promised to, how I'm going to improve/what i've learnt and where to next, first thing is I'm not going to use lego but try just welded styrene. Should be more watertight. I'm also going to try to use a sander without a sanding pad to vibrate the moulds when I'm making them or casting. Just a couple of minutes should knock some of the bubbles that formed in details like the rivets. To help with the bubbles I'm also going to try using some talcum powder on the mould and in the details before casting, if what I've read is right it should help with the bubbles. I'm also going to change the way I pour, I noticed that the rivets on the side were fine, but those on the top were bubbled. I think where they flowed into the rivets the bubbles were released but not where they flowed over. Another issue I had with the mould was leaking beneath or into gaps between parts. I'll try to use the plasticine to stop this around the base, but ensuring a good weld or using greenstuff/milliput/squadrongreenputty to seal any place I think will be problematic. Another thing I need to do is spend more time sanding down surfaces for a more polished surface, some are slightly scratchy. Using a milliput wash and a fine grade of sandpaper should help me out.
In terms of what's next, I'm going to make an extra piece of silicone to use as a void within the toe mould so that they are hollow, and I want to start the mould for the foot base too which will also have a piece of silicone to make it hollow. Besides reducing weight it will help save on cost. The next part I want to build is the calf inside, which I'll be making by hand as the acrylic tube supplier won't cut to the lengths I need. I also plan to order more materials in the next week, with a larger amount of silicone and resin as I'm happy with the finish so far on both the mould and cast. Updates to come later on.
15358
Post by: Vitruvian XVII
Its good to hear your thoughts and they are very sound.
Of course, you can always put a very subtle hint in your sig (and i mean subtle sincerely) that directs people to PM you if they are interested
With regards to the sander, would that not be too powerful? My experience with those things is that they shake pretty damn heavily. You wouldnt want to send the silicone flying everywhere!
43229
Post by: Ovion
I think an electric sander might be a bit too violent for the task at hand.
I'm not sure if others have tried it, or what's reccomended, but last time I used an electric sander it was particularly vibratey, and quite strong.
Maybe just sitting it on top of an active washing machine? (I know it works for helping air bubbles out of pancake batter!)
32724
Post by: fiorehellheart
Subtle hint you say, well, I had wondered how they'd be able to stop me selling them through private message, private sales must be much more difficult to stop. Might get done for if they find out though.
Well, it's not a full sander its a smaller detail sander, from running it slightly it seems good, and if it is too strong then I just need to put it a little further away to rock the surface rather than the mould. I could even clamp a piece of wood to the desk and apply it to that to transfer the shake, with dampening given by how far out from the table I decided to use it. I'm going to try a few things though and come back with the best, but I do want to attempt a vibrating table to get rid of bubbles if I can. The other plan is to make one using a motor and a lopsided weight on the axle.
53821
Post by: AnUnearthlyChilde
 fiorehellheart wrote: fiorehellheart wrote:So, writing what I promised to, how I'm going to improve/what i've learnt and where to next, first thing is I'm not going to use lego but try just welded styrene. Should be more watertight. I'm also going to try to use a sander without a sanding pad to vibrate the moulds when I'm making them or casting. Just a couple of minutes should knock some of the bubbles that formed in details like the rivets. To help with the bubbles I'm also going to try using some talcum powder on the mould and in the details before casting, if what I've read is right it should help with the bubbles. I'm also going to change the way I pour, I noticed that the rivets on the side were fine, but those on the top were bubbled. I think where they flowed into the rivets the bubbles were released but not where they flowed over. Another issue I had with the mould was leaking beneath or into gaps between parts. I'll try to use the plasticine to stop this around the base, but ensuring a good weld or using greenstuff/milliput/squadrongreenputty to seal any place I think will be problematic. Another thing I need to do is spend more time sanding down surfaces for a more polished surface, some are slightly scratchy. Using a milliput wash and a fine grade of sandpaper should help me out.
In terms of what's next, I'm going to make an extra piece of silicone to use as a void within the toe mould so that they are hollow, and I want to start the mould for the foot base too which will also have a piece of silicone to make it hollow. Besides reducing weight it will help save on cost. The next part I want to build is the calf inside, which I'll be making by hand as the acrylic tube supplier won't cut to the lengths I need. I also plan to order more materials in the next week, with a larger amount of silicone and resin as I'm happy with the finish so far on both the mould and cast. Updates to come later on.
I wouldn't advise the styrene method, but tbh, trying it won't hurt, but, it does require a risk in wastage of silicone... something I wouldn't risk personally. I suggest sticking with Lego, but take some standard wet clay and thinly spread it on the interior of the retaining walls and that will act as a seal. its cheap enough and you can get plenty of it. as I said before though I do suggest getting a lego tray like the one in the image below as I have seen people use them and have little to no wastage or seepage
yeah cost saving measure will be well worth it in the end if you do manage to avoid all legal loopholes to be able to sell it. Good luck
Automatically Appended Next Post: fiorehellheart wrote:Subtle hint you say, well, I had wondered how they'd be able to stop me selling them through private message, private sales must be much more difficult to stop. Might get done for if they find out though.
Well, it's not a full sander its a smaller detail sander, from running it slightly it seems good, and if it is too strong then I just need to put it a little further away to rock the surface rather than the mould. I could even clamp a piece of wood to the desk and apply it to that to transfer the shake, with dampening given by how far out from the table I decided to use it. I'm going to try a few things though and come back with the best, but I do want to attempt a vibrating table to get rid of bubbles if I can. The other plan is to make one using a motor and a lopsided weight on the axle.
Oh and as far as the sander goes, so long as you can vary the settings on it and turn it to low I shouldn't see a problem for it tbh. but the age old technique of tapping it works too
32724
Post by: fiorehellheart
I have plenty of those base plates, and I'd be inclined to use them if it werent for the leaking through the sides too. I'll order some clay with the next lot of silicone and resin, but for now I'm going to give the styrene a go before I get some delivered, I really do love the material...
One downside to the baseplate is that it will leave dimples on the bottom of the mould, which is okay for two part moulds, but for the toe mould I need a flat surface. The last step after pouring the resin is to wait a few minutes before placing a flat sheet of plastic over the top to give a smooth edge and remove excess, which is why on mine the edges were pulled up flat due to the surface tension as there was too little. This wouldn't work with the lego baseplate.
The sander isnt variable, but as you say, tapping worked okay for the first cast, and for the silicone so I'm not too hugely fussed.
53821
Post by: AnUnearthlyChilde
fiorehellheart wrote:I have plenty of those base plates, and I'd be inclined to use them if it werent for the leaking through the sides too. I'll order some clay with the next lot of silicone and resin, but for now I'm going to give the styrene a go before I get some delivered, I really do love the material...
One downside to the baseplate is that it will leave dimples on the bottom of the mould, which is okay for two part moulds, but for the toe mould I need a flat surface. The last step after pouring the resin is to wait a few minutes before placing a flat sheet of plastic over the top to give a smooth edge and remove excess, which is why on mine the edges were pulled up flat due to the surface tension as there was too little. This wouldn't work with the lego baseplate.
The sander isnt variable, but as you say, tapping worked okay for the first cast, and for the silicone so I'm not too hugely fussed.
Why not roll a thin sheet of clay to line the plate with, then you have both the dimples problem solved and the item your casting will have something to adhere to and won't run the risk of floating up into the silicone (I did this once, it was both horrifying and amusing lols)
58575
Post by: Wh40kPicasso
Or you could just give the New human walkers away and in return recieve a "donation" for your efforts.
as there is no actual sale just a friendly gesture from one friend to another.
also on the moulding container, couldnt you just use something like this?
i'm not 100% but it seems like a good idea to me, as i've been considering doing some moulding myself, but i haven't put the money forward for it yet, although i've found a fairly cheap supplier that i plan on using.
also you can keep me on ur list of donators. as i think GW can shove it in their tesseract labrynth.
47181
Post by: Yodhrin
 AnUnearthlyChilde wrote: AnUnearthlyChilde wrote: Ovion wrote: mwnciboo wrote: bibblles wrote:So are you going to set up an assembly line for these and sell them at massive profit?
I would recommend against it, from a legal standpoint.
Why not?
I personally see no problems whatsoever.
A: This is a completely unique model, he designed it from scratch. He has built it from scratch. This is all his own personal IP. Call it a Mars Asault mech and there is officially no link to GW whatsoever.
B: There is no official Warlord Titan model available regardless, so there's no clash in properties, but as stated above - it's all his own personal, unique IP anyway.
Its not a question of whether GW produces a model of this kind... its to do with intellectual property as well as image likeness, and as he has based the look of it on the mars pattern or at least the legs being similar to the image in the apocalypse book there is infringement of intellectual property there... hence why Chapterhouse is having ongoing issues with GW as GW is suing the pants off of them...
You mean in the court case which GW is going to lose, badly? Yeah, I think both Chapterhouse and the OP will be fine.
32724
Post by: fiorehellheart
Oooh, where can I find those, do I just search for transparent paint cans or something? Whilst I wouldn't cast in them, I would like something like that to mix in, with a substantial volume, it's annoying having to do multiple pours for a mould. but yea, I think 'donations' might be the way forward...
Yea, I think they will lose, but it'll take ages to be sorted. As I said though, I don't have the finances to support a legal battle with them, I'm going off to uni in october, and that's going to cost me a lot because of all the stuff I need to buy beforehand. as mentioned, I'll be appreciating 'donations' I think...
58575
Post by: Wh40kPicasso
http://www.youtube.com/watch?v=FQ1A7ZjTsx8&feature=pyv&ad=5385445946&kw=%22mold%20making%22
Here's a vid that i think is decent for a cheap mould box idea. and yeah they're just plastic clear paint containers.
53821
Post by: AnUnearthlyChilde
 Yodhrin wrote: Yodhrin wrote: AnUnearthlyChilde wrote: Ovion wrote: mwnciboo wrote: bibblles wrote:So are you going to set up an assembly line for these and sell them at massive profit?
I would recommend against it, from a legal standpoint.
Why not?
I personally see no problems whatsoever.
A: This is a completely unique model, he designed it from scratch. He has built it from scratch. This is all his own personal IP. Call it a Mars Asault mech and there is officially no link to GW whatsoever.
B: There is no official Warlord Titan model available regardless, so there's no clash in properties, but as stated above - it's all his own personal, unique IP anyway.
Its not a question of whether GW produces a model of this kind... its to do with intellectual property as well as image likeness, and as he has based the look of it on the mars pattern or at least the legs being similar to the image in the apocalypse book there is infringement of intellectual property there... hence why Chapterhouse is having ongoing issues with GW as GW is suing the pants off of them...
You mean in the court case which GW is going to lose, badly? Yeah, I think both Chapterhouse and the OP will be fine.
That just seems like your opinion and conjecture, unless you have some substantial hard facts to back up your statement?
32724
Post by: fiorehellheart
Ahh, progress. I've noticeable stumbled somewhat. In the past couple of weeks I've been sent my vacation work for uni when I begin, so that's been taking up some of my time. It's not easy starting a 1000 page maths book, I also want to try to read through at least volume 1 of the feynman lectures on physics which will also soak up a lot of time. All this means my education is taking precedent over my hobby again, but it's necessary for me to do well. I'm not going to stop completely, not at the hobby at least. The titan is going to remain somewhat untouched for a while now. I've largely lost my motiviation to work on it for extended amounts of time, so I'm going to start another project that I've always wanted to work on. A spacehulk board inspired by this fantastic one that's been in my inspirations links for years. http://spacehulk.beckerf.de/
The hope is that I'll be able to work a small amount on this and wait until I feel motivated to do another rush on the titan, which I expect when I come back from uni around christmas. For now I'm just experiencing shiny model syndrome and will probably swap back to wanting to work on the titan soon, but until then I'm doing a half height version of the spacehulk in the link. Whilst I plan to include different wall styles I am going to do a very similar hulk but with a different plan for making the parts. I'm going to make a mock up in paper to test sizes first, but once that's figured I'll make the masters and cast copies in resin, then from those I'll make corridor moulds and cast into those with plaster to save on cost. I'll update if I get any progress done but thought it was time I at least posted to say what's going on with the titan and my lack of progress.
22413
Post by: mwnciboo
Richard Feynman, a god among men. Maybe you call this "Walker" a Feynman Class.
57210
Post by: DemetriDominov
Hey, we haven't forgotten about you fiorehellheart, keep plugging away at this ambitious project! A rivet a day would be nice
22413
Post by: mwnciboo
I'm guessing he's back at University.
57210
Post by: DemetriDominov
Me2. Just reminding him for when he gets back.
32169
Post by: Rogue Wolves
amazing titan work!
44384
Post by: cjharrisman
Been following your work, and im interested are you using any kind of vacuum extractor on the silicone or on the resin. As i know how much of a pain air bubbles are.
32724
Post by: fiorehellheart
Hey guys, sorry about the complete lack of work or update for the past few weeks. as mwnciboo guessed, I've moved down to oxford and have started university. Apologies for the lack of any work in the week or two before I left, but I was quite busy both packing and attempting to re-learn the lost knowledge of 3 months time off. After getting here I've also been really busy with my freshers week and now I'm a week after that into lectures I've got a little bit of time to remember you guys and say thanks for posting whilst I was gone, it was nice of you and I appreciate it.
Unfortunately I'm not going to be able to work on the model at all for the next 7 weeks. I return home on the 1st of december, and as that's where all of my titan currently resides, along with hobby stuff, so you can wait until then. However, I would be happy to answer any questions anybody has, but I think that in the interests of you guys actually getting replies, I'd like this thread to be locked and to have a PM if you want anything. It should send me an email to tell me you have messaged, which should mean I can reply soon, but that depends on my workload here, it comes first as I hope you can appreciate.
I will also promise you a reply on the 1st of december, an update as I return home for christmas. If I don't then just PM me a load so I'm spammed with emails, this is fine if I haven't replied to the thread On my return I hope to be able to get a decent amount of work done, possibly starting the body, but that will also depend on the amount of vacation work I'm given. I'll do my best though!
In reply to those that posted, Thanks demetri as usual, and thanks rogue wolves too, always nice to see a new commenter. Cjharrisman, I haven't used a vacuum or pressure, which has really caused me a number of problems and is why I want to wait until I've completed a master model so that I can cast it properly. I'm fine without a vacuum, but could do with a pressure pot, the only problem then is that under pressure any air in the silicone will crush down and warp the mould, so that needs to be under a vacuum when I cure the silicone. I guess you know this already, unless the bubbles you talk about are the 'fine'cast ones, in which case I hope somebody else finds it interesting.
The last thing I'll leave you with is a picture from the window of my new home:
It does tend to make me want to make an imperator though, seeing my castley/churchey college hall across the gardens...
-Rory
32724
Post by: fiorehellheart
So, this post is a long time coming, but better late than never.
I've been quite busy of the past 5 months, with two terms of uni and Christmas so didn't get a chance to do any work on the titan like I had planned to. This break is different and I have 4 or 5 weeks in which to work as much on the titan as I can before I head back to uni. Later on I'll need to start doing uni preparation work but for at least the next couple of weeks, I'm fairly free to do as much as I can physically manage.
I think I'll have a quick recap of where I am and what I plan to do, just for people that have skipped ahead and for others who've forgotten. To build my titan I decided that I would construct a number of master/prototype parts. From these prototypes any pieces that need to be copied, say for example the legs, for a left and right, will be cast from the prototypes. If I'm able to I would like to make molds of all of the titan so that I can build more than one/sell a few on. Before uni I'd managed 'to complete most of the leg structure prototypes. I had the foot, toes, heel, ankle, a half completed shin plate, and the thigh of the titan. For the legs I had left to do, the back of the shin plate, the thigh plate, the knee, top shin joint and armour connectors.
In the first few days that I've been back I had a think about how I was building the shin plate. For all of this log so far I've persisted in wanting to use the filer method for the armour plates. I decided to accept I might be wrong though and tried to build a shin armour plate out of plasticard when I got back from uni. This is for a few reasons, mostly time given that the filler was taking a long time to complete, but also cost as the filler is expensive. Building that part was successful and showed that I could build other curved parts like that so shouldn't spend as much on filler, which is good. To build it in plasticard I did pretty much the same as before in terms of internal structure. A number of increasing radius braces with a wall in the middle giving strength. to align the frame properly, a problem I had with the previous version, I glued the piece down onto a small cutting matt so that it didn't shift around. This was much much better than before and could easily be removed afterwards and the superglue marks sanded down. after releasing the frame I had a tricky job to do in wrapping the plasticard around and gluing it down, this was much easier that it could have been, with small clamps. After the initial plating was on it was easy to complete the edging of the part too. Overall the part took me about a day and a half, compared to the week + that I'd spent on the other version it was much better, I even forgot to take progress photos because I building quickly.
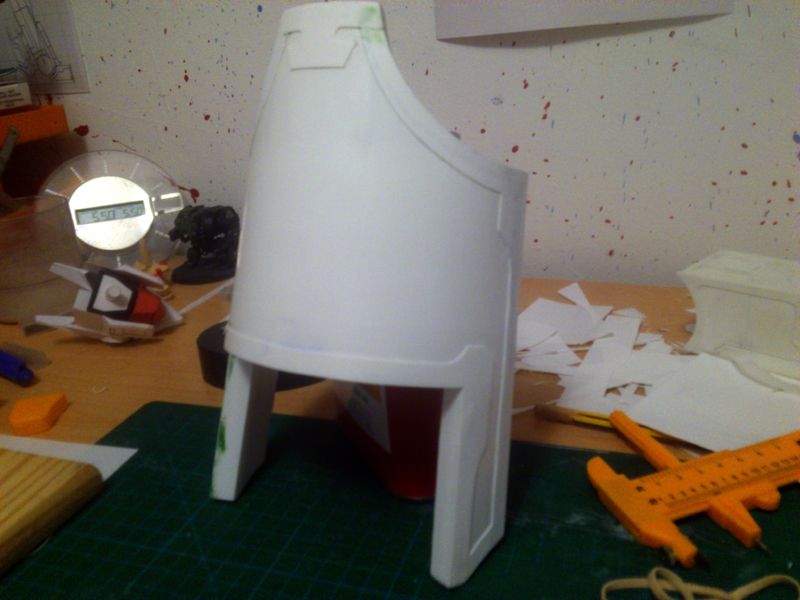

Having completed the shin plate I decided to move onto the part that was preventing me from assembling a mock up of the leg, the top shin joint. Before I start this though I needed to build the cylinder that comprises the knee joint. Cylinders have been something I've struggled with in the past, but I had a brainwave this time round. I constructed myself a jig consisting of a pair of parallel straight edged plates, at an angle, fixed a specific distance apart. This means that when I rest any circle or cylinder, with a diameter bigger than my gap, on the jig the centre will lie in a specific line. Provided I've taken care to cut out the same sized circles then it allows me to produce a much more accurately aligned cylinder than I had managed before. The straight edge is also useful in wrapping the completed internal structure as it allows pressure to be put evenly along a line, something I struggled to do earlier. This was really helpful at the seam where I got a fairly smooth join. Unfortunately the second layer of wrapping onto the cylinder was thicker, so the joins are very visible. This shouldnt be a problem however as by incorporating the cylinder into the top shin part, I can hide the seam line.
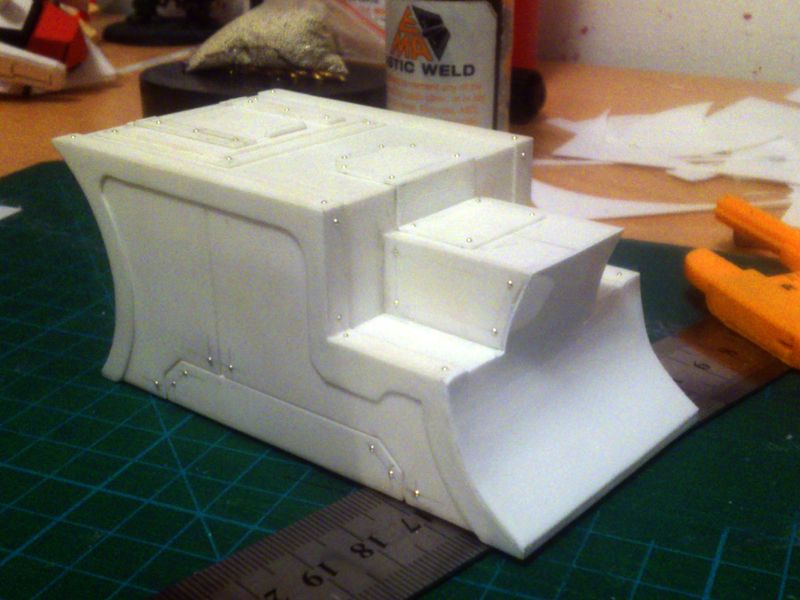
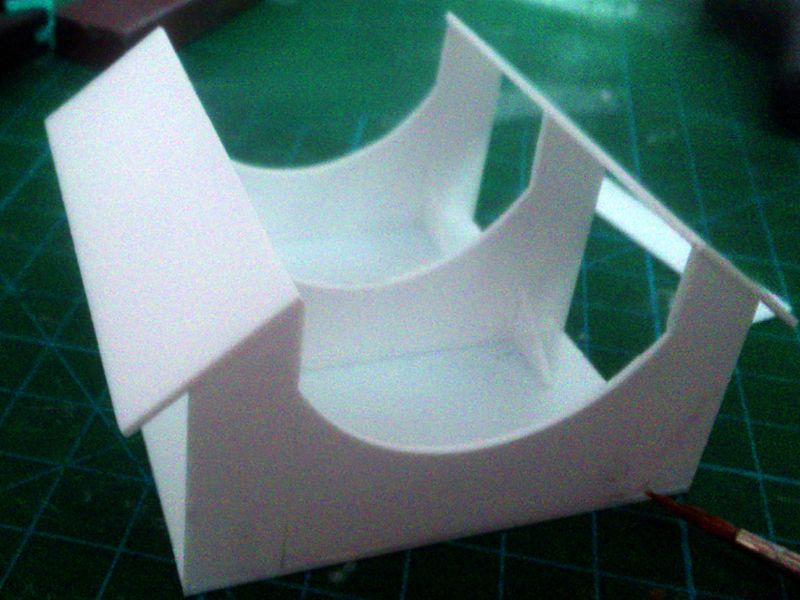
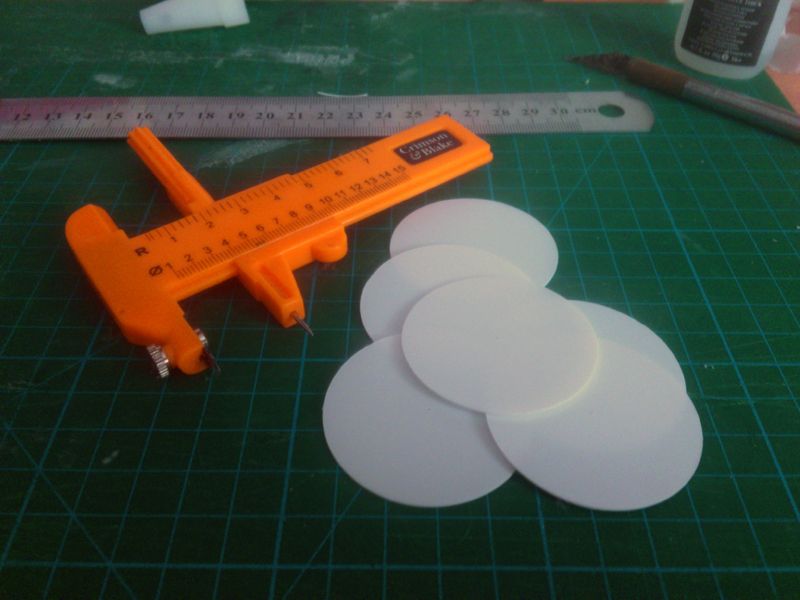
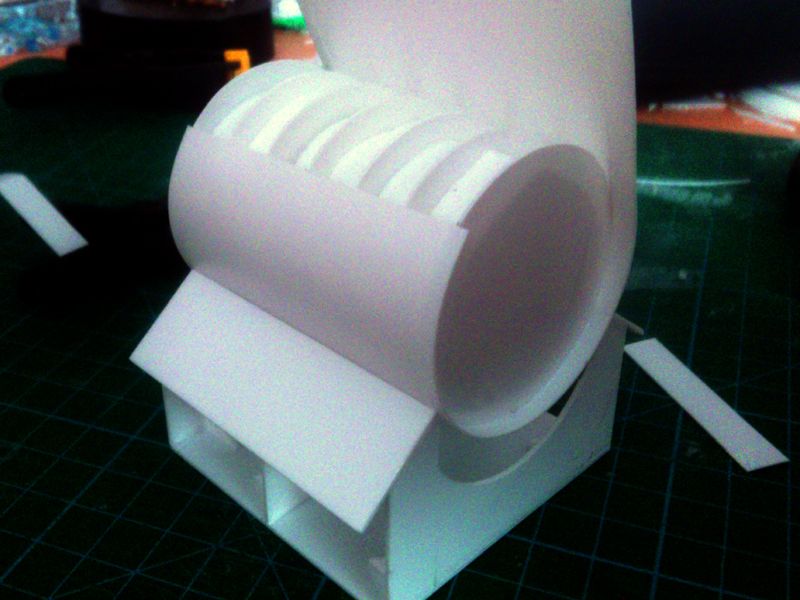
For the patterning and the style of the cylinder I using the warhound joints for a lot of the inspiration. The main body has a similar ridged central part and smooth outside sections. For the caps I also used a similar raised circle to the warhounds, but embellished mine with a cog and different rivet placements. On the ankle caps I had an edging on the detail similar to the knee caps. For those I had cut a thin strip of plasticard, and joined the ends of the strip square to create a loop. For these caps I was much more successful in beveling the start of the strip, wrapping it around the part, and then over the bevelled edge. I then sanded the overlap down so that it was almost a uniform thickness all around with next to no seam. I tried to get a decent picture of the wrapping, but my phone's camera isnt good enough at macro. I think that sometime in the next few weeks I will try and borrow a dslr from a friend to take a few high res macro shots to show the detail better. Forgive the current images, as I've adjusted the contrast and colours to bring out the details.
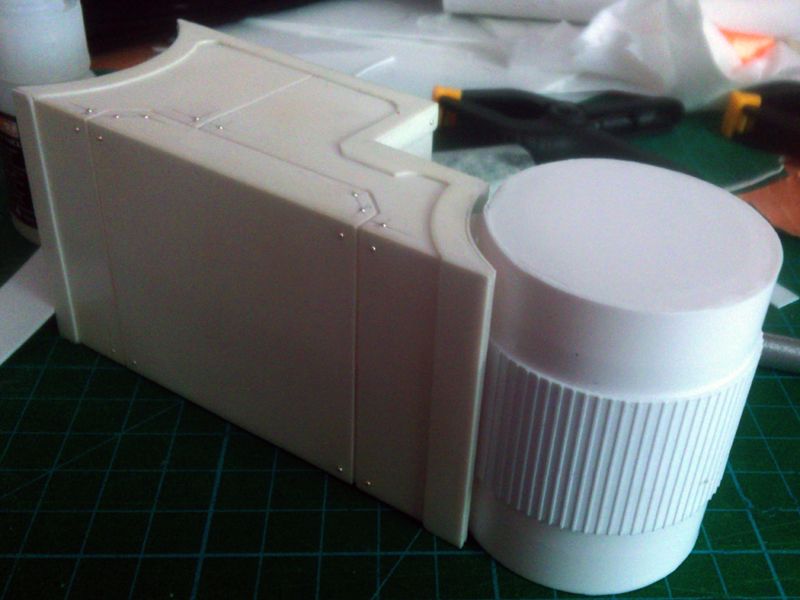
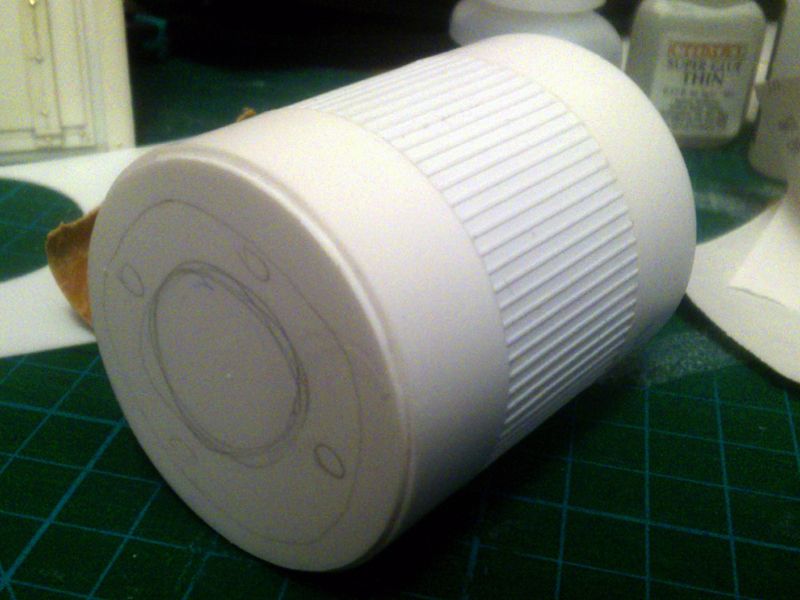
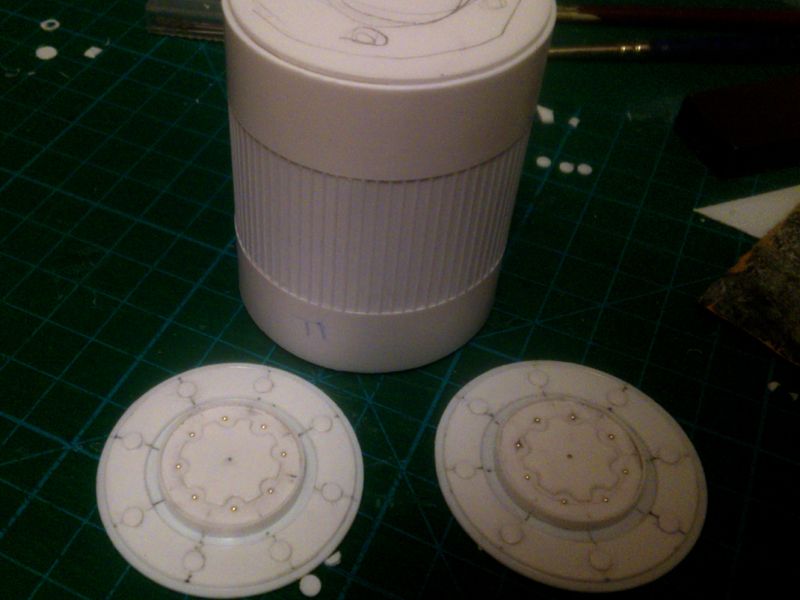
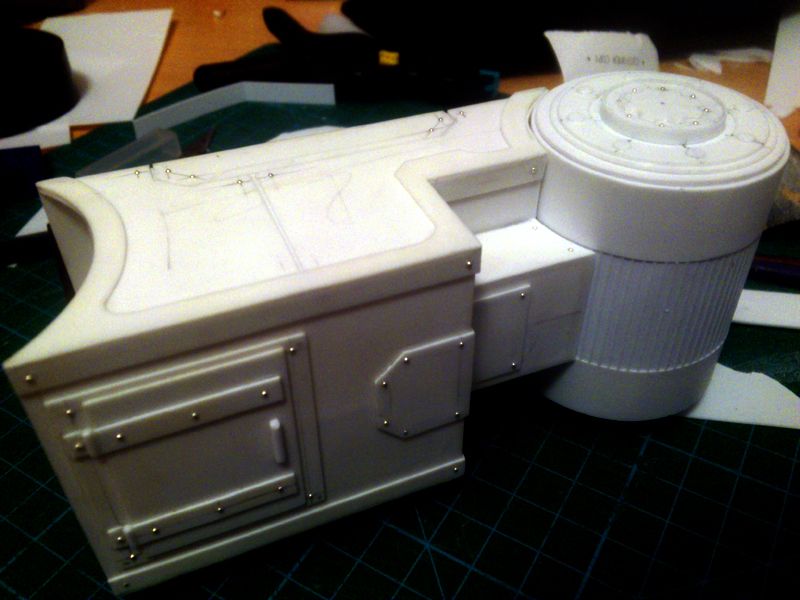
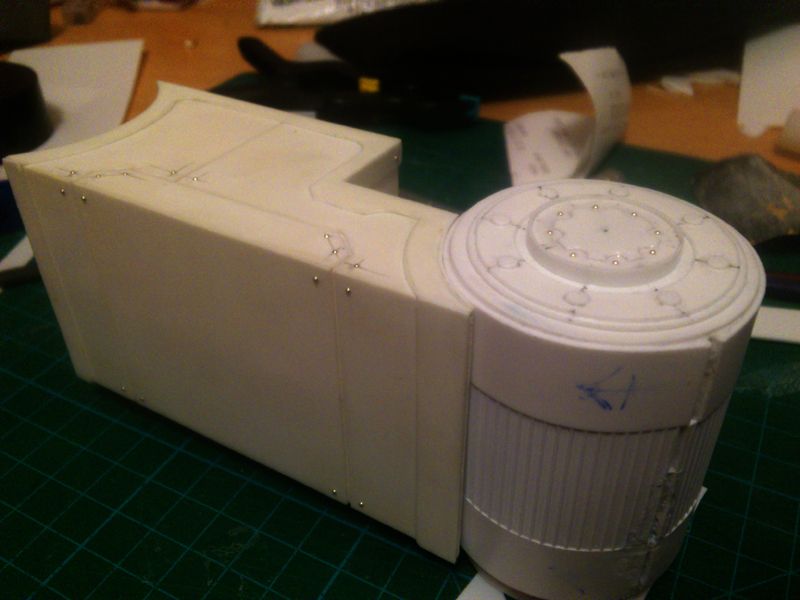
That's all I've been up to in the last few days, but will be starting on continuing as much as I can. I hope to be able to begin part of the body before heading back to uni. Next up though is finishing of the toshin joint with the new cylinder, and starting the back shin armour, and thigh armour, with connectors. After that it will just be the waist/hip before the body.
22413
Post by: mwnciboo
You an Architecture Student?
28327
Post by: mullet_steve
I realise that some might hate me for this statement BUT as someone who has been through uni I would heavily recomend that you do the uni work first then do the hobby stuff if you have any time left over, maybe limit yourself to an hour a day or something but the uni work should come first....
22413
Post by: mwnciboo
This counts doubly in the modern era because Student fees are "Immoral".
64239
Post by: Karokk
Wow this is like the most ambitious project I've ever seen!
26800
Post by: Commander Cain
That is one sturdy looking titan!
32724
Post by: fiorehellheart
I'm a physics student, not architecture, although I do have an interest. I'm studying in oxford, something I'm proud of and find the gothic building great as inspiration for an imperator. For ages I've wanted to make one as an updated version of the classic dreamforge leviathan, the one with a church on the back. But I've never liked the look of the roofs on that model, but I've seen a perfect style that I want though just wandering to and from lectures. The fee's are a lot and I know that I have to work hard. I've done my usual promising start and stalling in the last couple of weeks partly because I have been working as well as trying to make my model too.
Thanks Karokk, and I'll take that as a compliment Commander Cain. You should like the next update, it's blue tacked together and looks very sturdy indeed. I'll get around to posting that soon for you guys, Thanks.
32724
Post by: fiorehellheart
I've finaly returned from uni, got back my grades and got through to next year. it's just a little under 4 months until I go back, so I should probably be able to get a couple of those with decent amounts of progress. Already I've done a fair amount this past week so I'll just go ahead with the pictures.
First up is some non titan work that I've done. I think I talked about my love for spacehulk before now and I'm going to try and build a set as a little side project. Something to break up the titan monotony. I built these with 30mm tiles, as I felt that 25 was too small for modern terminators, and 40mm was large and would make the whole board much bigger. The plan is for the same style corridors and then mostly the same style rooms to start off with, but having some customised once I start to cast the floors up. The detail is some braided cable that I wound with a drill. I'll upload a picture of the room that I've built so far on the next update.
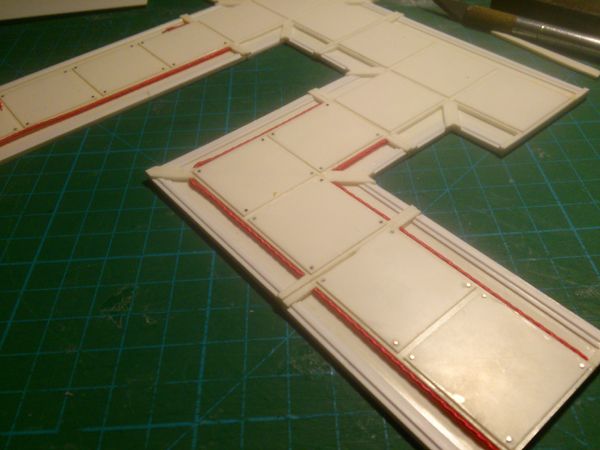

I did this work months ago, before I started the last term, but never updated. It's the progress on the leg armour, specifically the rear of the large shin plate and the thigh plate. I detailed it using most sheet with rivet detail but also used some textured plasticard scrap I had. That's at the lower part of the armour, just for extra interest. The back parts of most of the armour pieces will be detailed in similar ways, alhtought I might add some access hatches. The thigh armour was built in the same way the shin armour, using cross section pieces that have a spaced reinforcer, that is then wrapped with sheet. I've also done the plating on the shin part this past week. All that remains for it is the rear detail and the mounting spacers to attach it to the leg.
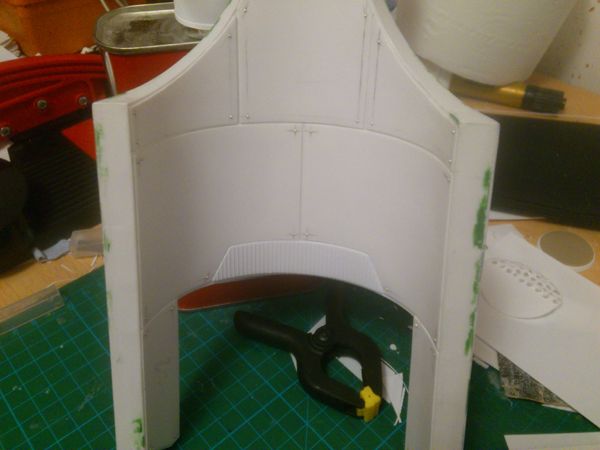
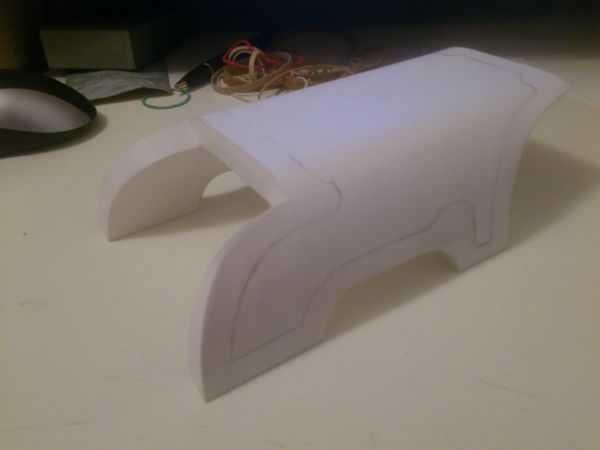
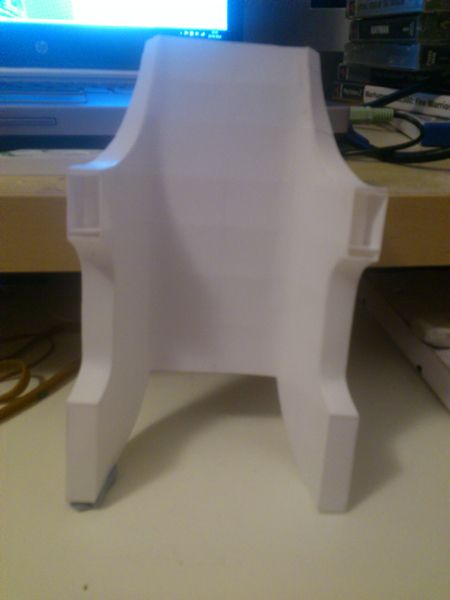
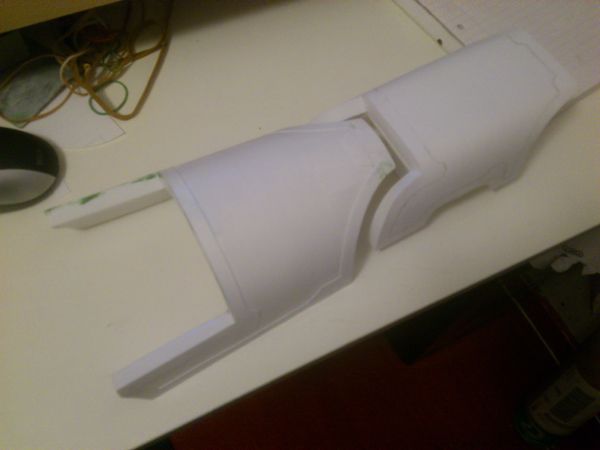

I had also begun work on the rear parts of the shin armour. These are two extra armour parts mounted alongside the front shin plate, that continue the curve of the armour. I only got as far as the the left part on the second piece, when I felt thet they were too short. I added a large trim which added some extra length, but have only finished these parts this week by adding the edges to the part and creating the start of the mounting pieces.I'll try to get a picture in the next update of the parts on the leg so you can see how the cutaway parts show the back of the leg, where I will eventually hope to add a large visible piston. The last picture is just to show how the style for the armour plates is generally consistent.
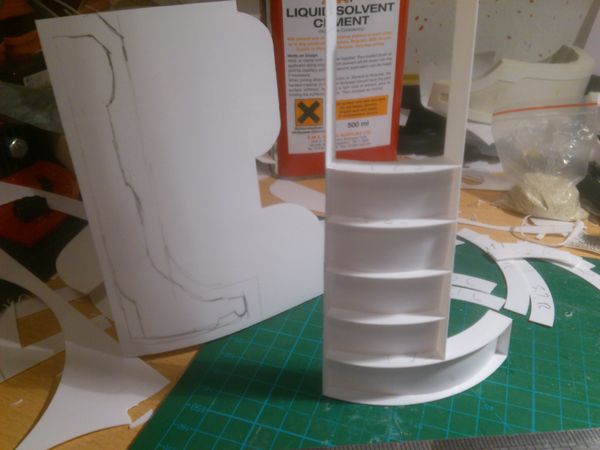
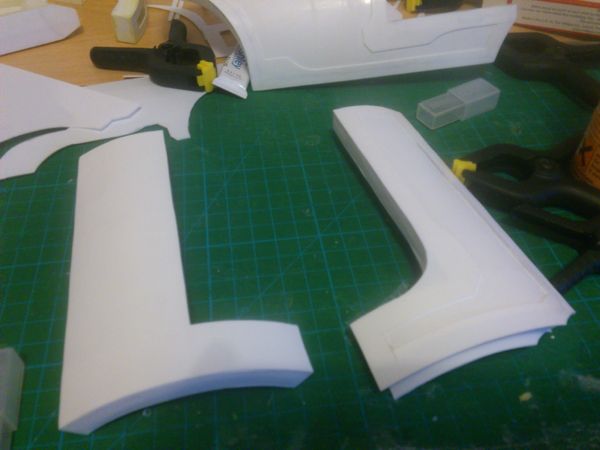
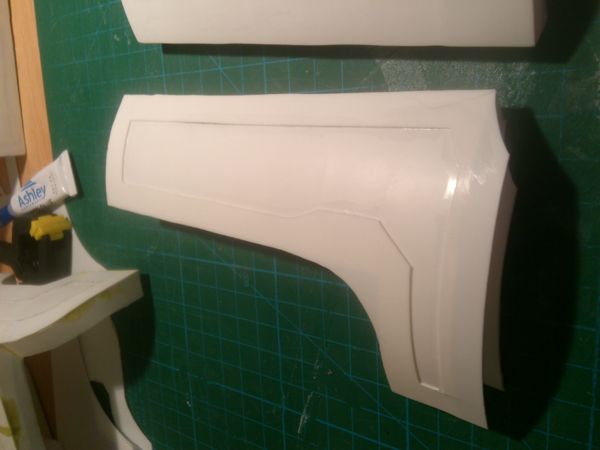
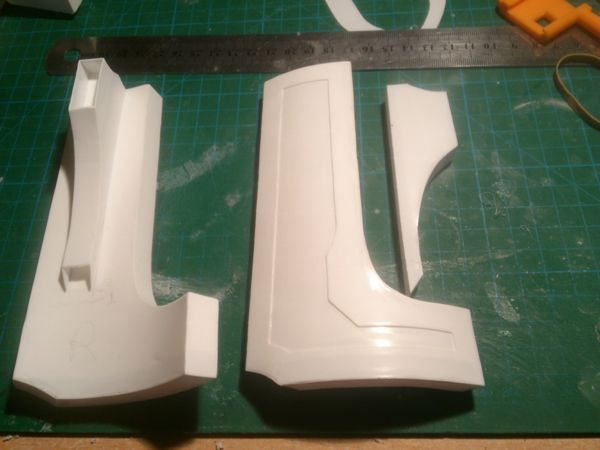

Whilst at uni I had access to a printer so I was able to print and construct a mock up for the head. I was worried about the scale as it's not huge in my current plans and I thought that the crew might not be able to fit within. I wanted to avoid the ehad looking too large, a small head should make it look taller by slightly forcing perspective, in the same way that towers are often tapered.
After calculating the sizes of the cockpits for the reaver and warhound I think that the cockpit is still well sized, which was confirmed when I ordered the pilot figures. I chose to use the pilots of sentinals, they are fairly plain and have steering rigs already. The current arrangement planned is the princeps amniotic casket in the front of the head, where there is more room for a larger tank, with the moderati and steersman in the back of the head. I figured they could take advantage of the access to the body most, and the princeps is installed before the titan is sealed up anyway.
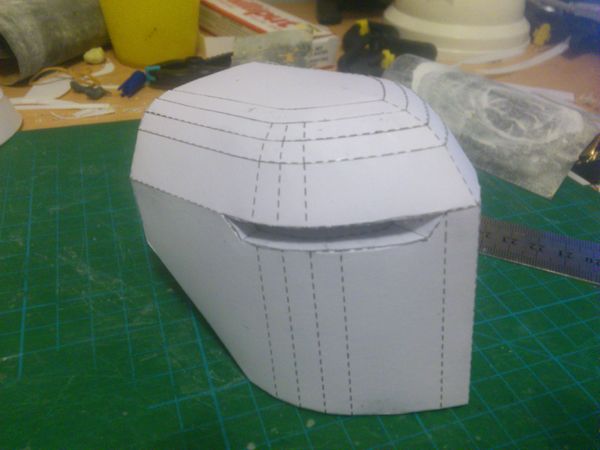
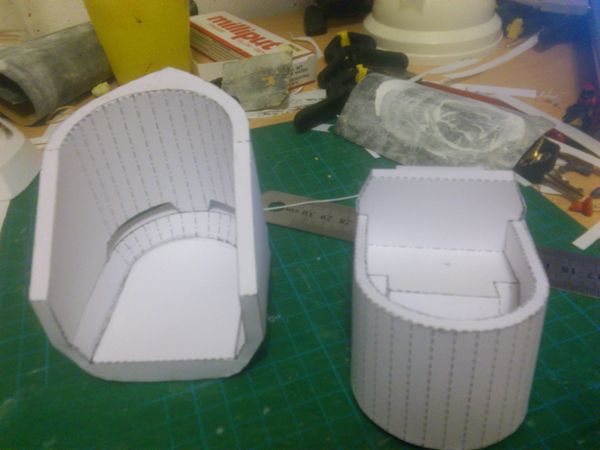
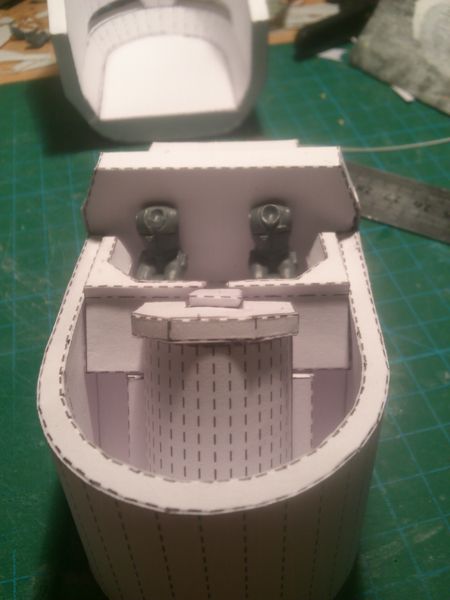
To build the curved surface of the head, I built the plasticard angular structure and then backed the inside with milliput at the corners. When I sanded away the corners of the structure is left a curved surface that was still strong. Once that was done I built the inside up before I remembered to take a picture. The curved sides were then glued on to form the wall of the head armour, which is the latest stage I'm at.
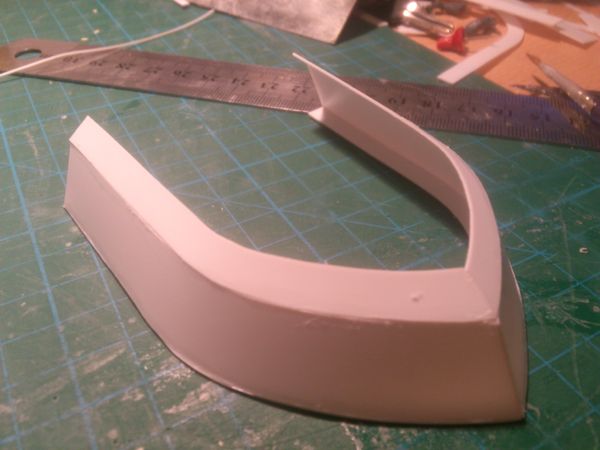
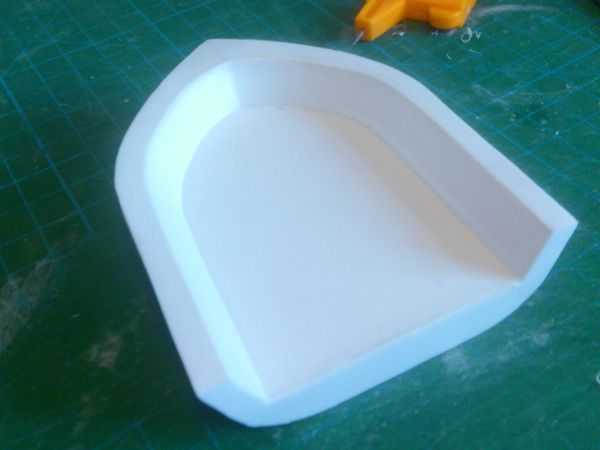

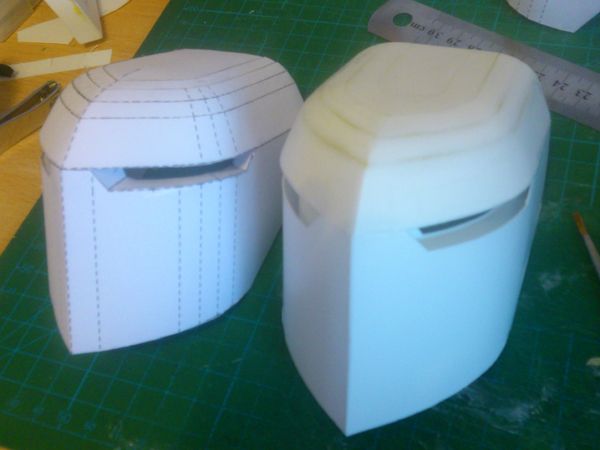
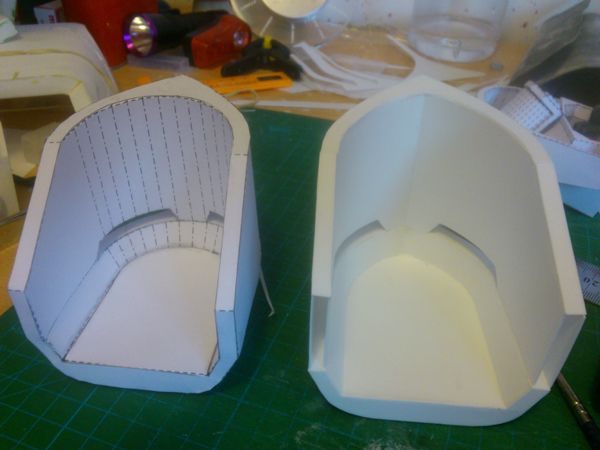
The most immediate stages I'll be attempting are:
- Finishing the head. I need to fill the gaps in the armour and complete the edging, but also build the interior of the head and create the princeps.
- Finishing the legs. So far to finish the legs proper, I need to correctly align the armour mounting for the rear shin armour and back both the shin armour and thigh armour fully. I may also decide to re-build the ankle joint in favor for a more stylish ball joint with better range of motion.
- Coat parts with primer. I'm going to start spraying parts with a grey spray paint as it should allow me to see faults better, and give some easier to shoot pictures than the white glare plastic.
If anybody has any comments or question, please ask away.
Thanks
-Rory
22413
Post by: mwnciboo
Rory, sorry I thought you were an Architecture Student due to the huge amounts of Plasticard you had access to...(A bad joke based on my own experiences at Uni - Architecture Students were given thousands of pounds of this stuff for model making but then they were at University for 7 years so you need something to do).
Nice work, looking very good.
29895
Post by: Mangozac
Fiorehellheart your styrene work is absolutely stunning! You're one of those lucky few blessed with "the knack" for styrene
The CAD work is certainly a massive help with designing something of this scale - doing things without it would certainly entail a lot more uncertainty (and likely rework). Being more of a Mars style fan than Lucious when it comes to Warhounds, I really love the design you've come up with for your Warlord.
The head and its interior layout is great. Having the Princeps at the front makes sense (I can't believe you did a paper mock-up of his tank too!). Are you planning to have a hatch in the bulkhead behind the Moderati/Steersman?
My only negative comment is that on the pictures so far the handing on the leg armour seems a little too thin. What thickness of styrene sheet are you using for it?
Are you still contemplating casting parts of this? If so, when it comes time go and check out www.resinaddict.com for lots for wargaming related casting information
32724
Post by: fiorehellheart
No problem mwnciboo, nice joke, I hadn't heard it before.
Thanks Mangazoc, I flattered by your blog post about my work too. Yea I'd like to be able to cast things up once I'm done, but I think that the initial cost of doing that would be too much for me to try anytime soon. Once I've finished I might try to take a few preorders and get casting started based on some deposits from people that want them. Your forum is down for me, but I'd be interested to see what casting knowledge you can share.
Paper is one of my favorite materials to build in, it's easy, but it's also reallyversatile. I even have a full paper mock up of the titan from at least 3 years ago that I no longer have templates for, I've avoided posting it because it's very different, although only in subtle ways, to the current one. That and I'd get spammed asking for pictures. I'll probably have to go ahead and post a picture now though.
What do you mean by the 'handing'? Do you mean the edging on the armour pieces? It's a half a millimeter thick plasticard on top. I wondered if it was a bit thin when I started but I've already done it on most the parts, and swapping wuold be a big job. Automatically Appended Next Post: I bought primer as I said, started using it to get some idea of how the finished parts appear. It's useful in trying to smooth out parts. I tested it on my spacehulk room.

I also did the plating on the inside of the thigh and shin armour. Same deal as the part I've already done, with detail on the thigh like on the front shin plate.
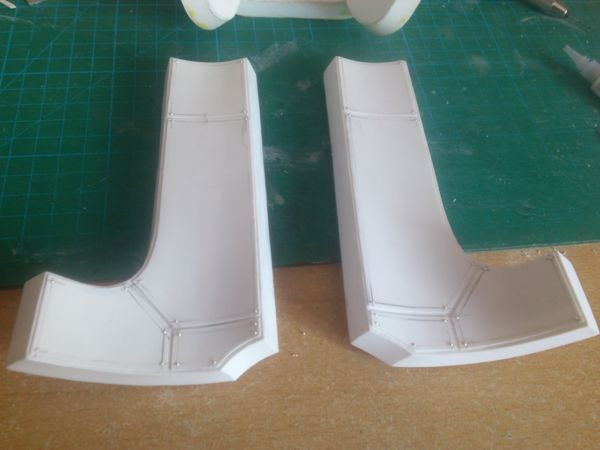
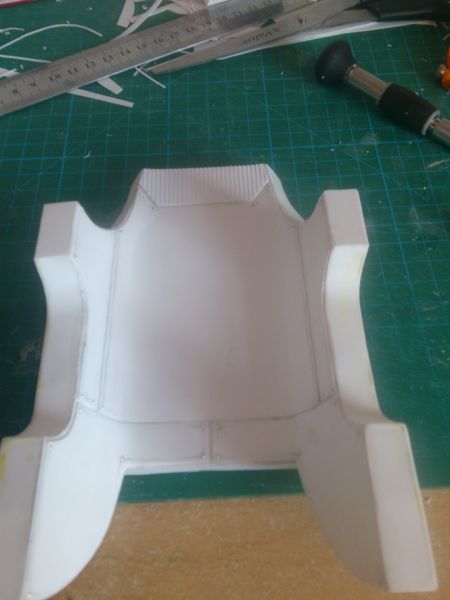
The biggest change since the last update is that I decided to change a few parts. Having ordered some pingpong balls to create a balljoint for the ankle, I decided to re-build the base of the foot along with the ankle joint. I also plan to rebuild the connectors for the circular ankle parts. The old ones were quite flimsy. I also decided to rebuild the hexagonal part on the main shin leg structure, to give it a slot for the armour connectors to fit into. I'm finding it difficult to align them now, and think that making the positions very rigidly fixed should help anybody else that builds it, and myself in having the leg able to disassemble. The parts I'm replacing are shown. To rebuild the foot base I went with thicker plasticard, using some 1mm thick sheets. Much sturdier which helped with the shape, I might have to go back on what I'd previously thought and start using thicker sheets again. To do the beveled edge, I covered the part in milliput and smoothed it down. I struggled the first time i used milliput, too much water made it a sloppy mess, but now I've got the hang so this went much better than I'd expected. It should only take a small amount of sanding to finish the part.
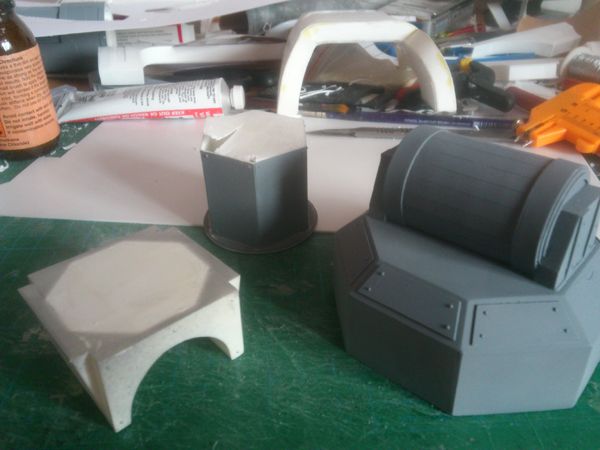
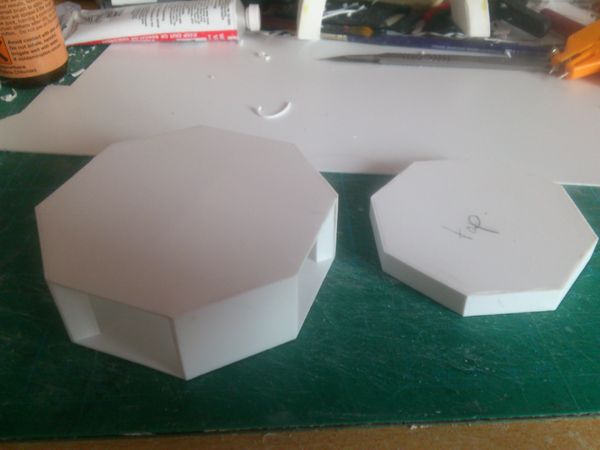
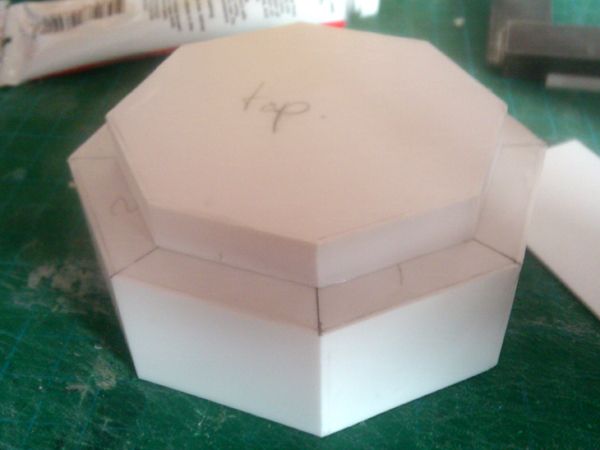
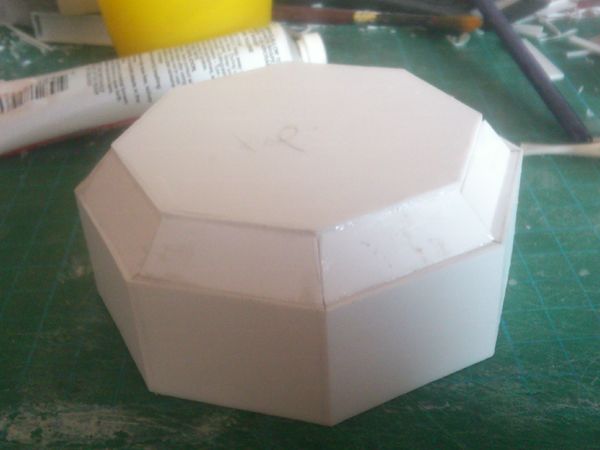
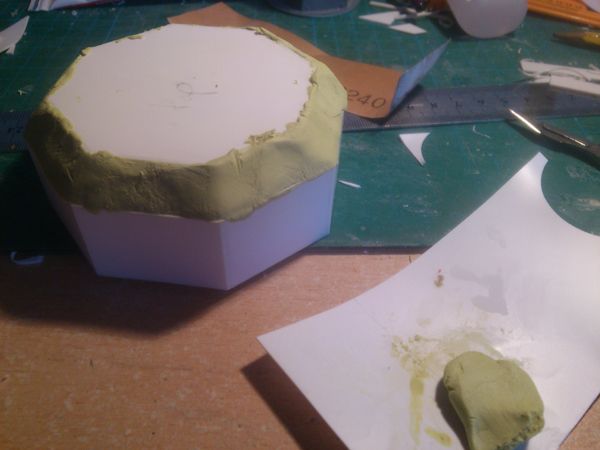
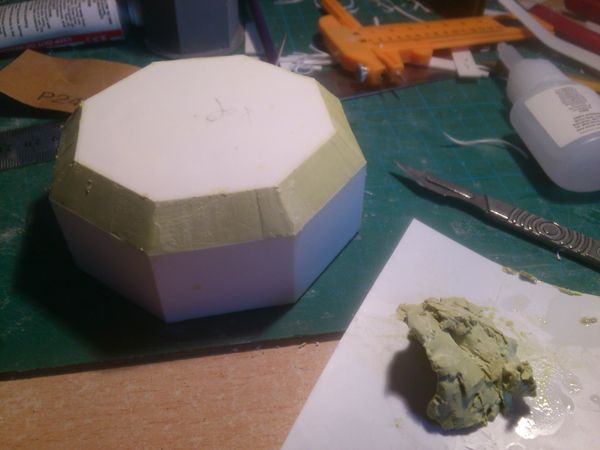
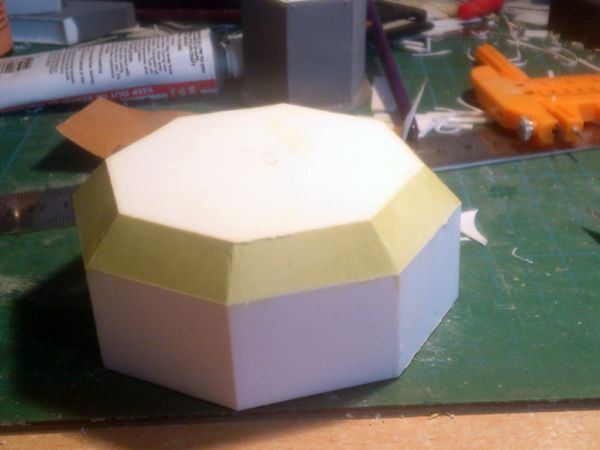
As usual, I appreciate and questions or criticisms.
-Rory
29895
Post by: Mangozac
Hey Rory,
Oh you found the blog post eh? Haha yeah I was obviously pretty impressed when I first ran across this project of yours
The Resin Addict forum is back up and running now (it was switched off while I was doing a server move). Even if you can't take on the casting yourself I should be able ot hook you up with someone local who can do it. Like you say, doing a few pre-orders would be the way to go.
Sorry for the typo, I meant banding. 0.5mm does sound too thin for something of that scale - I would have gone with 1mm. I wonder how much work it would be to laminate another strip to 0.5mm on top? That's the kind of little detail that would bug me if it were my project
What primer did you use? Indeed it's great to have parts in a nice, uniform colour - and it's much easier to get a feel for the form and detail when it's not all white styrene!
Milliput is my putty of choice for these kind of applications. Like you say, with too much water it turns to sludge, but once you know how to use it it's great to work with. I tend to just do my Milliput forms really roughly and then sand/file/carve/chisel it to the final shape (I can't tell if that's what you did or not).
Keep up the awesome work!
32724
Post by: fiorehellheart
I have been lazy over the past month in regards to posting, but I have at least not been lazy on the titan. I was racing to get as much done for last tuesday as possible, for an apoc game in my local GW. The game wasnt great as we had to many points and not enough time, so I didnt get to do much with it, but the presence of a deadline really helped me move on the models progress.
On the model the entirety of the legs is cast parts. The crotch/waist section connecting the legs isnt, but from the cylinders at the top of the thigh and down it is all cast in resin. Over the past few weeks I've been doing lots of casting, making lots of mistakes and learning a lot. I'll come back with another post soon showing the molds I've made and the casting process. I'll try to give the tips that I've learnt, and will also give some advice to doing this cost effectively, importantly I'll also talk about where I'm planning to improve so that I can get this model to a sellable point.
Also of note is that I need more money to continue making the molds, to which end I will be selling a titan soon. First I need to build the arms and guns, so the majority of the model will be cast except for the central body, which will be the plasticard one pictured above. When I built this is was a quick build over a few days, the legs are currently held together with hot glue and no pins, soon to change.Whilst the body works great assembled, it is too warped to mold make with, even if I can take it apart without too much damage. I will be making another 'master' for the body parts when I have some money to be able to cast them. If anybody would like to own a warlord titan, then send me a PM and we can figure something out, the sooner the better as then I can guns you want first and get it to you sooner. Automatically Appended Next Post: @magazoc, Sorry I never replied to this, kept on meaning too, but I have a habit of not updating and saving the small updates of each day for another update, which just continues without me posting.
Your forum is really helpful, remind me to make an account on there to add some of my own experiences casting. The next stage I think for me will be pressure casting and currently I'm just waiting to get a decently priced and sized pot and compressor.
The edging is just the 0.5mm which I want to stick with for now, as it's like that on the legs, I think it would be a surprising amount of work to go over the edging now. What I plan to do is eventually update the armour and make it tihnner, once the current molds degrade. I need to cut weight down and want to make the parts much smoother, and may try out a 1mm edging if I do. I think I'll also add some forgeworld style half dome rivets when I re-do the masters too.
The milliput work was all done whilst wet, to get a good clean edge I used the wetted edge of a fresh, sharp razor, that just gave a very smooth surface when dragged over at the right angle. I will need to use milliut to do repairs to miscast parts on the one I plan to sell, and will probably do what you suggest with the rough over use then sanding down, just seems easier.
22413
Post by: mwnciboo
APOC is terrible unless you limit the points. Everything descends into Chaos, people get bored 5 hrs and it almost always ends in a draw.
I think the Sweet spot is about 4000-5000 pts with 2-3 Super Heavies only. Any bigger it gets unwieldy.
The other thing I've found is that you have to limit the numbers of players (like 3 vs 3) or every man and his dog comes out of the woodwork to get involved and it ruins it.
Have extra players as Marshalls helps to resolve combats and move units more quickly.
39973
Post by: Galorn
fiorehellheart wrote:I have been lazy over the past month in regards to posting, but I have at least not been lazy on the titan. I was racing to get as much done for last tuesday as possible, for an apoc game in my local GW. The game wasnt great as we had to many points and not enough time, so I didnt get to do much with it, but the presence of a deadline really helped me move on the models progress. On the model the entirety of the legs is cast parts. The crotch/waist section connecting the legs isnt, but from the cylinders at the top of the thigh and down it is all cast in resin. Over the past few weeks I've been doing lots of casting, making lots of mistakes and learning a lot. I'll come back with another post soon showing the molds I've made and the casting process. I'll try to give the tips that I've learnt, and will also give some advice to doing this cost effectively, importantly I'll also talk about where I'm planning to improve so that I can get this model to a sellable point. Also of note is that I need more money to continue making the molds, to which end I will be selling a titan soon. First I need to build the arms and guns, so the majority of the model will be cast except for the central body, which will be the plasticard one pictured above. When I built this is was a quick build over a few days, the legs are currently held together with hot glue and no pins, soon to change.Whilst the body works great assembled, it is too warped to mold make with, even if I can take it apart without too much damage. I will be making another 'master' for the body parts when I have some money to be able to cast them. If anybody would like to own a warlord titan, then send me a PM and we can figure something out, the sooner the better as then I can guns you want first and get it to you sooner. Automatically Appended Next Post: @magazoc, Sorry I never replied to this, kept on meaning too, but I have a habit of not updating and saving the small updates of each day for another update, which just continues without me posting. Your forum is really helpful, remind me to make an account on there to add some of my own experiences casting. The next stage I think for me will be pressure casting and currently I'm just waiting to get a decently priced and sized pot and compressor. The edging is just the 0.5mm which I want to stick with for now, as it's like that on the legs, I think it would be a surprising amount of work to go over the edging now. What I plan to do is eventually update the armour and make it tihnner, once the current molds degrade. I need to cut weight down and want to make the parts much smoother, and may try out a 1mm edging if I do. I think I'll also add some forgeworld style half dome rivets when I re-do the masters too. The milliput work was all done whilst wet, to get a good clean edge I used the wetted edge of a fresh, sharp razor, that just gave a very smooth surface when dragged over at the right angle. I will need to use milliut to do repairs to miscast parts on the one I plan to sell, and will probably do what you suggest with the rough over use then sanding down, just seems easier.
Once you add some fittings the Harbor freight Paint pressure pot can make a decent Pressure vessel for casting... Just inspect it carefully for poor welds and paint slop into the threads of the sockets in the lid where fittings go. also you will want to replace the stock clamp bolts with somthing you can tighten with an allen wrench.
15358
Post by: Vitruvian XVII
That looks amazing!! Im very impressed with how its gone so far.
32724
Post by: fiorehellheart
Thanks Vitruvian, It's nice to get a complete picture of it now things are going together, rather than just a few separated pieces of a leg.
simple casting tutorial/guide.
The first thing you want to do is make sure that you are safe. A respirator mask is a must if you work in a small area, and even with ventilation its nicer without fumes. The gloves are also a must. The liquid resin can stain your hands, and is not something you want to be passing into food. Gloves make the clean up much easier and are cheap. I use a nitrile variety as I can also use them with silicone. The resin isnt too fussy, but silicone will be inhibited from curing by a latex glove.
For supplies you will need the resin itself, which comes in two parts, some are equal mass mix, some are equal volume so check carefully. The resin I use is a casting polyurethane resin, the lower viscosity the better. Some resins are polyester which smells much worse, and is more brittle. I made a mistake and got lots of this resin and it is effectively useless for casting. I also made a mistake at first in getting a filled urethane resin. This was thicker so lost a lot of detail, with bubbles in rivets and so on, and weighed 50% more. Low weight, Low viscosity is good. Another detail to watch out for is work time. A quickset resin will allow you to do many casts in quick succession, but you have to be really quick or else it will thicken and catch bubbles. Without pressure casting (the next step up), the best results should come from longer working time materials that release air after time. To mix resin I use disposable cups of differing sizes depending on the part to be cast. My mixing sticks are just kids craft lollipop/Popsicle sticks, although most quantities of this resin mix with a few simple swills/swashes of the cup. I mainly use mine to mix in the colour.
You will also need the mold itself, along with some tape/clamps and some wooden pieces to hold the mold closed and aligned.
The first step is putting the mold together to be poured. You can see here that there is an aligning channel around the edge of the part. It's not as well defined as I would like, but I can improve. Any good mold with have either been cut open in such a way that it locks together securely, or will have lots of registration keys to hold the two halves in place. Some people choose to add a 'release agent' to the molds before casting. It isn't completely necessary for casting resin, although I believe that companies like forgeworld use one that also acts to extend the lifetime of the mold. Silicone just doesnt stick to resin so it definitely isnt just a release agent. It's nothing an amateur should really worry about at first though.
The wooden boards are used to hold the mold together and are taped up with a small amount of pressure. Too little and it may leak, or you will get mold lines/leaks. If it's too tight and you can warp the shape. I did this on the mold for one of the hip joints at first, and ended up with an oval, not circular, tube.

The parts that I'm choosing to mold are the rear armour pieces. The masters are pictured below, along with the weighing of a pair that I have already cast up. With any mold the first cast will be difficult to judge the volume, but for any subsequent cast I can just do an equal mass as one that's been cast already, and record that number for future reference. This pair weighs 246g, so I chose to mix 260g just to be safe. Because the resin is in two equal mass parts, that means I just need 130g each, or A and B .
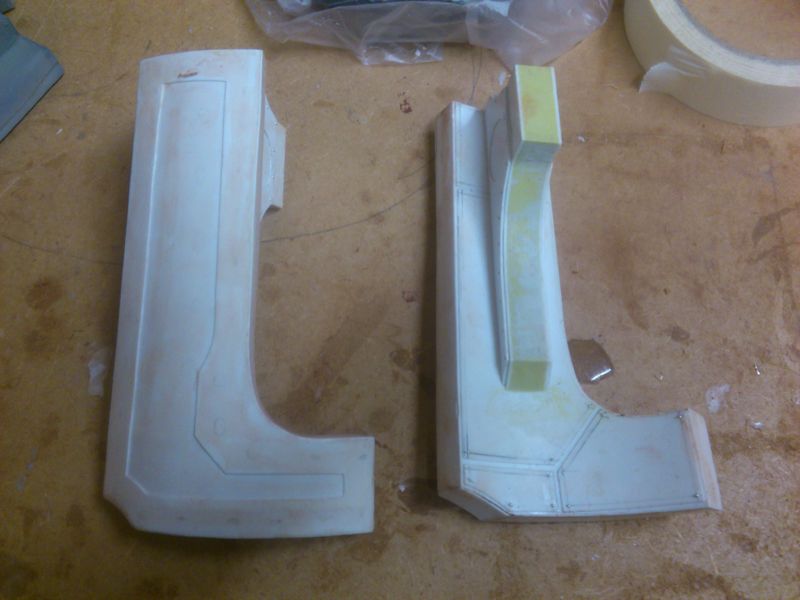
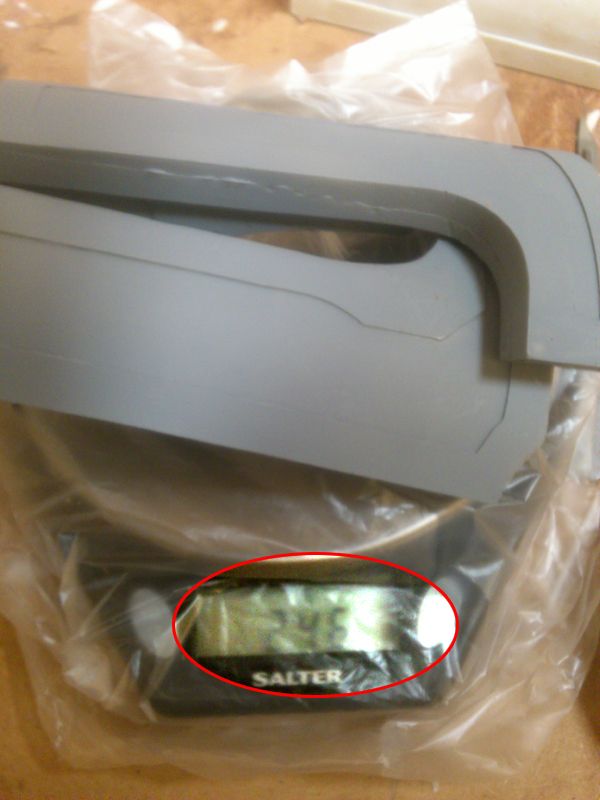
To add a little colour I mix in some of the oil paint to the whitish half of the resin. I mix into the pre-weighed out cup until I get a grey I'm happy with, which will only slightly yellow because of the resin used. The paint is important. An acrylic or other water based paint will ruin resin, because of the water. Oil paints are safe, as are specially designed resin colour compounds. Once I have the grey I want, I add the other half of the resin. You can measure this into another cup first, then pour both parts together into another cup or one of the cups, which mixes them well and quickly, or just measure straight into the single cup. After a little extra mixing, only 30 secs at most, you need to pour into the model. The sooner it is poured, the better the detail because bubbles will flow easier. With silicone the height of the pour is important to remove bubbles, but for resin it is no different, so pour as rapid as you like. Tapping the table or mold as you pour can also help dislodge air bubbles, and pouring at an angle so air bubbles are directed to a vent is helpful. If you have an open mold on the bottom, a simple spray of wax release agent, used for making 2 part molds, can lower the surface tension and pop bubbled for a smooth surface. You can also use a piece of acrylic on the top to squeeze excess resin off for a flat base.
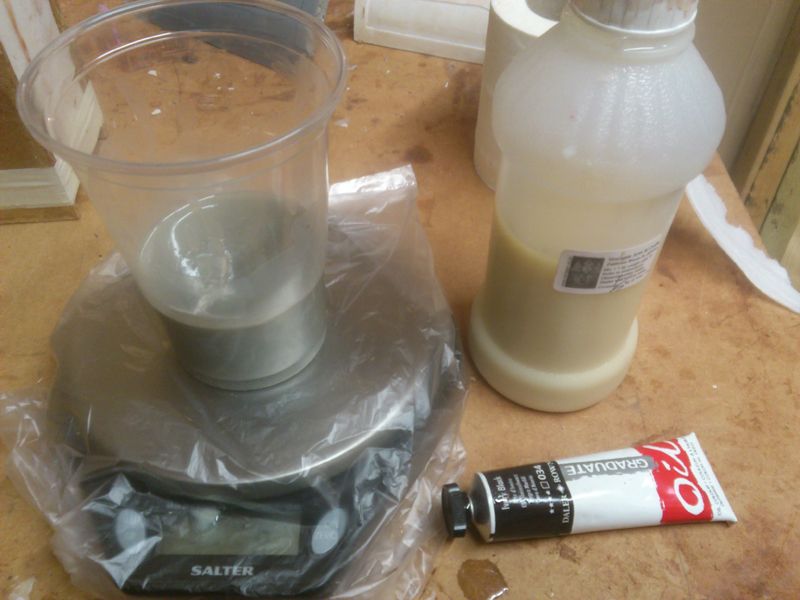
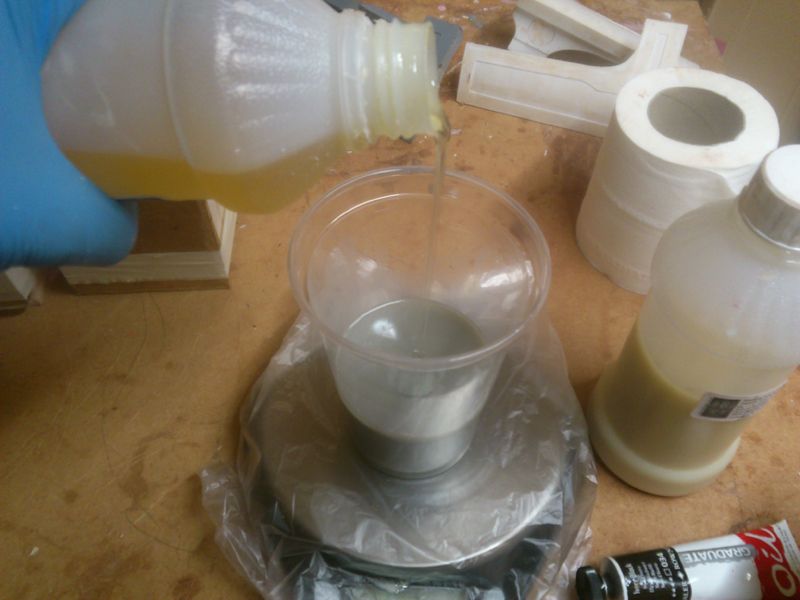
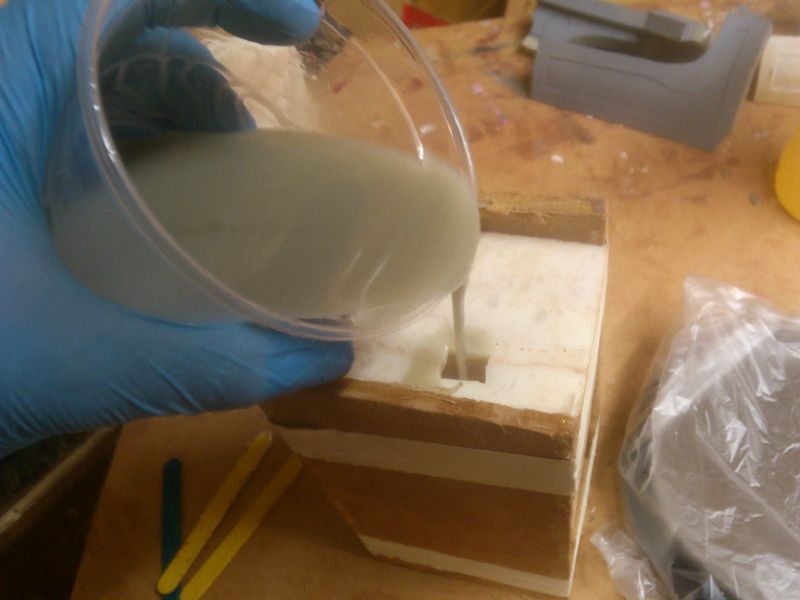
After waiting half an hour for my resin, it has set and is ready to be demolded. You should be careful of any vents that can snap and chip of a part or edge on the model, but otherwise you can just pull the part out. You can see how the cast isn't quite perfect. It's difficult to manage a perfect cast under atmospheric pressure, because the resin also releases gas as well as trapped air. When companies do resin casting it is usually done under pressure, which can be 50-60 for hobbyists and higher in prototyping companies, or industry. I don't know how high a pressure forgeworld uses, but the reason they have such large gates/sprue, is so they can just quickly pour and put under pressure really quickly. The increased pressure crushes any bubbles in the mold down so that they become microscopic, and I think they diffuse through the part more evenly. For any clear cast parts it must be done under pressure, as otherwise the bubbles make it look cloudy. I'm guessing this is part of why things like the canopies and clear parts are so brittle in model kits.
You can also see a problem caused by the mold being badly made. As I said before, the aligning ridge wasn't well defined enough, which means that the part has slipped and the edge isn't even. When making molds I try to put any mold line either out of sight, or in an easily removable place. These should be easy to fix, but on the next mold I'll be able to account for this. There is also a comparison of the masters (white) second casts from the mold(grey primer) and the newly molded parts (olive grey).
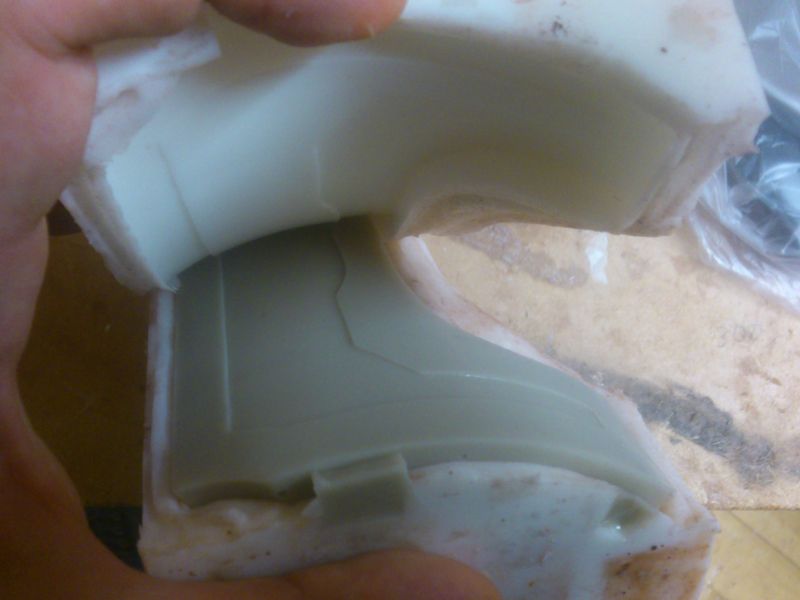
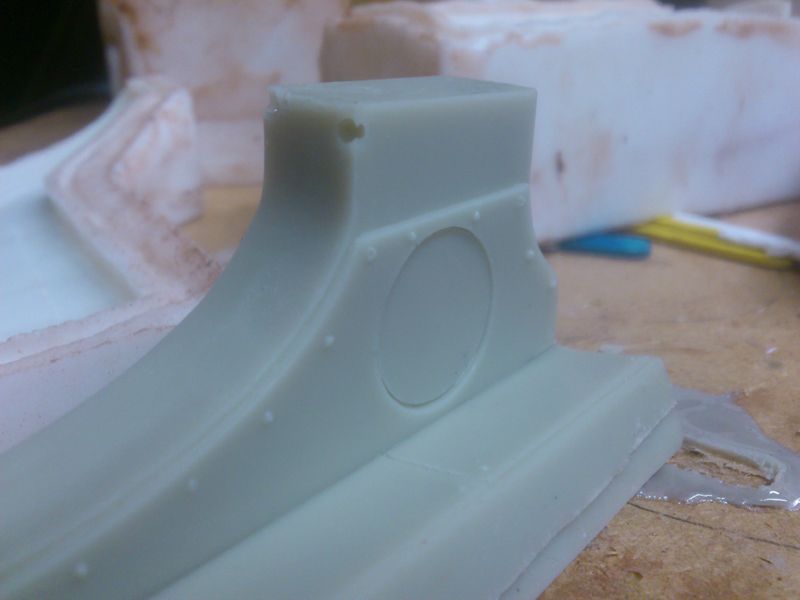
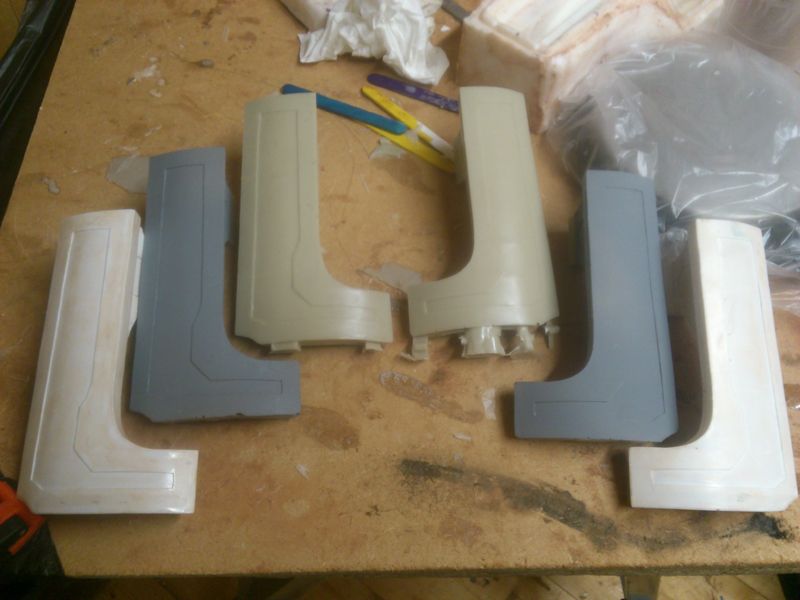
So, I've learnt a lot about mold making and casting in the past few weeks. Much of which has been trial and error. One example of which is the resin which I had been using. Not having much money, when I bought my first resin I failed to realise that it was a dense filler resin, and as such is much more viscous than I needed. I ordered a few kilos of the stuff though so wasted £70... The choice that I should have gone with was either a more expensive resin from the same supplier, or the one that I actually use now, which is a much cheaper resin from maragon art supplies. Aside from dropping the cost, the material has a much lower density, meaning I also get more volume for the already better value cost per mass. I found out when testing that the filler resin was 50% heavier than the resin I now use. This changed the predicted weight of the legs from more than 7 -8 kilos down to 'just' 5-6. I'll be able to test this when I finish casting the next leg. The one in the pictures from the apocalypse battle is an amalgamation of everything I had up to then cast, in both resins.
Another area that I've learnt in is the mold making. I tried various methods to create two part molds and only after some trial and error, and reading on the resin addict forum, that two part mold arent really necessary. I also want to stop using clay, before now the clay fills the lower half whilst the upper part is poured, and then the clay is removed and the lower half filled. I'm going to experiment using alginate, the same stuff that a teeth mold is made in, to pour a cheap lower half, before making the other half. This will stop me from getting 'dirty' mold and save time on cleaning clay from molds, that really clings on. When I make a new toe mold I'll update again, in a few days time.
37404
Post by: Jordan
Subscribin'
59114
Post by: timthehierodule
Please, Please, Please could you give me a link to the online store where you got the casting stuff, cheers.
32724
Post by: fiorehellheart
http://www.maragon.co.uk/arts-and-crafts.html#Init, There you go. Forgot to put it in. Really cheap materialls. Whilst I think that there is a drop in quality as a result, the silicone isn't as good as I'd like, if you don't have much money it's a life saver.
If I ever get to selling copies of this, provided people actually want them, then I plan to remake the molds in better quality material and cast with more expensive resin. For a cheap starter though the maragon stuff is great.
69758
Post by: wazrokk
Great work. one idea i have if you do start to try to sell them though is to make the arms and shoulder weapons interchangable (maybe magnitized or a snap on peice) also if you do start selling them make sure ot let us know lol i know more then a few people who would e intrested in buying them.
59114
Post by: timthehierodule
Thank you very much!
32724
Post by: fiorehellheart
Thanks, wazrokk, my next post should show how I'll make it modular.
I'm currently waiting for the delivery of more new plasticard, and haven't been up to much model work. I'm getting around to showing my intended arm attachment though and how I intend to keep it solid and strong, and hopefully, kind of lightweight.
Firstly just a picture of how I intend the final part to appear. The armour plates are red/gold, but all of the other parts are coloured individually. Each different colour is a seperate cast piece.
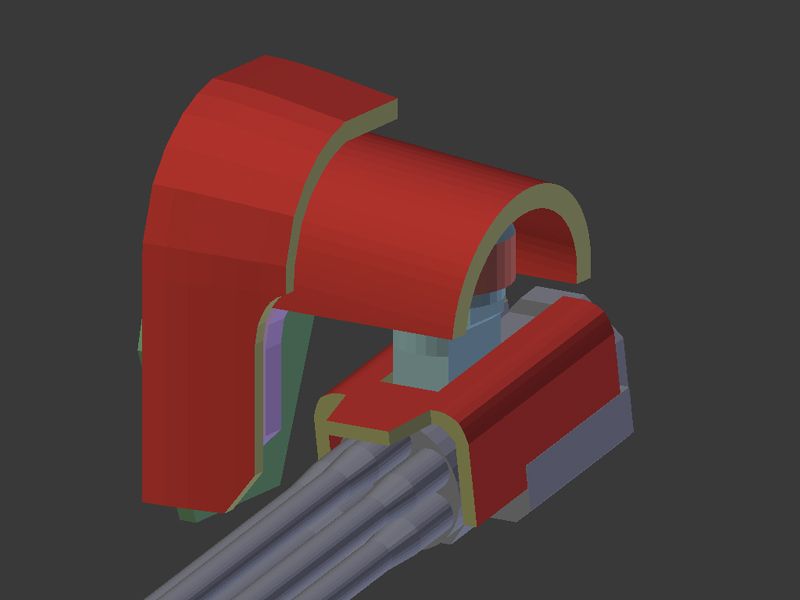
Without the armour you can see the final appearance of the shoulders. I wanted the double arch pieces in purple since I've seen the reaver. But they are much bigger in proportion. The paler red piece is the main part of the arm. To have modular guns I intend for the carapace on the gun, red/gold, to slide off from the body, in grey. This will reveal a recessed area on each side and a hole, through which a screw and bolt can be used to secure the hinge. If done right it should be a close enough tolerance and flexible enough wall to apply enough pressure with the bolt to secure it in position with friction. The carapace would probably be secured with magnets to the body itself
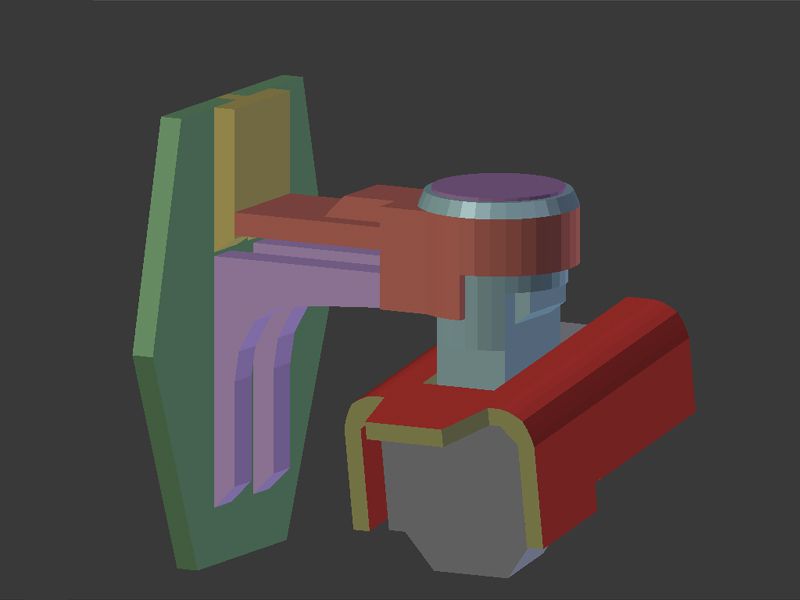
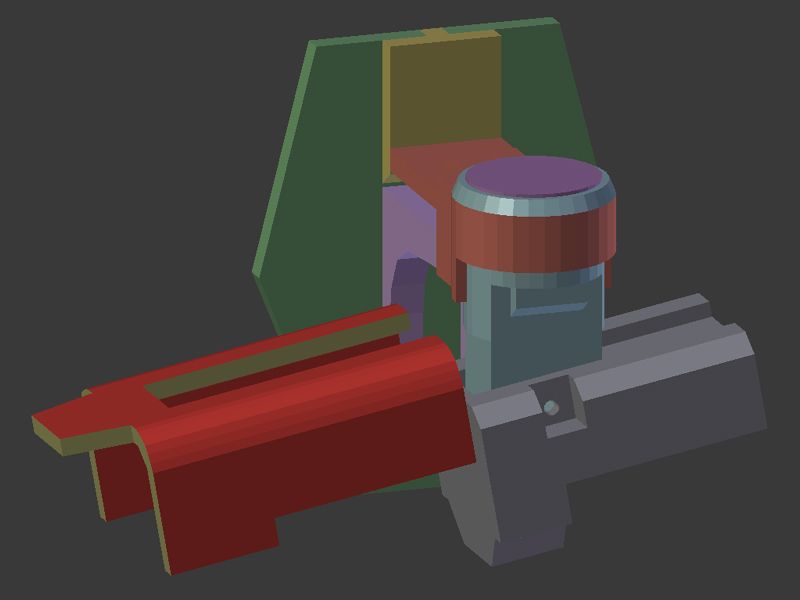
The male part of the hinge, in blue, slots into the grey part and will also be cast with a hole for the 'axle' to go through. It is designed to all fit the internal radius of the 'tube' section of the red piece. So that it can be slid in and left unglued, allowing rotation. To add more strength I may need more of a lip at the top than shown. The part is quite large in volume, so to reduce weight I plan to make it hollow, as shown, using a cap to finish it off.
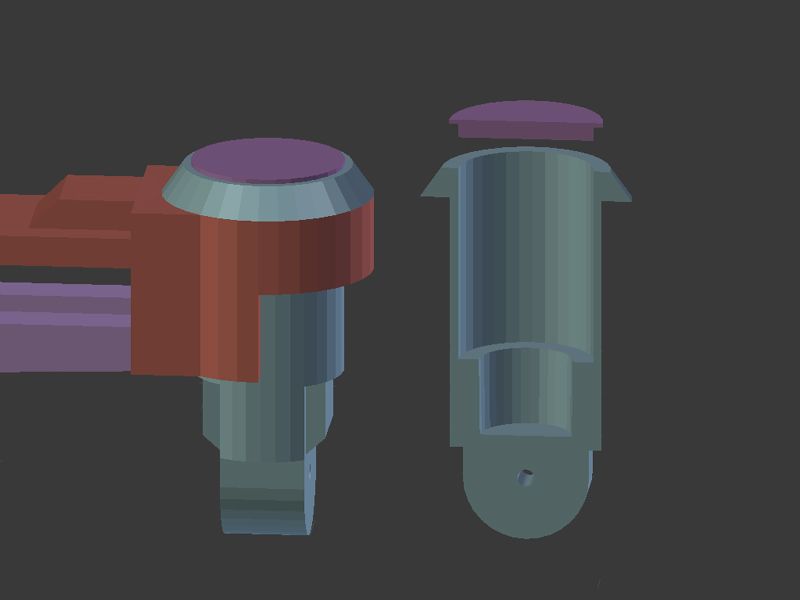
The red, yellow, and purple parts attach to the green body side in a specific order, to make sure that the part is strong enough. Unless I'm mistaken, from my design of the two lower arches, purple, and the top flat part, red, the force of weight will compress the two purple parts into the body, and tension the red part. I wanted to avoid a flat surface contact between the red and green as the only way to pin it would be perpendicular to the green plate. As pinning wouldnt really help that way, I thought that the red part should key into the body with a T piece on the inside. This can then be pinned parallel to the green plate into a part of that jutting inside too. Both parts are then forced into the green panel, the red is pushing out from the T, and the purple pushing in. If it's not clear the next pictures show the step by step process of assembling the shoulder.
Firstly the red part slides down a groove, with the end of the T fitting over then under the jutting parts. Once this is in place it can be pinned vertically.
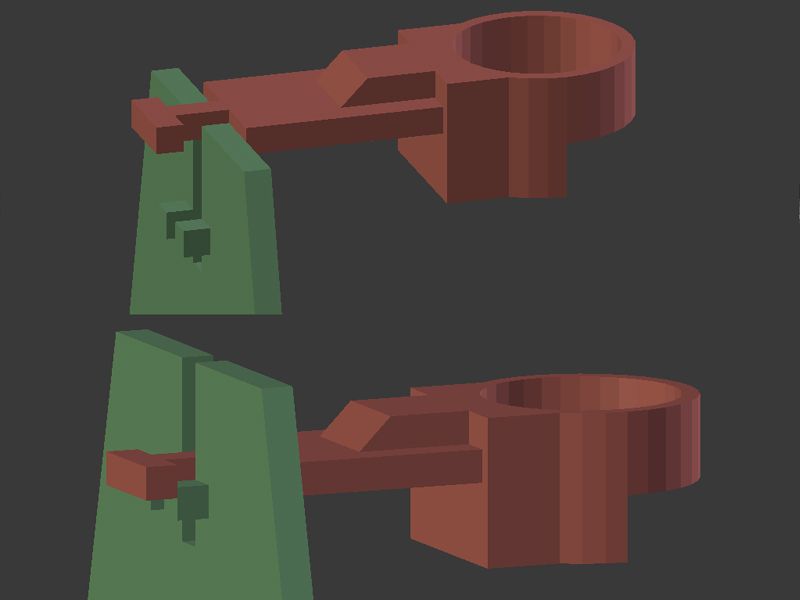
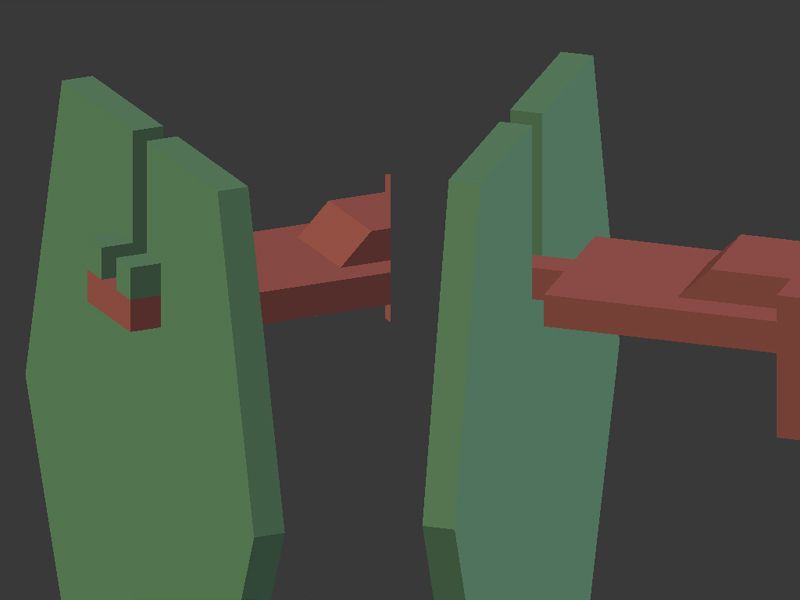
A gap is left on what is the outside of the face and the vertical groove is still open. The yellow part then slides down into the gap, securing the three parts together The yellow piece will also be used to position the shoulder armour plates central.
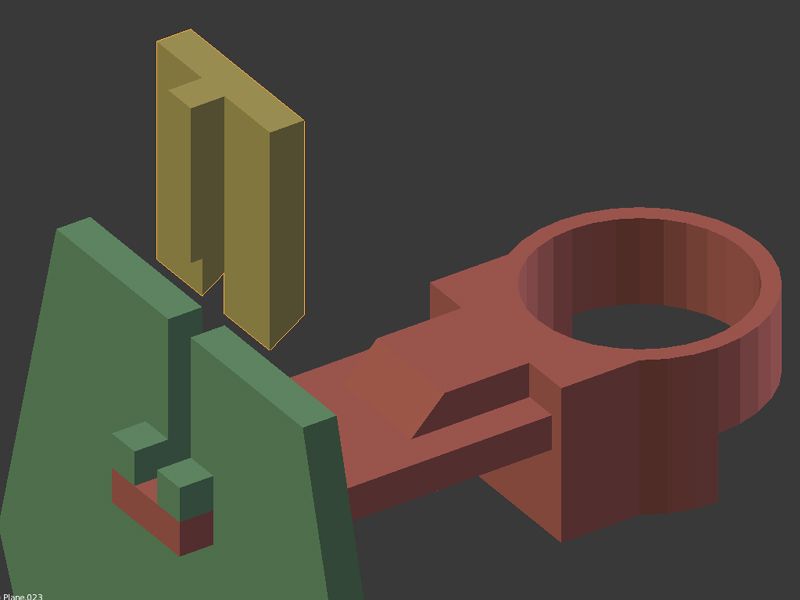

To give extra strength to the purple parts, I also plan to make some sockets for the pieces to align into.
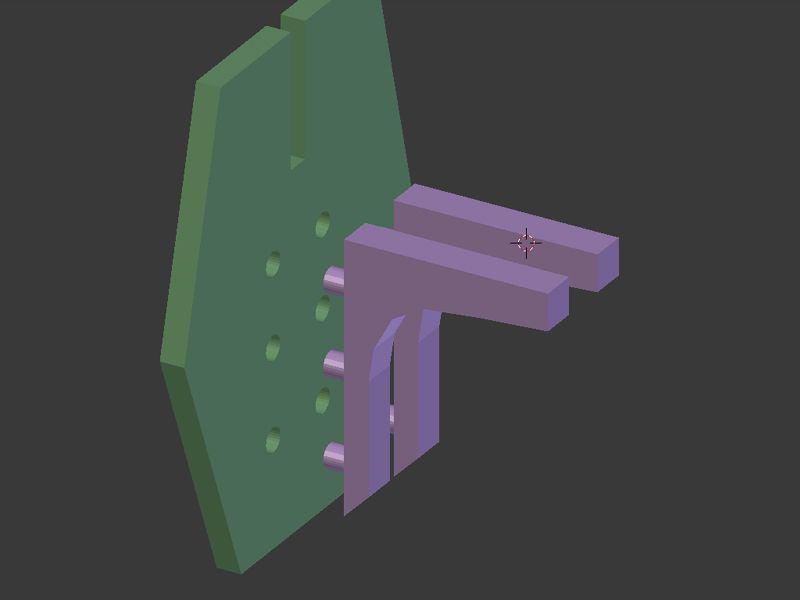
Thinking through those plans whilst writing this has given me a few clearer ideas. I think I'm going to simplify the way that it assembles, moving the pinnable part of the green body beneath the red part, hence removing the gap. I also plan to make it symmetrical for both sides of the body, so that I can just do the one master part. Next update should come when I begin to build, although I may tease some slight painting on the model that I tried out. I want to tie it into my warhounds and am testing colours currently.
28327
Post by: mullet_steve
Photo's not working... this makes me a sad panda!
32724
Post by: fiorehellheart
Photo's have been fixed, I think i'll transfer some of the photos over to the dakka dakka gallery soon so that I don't have to worry about bandwidth, does anybody know if it's okay for me to use the images from dakka in my thread on warseer?
29895
Post by: Mangozac
Dammit my thread subscription has failed me and I missed these updates :(
It's looking great man! Your casting is really impressive (it must be a nice, low viscosity resin you found to have such a small number of bubbles) and I'm glad you found the RA forums to be helpful.
LOVE the weapon mount design! Seriously a mechanical engineering career is calling!
32724
Post by: fiorehellheart
Thanks Mangazoc, It's the stuff from maragon arts, their fastcast resin. It's nice although I don't know the viscosity of it precisely. I intend to try the smooth on stuff eventually but if that's even nice than this I'll be pleased. Yea, I really need to improve on my keys between mold halves, or skill at cutting them apart. I have the curved scalpel blades, but haven't yet managed to make really really good keying. The mount design is probably going to be massively simplified. I've thought about it more and It'll probably just be a single part slotting in rather than a locking mechanism. I think I will try to make it removable so the body can be transported more easily though.
As usual I've been neglecting my forum absence for a short while. Nothing much has really been going on in terms of progress, although I am still trying to figure out how much it would cost me to send the substandard parts of my titan casts out for terrain. I have started a bit of work on the toes once again. I've been through several versions, and after a fair few modifications the previous master that I had used was fairly battered, and I though that I could do it better again.
I'm making the part hollow this time, to reduce on weight, and have started using pieces of 3mm square tube to give an even part width of about 5mm all round the model. Practicing and finding this quite an easy and surprisingly strong part, I'd really like to go back and re-do all of the previous parts to a 5mm thickness. I'm confident that the resin is strong enough at that thickness although I am able to add extra bracing if necessary. I'd like to get the body completed first though.
Another reason that I'm rebuilding the toe is that I don't have the mold for it anymore and needed to make a new one. It was something I didn't rush to do in time for the apocalypse game as I had 6 toes cast up. This is the progress that I made last night.
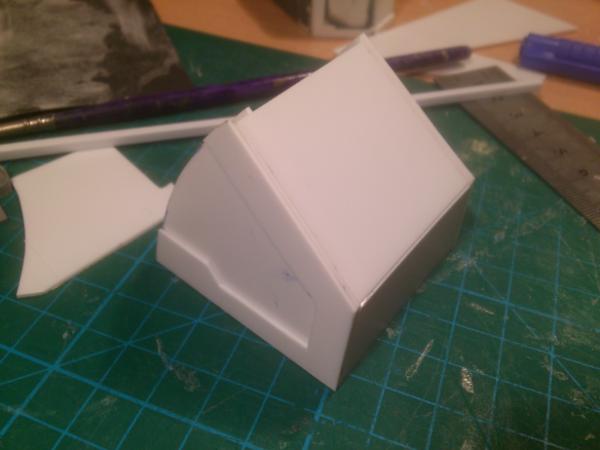
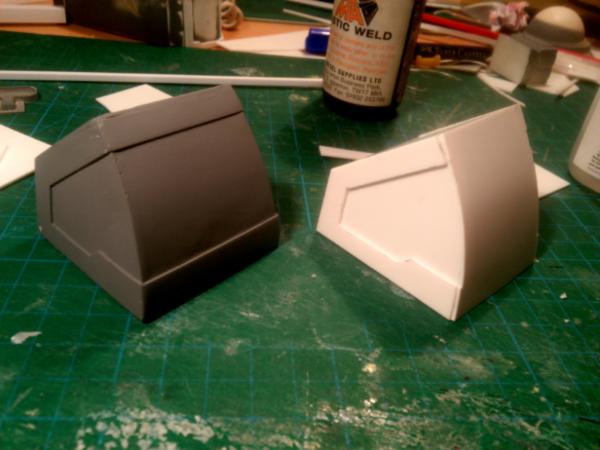
The progress before I remembered to take some pictures, just making the basic outlined shape so far. The method of construction is to build the shell then add an internal thickness to it from the outside in. That way any later mistakes won't affect the visible parts.
The comparison of old and new came out weird, they are the same size from the side, only the new one is a little less wide. I think perspective just came out funny here.
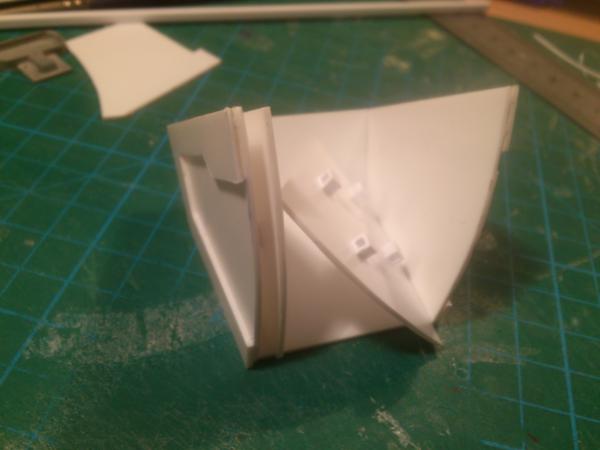
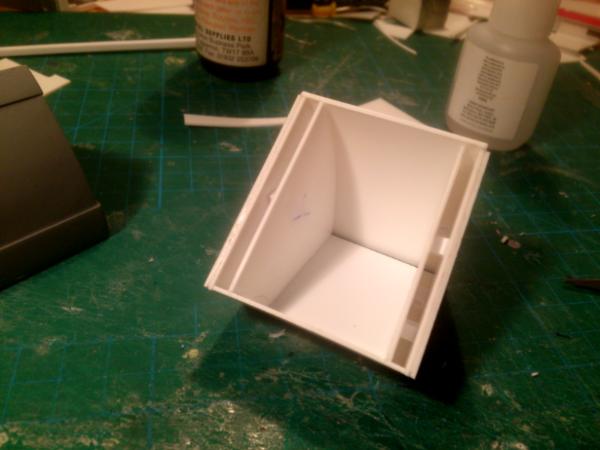
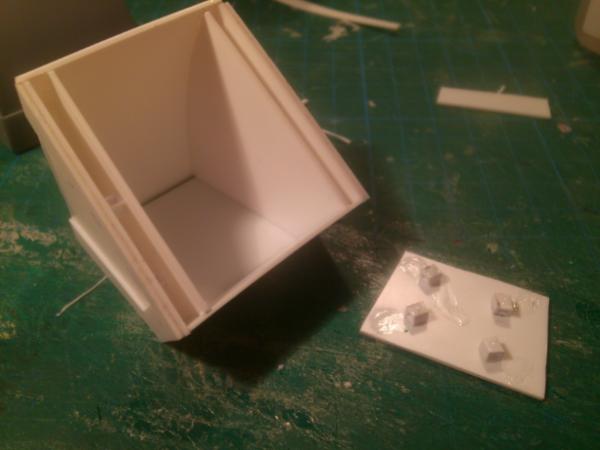
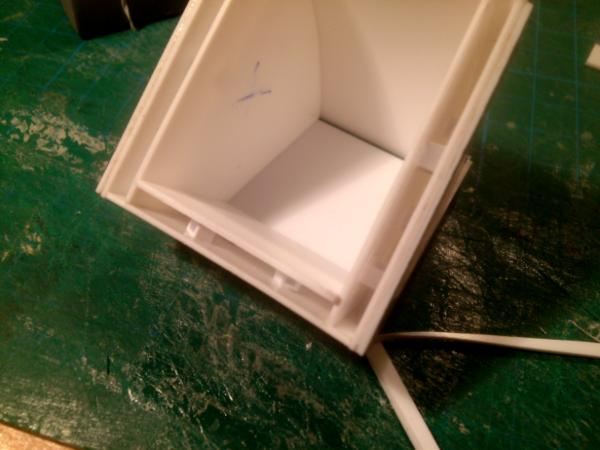
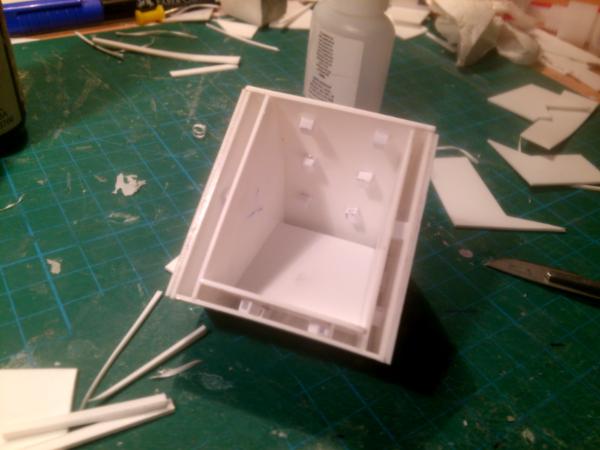


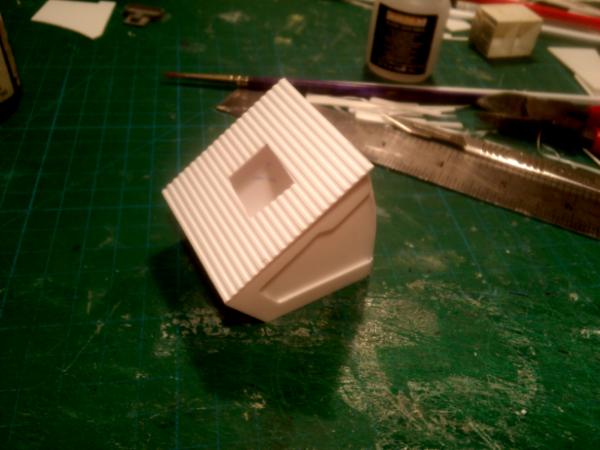
The process of adding the inside parts is fairly easy, although I did have to add a small bit of plasticard strip to seal up a gap. I also forgot to photograph the side that is rested on the bottom, but it was done so that the whole part has a uniform wall.
Other than that, It went together well. For the bottom I decided to have a grip so that it can be seen from the side of the model. I cut a hole and then glued it on, before removing the inside of the sheet further.
If there's any questions, ask or pm
-Rory
29895
Post by: Mangozac
Nice to see more updates, Rory!
Making hollow pieces is definitely the way to go - both with regards to cost and weight. I reckon the wall thickness should be good
46192
Post by: mxwllmdr
Dude,, you still working on this? I assume you are back at Uni.....
18611
Post by: furijozo
Rory... OMG....
what you have done my friend ....
the whole community is fuzzy in anticipation your Project ...
I'm incredibly surprised that you actively build a Titan.
I'll send you a p.m.
32724
Post by: fiorehellheart
Well, It's been a year. I thought it might be time to have an update/explain why this projects gone for so long without any news. I am currently at Uni, in my 3rd of 4 years. Because of living in student accommodation the project is on hold as a physical model, largely due to lack of time, and space to do work on it. Also because It's difficult to transport in and out of accomodation at the end of term. I also didn't get much done over summer last year either because of being busy doing travelling around europe for a month and working.
However the project isnt entirely dead. I'm still attempting to work on this every now and then, and think about it plenty. There's always more stuff that I can improve on the design of this thing, and parts that I still haven't even come close to finishing. In particular the shoulder mounted weapons were never even started.
So, Instead of making the model in plastic, which as I said I don't have the room to work on, I've been making a mock up out of paper. I have an old mock up that I made prior to this project log, such a long time ago, and I loved that, so I am currently trying to make a complete set of templates for the warlord titan. I'll post some of what I have built so far.
I'm also considering a really simple set of templates, the warhammer scale one I'm making is fairly complex, which I might be up for releasing so that others can build my warlord too. I've done this in the past, but those templates were really badly made, and the titans they build were less nice designs than my current one.
This is the current progress (Also, this must be the twentieth time I've built the foot of this thing...)
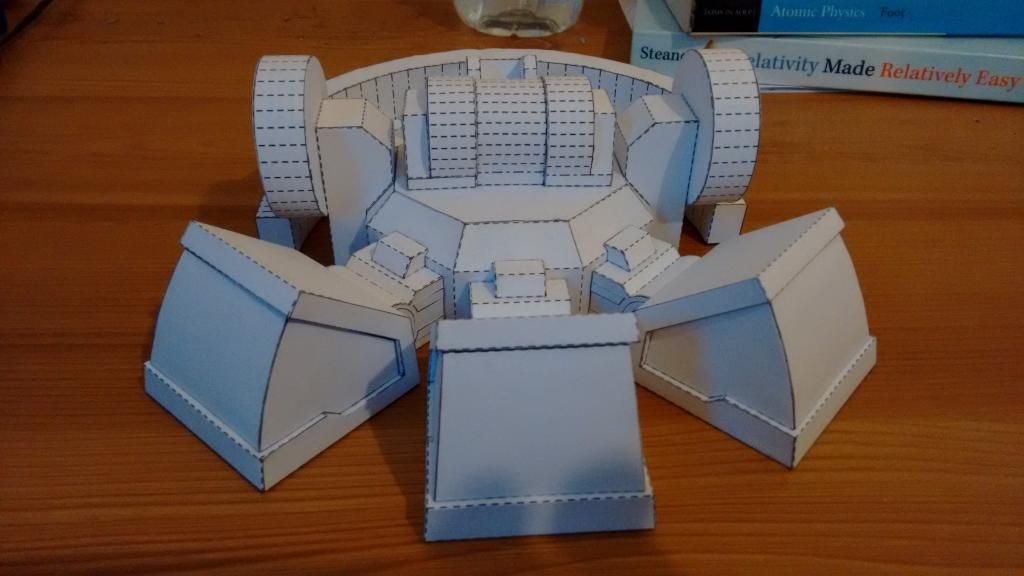
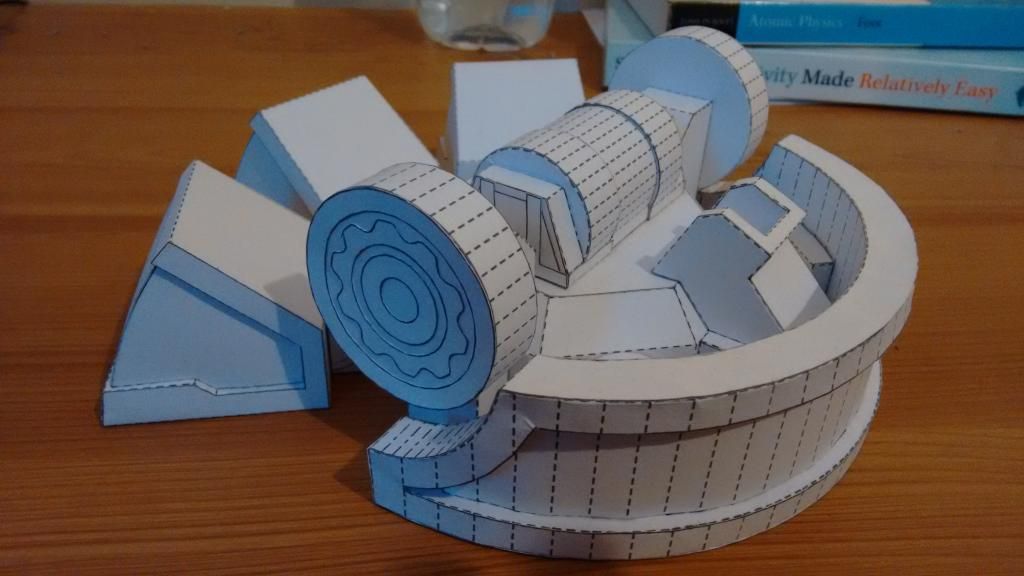


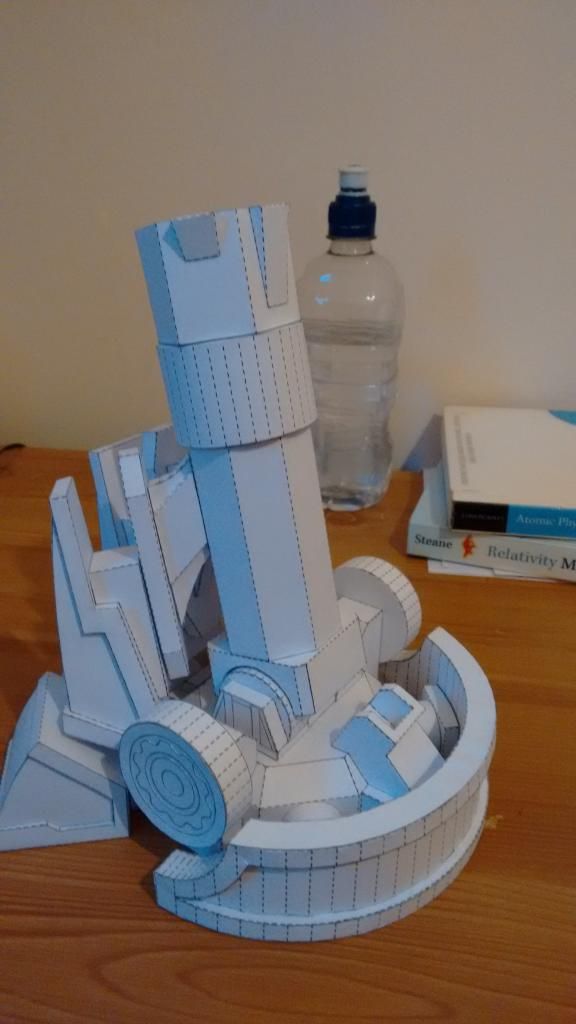
And the next parts are for the calf armour, which is just printing off now, and shows what the templates look like.
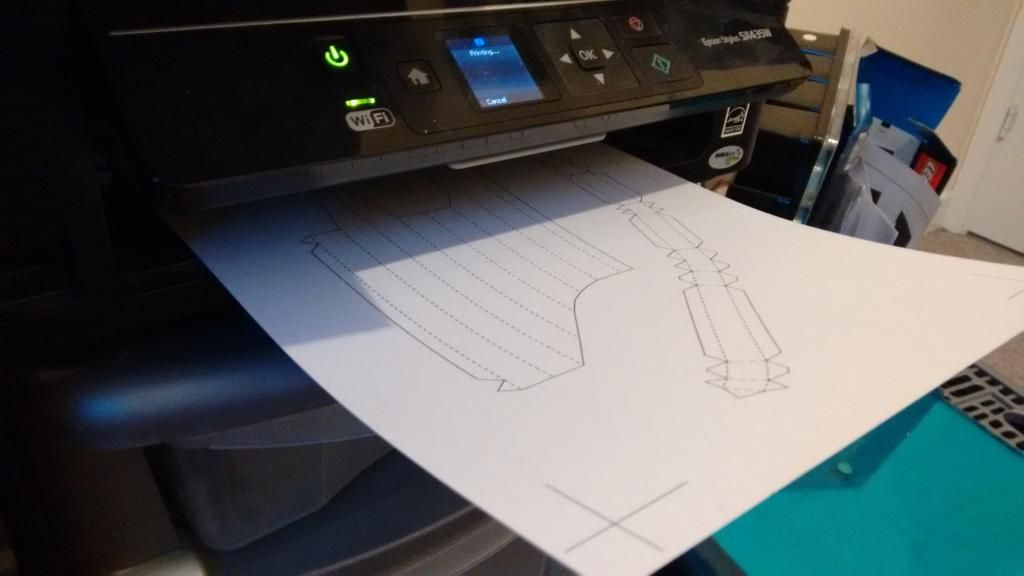
9394
Post by: Malika2
Holy crap...that's probably the coolest paper project I've ever seen!
32724
Post by: fiorehellheart
53821
Post by: AnUnearthlyChilde
Loving this so much. Seems pepakura was meant to be for this build. Will you be hardening it all with resin and bondo?
32724
Post by: fiorehellheart
Thanks. It won't be hardened, It's just an elaborate mock up really. I enjoy making things out of paper, and making things in general. I wanted something to do before I start term, it's also great distraction from revision, and this felt like something I could do so that I'm able to work on the my titan, without actually having to built the complicated plastic model. I just don't have the space/time/money at the moment to make anything that's going to be cast up for the titan.
So, I finished building the paper parts of the armour. Attaching them went fairly well, although I realized that in remaking the parts to make the paper version, I actually increased the radius of the leg armour. it was only by a small amount, a couple of millimetres, but just enough that it's actually meant that the armour clips on the back a little. The model still looks good, but the back 2 parts of the calf armour are slightly bent inwards as a result. I'll fix that when I build the second of the legs later on.


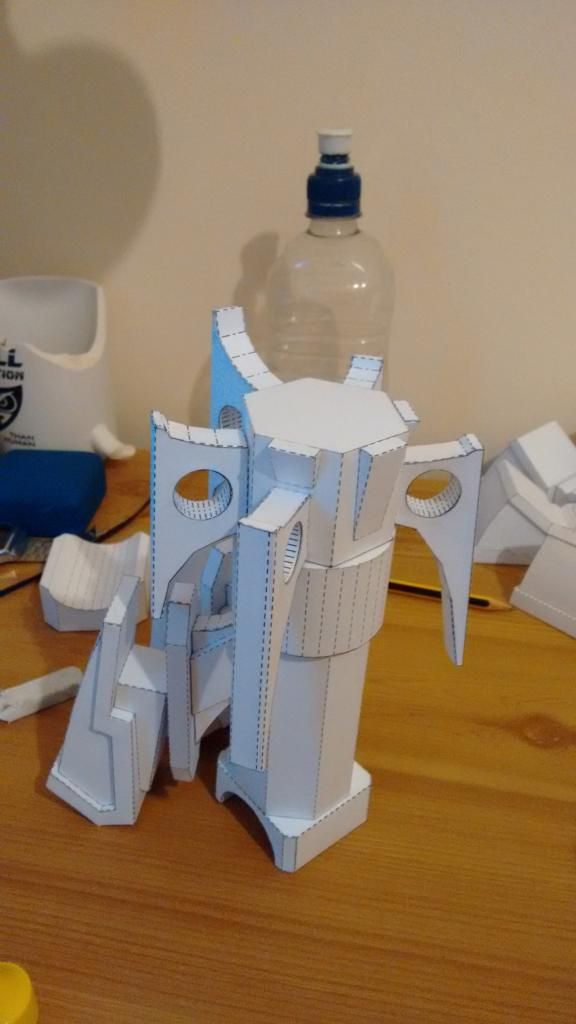
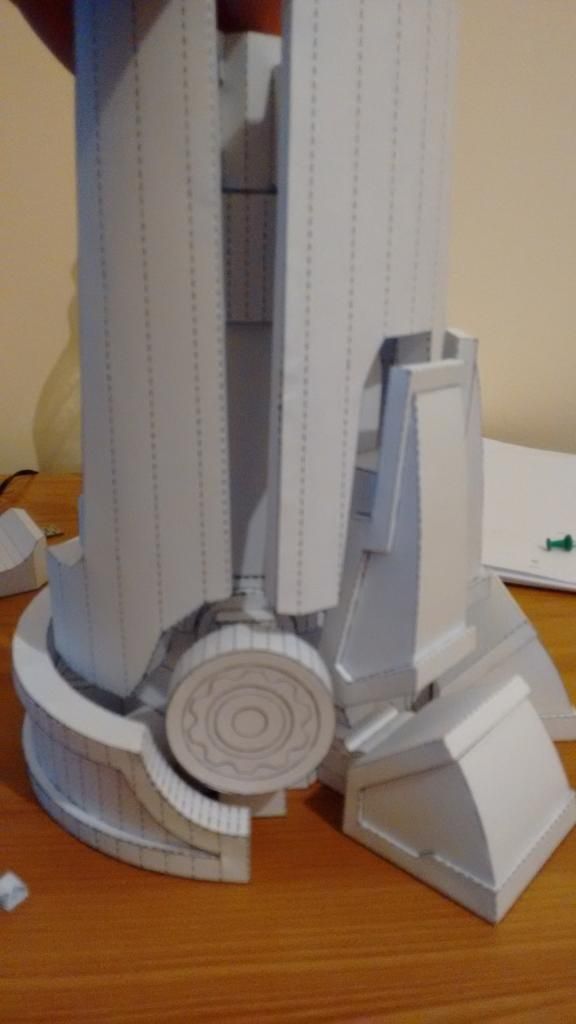
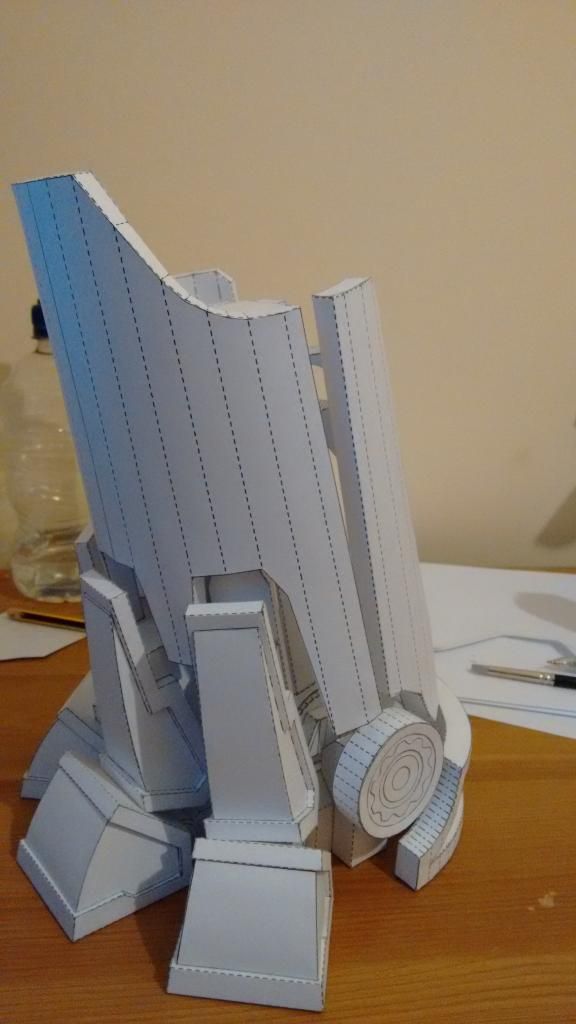
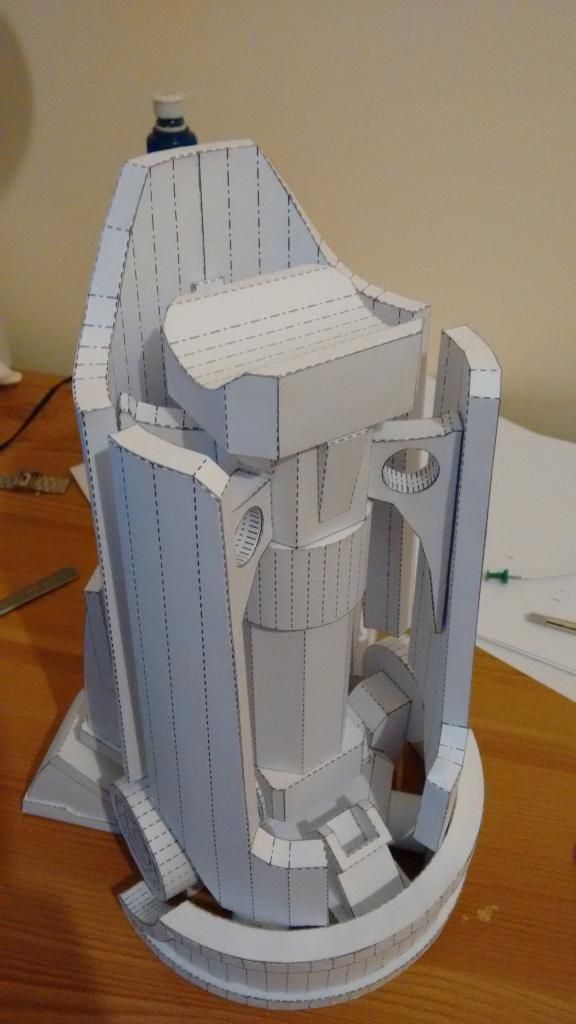
Next I have to fix up the file for the leg armoured parts, and also do the files for the piston on the back. That will finish off the foot/calf and I will move onwards and upwards, with the thigh pieces.
88099
Post by: e.earnshaw
please please please when you finish can I buy one from you how much do you intend to sell them for.
Also could you do some additional weapon patterns.
Automatically Appended Next Post:
At first I didn't see it then I spotted the kerbal space program mug virtual high five.
53821
Post by: AnUnearthlyChilde
Wow. Just wow. Wish I had skills like that...
Btw, does the ankle have left and right rotation as well as the front to back it already has? Also does it have the ability to swivel? I ask as a logical question due to how ankles really work.
32724
Post by: fiorehellheart
Haha, thanks e.earnshaw, that mugs a recent christmas present, and I love it. Well timed too, as the other mug which is visible in a couple of these photos was broken just after I got it. That ones a reference to the bladerunner fictional tyrell corporation.
Currently doubt I'll get around to selling a physical model, simply don't have the time for it over the foreseeable future. If I complete this thing, ever, it won't be for a while. The paper templates though I am thinking about giving away/selling, depends if I want to put the work in to make them more of a product.
@AnUnearthlyChilde, This model doesn't, it's simply a cylinder on the base of the foot, and corresponding half pipe on the top part of the leg. I did that because spheres are difficult for paper, and also difficult to make strong. The cylinder is really easy to reinforce.
On my titan model that I built earlier in the thread, it had an actual ball joint for the ankle, and also one at the hip, (made from ping pong balls) which is what I would like to do, but did this because it's easier.
53821
Post by: AnUnearthlyChilde
fiorehellheart wrote:@AnUnearthlyChilde, This model doesn't, it's simply a cylinder on the base of the foot, and corresponding half pipe on the top part of the leg. I did that because spheres are difficult for paper, and also difficult to make strong. The cylinder is really easy to reinforce.
On my titan model that I built earlier in the thread, it had an actual ball joint for the ankle, and also one at the hip, (made from ping pong balls) which is what I would like to do, but did this because it's easier.
Fair enough, though't I'd ask lol. So would that mean when it comes to the final piece that you'll do a combination of the two?
Sorry for all the questions, I'm just curious as I've been away from dakka for about two years lol.
32724
Post by: fiorehellheart
 AnUnearthlyChilde wrote: AnUnearthlyChilde wrote:Fair enough, though't I'd ask lol. So would that mean when it comes to the final piece that you'll do a combination of the two?
Sorry for all the questions, I'm just curious as I've been away from dakka for about two years lol.
Don't worry about it, questions are good. I expect to use just the ball joints on the final resin model, again, assuming I ever get that far. I'm also not the most frequent forum browser either, hence this year+ gap, but oh well.
53821
Post by: AnUnearthlyChilde
fiorehellheart wrote: AnUnearthlyChilde wrote:Fair enough, though't I'd ask lol. So would that mean when it comes to the final piece that you'll do a combination of the two?
Sorry for all the questions, I'm just curious as I've been away from dakka for about two years lol.
Don't worry about it, questions are good. I expect to use just the ball joints on the final resin model, again, assuming I ever get that far. I'm also not the most frequent forum browser either, hence this year+ gap, but oh well.
As I say, ive been out of it two years now where forums are concerned. litterally only been back days.
But glad you've returned as from before I remember how awesome this was looking, so I urge you to see this through!
32724
Post by: fiorehellheart
So, I've been busy the past couple of days with some exams, which hopefully went okay and are finished now. I did the pepakura work for the thigh parts, including the armour, and have just printed them out to build in the next few days. I'll update once that's done.
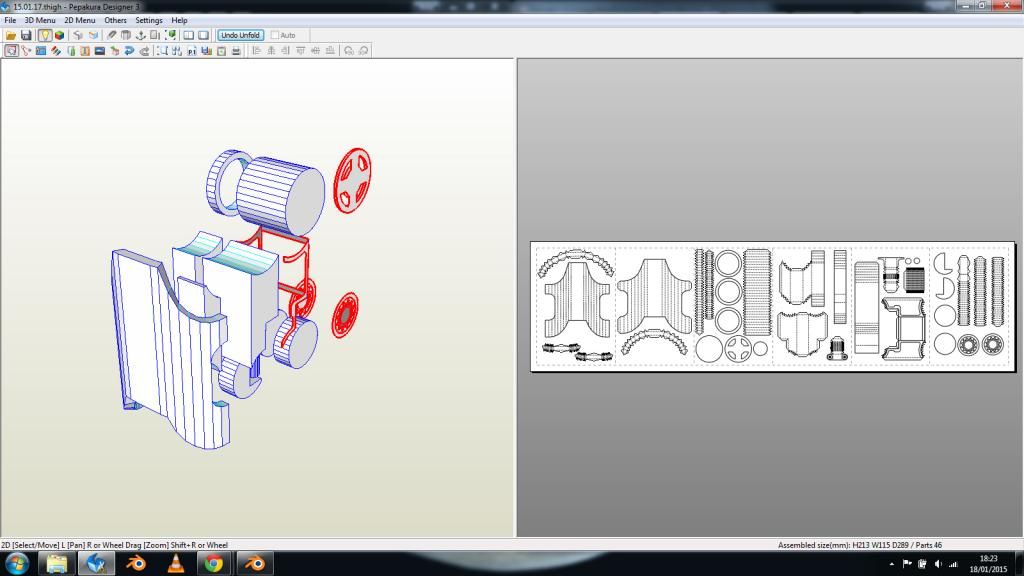
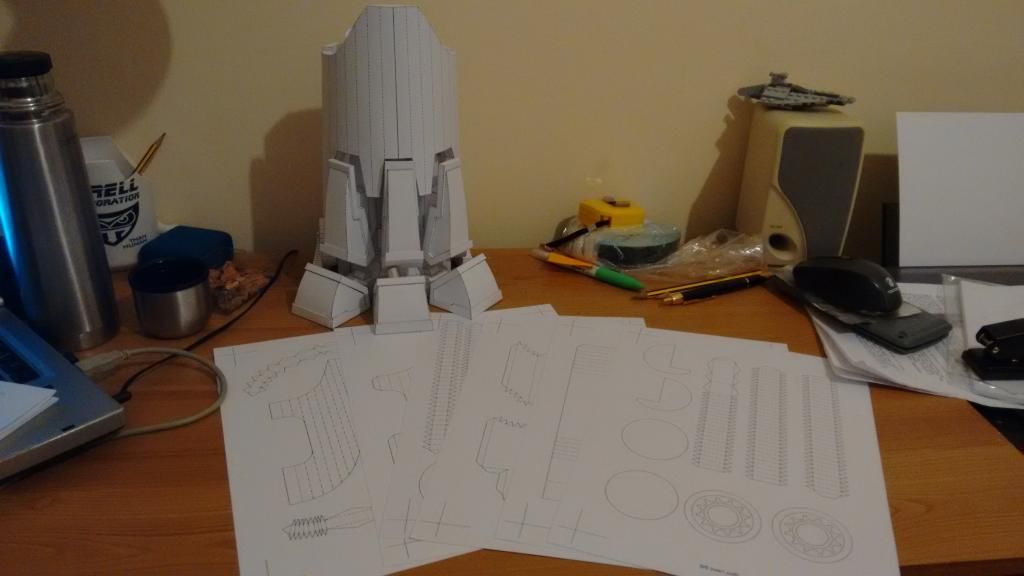
32724
Post by: fiorehellheart
@blackadder.(he asked how I get such precision on my drawings, over on warseer)
I get such decent drawings because I'm effectively using CAD. I've always liked being able to use a 3d model to get an idea of proportion, because that's one of the biggest contributors to a bad looking titan. From the 3d model though I started to make templates using a program called pepakura. it just unfolds a 3d shape into it's constituent faces, and has tools to move those around and change the layouts, and appearance. Initially I did that with 3d models that weren't really suited to it, and since have optimized how the 3d model is constructed.
For example, on the part in this post, I have a seperate piece for the middle of the thigh, and one for each of the two cylinders at the ends. Originally I would have had it as one part, but this is much less strong in paper, and because paper is about the same as plasticard, doesn't translate well there either. In fact, part of my planning now is still helping contribute to when I eventually build in plastic, because I'm able to use a more geometrically accurate model now. As in, I can create a part in 3d, and know that it will be a certain width, and when built in paper/on the drawings produced, I know I have that dimension preserved. This will help because when I restart in plastic, unlike the first time I built it, I plan to integrate things like plumbing parts for cylinders ect. Then I can make a 3d model which accounts for the precise sizes of those parts that I can't control.
So, I finished up construction of the thigh part. No real problems in building it, and it fits nicely onto the lower half of the leg. Next up is the hips, after which I'll need to build a second leg, but might begin on the body as it's a part I've never properly prototyped, and I always seem to reach the end of a leg and stop before the body is completed.
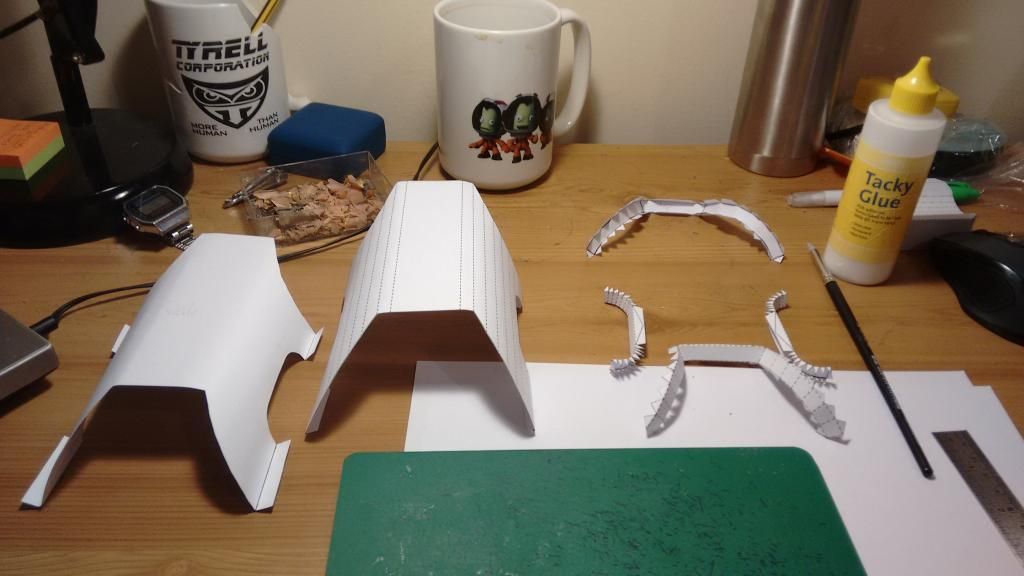
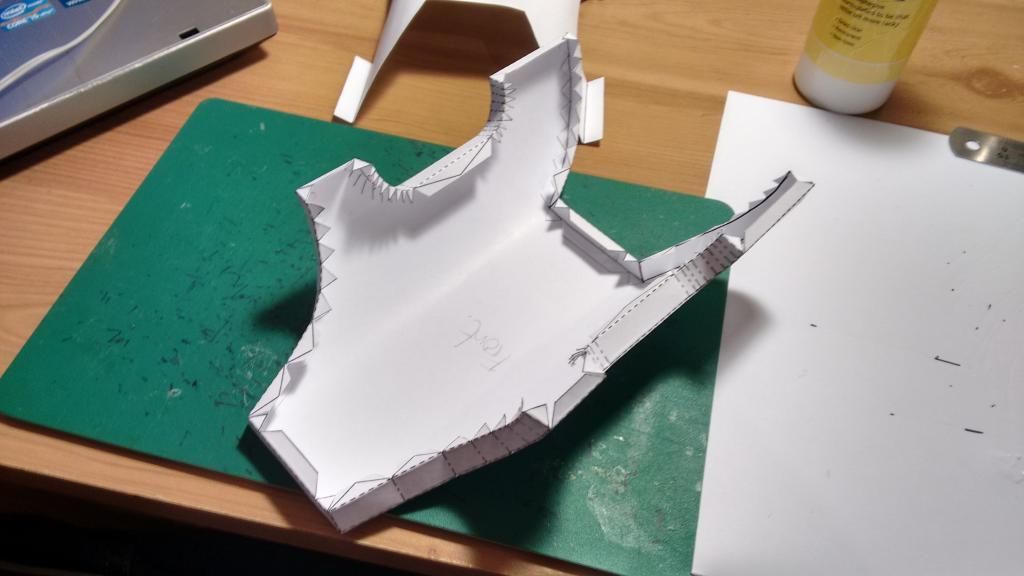
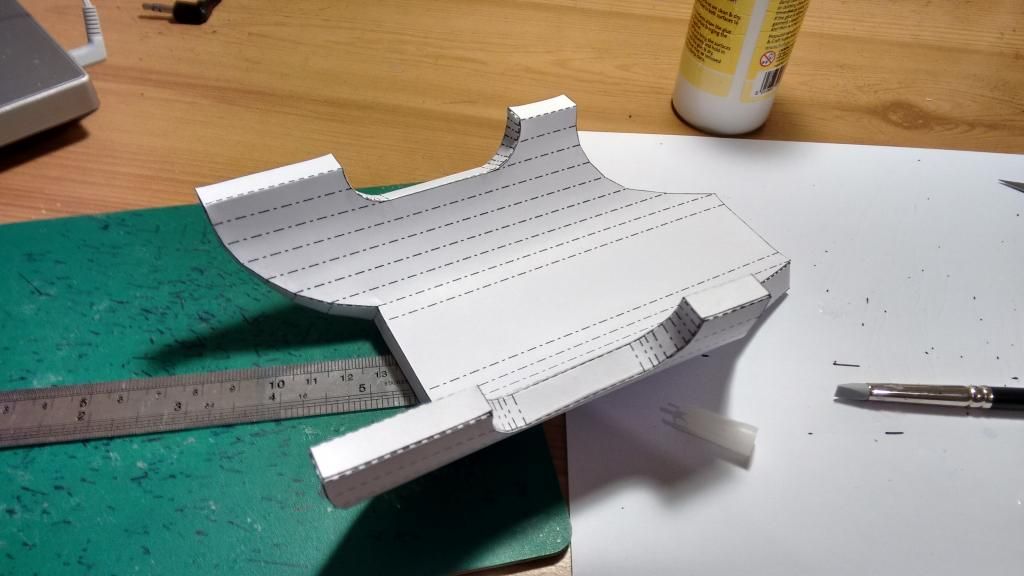
I managed to get distracted here and forgot to take and build photos, but here's the main part done. This is the bit which was built in seperate parts for the cylinders at either ends, to the middle, so that it's strongest. The bit on top, the armour seperator, isnt glued on here, hence wonky.
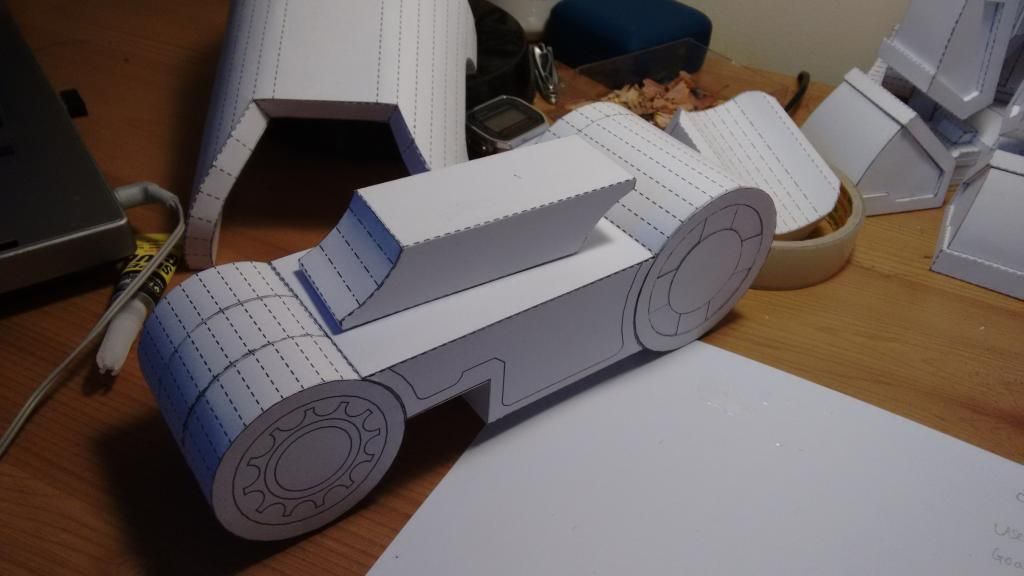
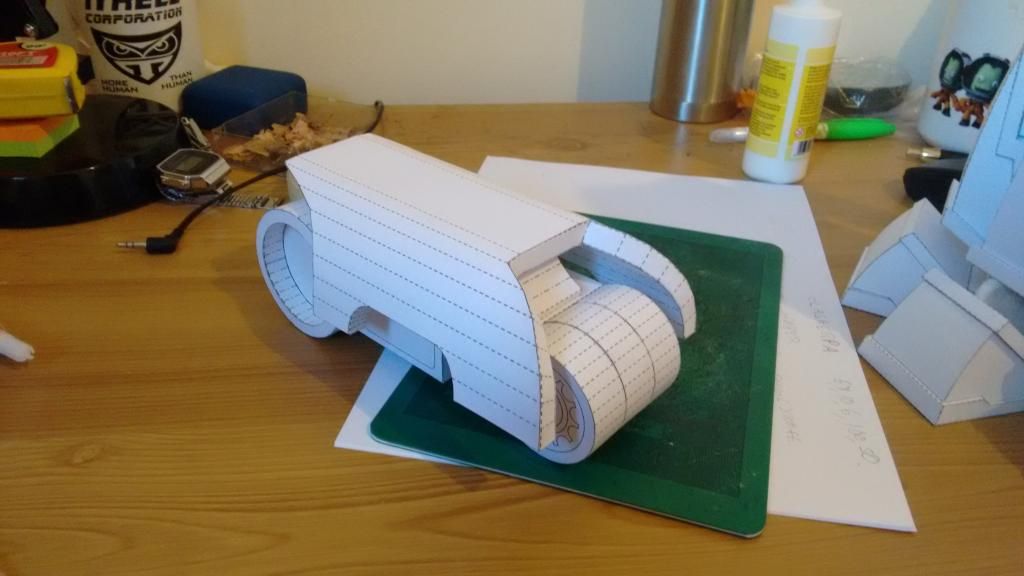
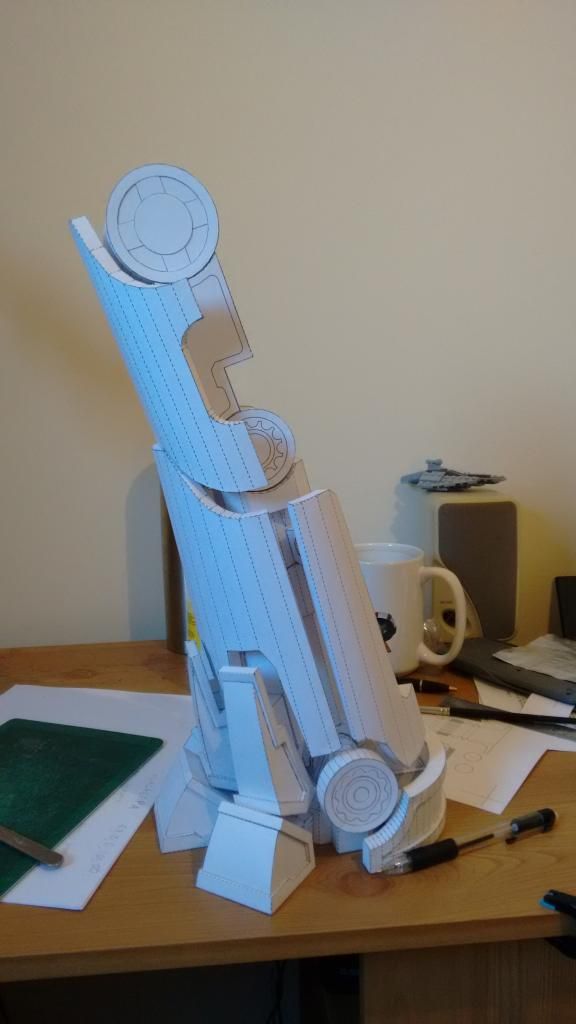

Finally a couple of shots showing the range of available motion, this is part of what I Wanted my titan to be able to do, a lot of warlords seem immovable. I forgot to get a frontwards picture, but will do so for the next update. I might show a bit of how the pepakura process works to make the templates I'm using too.
32724
Post by: fiorehellheart
So, no new updates on the paper model. I've been really busy with uni work, so it's gone slow again. However I wanted to show some of the thoughts I had on something else.
I was prompted into thinking about imperator class titans by a post from blackadder about his thoughts on building one. Which I hope he does because it will be awesome. I started thinking about how to make an imperator titan actually look like it could work, mechanically speaking. On the epic model, and also most 40k scale build, there doesn't seem to be any attempt at giving it an ankle. I guess this is because troops are stationed within the leg, and need to be able to exit, so must be able to leave through doors, down the toes to get to the ground. I suppose that the design could work with some strongly articulated toes, but I wanted to try and figure out some way for a working ankle joint, but still with troop carrying capability. This is a cross section through the armour, of what I came up with
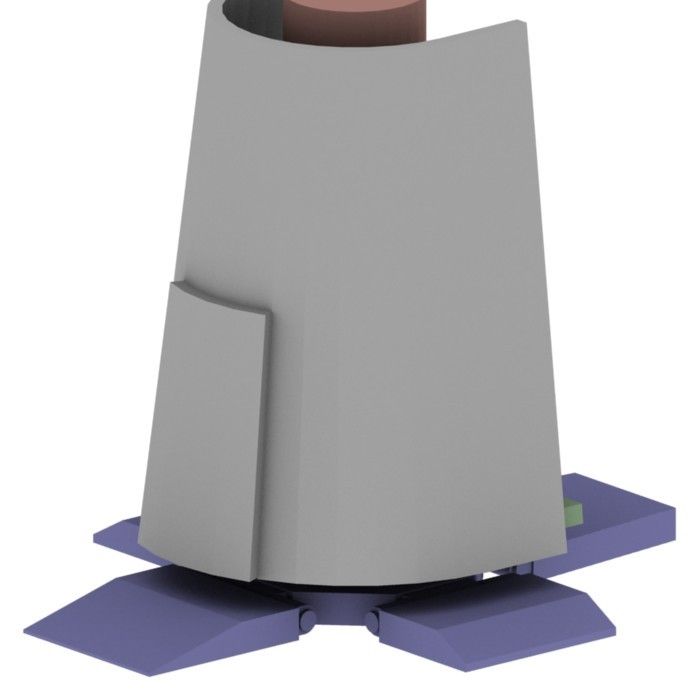 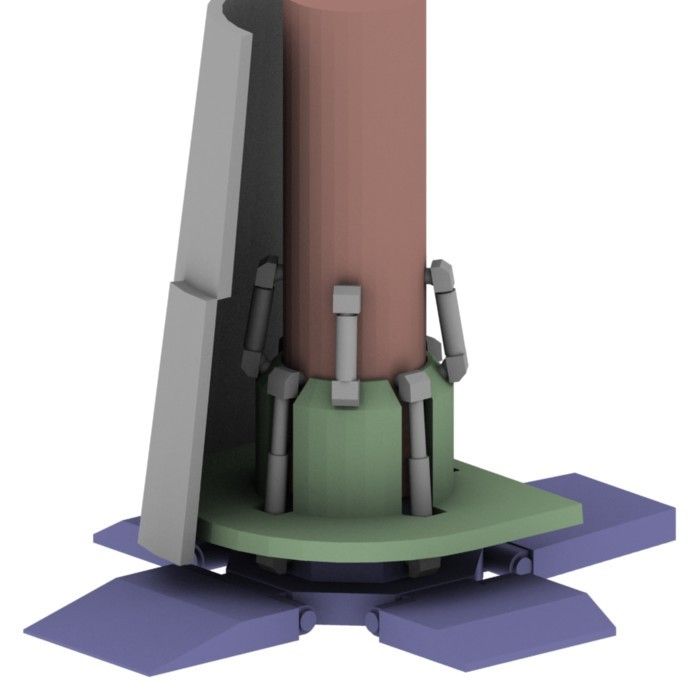
The basics are that it's still roughly imperator leg shaped, although that could be changed by design, and that there is detail on the front, of which is seperate to the main bit of armour. To make it look imperatory it would likely be arched window shaped, but to show here, it's simply a rectangle opening. With the armour cut away you can see the base of the foot (blue) the shin 'bone(red) and the platform that has men on it (green).
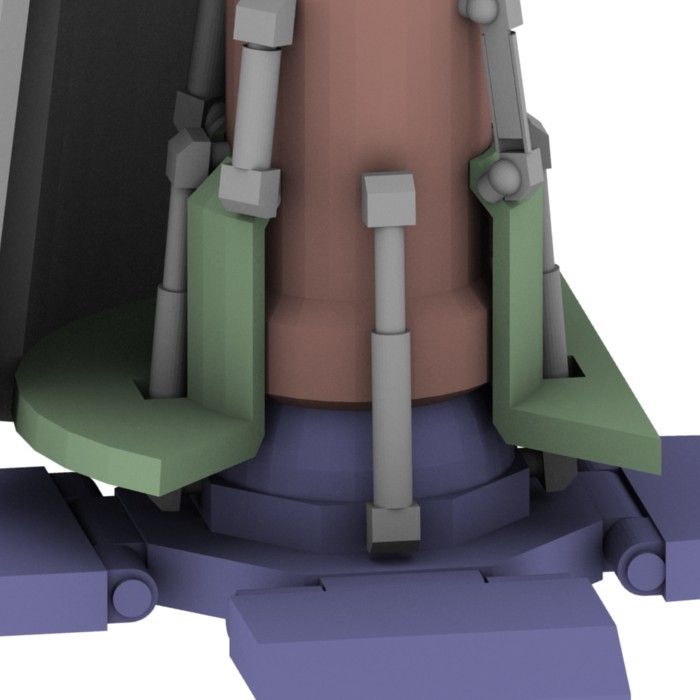
Cutaway even further and zoomed in you can see how it works. The blue is the base of the foot, and includes a hemisphere as the ankle joint. The red is the shin, which fits onto the ankle joint. Connecting those two are 4 pistons, each of which has a ball joint at either end, so that the ankle joint has a full range of motion. The same pistons are use above, one of which is cut in half to see it work. The driving force of the foot is from the 4 longer, lower positioned pistons, which also act to keep the shin connected to the foot, by maintaining that ball joint.
The platform itself is green, and also has 4 pistons which connect it to the shin. Between the shin and the platform would need to be linear bearings for it to run along when raising/lowering, but I didn't find them necessary to model here. It's cut away to show how it fits without impairing the ball joint. It also has recesses for the ankle pistons to fit through. A key point to make is that this platform is separate to the grey armour.
I made an animation to show how it works for getting troops on and off the legs, as it seemed the simplest way to describe fully.
It's also quite fun to see something I thought of move the way I did in my mind.
These are in spoiler tags, so you don't instantly get a laggy page if your browser is struggling with the GIF.
There is also an uncoloured render, where I show the leg moving, then stopping to allow disembarking.
This one shows the pistons on the rocking motion, with the cutaway.
Lastly a leg that rolls to show the x and y pistons moving at the same time. This ones surprisingly hypnotic...
I'll probably get some comments about the area on the platform seeming a bit small for 50-100 troops. Firstly, I think the scale is deceptive, the leg ends up huge, so the platform is still big. Secondly most people picture things like this in terms of troops on bases fitting into it. If anybody remembers the old krieg trench toops, they were lined up way denser than you might expect, in that way, a lot of troops could be squished in. Lastly, and I'll show this in the next update, I think you could fit a 2nd or even 3rd platform above the first. Then you can increase the total capacity. In terms of travelling down the leg, you just need to have some poles to slide down, fireman style. It might sound silly, but I think it would be both fastest and space efficient. It also stops intruders from travelling up easily.
So yea, they're just my thoughts about an imperator titan. I was also going to play around with the tops of the legs too, as the thighs of imperators are somewhere else I see problems.
PS, if anybody knows what the gorgon bay dimensions are, I'd love to know. Then with the actual density of troops I can figure out a theoretical capacity per leg.
53821
Post by: AnUnearthlyChilde
Not one to complain about your work, and the imperator titan work is lovely to see, but where's the warlord gone lol? ;P
32724
Post by: fiorehellheart
Haha, thanks. The lack of any work on the warlord is just a demonstration of my inability to commit to any one project. I like doing the warlord, but sometimes get tired of it. It's nice to have a break and do other things. Aside from the warlord and imperator planning, currently I have a few other things I'm doing. I'm making a 3d settlers of catan set. I'm making some cast metal jewellery for my girlfriend. I also have various other paper based project. I'm trying to make a super detailed viper model from BSG for example. I also have that pesky matter of a physics degree (Meant to be learning general relativity this week)... I know you're only joking but I do a reasonable variety of hobby stuff at any one time.
53821
Post by: AnUnearthlyChilde
Tbh I'm quite similar in that respect, as if I don't have a few projects on the go I tend to lose interest. Complete butterfly brain. Needs constant attention or it wanders off...
Talking of which, I'm about to start my Armies on Parade entry for this years competition, and with my being utterly useless with computers I was wondering if I could ask a favour if you've the time... It's basically making a flat image/images within Illustrator for use on a laser cutter. It's work which is laborious to do by hand tbh and the time it would save would be best used elsewhere in the project really lol.
If you think you may be free enough to help, please just inbox me and we can go from there.
Anyways, I'll be looking forward to seeing more of whatever you get on with soon lol
6825
Post by: The_Blackadder
Since there appears to be a Mar's Warlord titan on the horizon will you be modifying your Warlord to conform to the FW model or perhaps even better; producing a slick Mars Imperitor/Warmonger?
32724
Post by: fiorehellheart
 The_Blackadder wrote: The_Blackadder wrote:Since there appears to be a Mar's Warlord titan on the horizon will you be modifying your Warlord to conform to the FW model or perhaps even better; producing a slick Mars Imperitor/Warmonger?
Well, this project is effectively on hiatus because I have to do a degree and find a job ect. (I hate growing up...) I would like to be able to continue but neither have the time nor workspace to do so at the moment, or really in the foreseeable future, which sucks. Part of me doing the paper stuff was just a low effort continuation of my ideas. I've also been a bit demotivated towards this by the warlord becoming official. I feel less of a drive to create my own vision right now, so it can just simmer for a few more years.
I have however been thinking about other titans. If my warlord can no longer be a mars pattern, which it wasn't really anyway, I want to try and make my own warhound and reaver of my own pattern too. I find it funny that titans are described as unique to each forgeworld, yet everybody that owns one has the same ones because of forgeworld models. Even for scratchbuilt, people build to replicate that, rather than to reinterpret it. This isn't any critique, after all I couldnt possible build as precise as your build on lucie, but just me wanting to have my own titan legion.
It also means that the next unclaimed territory is the imperator/warmongerer, and I have yet to see a modernised rendition on those in the same way that forgeworld does. Their warlord is a great example of how it is recognisably that model, but so much more detailed and well thought out than the epic one. I want that in an imperator rather than just a scaled up epic model with all of those flaws. But it's not something I can do soon for the reasons above. I really think that you should give it a shot though. If anybody could do it properly I think you should be able to.
Also, my silly long analysis of the warlord stuff so far released. I'll probably revisit this next week.
In terms of what we've seen so far that head looks pretty great.
pic:
I expect that it will be hollow detailed although I need to see the scale on the thing. I'm intrigued if they have gone for the tank princeps that should be there, or if they're following the unplugged ones from the other titans. I like the pipes but think that the other detail is a bit over the top. From the warhound to reaver they ramped up the edging, and they've done that again so it doesn't actually match the warhound now. The way that every interior edging corner is circled doesn't look that great to me. I also don't like the extent of premolded detail on the plates like that cross.
pic:
The guns follow much of the barrel design that came before which is great, and with some nice detailing on the undersides. The armour plates again are too detailed though. The lines on the surface and those circle cut corners on the edges just really don't do it for me. I think that the mars warhound had an amazing clean look and after that they've gone crazy with digital modelling and detailed too much, without actually looking at how the thing will go together. I expect to find the model too busy in that regard.
pic:
The foot picture irritates me a bit. The design of the piston layout is like the reaver, where the leg has a piston to the toe, which is hinged to the foot. That never looked very strong to me, and this one is worse given how exposed that ball joint is. I need to see it with everything in place, but I'm not massively convinced. Of note is that there are 4 posts for the shin armour to attach, all round the leg. Which implies to me a much more evenly covered design than the original beetleback front faced legs, or the standard warlord one with front and side. Something else from the video that I saw was that the pistons seems to be recessed in regard to the armour. For example on mine and the reaver the toes extend past the shin plate, whilst this seems the other way around. Again need to see it properly to judge what I think.
For the overall shape from that teaser video,
pic:
the upper legs and midsection I like. Also the way the arms are hinged and armoured. I find the shoulders make it look too much like a knight titan. I think ideally the warlord should have been first. When they came out with the knights one of the first things I saw was the opportunity for a warlord type design, given that this is the case I'm a bit dissapointed. I also dislike how the dislocated knee is similar to the FW castigator knight, which is very similar all over.
The scale from that video is hugely deceptive. The one just off to the right looks like a good candidate for sizing, but best to just wait for next week. I think it will be significantly smaller than mine would be.
Well, that was a huge rant from a small comment. What can I say, I'm excited for next week.
|
|