Another perspective of our battle, courtesy of SabrX himself:
PRE-GAME ANALYSIS:
Tau: (by SabrX)
In objective games, I would typically go second in hopes of contesting or capturing objectives at the last minute. However, jy2's Crowe list packs a lot of firepower. His Str8 Autocannons can easily instant kill my Broadsides or Crisis Suits. However, they weren’t as deadly as his Purifier squads. I’ve read jy2’s previous battle reports and know how devastating Cleansing Flame can be against large infantry squads. I opted to go first, hopping I could disable jy2's transports at the start of turn 2 and force his small purifier squads to slog across the board. After that, I could focus on his Dreadnoughts.
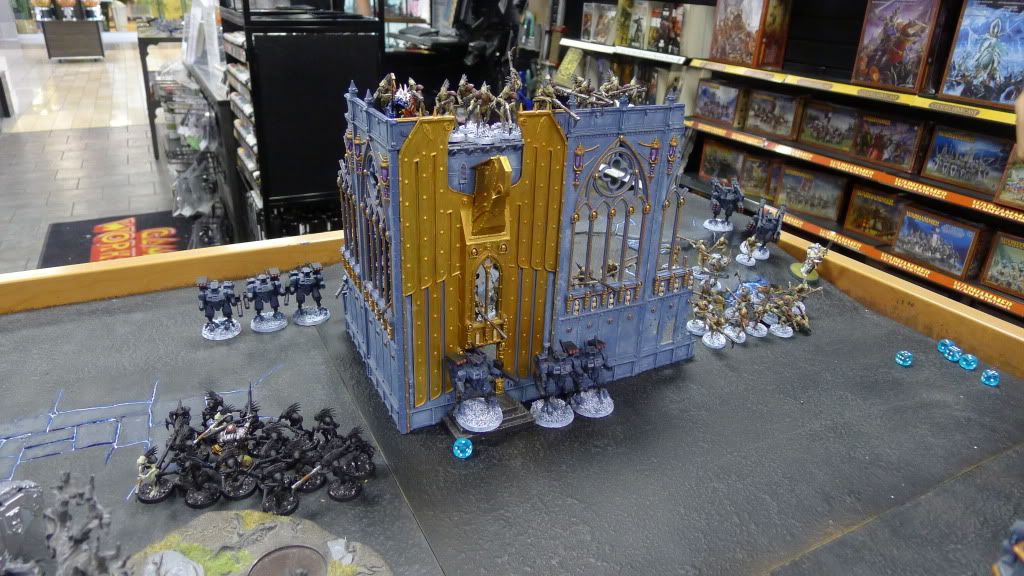
My side of the table had a large “Shrine of the Aquila” terrain piece, which would be perfect for hiding my forces out of
TLOS on turn 1. It would make a good firebase. I left 5 units in reserves. The Fire Warriors weren’t any use until later in the game. I left 2 Kroot squads hoping at least one will come on from the right board edge and head towards the right objective. Both Piranhas would come in and hide behind terrain until turn 4 or turn 5, where they would move flat out and contest back or right objective.
If my strategy worked and the goddess of fortune smiled down upon me, the game should end with my forces securing home objective and the other two objectives either captured or contested.
-------------------------------------------------------------------
Mission: Seize Ground - 3 objectives
Deployment: Dawn of War
Initiative: Tau
-------------------------------------------------------------------
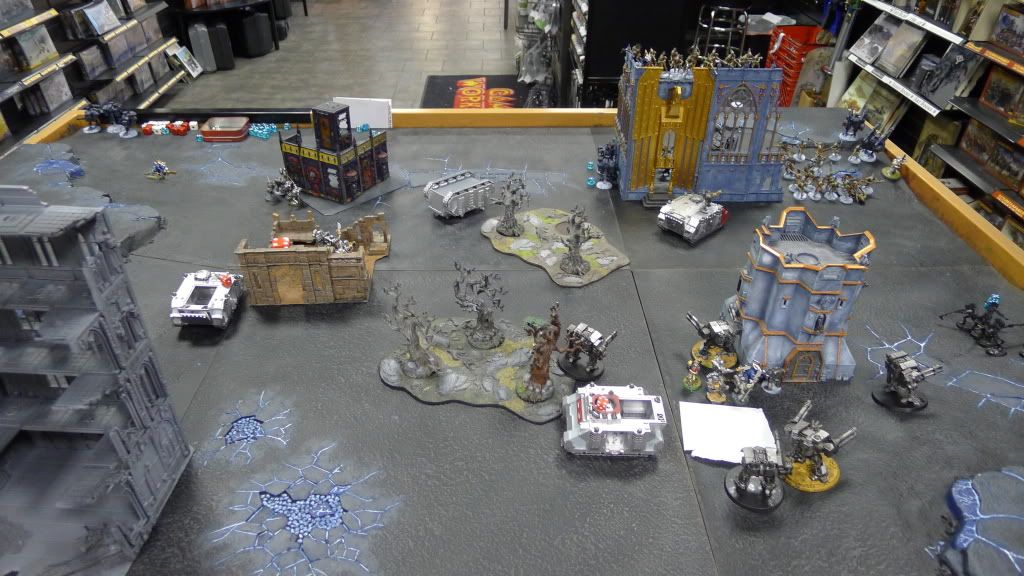
Map of the terrain:
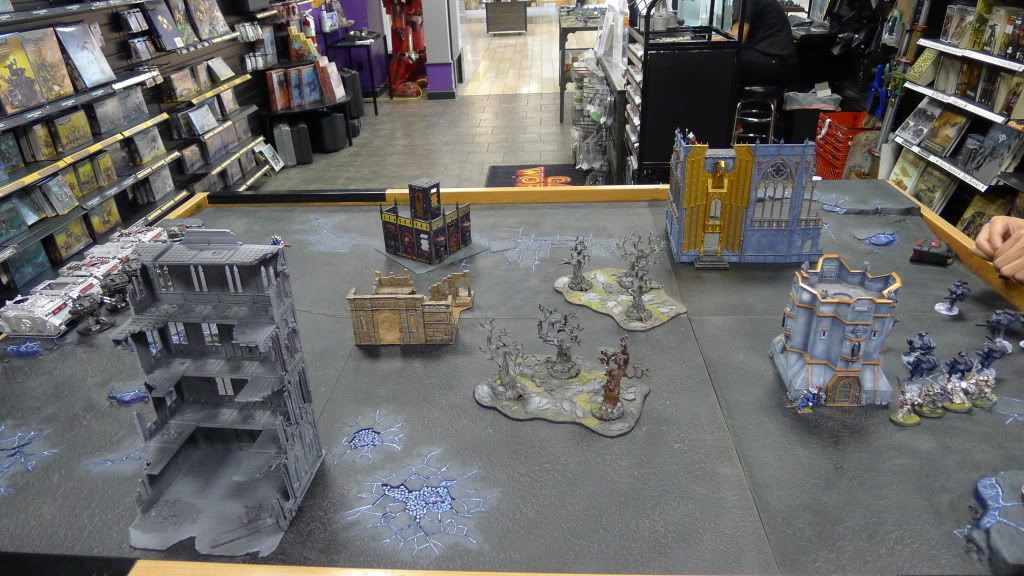
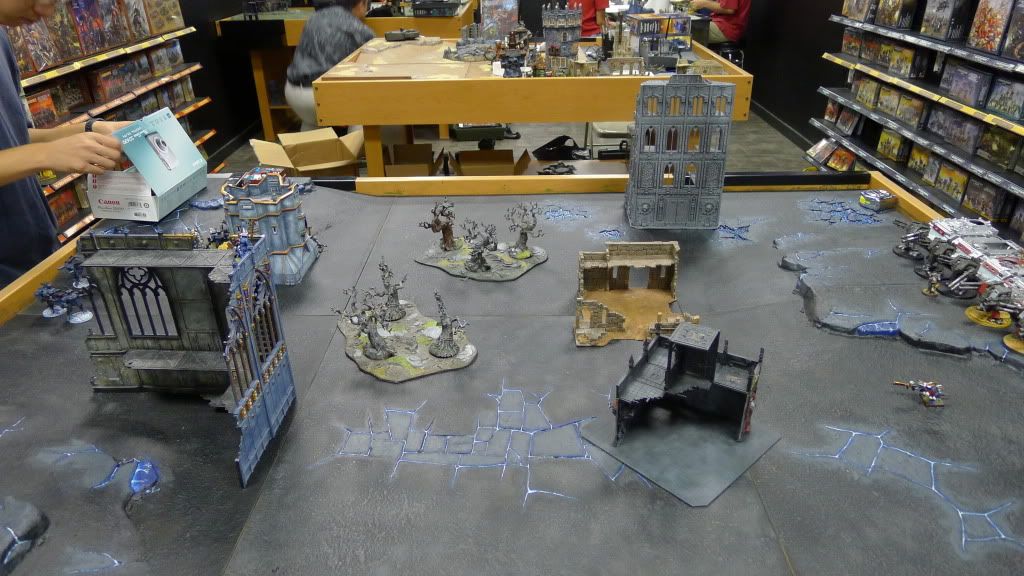
Ignore the units on the table for now. They aren't actually deployed yet. SabrX was short a few broadsides so proxied some of my terminators as broadsides.
Placement of the 3 objectives:

This objective is in SabrX's deployment zone.
This objective is in my deployment zone.

Finally, the last objective is placed on SabrX's deployment zone but as far away from the other 2 objectives as possible.
-------------------------------------------------------------------
Deployment:
Tau deploys nothing on the board. He leaves 5 units in reserves: 2 kroots (outflanking), both piranhas and the fire warriors.

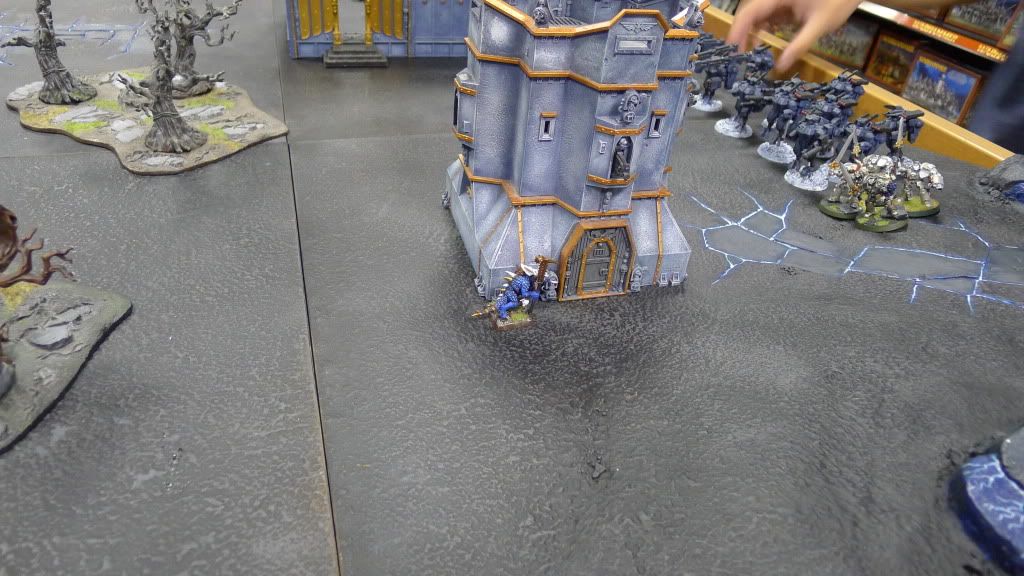
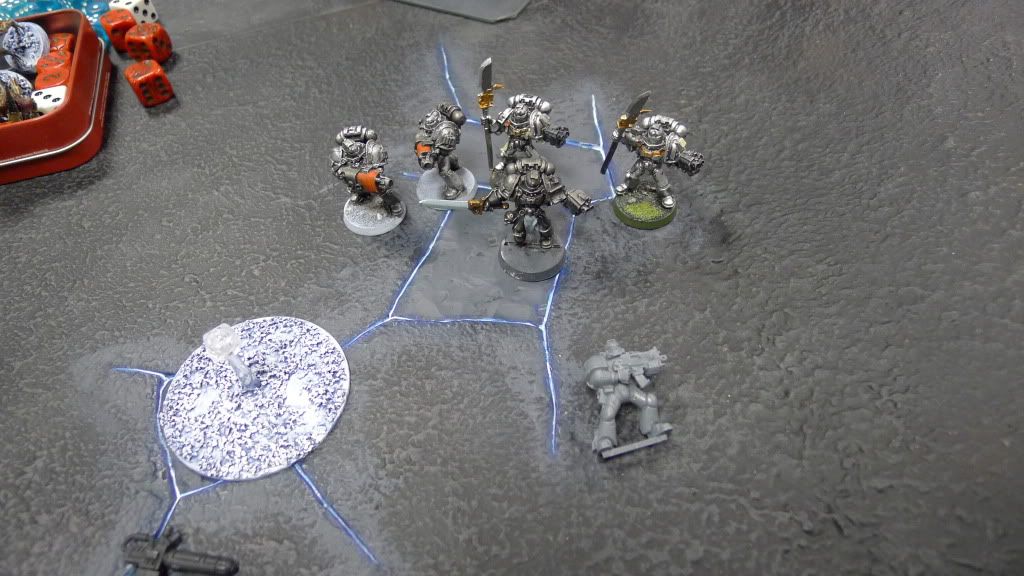
I deploy 1 single unit of purifiers in rhino in terrain.

Hiding just behind is Crowe.
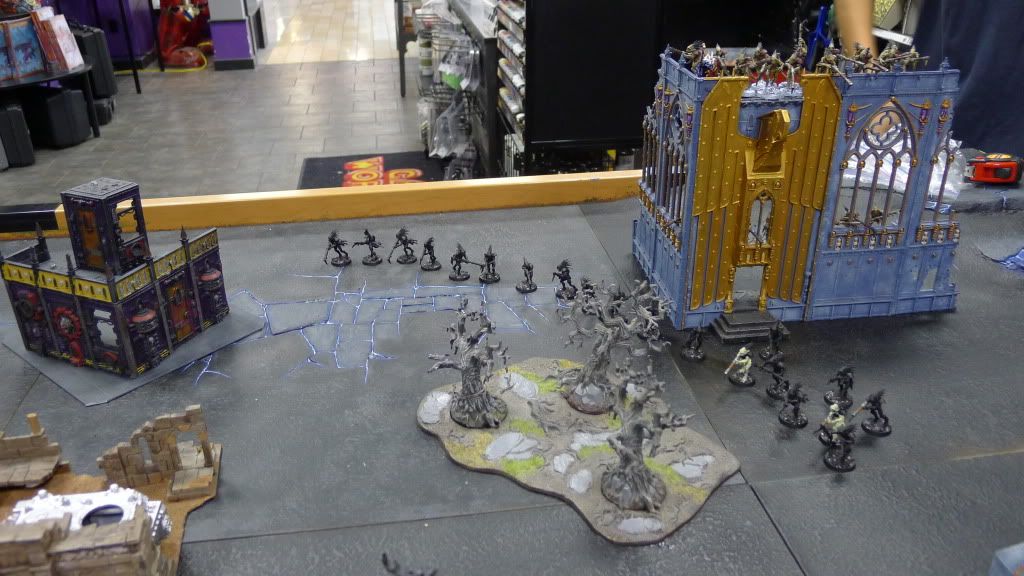
SabrX then infiltrates 2 units of kroots. One unit is on top of the ruins on his own objective.
I don't seize the initiative. Didn't even try.
-------------------------------------------------------------------
Tau 1

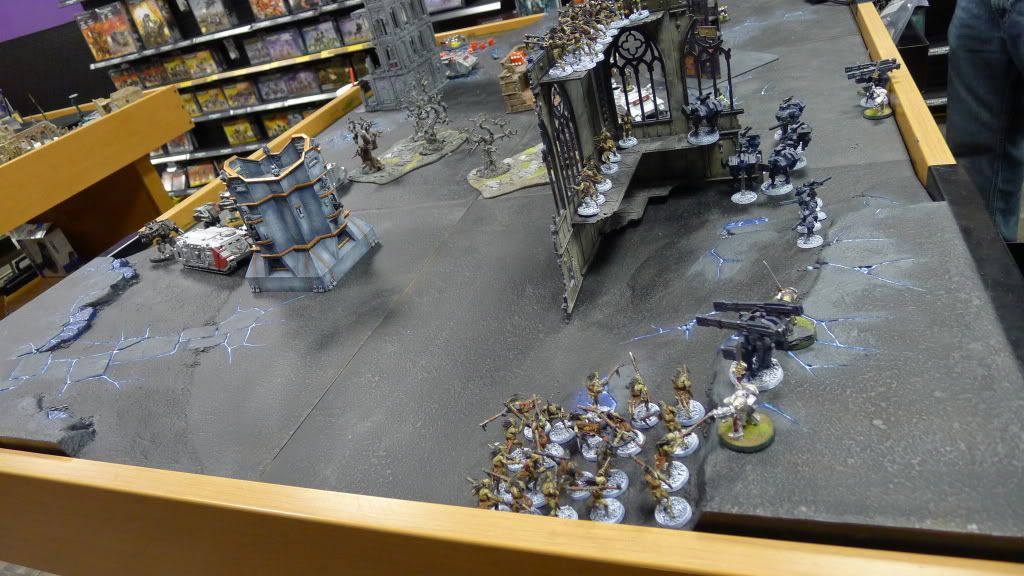
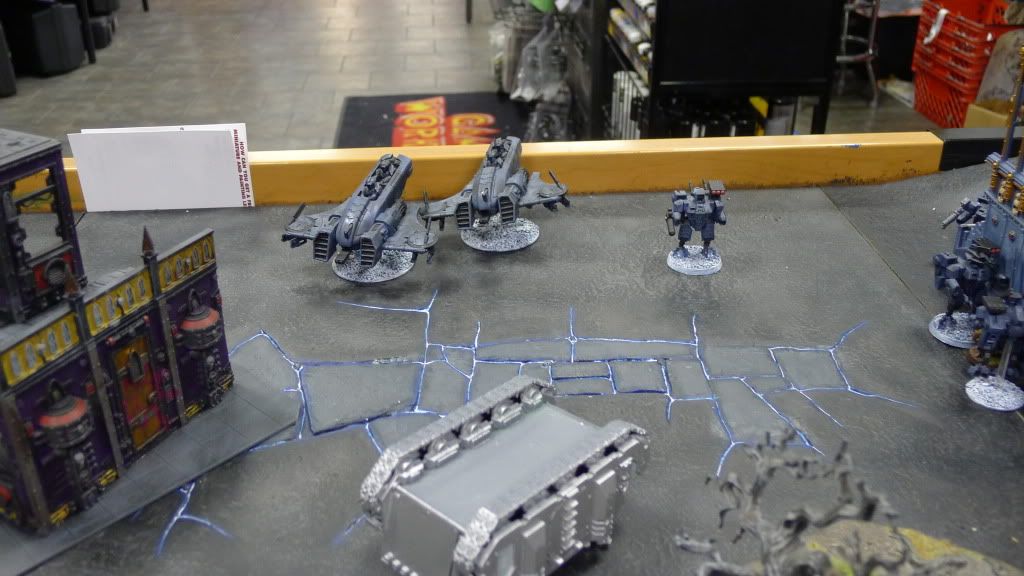
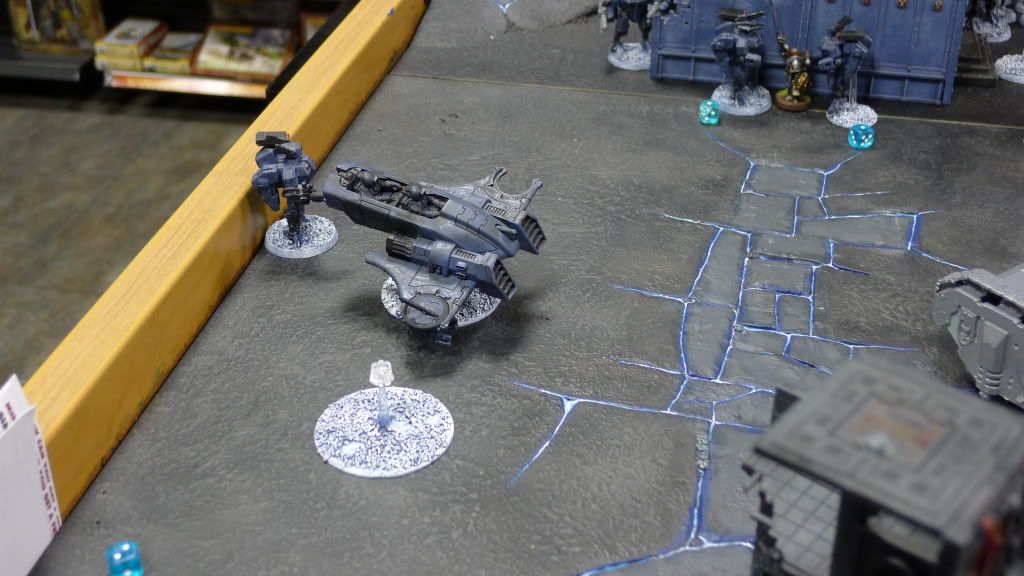
Tau walks on towards the left side of the board. His suits see that big piece of terrain and then rev up their jetpacks. There is some proxying in this game. My grey knight terminators are proxied as broadsides here as are the very left crisis suits (with flamers).

Only 1 unit of XV88 suits manage to spot my rhino due to night-fight, but I manage to escape any damage due to cover. The rest of his army runs and his suits jump in the assault phase.
Grey Knights 1
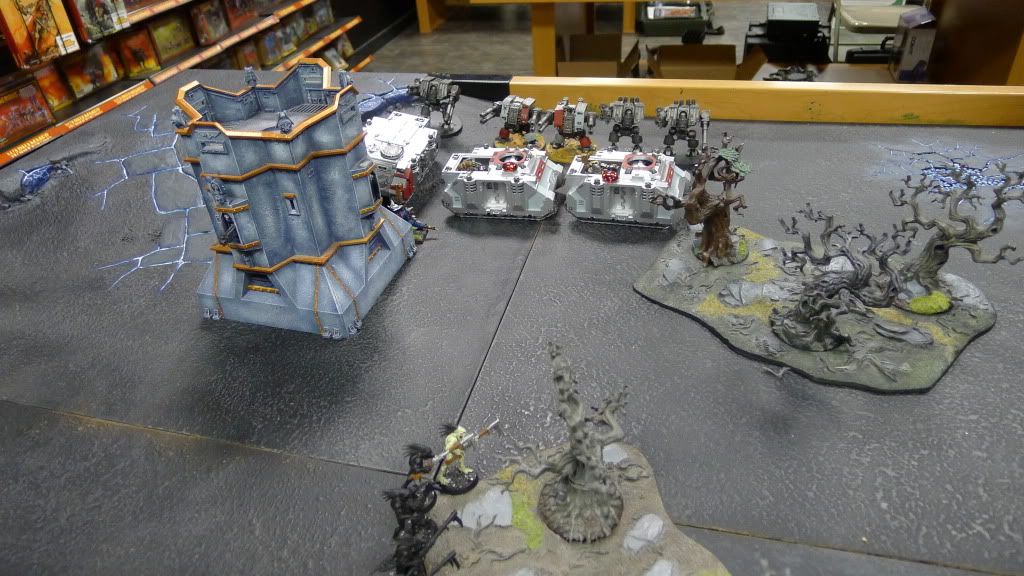
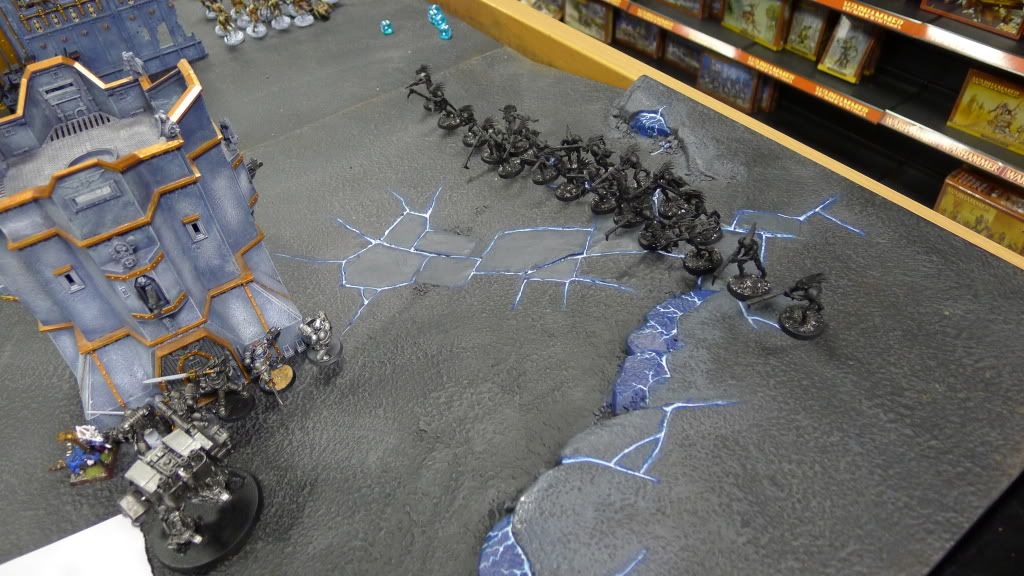
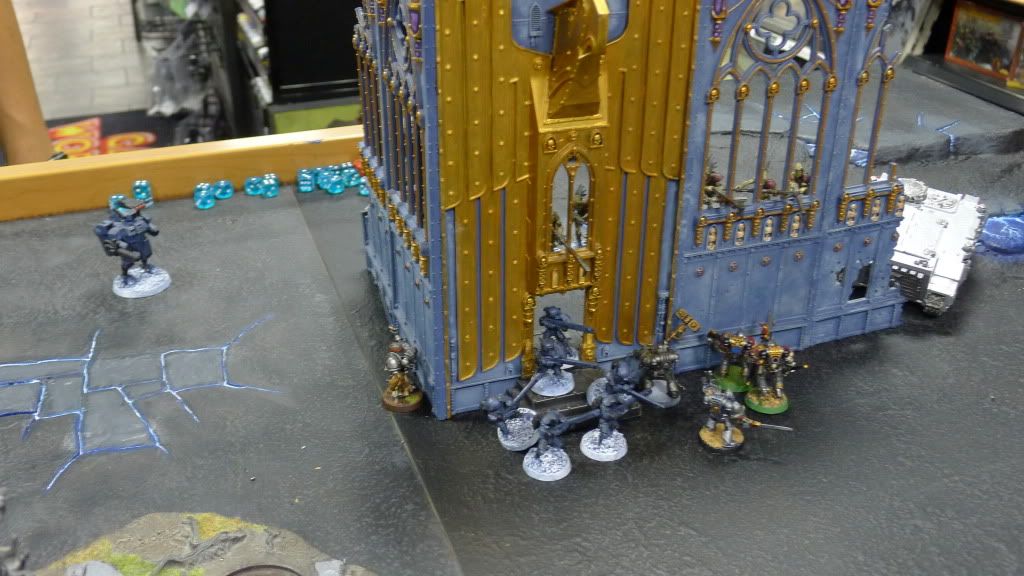
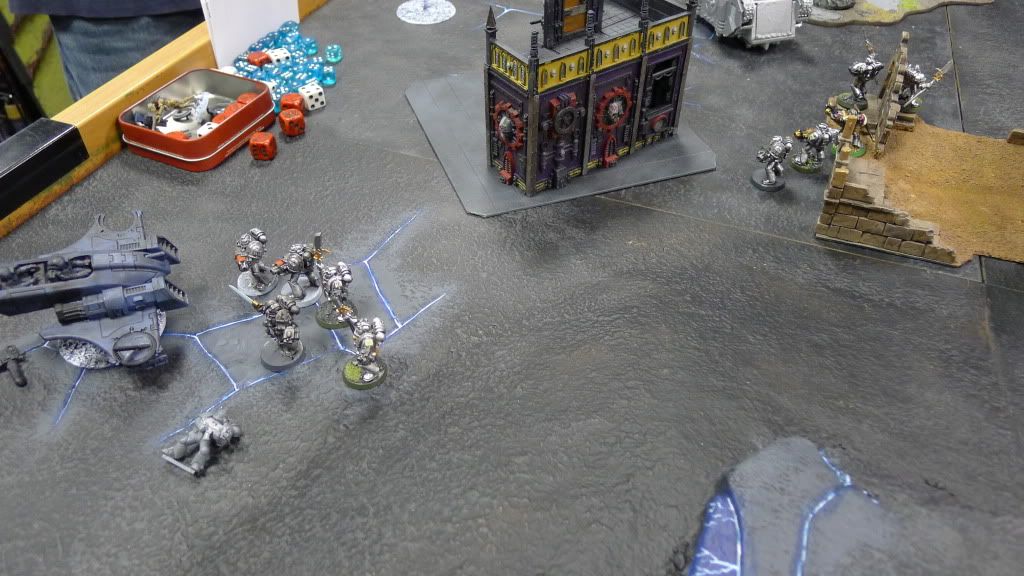
My army comes in opposite his (and right by my objective). Lead rhinos, both with purifiers, pop smoke. My other purifier unit comes in on the opposite end of the table (not pictured) and pops smoke.
Here I make a move that surprises SabrX. My purifiers disembark from their rhino and start to make their move to the far-right objective. Crowe then hops onto their rhino and zooms 12" towards his line, popping smoke in the process.
In my shooting phase, 2 of my dreads spot his kroots and fire. Despite 3+ cover, I shoot down 3.
Tau 2
Tau movement. Only 2 of his reserves come in - the fire warriors and 1 unit of kroots. His jumping beans start jumping. Kroots get ready to rapid-fire Crowe once he destroys my ride.
Unfortunately, his kroots come in on the wrong side. He wanted them to come in on the right side of the board to claim/contest the far-right objective.
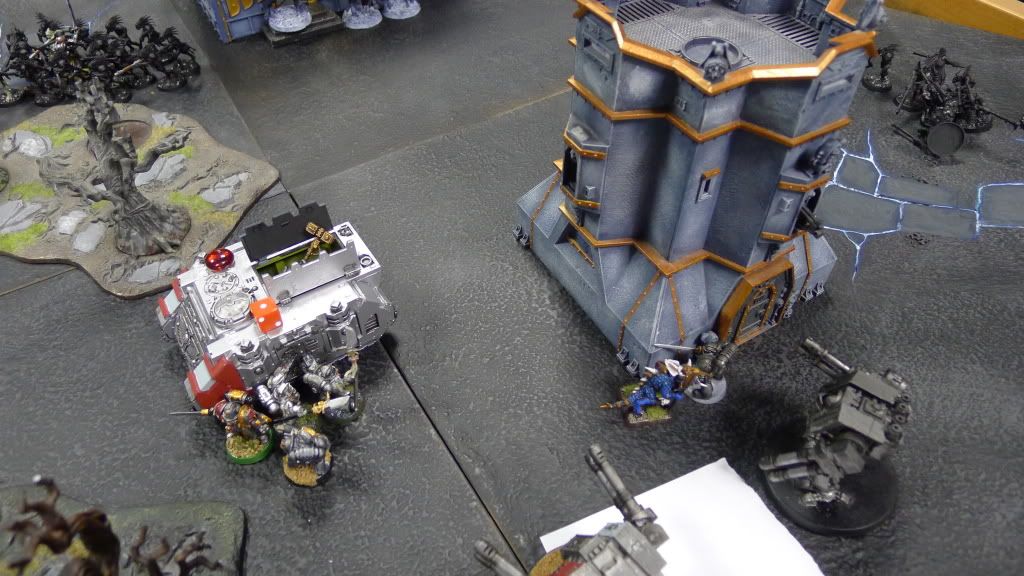
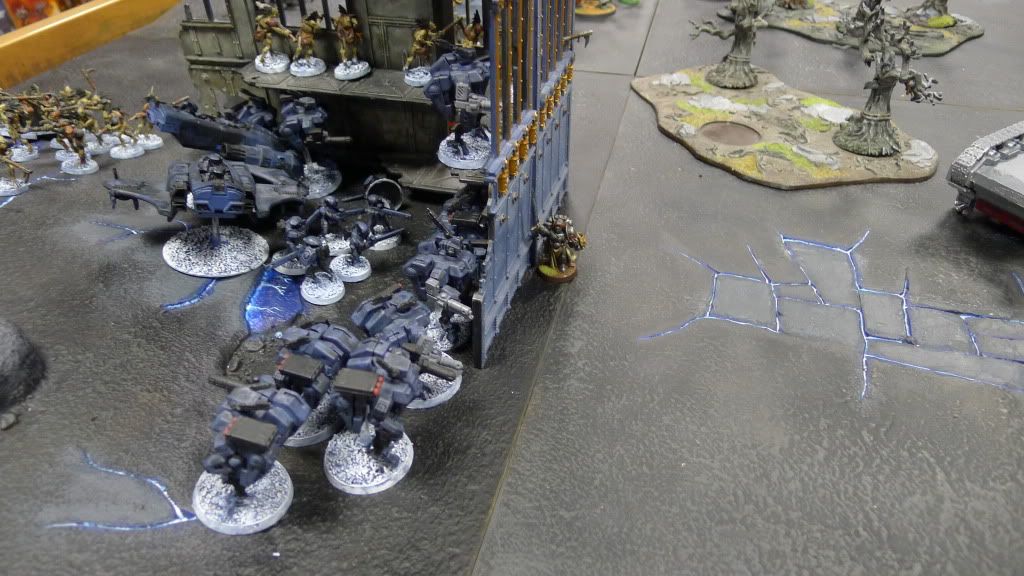
He does manage to wreck my rhino, though it takes him more shot than he would have liked in order to do so. I must've made 5 or so cover saves! Crowe disembarks out of
LOS of his rapid-firing kroots. Unfortunately, he is not totally out of
LOS as some of my opponent's kroots perched atop the tall terrain can barely see. Fortunately, Crowe makes all his saves and is unharmed.
Despite cover, he blows up 1 rhino and immobilises the other. 1 purifier dies in the explosion.
Finally, one of his crisis teams fire at my disembarked purifiers with plasmas and missile pods. Thanks to cover though, I only lose 1 knight.
Finally, his suits jump back into the safety of the ruins. 1 of his suits twists his ankles though. Though slowed and moving with pain, he is still able to fight. (1 crisis takes a wound to dangerous terrain). Right kroots run back 5" away from Crowe and left kroots run forwards.
Man, I haven't done anything yet, and already I'm down 3 out of 5 transports. And I actually got off light from his shooting! I made more than half of my cover saves, and yet I still lost 3 rhinos. Well, at least all my dreads are full and functional.
Now let's see how I can come back from last round.
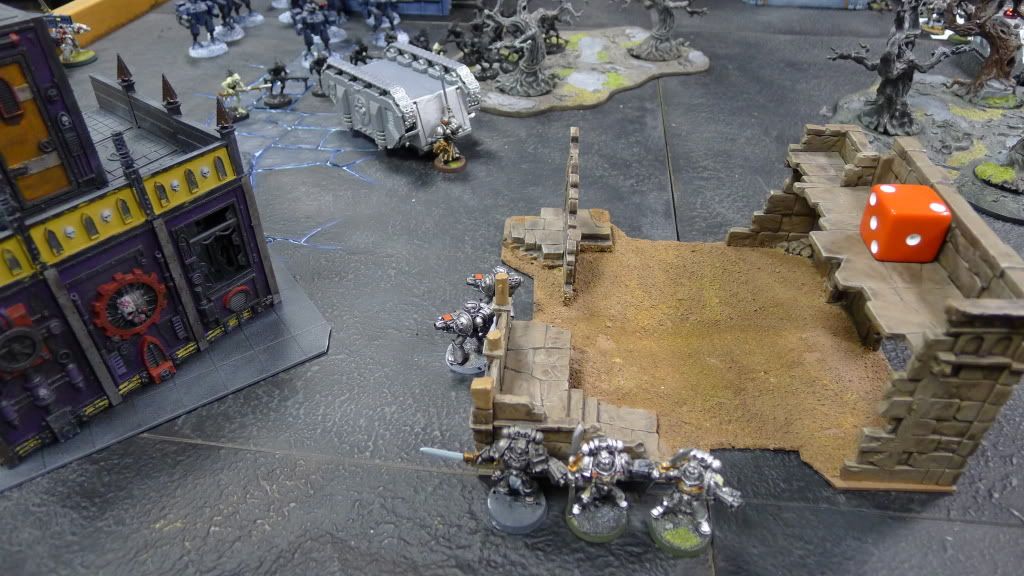
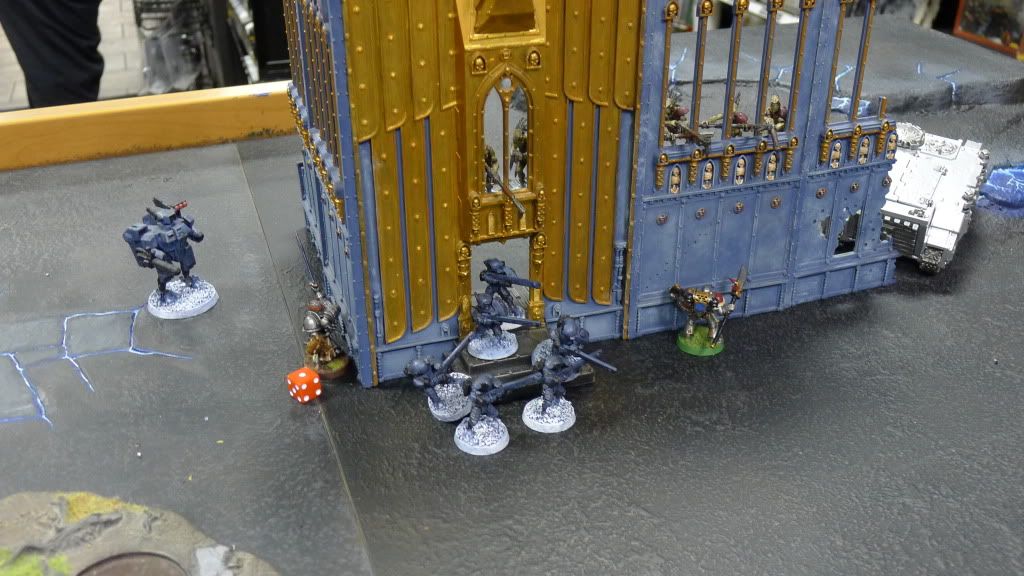
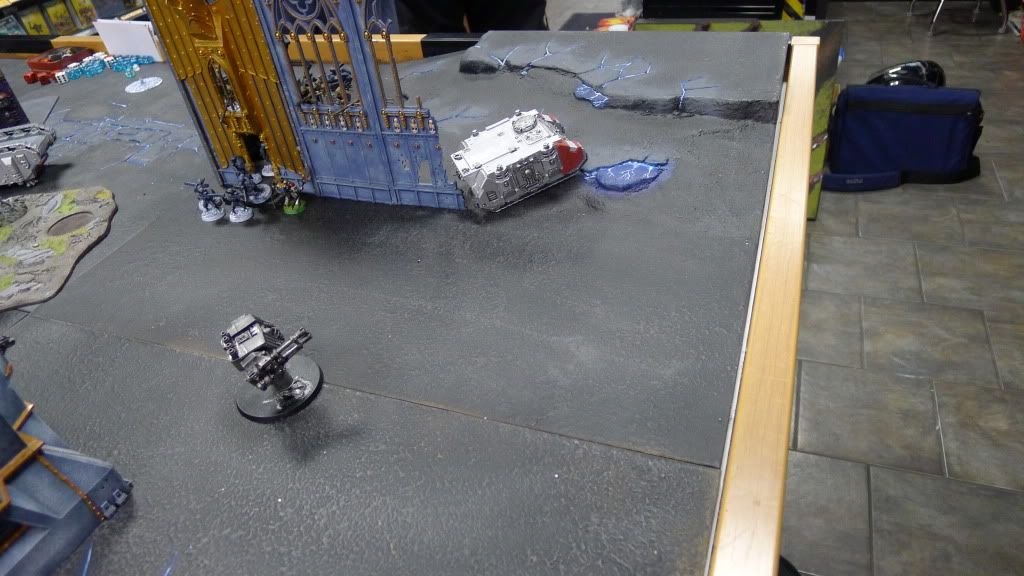
Grey Knights 2

Purifiers move towards the far-right objective. Far-right rhino follows suit. I popped smoke last turn, but this turn my rhino should be able to get cover from the ruins.
Strike squad disembarks. Purifiers then borrow their rhino and zip forwards popping smoke. My other purifier squad gets out of their immobilised rhino and follows closely behind the lead rhino, trying to stay out of
LOS. Dreads advance.
Time for some payback!
I believe 3 dreads fire at 1 unit of broadsides. I insta-kill 1.

They then fail morale and run off the board.
The other 2 dreads fire at his suits. I believe I insta-gib 1, but they pass morale. Well, at least 1 squad of broadsides are gone.

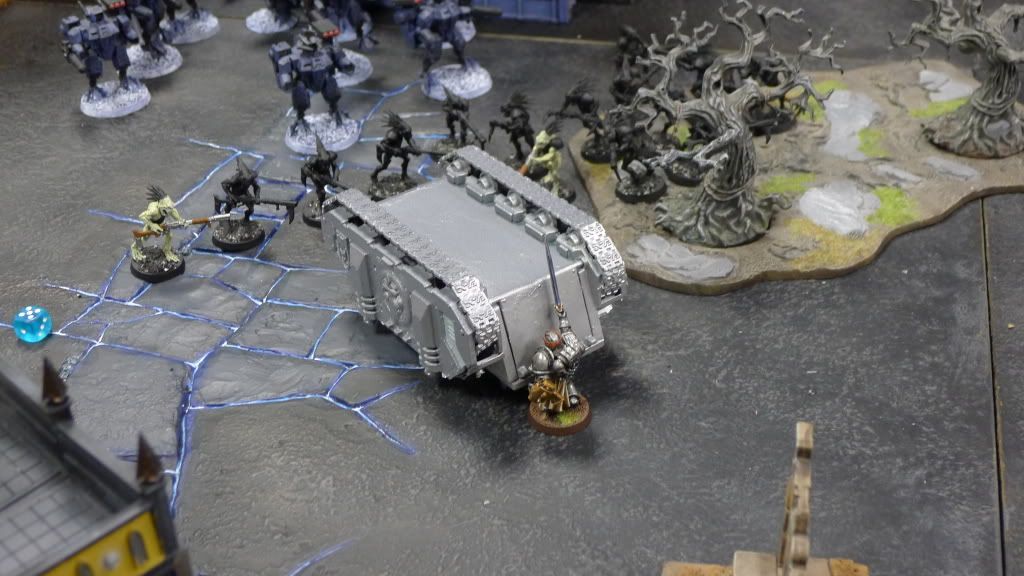
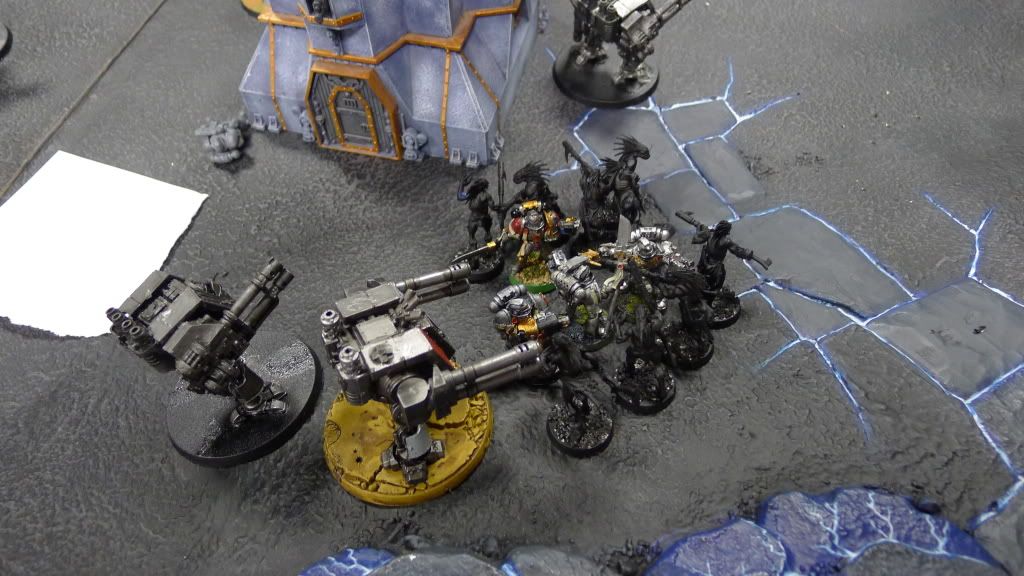
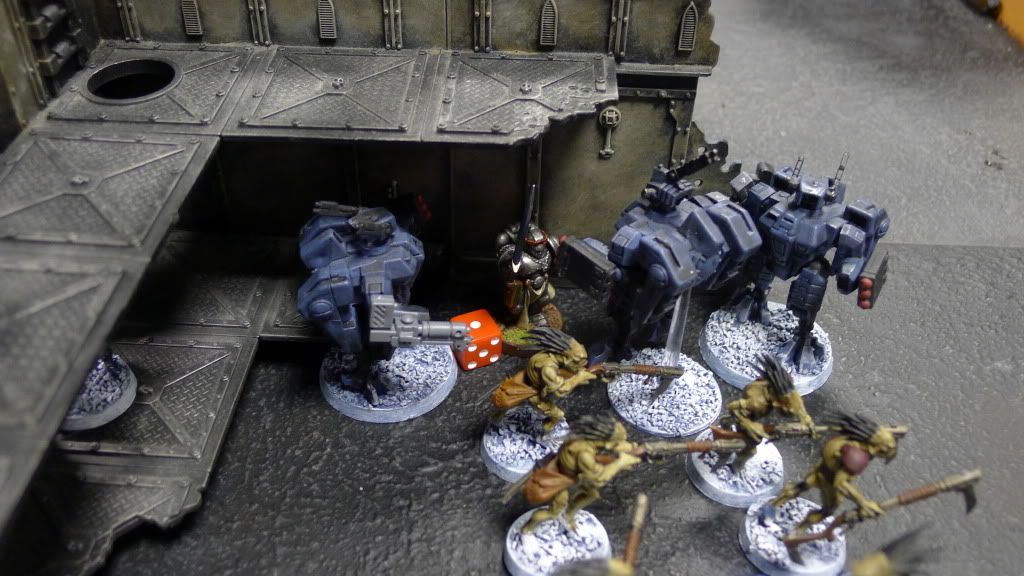
Crowe then assaults his kroots. Here, I catch SabrX with another surprise. He assumes that I would be casting Cleansing Flame to kill his kroots and start picking up his dice to roll. I then stop him and told him I wasn't doing Cleansing Flame. In fact, I'm not going to attack at all. I'm just going to parry.
So 17 kroots attack me. Out of 34 attacks, he rolls something like 25 hits or so. Wow, way above average. Then he only does about 8 wounds to me. Way below average. I then roll 4 1's on my armor save! But wait....I pick up my failed armor saves and re-roll them again thanks to Parry. I then roll 4 6's! Crowe just scoffs off his kroot attacks.
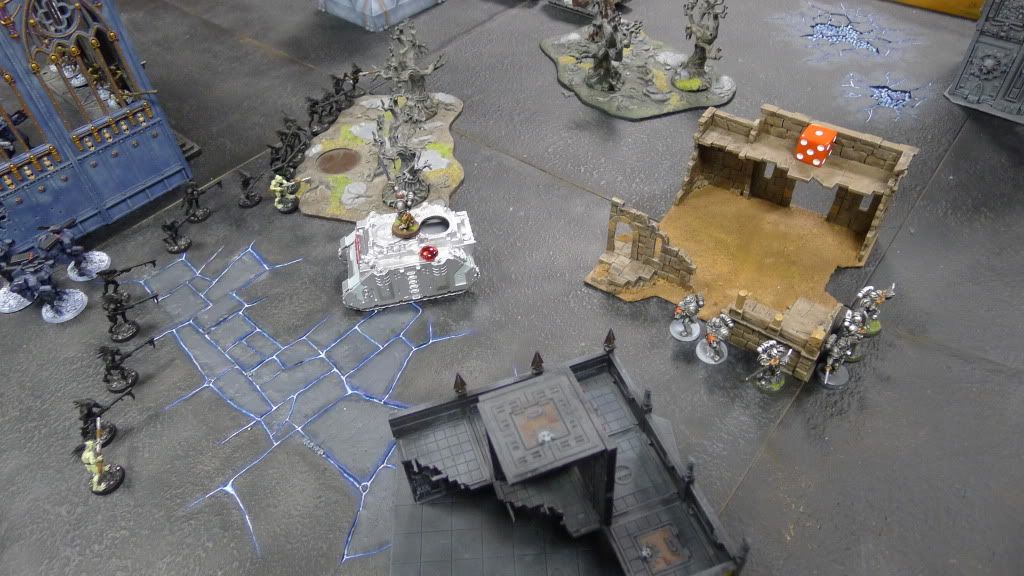
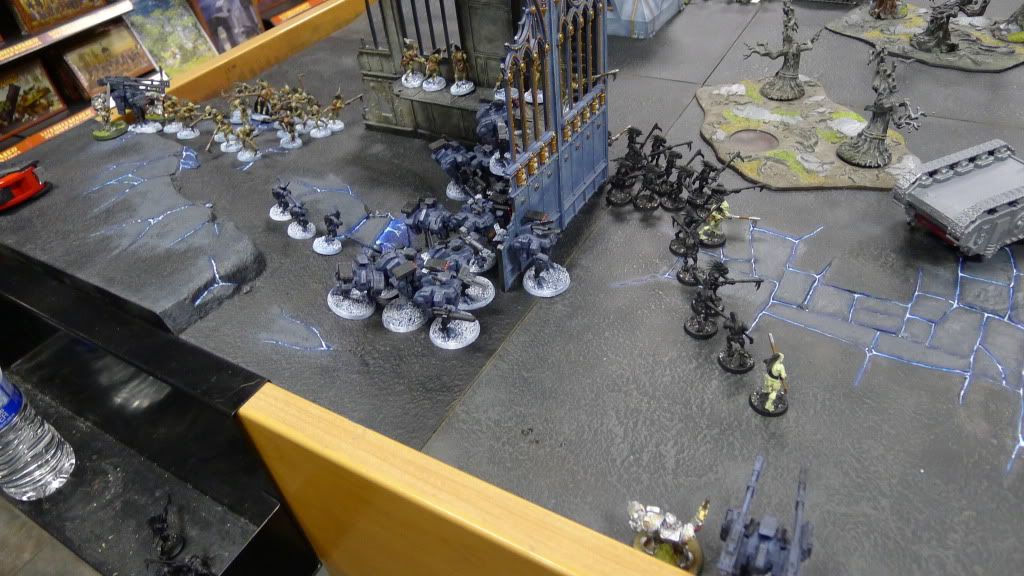
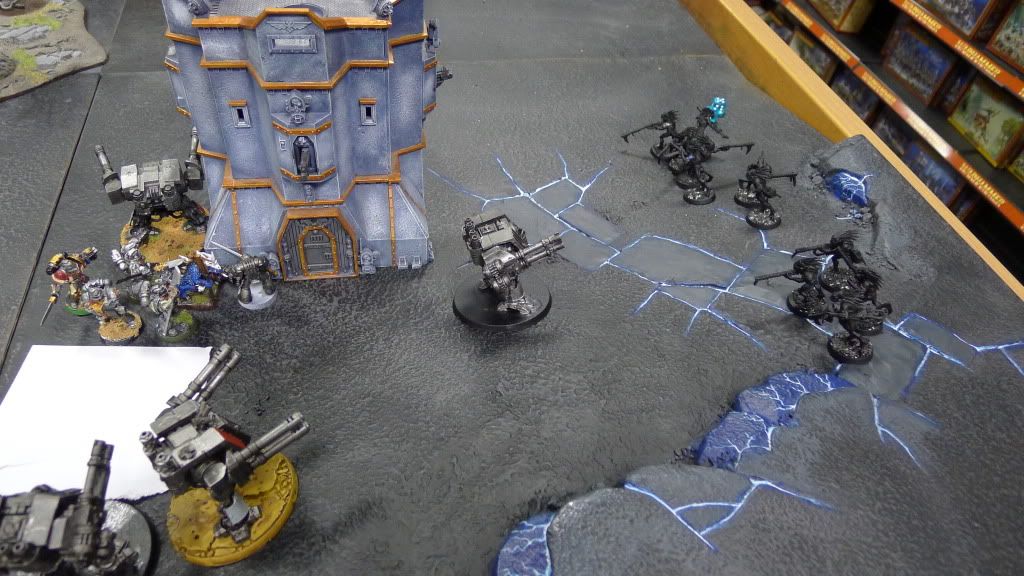
Tau 3
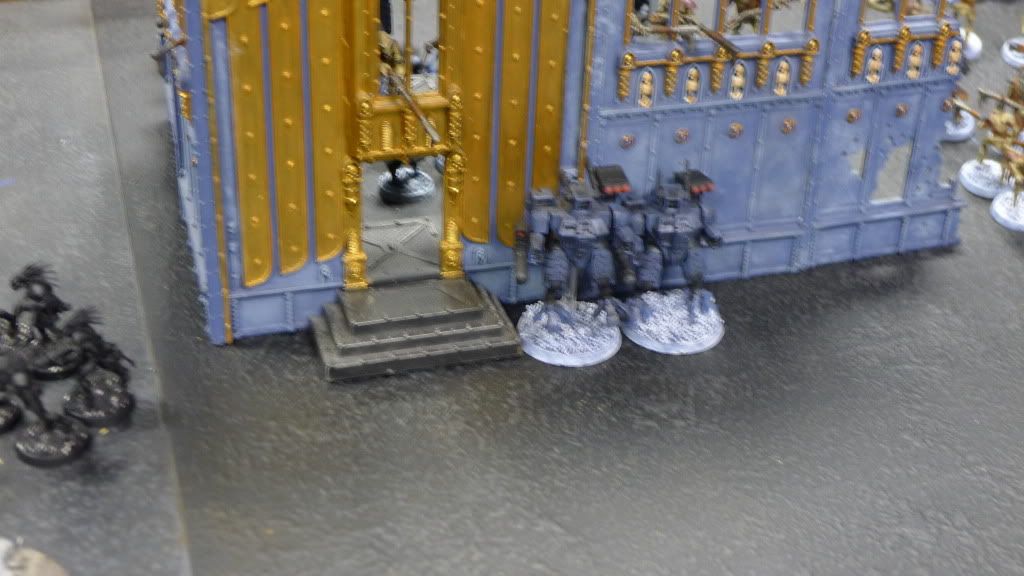
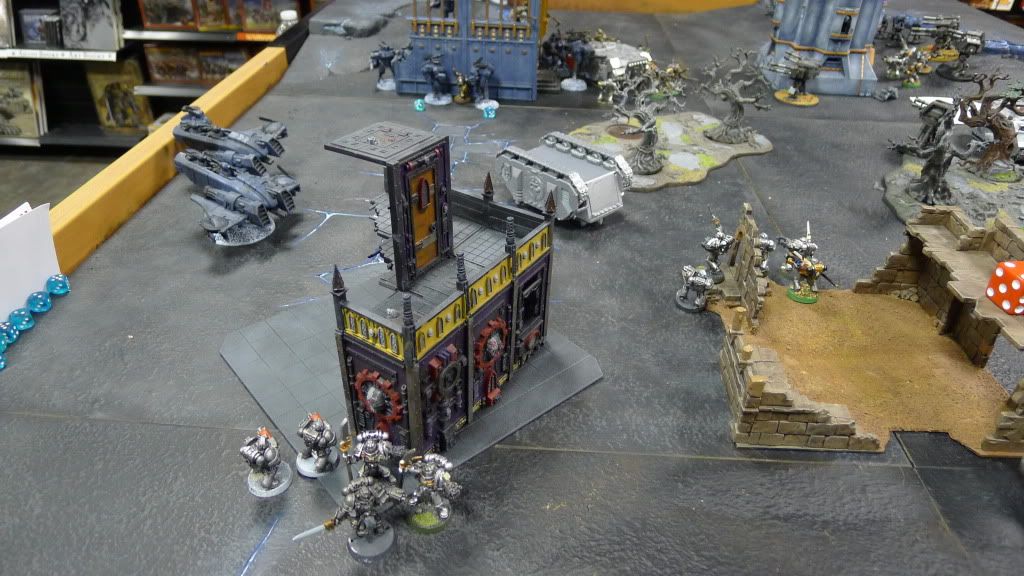
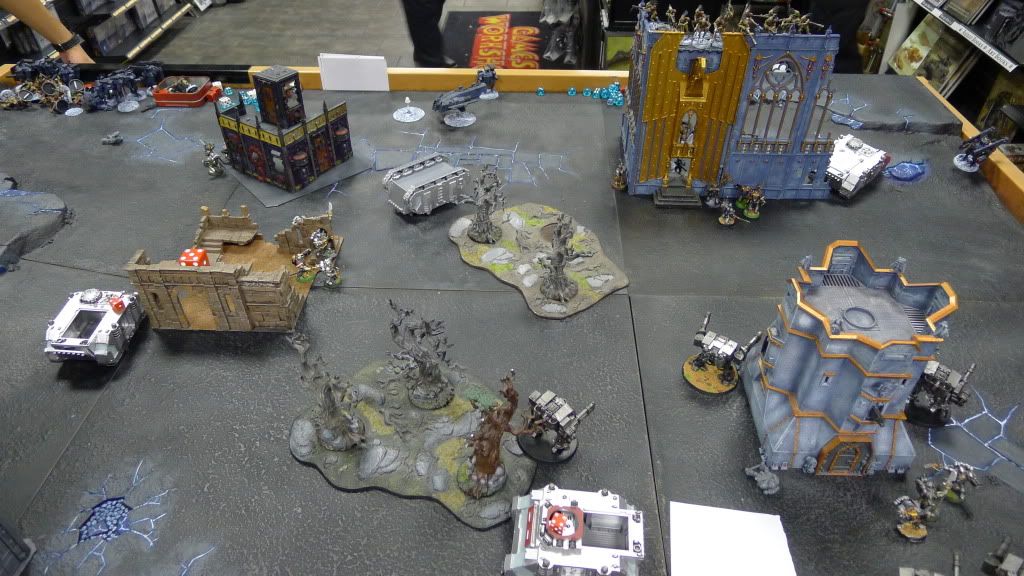
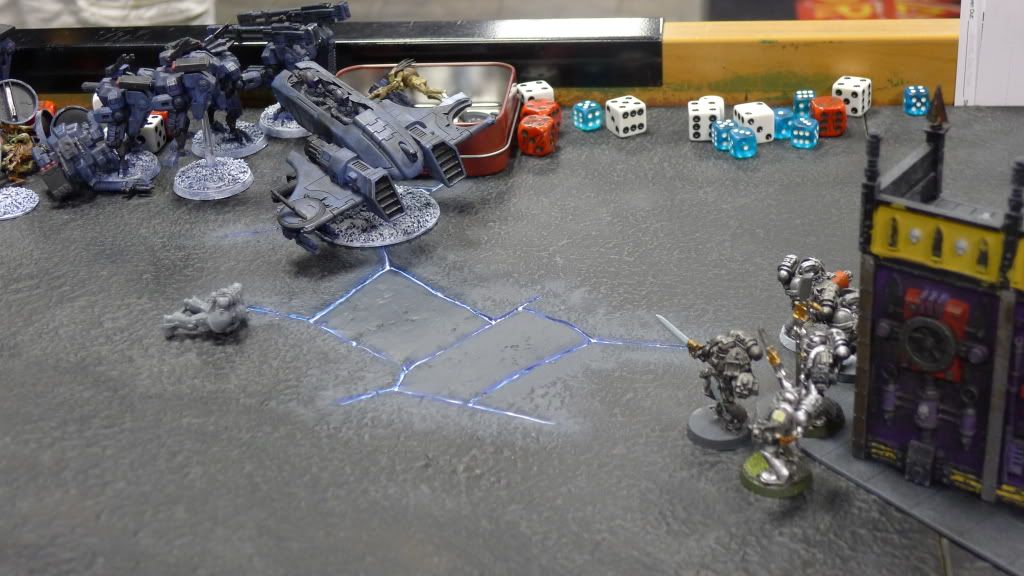
Overview of the beginning of Turn 3.
All his reserves come in. Again, his kroots come in on the wrong side (he wanted them to come in on the other side with the far-right objective).
His suits jump forwards. One takes a wound to dangerous terrain.
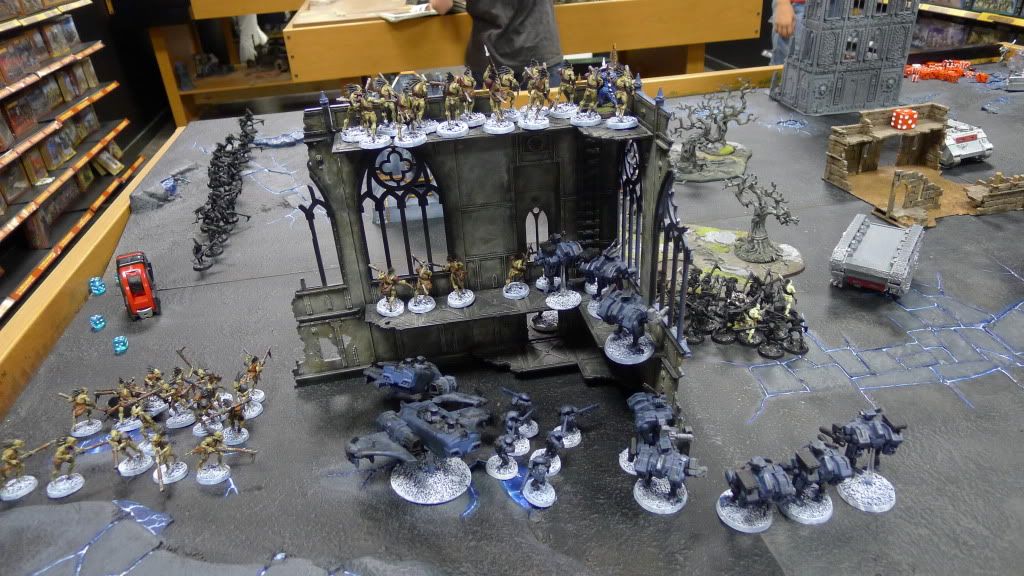
Piranhas come in behind the tall ruins and stay out of
LOS.
He goes after my rhinos. I make a lot of cover saves but finally 1 shot manages to immobilise my far-right rhino. It also got shaken and stunned from some of his other shooting.
Then he fires almost his entire army at my fast advancing rhino. I must've made 5-8 cover saves! My cover rolls were hot.

When the dust finally settles, my rhino comes out with just a shaken result.
His kroots atop the ruins see my almost-hidden purifiers behind the rhino and open fire. Again, I roll well for my saves and only lose 2 purifiers.
Finally, his outflanking kroots open fire at my strike squad and kill all but 1 knight. I pass morale.
While jumping back behind the ruins, his wounded suit breaks his leg and dies.

His other suits then fail 2 dangerous terrain tests while also jumping behind the ruins. He puts 1 on his
HQ and another on regular guy.
Wow....3 consecutive failed
DT tests. Ouch.
Last but no least, Crowe casts Cleansing Flame on his kroots while parrying. I only kill about 6 out of 17, but that is enough for me to win combat and sweep them.
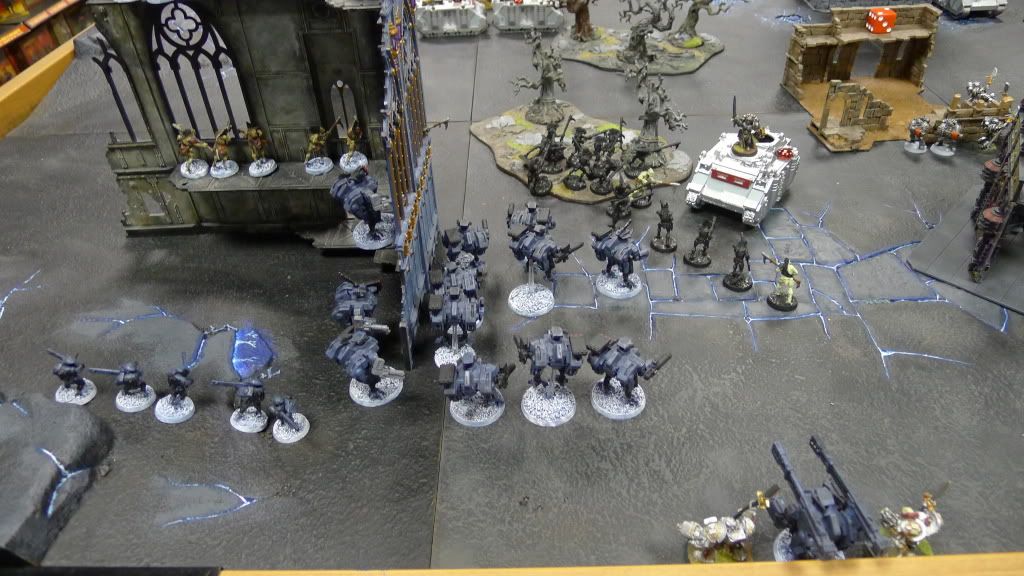
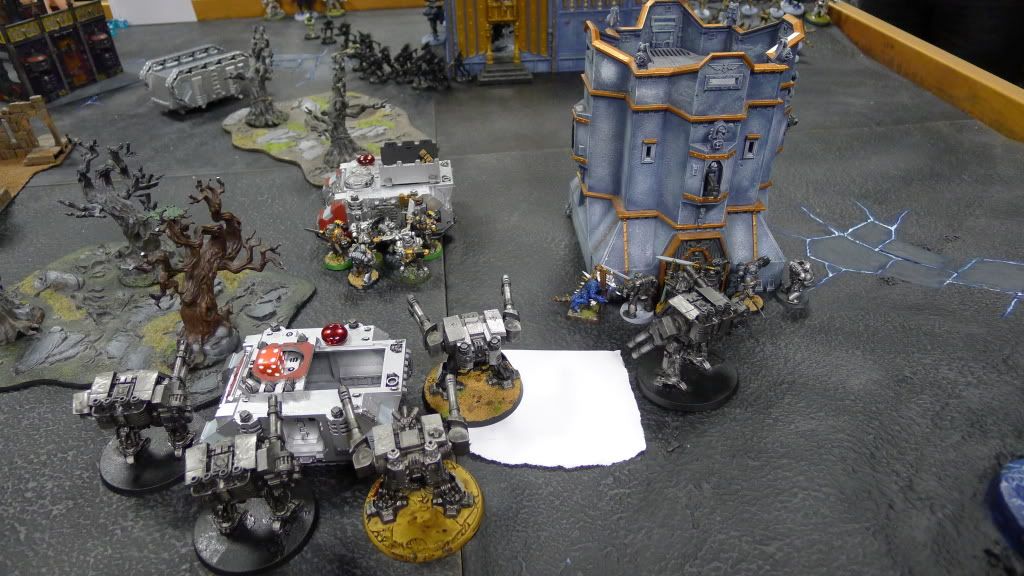
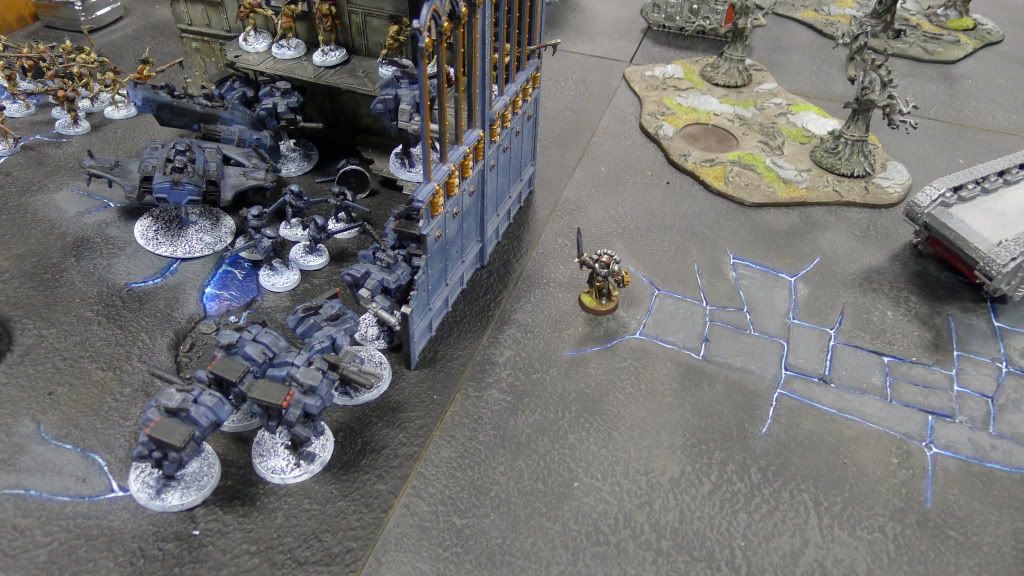
Grey Knights 3

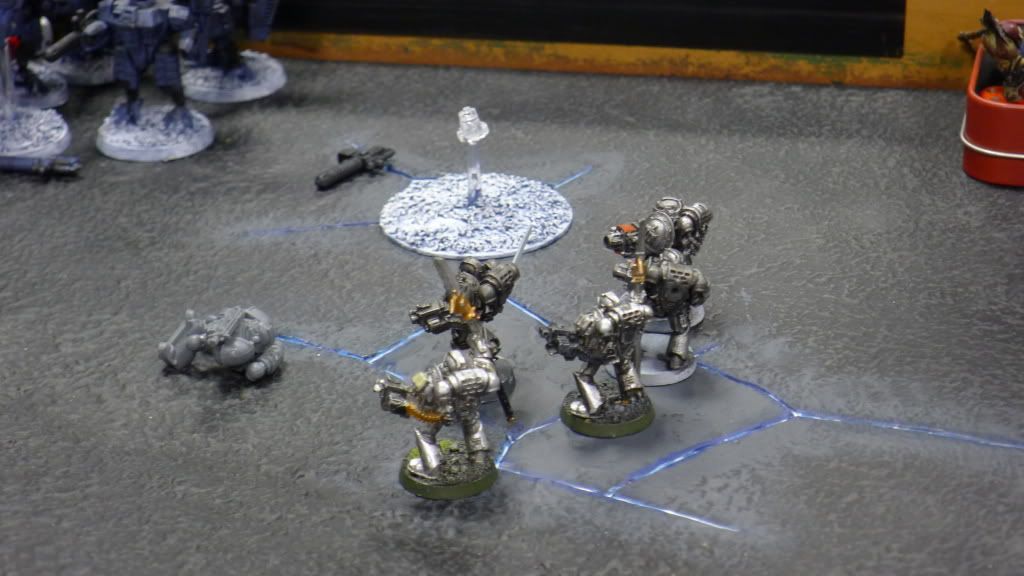
4-man purifier unit has to go back to deal with his kroots. Dreads also move towards them.

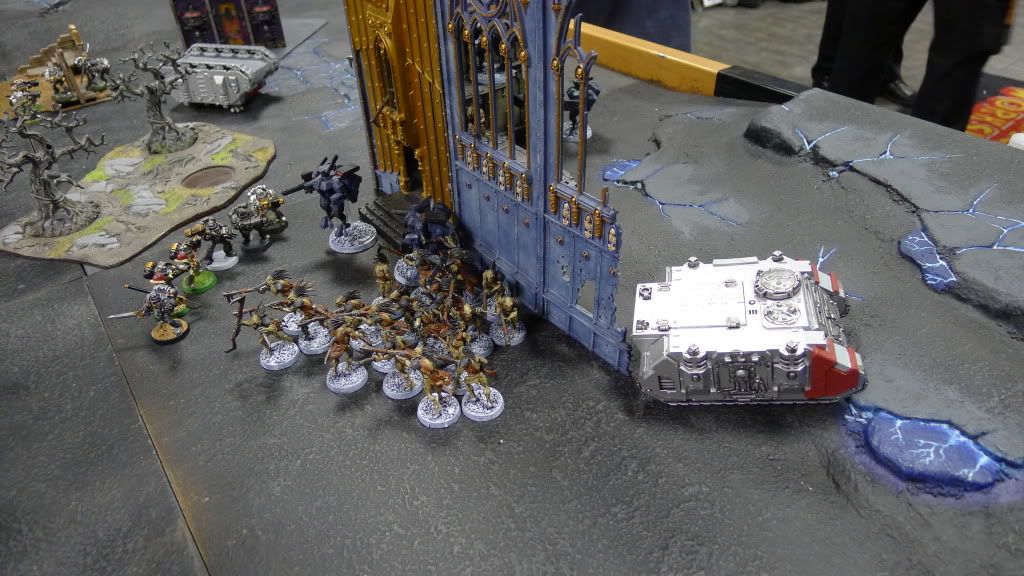
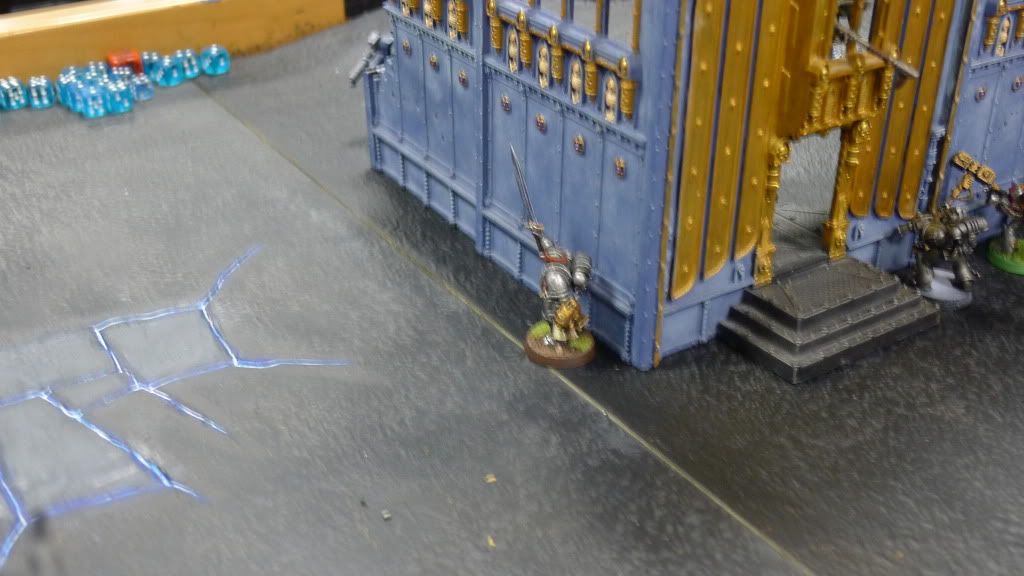
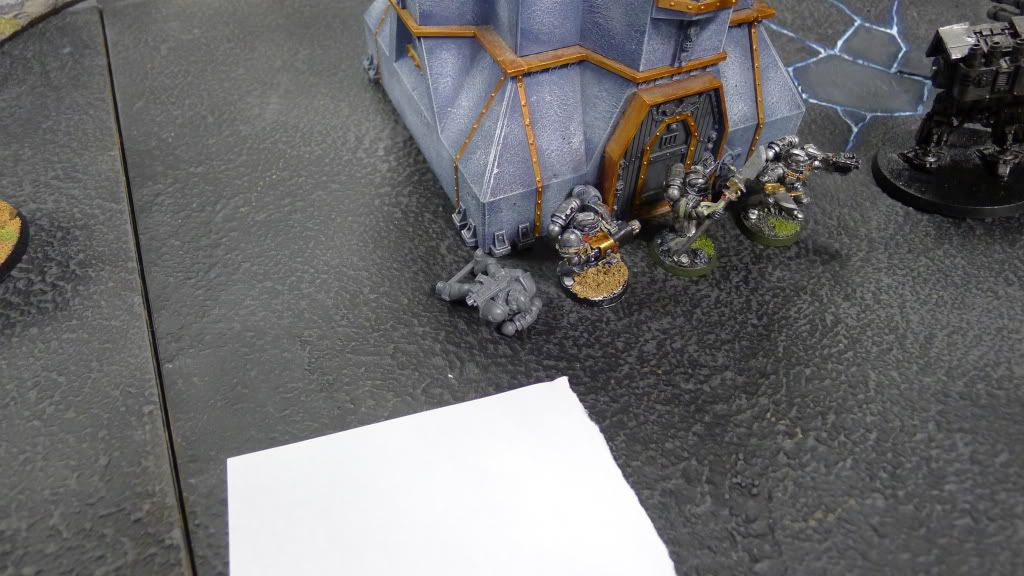
The moment of truth as my purifiers make it to Tau lines.
My other purifiers disembark from their immobilised rhino.
Do you hear that? It's the sound of impending Doom creeping up....
Dreads, purifiers and lone striker kill a bunch of kroots. Luckily for them, they pass morale.
I believe 1 or 2 dreads fired at his exposed broadsides, but I couldn't see anything else. I fail to kill any broadsides.

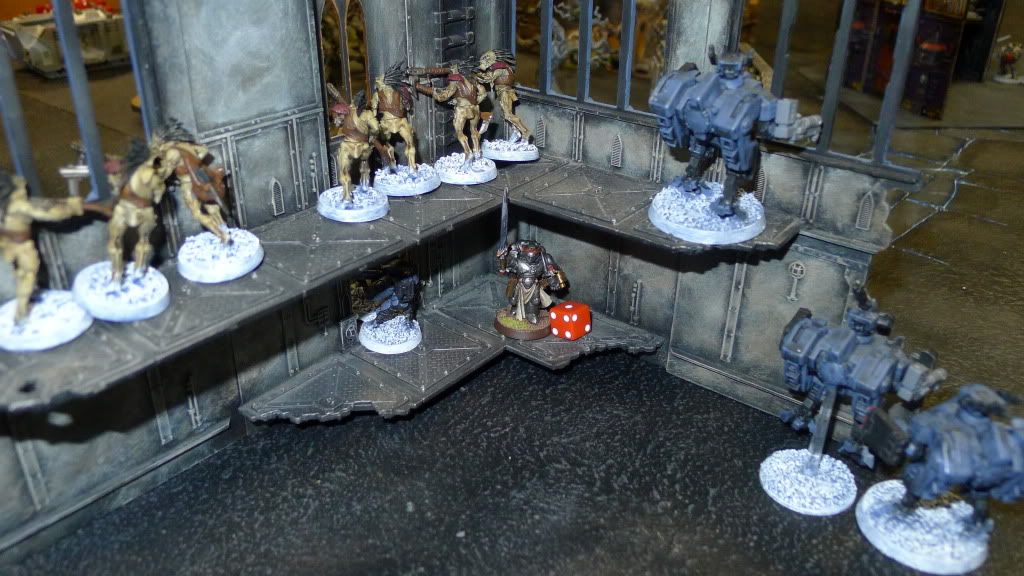
Crowe assaults his
HQ unit. I don't cast Cleansing Flame and just parry instead. He is not able to hurt me so we remain locked.
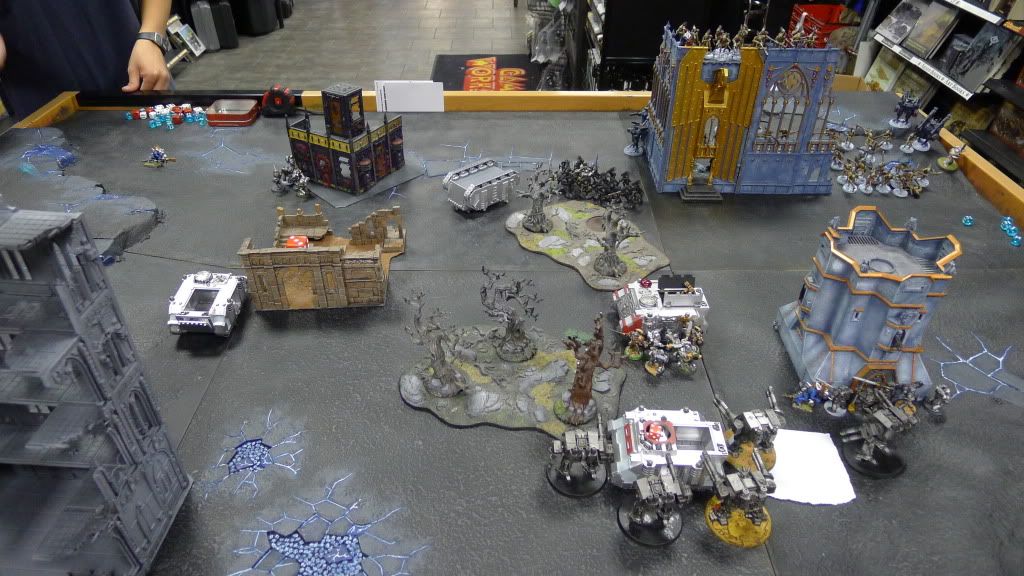
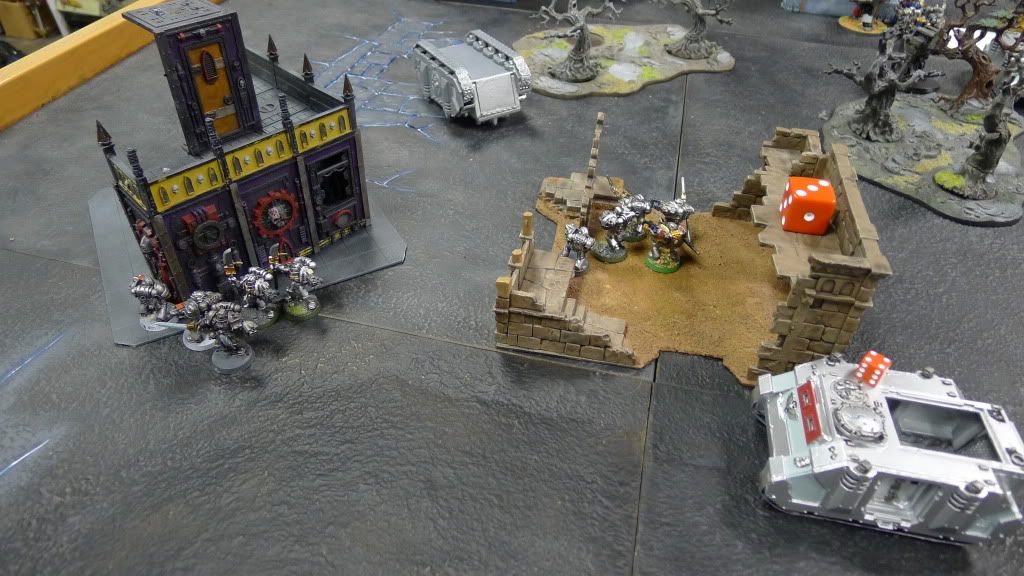
Tau 4
Overview of the beginning of Turn 4.

Kroots and crisis team go after my purifiers. If only his broadsides can take out the vehicle, then his kroots and fireknives should be able to finish off the purifiers inside.
Kroots advance.
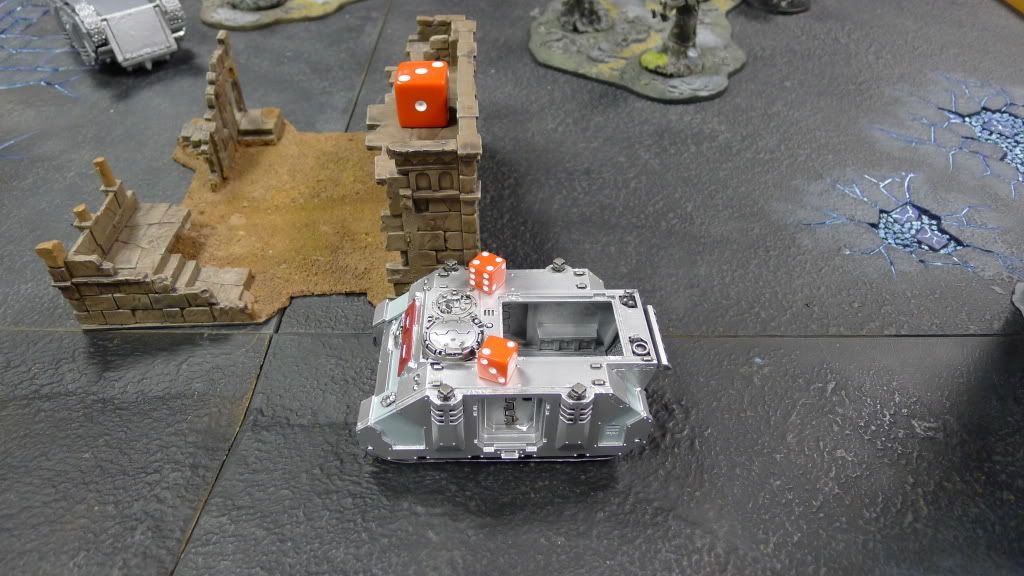
Piranhas flat-out 24" towards the far-right objective in preparation for a Turn 5 contest. While jumping out of the ruins, I think he fails another 2 dangerous terrain tests, killing another one of his fireknives. Thus, his 3rd squad of fireknives has just 1 guy left.

3 railguns, 4 missile shots and 4 plasma shots later, my rhino is stilll just shaken. My streak of cover saves is on
! SabrX can't believe my luck.

Kroots fire at and kill off my lone striker on my objective. I've still got my purifiers there though.
BTW, we swapped out the lizardmen objectives for unpainted, unbased marines as objectives because the store took them back.

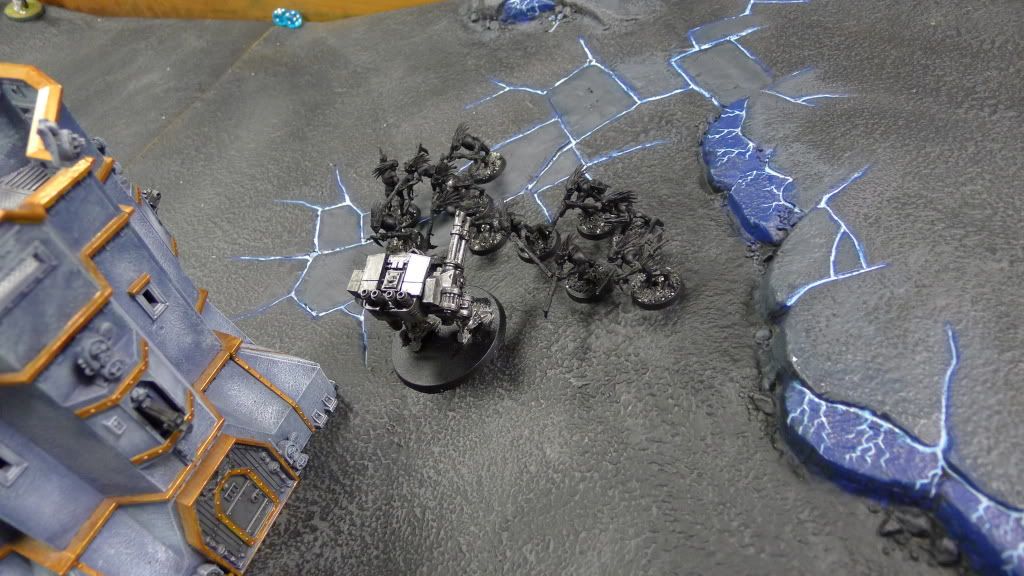
Charge! That's 45 kroot attacks (some died earlier to my shooting) and 2 crisis suits.
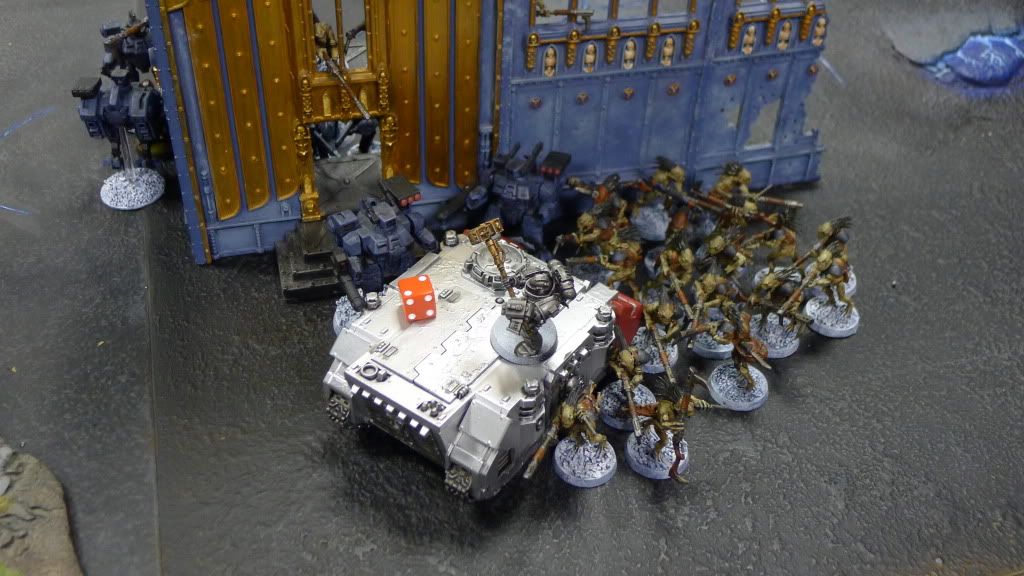
Oh no you didn't? You did! You scratched my new paint job. I'm stunned!
In the only other assault, Crowe casts Cleansing Flame but fails to penetrate their armor save. I then fail to rend his suits and we stay stuck in combat.
Grey Knights 4
Things are starting to look bad for Tau as my purifiers disembark. The rhino tank shocks forwards 12", but both units pass morale.
I reposition my far-right purifiers to get better shots at his piranhas.

Dreads shuffle around. Purifiers go after his kroots. They kill a couple with limited shooting.
2 dreads fire at 1 piranha and destroy 2 weapons from it. My purifiers than go on to explode the other piranha.
Finally, 3 dreads aim for his exposed broadsides and insta-pop 2 of them. Luckily for them, they pass morale.
Purifiers charge his kroots.

Cleansing Flame followed by assault wipes out his kroots completely.

Then my hammerfiers multi-assault his kroots and crisis team. I should kill a lot with Cleansing Fla....
WTH! I fail my psychic test on a roll of 11.

No matter. I didn't need Cleansing Flame as I insta-thump both his suits with my hammer and shish-kabob a few kroots. He only kills 2 of my knights and I sweep his guys.
Finally, Crowe rends his Shas'
el's unit twice and then sweeps them.
What a painful turn for Tau....
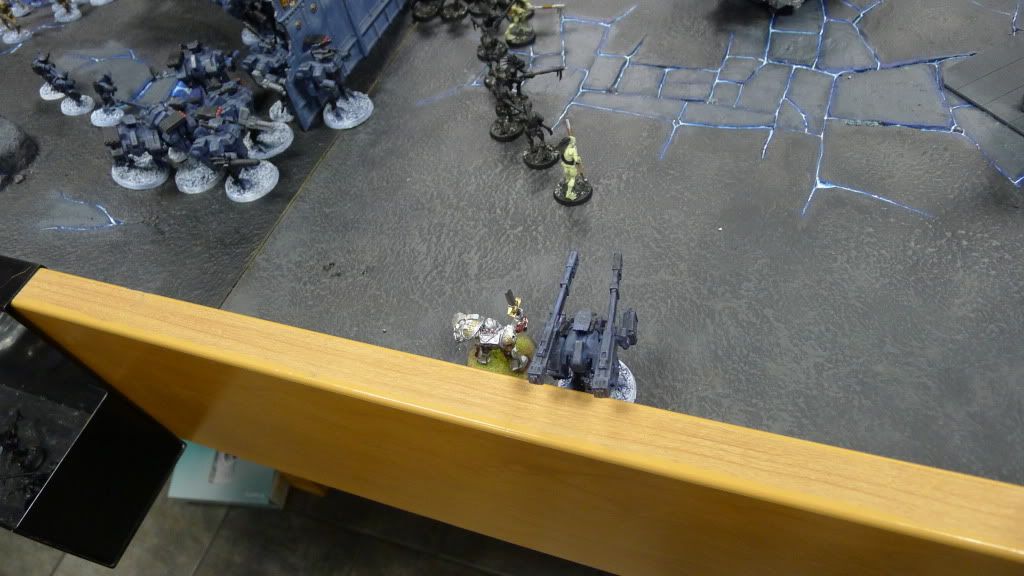
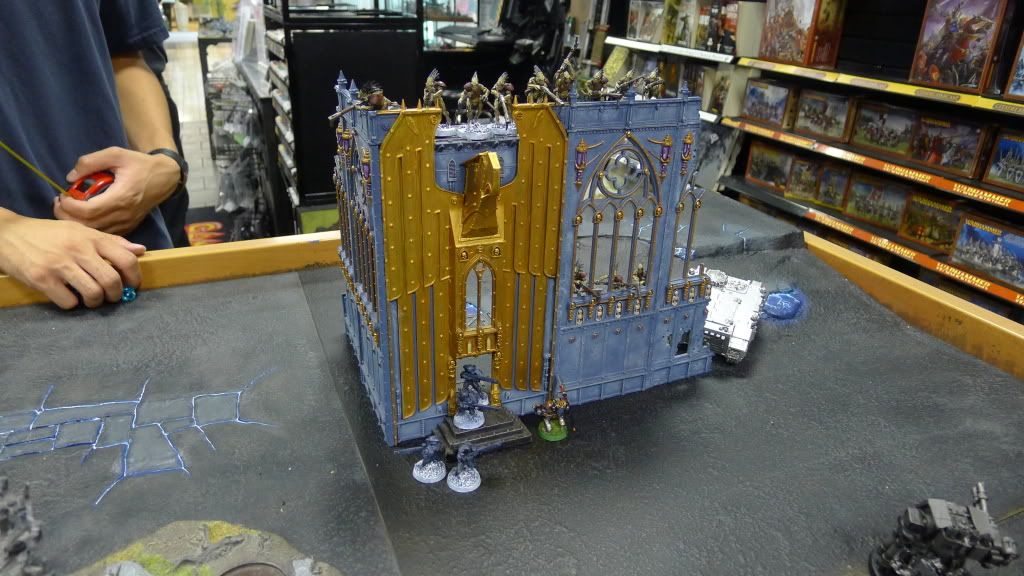
Tau 5
Overview of the beginning of the end.
Fire warriors come out to play.
Last piranha turbos to contest the far-right objective.
Now SabrX has a slim chance to pull out a draw. He can't get to my objective. What he needs is:
1) Hopefully by some miracle have his piranha survive.
2) Kill off or tarpit Crowe and my purifiers so that I cannot contest his objective (or kill his last 2 scoring units left).
3) Have the game end on the bottom of Turn 5.
He fires 30+ S4 rapid fire shots from his kroots, 12 S5 shots from his fire warriors and 4 S5 smart missiles from his broadside at my 4 purifiers. I beat the odds and 1 purifier survives!
Then he sends a railgun shot to Crowe's face (only 1 of his broadsides could see Crowe) which Crowe barely ducks. However, while ducking that railgun shot, Crowe gets tagged by a plasma shot from his last
fireknife. No biggie, it's just a flesh wound.
 Grey Knights 5
Crowe walks through the ruins. Hmmm....who should I take out? Broadsides or kroots on objective?

Purifiers go to claim their own objective. Dreads advance.
Other purifiers go to claim the far-right objective as well as to deal with the contesting piranha.
In shooting, 1 of my dreads kill off his lone, exposed broadside.

Another one dread kills off his lone, exposed and last crisis suit.
Purifiers explode his contesting piranha.
Finally, 3 dreads and 1 unit of purifiers fire at his kroots on his objective. I kill enough to force morale....which he then fails. Off they go, leaving his objective empty.
Well, that just made it a no-brainer. Crowe goes to fulfill my goal....which was to kill all his broadsides. Too bad I completely whiff in combat and fail to wound his broadsides.
However, the result is clear and we call it here.
I've got my objective....
....as well as the far-right objective.

Tau objective goes unclaimed.
Victory to the Grey Knights!!!


 .....Bay Area Open GT 2013 - Best Tyranids
 .....LVO GT 2014 Team Tournament - Best Generals


 - 1500 6th ed codex: 2 wins, 1 loss, 0 draws