I am all for a new codex as every other tau player is, but I know a lot of tau players out there, or at least people with tau armies, don't like to play the tau any more due to them getting whooped a lot.
Well... There is some light at the end of the tunnel. Using some 'unorthodox' means, I have pulled out some high ranking spots in some local tourneys. Now these are not just garage tourneys. The latest one was a sanctioned
GW GT tourney.
I pulled off 4th place, and some people could not wrap their head around that tau beat them. As is customary, as it seems, the armies that won the top three where space wolves, sisters of battle, and grey knights respectively.
That is all customary, but I seek to change that. It may take a new codex to do it, but I just want for fellow Tau players that the Tau are not defeated yet.
For the Greater Good,
Waffles
Sorry about the wait, trying to make everything work.
Feb 25th. Seattle Bunker Games Workshop
GT Tourney. 1500 points: Normal Force Organization.
All photography from
GW's facebook page.
my list: Unit cost: 96
XV8 Shas'
el
--- [,
TL Missile pod, Positional relay,
HW Drone controller, Gun Drone,
HW BS filter]
++++ [Elites] ++++
Unit cost: 201
XV8 Shas'ui
TL
--- [
TL Fusion blaster, Plasma rifle,
HW Multi-tracker]
XV8 Shas'ui
--- [
TL Plasma rifle,
BS Filter]
XV8 Shas'ui
--- [
TL Plasma rifle, Drone controller, Shield Drone]
Unit cost: 201
XV8 Shas'ui
TL
--- [
TL Fusion blaster, Plasma rifle,
HW Multi-tracker]
XV8 Shas'ui
--- [
TL Plasma rifle, Drone controller, Shield Drone]
XV8 Shas'ui
--- [
TL Plasma rifle,
BS Filter]
Unit cost: 152
XV8 Shas'ui
--- [
TL Missile pod,
BS Filter]
XV8 Shas'ui
--- [
TL Missile pod, Drone controller, Shield Drone]
XV8 Shas'ui
--- [
TL Missile pod, Target lock]
++++ [Troops] ++++
Unit cost: 145
6x Fire Warrior 'la
--- [Pulse rifle]
Devilfish
--- [Burst cannon, 2x Gun Drone, Landing gear, Disruption pod]
Unit cost: 145
6x Fire Warrior 'la
--- [Pulse rifle]
Devilfish
--- [Burst cannon, 2x Gun Drone, Landing gear, Disruption pod]
Unit cost: 60
6x Fire Warrior 'la
--- [Pulse rifle]
++++ [Fast Attack] ++++
Unit cost: 145
5x Pathfinder 'la
--- [Pulse C./ Marker]
Devilfish
--- [Burst cannon, 2x Gun Drone, Landing gear, Disruption pod]
++++ [Heavy Support] ++++
Unit cost: 118
XV88 'ui
TL
--- [
TL Railgun,
TL Plasma rifle, A.S.S.,
HW Multi-tracker,
HW Drone controller, Shield Drone,
HW BS filter]
Unit cost: 118
XV88 'ui
TL
--- [
TL Railgun,
TL Plasma rifle, A.S.S.,
HW Multi-tracker,
HW Drone controller, Shield Drone,
HW BS filter]
Unit cost: 118
XV88 'ui
TL
--- [
TL Railgun,
TL Plasma rifle, A.S.S.,
HW Multi-tracker,
HW Drone controller, Shield Drone,
HW BS filter]
-----------------------
Total model count: 39
FIRST BATTLE: 5 objectives: dawn of war, 6 turns exact. ENEMY: Necron.


Table layout: Two centralized ruins and 4 corner placed small forests.
Objectives where placed at true center, opposite 12" 12" corners, and along the middle 12" away from the center to the left and right.
Roll off gives me First turn.
Decron list (inexact) 2 monoliths, Doomsday Arch, Two troops with Gauss, Immotech, Immortals.
Deployment: Tau:
HQ centralized at 23" to keep his troops away
:Necron: Three troops, two on left and one right, Immortals with Immotech mid board.
Seize Initiative: Failure
To come on: 2 broadsides and pathfinders. Reserve troops, 1 broadside, and deepstriking suits.
Turn 1
Broadsides come on left both left side and commander starts moving back from middle of board. Pathfinders find cover in Right hand corner to set up markerlight shots.
Two necrons are killed and both stand back up.
Monoliths and Doomsday Arc comes onto board. Failure to see enemy. left hand troops pushes forward. Righthand troop seizes objective. Immortals push up middle.
Necrons wanted it to stay night fight and so it stayed night fight.
Turn 2
Commander allows broadside to come onto the board and everything else stays back.
Commander stays mid within cover and shoots at forward troop. Kills 2, one stands back up.
Broadsides take out one monolith and Doomsday arc.
Necron left troop pushes forward. Sees a broadside but does no damage. Immortals move up mid board and seize control of right mid objective. Left hand troops split up. One for Tau side objective and one for true mid objective.
Chain Lightning kills one broadside.
Necrons want night fight again, but their will is granted: Night Fighting continues
Turn 3.
Commander tries to bring on Firewarriors with Devilfish, but fails to do so. Everything else stays off.
Broadsides try and take out monolith, but fails to do so.
Commander kills 1 troop that is going for Tau objective
Monolith targets Broadsides, but fails to hit. Left hand troops gain objective control.
Left hand troops can not see broadsides. Immortals can see commander, dealing 1 wound and loosing drone. Moral check passed
Chain Lightning fails to hit anyone.
Night fighting ends.
Turn 4
With no more night fight Commander lets the Tau flood gates open. All reserves come into play except for a single
FW squad with DF.
Deepstriking plasma suit squad and missile pod squad deploy to take out Tau objective holding Necrons. Third deepstriking unit comes in next to commander mid board. All make direct hits thanks to re-rolls.
Both
FW squads come on left side to help take out Tau objective holding squad.
Necron troop holding Tau side objective is obliterated with
FW's and crisis suits. Broadsides shoot at monolith, but only stun it. Commander and third crisis suit squad shoots the second left side Necron Troop. Killing 5, and making them run.
Necron chain lightning take out a Broadside's drone, causing Broadside to flee.
Immortals shoot at 3rd crisis suit squad and deal 3 wounds. Crisis suits do not back down.
Monolith Shoots at Missile Pod squad, killing Two suits, and sheild drone. Single Suit does not fall back.
Turn 5
Last
FW team comes onto Board to take and hold Tau side objective.
FW Teams get into Devilfishes (
FW without dedicated use Pathfinder's dedicated Devilfish). One Team takes the Left side mid objective and the other sets up for taking true mid objective next round (front of devilfish only about 2 inches away).
Broadside shoots at monolith and destroys it. Commander and crisis suits start to try and converging on immortals. Shots kill 4 immortals, but all 4 stand back up.
Immortals move off of right mid objective to try and stop the devilfish.
Immortals fire at DF, getting 2 glancing hits and stuns transports.
Turn 6
FW's secure possitions to take both left hand side objectives.
FW disembark and take cover and claim true mid objective.
all suits shoot at immortals, 5 go down and 4 stand back up.
Tau Finish All turns with 3 objectives within control.
Immortals Move back to claim mid right objective.
instead of firing, immortals run 5" to get within 2.5 inches of true mid objective.
Draw game. Tau 2 objectives, Necrons 2 objectives.
Necrons pulled off a draw with "conga-line maneuver."
GAME 2: Annihilation - spearhead, 6 turns exact. Enemy: Space Marines (Doom Legion)
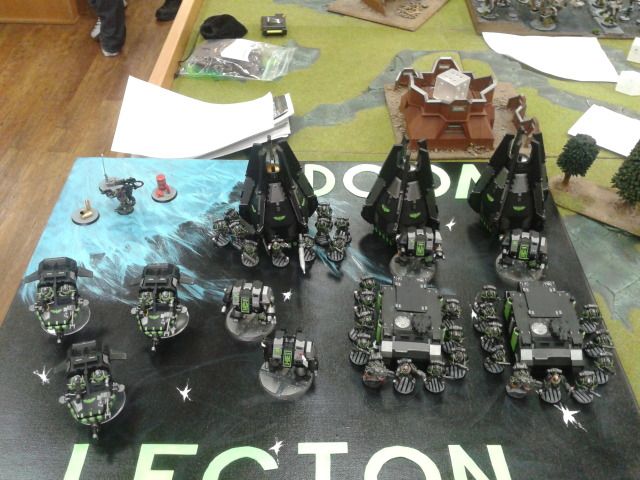
Table layout: Two centralized ruins and 4 corner placed small forests. (same table as first game)
Roll off Gives Space Marines first turn.
Enemy Deployed Right upper corner, I deployed Lower Left Corner.
Enemy List: 4 dreadnaughts, 3 separate speeders, three tactical squads, three drop pods (two with dreadnaughts, one with marines), Techpreist, and two rhinos.
Deployment: Two space marine squads within a ruin on the midway line, 2 dreadnaughts and 3 speeders behind for cover. 2 rhinos in reserve, drop pods and their cargo in deepstrike.
: Pathfinders in ruin on the midway line, Shas'
el behind ruin (in reference to the space marines) and my devilfish in the back corner as far away as possible.
Scout moves: Pathfinders moved into the 12" radius 'no deploy zone' to get a larger target advantage.
Seize initiative was a failure.
Turn 1:
Space marine drop pods, both with dreadnaughts (power weapon and meltas) come out of the sky. First tried to come down near the commander towards my board edge. It scatters a full 12" towards my devilfish.
Second drop pod misses and stops right before the ruin to the right.
Three speeders come around the right ruin from the north (his board edge) and 2 dreadnaughts move though cover to the south.
Dreadnaught one comes out and fires at my devilfish. Successful hit for a destroyed transport.
Dreadnaught two fires at my commander doing no damage.
Pathfinders put two marker lights upon dreadnaught 2. Dreadnaught can not shoot next turn.
Turn 2:
No reserves come in.
Dreadnaughts 1, 3 and 4 start to move towards the middle of the board after my pathfinders and my commander. Speeders diverge, 1 and 2 go south and 3 goes north.
Commander is shot and takes 1 wound.
Speeders take out 2 pathfinders forcing a moral check: They stand and fight.
Commander is assaulted by Dreadnaught 2, they are locked in combat. -------- Sorry, did not mention that drone went down from assault.
Commander has one broadside come in at a 2+.
Broadside comes in on left hand side in perfect spot to get shot at dreadnaught 1's back armor.
2 marker lights hit dreadnaught 1 from the pathfinders.
BS on broadsides goes from 3 to 5. Broadside hits with both plasma and railgun into dreadnaught 1.
Railgun is an automatic penetration shot and dreadnaught flies apart in an un-calculable number of pieces.
Commander can not hit the dreadnaught but survives for another round, still stuck in combat.
Turn 3
No space marine reserves come in yet. (forgotten transports are not rolled)
The Ruins dwellers still do not move since they get a 3+ save while there.
Dreadnaught 3 makes it about halfway from left and right, while dreadnaught 4 is about 7 inches behind the first.
The three speeders converge onto the pathfinders, one northeastward, one eastward, and one southeastward. With flamers, the pathfinders cook while hiding for non-existent cover.
Dreadnaught 1 hits and kills the Shas'
el. Afterwards it turns and starts heading after the broadside to exact revenge.
*cue sarcastic comment from space marines about how easy the tau are to kill*
Without the Shas'
el to hold back reserves, the tau rush on. Every single tau is rolled to come onto the board except for a single
FW team with DF
PR suit team 1 comes on 6 inches behind dreadnaught 4.
MP suit team comes in along the north edge slightly to the right of midway lengthways.
PR suit team 2 comes in behind dreadnaught 1.
Broadside 2 comes in on the left side to help out with dreadnaught control.
Broadside 3 comes in on the right side to get a rearward shot into dreadnaught 3.
FW w/ DF 1 comes in mid board and
FW come out of DF to get rapid fire on speeders.
FW static team come in next to
FW team 1 to assist with speeder control.
After a devastating round of shooting (for the space marines that is) the tau destoyed: southern most speeder. dreadnaughts 3 and 4
dreadnaught 1 was shaken and missing a melta. Eastward speeder was missing a melta.
turn 4
Drop pod comes in ( Rhinos are once again forgotten)
Drop pod comes in at northwestern corner, about 12" east and 8" south from the board sides.
Squad comes out and shoots PR suit team 1. With other concentrated shots upon that team, drones go down and each suit only has 1 wound left.
Northernmost speeder goes south and takes out 5
FW's,
FW's (or rather
FW) held his ground.
Eastern Speeder goes northward to get cover saves.
Devilfish is shot by a multimelta from the ruin. Devilfish explodes, taking out 3 of 6
FW in team 3. Team 1
FW is not hit.
Dreadnaught 1 assaults PR team 1, Kills a single suit. PR team 1 is way too brave and does not fall back.
FW w/ DF team 2 comes into play in the back right hand corner.
FW team 1 Starts running To the right Corner, As does
FW team 3.
MP team moves to get better shots, but only imobilizes and takes out all weapons.
Broadsides 1 and 2 mop up kill points by taking out drop pods. one drop pod is destroyed
Broadside 3 shoots cross board and misses.
Devilfish and its drones shoot at the now southern speeder, immobilizing it.
PR suit team 2 shoots at the ruins, taking one marine, and moves behind cover in the southern most right hand corner.
Dreadnaught 1 kills another suit. The team now falls and is caught. The revenge upon the broadside continues.
Turn 5
Rhinos are remembered and come in.
Rhino 1 comes in in very back northeastern corner.
Rhino 2 comes in tankshocking
MP suit team. The team was not scared, but was now pushed into range of the marines in the ruins.
Bolter fire from the drop pods take out the shield drones of both broadside 1 and 2.
Fire from the ruins are directed at both the
MP suit team and
RP suit team 2. PR suit team comes out unscathed.
MP suit team is reduced to only one suit. Does not fall back.
Dreadnaught 1 assaults broadside 2. With no shield drone, Broadside goes down.
Broadside 1 shoots and kills dreadnaught 1.
FW teams 1 and 3 keep falling back to the corn avoid shots,
Broadside 3 shoots and destroys southern speeder.
MP suit moves eastward to avoid fire and takes out the rhino that tank shocked his team.
PR team 2 jumps foward and shoots into the ruins, taking out 1 more marine. Then they jump back behind cover.
Turn 6
Space Marines start coming out of the ruins for a last second chance, but did not make it far due to difficult terrain tests.
Broadside 3's shield drone goes down. Broadside does not back down.
Drop pod bolters take out 2 fire warriors out of the 3 man team. This little
FW was done and ran off the board.
Broadside 1 destroys another drop pod.
Broadside 3 destroys southern immobile speeder.
MP suit takes out another weapon on the remaining speeder, but since it had no weapons and was immobilized, it was destoyed.
Kill points for Space Marines: 7
Kill points for Tau : 9
-- Looking up after this battle I realized that we were the last match going, coming down to the last 5 minutes left in the time limit, and we had become the entertainment of the night.--
This was the most entertaining game of annihilation I have ever played. Not due to rolls or opponent, but due to my concentration upon the game. I there were so many points in this game that if I would have made a single mistake, I would have been decimated.
I will get game 3 in at some time. I am not too fond of it due to my opponent was really rude. He complained off the start that he "wanted a more challenging opponent for his last game of the night." Then after the 5th round, he realized that I was just plain beating him up and he started throwing dice and swearing heavily. Blaming his dice, the game board layout, his list, and the game's mission/deployment.
I had won the game, but was one of the worst games I had played in nearly a year. It nearly left a bad taste in my mouth until I realized that the next table over had noticed his bad sportsmanship as well and had him removed from the store. I was not particularly glad that he left (maybe kicked out even), but was glad to see that the other players did not stand for that kind of conduct.
I can still post the battle report up for my third game, but I really do not wish to remember that battle in great detail....
Just let me know.
If you guys want any more information or are a player in the lower puget sound area, let me know and I can talk and play with anyone.
Waffles


 4.5k
4.5k
 1.3k
1.3k
 2k
2k 


 5 Wins, 6 Draws, 3 Losses 2000 points
 500 points


