| Author |
Message |
 |
|
|
|
|
Advert
|
Forum adverts like this one are shown to any user who is not logged in. Join us by filling out a tiny 3 field form and you will get your own, free, dakka user account which gives a good range of benefits to you:
- No adverts like this in the forums anymore.
- Times and dates in your local timezone.
- Full tracking of what you have read so you can skip to your first unread post, easily see what has changed since you last logged in, and easily see what is new at a glance.
- Email notifications for threads you want to watch closely.
- Being a part of the oldest wargaming community on the net.
If you are already a member then feel free to login now. |
|
 |
2009/02/28 21:03:31
Subject: Re:"Forward to Germany" - Soviet WW2 T34/76 Diorama
|
|

Regular Dakkanaut
|
|
|
|
|
 |
|
2009/02/28 21:20:55
Subject: Re:"Forward to Germany" - Soviet WW2 T34/76 Diorama
|
|
[ADMIN]
Decrepit Dakkanaut
|
That looks great! I wouldnt be surprised if the whole thing was fully functional and it drove off across your desk. Really looking forward to seeing this painted too.
|
Check out our new, fully plastic tabletop wargame - Maelstrom's Edge, made by Dakka!
|
|
|
|
|
2009/03/01 13:58:24
Subject: Re:"Forward to Germany" - Soviet WW2 T34/76 Diorama
|
|
Regular Dakkanaut
|
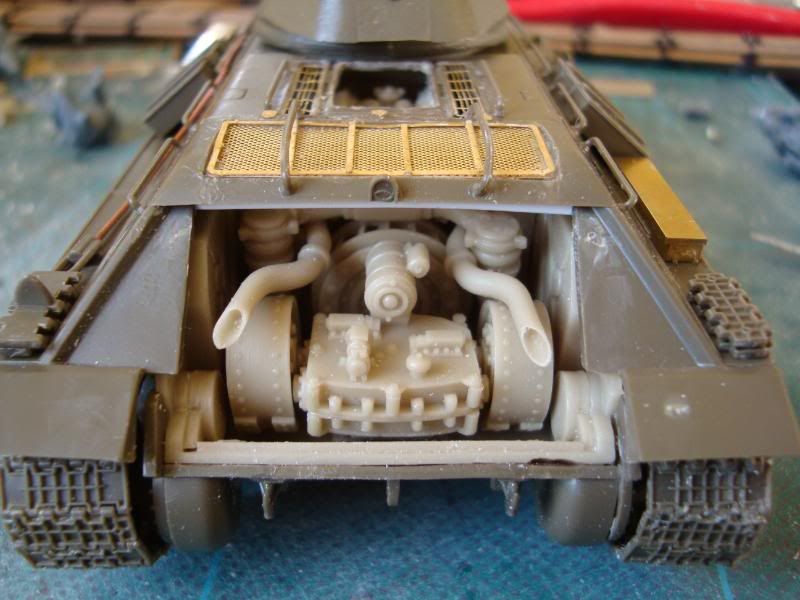
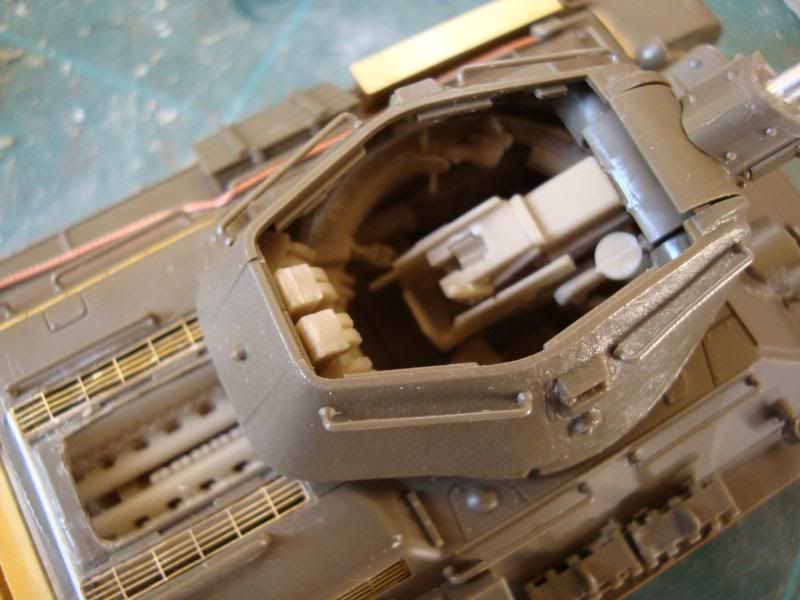
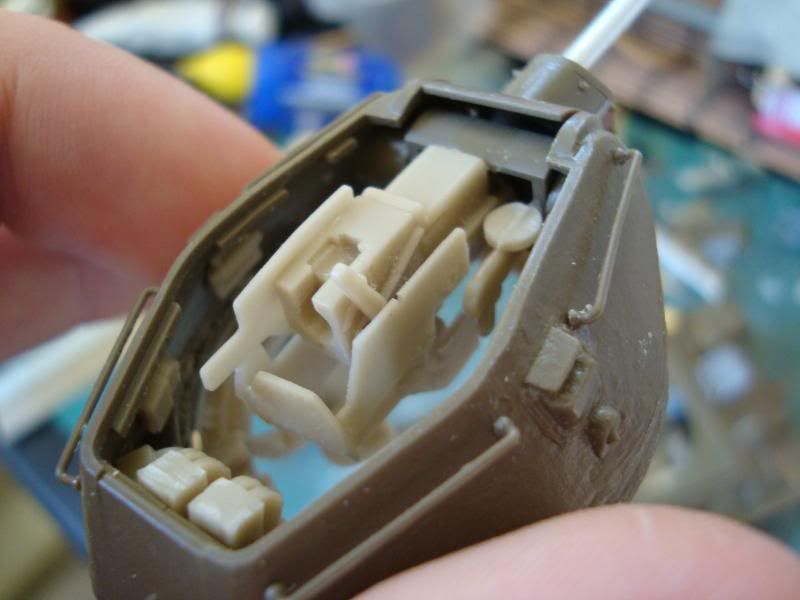
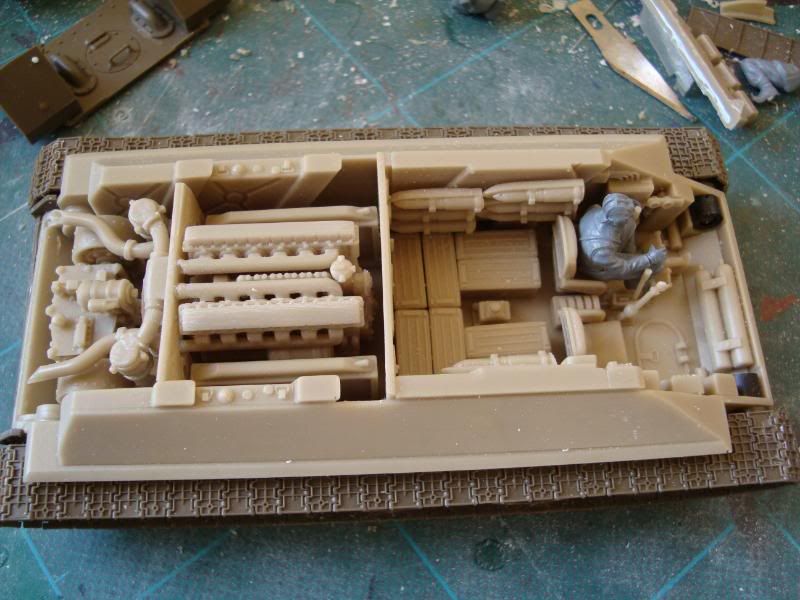
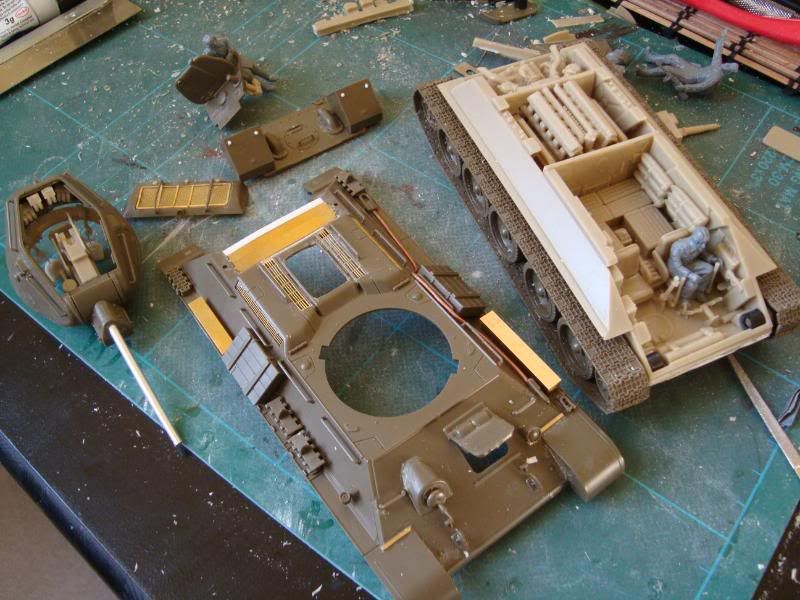
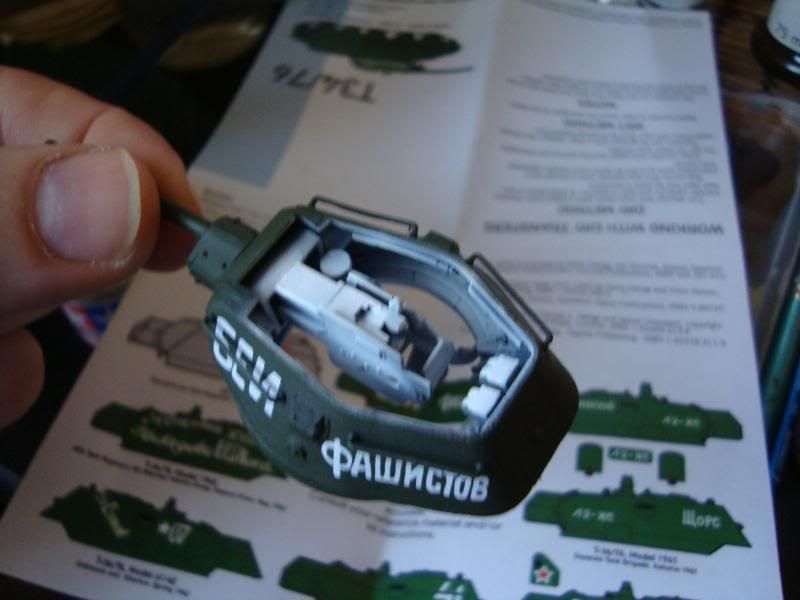
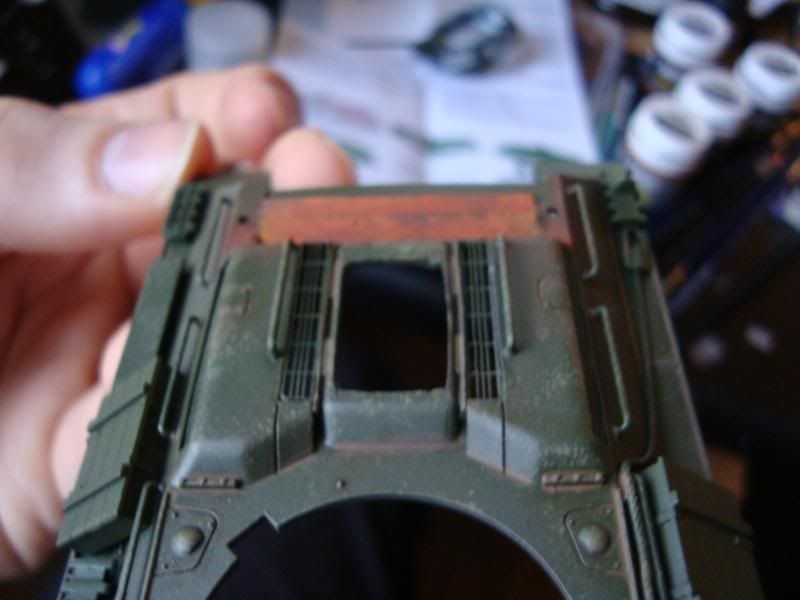
Thanks Legoburner! It certainly took a lot of work but the interior detailing really paid off.
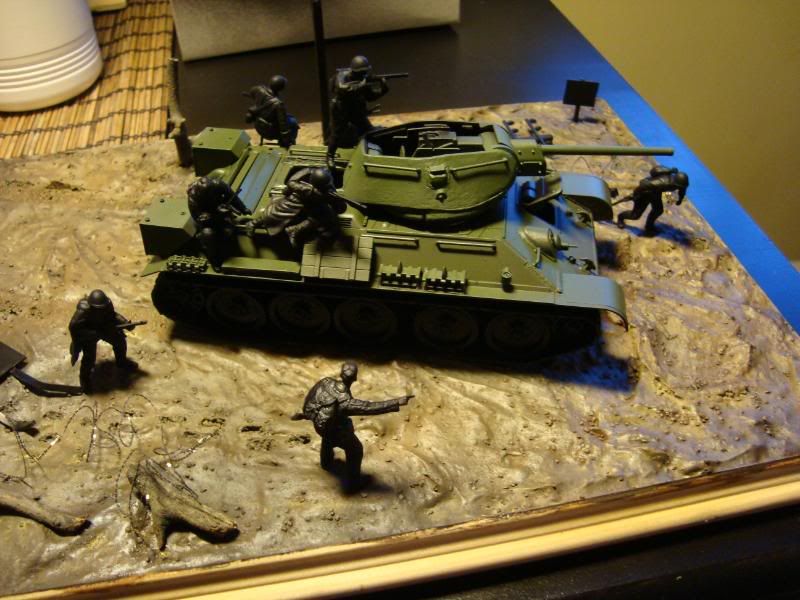
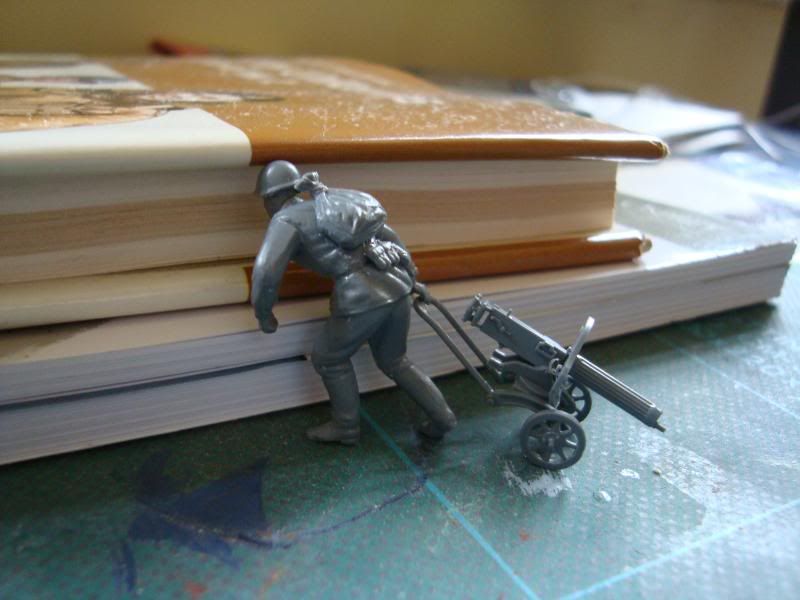
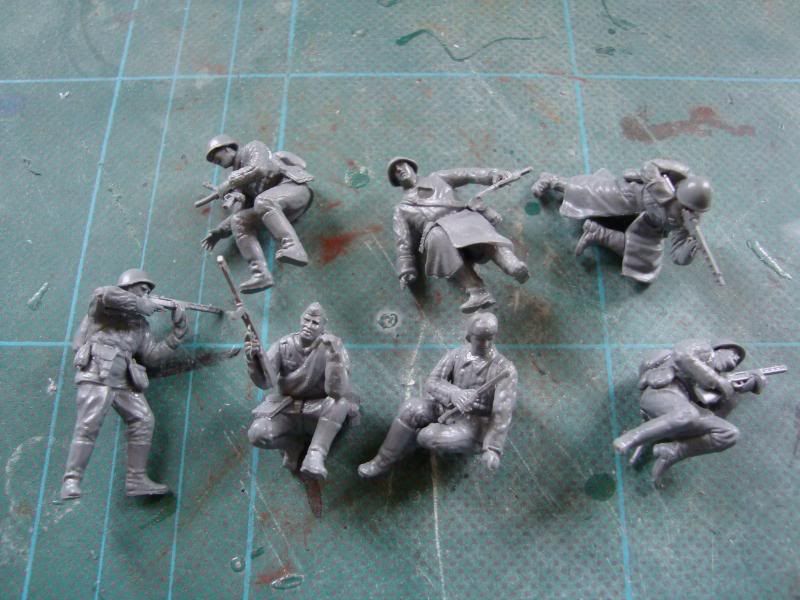
The Infantry are now finished and ready for the diorama and painting.
Infantry on foot:
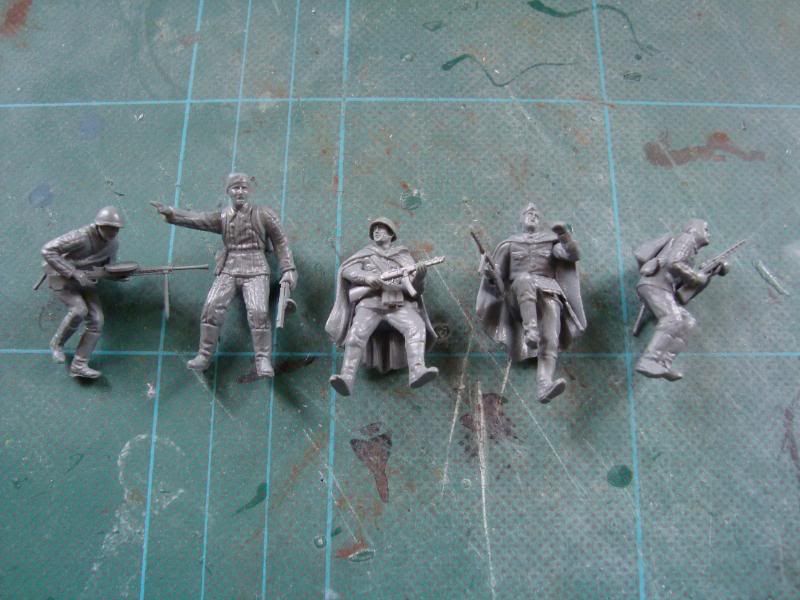
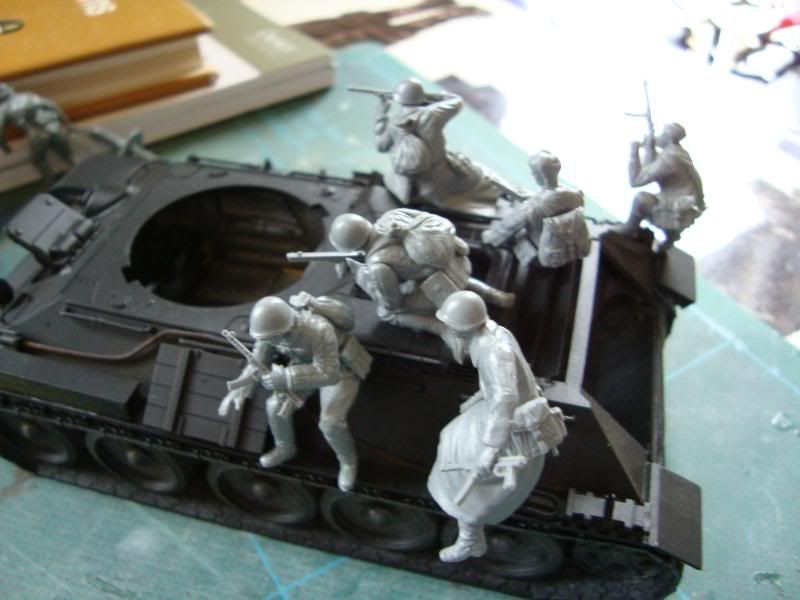
Infantry riding the tank:
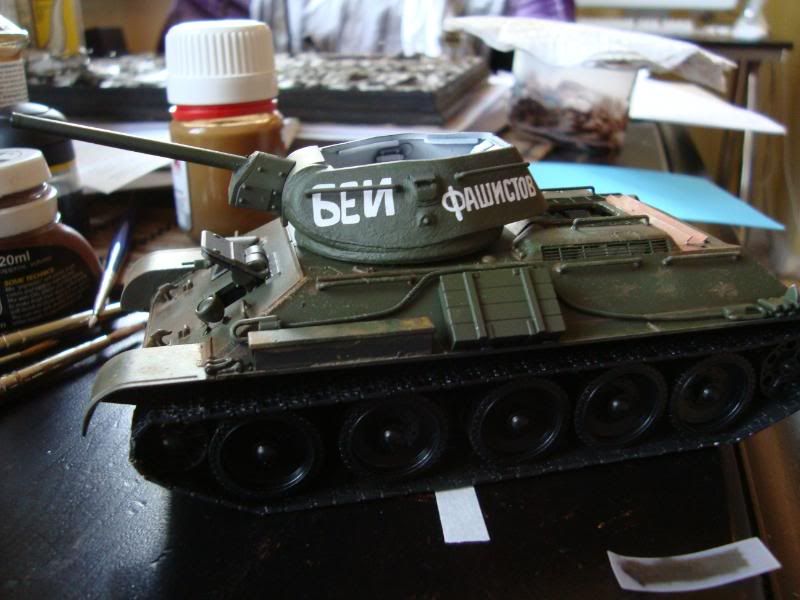
Now that the troopers are all done I've moved onto making the scenic base for the diorama and started painting the Tank. More photos of the painting to follow shortly.
|
|
|
|
|
|
2009/03/01 15:31:50
Subject: "Forward to Germany" - Soviet WW2 T34/76 Diorama
|
|
Rampaging Reaver Titan Princeps
|
Really nice work, good to see some really nice scale modelling can't wait to see the diorama. Love the guy with the traditional Gatling gun, As the posture looks right.
|
|
This message was edited 1 time. Last update was at 2009/03/01 15:32:36
"But me no buts! Our comrades get hurt. Our friends die. Falkenburg is a knight who swore an oath to serve the church and to defend the weak. He'd be the first to tell you to stop puling and start planning. Because what we are doing-at risk to ourselves-is what we have sworn to do. The West relies on us. It is a risk we take with pride. It is an oath we honour. Even when some soft southern burgher mutters about us, we know the reason he sleeps soft and comfortable, why his wife is able to complain about the price of cabbages as her most serious problem and why his children dare to throw dung and yell "Knot" when we pass. It's because we are what we are. For all our faults we stand for law and light.
Von Gherens This Rough Magic Lackey, Flint & Freer
Mekagorkalicious -Monkeytroll
2017 Model Count-71
|
|
|
|
|
2009/03/01 18:14:29
Subject: Re:"Forward to Germany" - Soviet WW2 T34/76 Diorama
|
|
Regular Dakkanaut
|
Thanks Llama, I really love the Tamiya sculpts. They really managed to get some great dynamic movement into the minis.
You can really believe they are running for cover etc.
I'm working on the base right now and hope to have some more photos of that up soon.
|
|
|
|
|
|
2009/03/01 22:30:48
Subject: Re:"Forward to Germany" - Soviet WW2 T34/76 Diorama
|
|
Regular Dakkanaut
|
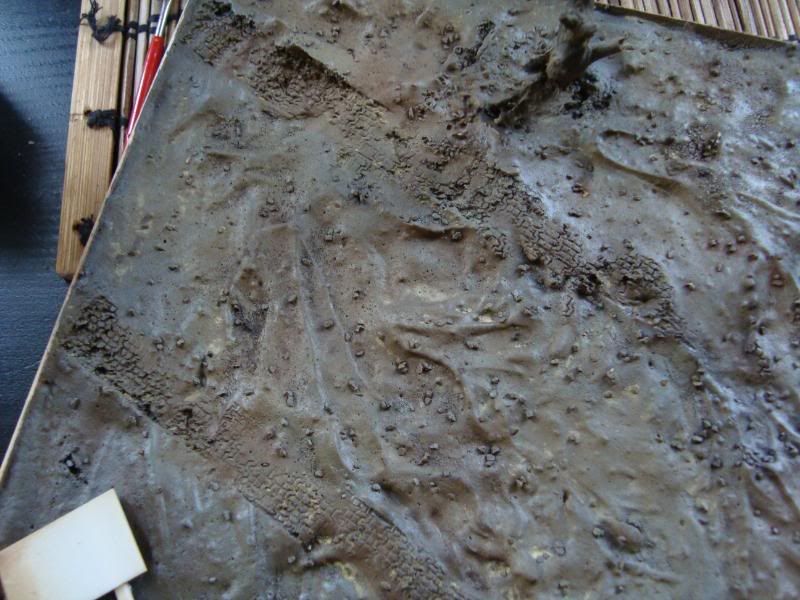
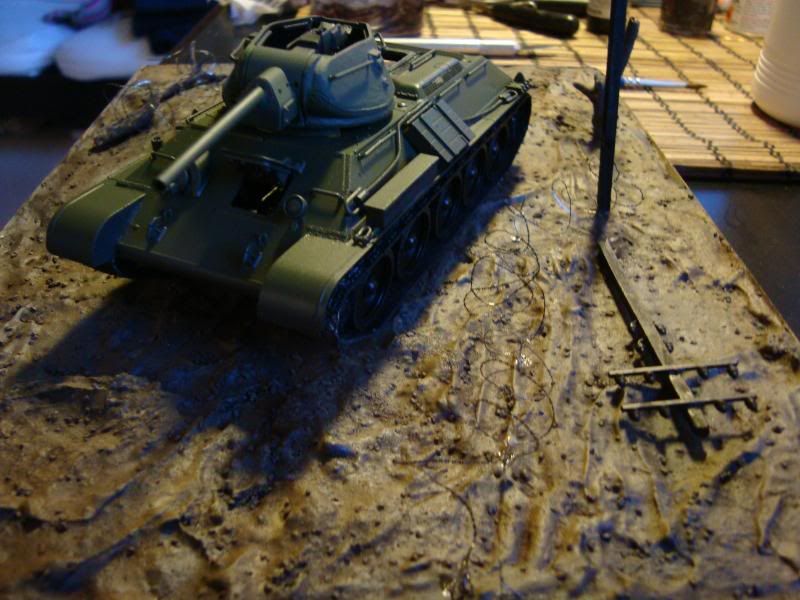
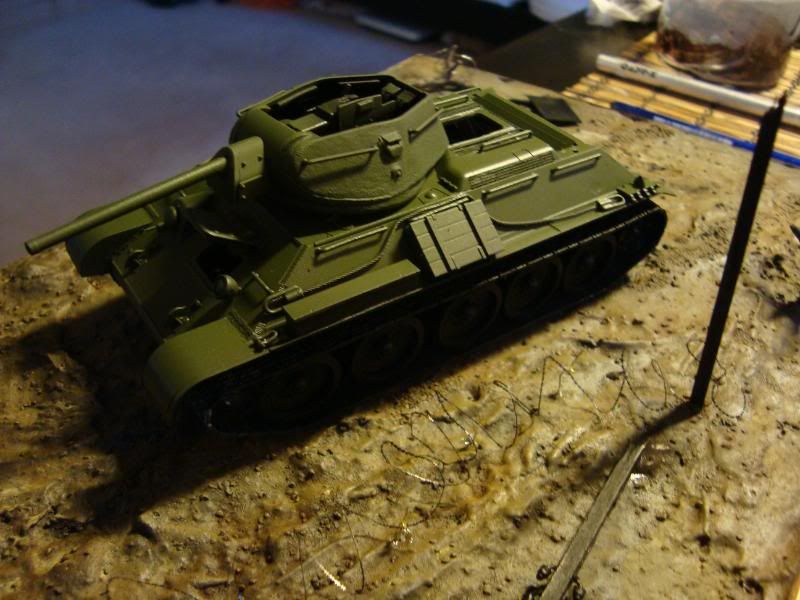
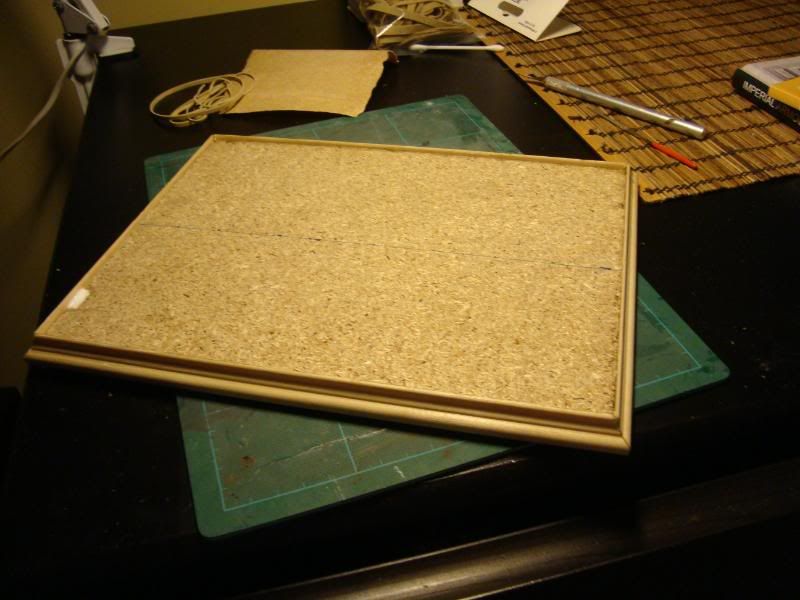
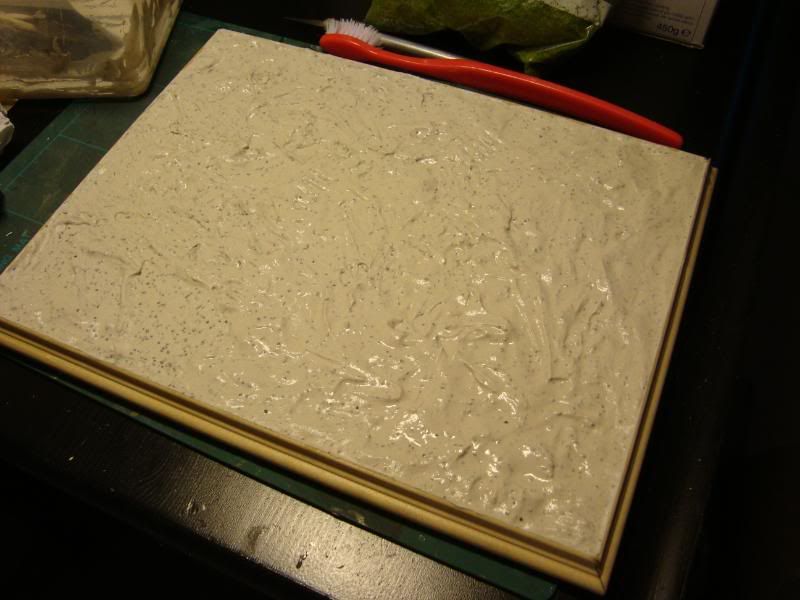
The base WIP:
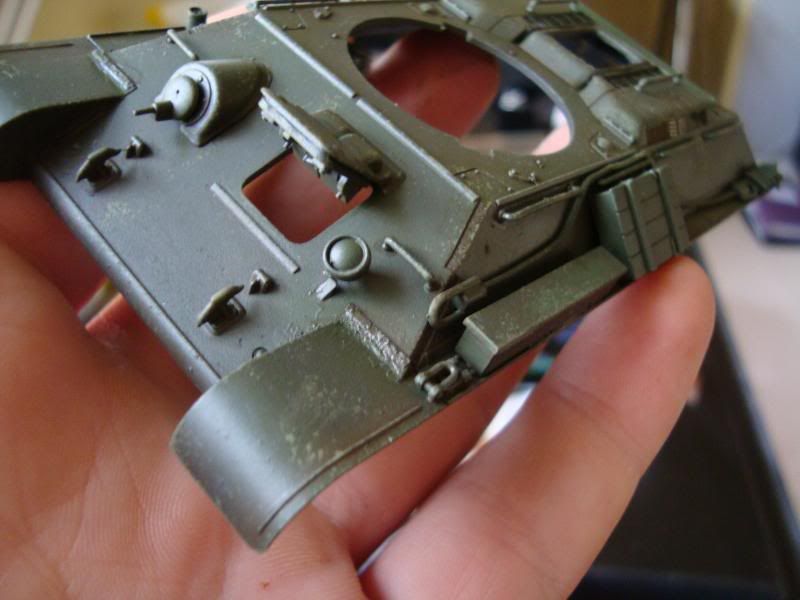
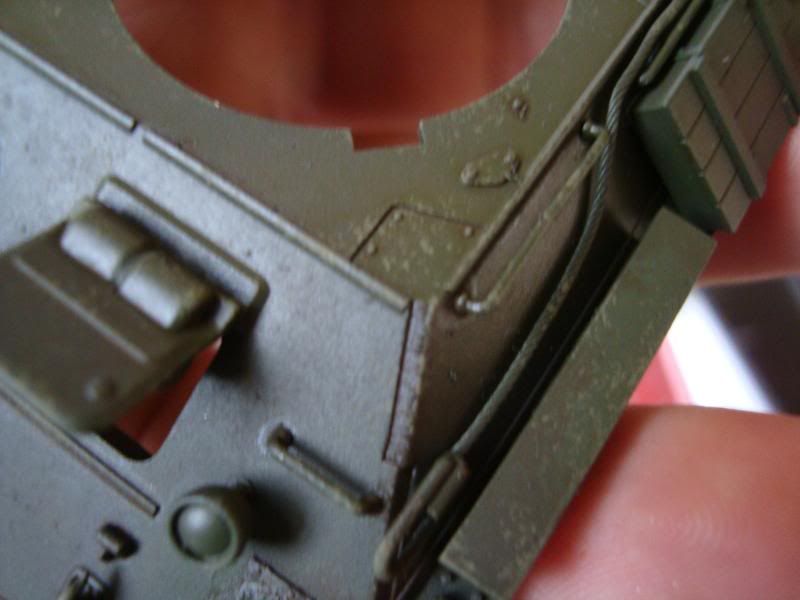
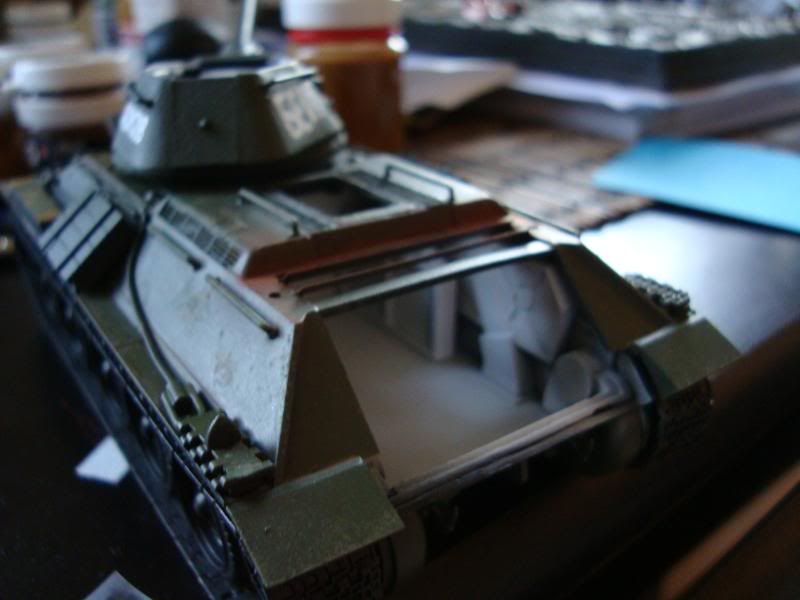
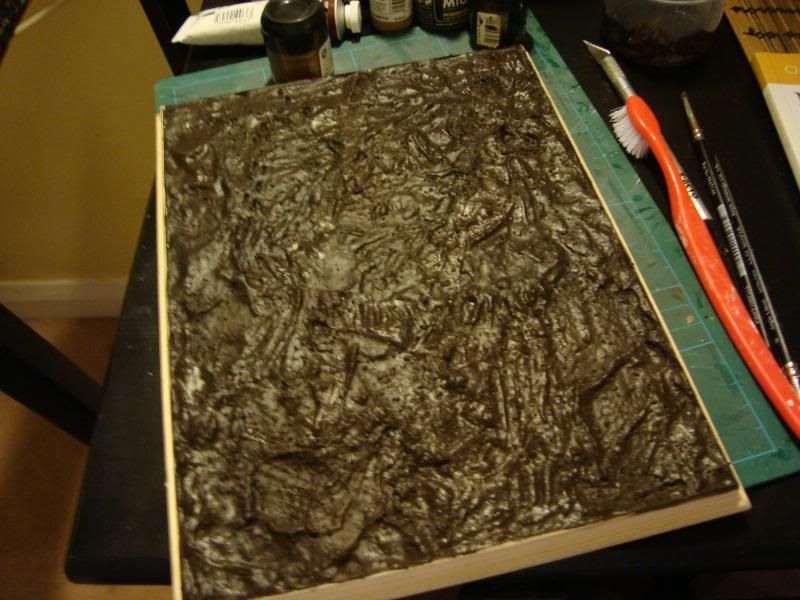
1st stage of painting:
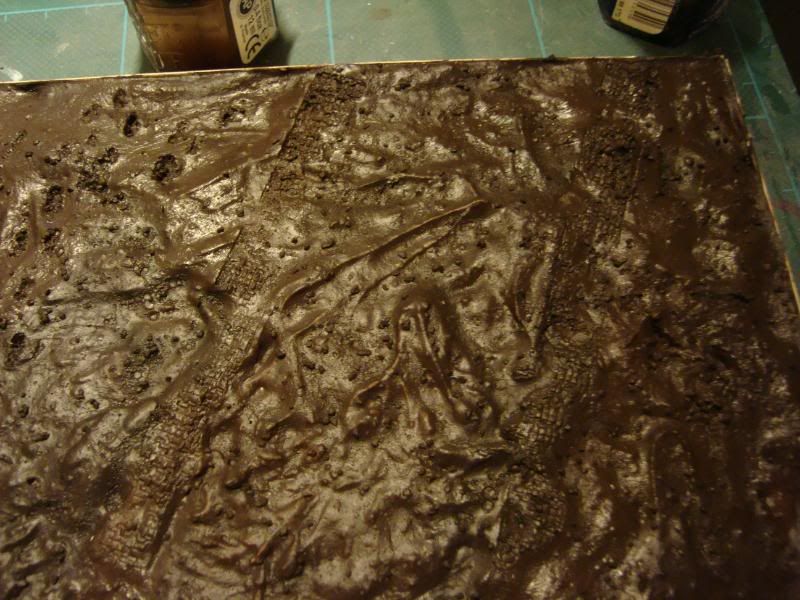
Tank tracks (a little hard to make out in this photo):
|
|
|
|
|
|
2009/03/01 23:39:30
Subject: "Forward to Germany" - Soviet WW2 T34/76 Diorama
|
|
Rotting Sorcerer of Nurgle
|
great work so far.
i'm starting to collect 1:48th WW2 too.
still not 100% confident of the etched brass bits though - some are soooo tiny.
your progress picts are great - better than most model magazines (but then they are limited on space i suppose!)
cant wait for the next lot.
will you airbrush this?
also could you do a pict of one of the men next to an IG mini?
|
Check out my gallery here
Also I've started taking photos to use as reference for weathering which can be found here. Please send me your photos so they can be found all in one place!! |
|
|
|
|
2009/03/02 09:57:44
Subject: Re:"Forward to Germany" - Soviet WW2 T34/76 Diorama
|
|
Regular Dakkanaut
|
Hi Bubber, thanks for the comments! Yes Photo etch components are very fiddly! It takes a lot of work and patience especially when you have to remove very small areas from the original plastic parts to accomodate them. It's really worth it though and gives a great end result.
If you're not too sure about photo etch there are lots of different sets of different levels of detail you could try to start with. Lions Roar do varying levels from easy to experienced.
I'll be doing a mixture of airbrushing and brush painting on this set. The base and the tank will be airbrushed then worked on with brush techniques and washes, and the troopers will be brush painted.
I'll dig out an old plastic IG mini for you and get some comparison shots.
|
|
|
|
|
|
2009/03/02 11:24:24
Subject: Re:"Forward to Germany" - Soviet WW2 T34/76 Diorama
|
|

Been Around the Block
|
Great work here Gundam-Mecha. I recently returned to the hobby and your level of detail and dedication is really inspiring.
I hope I can keep up my motiviation as well, starting on a blog ( here and on blogspot ) soon to motivate me.
|
|
|
|
|
|
2009/03/02 12:03:16
Subject: Re:"Forward to Germany" - Soviet WW2 T34/76 Diorama
|
|
Regular Dakkanaut
|
Thanks Kagar!
What will you cover in your blog? I'll be sure to check it out!
|
|
|
|
|
|
2009/03/02 22:41:17
Subject: Re:"Forward to Germany" - Soviet WW2 T34/76 Diorama
|
|
Regular Dakkanaut
|
Today I visited a local model store and stocked up on some different materials, including lots of scenery bits and the Sin Industry Filters by Mig Productions.
I've seen quite a few articles on these filters and have been really keen to try them, today I got myself the Allied filters set for Soviet, US, and British Tanks.
Filters are very subtle washes that you apply to armour to pick out the details and give interesting shades and colouring.
I also ordered myself a new airbrush online that will arrive tomorrow, so it will be great to try that double action airbrush on the T34.
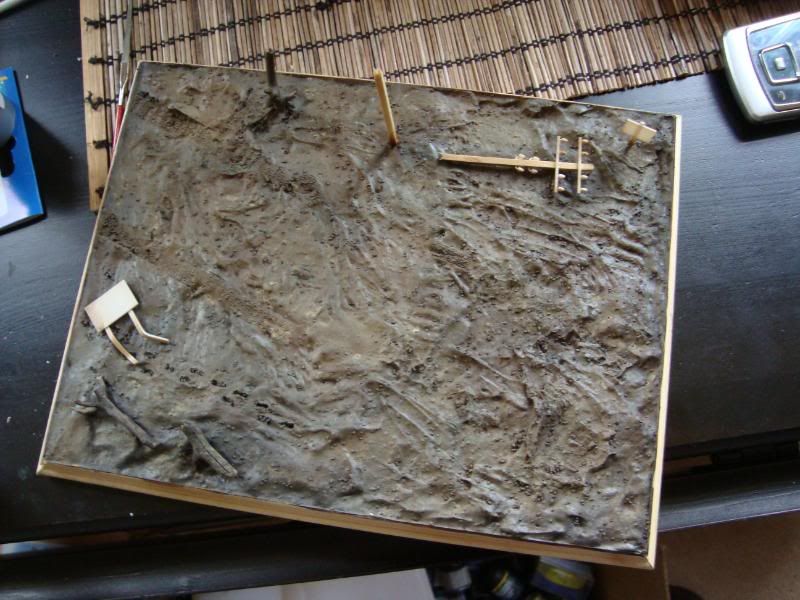
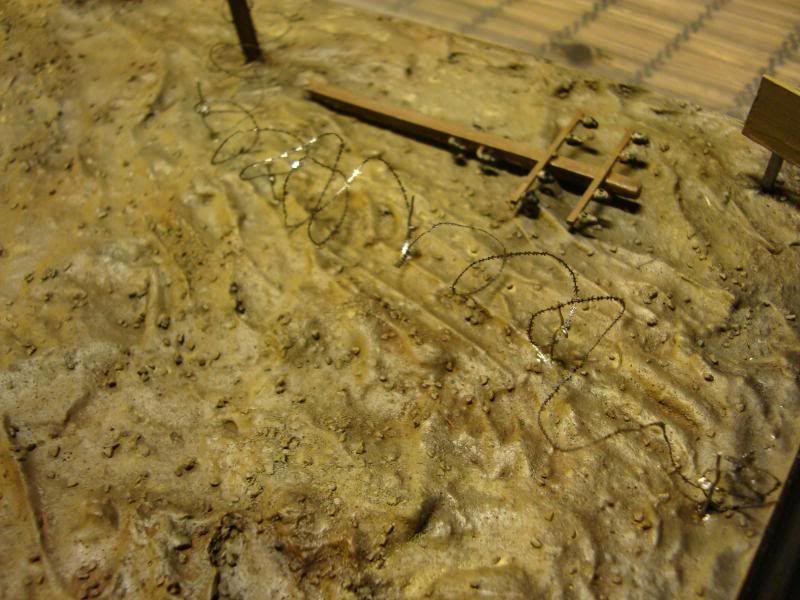
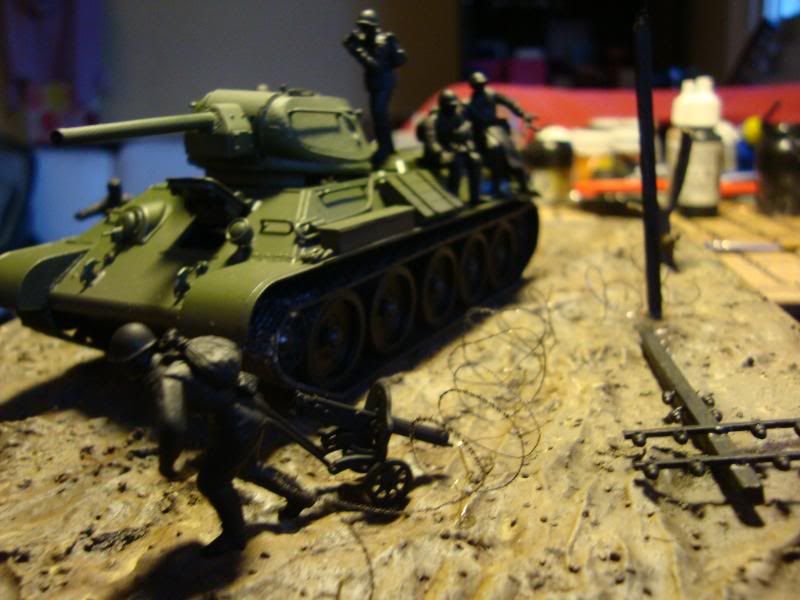
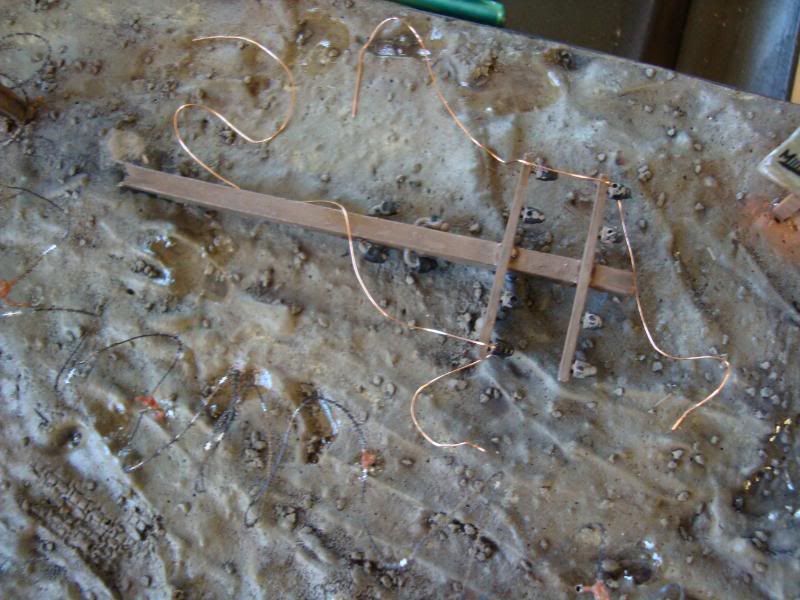
Here are some more WIP shots of the scenic base:
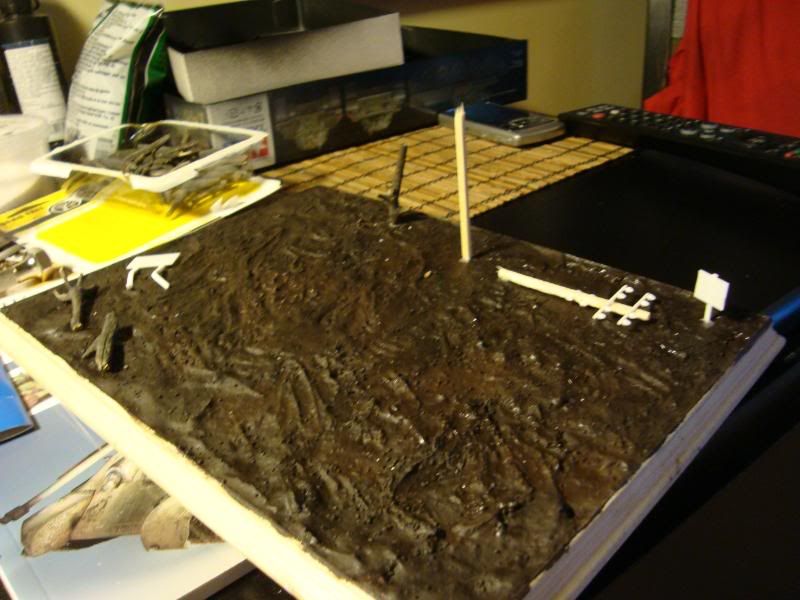
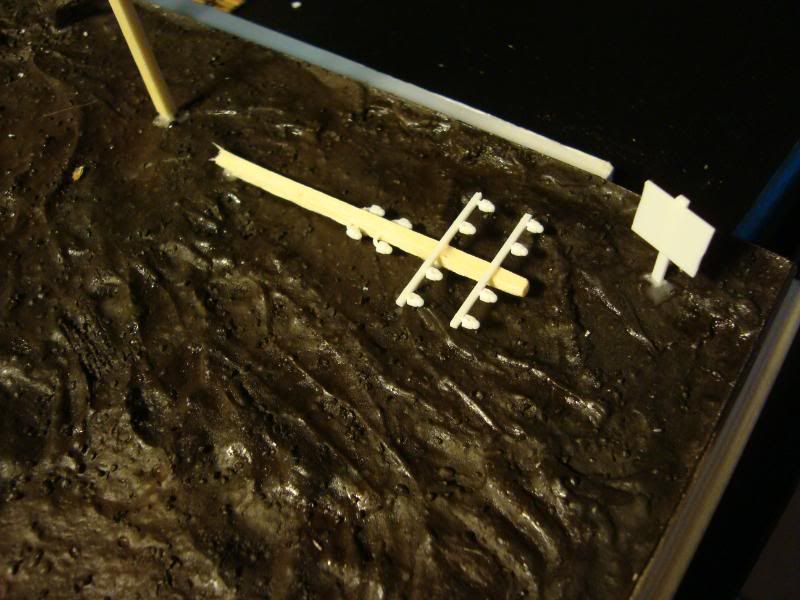
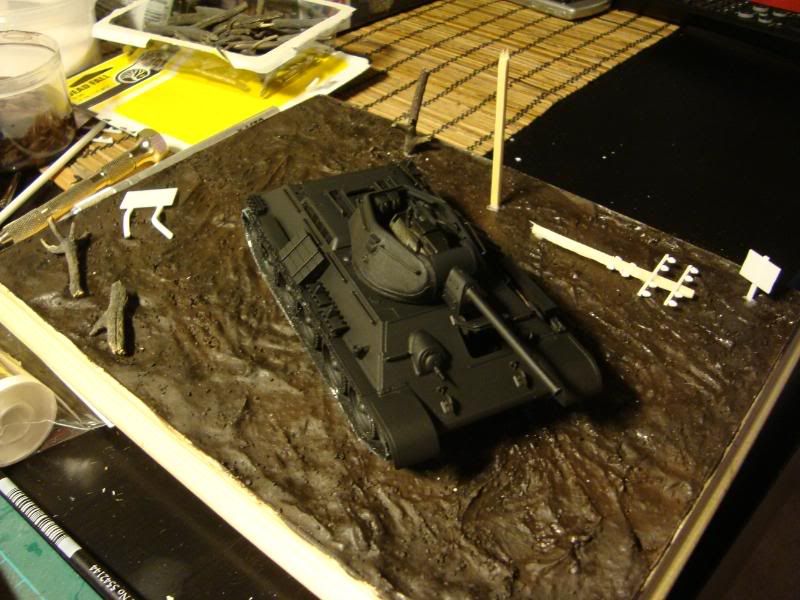
Theres still a lot more to do on the base. For example the telegraph poles will have copper wire through the holes I drilled out on the plastic parts. I plan to have these cables hanging from the pole and also strewn across the ground to make some interesting patterns. I'm also waiting on some brass etch barbed wire for the base.
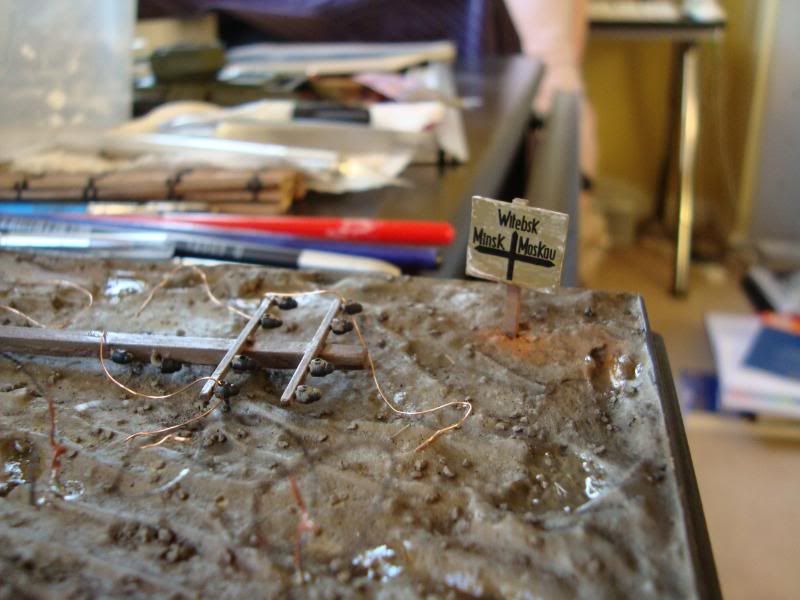
The signs will also be painted and finished with the Tamiya 1:48 road sign set, the sign standing will be in German reading "this way to Minsk, Moscow" and the damaged sign on the ground will be a Russian war slogan.
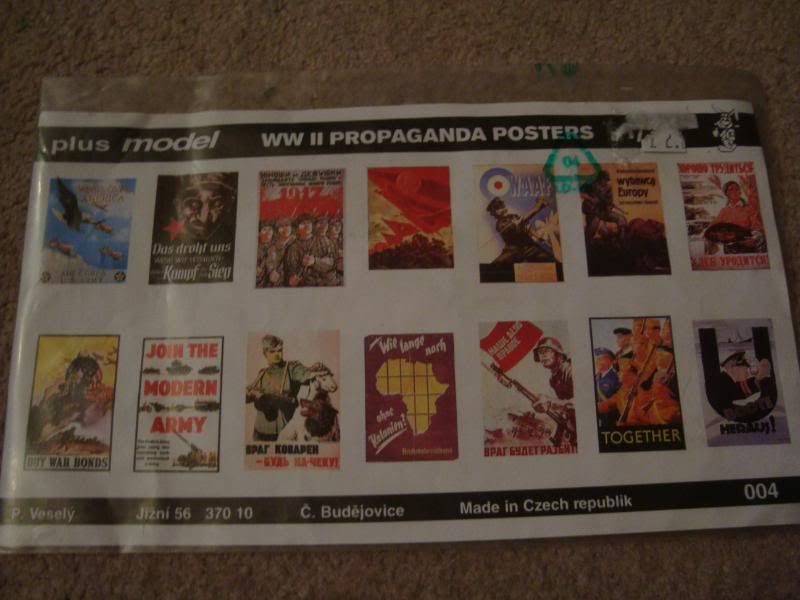
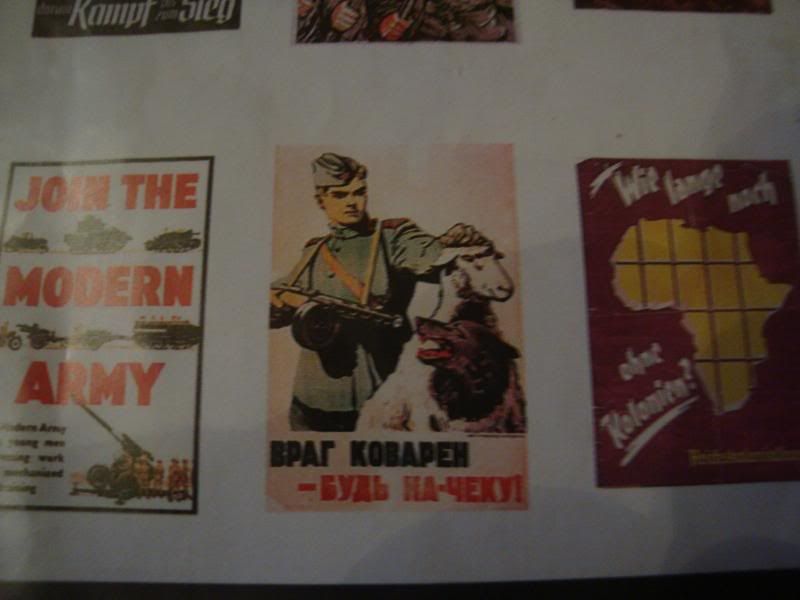
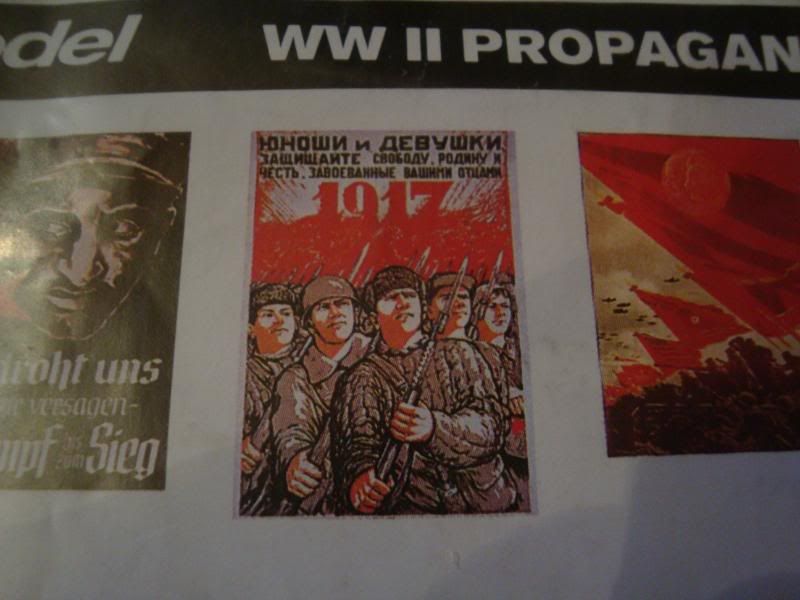
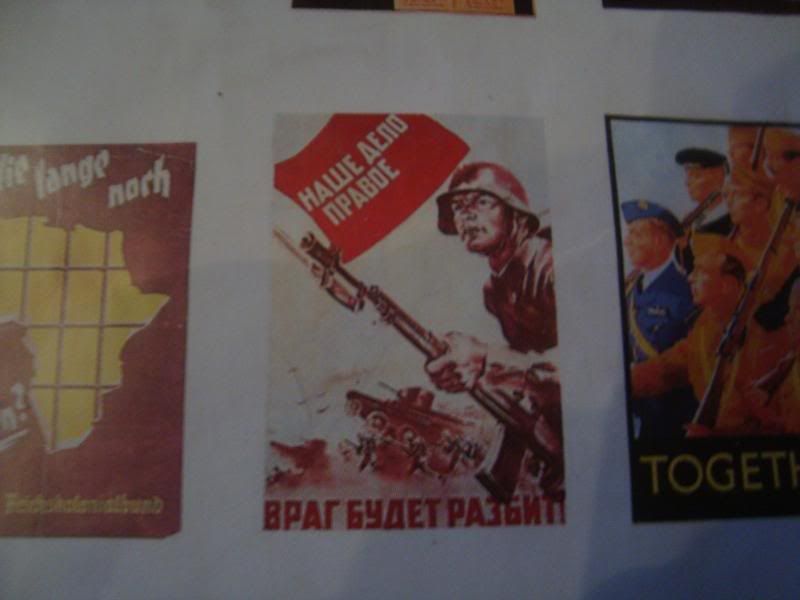
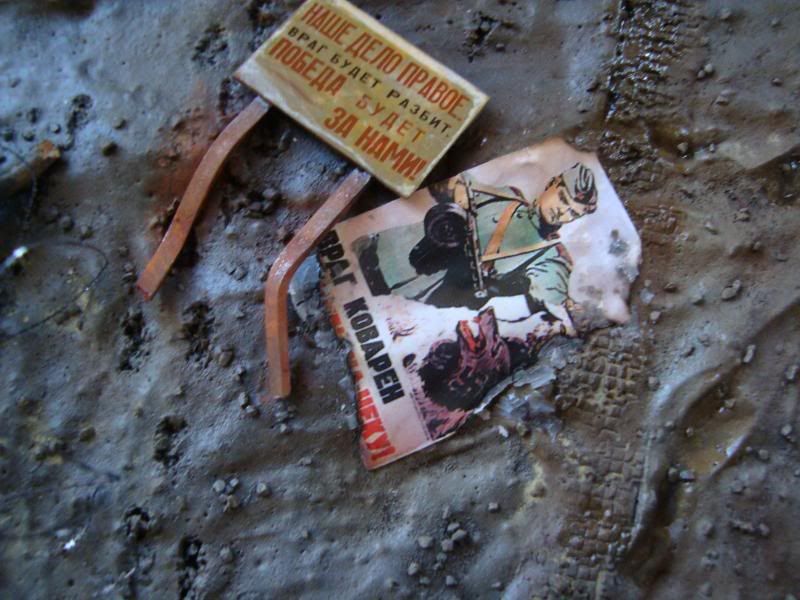
I'm also going to have some Soviet propaganda posters strewn across the floors:
|
|
|
|
|
|
2009/03/03 07:16:14
Subject: "Forward to Germany" - Soviet WW2 T34/76 Diorama
|
|

Paingiver
|
Thats starting to shape up nicely.
The russian posters are great looking!
|
|
|
|
|
|
2009/03/03 10:08:49
Subject: "Forward to Germany" - Soviet WW2 T34/76 Diorama
|
|
Battle-tested Knight Castellan Pilot
|
Wow, so much progress has been made! Maybe mother russia was right!
Seriously though, I love the base, it looks great. It gives a lot of space to the diorama and with the men running around it'll look complete. Did you use real pieces of wood for the trees? It looks like it. I always wondered why people spend loads of money to buy plastic trees, when you can get real ones for free!!
|
Stick to the shadows - Strike from the darkness - Victorus aut Mortis - Ravenguard 1st Company |
|
|
|
|
2009/03/03 13:18:27
Subject: Re:"Forward to Germany" - Soviet WW2 T34/76 Diorama
|
|
Regular Dakkanaut
|
Thanks guys!
I really love the posters and war slogans, it's going to be fun working with them.
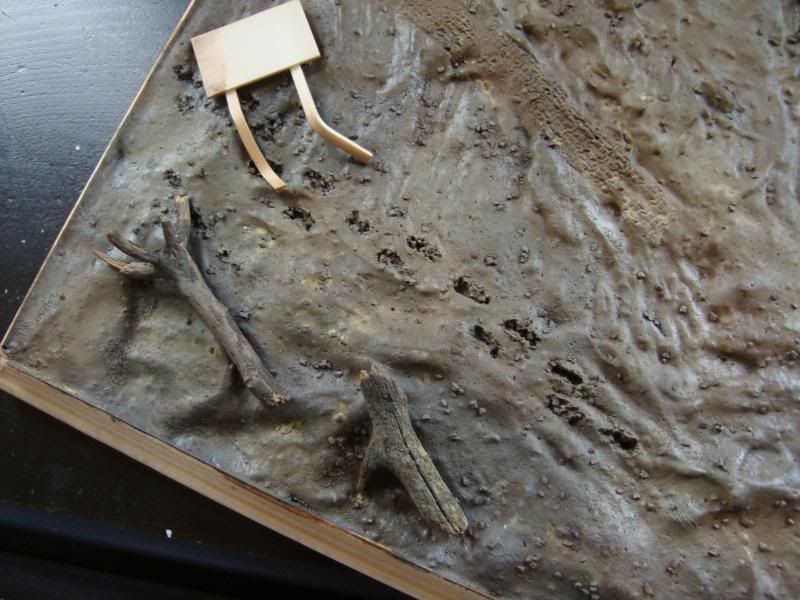
As to the base it was important to allow enough room for all the infantry and the Tank since its actually quite a small area to work in (around 25cm x 18cm).
I wanted to try and get the subtle impression of a battlefield without filling up too much room as I wanted the minis themselves to be the real focal point. Theres still a lot more to come and it does look a bit bare now since there are no other effects such as foliage, flock, water effects, ice, snow, leaves etc. I'm hoping also that the barbed wire will really bring some more to the scene when it arrives in the mail tomorrow.
The trees are real wood yes, just some twigs snapped into the right length for modeling. I'm most likely going to end up weathering these and maybe adding a little paint, or I may leave the natural wood colour.
The Telegraph pole is made from a match stick.
|
|
|
|
|
|
2009/03/08 22:03:53
Subject: Re:"Forward to Germany" - Soviet WW2 T34/76 Diorama
|
|
Regular Dakkanaut
|
|
|
|
|
|
|
2009/03/08 22:20:57
Subject: Re:"Forward to Germany" - Soviet WW2 T34/76 Diorama
|
|
Regular Dakkanaut
|
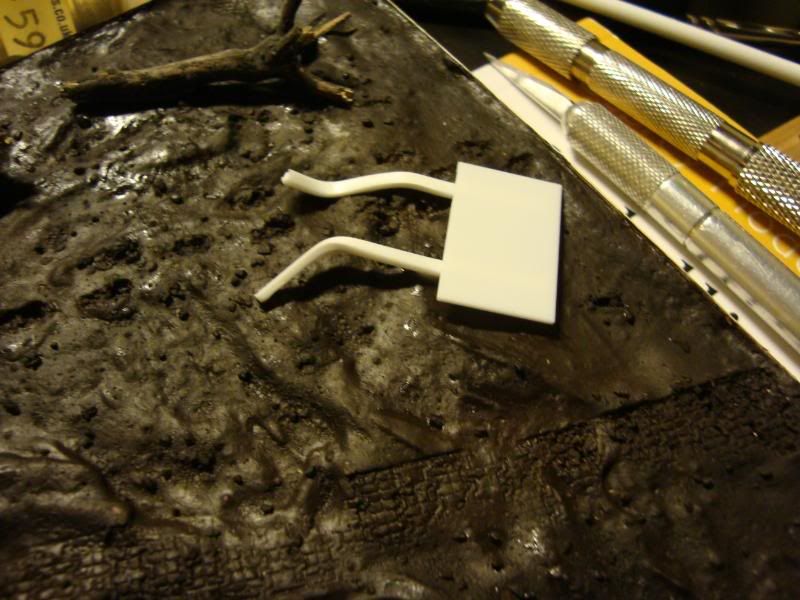
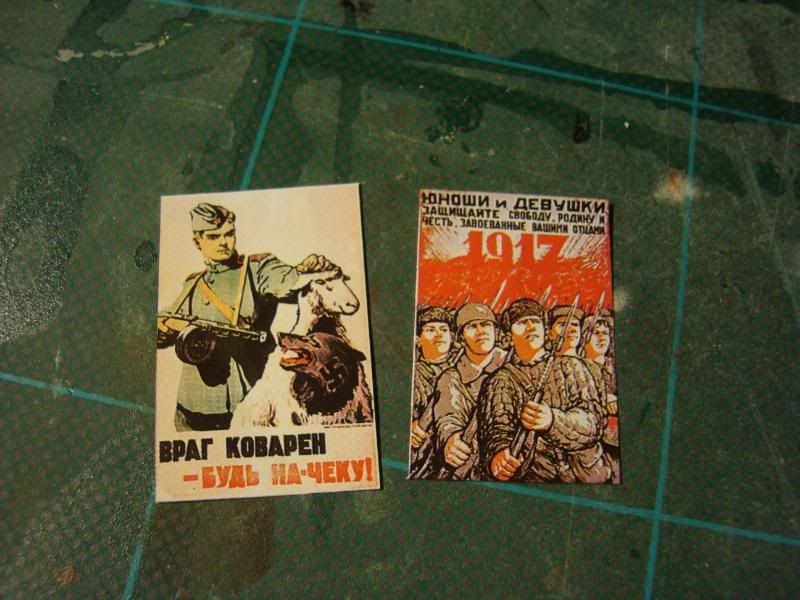
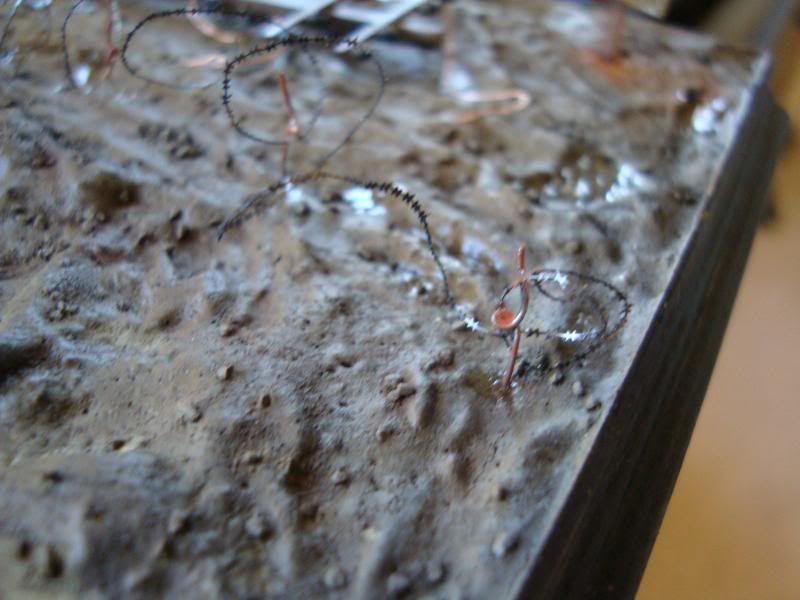
The Posters cut out:
Work on the Telegraph Poles:
The signs marked out with the Tamiya transfers:
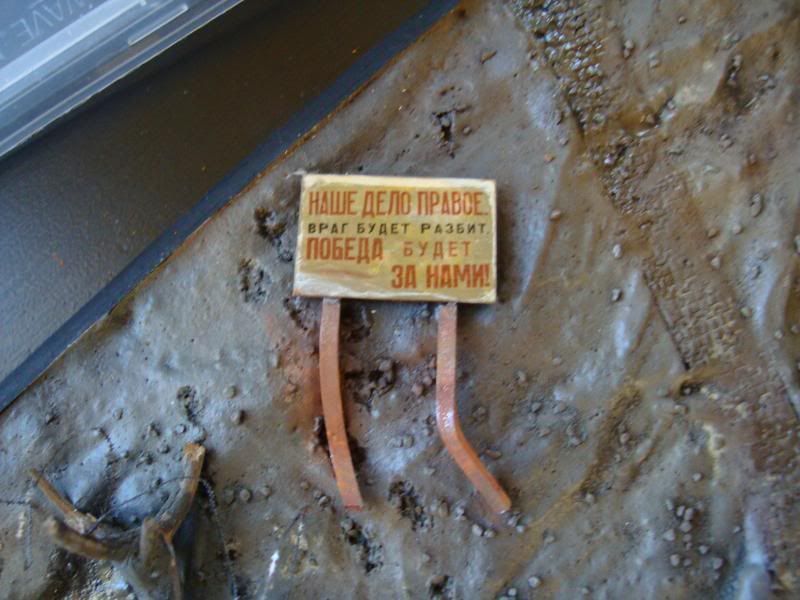
Poster weathered and attached to base:
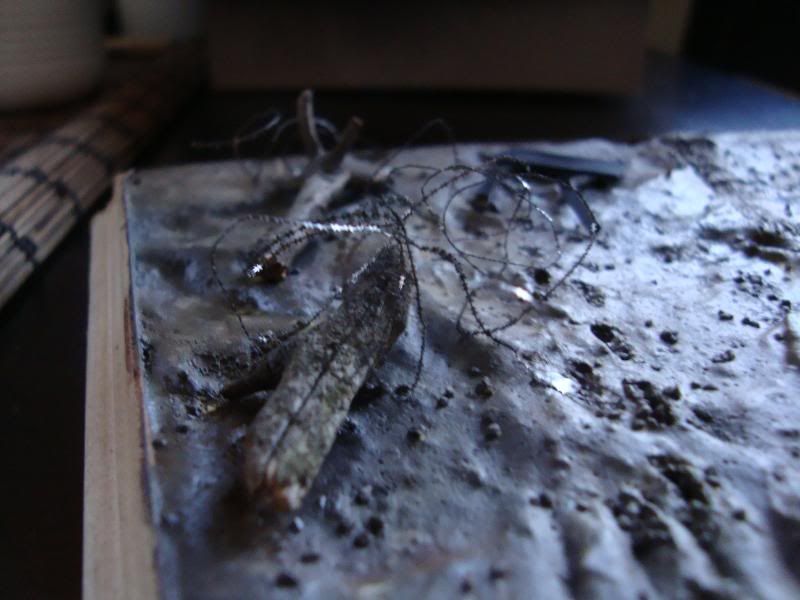
Weathering and rust on the barbed wire fence:
|
|
This message was edited 1 time. Last update was at 2009/03/08 22:25:05
|
|
|
|
|
2009/03/08 22:27:31
Subject: "Forward to Germany" - Soviet WW2 T34/76 Diorama
|
|
Regular Dakkanaut
|
Its looking great! Do you read AFV magazine?
Its great for this sort of hobby.
Ive made a few 1:35 dioramas so i know the work involved!
Keep it up 
|
|
|
|
|
|
2009/03/08 22:39:52
Subject: "Forward to Germany" - Soviet WW2 T34/76 Diorama
|
|
Battle-tested Knight Castellan Pilot
|
Did you singe the edges of the poster with a flame? It looks great. Keep up the good work!
|
Stick to the shadows - Strike from the darkness - Victorus aut Mortis - Ravenguard 1st Company |
|
|
|
|
2009/03/09 09:56:39
Subject: Re:"Forward to Germany" - Soviet WW2 T34/76 Diorama
|
|
Regular Dakkanaut
|
Thanks guys,
Grandmaster - I read AIR modeler magazine which is the sister mag to AFV (started reading it for ideas for my FW Thunderbolt). I've never actually read an AFV mag though. I've flipped through them a few times though. It seems to be a great magazine and I'm actually considering getting a subscription as there are some wonderful models and painting inside!
I've never worked in 1:35 myself but I've been considering it recently. You can certainly get a much higher level of detail in armour at that scale and there are so many fantastic infantry and crew kits available at that scale. Acessories and after market kits are also much wider ranging at 1:35, it can be a challenge sometimes to find things at 1:48. It's a shame really I'd like to see more stuff at 1:48 I really like the more compact scale myself.
Yeah it is a lot of work, but it's really worth it. A lot of people have asked me on Warseer especially if I intend to game with these WW2 models or my Thunderbolt and all seem disapointed when I say no. I guess they find it hard to appreciate that people like to build models and paint them just for the art of it. It's really satisfying to spend the time on a diorama or a complex kit and just watch it grow and develop. Actually I never seemed to have time to finish whole armies when I played Fantasy and 40K in the past, I just ended up with large groups of semi finished minis. With one diorama though or a single kit, you can get a project finished and really work on all the cool elements of painting that come near the end of a project like weathering and highlighting etc. It's ironic that my painting now has imporved alot more now that I'm painting less compared to when I used to work for GW and was painting shedloads of minis everyday!
It's finishing a model to completion that really helps you hone and develop your skills I think.
S.J - yes the edges of the poster were burnt with a match, very carefully and then blown out pretty much as soon as they were lit. Since the posters were so small it was really important to move quickly and try to control the burning as much as possible. I then sealed the ash and burnt areas of the paper with some watered down PVA glue to stop them from crumbling and blowing away and gave the poster a wash of Chesnut brown ink mixed with Badab Black wash. Soaking it in watered down PVA and sealing the top afterwards really helped get the paper to fit the contours of the scenery nicely.
I also tried the Johnson's Klear trick for applying Transfers from the Imperial Armour Masterclass book and found it worked really well.
|
|
This message was edited 4 times. Last update was at 2009/03/09 10:02:05
|
|
|
|
|
2009/03/09 11:16:59
Subject: Re:"Forward to Germany" - Soviet WW2 T34/76 Diorama
|
|
Been Around the Block
|
This looks better and better after every update you post, I espescialy like the pigtails that are holding up the barbed wire.
I've send you a pm regarding your prior question.
|
|
|
|
|
|
2009/03/09 11:55:19
Subject: Re:"Forward to Germany" - Soviet WW2 T34/76 Diorama
|
|
Regular Dakkanaut
|
Thanks Kagar!
Those "pig tails" were very tricky to bend. A thin bit of copper wire, some plyers, and a lot of patience!
I followed the example in the Modeling Masterclass book, they did a similar thing in the Krieg Earthshaker Diorama.
Checked out your blog, great to see some Mordheim stuff!
|
|
|
|
|
|
2009/03/09 12:39:53
Subject: "Forward to Germany" - Soviet WW2 T34/76 Diorama
|
|

Junior Officer with Laspistol
|
Nice,now get to work finishing it up I must see the end result!
|
"I refuse to join any club that would have me as a member."-Groucho Marx
|
|
|
|
|
2009/03/09 17:45:05
Subject: Re:"Forward to Germany" - Soviet WW2 T34/76 Diorama
|
|
Regular Dakkanaut
|
|
|
|
|
|
|
2009/03/10 18:01:08
Subject: Re:"Forward to Germany" - Soviet WW2 T34/76 Diorama
|
|
Regular Dakkanaut
|
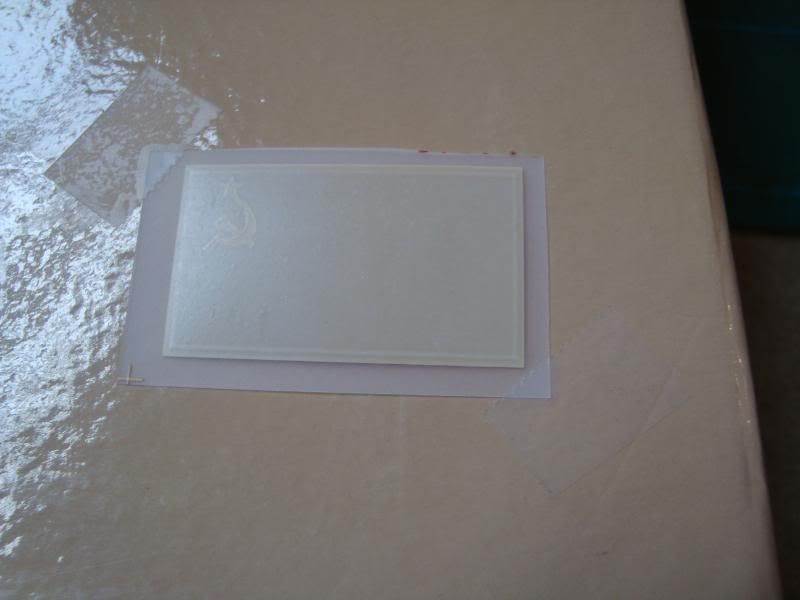
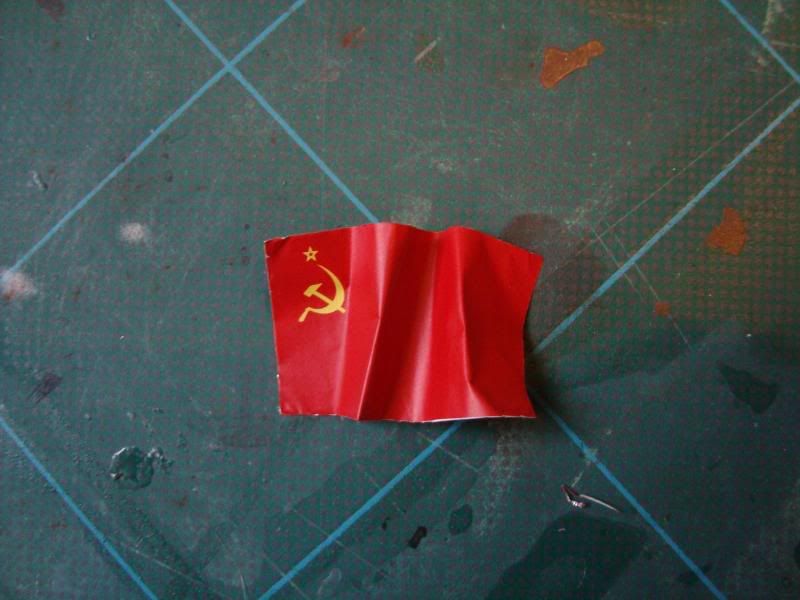
A small package arrived in the post today and contained these:
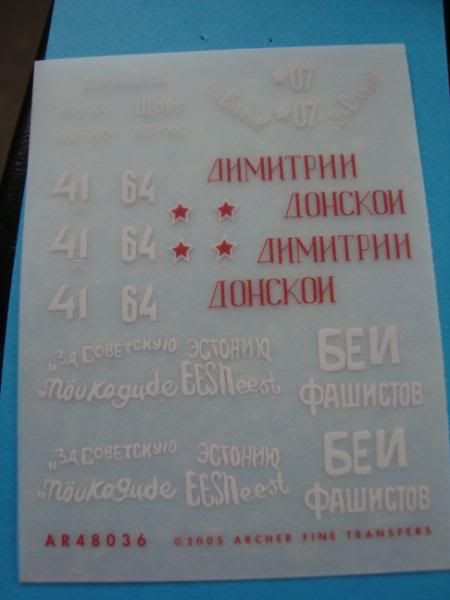
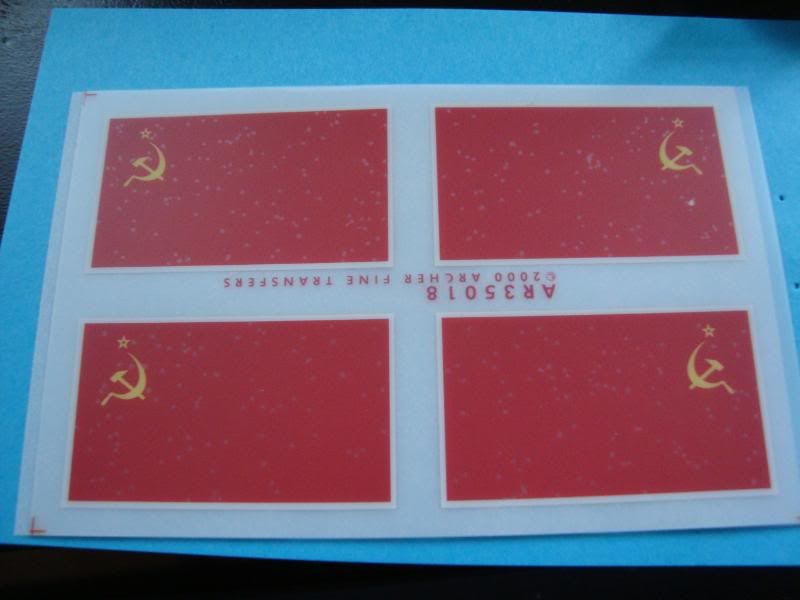
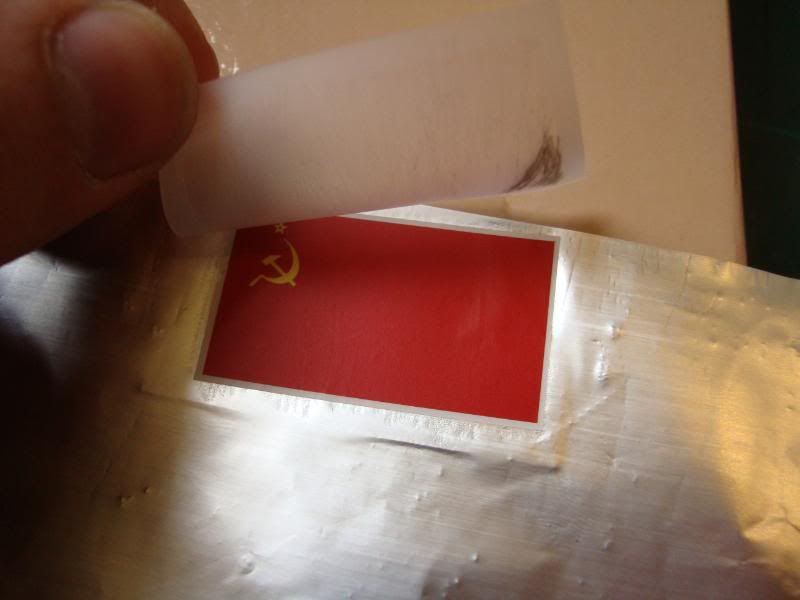
My transfers and banner from Archers. I've used Archers transfers before but this was the first time to use one of their flags. The Instructions provided were pretty clear and the quality of the transfers fantastic, they apply directly to tin foil. Heres a short how to guide:
Step 1:
Cut out one left and one right side of the flags, being careful not to cut the backing paper just the transfer sheet.
Step 2:
Stick one side down to a flat light surface with some tape. Making sure the image is facing down.
Step 3:
Place the other side on top sticking one side with tape to make a hinge so you can make a sandwich. Dont push down at this stage as the transfers will bond together and become useless.
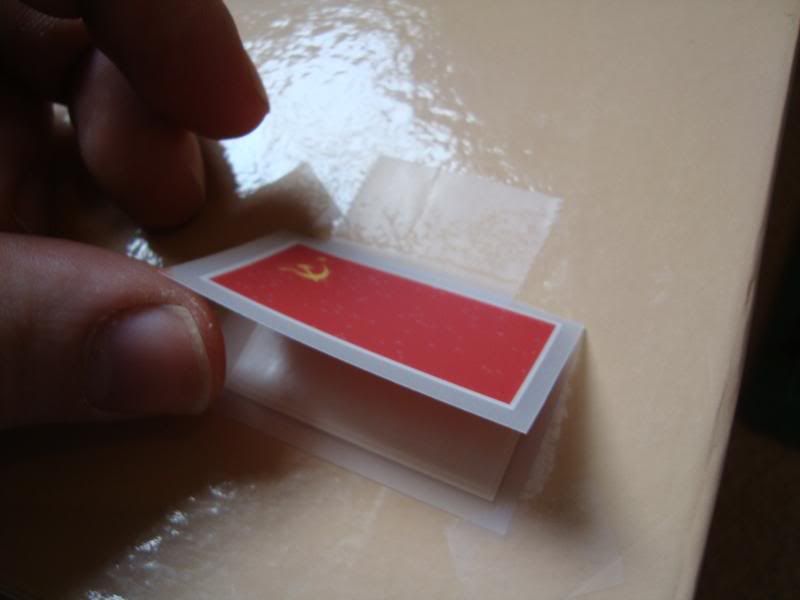
Step 4:
Place your tin foil in-between both halves and make a snadwich.
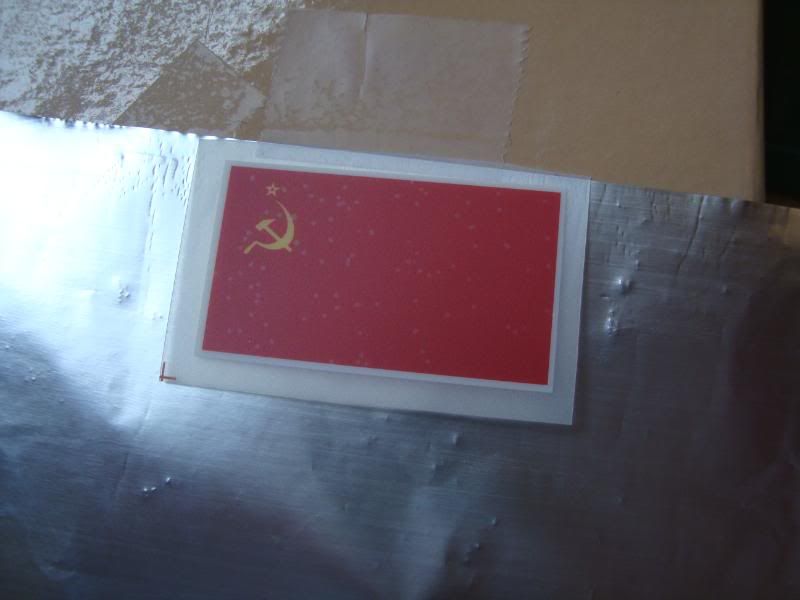
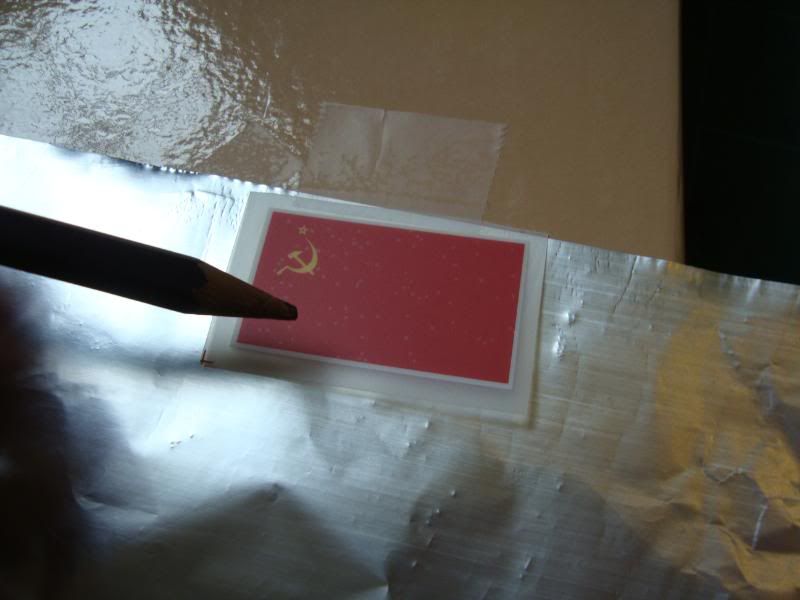
Step 5:
Use a dull pencil and some force to push the transfers onto the foil.
Step 6:
Carefully lift the transfer paper from the foil.
Step 7:
Place backing paper over the flag and burnish the transfer into the foil to seal it.
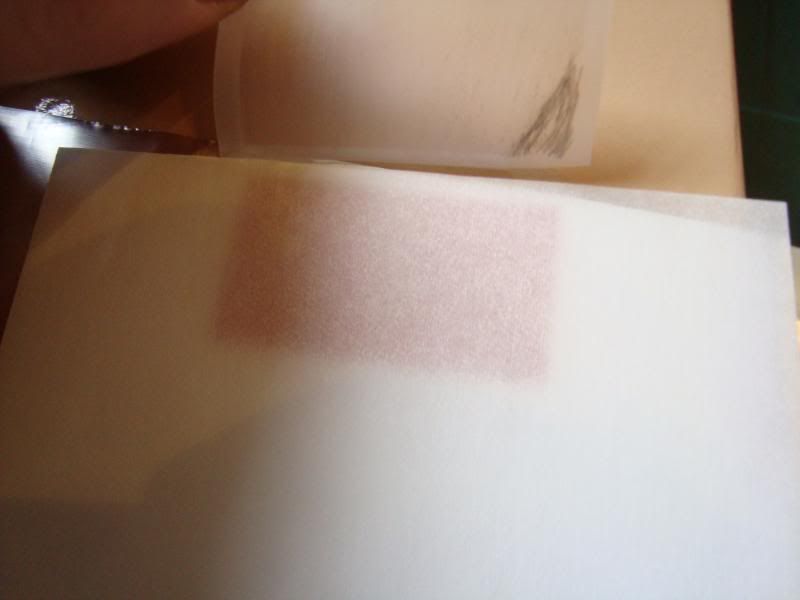
Step 8:
Remove the backing paper and carefully peel the foil from the transfer paper on the other side.
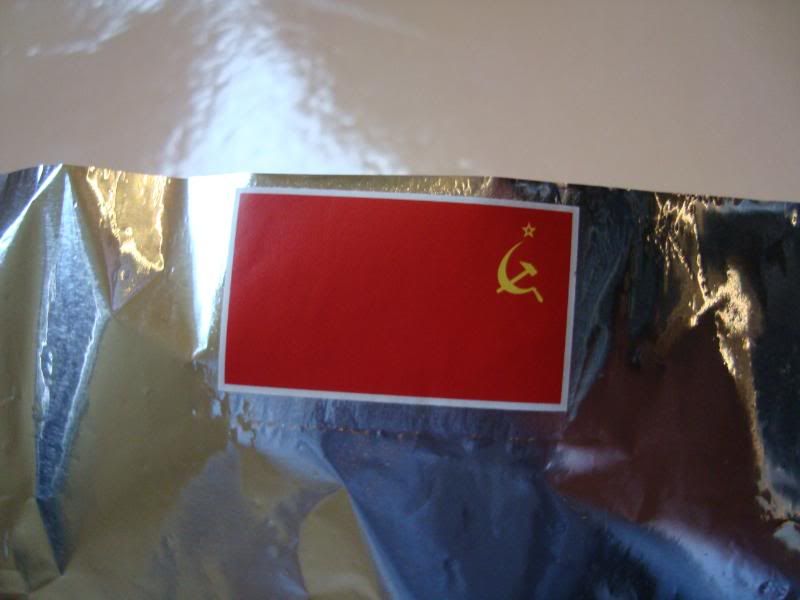
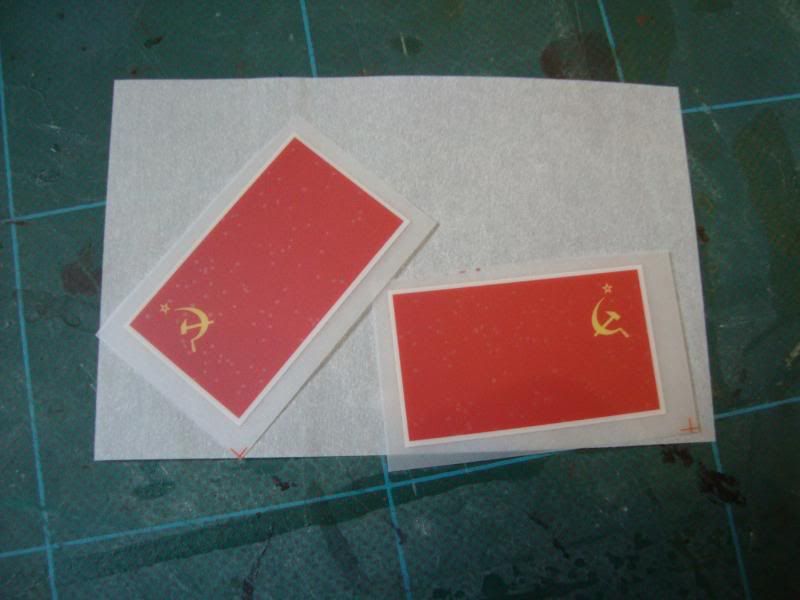
Step 9:
Carefully cut out your flag using a scalpel blade and very light cuts. The foil can easily tear or split at this stage.
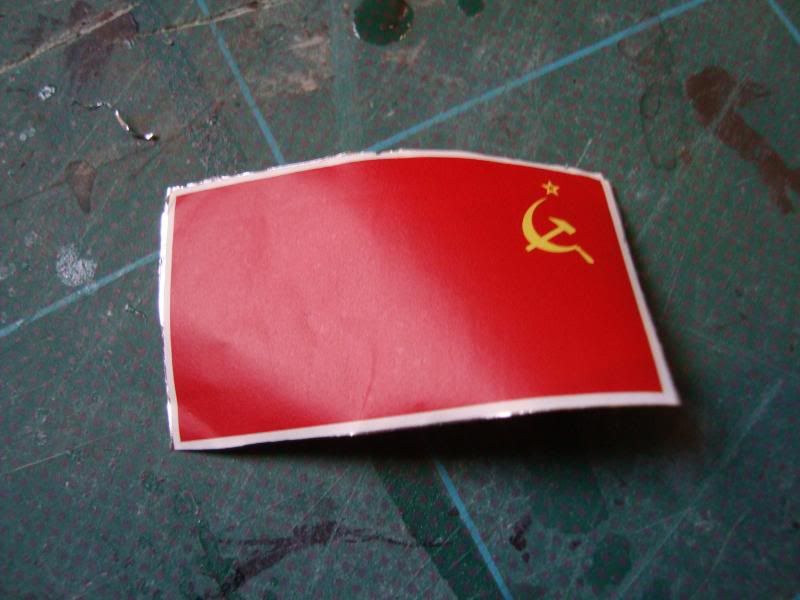
Step 10:
Bend and crease the tin foil to the desired shape. The foil will hold any shape you want and the ink will never crack or peel. It's remarkably durable.
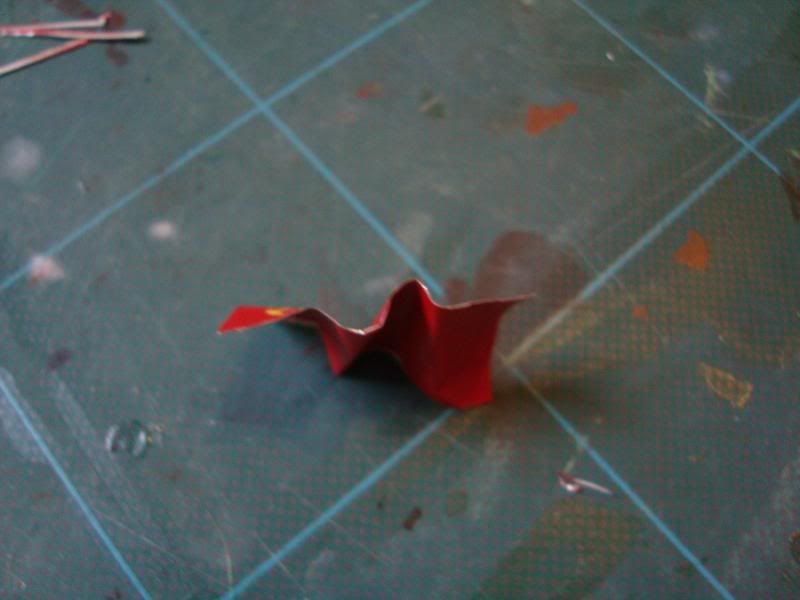
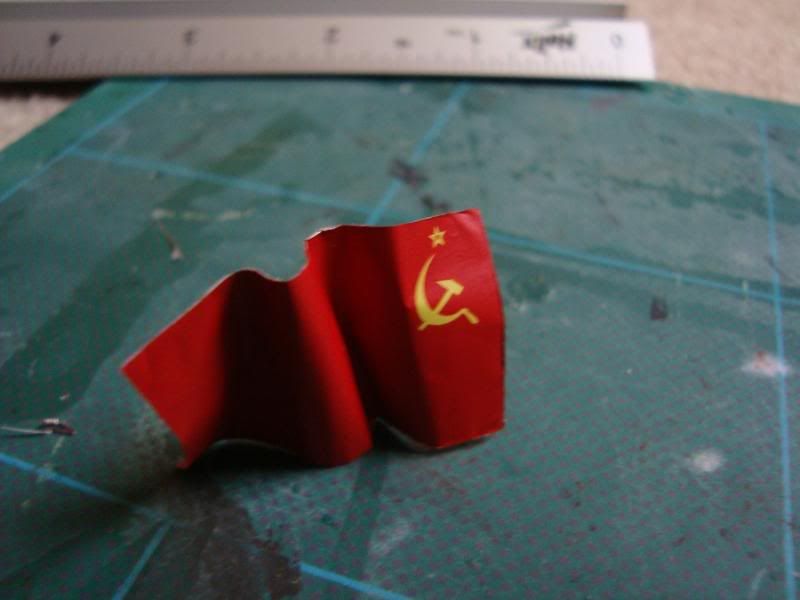
These flags are a great product and give some very diverse and realistic effects. I can't recommend them enough!
|
|
|
|
|
|
2009/03/10 18:12:24
Subject: Re:"Forward to Germany" - Soviet WW2 T34/76 Diorama
|
|
Regular Dakkanaut
|
|
|
|
|
|
|
2009/03/10 18:21:39
Subject: "Forward to Germany" - Soviet WW2 T34/76 Diorama
|
|
Been Around the Block
|
Your booking a lot of progress, how long do you think is ahead of you to get this finished. Or don't you plan these things?
|
|
|
|
|
|
2009/03/10 18:25:51
Subject: Re:"Forward to Germany" - Soviet WW2 T34/76 Diorama
|
|
Regular Dakkanaut
|
Hi Kagar!
I hope not too long till the end now. The tank has some more stages of weathering and painting, but the base is mostly done. The next thing is of course the infantry.
My final deadline is the summer of this year as that is when i will be traveling to Minsk to deliver the finished diorama to my relative. So I have to get it done over the next few months for sure!
|
|
This message was edited 1 time. Last update was at 2009/03/10 18:26:25
|
|
|
|
|
2009/03/10 18:37:44
Subject: Re:"Forward to Germany" - Soviet WW2 T34/76 Diorama
|
|
Been Around the Block
|
Well seeing the progress that your making I'll take it you've started work on another project by then. 
I've started work on my Tau army now, I've posted the last pictures of my Witchhunter warband yesterday.
|
|
|
|
|
|
2009/03/10 23:48:49
Subject: "Forward to Germany" - Soviet WW2 T34/76 Diorama
|
|

Homicidal Veteran Blood Angel Assault Marine
|
Looks awesome GM!
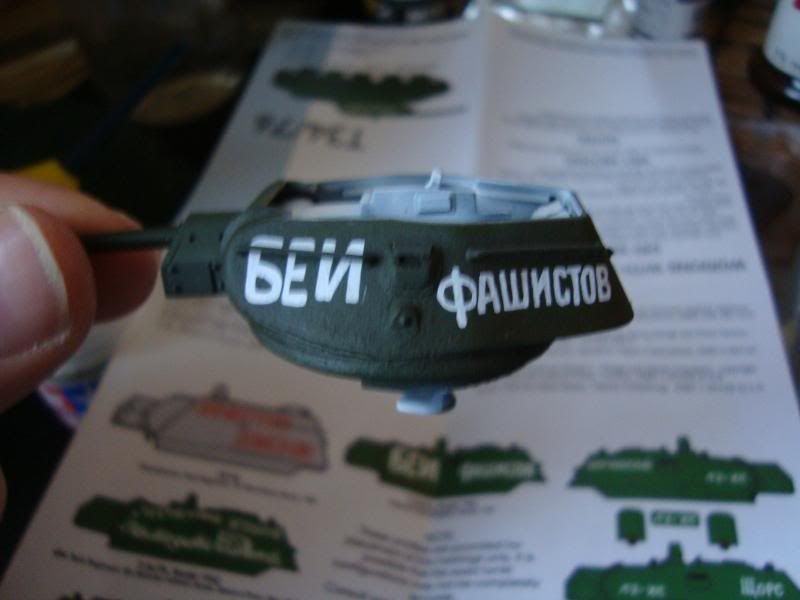
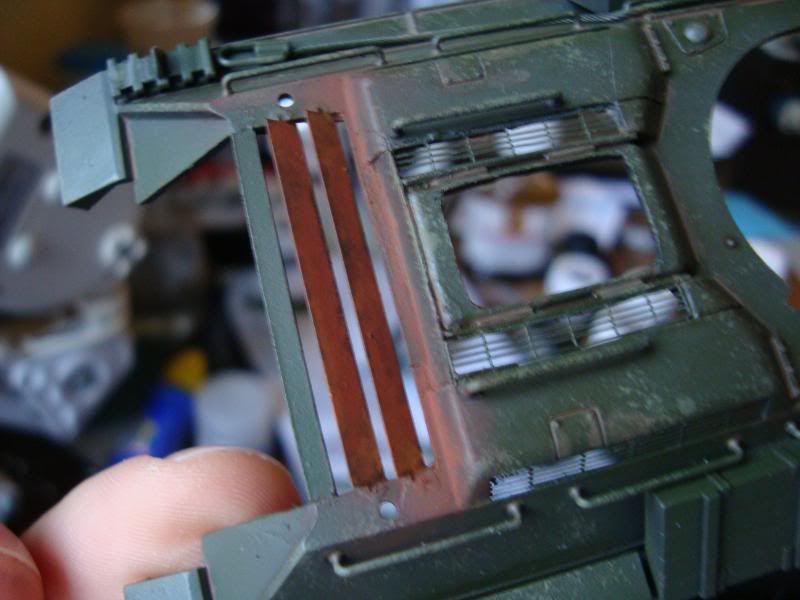
The paint with the weathering even looks like thick soviet paint that would go over these things.
|
|
|
|
|
|
2009/03/11 00:18:14
Subject: Re:"Forward to Germany" - Soviet WW2 T34/76 Diorama
|
|

Regular Dakkanaut
|
Amazing job overall. I used to model WWII armour in 1/35 scale before moving into 40k and I can certainly appreciate the amount of work that goes into a project like this.
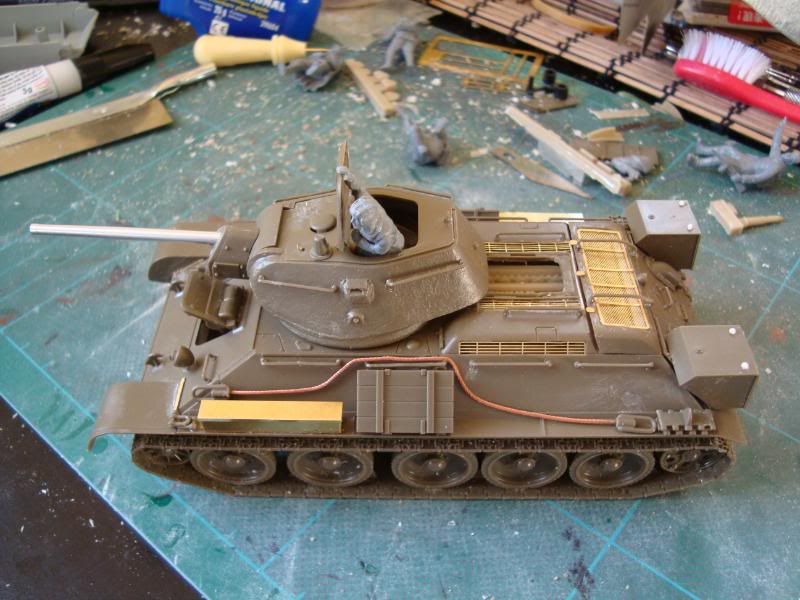
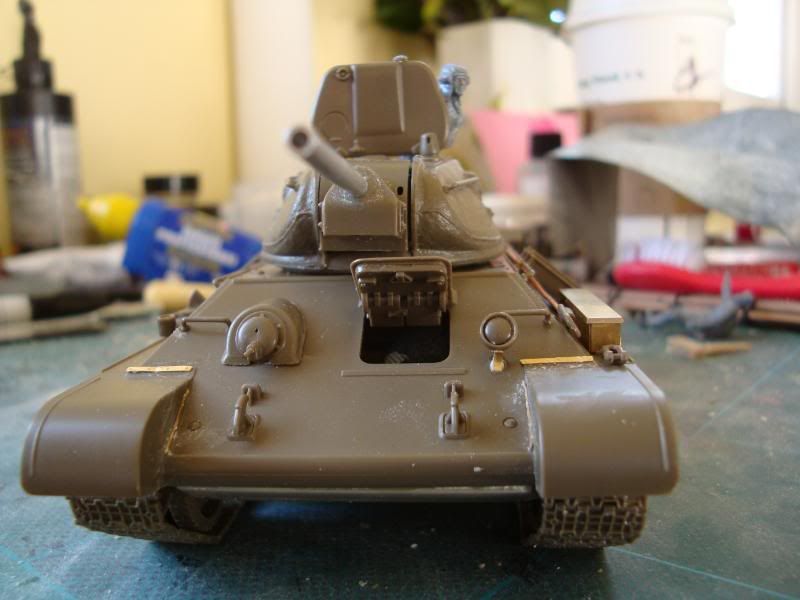
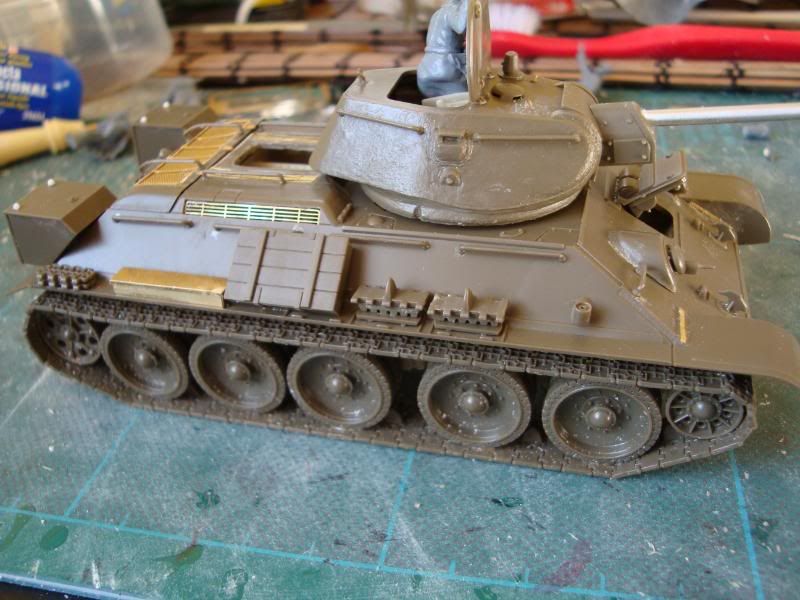
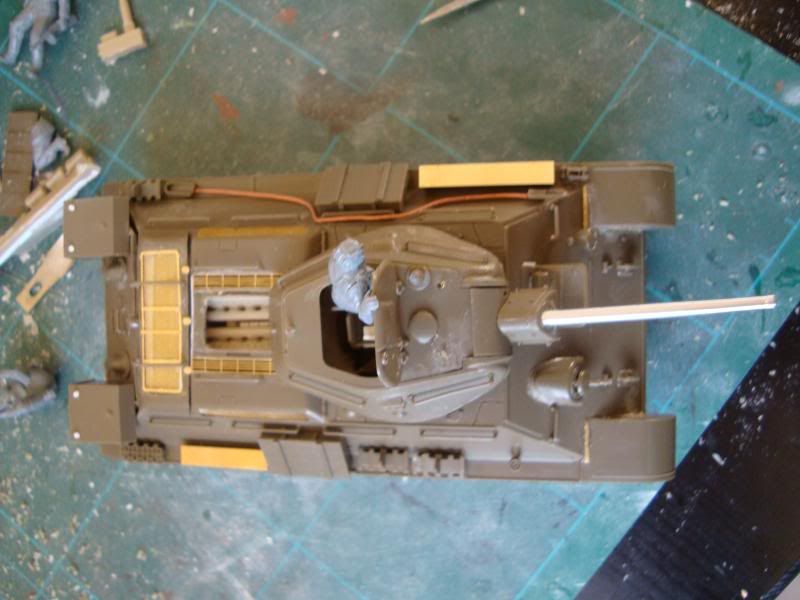
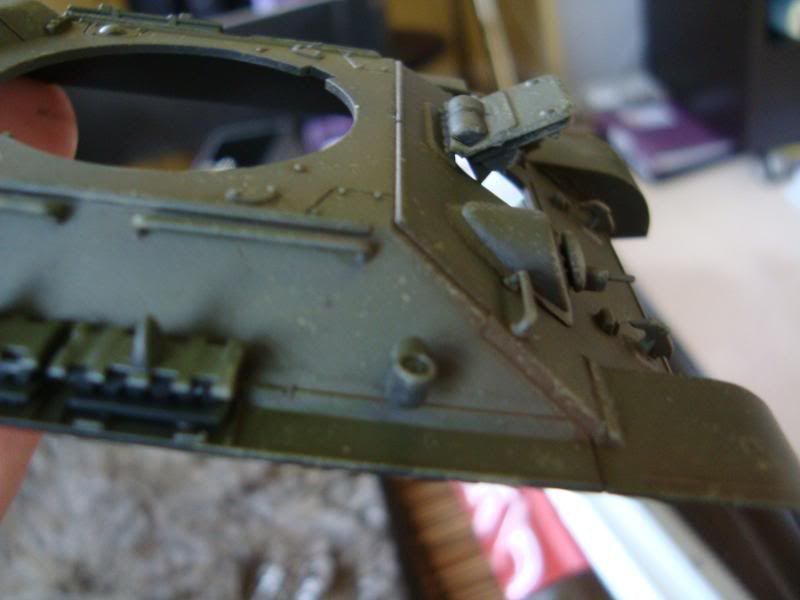
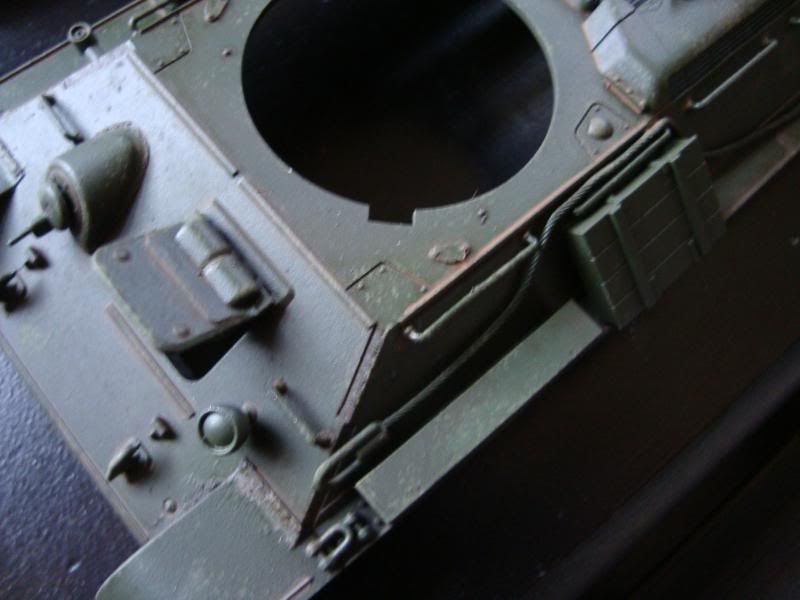
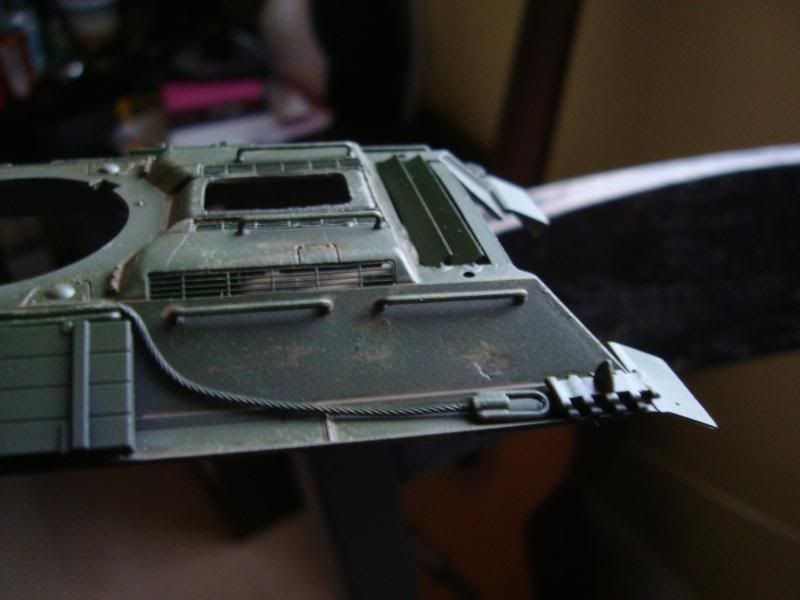
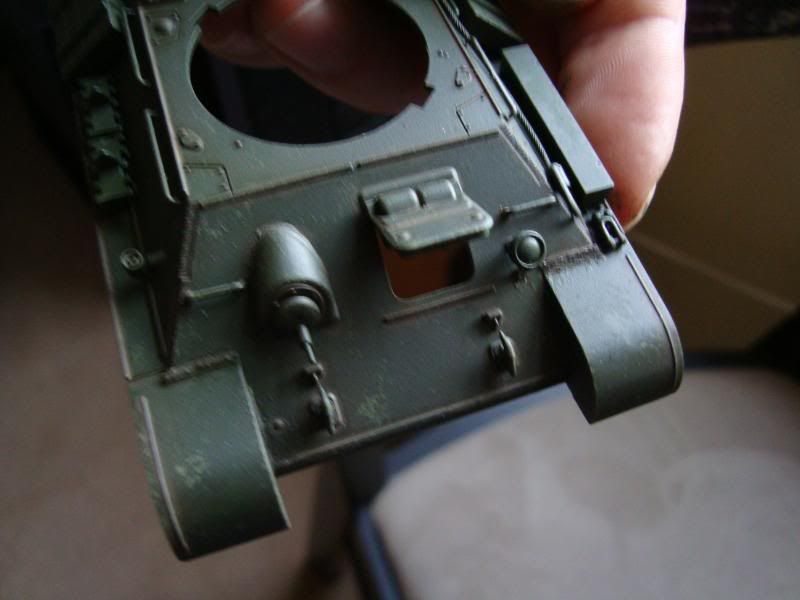
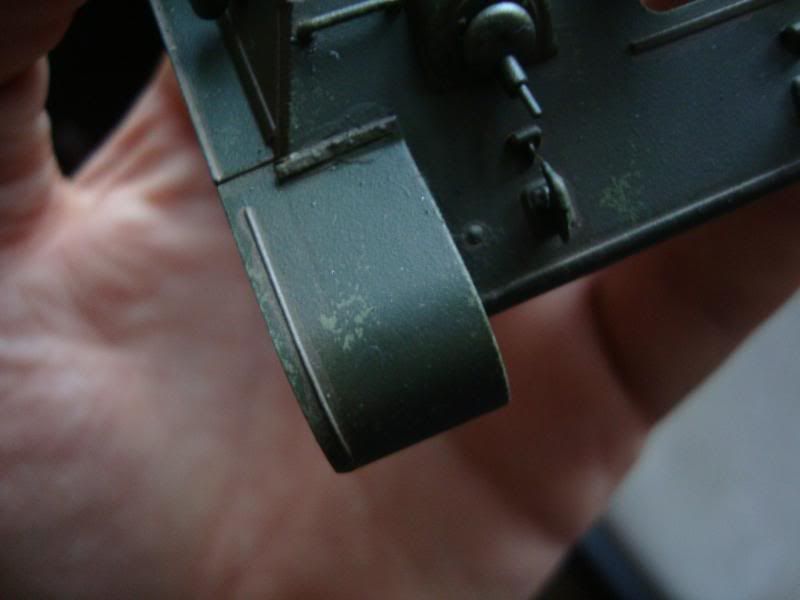
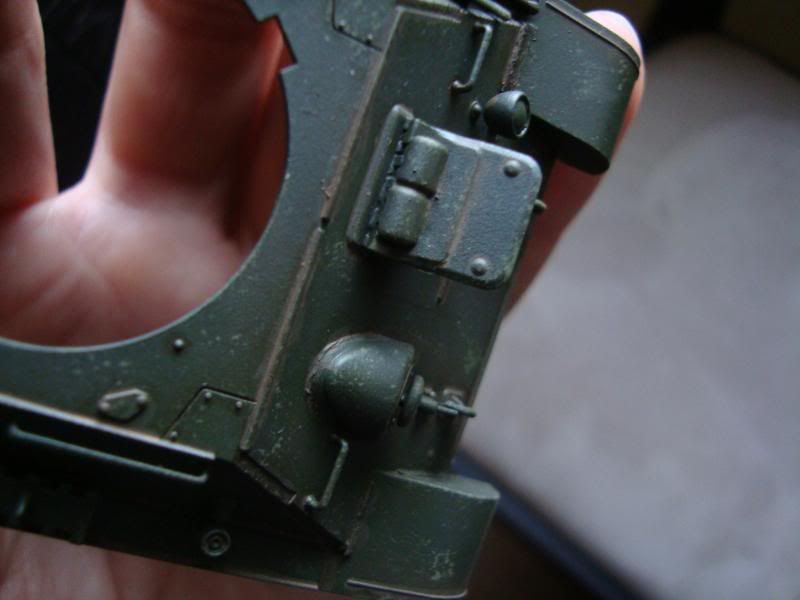
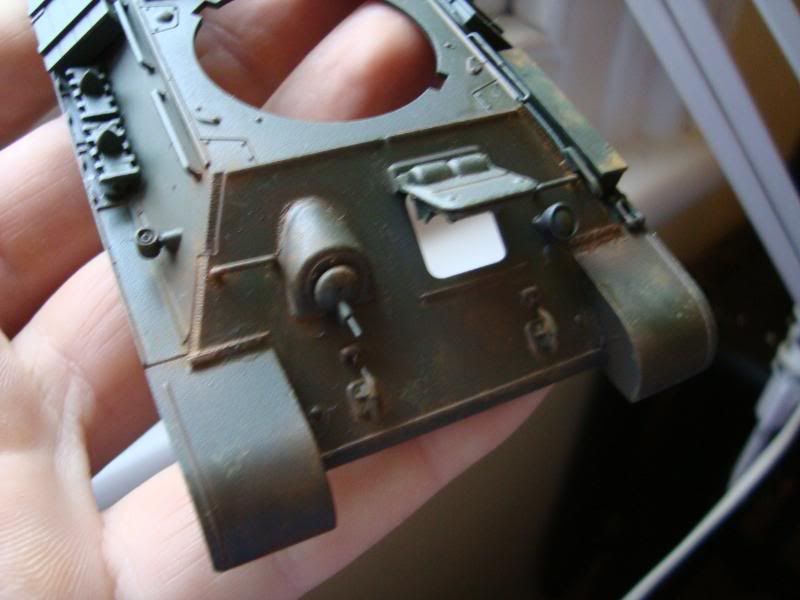
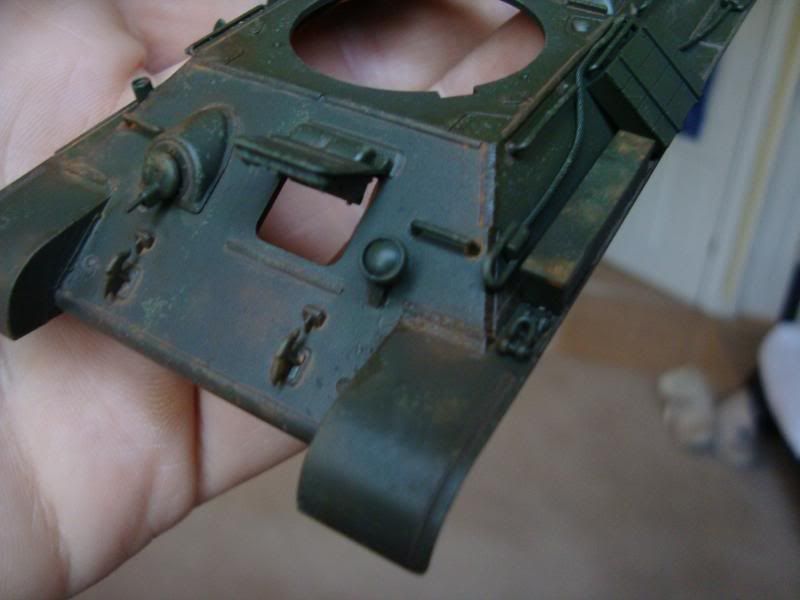
I have one comment. The external stowage (the crates, track links, tow cable, barrel cleaning kit) don't appear to be fastened to the hull in any manner. They just seemed to be sitting on the tank and look like they will fall off as soon as the tank drives away. Obviously as modellers we can glue parts on our vehicles anywhere we like, but real tankers have to ensure that their gear is secure.
For example: with T-34's it was very common for the crew stash the spare track links vertically into the long hand holds that adorn the tank.
|
|
|
|
|
|
|