Forum adverts like this one are shown to any user who is not logged in. Join us by filling out a tiny 3 field form and you will get your own, free, dakka user account which gives a good range of benefits to you:
No adverts like this in the forums anymore.
Times and dates in your local timezone.
Full tracking of what you have read so you can skip to your first unread post, easily see what has changed since you last logged in, and easily see what is new at a glance.
Email notifications for threads you want to watch closely.
Being a part of the oldest wargaming community on the net.
If you are already a member then feel free to login now.
Heretic Tom wrote: Does anyone know if you can tint nurgle's rot? I thought I might me able to make a mud puddle with it. Thanks for the help!
No, but would be interested in answer!
Also, have you thought about the glue + paint trick for a puddle? although it might not lay down quite as well. Or water effects + ink (be more transparent tho)
Also, have you thought about the glue + paint trick for a puddle? although it might not lay down quite as well. Or water effects + ink (be more transparent tho)
I had considered glue for blood effects in the past, finally got some bftbg, so I never tried it on an actual model. I tested it on a piece of sprue with less than thrilling results. Water effects is on my hobby needs list, but it'll have to wait a bit longer. And the only ink I have is a cheap black ink that's only use seems to be the utter ruin of models.
This message was edited 1 time. Last update was at 2016/10/29 18:18:01
Hey guys! This is a great thread subject. Thanks Heretic Tom for bringing it to the table. Im currently in the throws of painting the tiny gd dmn infinity models and i think after this im going to with back to 40k and possibly even build a new army. You guys are way better at the grit and grime so please, when you find some good info on this topic of mud, please keep us informed here! MUD MUD MUD!!!
With blood for the blood god, I like it, but rarely just by itself...I find it looks a little too "pink" for realistic blood, specifically in large areas, over shiny metal, light coloured areas, etc...I also find it too thick, although my pot is old now...
Anyway, I usually thin mine with a little water, and quite often mix in a bit of gw's yellow wash, I forget the name...but that makes it lean more towards an orange-brown red than a pink-red...it works wonderfully for nurgle stuff, or any blood or wounds that are supposed to look more than 5 minutes old.
@Heretic Tom - you can kinda tint nurgles rot, although to make it the right colour for mud puddles, you would probably need to add too much to it, that it would kill the gloss...I'd suggest a pot of 'ardcoat instead, for either making gloss mixes, or just painting it over things to make them glossy...were you looking for just "wet mud"?, or something more like those kinda milky-tan puddles that tend to gather in it?...if just wet mud, then put down some of the dark brown texture paint, with a wash and a drybrush, followed by a good coat of (maybe thinned?) ardcoat, that should do it...if you want the milky pools, then basically same as above, but leave dents in the texture paint for the pools to collect in, then make a mix of mostly ardcoat, with dash of...ushabti bone? something like that should work...only a little though, a third or less of the mix...and fill up the dents you left in the texture paint - it will shrink down when it dries, so really blob it on over the dents, or give it another layer when it dries
You can tint nurgles rot and in a few different ways. One way is to add another colour in but not totally mix it so you can get some cool streaks of (iused brown) colour, shade, shadow, tone et al through the paint. You can totally mix in another colur to change the whole colour of the rot too but you want a very strong and pigment rich paint to do so. If you do t want to lose any of the shine of the rot, I simply add some extra 'ardcoat to the rot before mixing in another colour to compensate. Hope that helps As for bftbg - it's final look really depends on what paint/colour it's going down on top of. For a darker richer blood effect I paint it on top of some Khorne red/ abaddon black which I've sketched out the blood effect with already.
Quick little cheap and nasty technique I'll throw out for folk that might find it useful
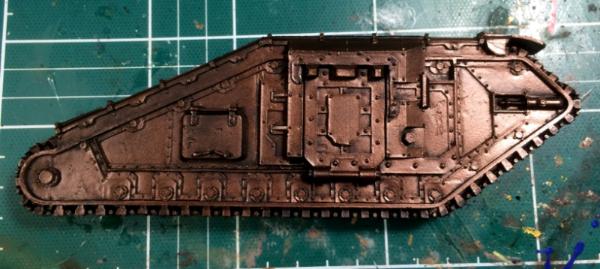
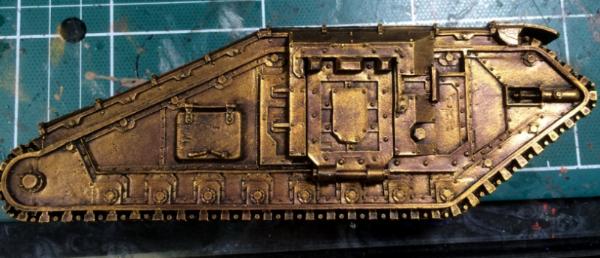
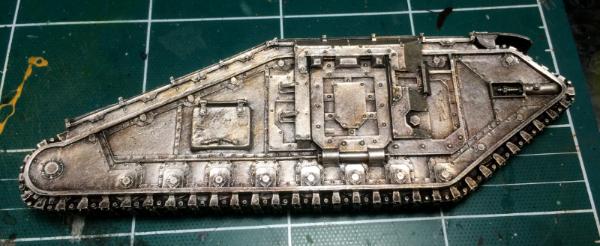
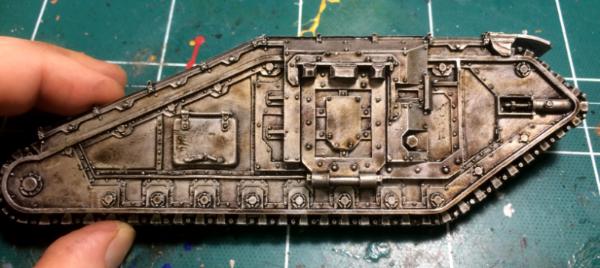
I love my metals and metallics - TMMs all the way. Bright, shiny and new metals are nice but I prefer the dirty, stained and old metals for the most parts. This works nicely as an esy way to get a good old and worn metal base to then further work on.
Base whatever it is with a black spray first (I've alwys used GWs Chaos Black spray and always found it to be top notch)
Once dry, get out your drybrushes - its fun messy time.
We're going to put down a succession of three different metallics to give a nice tarnished patina'd effect.
First up - roughly drybrush with warplock bronze - this gives a nice dark depth to the metal finish
nice and light. get in there! Wash out the drybrush thoroughly and let it dry
Next drybrushing time again, this time with ghenna's gold. This will give patches of stain, tarnish, oxydation etc etc. Dont be as thorough with this layer as before - let some of the bronze show through in places
washy washy, dry dry......drybrush the final layer with runefang steel. This will seem really too bright and shiny but it needs to be as the washes later will bring it right down.
Be quite thorough with this layer but again heavy in some places, lighter in others
Leave to totally dry and then some. Finally wash the whole thing with ye olde faithful Nuln Oil - don't be scroogey with this wash but try to avoid pooling. Even if you do get a few coffee stains here - it doesnt really matter as it just fits right in with the overall intended effect.
Once this is dry you have your base aged metal done. From here, you can add other targeted shades/washes to add further stains, grime etc - agrax and coelia are great for this.
Later some dabs of typhus corrosion into corners and lower recesses complete the fithly metal effect
Hope all of that makes sense and helps some folk out
Cheers
Jan
hey Jan, I found myself going back and looking at that worn metal base technique quite a few times since you posted it...it just seemed interesting, and really simple...anyway, while I was procrastinating while working on my stompa, I decided to try it out, just to see what kind of results I could get out of it...I tested it out on the big skull belly-plate from the stompa kit (unfortunately not actually going to be used on my stompa, but it'll probably wind up on some terrain or on the front of some crazy scratchbuild or something down the line ), and I was also curious if the technique could scale down to work on an infantry-sized model, so I made a super quick, rough iron warriors tester-marine too, I think it works
in hindsight, I probably went a little too uniform with the final silver drybrush, so the bronze/gold don't show through quite as much as I'd like, but they're there, looks a bit better in real life too, but phone pics being what they are, y'know...
bebopdrums2424 wrote: The iron Warrior looks awesome. Super clean. The shield needs more depth and dynamics. more browns...go big!
oh yeah, I wasn't saying either of those were finished jobs, I just wanted to try out Jan's worn metal "base coat" technique to see how it looked...the marine then got some quick stripes thrown on, and a little "blood for the blood god" on the eye/lenses, to make him vaguely look like an iron warrior
almost makes me want to paint iron warriors now...but I'm already doing nurgle chaos marines and I've got 30k salamanders in the pipeline...but I mean...that one marine took me exactly an hour, including probably half an hour of waiting for the wash to dry...needs a few more details done, but still, I could probably have a 10-man squad done in a couple of hours, and the metal looks great!
...hmm, I bet that'd be good for some super-quick - but decent-looking - necrons too...
Back to the subject of mud...i tested tinting Nurgle's Rot, as zobo stated above, adding "too much" killed the gloss effect. It doesn't appear to be possible to tint it and retain it's effect. It just became a thin brown paint. Adding less didn't really do anything, it was just Nurgle's Rot up to the point it became thin brown paint. So, for my next attempt I will be using some water effects (as soon as I get some) and then I will give an update. I expect to have better results with this approach.
I still recommend getting a pot of citadel 'ardcoat...either tint it with a dash of brown/tan/etc...experiment before actually using, you'll probably find you don't need to add as much paint as you may think at first...the ardcoat is quite white and milky when it's wet, so it can be tough to judge if the mix is right until it dries...but I generally recommend roughly 1 part paint to 3-4 parts ardcoat...I usually thin it out a bit with a little water too, to help it flow/pool more naturally.
Of course, you could also just paint a layer of straight ardcoat over whatever you want to look wet, that does a decent enough job too...
I recommend ardcoat, because it's like nurgles rot, in that it's transparent and glossy, but on it's own, it's completely transparent - you don't need to work around the green of nurgles rot...and honestly, I prefer using various tint-mixes of ardcoat, instead of nurgles rot, for my nurgle models even...it just gives you more freedom
This message was edited 1 time. Last update was at 2016/11/07 05:02:13
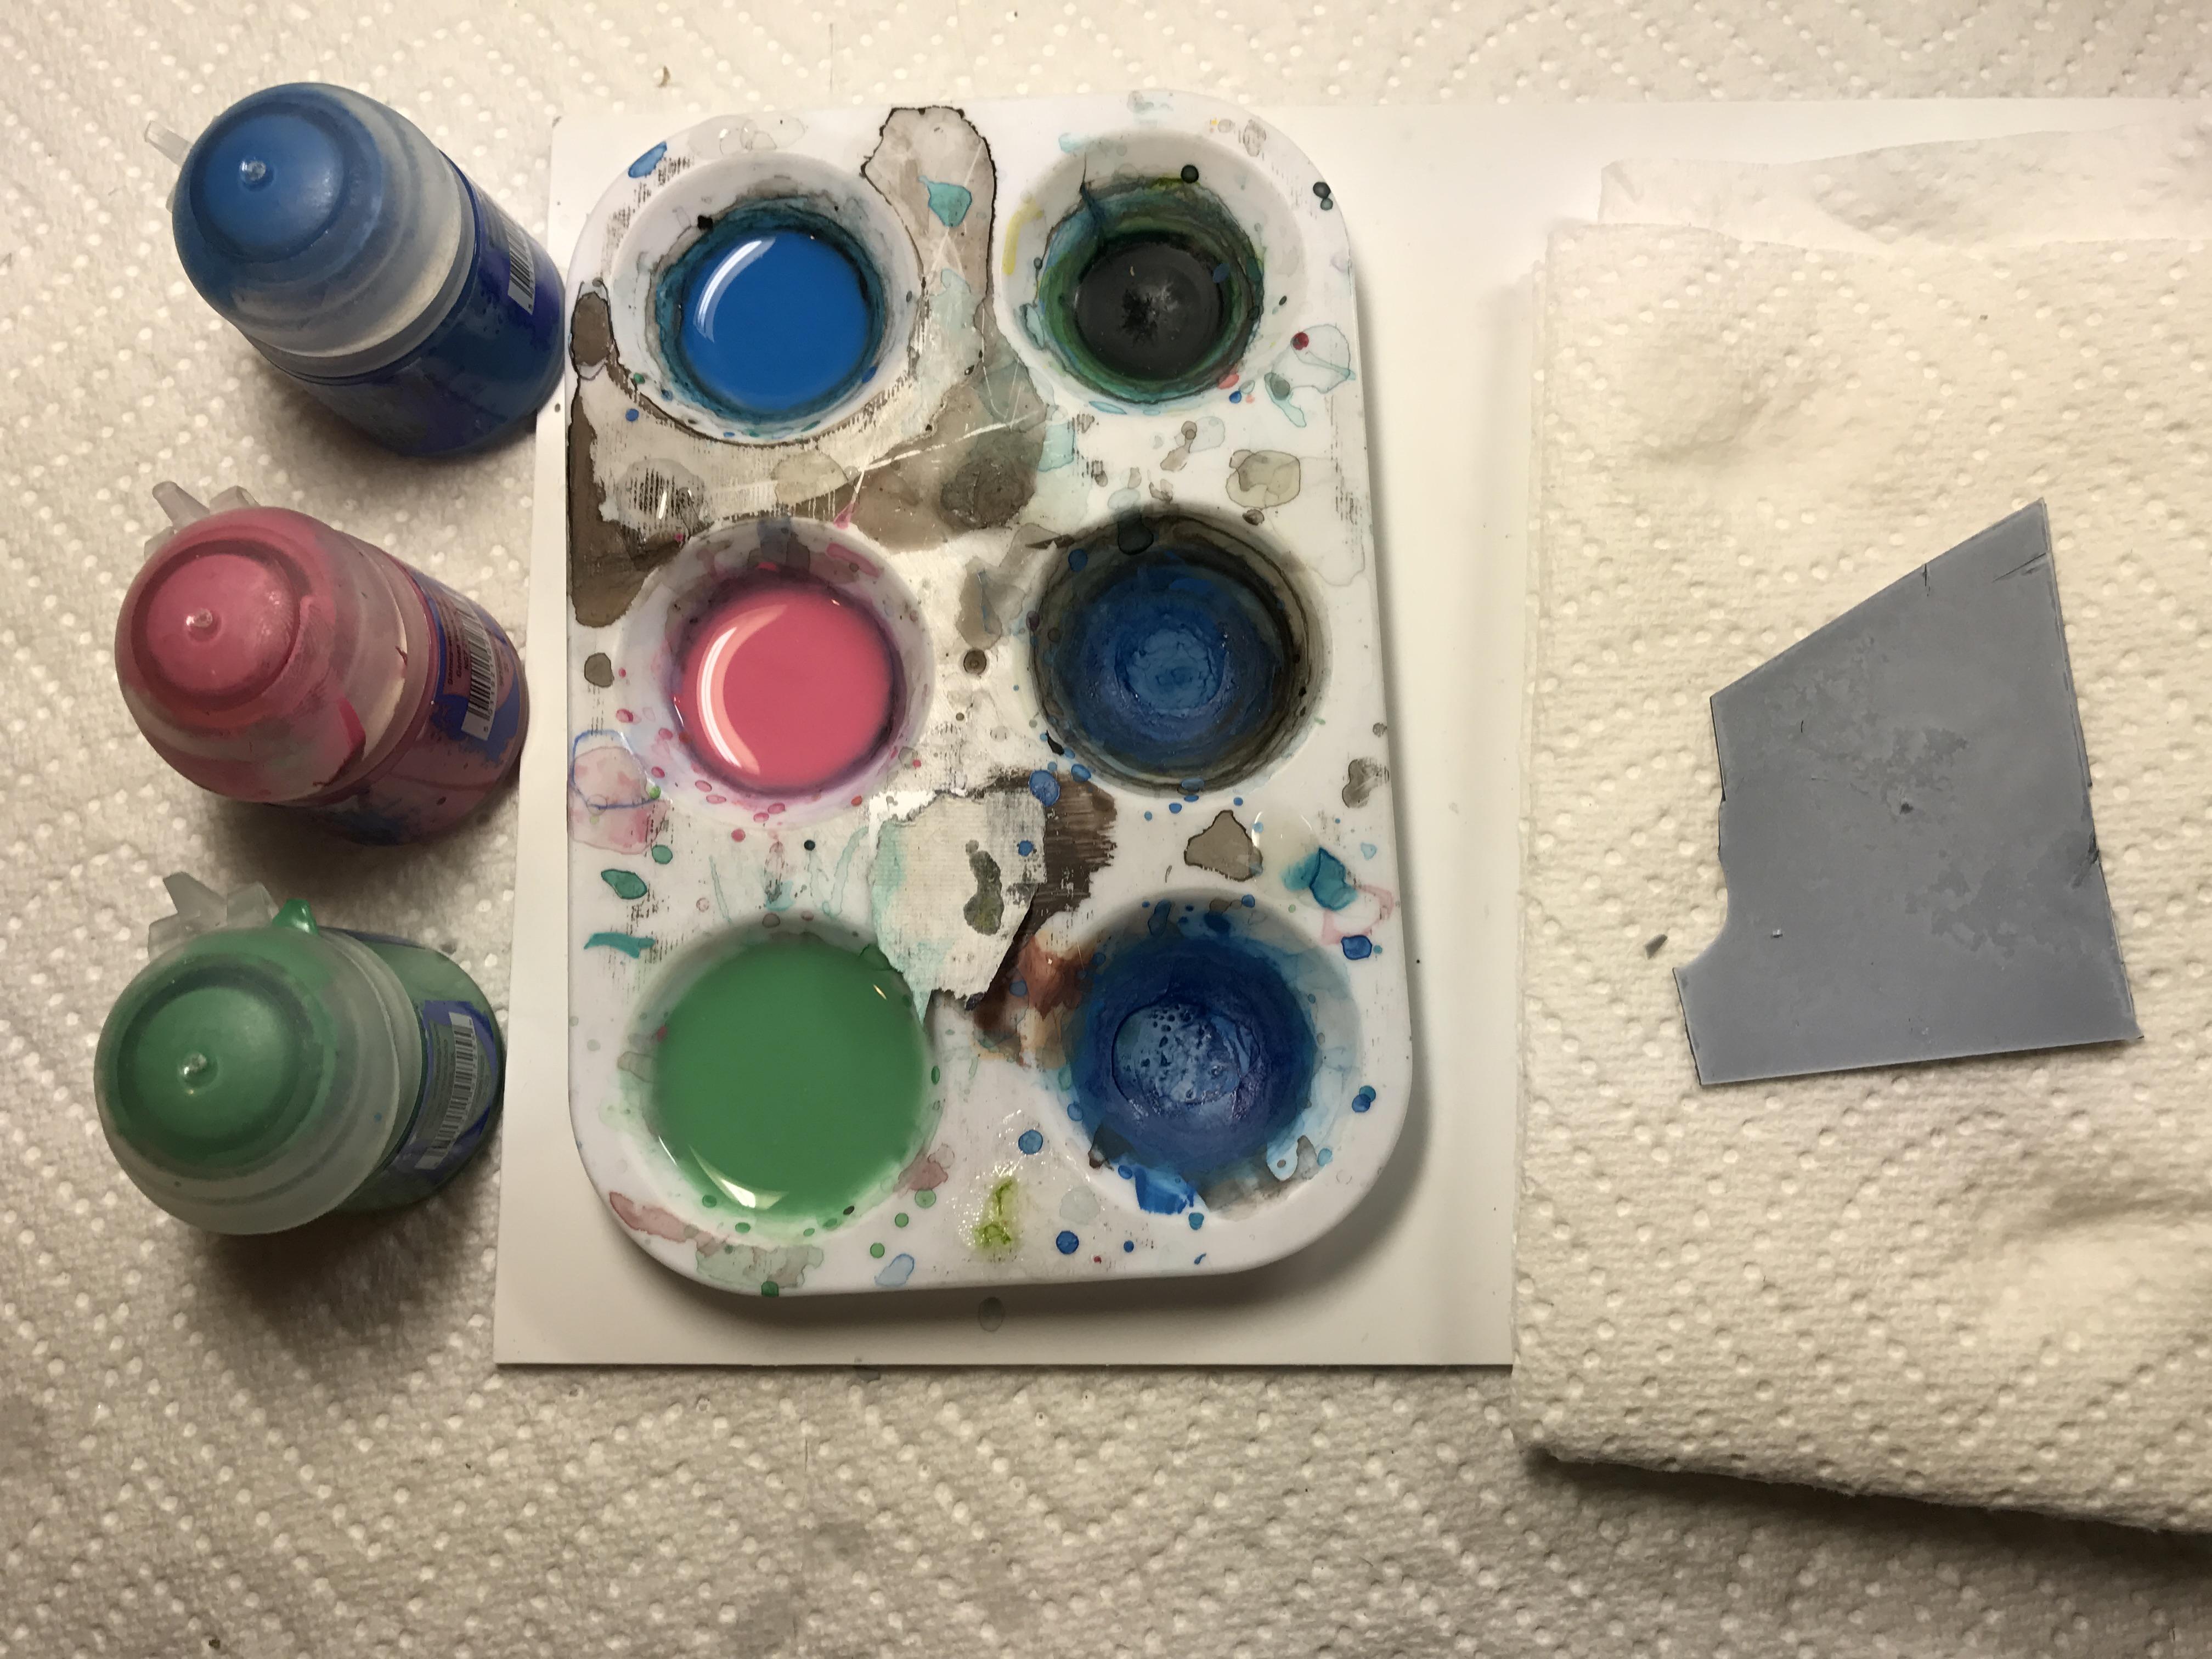
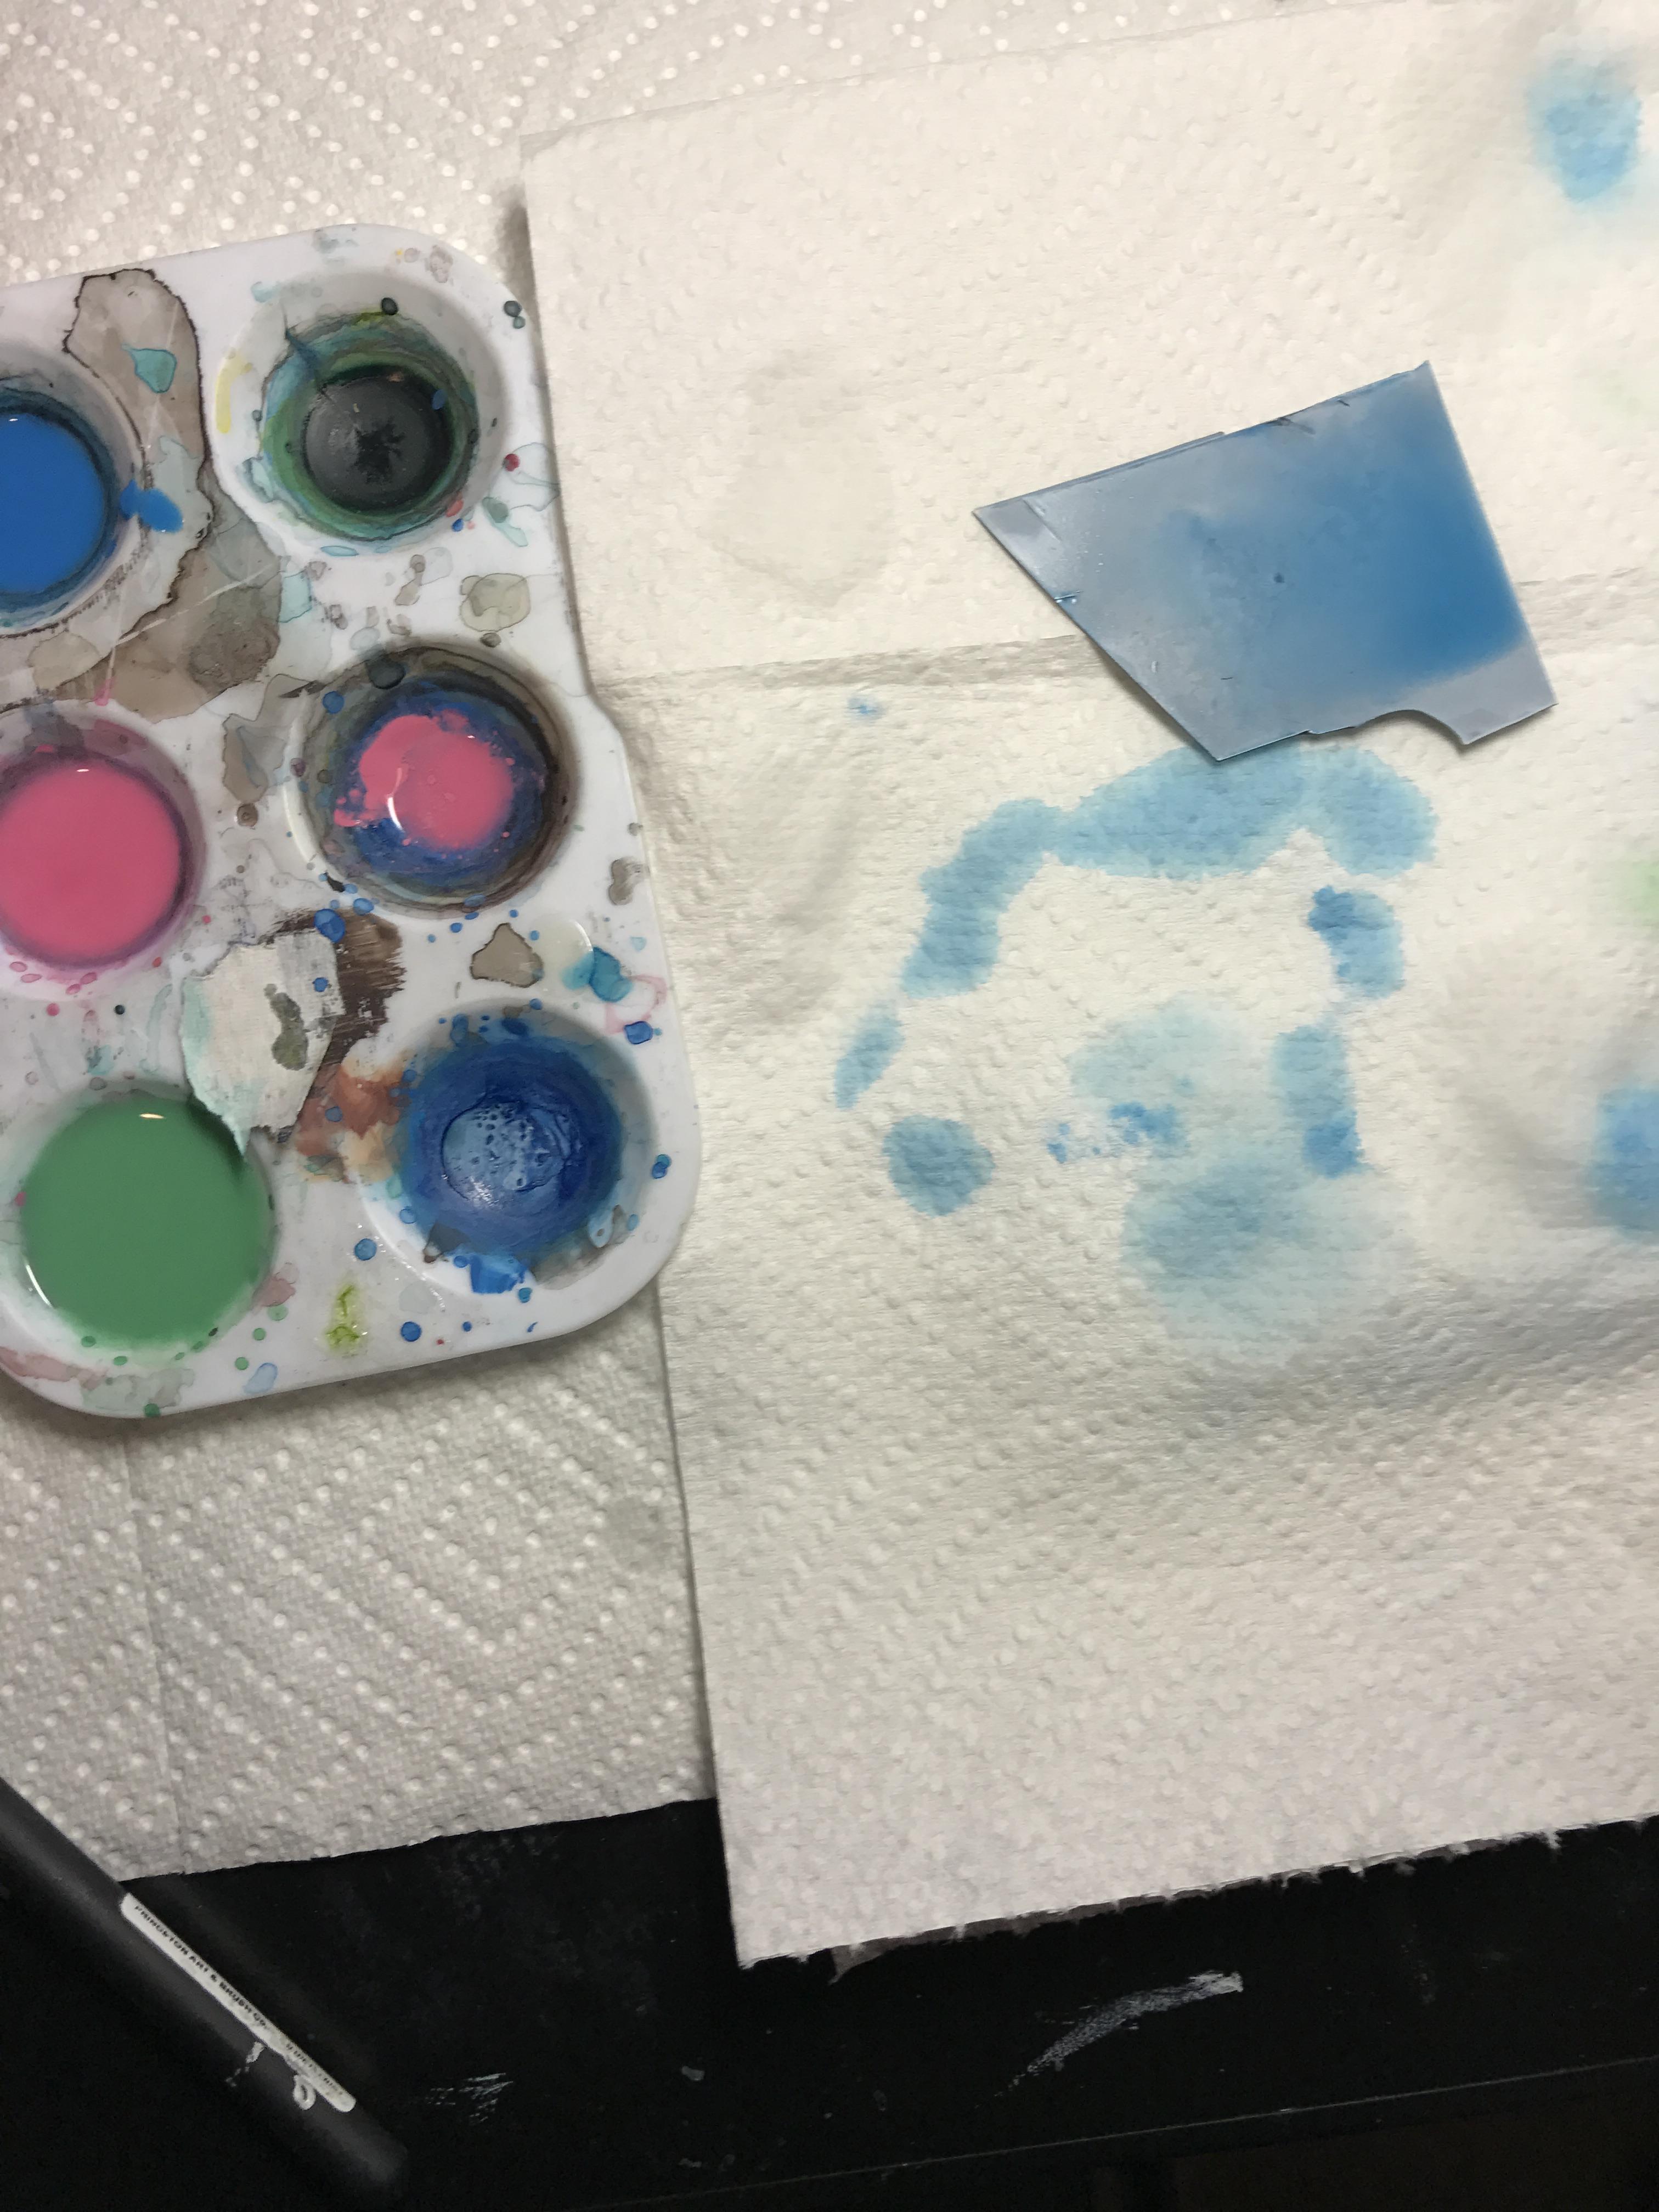
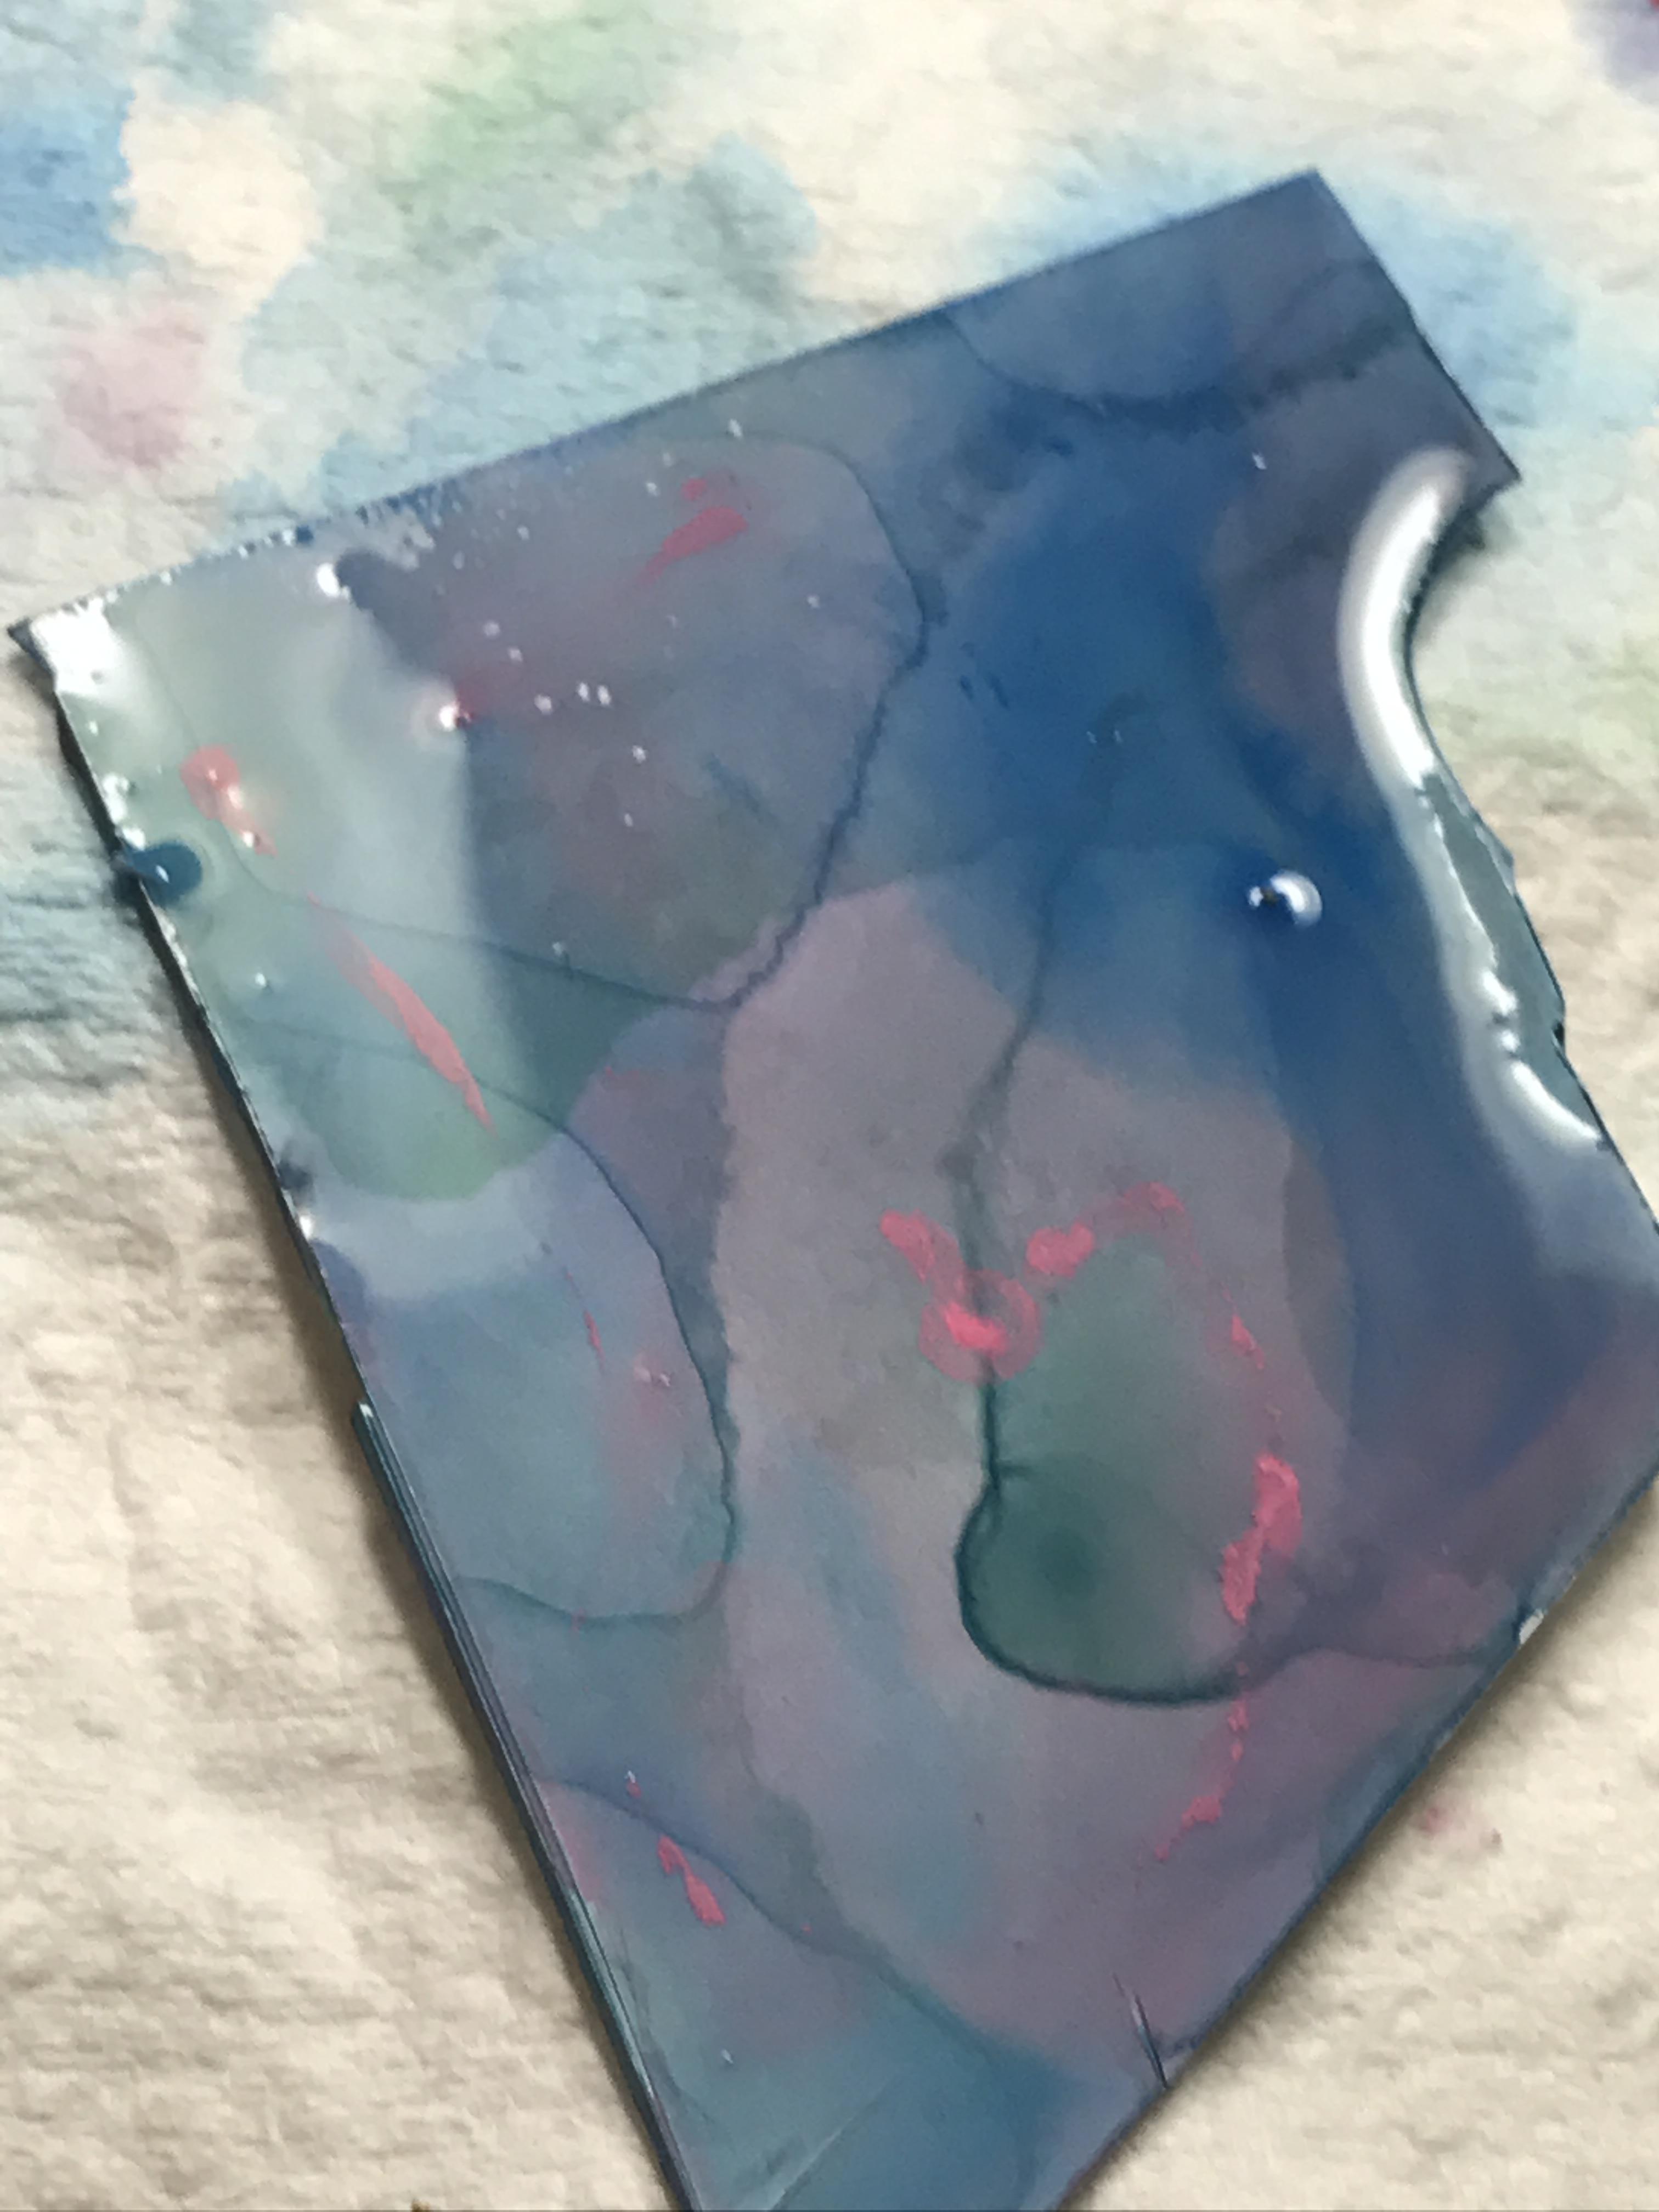
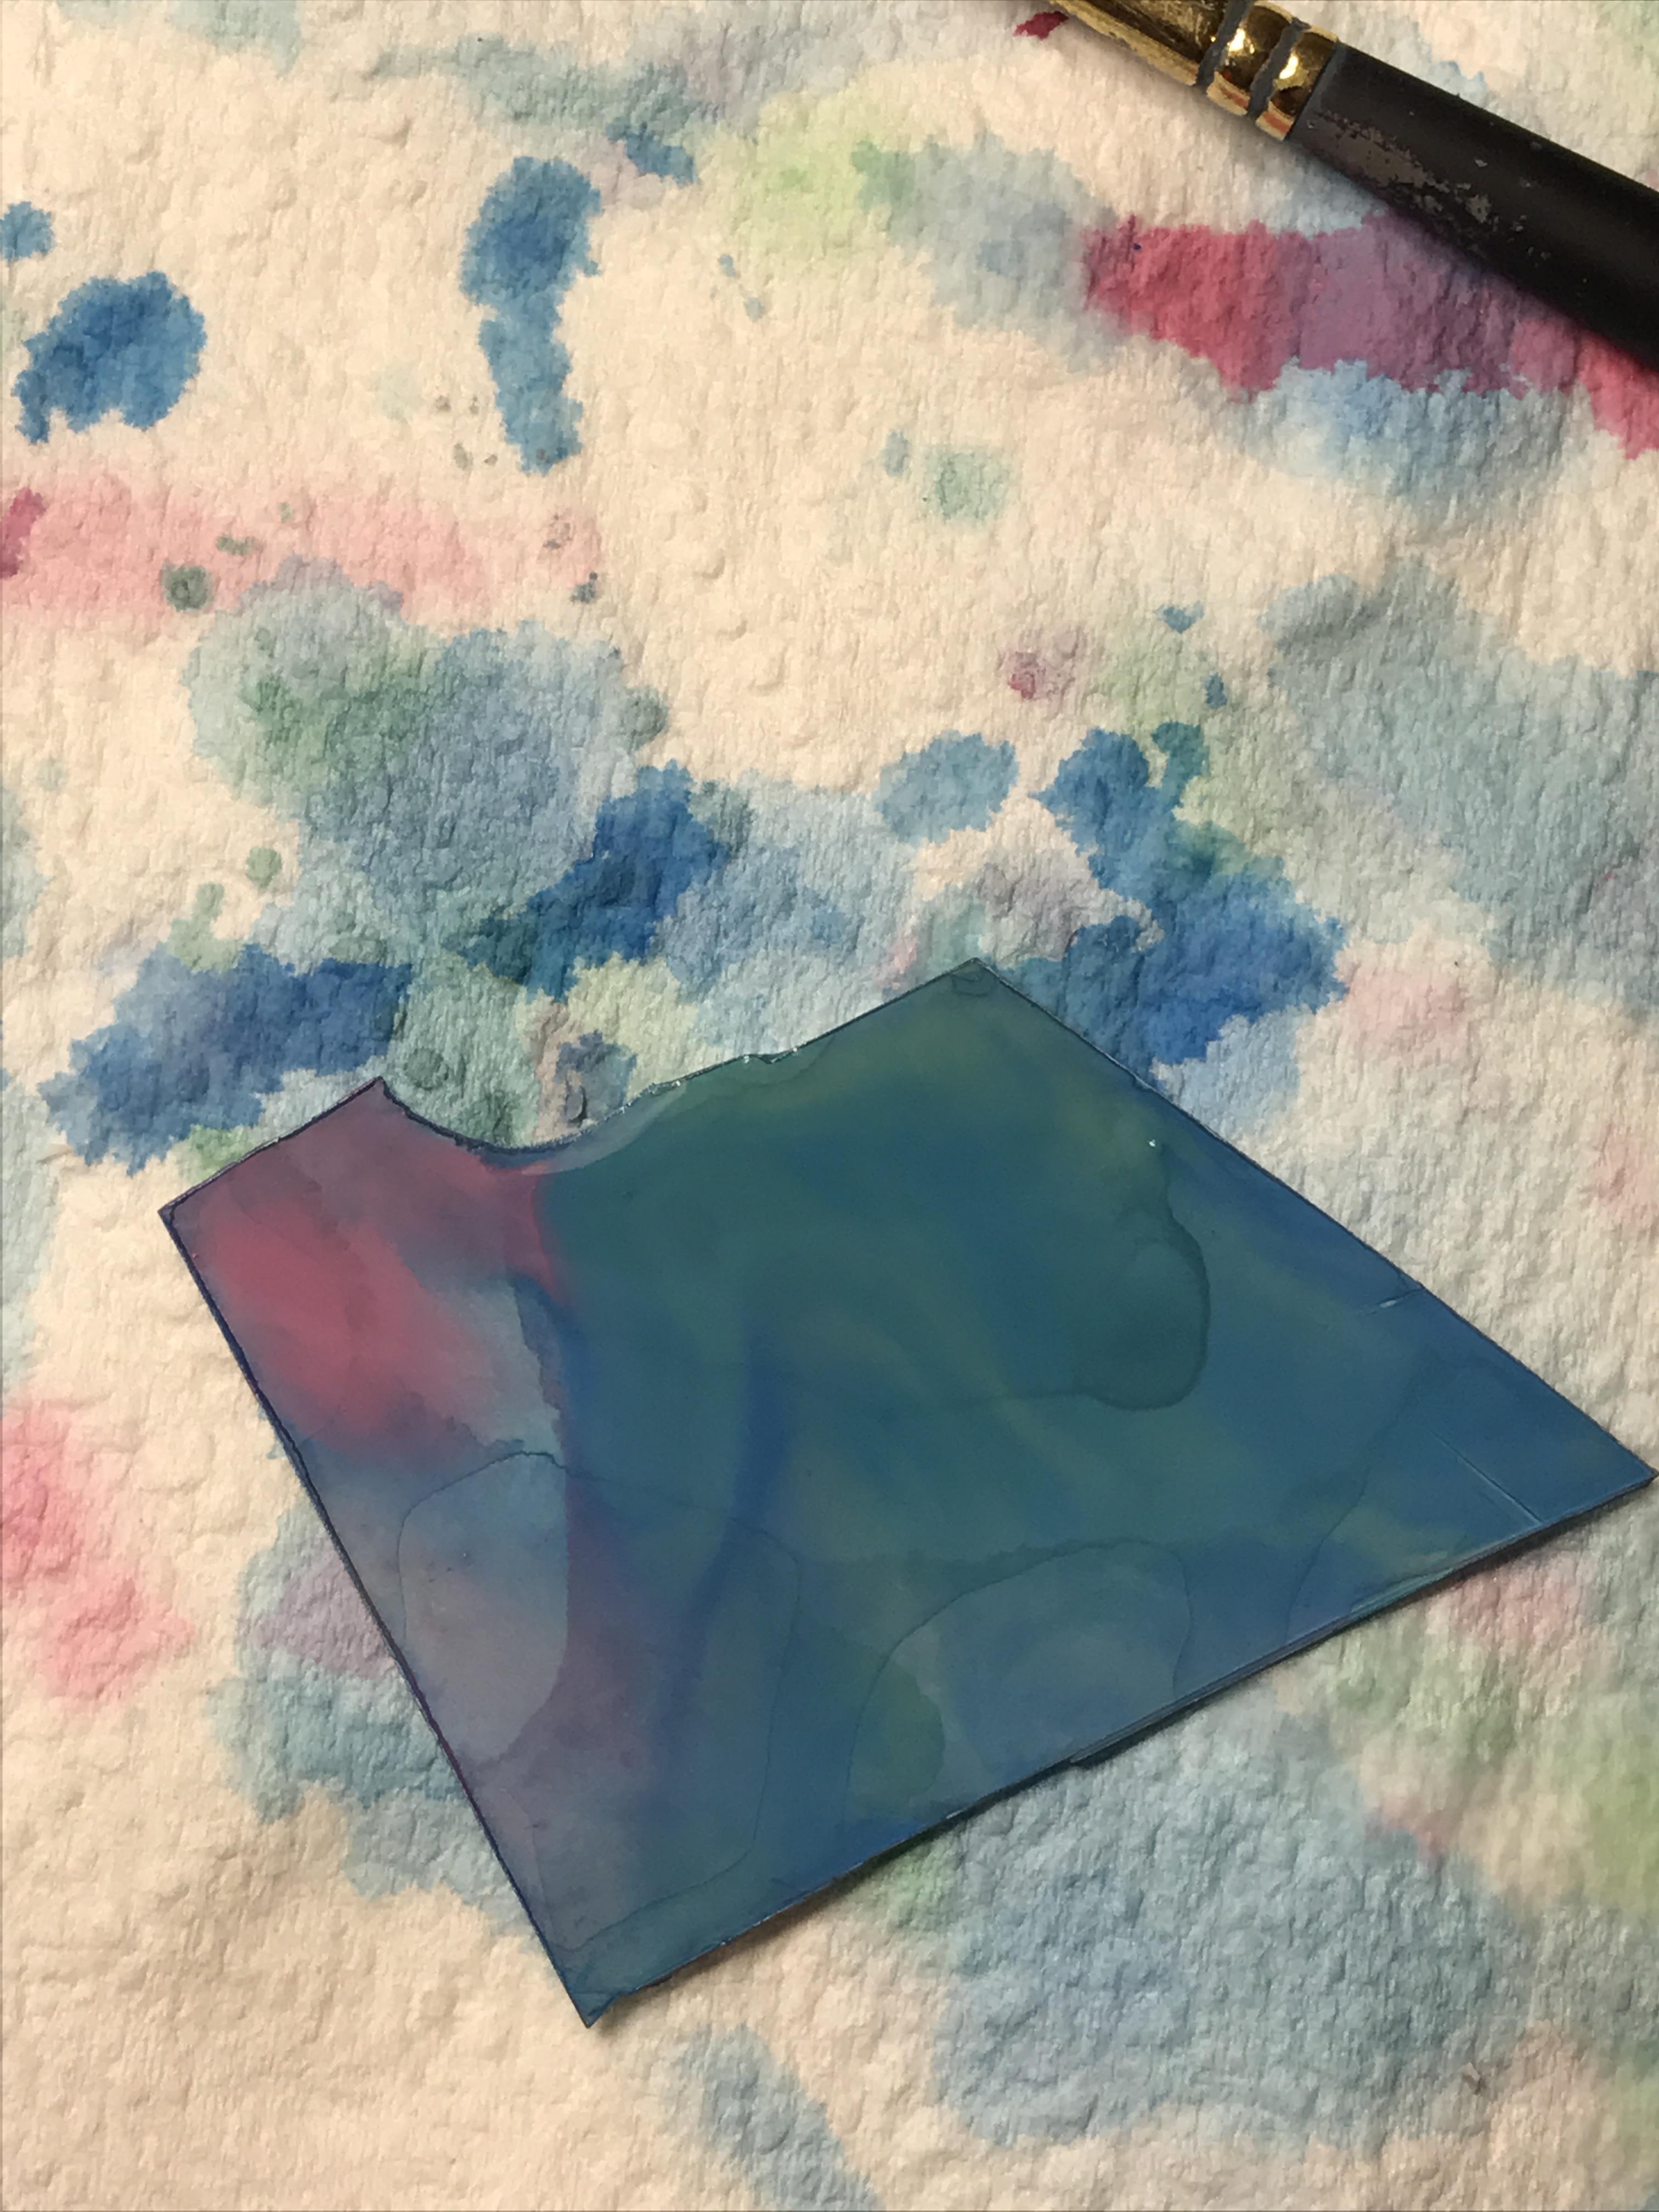
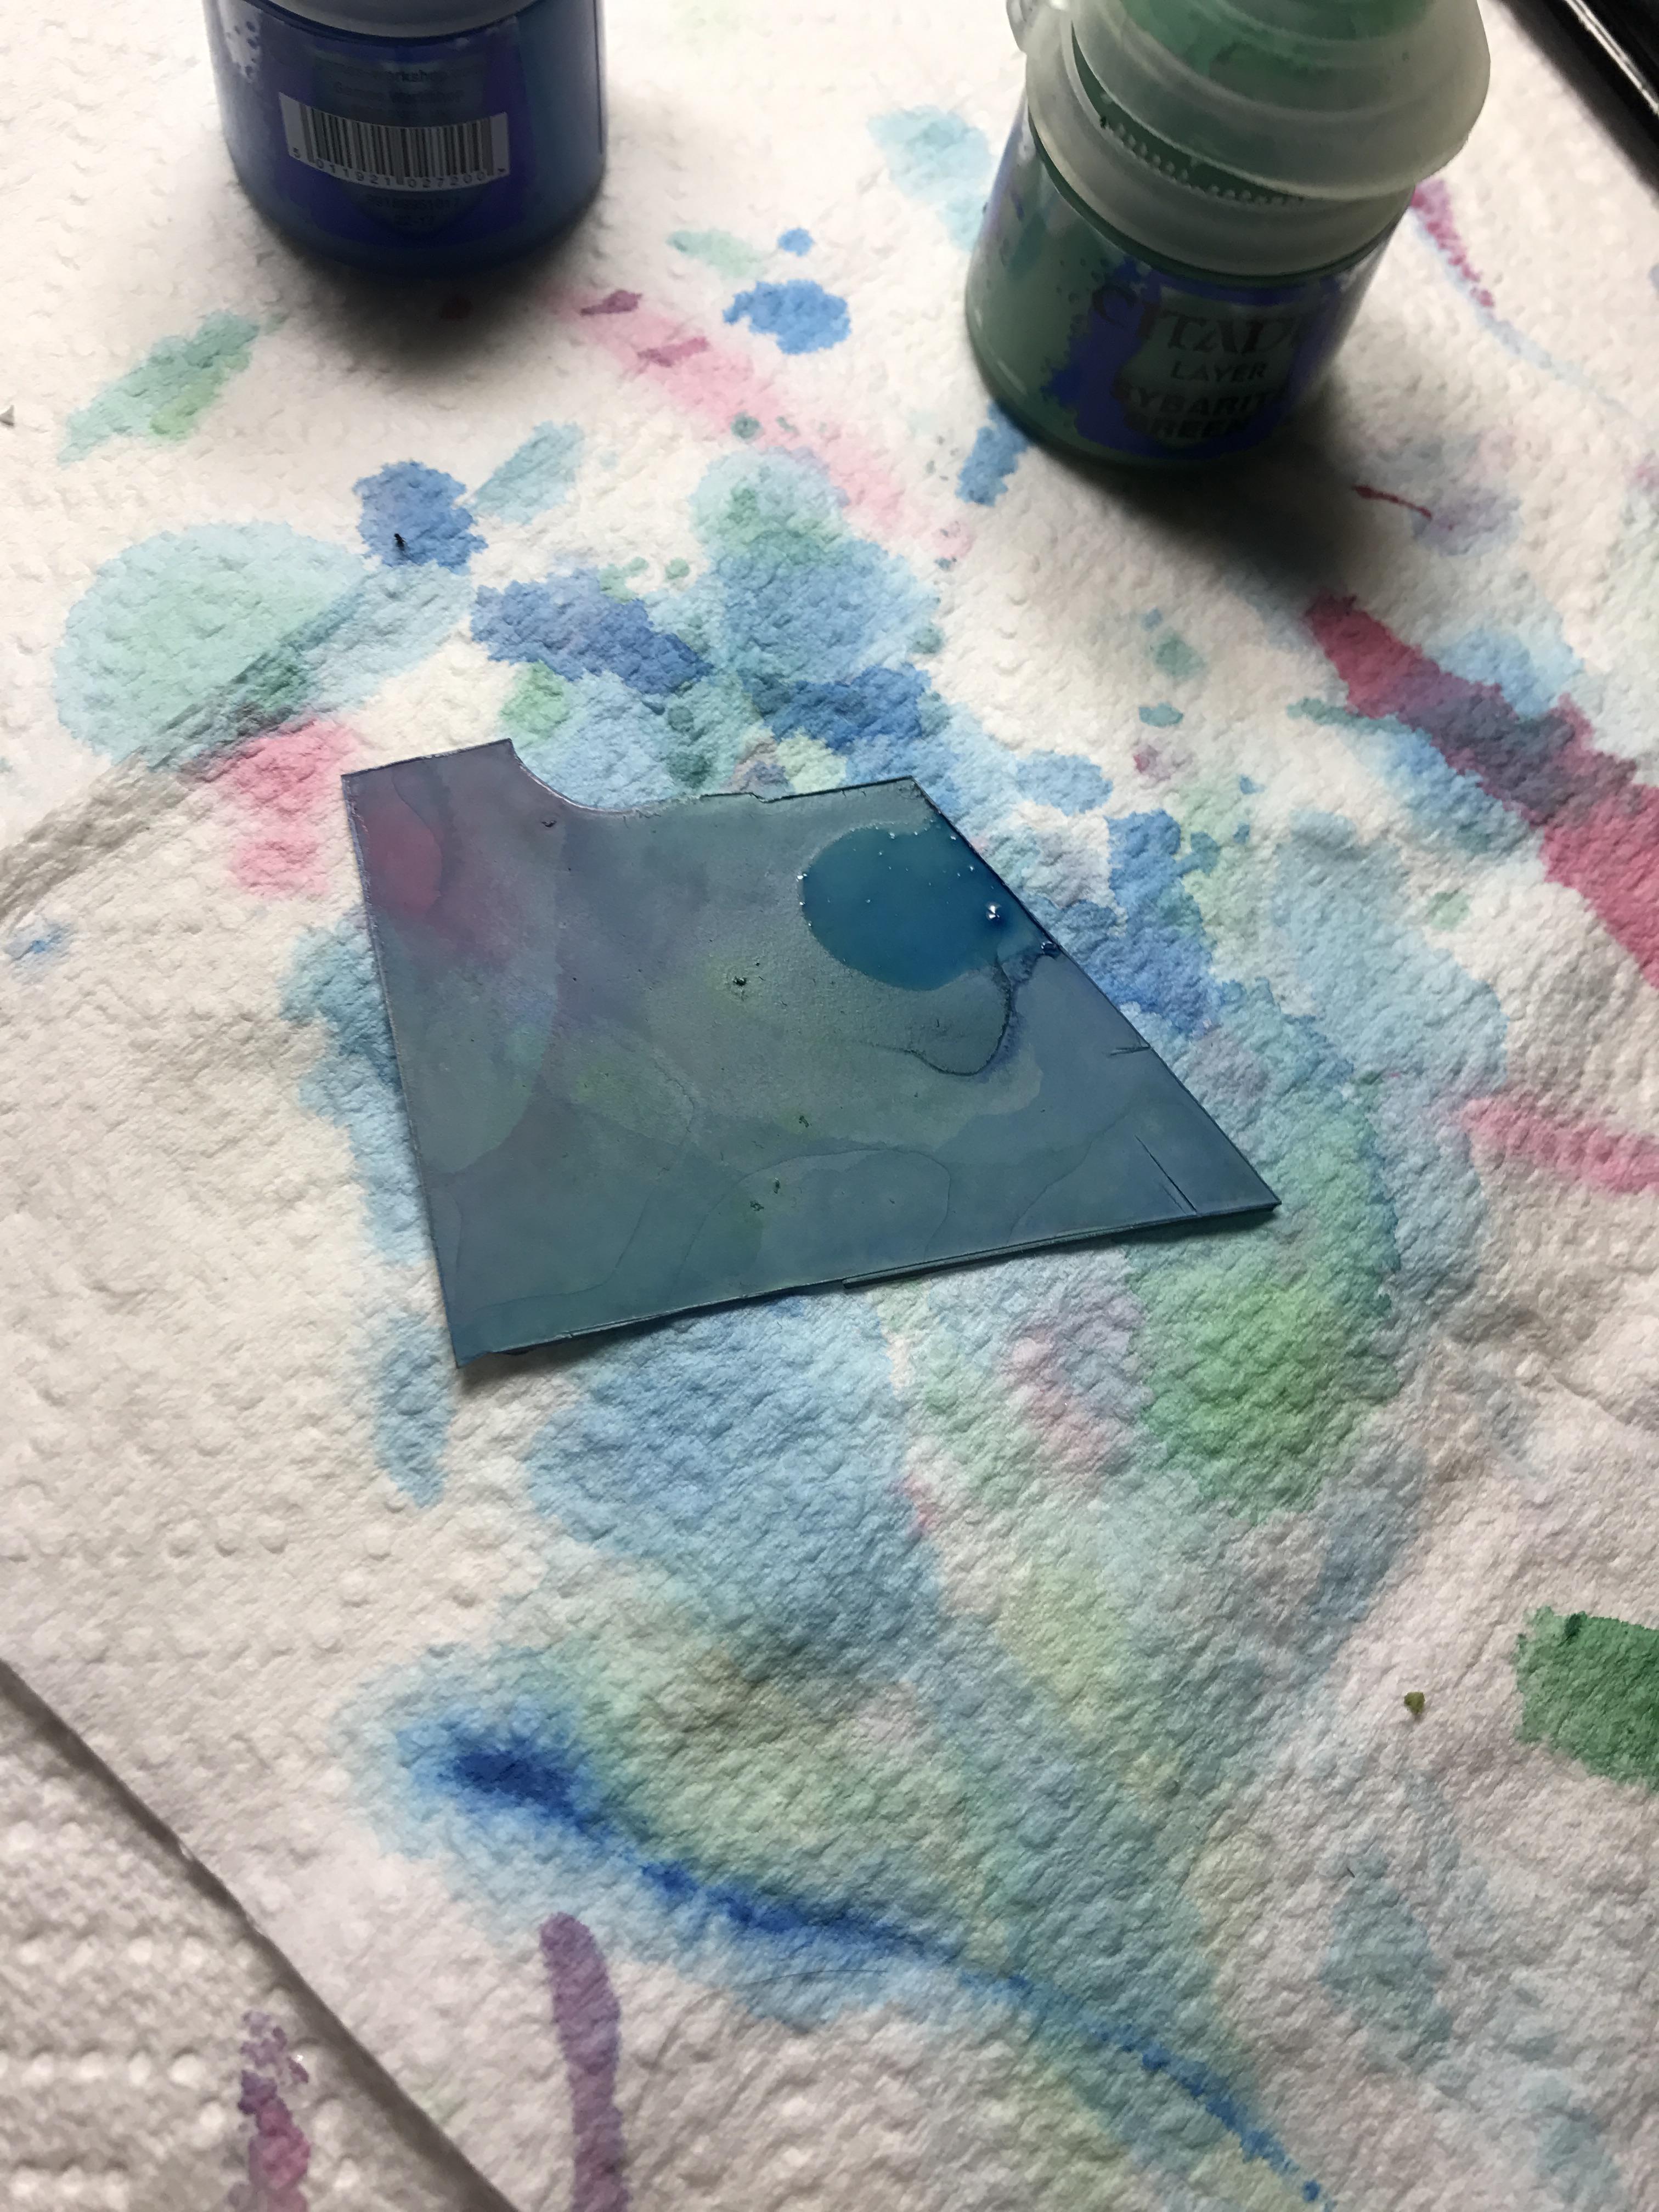
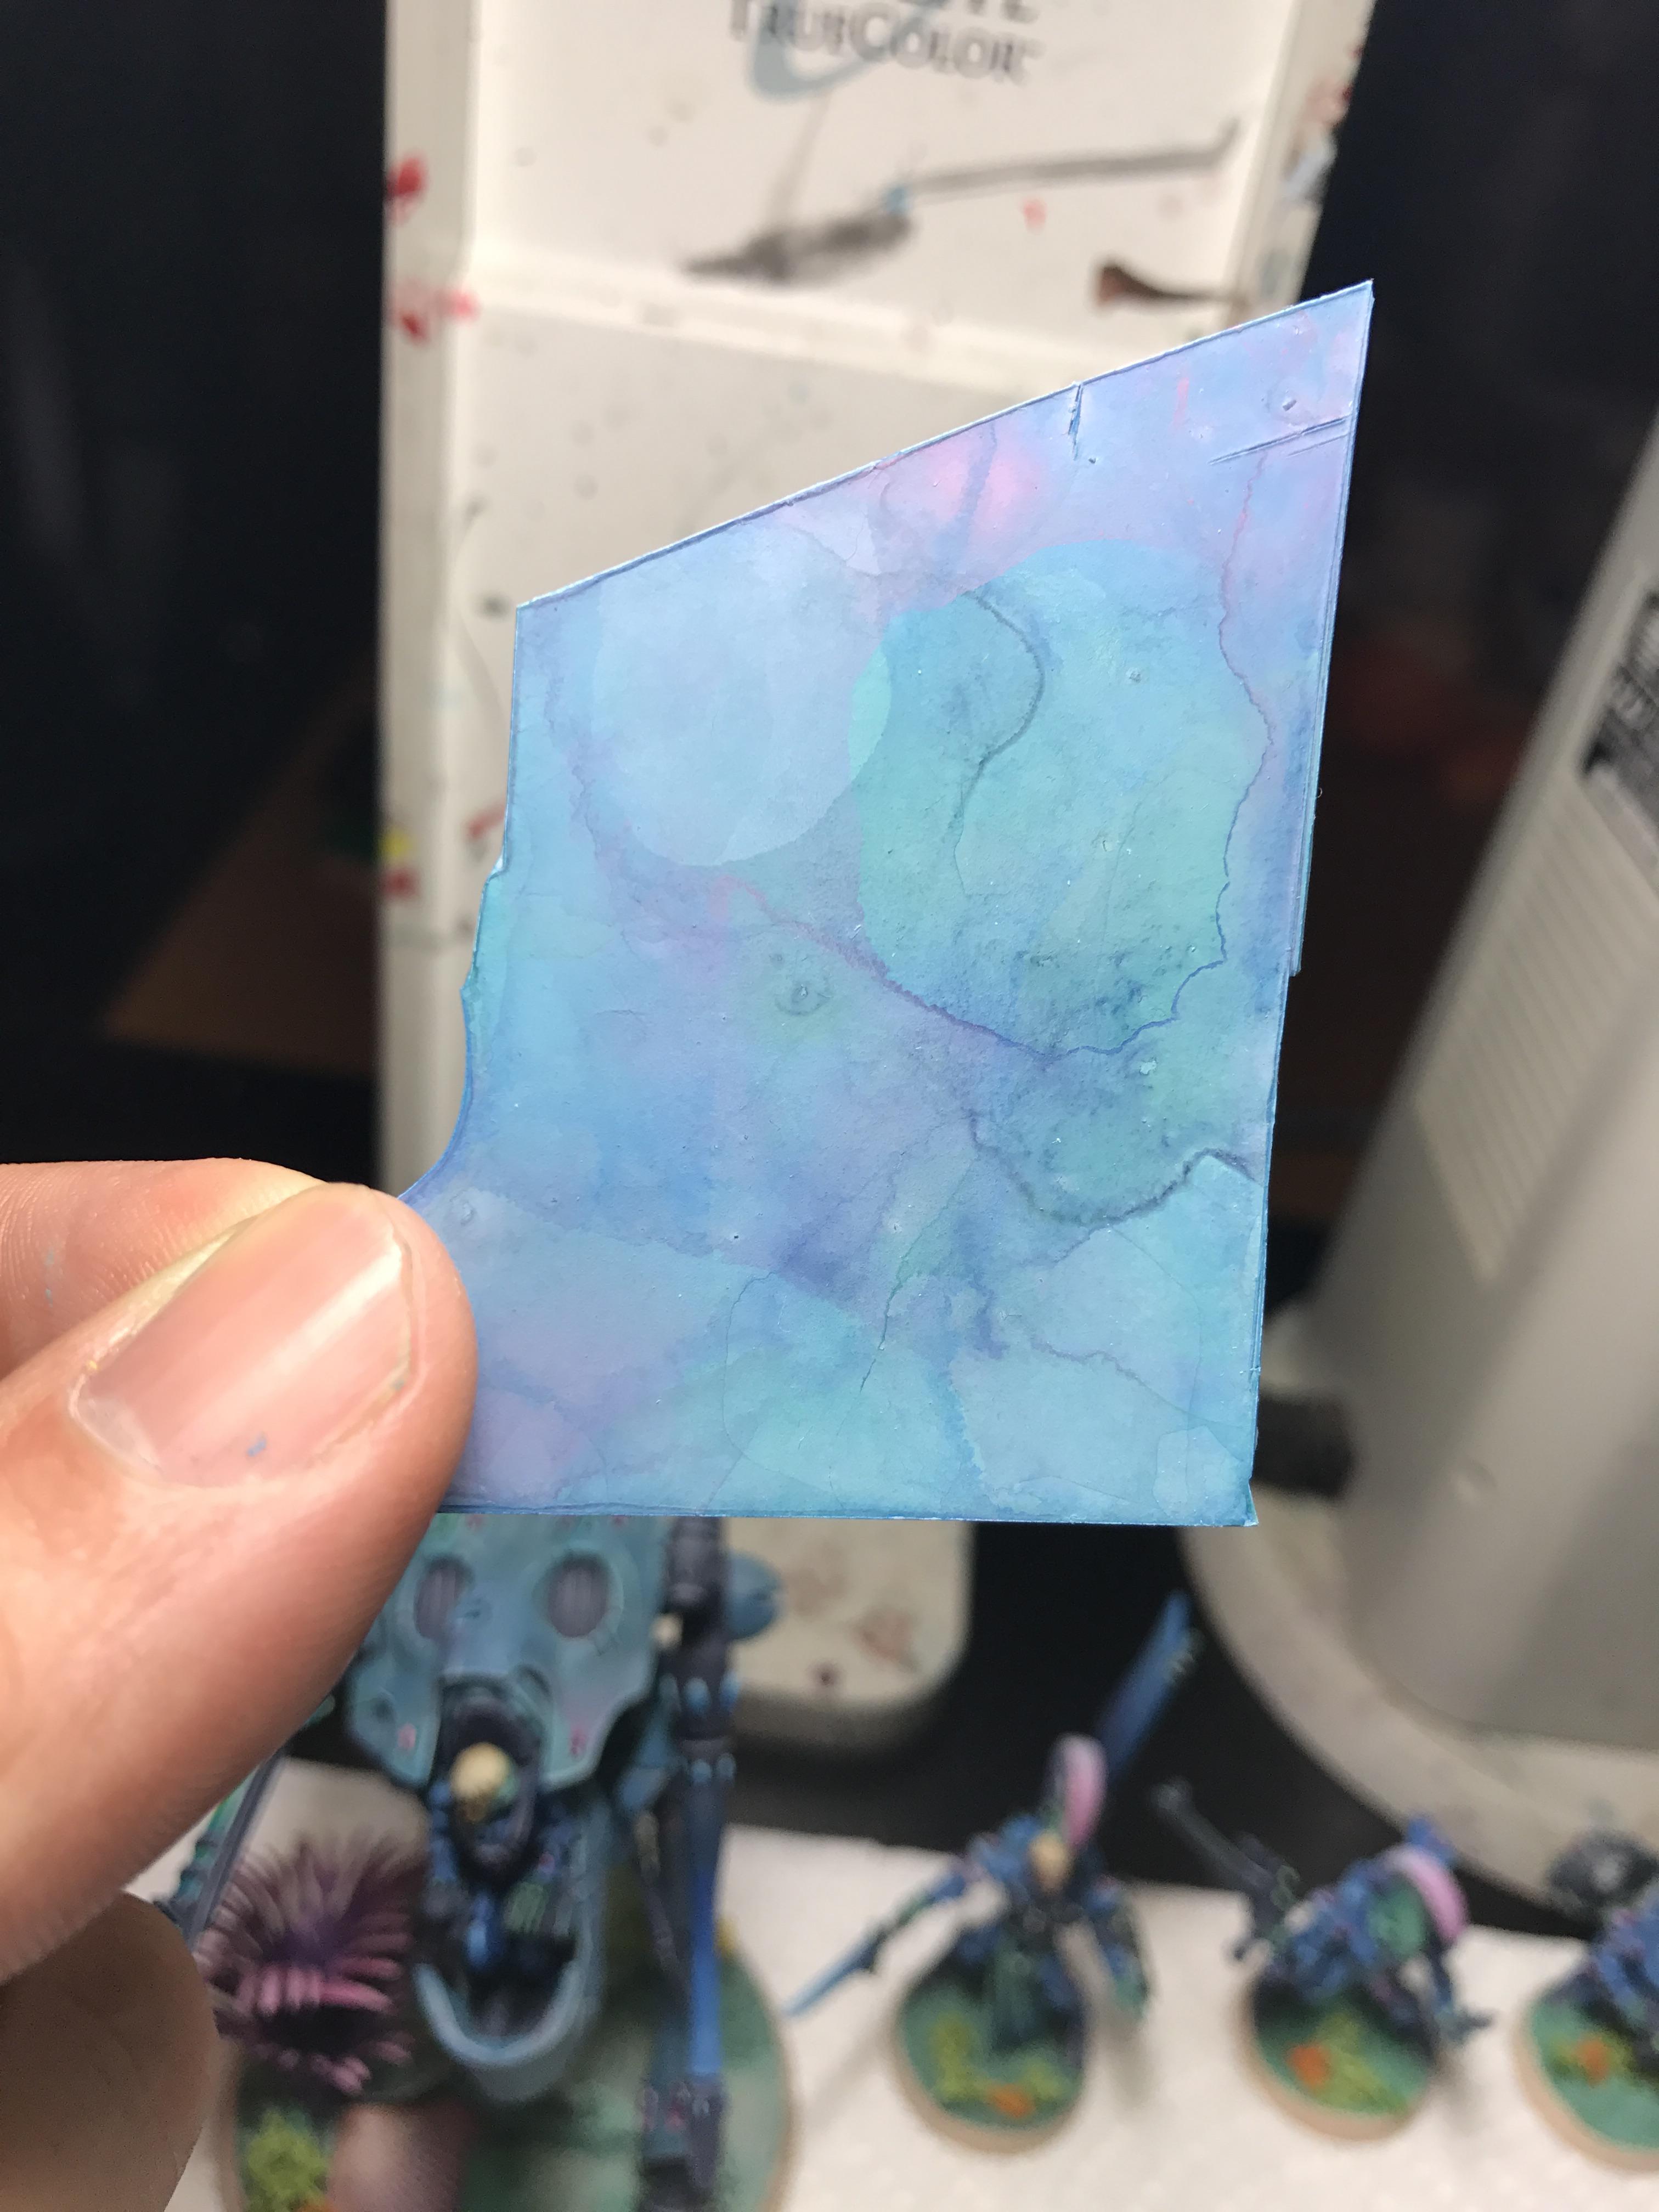
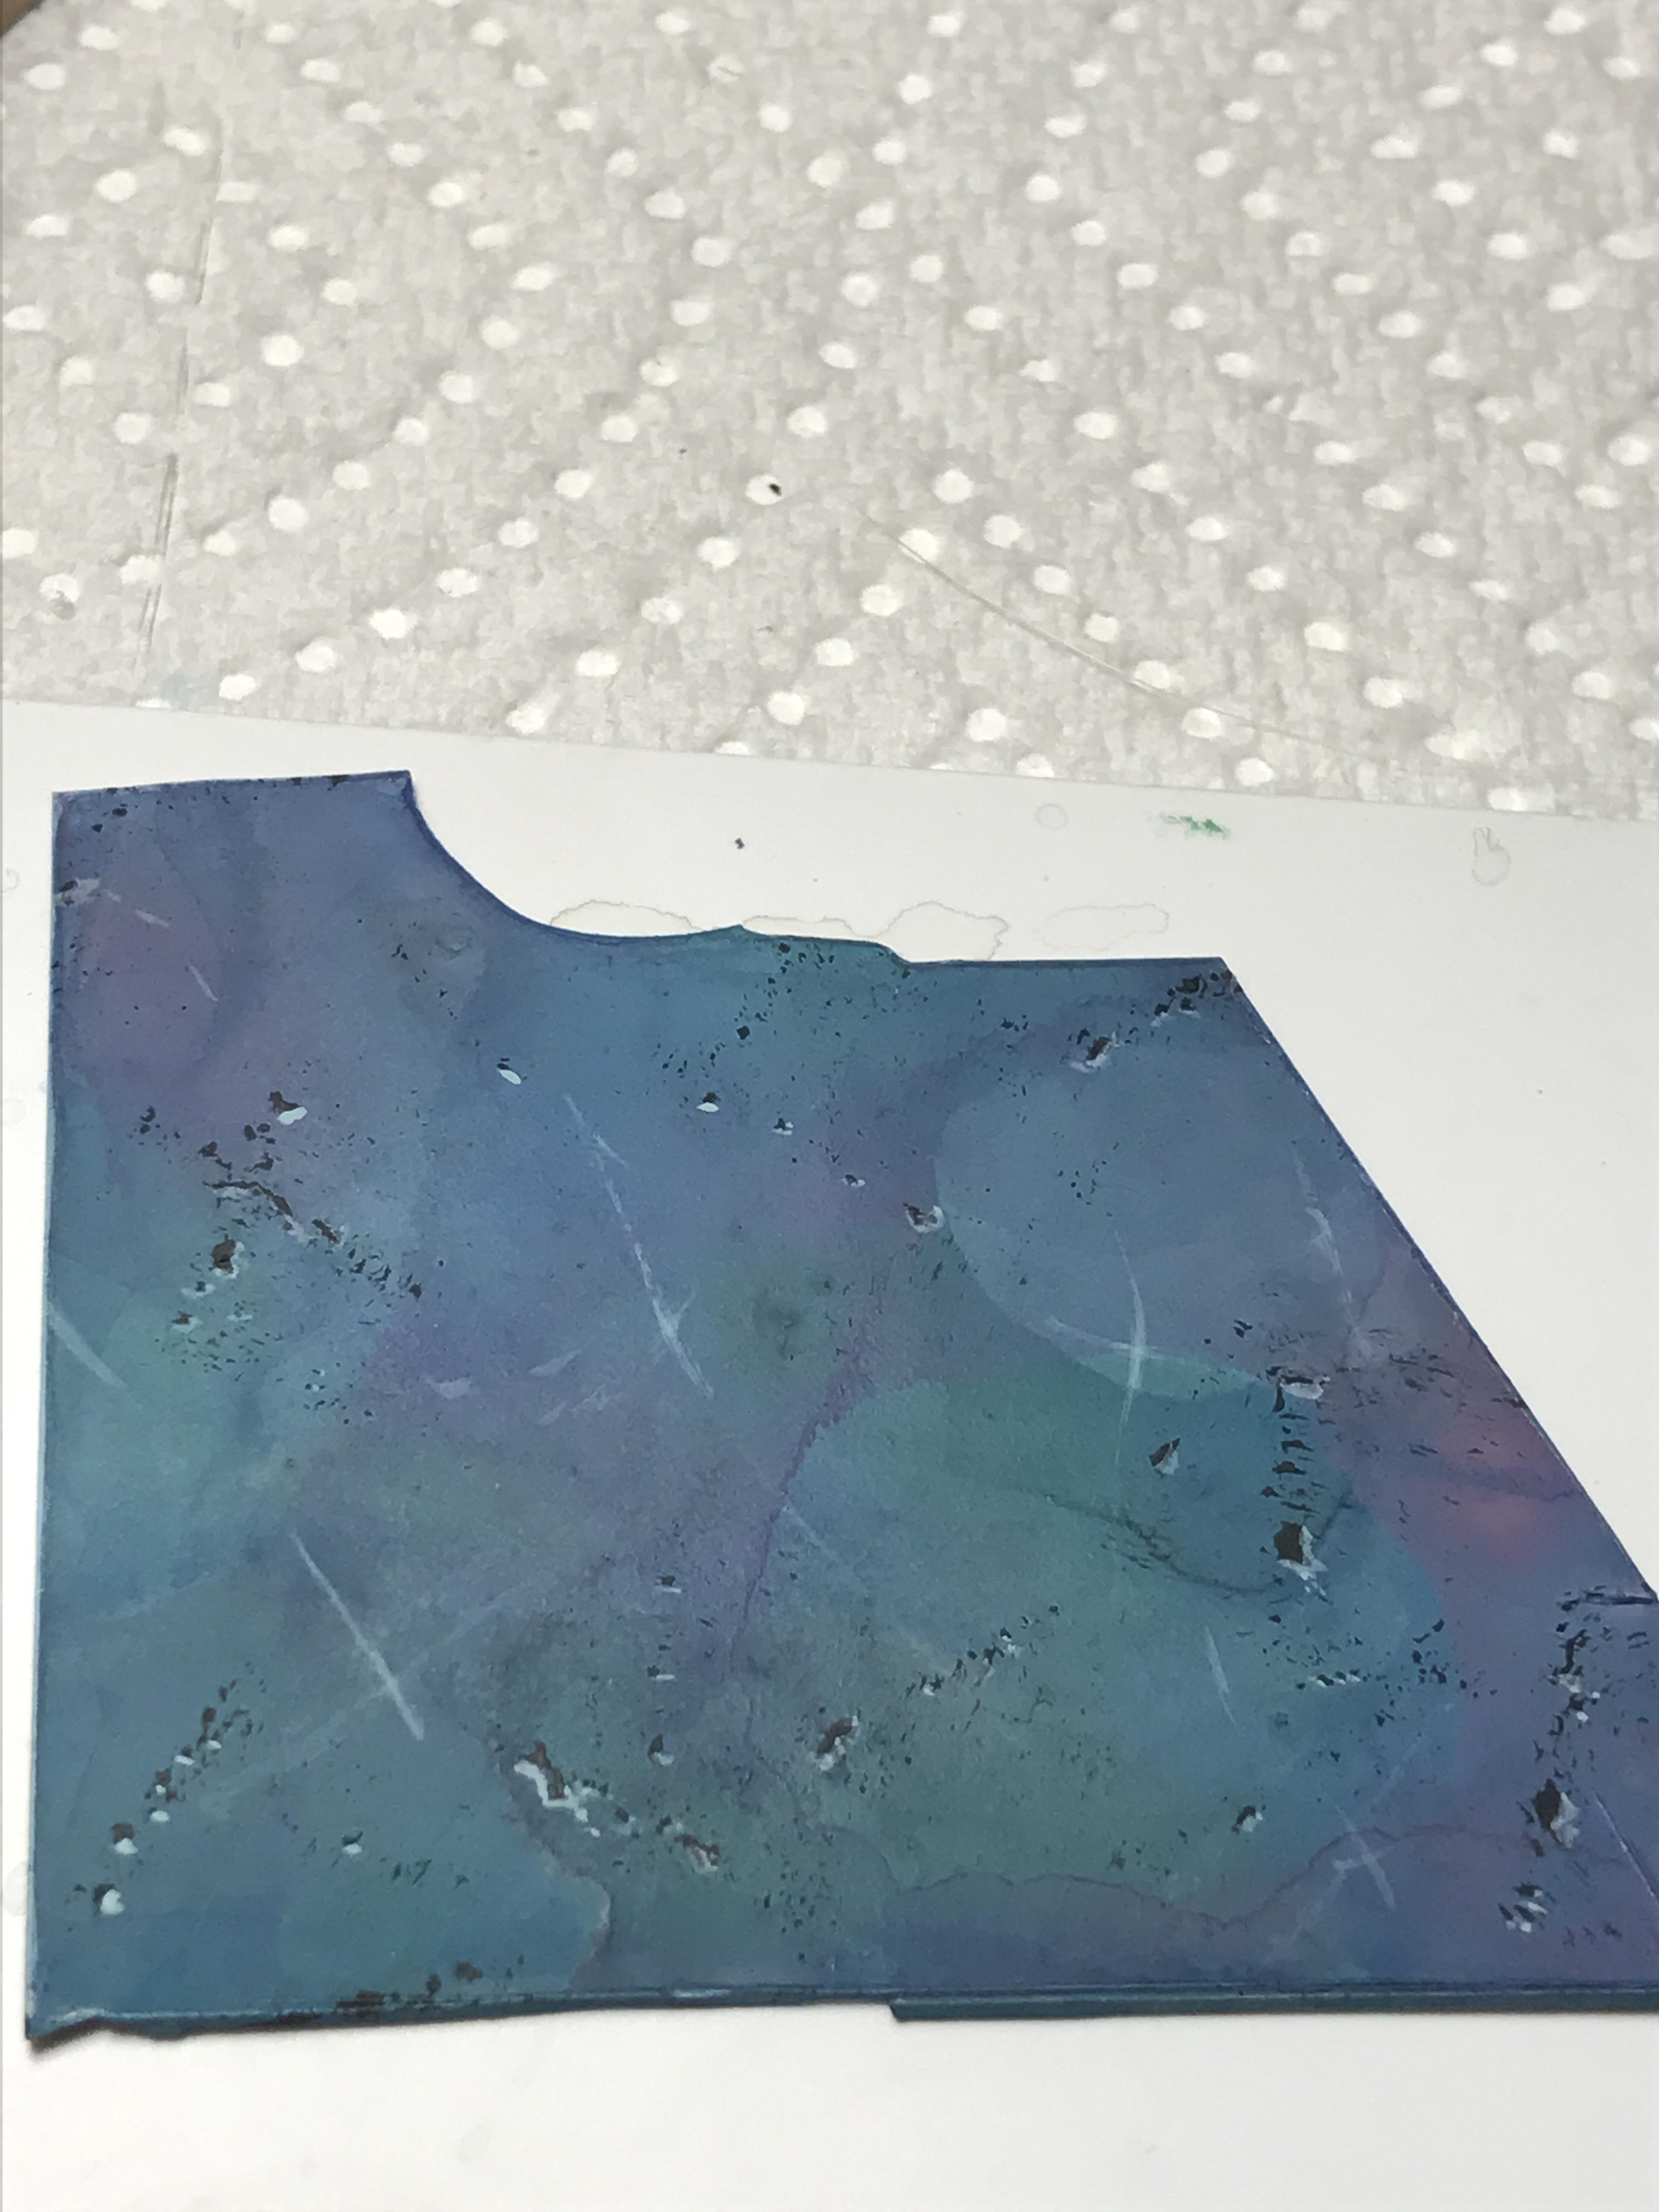
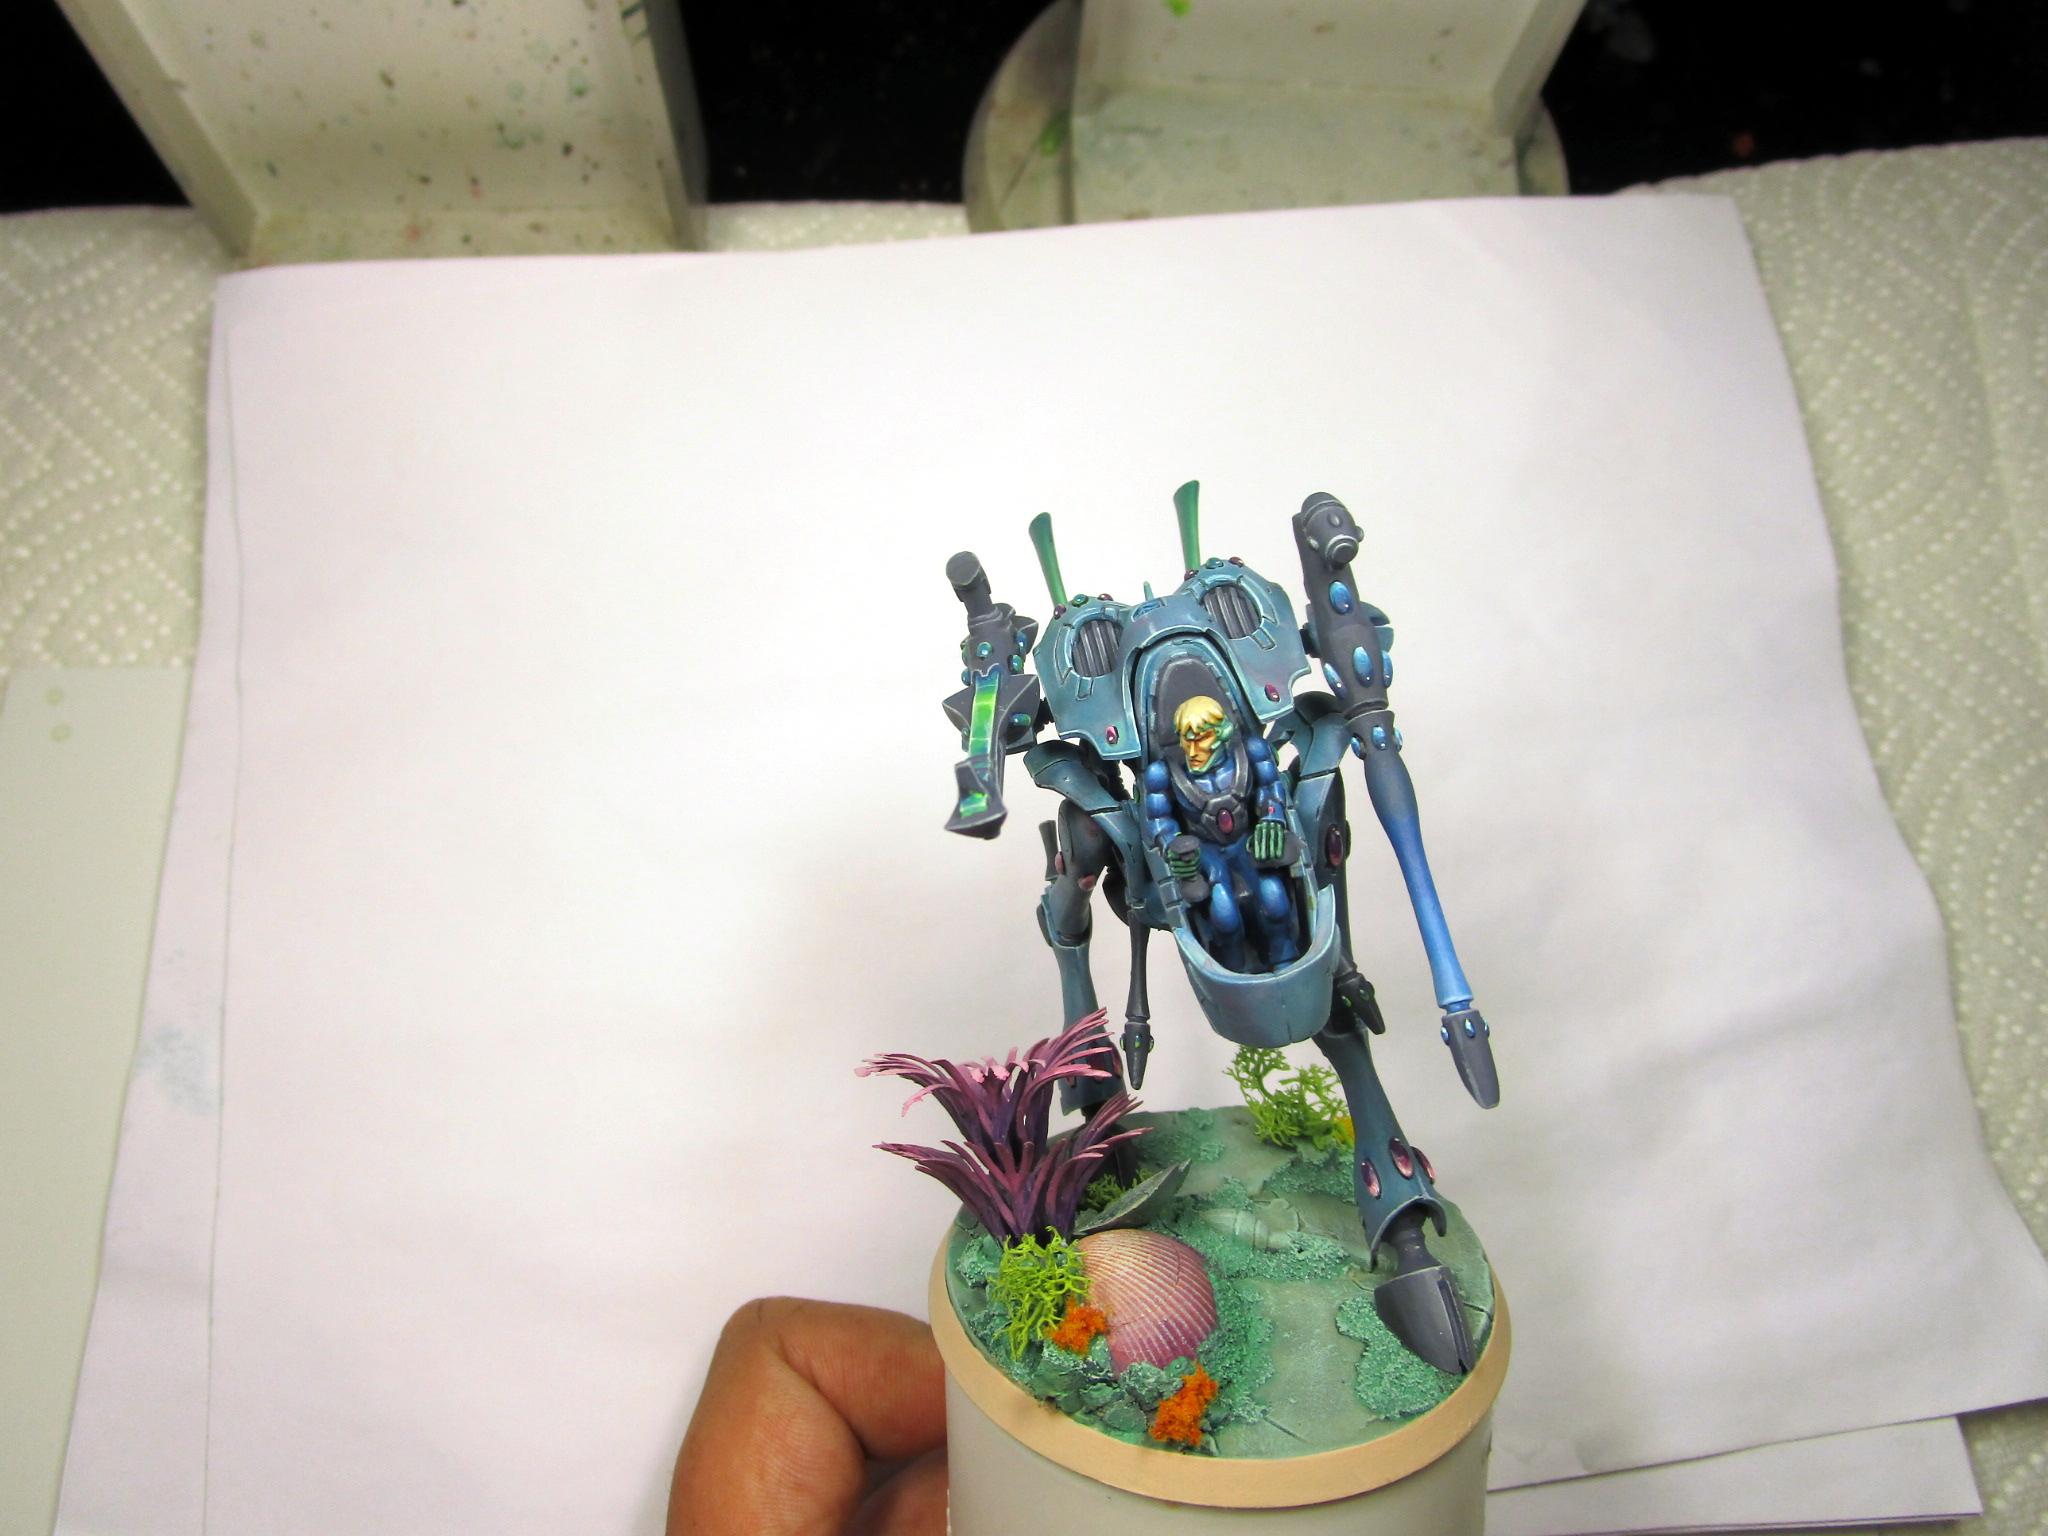
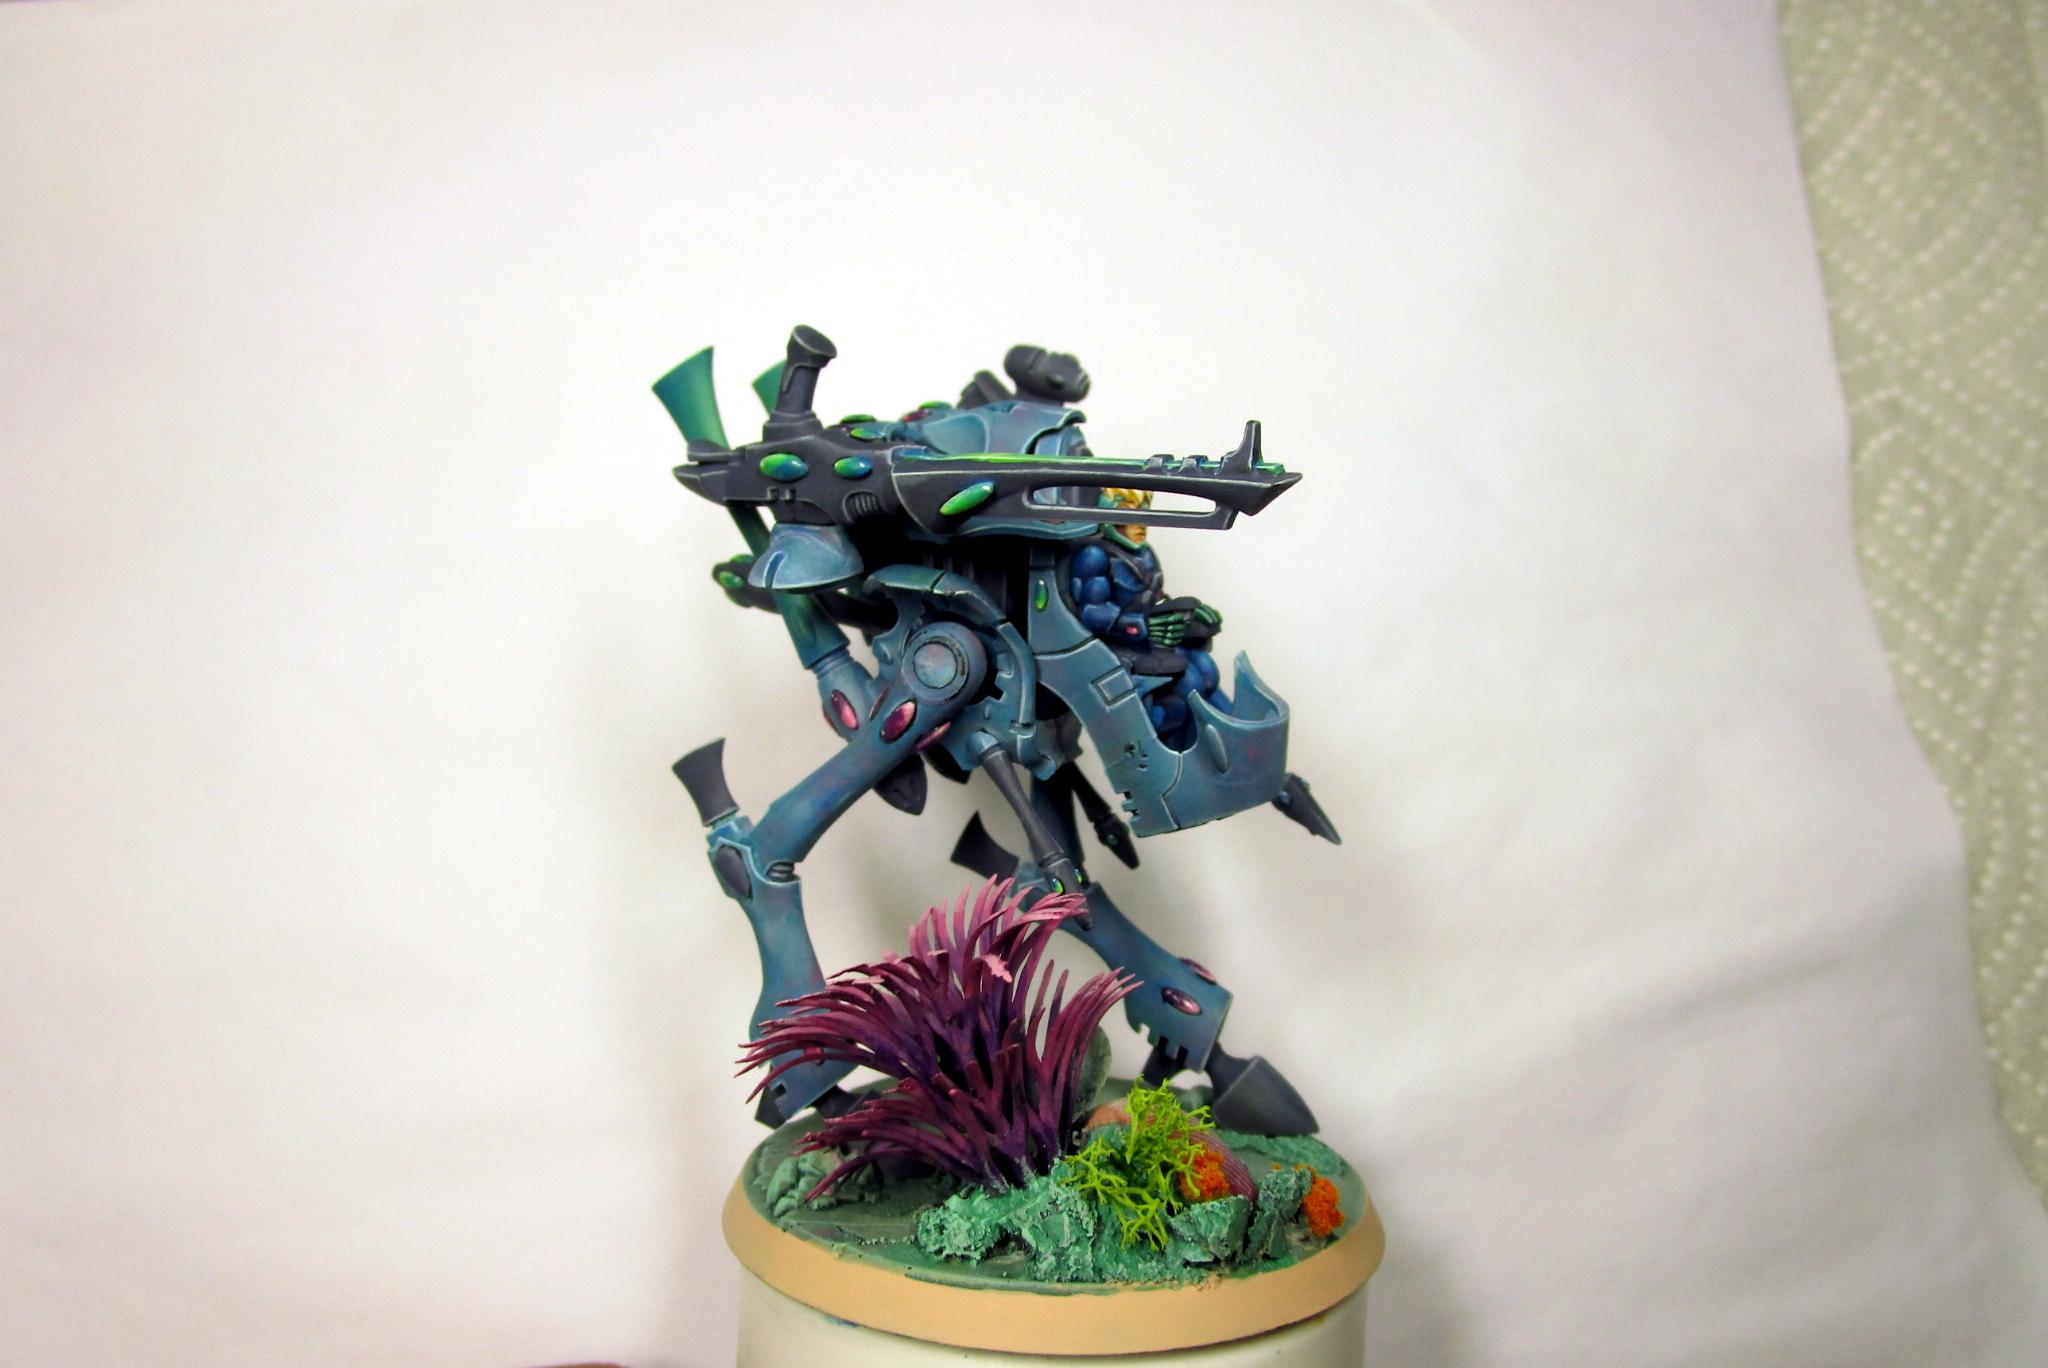
And from the ashes....im giving this thread a little life again, because its a good meeting spot for everyone in the pm blog to ask any questions or plain ole discussing anything about painting minis. Also, im posting a tut here that has been requested a few times over the last couple of weeks. For those not following my blog, how dare you...kidding totes, but im painting an eldar army. Im not that far in, but my finished warwalker raised some questions as to how i did the effect. Below is a concise tutorial on how to do it.
A couple things to note. you can probably use any three colors you want whatever use you have in mind for this affect. But i advise to choose your three colors wisely as the do have to mix. Lastly, be patient, this process took a long time because its important to let the washes dry as they will, the randomnessa and pooling lends to the effect. You may try a lamp or something to speed it up, but still many many many layers of this is required. OKOK .... let me just move on.
This tut is best showed in just pictures... ill add some text as needed...
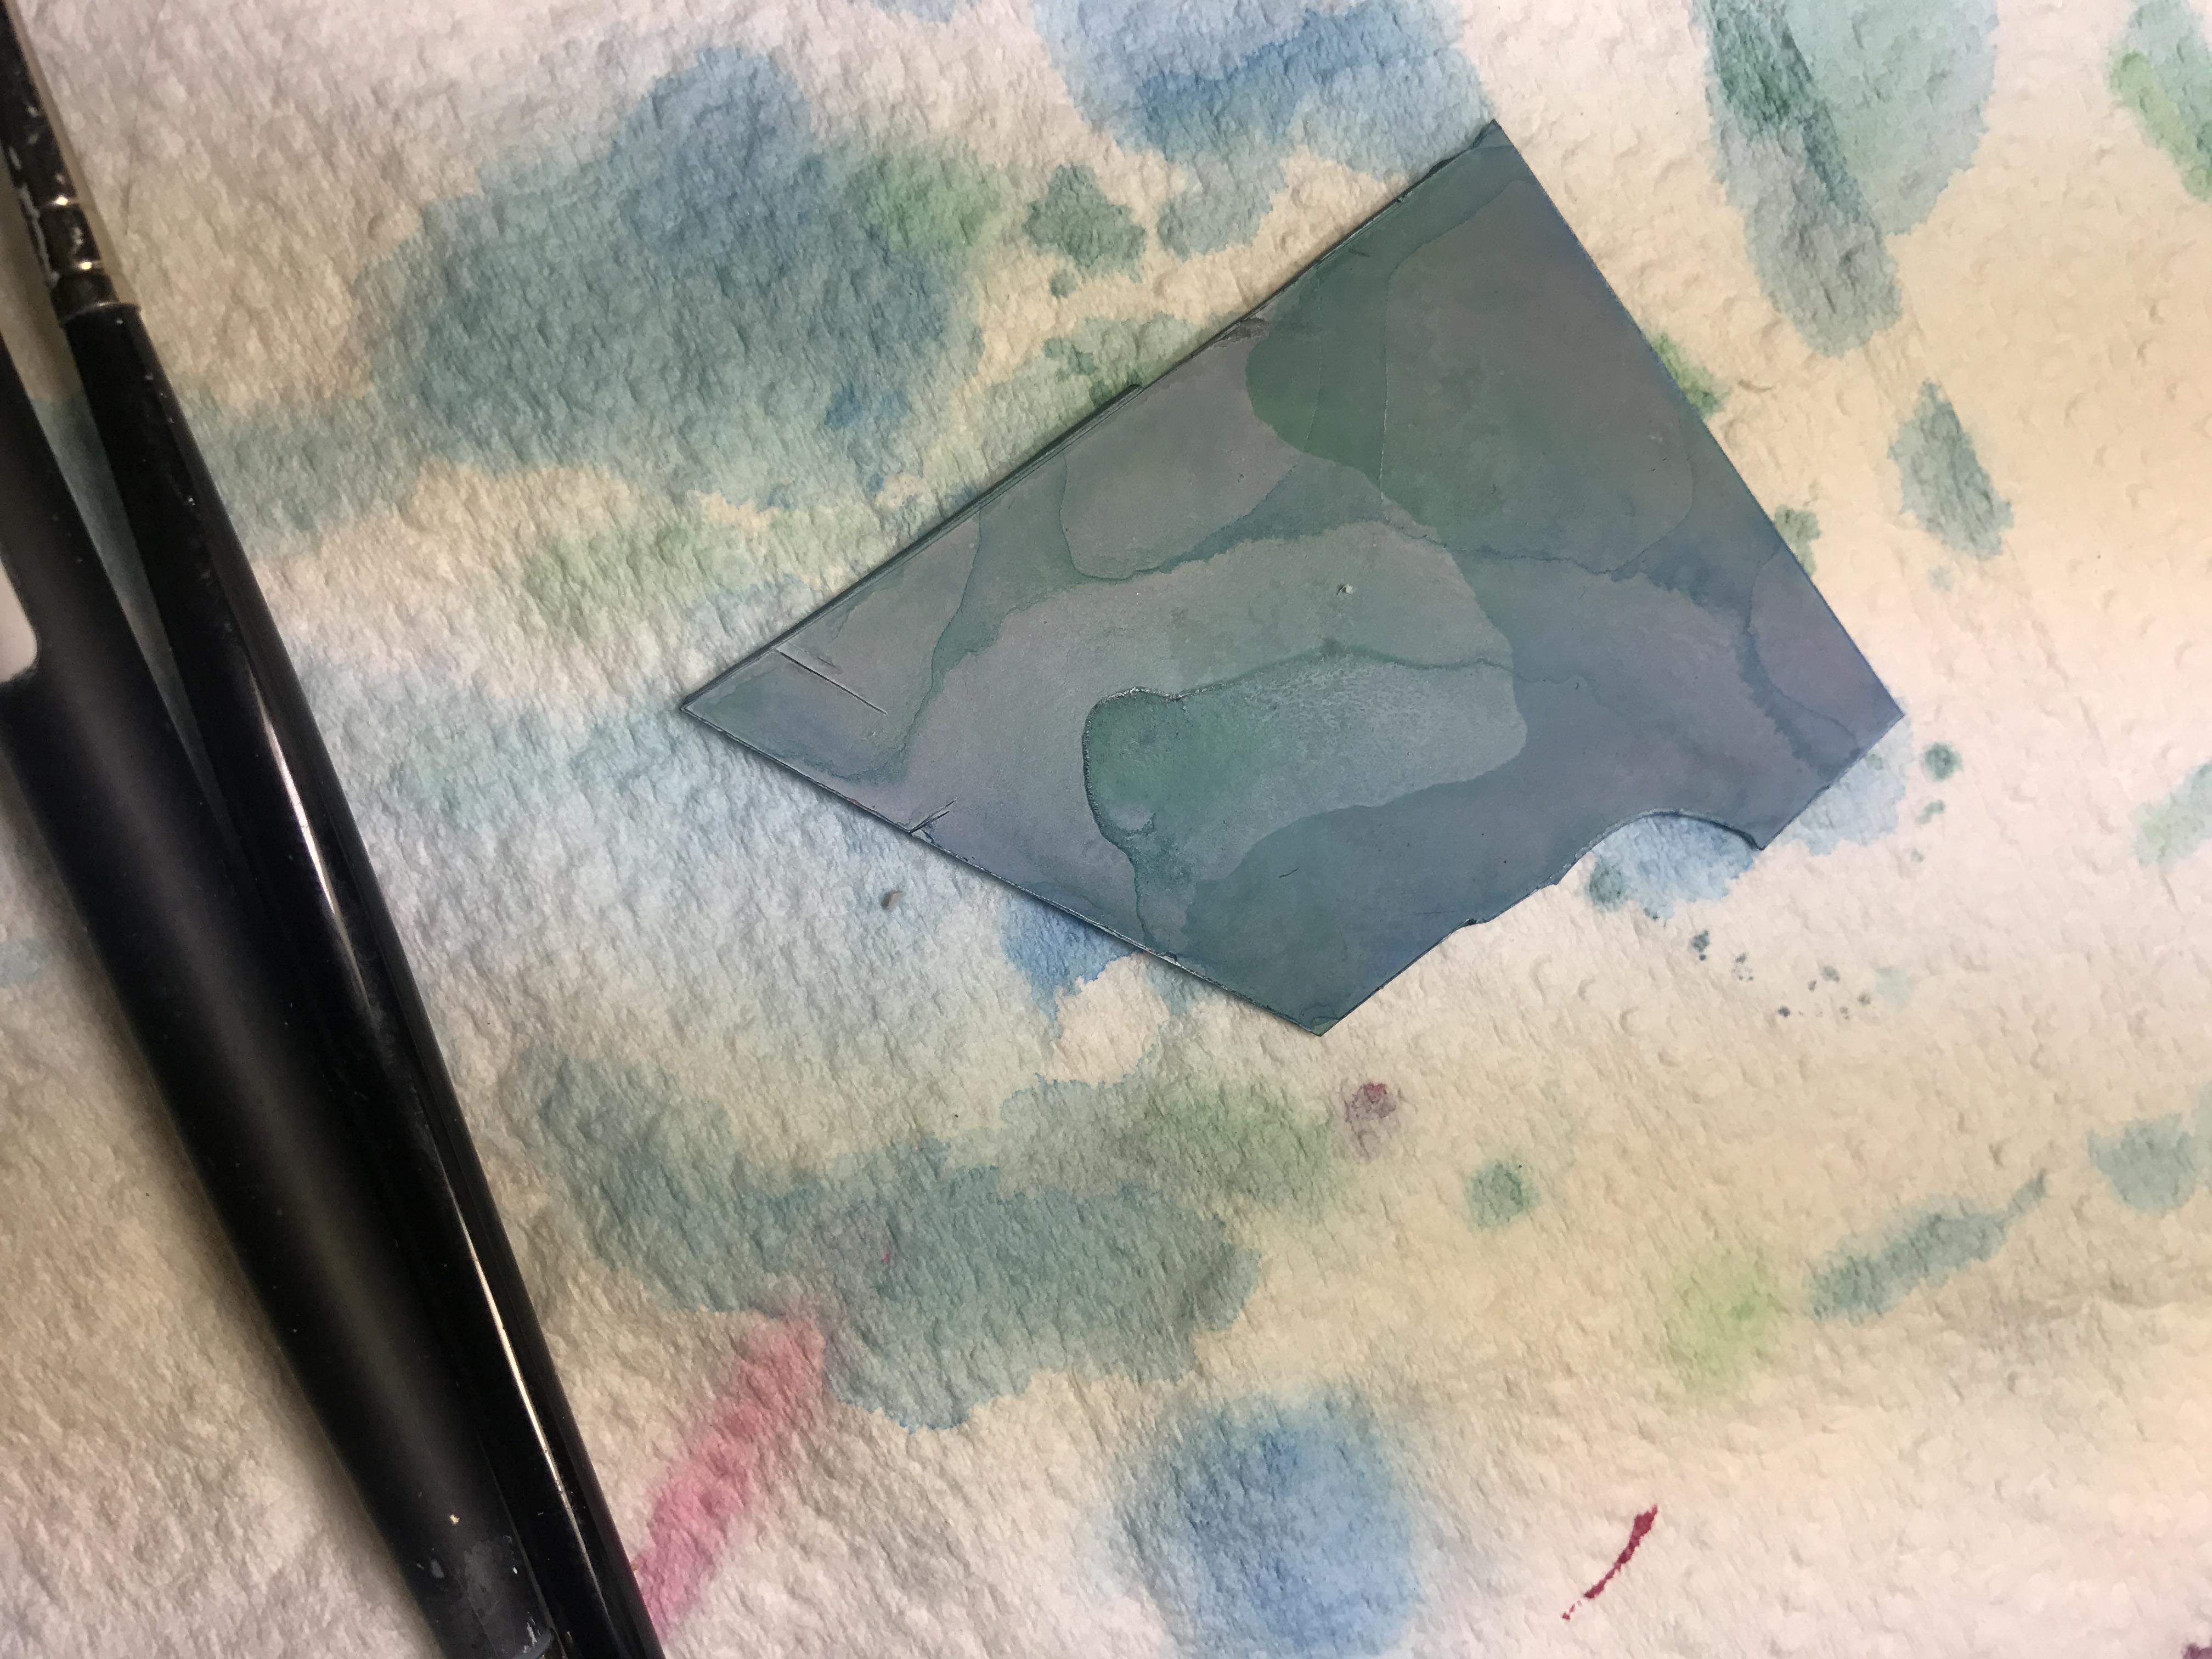
starting pic. primed. have my three colors chosen.
This demostrates how thin the mixes are. Extremely. It should be bertweem a glaze and a wash. But experiment with different amounts of water per, to accentuate one tone over another. In this case, pink was least watery but it was my tertiary, so i wanted the rare spots of pink to be pretty strong....
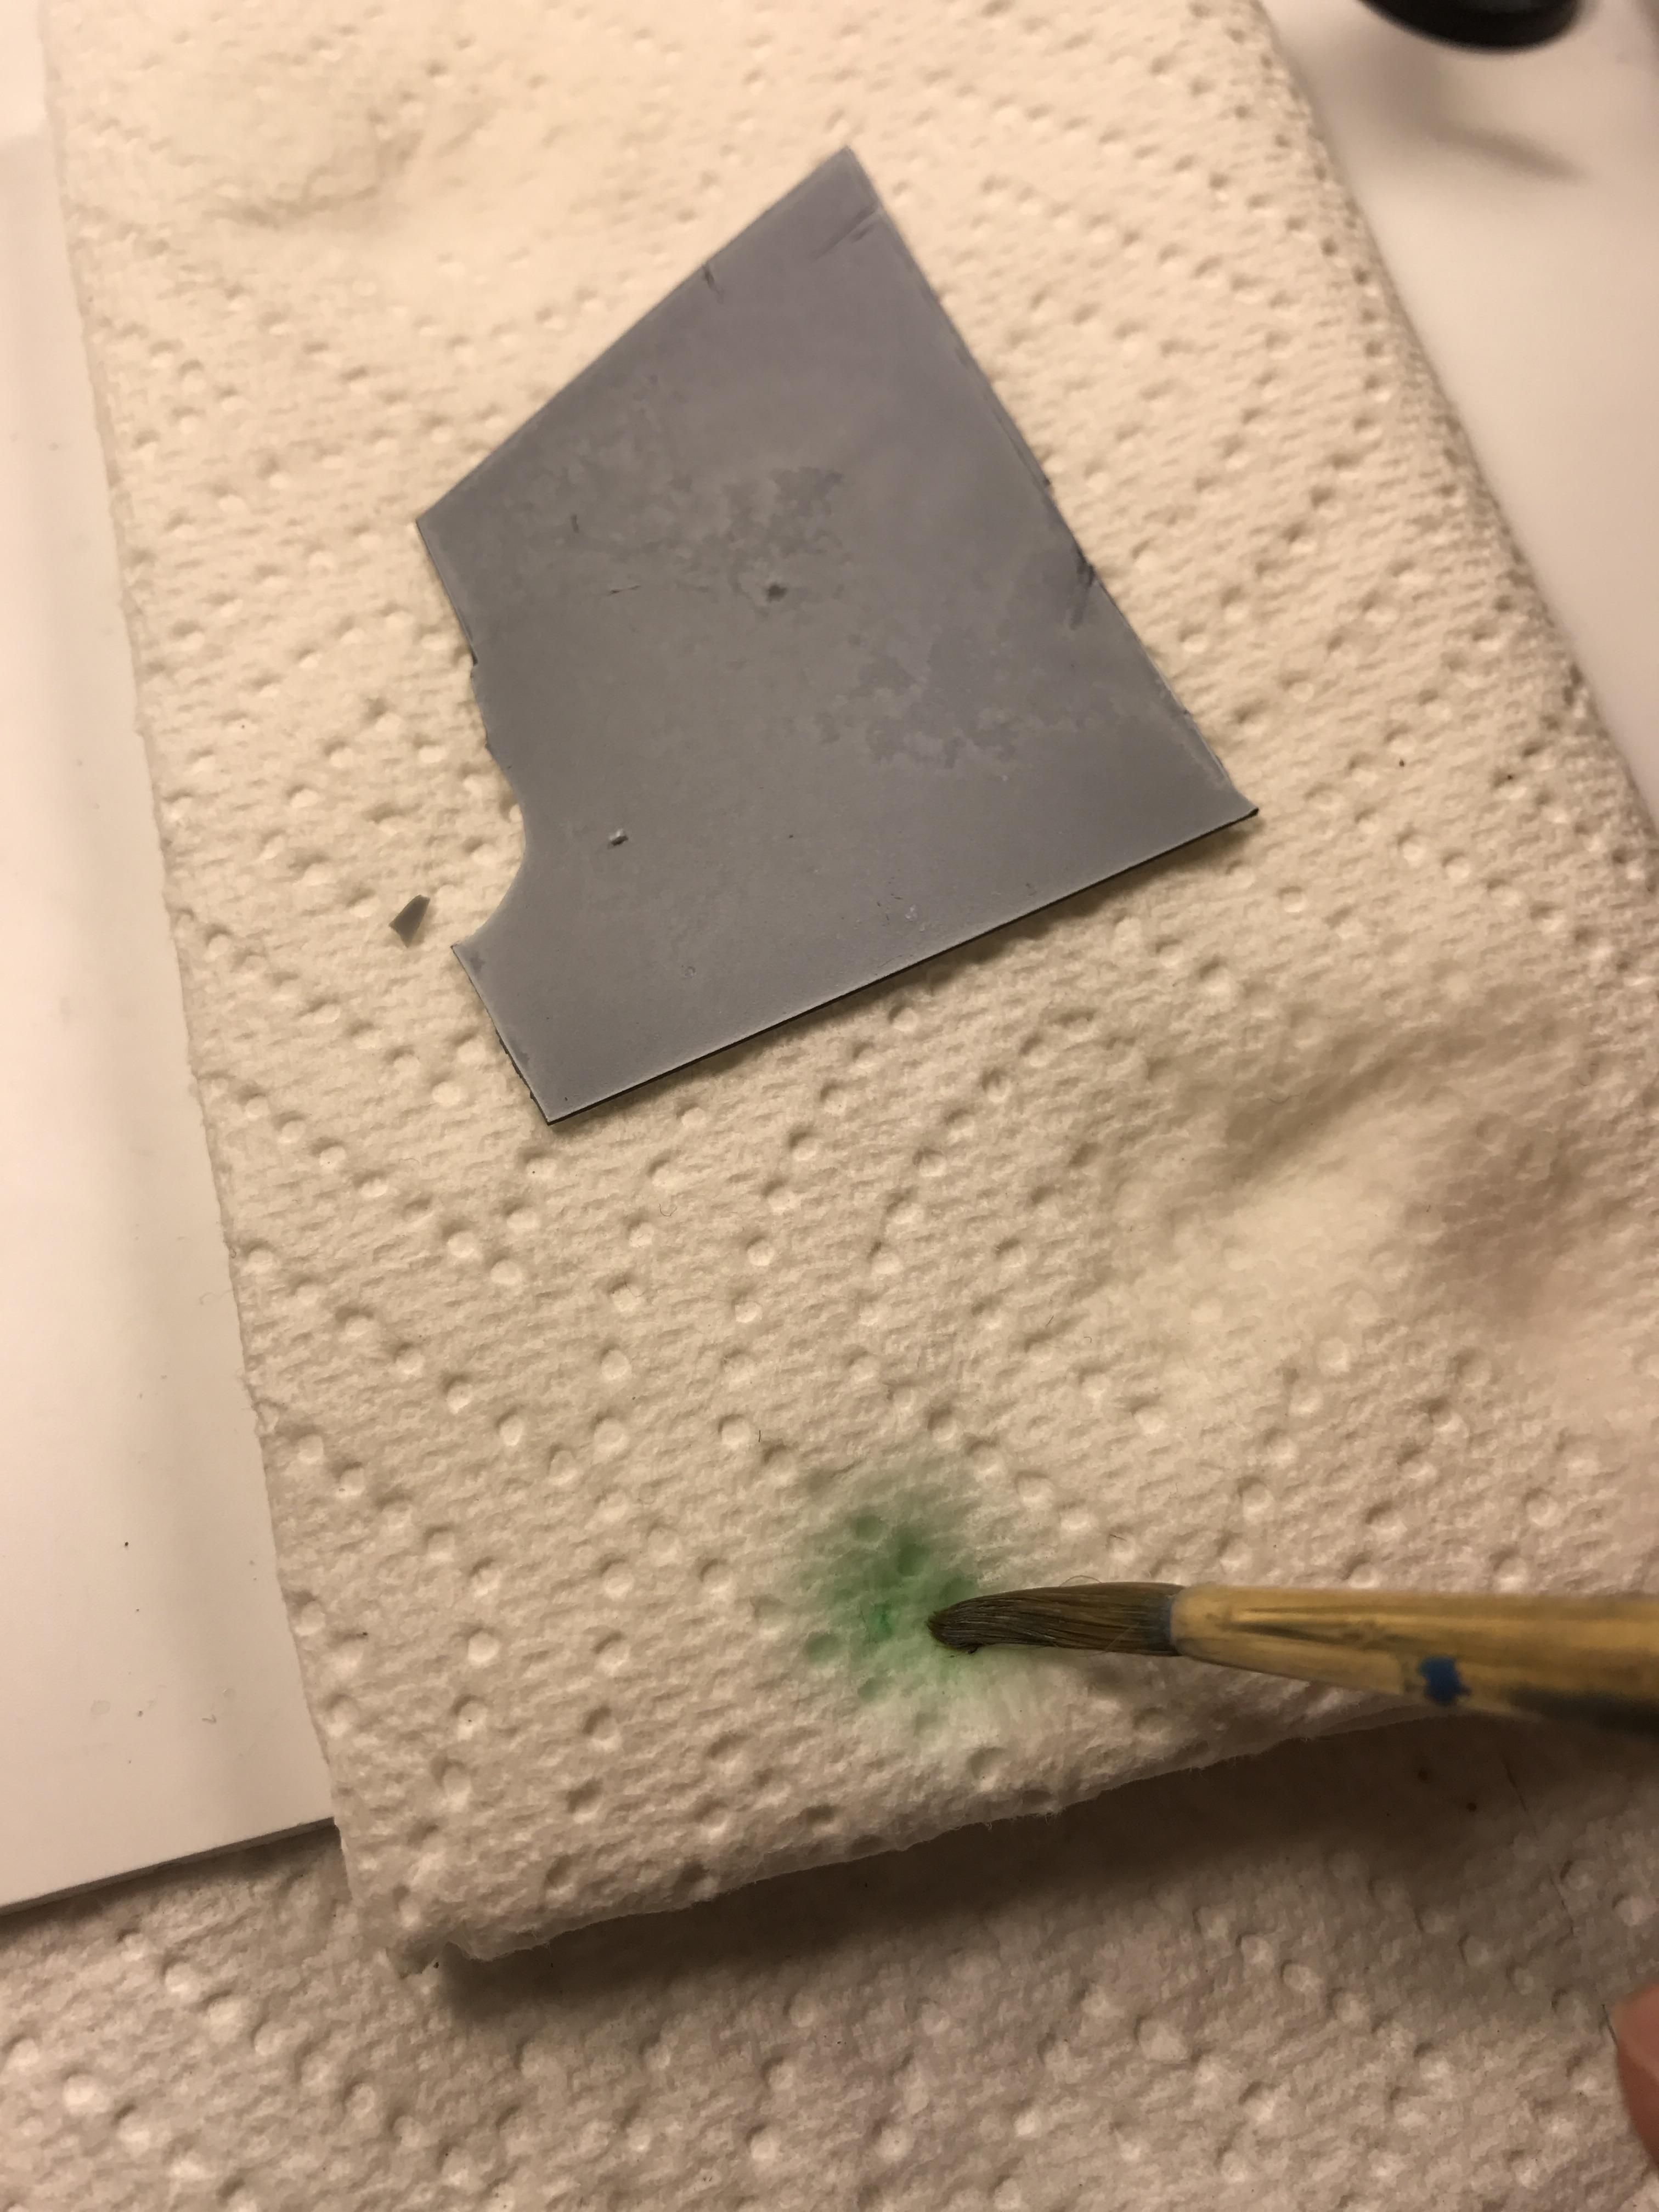
first "set", blue first, then added a huge green wash too allowing for them to mix at its will...
then while both are wet, i took pink from the pot, not watered down, and basically stuck my brush in the blues and green and allowed the water to pull pink off the brush. but because the pink isnt watered down, the pigments are real strong.
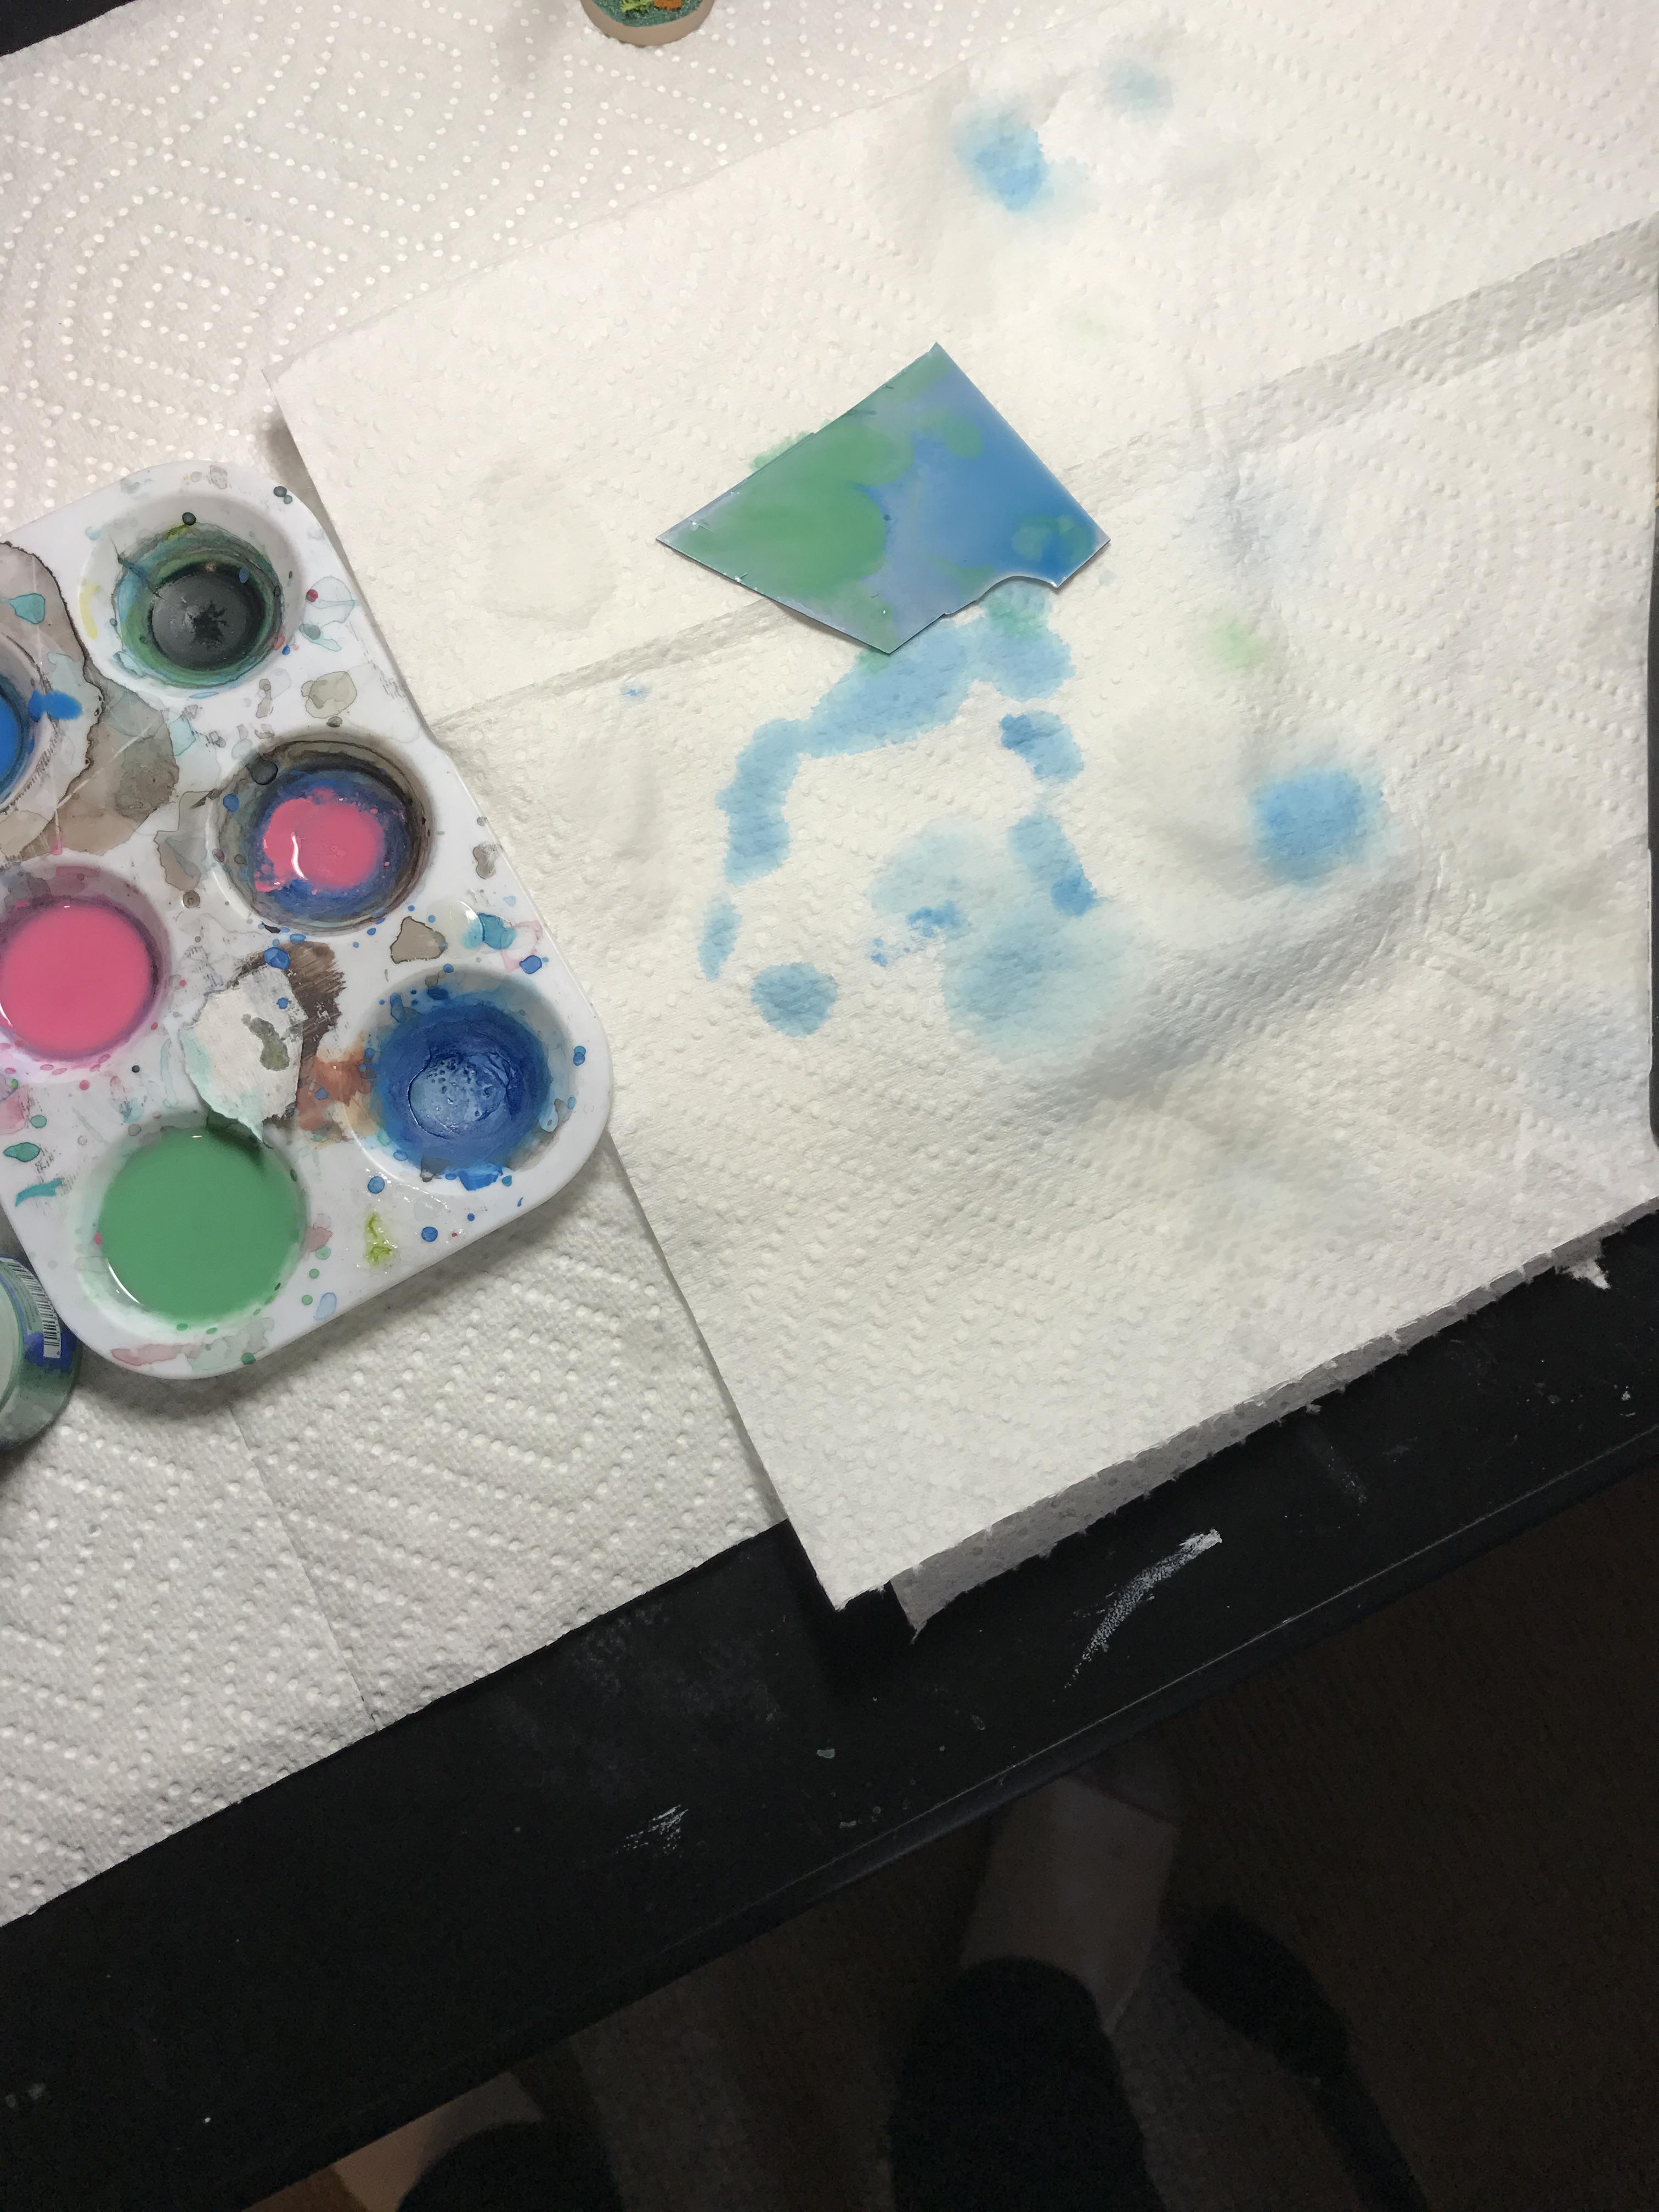
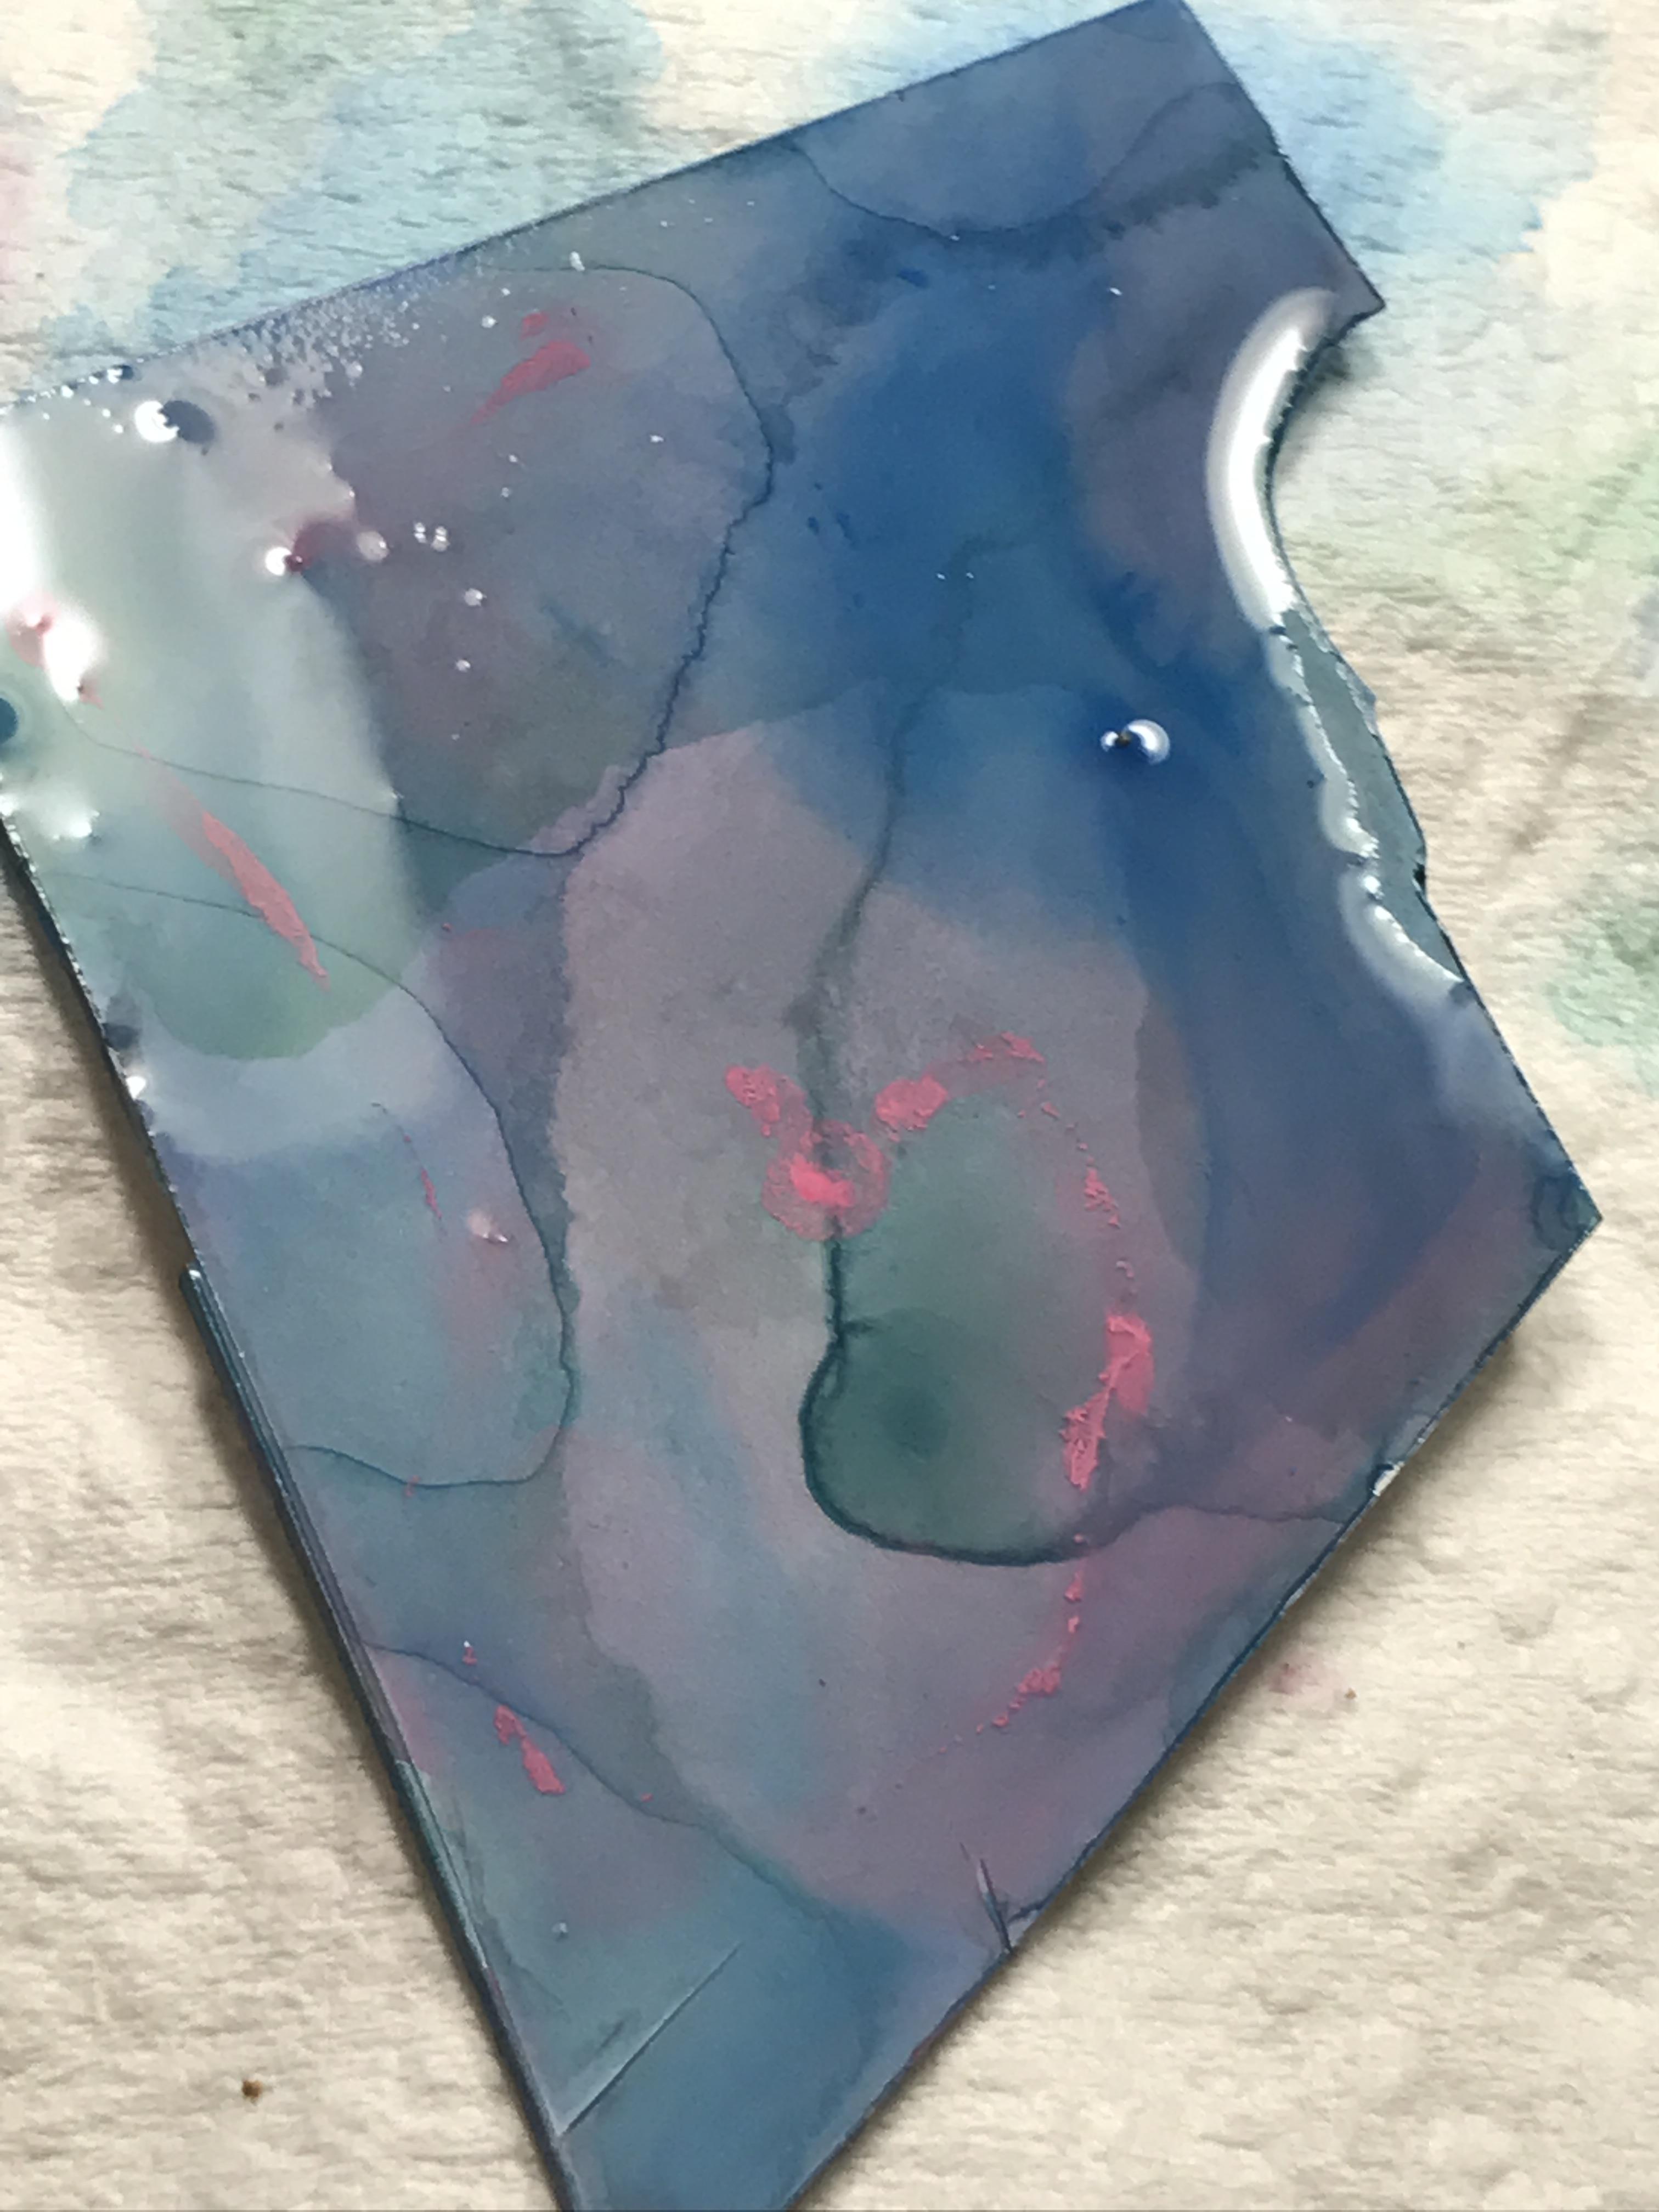
the final dryed first "set".
Notice how dull it looks....its ok...you will literally keep repeating this above set ad nauseum until you have the coverage you are looking for....
this time ive used blue right from the pot....totally random...
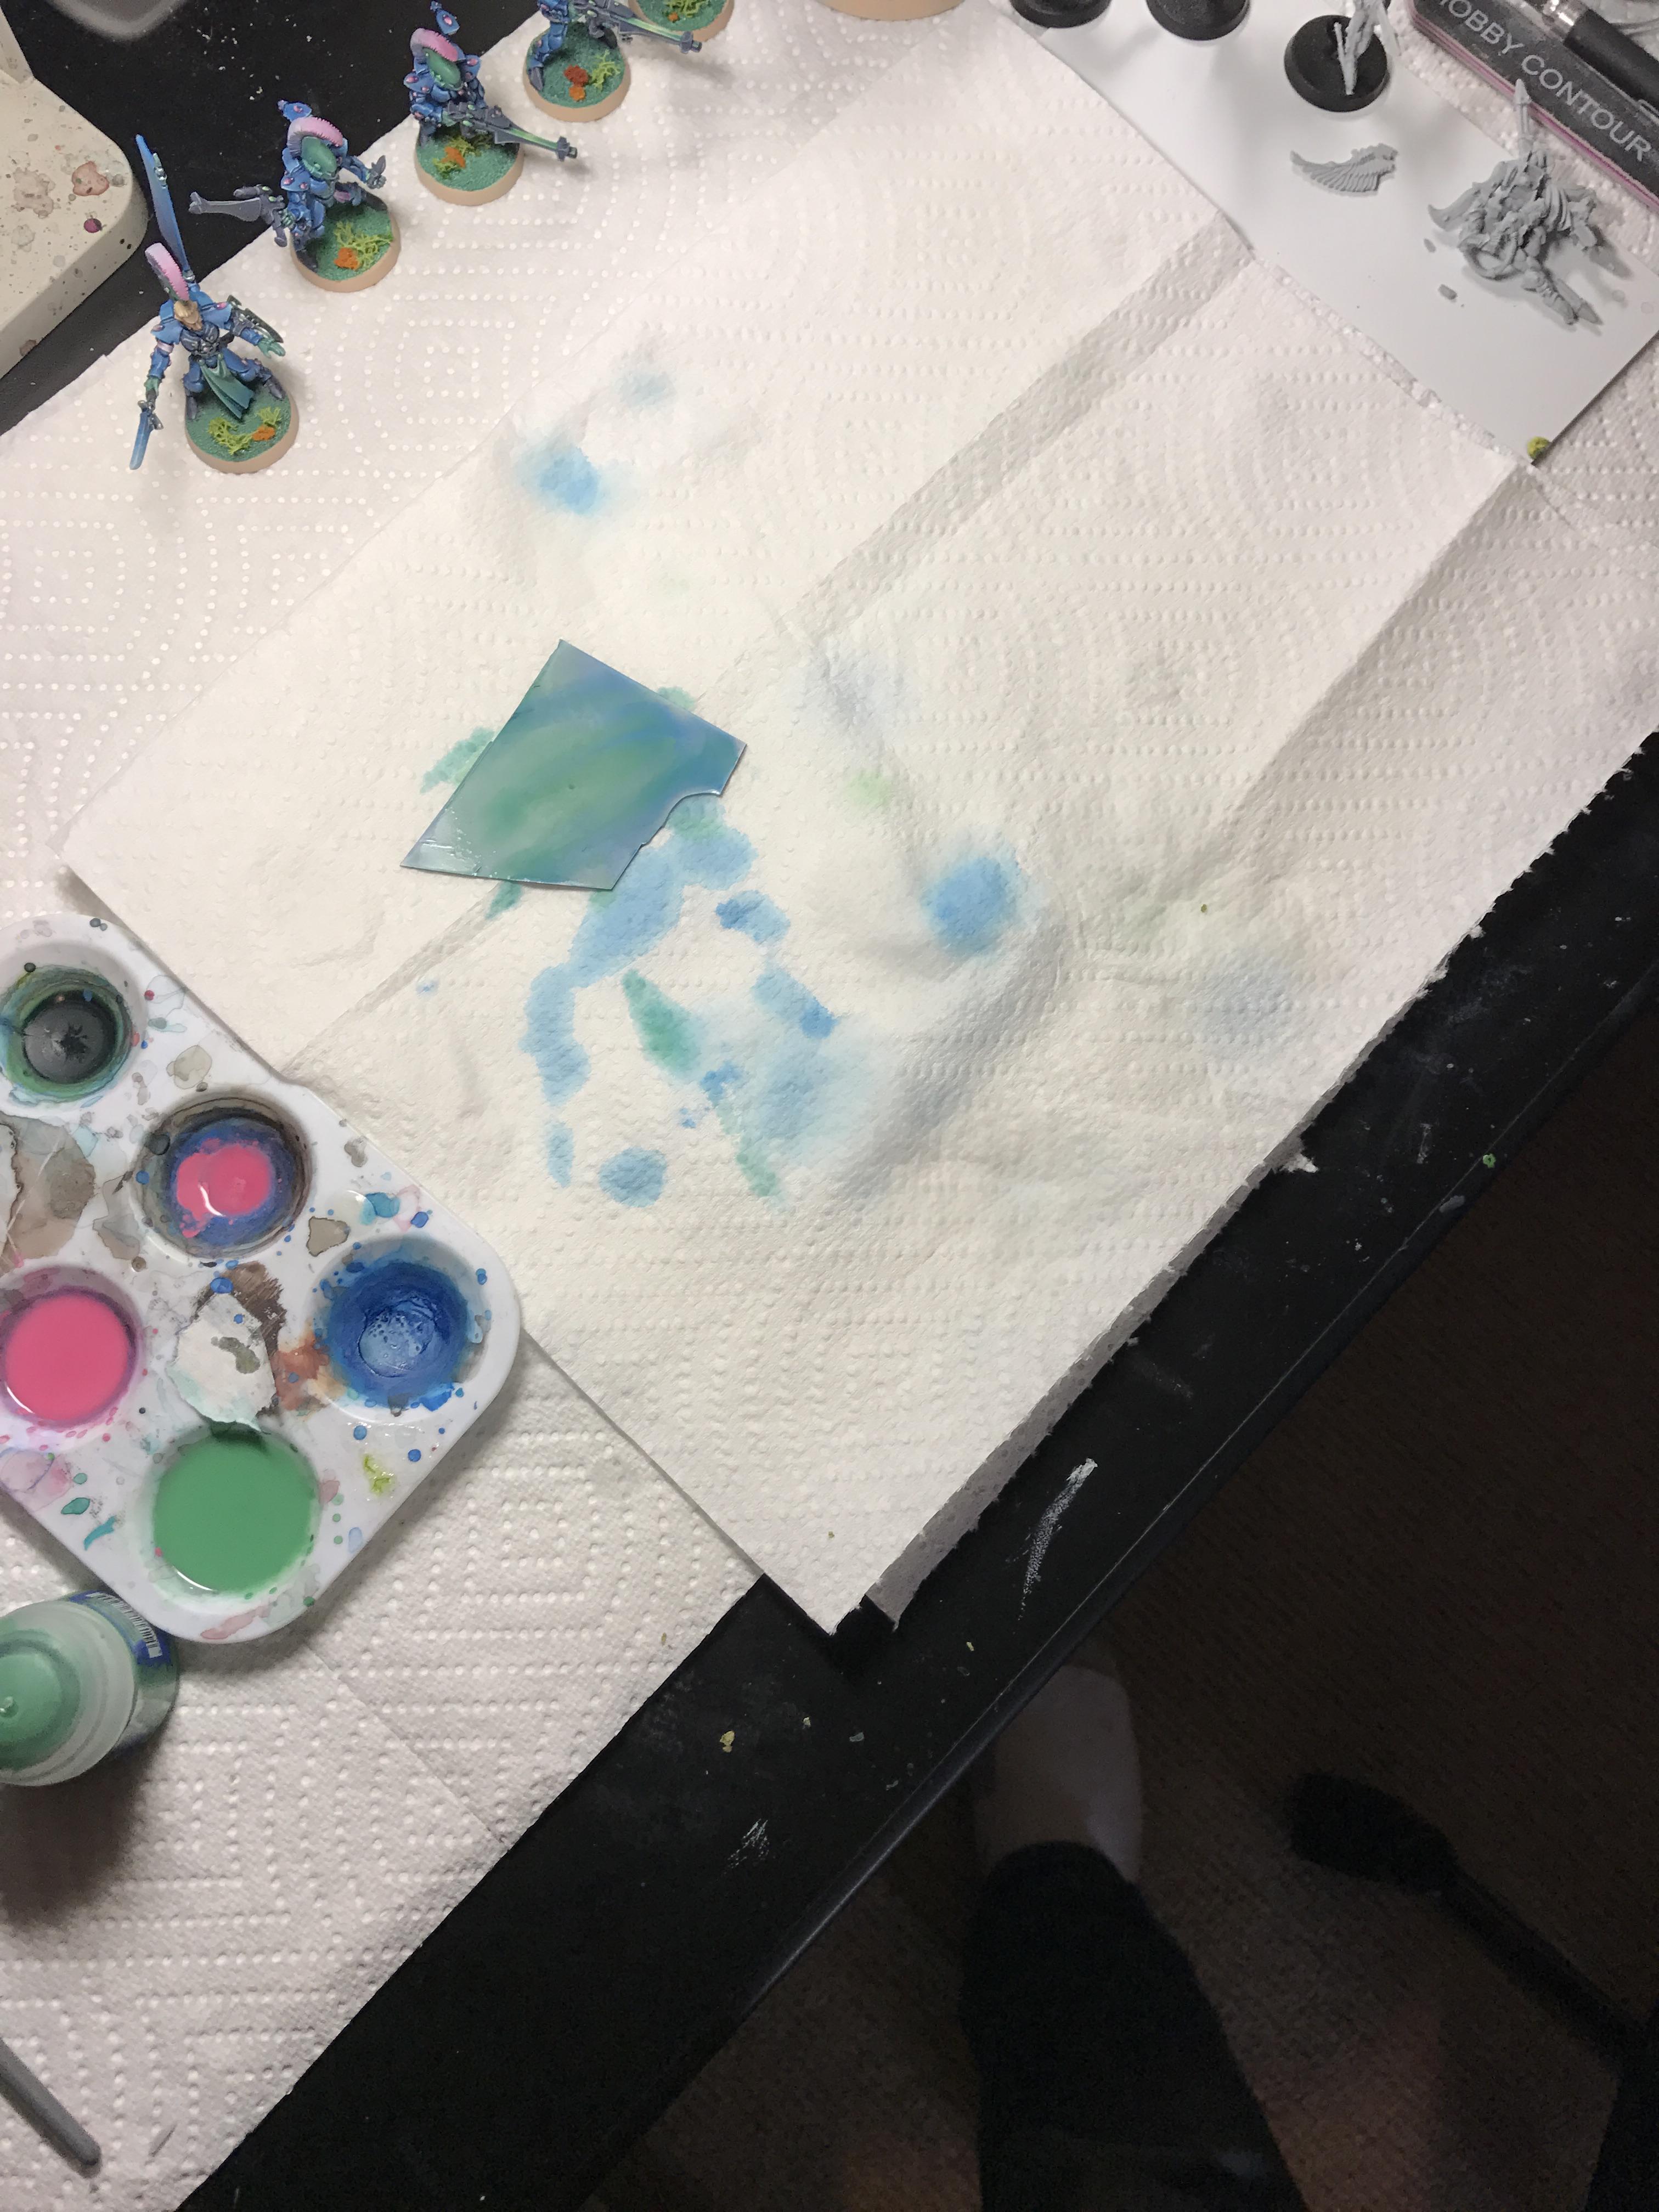
so once you do this over and freaking over.....doing these bits like this basically took a whole night of fussing over it from afar. by afar i mean, it takes no real brain power to do this besides maybe balancing your colors around the model so one side isnt completely one color....but even then,...cool?.......so we end up with this...
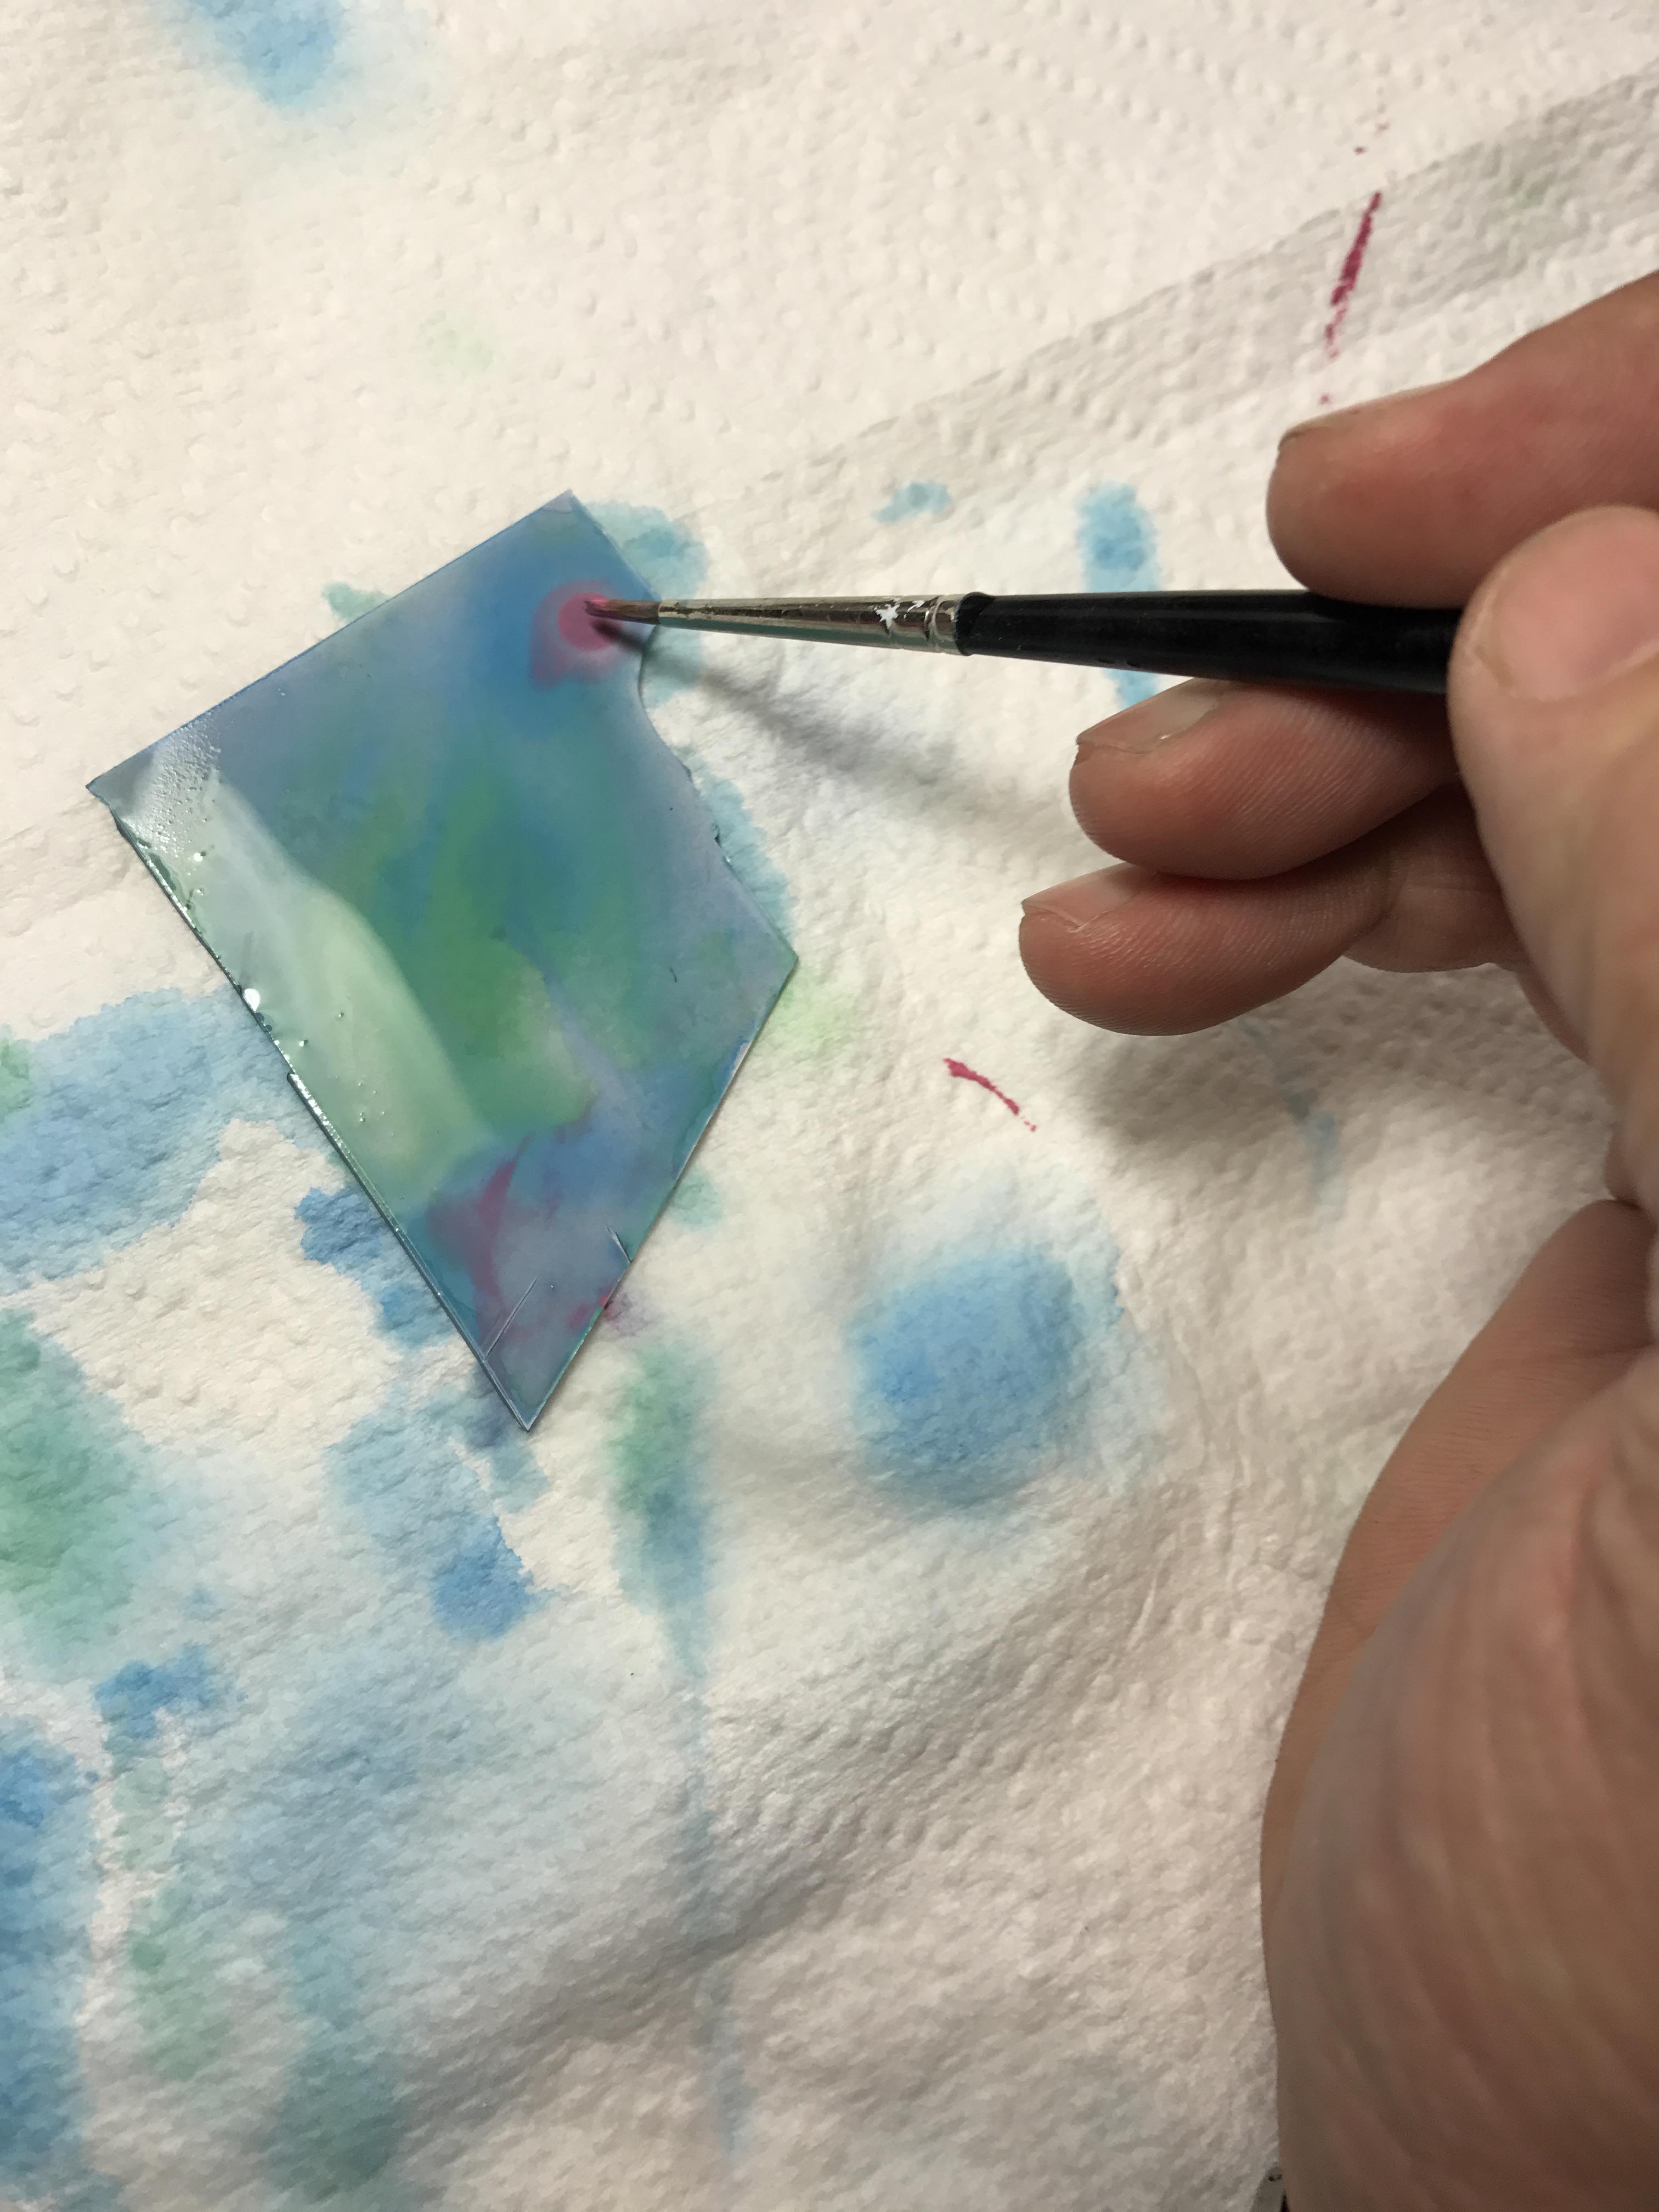
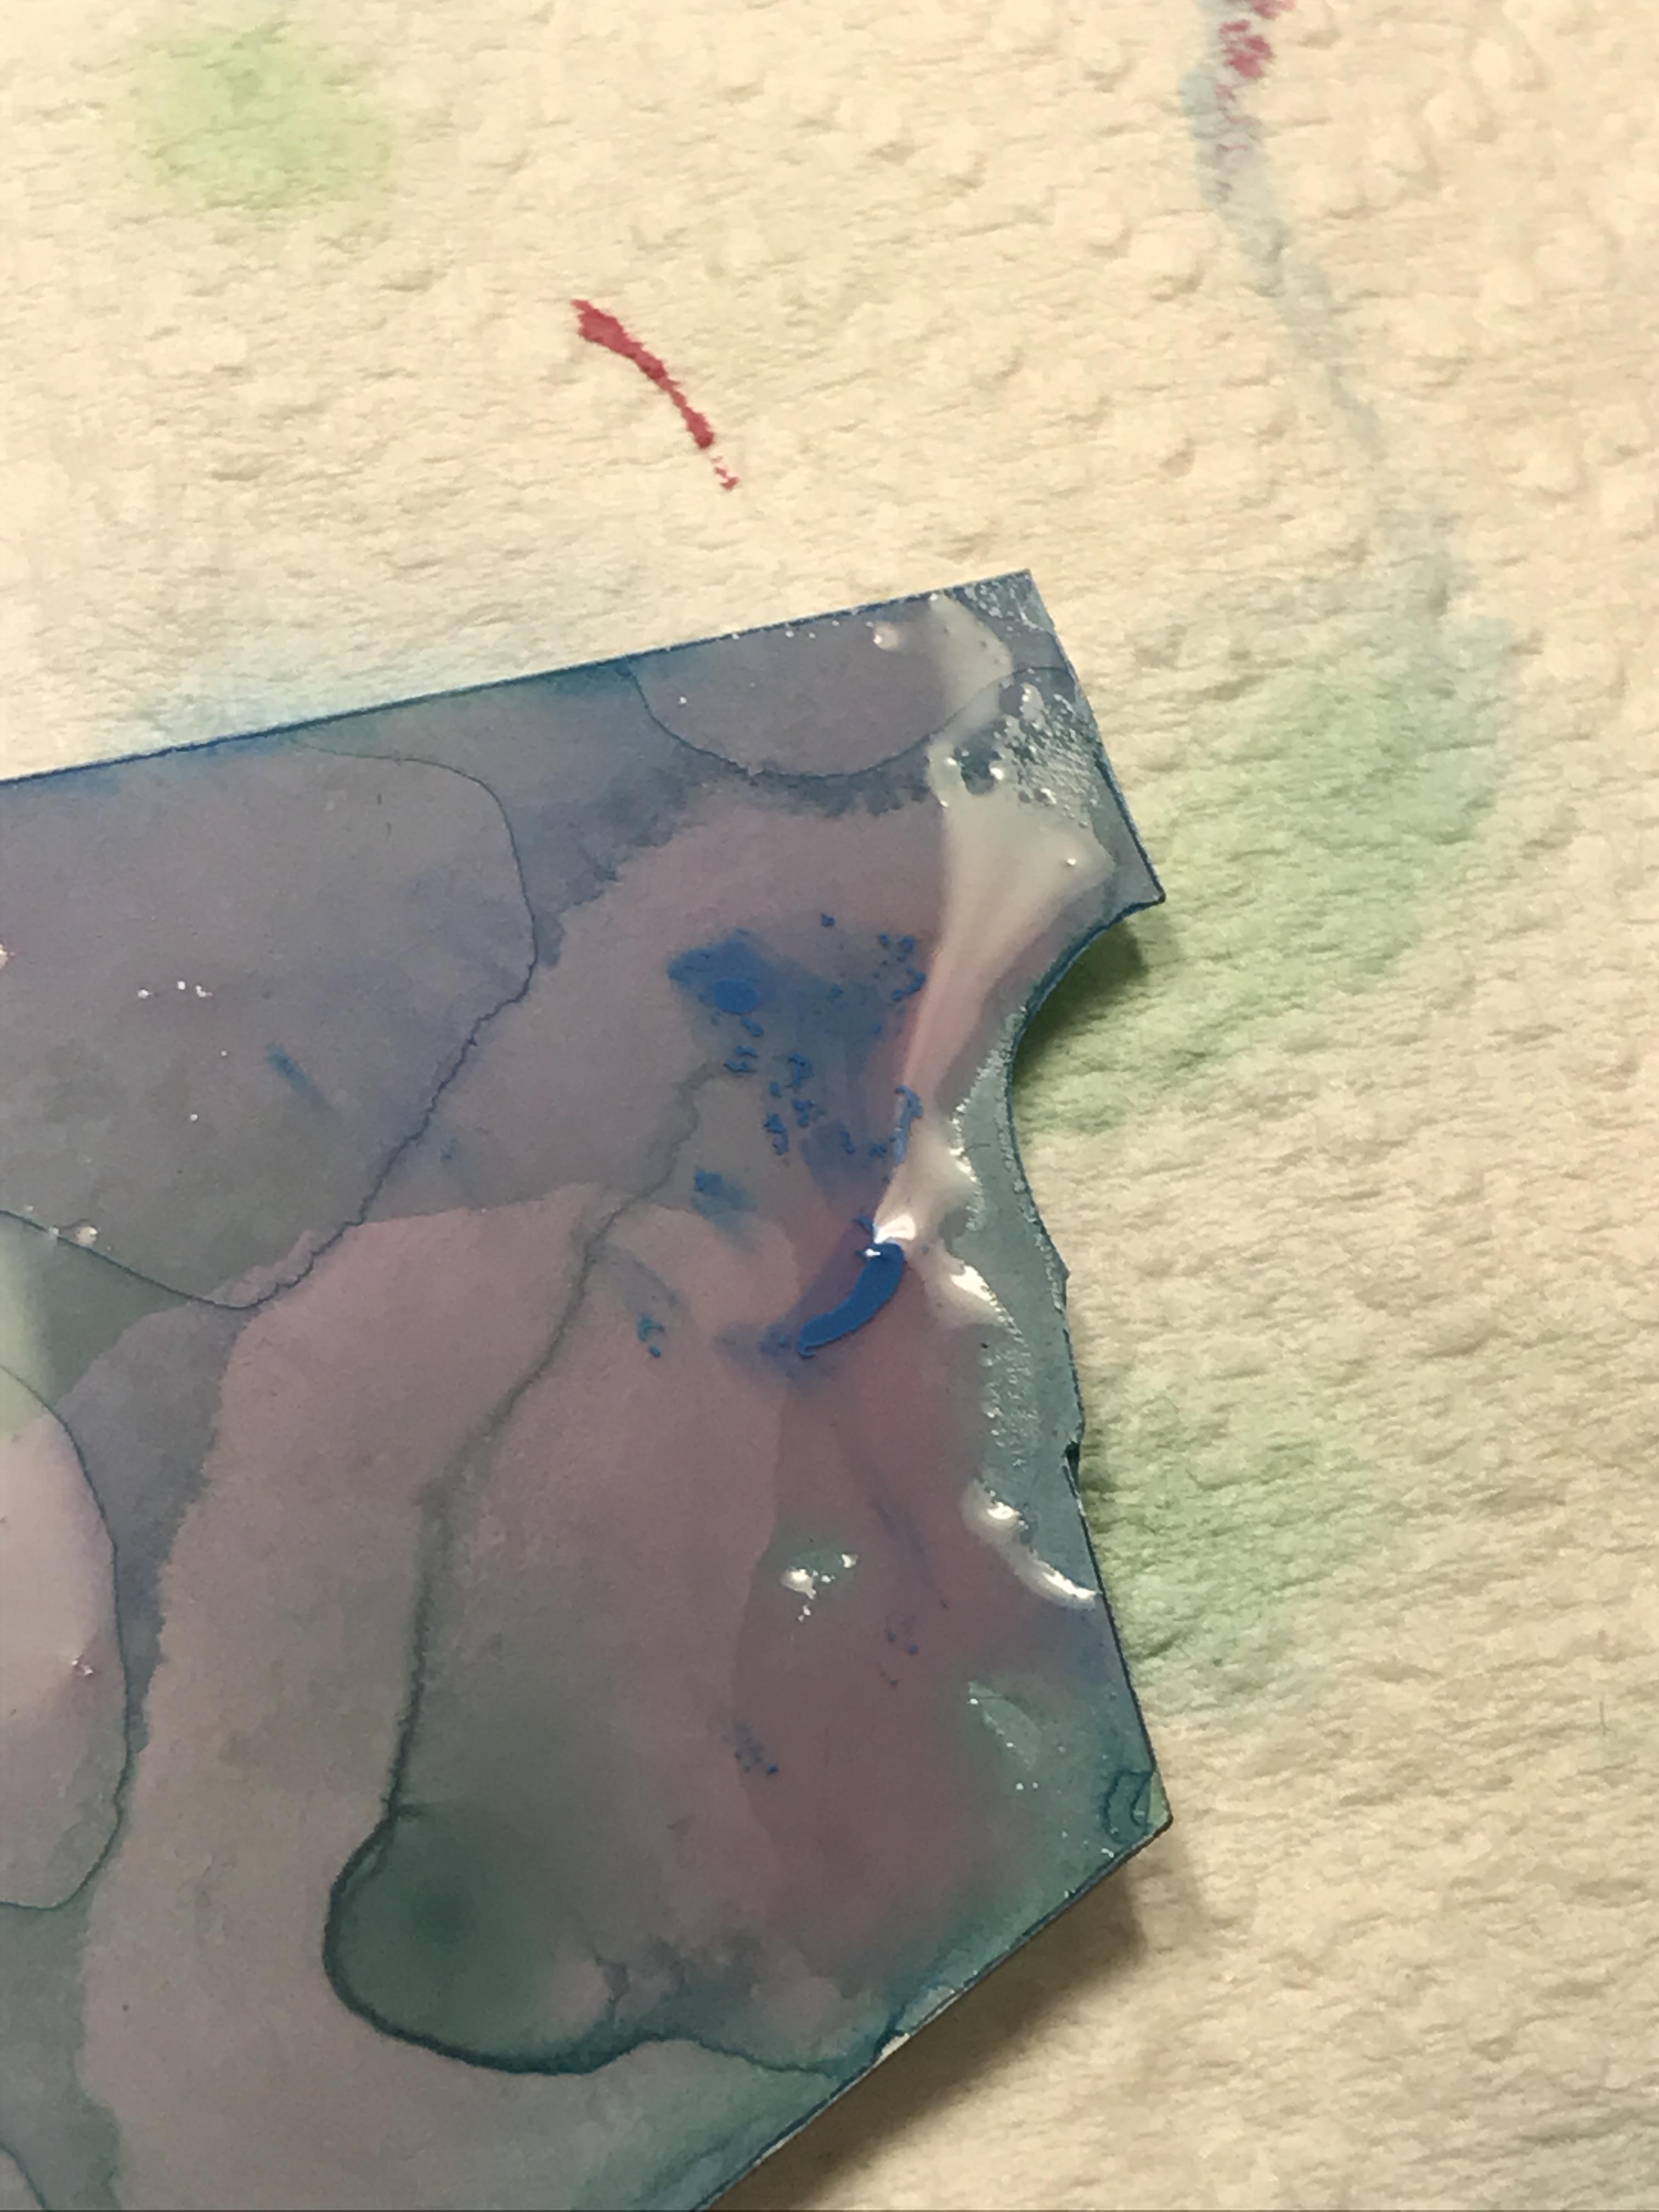
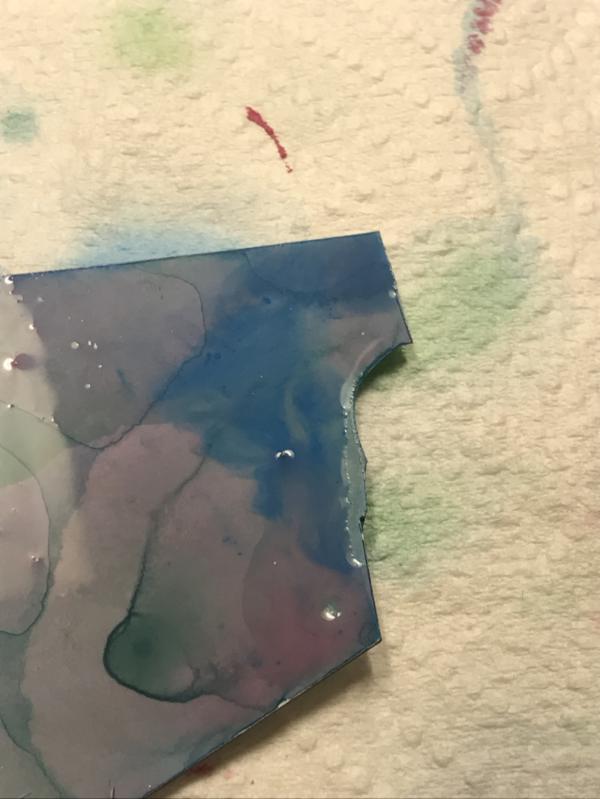
but the step that really sells it...is when you added the chipping, and edge highlighting in the case of the walker below....the mix used to edge highlight was a general esimation of the two primary colors mixed together plus white..it didnt need to be perfect match....
and the final product...(which is the blueprint for my eldar army)
alright everyone, i hope that helps anyone who was asking...slavetodarkness got your im, so here ya go
That's a similar technique to how I did the rusty roof on my sprue hut, but I blended out the tide-marks... and used rusty colours.
Not done much adventurous painting recently to show off in here.
Mastodon: @DrH@warhammer.social
The army- ~2295 points (built).
* -=]_,=-eague Spruemeister General. * A (sprue) Hut tutorial * Dsteingass - Dr. H..You are a role model for Internet Morality! // inmygravenimage - Dr H is a model to us all Theophony - Sprue for the spruemeister, plastic for his plastic throne! // Shasolenzabi - Toilets, more complex than folks take time to think about!
Wow, that is a really cool technique! Thanks so much for posting the tutorial out here... I will have to find an excuse to try that out on something later.
This is a somewhat dead forum group post. If you wish to put in your sig, you can, I think click on the picture and add it in your profile sig settings...its not complicated...but again, its a somewhat pointless endeavor at this point. Of course all contributing members have their own plogs as well.
Cheers
BB
This message was edited 1 time. Last update was at 2017/05/27 19:54:57
It is sad that this thread hasn't manage to reach a self-sustaining mass.
Turns out I don't do half as many new things with my painting as I do with my modelling.
Incidentally, Megaknob, for links to work in your sig' as well as posts you need a (url) and a (/url) in square brackets before and after the link to make it work.
You can also use (url=*link address*) *the text you want to appear* or a picture link (/url) to do things similar to what appears in my Sig'.
Quote this post and see what the below looks like:
You'll see (without all brackets); url=*link*] img]*picture link* /img] /url]
You can use this "formula" for any combination of links and words or pictures.
This message was edited 4 times. Last update was at 2017/05/27 21:23:59
Mastodon: @DrH@warhammer.social
The army- ~2295 points (built).
* -=]_,=-eague Spruemeister General. * A (sprue) Hut tutorial * Dsteingass - Dr. H..You are a role model for Internet Morality! // inmygravenimage - Dr H is a model to us all Theophony - Sprue for the spruemeister, plastic for his plastic throne! // Shasolenzabi - Toilets, more complex than folks take time to think about!
I'm going to revive this thread, because I both miss it and think it may be the best place for this post..
I realized recently that none of my miniatures have eyebrows.. which is weird, why haven't I noticed until recently that all of these tiny people are missing their eyebrows? Do you paint them on your minis? If so, do you have a technique that looks both natural and appropriately noticeable? Do you feel it's unnecessary? Am I the only one not already doing it?
This message was edited 1 time. Last update was at 2019/06/05 12:31:28
I do paint eyebrows on my models most of the time, I’ll have to do some pics later.
Not all of them have unibrows, but a fair amount do
LOL, Theo your mind is an amazing place, never change.-camkierhi 9/19/13
I cant believe theo is right.. damn. -comradepanda 9/26/13
None of the strange ideas we had about you involved your sexual orientation..........-Monkeytroll 12/10/13
I'd put you on ignore for that comment, if I could...Alpharius 2/11/14
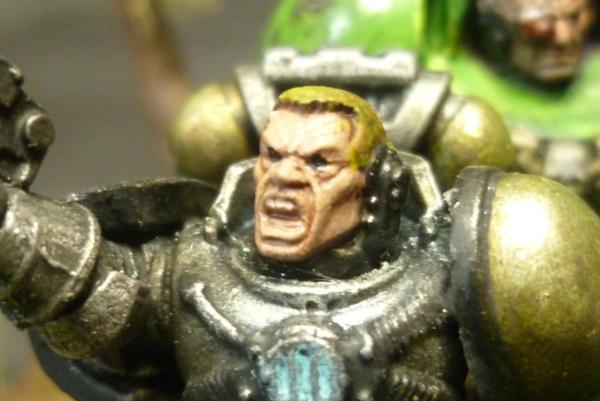
nice work tom! NOrmally id say to generally avoid it because its just one of those things...(like sweat) that doesnt always transfer well to a 28mm scale....but here you have really done it justice and it looks great. Your painting is showing alot of improvement, my advice is continue to thin your paint more and build up smooth opaque finish over many coats of thin paint. Your models will look smoother if you take the time during the basing stage to make sure everything is nice and tidy.
Thanks Bebop. I'm impatient and it's having a detrimental effect on my minis for sure. Lately I've been struggling to figure out why my faces are always a mess, and I've clearly been ignoring what I should already know, thinner is better. Time to slow it down and remind myself that if I'm finishing a color in only two coats, it's not nearly thin enough. Thanks for the encouragement!
Try to paint one item on the mini at a time. It helps with patience. Give yourself goals and checkpoints, and most importantly, forget about finishing the model. Its the journey not the destination. Easier said than done! Keep it up, your progress is real!!
LOL! Did you see my story on IG? LOL....nahhh im justplaying around, i think they will have a great use. Im looking forward to trying them out with army painting.


 Chaos Warband & Inquisition


 Say hi, leave some love
 ~2800 points


 ...it's good to be green!


 // inmygravenimage - Dr H is a model to us all