Forum adverts like this one are shown to any user who is not logged in. Join us by filling out a tiny 3 field form and you will get your own, free, dakka user account which gives a good range of benefits to you:
No adverts like this in the forums anymore.
Times and dates in your local timezone.
Full tracking of what you have read so you can skip to your first unread post, easily see what has changed since you last logged in, and easily see what is new at a glance.
Email notifications for threads you want to watch closely.
Being a part of the oldest wargaming community on the net.
If you are already a member then feel free to login now.
2019/09/12 14:53:19
Subject: Re:Dungeons and Dragons Blog - Dark Ages Terrain - Ringfort layout - outer pallisade finished
Theophony: Kebab skewer bamboo? Kinda thinking about doing some of that for some jungle scatter. Will have to check yours out.
Slinky: Thanks!
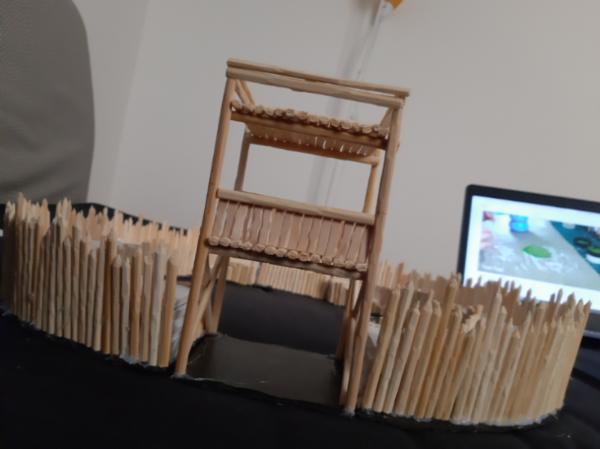
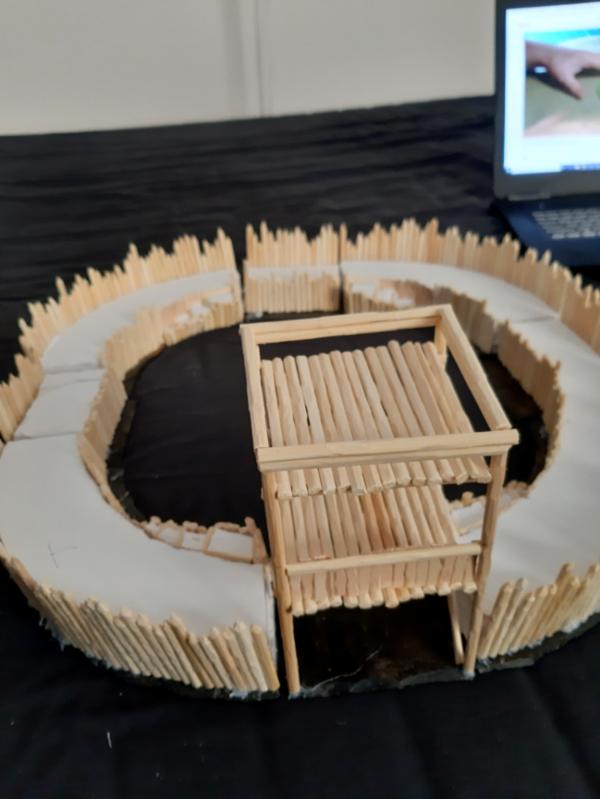
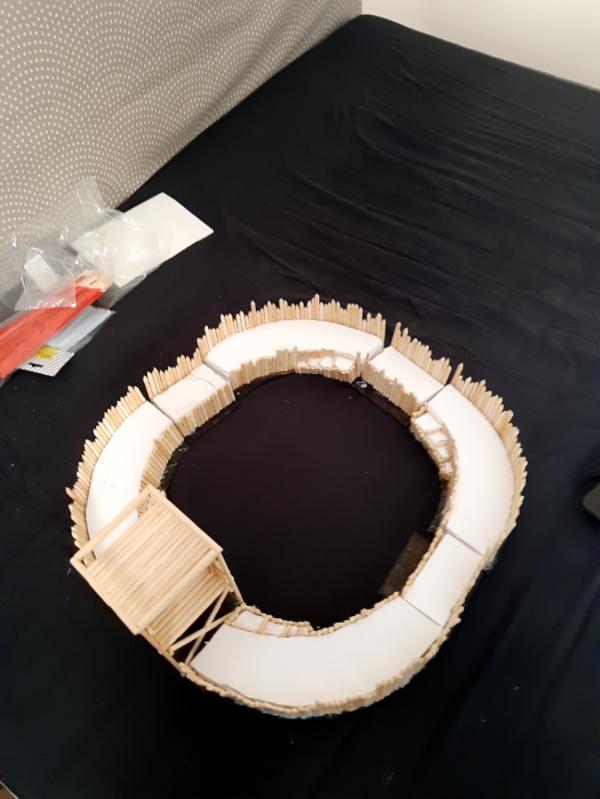
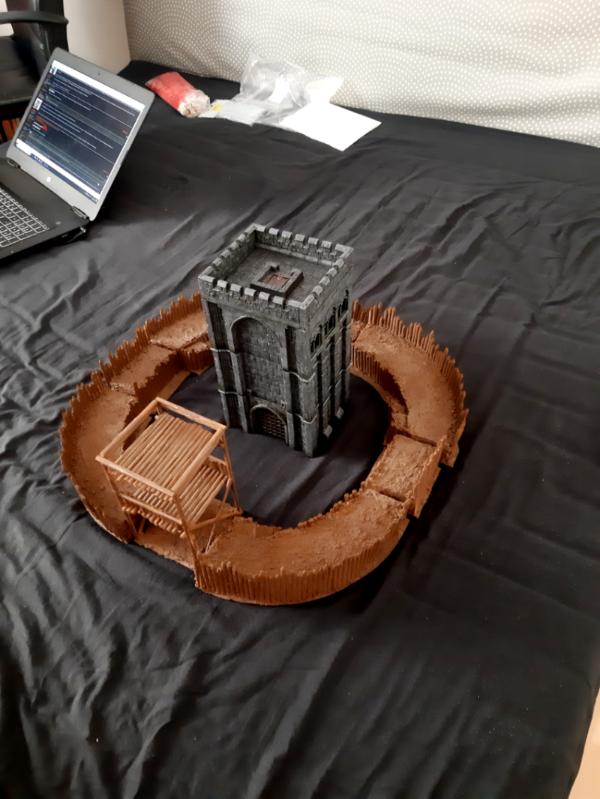
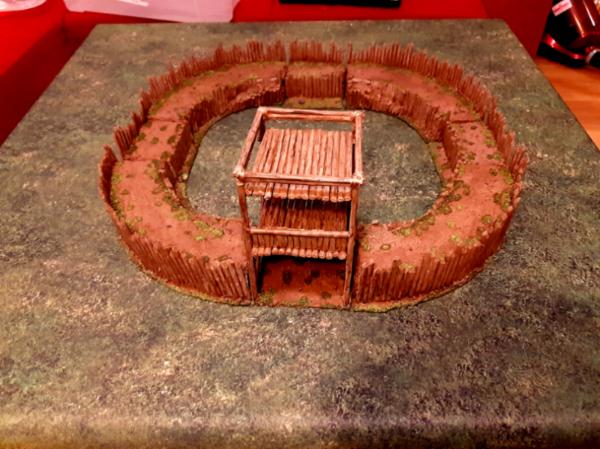
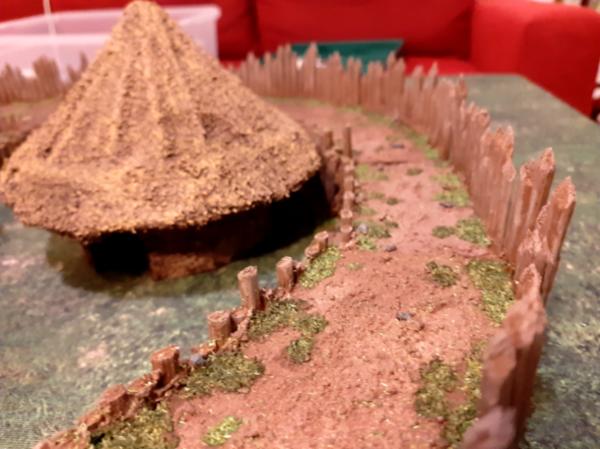
So the last couple of evenings I have been plugging away at finishing the wood details on the fort, and it is pretty much done!
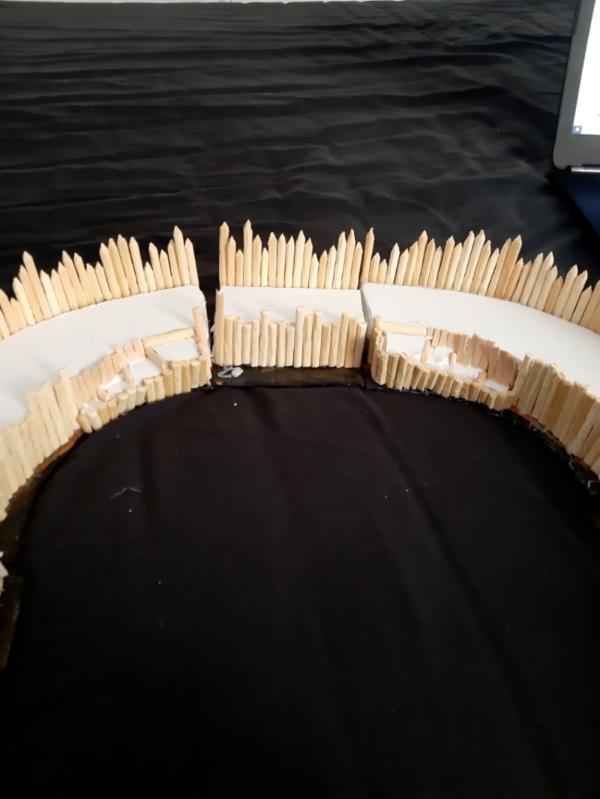
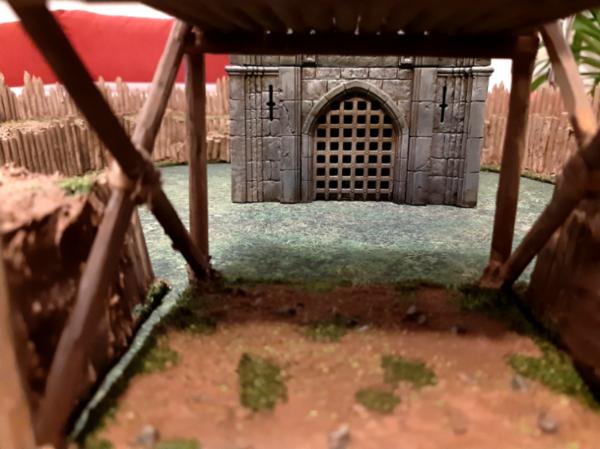
Nice view through the gate
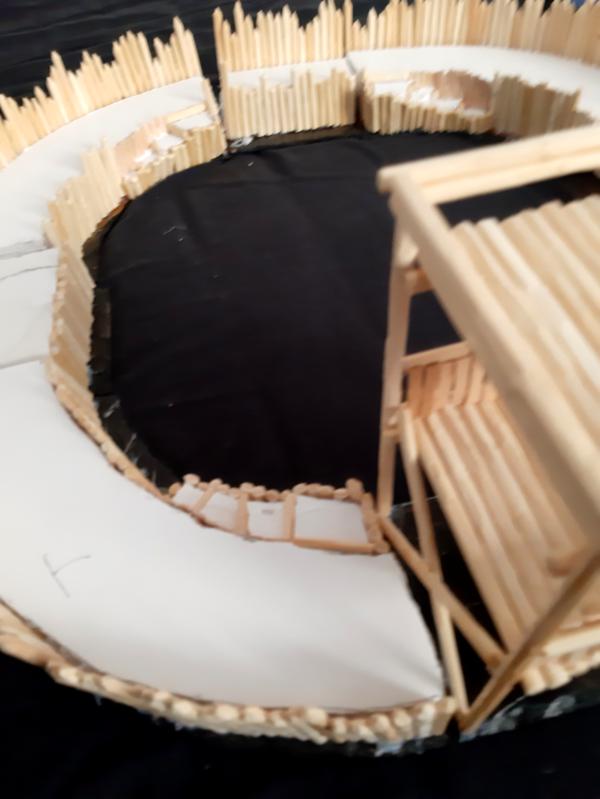
Different angle
The back spacer section has a pretty unacceptable gap, so the next thing I plan on doing is fixing it up, along with the other, cutting stuff to make it fit together better, and possibly filling some areas. I don't mind a small gap but at the moment it is a bit much for me.
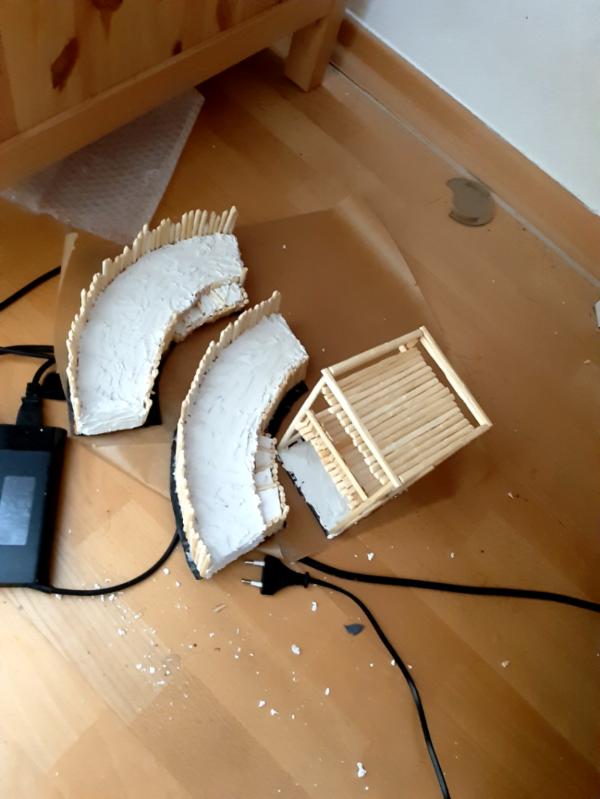
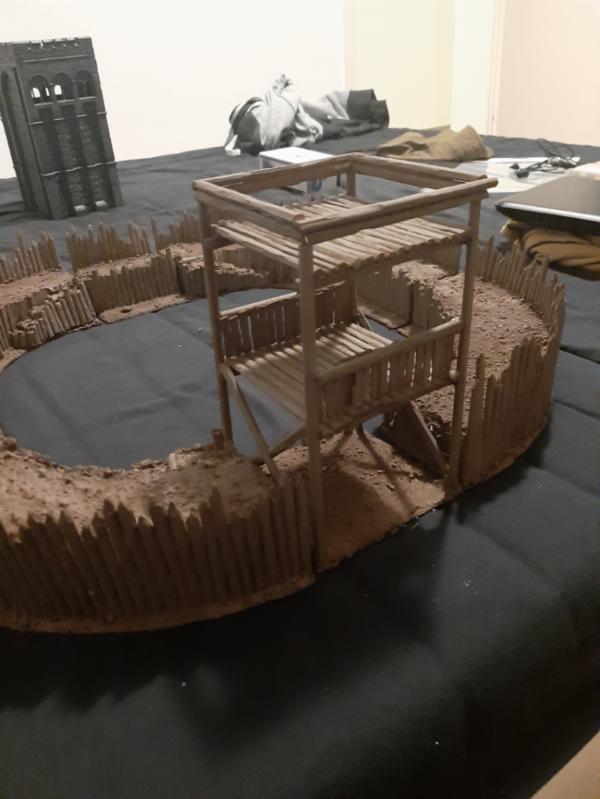
The stairs are fairly playable, you can fit 25mm bases on each of the steps. Pretty happy with how they came out. It was a lot of extra effort to put a staircase on each curve but I think it will be lovely in play and I think it looks good.
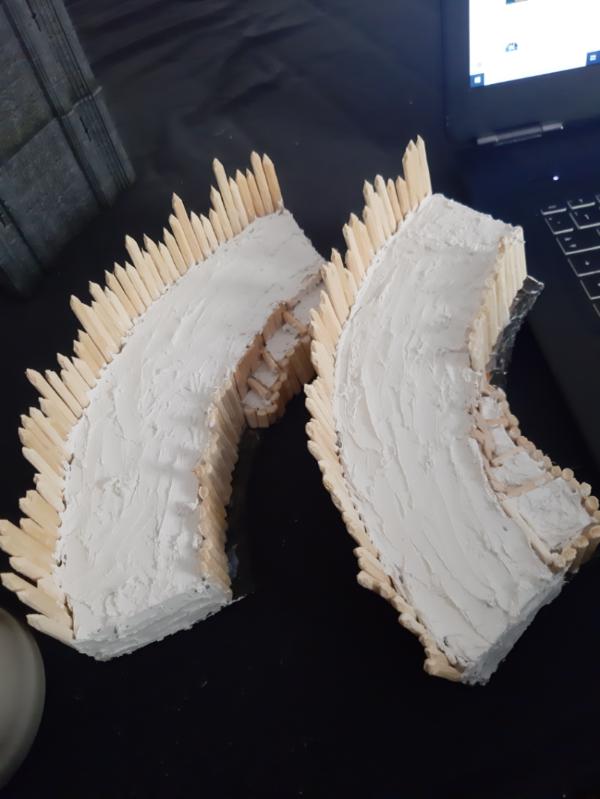
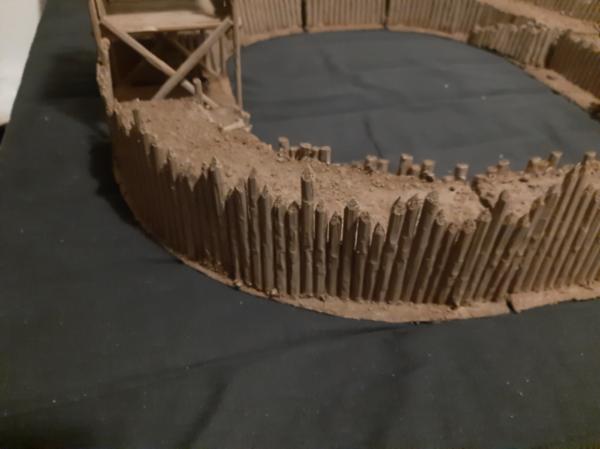
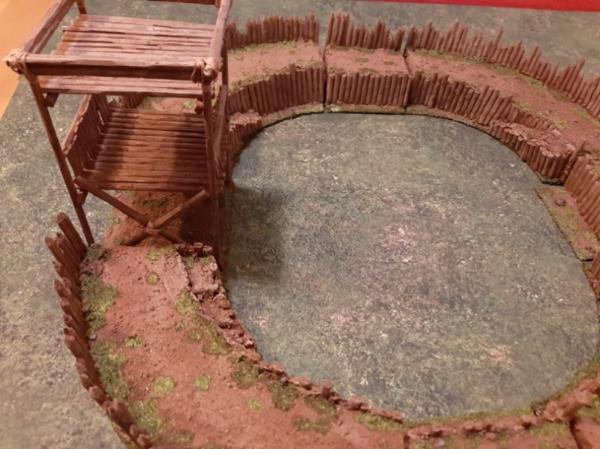
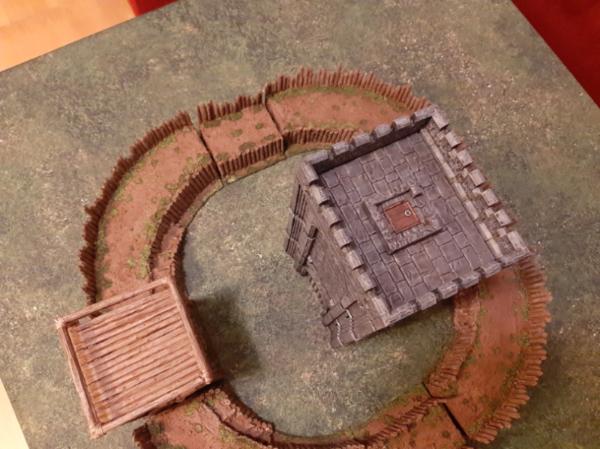
View from the side. You can see the gaps are not great here, but I think I can improve them enough for them to be acceptable. What I am really happy about is the texturing on the logs, I think it looks great.
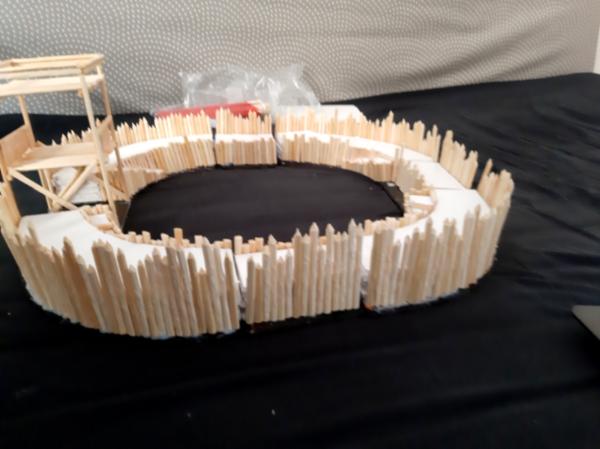
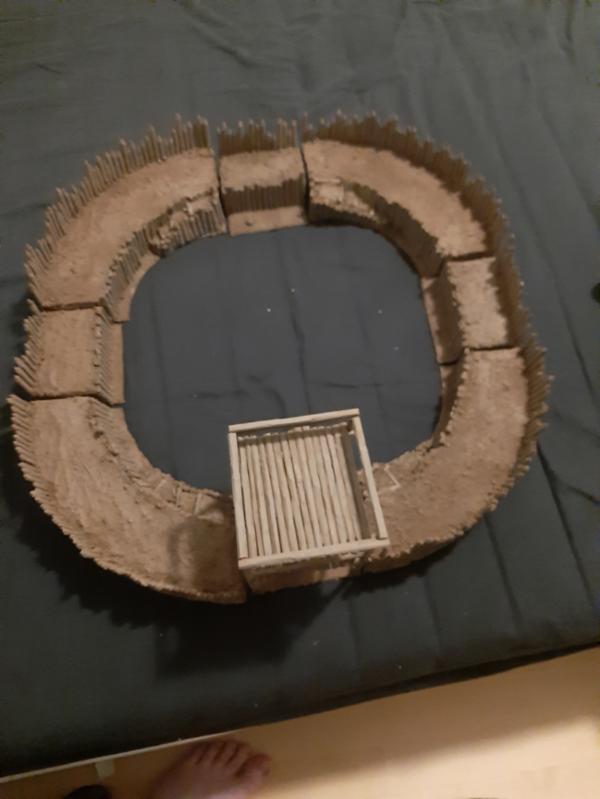
Finally an overhead shot. The inside area is just over a foot square, which I think is a decent size for a tabletop fort. I am happy that I can also set it up along a table edge as a half fort, or as a town wall using all the linear spacers to make one long wall.
Really pleased to be finished with this part, it was definitely the worst! Still to do...
- Fix the gaps betweeen the sections
- build a "gate" piece to block the bottom of the tower and two small "stair" sections to link the curved walkways to the first floor of the tower.
- put filler on all the flat foam surfaces, the bases, and the ends of the sections.
- Glue on sand
- Paint some test pieces for the wood, I have a couple of schemes in mind
- base everything, then paint it all up
- flock it
- tie my "rope" around the joints of the tower
- seal it
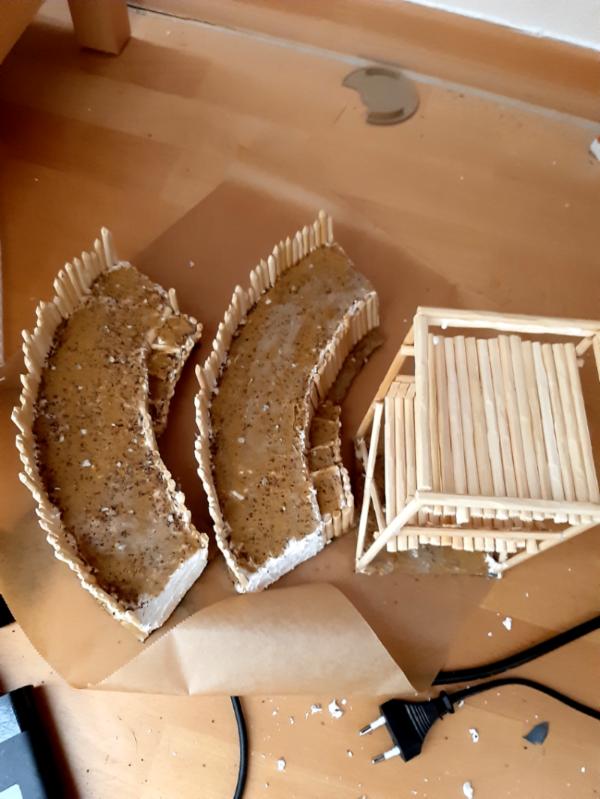
So, three things crossed off the list. I chopped off some of the ill fitting parts and it has made a bit of an improvement to the gaps between the sections. You can still see them, but I think it is fine now.
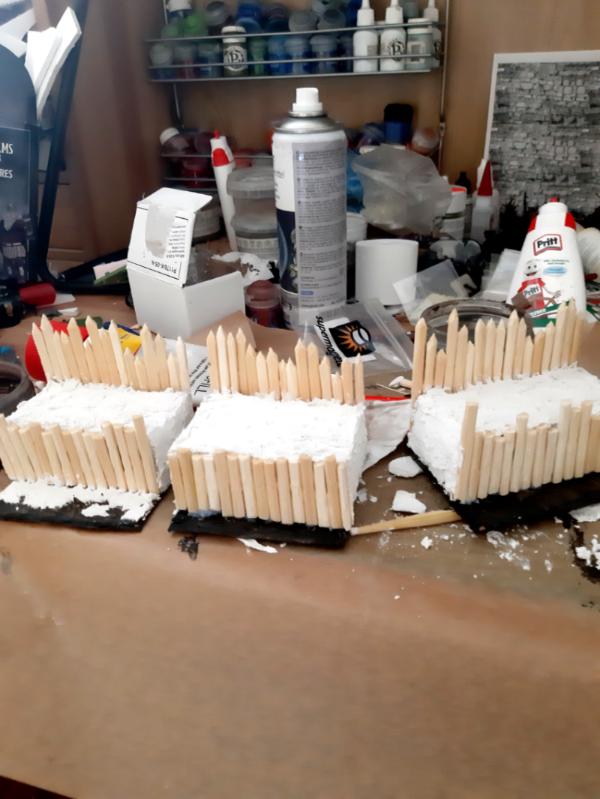
Then I got some moltofill (a generic filler) and used a lollypop stick to slather it all over the foam surfaces, filling in any gaps and smoothing over the layers on the ends. This took an entire tube of the stuff, which surprised me.
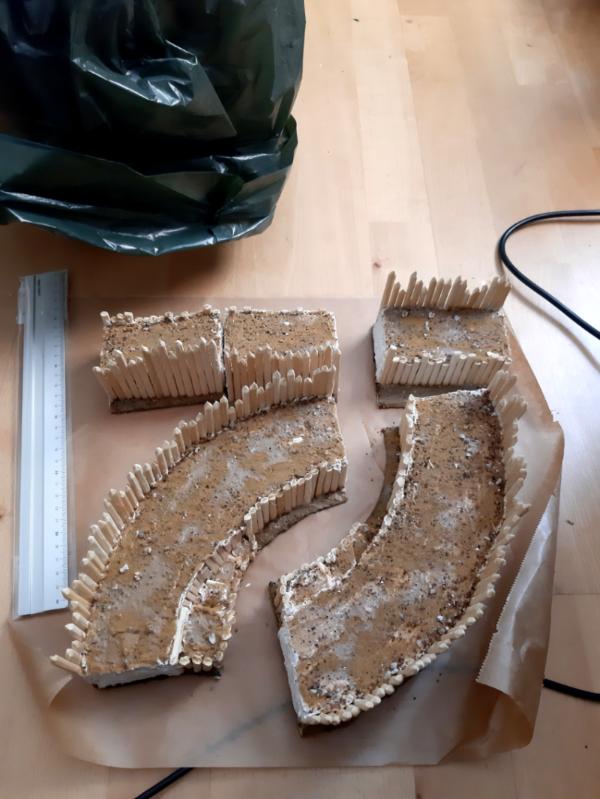
Then I mixed up some different basing materials (model railway balast and Army Painter Rocks and Sand with some old sand I have had for ages. I tried to find this construction sand everyone swears by in the local hardware shop, but no luck!).
I smeared the earth surfaces in a healthy amount of PVA and then sprinkled the mix on top, shook the excess off. I think it is looking pretty nice!
That is gonna sit and set for a few hours now, and then I will paint over it with watered down PVA to seal the sand on. In the meantime, I am gonna carve up some stakes to try out some wood schemes on, because which scheme I choose has a big impact on how I will basecoat this entire set.
Very nicely done- the final effect is extremely realistic!
I also enjoy using different kinds of caulks, fillers, spackles, repair creams, etc- anything that doesn't have the word 'hobby' in it, just to see how it will work. I sometimes think that a lot of the materials that are marketed to us 'toy soldier enthusiasts' includes a generous mark-up for gullibility ie: "this special material, compounded of pure Unobtanium (trademark pending) is specially supplier to you, the hobbyist, to assist with all your particular (and peculiar) needs" for the low low price of $29.95". Or, I can go to Home Depot, or a dollar store and get something that performs in very similar manner for a dollar.
In addition to paints and washes for coloring your timbers, are your considering actual wood stains? The DIY shops I go to often have dented or otherwise one-off cans of many colors that they sell cheap to get rid of, although it isn't often I need either the half-cup can or the 5 gallon bucket, which is what they mostly seem to have.
Also, I've seen in the discount shops (Goodwill, Dollar Tree, etc) 'furniture repair kits' that are essentially wax crayons with stain impregnated into them- if you have a scratch, you just color it in with the crayon and smooth it with isopropyl alcohol. If you can find some discount, might be worth a try (but what a lot of coloring-in, what with all your great timber details!)
Toujours en avant, Always Out Front- lead the way Boss!
"He fears his fate too much, or his desserts are small, who will not put it to a single touch; to win- or lose- it all."
Montrose Toast
2019/09/14 18:25:52
Subject: Dungeons and Dragons Blog - Dark Ages Terrain - Ringfort - texturing the eartworks
Thanks Slinky!
Meer_Cat: Yeah, I think for terrain making you gotta try stuff out. This was a really ambitious project for me after years of not doing anything, but it was what I wanted to do so I was motivated to finish it.
I based everything in leather brown. I think I really like this shade for the earthworks, so I may just give it a brown wash, pick out some details and call it done. I was gonna base it again in a dark brown and then highlight up, but that might be overkill. I will try it out on a small area first and see what I think.
The wood I am gonna drybrush with a light tan, maybe then with a mix of light grey in it for a final highlight, and the cut wood with a very light tan, before washing brown.
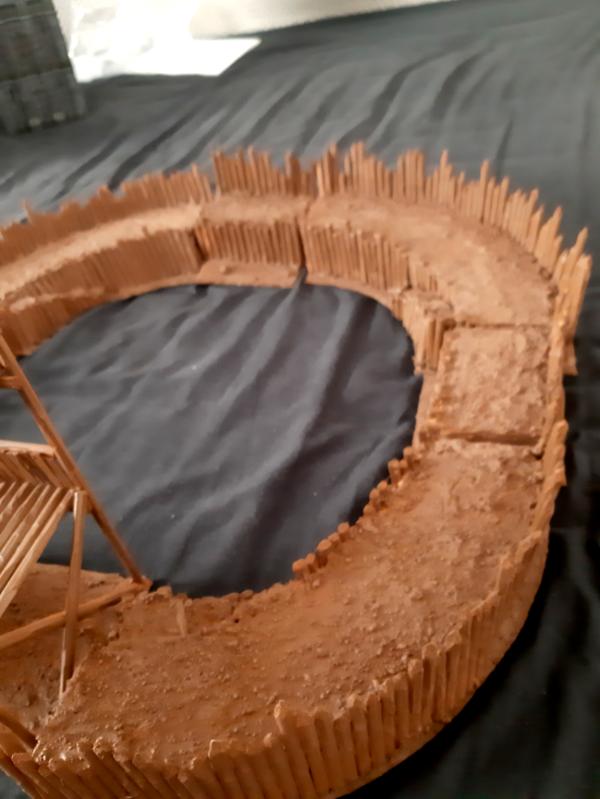
Close up on the texture:
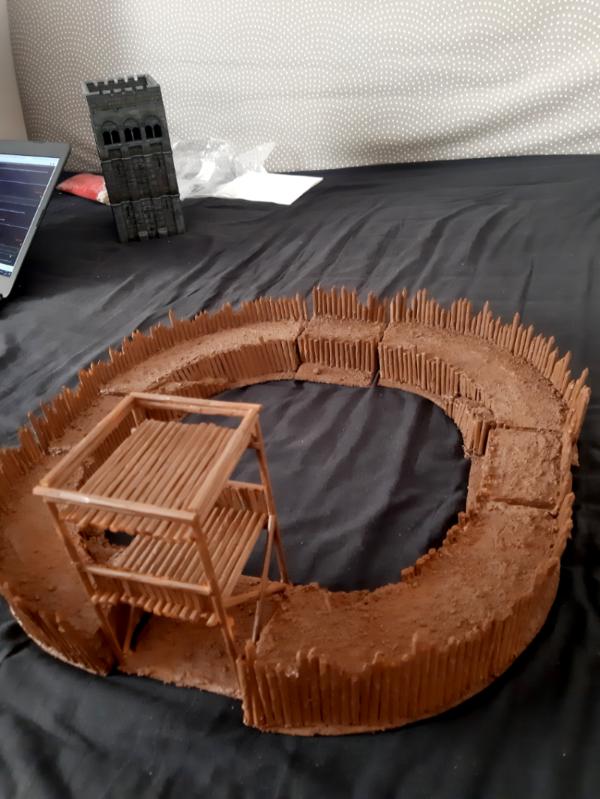
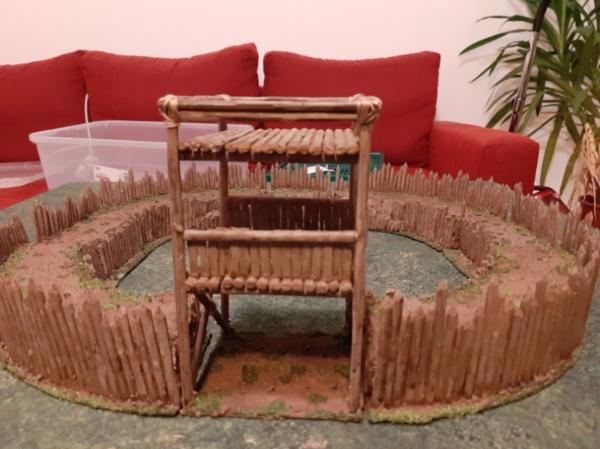
Overall view
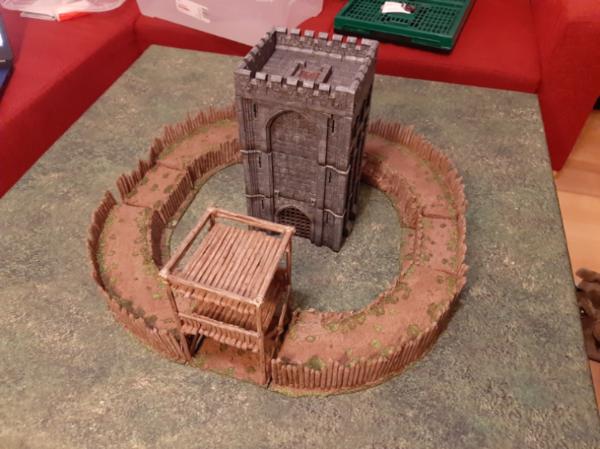
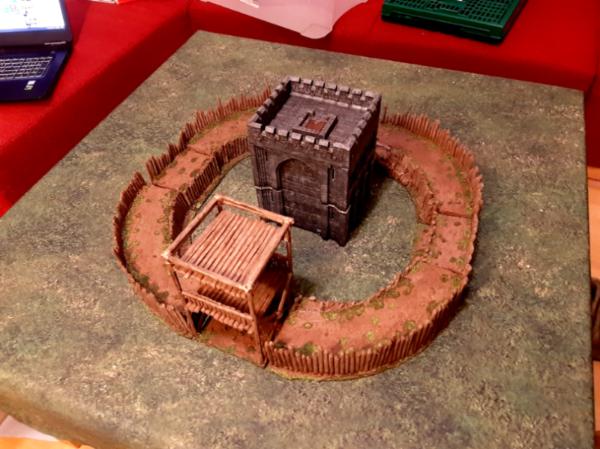
And with my Renedra keep in the middle as a "motte and bailey" style fort
The tower is a maybe a wee bit too tall, but you can take the bottom floor off.
This is really looking impressive now. One of the best medieval terrain projects I have seen in a long time. The texture is really helping. I know it was extra work but I agree that four staircases makes it much more playable. Great work so far!
Project log and campaign featuring Orks, Imperial Guard, Marines, Tyranids: http://www.xhorikwar.blogspot.com/ Currently focused on our Horus Heresy campaign with White Scars, Death Guard and Imperial Militia.
2019/09/16 20:23:38
Subject: Dungeons and Dragons Blog - Dark Ages Terrain - Ringfort - starting the painting
Thank you! That is a really nice compliment. I am very happy with the playability of the piece. I hope I can find someone to do a siege scenario with using this, those have always been my favourite games.
I started painting it tonight. First, I drybrushed the earth areas with a light tan colour. Then, I made a simple wash using washing up liquid as a flow aid and dark brown paint. The wash went on very dark, but looking at it now I think it might be a bit light. I might give it another go.
Then I let it dry before mixing up a tan-beige-light grey mix for a greyish brown and drybrushed all the wood pretty heavily. Aged wood in real life is usually grey with brown undertones, and that is what I am going for. In the pictures it looks browner than in person, particularly under the poor quality lights in my spare room. I will try and get some pictures in daylight tomorrow. It may be that I need to do another layer of highlighting on the wood and darken down the soil. I think the tower wood looks about right. I plan on giving it all a light brown wash (earthshade ish) and some splotches of an olive green wash (camoshade) on the ground and the wood.
After painting is finished, I will glue on my flock, mostly on the edges and around the edges of the earthworks, leaving a lot of it as bare ground.
The painting is definitely bringing it to life. But I agree it could use more contrast between the wood and soil, at least in this lighting. I would go for darker brown soil and greyer wood, like you were describing.
Project log and campaign featuring Orks, Imperial Guard, Marines, Tyranids: http://www.xhorikwar.blogspot.com/ Currently focused on our Horus Heresy campaign with White Scars, Death Guard and Imperial Militia.
2019/09/17 11:10:32
Subject: Re:Dungeons and Dragons Blog - Dark Ages Terrain - Ringfort - starting the painting
One thing I've learned about using acryllic fillers (and constantly forget to fully implement myself) mix it with some coarse sand/mortar, maybe even small stones to create more spots for wash to pool and drybrush to highlight; use very wet large brush (literally dripping water) to wash out the central part of any surface us humans are expected to move over - we tend to follow same paths and this usually shows; have something contrasting, like a sienna or yello ochre pigment and rub it in in small patches to imitate some disturbed dirt.
Oh, and definitely go for greyish wood. A lot of trees that grow Northern Europe produce a grey bark/trunk after a few seasons that later will grow darker and spotty with moss etc.
Painting progress tracker:
2017: 50 of 50 planned; 2018: 80 of 60 planned; 2019: 75 of 75 planned
Pledge 2020:
6 to sculpt, 75 to paint (2/57 done)
2019/10/08 18:21:54
Subject: Re:Dungeons and Dragons Blog - Dark Ages Terrain - Ringfort - starting the painting
Phew! Sorry for no updates, life got very busy. I kept working on stuff but did not have time to photograph and post as much as before.
So since last time, I have finished the project. Glued on flock, darkened it down with Camoshade, inked everything, and tied on some thread on the tower in appropriate places (I would have done more, but it was very fiddly and I think it is enough as is!)
Very happy with the finished product, so I have a few set ups photographed on my grass mat from Deep Cut Studios.
First, the ringfort empty of buildings:
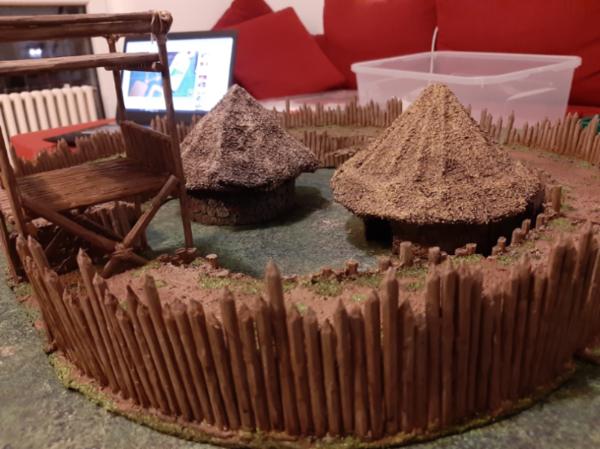
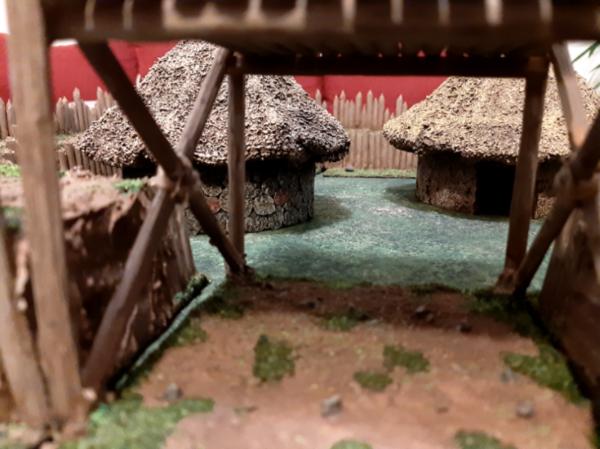
Here it is set up as the original idea, a Celtic Ring Fort with the characteristic circular houses.
And finally, here is a Motte and Bailey fort for when I want to run this with my Normans!
I think the tower is a bit too tall, so I tried it with the bottom floor removed. Maybe this looks better?
Looks a bit more like a squat keep. I think a wooden keep would look even better, and I might put one together at some stage!
Right now, working on basing some model railway trees for some forest bases, and then going to finally get around to making some polystyrene hills. Slowly building a collection of terrain for play!
This was super satisfying to bring to completion. It is not "perfect" but it is pretty close to what I wanted from the start, and it will do the job on the table admirably. This is the biggest terrain piece I have ever made, and I am excited to get to use it in games!
The finished product is excellent Boss! Kudos to your imagination and perseverance. The Iron Age roundhouses look perfect in their enclosure- as does the motte. With your modular approach to the walls, you could actually insert a straight section or two in each side to make a larger, more oval shaped bailey!
"He fears his fate too much, or his desserts are small, who will not put it to a single touch; to win- or lose- it all."
Montrose Toast
2019/10/09 06:27:12
Subject: Dungeons and Dragons Blog - Dark Ages Terrain - Ringfort - complete!
Meer_Cat: Thank you! I had the same thought about adding more sections, I think it could look a lot better and help with alternate layouts. I might do it, if I find myself getting a lot of use out of it and wanting those alternate set ups.
Slinky: Thanks! I feel it was worth the work too. The carving of hundreds of chopsticks was the most tedious (I have new callus on my fingers from it!) but overall it was a lot of fun to make and I hope to get some use out of it pretty soon. In any case it has been such a long term ambition I just really wanted to get it done!
It looks great Da Boss! What an accomplishment, bringing that to completion. It will be great to see it in use in some battles, I hope you get to play on it soon like you said. I hope you can share some action shots of your ring fort when you do get to use it in play.
Great work! I could see some brave heroes defending this to the last to keep a few beleaguered villagers safe, or breaking through it to finish the enemy opposition.
Looks good.
2019/10/11 22:55:37
Subject: Re:Dungeons and Dragons Blog - Dark Ages Terrain - Ringfort - complete!
Great stuff oddly enough through the size is about right. I've worked on Raths in Ireland, Banjo Enclosures in England and seen Duns in Scotland and your size is about correct. Traditionally the structure in the middle of an enclosure that size during the later period would be a tower house not a full keep. Well worth some research for a later project.
"But me no buts! Our comrades get hurt. Our friends die. Falkenburg is a knight who swore an oath to serve the church and to defend the weak. He'd be the first to tell you to stop puling and start planning. Because what we are doing-at risk to ourselves-is what we have sworn to do. The West relies on us. It is a risk we take with pride. It is an oath we honour. Even when some soft southern burgher mutters about us, we know the reason he sleeps soft and comfortable, why his wife is able to complain about the price of cabbages as her most serious problem and why his children dare to throw dung and yell "Knot" when we pass. It's because we are what we are. For all our faults we stand for law and light.
Von Gherens This Rough Magic Lackey, Flint & Freer
Mekagorkalicious -Monkeytroll
2017 Model Count-71
2019/10/14 14:59:29
Subject: Dungeons and Dragons Blog - Dark Ages Terrain - Ringfort - complete!
Thanks for all the kind comments! I am still wiped out, was back in Ireland for a wedding on the weekend. I dug out a whole pile of Sci Fi bits including all my old 2nd edition 40K stuff, might start a new blog for my sci fi adventures...
Welp. Predictably, work became insane over the latter half of the year and we had a death in the family, so I wasn't up to much with regard to posting in this forum section. But I have been fizzling away thinking about my Dark Ages terrain set up, and made some progress.
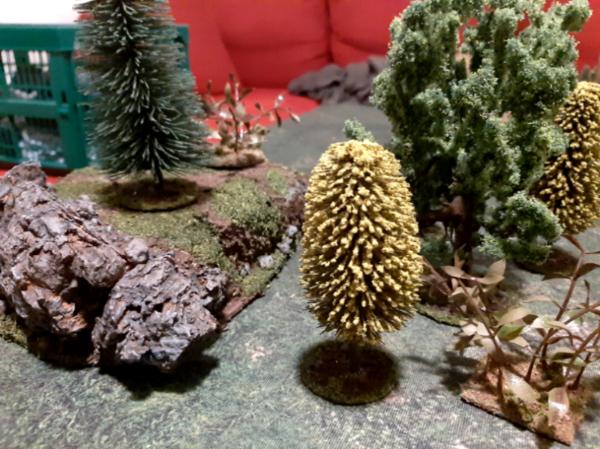
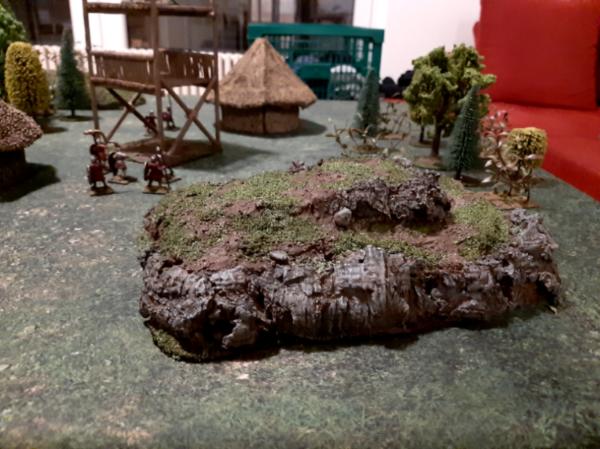
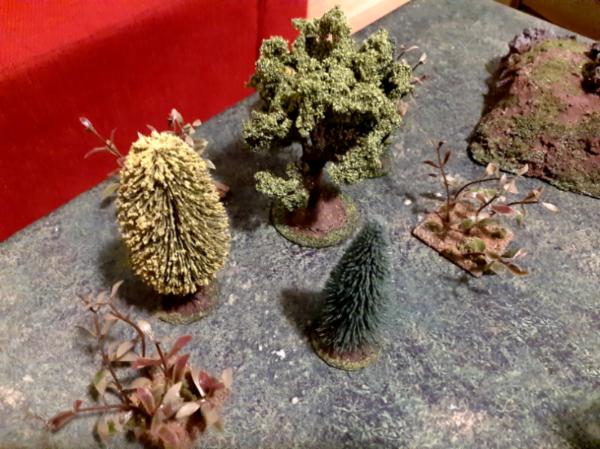
I wanted some hills and forests to go along with my fortress. Got two hills and a couple of small sets of trees done. The trees are just model railway trees glued to 40mm and 50mm bases, the undergrowth I made a while ago from one of those aquarium plant balls. I flocked them the same way as the fort around the edges. They definitely need a shape to sit on to define the forest area for wargames, but I wanted them individually based for RPG use.
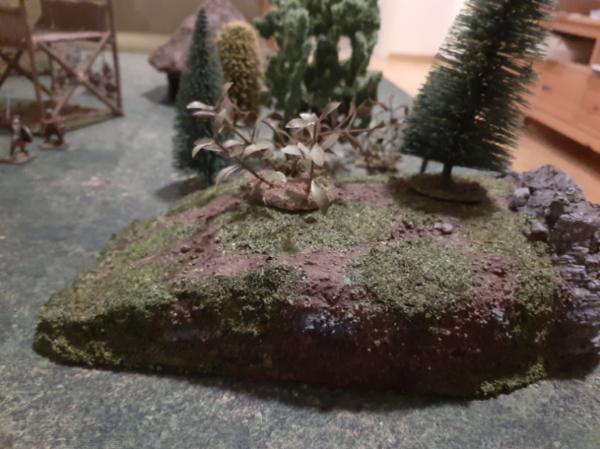
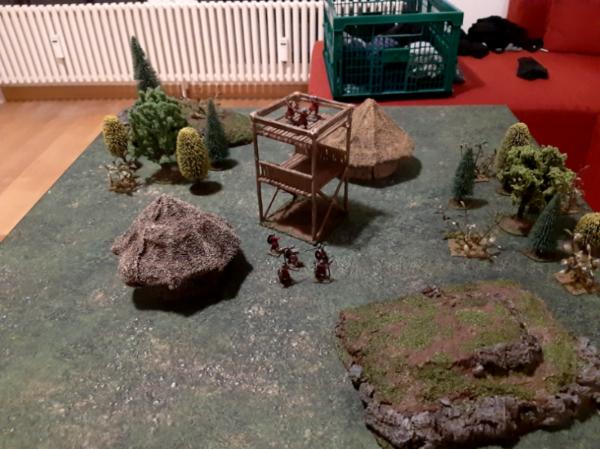
I then built some hills from foam (the expanded, white kind), filler and cork. The cork was a lot harder to work with than I anticipated, and is the main reason I only got two hills done. I think they are okay, I was trying for something fairly "real" looking that was also playable and I think both hills are compromises in that regard. I think the flocking looks a bit cruddy on such large pieces and may go back to these and add static grass and so on. Gonna build at least two more of these. Made a little set up on my mat on a 3'x3' table to show off what I have done, a little outpost in the forest.
Next up, I am gonna try making some flexible forest bases out of canvas, duct tape and acryllic caulking, and then a pond and some river sections from the same plus transparent caulk. I think that is all the basics for a normal game, and with some little walls and ruins it will be a pretty decent set up.
The Sci Fi blog is still in the works, and I have also been painting some minis, but I want to get an actual game in so getting a set of terrain built is pretty important! It is fun, because this is pretty much the set I had made as a kid when I started playing wargames, but it looks a lot better!
This message was edited 1 time. Last update was at 2019/12/29 19:41:12
Very nicely done! The little hilltop (Strategic Terrain Feature 676-776) is particularly good. It just shows what can be done with a limited amount of space but a large amount of imagination! Rock on!
"He fears his fate too much, or his desserts are small, who will not put it to a single touch; to win- or lose- it all."
Montrose Toast
2019/12/29 21:17:14
Subject: Re:Dungeons and Dragons Blog - Dark Ages Terrain - Forests and rocky hills
Terrain pieces are looking good, interested in seeing how the canvas flexible forest works out .
LOL, Theo your mind is an amazing place, never change.-camkierhi 9/19/13
I cant believe theo is right.. damn. -comradepanda 9/26/13
None of the strange ideas we had about you involved your sexual orientation..........-Monkeytroll 12/10/13
I'd put you on ignore for that comment, if I could...Alpharius 2/11/14
2019/12/29 21:41:39
Subject: Dungeons and Dragons Blog - Dark Ages Terrain - Forests and rocky hills
Cork is non-trivial thing to work with, I admit. First, it can refuse to absorb glue, bending in random directions afterwards. Second - a good deal of pressed cork for decorative walls and furniture is impregnated with some fairly disagreeable stuff that reacts with anything but the water. Ugh! I understand it is done to make it less flammable, but... sorry, got carried away.
Great stuff, Da Boss! Terrain looks both pretty and practical, hills included. Rocky outcrops look fantastic, nice shades of grey! Flocking do looks more like moss, but this is not necessarily a bad thing, (static) grass does not grow directly on rocks either.
Thank You for running these entertaining articles here on Dakka, have a happy, colorful and wargaming New Year!
Painting progress tracker:
2017: 50 of 50 planned; 2018: 80 of 60 planned; 2019: 75 of 75 planned
Pledge 2020:
6 to sculpt, 75 to paint (2/57 done)
2019/12/30 00:35:45
Subject: Re:Dungeons and Dragons Blog - Dark Ages Terrain - Forests and rocky hills
Sorry about the loss in your family. Those are nice additions to your board. The cork may have been a pain to work with, but I'm really impressed with how good yougot it to look in those hills.
Those hills look good-- natural while remaining playable. Regarding the flock: you might try hitting it with a wire brush to make the patches of grass, er, patchier. I got that idea from the Terrain Tutor, and it really helped when I built a couple of hills recently.
Meer_Cat: Thanks! In my imagination I was gonna make something with laods of little features like that, but in practice this was about all I could manage!
Theophony: Thanks for the kind words. Canvas terrain is proceeding pretty well, as you shall see!
Wirecat: Cheers! Yeah it does look a bit mossy, doesn't it? I am thinking about adding static grass as well, my thinking was that wood chip flock is more durable for long term use. I dunno, definitely the weakest part of all of these builds, but luckily it is the last layer so I can go back and add more to it if I want to.
Syro: Thank you. The article on Dakka does a much better job than I did, but I was happy enough with how they came out.
Slinky: Thank you!
JoshInJapan: Not a bad idea. Yeah, it is a bit all or nothing right now, like either really grassy or totally bare. I will have a look for the Terrain Tutor video.
So, despite a bit of quiet here, I have been working on my canvas templates. I was inspired by this video by Red Beard Baron on Youtube:
I wanted my trees to sit on relatively flat, textured bases to define the forest area, and I was gonna make them out of mdf. But the more I thought about it the less happy I was with the idea, because I figured they would be heavy and unwieldy and a pain to work with. On seeing this video, I was really excited to try it out. I will make a river set as well, just experimenting with the ideas here before I go for such a big project. Btw, this was really cheap as a method, the canvas cost me a tenner for more than I will need for these templates and an entire river set, and the rest is very cheap too.
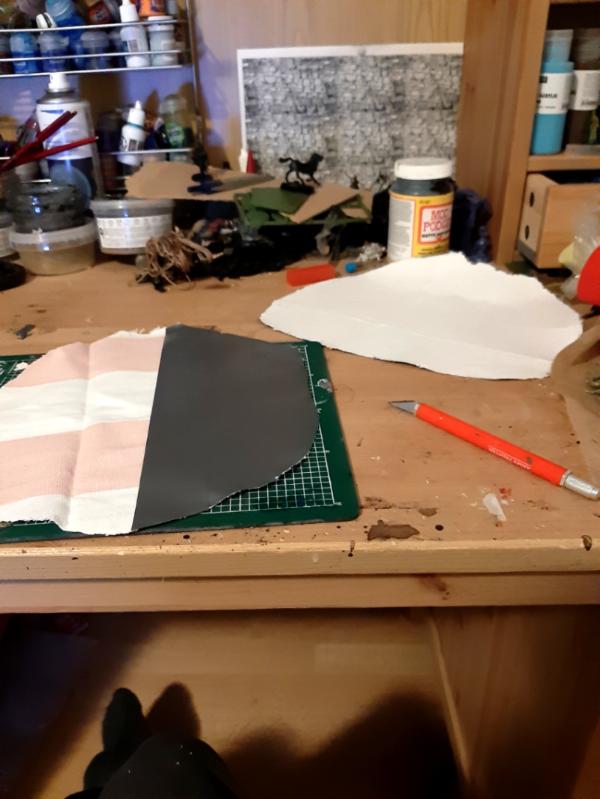
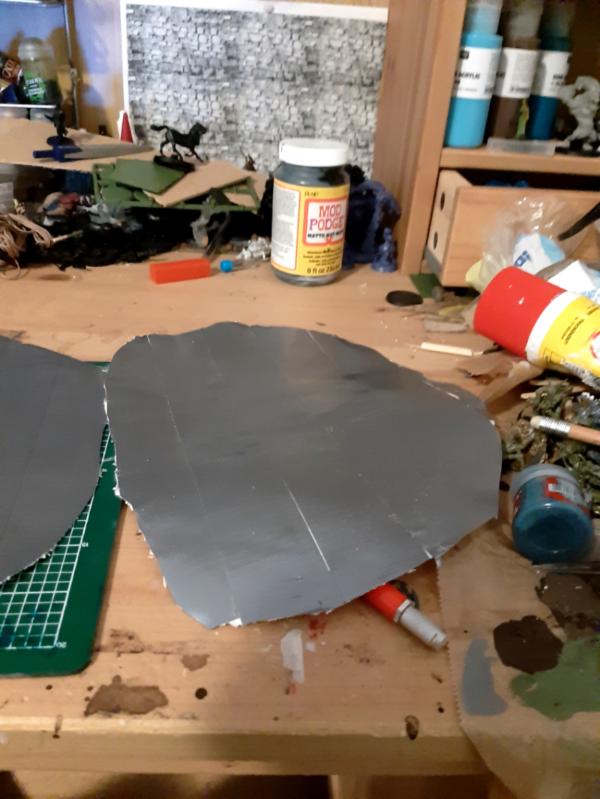
So, first I cut my templates out of canvas and then stuck duct tape to the back. I cut the duct tape into shape with a modeling knife,
The idea here is to prevent curling as much as possible and also to increase the durability. A bit annoying and you could skip this step but I think it adds a lot.
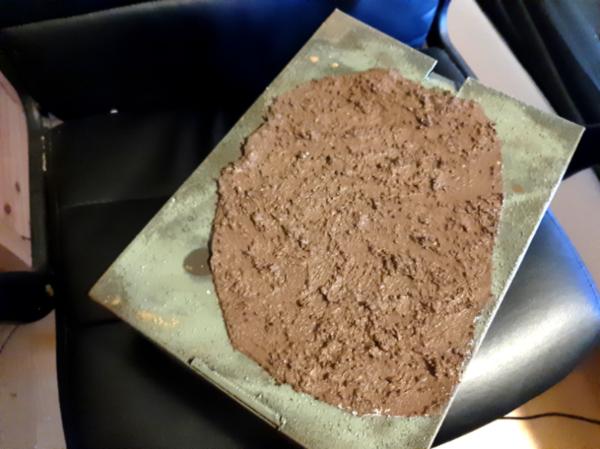
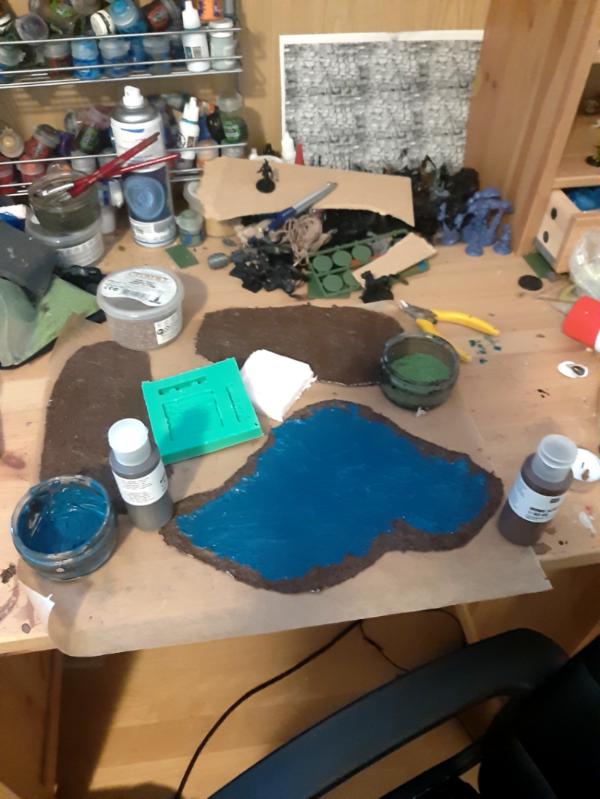
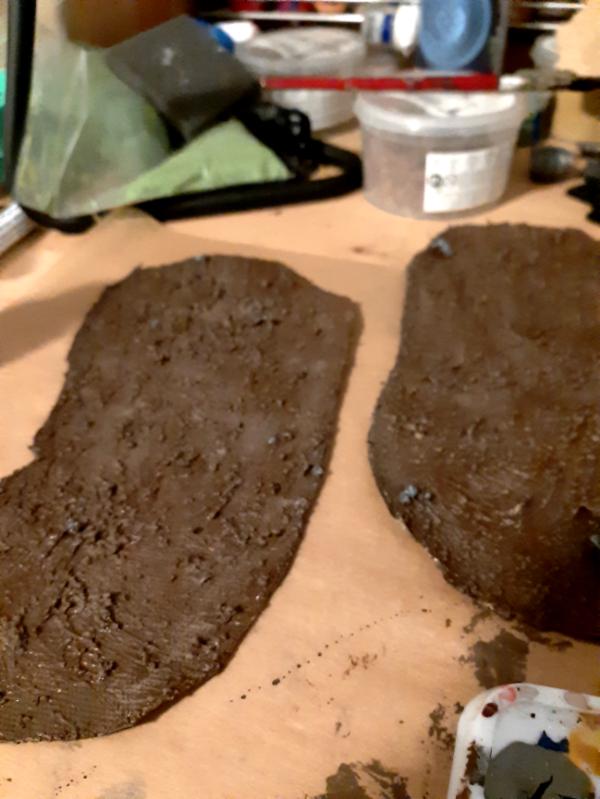
So the next step involved Acryllic filler, which you can get from a hardware store. I got the stuff that said it did not have much odour. Really happy with it! You can mix acryllic paint with it to colour it, which I was happy about because the other filler I used was showing white if it chipped at all, whereas this is one colour the entire way through. I also mixed it with a bunch of sand and small gravel for texture, and then just smeared it onto the canvas in a very thin layer.
Takes about a day to dry.
Once it had dried for about 45 minutes I put weights on the corners to help counteract curling.
Unfortunately it did curl a bit, but it is not too bad.
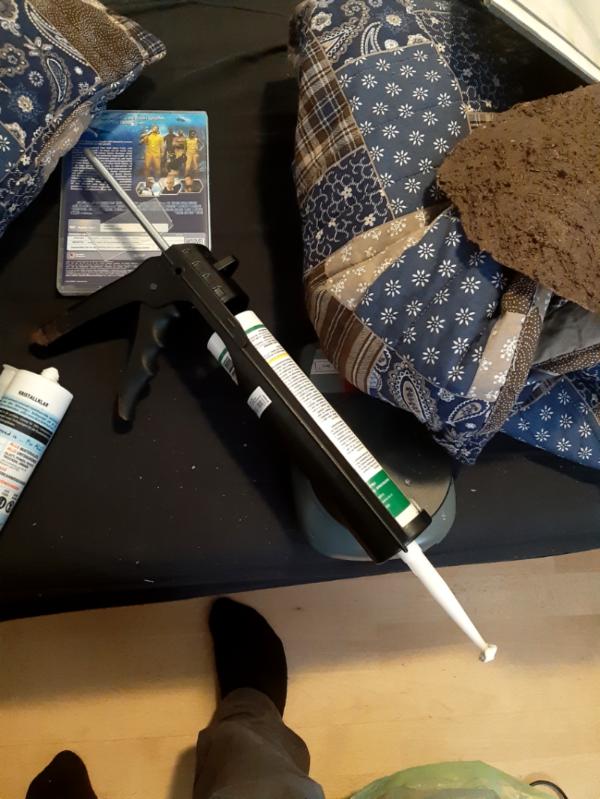
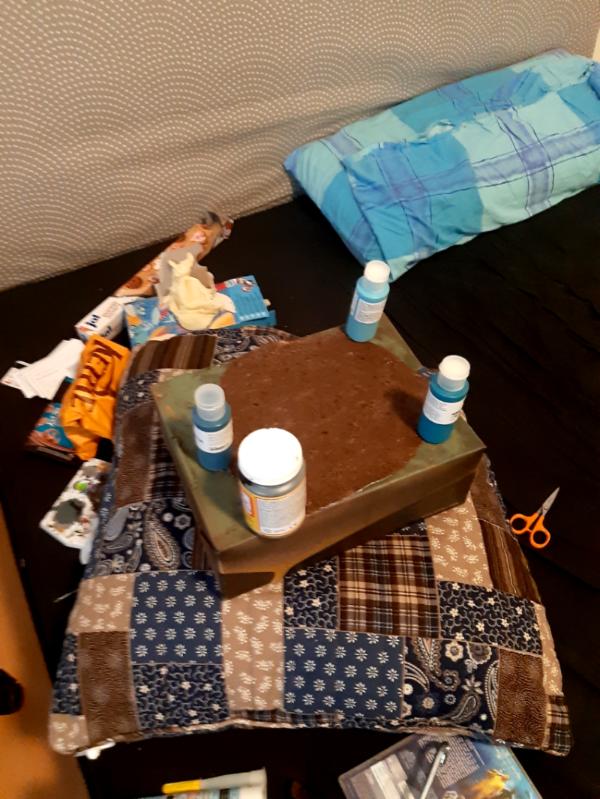
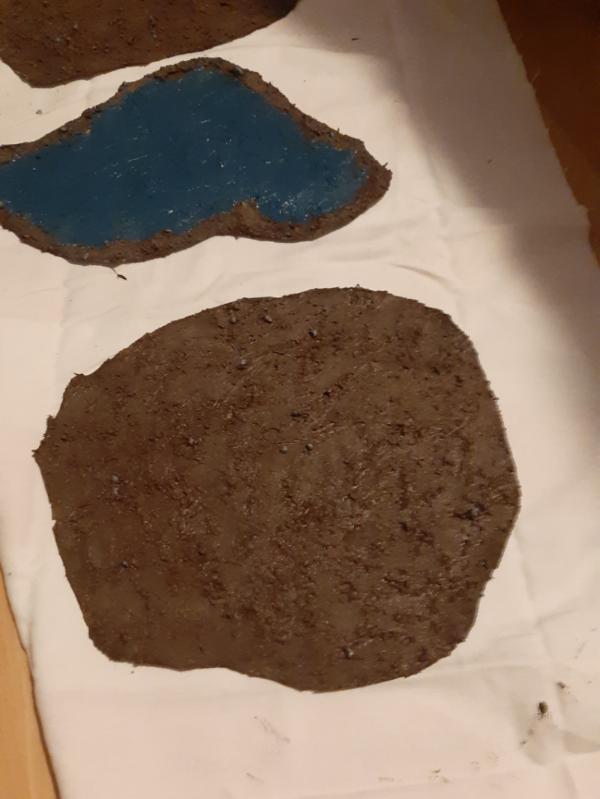
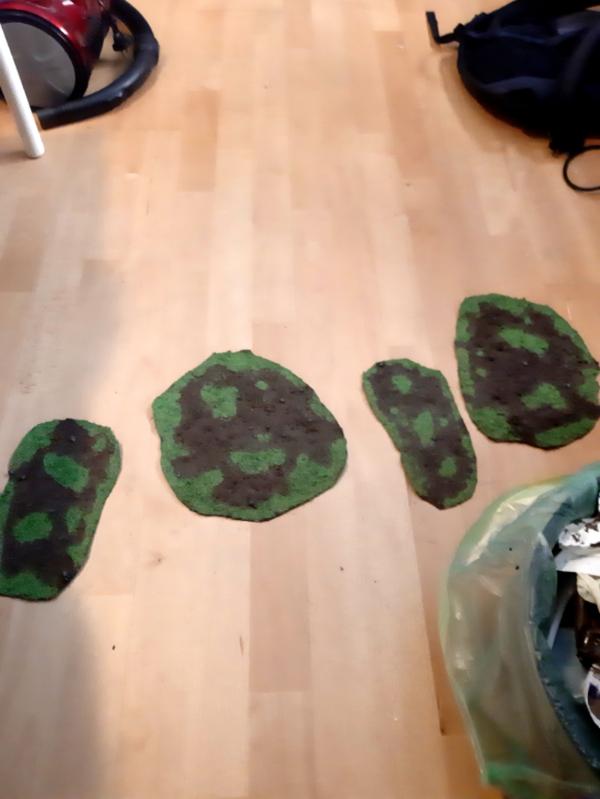
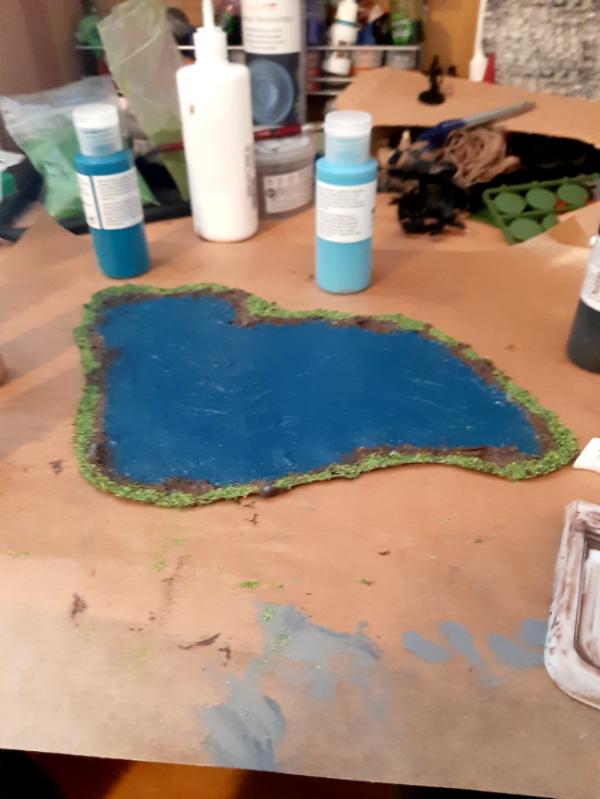
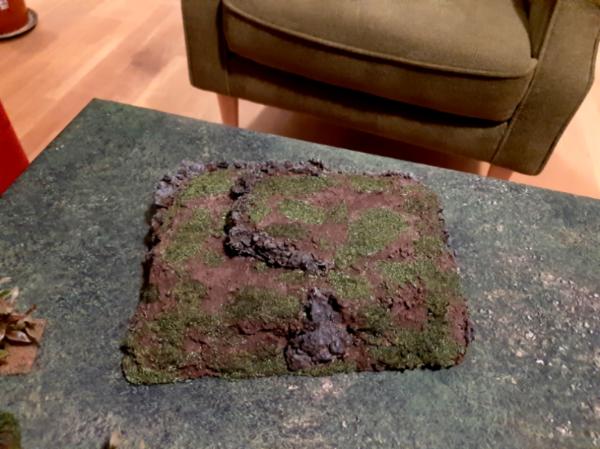
As well as these forest bases I decided to try a pond. I just used the acryllic caulk for the water area, with no sand in it, and will later go over it with transparent acryllic caulk.
I left everything overnight, then painted it all with my craft paints to bring out some of the detail before flocking it:
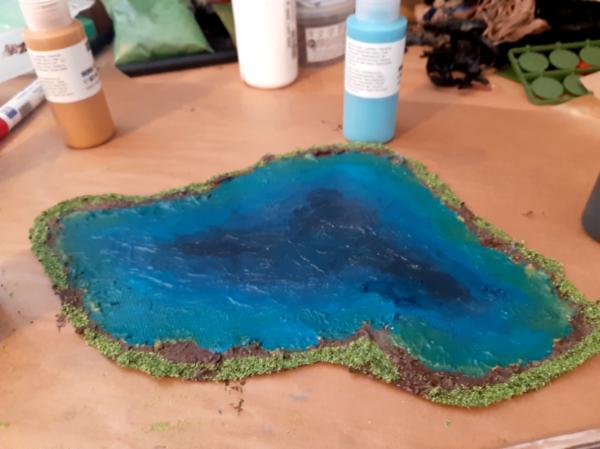
Then I got to work on my pond. So I am going for I guess a more cartoony look rather than the popular "greeny brown" pond look, mostly because this technique sort of encourages that. I think I might need to darken this down with a blue or green wash though, the shallows came out a bit too bright maybe...
Next is washing all the flocked areas with camoshade to darken them down and make them look a bit less even, and then I will glue a bunch of herbs and green tea on the forest bases as leaf litter.


 .
.