Hey dakka
Meeting with many fellow hobbyists, i have found out that nearly everyone of them has quite a load of useful advice to share. For example how to paint white with two layers or how to best treat your paints and so on. Then I thought i should start a thread where everyone shares his favourite (or most useful) bit of p&m-advice.
Here it is.
Lets make up some rules:
There are three kinds of advice; "general", "specific" and "for newbs"
things that are listed as general should be useful to all wargamers, specific should include your fav. skin method for example, and the other category runs all those things newbs dont yet know (like how to thin down paint)
then we have sub categories like Paints and Painting, Modelling, Tools and Other.
OK guys, I'll collect all your useful advice here!
Basics:
Fist off one of Sonophos's pieces of advice;
-If you have a problem [that you cant solve with the help of this collection

, MrMerlin] do not be afraid to ask. The people on Dakka are very forthcoming with polite advice and pointers.
He who asks a question is a fool for 5 minutes; He who does not is a fool forever. (Confucius).
Tools and brushes
- use the edge of a scalpel/hobby knife to scrape off mold lines from your mini's (nerdfest09)
(dabedmans comment on this: About this, if you don't have a scalpel or a hobby knife, use a boxcutter. I know there are people like me who likes to keep things dual-purpose and for hobby knives; buy a boxcutter! cheap and infinitely useful everywhere in a home.
They have a very long life as if the blade goes dull, just snap some off of the top, and the best part: the back of the blade is amazing to get mold lines off.
There is NO risk of cutting into the model with the back of a boxcutter. Or use your nails, that works too) (sluggaslugga seconds that: Always, and I mean always! file off the mould lines.
It doesn't matter if it's hard, or boring. You still should do it.)
- A regular brush with a nice pointy tip is a much better investment than a fine detail brush.(Dabedman)
- Keep the paint off the Ferrule (The metal piece the bristles go into), your brushes will last a whole lot longer whatever the quality of them. If you are always getting paint on the ferrule, you are overloading the brush and being impatient. Take your time, take care, and your mini's will be amazing. (Conrad Turner)
- Only drybrush with old and/or cheap brushes without much of a tip. And do not drybrush to violently, swift is better than hard.(Dabedman)
- Ask your detentist if they have any tools they are going to throw away. Use for sculpting. (bubber)
- a pair of angled finger nail clippers works just as well for getting models off the sprue as an expensive clipper.(nerdfest09)
- Buy tools/paints/brushes to do jobs, don't make jobs for things you buy.(oadie)(mrMerlin:in other words: wait until you actually need the tool before you get it.) (sonophos: When you are first starting up don't get tempted to buy the very best tools, there are often different ways to do the same thing and you won't know which is best for you before you try. Once you know what you want then buy the more expensive stuff. :
GW: has a grand markup on it's tools and they are not always the best for the job.)
- When you do buy, it pays to get advice and shop around. You don't want to bankrupt yourself, but crappy tools are a handicap - there is a happy medium to be found, I promise.(oadie)
- Quality over quantity. You don't need 20 files, you need 4 in the proper shapes, that cut well. One size 0 brush with a good point does the work of a 0-5/0 set of frayed nylon brushes from the craft store and gives you more control (oadie).
- don't throw away old electric toothbrushes - these are especially good for cleaning resin models. (bubber)
Paints and Painting
- always thin down your paints (exept when drybrushing). They wont ruin your details then, and are easier to work with. I usually work with a mix of 2/1 (paint/water) (MrMerlin)
- Use two pots of water to wash your brushes, keeping one for just the metallic colours. Otherwise, especially if doing a lot of painting in one go, flakes of metallic material will start to creep into your non-metallic colours. (Not such a problem if using
NMM) (Conrad Turner) Sonophos: I also use a separate water pot and brush for painting pure white because it is very easy for colour to bleed in and you end up whith pale pink, baby blue or beige where you want a nice flat white.
-Don't paint out of the pot. Grabbing the paint out of the pot and putting it straight onto the model will nearly always come out too thick and tends to let crap fall into the paint and to dry it out. Instead use a pallet and place some paint onto it using a brush. Preferably look for paints that come in dropper bottles as this will not waste paint as it will with pots sharing the
GW design.(n0t_u)
- Wash everything but highlights, and I mean everything! (Dabedman)
-Always prime a model before painting. Do this in thin coats as it is to give the paint something to stick to. Too thick will block up some of the detail and detract from it. (n0t_u, MrMerlin, Maximus Prime)
- Finecast needs to be sprayed, don't paint on the bare resin, no regular paint will stick.(Dabedman)
- an old white ceramic side plate works well as a paint palette and is easy to wash up :-) (nerdfest09)
-Some materials should be washed before painting starts to removie any mold release that may still be on the model. Mostly resin and metal though if plastic seems somewhat oily it needs it as well. This will help the paint adhere to the surface easier. (n0t_u) MrMerlin: always wash your models with soap before basecoating. This is important because after handling the model a few times, it builds up a layer of grease (wich is often found on your fingers). Paint wont stick to that very well, and will chip off.
-Less is more. When painting try to use thin coats as if you are too heavy handed it can look caked on.(n0t_u)
-Test models. Having a few spare trash models around or even sprue can be useful for trying out a colour scheme before putting it onto an actual model. The same goes for new techniques. When done these models can be stripped then used again.(n0t_u)
-Save on grass; a wonderful array of flocking materials are also easily and cheaply found at a craft store.(a craft store is not a hobby store!) (Zariart)
-The best weathering powders are usually made out of pastels. do what they do,use pastel chalk with a file and create all the dusts,muds,rusts and snow you want with very little money.plus you get way more choices! (Zariart)
Modelling
- I keep my green stuff in the freezer to keep it fresh.
I also buy it in 2 seperate lumps from Heresey rather than in a strip. (bubber)
- Beginners- When mixing up some green stuff, estimate how much you will need for the job then Half it. This rule is 95% fool proof and cuts down on.. erm... 50% of your waste. Mixed too much? Either roll it flat into a sheet (using the handle of your hobby knife for example) so you can use it to make straps or find something to press mould. Freezing it also adds a couple days.(Perkustin)
-Working with greenstuff is much easier when you put some vaseline on your tools. It won't stick to them then. Just make sure to wash the
GS before adding any new layers.....
- when dealing with Green stuff, always have a cup of warm water near, to keep the Gs wet and easy to work with.
- You can use a file instead of a scalpel for mould lines.but its better not to. I have ALWAYS regretted a mould line I missed or left on...always. which leads to:
- You cant make up for hard work with money unless some one else is doing it for you. (Zariart)
Other
-Practice. Nothing is more valuable, don't become discouraged if you see models better than yours or your own as crappy. Take the difference as inspiration to improve and keep at it. (n0t_u)
- Have reasonable paint schemes, such as at most 3 prominent colors on a model, mute secondary colors with washes to avoid cluttering.(Dabedman)
- Keep your painting area clean/tidy. I CANNOT stress on how important this is. With a untidy painting area you will loose lots of valuable parts, tools, brushes. (Maximus Prime)
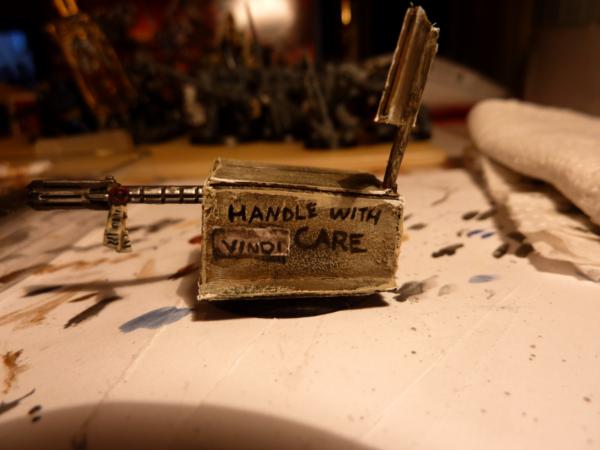
- If you do not want to pay up dear money for a model that you need, (for me it was the vindicare assassin, metal and expensive) make them out of (edit) bitz and other
GW products (/edit) and make it awesome. (Dabedman)
- Bitz make good terrain/ objective markers/ bases (Dabedman)
- Always keep all your leftover bits in one huge box if you want to spend hours finding out if you have the piece you need for a kit bash or conversion.
http://www.reallyusefulproducts.co.uk/ do some of the best modular plastic drawer sets from tiny up to huge.
- Decide early on who you are painting for - yourself or for the crowd at large. If you're painting for yourself, and taking constructive criticism, you'll enjoy the hobby a lot more.
Secondly ignore the screaming fan boys who will tell you what you've done or are doing is wrong. Remember why you paint - and if you want to paint your orks brown or yellow, enjoy yourself - dont listen to those who tell you they are not "cannon". (steelcult)
- If you are painting a unit for a game, it may help you save time and effort by batch-painting. This means you take 2-10 figures that will have similar color schemes and paint one color on all of them before moving on to the next color, and so on. Example: A Squad of 10 Dark Angels Space Marines; Spray prime all of them Black, then paint Dark Angels Green base coats on all 10 models, then paint black back over the spaces between the armor, then shade or wash all 10, then paint on the armor highlights on all 10, then paint all the chest eagles, Dark Angles Chapter emblems and Robes their base color (some light brown color), then highlight all of those up to Bleached Bone/white, etc, etc, In the long run, you will save time cleaning water and brushes between colors, closing opening new paint pots, etc. And you end up getting a more consistent overall look across the unit. If you paint particularly slowly, maybe keep the max batch to 5 models so you don't get discouraged by painting forever and not having completed models to show for it. (Fango)
- Catch up on Podcasts or listen to Audiobooks while painting. Its been mentioned before to listen to music, or talk radio, and to not have the TV or a movie going on your computer (if you paint near either) but being a husband and a father of 2, my ME time is already stretched pretty thin. I also like to read, but seldom have time to do so AND spend on my hobby...audiobooks allow me to kill two birds with one stone, so to speak. (Fango)
- Only have the model (or unit if batch-painting) that you are currently working on out on your work-station at any given time. This will keep your area clean and stress free and wont distract you from completing the task. This is something that I still haven't mastered with my ADD personality...I tend to have loads of minis, from multiple game systems out on my desk...and I am constantly distracted by this and that, and never seem to make any real solid progress on anything. So, do as I say and not as I do. (Fango)
General:
Tools and Brushes
- Airbrushes are worth every penny, the
GW air gun is a waste of your money(all it does is base coat, no detail). (Aerethan)
- for an airbrush you want a gravity fed dual action brush. (Aerethan)
- Rosemary & Co brushes(series 33) are just as good as Windsor and Newton Series 7 brushes at about half the price(plus R&C has a larger selection of sizes and types). (Aerethan)
- Xuron 410a and 420 micro shears are my favorite sprue cutters. The newer citadel cutters are also decent. (alterEgo)
- If the sprue attaches on a flat surface... it's difficult to cut the sprue absolutely clean, so sand with fine grit sandpaper. I use 320 grit from the hardware store then finish with micromesh 2400/3200 grit. (alterEgo)
- Buy a large quantity of number 11 hobby knife blades and refresh the blade often... when you are building your models a sharp blade will lead to much cleaner sprue cuts. (alterEgo)
- For
GW plastic. use testors plastic model cement, the one with the tiny thin metal applicator. It's much easier to be accurate and dispense small amounts than the
GW plastc glue, and once cured much stronger than using
CA glue. It also has a 10 second 'dry time' which gives you enough time to carefully lay down glue and position large pieces (land raider sides and body being good examples). (alterEgo)
- The best 'files' to buy for cleaning up metal models are actually diamond grit 'rifflers.' You can find them on Amazon, eBay, or micromark. The set of 10 for around $22 is enough quality for modeling, no need to buy the ultra expensive pro grade ones.
Paints and Painting
-
GW washes are waaay better that thinned down paint (MrMerlin)
-
GW is NOT the only company that makes paints and brushes. Vallejo, Reaper and Privateer Press all make paints that are perfectly suited for the miniatures hobby. (Aerethan)
- Always have a painting station that you cannot ruin by spilling paint. (I have a thick piece of paper that absorbs any and all mistakes. (Dabedman)
- Always keep lots of paper towels nearby. (Dabedman)
- I use milk bottle lids (the plastic ones - other drinks are available) to mix weathering powder washes in. (bubber)
- Never paint with bad lighting, it will lower you painting quality and detail in addition to straining your eyes. (headaches and eyesight issues may follow) (Dabedman)
- A palette is a wonderful thing, use one. Beastsofwar.com had a small tutorial in a grey knight terminator painting video they made. Also I think Girlpainting has a wet-palette tutorial on her youtube channel. Either way, use any sort of plastic for a palette if you don't feel fancy. (Dabedman)
- For resin and metal models, use a toothbrush to scrub with dish soap/water to clean the models of any mold release. SOMETIMES you can get away with skipping this step, but don't be suprised if your paint beads up and fails to adhere to the model. (alterEgo)
-Coat d'Arms also make acrylic paints - in fact they were once suppliers to
GW.
They have flip-top lids that keep the paint well (I have some which are over 20 years old & still usable!!)
I recommend their
DA Green over the
GW one.
They also do a good range of inks. (bubber)
- I have used paint out of the tube from a craft store for years. They have high quality paints for much less.(that doesnt mean its better) Experiment with the different products!. The best mud/rust wash I ever used is a 5$ bottle of red brown liquitex, that holds the same as 4 or 5 bottles of
GW paint,has a handy lid and washes like an ink with an almost gloss finish. for yellow I use winsor newton, its not about the company its about whats best for given situation. (Zariart)
Washes go on better over a gloss finish while drybrushing goes better over a matt finish - remember varnishing doesn't always have to be done just at the end, it can be used at different stages during the painting process to help the paint / inks act as you want them to. (bubber)
- when working w/ inks and washes and you want to keep things moving right along, try a hair dryer on low setting / low heat. Be sure to move it back and forth to avoid blowing the ink / wash out of recesses, etc. This technique also works with regular paint. (Skalk Bloodaxe)
-When painting mass armies, try painting the models in a patch of 10-20, so you don't get deppressed looking at your 100 unpainted miniatures and you don't get bored painting the figures one at a time. (sluggaslugga)
- For metal figures, to reduce the pitted finish before priming, coat large flat non detailed surfaces (cloaks, shoulder pads, top of jump packs, etc) with a watered down coat of white milliput, let dry overnight, then sand with micromesh sandpaper. (alterEgo)
-Write down paint recipies! There is nothing more annoying than coming back to a model and not being able to remember how you mixed the colours. This is especially important if you use
NMM techniques. You can make the process easier by using dropper bottles; Vallejo paints come in dropper bottles as standard, but you can also buy empty ones from a few websites and transfer you
GW ones into them if needs be (J.Black)
- re primers:
I use Halford's (an automotive chain here in the
UK).
They do black, white, grey, red oxide & a yellow which is close to desert yellow. (bubber)
In the few days since I joined Dakka I have picked up one tip that I have had the chance to act on: Micron pens. In all the time I have been painting models I had never thought or heard of using them. They are great! I am now busy drawing unit markings and putting tiny writing on my troops. (Sonophos)
Modelling[/u]
- it is important to give your models a realistic pose. Unrealistic poses ruin models
imo. If your dude has his right arm raised, tilt the torso so that the right shoulder is also raised.(MrMerlin)
Don't buy Green Stuff from
GW. It's really called Kneadatite Duro, and you can get it much cheaper shopping around. (Plundabaya)
Don't use Green Stuff for bases and scenery. Use Milliput. It's cheaper, it has more of a texture to it and it dries hard. You can sand, drill and file it once it's set. It's not as easy to work with. (Plundabaya)
You can mix kneadatite and Milliput to create a putty that's easier to work with, but sets hard. (Plundabaya)
- greenstuff must be anchored to something. You simply can not work with it if it is freestanding. If you want to have a part of the conversion that is freestanding (like a billowing cloak or fur pelt or something), you first have to put something down to act as the armature, and then apply the texture you want with
GS on top of that. (Ailaros)
-
GS will stick to everything but what you want it to stick to. It will stick to knives, and to fingers, and to itself when you don't want it to, but it never will stick to plastic, metal, or to
GS when you do want it to.
The best way to handle this is to put down a tiny amount of superglue down to glue the blob of
GS to the model, and then work from there. (Ailaros)
- Make sure to keep your working tool lubricated. Spit does fine. (Ailaros)
-
GS "mellows" over time. This means it's flat surfaces become bowed, and it's nice sharp corners become round. The ways to fix this are to let the
GS cure a little before you start doing your finishing touches, to keep on going back every half hour and re-creasing/flattening things, or to go back after the
GS is cured and cut new corners/file down large areas. (Ailaros)
-
GS has to be thoroughly mixed. Every time. It's green stuff, not yellow-and-blue-marble stuff. (Ailaros)
- the more blue you mix into greenstuff, the better detail you get, and the faster it cures, but the harder it is to work with and the less time you have before it cures. (Ailaros)
- don't get hung up on making something perfect in the first go. If the
GS doesn't come out quite right, you can always modify it with cutting and more
GS later. Overworking
GS will kill your work every time. (Ailaros)
- be very gentle with greenstuff. It tends to have a "memory", especially if it has extra blue, or has had a bit of time to cure. I once heard that you should sculpt the
GS with no more force than a jedi would use sculpting with his mind. Seems apt. (Ailaros)
- your biggest limitation to working with greenstuff is mental. It is easy to see something and think "I could never do that, that's insane". Once you get basic skills down, though, you have the ability to do quite a bit. It's just a matter of trying out new things to build new specific techniques, having the willpower to keep working on it, and having the self-confidence (or insanity) to try things even without knowing how you will do them. (Ailaros)
One of the easiest
GS armatures is actually
GS. Just put down the
GS in the basic shape you want it (doesn't need to look nice, as it's structural), and then use a second step of
GS to get the nice smooth billows, or fur texture, or whatever.
GS just isn't rigid enough while you work with it to allow freestanding things to be put down in one go.
- you don't need to cut all the way through sheet styrene, you only need to score it and then snap it along the line. (Ailaros)
- plasticard is difficult to work with. Use thinner plasticard when you can get away with it, and consider sandwitching several layers of thinner styrene, rather than one layer of thick styrene, when you can't. (Ailaros)
- measure thrice, cut once. (Ailaros)
- Eat small individual pies. Apple, mince, whatever you fancy. not only are you getting fruit (1 of your 5 a day), once you clean out the foil case they come in, you have a ready supply of free mixing pallettes. Throw them in the bin once you have finished. The plastic trays that 6 pies come in are also usefull. (Conrad Turner)
sonophos comment on this: Little PIES Rock! But don't throw out all the trays turn them into craters. Don't forget to consult DJ Pie Safety though.
- Don't just see, look! It is amazing at what you can do with common household objects. For examples, look in the original "Rogue Trader" book where they take dessert pots and turn them into buildings, or deodorant bottles into tanks. (Conrad Turner)
-There are 3 types of things that make nearly any model look cooler:
(1) Rivets / weld lines, (2) Cables/tubes/wires, (3)Techy Gubbins (Tesla coils And Most any part from a necron gun) [from "Primarch of mechmarines' sig

]
- For
GW plastic, clip the part from the sprue close to but not flush with the part with a sprue cutter, then carefully cut the small remaining sprue nub with a sharp razor blade, then use the back (non-sharp edge) of the blade to scrape anr remaining extra plastic. (alterEgo)
- Resin (esp from
FW) can shatter if you try to break off the big chucks they sometimes come with. The following also applies to really thin plastic parts like tank grab rails.
Nip the sprue off a little bit at a time. The aim is to reduce the stress that the model is put under when attacked with clippers.
I sometimes even use my saw on tiny parts. (bubber)
- If you have the patience, dont assemble the entire model right away. keep bits that block areas to paint separate and glue using
CA glue once the non accessible areas of the model are painted. (alterEgo)
- Drill out the bores on guns, the bit size that comes with the
GW drill is perfect for bolt guns. The rough drill sizes (hard to find locally, places like micromart.com are your best bet although expensive) is NO 63-65 (the smaller the number the bigger the bit, these are all very close to the same size and will work for most pinning and bore drilling). (alterEgo)
- You can use a file instead of a scalpel for mould lines.but its better not to. I have ALWAYS regretted a mould line I missed or left on...always. which leads to:
- You cant make up for hard work with money unless some one else is doing it for you. (Zariart)
Photographing
-Use a tripod when taking photos.
If you can't afford one, then use a small beanbag, stack of hardcover books or something that will hold the camera stable. NOT YOUR HANDS. Handshake is the primary cause of crappius imagus.
RTFM for the camera. It will cover all the basics you need to know. Especially you blokes who 'never read the manual'.
Like what questions?
1. Does Macro work with self-timer on this camera, or is it an either/or function?
2. What is the minimum focus range on the macro setting?
These are important. #1 helps to remove even lingering camera shake from the pressing of the shutter button. #2 if your pictures are still fuzzy, you are too close.
The camera will ALWAYS exaggerate any imperfections (you are magnifying something a bit over 1" tall and usually only seen from 3' away to an image usually around 6" tall seen close up).
If you can't paint exceptionally well for 6" away viewing, paint for 3' away (like theatrical makeup, really. Looks bad close up, is meant to be seen clearly from the back row.). (chromedog)
- When taking photos of my models I set up the camera about 1m away & zoom in, NOT using the macro function.
This allows me to get more of the model in focus and reduces paralax error.
Also use a low aperture setting (f-stop number) like 4 rather than 8.
It's what I did to take this photo:
http://www.dakkadakka.com/gallery/267316-World%20Eaters%2C%20Zhufor%20%28final%29.html (bubber)
Other
- Don't get hung up on what other people say about your models. If you want to paint dwarves with green beards, do so. But take on board constructive criticism. It is meant to help you. Ignore people who just put your work down without giving you a reason they don't think it is good, or giving you a hint on how to improve. Remember, there will always be people with greater or lesser skill than yourself. (Conrad Turner)
- Don't expect everyone to have the same tastes as you. Your professional standard painted furry army may be the best thing you ever did, but not everyone will like the idea of battle Sisters with cat ears and tails! (Conrad Turner)
-Constructive Criticism. This seems to pass by some rather easily but it is important to give as it is to take. "Good job", "great", "this sucks" and "terrible" are all the same. They are criticism, but without the aid attached to it and will not help the painter. However unlike negative criticism, positive without any more information added to it can encourage the painter; though should be used sparingly. While it is best to try and help out with tips, don't try to force them. Don't be afraid to give out constructive criticism if you feel the need, if you word it right you'll help in the long run.
It also helps to try and not have a condescending tone as they may take it the wrong way and ignore what may have otherwise helped them achieve a new standard. It should also be somewhat objective; ignoring who did it, but focusing on what they did. (n0t_u)
- Personally i much prefer using DIY hobby knives to store bought hobby knives (way more precise and better control
imo). If you want to give it a go simply take a stanley blade and wrap the top in duct tape/parcel tape to make a handle. (Perkustin)
- Listen to radio 4 or 5 when painting. For non-
uk readers talk/news radio. Not only is it less distracting but you also might learn something . Never paint infront of the TV, it is distracting and frustrating on both counts
lol. (Perkustin)
- liten to music while painting/moedelling. If you only listen to a small selection of tracks, you will always get inspired to paint or model if you listen to them (MrMerlin)
- Ultrasonic jewelry cleaners will take the paint off old metal and plastic minis with plain tap water. No need for toxic chemicals (I have two toddlers so I don't like having brake fluid and such around) and it gets paint out of the niggley little corners.
This lets you paint up minis and repaint them as many times as you like so you save money when starting up.
Always keep the first mini you paint so you can see how much your painting has improved. (Sonophos)
Specific:
Paints and Painting
- If you are willing to paint ANY miniature to a better than tabletop standard, you must learn about colour theory. This teaches you about mixing paints, the way light reacts on different textures, the way light reacts on metal etc.
Simply google colour theory and you will get loads of info. Beasts of War also do a great video on colour theory.
This will also leave you with NO motivation to paint at all. Starting a painting session by having to clean you workstation is really annoying. A better thing to do is clean up afterwards, motivating you to paint more WHILE your painting. (if that makes any sense to you...) (MaximusPrime)
- if you want to paint white quickly on a black undercoat, use astronomican grey for a first layer. Its a foundation paint and covers very well (MrMerlin)
- when painting gold, either use a strong yellow (lyanden darksun) or a mix of gold and brown for the first layer. Then apply shining gold and wash with ogryn flesh. (Because the gold is very bad at covering, you want a layer of yellow under it) (MrMerlin)
- if you need a good method for painting ork skin, head over to cattatafishs tutorials (MrMerlin)
-Girl painting has a number of good and varied how to videos:
http://www.dakkadakka.com/dakkaforum/recentTopics/showTopicsByUser/39199.page (sonophos)
- doing rust: there are two ways of painting rust; either washing or drybruhing. for both, you want a 50/50 mix of bestial brown and blood red. apply it over the metal after a wash of badab black. for more rust, either apply lots of drybrushes/washes, or do both. looks great
imho (MrMerlin)
- For gold, I use dwarf bronze as a base and then highlight with gold, because I like a darker goldish color. Also, wash the bronze with any appropriate wash (badab, gryphonne, devlan) before highlights (Dabedman)
-The boxes your minis come in, they make very nice material for
Wh40k cardboard. Just turn the printed side inwards and paint the rough side. (Dabedman)
- Badab black is the be-all-end-all wash color for the cheap. Just thin it to your liking and go nuts. (Dabedman)
- for simple but good looking metal, just wash a flat coat of boltgun metal (or epuivalent) with badab black. (MrMerlin)
- To apply a black haired 5 o'clock shadow (or stubble to a shaved head) to your light skinned human or space marine models, mix some codex grey with a little bleached bone until you get the shade you want. Water it down a bit and apply multiple LIGHT coats to the areas. If you want to do brown or blonde hair replace the grey with golden yellow, scorched brown, or bestial brown. Looks great and adds to the realism. (Thare1774)
-When painting on damage to tanks don't just splash some silver paint on the model.
Vehicles (real ones) have a primer coat. Sometimes this is black but not always. It can also be red oxide (dark flesh is good for this) or grey (eg codex grey).
First add the 'primer' colour then add the silver / boltgun metal.
For more realistic scratches you can add shaddows & highlights to these damaged areas. (bubber)


 Flesh Eaters 4,500 points


 )
)

 More have died in the name of normality than ever for strangeness. Beware of normal people.
