So I finally got off my duff to start work on my new gaming table. I've been using a homemade folding table-top, but the playing surface is only about 40" by 64". I did quite a bit of research and sketching before I found myself a design that was cheap and effective. Actually, the table I'm basing my design on was spotted on Dakka Dakka!
As I purchase supplies I will keep a running total of supplies needed for the project. I'm expecting the table to cost me about $150, but we'll see.
Supplies
- 9 ea. 2x4 x 8'
- 2 ea. 4x4 x 8'
- #10 screws, 3" (box)
- #8 screws, 2.5" (box)
- 16 ea. 1/4" carriage bolts (6")
- 1/4" washers
- 7/16" nuts
Total Bill: $85
STEP 1: Design
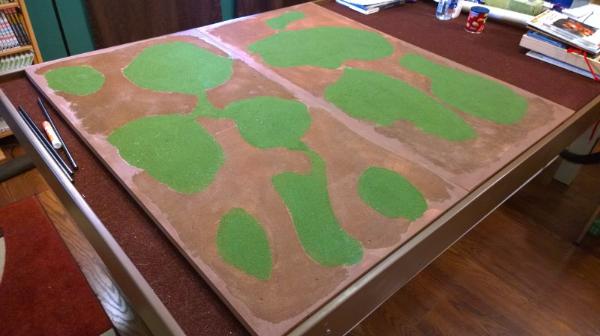
Pardon my corny "Paint" drawings but it's light years better than my doodles on graph paper. The top layer will be 4' by 8', with a 4' by 6' playing surface and a 2' by 4' storage area for dead models, reserves, etc. The playing area will be covered by speed cloth or felt, and the 2' by 4' area will be stained or painted. Around the edge of the board will be a 2" "dice lip" to keep stray dice from bouncing off the table, and help keep those Realms of Battle boards together.
The bottom level will be 12" off the floor and will serve two purposes. The bottom area will serve to keep the legs firm and prevent the table from wobbling, and will double as a shelf area for boxes, terrain, etc.
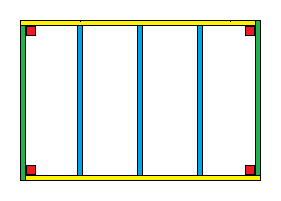
The four outer pieces (yellow and green) are offset to add strength, and the blue pieces are included to add stability and strength. The red squares will be the 4" by 4" table legs.
On the lower level, the 2" by 4"s are attached to the legs about 12" off the ground to provide stability to the table and to provide a storage area.
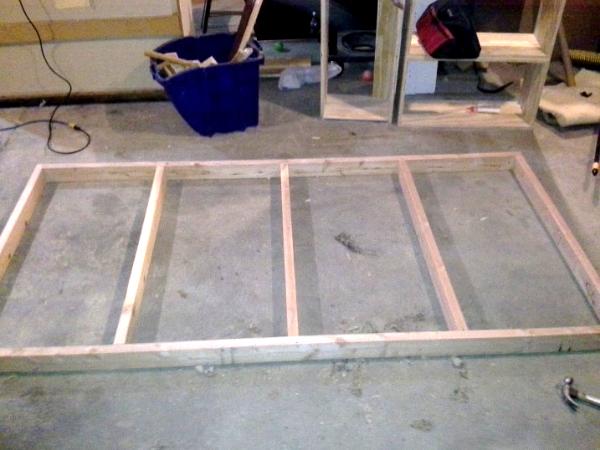
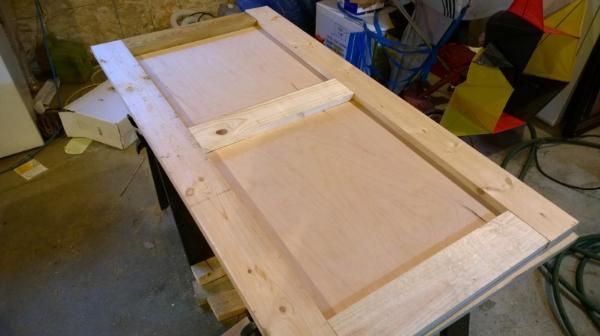
STEP 2: Top Frame
Cuts
2 ea. 2x4" by 46.5"
2 ea. 2x4 by 94.5"
3 ea. 2x4 by 45"
Despite the name, 2x4s aren't actually 2" by 4". The board is actually about 1.5" thick, so when you offset the 2x4s for the project, you're adding about 1.5" to the overall length of the table. Since I want to build the table at 4' by 8' and not 4'1.5" by 8' 1.5", I'm going to cut that extra inch and a half off. Laid out on the floor, the pieces look something like this:
At this point, I made a boneheaded mistake. The saw blade usually takes off about 1/8" from the wood, and I cut every short piece on the wrong side of the mark. SOOOO I ended up with a table that's about 1/4" or so (two cuts per board) thinner than it's supposed to be. I know it's minor but I couldn't help but kick myself for such a dumb mistake.
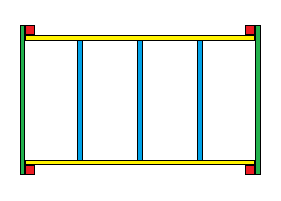
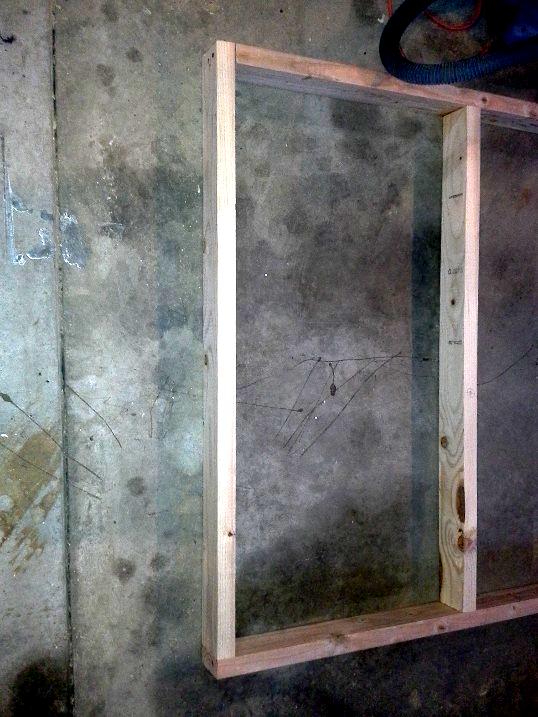
I attached each of the four outer pieces with two #10 screws on each corner. Remember, I wanted to offset the boards so the corner looks like this:
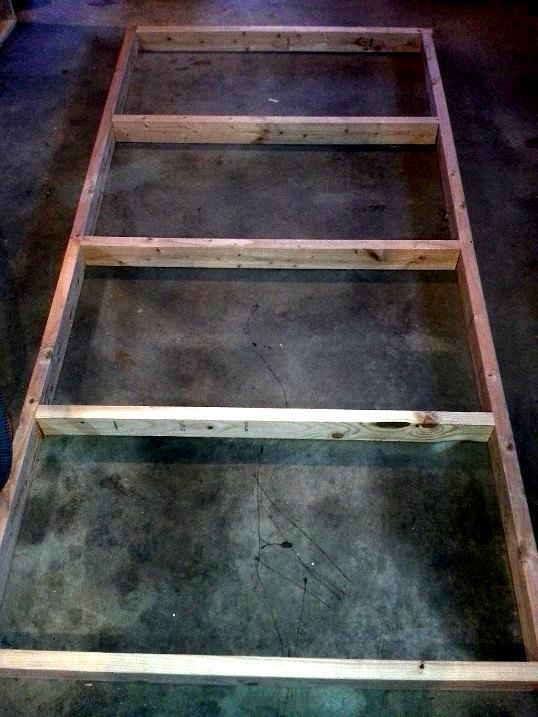
Finally, I added the inner supports every 24". This will give me a place to attach the plywood coming later. It will also add a lot of strength and stability to the table surface. Once it is done, it should looks something like this:
If you're trying to recreate my table, make sure your 2x4s are straight and there is no warping or twisting. This is easy to do at the lumber store, simply by taking a good-looking piece of wood off the rack and placing it on the floor. If it doesn't lay flat, find a different piece. You might get a few weird looks but it's better than buying defective wood and trying to make that work out.
STEP 3: Legs and Bottom Frame
Cuts
4 ea. 4x4 by 30"
2 ea. 2x4 by 84"
2 ea. 1x6 by 45"
3 ea. 2x4 by 35"
I agonized over the length of the table legs. A standard table is somewhere around 30". I thought about going all the way up to 48" because a lot of gamers (myself included) like to stand while playing. However, I also like to be able to sit down and still be able to see what's going on. I could by stools or captain chairs, but stools are uncomfortable, and captain's chairs are expensive. In the end, I went with 30" so I can use standard folding chairs.
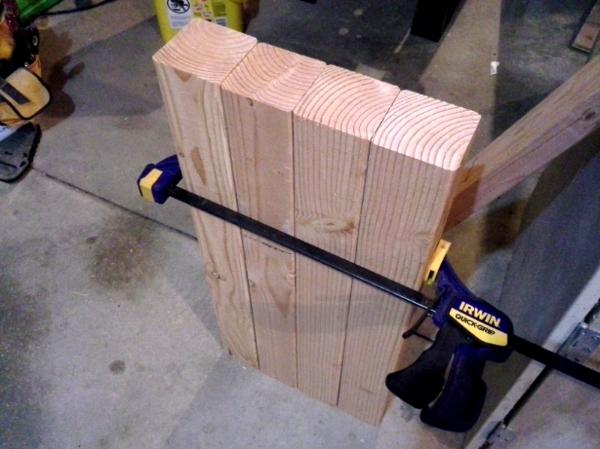
After cutting the legs, I butted them up together to make sure they were all the same length, then clamped them together. Then, I used my sander to sand down any inconsistencies in the lengths.
Now, I knew that the carriage bolts were going to be just a little long, so I used a spoon drill bit to drill down about 1/4". I didn't want to drill too deep, so I used a piece of tape wrapped around the bit for a visual indicator.

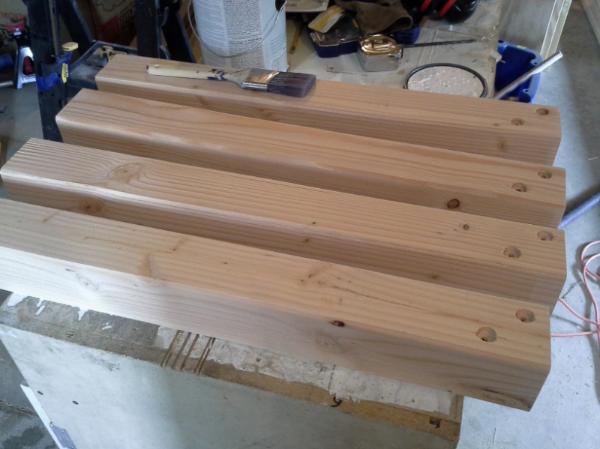
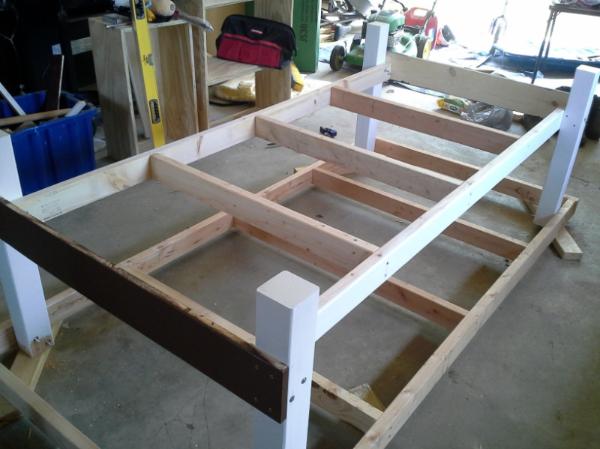
At this point, I made a small change in the design. Rather than put the legs directly in the corner, I offset them by 6" so give a little bit of extra room on the end of the table. I also did it to prevent interference from the screws in the top frame. The two 1x6s are used to brace the legs, and the two 84" 2x4s provide cross-table support. The supports are installed 15" below the surface of the table, to give some extra room for storage.
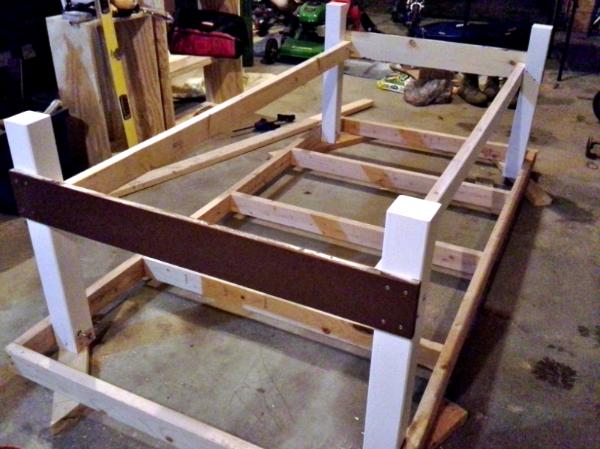
It took me quite a while to finish Phase II because of the design changes, and because I'm sanding and painting the sections as I build. Because I want the paint job to last a long time, I painted each part, sanded it with 120 grit, and then paint again. At the end of Phase II, my table is finally starting to come together.
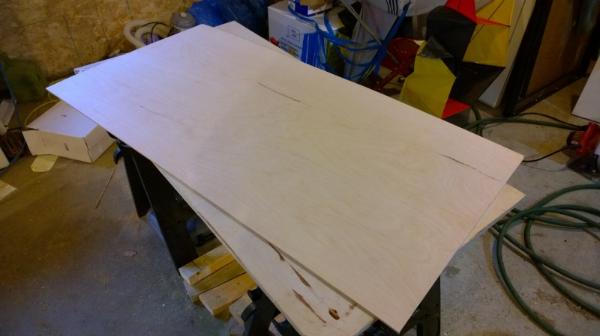
 STEP 4: Dice Fence and Plywood
 **COMING SOON**


 Imperial Guard