A friend of mine and I got the RoBB a year and some change ago. We also picked up the Secret Weapons Destroyed City board. It took some time to get this done, but once you get everything you need for it, it goes pretty smoothly. I searched around for a lot of ideas on how we were going to do ours. It's like skinning a cat, 100 ways to do it and generally they all looked good. One thing I will say is everyone has their own style. So this one is mine. I hope it helps and if you have any questions feel free to comment or
PM me and ask.
Prep.
The first thing I did was wash the board down. Soapy water and a scrubber. I wanted no chances that what I was going to do would flake off. I set it up outside, had plenty of room and let the sun dry it after I rinsed it. During this drying stage I went to Lowes with a swatch of Steel Legion Drab and Ushabti Bone. I got two quarts of latex paint of each. I could've went acrylic but I decided to do this instead. Latex needs more time to dry and away from high heat. As long as you follow those rules you will be fine. I went with latex because for me it was going to be easier and cheaper to roll and apply it.
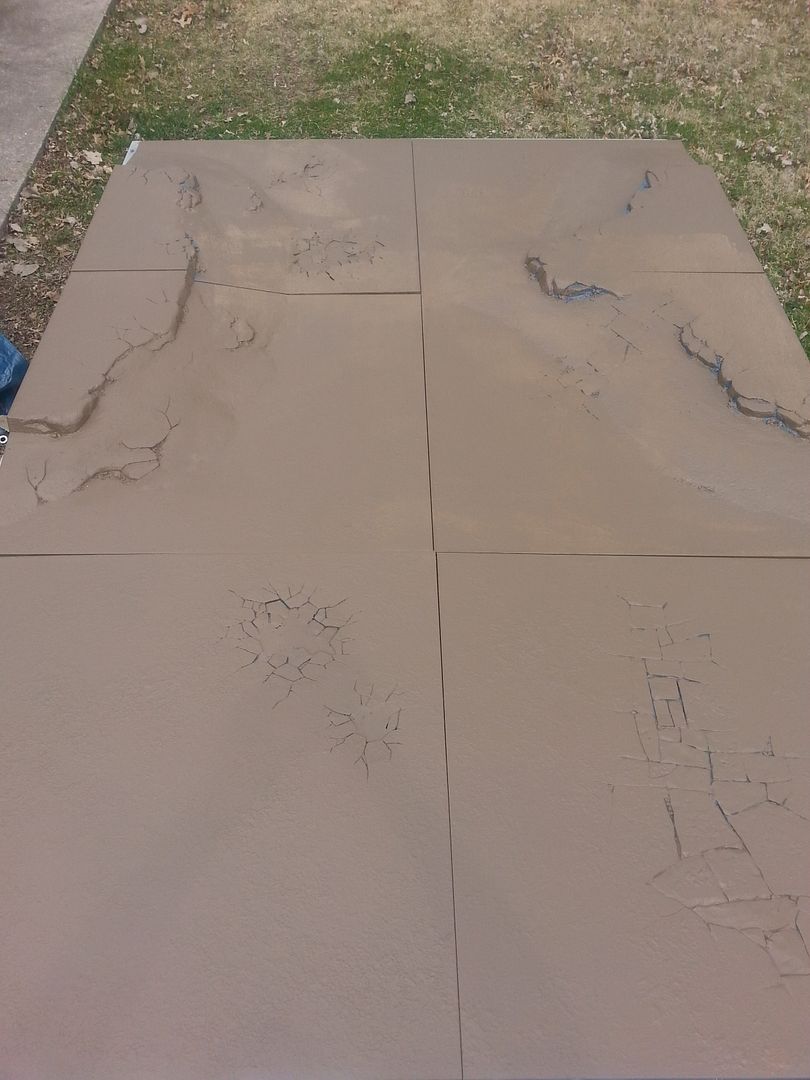
Steel Legion Drab rolled over the whole board. If you look close you will see that I missed some spots. Some of this was intentional. I planned on airbrushing parts black and painting in a swamp. I will say with latex, you obviously can't thin it with water, so be careful if you use one brush and save it later for more applications (washing the brush).
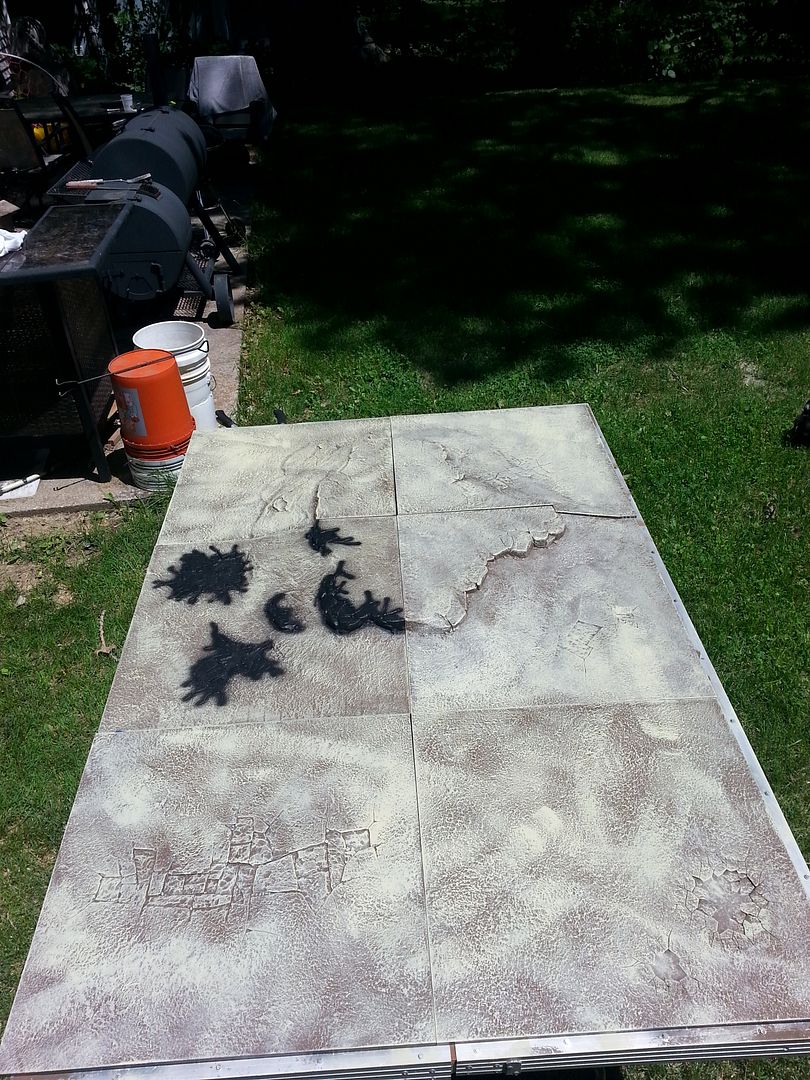
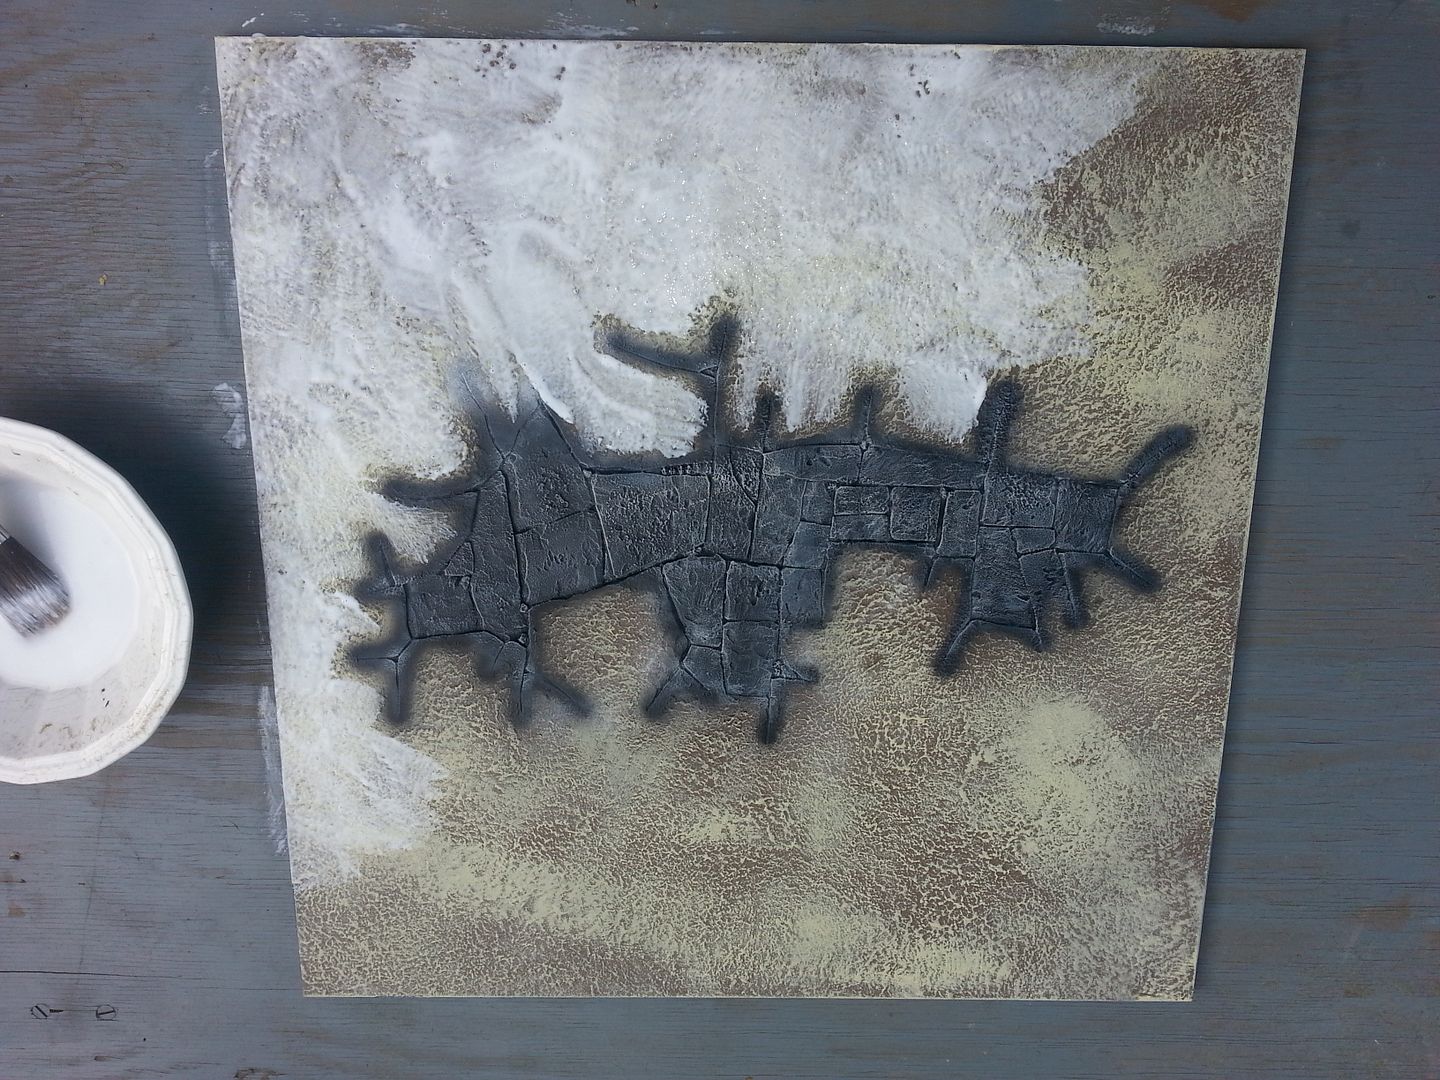
I did a VERY liberal dry brush with the Ushabti Bone. The one black tile was the test tile. You need to let the latex dry well overnight. Now to move onto the next stage, I took the time to matte dullcoat the board. I decided to do this here. This made the next stages much easier to do. Later, we applied more protection, but this small step here helped preserve parts of the board during the process.
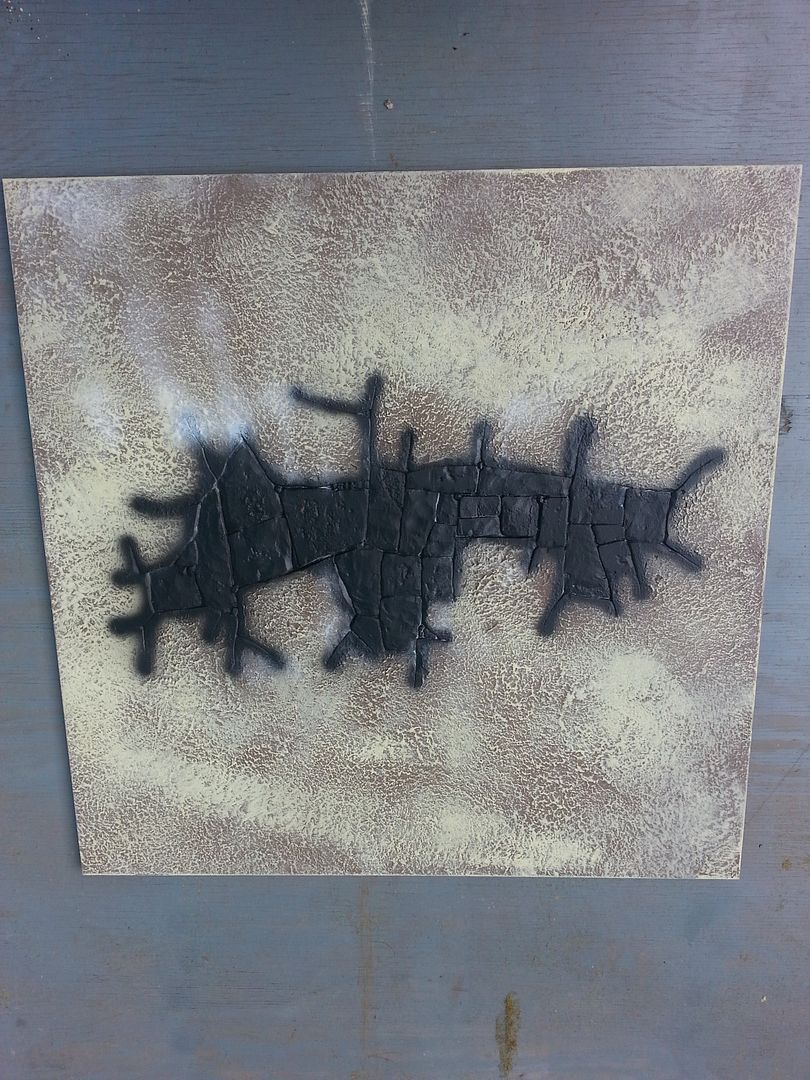
I airbrushed all the stone black. This includes the pile of skulls that was covered with an epoxy.
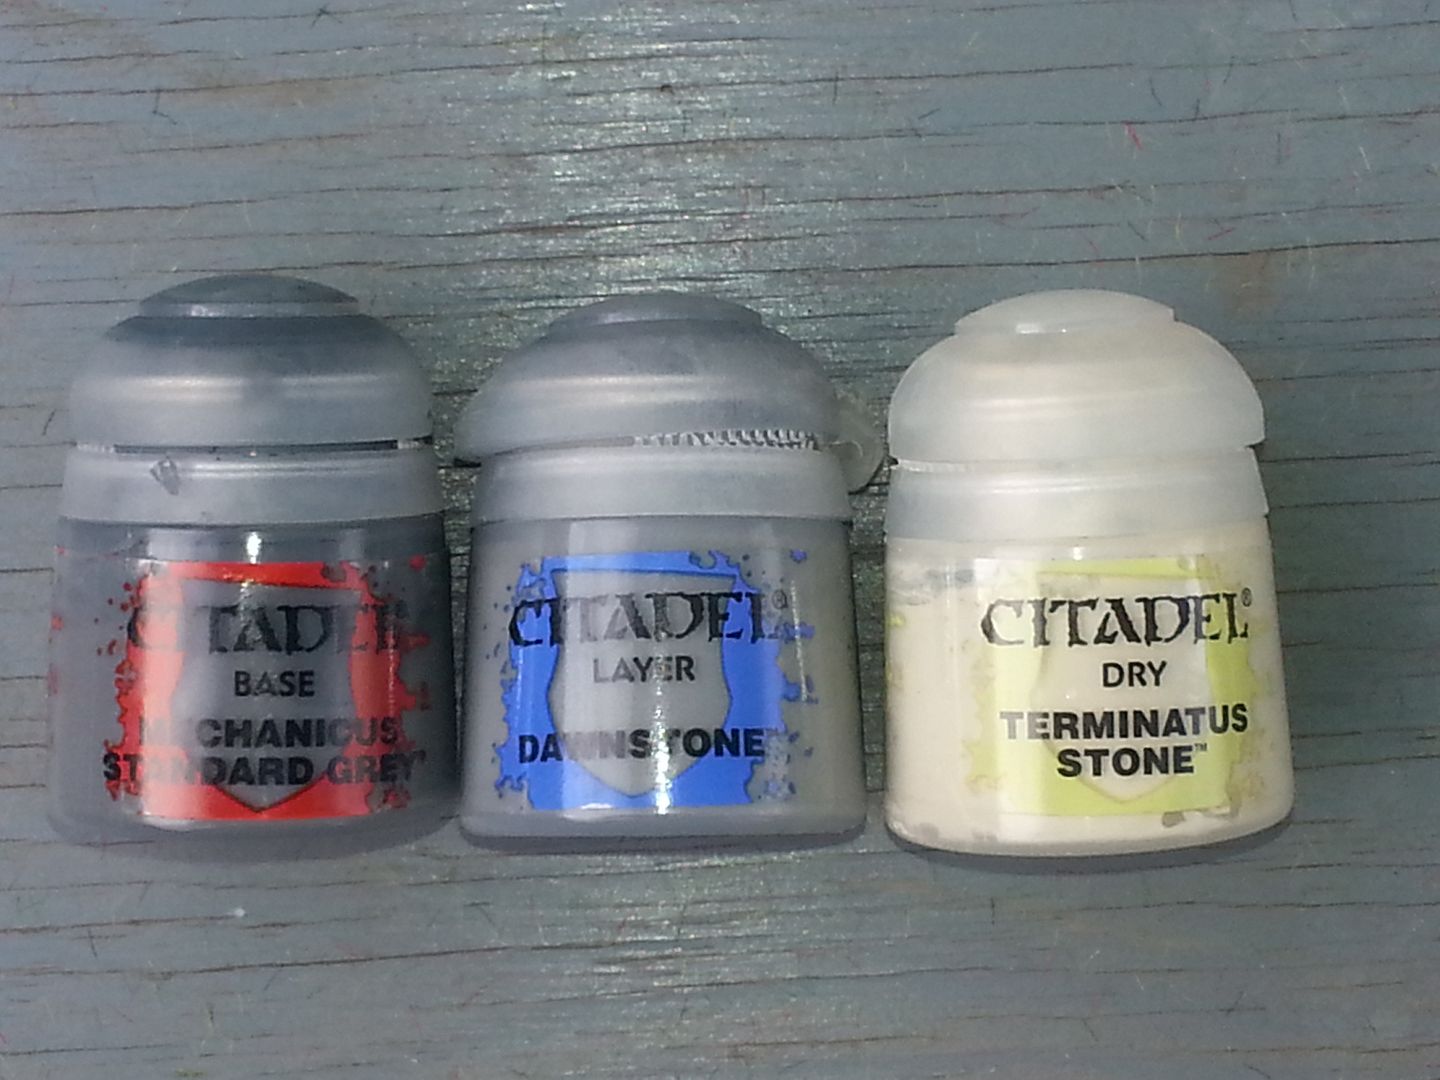
The colors I used on the black parts.
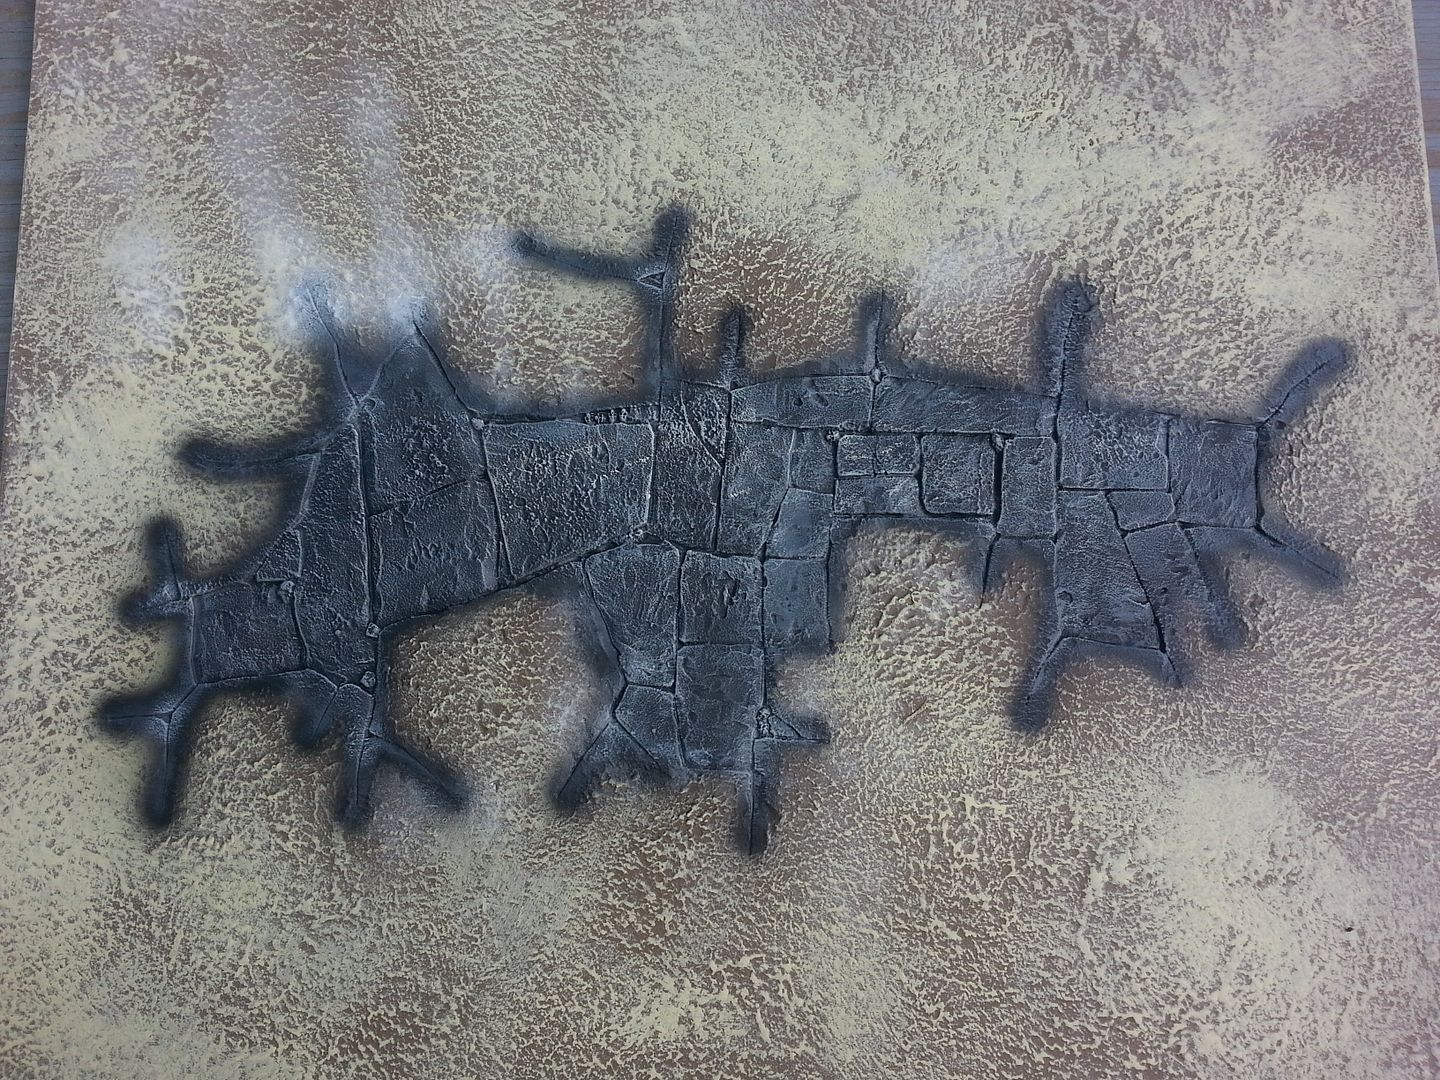
After all the black progression is completed. Small mistakes here are really no big deal and you will see why.
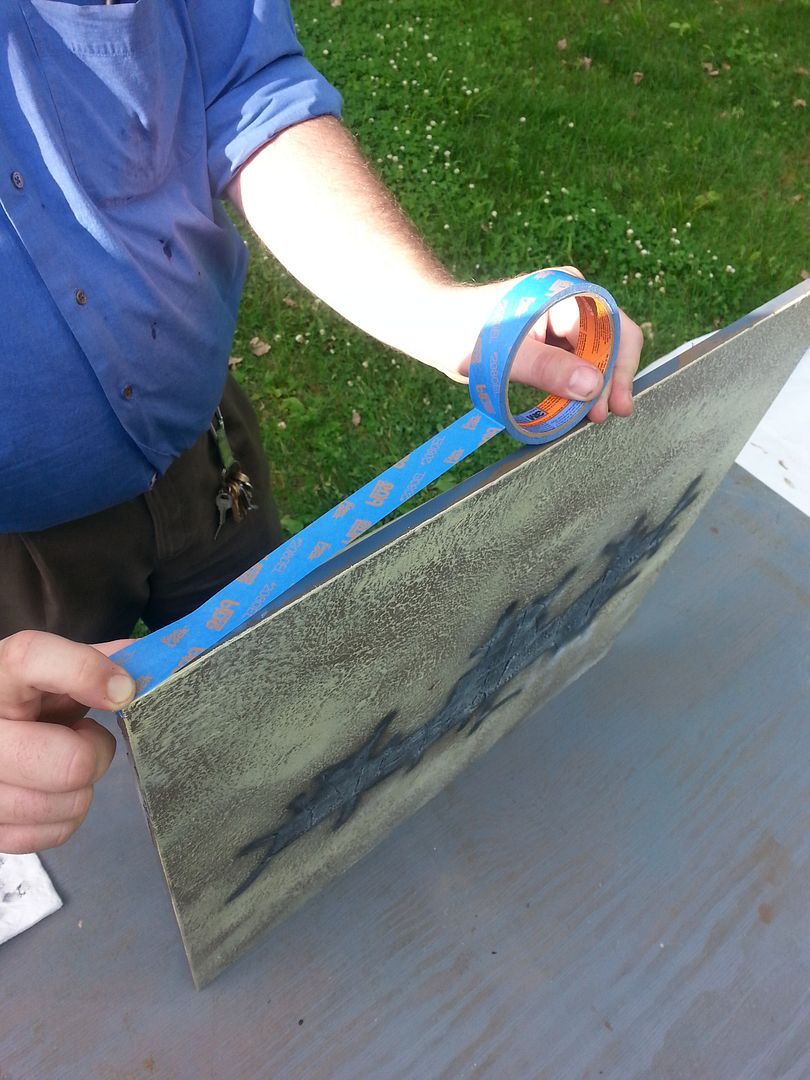
Make sure you tape the edges here. Now I didn't do this when I painted it but I didn't really feel I had to. Some folks do and that's great. It's really up to you. But for the gluing and grassing this is a MUST stage. Painters tape is the easiest to use. I had two rolls, one large and one thin. I used both. An extra set of hands help if you can get your friends to help.
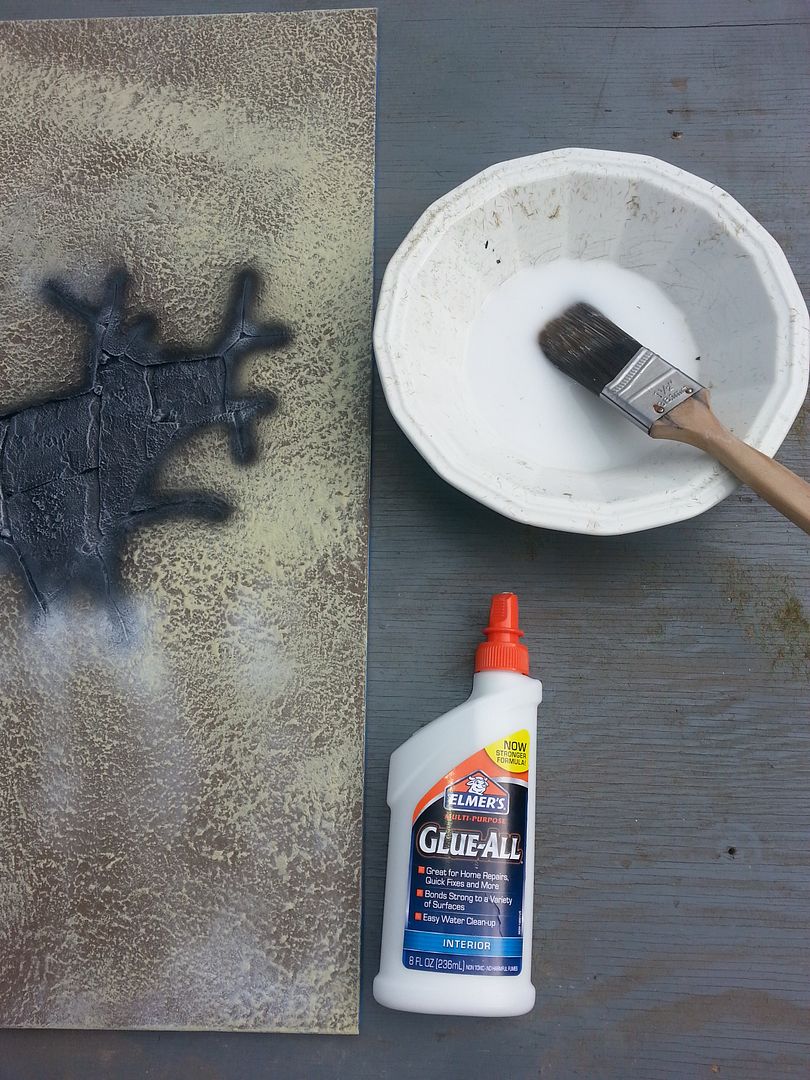
Glue. OK friends, if you take anything away from this here is point 1 for tips. Spend the extra for the heavy glue. Guys and gals, the school elmers is NOT good enough. It will work in a pinch but I did both and by far the stuff you get at the hardware store is superior. Get a bowl and add a little water to it. Squeeze out the glue on your board. Paint it around with a painter brush, dipping the brush in the water. This is a gradual thin and I found it worked great. You could mix the stuff before, but its a bigger mess than what you need. I painted each section into areas, undefined so I could mess the grassed zones. no geometrical lines to make it look natural and thinning in places, like a swamp. Small subtle lines running along the base of hills and rocks for instance.

Static Grass.
My
FLGS proprietor helped me out with locating the amount of grass and color I wanted. When you get this stuff in bulk it can sometimes clump up on you. I was able to get around this by using a small strainer. Put the grass in the strainer and tamp it along your hand, covering the areas you want grassed. All of the clumps worked themselves out on their own in the strainer.
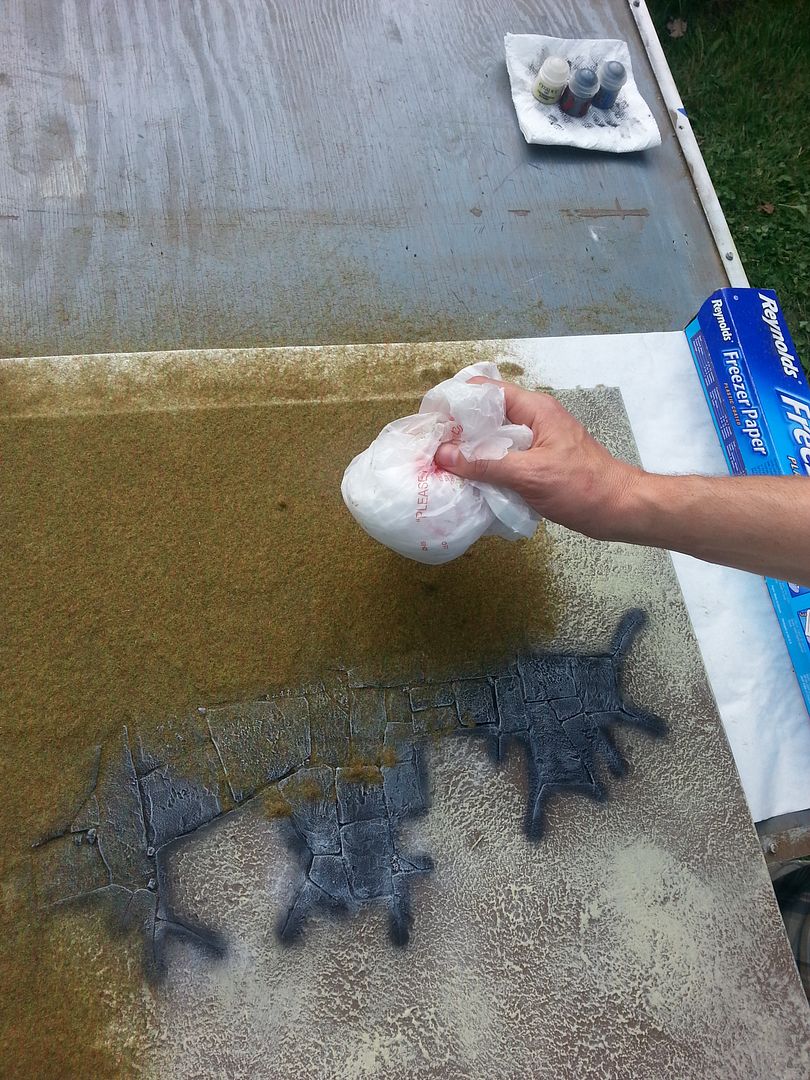
After applying the grass, I balled up a bunch of plastic bags and used them to press the grass down, making sure I had a good connection with the glue.

Repeat the last few steps and this is what you get (shaken off that is). Some subtle lines but it is what I wanted. I added some discolored grass and flocking to give it a blended look.
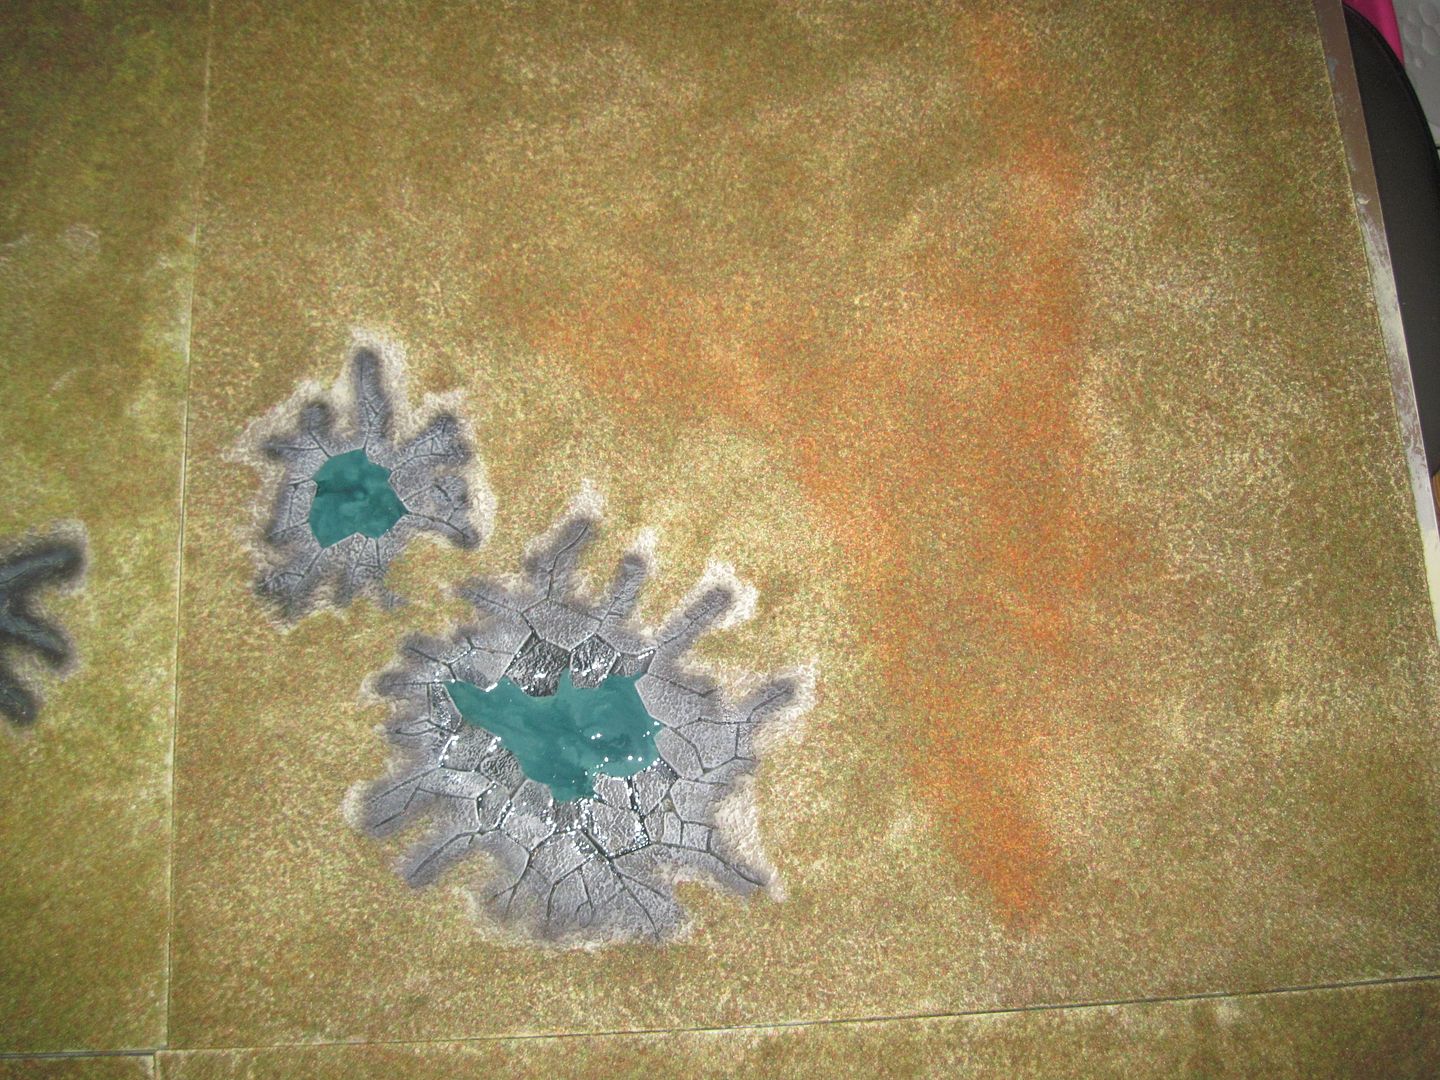
Ain't no bugs -er skulls- on me! I painted a mix of Thunderhawk Blue and Warpstone Glow for my swamps/skulls. While it was still a little wet, I used the Coelia Greenshade. I put in a wet blend to it. When it dried I put on the water scapes. On this tile i blended in some other grass.
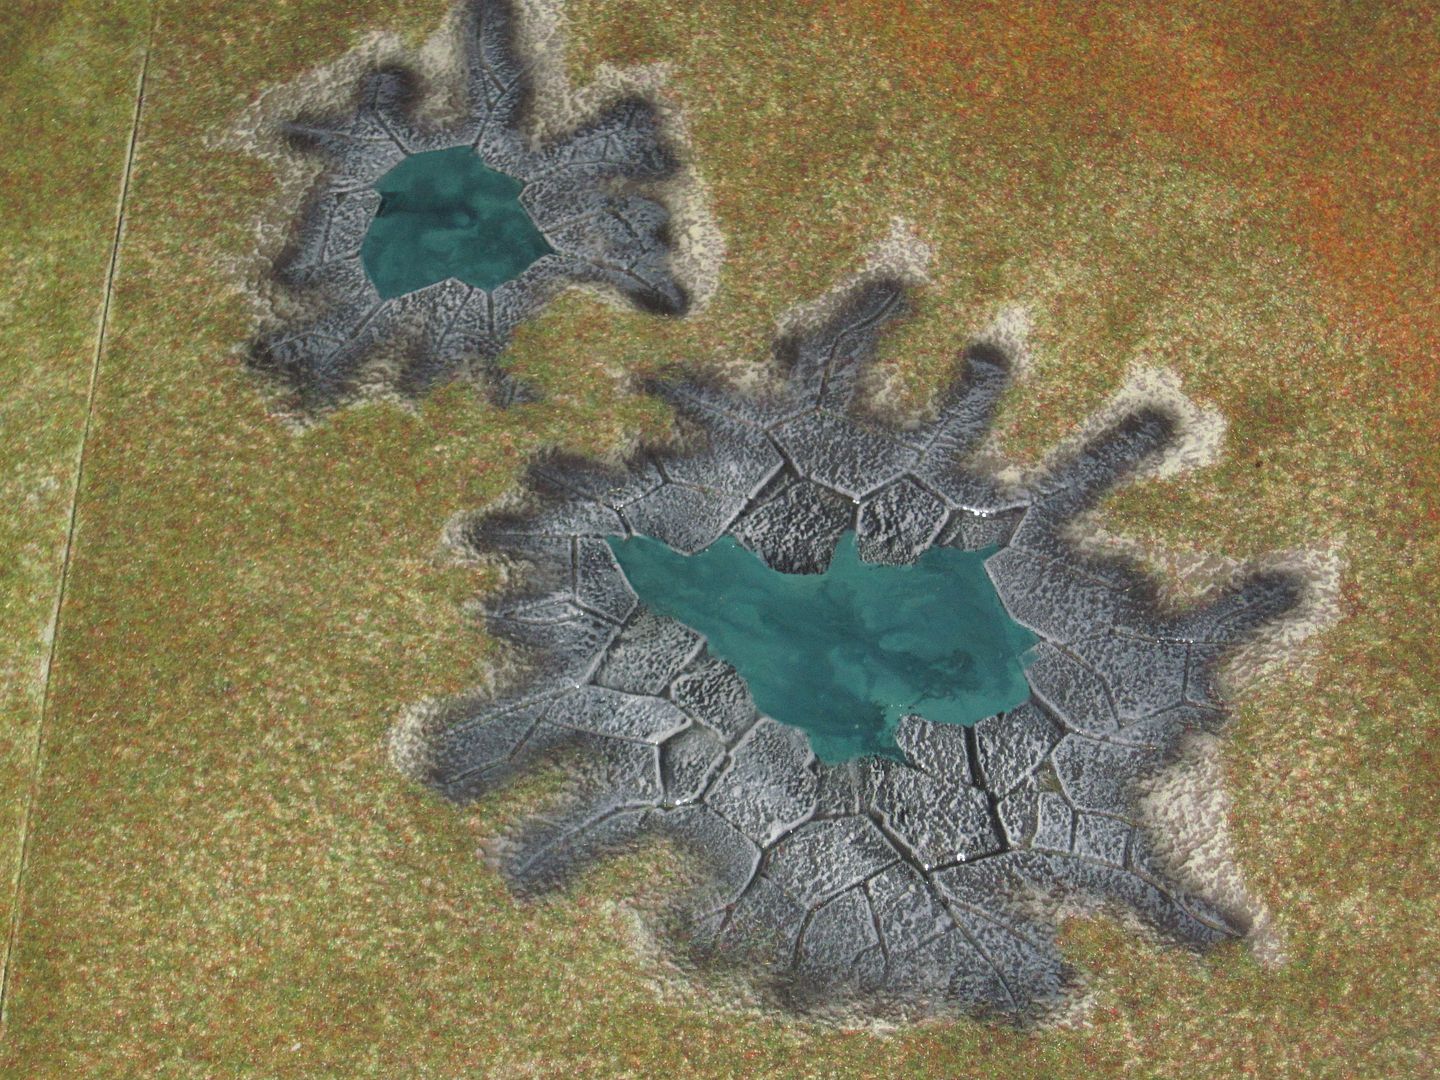
Closer of the swamp.
I added a final coat of matte medium over the ENTIRE board, covering the waterscapes of course. Get a spray bottle and half and half the stuff with water. Let this dry overnight. You can even fill in some areas before you spray it on to apply to places you wanted more fill in. The Matte Medium is like a big spray of glue to help your flocking and static grass stick. It drys clear and REALLY keeps the static grass from falling off.
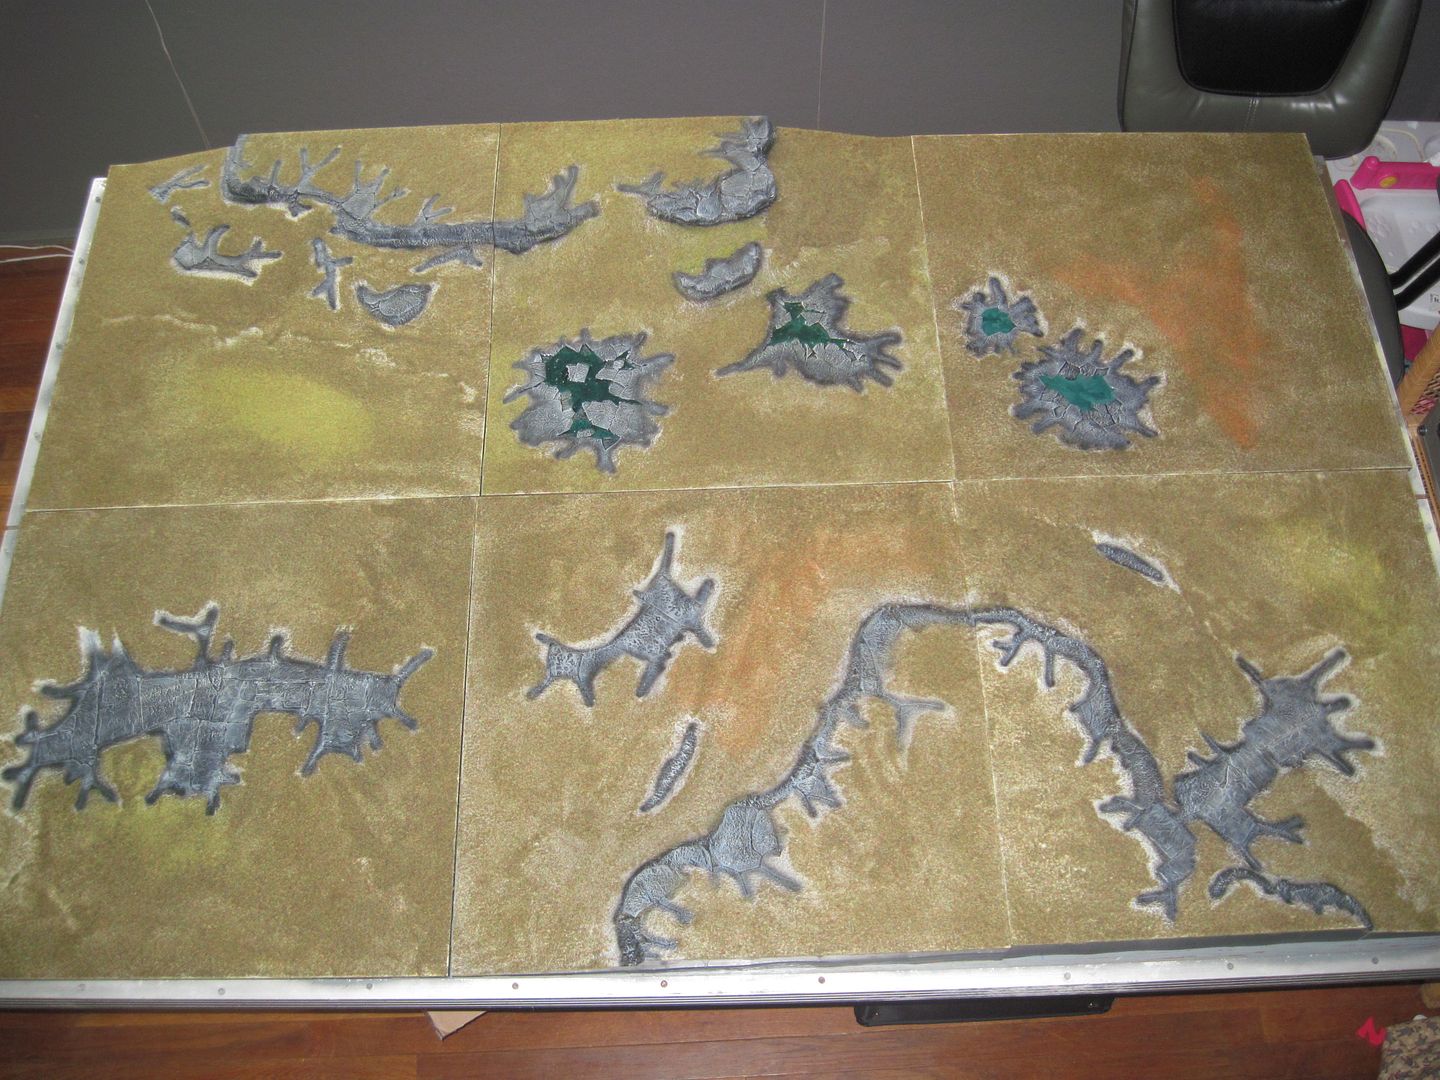
Finished! All said it took somewhere around 30 hours for me. But I took my time and did things maybe others wouldn't. There are lighter and darker patches, water, thicker vegetation and rock. It's the way I wanted my board to look. It's like any other model you paint, it has its own character. Some of the best advice I got while doing this was not to be a perfectionist on your board. It's only the back drop for the best painted models you put on the field.
I hope this helps you finish your board.
PM me if you have any questions.
Josey


 Necrons - 3000 pts
 HH Imperial Militia/Cults - 1000 points Check out my P&M blog! (
 Bretonnia - 4500 pts

