@Malika2: Thanks, man!
@Don Qui Hotep: Kind words. I appreciate the charitable description!
@monkeytroll: I know, right?

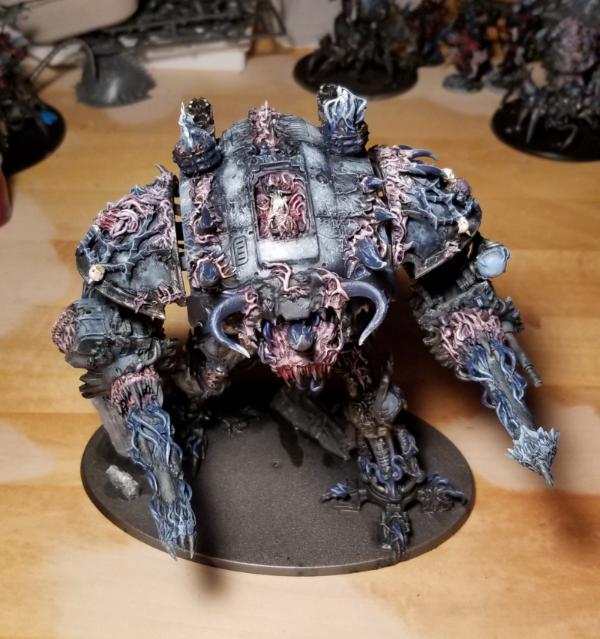
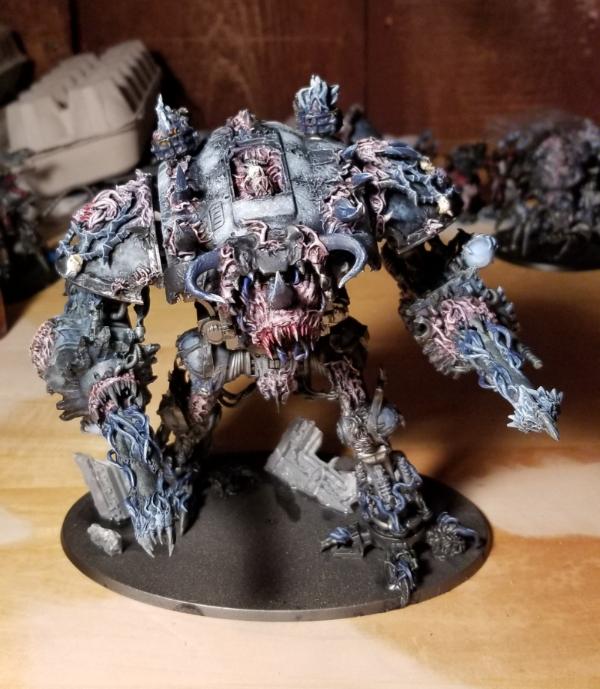
Well, the project lurches unsteadily forward. Some painting progress on the first two knights -- but no sharing yet -- I want to get things just a little further along before posting on that.
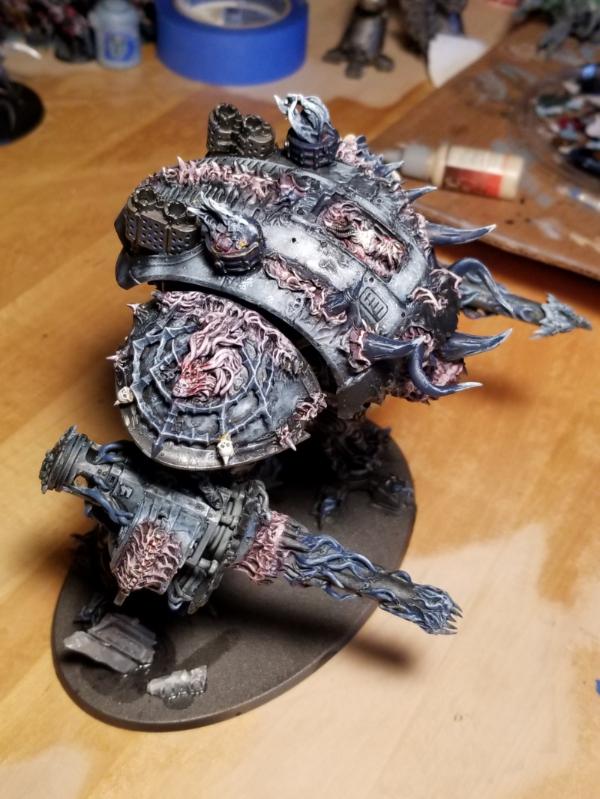
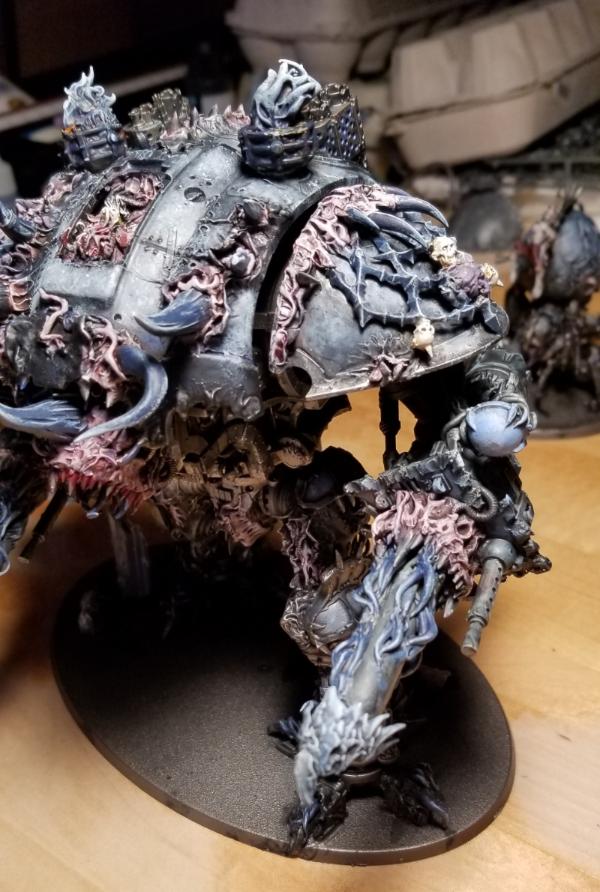
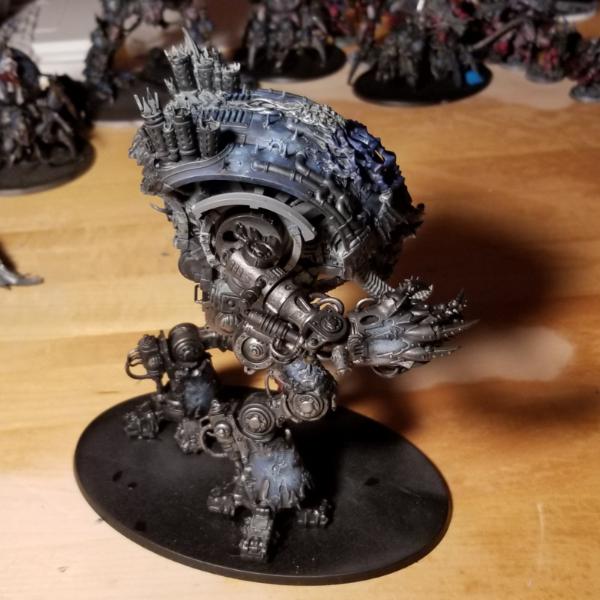
On the 3rd knight, meanwhile (meaning, the truly Tzeentchian creature with the twin dragon/bird heads), I've been working on sculpting and converting details, managing to (pretty much) finish up the two shoulder pauldrons.
Here's a look at the first:
and
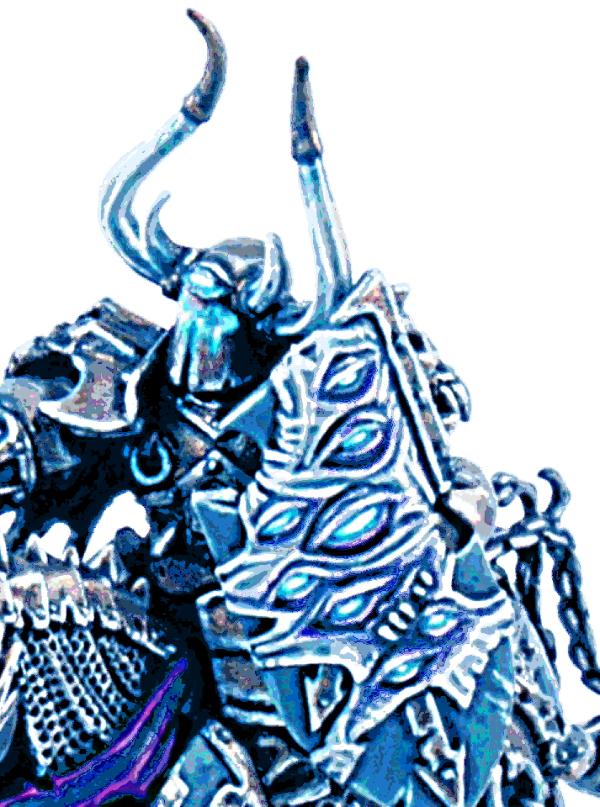
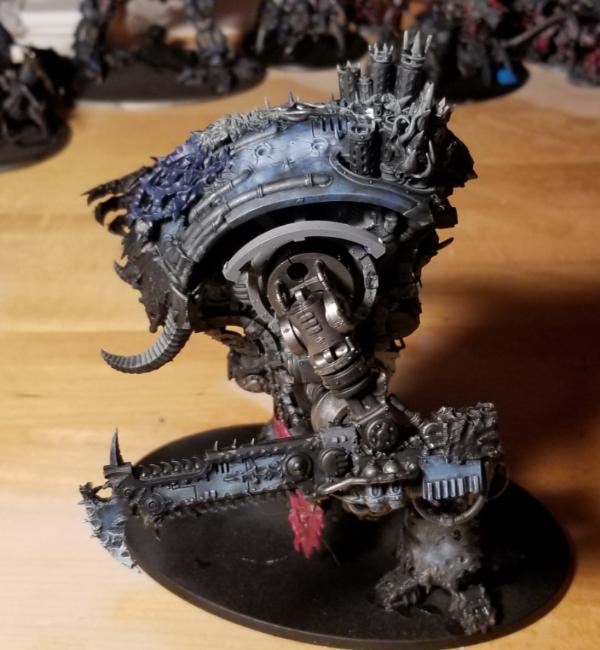
On the other side, I took a different approach. I have always loved one of the shields on the old
WHFB chaos knights: this one:
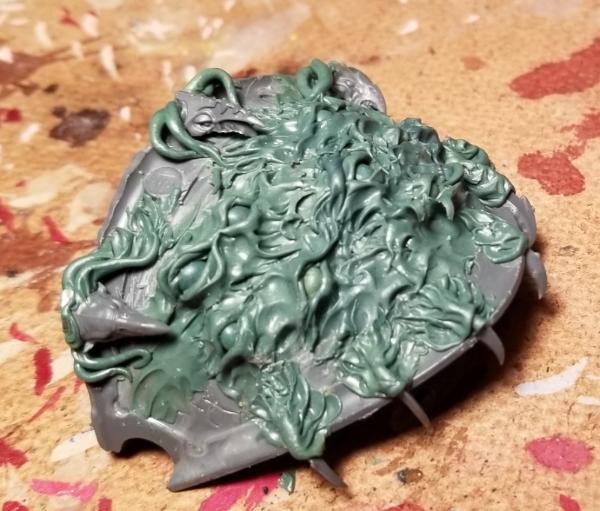
So I decided to try to craft a similar look for my second pauldron. Since the process was so involved, and since I've so appreciated some of the step-by-step hobby documentation in other project logs that I've admired, I thought I'd offer a detailed look at how I went about this part of the whole.
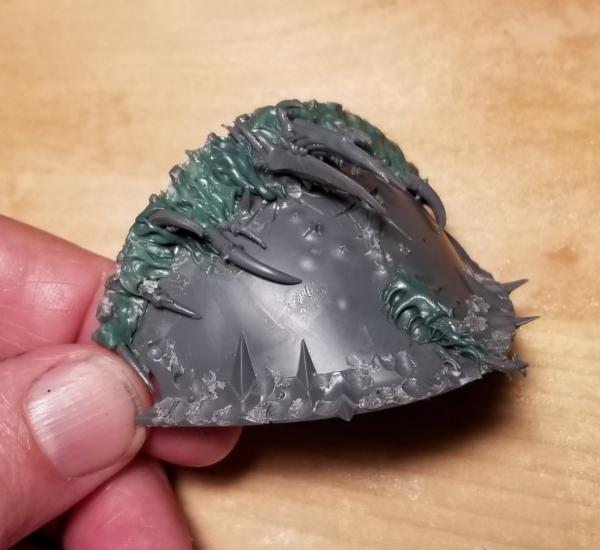
I started by drilling a random spray of holes in the pauldron:
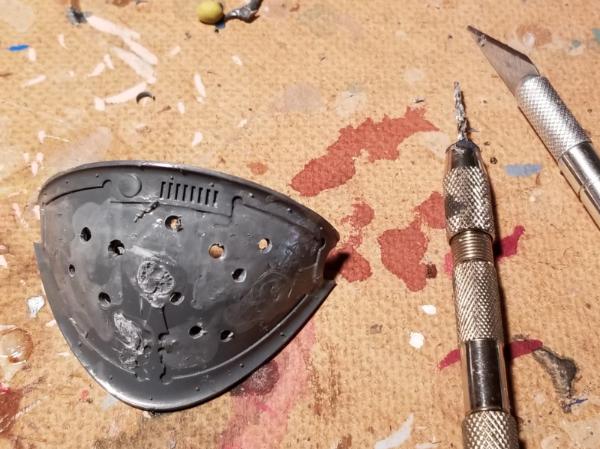
(As you may also be able to tell here, I also "painted" the smooth surfaces of the pauldron with a thin coat of plastic cement, to melt and subtly misshape it -- though as things turned out, I didn't really need to have bothered with this step!
)
Anyway, next step was to superglue small balls of greenstuff into the holes, for the eyes:
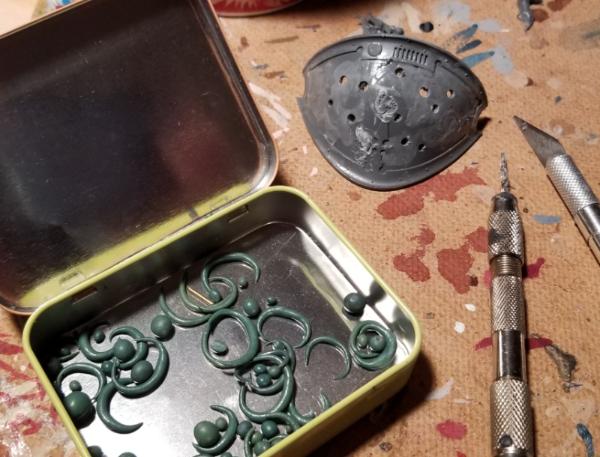
You can see the tin of greenstuff bits I drew from for this: when I'm sculpting, I frequently end up with excess already-blended greenstuff after finishing with a particular round of sculpting. In these cases, I use the leftover (which would otherwise go to waste) making small spheres that might serve as eyeballs or bubbles, as well as rolled, sharp-tipped, curls that might serve down the road as claws or talons or teeth -- as in my case, there is always more harrowing to come!
Having already dried and hardened spherical eyeball bits makes it much easier to then layer in folds of flesh/harrowing, like so:
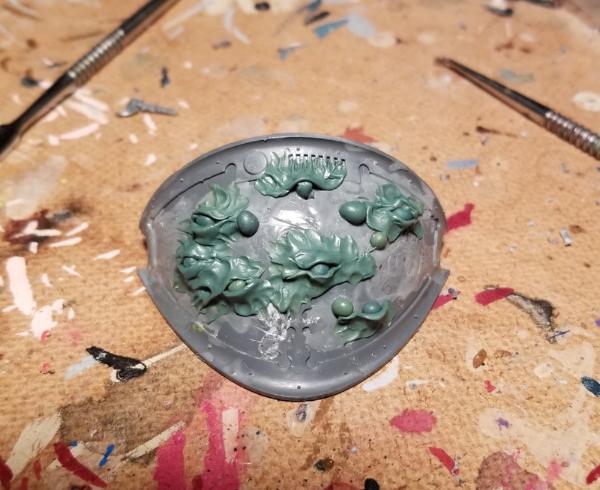
... and then (I find this is best done in multiple stages), like so:
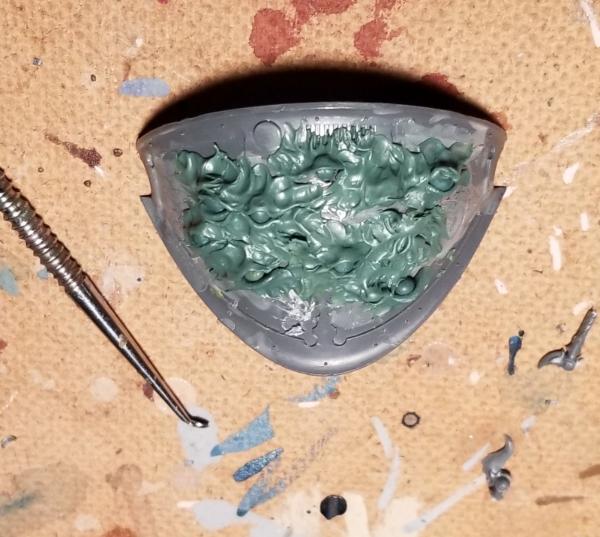
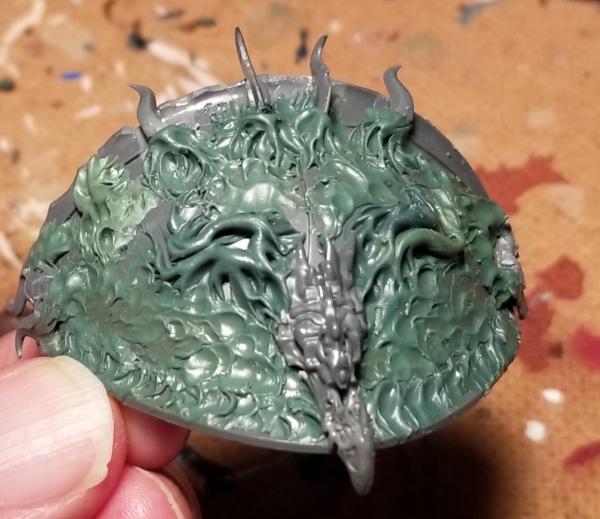
And again and again, layering things in, and leaving plenty of time between sessions for the greenstuff to dry, until I ended up with this:
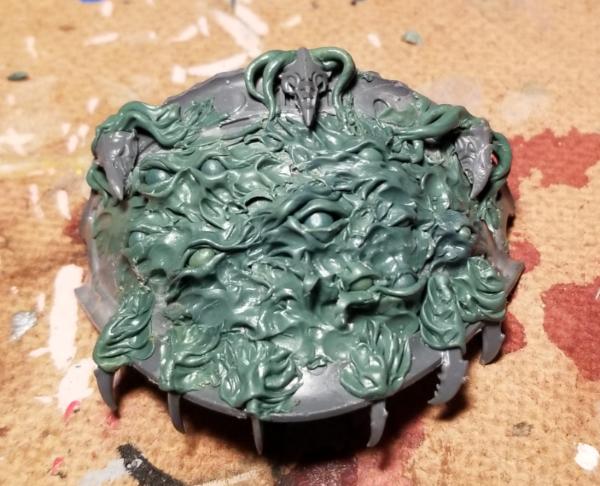
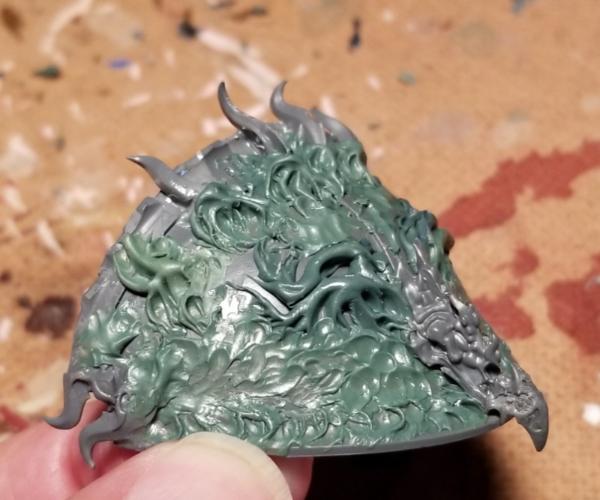
and (from another angle), this:
Anyway, there's some progress, and a look at how I got there.
Thanks for looking!!


 )
)
