| Author |
Message |
 |
|
|
|
|
Advert
|
Forum adverts like this one are shown to any user who is not logged in. Join us by filling out a tiny 3 field form and you will get your own, free, dakka user account which gives a good range of benefits to you:
- No adverts like this in the forums anymore.
- Times and dates in your local timezone.
- Full tracking of what you have read so you can skip to your first unread post, easily see what has changed since you last logged in, and easily see what is new at a glance.
- Email notifications for threads you want to watch closely.
- Being a part of the oldest wargaming community on the net.
If you are already a member then feel free to login now. |
|
 |
2020/12/30 20:53:58
Subject: Syro's projects: 40k, D&D, and finishing Sculptember sculpts
|
|

Liberated Grot Land Raida
|
He's Rother wonderful!
Bad puns aside I really do love that critter. Excellent work. Hope the molding goes well. Looking forward to seeing the herd.
|
|
This message was edited 2 times. Last update was at 2020/12/30 20:59:30
|
|
|
 |
|
2020/12/31 11:10:39
Subject: Re:Syro's projects: 40k, D&D, and finishing Sculptember sculpts
|
|

Krazed Killa Kan
|
@theCrowe: Thank you theCrowe. And no worries, puns are always welcome here. I'm glad you like the rothe.
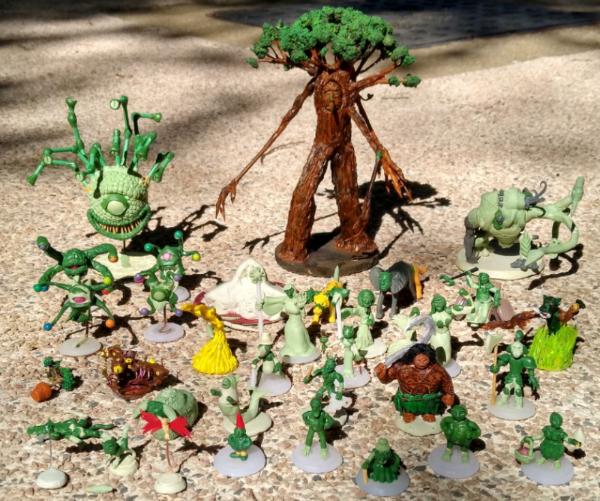
I managed to finish one last miniature sculpt today, but first the group shot of (nearly) every sculpture that I made in 2020. It's always fun doing these year reviews, and it helps me focus on finishing a few more when the end of December approaches 
My 2020 sculptures:
And a low angle shot to see heights:
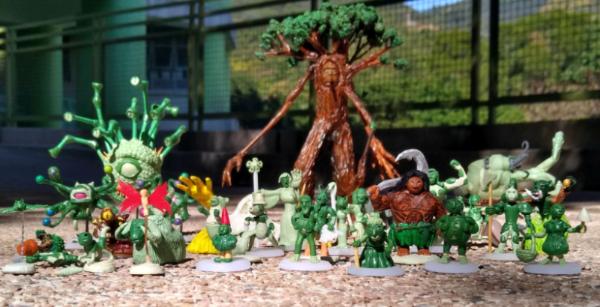
I broke my Dark mantle sculpt as I tried to get it out of its storage box, so its not pictured. Also the ice toad that I carved out of styrofoam was too like to have in the picture. The only other finished sculpture that I know isn't in the photo is below because it wasn't dry yet for the group photo,
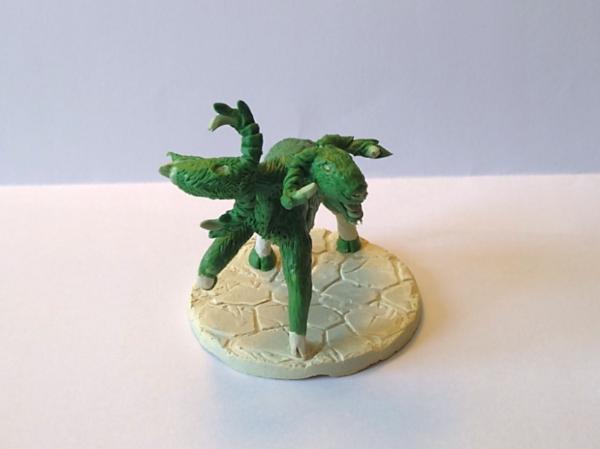
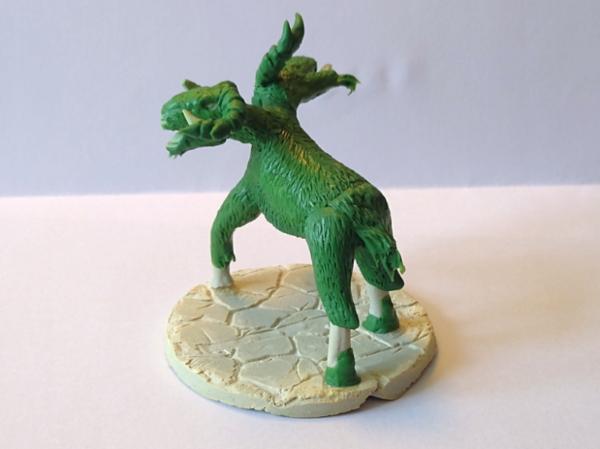
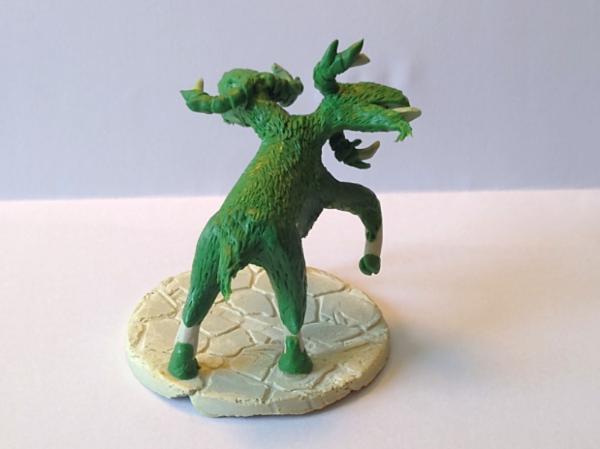
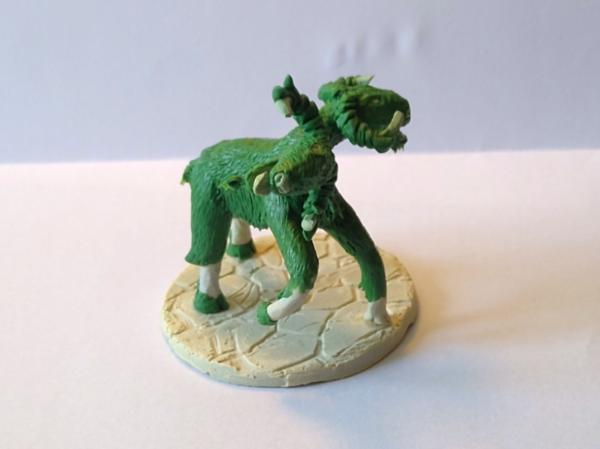
My last sculpture of 2020, I believe I started in February of this year, It is the giant two-headed demon goat from the D&D adventure "Harried in Hillsfar"

|
|
|
|
|
|
2020/12/31 12:21:19
Subject: Syro's projects: 40k, D&D, and finishing Sculptember sculpts
|
|

Liberated Grot Land Raida
|
Nice overview, and that rothe looks good! Will the feet be cast properly like that?
|
A Squeaky Waaagh!!
Camkhieri: "And another very cool thing, my phones predictive text actually gave me chicken as an option after typing robot, how cool is that."'
Meercat: "All eyes turned to the horizon and beheld, in lonely and menacing grandeur, the silhouette of a single Grot robot chicken; a portent of evil days to come."
From 'The Plucking of Gindoo Phlem' |
|
|
|
|
2020/12/31 13:55:10
Subject: Re:Syro's projects: 40k, D&D, and finishing Sculptember sculpts
|
|
Krazed Killa Kan
|
Thanks CommissarKhaine, and good point about the casting. I'm not sure if it will cast properly, but my plan is to have the base and feet as a single cast piece to attach to the body. I was hoping it would keep the molds more simple, but I'm guessing you're worried about air bubbles forming in each ankle area. That culd be possible.
|
|
|
|
|
|
2021/01/01 21:03:07
Subject: Syro's projects: 40k, D&D, and finishing Sculptember sculpts
|
|

Potent Possessed Daemonvessel
|
Very cool year sculpt wise !
|
|
|
|
|
|
2021/01/02 08:22:35
Subject: Re:Syro's projects: 40k, D&D, and finishing Sculptember sculpts
|
|
Krazed Killa Kan
|
Thanks!
|
|
|
|
|
|
2021/01/02 10:22:59
Subject: Syro's projects: 40k, D&D, and finishing Sculptember sculpts
|
|

Longtime Dakkanaut
|
Edit, because Dakka posted my original post some more and I seemingly can't edit the posts that are shown to me the forum had a major hiccup when I tried to post. One of my four posts should at least be the original one 
|
|
This message was edited 2 times. Last update was at 2021/01/02 10:34:42
|
|
|
|
|
2021/01/02 10:25:00
Subject: Syro's projects: 40k, D&D, and finishing Sculptember sculpts
|
|
Longtime Dakkanaut
|
Double Post
|
|
This message was edited 3 times. Last update was at 2021/01/02 10:33:02
|
|
|
|
|
2021/01/10 00:35:51
Subject: Re:Syro's projects: 40k, D&D, and finishing Sculptember sculpts
|
|
Krazed Killa Kan
|
|
|
|
|
|
|
2021/01/10 01:30:20
Subject: Syro's projects: 40k, D&D, and finishing Sculptember sculpts
|
|
Liberated Grot Land Raida
|
looks like you've done your research on building the moulds.
Here's a rant about DIY vibration tables that you prob already know about too. If not enjoy.
It's a messy and frustrating business but I wish you lots of luck.
|
|
|
|
|
|
2021/01/10 06:49:49
Subject: Re:Syro's projects: 40k, D&D, and finishing Sculptember sculpts
|
|
Longtime Dakkanaut
|
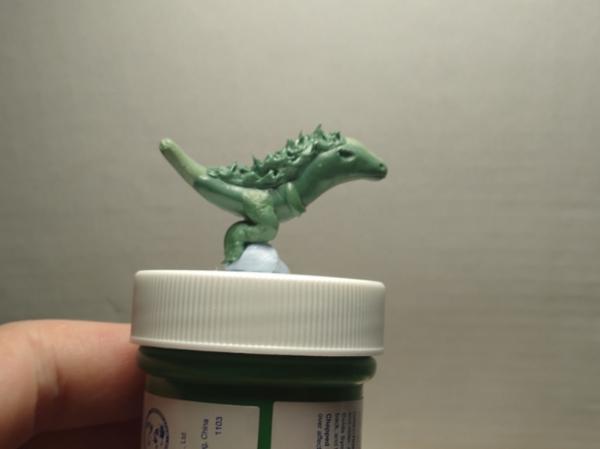
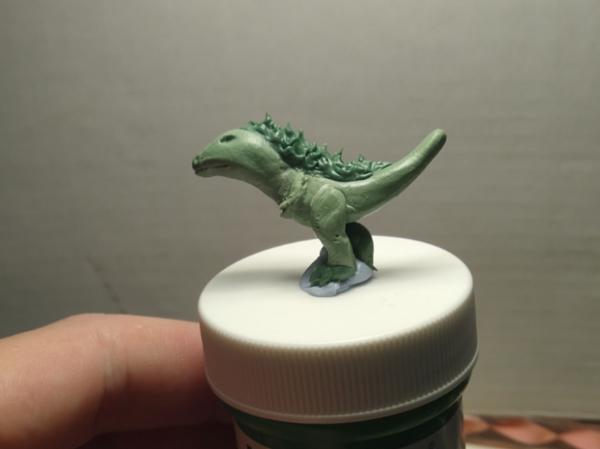
Cool update, excited how this project will work out. And is that one mini a baby Godzilla?
Re my lost post, luckily I have an extended clipboard and it was still on it:
Nice recap post, the halflings are still my favorites of the bunch, so characterful. And great way to cap off the year with the demon goat, love the texture on the fur.
|
|
|
|
|
2021/01/10 11:16:29
Subject: Re:Syro's projects: 40k, D&D, and finishing Sculptember sculpts
|
|
Krazed Killa Kan
|
@theCrowe: Thank you Crowe, I agree, it is a messy and frustrating business. And thank you. I know about vibration platforms to get rid of bubbles, but didn't know about that DIY one, so thank you. Unfortunately, my dremmel tool is back home on another continent, and there's no room for anything like that in this tiny Hong Kong apartment. Something to remember for the future though.
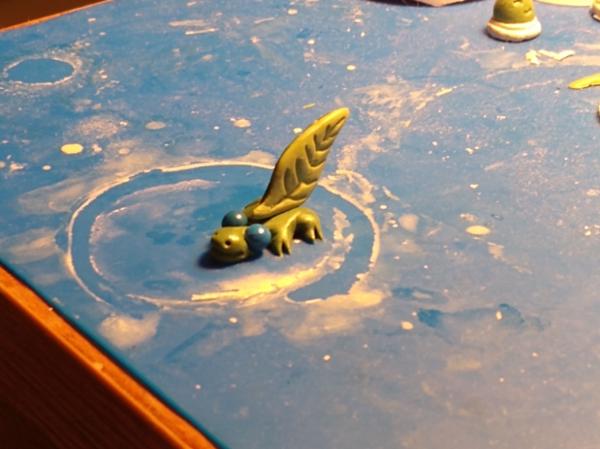
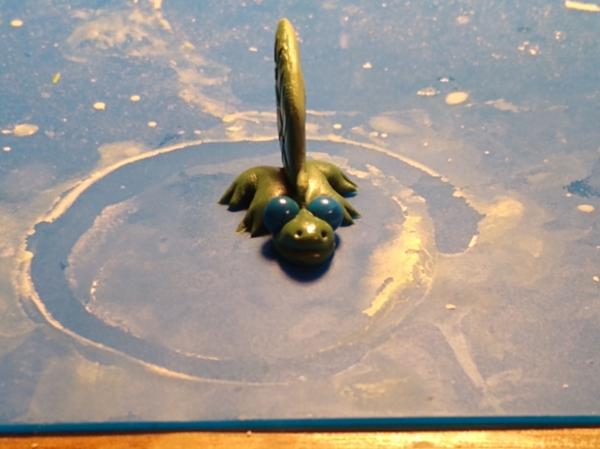
@Viterbi: I'm glad you still had your original comment, I'm happy from getting to read it. I'm glad you still like the halflings, they are still some of my favorites too. As for the one mini, it does look like a baby godzilla doesn't it? That is meant to be fire on its back, hopefully when I paint the copies it will look good.
Unfortunately, it looks like I don't have enough silicone to finish, so there won't be much of an update until my order arrives.
|
|
|
|
|
|
2021/01/10 15:35:03
Subject: Syro's projects: 40k, D&D, and finishing Sculptember sculpts
|
|
Liberated Grot Land Raida
|
Maybe arange it at a time you have some laundry on and set the molds on top of the washing machine.
|
|
|
|
|
|
2021/01/11 07:46:30
Subject: Re:Syro's projects: 40k, D&D, and finishing Sculptember sculpts
|
|
Krazed Killa Kan
|
That is a really good idea! Thank you
|
|
|
|
|
|
2021/01/11 09:57:17
Subject: Syro's projects: 40k, D&D, and finishing Sculptember sculpts
|
|

Alluring Mounted Daemonette
|
Love the little dino monsters - a super cool idea and executed really well - and good luck with the casting process! Always keeping an eye out for ways to get the kids involved with the hobby - keep us posted!
|
t z you are k |
|
|
|
|
2021/01/17 09:19:28
Subject: Re:Syro's projects: 40k, D&D, and finishing Sculptember sculpts
|
|

Sinewy Scourge
|
Very impressive year!
So many cool sculpts that it's hard to pick a favorite. I still think it's the ent, or the spectator with the "cat ears"
Just with a small margin though, as they are all really super cool sculpts!
I'm hoping you succeed with the molding in the end!
|
|
This message was edited 1 time. Last update was at 2021/01/17 09:19:58
|
|
|
|
|
2021/01/17 12:44:14
Subject: Re:Syro's projects: 40k, D&D, and finishing Sculptember sculpts
|
|
Krazed Killa Kan
|
@tzurk: Thanks tzurk My students are anxious to try out the game, so it's a shame there have been so many setbacks. Also said students keep me so tired, that I don't have much energy for hobbying after school. If only they could understand that they are hurting themselves by tiring me out
@Ezki: Thanks Ezki I'm glad the cat eared spectator is getting some love. I'm still ahving some difficulty with this silicone that I'm not used to (see below) but I am making some progress. The new stuff arrived a few hours ago finally, so I'll get back to making the rest of the molds when I have time.
After 2-3 weeks of waiting for the mold that I didn't add enough catalyst to, to set I finally thought it was good enough. Unfortunately There was so much stuck to the model. I don't know if this new kind is reacting to the epoxy putty in some way. But I will try to put even more prep into making the molds come out well. I also keep trying to find the sweet spot of catalyst.
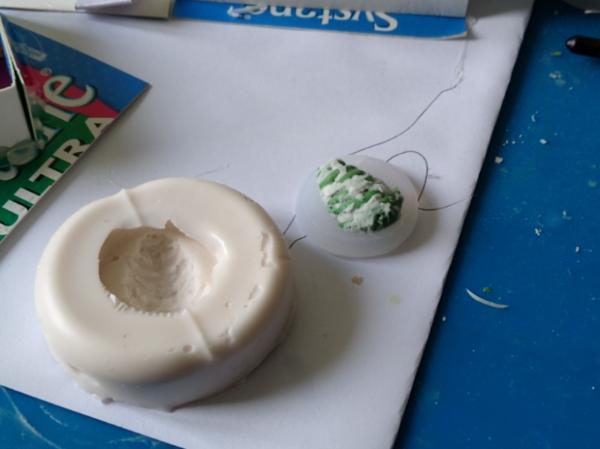
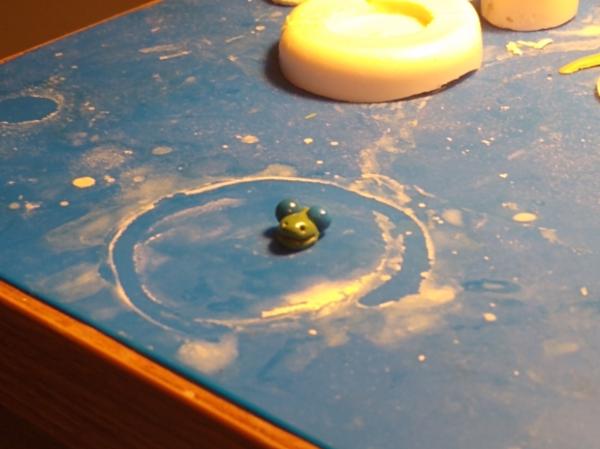
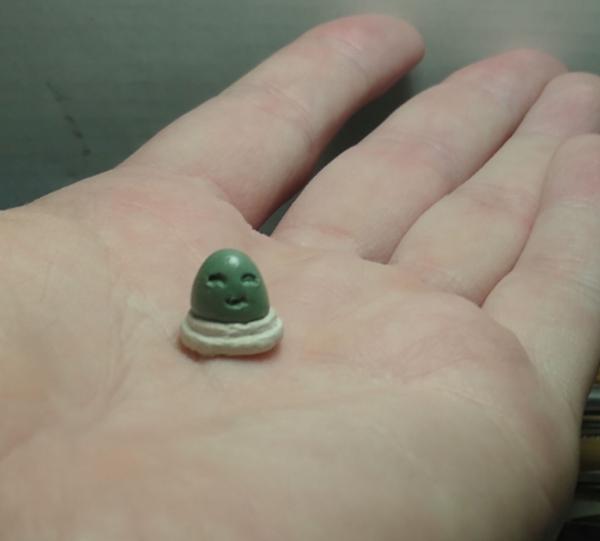
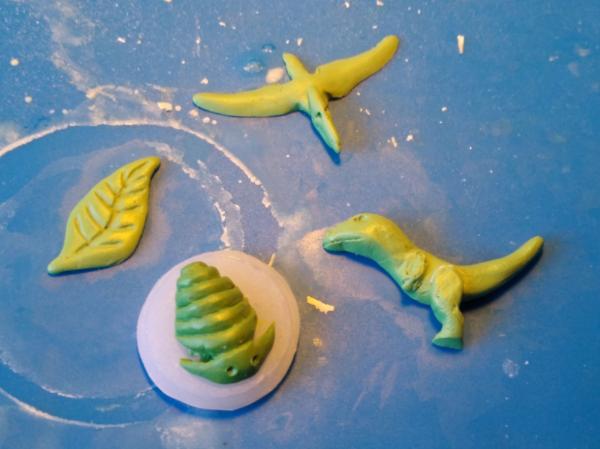
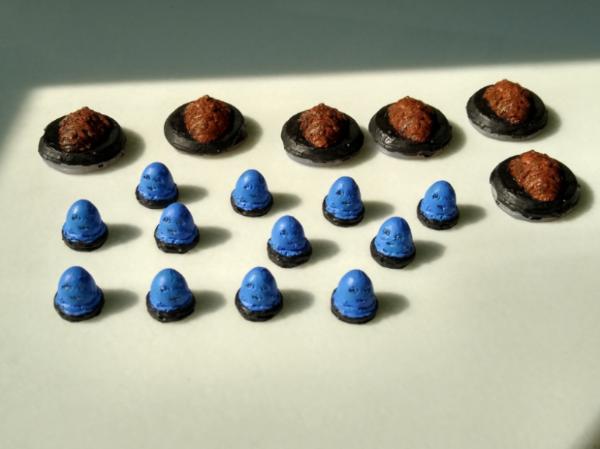
The jelly blob, the tiniest model came out pretty well in the mold. I cast a few of both the jelly blog and the very messy trilobite (I might make this a chiton depending on how it turned out). it will be easier to assess when I have time to paint them.
Thanks
|
|
|
|
|
|
2021/01/17 16:11:14
Subject: Syro's projects: 40k, D&D, and finishing Sculptember sculpts
|
|
Liberated Grot Land Raida
|
Yeah, I had some similar issues with poorly mixed silicone. You do have to be quite exacting with the ratios. But maybe adding a little more catalyst is better than risking too little. The other question is mold release. I've heard of oil, or talc or Vaseline to help the piece not get stuck to the silicone. No doubt you know this already.
|
|
|
|
|
|
2021/01/21 15:06:11
Subject: Re:Syro's projects: 40k, D&D, and finishing Sculptember sculpts
|
|
Krazed Killa Kan
|
I'm in trouble if you have to be pretty exact with the ratios, since I have no way to measure the weight of catalyst accurately enough, I've been trying to find a number of drops that works well to a number of grams of the uncured silicone. Thank you for trouble shooting with me Crowe, even though I do know of those mold release methods, I'm embarrassed to say, that I didn't use any on the initial molds. I got so spoiled by the silicone mold making stuff I'm used to using never needing mold release that I wasn't being careful enough. I'm in the slow process of taking apart the cardboard frame of the most recent mold I made, which uses mold release. I don't have much hobby time, and I keep hitting uncured sections of the outside edge of the mold, so I keep stopping to add a drop of catalyst and then waiting.
|
|
|
|
|
|
2021/01/22 17:34:43
Subject: Syro's projects: 40k, D&D, and finishing Sculptember sculpts
|
|
Liberated Grot Land Raida
|
Been there sy. I had to paint catalyst on the "Sniffy and Cheesey" mold. It was a bit hit and miss and the results in the end were only really useful as dollies to sculpt onto.
My best results have been with one part pour-in molds. As some of the two part molds created some bad bad results.
Kitchen scales for measuring weight?
Electric shaver for vibration?
|
|
|
|
|
|
2021/01/22 19:26:35
Subject: Re:Syro's projects: 40k, D&D, and finishing Sculptember sculpts
|
|

Is 'Eavy Metal Calling?
|
This is Awesome  .
It is a fun little piece, well done, it gave me a smile.
|
LOL, Theo your mind is an amazing place, never change.-camkierhi 9/19/13
I cant believe theo is right.. damn. -comradepanda 9/26/13
None of the strange ideas we had about you involved your sexual orientation..........-Monkeytroll 12/10/13
I'd put you on ignore for that comment, if I could...Alpharius 2/11/14 |
|
|
|
|
2021/01/23 12:51:00
Subject: Re:Syro's projects: 40k, D&D, and finishing Sculptember sculpts
|
|
Krazed Killa Kan
|
@TheCrowe: Ah yeah, I remember all the sculpting you had to do on top of sniffy and cheesy. Luckily they looked great in the end. I agree about trying to keep the molds as simple one piece molds. I made all but two of my sculpts simple enough to make one part molds. Hopefully the two others will work. Thank you for all the good ideas, luckily I have been using a kitchen scale from the very beginning, but even after emptying about 1/5 of the catalyst into a zeroed cup the first day, it wasn't heavy enough to register. That's why I have been trying to figure out a drop of catalyst to grams of silicone ratio that works well. You will see below better success thanks to your advice
@Theophony: Thanks Theo I'm partial to that one too. I hope I can make a good enough mold to get decent casts of that one.
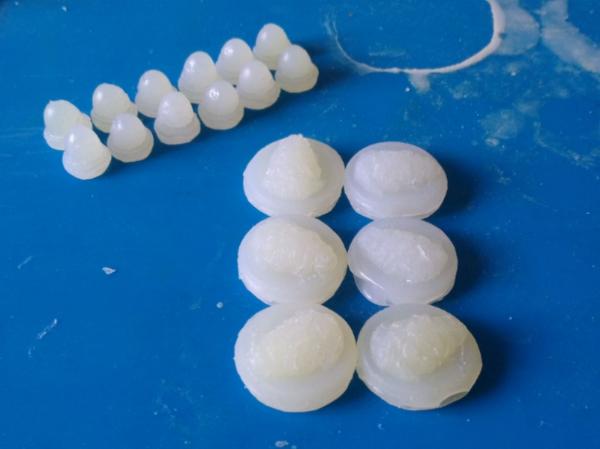
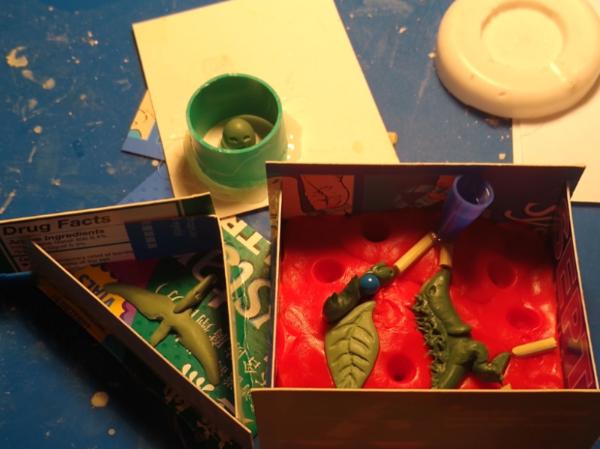
Luckily following TheCrowe's advice and very carefully pulling away the frame for the mold and adding catalyst to leaking parts over the course of around 4 days, I have had my most successful mold since moving to Hong Kong. But first the painted up casts of the first models:
Here is the newest mold mentioned above. it is working well.
And the newly cast pterosaurs. I finished casting and clipping the flash a few minutes before this post.
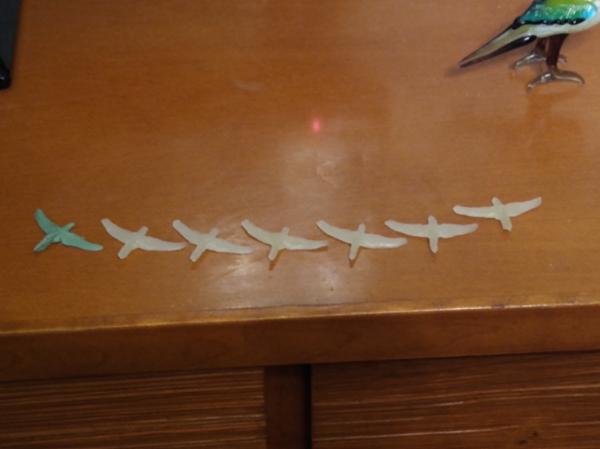
Thanks for stopping by.
|
|
|
|
|
|
2021/01/23 17:33:54
Subject: Syro's projects: 40k, D&D, and finishing Sculptember sculpts
|
|
Liberated Grot Land Raida
|
Very cool. Nice work on your casting success so far. So how is this game played then?
So for this guy.
How's the mold turning out? Have you got two well cured sides yet?
When it comes time to cast you might need a syringe for a little bit of pressure to get the resin through the whole thing.
|
|
|
|
|
|
2021/01/23 18:48:06
Subject: Syro's projects: 40k, D&D, and finishing Sculptember sculpts
|
|
Joined the Military for Authentic Experience
|
Hey Syro I had similar problems with my resin molds at first. It turns out that the catalyst I was using was slightly less dense than the liquid resin. The instructions said 1:1 mix but that was by mass rather than volume. So I just added10% more each time and that worked pretty well to give me a proper fast setting and hard resin.
Though I also had some funny reactions with epoxy putties particularly if I didn't add enough catalyst. I guess it depends what resin you are using, I dunno if there is a downside other than increased cost to adding a little extra catalyst to each mix.
|
|
|
|
|
|
2021/01/24 12:48:32
Subject: Re:Syro's projects: D&D sculpts, and making a kids game
|
|
Krazed Killa Kan
|
Thanks for the comments
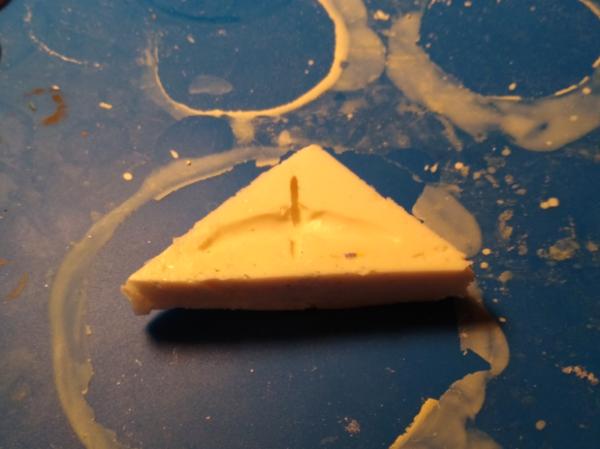
@TheCrowe: Thanks Crowe unfortunately I don't even have one nicely cured side yet for the most complicated mold. It was such a big and important mold I was very liberal with the catalyst, and it was curing so fast that it's lumpy and didn't fully flow around the planned injection port:
It's nice and solid at least. I kind of forgot to work on it since, but after seeing your post, I just added a little silicone to that area before responding. As for the game, it's kind of a combination of a table top war game, the Pokemon TCG, and scrabble. My goal is to make a game that is fun enough that children will want to play with it even though it helps them learn spelling. And thanks for the tips.
@Da Boss: Thanks Da Boss, that's good to know that I'm not the only one who has had struggles, and things to avoid. Luckily I'm not working with resin, so I'm currently avoiding those difficulties. I have been a long time user of hot glue for cheap casts in silicone molds.
|
|
|
|
|
|
2021/01/27 12:47:32
Subject: Re:Syro's projects: D&D sculpts, and making a kids game
|
|
Krazed Killa Kan
|
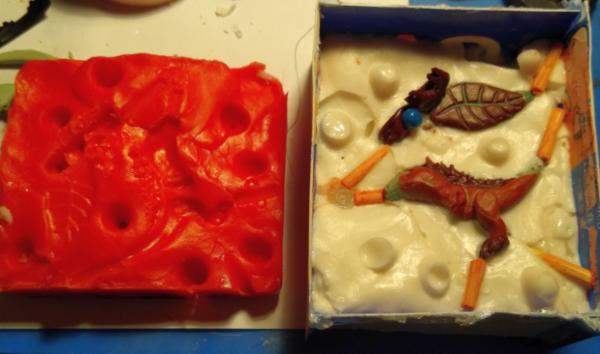
Not much of an update, but I have removed the cardboard bottom and managed to get out the hardened playdough like clay out to prepare for the second half of the mold to be made. They playdough hardened into a hard rubbery consistency, almost like a mold itself. I was surprised how stained my models were by the clay. I hope to pour the other half soon once I finish cleaning it up and have the time.
|
|
|
|
|
|
2021/01/28 08:41:53
Subject: Syro's projects: D&D sculpts, and making a kids game
|
|
Liberated Grot Land Raida
|
Sounds like a fun little game. Homeschooling like a pro.
Looks like you got a couple of big bubbles in the divits but as long as the minis got covered I'm sure it'll be ok.
I've seen it done where a small amount of mixed silicone is painted on top of the minis so as to ensure all detail is covered and no bubbles before the mould is properly filled.
Don't forget some mold release on the whole lot here before you mix and pour the second side or the whole lot will be locked solid. I know you know this but it's worth repeating.
|
|
|
|
|
|
2021/01/28 17:55:54
Subject: Syro's projects: D&D sculpts, and making a kids game
|
|

Confident Halberdier
|
I’d like to see a demo of your game when you get it finalized Syro.
Good luck with the mold making!
|
|
|
|
|
|
2021/01/29 14:39:12
Subject: Syro's projects: D&D sculpts, and making a kids game
|
|
Longtime Dakkanaut
|
Mold making looks very interesting, very cool to see the progress.
|
|
|
|
|
2021/01/30 13:44:28
Subject: Re:Syro's projects: D&D sculpts, and making a kids game
|
|
Krazed Killa Kan
|
@TheCrowe: Thanks Crowe That is definitely worth mentioning. I wouldn't want to have to cut my minis out of there. This stuff is so thick, I don't think I would be able to paint it on. But I have been trying some of your suggestions.
@Thumpingbear: Thank you, I jsut did a pour this morning, we'll see how it turned out soon. Sadly, it's still further until I can try the game than I would like. Real life seriously slowing things down.
@Viterbi: Thanks
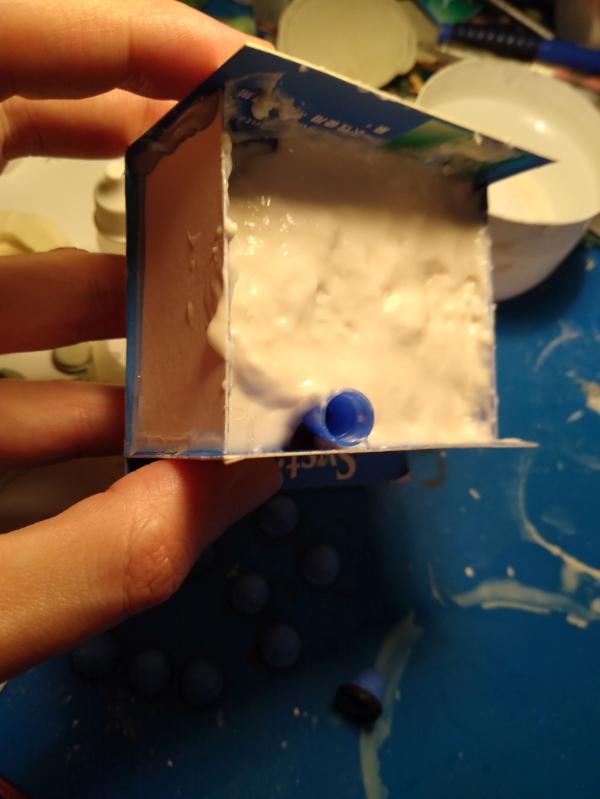
At TheCrowe's suggestion I started a load of laundry this morning to let my newest silicone mold pour ride on to shake out bubbles. This is the complicated two part mold with my first attempt adding flow channels. The mold is mostly cured, but there are a few gooey spots still tonight that I added a bit more catalyst to. Hopefully it will be ready for unveiling soon.
|
|
|
|
|
|
|
|