| Author |
Message |
 |
|
|
|
|
Advert
|
Forum adverts like this one are shown to any user who is not logged in. Join us by filling out a tiny 3 field form and you will get your own, free, dakka user account which gives a good range of benefits to you:
- No adverts like this in the forums anymore.
- Times and dates in your local timezone.
- Full tracking of what you have read so you can skip to your first unread post, easily see what has changed since you last logged in, and easily see what is new at a glance.
- Email notifications for threads you want to watch closely.
- Being a part of the oldest wargaming community on the net.
If you are already a member then feel free to login now. |
|
 |
2017/03/22 01:34:08
Subject: Oldraven's Little Projects Thread.
|
|

Rogue Inquisitor with Xenos Bodyguards
|
Al looking good! and I see the Hiss tank is a massive machine as well, next to that Chimera
|
"Your mumblings are awakening the sleeping Dragon, be wary when meddling the affairs of Dragons, for thou art tasty and go good with either ketchup or chocolate. "
Dragons fear nothing, if it acts up, we breath magic fire that turns them into marshmallow peeps. We leaguers only cry rivets!


|
|
|
 |
|
2017/03/22 01:38:49
Subject: Oldraven's Little Projects Thread.
|
|
Longtime Dakkanaut
|
 shasolenzabi wrote: shasolenzabi wrote:Al looking good! and I see the Hiss tank is a massive machine as well, next to that Chimera
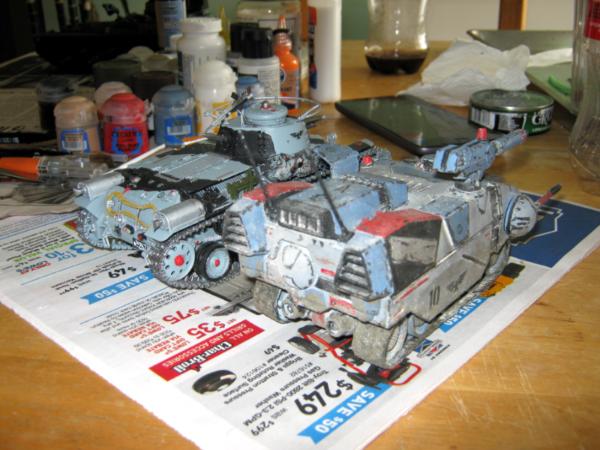
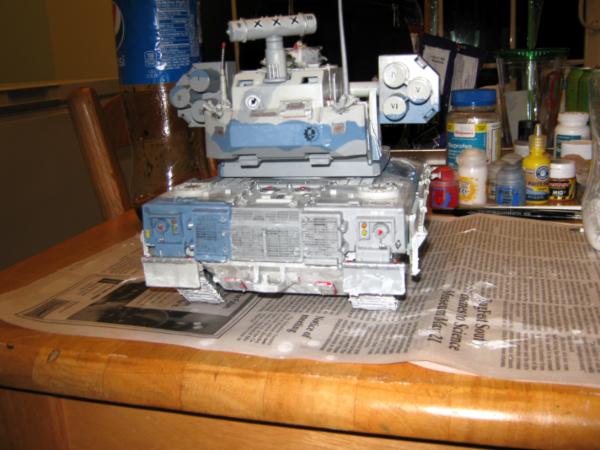
Very true. I would put the H.I.S.S. in Macharius territory, size-wise. Just taller.
And as always, much thanks for the feedback. It's always welcome.   Automatically Appended Next Post: Automatically Appended Next Post:
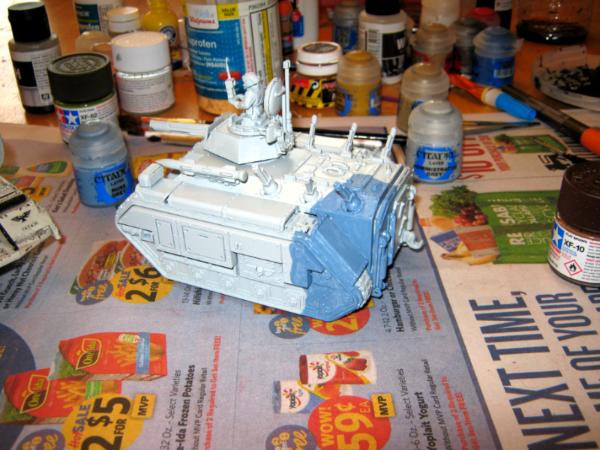
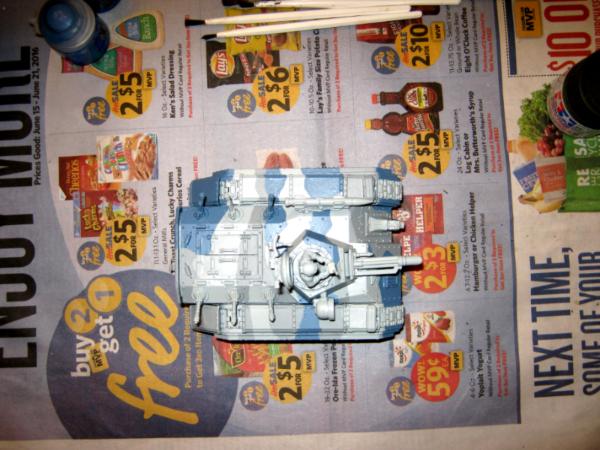
I got bored tonight. So, I decided to start a bit of painting on the IJA Type 97. Still have a long way to go, though.
Pics:

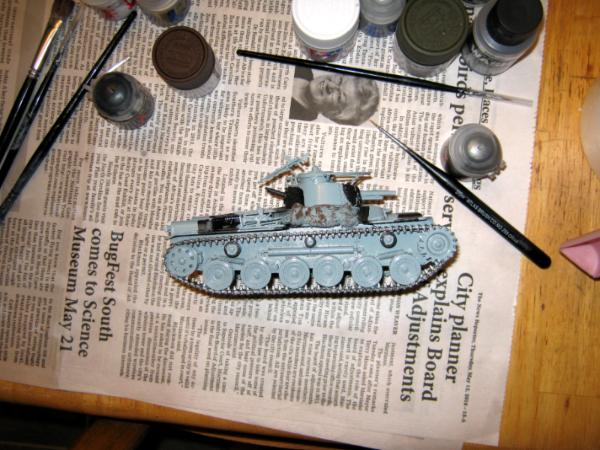


And as always, more to come........
|
|
This message was edited 1 time. Last update was at 2017/03/22 05:24:56
Proud Purveyor Of The Unconventional In 40k |
|
|
|
|
2017/03/23 01:11:26
Subject: Re:Oldraven's Little Projects Thread.
|
|
Longtime Dakkanaut
|
|
Proud Purveyor Of The Unconventional In 40k |
|
|
|
|
2017/03/23 16:43:21
Subject: Re:Oldraven's Little Projects Thread.
|
|
Longtime Dakkanaut
|
|
Proud Purveyor Of The Unconventional In 40k |
|
|
|
|
2017/03/24 02:03:43
Subject: Re:Oldraven's Little Projects Thread.
|
|
Longtime Dakkanaut
|
|
Proud Purveyor Of The Unconventional In 40k |
|
|
|
|
2017/03/25 02:45:05
Subject: Re:Oldraven's Little Projects Thread.
|
|
Longtime Dakkanaut
|
|
Proud Purveyor Of The Unconventional In 40k |
|
|
|
|
2017/03/25 15:46:44
Subject: Oldraven's Little Projects Thread.
|
|
Rogue Inquisitor with Xenos Bodyguards
|
I do so like seeing your progress for your tanks
|
"Your mumblings are awakening the sleeping Dragon, be wary when meddling the affairs of Dragons, for thou art tasty and go good with either ketchup or chocolate. "
Dragons fear nothing, if it acts up, we breath magic fire that turns them into marshmallow peeps. We leaguers only cry rivets!
|
|
|
|
|
2017/03/25 23:48:10
Subject: Oldraven's Little Projects Thread.
|
|
Longtime Dakkanaut
|
Thanks. Hopefully, I can continue to make steady progress, with few lulls.
And on that note, update time.
First, the Galleon is really and truly complete at last. The last step was a light coat of Krylon Matte to get rid of the shiny spots from the 'Ardcoat. Despite the issues with the base coating/priming on this project, it turned out fair as a dirty, banged up tank operating in a hostile environment.
Oh, and this vehicle is now a Commissar's relic ride. Only the best for our favorite BLAMming bastards.
Pics:


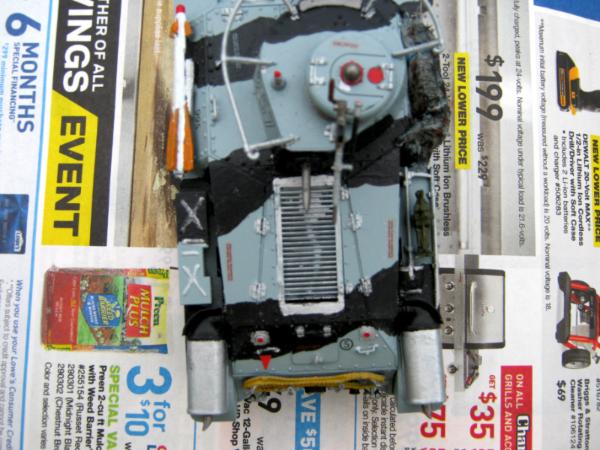
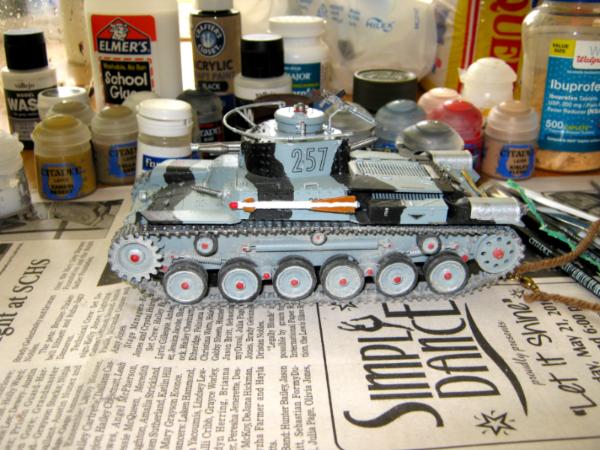
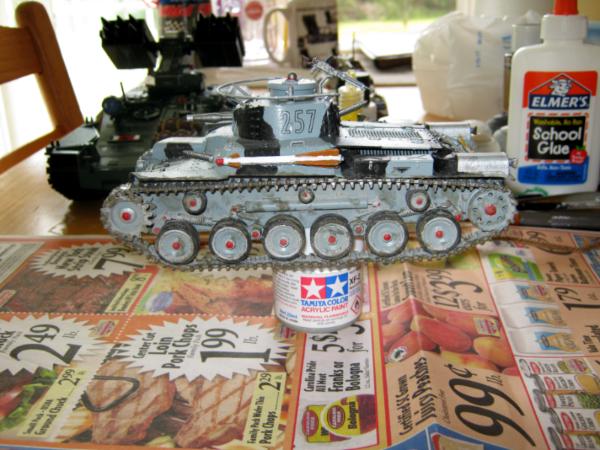
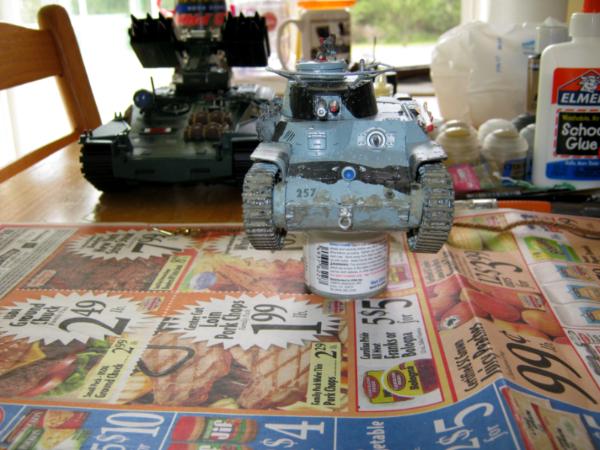
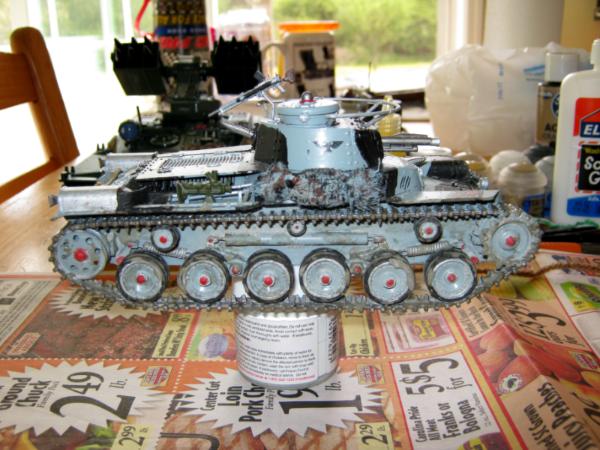
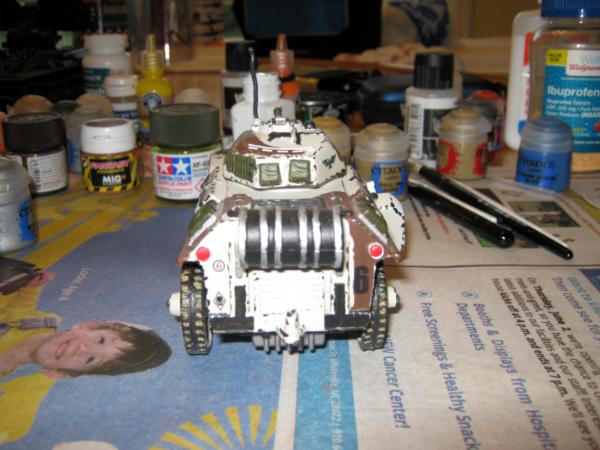
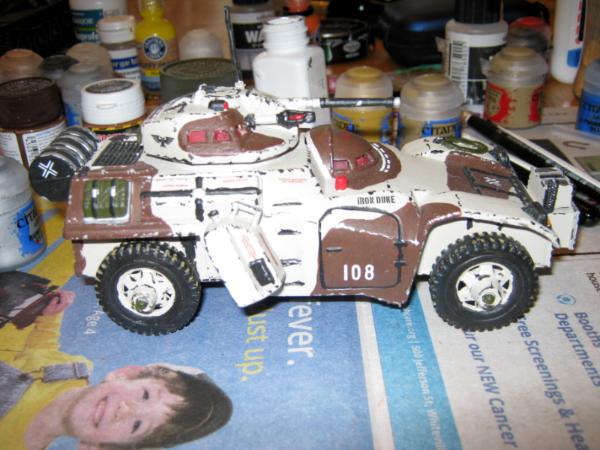
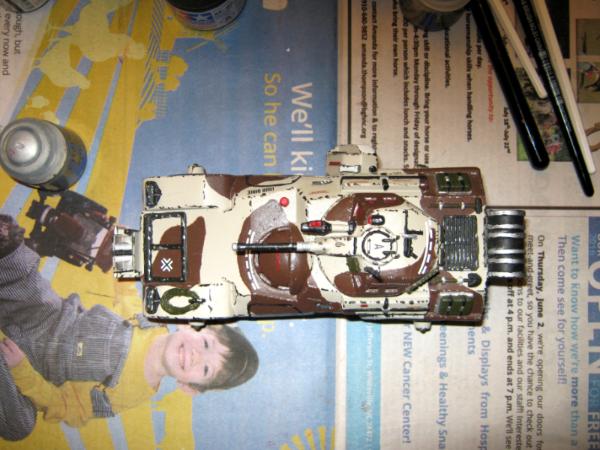
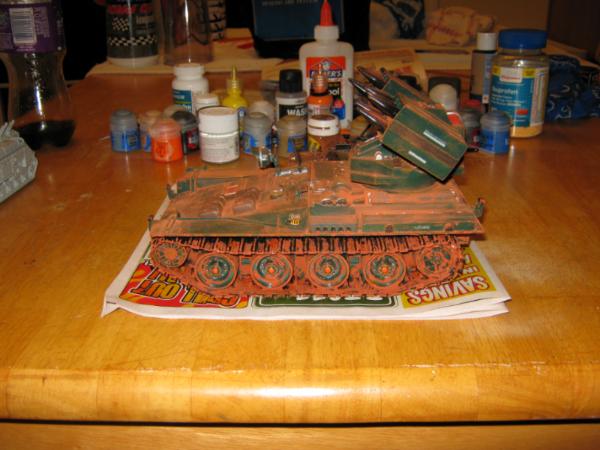
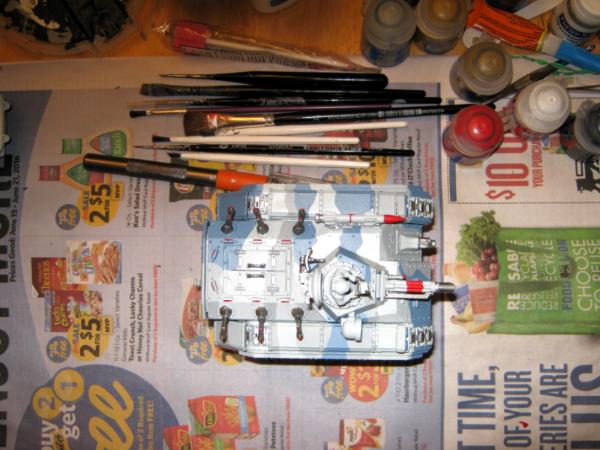
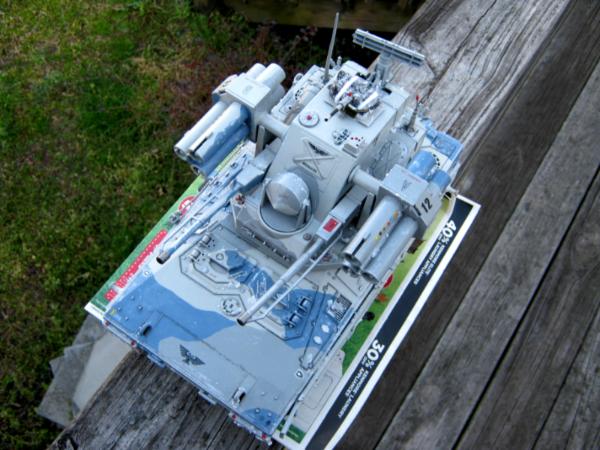
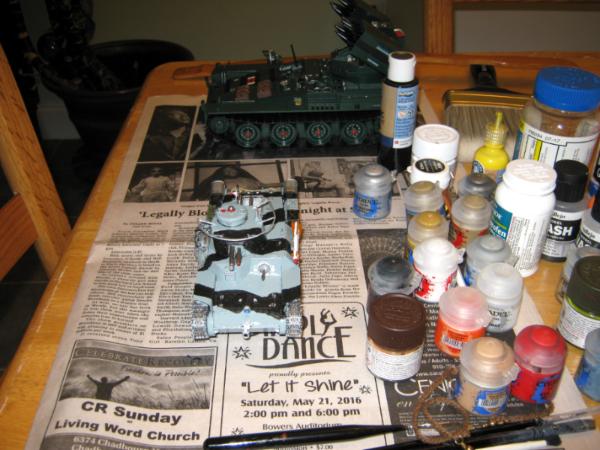
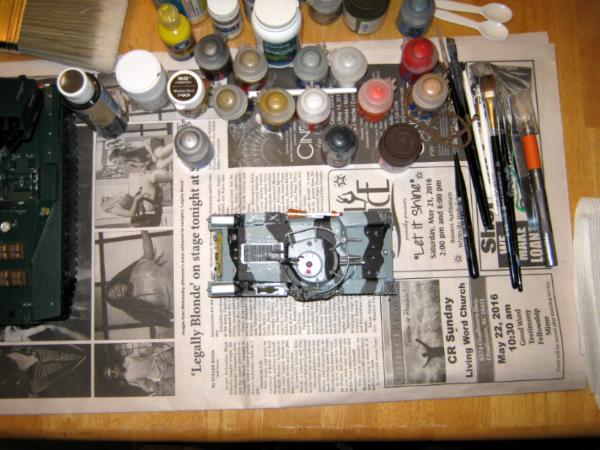
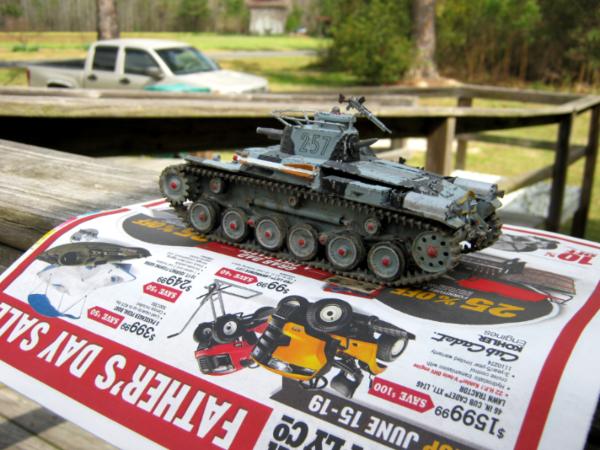
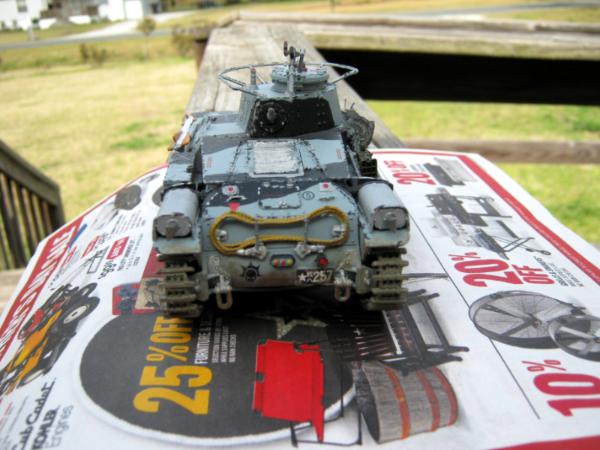
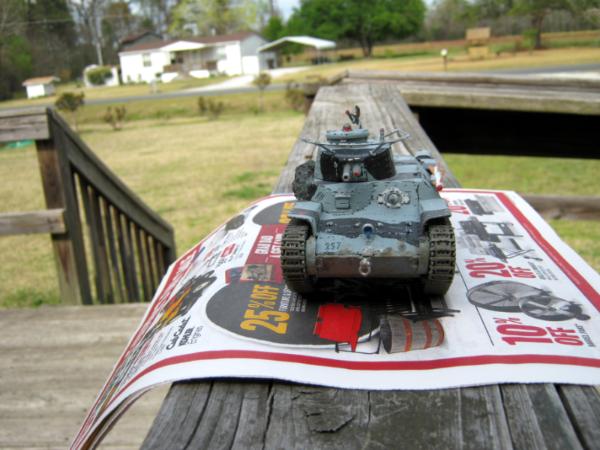
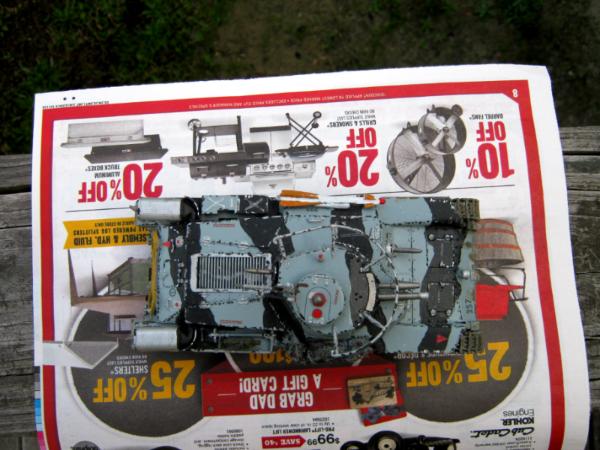
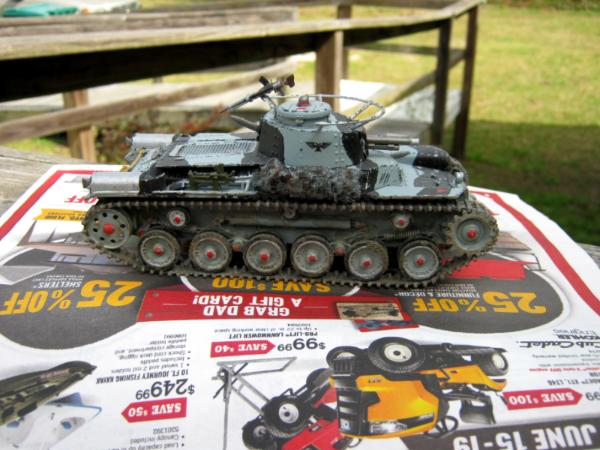
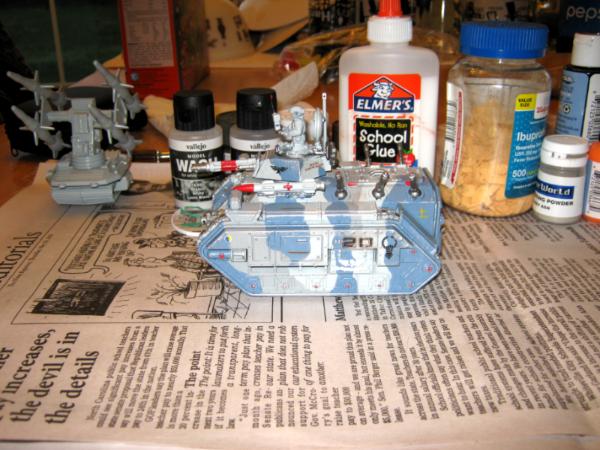
Last night, I spot varnished the Type 97 with 'Ardcoat, allowing it to dry overnight. Today, I applied transfers and sealed them up with more 'Ardcoat. Finally, I applied a coat of Krylon Matte to get rid of the gloss of the 'Ardcoat and Rust-o-Leum.
Pics of the results so far:


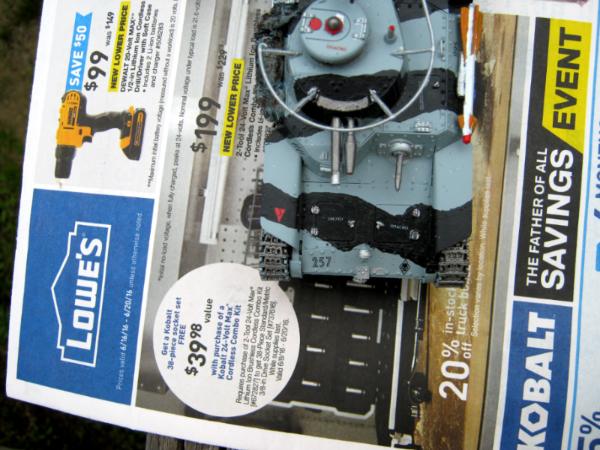
On the lower right side of the rear of the tank is a Tamiya IJA I.D. plate transfer. I numbered the tank, using Forge World numbers transfers, to correspond to the same number (i.e. #"257").
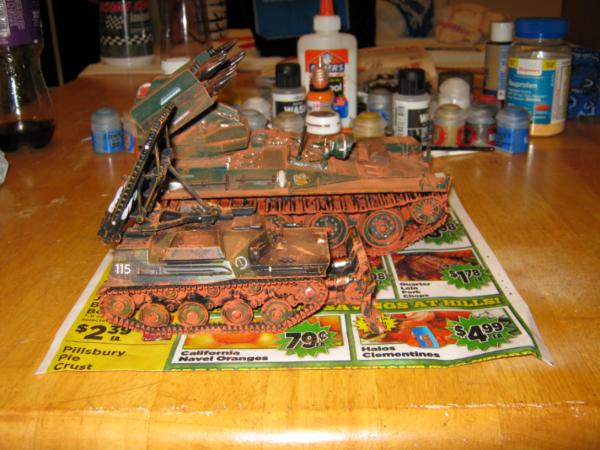
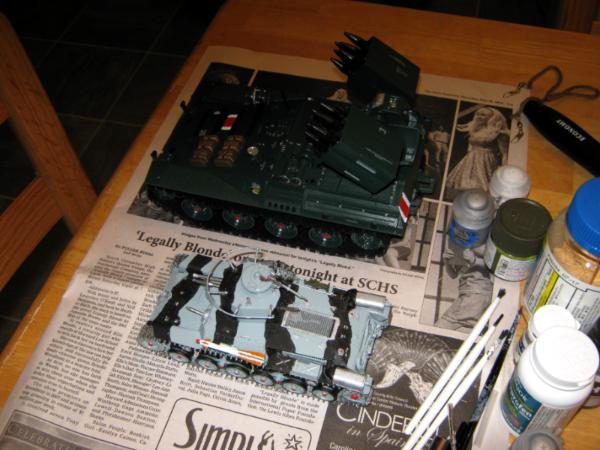
Of course, working on two vehicles at once is a good opportunity for some comparison shots:
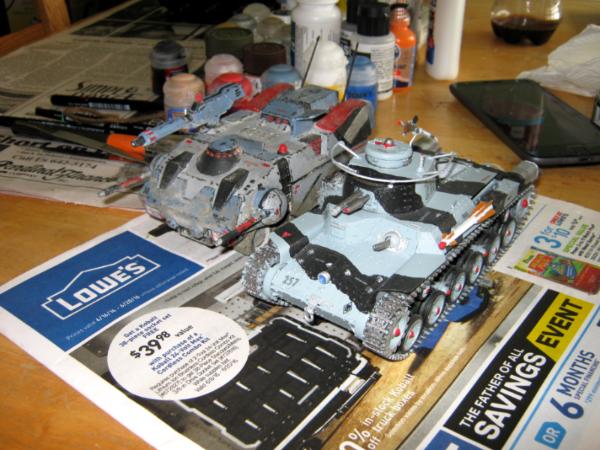
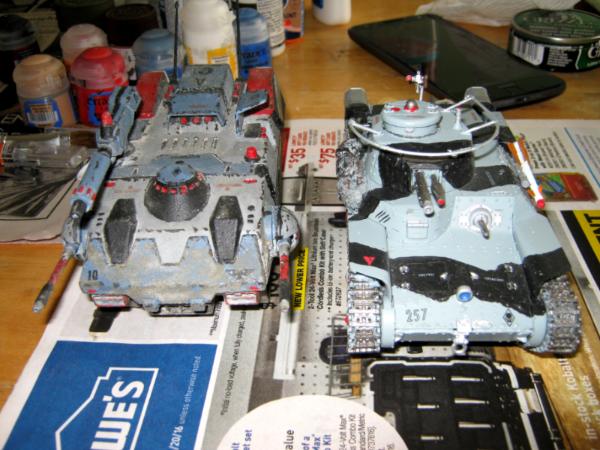
Anyhow, that's all for now. More to come.......
|
Proud Purveyor Of The Unconventional In 40k |
|
|
|
|
2017/03/26 23:09:58
Subject: Re:Oldraven's Little Projects Thread.
|
|
Longtime Dakkanaut
|
Update time, folks........
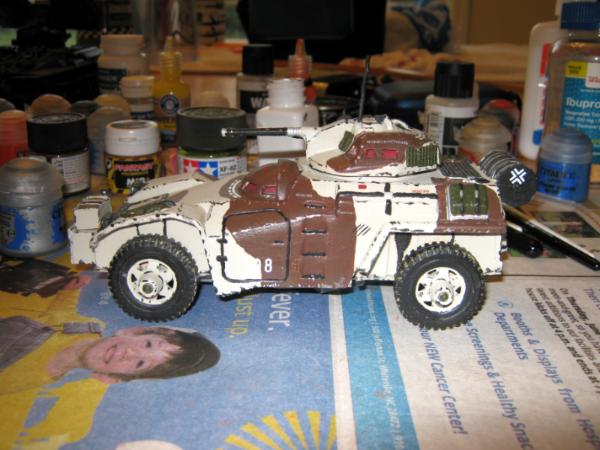
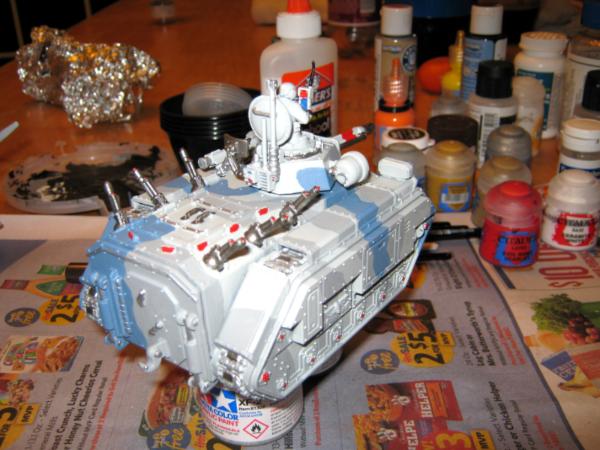
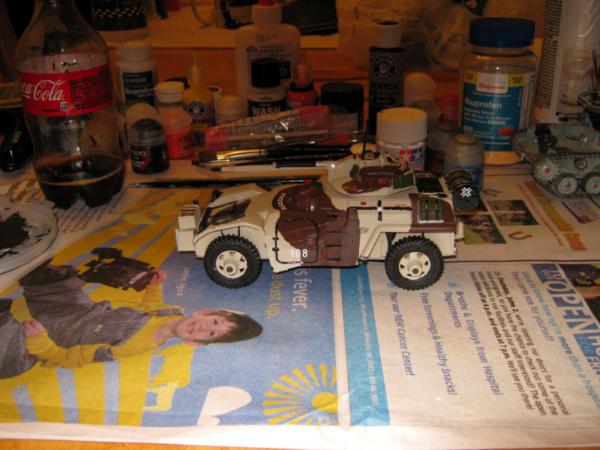
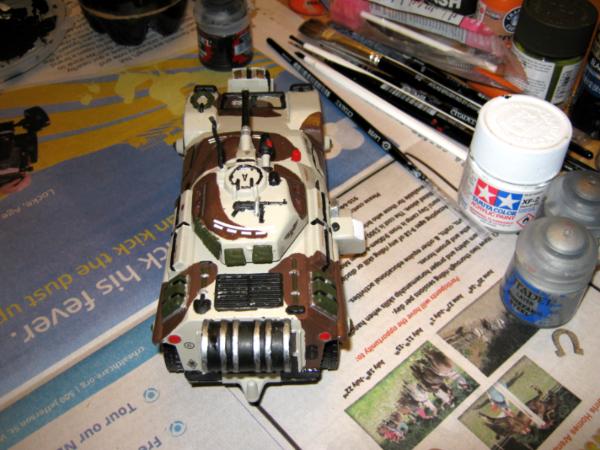
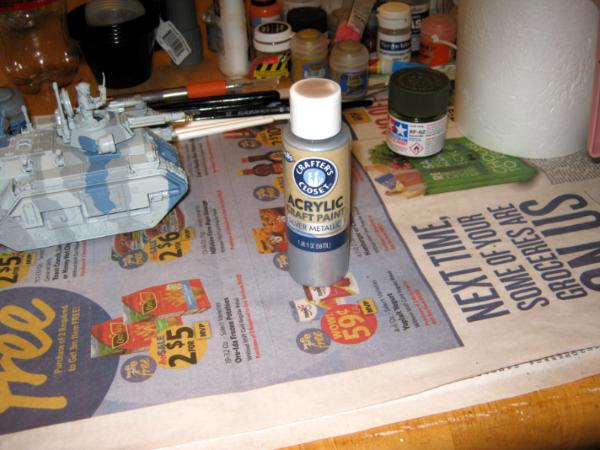
First off, I did a bit more work on the armored car. I continued working on the "water only" white stripe on the old V.A.M.P. Mk II jerry can. I also started painting on the bottom of the vehicle, hitting the drive equipment/protective covers with some Citadel Leadbelcher. I also did the spot varnishing with 'Ardcoat in preparation for the waterslide decals:

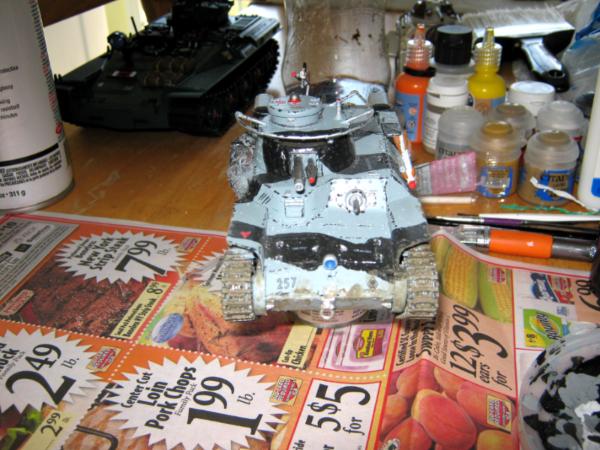
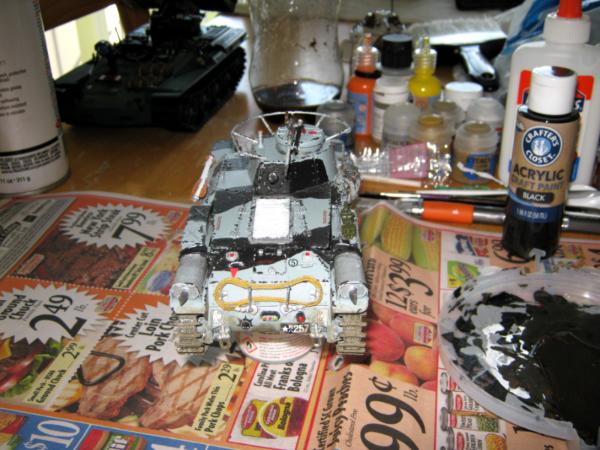
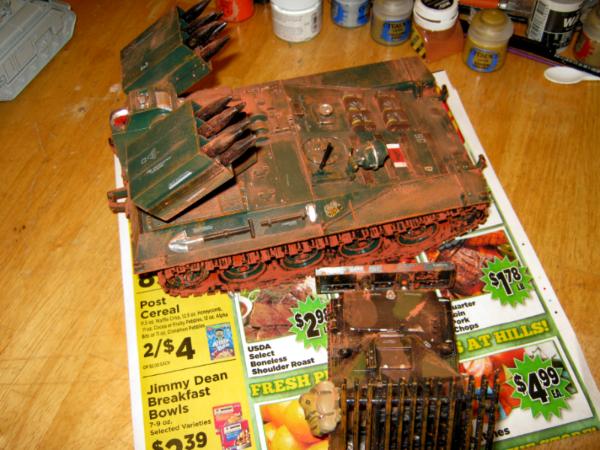
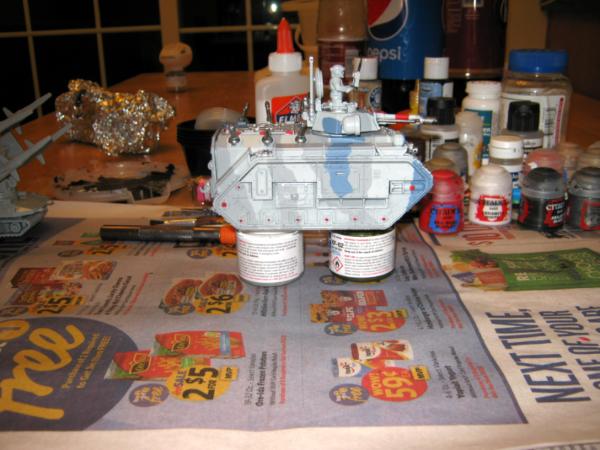
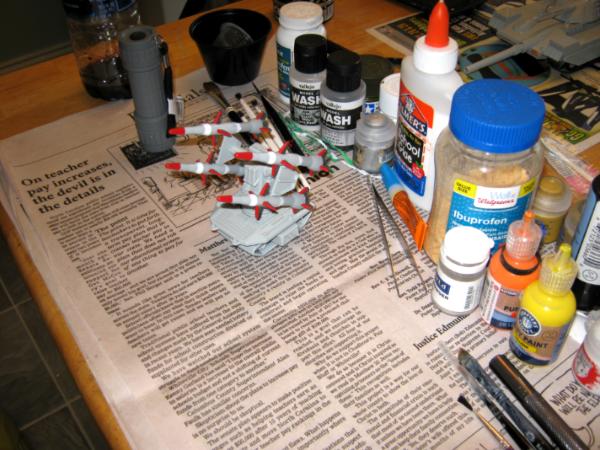
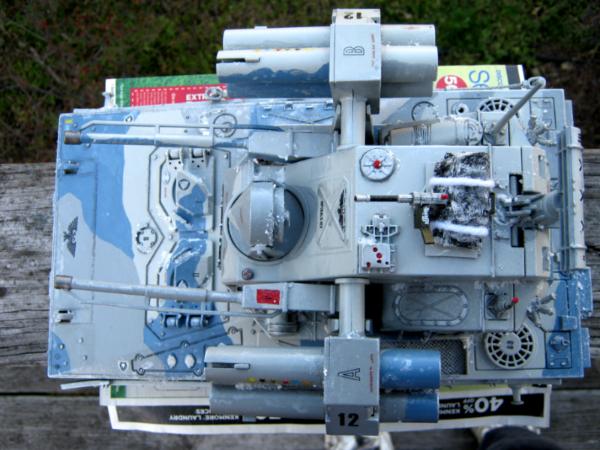
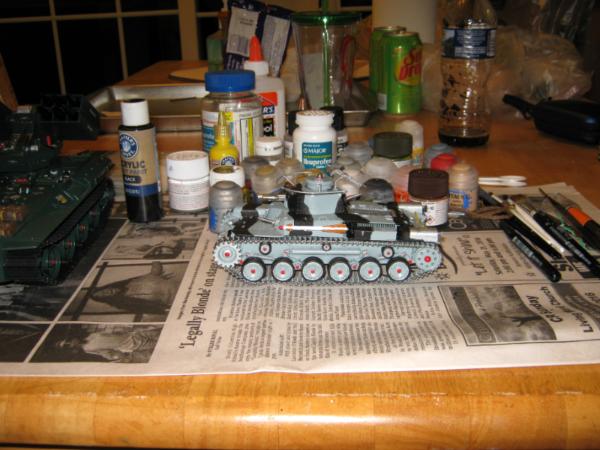
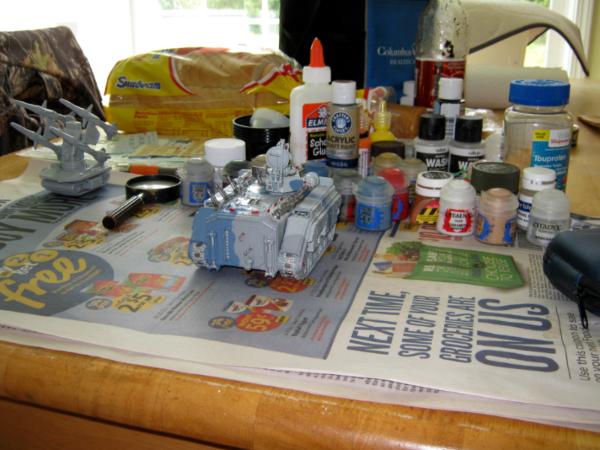
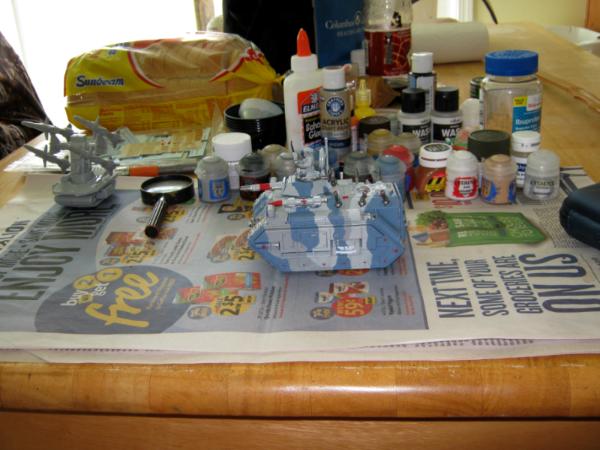
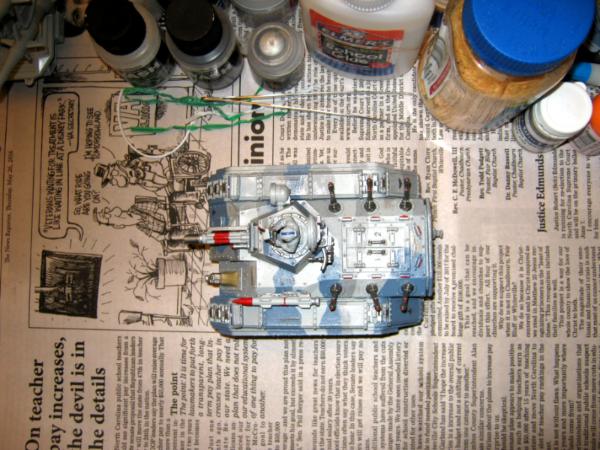
Back to the Type 97. First, using Forge World Ash Grey weathering powder, I added some dust effects to the lower areas of the main hull, concentrating around the wheels, treads, and suspension.
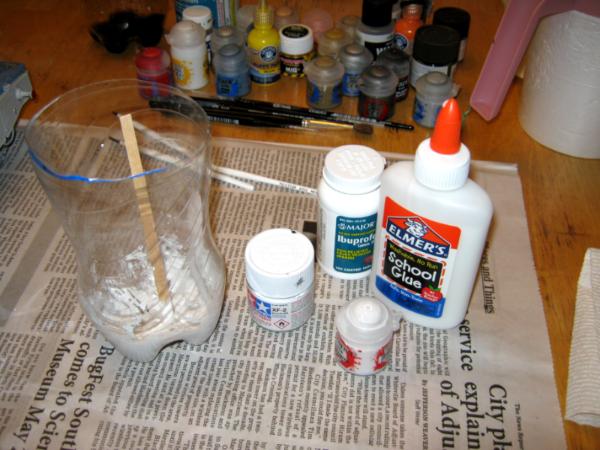
Next, I mixed up some ashen mud with Elmer's white school glue and more Forge World Ash Grey powder:

Finally, some chipping effects. I hit the areas base coated with Rust-o-Leum Winter Gray with a mixture of Tamiya XF-10 Flat Brown and dollar store black acrylic craft paint. The areas painted with Citadel Abaddon Black, I used a light stippling of Citadel Runefang Steel.
Pics:


Well, that's it for now. More to come.......
|
Proud Purveyor Of The Unconventional In 40k |
|
|
|
|
2017/03/26 23:14:30
Subject: Oldraven's Little Projects Thread.
|
|

Gargantuan Great Squiggoth
|
Nice work, really coming on now, you are really cranking them out. Love the extra detailing, right up my street.
|
|
|
|
|
|
2017/03/27 08:34:58
Subject: Oldraven's Little Projects Thread.
|
|
Longtime Dakkanaut
|
|
Proud Purveyor Of The Unconventional In 40k |
|
|
|
|
2017/03/27 20:39:55
Subject: Re:Oldraven's Little Projects Thread.
|
|
Longtime Dakkanaut
|
|
|
This message was edited 1 time. Last update was at 2017/03/28 02:50:05
Proud Purveyor Of The Unconventional In 40k |
|
|
|
|
2017/03/28 08:27:15
Subject: Oldraven's Little Projects Thread.
|
|
Rogue Inquisitor with Xenos Bodyguards
|
All looking great! some look like they need rust remover! good use of effects.
Galleon as Commissar's pimped relic ride works!
Type 97 Looking properly Imperial!
the big manticore style and the little Katyusha launcher also look good, (and need rust removal jelly!) 
|
"Your mumblings are awakening the sleeping Dragon, be wary when meddling the affairs of Dragons, for thou art tasty and go good with either ketchup or chocolate. "
Dragons fear nothing, if it acts up, we breath magic fire that turns them into marshmallow peeps. We leaguers only cry rivets!
|
|
|
|
|
2017/03/29 01:59:49
Subject: Oldraven's Little Projects Thread.
|
|
Longtime Dakkanaut
|
shasolenzabi wrote:All looking great! some look like they need rust remover! good use of effects.
Galleon as Commissar's pimped relic ride works!
Type 97 Looking properly Imperial!
the big manticore style and the little Katyusha launcher also look good, (and need rust removal jelly!)
Thanks. Your feedback is always welcome and appreciated.
Now on to the update.......
I'll cover the armored car project first.
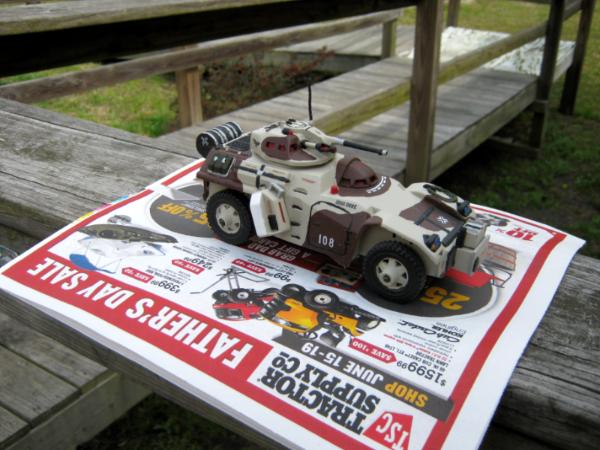
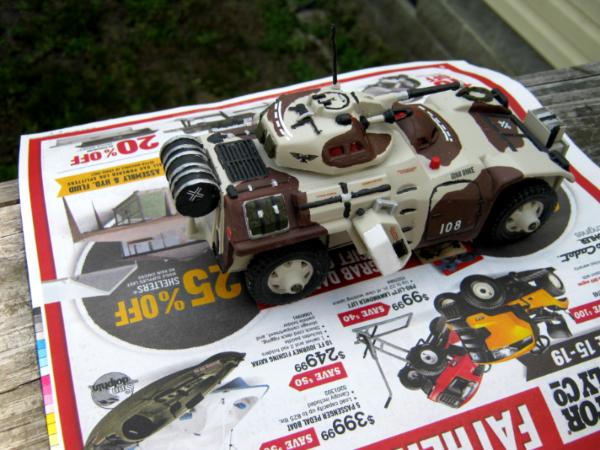
First off, I painted inside the tire treads with a bit of Citadel Tallarn Dust:
Then on to the chipping and wear effects. I used my usual poison: Runefang Steel for the brown and black areas, a mix of Tamiya Flat Brown and black paint (dollar store acrylic craft paint, in this case).
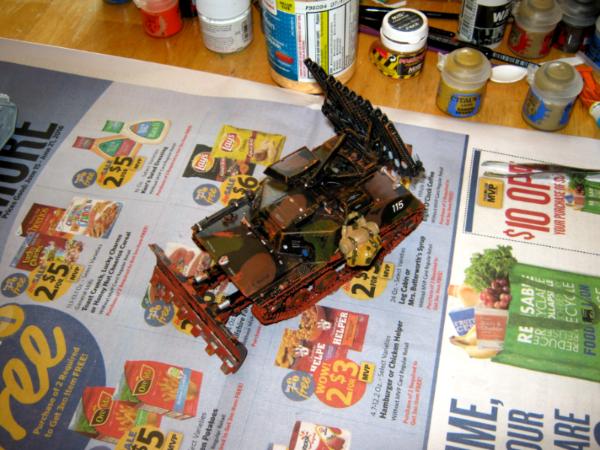
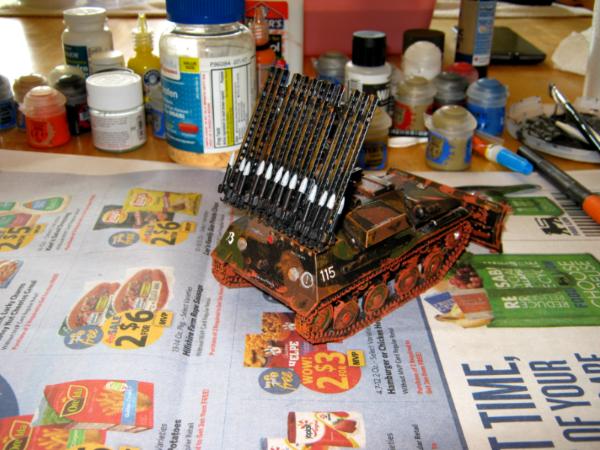
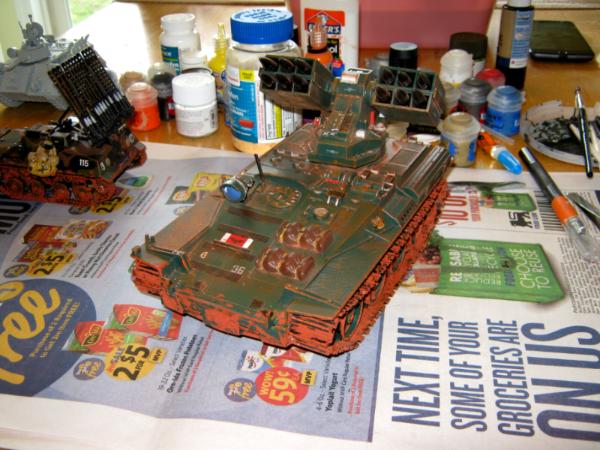
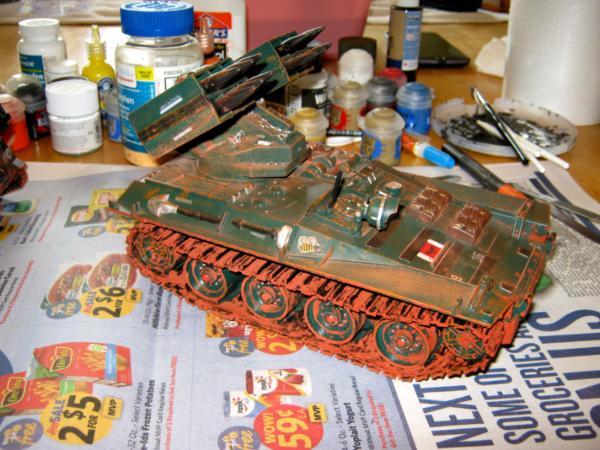
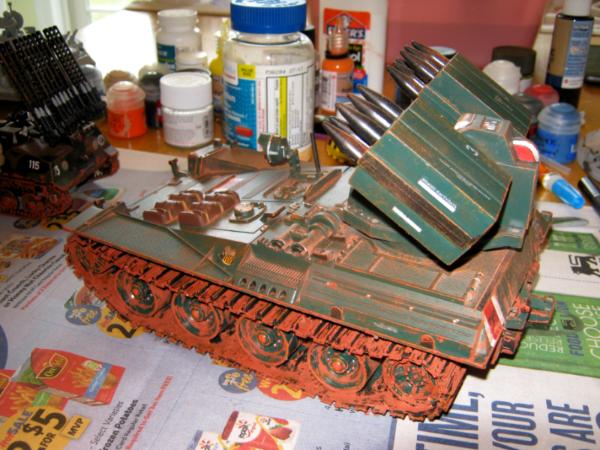
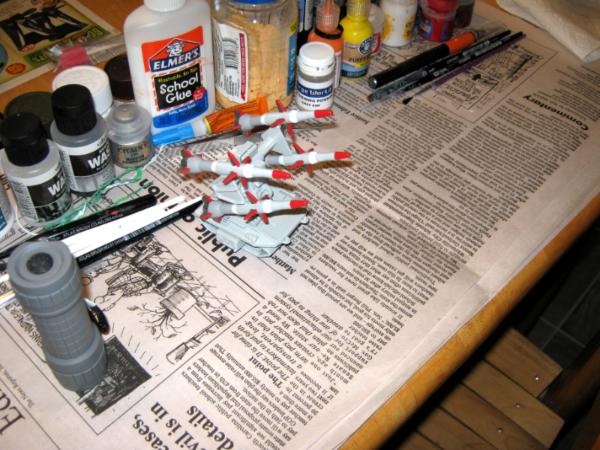
A progress shot of the work on the stowage pack for the Katyusha:

And the stowage pack finished:

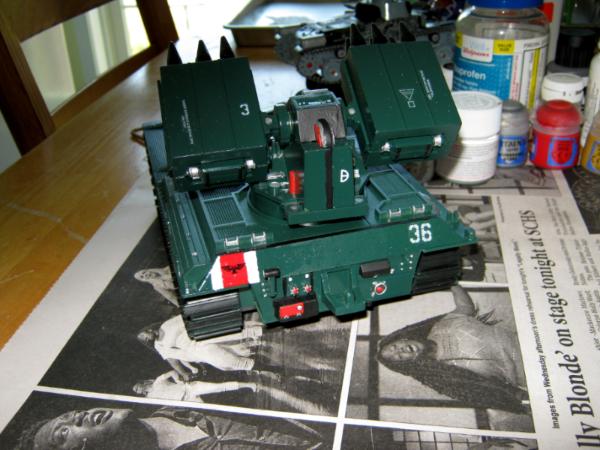
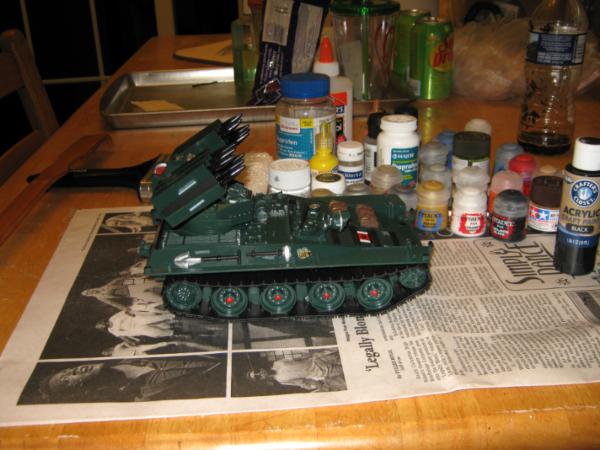
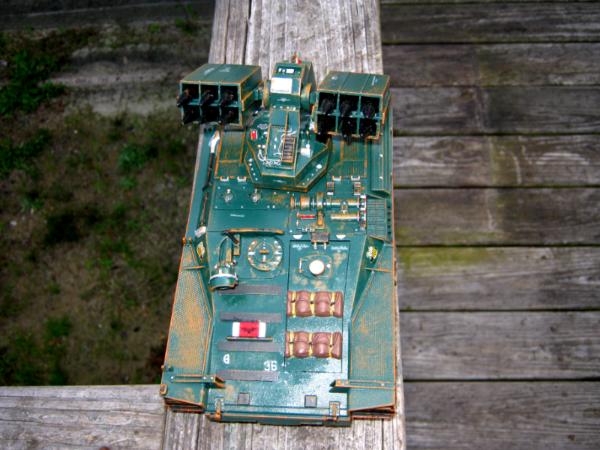
On the Wolverine, I used a dark wash on the stowage packs, on the engine cover, to bring out their details a little bit better:

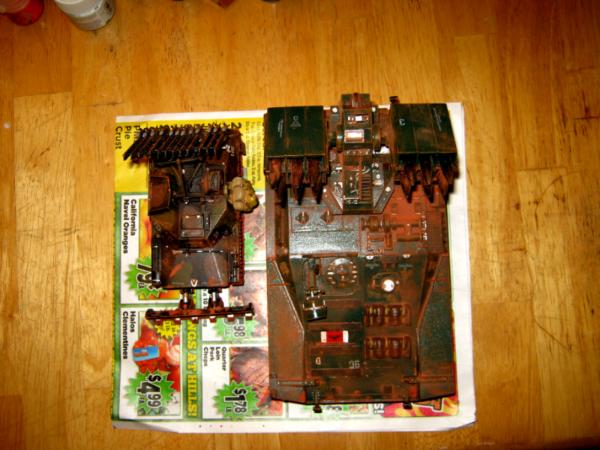
On to the next step, I hit two vehicles in one sitting. I used the MiG Martian Dust and Elmer's white school glue to make the red clay and mud mix. After application, I heavily dusted both vehicles with the same powder to simulate heavy red clay dust. Tropical jungle environments, during the dry season, don't make for clean vehicles. The next step will be the matte coating with Krylon.
The pics of the nasty, dusty AFVs:


Well, that's it for now folks. More to come......
|
Proud Purveyor Of The Unconventional In 40k |
|
|
|
|
2017/03/29 23:19:00
Subject: Re:Oldraven's Little Projects Thread.
|
|
Longtime Dakkanaut
|
Time for another update to the thread.....
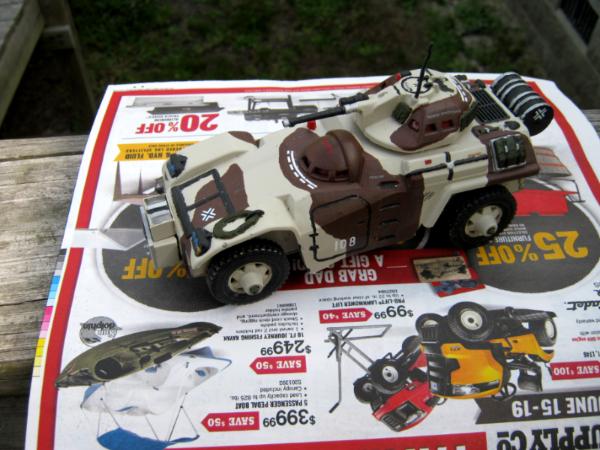
First off today, I took the Wolverine and Katyusha outside, and used a standard household paintbrush to dust off some of the excess weathering powder. After that, I started applying the rattle can Krylon matte finish:

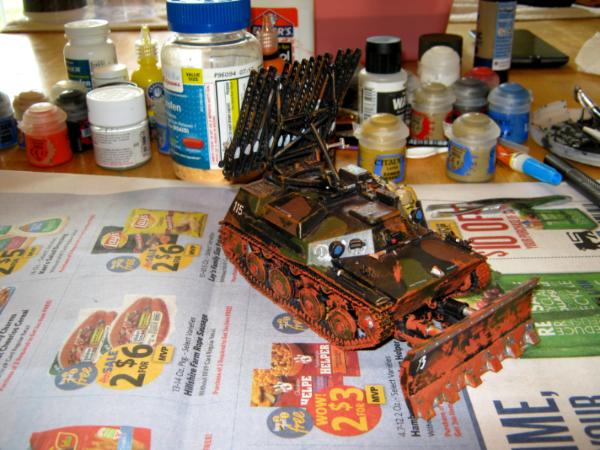
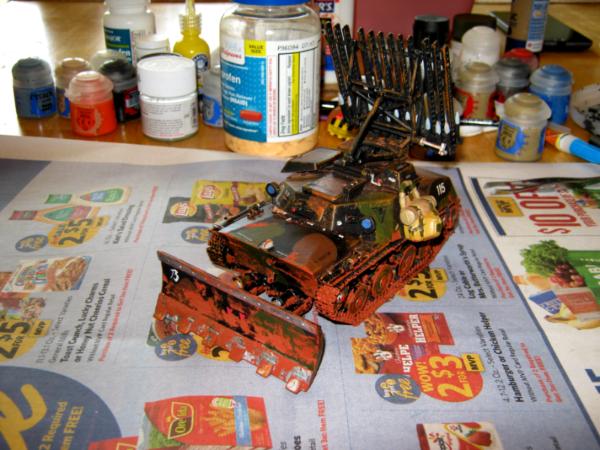
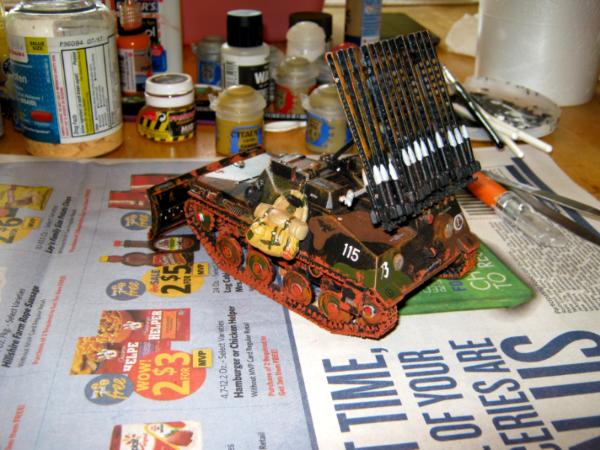
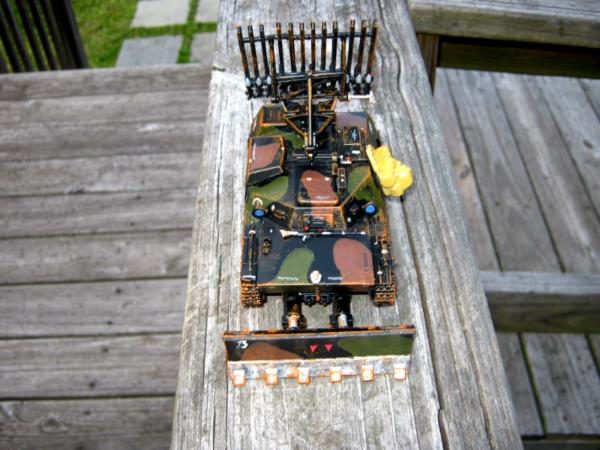
After coating the Katyusha, I started matte coating the Wolverine. That's when I got a rude surprise. The Katyusha model is fairly light weight, even with the Citadel dozer blade and G.I. Joe stowage pack added on. Out of habit, I also had the little model sitting on an old sales paper on the front porch rail. Along comes a gust of wind, and this happens:
Fortunately, I used Loc-Tite super glue to build the launch rail and I was able to recover all of the pieces intact. It didn't take much to apply some Gorilla super glue to put everything back together in a "good enough" repair job.
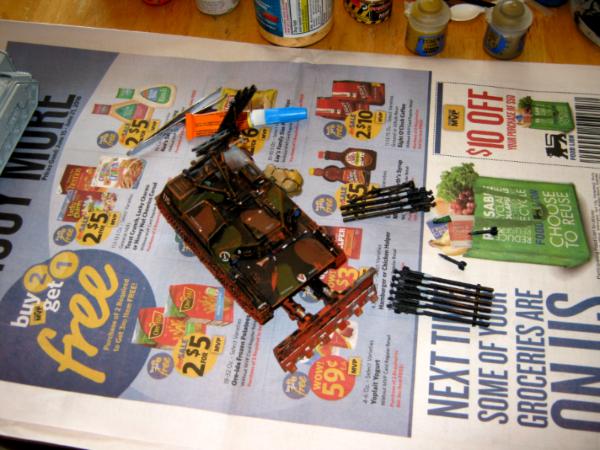
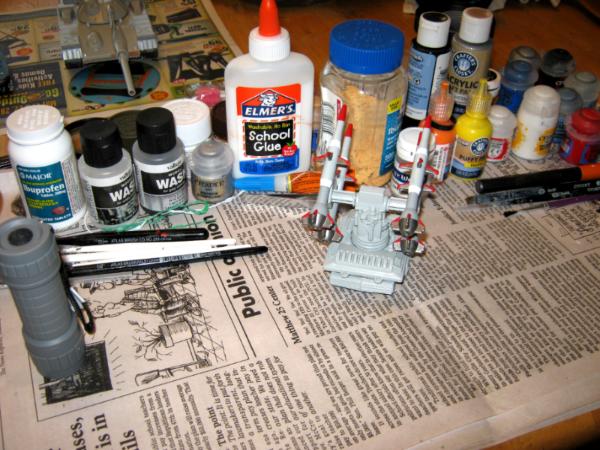
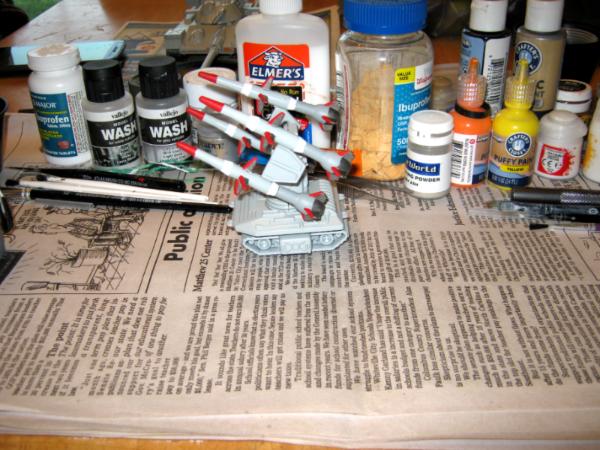
And I am happy to say that after repairing the mess, the BM-8-24 "Katyusha" (on the T-40 chassis) is now FINISHED.
More pictures:
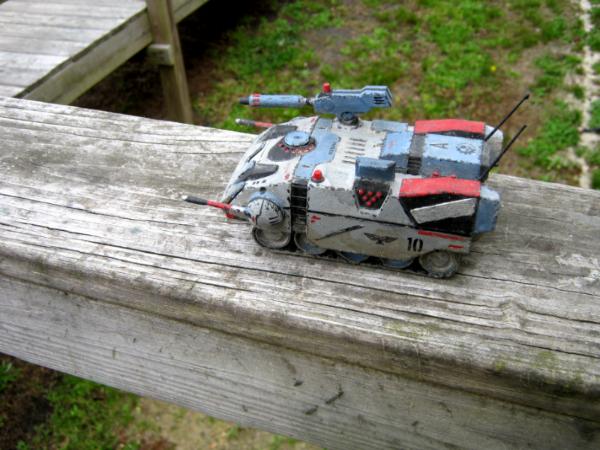
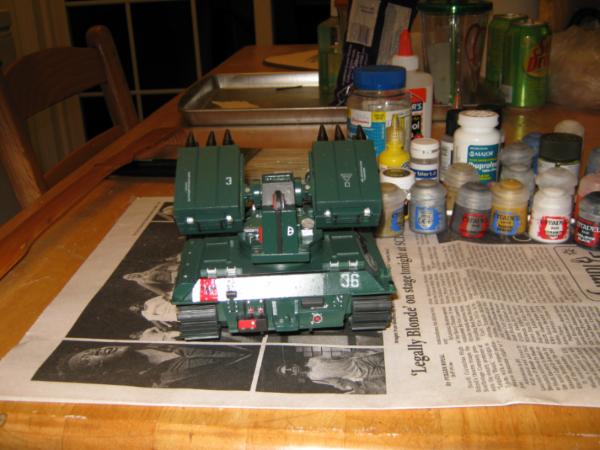
Also finished up today after a good coat of Krylon matte is the Wolverine. I just have to put the towing rope back on the front, and I'll call it good:

I broke out the Armadillo and painted between the track links with a little Citadel Tallarn Sand. I also hit the vehicle commander with some Vallajo dark wash to bring out the details a little better (because I suck at painting figures). After this, like the Armored Car Project, it will have to be put on a back burner until I get some desert weathering materials.

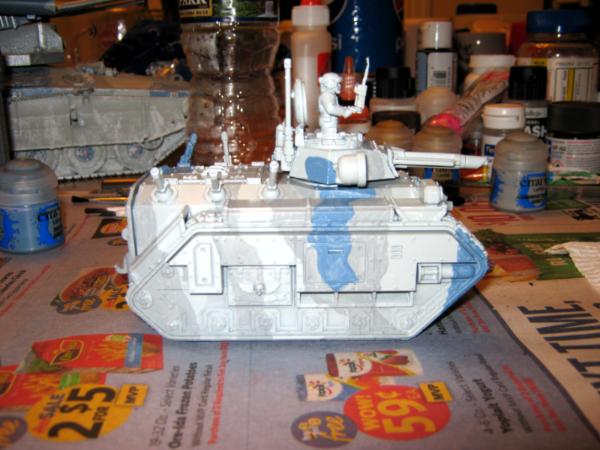
Finally, I started painting the camo pattern on the Chimera CCSV (Control, Coordination, and Support Vehicle) using the Equalizer as a painting guide:
Well, that's it for now. More to come, folks.
|
|
This message was edited 1 time. Last update was at 2017/03/29 23:21:49
Proud Purveyor Of The Unconventional In 40k |
|
|
|
|
2017/04/03 02:50:13
Subject: Re:Oldraven's Little Projects Thread.
|
|
Longtime Dakkanaut
|
|
Proud Purveyor Of The Unconventional In 40k |
|
|
|
|
2017/04/04 06:07:51
Subject: Re:Oldraven's Little Projects Thread.
|
|
Longtime Dakkanaut
|
UPDATE:
Camo touch-ups were taken care of. I also started painting on the details and am over half-done with them. After that, I will backtrack and touch up the details needing it.
I'll need to pick up a new fine detail brush before working on the vehicle commander. But in the meantime, I'll spot varnish with 'Ardcoat and apply transfers.
Anyway, here are the pics of this evenings progress:


Anyway, that's it for now. More to come.......
|
Proud Purveyor Of The Unconventional In 40k |
|
|
|
|
2017/04/04 06:31:44
Subject: Oldraven's Little Projects Thread.
|
|
Rogue Inquisitor with Xenos Bodyguards
|
All looking good! shipped Armored Car, and that red dust gets all over things! 
|
"Your mumblings are awakening the sleeping Dragon, be wary when meddling the affairs of Dragons, for thou art tasty and go good with either ketchup or chocolate. "
Dragons fear nothing, if it acts up, we breath magic fire that turns them into marshmallow peeps. We leaguers only cry rivets!
|
|
|
|
|
2017/04/08 00:14:43
Subject: Oldraven's Little Projects Thread.
|
|
Longtime Dakkanaut
|
|
Proud Purveyor Of The Unconventional In 40k |
|
|
|
|
2017/04/08 07:27:37
Subject: Oldraven's Little Projects Thread.
|
|
Gargantuan Great Squiggoth
|
Thats looking brilliant bud, and loved the rust work previous.
|
|
|
|
|
|
2017/04/08 08:17:15
Subject: Oldraven's Little Projects Thread.
|
|
Longtime Dakkanaut
|
Thanks, Cap'n. I'm glad you're enjoying the results so far.
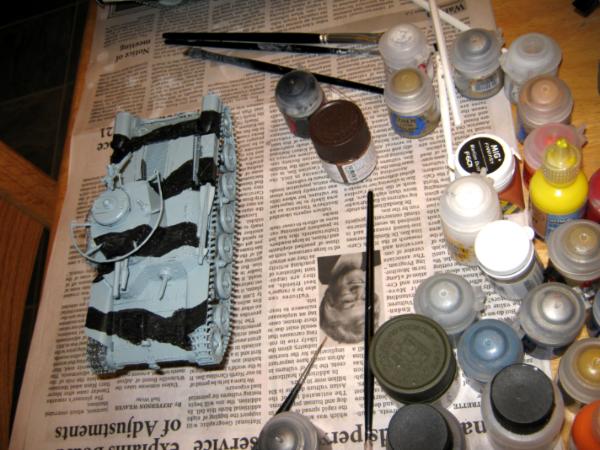
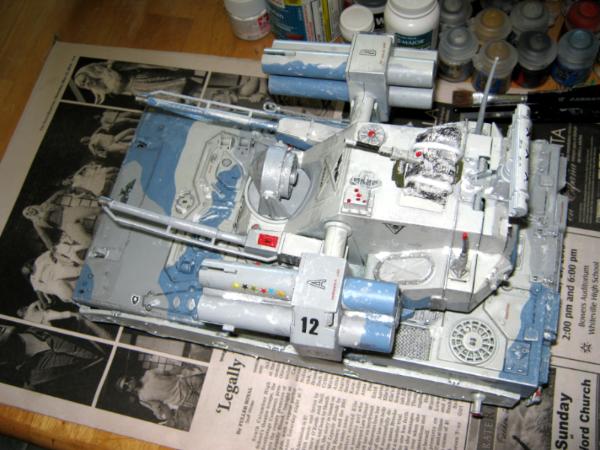
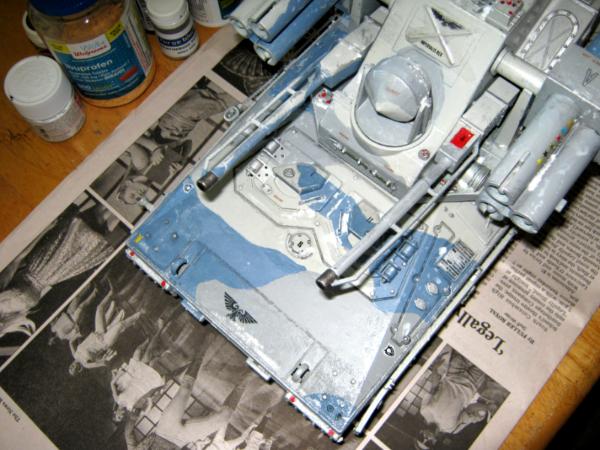
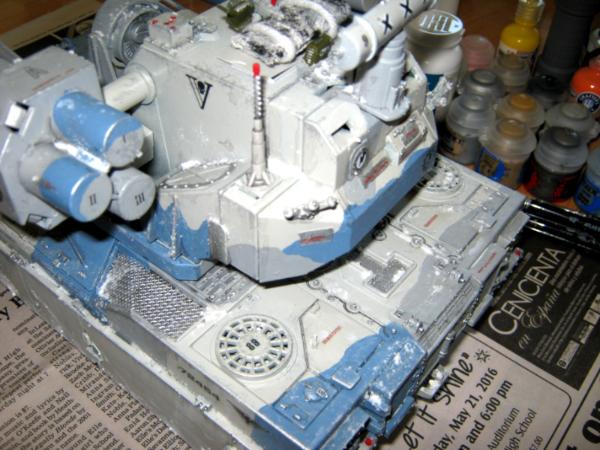
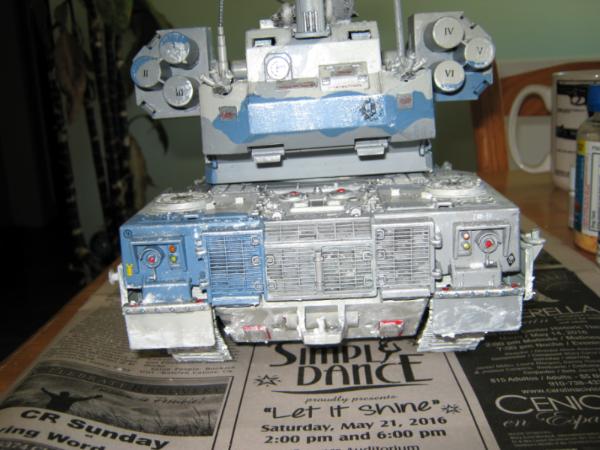
I've already pin washed the Chimera and did a light white "winter" wash of the flat areas on the hull. The snow and ice will get slapped on tomorrow.
I'm ready to start working on the PAC/ RAT that I already have base coated. I have two other PAC/RATs to base coat, and one PAC/ RAT chassis that I want to use for a custom melta armed unit. I also want to put together another control vehicle for the PAC/RATS. I'm looking at using a Rhino just for variety. I'll also need some techpriests as datasmiths, and maybe some armed support personnel. I'm leaning a little to the high tech and oddball side for the Operation: MUSE WINTER army.
|
Proud Purveyor Of The Unconventional In 40k |
|
|
|
|
2017/04/16 00:43:38
Subject: Re:Oldraven's Little Projects Thread.
|
|
Longtime Dakkanaut
|
Update. And one that is long overdue.
Please note that some of these pic have been posted in the gallery for over a week. I'm only getting around to posting today. It's been busy.
After the washes and winter effects, I applied the Krylon Clear Glaze to give an effect of frost/an iced-over hull (except the tank commander, who I blocked with paper to avoid glaze on him). After that, the Chimera CCSV is FINISHED:


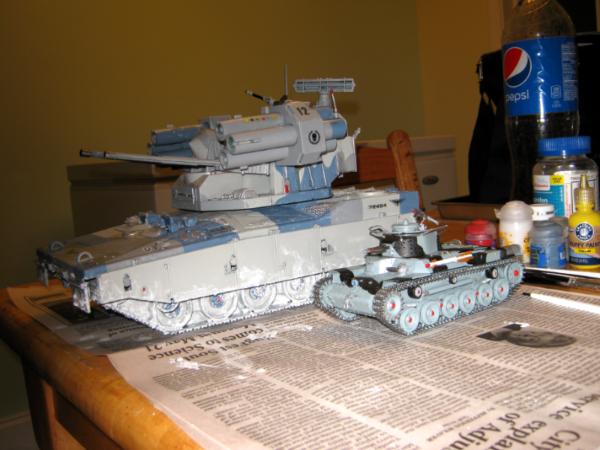
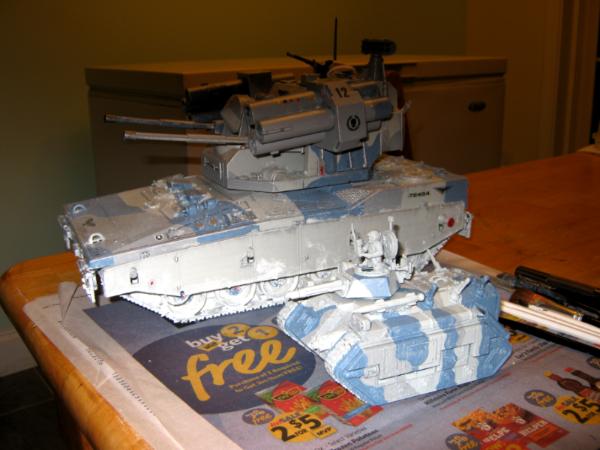
Two-sie shot with the "Pattern 121":


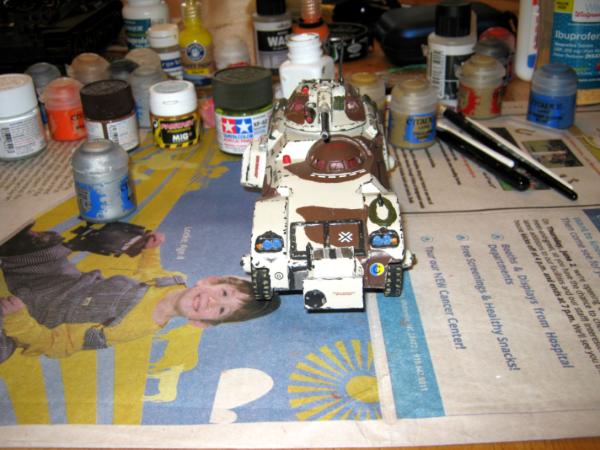
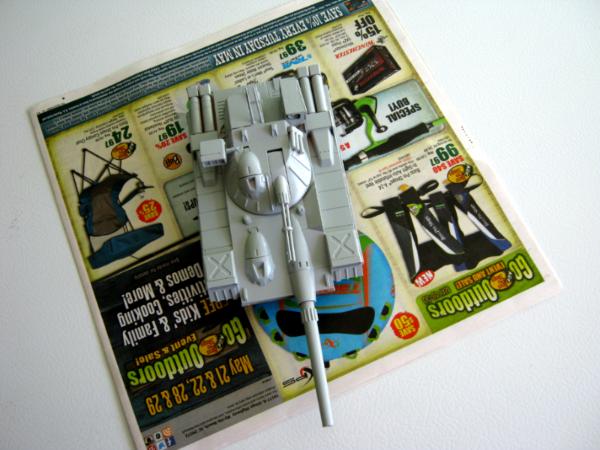
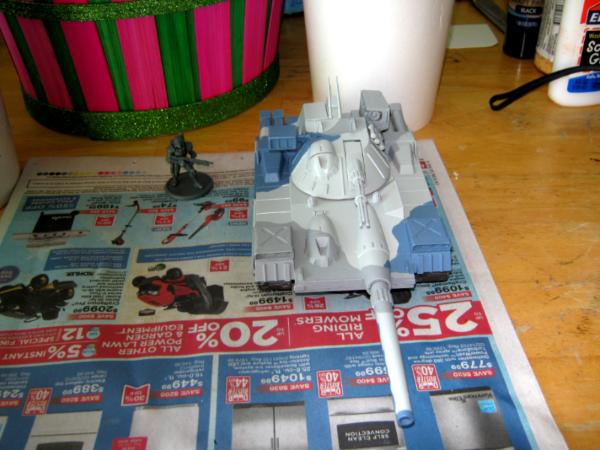
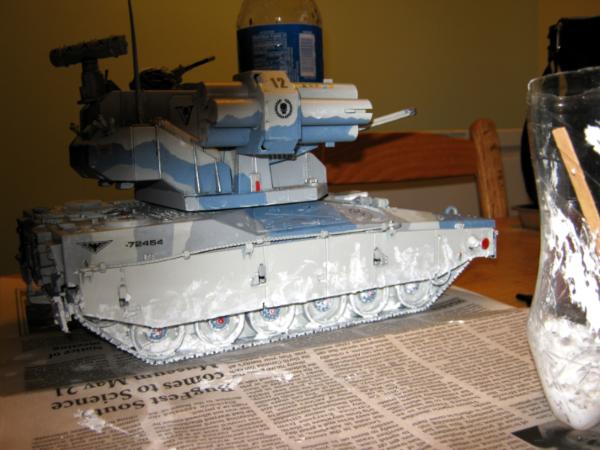
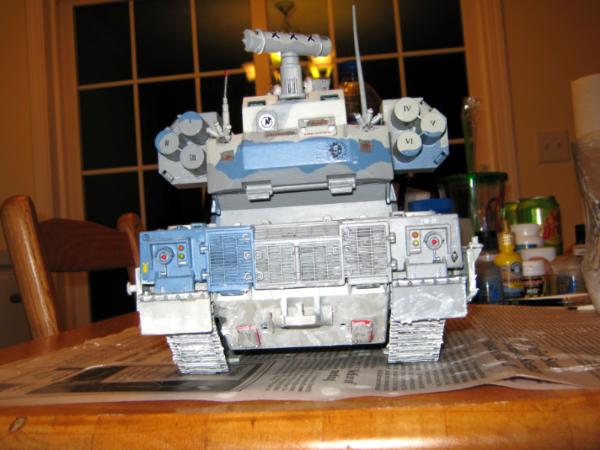
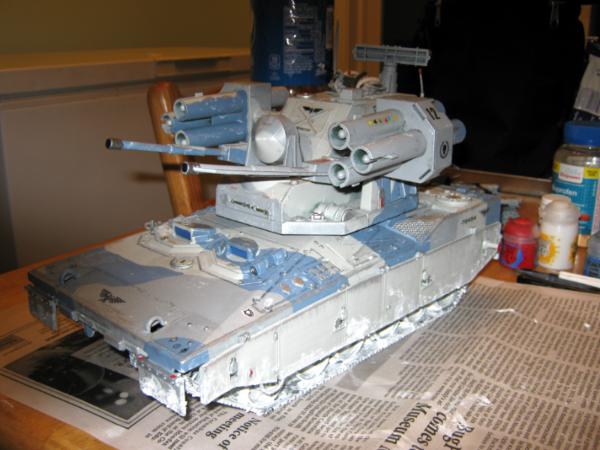
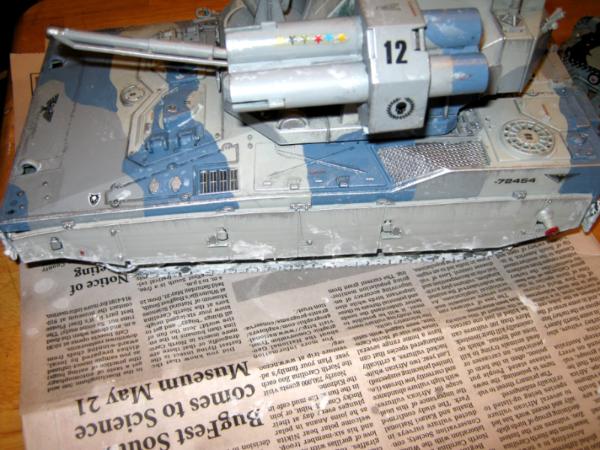
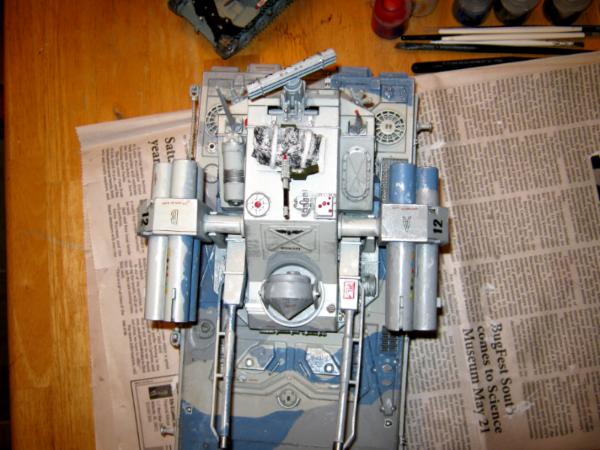
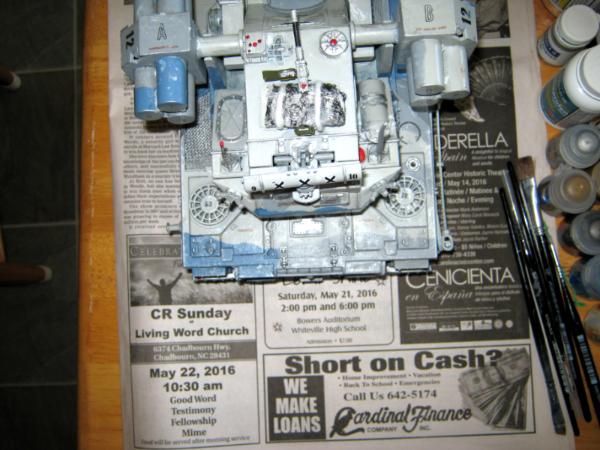
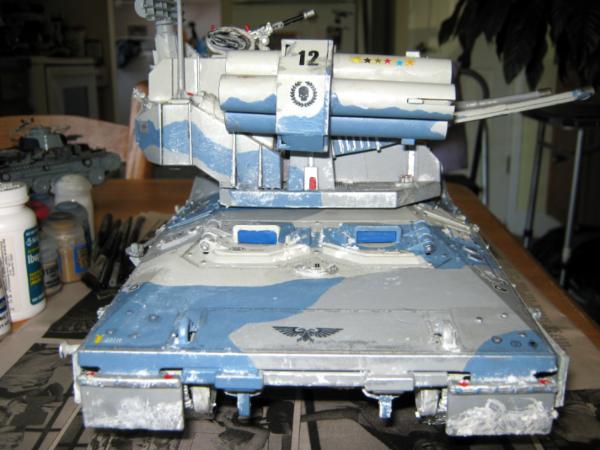
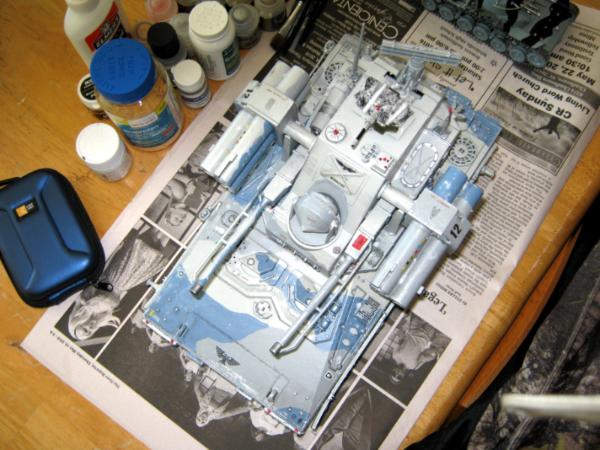
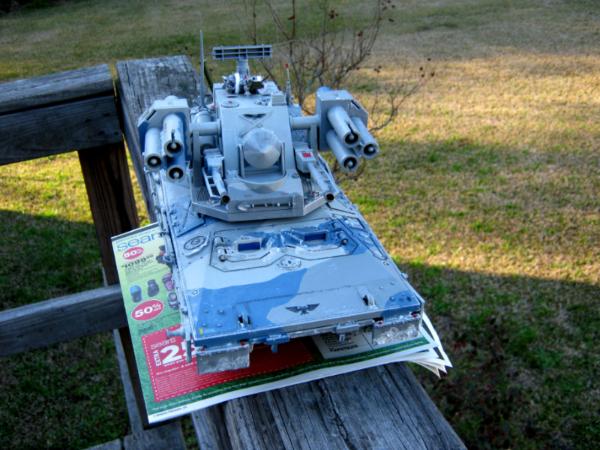
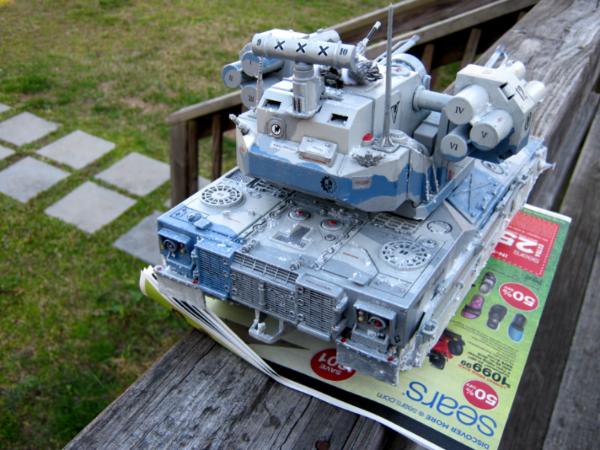
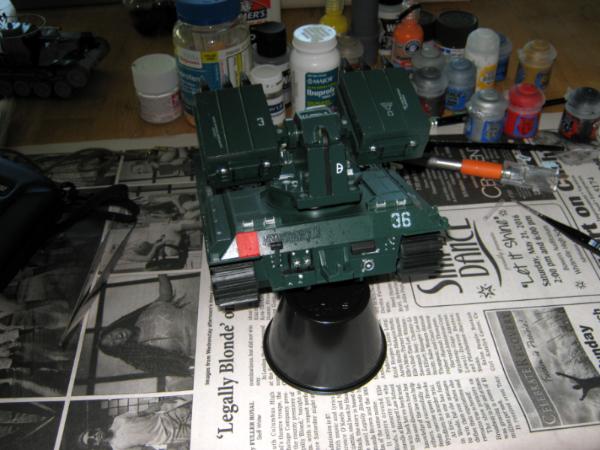
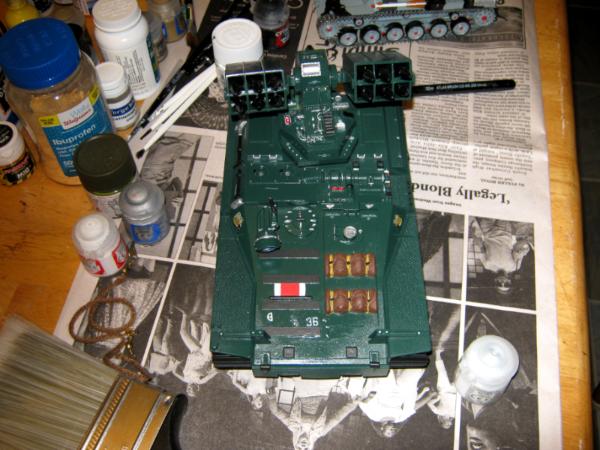
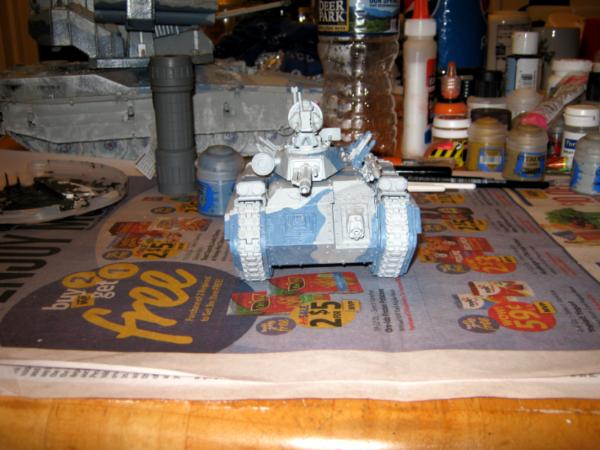
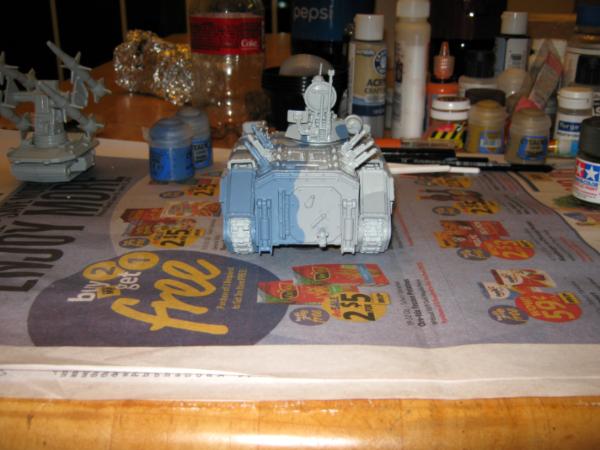
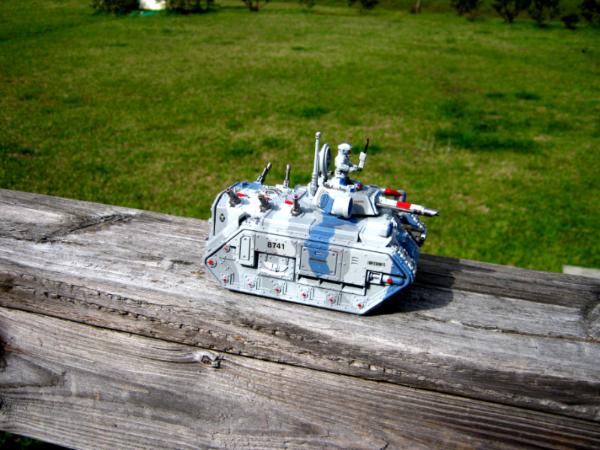
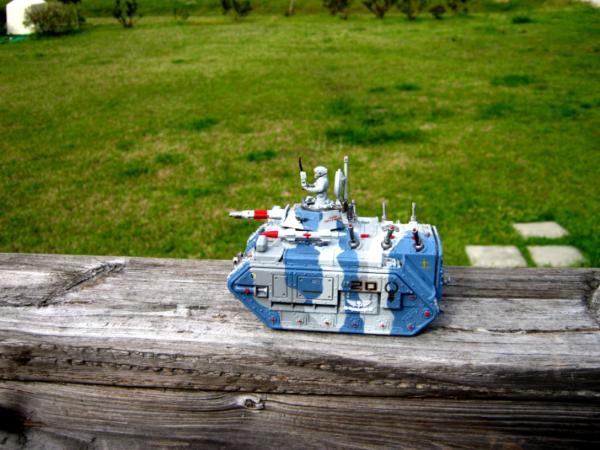
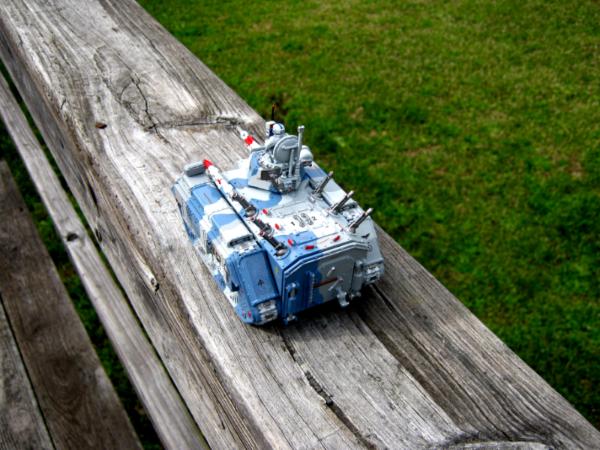
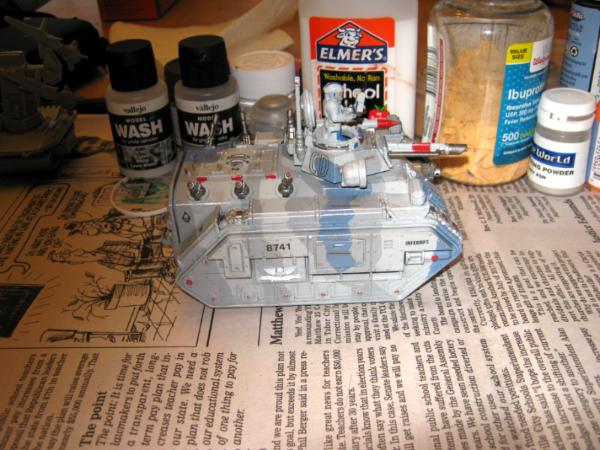
Base coated the MBT-90D in preparation for painting:
I also painted and touched-up the missiles on the PAC/ RAT:

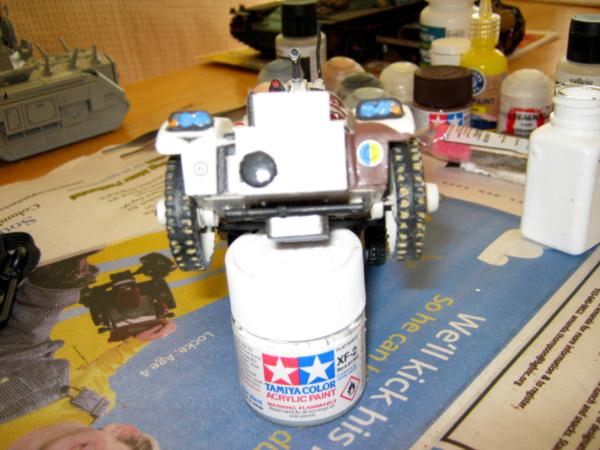
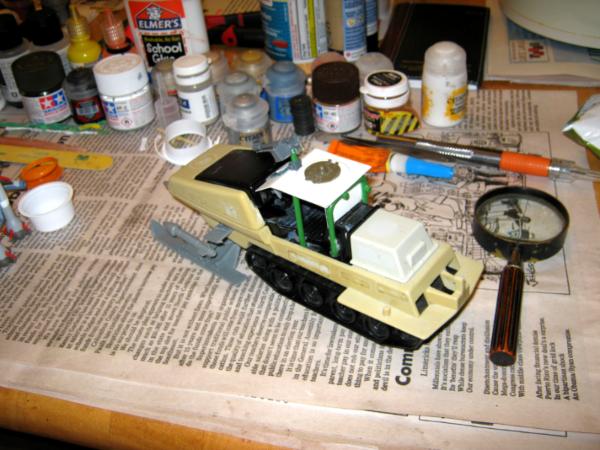
I decided that building an armored cab for the Polar Battle Bear would be easier if I built a frame first. Now, I'm trying to decide how I want to build said frame:

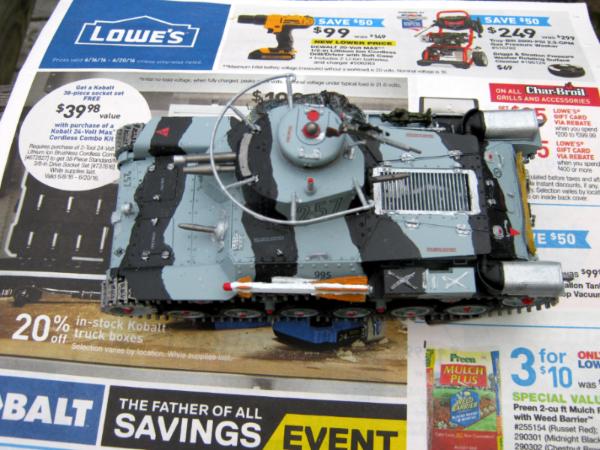
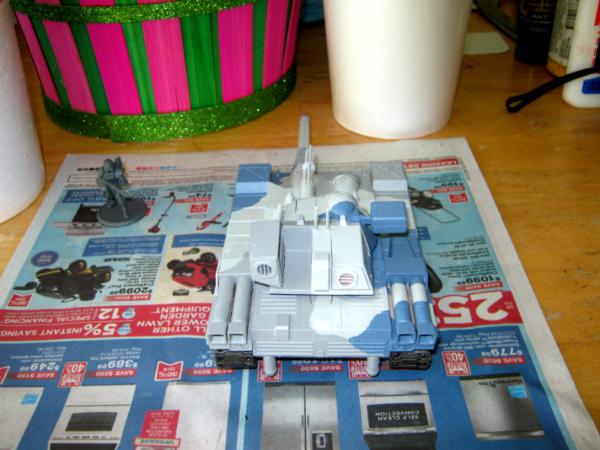
I have been painting the camo on the MBT-90D. I'm taking it nice an slow, allowing it to dry good in between coats and trying to keep it neat.
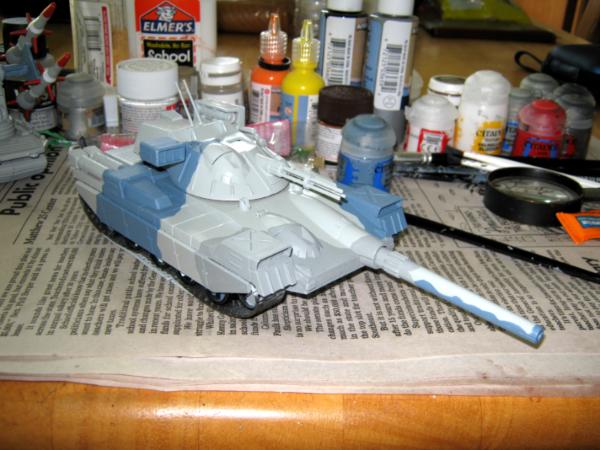
The same goes for the PAC/ RAT:

Well, that's it for now. More to come.....
|
Proud Purveyor Of The Unconventional In 40k |
|
|
|
|
2017/04/16 06:27:35
Subject: Oldraven's Little Projects Thread.
|
|
Gargantuan Great Squiggoth
|
Chimera is looking spot on matey, good work.
The rest is all coming on well, the camo on the 90D is looking great.
|
|
|
|
|
|
2017/04/20 12:19:03
Subject: Oldraven's Little Projects Thread.
|
|
Longtime Dakkanaut
|
 Camkierhi wrote: Camkierhi wrote:Chimera is looking spot on matey, good work.
The rest is all coming on well, the camo on the 90D is looking great.
Thanks, Boss. I'm glad you are enjoying it so far.
Quick update.
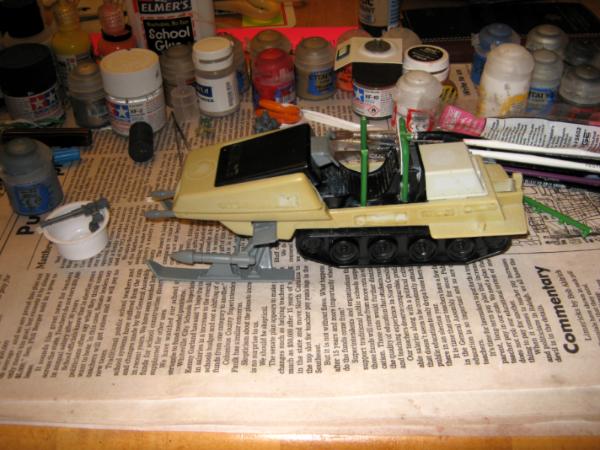
The Polar Battle Bear Project.
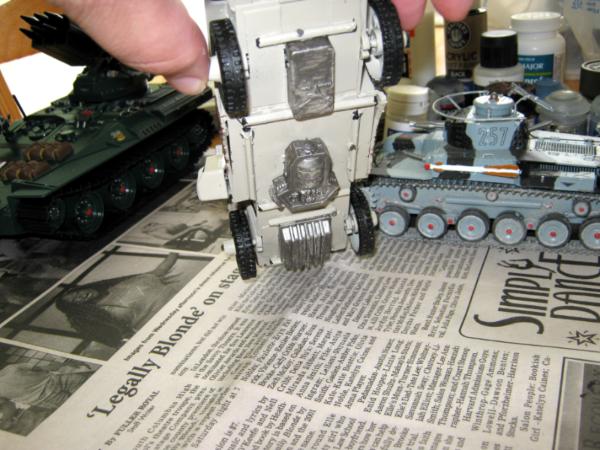
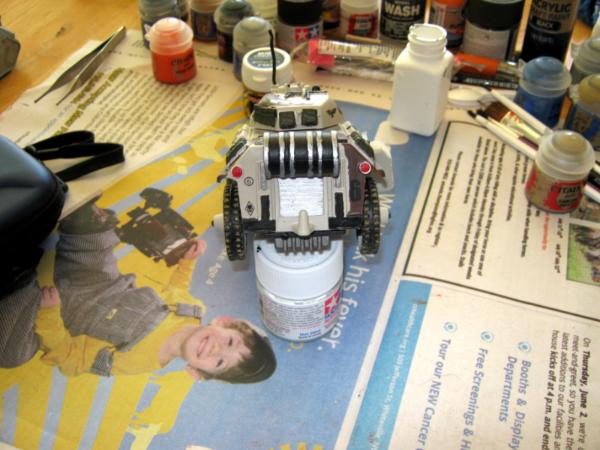
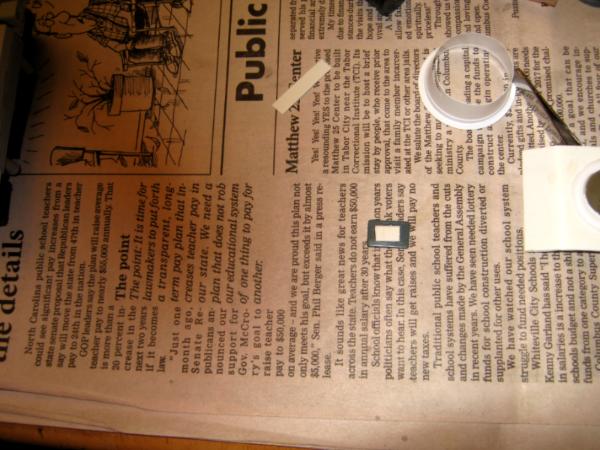
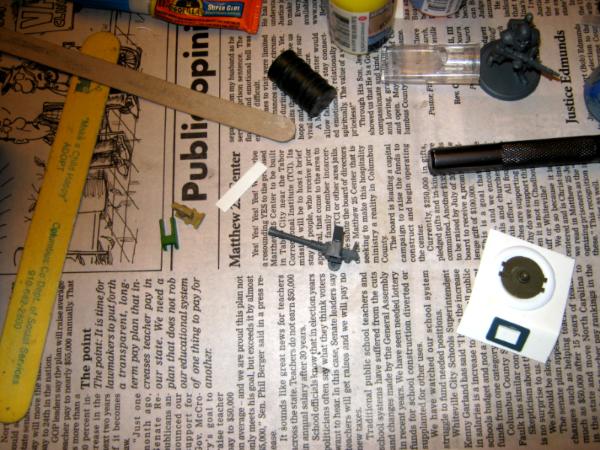
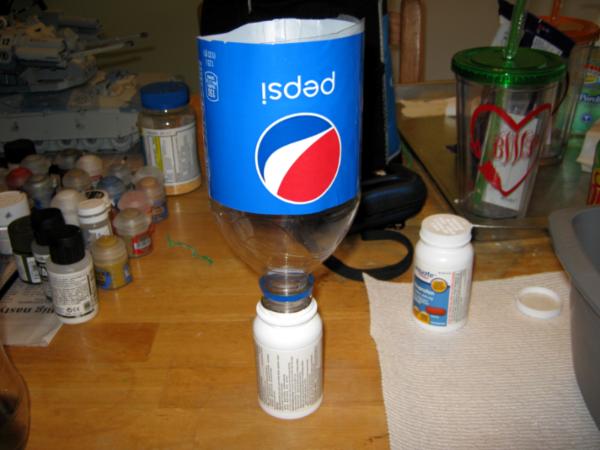
Using a piece cut from an old novelty sign, I made what will be the top of the armored cab for the over sized snowmobile (But hey, it's the Imperium of Man. Go big or go home). Then, using the bottom cut from a leftover small butter container, I made the main "ring" of the top hatch slash cupola:
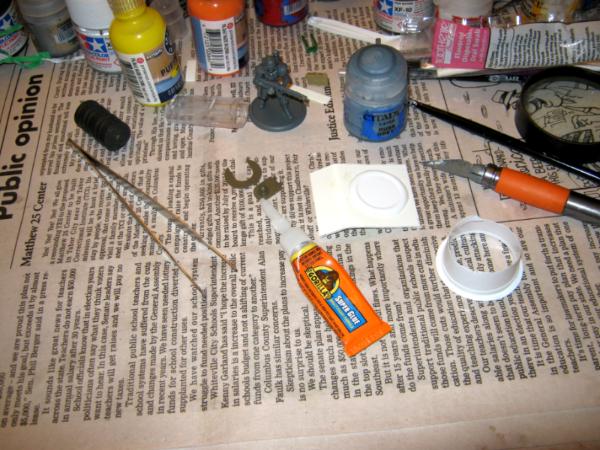
The using leftover bits from the Tamiya Type 97 kit (for the "open hatch" option on the commander's cupola), I made the top hatch:
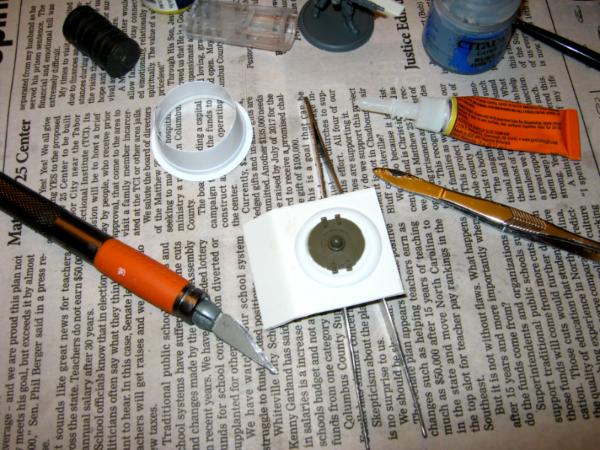
Next is the armored viewport on the cab's front glacis. This was made with the base for the bonus figurine from the Takara Galleon kit, and a small piece from the old novelty sign for the "transparency" /window. Then, after letting the Gorilla Glue bond good, I glued it to the front glacis:

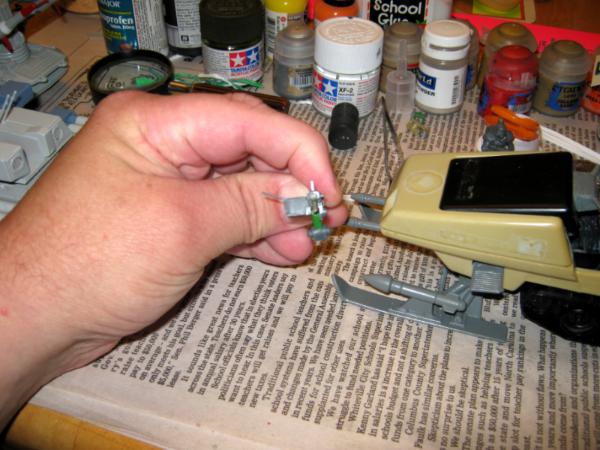
I assembled the unused heavy stubber from the Chimera kit next:
Since Citadel/Games Workshop sees fit to include only one trigger/grip assembly for the pintle mounted weapon, I had to improvise. I made my own grip/trigger from some small sprue leftover from the Trumpeter JGSDF CRV kit.

Since the connections for the moving guns are a bit on the flimsy side due to age, I super glued them to a fixed position. Also, better safe than sorry. Because once the crew cab is assembled, there will be no more disassembling the vehicle, since the hood, dash, driver's seat/position, and engine are all part of a two piece assembly. An assembly that comes off of the chassis part as one piece. It would be a pain in the ass to put the gun assembly back to together, if they ever popped lose after finishing the conversion.

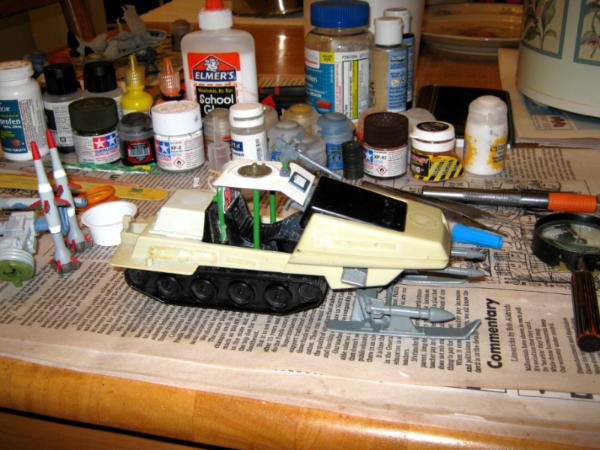
I also started building the frame with sprue from one of the STC T-40/Katyusha kits.
Next, using sprue from one of the STC START T-40/Katyusha vehicle kits, and a connector piece from the Bandai Patlabor kit, I made a pintel mount for the heavy stubber leftover from the Chimera kit.

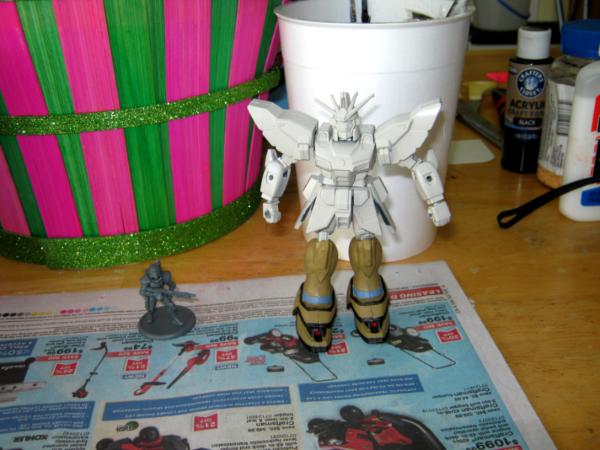
Next up is ADVICE TIME, where I humbly seek advice from you, dear readers.
In your opinion(s), what would be the ideal sized base for the 1/144 scale Gundam Wing Sandrock for tabletop? To get an idea, here is a size comparison shot with a 28mm Dreamforge Eisenkern Stormtrooper:

Anyway, thanks in advance. And with that, update for today is wrapped up.
More to come...................
|
Proud Purveyor Of The Unconventional In 40k |
|
|
|
|
2017/05/02 16:42:58
Subject: Re:Oldraven's Little Projects Thread.
|
|
Longtime Dakkanaut
|
Just dropping in to give a heads up........
With Spring upon us, that means warmer weather and things that need to be done. Because of that, this thread won't be updated as much as before, at least for a little while. But I will continue to post pics in the gallery as I go along, updating the thread when I have enough images posted to make it worthwhile.
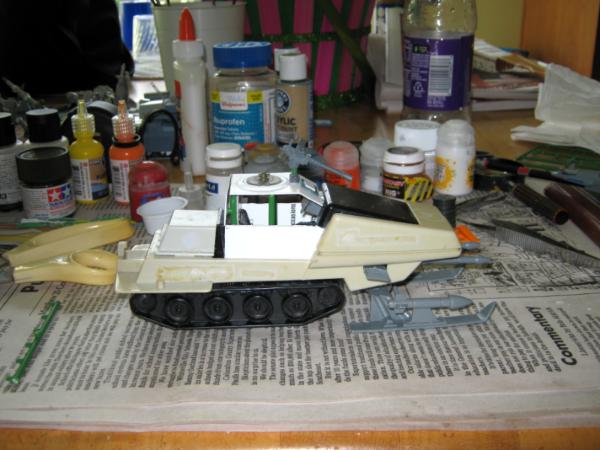
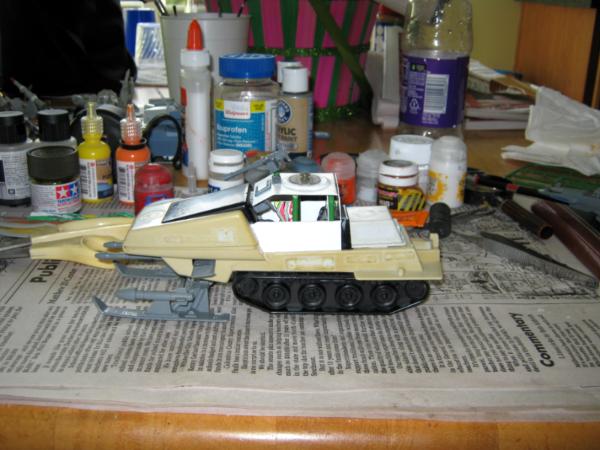
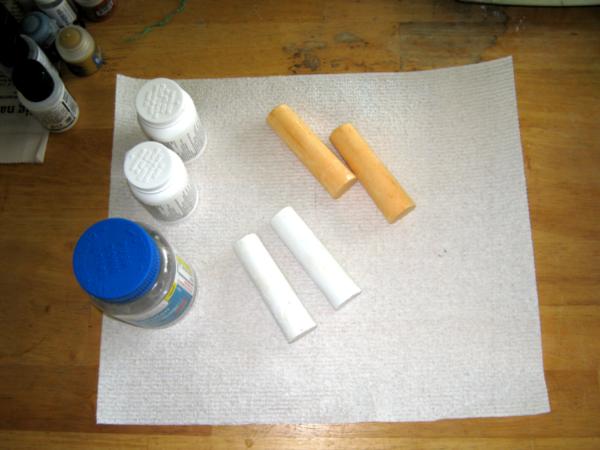
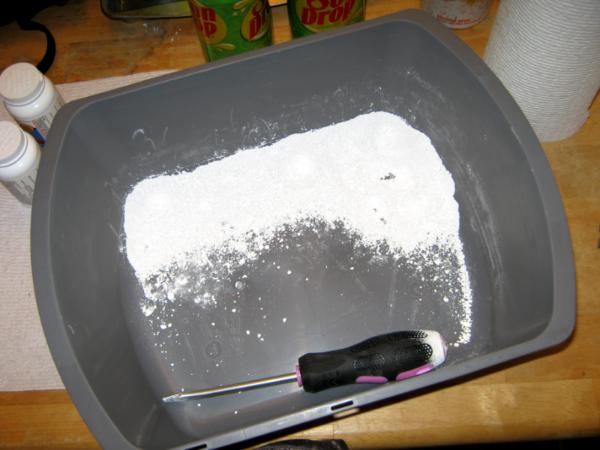
Here are some pics of the Polar Battle Bear project that have been up in the gallery for a while. Most of the work has involved building a crew cab.


And some free 60 grit sand paper from an uncle to work the paint off of the old metal toys. It ain't much. But it was a freebie:

Well, that's it for now. More to come (at some point).........
|
Proud Purveyor Of The Unconventional In 40k |
|
|
|
|
2017/05/03 21:18:46
Subject: Oldraven's Little Projects Thread.
|
|
Gargantuan Great Squiggoth
|
Looking fantastic bud, great work on the cab.
|
|
|
|
|
|
2017/05/04 23:37:03
Subject: Oldraven's Little Projects Thread.
|
|
Longtime Dakkanaut
|
Thanks, Boss. It's coming along slowly but surely, since I'm not working from a template and doing it "on the fly".
|
Proud Purveyor Of The Unconventional In 40k |
|
|
|
|
2017/05/05 00:31:41
Subject: Oldraven's Little Projects Thread.
|
|

Fixture of Dakka
|
Always interested in what you are going to come up with next.
Cheers,
CB
|
|
|
|
|
|
2017/05/05 21:57:36
Subject: Oldraven's Little Projects Thread.
|
|
Longtime Dakkanaut
|
Much thanks. It's always appreciated.
Since I'm here, just a brief update........
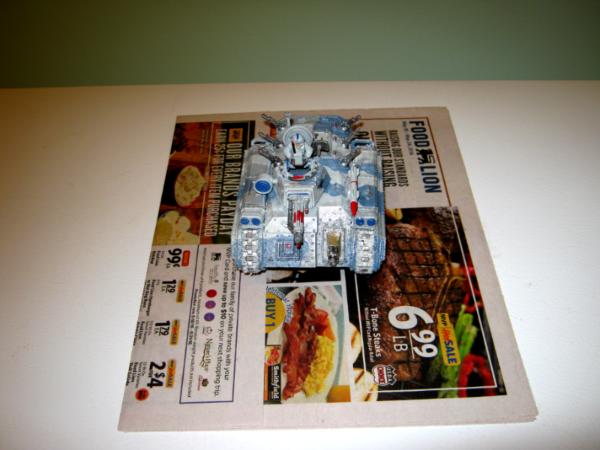
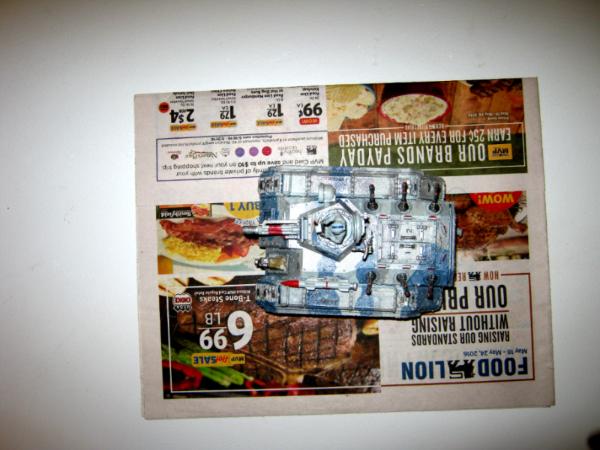
I did manage to start painting some on the "Sandrock" Gundam. Still have a ways to go.
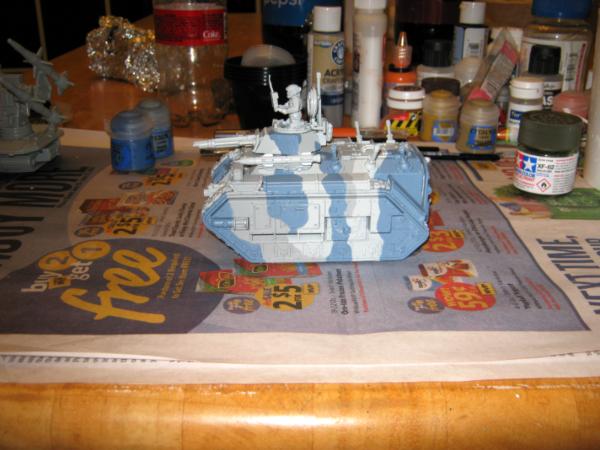
I also finished the basic camo pattern on the MBT-90D:


Well, that's it for now. More to come......
|
Proud Purveyor Of The Unconventional In 40k |
|
|
|
|
2017/05/06 04:53:45
Subject: Oldraven's Little Projects Thread.
|
|
Gargantuan Great Squiggoth
|
Your Gundam work has me itching. Got one somewhere.
Camo is looking great.
|
|
|
|
|
|
|
|


 Finished Forge World Elysian Army
  Finished Tau Sept Cadre
  Alaitoc Eldar Warhost
  Finished Order of Our Martyred Lady - Sisters of Battle
  Finished Necromundian Imperial Guard Regiment
