| Author |
Message |
 |
|
|
|
|
Advert
|
Forum adverts like this one are shown to any user who is not logged in. Join us by filling out a tiny 3 field form and you will get your own, free, dakka user account which gives a good range of benefits to you:
- No adverts like this in the forums anymore.
- Times and dates in your local timezone.
- Full tracking of what you have read so you can skip to your first unread post, easily see what has changed since you last logged in, and easily see what is new at a glance.
- Email notifications for threads you want to watch closely.
- Being a part of the oldest wargaming community on the net.
If you are already a member then feel free to login now. |
|
 |
2017/05/11 02:35:38
Subject: Oldraven's Little Projects Thread.
|
|

Longtime Dakkanaut
|
|
Proud Purveyor Of The Unconventional In 40k |
|
|
 |
|
2017/05/11 19:19:26
Subject: Oldraven's Little Projects Thread.
|
|
Rogue Inquisitor with Xenos Bodyguards
|
Looking good there! good wintry camo
|
"Your mumblings are awakening the sleeping Dragon, be wary when meddling the affairs of Dragons, for thou art tasty and go good with either ketchup or chocolate. "
Dragons fear nothing, if it acts up, we breath magic fire that turns them into marshmallow peeps. We leaguers only cry rivets!


|
|
|
|
|
2017/05/12 05:41:41
Subject: Oldraven's Little Projects Thread.
|
|
Longtime Dakkanaut
|
|
Proud Purveyor Of The Unconventional In 40k |
|
|
|
|
2017/05/15 02:38:36
Subject: Re:Oldraven's Little Projects Thread.
|
|
Longtime Dakkanaut
|
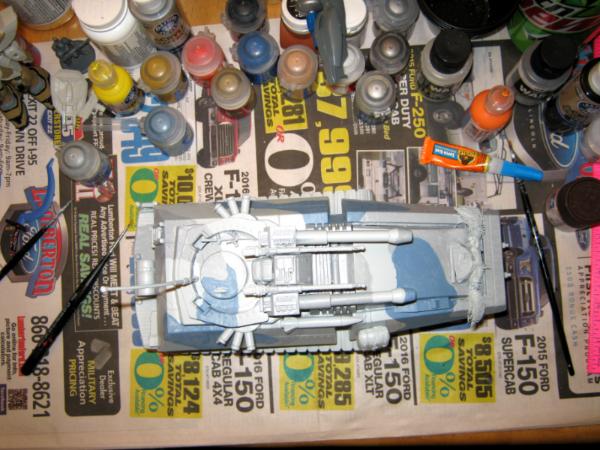
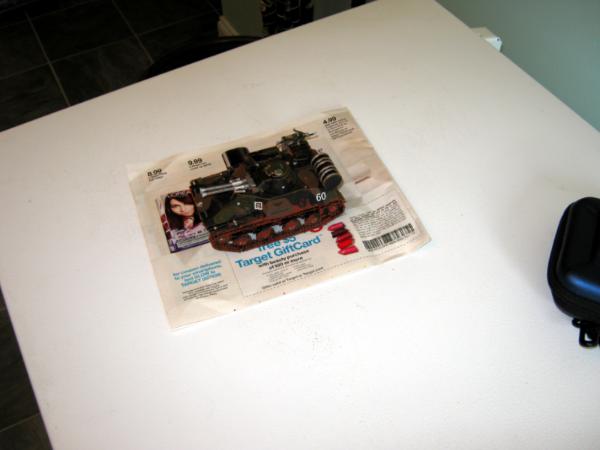
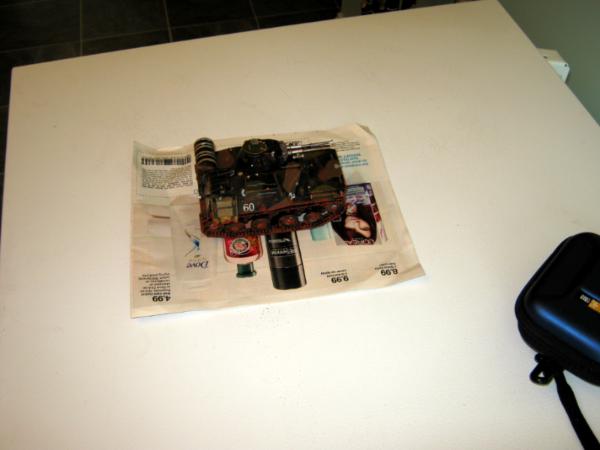
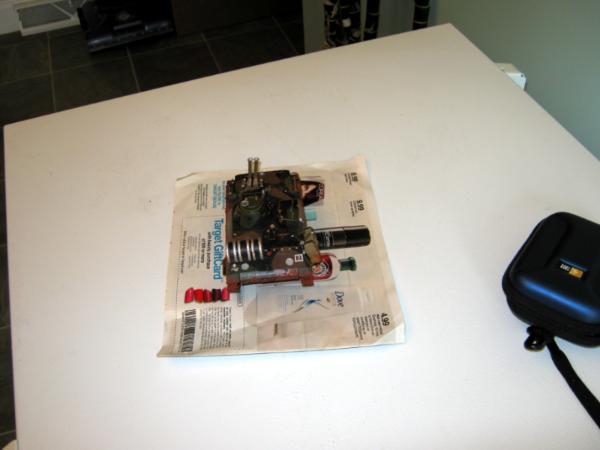
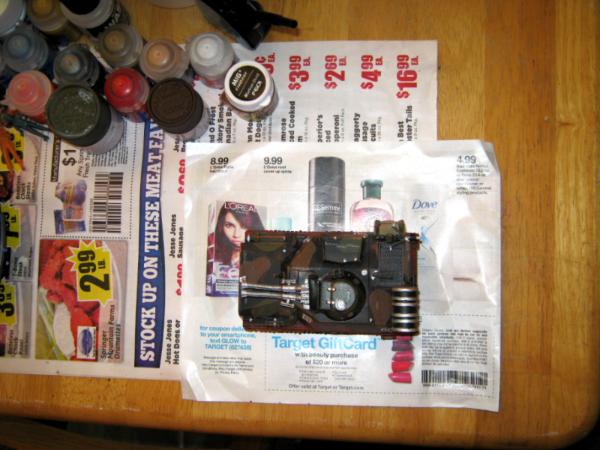
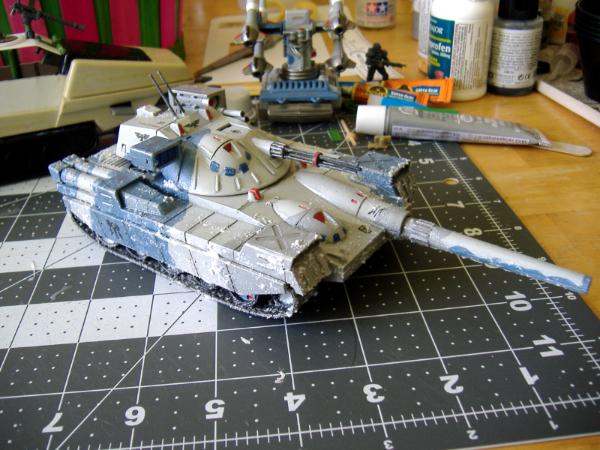
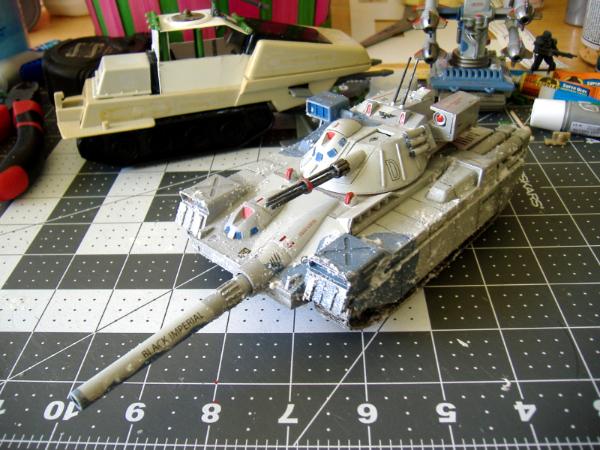
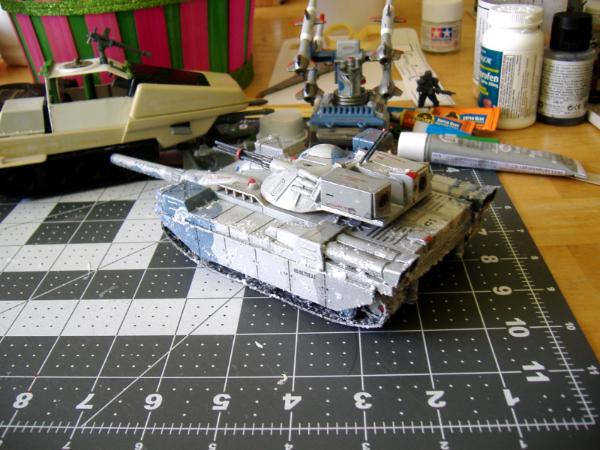
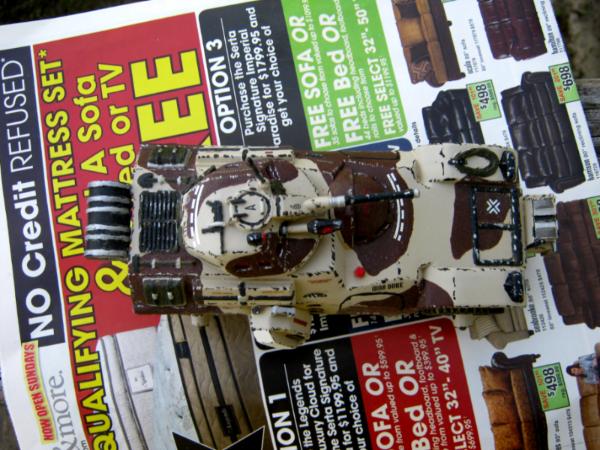
Quick update.
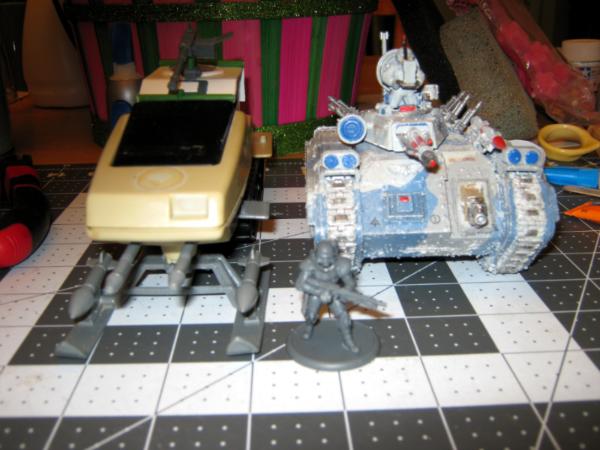
The MBT-90D got a matte coat of Krylon and some snow/slush effects via Citadel Valhallan Blizzard. The next step will be the Krylon glaze, and the project will be finished.
Pics:


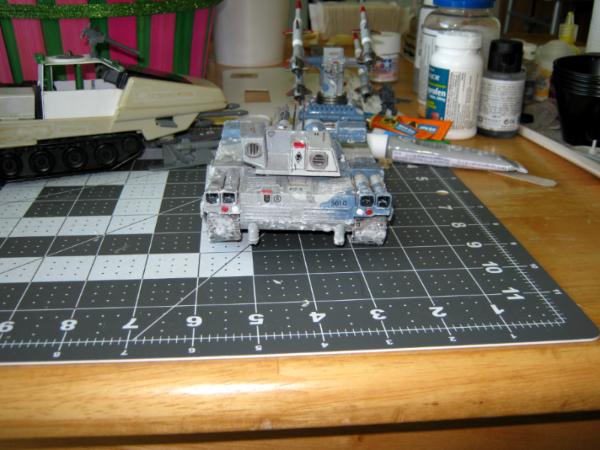
I also did a bit more cab work on the Polar Battle Bear:


A size comparison between the Polar Battle Bear, the Chimera, and a 28mm Dreamforge Eisenkern Stormtrooper:
That's it for now. More to come....................
|
Proud Purveyor Of The Unconventional In 40k |
|
|
|
|
2017/05/15 03:25:16
Subject: Oldraven's Little Projects Thread.
|
|

Gargantuan Great Squiggoth
|
Brilliant work, on both pieces.
|
|
|
|
|
|
2017/05/16 19:44:40
Subject: Oldraven's Little Projects Thread.
|
|
Longtime Dakkanaut
|
|
Proud Purveyor Of The Unconventional In 40k |
|
|
|
|
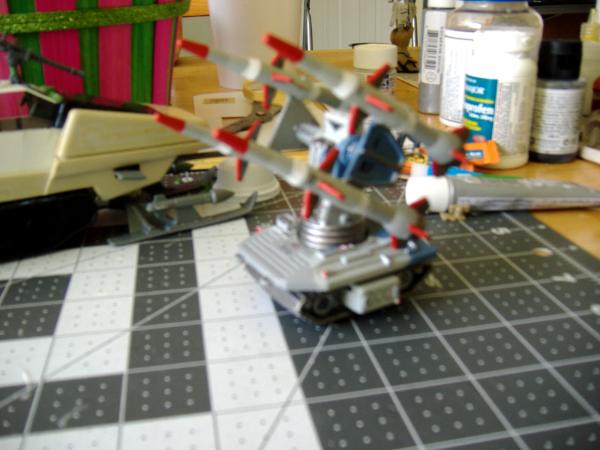
2017/05/16 22:36:33
Subject: Oldraven's Little Projects Thread.
|
|
Rogue Inquisitor with Xenos Bodyguards
|
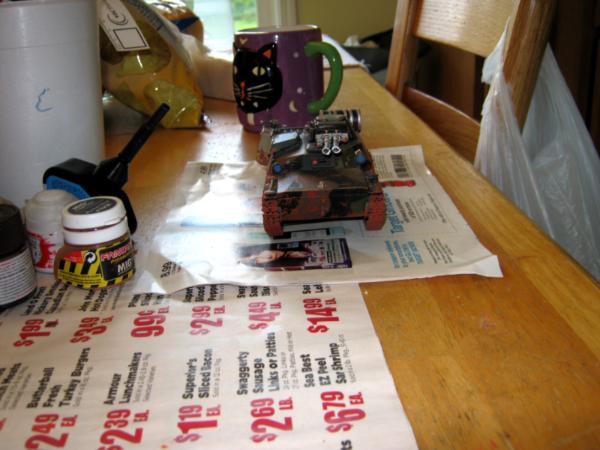
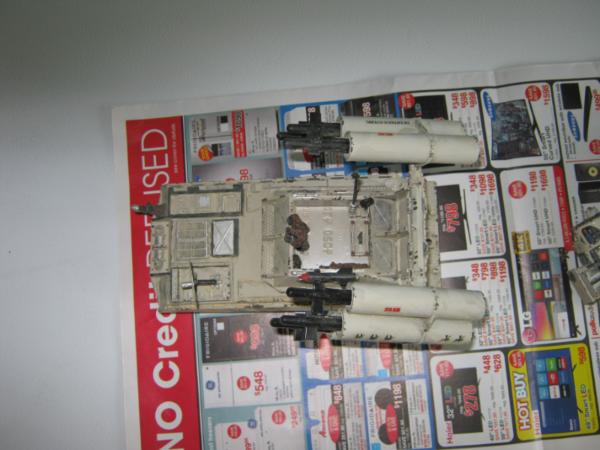
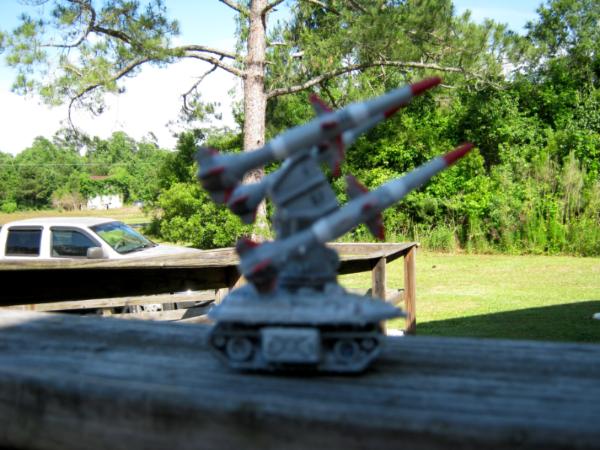
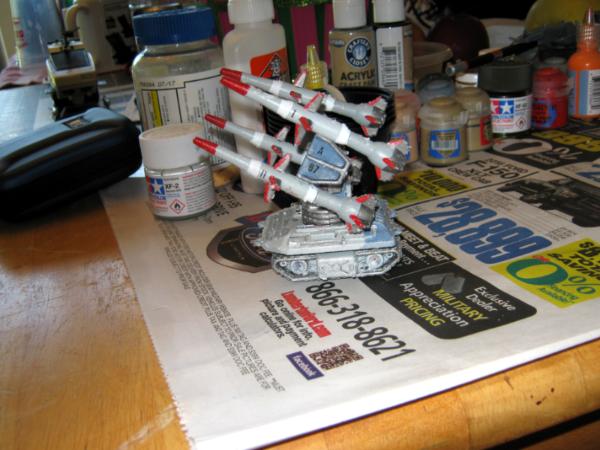
Cute mini missile launcher.
|
"Your mumblings are awakening the sleeping Dragon, be wary when meddling the affairs of Dragons, for thou art tasty and go good with either ketchup or chocolate. "
Dragons fear nothing, if it acts up, we breath magic fire that turns them into marshmallow peeps. We leaguers only cry rivets!
|
|
|
|
|
2017/05/20 12:45:08
Subject: Oldraven's Little Projects Thread.
|
|
Longtime Dakkanaut
|
|
Proud Purveyor Of The Unconventional In 40k |
|
|
|
|
2017/05/20 23:44:43
Subject: Oldraven's Little Projects Thread.
|
|
Rogue Inquisitor with Xenos Bodyguards
|
Looks like you are catching the vehicles up on their paint and details! 
|
"Your mumblings are awakening the sleeping Dragon, be wary when meddling the affairs of Dragons, for thou art tasty and go good with either ketchup or chocolate. "
Dragons fear nothing, if it acts up, we breath magic fire that turns them into marshmallow peeps. We leaguers only cry rivets!
|
|
|
|
|
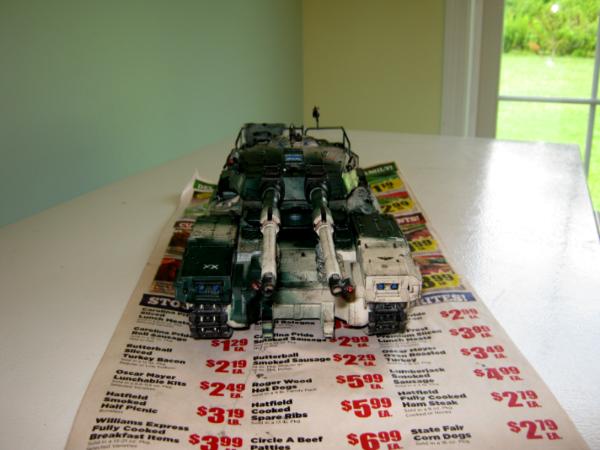
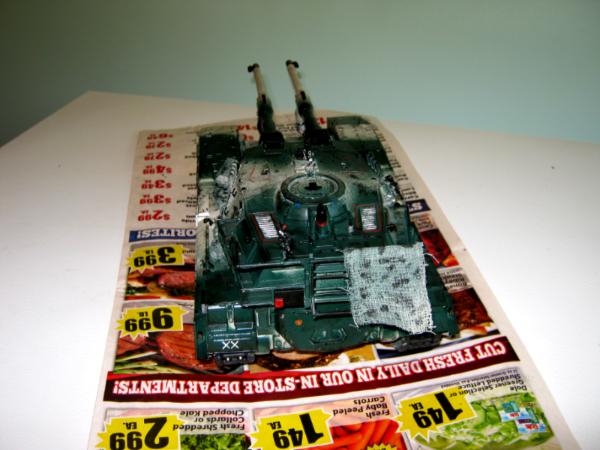
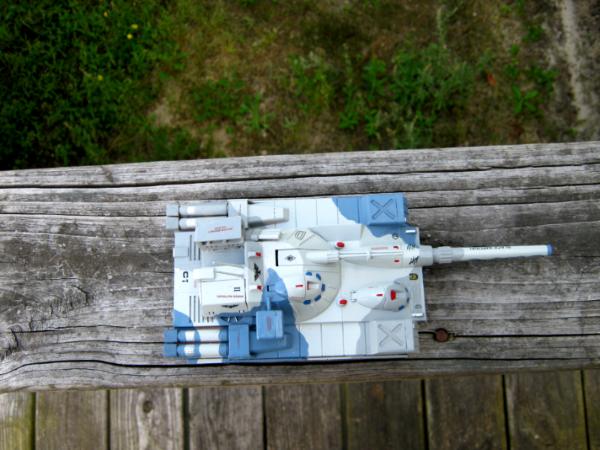
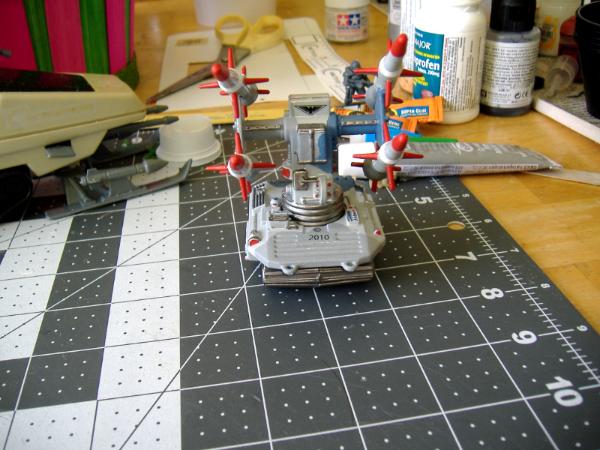
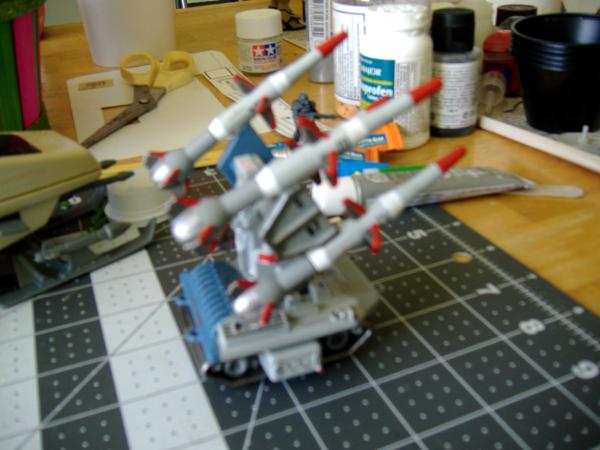
2017/05/31 23:25:33
Subject: Oldraven's Little Projects Thread.
|
|
Longtime Dakkanaut
|
I'm getting things done, slowly but surely. 
Quick update.
Using Testor's contour putty, I started filling up the holes on the Sandrock's gun. Also, painted some more on the leg units.


I started painting on the power scythe swords, starting with the hilts. I had to use the dollar store Crafter's Cubby black paint, since I'm out of Citadel Abaddon Black.

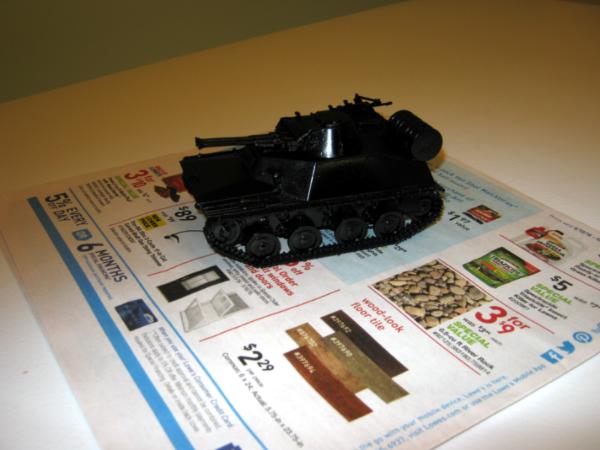
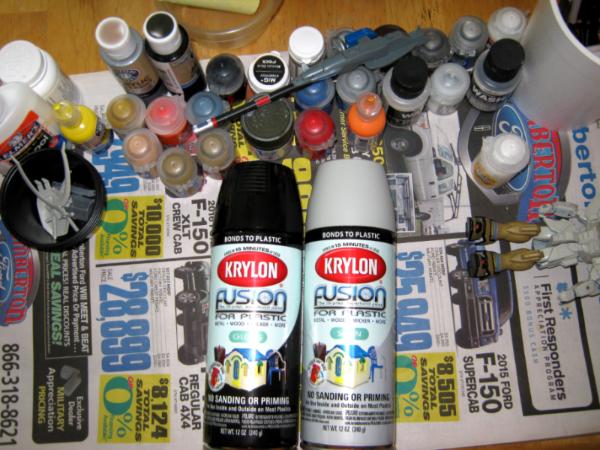
Next up is the T-40. I managed to luck up and get a low humidity day. So, out comes the Krylon and the base coating gets done.
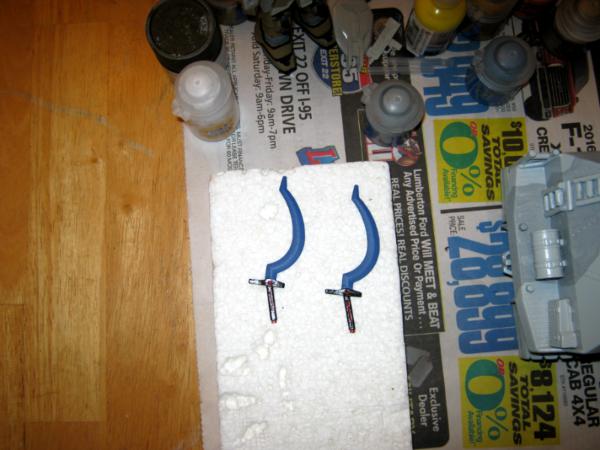
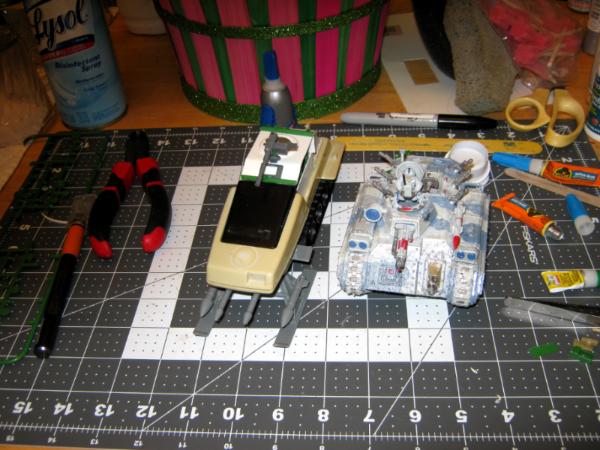
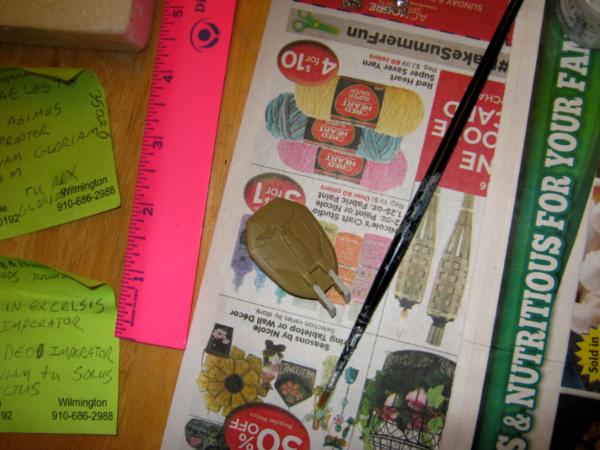
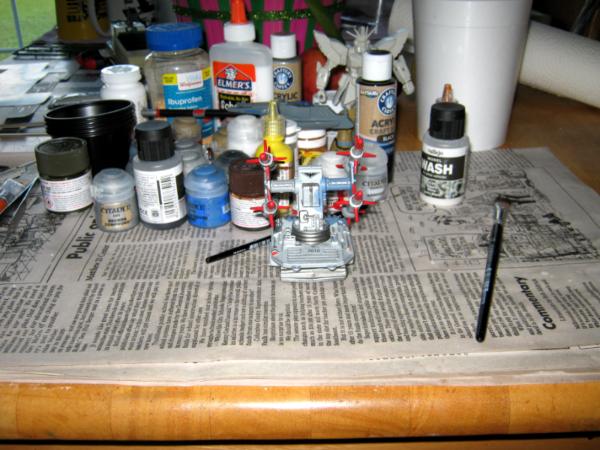
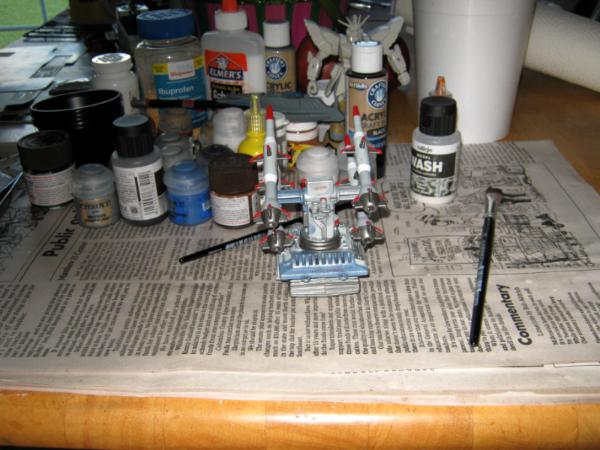
Here are the shots of the progress so far on the swords for the Sandrock Gundam. I also started paint work on the unit's gun.


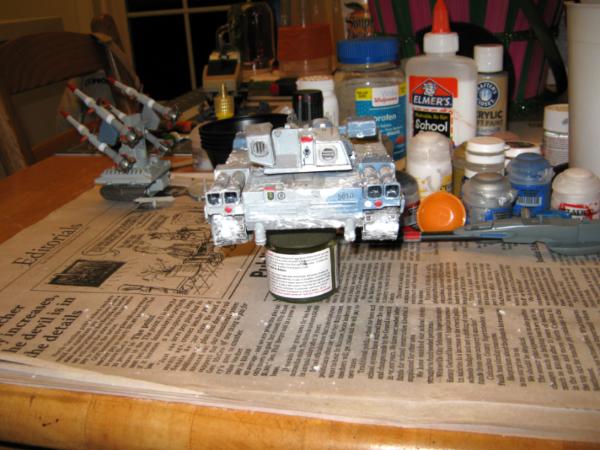
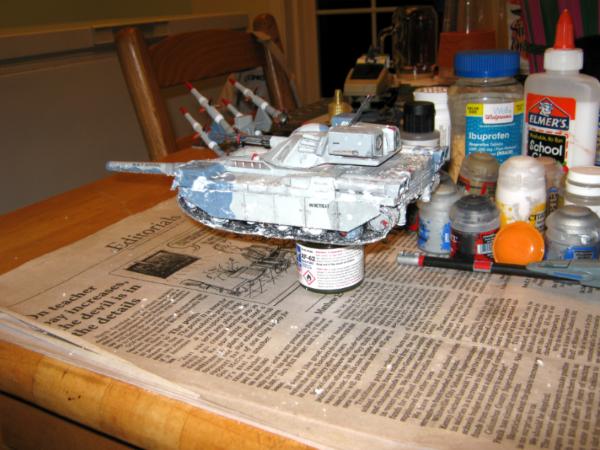
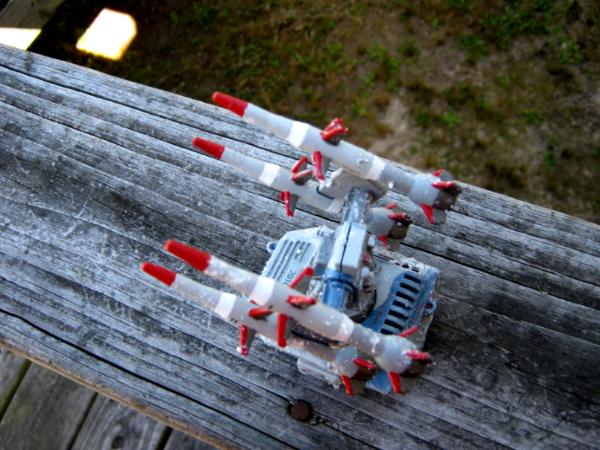
Additional progress on the walker itself:
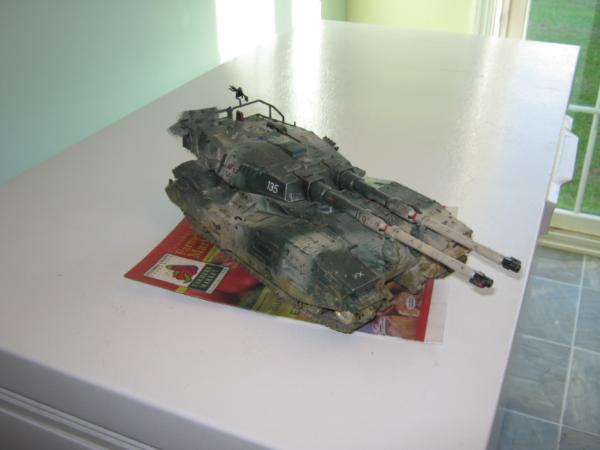
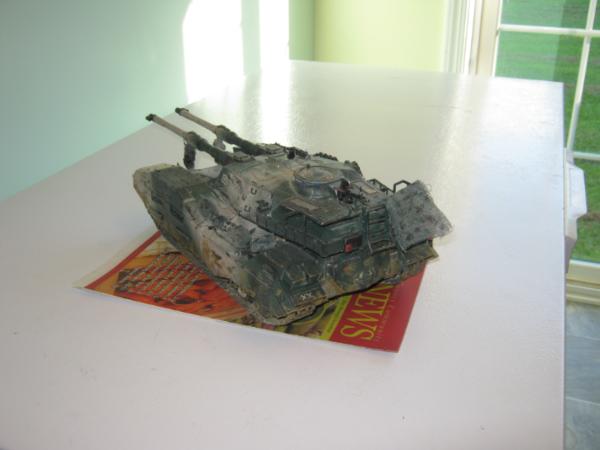
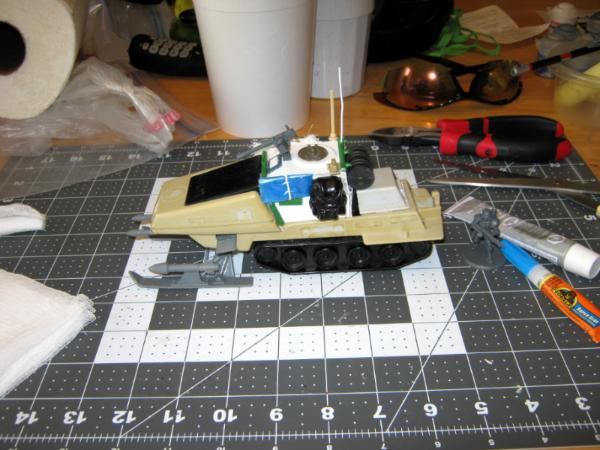
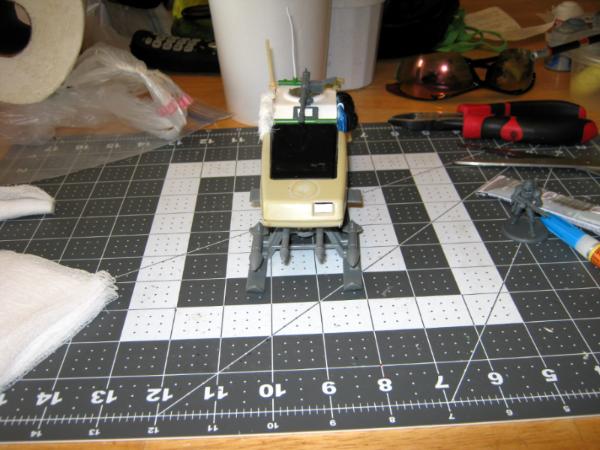
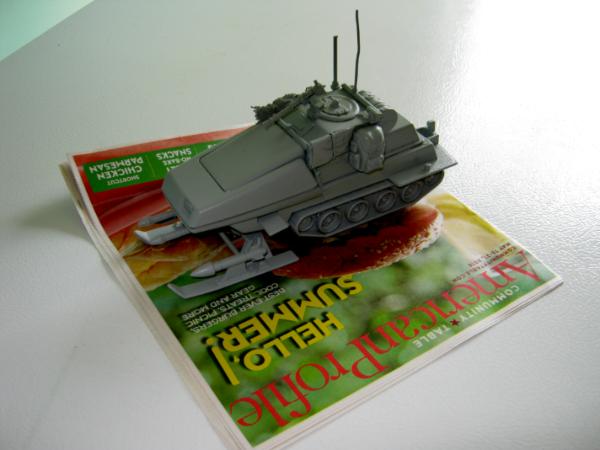
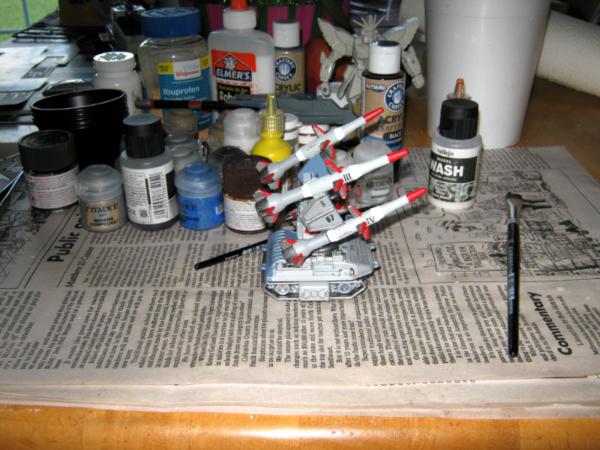
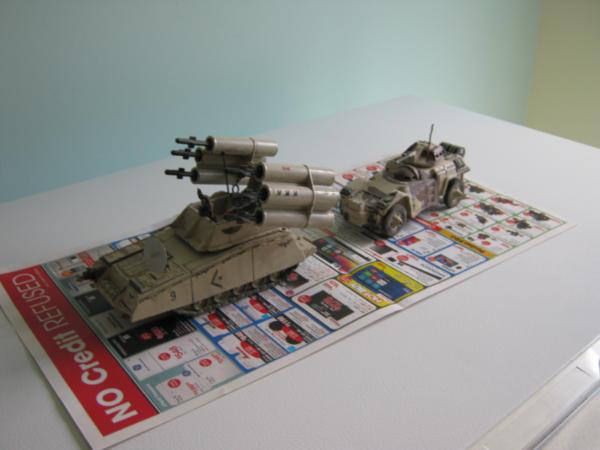
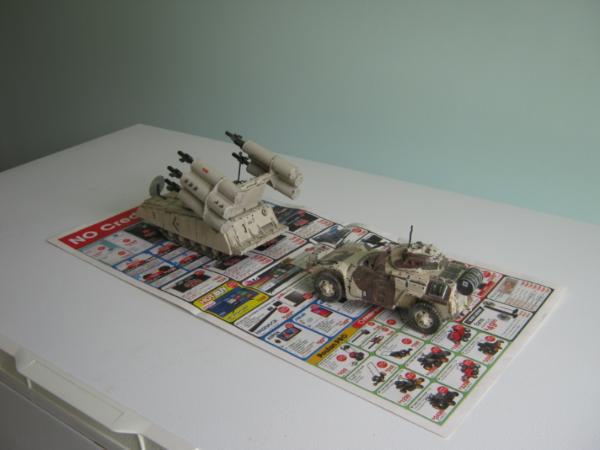
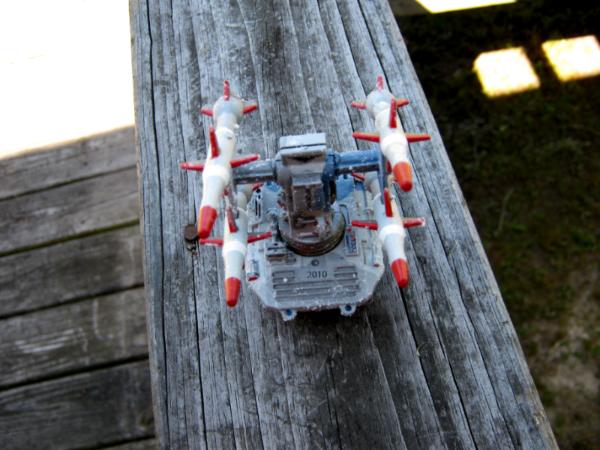
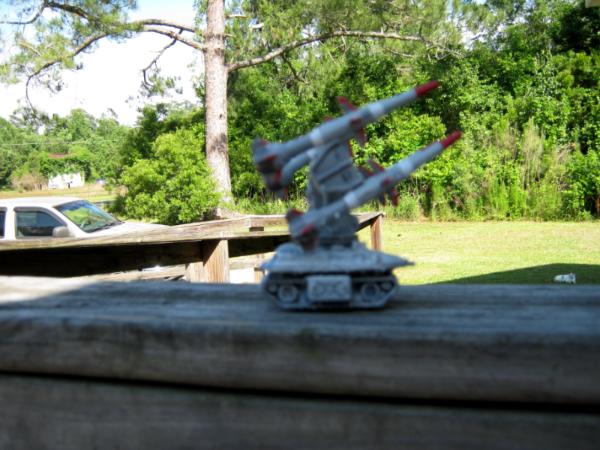
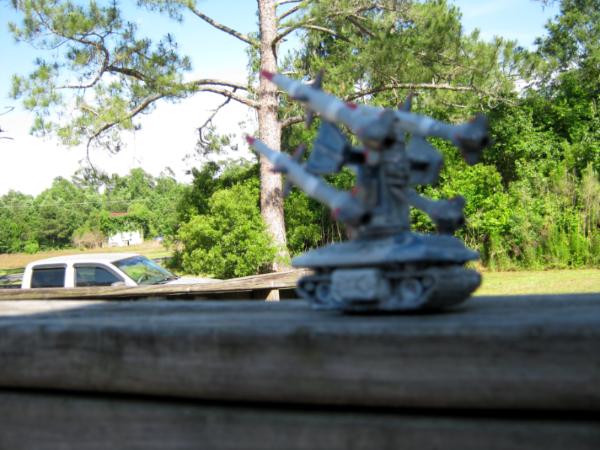
Finally, the Polar Battle Bear build is complete. It ain't pretty. But this is the Imperium we're talking about here. Attractive vehicle designs are few and far between. I'm debating on whether or not to superglue the missiles on their pylons, since those can easily get lost. Either way, the vehicle is ready for base coating.
Pics:


Well, that's it for now. More to come..............
|
Proud Purveyor Of The Unconventional In 40k |
|
|
|
|
2017/06/01 05:55:27
Subject: Re:Oldraven's Little Projects Thread.
|
|
Gargantuan Great Squiggoth
|
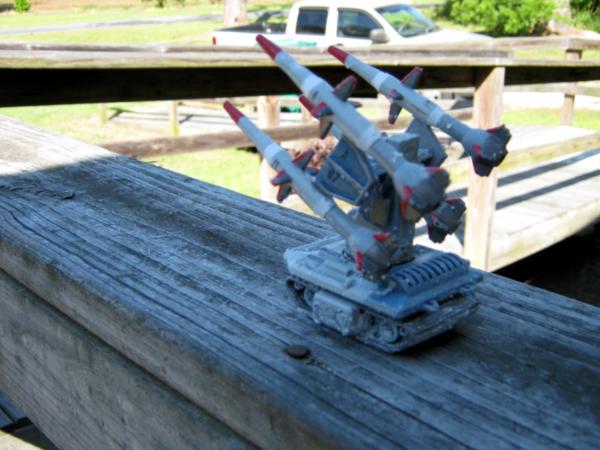
Really great solid work. Gundam is looking great, nice colour choice. And the PBB is looking great, really has a patrol boat vibe to me.
|
|
|
|
|
|
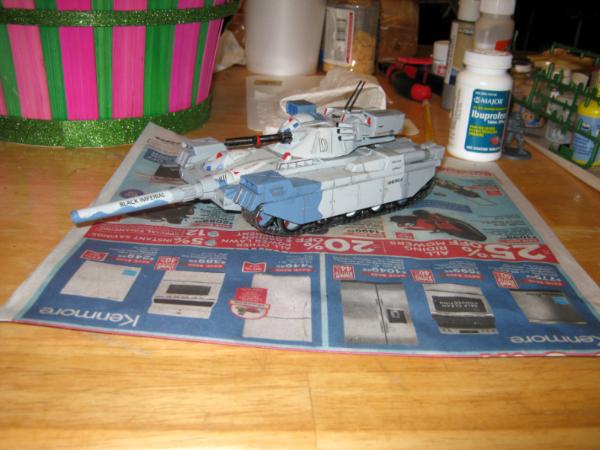
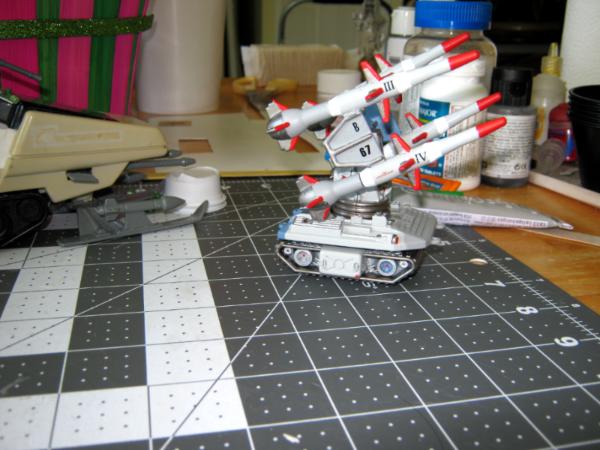
2017/06/02 20:48:45
Subject: Re:Oldraven's Little Projects Thread.
|
|
Longtime Dakkanaut
|
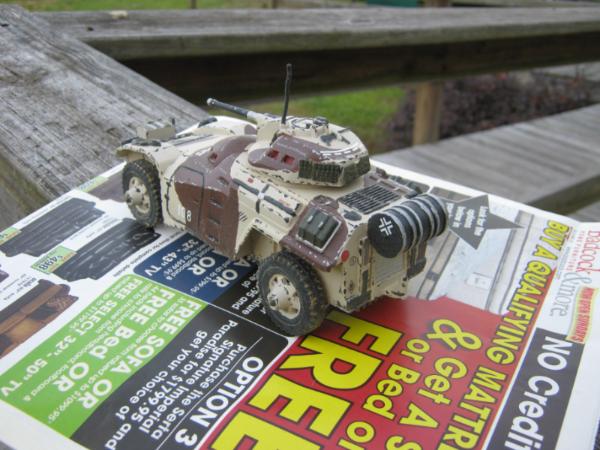
 Camkierhi wrote: Camkierhi wrote:Really great solid work. Gundam is looking great, nice colour choice. And the PBB is looking great, really has a patrol boat vibe to me.
You're absolutely right. It does have a patrol boat look to it. If not for your photo, I would've never made the connection. LOL 
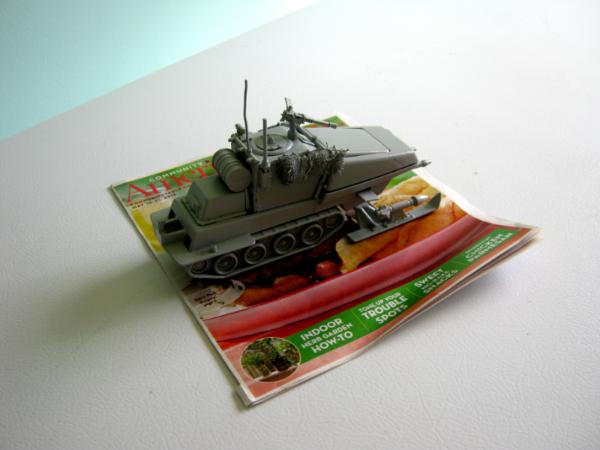
I did get the vehicle based with Krylon Fusion satin pewter gray. It doesn't look as ramshackle with paint.
Well, that's it for now. More to come.
|
Proud Purveyor Of The Unconventional In 40k |
|
|
|
|
2017/06/05 23:55:52
Subject: Oldraven's Little Projects Thread.
|
|
Rogue Inquisitor with Xenos Bodyguards
|
Looking good! can't wait to see those all camo'd up
|
"Your mumblings are awakening the sleeping Dragon, be wary when meddling the affairs of Dragons, for thou art tasty and go good with either ketchup or chocolate. "
Dragons fear nothing, if it acts up, we breath magic fire that turns them into marshmallow peeps. We leaguers only cry rivets!
|
|
|
|
|
2017/06/07 05:39:49
Subject: Oldraven's Little Projects Thread.
|
|

Fixture of Dakka
|
More great conversions of toys and models I would never have considered. Great stuff.
Cheers,
CB
|
|
|
|
|
|
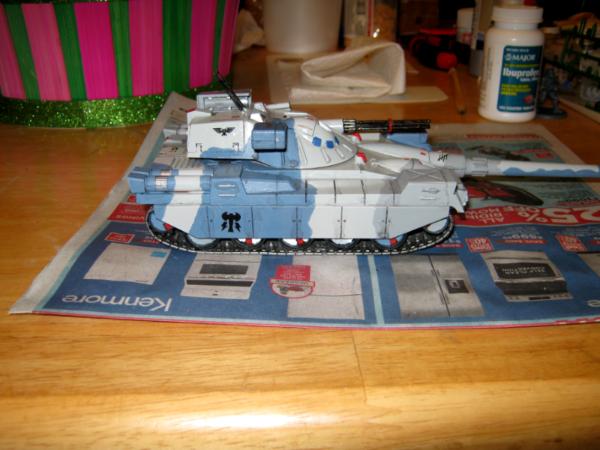
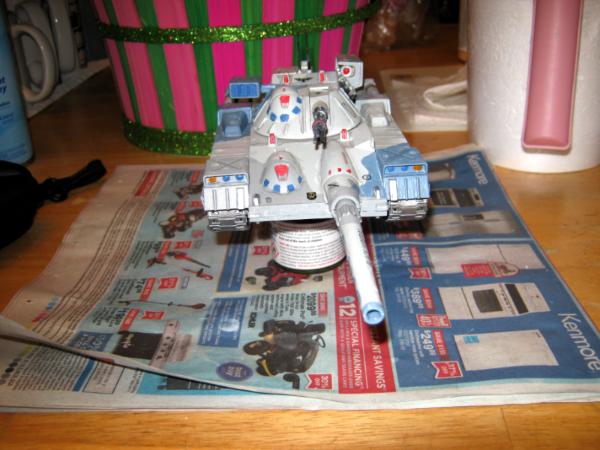
2017/06/11 08:51:15
Subject: Re:Oldraven's Little Projects Thread.
|
|
Longtime Dakkanaut
|
|
Proud Purveyor Of The Unconventional In 40k |
|
|
|
|
2017/06/11 09:04:02
Subject: Oldraven's Little Projects Thread.
|
|
Gargantuan Great Squiggoth
|
PBB is looking stunning with a coat of primer.
Great work on that camo, looks proper if that makes sense.
|
|
|
|
|
|
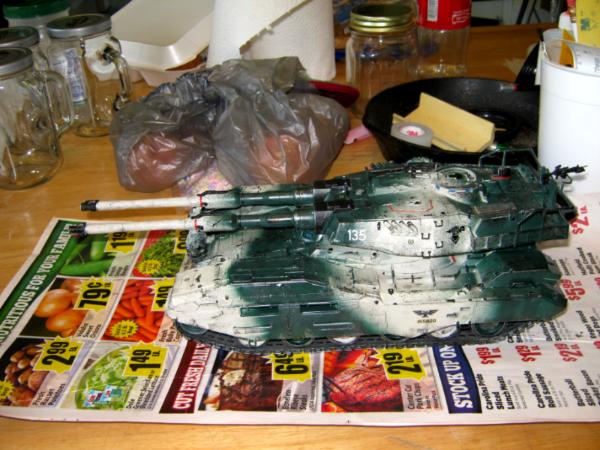
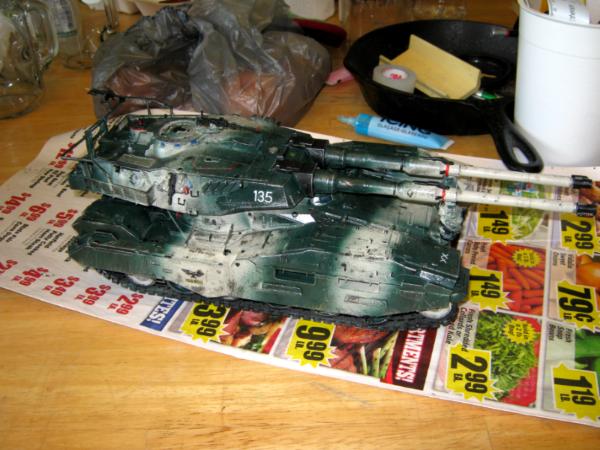
2017/06/24 19:03:11
Subject: Oldraven's Little Projects Thread.
|
|
Longtime Dakkanaut
|
Camkierhi wrote:PBB is looking stunning with a coat of primer.
Great work on that camo, looks proper if that makes sense.
Much thanks, Boss. I'm glad you like it. 
Update time!
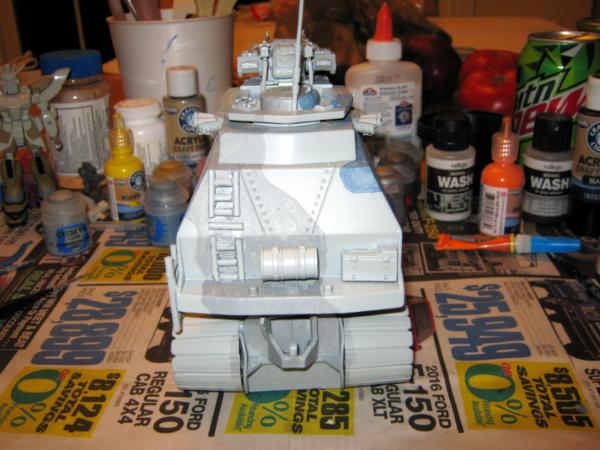
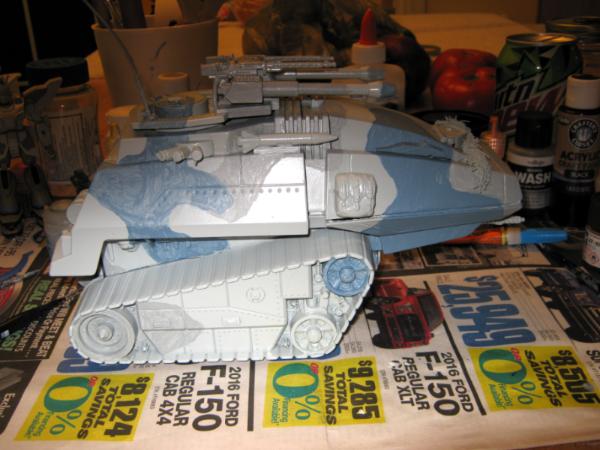
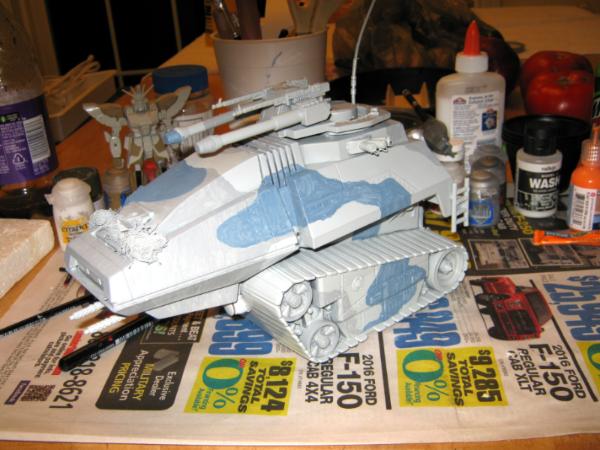
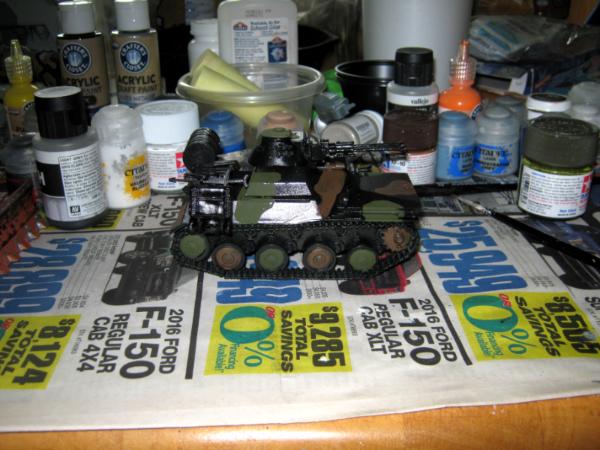
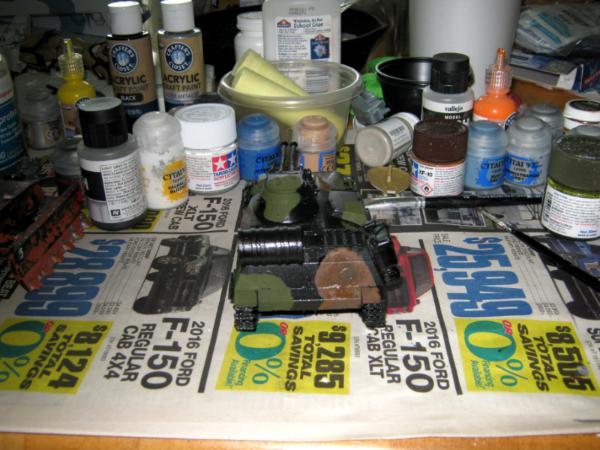
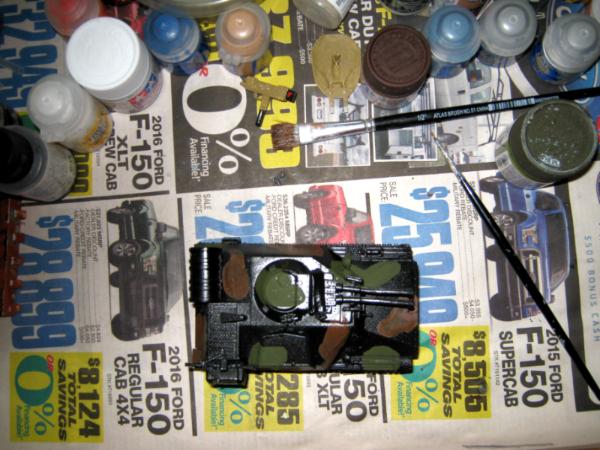
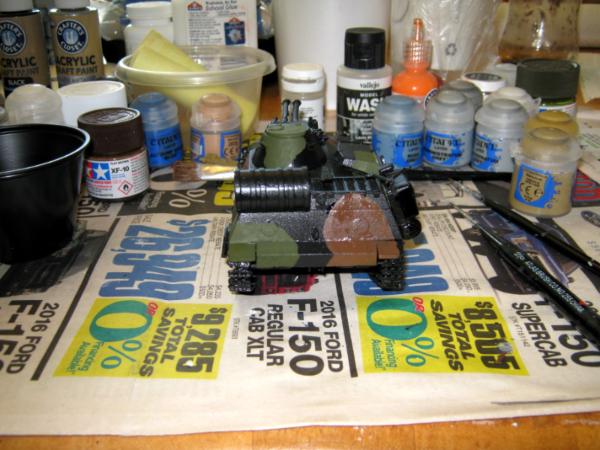
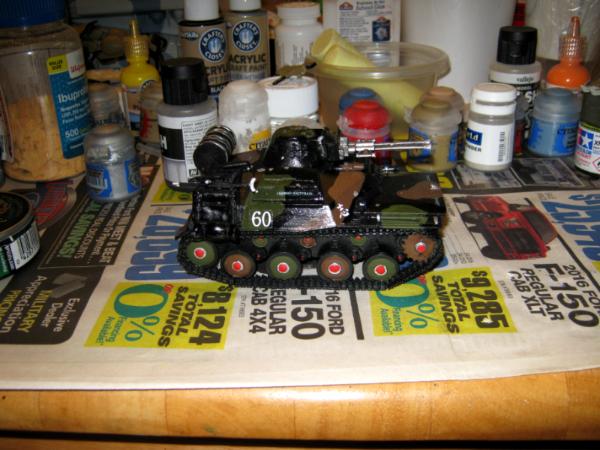
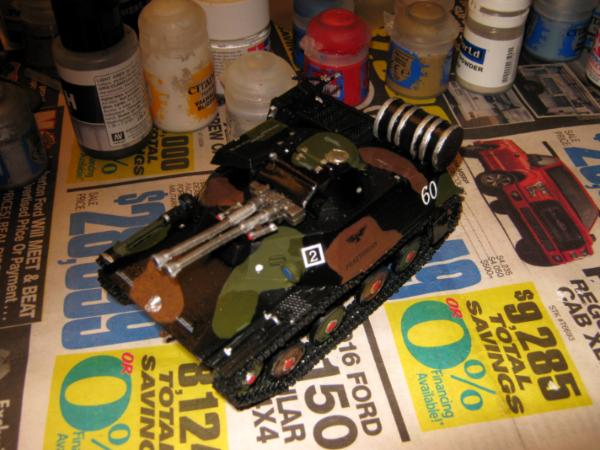
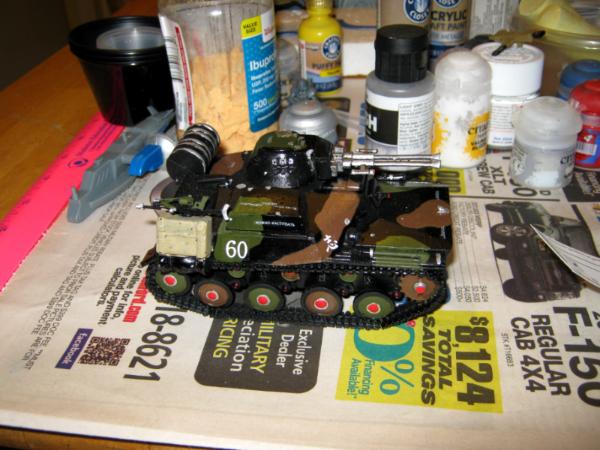
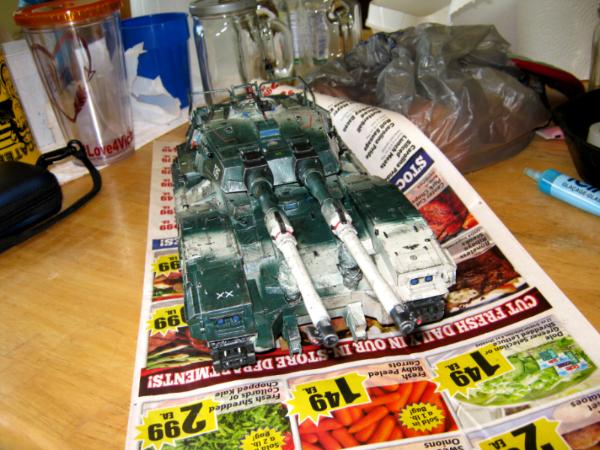
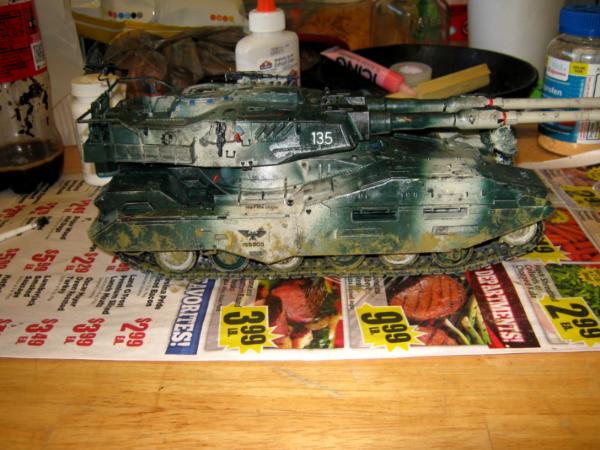
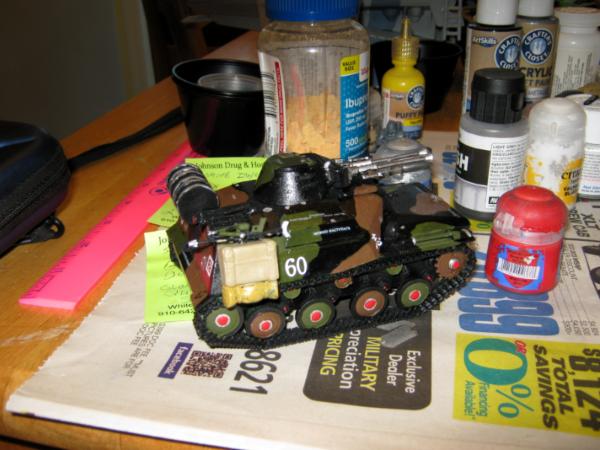
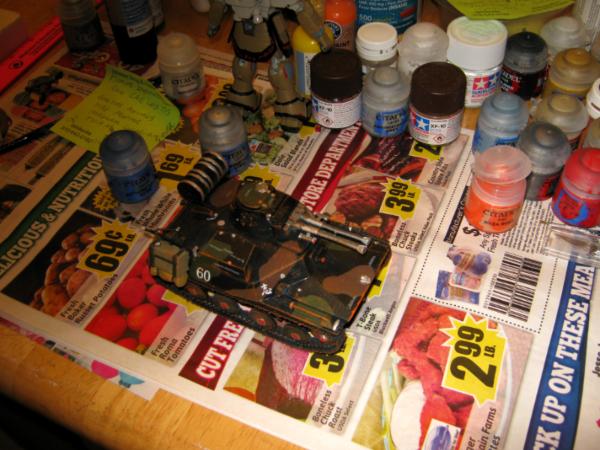
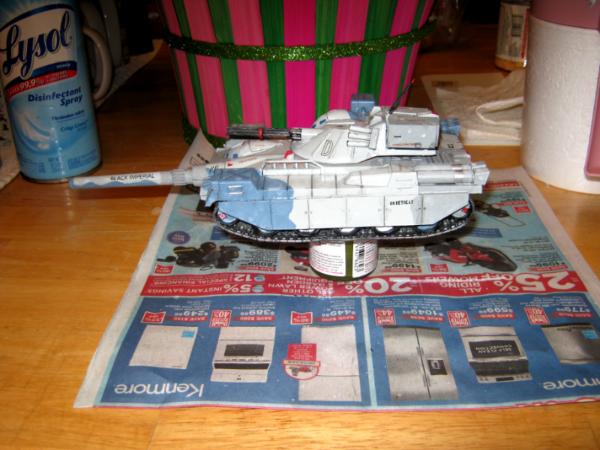
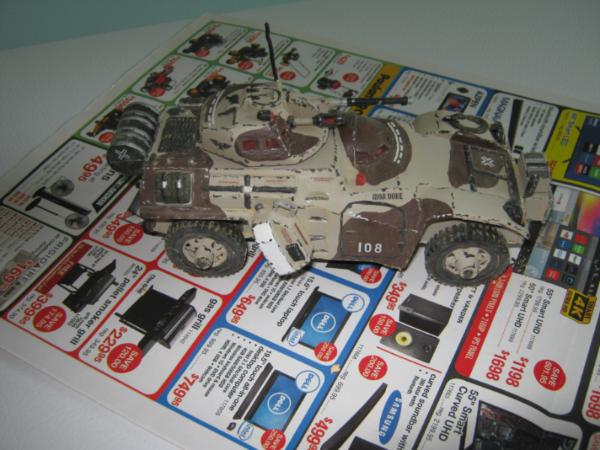
First off is the second layer on the H.I.S.S. Tank's camo paint job. Pics:
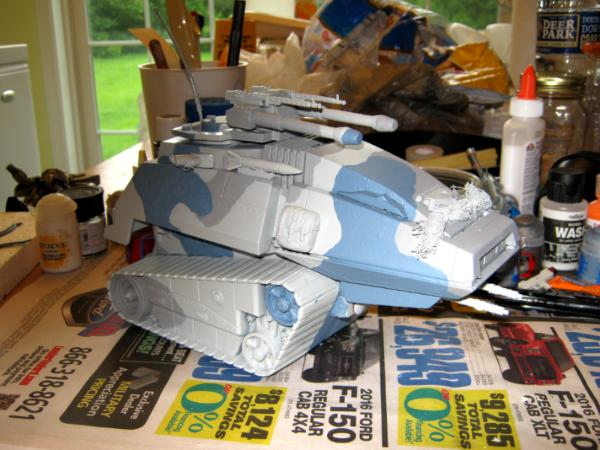


I did make an expected detour on the P&M highway. The M61A5 model has been sitting aside for a while. So long, that the craptastic Forge World transfers were starting to fall off, since I forgot to seal them in with varnish. So, I re-set them and sealed them in with Citadel 'Ardcoat.
Pics:

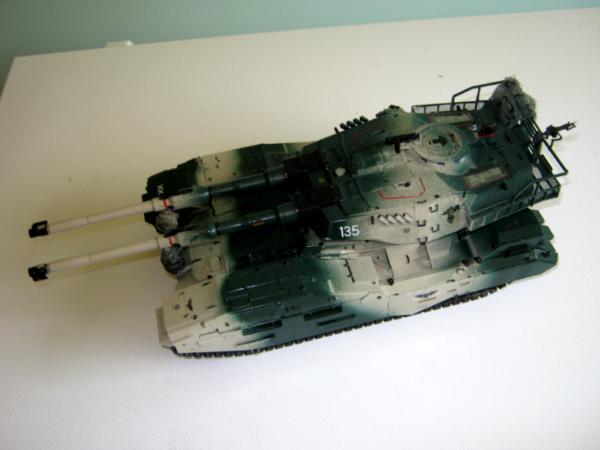
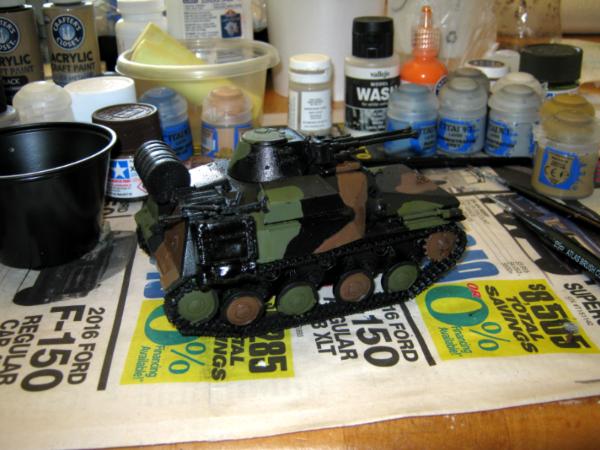
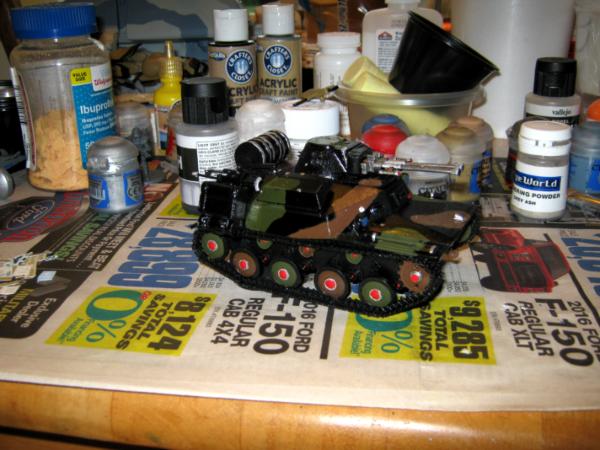
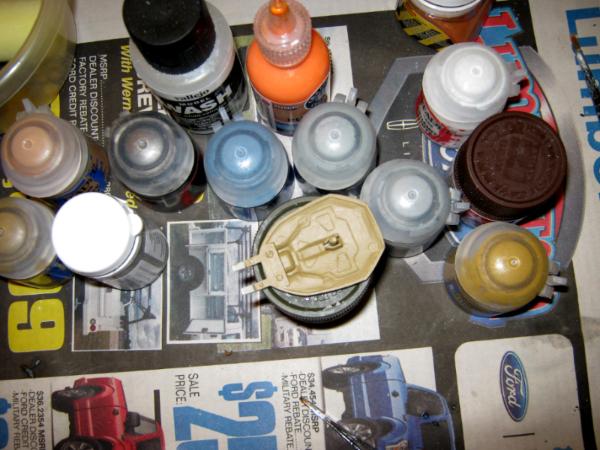
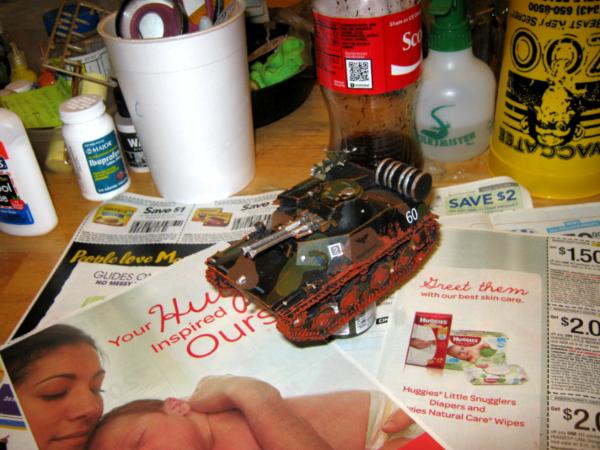
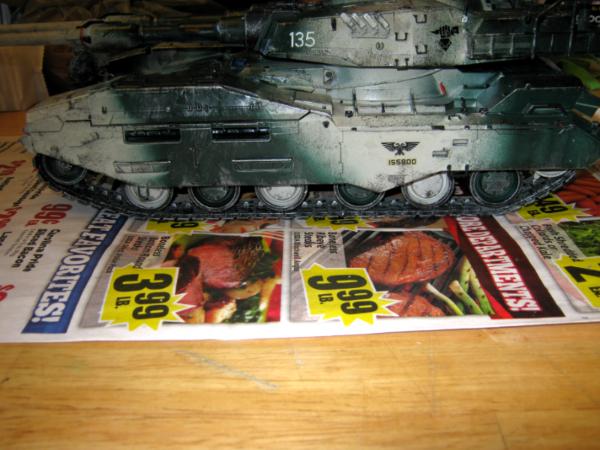
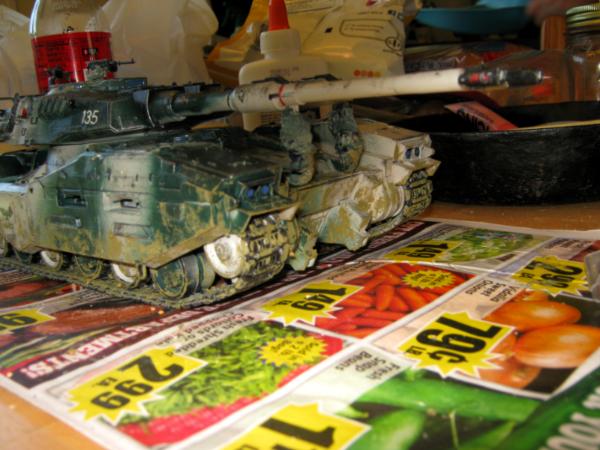
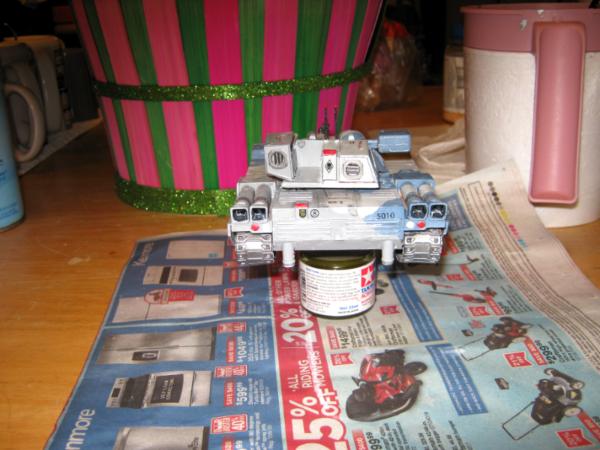
Since I had the tank out and on the table, I decided to go ahead and make a dash to the finish line with this project. I went ahead and applied a wash with Vallejo. Pics:

Next, I mixed some black craft paint and Tamiya flat brown. Using a disposable oral swab, I dabbed the paint on spots to simulate paint chipping and wear, concentrating mostly on the areas painted in tan.
Pics:

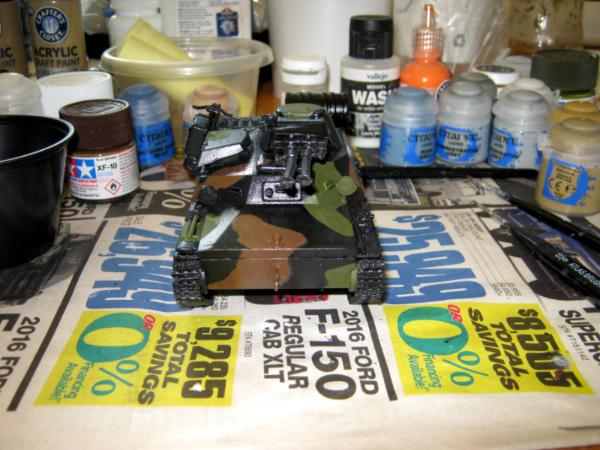
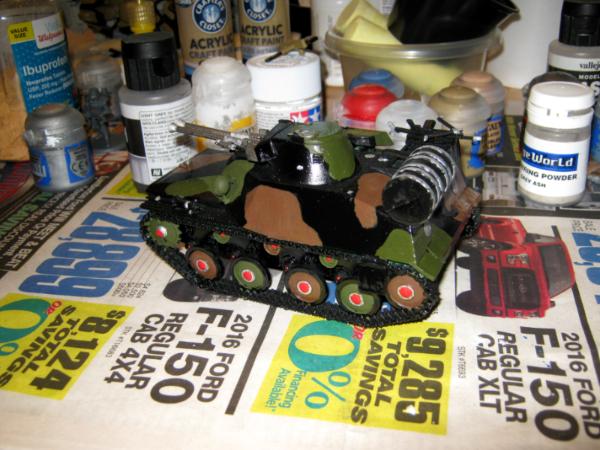
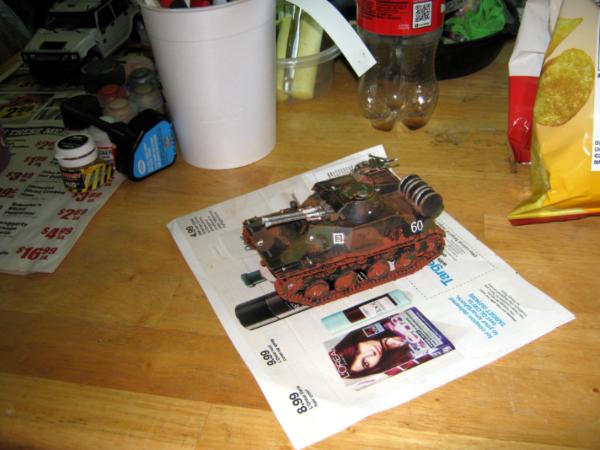
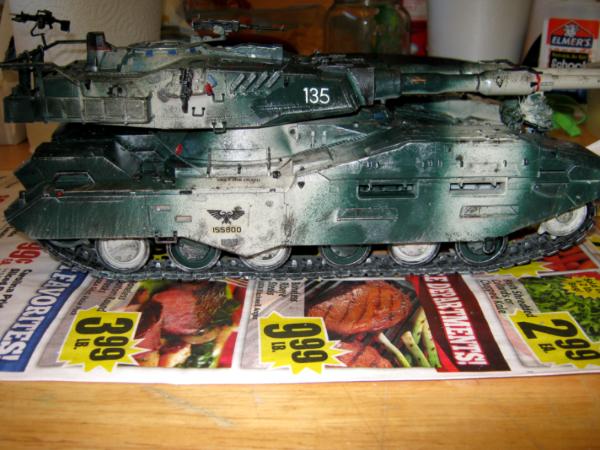
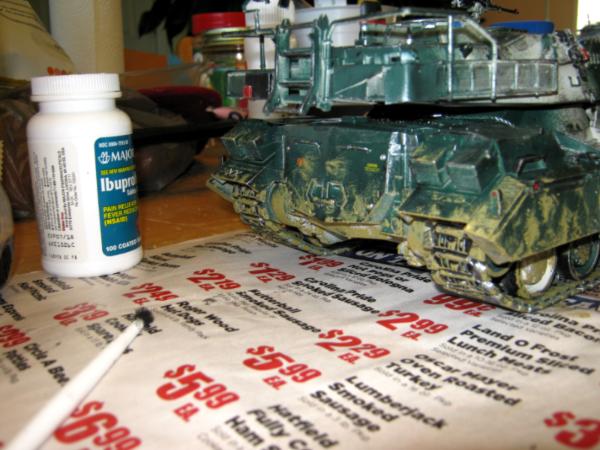
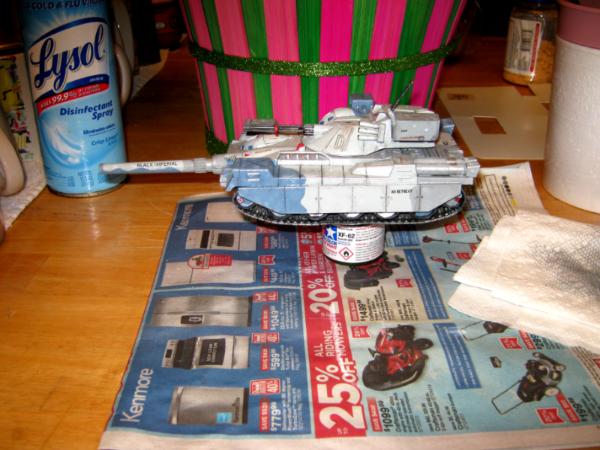
Next was the dry brushing with Citadel Necron Compound. Pics:


A bit more dry brushing on the tank's tracks. Pics:
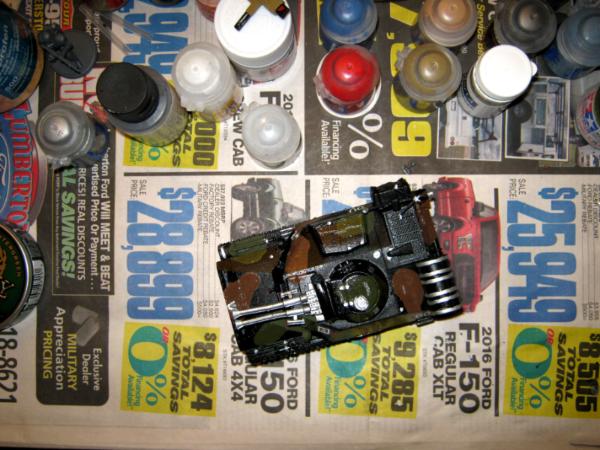
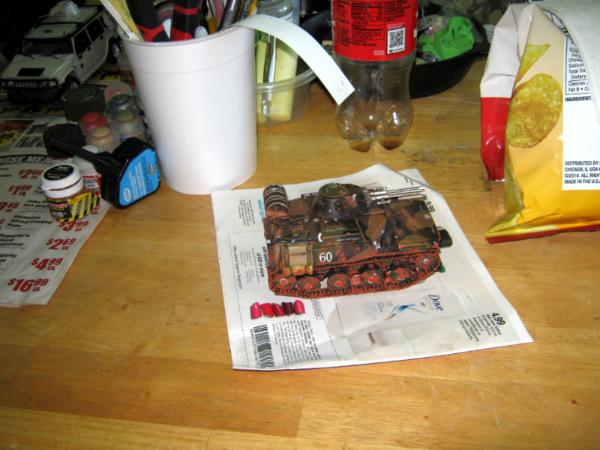
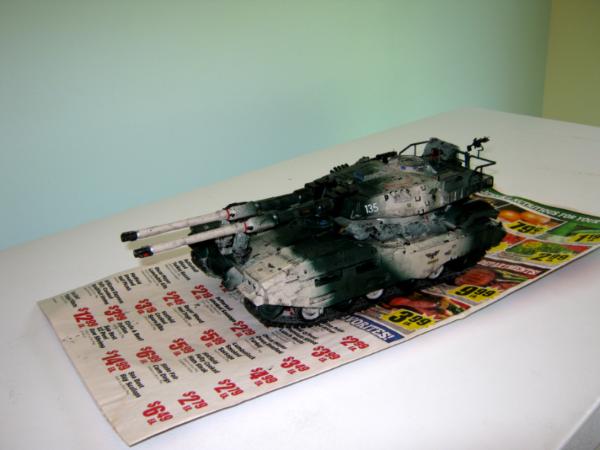
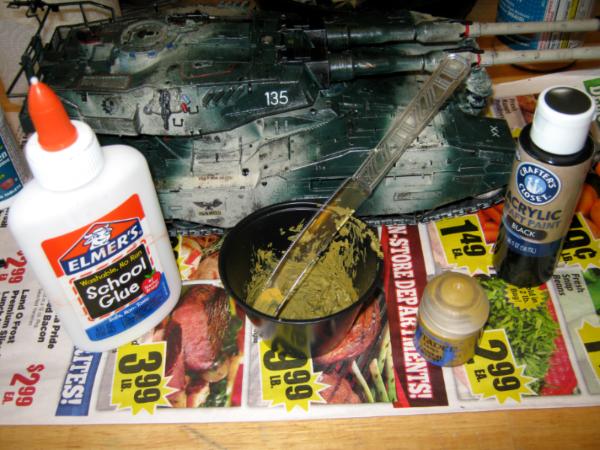
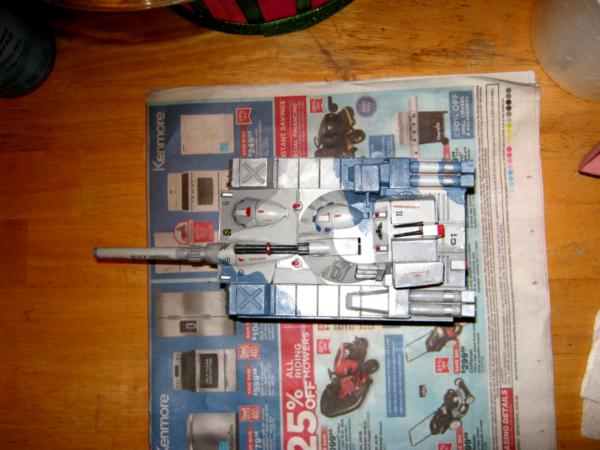
Next, I took the end of some pliers and pounded some kid's chalk into a much finer powder, to make a mud mixture and for dust effects. Pic:

Then, adding some Elmer's white school glue, black craft paint, and some Citadel Zamesi Dust layer paint to some of the chalk powder, I mixed up some nasty looking mud. Pic:
Using a stiff bristled, el cheapo art paint brush, I applied the mud in spots on the bottom of the armored skirts, on the wheels, treads, and the area behind the wheels.
Pics:

And some mud on the lower front and rear. Pics:
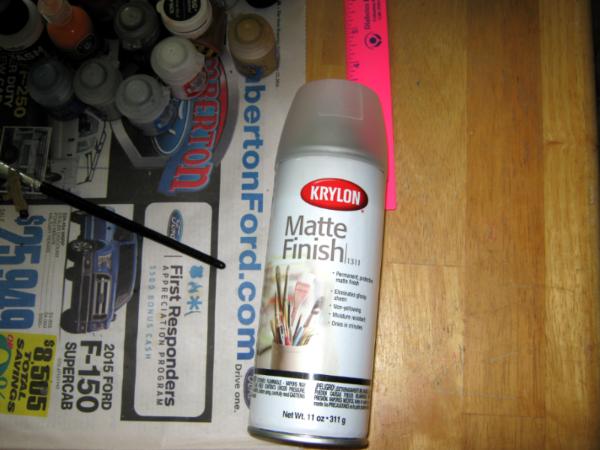
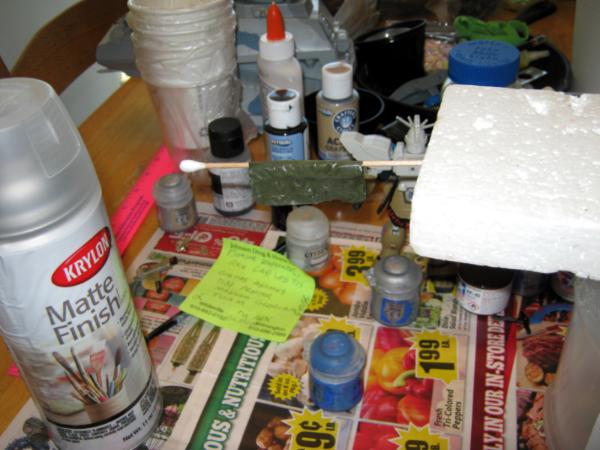
Next, the dust effects with dry kid's sidewalk chalk. While the humidity today was ideal, the temperature was too high for matte coating with Krylon #1311. So, the final step will have to wait.
Pics:


Well, that is it for now. More to come, folks........................
|
Proud Purveyor Of The Unconventional In 40k |
|
|
|
|
2017/07/01 15:10:40
Subject: Re:Oldraven's Little Projects Thread.
|
|
Longtime Dakkanaut
|
|
Proud Purveyor Of The Unconventional In 40k |
|
|
|
|
2017/07/02 23:01:00
Subject: Oldraven's Little Projects Thread.
|
|
Rogue Inquisitor with Xenos Bodyguards
|
Looking good so far there , like the "winter" pattern.
|
"Your mumblings are awakening the sleeping Dragon, be wary when meddling the affairs of Dragons, for thou art tasty and go good with either ketchup or chocolate. "
Dragons fear nothing, if it acts up, we breath magic fire that turns them into marshmallow peeps. We leaguers only cry rivets!
|
|
|
|
|
2017/07/03 08:40:50
Subject: Oldraven's Little Projects Thread.
|
|
Gargantuan Great Squiggoth
|
All looking mighty fine bud, really great work.
|
|
|
|
|
|
2017/07/08 03:40:03
Subject: Re:Oldraven's Little Projects Thread.
|
|
Longtime Dakkanaut
|
|
Proud Purveyor Of The Unconventional In 40k |
|
|
|
|
2017/07/09 00:34:16
Subject: Re:Oldraven's Little Projects Thread.
|
|
Longtime Dakkanaut
|
Tonight's quickie update.
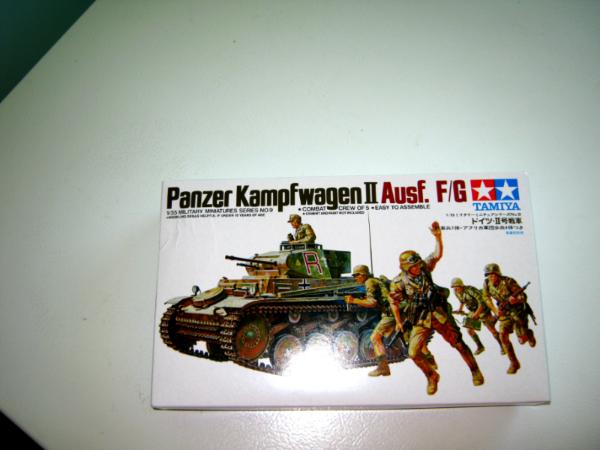
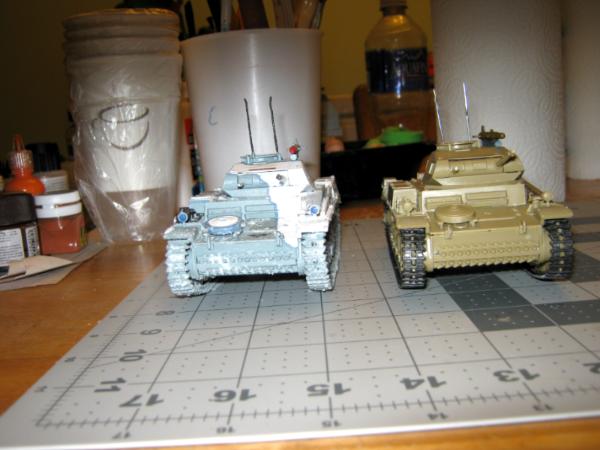
First off, I finished the assembly of the second Panzer II kit. Here are some twosie shots with the first Panzer II I completed.


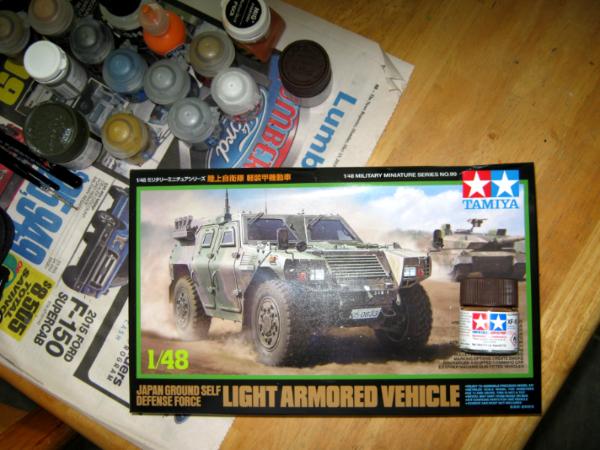
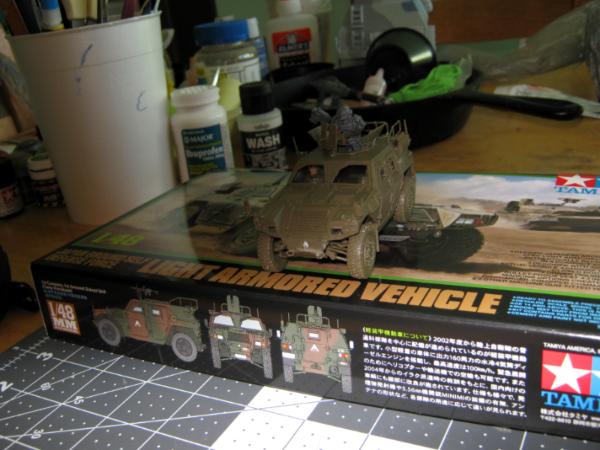
SUPPLY DROP. A Tamiya 1/48 scale JGSDF Komatsu Light Armored Vehicle and some more Tamiya XF-10 Flat Brown (I was running low). Pic:
Onto the Sandrock Gundam,.......
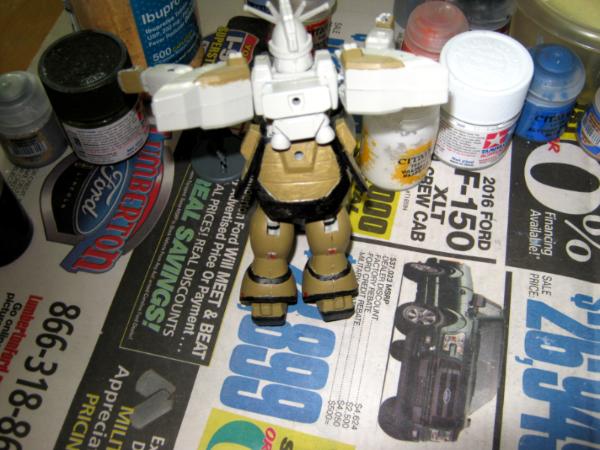
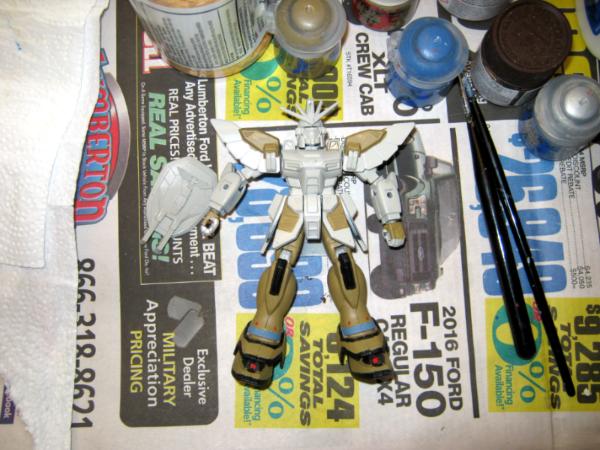
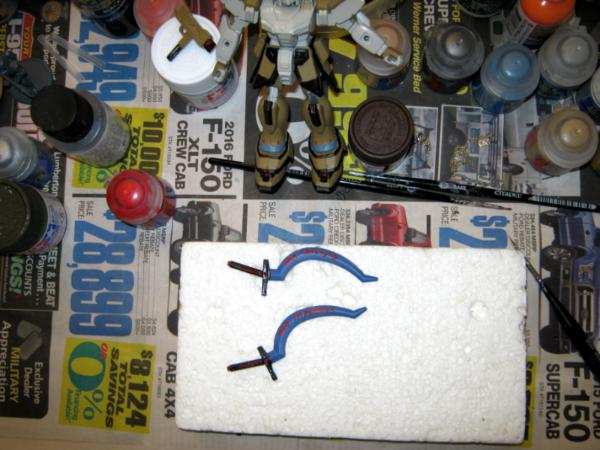
First off, I decided to try my hand at freehanding lettering on the power scythes. The phrases are Latin in pseudo-runic script to represent High Gothic. After these dry good, I'll work on the other side of the blades.

Painted on another coat of Tallarn Sand onto the hip armor covers.
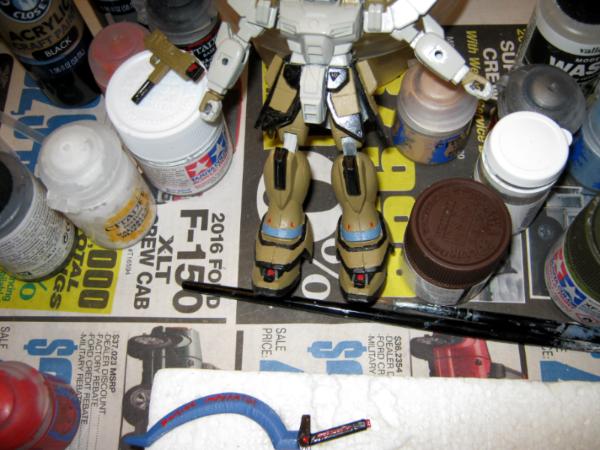
And painted the first coat on the front of the shield.

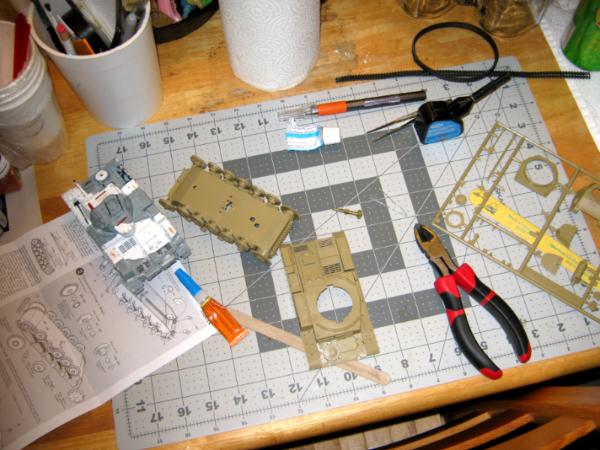
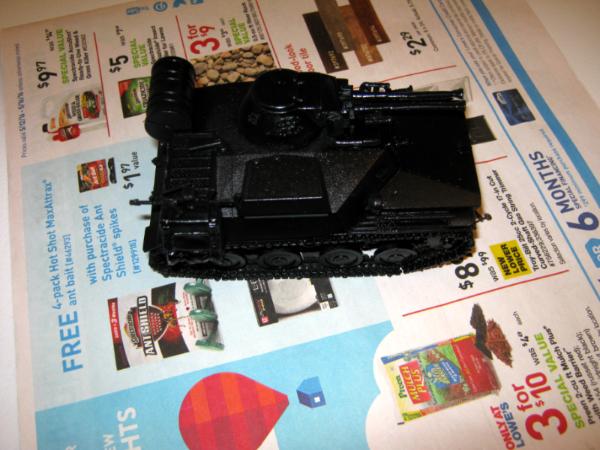
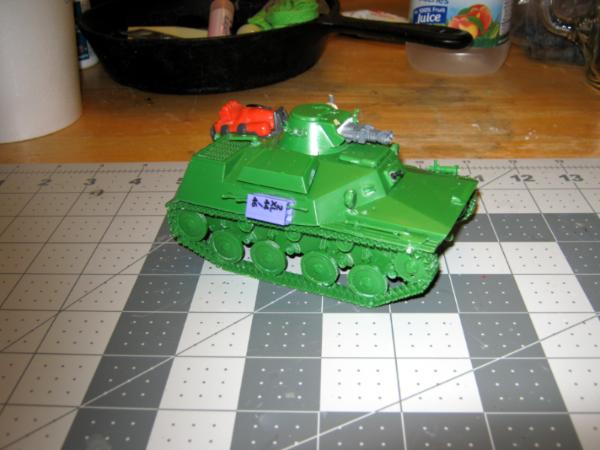
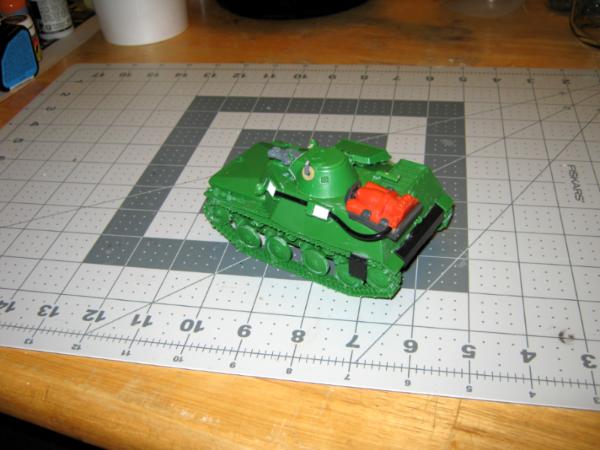
Next, I started assembling the second T-40 (T-30) Amphibious Light Tank. This one will be sporting a heavy flamer in the turret.

Finally for tonight's update, I'm closer to being done with the final detailing on the stowage, on the first T-40 (T-30). Next will be a coat of Krylon Matte and dry brushing with Ryza Rust Dry.
That's it for tonight. More to come...........
|
Proud Purveyor Of The Unconventional In 40k |
|
|
|
|
2017/07/09 22:24:02
Subject: Oldraven's Little Projects Thread.
|
|
Rogue Inquisitor with Xenos Bodyguards
|
That tank is looking very nice! will it get some wear and dirt on it?
|
"Your mumblings are awakening the sleeping Dragon, be wary when meddling the affairs of Dragons, for thou art tasty and go good with either ketchup or chocolate. "
Dragons fear nothing, if it acts up, we breath magic fire that turns them into marshmallow peeps. We leaguers only cry rivets!
|
|
|
|
|
2017/07/12 04:21:55
Subject: Oldraven's Little Projects Thread.
|
|
Longtime Dakkanaut
|
Thanks, bro. And yeah, there will be some extra environmental effects added. But weather hasn't exactly been ideal for rattle can spraying. I want to put on a coat of matte before dry brushing. Then there will be red clay effects and clay dust. And a final coat of Krylon matte.
Now, for a quick update.
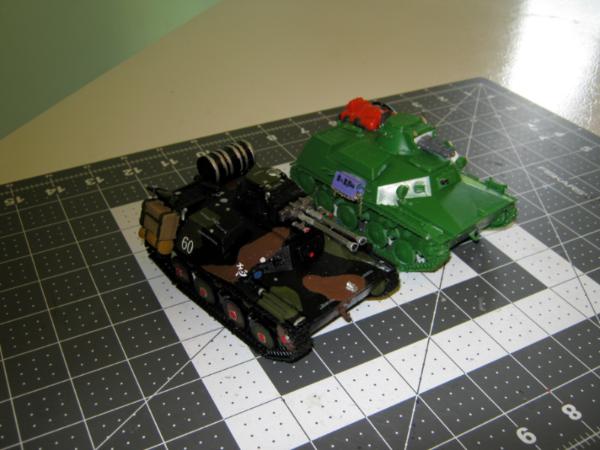
I finished the assembly of the second T-40/T-30 conversion. This example is sporting a heavy flamer.
I used the turret heavy flamer from the Chimera kit. Other non- STC START kit parts used includes pieces of a dollar store "No Trespassing" sign, a fire fighter's tank and a rubber hose from G.I. Joe action figures, a tiny clamp and washer from the Tamiya Panzer II kit, a piece of sprue, a label clamp from a Wal-Mart clothing hanger, and a cheap necklace chain.
Pictures for your viewing:


I also finished the detailing on the first T-40's stowage and applied a dark wash to it. Here's a twosie shot with the T-40 recently assembled:
I finished the freehand Latin on the power scythes:
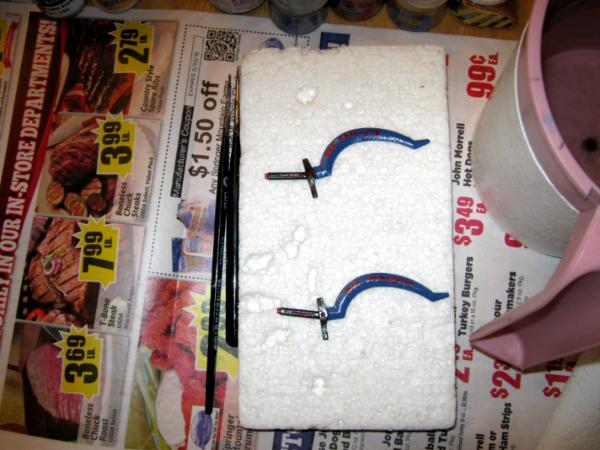
Then, I applied a coat of 'Ardcoat to the blades of the power scythes:

The second coat of Tallarn Sand to the Sandrock's shield:
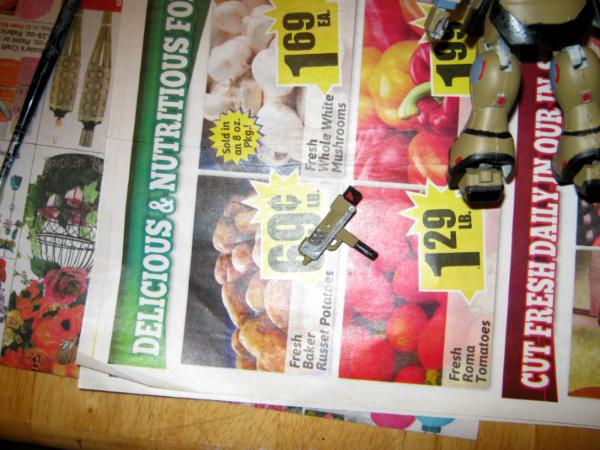
I did a bit more painting on the Sandrock's handheld gun:
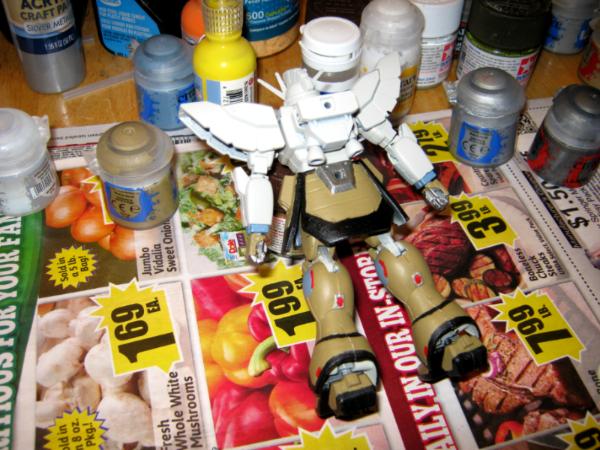
I finished the legs of the Sandrock and I'm nearly done with lower body. I also did a bit more work on the hands and wrists. Pics:


Well, that's all for now. More to come, folks........
|
Proud Purveyor Of The Unconventional In 40k |
|
|
|
|
2017/07/12 05:22:28
Subject: Oldraven's Little Projects Thread.
|
|
Pious Palatine
|
Looking good dude. Keep plugging away!
EDC
|
|
|
|
|
2017/07/12 10:29:21
Subject: Oldraven's Little Projects Thread.
|
|
Gargantuan Great Squiggoth
|
All looking good, great work on the Gundam. Tank is really coming on too.
|
|
|
|
|
|
2017/07/12 23:41:22
Subject: Re:Oldraven's Little Projects Thread.
|
|
Longtime Dakkanaut
|
Much thanks, folks. I'm glad you both like it.
Brief update........
The weather allowed me to get some stuff done. Sunny and the humidity was ideal, although the temp was borderline. I got a coat of Krylon matte on the first T-40, and a coat of Krylon Fusion on the second vehicle.

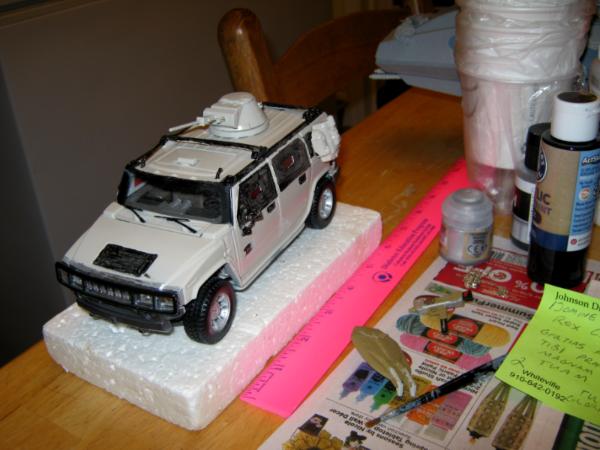
While waiting for the light tanks to dry enough to handle, I decided to start the painting phase on the HMTT Project, basing with Krylon Fusion River Rock light tan. Here I masked off the areas I didn't want to coat with Krylon.
Pic.

After the base coat/priming. The light tanks are still drying. Pic:

The tanks are now dry enough to handle, if not completely dry. I removed the masking tape from the die-cast Hummer. Pic:

I applied another coat of Tamiya olive drab to the tarp I made for stowage on the HMTT:


Sorry for the quality of the second pic. 
After the paint on the tarp dried a bit, I applied a coat of Krylon matte to seal in the paint and prevent flaking, which the Tamiya paint will do on this type of material. Pic:
Well, that's it for now. More to come.....................
|
Proud Purveyor Of The Unconventional In 40k |
|
|
|
|
2017/07/14 03:39:13
Subject: Re:Oldraven's Little Projects Thread.
|
|
Longtime Dakkanaut
|
Update for tonight......
First things first. I got the dry brushing done on the first T-40 Amphibious Light Tank, using Citadel Ryza Rust. Pics:

I also started detail painting on the HMTT. Pics:
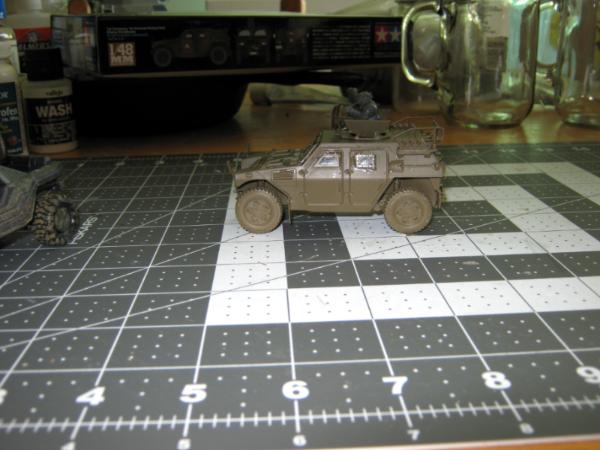
Today, I assembled the Tamiya 1/48 scale JGSDF Komatsu Light Armored Vehicle. It was a quick build, with the only hitch being that I broke one of the rear struts. But a quick repair with Gorilla super glue solved that problem.
The commander figure is from the GW Chimera kit. Overall, it makes for a nice little armored jeep, and I'll be ordering more of them. I may even get the 1/35 version in the future to make a homebrew MRAP.
Anyhow, pics of the assembled vehicle:

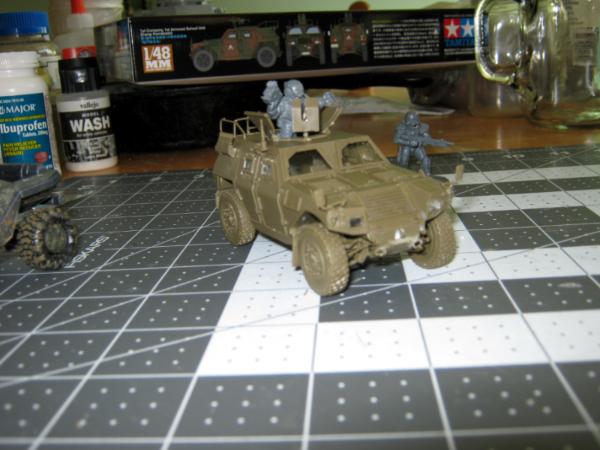


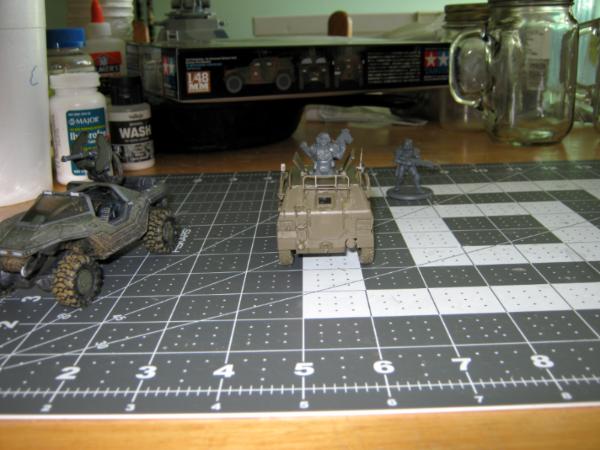

Comparison shots with the McFarlane HALO 3 Warthog and Dreamforge Eisenkern 28mm Stormtrooper:

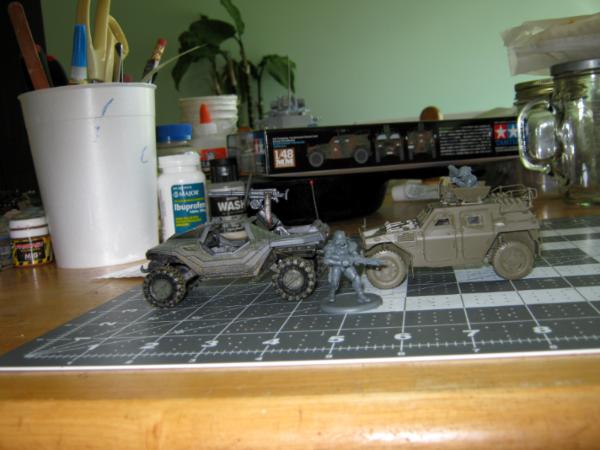

Couple of more shots of the LAV, with a better view of the stock driver figure:

Finally, tonight I got another coat onto the areas painted black, on the HMTT. Picture:

Anyway, that's it for tonight. More to come, peeps...................
|
|
This message was edited 1 time. Last update was at 2017/07/14 03:46:02
Proud Purveyor Of The Unconventional In 40k |
|
|
|
|
2017/07/15 19:06:05
Subject: Re:Oldraven's Little Projects Thread.
|
|
Longtime Dakkanaut
|
|
Proud Purveyor Of The Unconventional In 40k |
|
|
|
|
2017/07/16 10:55:30
Subject: Oldraven's Little Projects Thread.
|
|
Gargantuan Great Squiggoth
|
Great work. Nice weathering and good work on the Hummer.
Just a suggestion, pic up a set of cheap pastels at the art store. Scraping or sanding them into powder, is an awful lot cheaper than Mig Powders. I would keep the Mig for special.
|
|
|
|
|
|
|
|


 Finished Forge World Elysian Army
  Finished Tau Sept Cadre
  Alaitoc Eldar Warhost
  Finished Order of Our Martyred Lady - Sisters of Battle
  Finished Necromundian Imperial Guard Regiment