My friend and I started getting back into
40k after a long absence about 6 months ago, and have been refining our armies. I have been focusing on a new Tyranid army (Hive Fleet Inferno), whilst he has been focusing on Space Wolves and Tau.
Nids
I created a fresh Nid list to form the core of my army, and have been playing with pretty much the same list for many games now. I have taken the same army in all three of these games to try and help me focus on strategy, what works, what doesn't work etc.
Tau
The focus for my friend over these three games was to find a list of Tau that worked for him. You will see a very clear progression from his first army to his third, and how effective each was.
Each game can be found here:
Nids vs Tau (Part One)
http://www.dakkadakka.com/dakkaforum/posts/list/368029.page
Nids vs Tau (Part Two)
http://www.dakkadakka.com/dakkaforum/posts/list/372694.page
Nids vs Tau (Part Three - Currently reading)
Game Three
Mission: Capture
Setup: Pitched Battle
First Turn: Tau
Tau (from rough memory)
Commander with fragment gun and missile pod
2 x 8 Firewarriors
Path finders with Devil fish
2 broadsides
Hammerhead
2 crisis suits w flamer and plasma
1 crisis suit w flamer and plasma
about 10 kroot with 4 kroot hounds
Hive Fleet Inferno
Tyranid Prime –
LW/
BS & Death Spitter
5 Warriors (4 deathspitters, 1 Barbed Strangler)
2 x 10 Hormagaunts
2 x 15 Gargoyles
2 x 1 Zoey
2 Hive Guard
Trygon
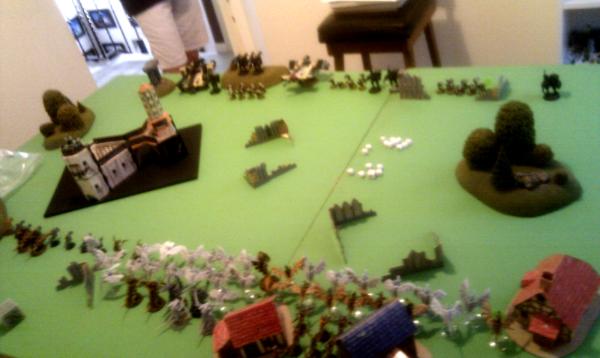
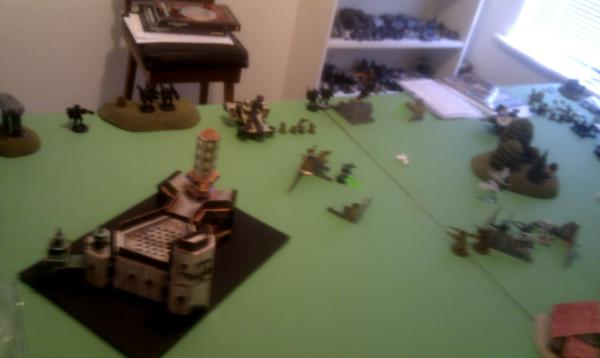
Setup
The Tau deployed across the board with leader on his far left, 1 firewarrior squad in the ruins on his opbjective, 2 crisis suits next to ruins, pathfinders in the middle with devilfish to their right, the other firewarrior squad in front of the hill on his right flank with the broadsides on top of the hill and the hammerhead and single crisis suit to the right of the hill. He outflanked his kroot.
My home objective was placed on my right flank opposite his home objective.
Gargoyles deployed in a screen across my whole army, with one hormagaunt unit placed on my left flank screening my Hive Guard. Zoeys and Warriors were placed centrally with the other hormagaunt unit lurking near my objective. I chose to experiment a bit here by deep striking the Trygon, which I'
de normally only do in a
DoW setup.
 The plan
The plan was simple. My hormies on my right flank would lurk behind my objective, and the warriors would remain nearby for fire support if needed. If the Kroot came on over my objective, this would allow me to shoot them up with my deathspitters, and then assault with my hormies who would then consolidate back on my objective. The rest of my force would advance on his objective, and hopefully just overwhelm him so that at worst it's contested, at best I might hold it.
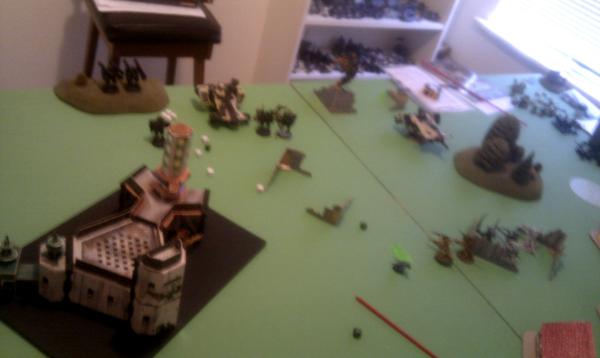
Tau T1
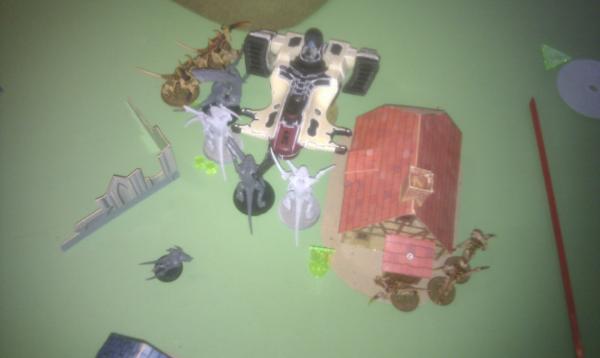
The Tau turn started with the Devil fish picking up a unit of firewarriors and moving towards his left flank (right on the photo below). The rest of the army prepared to fire on the advancing horde. The pathfinders targeted one of my Zoeys with their flash lights, but only managed to put one light on him. All the long range guns then proceeded to fire at the Zoey, who almost managed to survive unscathed until the broadsides unloaded and managed to get a wound through insta killing my Zoey.
Nids T1
The Nids started in the usual fashion, barreling towards the enemy gun line at speed (when I say at speed, most of my run rolls were 1's and 2's, so not that great speed). Most of my guns were out of range except for my warrior with the barbed strangler who fired on the fire warriors in the ruin killing two and pinning the unit.
 Objectives - Tau: 1, Nids: 0 (KP - Tau: 1, Nids: 0)
Tau T2
Objectives - Tau: 1, Nids: 0 (KP - Tau: 1, Nids: 0)
Tau T2
The Tau roll for their reserves, and the Kroot show up on his preferred edge!
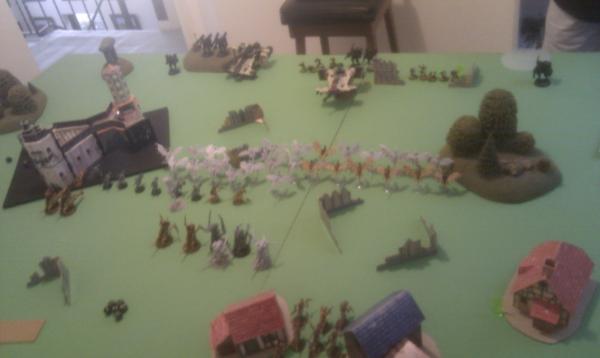
The Kroot move on his left flank (my right) near my objective and gargoyles. The devil fish moves across further to his left, and unloads the firewarriors in front of my gargoyles. The hammerhead moves into the centre.
Firing sees the kroot, one firewarrior unit, the devil fish, crisis suits, leader and hammerhead all fire into my gargoyles on my right flank, killing all of them. Meanwhile, the pathfinders put a light on my other Zoey, who the broadsides then pop.
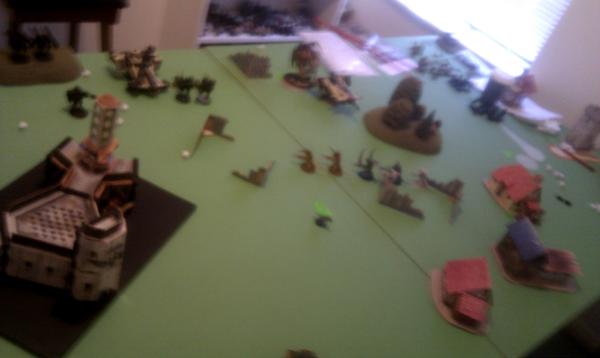
 Nid T2
I roll for my Trygon, and it comes in bang on target in front of his objective! (would love to see the look on those fire warriors faces

)
My warriors and hormagaunts on my right flank move towards his Kroot to spring the trap. The hormies on my left move into the ruins, whilst the Hive Guard advance behind them. The remaining gargoyle brood flies over towards the firewarriors who disembarked, ready to take some revenge for their sister brood.
Shooting sees about 5 kroot fall to my warriors deathspitters and strangler, whilst a couple of firewarriors die to my Trygon's spines. The gargoyles choose not to shoot, in case I kill too many and can't charge. The hive guard fail to do anything to his hammerhead.
The gargoyles assault the firewarriors and wipe them out, whilst the hormagaunts assault the Kroot and take down 5 for 4 losses. The kroot break and are run down by the hormagaunts, who consolidate towards my objective.
 Objectives - Tau: 0, Nids: 1 (KP - Tau: 3, Nids: 2)
Tau T3
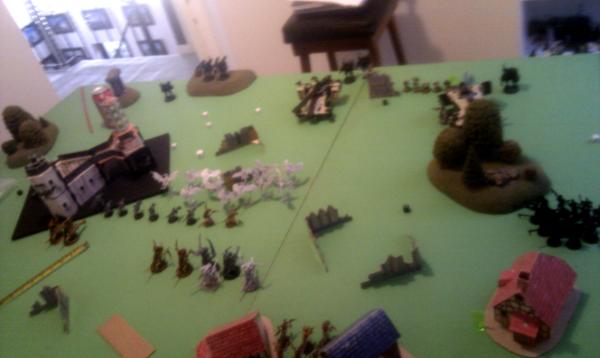
Moving sees the devil fish fly away from the action towards his left. Everything else prepares to fire at my gargoyle brood.
Firing from the devilfish, remaining warriors and crisis suits sees 13 gargoyles dead, 2 remaining. The path finder light up my Hive guard who are then shot at by the broadsides and the hammerhead, killing one.
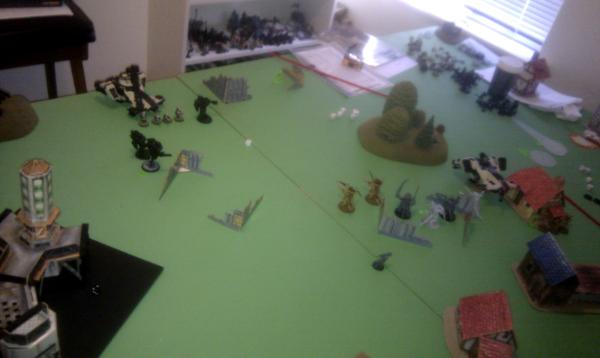
Nids T3
My Synapse is starting to get severely stretched here, and I need to take tests on most of my units. Everything passes except for the hormies, who move towards the pathfinders, and the Trygon, who moves towards the warriors. The remaining hive guard moved to block
LOS from the broadsides, but still see the hammerhead.
Firing sees very little occur except my hive guards shots pattering off the Hammerheads armour.
Assault sees the Trygon charge and wipe out the warriors on the objective, whilst my homragaunts charge, kill one pathfinder and lose two !?! My hormies are out of synapse, so they start running away.
 Objectives - Tau: 0, Nids: 1 (KP - Tau: 4, Nids: 3)
Tau T4
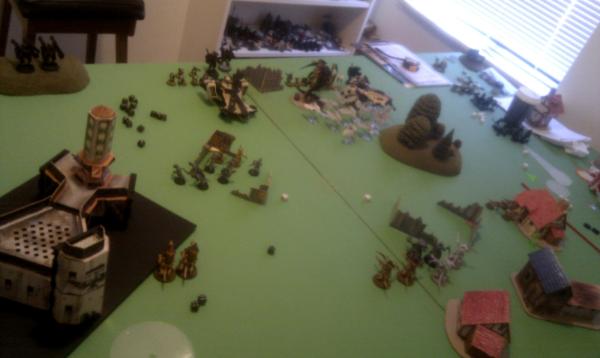
The Tau move away from the rampaging Trygon.
Shooting sees the remaining Tau focusing their fire on the Trygon, dealing three wounds to it along with taking out my remaining gargoyles with the devilfish.
Nids T4
My Trygon continues to rampage.
My Hive Guard failed again to do anything to his hammerhead.
Then I had both a crucial tactical error and a rules error. Tactical error: for some reason, I seemed to have a mental lapse and shot my Trygon at his leader, dealing a wound (thinking I could then assault his devilfish - a point which my opponent picked me up on later). Rule error: I had forgotten my codex for this game, which didn't matter too much as I knew most of my rules inside out. The one that I didn't know clearly though was the 'feed' instinctive behavior rule. I presumed this was just rage, but upon reading it later found it prevents me from shooting at all, which would have saved me from this tactical error.
My warriors shot into his pathfinders with the strangler and killed another one.
 Objectives - Tau: 0, Nids: 1 (KP - Tau: 5, Nids: 3)
Tau Turn 5
The Tau moved the devil fish and leader around the forest on his left flank.
The Hammerhead killed my last hive guard, whilst the rest of the Tau army finished off my Trygon.
Nids T5
On the killing side of things, it was becoming a bit desperate, but I was way ahead on mission objective. My opponent had no troops left, and I had two. I couldn't take his objective, but I could almost guarantee I would hold mine...
My warriors moved back towards my objective, and opened up on his commander killing him.
No Pic
Objectives - Tau: 0, Nids: 1 (KP - Tau: 6, Nids: 4)
If the game ends here, I'll win. We roll the dice, and it goes for another turn.
Tau T6
The devil fish moves towards my objective. It's just on the 3" line, and will contest it. The rest of the Tau advance on my warrior unit.
Firing sees my hormagaunts lose a couple from the devil fish. The Hammerhead, Broadsides and crisis suits manage to put 3 wounds on my warriors, on on each type.
Nids T6
He is contesting my objective with his Devil Fish that moved at cruising speed... My warriors advance on it.
Shooting sees glancing hits stunning and shaking the target - not good enough...
My warriors assault the devil fish, I get a glance with my warriors who shake it again, and then my Prime fails to do anything...
 Objectives - Tau: 0, Nids: 0 (KP - Tau: 6, Nids: 4)
I need another turn to kill the Devilfish. It can't move next turn, so it's a sitting duck. We roll for another turn, and get a one. The game ends in a tie.


 Imperial Knights: The Avengers Initiative
 Da Dark Angelz
 Arakasi vs Infinity
 This eventually led to the downfall of that flank, which I didn't think would be a problem given both objectives were on the opposite flank, but the tricksy devil fish managed to contest it...