Insurrection 2011
Insurrection is an annual tournament held by the Gaming Lords Leuven, a local and pretty active club. Their events are always well organized, so when I realized I had the time I happily went. Two friends from my hometown went with me as well, Thomas with his Imperial Fists to participate in his first
40K tournament, and Sam who wanted to write a report of the event. All of the pics you see here were made by him.
Insurrection is a one-day tournament (standard format in Belgium): three battles, each consisting of primary (objectives), secondary (
KPs) and tertiary (
VPs) missions. The guys are always looking for interesting yet easy-to-remember scenarios. The mission parameters will be mentioned at the start of each battle. You could also gain points for having your army painted, sportsmanship, and handing your list in on time.
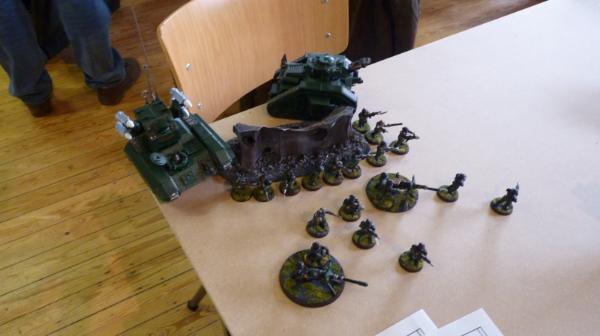
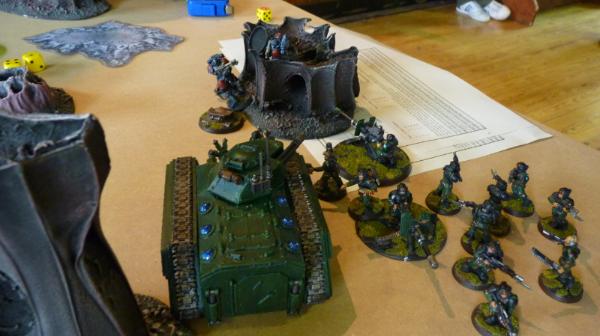
My army list:
- Company Command Squad, Astropath, 4 meltagunners, in a Vendetta
- Company Command Squad, 4 meltagunners, in a Chimera with a hull heavy flamer
- Marbo
- Psyker Battle Squad (8 psykers) in a Chimera
- Veteran squad with shotguns and 3 meltaguns, in a Vendetta
- Veteran squad with 3 plasma guns, in a Chimera
- A platoon consisting of:
o Platoon Command Squad with 4 flamers in a Chimera
o Infantry Squad with autocannon, plasma gun
o Infantry Squad with autocannon, plasma gun
o Infantry squad with autocannon, in a Valkyrie with multiple rocket pods
- A Manticore
- An Executioner with plasma sponsons.
I wanted to add in a commissar, but he got dropped out due to a ‘cut and paste accident’ (that’s what the guardsman with the ‘innocent’smile told me, anyway). Still, I feel this list has all the tools to deal with what people can throw at me and can counter most of the meta.
Battle 1: Louis, Space Wolves
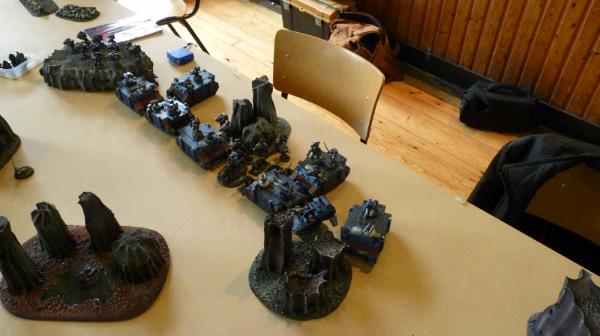
Louis had a long fang/razorback spam list, consisting of:
- Wolf Lord on thunderwolf (Powerfist, storm shield, 2+ save), accompanied by 5 fenrisian wolves
- 3*6 Long Fangs, 5
ML, las/
plas Razorbacks
- 3* Grey Hunters in rhino, melta, flamer, Mark of the Wulfen, wolf guard w/ combimelta, one accompanied by a Wolf priest (
JotWW, Murderous hurricane)
- 6 Grey Hunters, Mark of the Wulfen, las/
plas Razorback
- Land speeder, multi-melta
Misssion 1: Grab And Control - Pitched Battle Deployment
3 Objectives are placed in the neutral zone in the middle of the table (around the 24” mark). The Objectives are alternately placed by the players. Then each player places an objective in one of the deployment zones. The Objectives are placed 12" from those on the neutral zone and 6" away from the table edge and may not be in impassable terrain. At the end of the battle you count how many Objectives each player occupies. Objectives can only be claimed by a scoring unit within 3 ". A unit cannot simultaneously claim multiple Objectives (randomly decide which one is claimed if a unit should claim multiple at the end of the battle). A non scoring unit can never claim but can of course contest. Each objective under your total control at the end of the battle scores you 2 mission points, up to a maximum of 10.
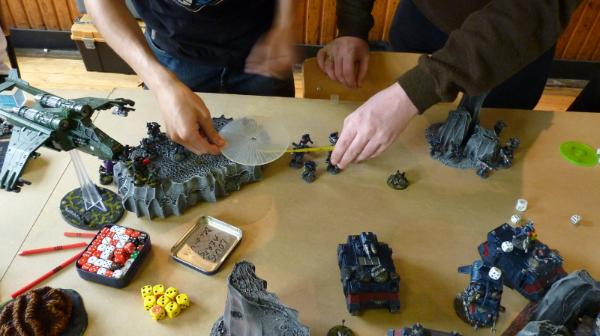
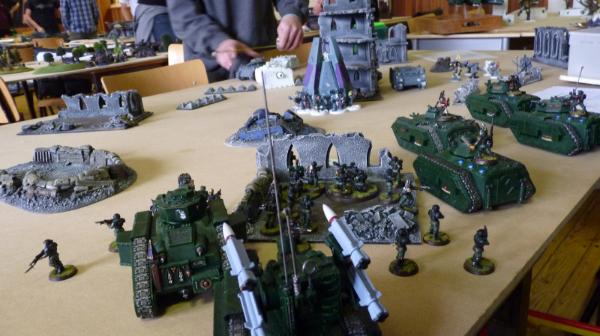
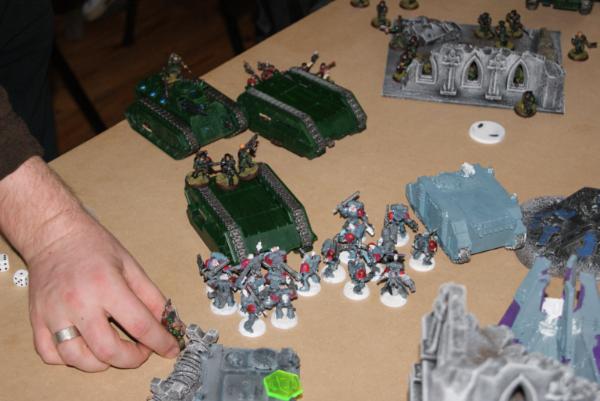
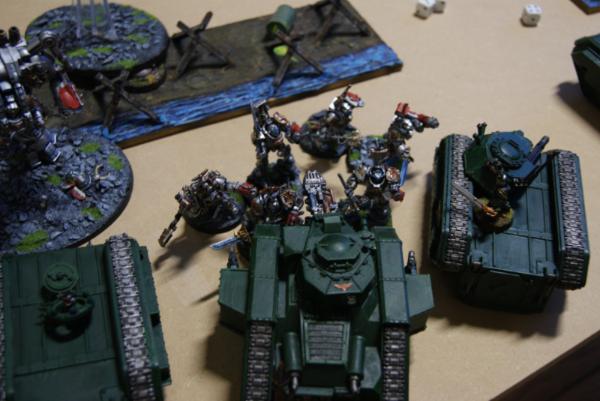
The terrain consisted of a bunch of hills, with a few rocky outcrops we counted as impassable. Louis wins the roll-off and decides to go first.
He deploys a parking lot in the centre, with longs fangs spread out on my left flank and centre. The Wolf lord goes in the middle with the car park, and the multi-melta speeder also deploys in the centre. I hold almost everything in reserve, and deploy my Manticore, Executioner, and a 20-man blob in my right corner, out of range of most of his Long Fangs, reasoning that a single las shot from a Razorback (only one who could get in range) isn’t that much of a threat.
My plan is to lure him towards my tanks, and then hit the other flank with my Vendettas and Marbo, blowing up his (rather unsupported) long fangs. With the Long Fangs out of the way, a shooting match should be in my favour.
I fail to seize, and Louis starts his turn 1
T1
He drives up in the center, immobilising one rhino in the process. The single lascannon shot manages to weapon destroy my Manticore. Not what I had in mind, but well, not much to do about it. He also kills a few guardsmen with the odd long fang that can draw
LOS and is in range. His other long fang squads move towards the centre, since they can’t do much where they are right now.
In my turn, the Manticore moves towards the centre, since it’s equipped with a heavy flamer.
The two autocannons manage to shake the speeder. The one plasma gunner in range manages to fry himself, something which would turn out to be a recurring theme of the day. My Executioner shoots a bunch of templates at the mass of rhinos and razorbacks, but does squat.
 T2
T2
One rhino, one Razorback and the wolf lord with his pets advance towards my right corner from the center, the speeder going that way as well, moving flat out for the cover save. The 6-man hunter squad in the Razorback move around a rocky outcrop, intent on flanking my holding force. Shooting doesn’t do much, maybe killing a few guardsmen.
In my turn, I get one Vendetta with a Company Command Squad, Marbo, the Psyker Battle Squad, and my plasma vets. Plasma vets reinforce my right flank, hoping to discourage any reckless charges of the space wolves. Marbo pops up in cover, ready to drop a demo charge on a unit of long fangs in the open, and is joined by the Vendetta with the Company Command Squad, who dismount to melta another long fangs squad. The Psyker Battle Squad took up position on my left flank, away from the rune priest and his psychic hood, hoping to make one of the long fangs units flee. The Manticore moves forward 12” to block off a hole between two rocky outcrops. I hope it’ll explode and take down a few wolves with it. With only a heavy flamer, the Manticore’s best use is, unfortunately, as a roadblock.
In my shooting, phase, I shoot a few Fenrisian wolves, and shake the land speeder again, despite scoring a penetrating hit on the elusive thing. Then the big moment: my attack on the firebase. Marbo tosses his demo charge towards the Long Fangs in the open. With his
BS 5, I’m reasonably confident. A roll of eleven on
2d6 later, I’m glad he managed to miss himself… Well, the Company Command Squad has 4 melta guns, time to fry a few longs fangs of the other squad, right? To hit roll: 1,1,2,4. One hit, resulting in one dead long fang. No panic test, so the Psyker Battle Squad drop off a template instead. The S8 template does nothing, despite hitting a rhino and a Razorback. Ouch. This is not how I had envisioned ending my T2… At least the Vendetta manages to destroy the rhino speeding towards my firebase, killing 3 Grey Hunters in the ensuing explosion. They’re not pinned, thanks to the accompanying Rune Priest’s
Ld 10.
 This turn means I’m in a bad position. My firebase is in decent shape, but my ouflankers are pretty much doomed, with 14 irate missile-launcher-wielding Long Fangs looking their way. There’s no way I’ll be reaching two of the objectives now, since the long fangs have them firmly in their sights and I can’t mount a big enough advance to overload their targeting capacity, especially since they can shoot 6 vehicles/turn…
T3
This turn means I’m in a bad position. My firebase is in decent shape, but my ouflankers are pretty much doomed, with 14 irate missile-launcher-wielding Long Fangs looking their way. There’s no way I’ll be reaching two of the objectives now, since the long fangs have them firmly in their sights and I can’t mount a big enough advance to overload their targeting capacity, especially since they can shoot 6 vehicles/turn…
T3
Discouraging Space Wolves with plasmavets? Doesn’t work that way, and the Wolf lord and the Grey Hunters move towards the Manticore, intent on charging in it. Still, it kept the rest of my troops safe, so I was happy. A rhino squad from the middle moved up near my deployment zone, close to an objective. The speeder accompanied the Razorback outflanking my holding force, which moved towards an objective there. In the back, the third Grey Hunter squad disembarked and moved towards Marbo. The shooting phase cost me my Vendetta; Marbo went to ground, surviving with one wound (not bad, considering the amount of shots aimed at him). The Company Command Squad was killed by the long fangs in
cc, and the Manticore was weapon destroyed and immobilised. No explosion sadly, and to add insult to injury I couldn’t put templates over it since it wasn’t destroyed and it would give cover…
In my turn, my Platoon Command Squad came on, together with my Vendetta with the meltavets. The Valkyrie came in as well, but on my left flank, unfortunately. I went all out for the cover save, since it couldn’t do anything useful. The meltavets appeared near the flanking Grey Hunters, while the Platoon Command Squad rushed on to support my right flank. My Executioner stayed still for more shots. The space wolves have so many attacks that being hit on a 4+ won’t help out, so I decide to go for max firepower. Shooting blew up the Grey Hunter’s Razorback with the meltavets, and that obnoxious speeder with the Vendetta. My Psyker Battle Squad managed to immobilize the rhino going up the middle, reducing their mobility. My Platoon Command Squad flamed the wolf lord and the Grey Hunters behind, killing all of the Fenrisian wolves and a few Grey Hunters. The blob squad messed up the Grey Hunters a bit more. Then, when the wolf lord was alone, my plasma vets shot him, taking off one wound, and of course overheating twice and killing two plasma vets….My Executioner shot him again, reducing him to one wound (boy, do I hate storm shields!) and scattered a bit on the Grey Hunters till only the wolf priest remained.
 T4
T4
This turn saw the wolves closing in for the kill. The wolves I shot out of their Razorback moved closer to my meltavets. The wolf lord rushed my Executioner. Everything else shuffled around a bit, taking up better firing positions. In the shooting phase, some long fangs immobilized the Vendetta, and Marbo got shot to bits. One stray missile (the only one that could see it) exploded my Platoon Command Squad’s Chimera, killing the platoon commander and a flamer in the process, and causing them to run. Drat. Also in the shooting phase, the wolf priest cast the spell that made my plasma vet Chimera count as in difficult terrain. A few Grey Hunter missiles shooting the Psyker Battle Squad’s Chimera and the Valkyrie were thwarted by cover. The Grey Hunters on my right flank flame the vets and charge them. They managed to hold, unfortunately, since now I can’t shoot them in my turn. The Wolf Lord (predictably) tears the Executioner apart.
My Company Command Squad finally rolled in, speeding past the wolf lord and disembarking, intending to give him some melta loving. My remaining flamers from the Platoon Command Squad managed to rally, and put themselves in a good position to flame the wolf lord. The infantry squad disembarked from the Valkyrie behind
LOS-blocking terrain, hoping to run towards a nearby objective T5, while the Valkyrie sped off again, hoping against all odds to survive. In retrospect, I should have grav-chuted the infantry squad so I could still gain the cover save on the Valkyrie. Due to the time limit we knew there wouldn’t be a turn 6, so objective grabbing preparations were being made. In the shooting phase, the Psyker Battle Squad fluffed. My Vendetta managed to miss the rear of a rhino it could see. The flamers didn’t wound the wolf lord, but that was a long shot anyway. My Company Command Squad tried to fry the wolf lord: I manage to hit thrice, and then roll two 1’s for the to-wound roll. The last wound was saved... In the end, the humble lasgun brought down the wolf lord as he finally rolled a 1 for an armour save, my blob squad rapid firing into him in desperation. Next, my plasma vets shot the Wolf Priest, reducing him to one wound . In close combat, the Grey Hunters finished off my vets and consolidated towards the objective.
 T5
T5
Due to the time constraints, we knew this was the last turn, so it was all-out objective time.
Louis’ central Space Wolves disembarked and shielded the objective. His remaining Grey Hunters on my right flank moved into cover near their objective. In the centre, his other Grey Hunters moved on an objective as well. One other objective was under the Long Fangs, the objective in the centre was left empty. One of his Razorbacks tank shocked my infantry squad, who promptly ran off. In the shooting phase, the Valkyrie was shot down, and the plasmavet’s Chimera was blown to smithereens by the Grey Hunter’s meltagun, resulting in them being pinned. His Rune Priest used
JotWW on my Company Command Squad and blob, killing 3 meltaguns and a few infantrymen. My immobilized Vendetta lost a lascannon from all the missiles heading its way. Louis ended his turn in control of 3 objectives.
In my turn, I moved my blob towards the rightmost objective. Depending on shooting casualties, I could charge the four remaining Grey Hunters (two had died when their ride exploded), or just contest. The Company Command Squad’s Chimera moved up as well, hoping to add its heavy flamer to the firepower. With the Valkyrie destroyed and my infantry squad running, I couldn’t contest the objective on my left flank. I could empty the one right next to me, however, if I could shoot the Grey Hunters, force a panic test, and then lower
Ld with my Psyker Battle Squad. Of course, my Company Command Squad rolled a 12 for their ‘get in the fight’ order on my plasmavets. Less shooting at the grey Hunters shielding the objective, I guess…Next, my Psyker Battle Squad’s Chimera wants to race forward 12” and disembark to draw a bead on the Grey Hunters I want to panic. Due to the (still retreating) infantry squad, it has to go through difficult terrain. A one… As I disembarked with the Psyker Battle Squad and tried to move through difficult terrain, I only moved 3”; not enough to see the Grey Hunter squad. In my shooting phase, I killed enough Grey Hunters to force a morale check , but they passed. I couldn’t kill a single Grey Hunter occupying the rightmost objective, so I decided not to charge them with my blob, since 15 or so guardsmen vs 4 Grey Hunters wasn’t going to go my way.
 The battle ended there. Louis got primary, two objectives to 0 (4-0 MPs), secondary was KPs, in which we were only 3 KPs apart (10-7), resulting in an even spread in mission points (2-2). Same for VPs: Louis only had 400-something more, and you need 500+ for a mission point advantage (3-3 on the MPs). In the end, I suffered a minor loss. Not a great start, but I knew this was going to be an uphill struggle as soon as Louis had first turn. A few fluffed rolls just sealed my fate. Luis is also a top player, part of the ETC team, so I knew my chances were pretty slim from the start; the odds of him making a big mistake I could capitalise on being pretty low. A very fun match though, despite a few odd dice.
B2: Donovan, Space Wolves
The battle ended there. Louis got primary, two objectives to 0 (4-0 MPs), secondary was KPs, in which we were only 3 KPs apart (10-7), resulting in an even spread in mission points (2-2). Same for VPs: Louis only had 400-something more, and you need 500+ for a mission point advantage (3-3 on the MPs). In the end, I suffered a minor loss. Not a great start, but I knew this was going to be an uphill struggle as soon as Louis had first turn. A few fluffed rolls just sealed my fate. Luis is also a top player, part of the ETC team, so I knew my chances were pretty slim from the start; the odds of him making a big mistake I could capitalise on being pretty low. A very fun match though, despite a few odd dice.
B2: Donovan, Space Wolves
Space pups, again…Donovan had a very different list then Louis though, one based on his fluff, so it felt like a totally different army. It consisted of:
- a wolf lord with 4 wolf guard, all with terminator armour, lightning claws and storm shields (one cyclone as well) in a drop pod
- Grey Hunter squad w/Mark of the Wulfen, meltagun, flamer, in rhino (accompanied by a rune priest)
- Grey Hunter squad w/Mark of the Wulfen, meltagun, flamer, in rhino
- Grey Hunter squad w/Mark of the Wulfen, meltagun, flamer, in rhino
- a squad of skyclaws with a wolf priest and a power fist
- vindicator
- predator (autocannon turret/lascannon sponsons).
Mission 2: Hold At All Costs - Spearhead Deployment
An objective is placed in the exact middle of the table and one in the exact center of each table quarter. These objectives need to be held at all costs. Before starting the battle, each player picks one of his troop choices to be his KEY UNIT. This unit will be pivotal in the battle because it will generate you double amount of objective points, but also give your opponent double the victory points and double the kill points if destroyed/fleeing at the end of the battle, or its total worth in
VP if reduced at half strength. From round two onwards, players get one objective point at the beginning of their turn (before rolling for
reserves, making morale checks or any other action for that matter) for every scoring unit that has one model in base contact of an objective. Subtract one point for each enemy scoring unit that is contesting (if you have 4 scoring troop choices on an objective and your opponent none, you get 4 points. If your opponent is contesting within 3” with two scoring units, you get the difference, namely two points). don’t forget that your key unit gets in double amount of points, and that you can only ever score a maximum of ten objective points for the battle in total. Count the total number of objective points at the
end of the battle to determine the outcome!
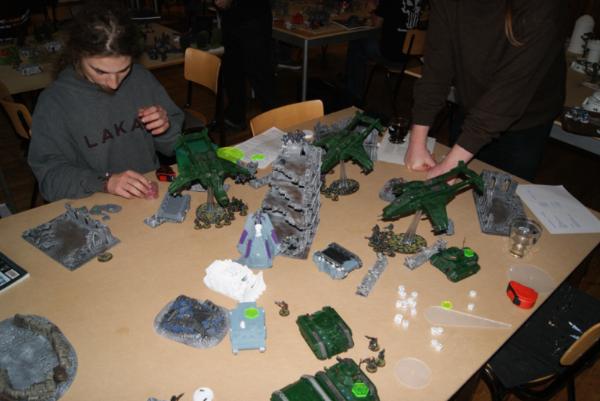
Terrain consisted of plenty of ruins, with a big
LOS-blocking building in the centre of the table.
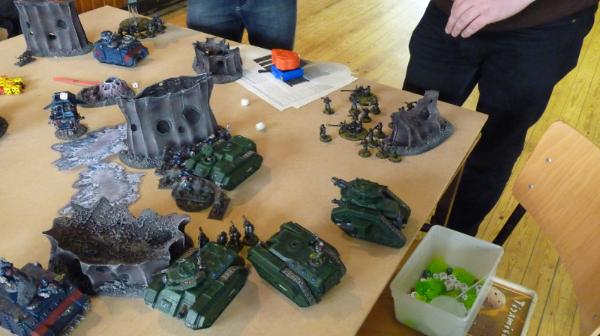
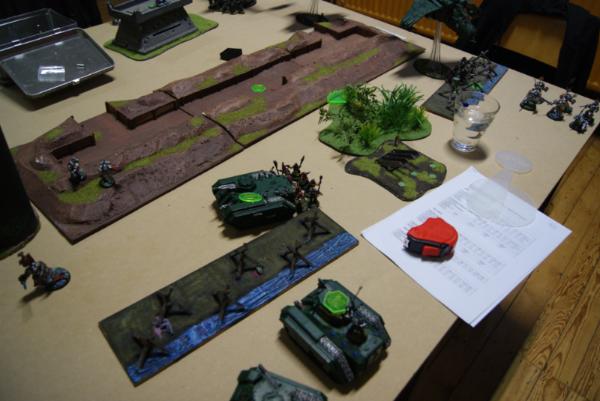
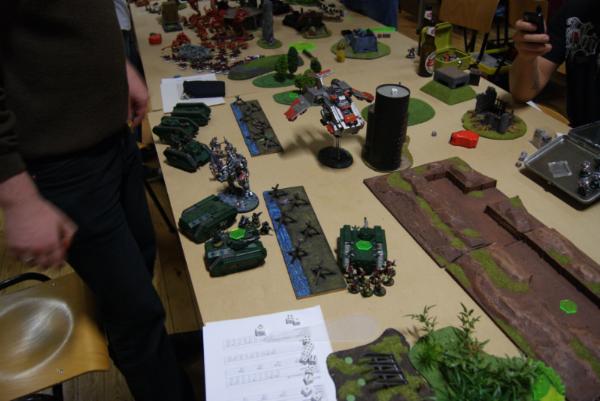
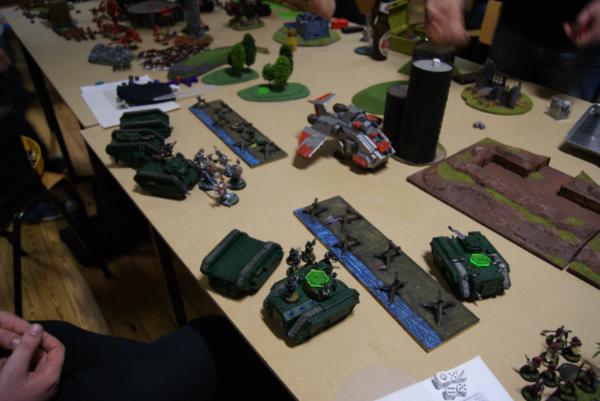
For his vital unit he chose the Grey Hunters companied by his rune priest. Donovan won the roll for T1, and decided to take it. I chose a 20-strong blob squad as my vital unit. They started the battle on their objective. (deployment pic), while Donovan set up aggressively for a two-pronged assault around the central objective. I forgot to ask him after the battle, but I assume he wanted to kick me off mine and then start nabbing objectives.
I deployed so that his drop pod couldn’t land inside my units, and with plenty of fire lanes and lines of retreat for when the fighting gets close and personal.
T1
Donovan’s drop pod comes in, and he tries to land right in front of my lines. Fortunately, he scatters back 7”, giving me some breathing room. Two of his rhinos move up on the right of the central building, while the vindicator, the predator, and the rhino containing the rune priest move up on the left. His Skyclaws with wolf priest join his the rhinos on the right. The cylone on the wolf guard immoblizes the plasmavet Chimera, and the drop pod’s storm bolter kills a guardsmen.
In my turn, I decide to plan ahead a little and quickly realise that my right flank is the most interesting for my outflankers: I can see the rear of his vehicles, there are plenty of flight/fire lanes and the whole table half will be useful, while the top left of the battlefield doesn’t contain enemy troops and the bottom left is already filled with my objective-holding force. This means I need some bait there to keep the pups busy and draw them away from the objectives. Also, this gives me time to deal with the wolf guard in my face. To that end, the Platoon Command Squad with the flamers rushes 12” towards the Skyclaws, and disembark. My mobile Chimeras move away from the wolf guard, and all guns are aimed straight at them. I could’ve moved my Company Command Squad closer to shoot their meltas at the wolf guard but with their previous performance (and the storm shields) in mind, I decided to stay away, since I was sure I was more than 12” away, giving me a turn’s respite from their close combat prowess.
In the shooting phase, the Platoon Command Squad Chimera pops smoke and the Command Squad itself flames the Skyclaws, killing two. My opponent declares he’s going to take them down, eyes gleaming, ready for the kill. The bait has worked. Everything else fires on the wolf guard with the wolf lord, killing three. Let me state again how much I hate storm shields: they had over 1000 points of firepower aimed at them, and I did 3 wounds…. The Manticore managed to destroy the storm bolter on one of the rhinos.
 T2
T2
Turn 2 saw the wolf guard moving towards my line, and the two rhinos on the right moving around the building, one popping smoke. The Skyclaws landed next to my Platoon Command Squad. The left prong of the attack slowed down to allow the vindicator and the predator to fire, the rhino lagging behind as well, shielded from view by the other two tanks. Shooting didn’t see much happen, the predator hitting the Executioner but failing to penetrate its front armour. The cyclone of the wolf guard wrecked my Psyker Battle Squad’s Chimera, who lost a few in the blast but remained steadfast. In close combat, the Skyclaws multicharged my Chimera and my Platoon Command Squad. The Platoon Command Squad was wiped out, but the Chimera only got immobilized thanks to having moved 12” the turn before.
In my Turn 2, the two Vendettas and the Valkyrie showed up, only Marbo staying in reserve. They all arrive on my right flank, the Company Command Squad and the meltavets disembarking to take a shot at the Skyclaws. The rest of my units move to target the wolf guard. At the start of the turn, I also netted two objective points since my vital unit was on my objective.
The shooting phase saw the Skyclaws and the accompanying wolf priest obliterated, one of the rhinos immobilized, the other weapon destroyed, and the wolf guard with the wolf lord wiped out by massed firepower, which took pretty much my whole army. Two of my three plasma vets overheated – makes you wonder how they ever became veterans... The Manticore loosed of three missiles but scattered badly and didn’t do much.
The rhinos were more or less in position now, but at least the wolf guard were gone. If the Grey Hunters disembarked, they could only reach one Chimera. Also, all my flyers had come up right where I wanted them, isolating part of Donovan’s two-pronged assault and turning it into a flanked/rear attacked defensive action.
 T3
T3
Donovan disembarked his two Grey Hunter squads, moving them towards my corner to start munching up stuff. His shooting destroyed the Executioner with a lucky lascannon shot, but the vindicator veered off target, missing everything. In the assault phase, he destroyed the plasma gunners’ ride, killing 5 in the progress. I kept a sarge, one plasma gunner, and a lasgunner. For those wondering: marines with mark of the Wulfen do nasty things to vehicles, especially if you roll high for their number of attacks.
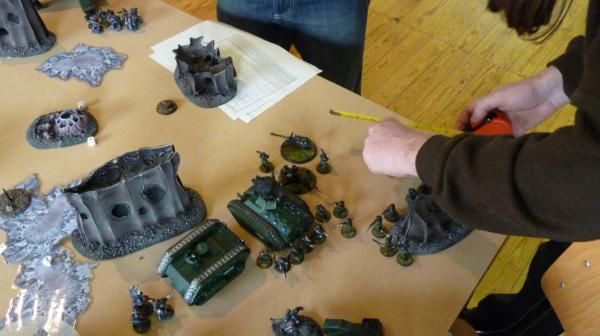
In my turn 3, Marbo decides to show up, so I put him close to the rightmost Grey Hunter pack, since those were difficult to target with the rest of my army due to all the wrecks in the way, and because they were bunched up like crazy. My meltavets and Company Command Squad re-embarked, and their rides moved forward 6”, lascannons pointing firmly at the central Space Wolf units. I got another two objective points for my vital unit roasting marshmallows on the objective.
The Manticore really shone this turn: it launched three rockets, hit the three tanks on the left flank and destroyed the predator, weapon destroyed the vindicator, and shook the rhino. To add insult to injury, Marbo’s demo charge scored a hit, and killed one 9-strong Grey Hunter pack outright. The Company Command Squad and the blob, together with the plasma vets and the Vendettas, then reduced the other squad to two models: a sergeant and the Wulfen. This had been a devastating turn for Donovan, reinforcing my already strong position on the board.
 T4
T4
In his T4, Donovan didn’t have much left, but he went in with true Space Wolf grit, charging my Company Command Squad Chimera with his remaining Grey Hunters, and moving his vital unit out of his rhino and onto the central objective, safely ensconced in cover. His still mobile rhino moved off to contest my objective but was still about 4” away. The vindicator also moved forward. His charge took down the Company Command Squad Chimera, wrecking it, and forcing them to disembark. He also gained two objective points for his vital unit on the centre objective
In my T4, I moved in to consolidate. Marbo charged the immobilized rhino, my Vendettas and their passengers moved towards the centre to kill off the last unit, the Valkyrie moving towards the objective in his table quarter to start scoring points there as well, while I got another two points for my objective.
My shooting phase saw the two remaining Grey Hunters killed by the Company Command Squad, the rhino coming to contest immobilized, the drop pod finally killed off, and about half of the centre unit killed. Donovan passed his morale test, and stayed put. Marbo wrecked the immobilized rhino with his meltabomb.
 T5
T5
Donovan’s turn 5 was (predictably) short. His surviving mobile rhino sped off to contest the objective in his rear, and his rune priest casting
JotWW and obliterating my whole Company Command Squad and two psykers.
When it was my turn, I destroyed the vindicator, the rhino and the whole Grey Hunter squad, leaving just the Rune Priest standing.
Donovan agreed that I’d kill the Rune Priest in my next turn, and we ended the battle there.
My army worked well here; all of the bad luck from the first battle was compensated for, and I think my plan worked perfectly. I had an almost full score for the primary mission (10-2), and won points on both secondary and tertiary as well, netting me a solid victory. Donovan’s wolf guard had to come in T1, and them scattering back a bit gave me enough time to deal with them. The diversion on my left flank worked a treat, keeping the Skyclaws out of my hair and leading to their demise. Also, I had spread out a bit in deployment, giving my tanks room to retreat a bit, gaining me crucial inches while still forcing the drop pod to stay out of my perimeter. Donovan attacked a bit too piecemeal IMO; if he had shoved everything down my throat ASAP instead of relying on cover, I would’ve had a lot more trouble dealing with his army. This battle also showed Marbo’s potential when he works right. I know you can’t rely on that, but it was nice to see my plans coming to fruition!
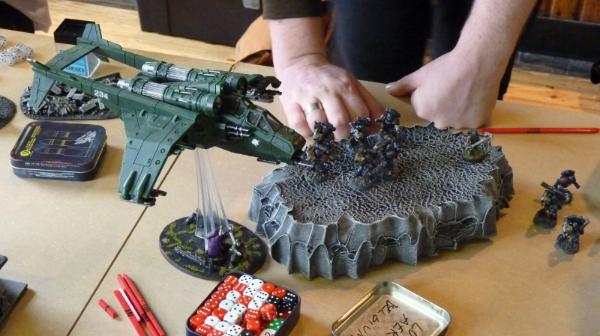
B3: Kristof, Grey Knights
My opponent Kristof brought a Draigowing-style army to the table:
- Draigo, obviously
- Librarian with lots of psychic powers, warding stave
- 5 paladins, differentiated, two psycannons
- 6 paladins, differentiated, two psycannons
- Solodin, NO psycannon (thanks Kristof)
- 5 grey knights, 1 psycannon
- Stormraven (assault cannon & multi-melta, both twin-linked)
- Dreadknight (the jump pack item, big honking sword)
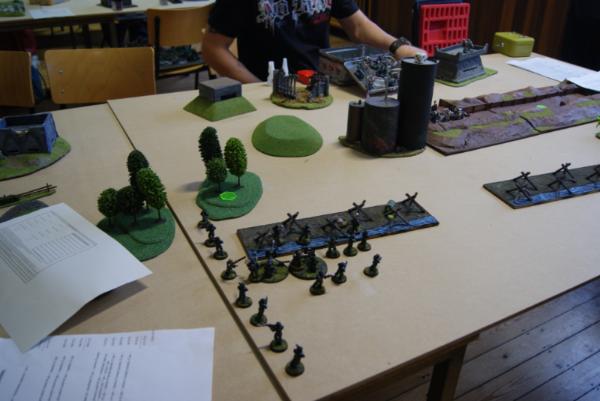
Mission 3: Secure The Area – Dawn of War deployment Each player chooses a piece of terrain in his deployment zone as an objective/command center as soon as both have finished deploying. Objectives can only be claimed by a scoring unit mostly within the terrain piece. A non scoring unit can never claim but can contest the main objective if it is in combat with the occupying unit(s) or mostly within the terrain piece as well. Before starting the game, roll a
D6 for every OTHER terrain feature on the table. On a 4+ that feature is considered to have caught fire. The smoke and smouldering flames affect the game like nightfight for every model/unit that wants to shoot through, in, or out of the terrain feature at another unit.
Draigo rolled a 3 (on a D3) for his grand strategy, giving the Dreadknight, the Stormraven, and the paladins on foot the Scout
USR.
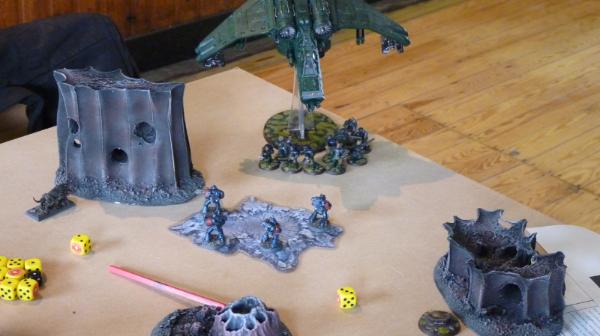
Kristof won first turn and deployed Draigo with the strike squad in the centre, and the solodin on his objective. I deployed two infantry squads in an L-shape to form a perimeter against outflankers, since his Dreadknight, paladins on foot, and the Stormraven (with the other paladins inside) all outflanked.
I fail to seize, and we get going.
T1:
Draigo and his squad move forward and kill 3 guardsmen, causing the rest of the squad to leg it straight off the table with a 9” run. In my turn, everything rolls up on my left flank all the way to the centre, except the flyers and Marbo, who are outflanking (or popping up) as always. I make the mistake of moving my Executioner and Manticore up in my left bottom corner, near my objective. Don’t know why to be honest, probably because they were the first two I grabbed and I was trying to play a bit quicker. In my shooting phase, a Chimera lights up Draigo and his cronies, and at the end of the shooting phase, Draigo had lost two wounds and he only had two grey knights left accompanying him. They passed morale because my Psyker Battle Squad fluffed their roll.
 T2
T2
Thanks to psychic communion (which allows for a +1/-1 on reserve rolls), all three of his reserves arrive. The Dreadknight and the Stormraven pop up on my left flank, the 6-strong paladins on foot have to come up on my right, half a table away from all the action. The stormraven disgorges his termies/libby payload right in front of my Manticore and Executioner (thanks to my infantry squad running away, there wasn’t much perimeter defense left), and the Dreadknight sizes up my remaining infantry squad on my objective. His shooting sees theManticore destroyed. His assault then destroys my infantry squad, my Executioner, and a Chimera he could multi-assault containing my Platoon Command Squad. 3 flamer guys make it out alive.
In my turn 2, all of my reserves arrive as well. I decide to bring all the flyers in on the right, the meltavets and their Vendetta preparing to take down the solodin, with the Valkyrie right behind to drop off its infantry squad in case the solodin bites it. The Company Command Squad and its accompanying Vendetta land next to the 6-man paladin squad that just walked on, and the Psyker Battle Squad’s Chimera moves up as well and disgorges its psykers, hoping to bring them in range of the rightmost paladin squad, since the left is guarded by the librarian’s psychic hood. My Company Command Squad near my objective moves away from the rampaging horde of silver-armoured maniacs that has landed there. Marbo pops up behind the paladins that the Stormraven disgorged, hefting his demo-charge. The shooting phase sees Marbo’s democharge hit 5 paladins, in the open, with S8
AP 2 instakill goodness. The 5 dice come up, showing four ones. Crap. To compensate, my plasma vets manage to kill off Draigo who had left the strike squad, and the two grey knights from the strike squad get fried as well by multilasers. I toss the psykers’ large blast towards the left group of paladins, since it’s S8. I pass the
Ld, roll for
AP, get AP1 (ouch!) and then roll a hit on the scatter die! 3 Paladins die (Kristof makes 3 5++ saves). The Company Command Squad then melta the last three, killing them all. Near the Grey knight objective my meltavets don’t manage to shoot down the solodin, because of him going to ground. The lascannons on the Vendetta manage to force the one failed save that I need, however, putting his objective firmly in my hands. I managed to clean up the right flank, but the left flank has a lot of heavy stuff still going strong, he paladins being… extremely lucky to say the least. I’ll have to draw them away from my objective, bringing my superior firepower to bear.

 T3
T3
After the emotional rollercoaster of T3, Kristof moves as fast as he can towards my centre, ignoring the remaining 3 flamers guys and Marbo. They can’t charge anything this turn, but next turn the Dreadknight will always be able to reach me, as will the Stormraven. In the shooting phase, the Stormraven kills the Psyker Battle Squad’s Chimera, killing one of the psykers in the resulting blast. The paladins decide to run, moving closer to my remaining vehicles.
In my turn, I race my Company Command Squad towards the Dreadknight, dismounting since I moved more than 12” and want to shoot. The infantry squad dismounts from the Valkyrie and moves towards the enemy objective, and my vets hop back in, as do the other Company Command Squad in their Vendetta. In the shooting phase, his librarian tries to cast the shrouding, but fails with a perils, though he survives. Actual shooting sees me kill off the Dreadknight with the Company Command Squad and the plasmavets. The Vendettas immobilize and stun the Stormraven, meaning all my opponent’s mobility has been taken away. Marbo shoots the paladins with his AP2 pistol, but they make their 5+ save
 T4
T4
The paladins charge my Company Command Squad and their Chimera, wrecking both. They consolidate towards my plasmavets in their immobile transport.
In my turn, everything fires at the Stormraven and the paladins, resulting in... nothing.
 T5
T5
My opponent shoots mindstrike missiles at the Psyker Battle Squad, killing all except the overseer, and the paladins wreck my plasmavet Chimera. Two vets survive the blast.
In my turn, I run my flamers from the Platoon Command Squad on my objective, and Marbo charges the Stormraven. Shooting kills one paladin thanks to the libby’s shrouding power, and Marbo can’t penetrate the Stormraven due to its heat shielding.
The game ends with me in control of both objectives, but both
KPs and
VPs are in the draw range. Still, solid victory to me.
This mission favoured my army heavily, since Kristof could ill afford to keep one of his expensive units back for objective sitting duty. I would have deployed the 6-strong pally squad with Draigo though, and have shoved them in my face T1. Now the strike squad was basically target practice. Luck went both ways, but in the end deathstars are ill equipped for guard, who tend play a bit MSU. I made a mistake on my left flank that cost me both my Executioner and my Manticore though: If I’d managed to keep one of those alive, they could have helped out immeasurably. Still, a fun game. I was a bit worried since Kristof made quite clear he wasn’t too excited about playing my guard, but it turned out to be a nice game against a nice (and very sporting) opponent.
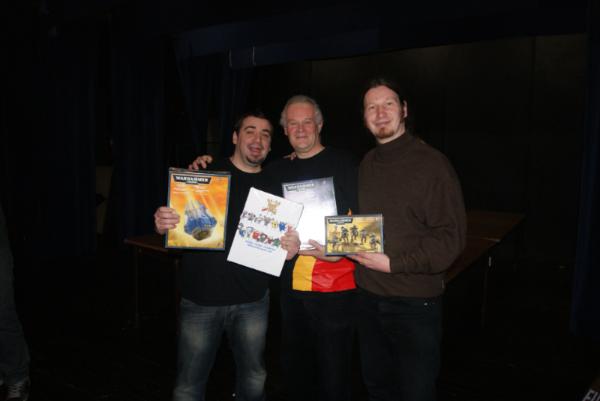
End Result.
Thanks to the painting score (my guard scored 15/20, max score was 17/20) and bringing in my army list on time (easy bonus points), I finished on a nice third place. I hadn’t expected it because I rated my performance as a bit mediocre. Looking back though, I did manage to win two battles quite convincingly, and only lost the first one by a small margin; not that bad after all! I scored 57 points total, with 2nd place scoring 59 and first place scoring 60 points. The tournament was won by the guy who won the Grand Belgian open, and number two was part of the
ETC-team, so I did more than OK I think!
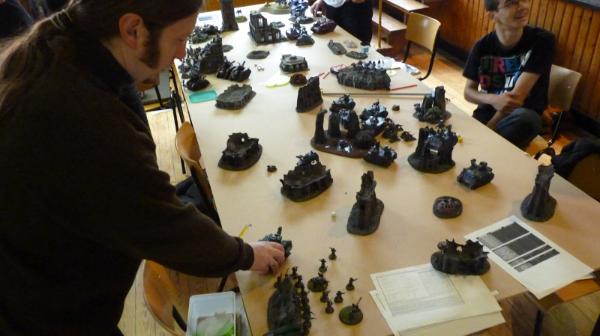
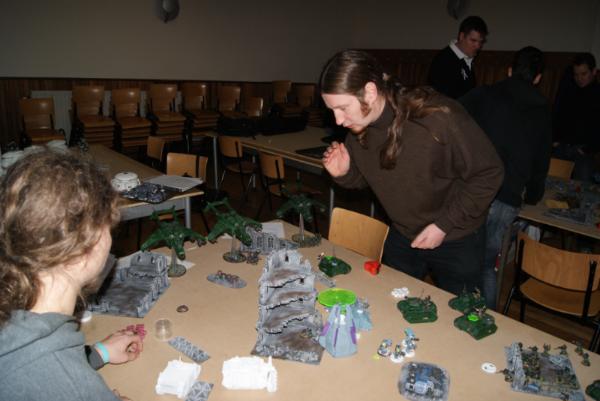
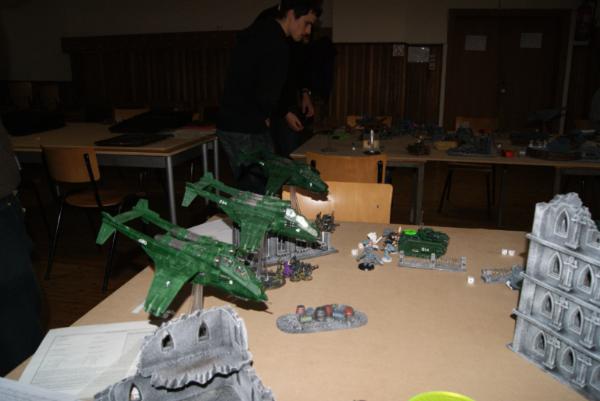
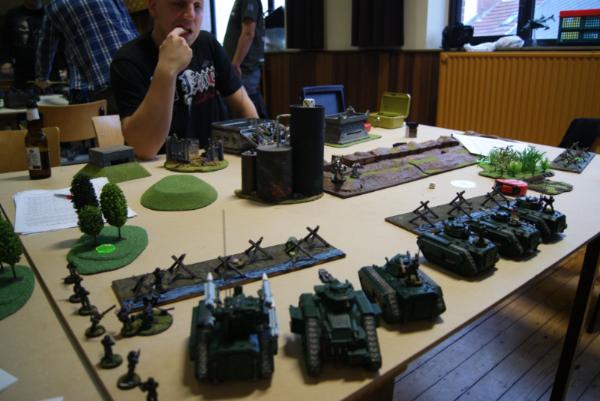
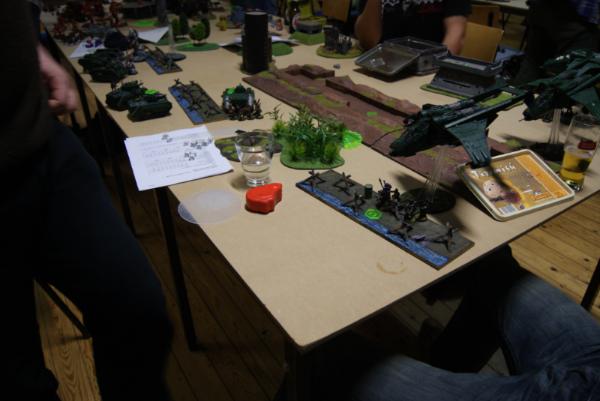
And a view of the location:
 Afterthoughts
The theme of the day was: if it’s grey, shoot it, apparently. Current meta includes lots of grey knights (8 armies out of 36 participants), and lot of other marines as well. Not that amazing, since all of smurfkind together has 8 out of 15 army books. My army is decently equipped for marines, so that sure helped out, though turn 1 matters a lot against Long Fang/Razorback spam. I have to look for a way to counter those alpha-strike armies: everything in reserve, maybe more russes… not quite sure yet. I’m not that afraid of the grey knights with my guard, but shooty space wolves really are a tough proposition. Of course, having first turn can make heaps of difference.
I did miss my commissar (not to mention he’s one of my best painted models), so I’ll be re-reading my army list a bit more thoroughly next time.. Also, the Valkyrie (and by extension, the squad inside) did next to nothing, making it worth replacing. I’ve been thinking about an outflanking penal legion squad, which can do pretty much the same job for 80 points, freeing up 50 points for a commissar and maybe some power weapons or a power fist for my Company commander. This would allow for a 30-strong blob, if I decide to keep the infantry squad. The Valkyrie is a nice model and can move quickly, but you rarely face hordes in tournaments due to the time constraints, so you’re paying lot of points for a fragile transport. A Banewolf could also have been useful, since it’s as big a target as the Manticore and is simply made to fry marines of all types. Or maybe a sentinel with an autocannon an a
HK-missile? Things to consider and test out!
All contemplating aside, I had a fun day against fun opponents. The missions were nice, the sportsmanship score kept everyone honest, and the food was great as always (if you go, try their home-made brownies, muffins or meatballs!). The event went through in a different room of the same location, which had a bit more room and light, always nice, and the judge knew his stuff. In short: I’ll be going again next time!


 resulted in stunned or shaken results. Besides, full mech armies excel in the 12-18" band, so you know at what distance you want to keep them. The lonfang/razorback spam list is dangerous from 48", making it a much tougher proposition.

 Imperial Knights: The Avengers Initiative
 Da Dark Angelz
 Arakasi vs Infinity
 About 10000
 - 5000


 5000pts
 2000pts
 5000 pts
 1 squad
 "
"