So, we've been meaning to do this for AGES. No, really.... AGES. We've seen a few other 'how-to' articles on here, but none of them really have much in common with how we make our reports. So, overhead cameras at the ready... here goes...
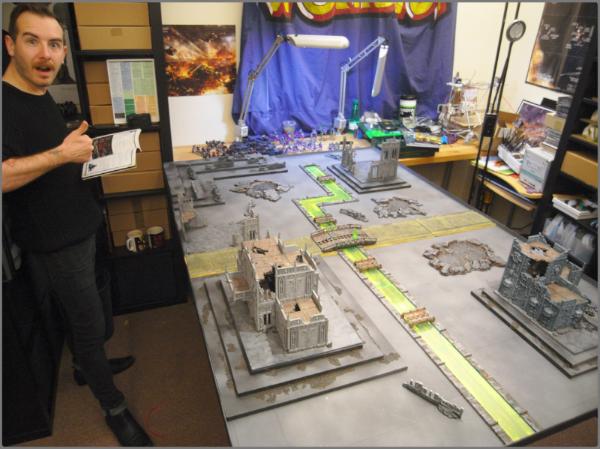
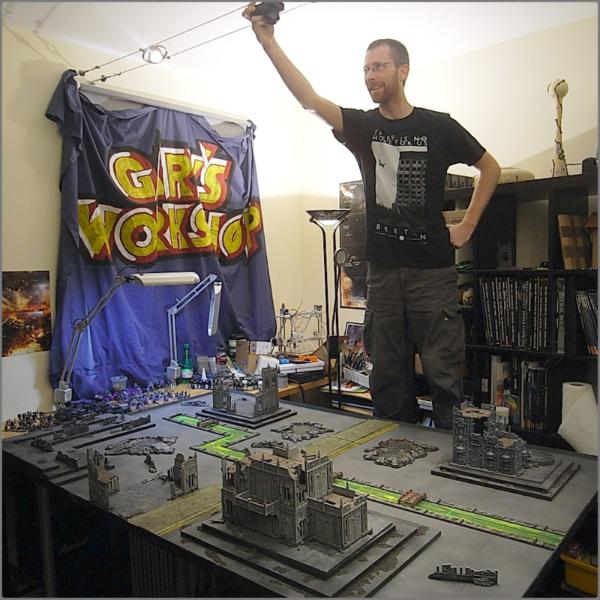
How to Write Battle Reports 1. Setting Up 1.1 Space You're going to want a lovely game board with enough space to get around most of the sides and some space to lay out your armies and clear away books and rulers to - this last bit becomes important later. As you can see, in Panic's Geeking Room we don't have a huge amount of space, but certainly enough for me to give a thumbs up.
 1.2 Lighting
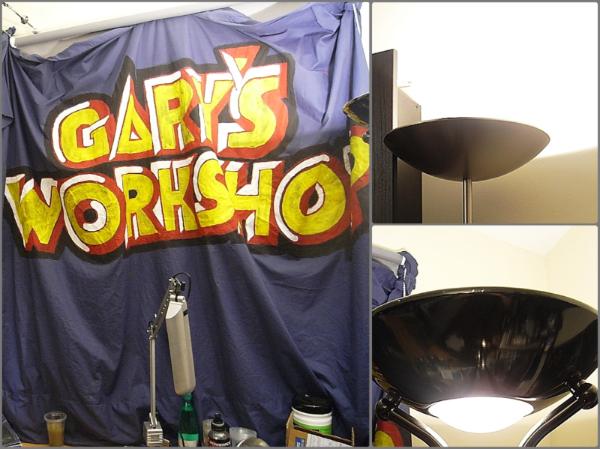
 We want even lighting on the whole of the table. What's really important here is NOT to rely on the light from a window - it will be very directional and all your models will cast dark shadows on the table. We cover up the window with an attractive banner. We prefer strong uplighters, which then bounce off the white ceiling, giving a much more even light.
 1.3 Cameras
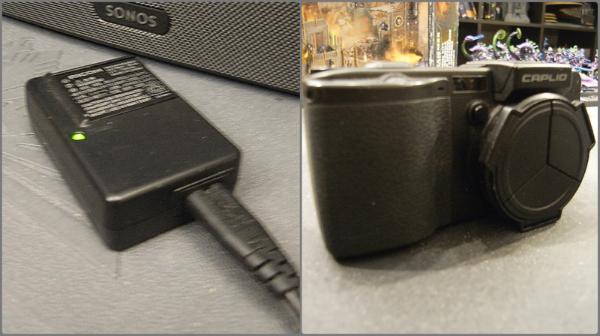
 Firstly, make sure your camera is charged. We use Ricoh GX100 cameras, which are quite cheap nowadays but have a pretty good lens and a decent amount of options. The important thing is to get something that has a '28mm equivalent' lens - this is 'equivalent' to a 28mm lens on a full size SLR chip. We find that this is wide enough for us to get an overhead shot of the whole table from ceiling-height. We also tend to limit the size of the image files - you really don't need 10 Megapixel images for a Batrep, and they'll take AGES to upload. Go for something smaller like 2048 pixels...
 2. Pre-game 2.1 Fancy Army Photographs
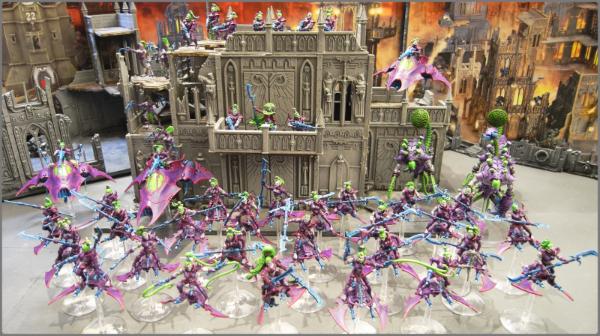
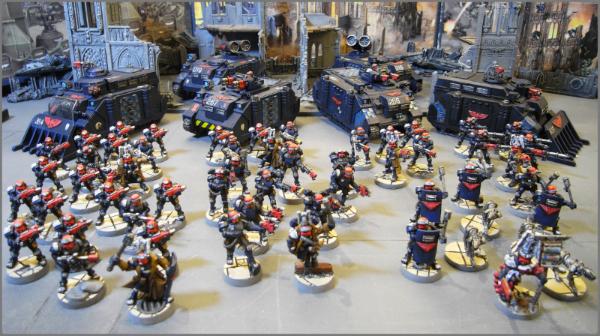
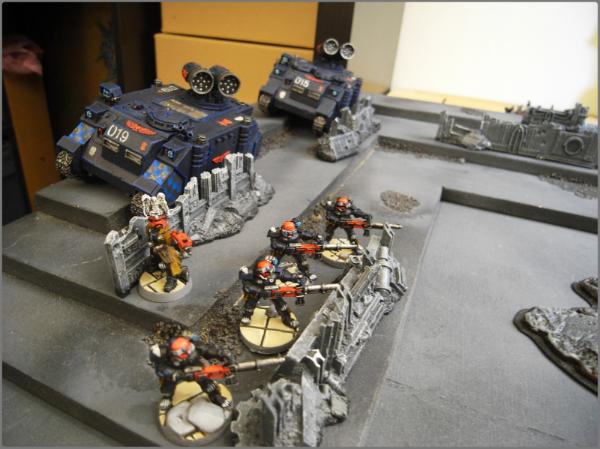
 Remember that people mainly read battle reports for the lovely pictures of models, so you'd better get some lovely pictures of models. We sometimes go to town and make some fancy 'army setup' shots like this. You can use some terrain and the front of GW terain boxes to make a pretty convincing backdrop, especially if you use smaller terrain objects to hide GW logos and the like.
A bit of Photoshopping to delete the obvious cardboard box corners and they are ready to go!
 2.2 Deployment
 The first set of photos to take is deployment. Remember to take photos of the objectives, and any units which are deployed. This will be the first chance for the reader to see everything on the board and understand where everything is. LASTLY, take a photograph of the whole table from above.
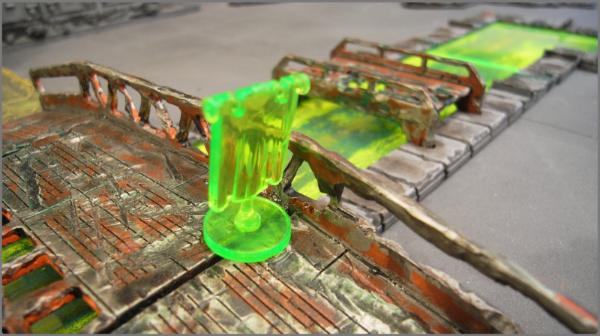
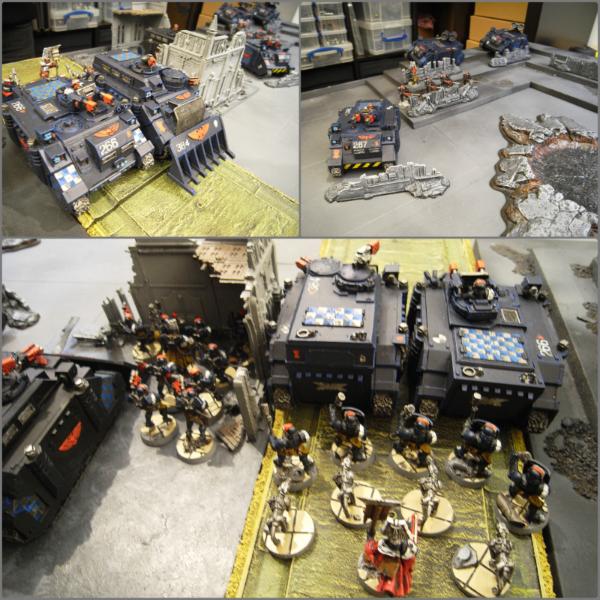 3. During the Game 3.1 Tokens
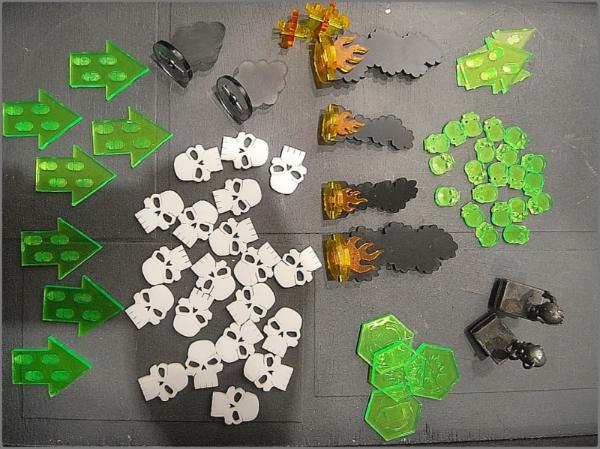
 We use a load of tokens and markers during the game to allow us and the reader to follow what is going on.
* Flame markers for wrecked vehicles (Litko)
* Smoke markers for popping smoke (Litko)
* White skulls for marking dead models in the overhead shots (Litko)
* Little green skulls for tracking wounds (GW) - we also use these for hull points
* Arrows to indicate movement (GW) - these are actually 'run' markers in the GW set, but we don't use them for that
* Vehicle damage markers (GW) - we find that the new 'damage dice' are rubbish in overhead photos.
* Fall back arrows (GW)
* Objective markers (GW) - the objective dice are actually really useful, so we usually use the new markers, but if Mysterious Objectives aren't being used we'll use the more visible green flags.
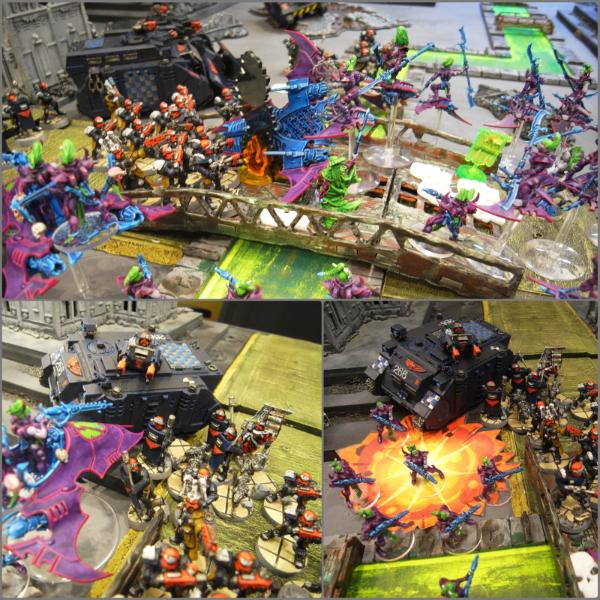
We also use some paper cut out explosions to mark exploded vehicles, and then replace the paper cutouts with craters in the next turn.
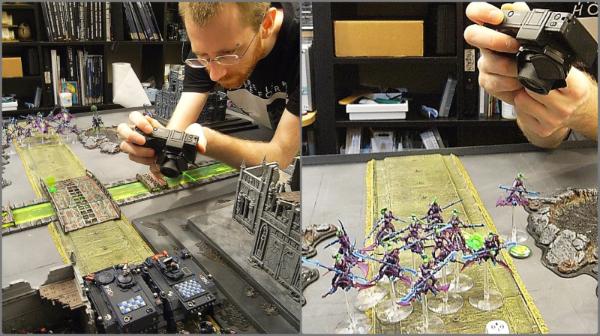
 3.2 When To Take Photos
 The most important bit. You want to record the main actions in the game in all their lovely photoey glory. But, you also want to keep it concise, and do it in a way that makes it easy to type up the report afterwards. Also, you don't want too many photos as they can be a drag to trawl through afterwards. You should be aiming for four or five photos per player turn. If you take a photo you don't like, you should delete it THERE AND THEN. Don't leave it on your card. This will make it easier to sort through photos.
* Remember to take photos of stuff arriving from reserves
* Photograph important movements, but only really important ones - most movement can be seen on the overhead shot.
* Before and after important shooting, or shots which do a 'models eye view' on important shooting (only IMPORTANT shooting, though)
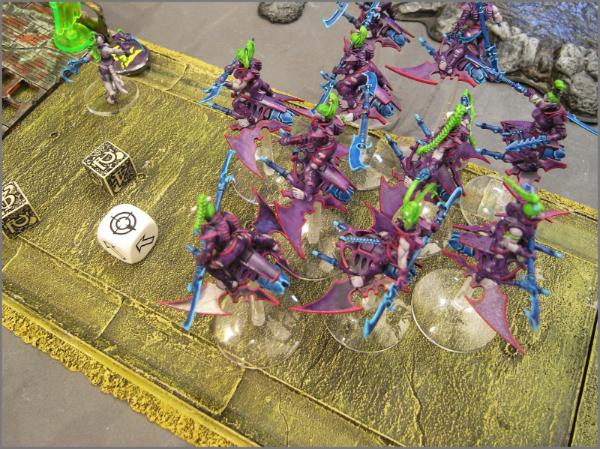
* Before and after important combats - these really help give a sense of location on the battlefield. Try and get a photo of each new combat.
* Remember to take photos of models impacting the game but not near the action
* LASTLY, take the overhead shot at the end of each player turn. Don't be tempted to take any more photos of the turn after the overhead. This way, when it comes to editing, the overhead shots will act as bookmarks for the turns.
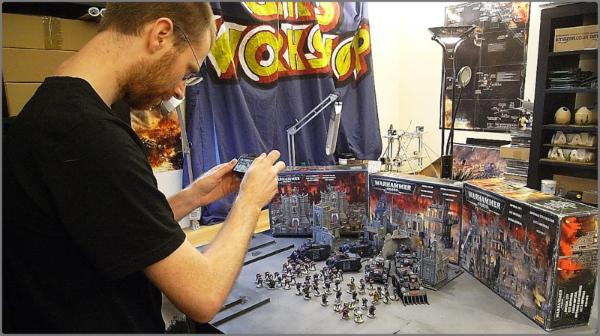
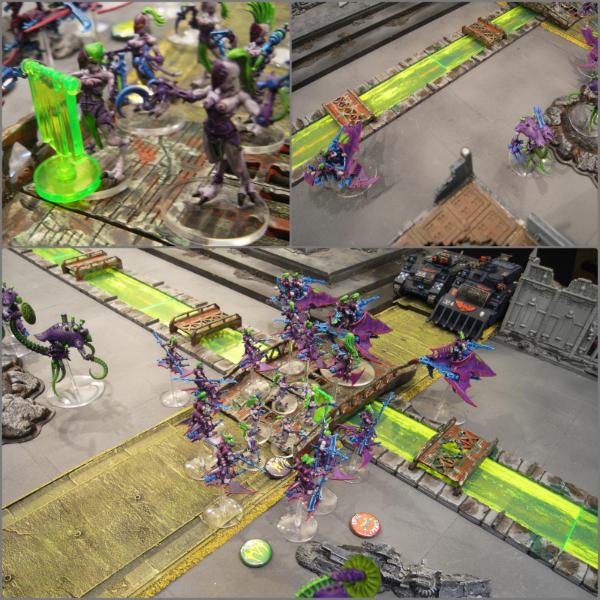
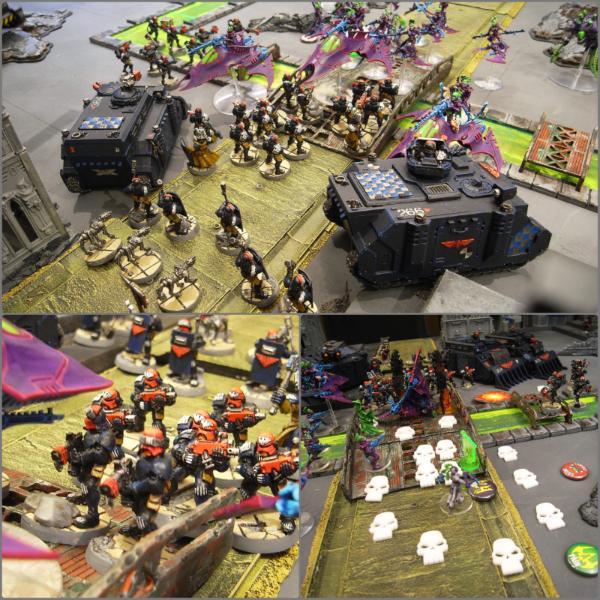
3.3 Overhead Shots Everyone always comments on our overhead shots, and how we get them. It's really easy. Panic stands on a stool and takes a photo with his camera. Look. Easy.
Remember to get a sturdy stool, and have good balance. You don't want to fall off and hurt yourself or, worse, break the table and models. Maybe don't do it if you're really fat, or have shaky alcoholic hands. Oh, and check the photo for focus while you're up there. If it's out of focus, delete it and take another before you get down. Don't kill yourself by mistake.
The other REALLY important thing to get into before taking this photo is to clear the board. Look at this before-and after shot to see the difference clearing the board can make. Clear off any dice, tape measures, dead models, books and cups of tea.
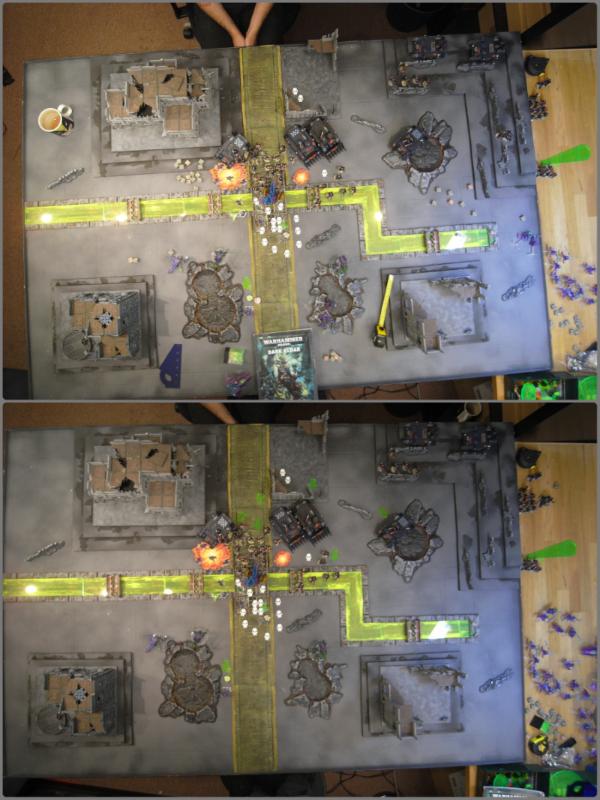
(As it turns out, the game we played to illustrate this featured a massive messy fight right in the middle, but you get the picture)
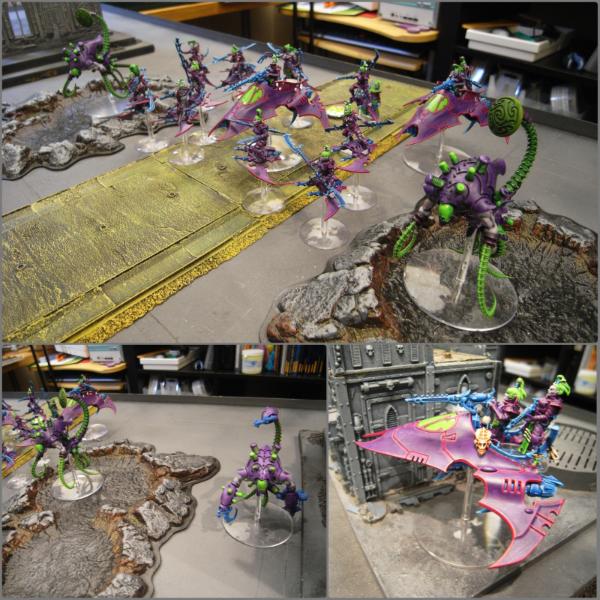
4. Working With The Photos 4.1 Panelling photos Panic likes to use PicFrame (69p on the App Store!) to combine three or four photos into 'panel' images. This means less images, and thus less time uploading to the Dakka gallery. When outputting the image, name it so that it still sits in the right place in the folder of images, which means your photos will upload in the correct order. If you do this well, you can condense every turn down to one or two panelled images and then the overhead. If there is a particularly amazing photo, leave it big and don't panel it.
http://activedevelopment.co.nz/picframe-for-mac/ 4.2 Adjusting Overhead Photos Panic uses Digital Photo Pro to increase the sharpness and crop the overhead photos. It's important to get as much detail into these as possible, hence the sharpness boost, and the less off-table the distractions the better, so the photos are warped so the corners of the table fit the corners of the picture. Any photo editing software can do this sort of stuff - here's an old tutorial on how to do it with Photoshop -
http://www.dakkadakka.com/wiki/en/How_to_Make_BattleReport_Map_Photos 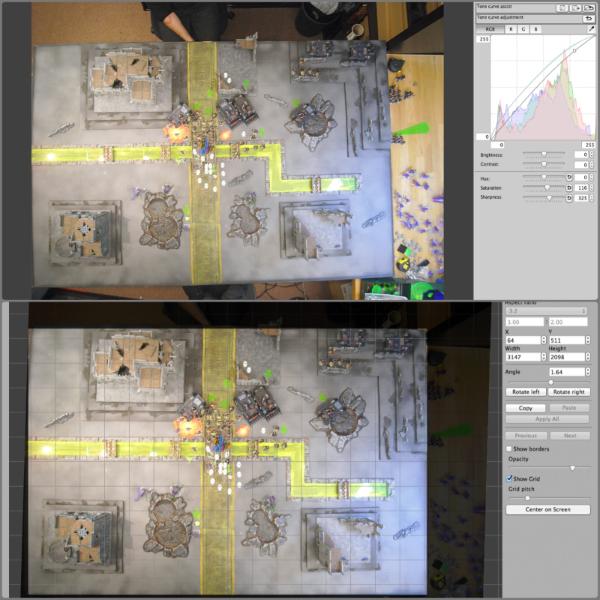
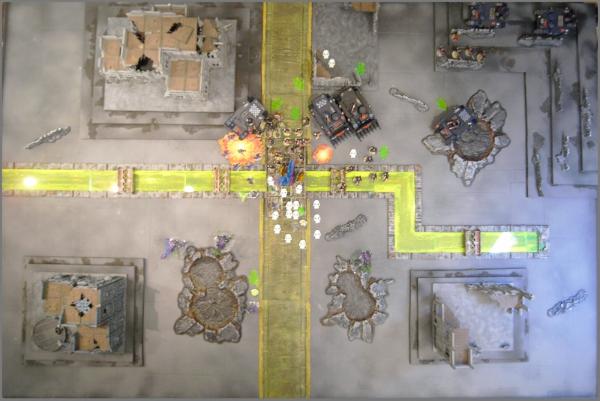
The result is much nicer to look at
 4.3 Uploading Photos
 You should now have all your photos ready and in the correct order. Upload them ten at a time using the Dakka uploader. Remember to keep them in the correct order as you upload, and don't give them names. This will be important when writing the report. I'd recommend making a separate category in your gallery for 'Battle Reports'.
5. Writing the Report [b]5.1 Importing Photos
* Go to your gallery and select the first photo, and copy the Forum link
* Paste this into a new Battle Report thread
* Delete the URL on each side of the image link. The image link section looks like this - it only has a number at the end, because you didn't give the images names when you uploaded them
* Copy this about thirty times, then just go down the list adding 1 to the end number.
* Hit preview and, if you uploaded all your images in a timely fashion (and the images weren't too massive), you should see the entire report in order. If other people were uploading at the same time as you, you might get a few of their photos. That's fine, just delete those links and preview again. This method is MUCH faster than opening each image separately in the Gallery and copying the forum code..
5.2 Layout It's important to keep the layout of the report clear, consistent and simple. I don't tend to use underlining, boldening, etc. I just name each section heading 18pt size and give it two empty lines before and one after. This way, it's easy to see the 'breaks' when scrolling quickly down the page. Every photo has a line or two of text before it, and a space that separates the text from the photo. The most important thing in good layout is to be consistent. Sections are as follows
* A short hello and introduction to why you're playing the game
* Armies - the title says who is playing and what army, followed by a fancy picture of the army and the army list. We don't bother breaking down all the points, just listing the squads and upgrades. The picture can be bigger than usual if you like - these army pictures are what will draw the reader into the game.
* Pre-game - This is where we describe the mission, deployment type, psychic powers, warlord traits, etc, and then go onto a pannelled image of each armies deployment, followed by the overhead shot of deployment
* Player Turn 1 - Each turn comprises one or two panelled images and an overhead shot
etc, etc, etc
5.3 Writing text So, as previously stated, we think people read the reports to look at the pretty pictures. The pretty pictures should really tell the story - your text should just be a short description of what is happening in the picture. We stick to a general style when writing, as follows...
* I know a lot of people like to write in-game, but we tend not to. Narrative writing tends to make for big dense blocks of text.
* If you have multiple of the same unit, give them simple names and refer to them as that all the way through the report - for example 'the plasma veterans, the melta veterans and the flamer veterans'.
* We don't refer to player actions, to keep it neutral, instead referring to 'the army' as making the choices - 'The nurgle line advanced' rather than 'Panic moved all his models forward'.
* We also tend not to refer to dice rolls unless it is really important/crazy/terrible
* I try not to use abbreviations - 'The Predator fires it's lascannons at the Plague Marines' rather than 'the Pred fired TLLC at the PM'.
So wouldn't write this
* I fired one of the Preds at the DP, getting two 3+ and Panic made one of his saves.
or this
* Brother Spamface of the White Scrapes armoury grinned as his optotronic targetting matrix sighted on Aghnngrthrax the Smelly. The Daemon's aura disturbed the sacred optics of the Lascannon, but Spamface concentrated, focussing his superior Astartes battle sense and burning through the cloud of noxious flies, causing a deep gouge in the creature's flank. Anngggthrrrhtancx howled in pain.
instead writing
* The lascannon Preadator fired at the DP, causing one wound.
If you've taken good photos, you won't need any notes to remember what happened - just describe what is happening in the photos. Use the overhead photo to catch anything not pointed out in the closeups. You'll often find as you go through the game that something might happen in Turn 3 which you probably should have made clearer in previous turns. In this case, just go back to the previous overhead and put it in there. For example, some Scout bikers charge the rear of the vehicle in Turn 3, but you haven't mentioned that they only did this because they Turbo-Boosted into position on Turn 2. Jump back to the Turn 2 overhead and mention 'as you can see, the Scouts Turbo Boost into position, ready to assault the Predator next turn'.
5.4 Titles Leave the title of the the thread until last. If you don't get time to complete the report in one go, you can always copy and paste to textedit or something, but you'll lose the title. We tend to follow the following format..
[PICS] UNIQUE CATCHY REPORT NAME IN CAPITALS - Army 1 vs Army 2 - Player 1 vs Player 2 - XXXpts
See? Easy!l


 .....Bay Area Open GT 2013 - Best Tyranids
 .....LVO GT 2014 Team Tournament - Best Generals
 Great job, fellas.
 7K Points of Black Legion and Daemons
  5K Points of Grey Knights and Red Hunters


 Daemons: 5000+ points
 Deathwatch/Knights: 5000 points