Viktor von Domm wrote:i sometimes cringe a bit at the fact of how much work is ruined once you aply the mud...but there is only one way to weather down a tank... you have to firstly make him shiny and then destroy the paintjob^^
Ah yes, but the final results speak for themselves, machines that have the look of actual campaigning or actual live training to them.
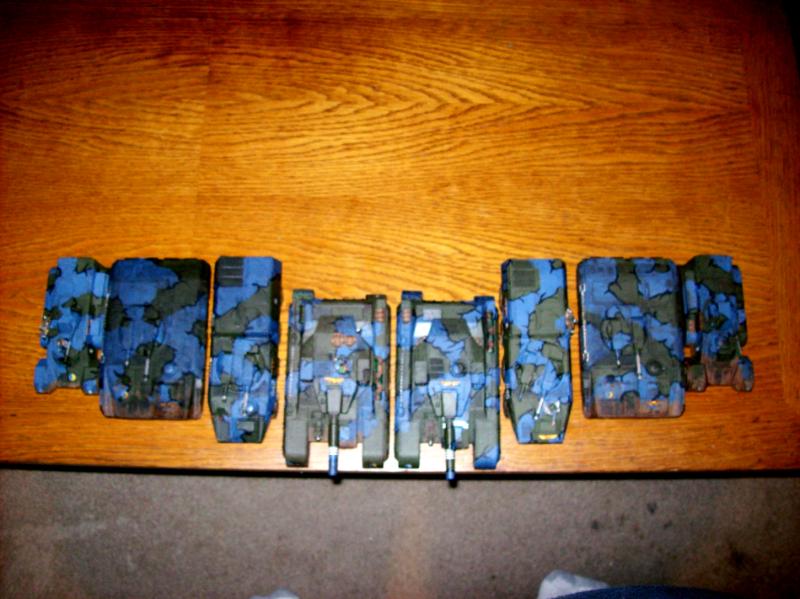
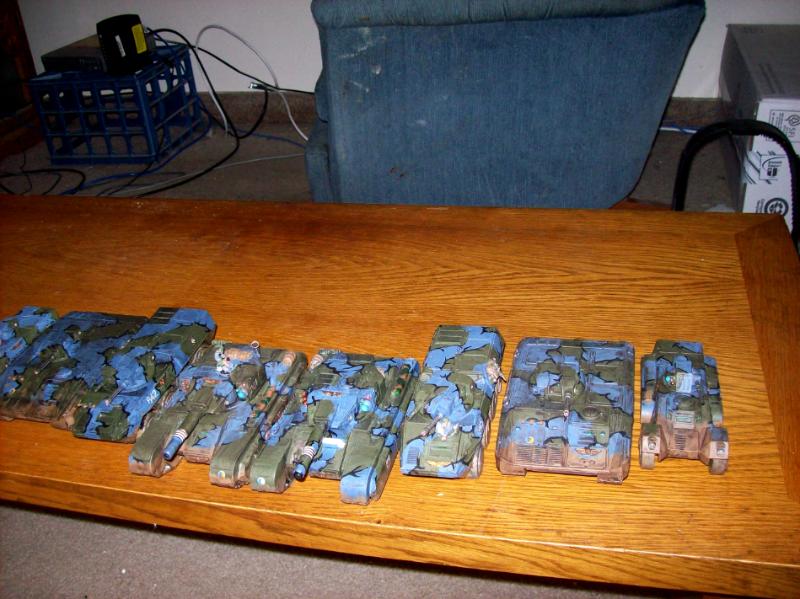
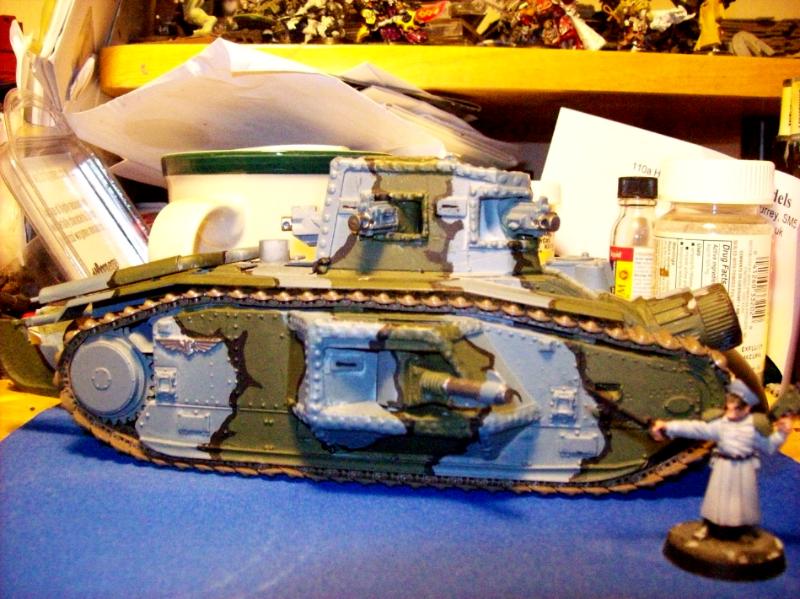
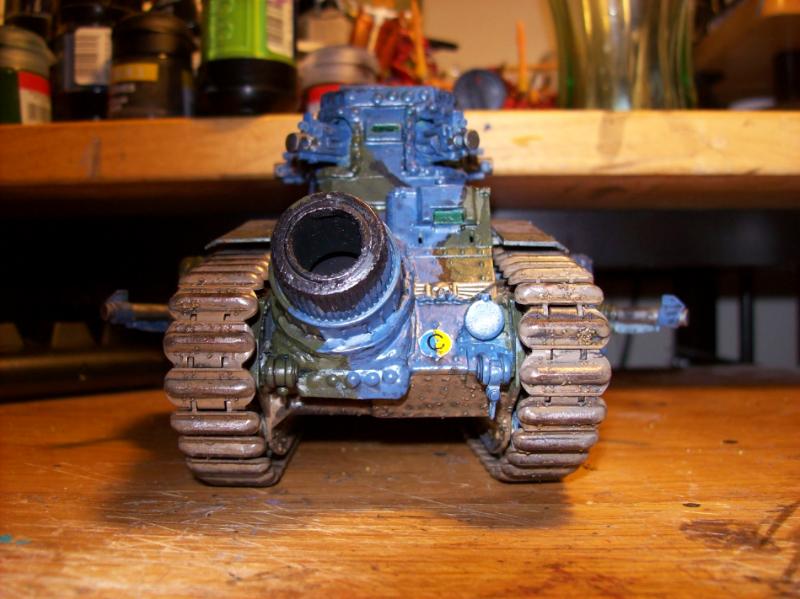
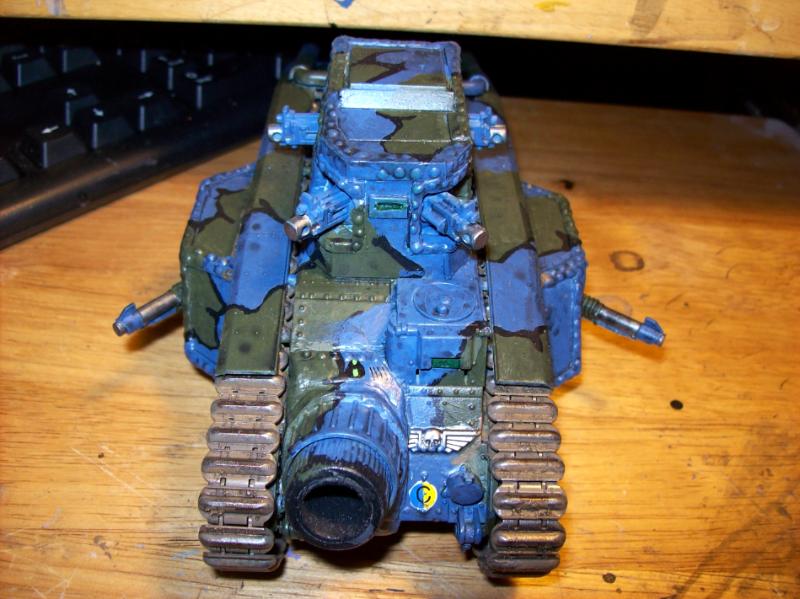
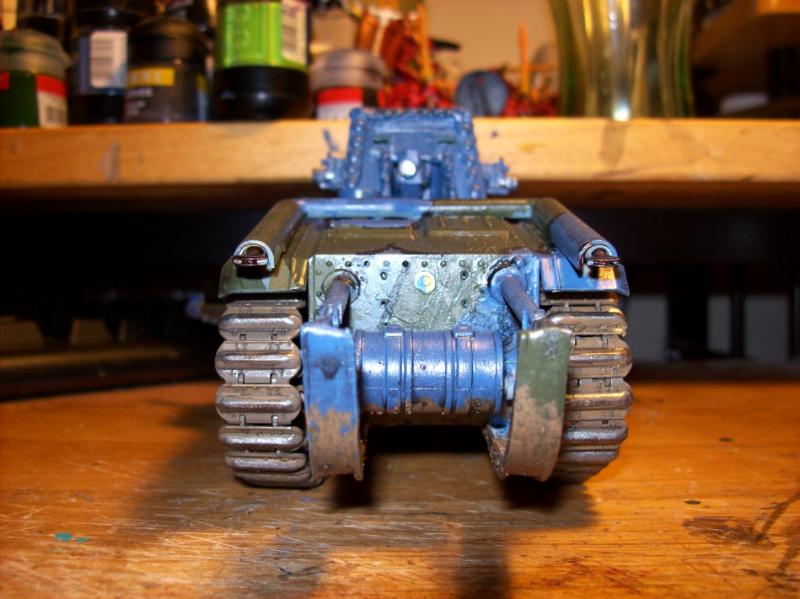
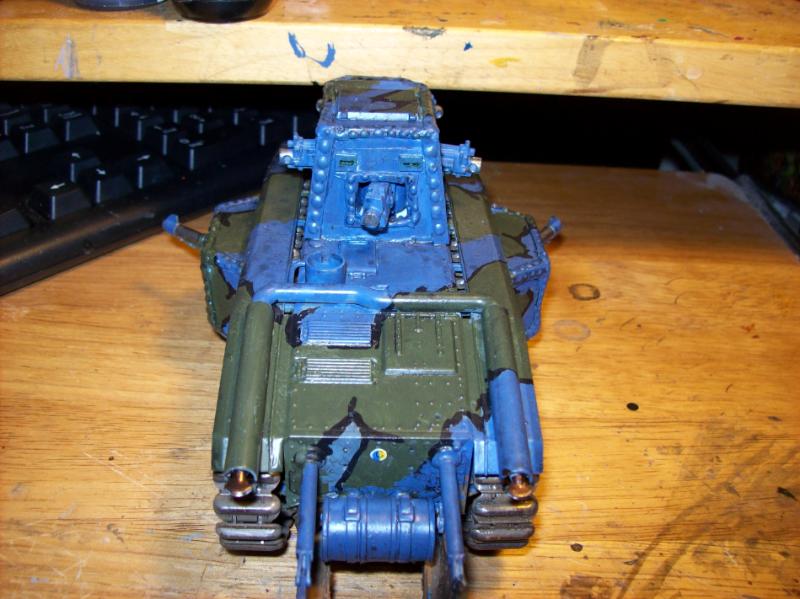
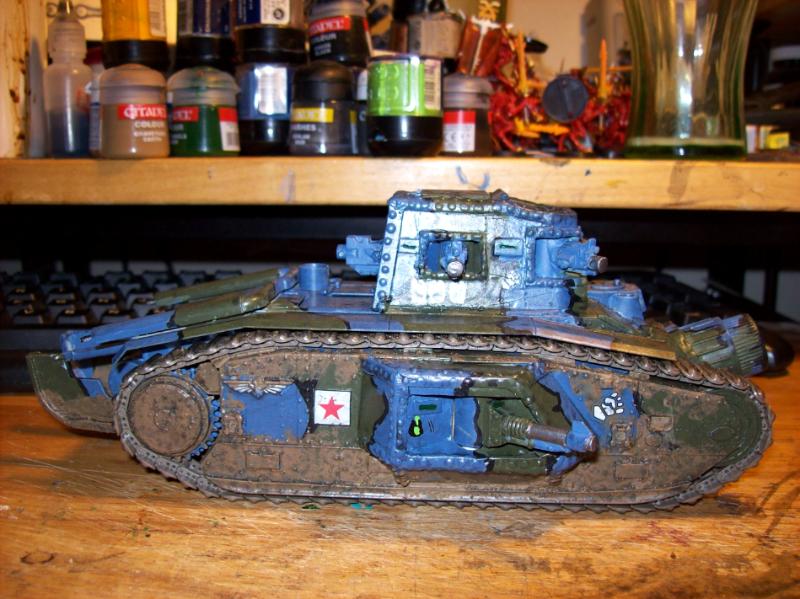
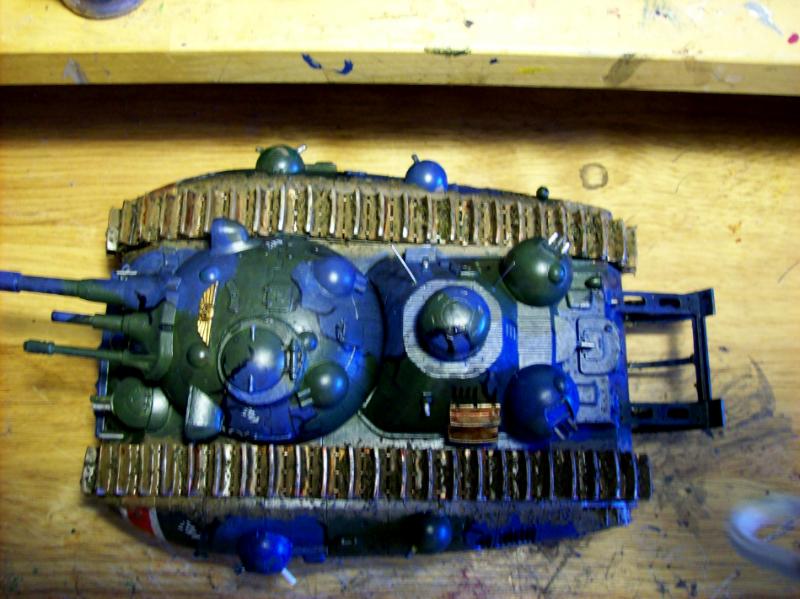
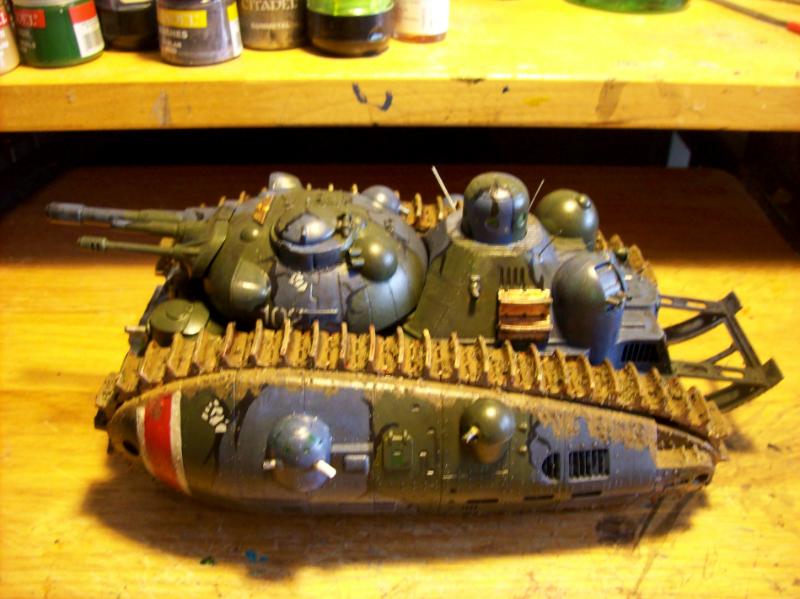
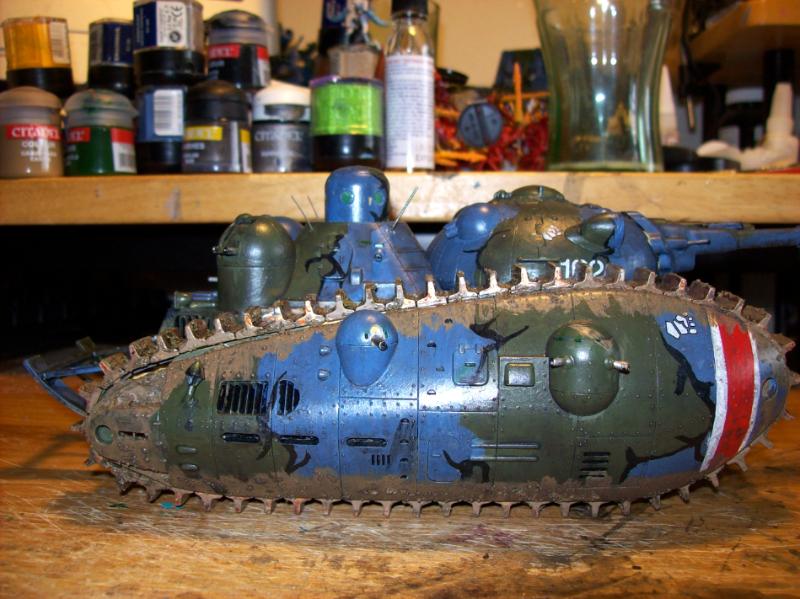
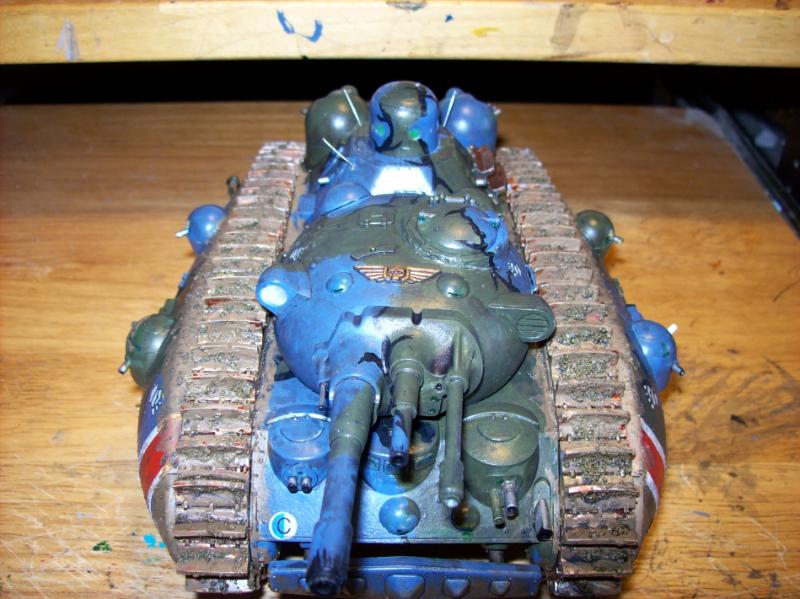
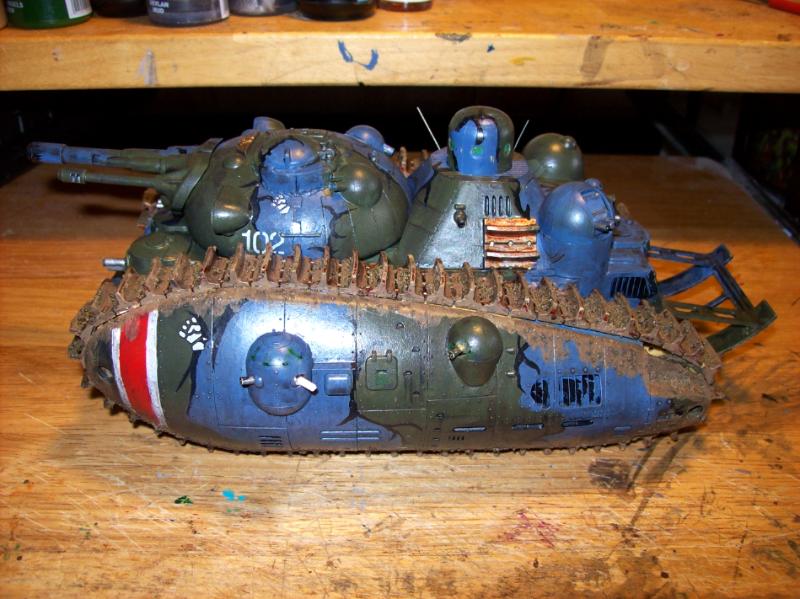
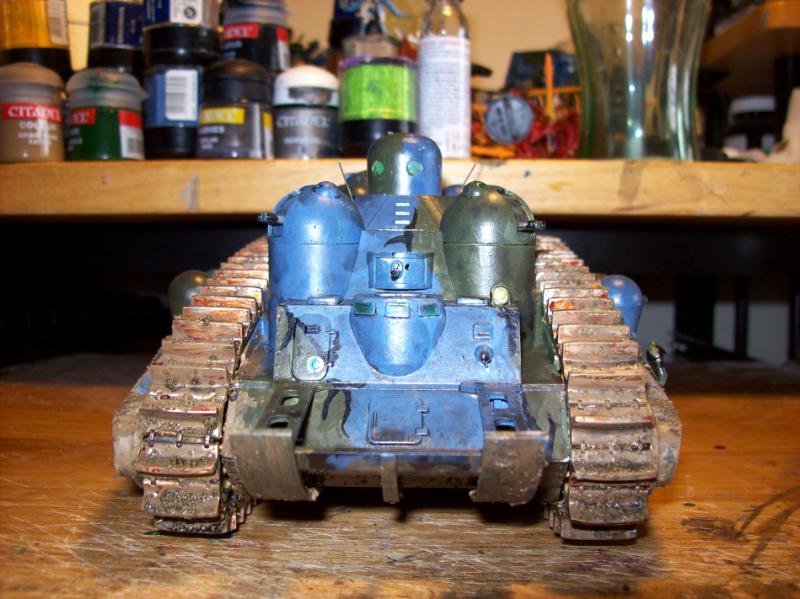
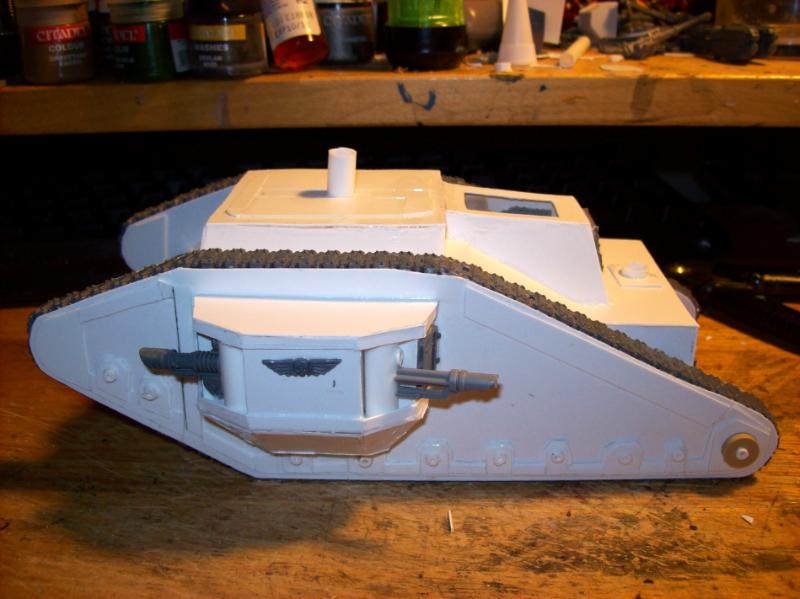
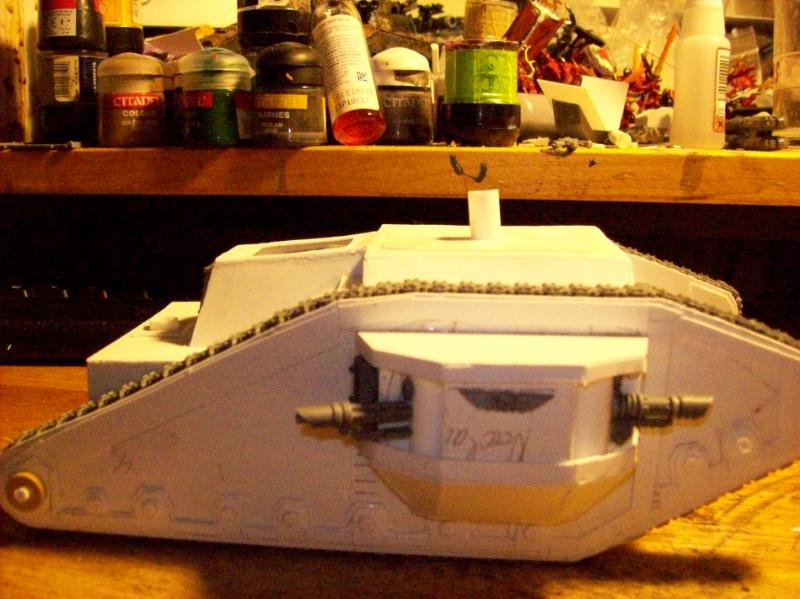
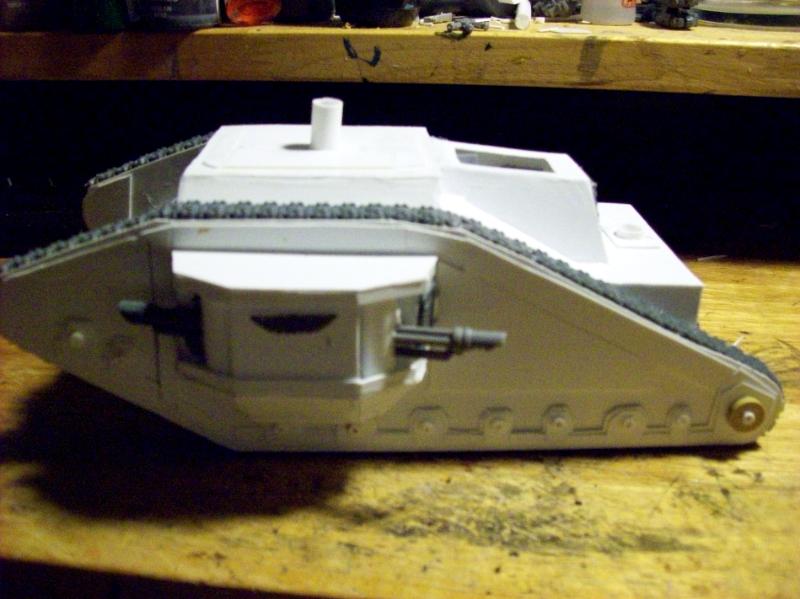
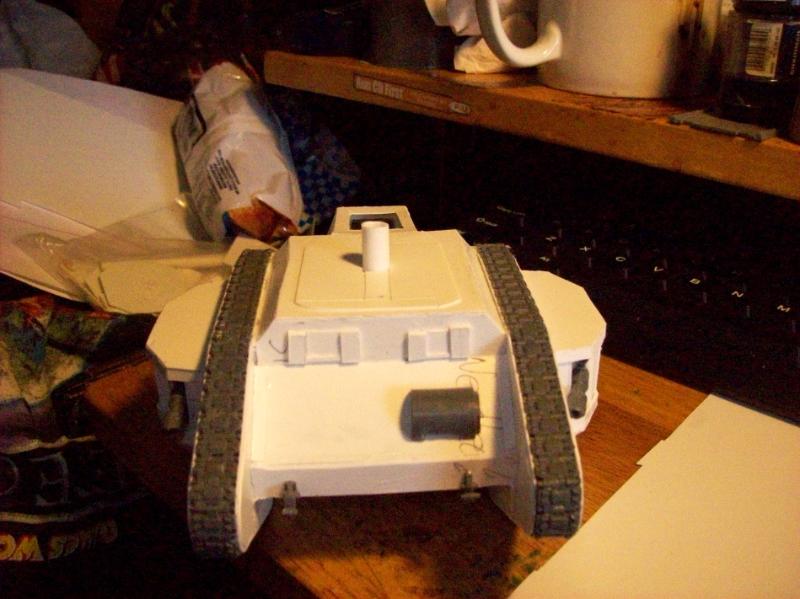
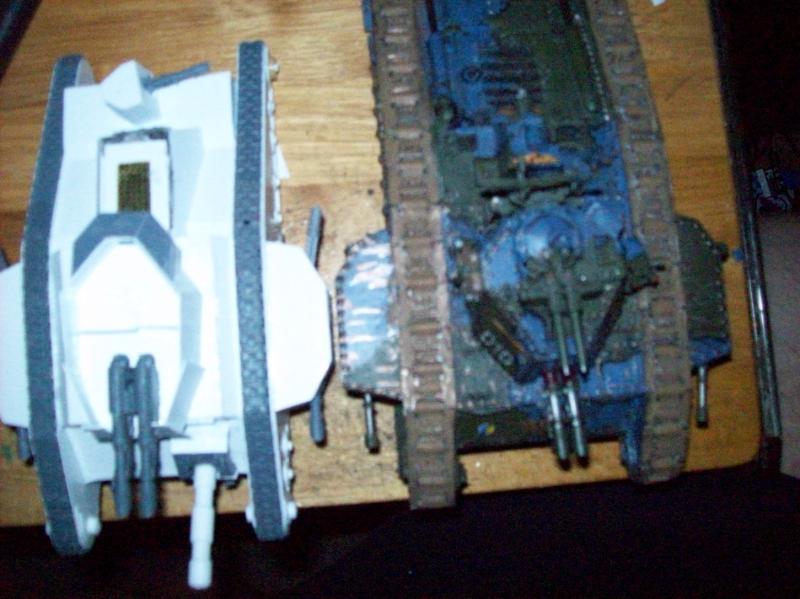
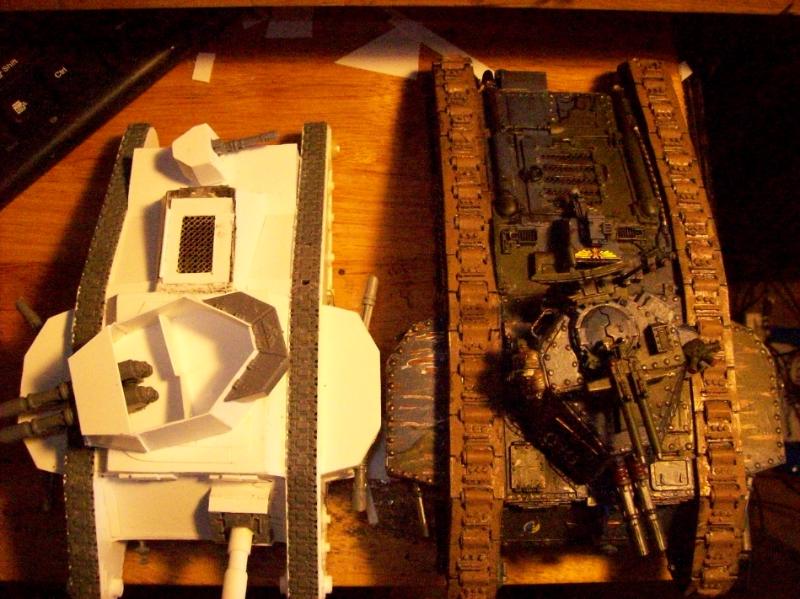
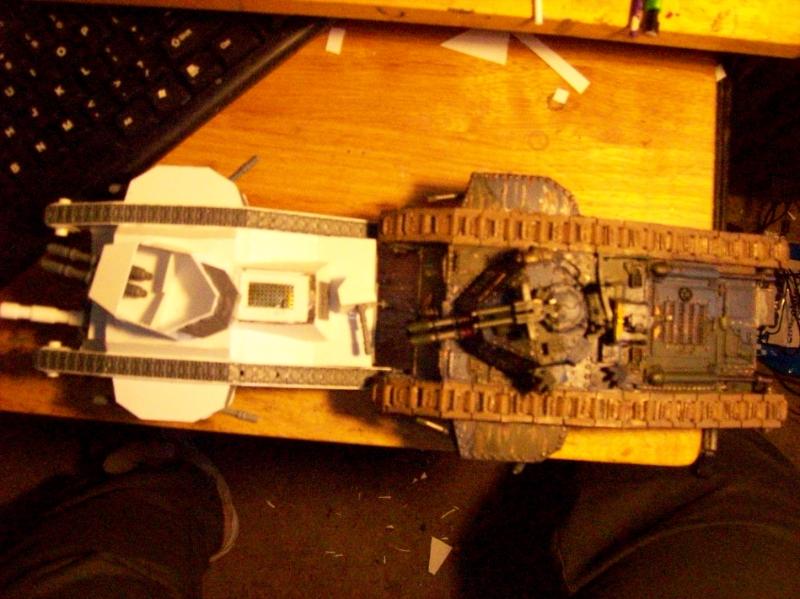
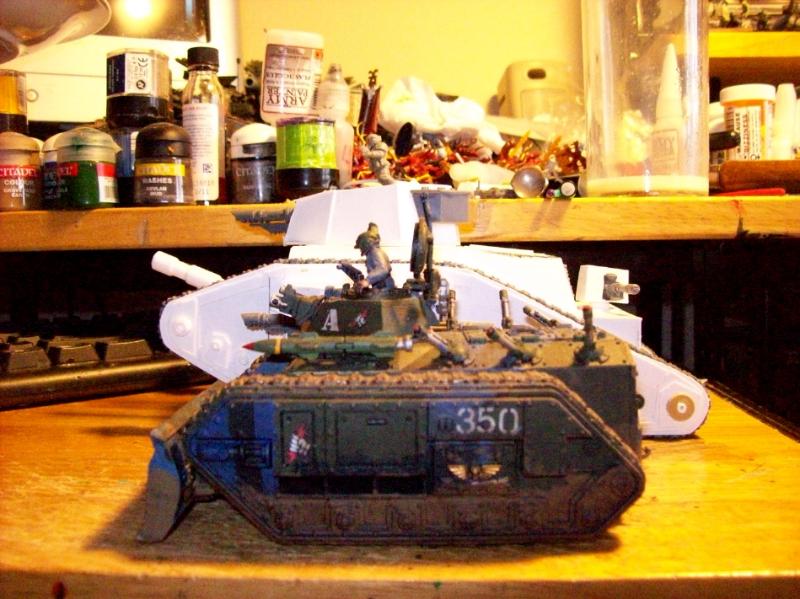
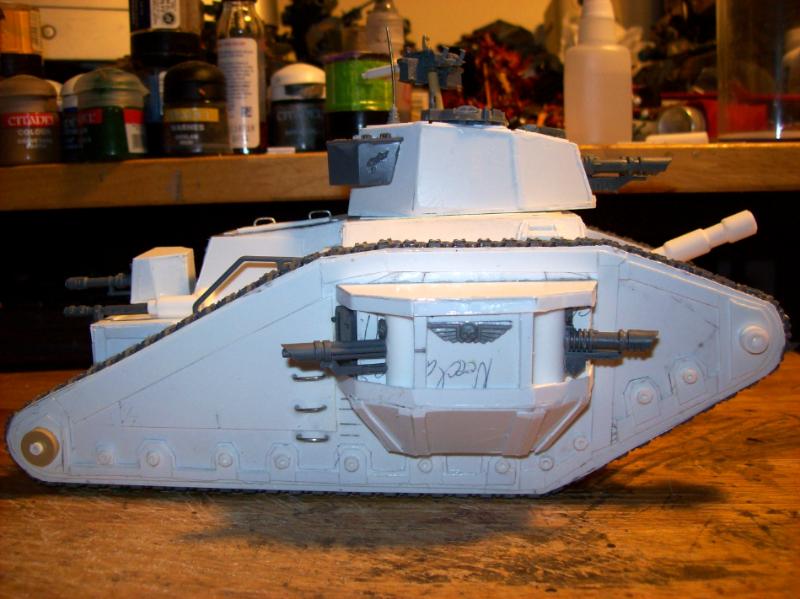
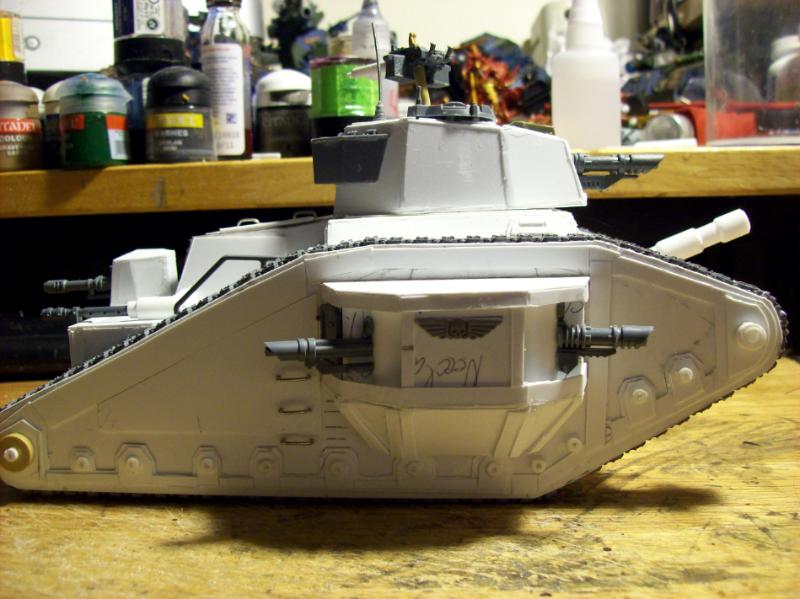
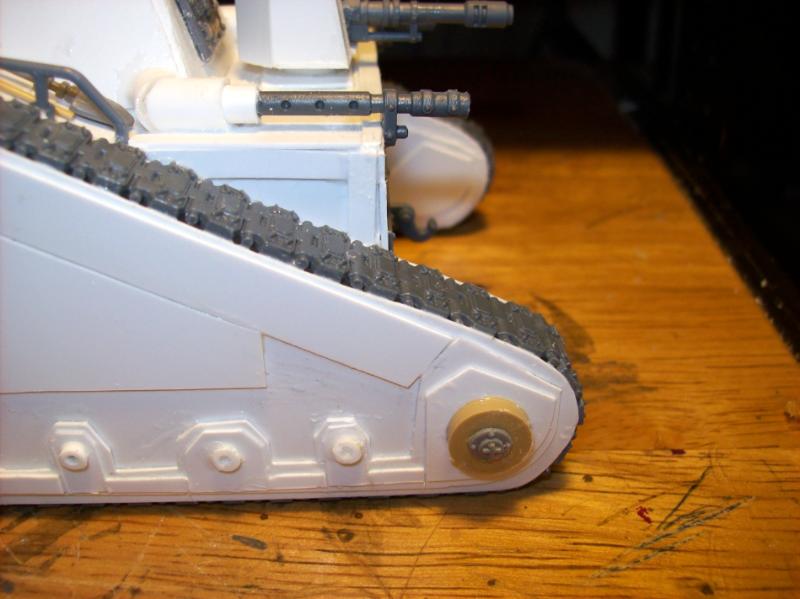
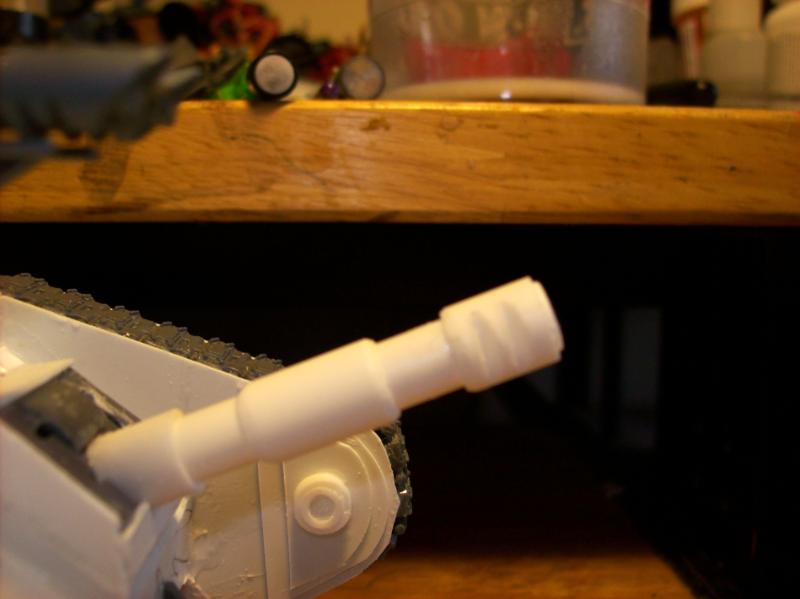
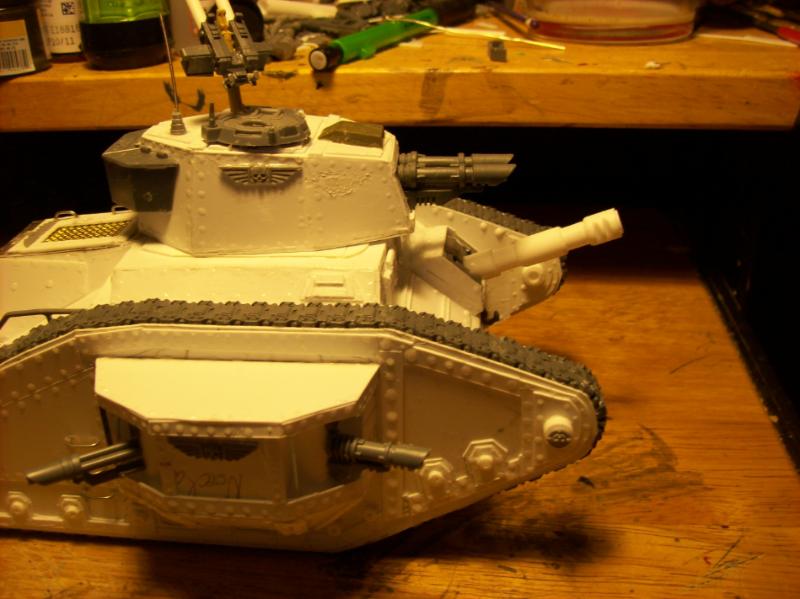
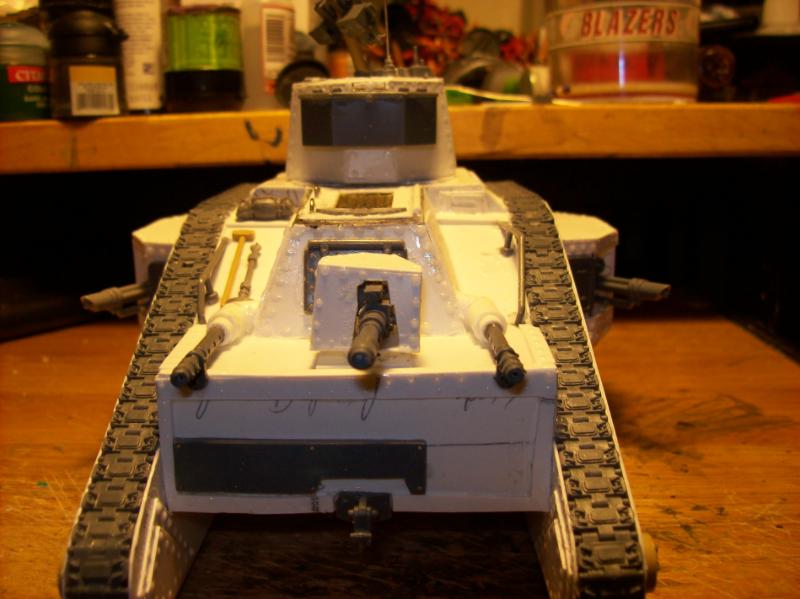
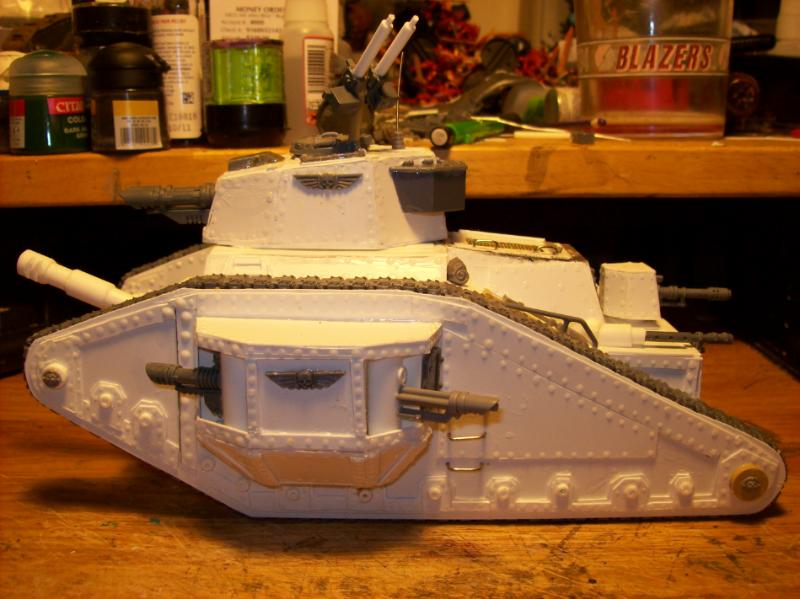
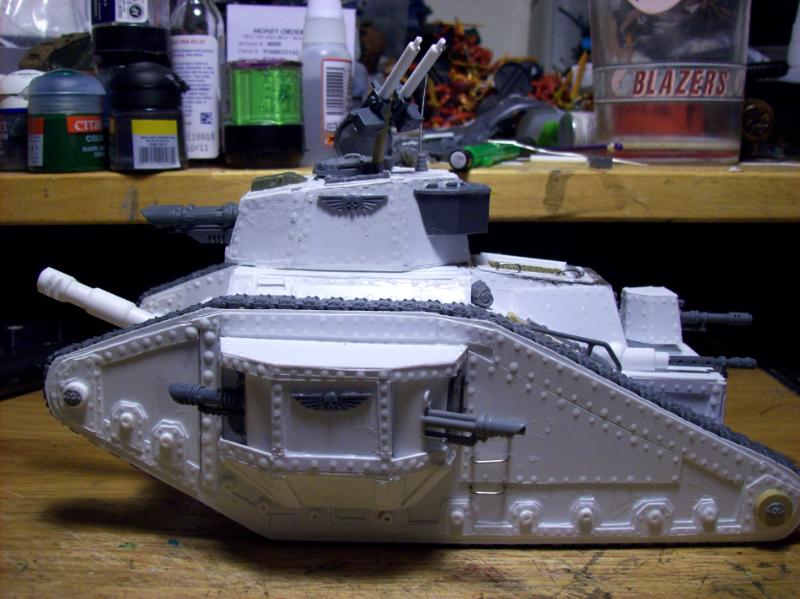
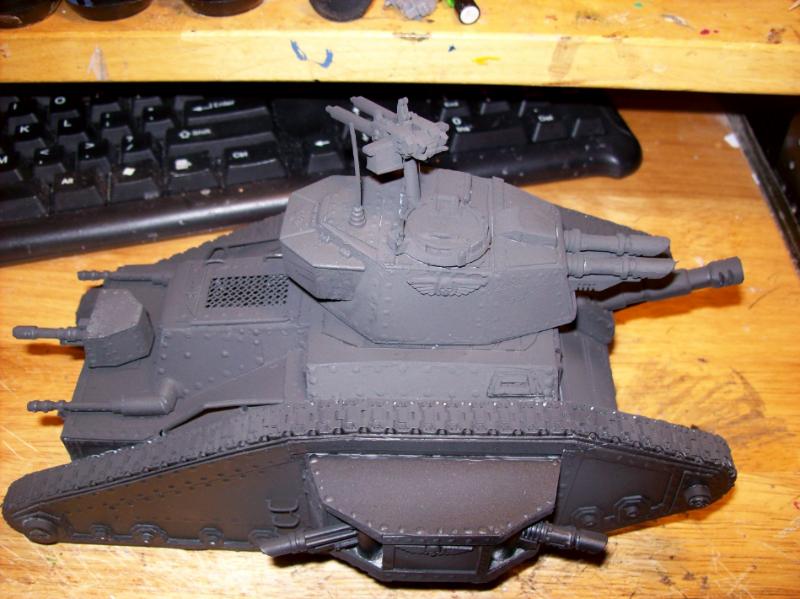
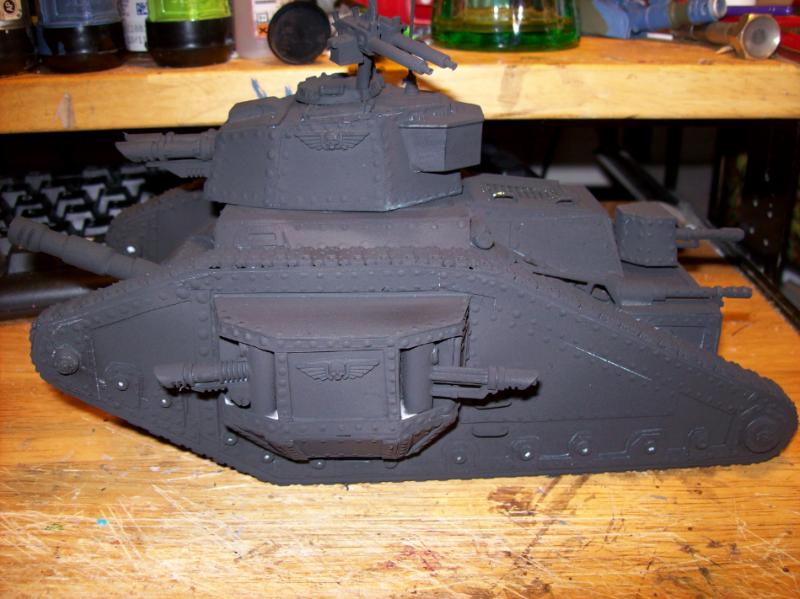
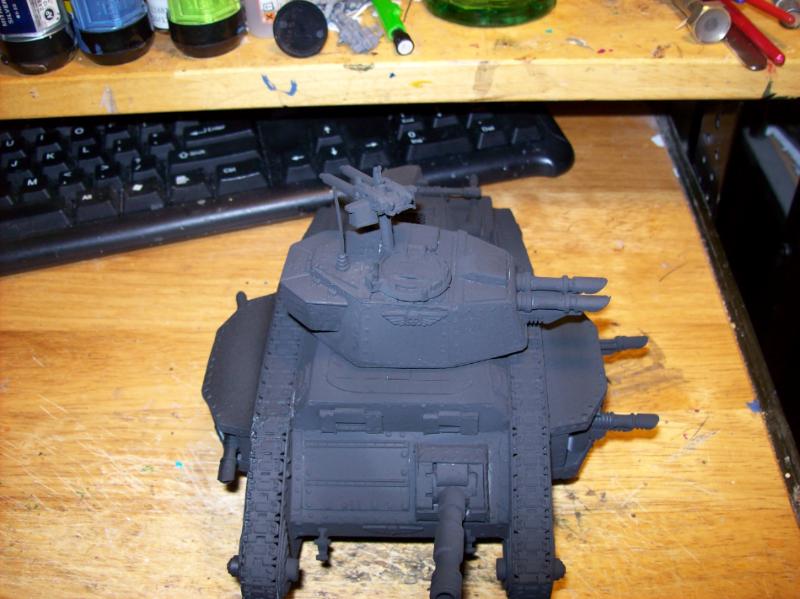
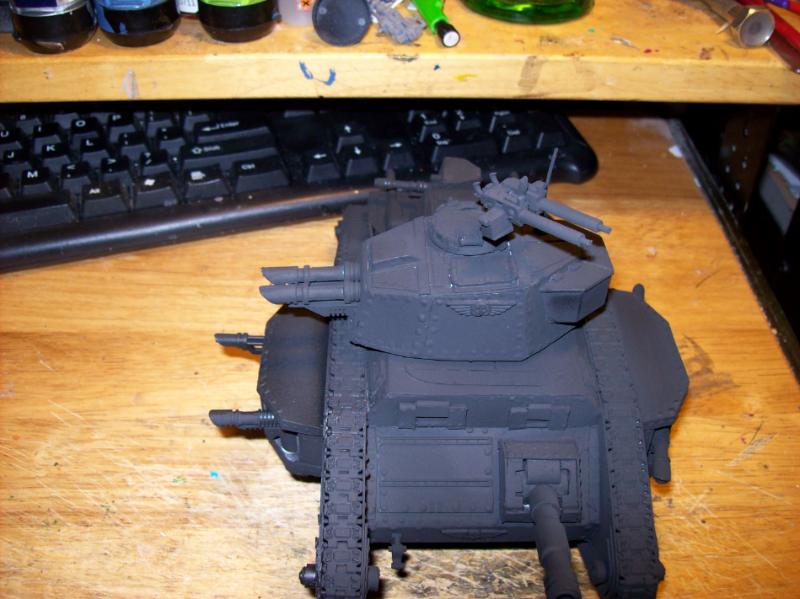
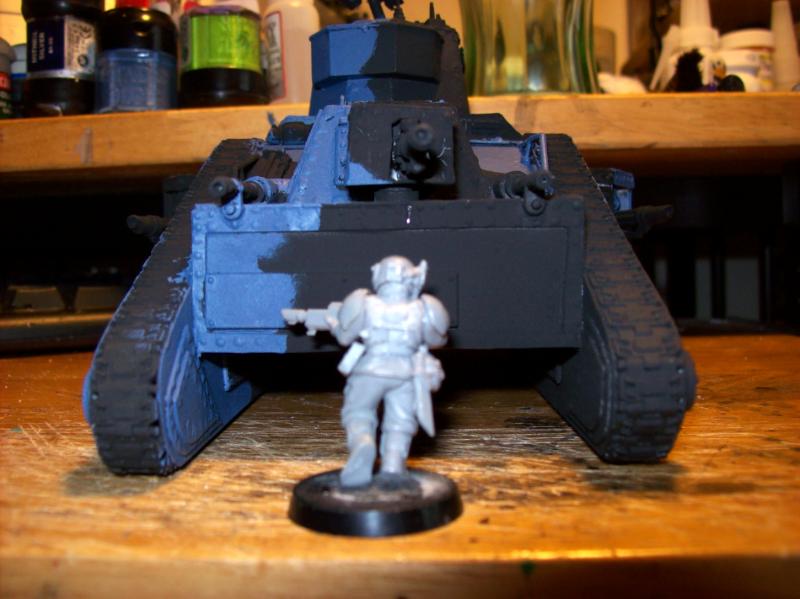
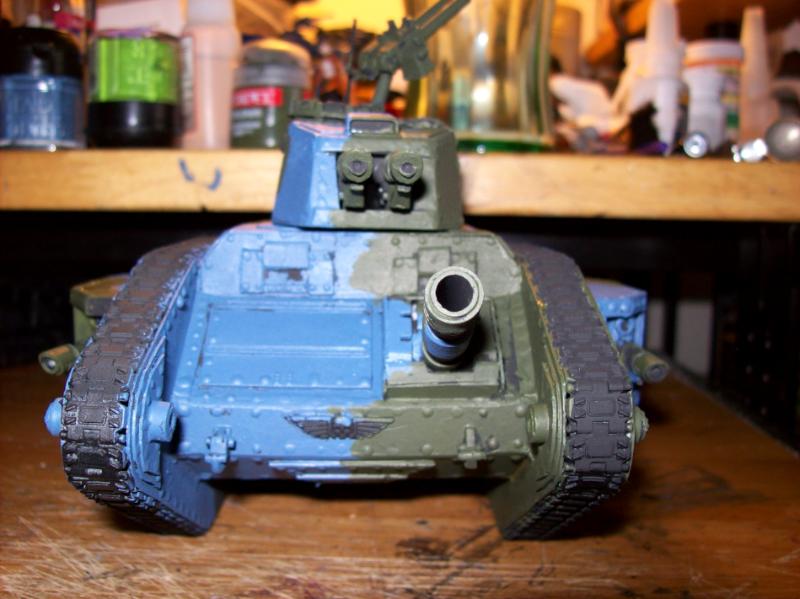
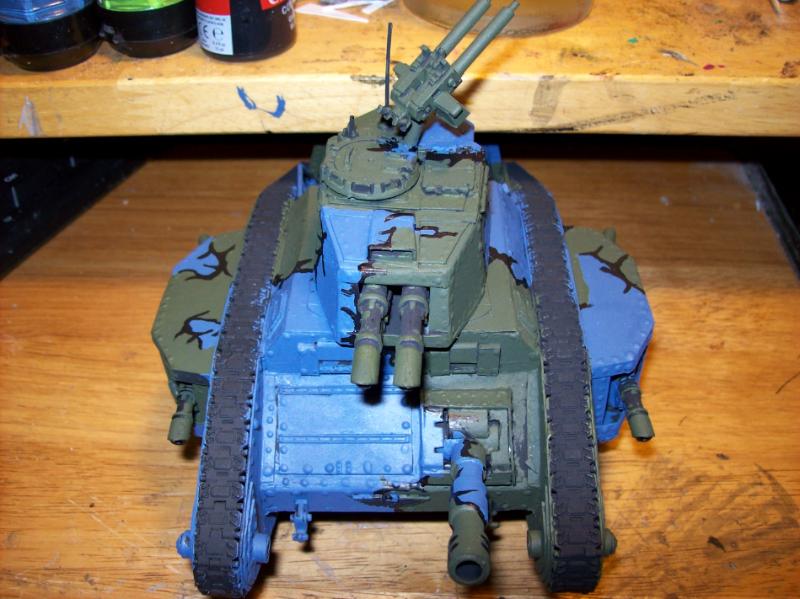
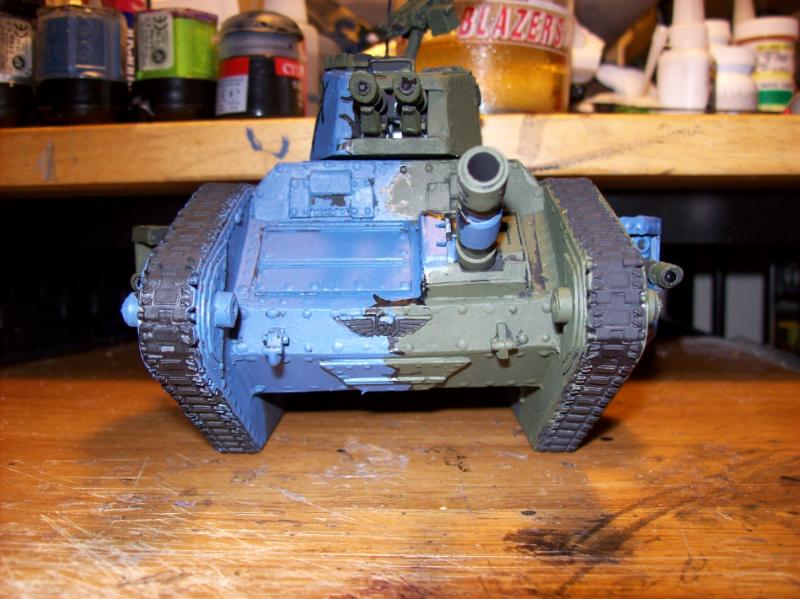
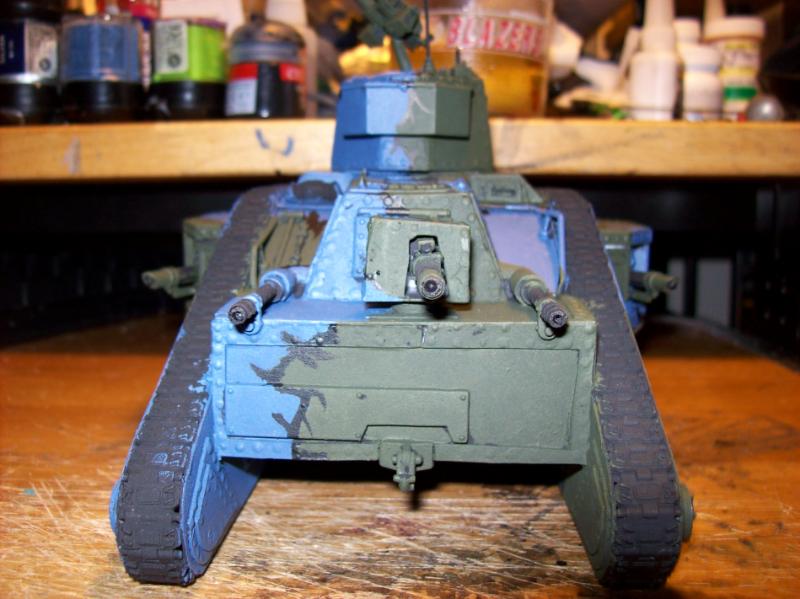
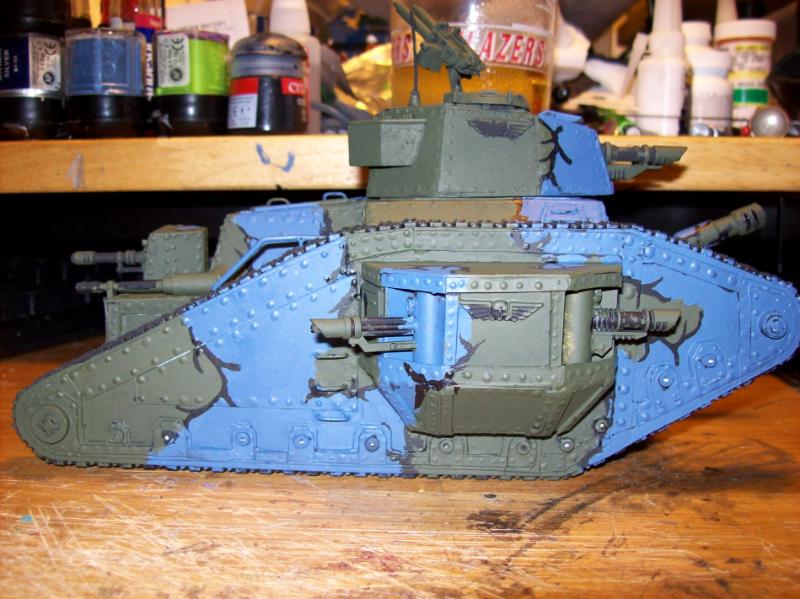
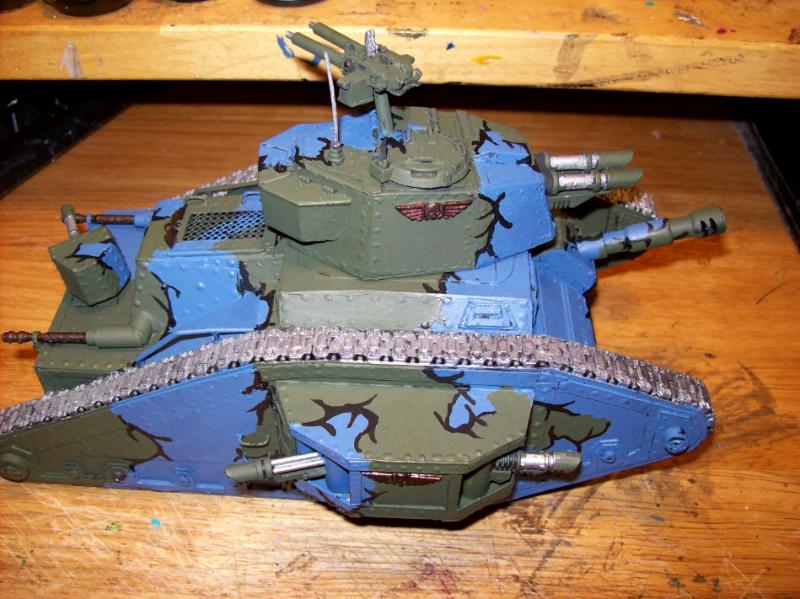
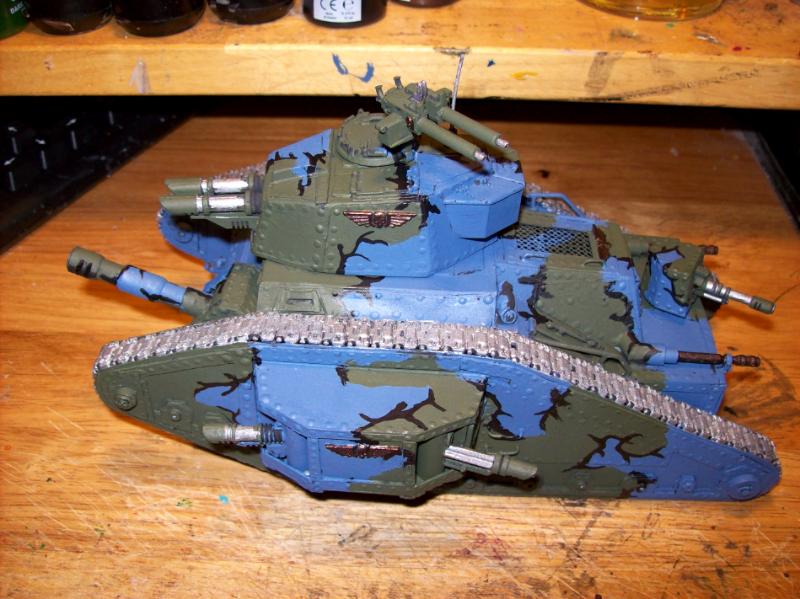
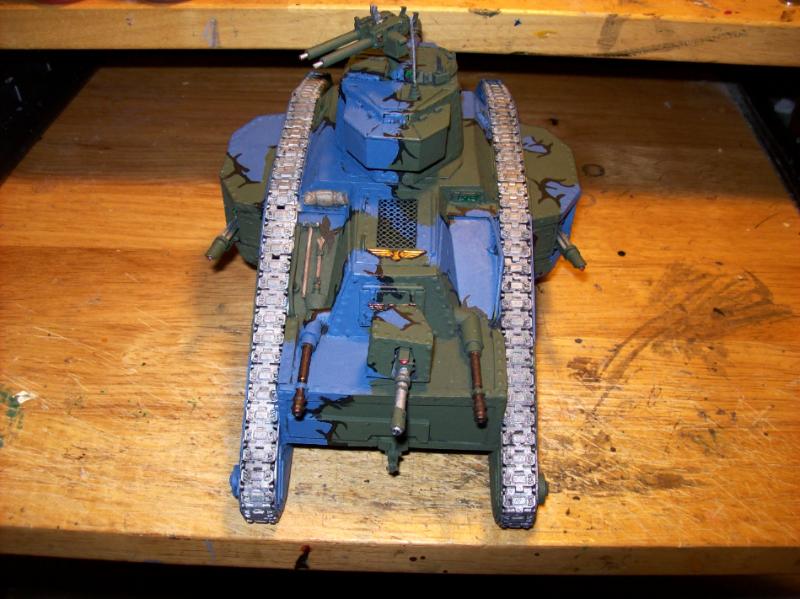
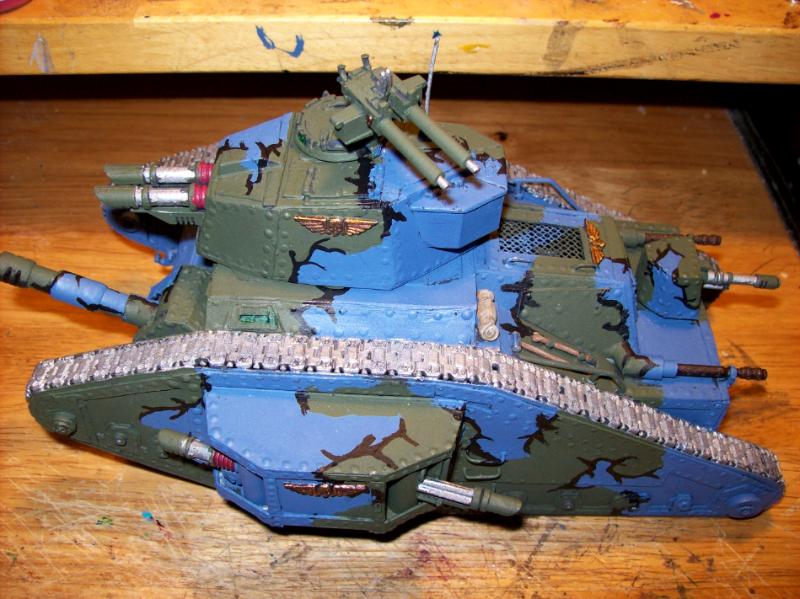
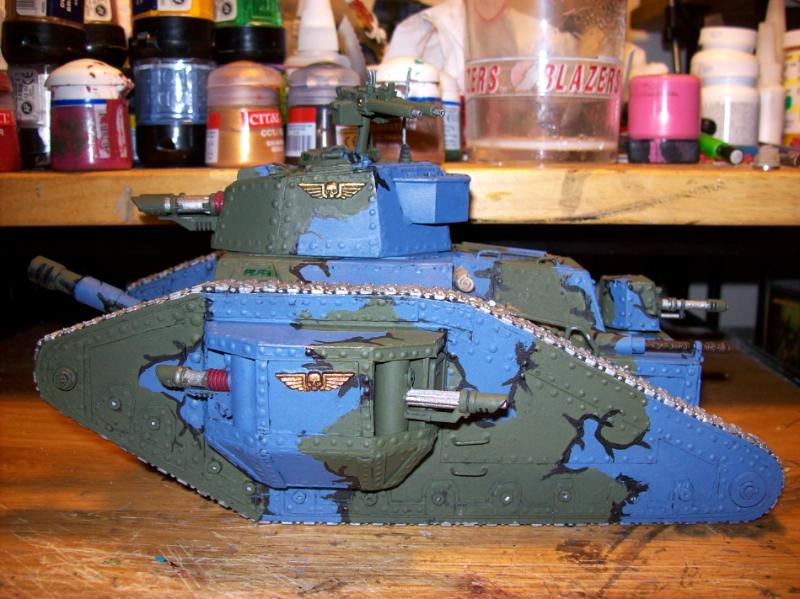
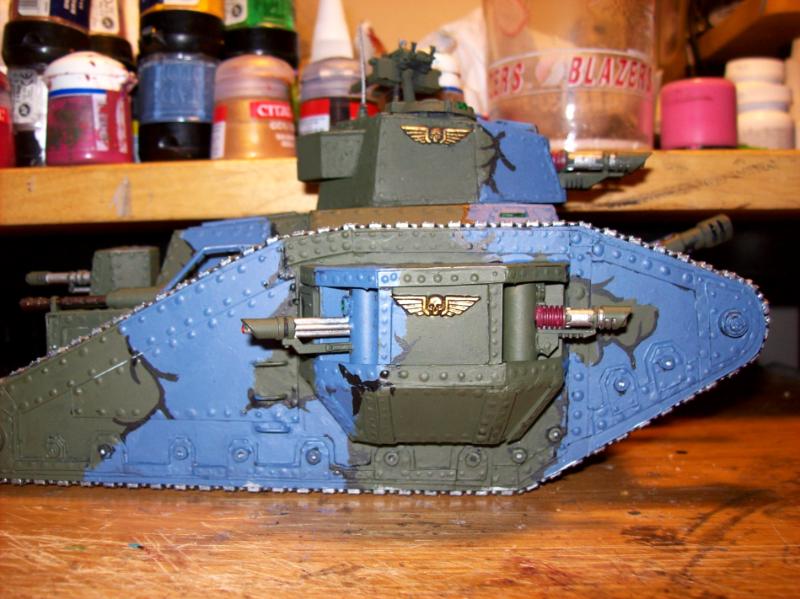
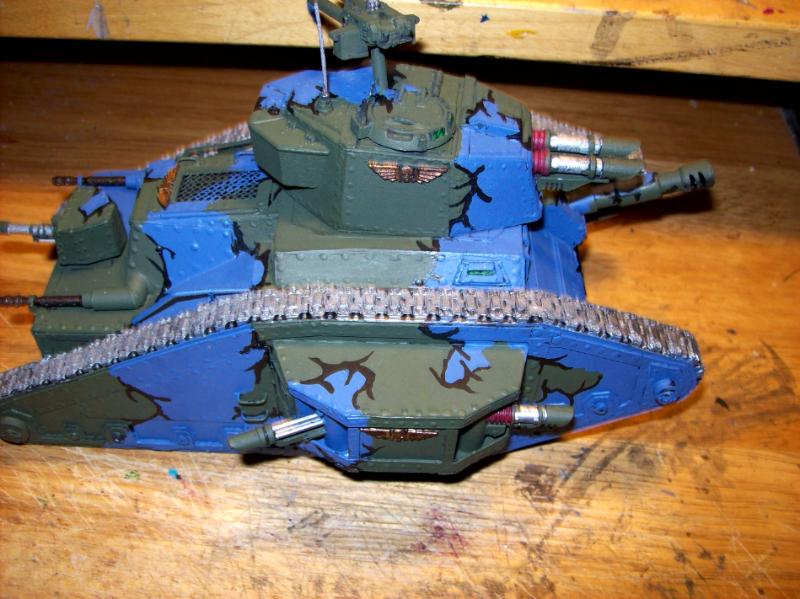
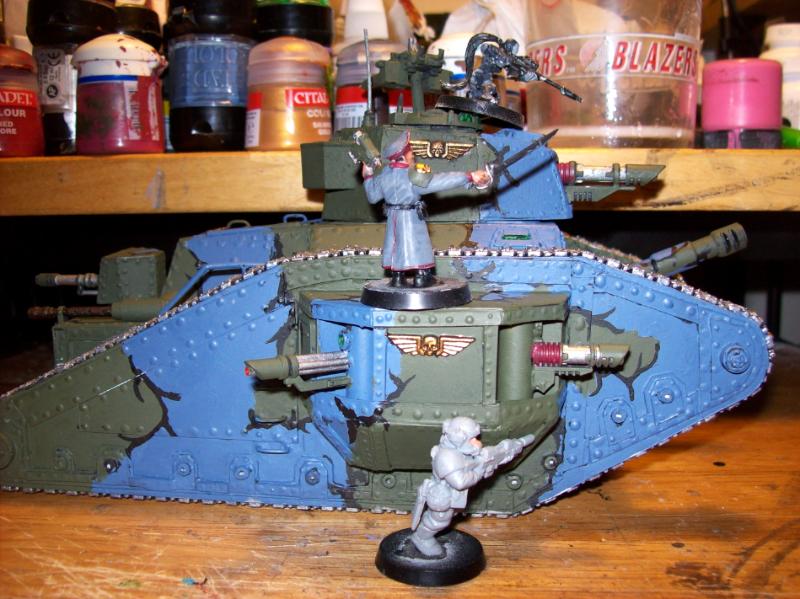
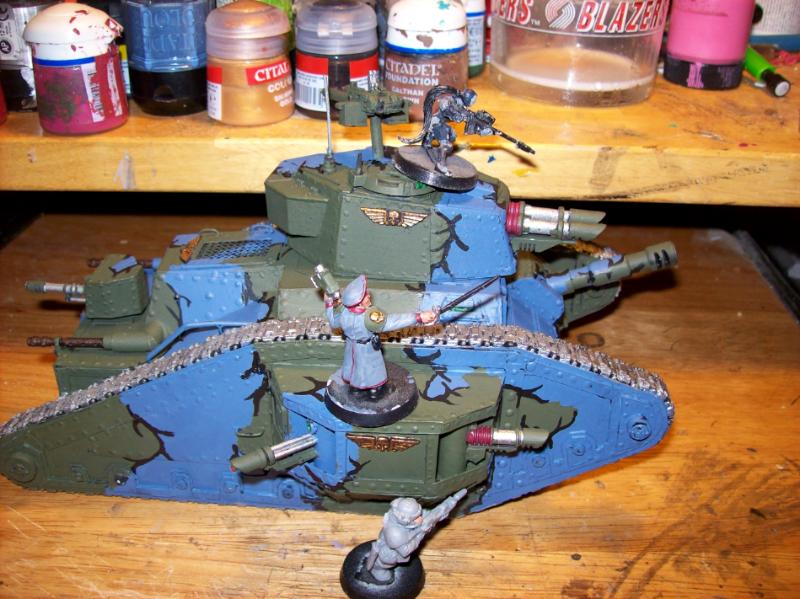
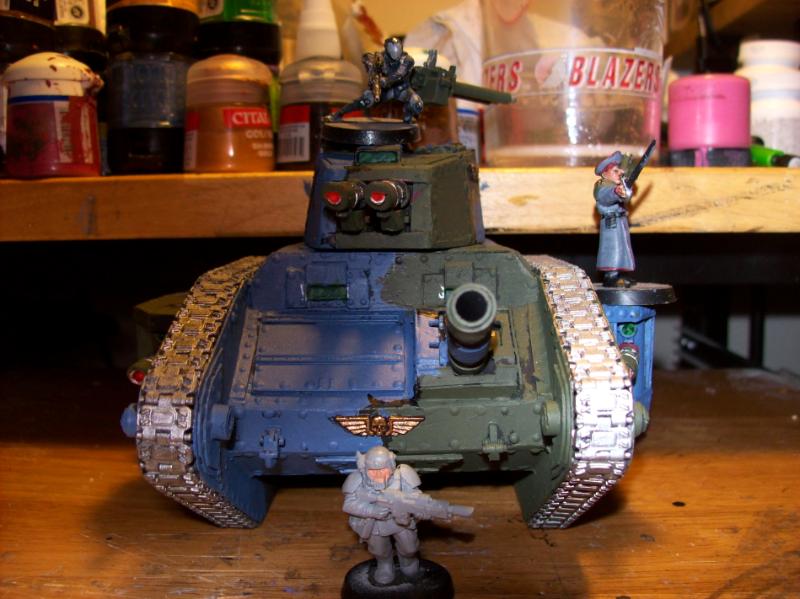
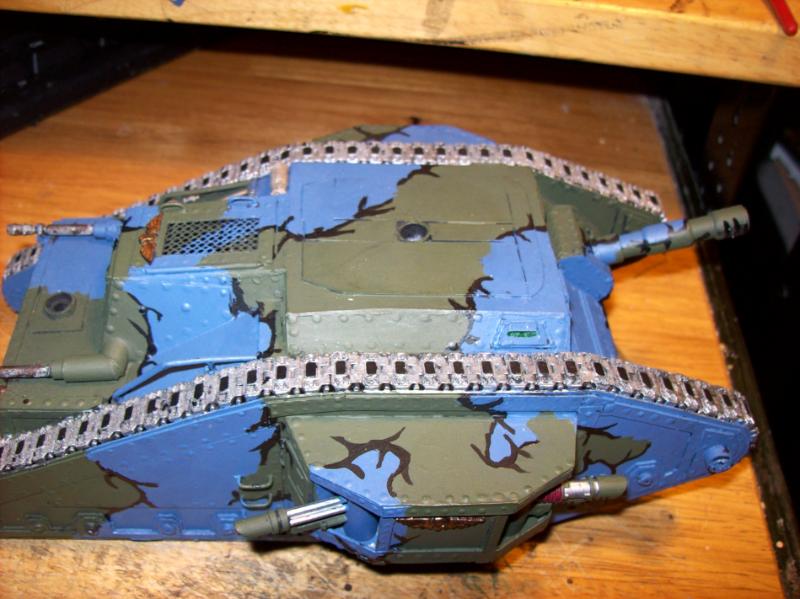
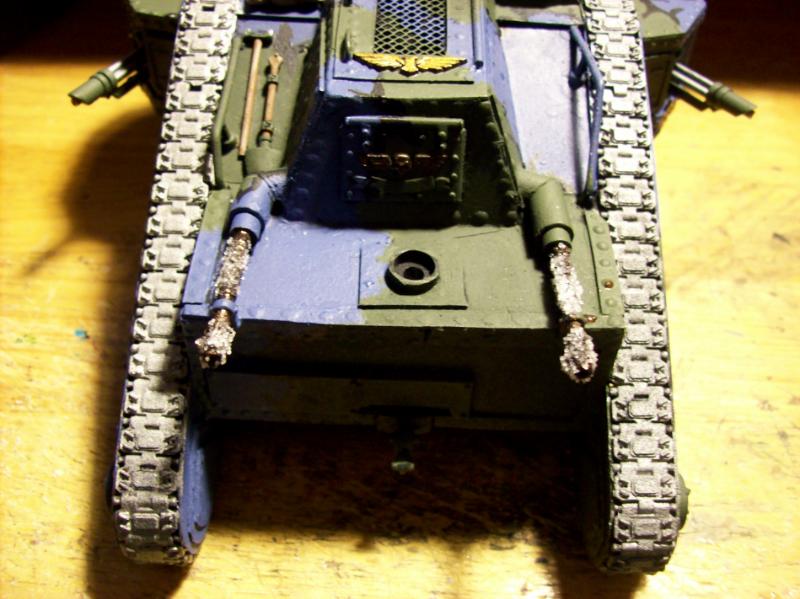
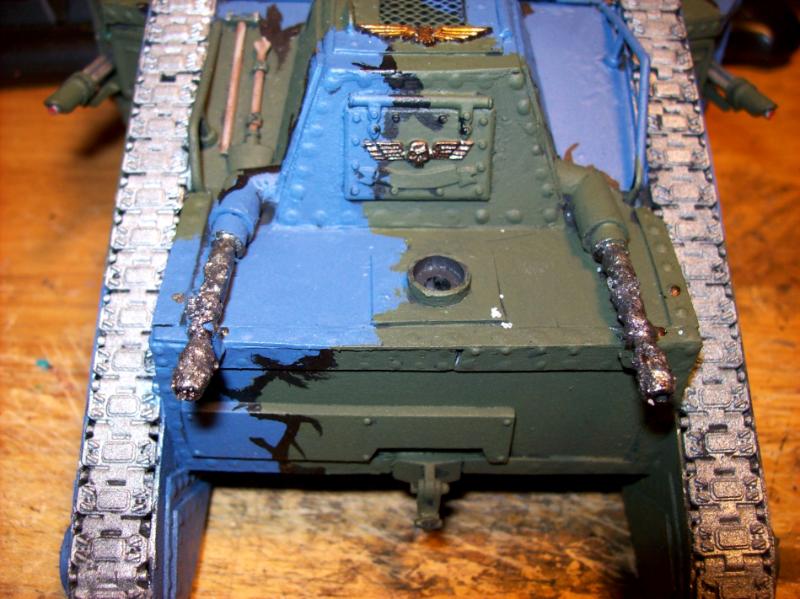
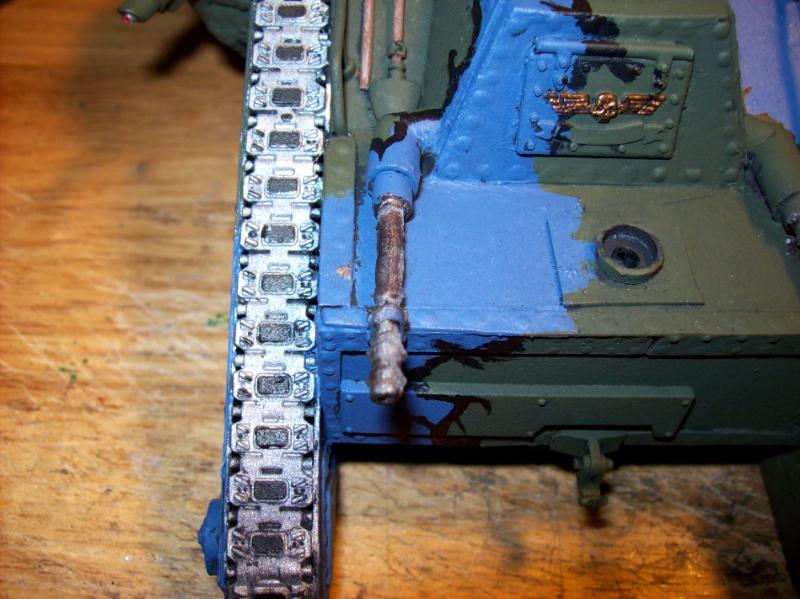
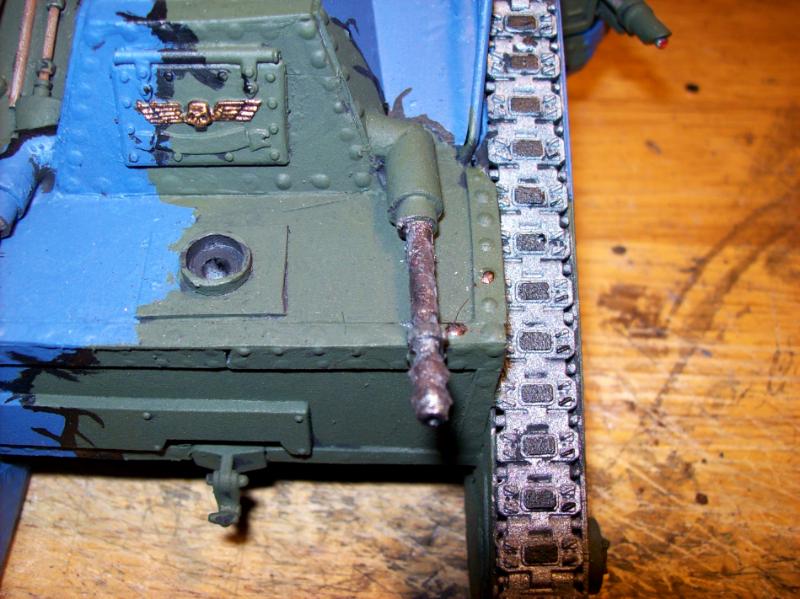
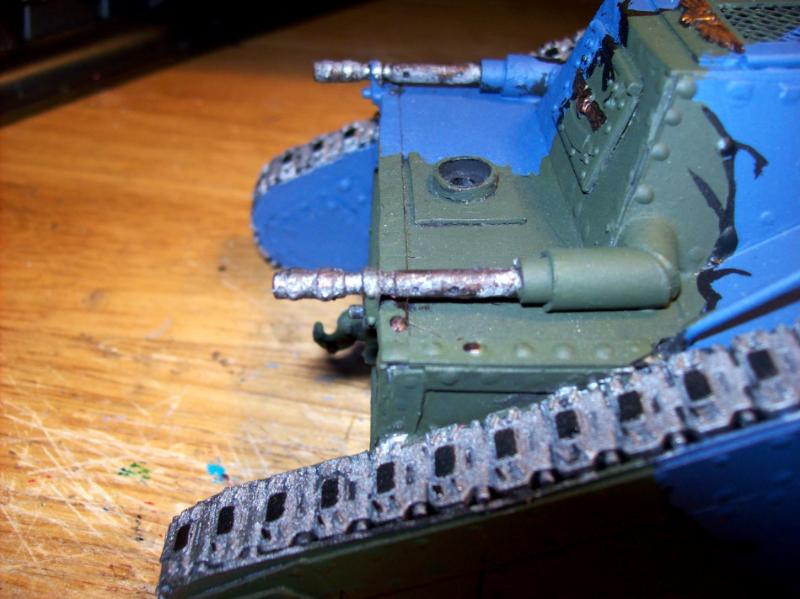
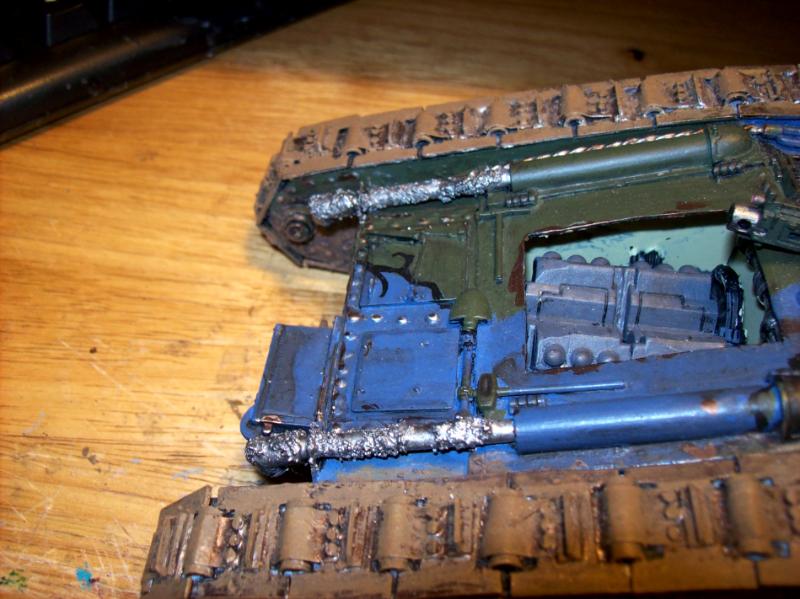
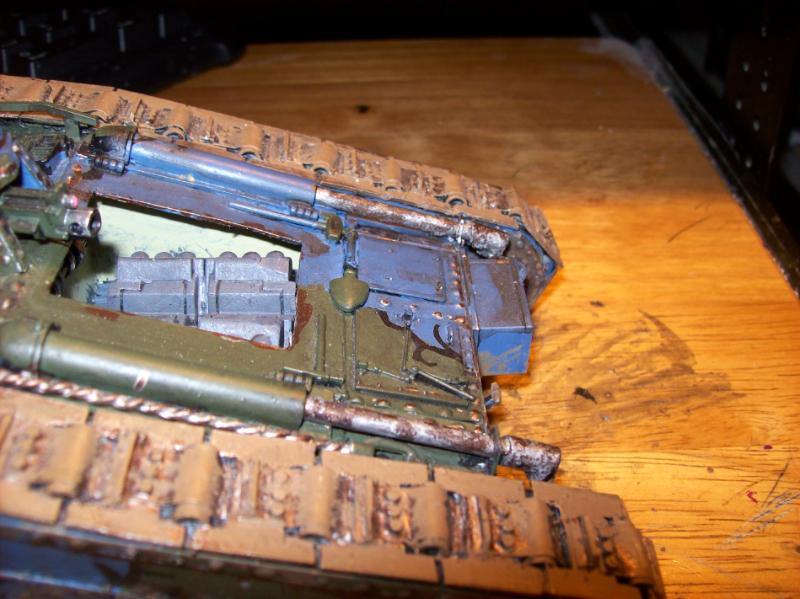
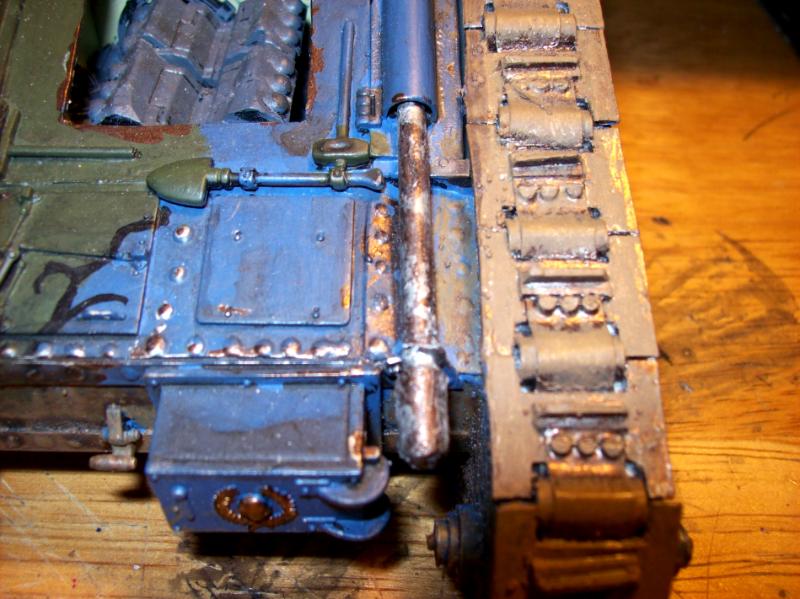
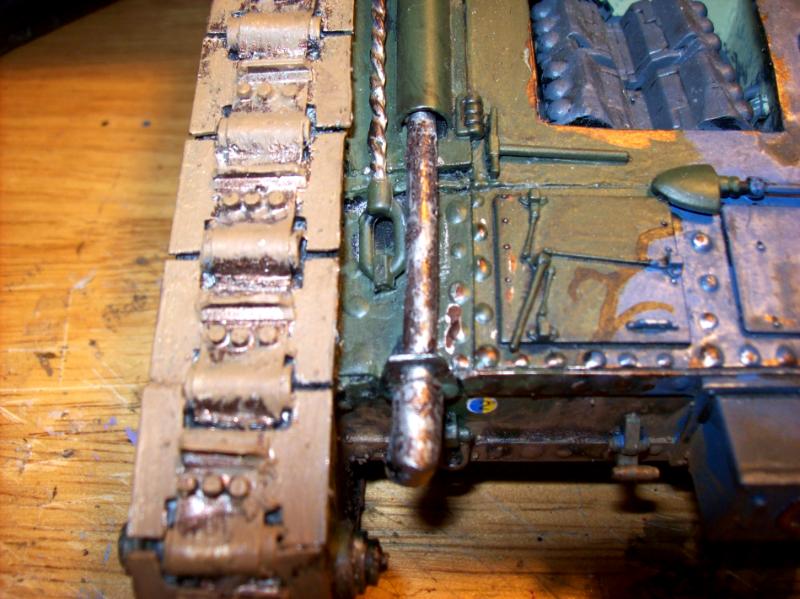
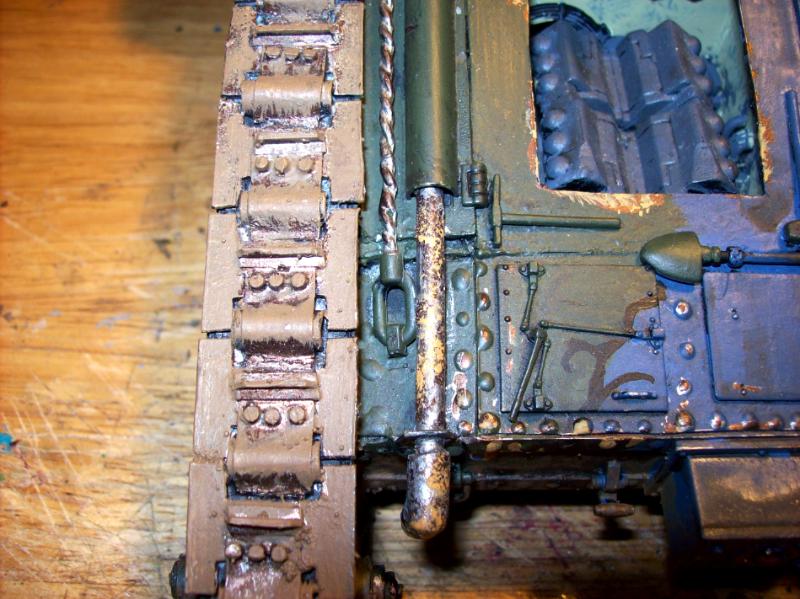
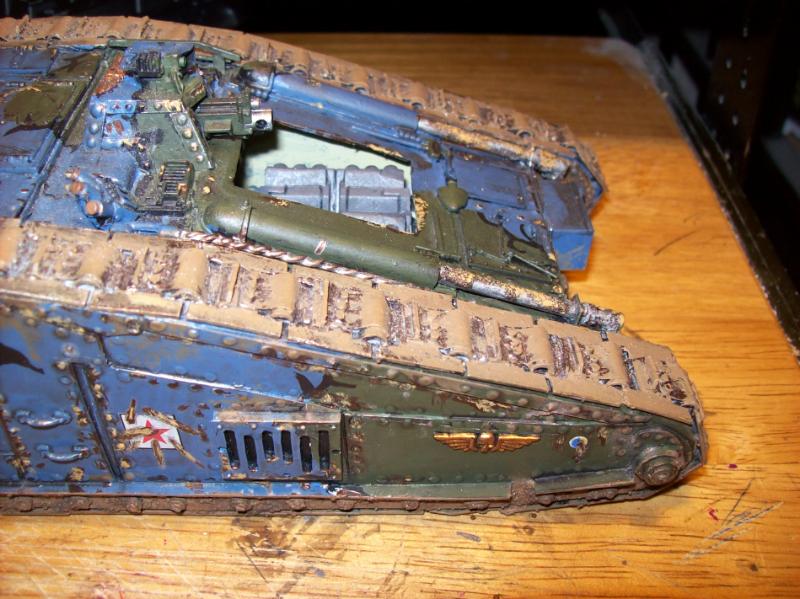
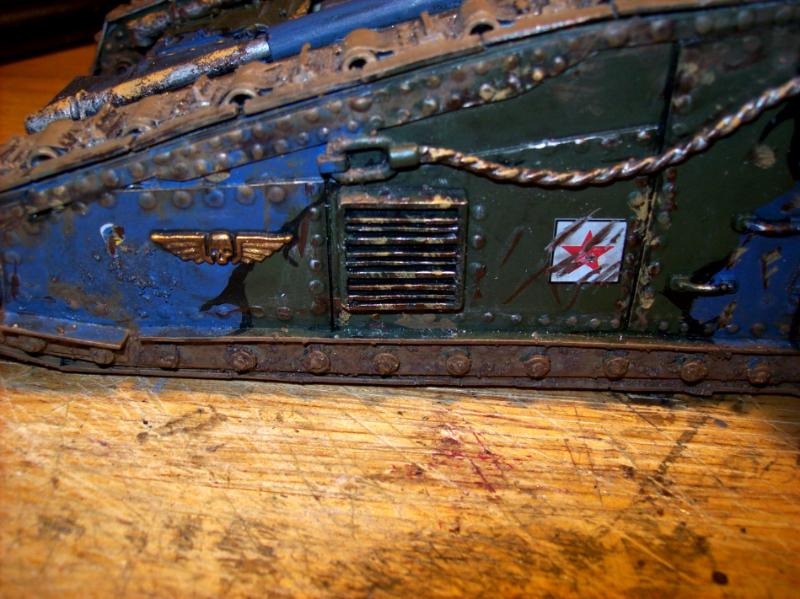
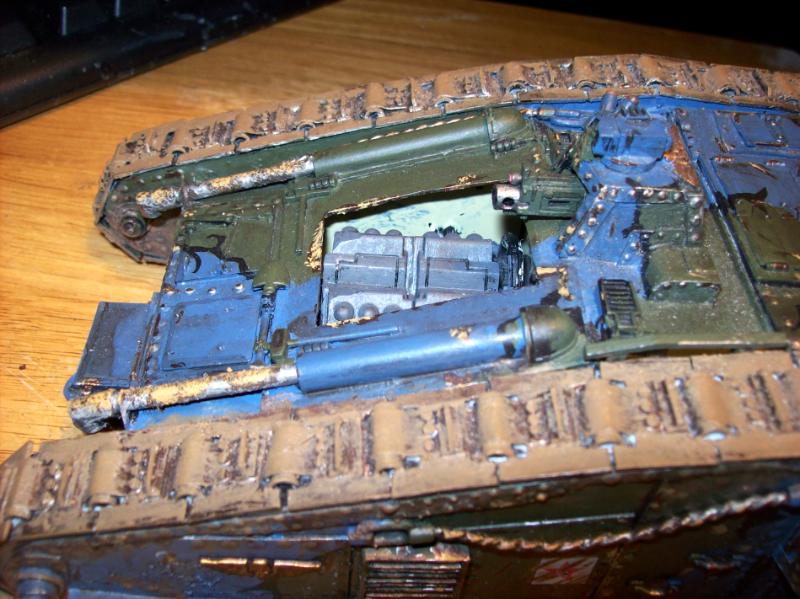
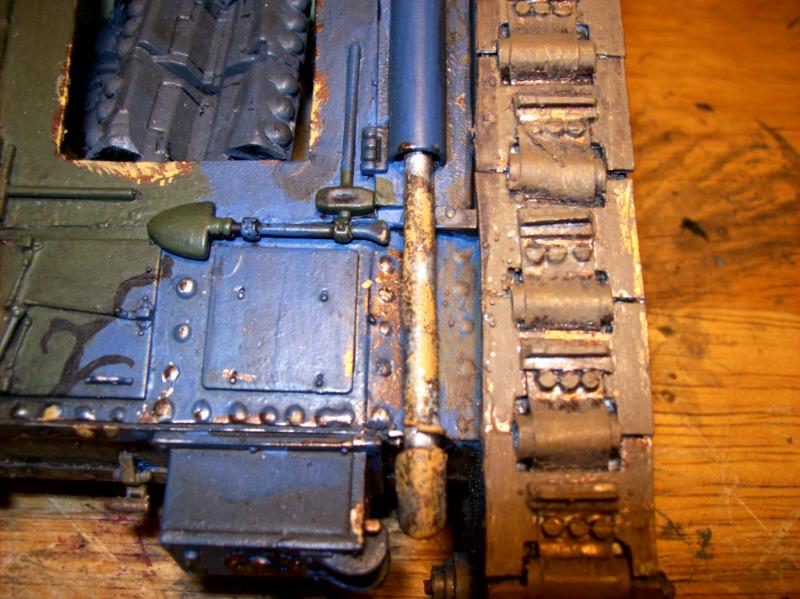
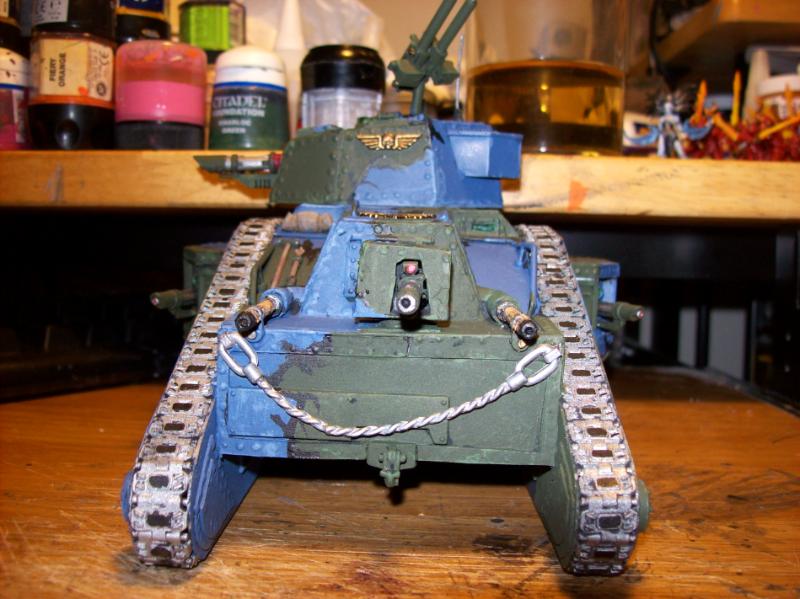
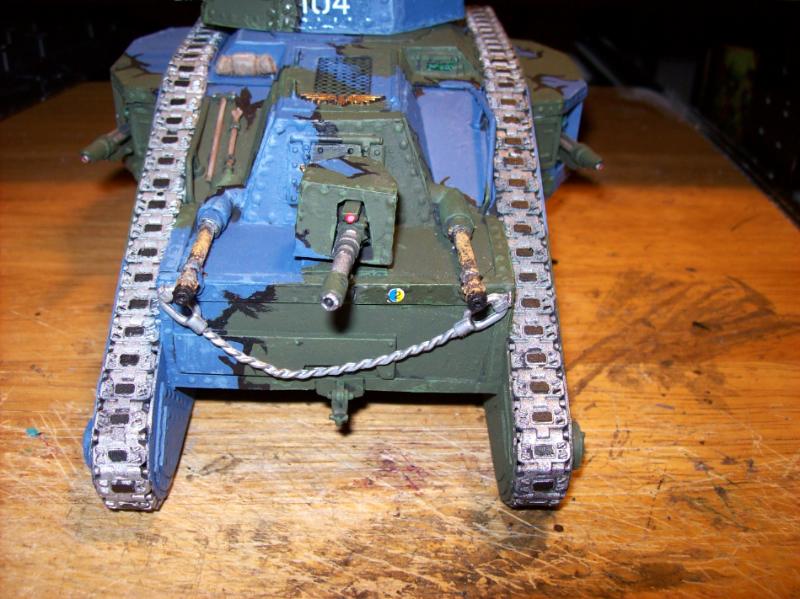
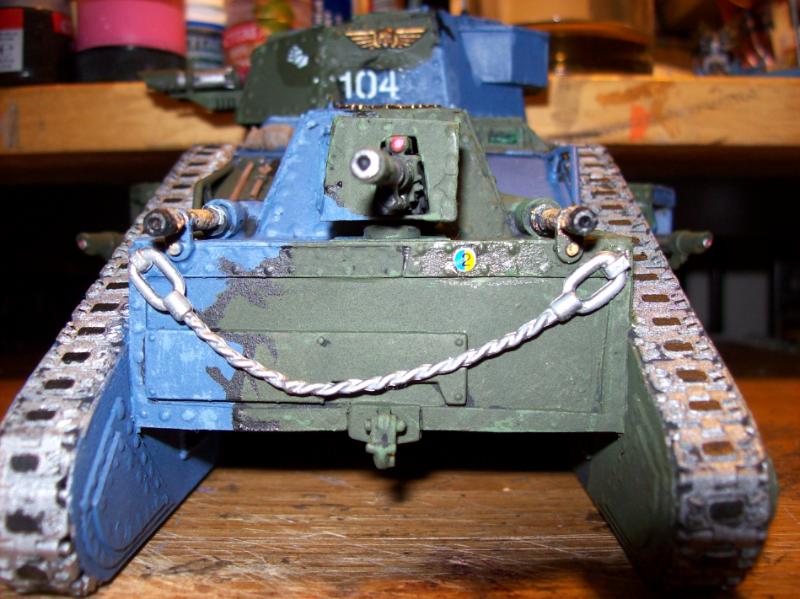
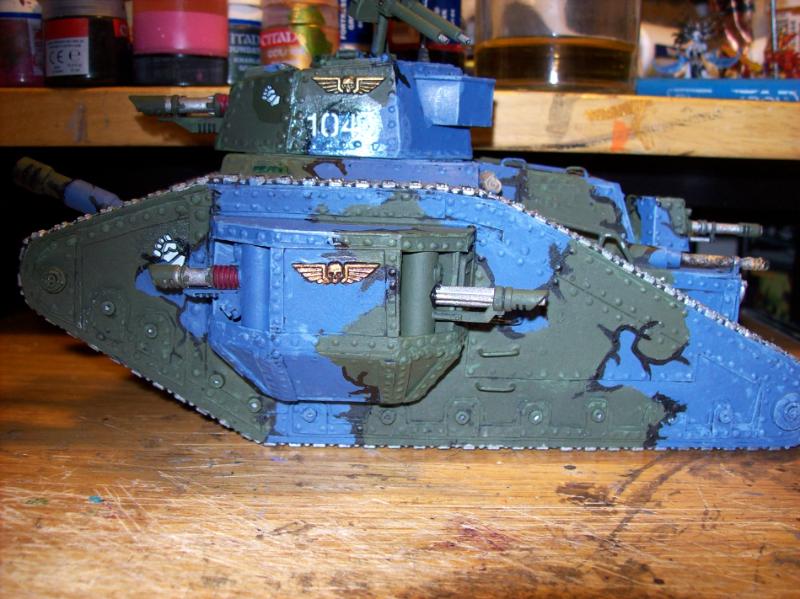
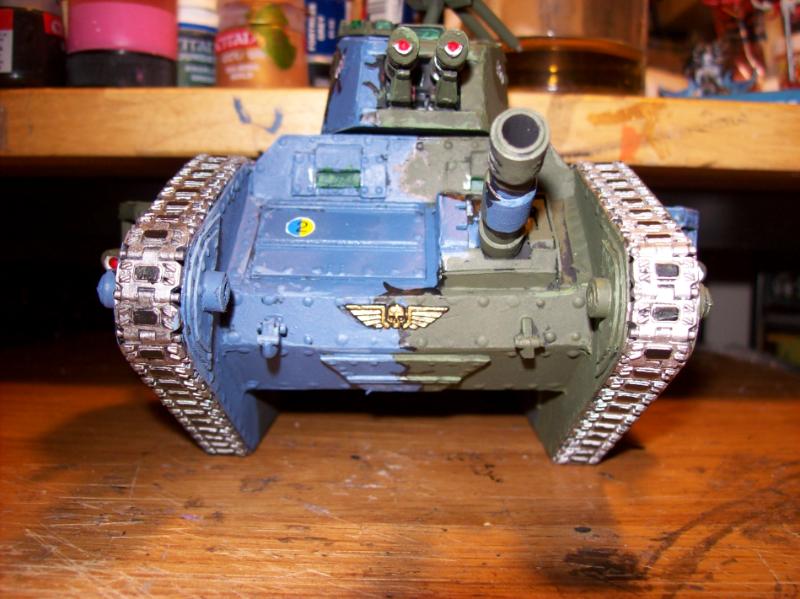
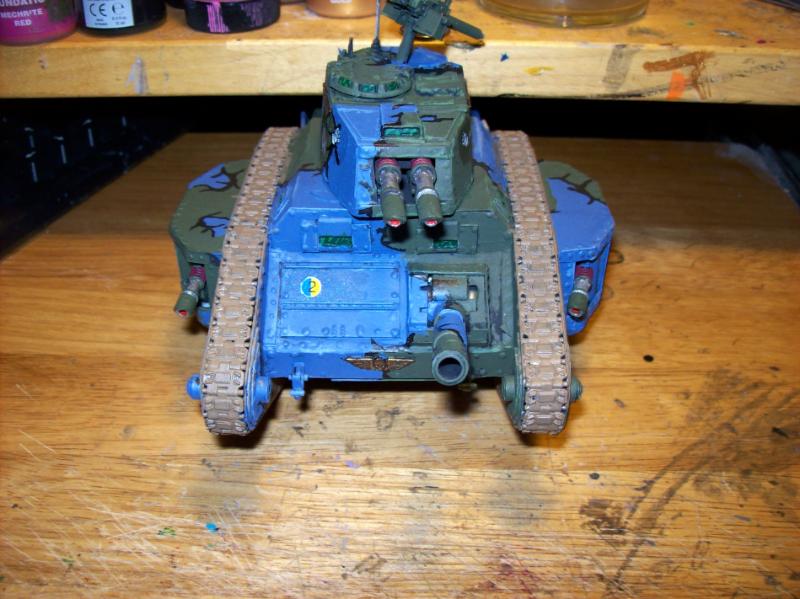
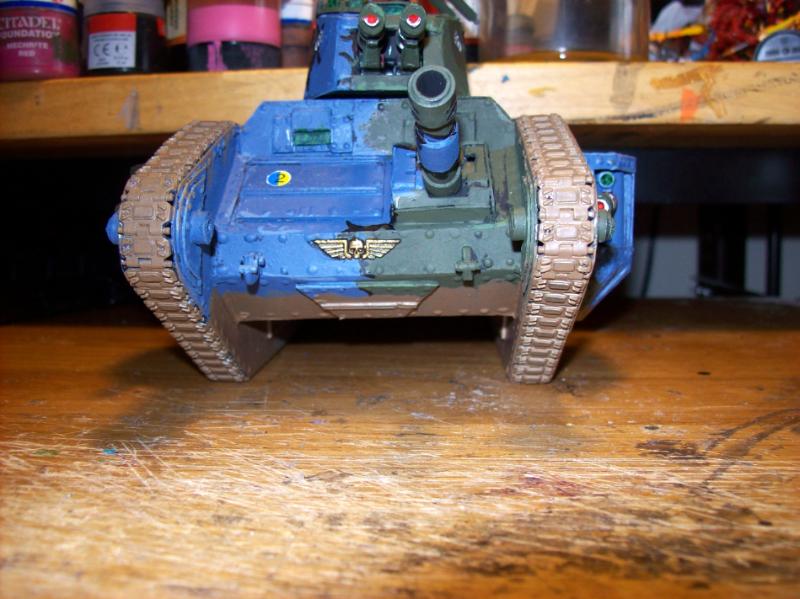
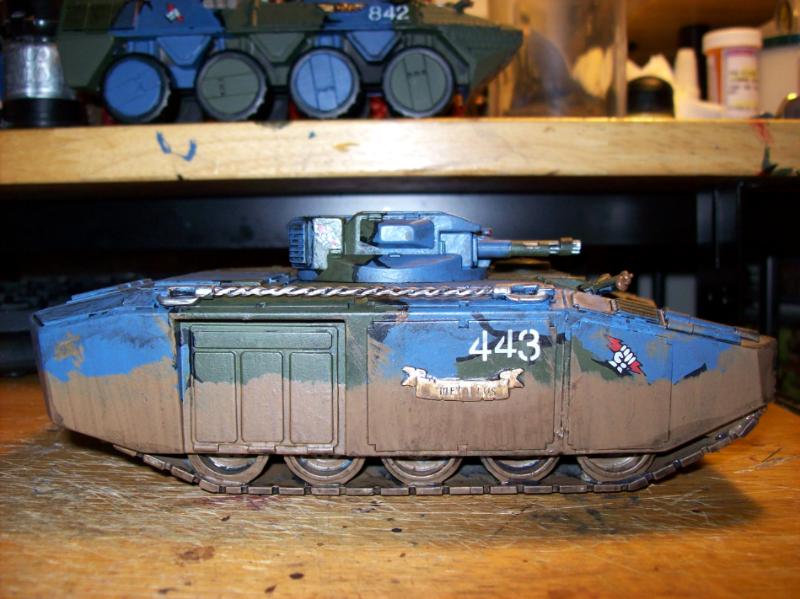
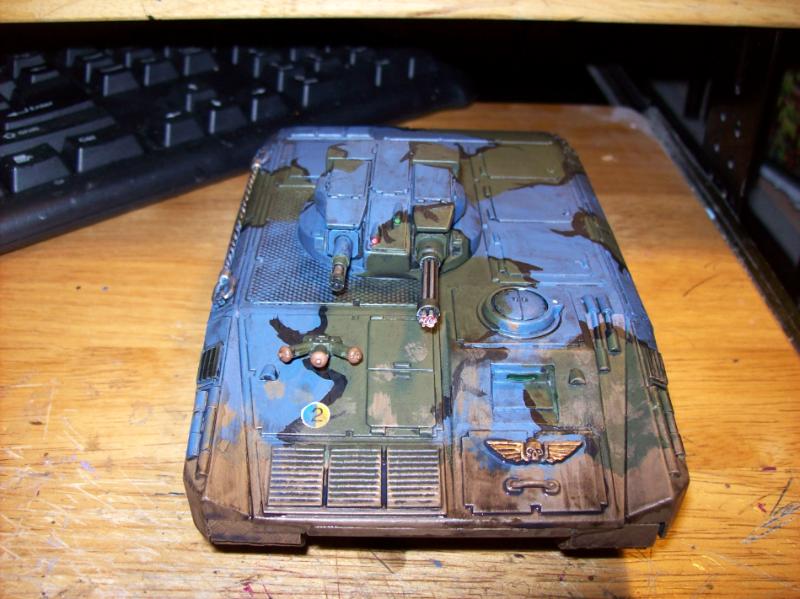
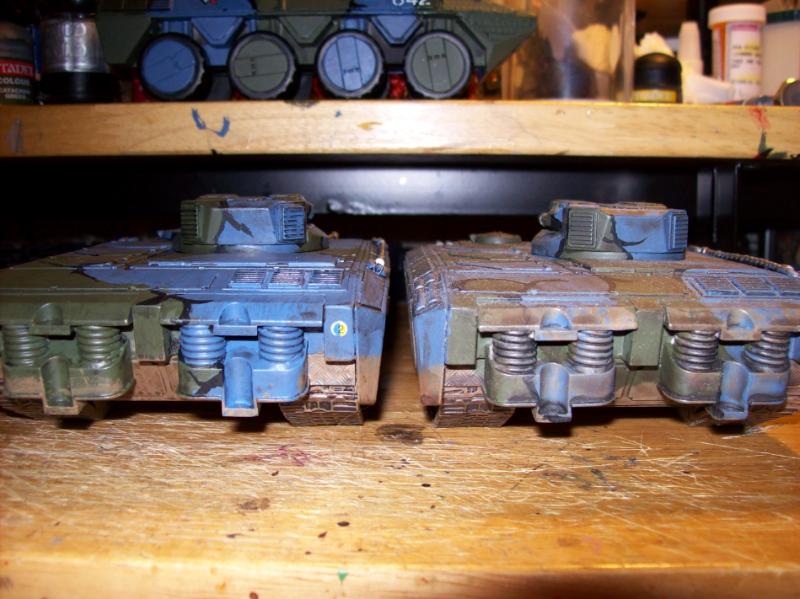
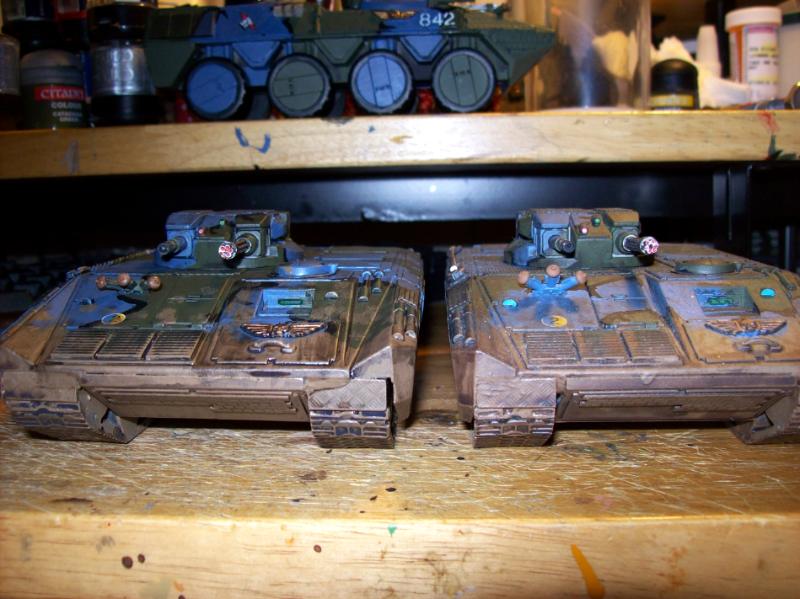
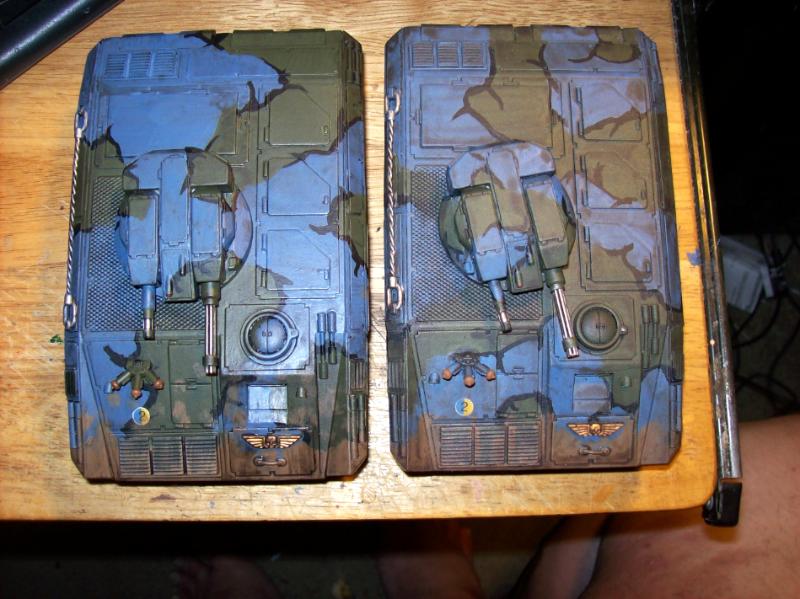
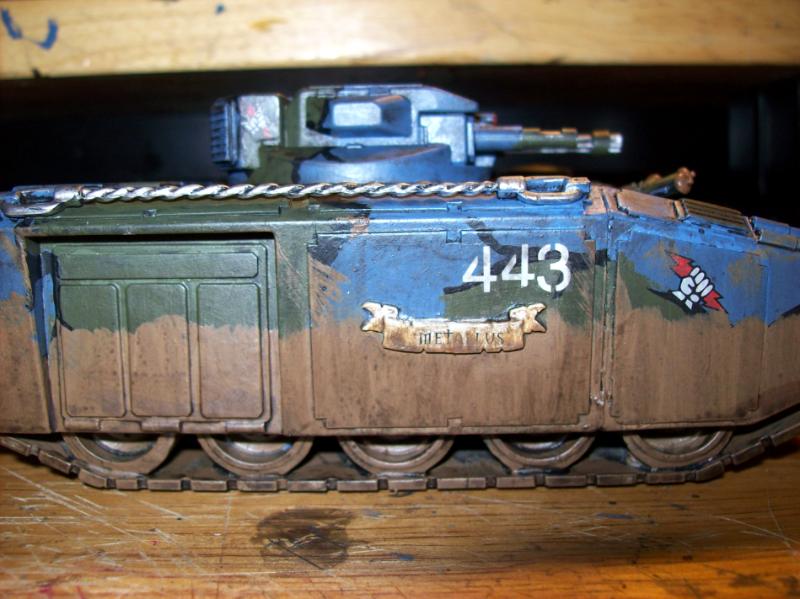
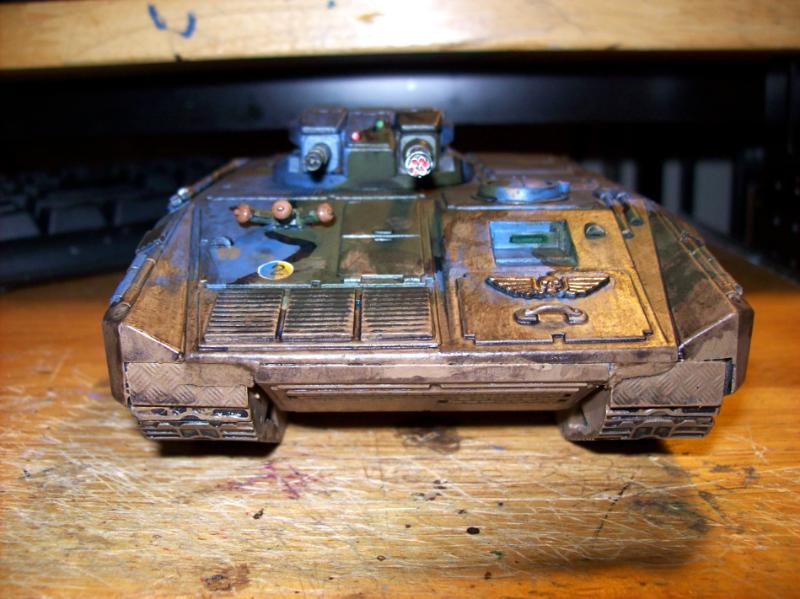
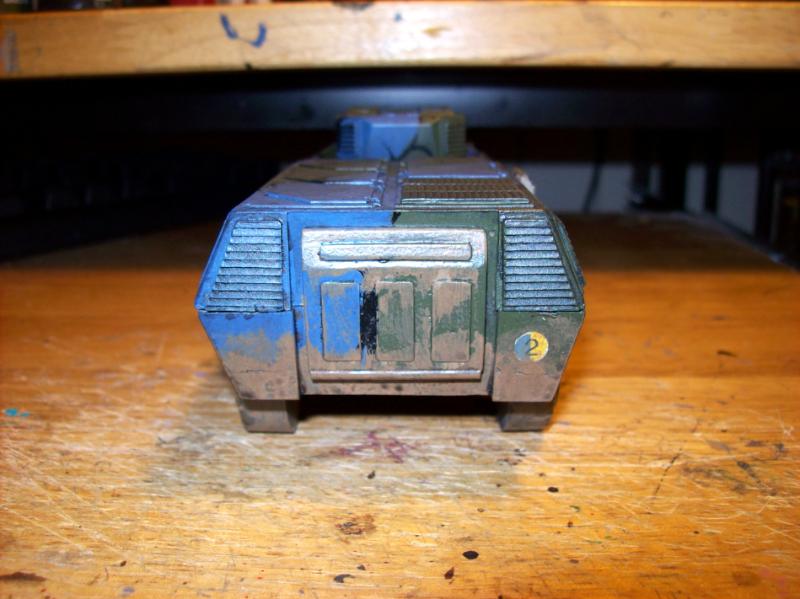
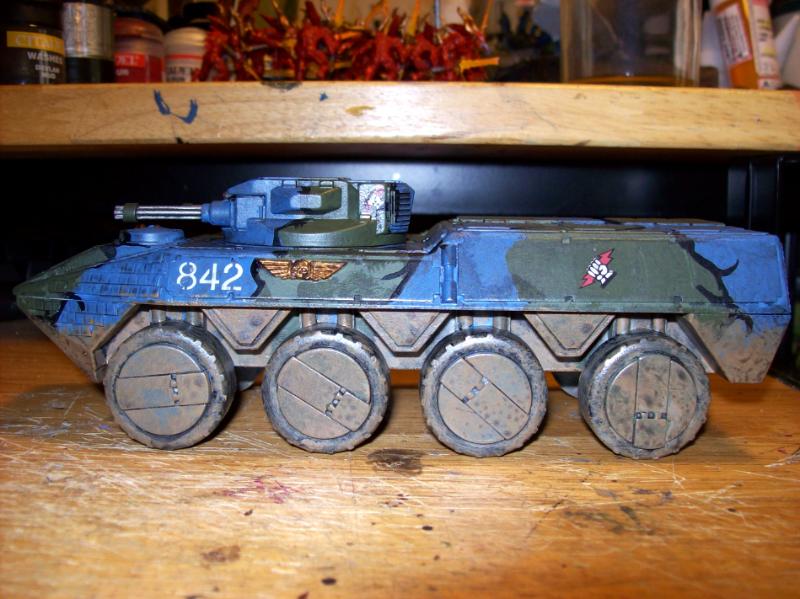
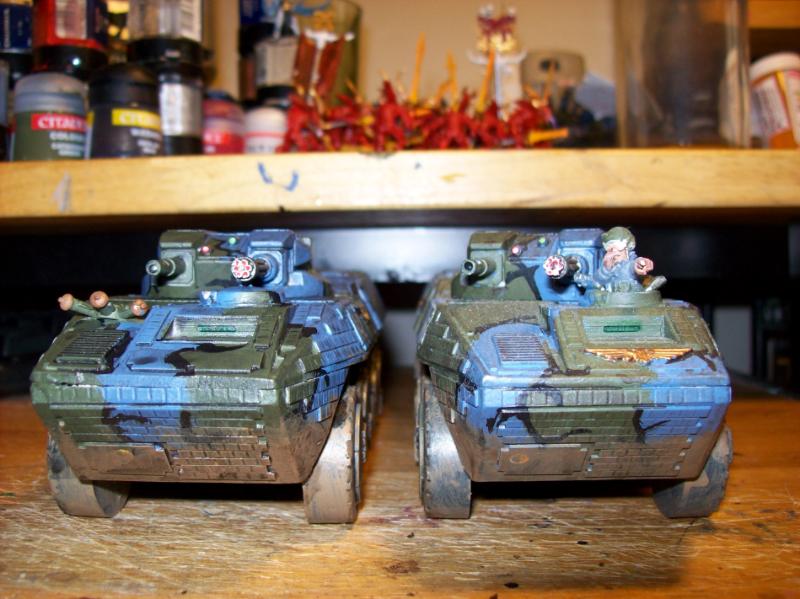
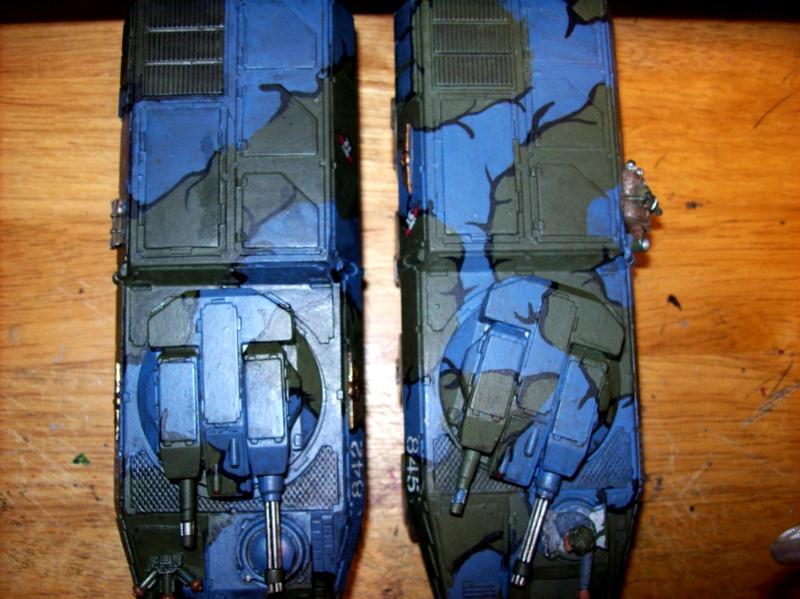
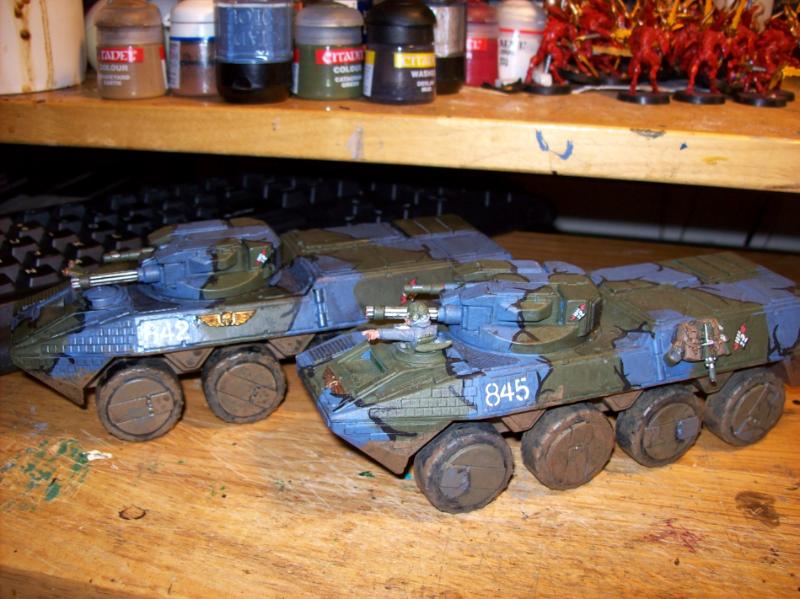
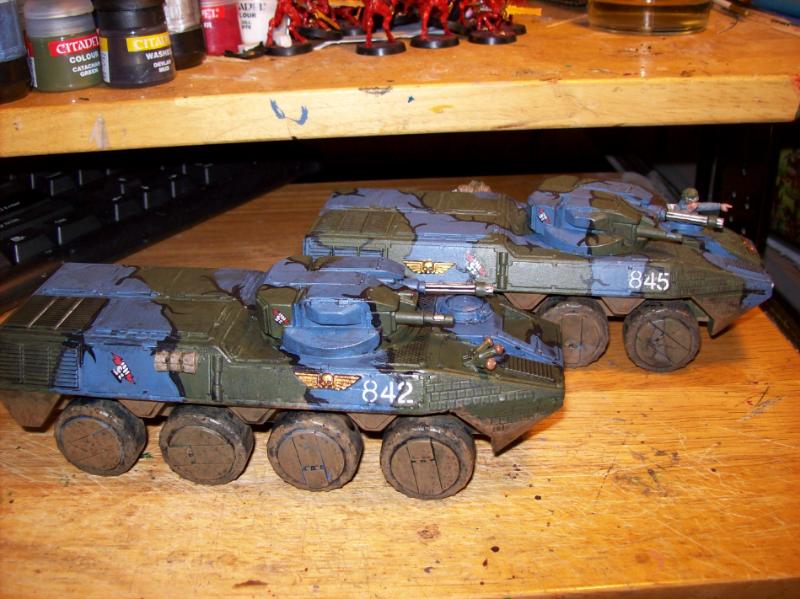
Speaking of, a double treat as both Lancers are together for the next round to show the dirty wash effects
Not dirty enough![/img]
better[/img]
[/img]
[/img]
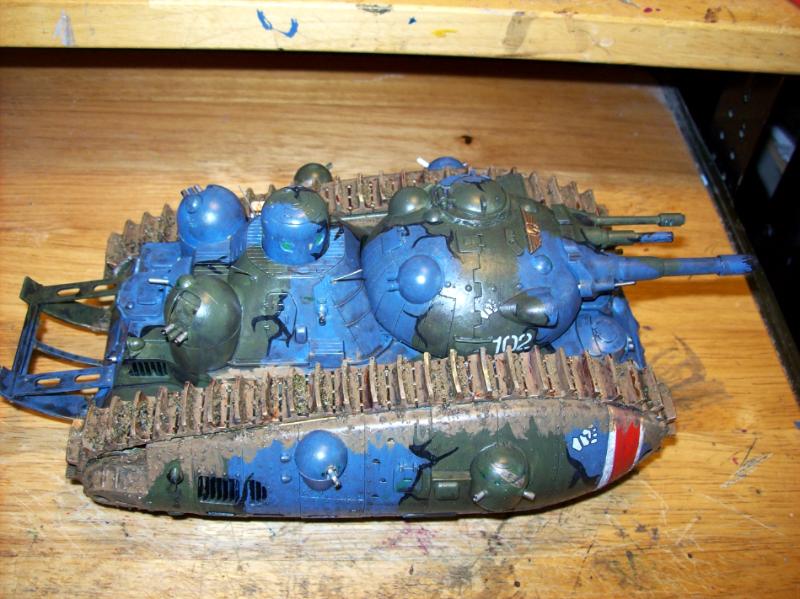
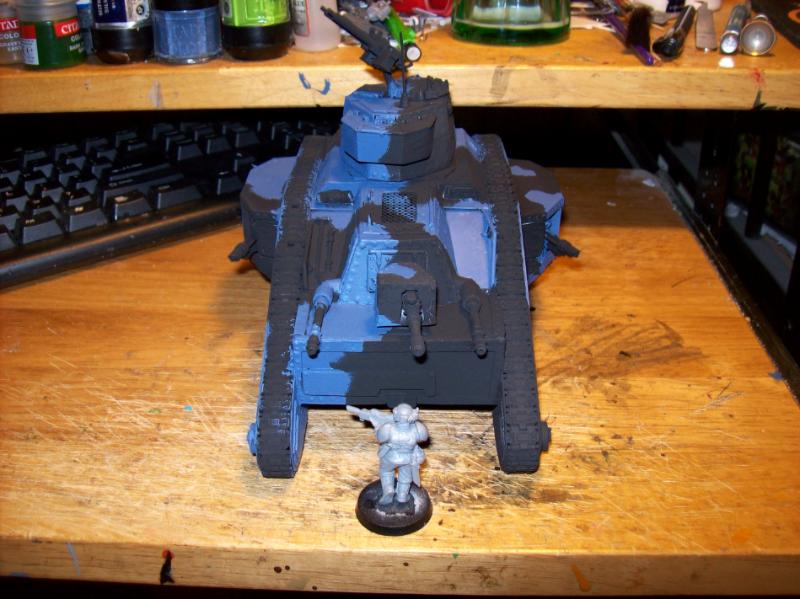
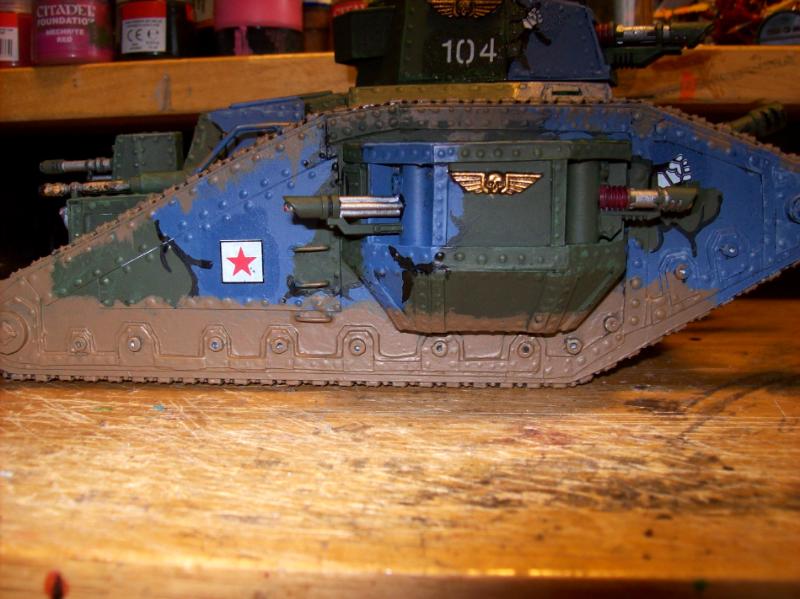
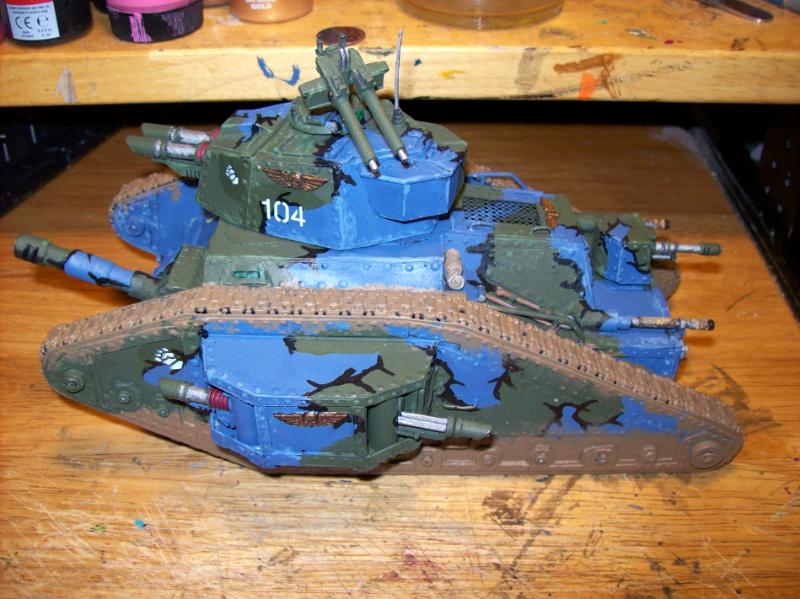
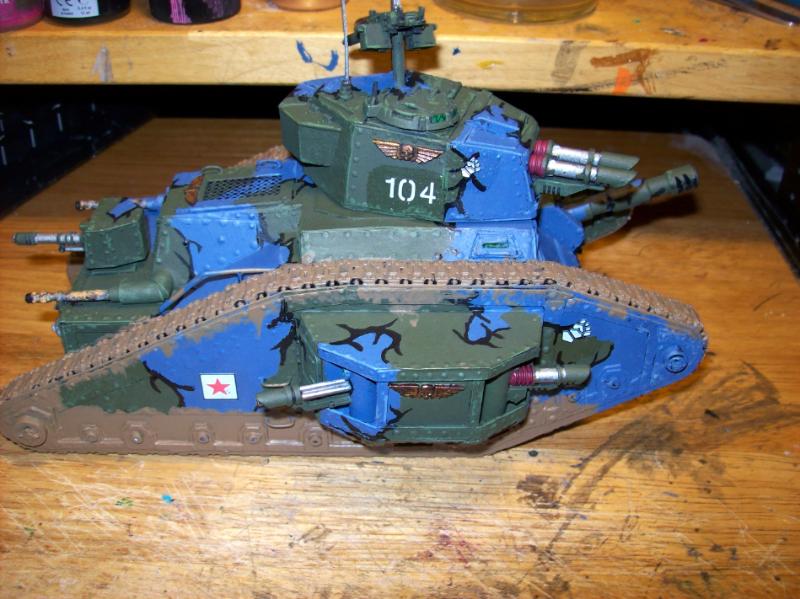
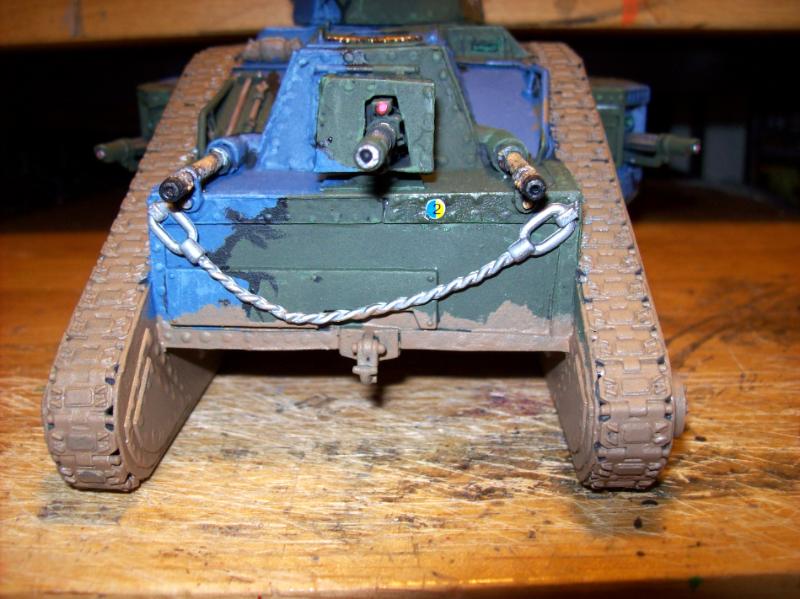
Dirty siblings
[/img]
[/img]
Still not as dirty as the first one.
[/img]
[/img]
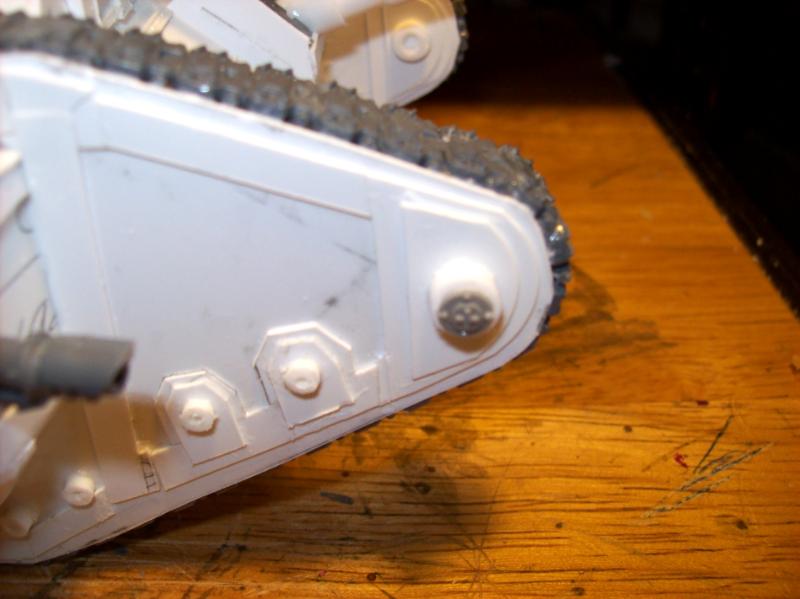
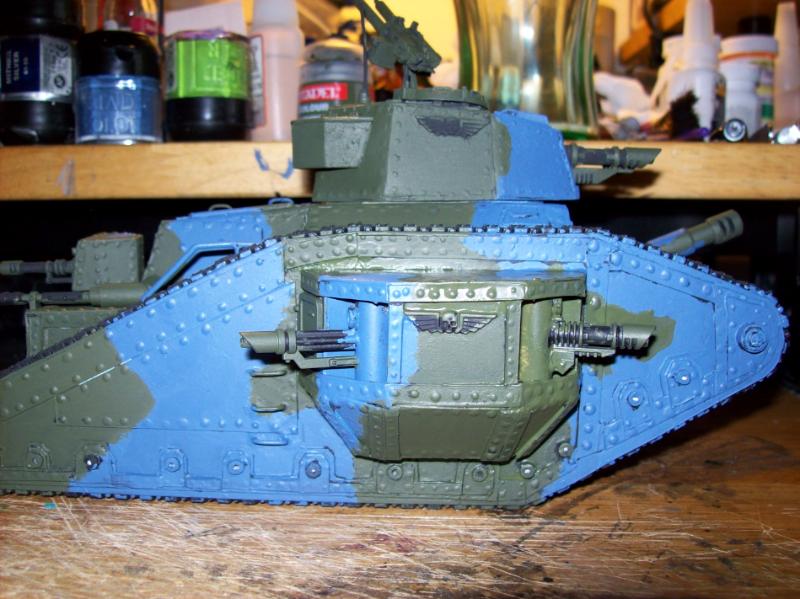
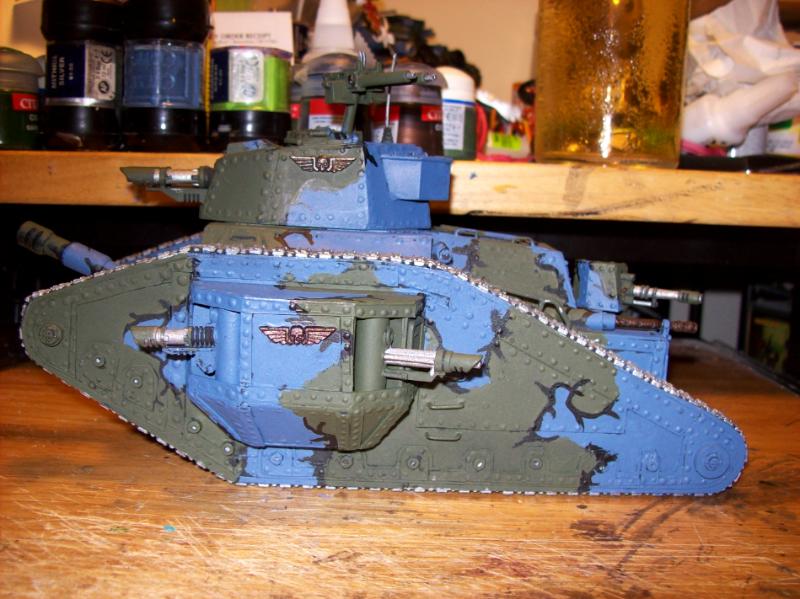
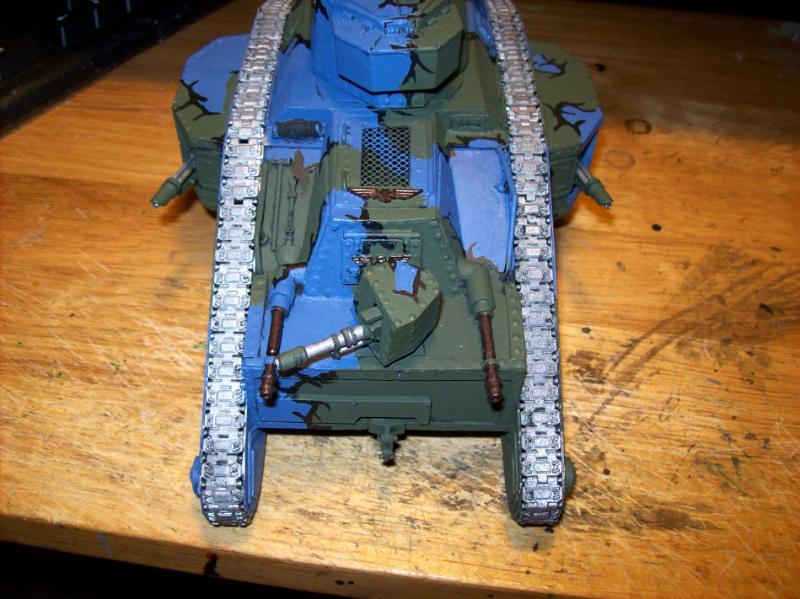
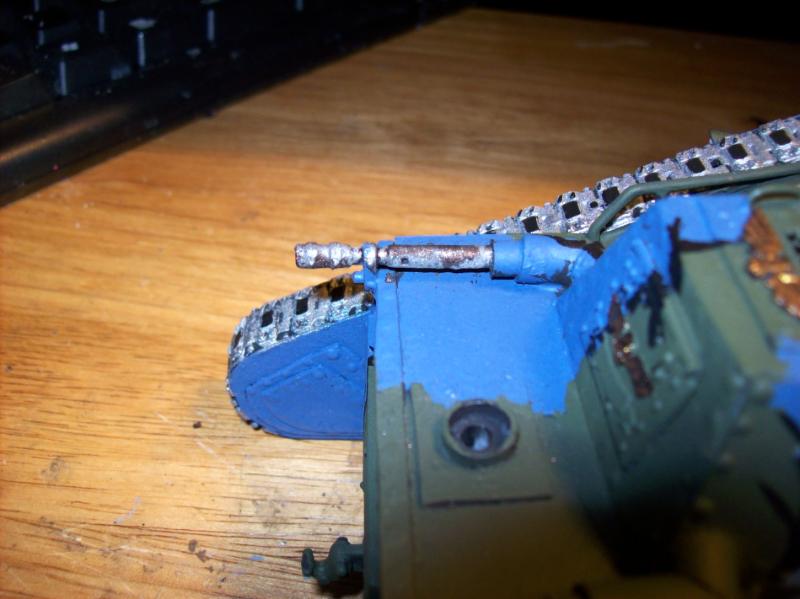
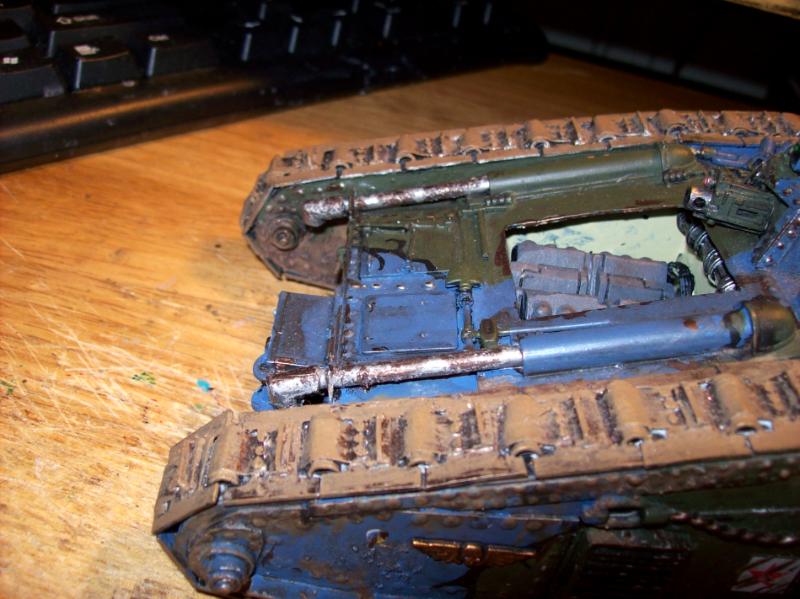
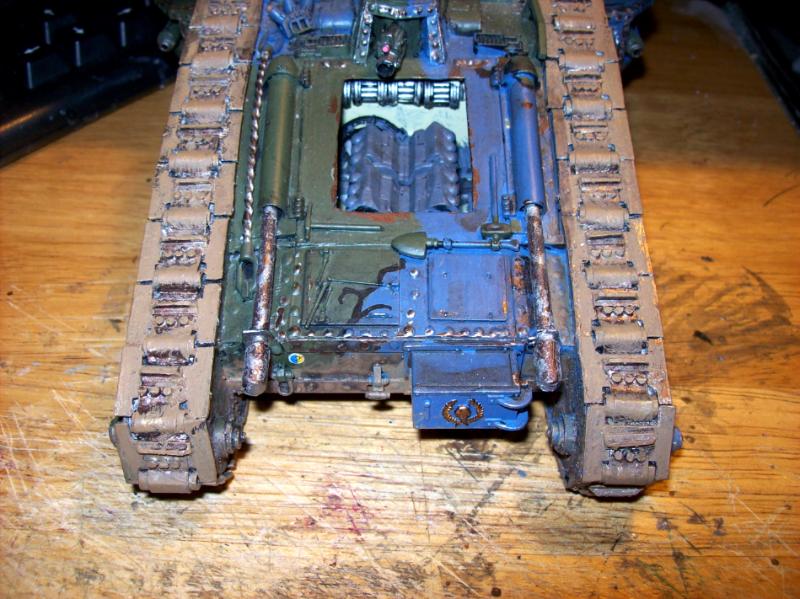
Try again!
[/img]
[/img]
[/img]
[/img]
[/img]
[/img]
[/img]
[/img]
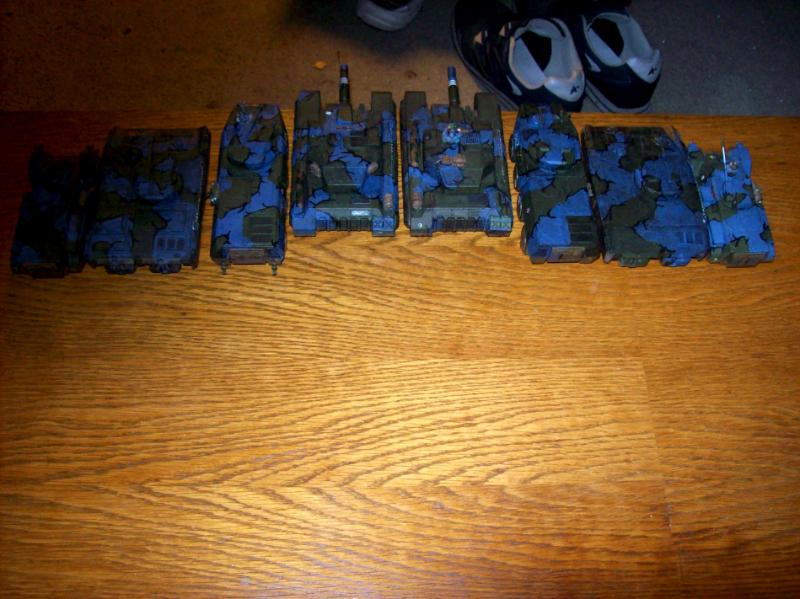
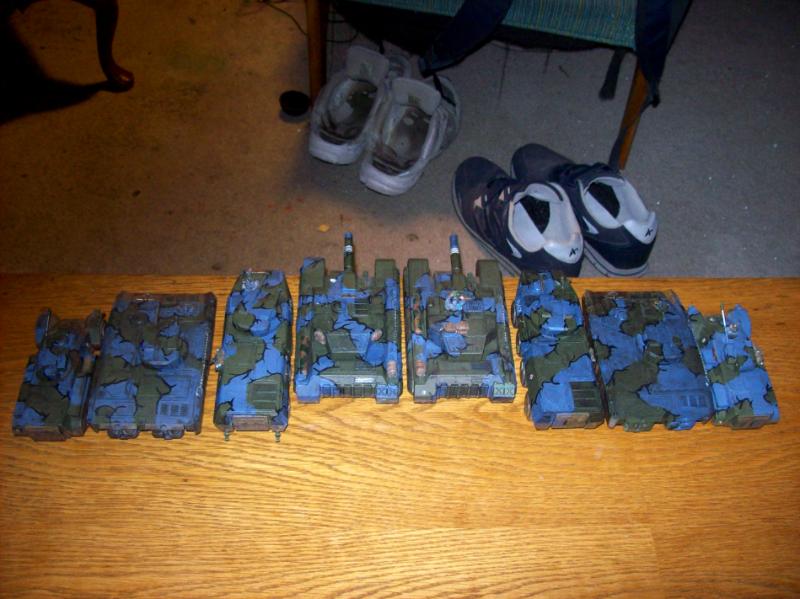
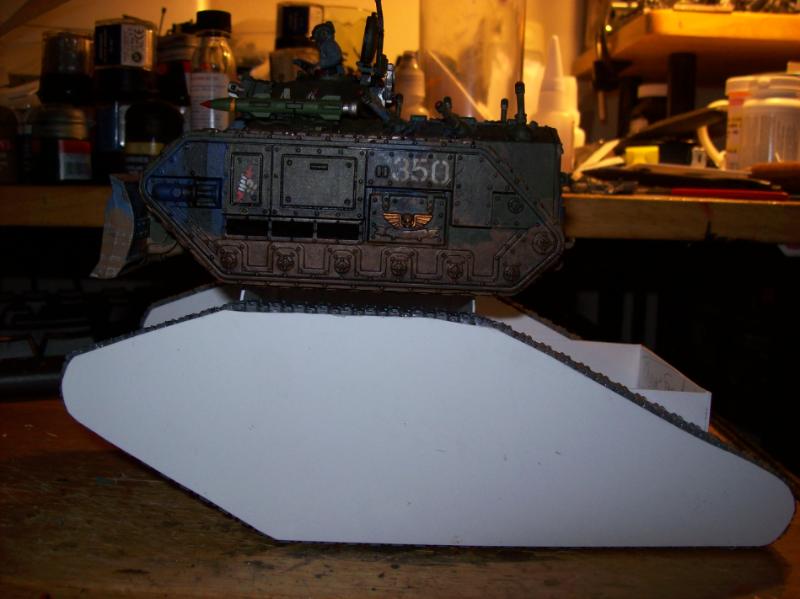
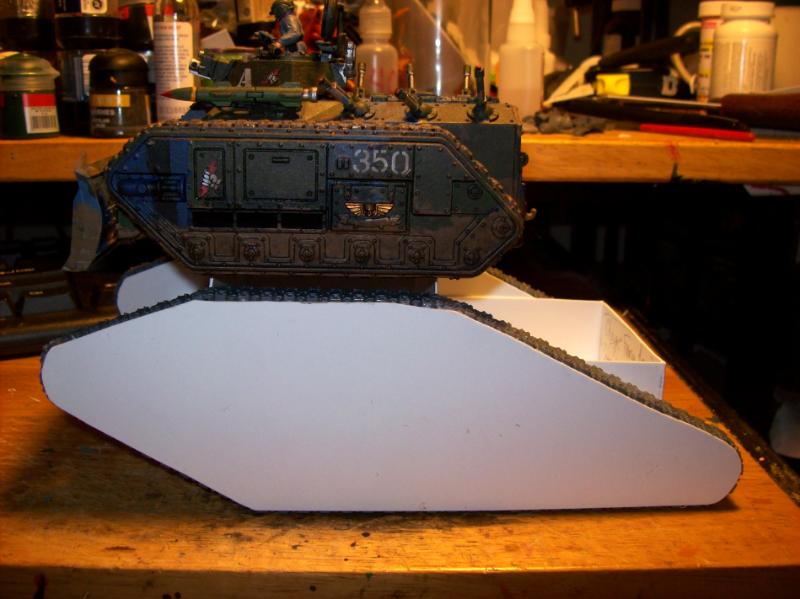
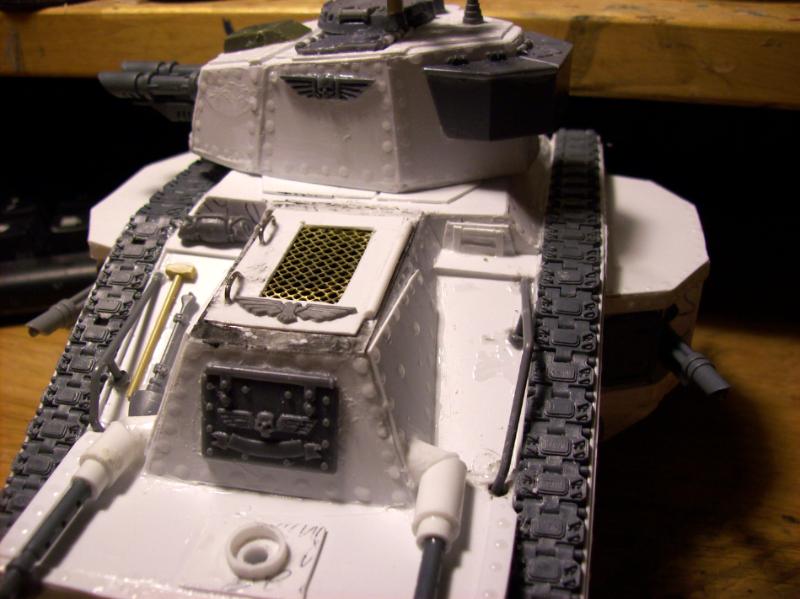
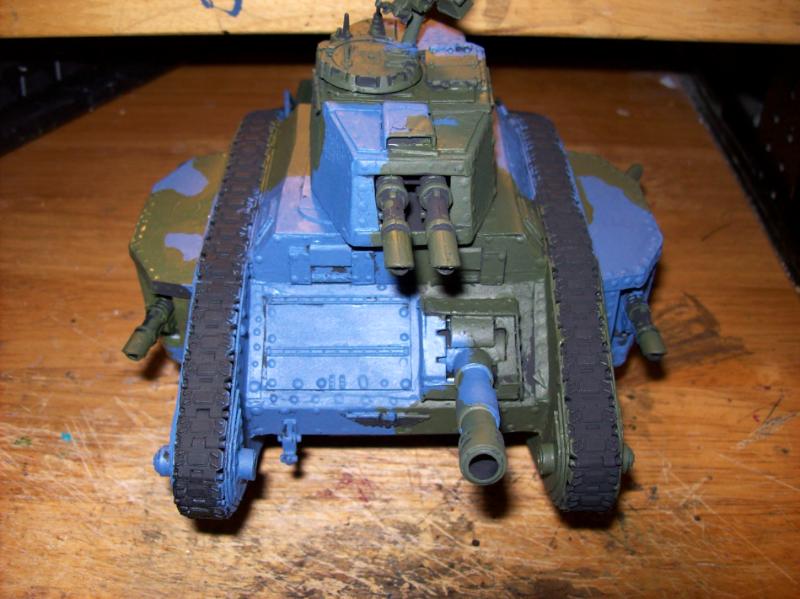
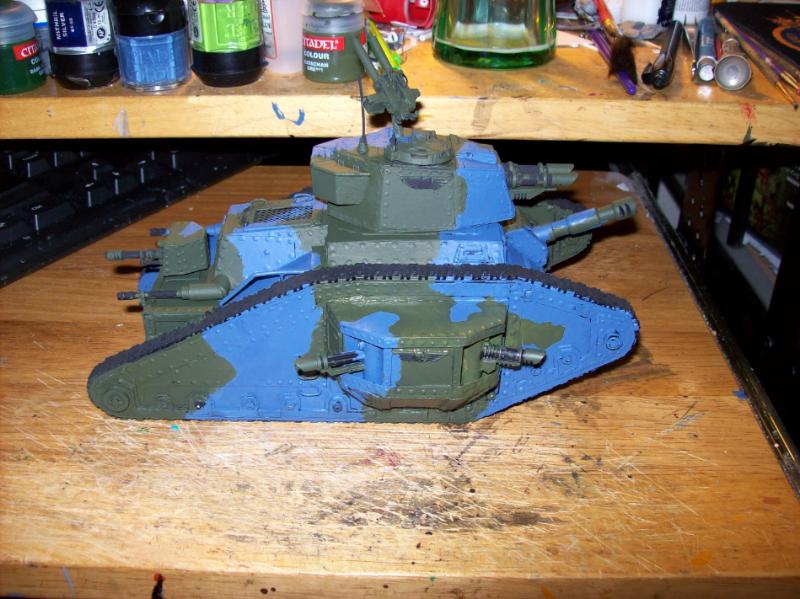
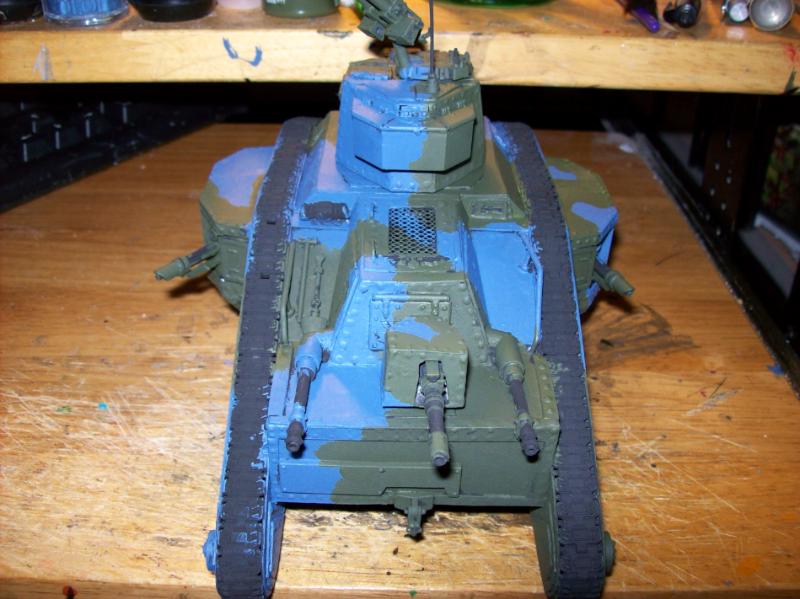
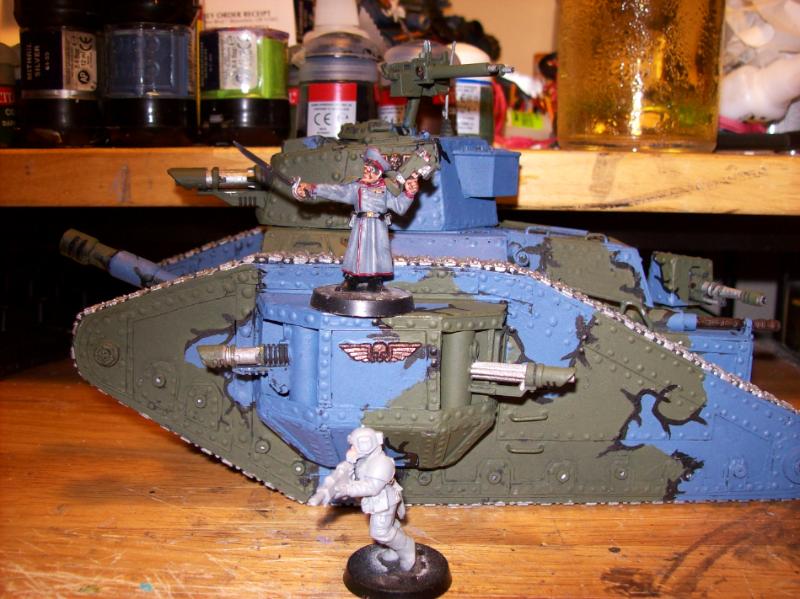
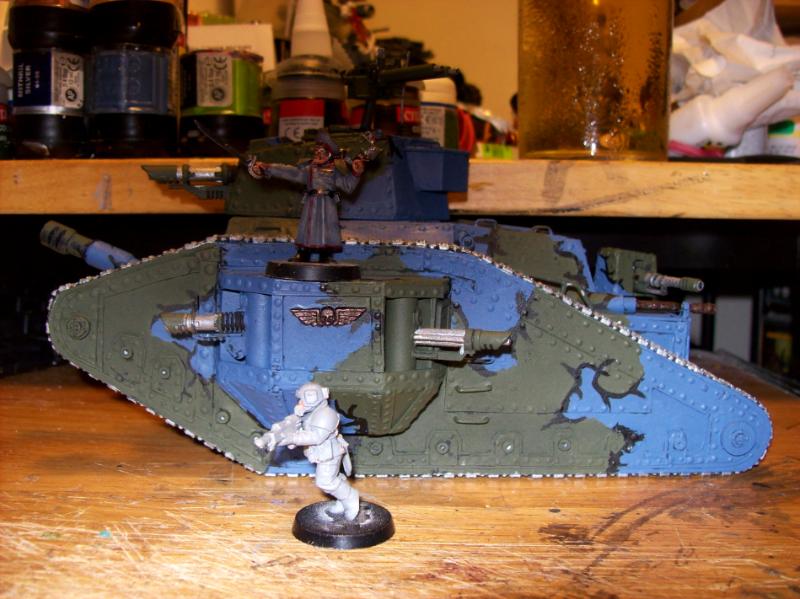
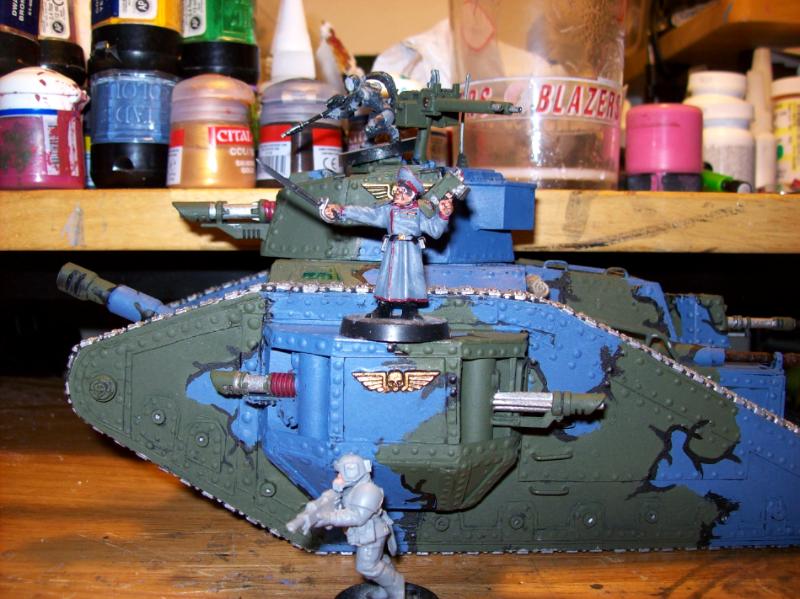
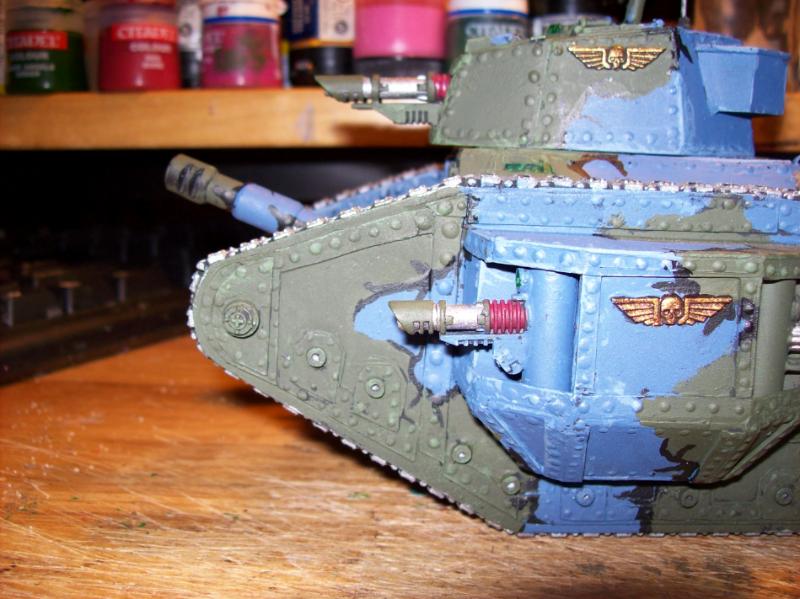
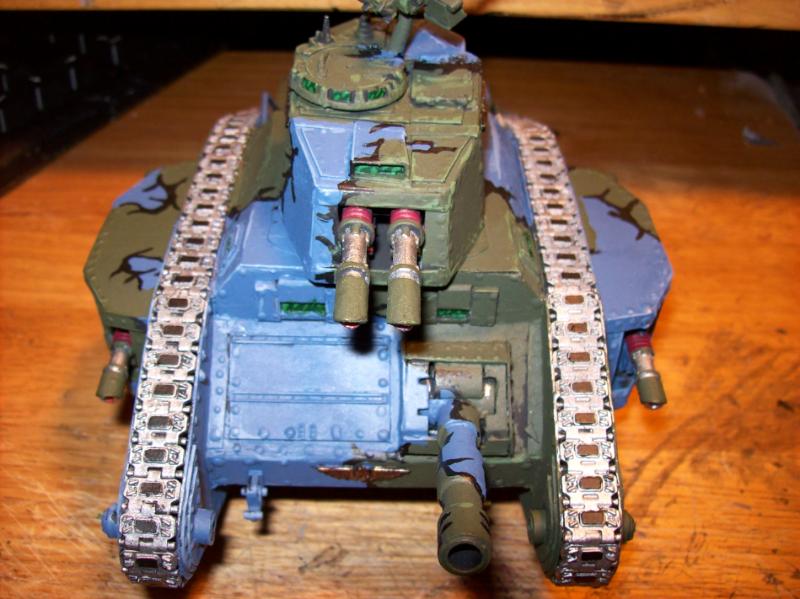
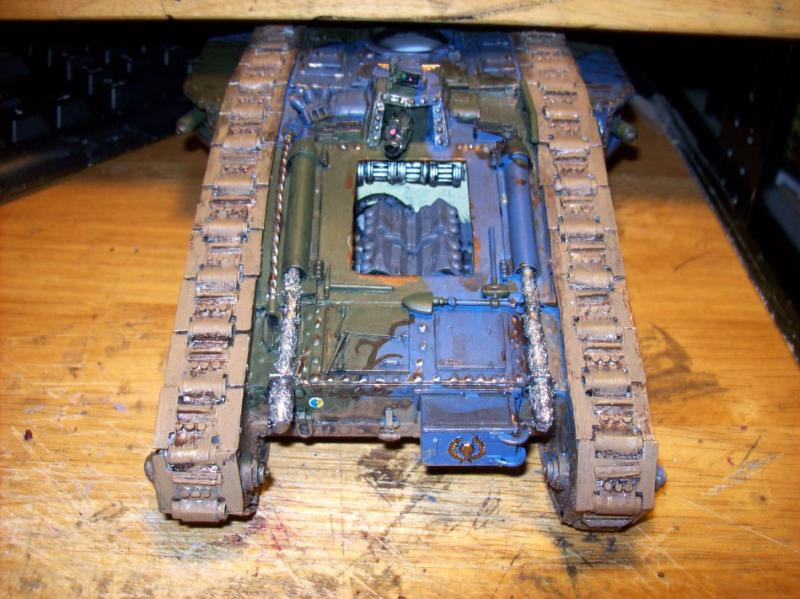
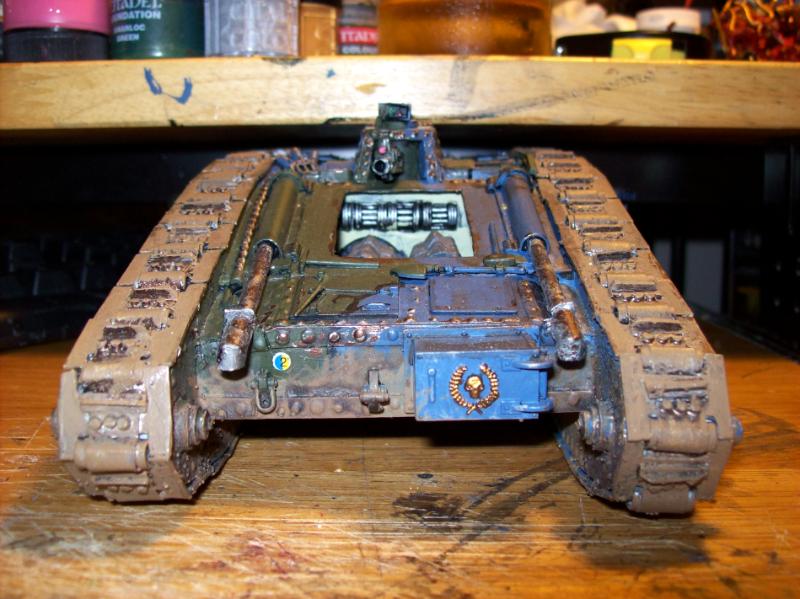
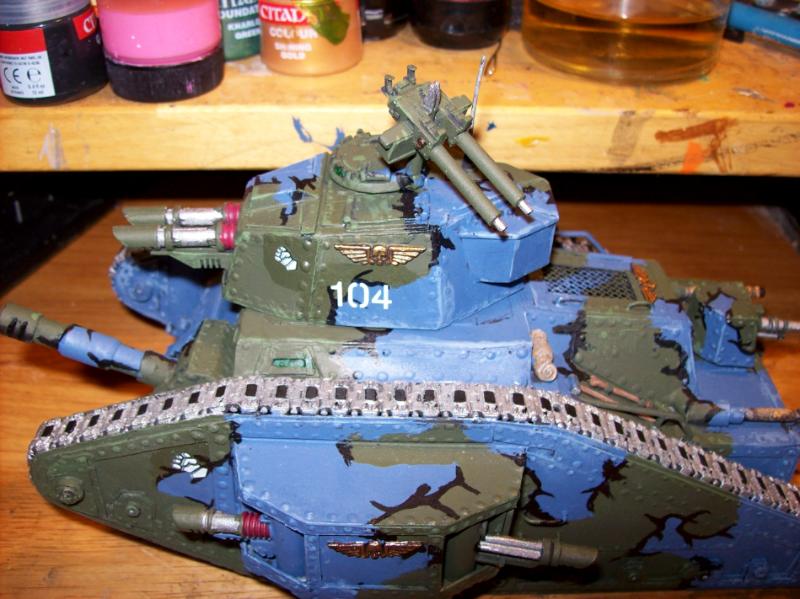
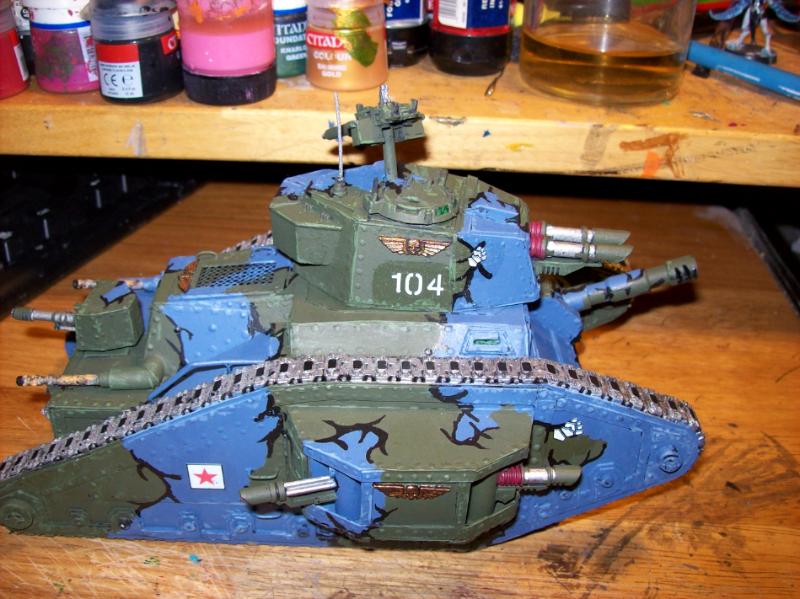
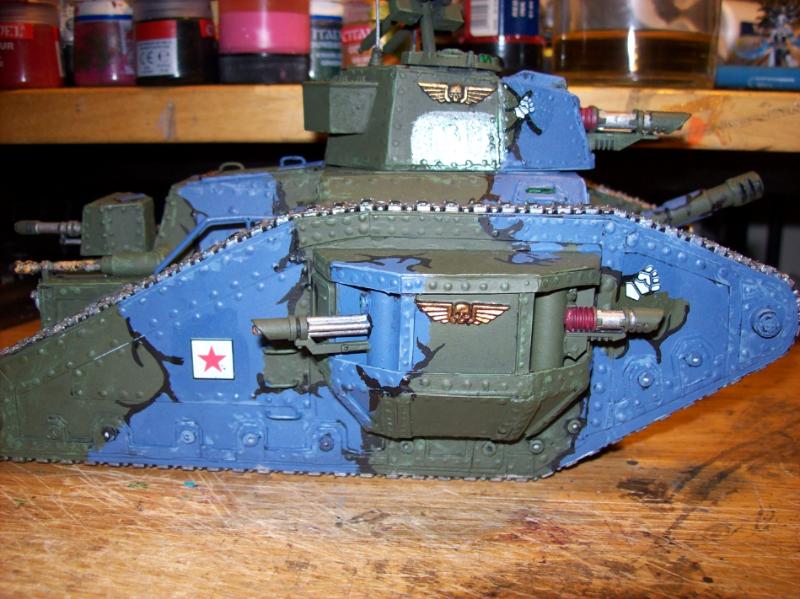
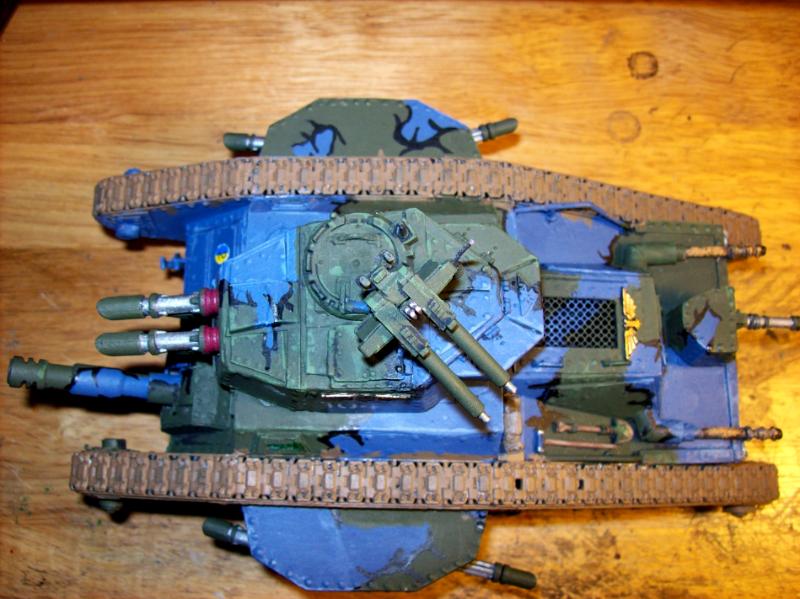
And there we go, just have one more OC to dirty up and that is the pristine looking Claymore.
if i got that right, the second wash helped bring along a mile the muddy look! after the claymore there might be the need for a new armyshot? at "least" the motorized part^^
Viktor von Domm wrote:if i got that right, the second wash helped bring along a mile the muddy look! after the claymore there might be the need for a new armyshot? at "least" the motorized part^^
Hmmm, the OC models all together, interesting, I am about out of the mud color I use, so I may be stalled on the Claymore until I can get more. I could also pose the fully dirty Chimera and Perun with them, and the "Mazurka"
Hmm, I've been following the progress of this lot for a while, and I love seeing all the Old Crow vehicles you've done.
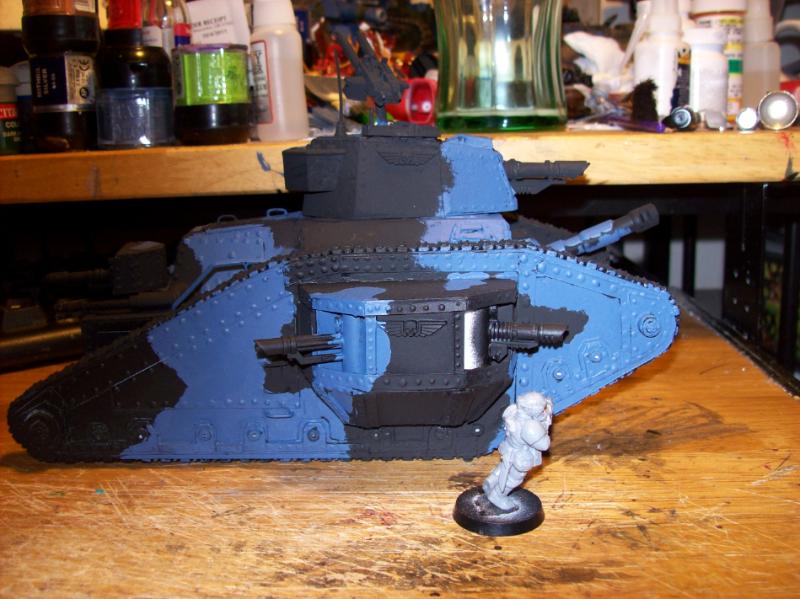
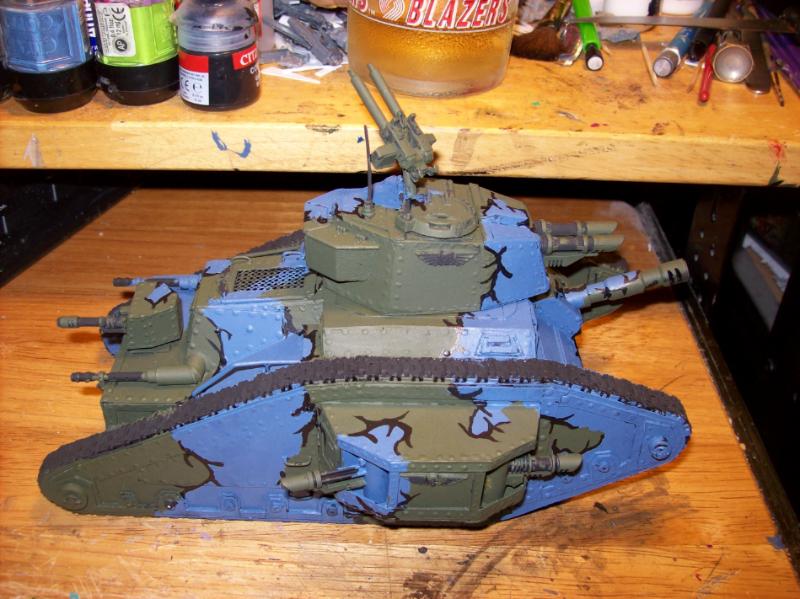
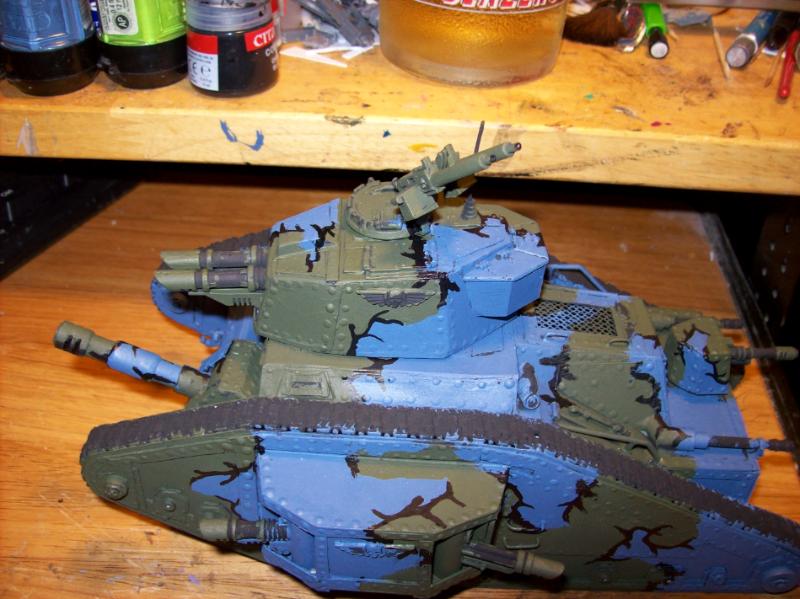
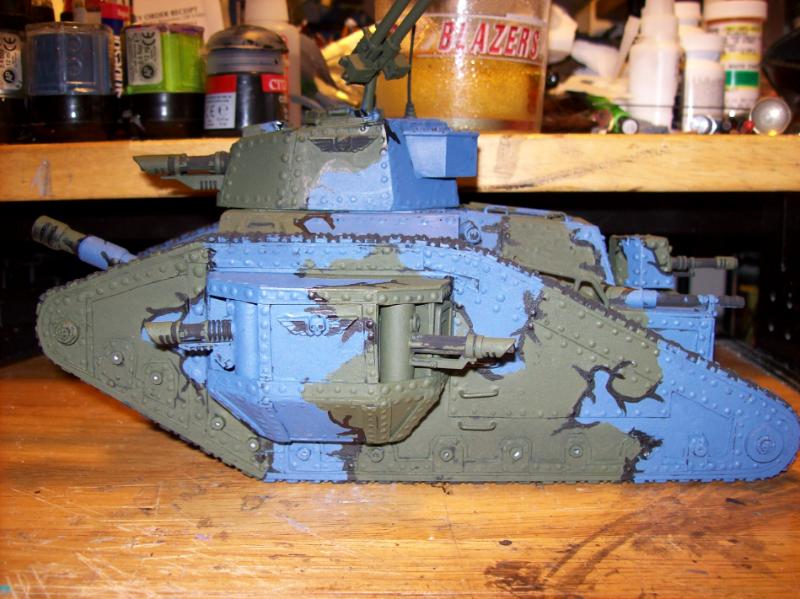
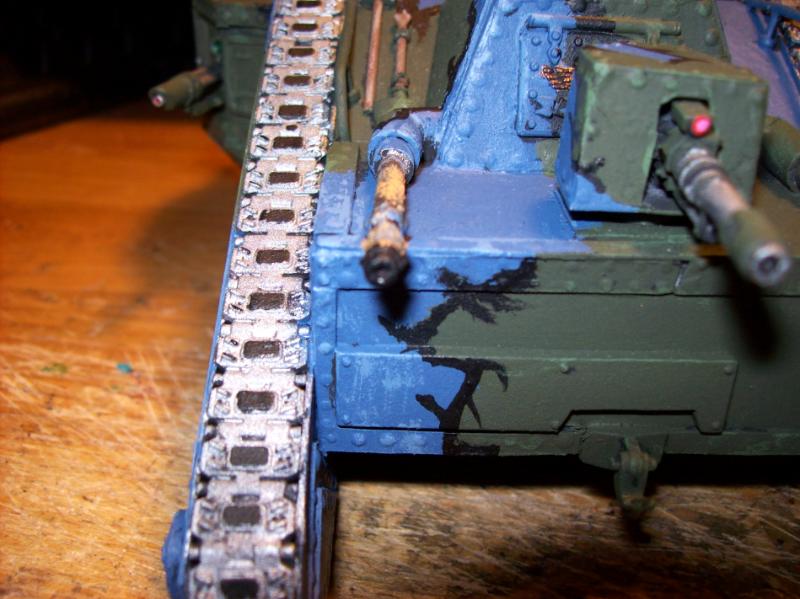
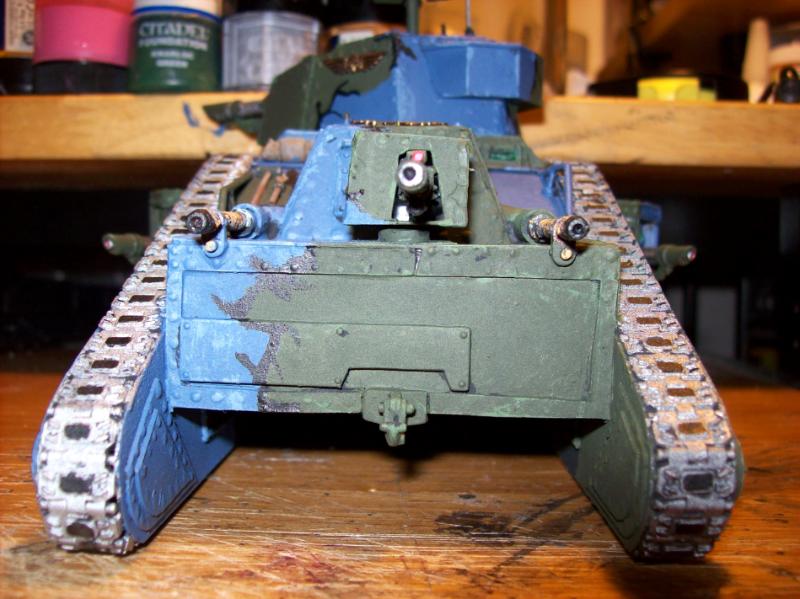
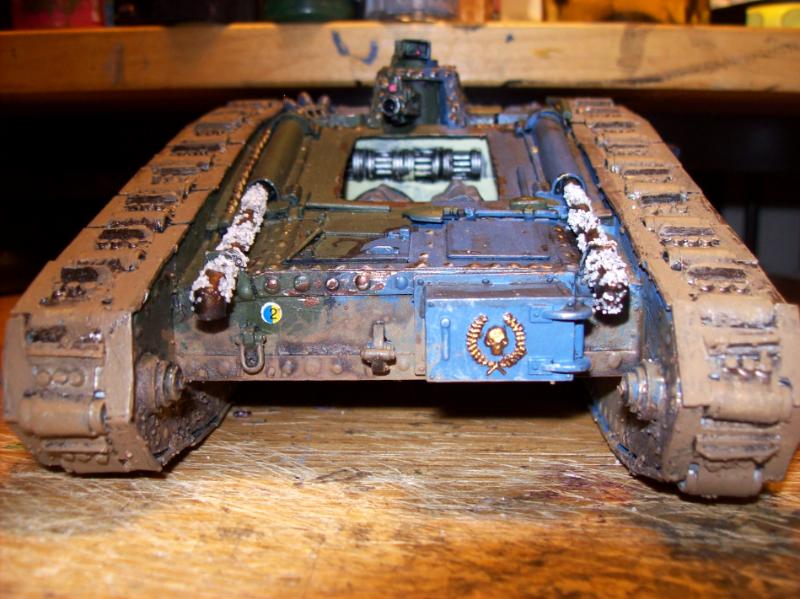
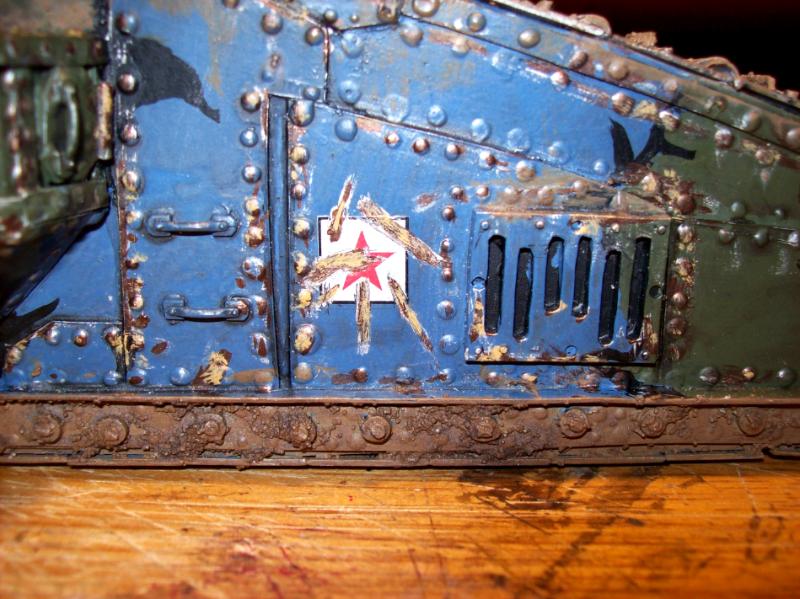
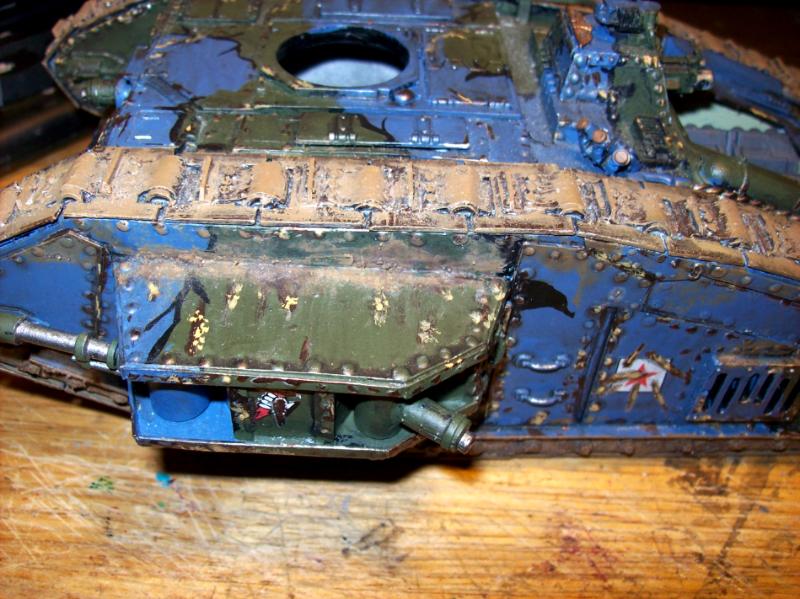
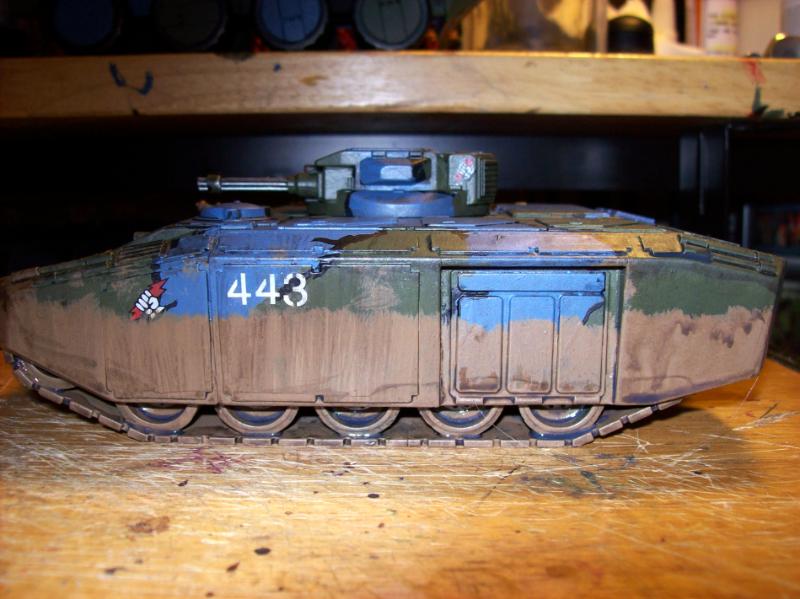
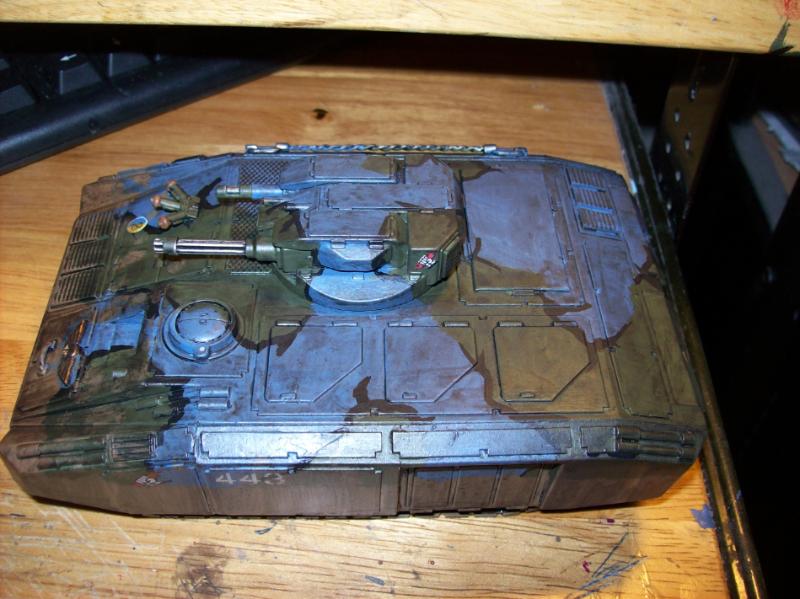
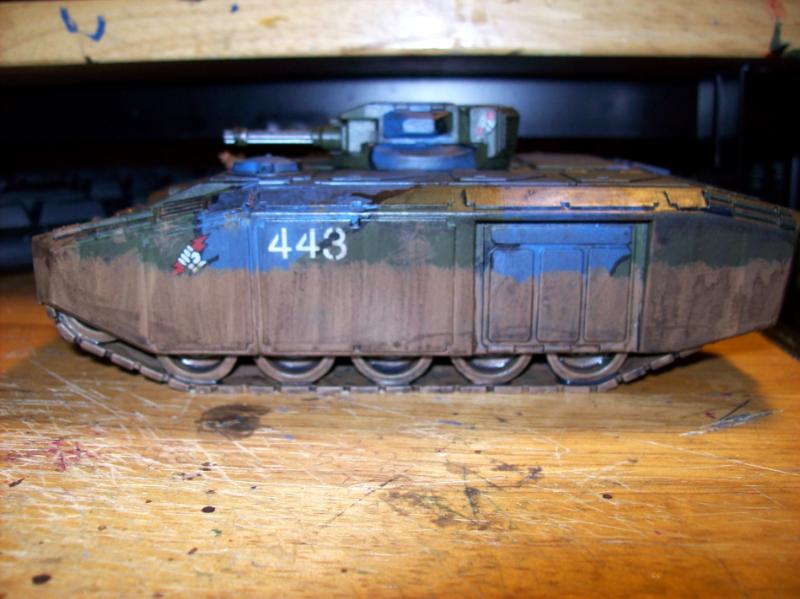
However, in this case, I think you may have gone a bit overboard with the mud paint on the sides. It appears that the mud is more of a paint than a muddyness . Perhaps for future vehicles, consider buiding up the mud slowly with washes or drybrushes and letting a bit more of the vehicle show through . Lastly, a bit of texture via sand, silt, or whatever can add some muddiness to the look.
Here's an example of a less extreme muddying.
http://www.dakkadakka.com/gallery/181952-basilisk.html?m=2 The grit on the treads is just "sheetrock" brand paint texture. It's really cheap. You just glue some on, paint it the color you want, and then drybrush it for contrast.
These are only minor quibbles. Keep up the good work.
Viktor von Domm wrote:well i had the complete family shot in mind... blst no muddy paint anymore...? that is a blow...
Well, I have just enough to get a start on it.
Eilif wrote:Hmm, I've been following the progress of this lot for a while, and I love seeing all the Old Crow vehicles you've done.
However, in this case, I think you may have gone a bit overboard with the mud paint on the sides. It appears that the mud is more of a paint than a muddyness . Perhaps for future vehicles, consider buiding up the mud slowly with washes or drybrushes and letting a bit more of the vehicle show through . Lastly, a bit of texture via sand, silt, or whatever can add some muddiness to the look.
Here's an example of a less extreme muddying.
http://www.dakkadakka.com/gallery/181952-basilisk.html?m=2 The grit on the treads is just "sheetrock" brand paint texture. It's really cheap. You just glue some on, paint it the color you want, and then drybrush it for contrast.
These are only minor quibbles. Keep up the good work.
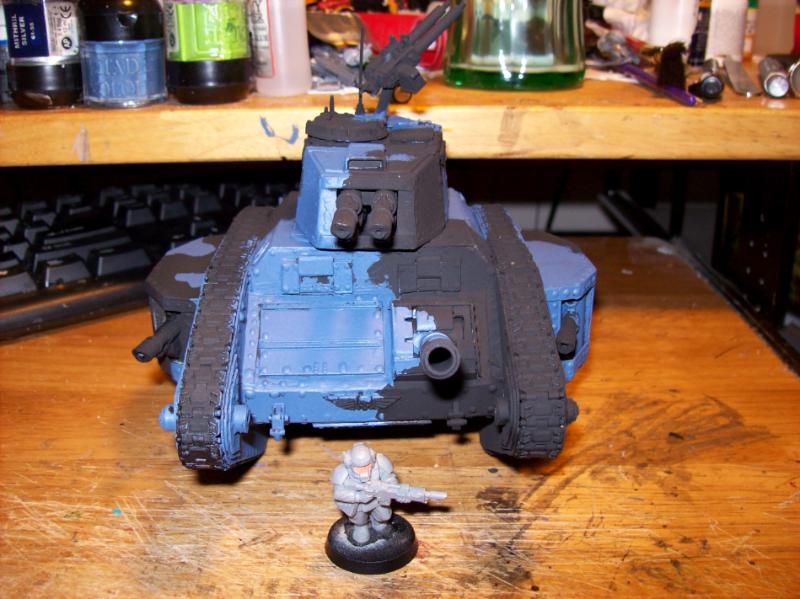
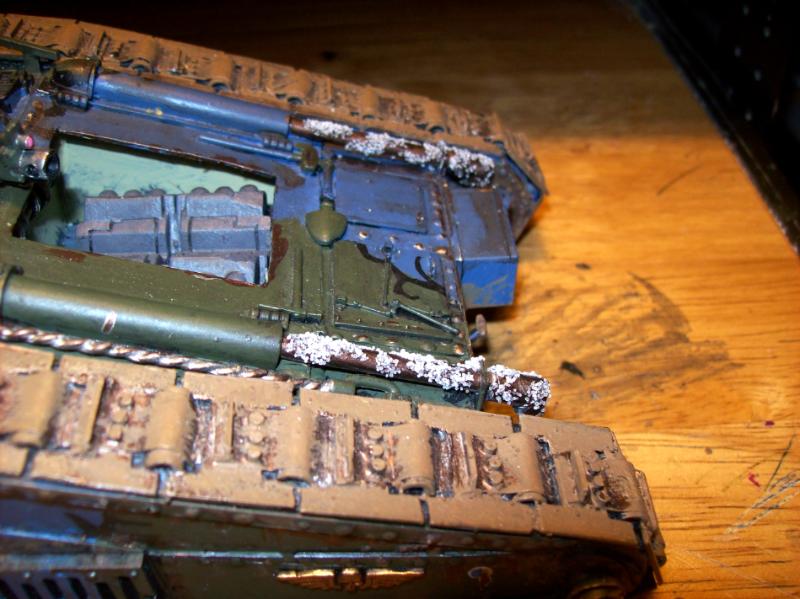
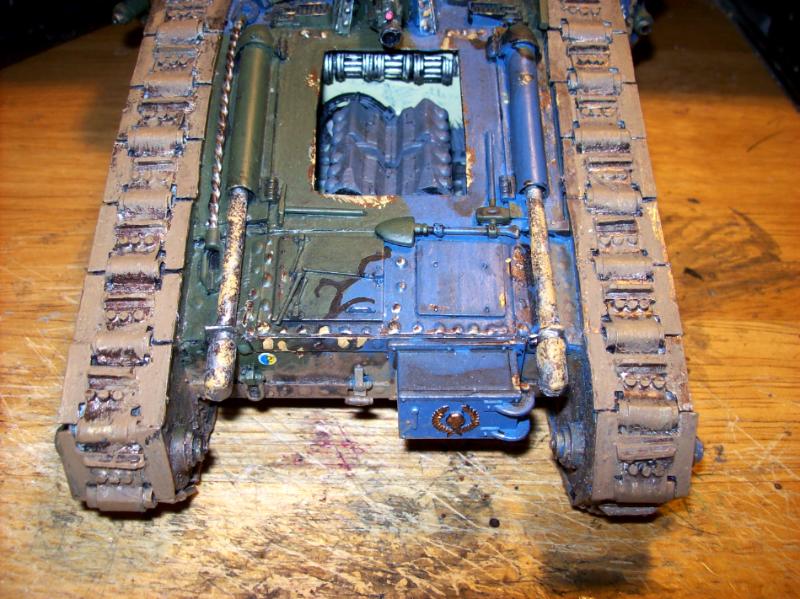
Oh no worries, as Vik will tell you, I do respond to feedback, the look I went for here is similar to what can happen to vehicles if they hit certain kinds of sticky-gooey, yet watered down clay like mud like I found in Germany and even had some pics posted from such a muddying. it winds up looking as if the vehicles got a new coat of paint all over some of them and since it came from a river or stream that got churned up, the stuff had little grit to it, very smooth stuff
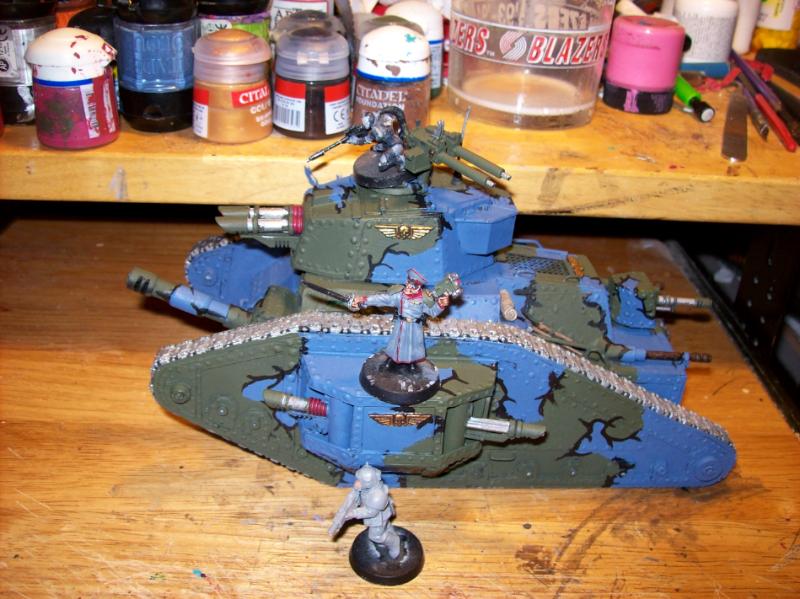
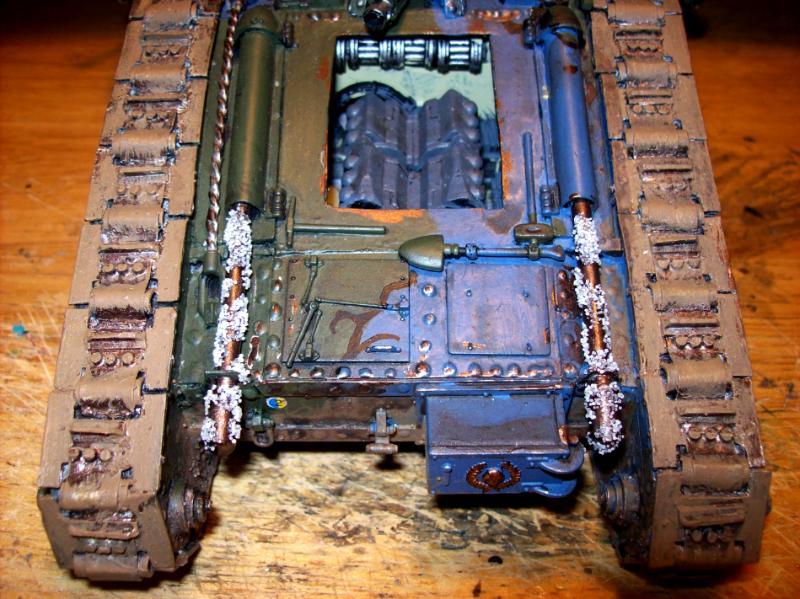
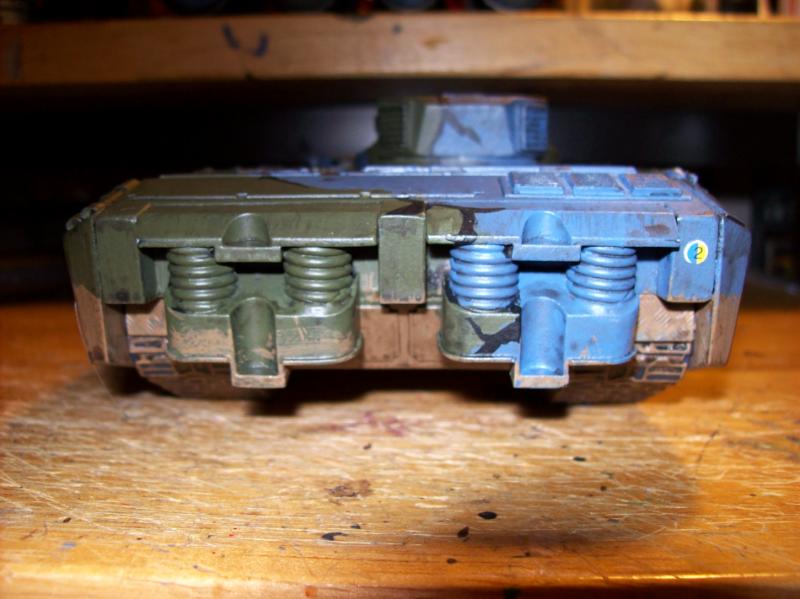
Now my Perun is a true earthen mud mover as I used salt crystals in my paint to smulate pebbles and small stones of more "No mans' Land" mud.
[/img]
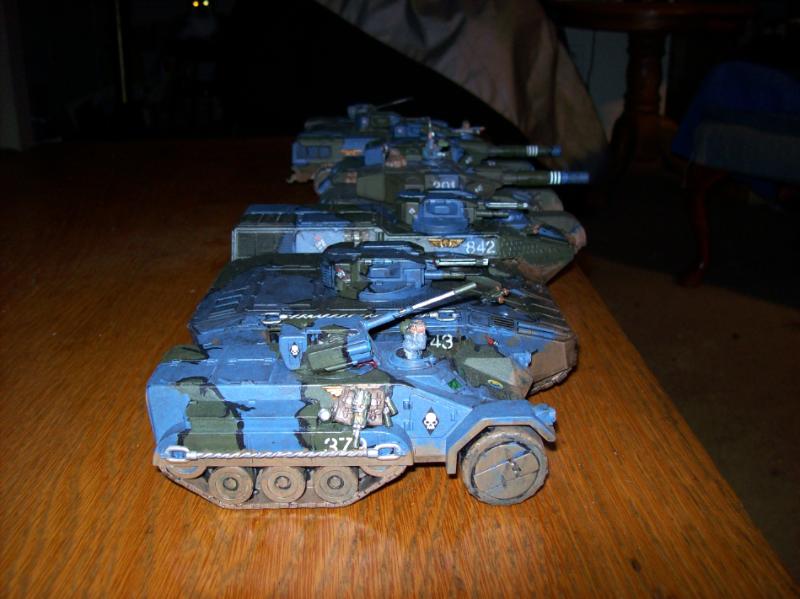
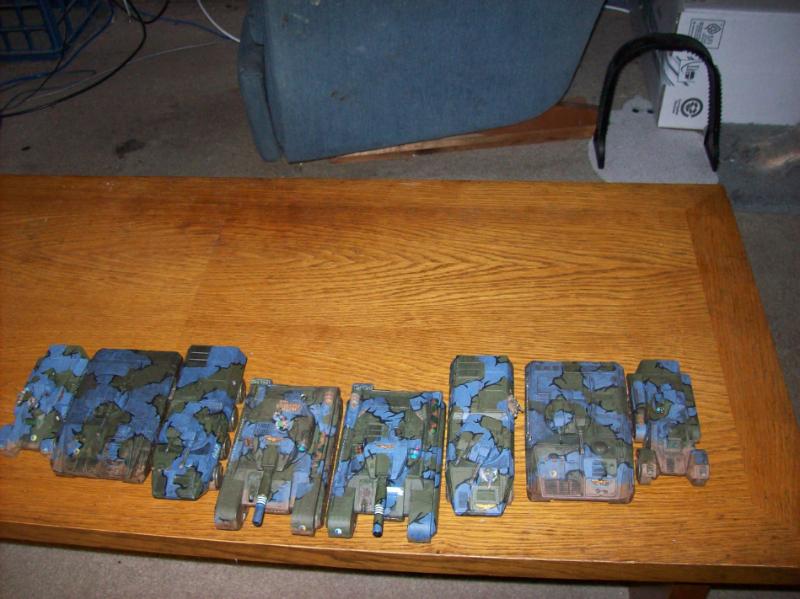
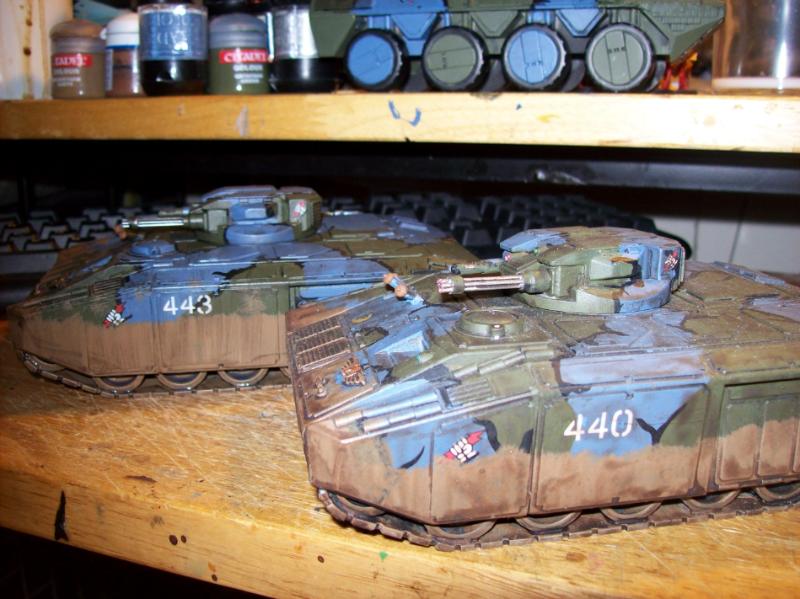
Hey Shazo , just catching up with your wonderful odd ball tank collection. The group shots of the the tanks on the previous pages are nice , its good to see them all together , its sometimes hard to make out the sizes of them individually .
I noticed several new editions since the last time i checked in . The claymores and those low profile tanks above all looking suitably dirty as is the the Perun matey. keep it up fella! its always good to see what else you have added to your armored legion. Oh and the potential new commissar is a must!
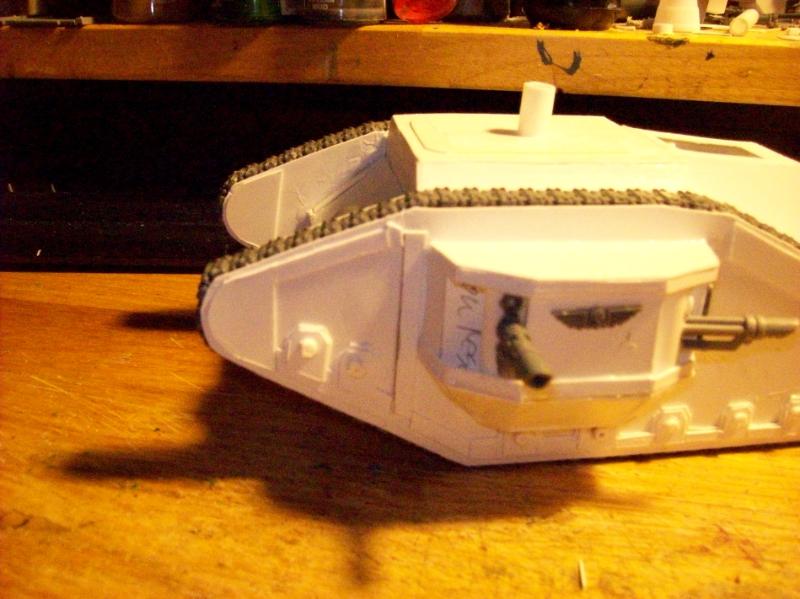
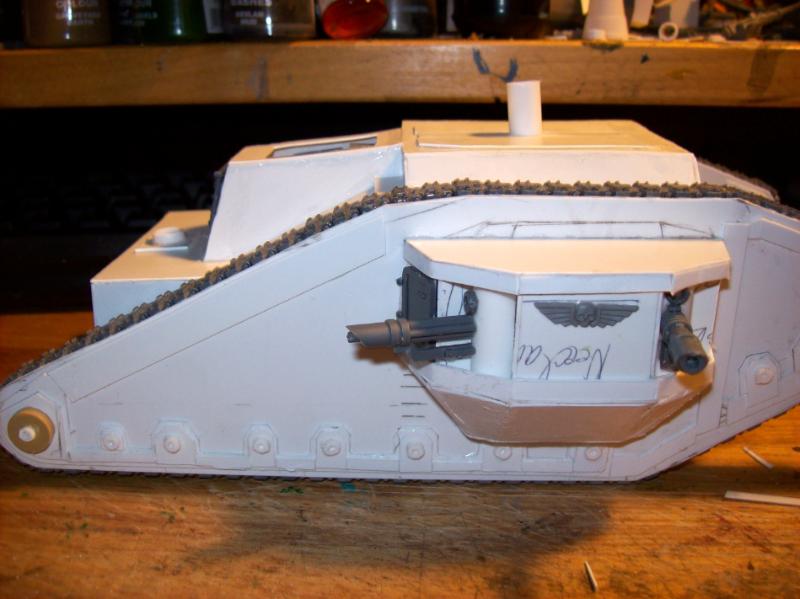
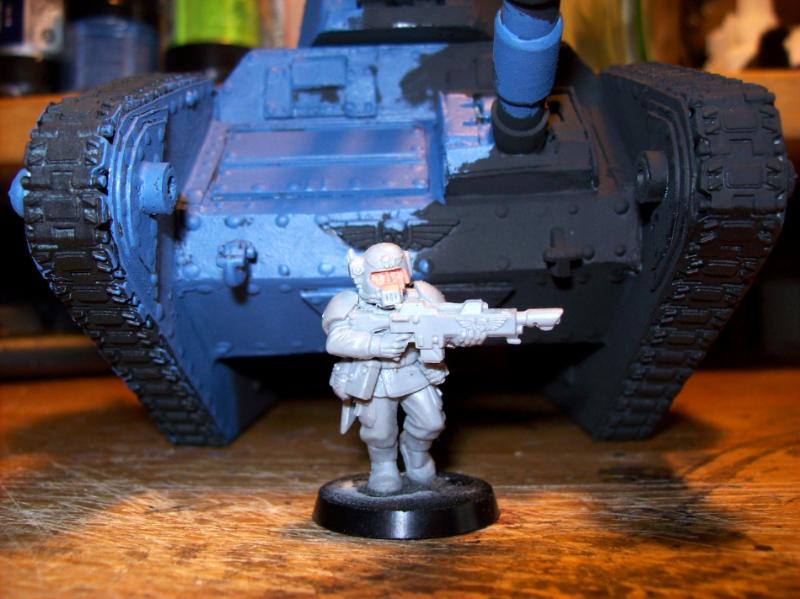
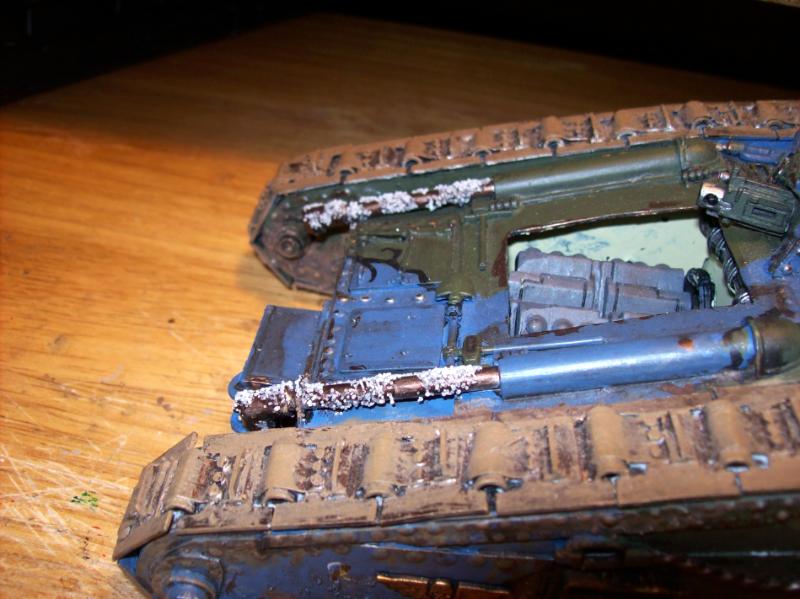
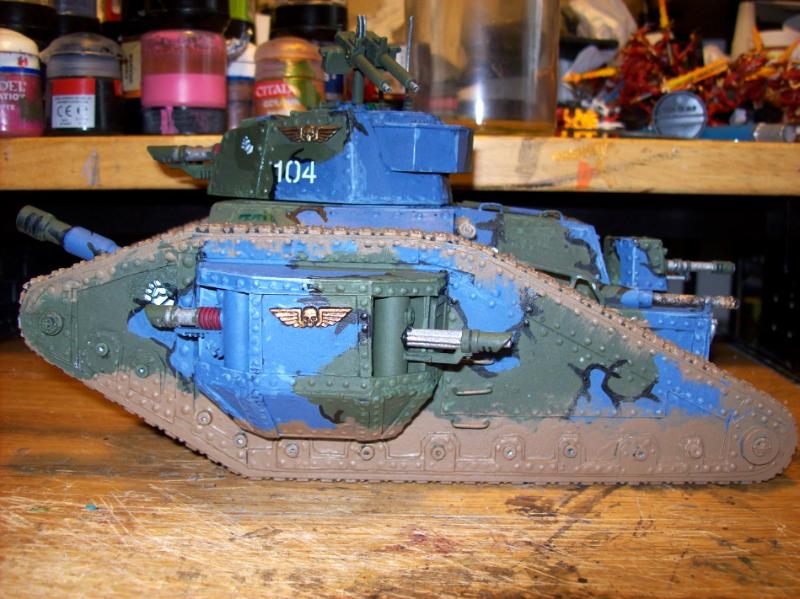
Yeah that older Claymore got the plain devlan mud wash, the second one got a wash of a mix a friend made, he gave me 2 washes, one that shows really dirty, and a weaker one for more subtle stuff.
ah ok, how did he make them? i tried myslf once and made a marmelade glass worth of some homebrewed stuff...cheap acrylic paint for wallpaint but i think the effect wasn´t that good...
Not sure, I would have to track him down and ask what he mixed and how much of each part of the liquids. He put them in squeeze bottles and added a bit of scrap sprue to help agitate the stuff when I shake the bottle as it does separate out when left standing.
sprue as a shakerhelper? now that is a nice idea... never thought about that... i use currently some bitz you use normally for cubboards to hold the boards inside on level...they are made of metal and in my white pot it corroded even... thought at first this wont happen... epic fail...but this idea i will try out^^
mixture would be nice, but then again if there are any exoitc liquids involved i probably wont have them at hand...
hey shasolenzabi, just a thought, add some sand or some basing grit to some glue and add that to your tanks on the undercarriage and throughout the brown paint. it will add some texture to your paint job.
just a thought, I like where you are going, I think that might help add some depth to it.
only constructive criticism, I mean no disrespect.
Rimmy wrote:hey shasolenzabi, just a thought, add some sand or some basing grit to some glue and add that to your tanks on the undercarriage and throughout the brown paint. it will add some texture to your paint job.
just a thought, I like where you are going, I think that might help add some depth to it.
only constructive criticism, I mean no disrespect.
Hi Rimmy, I have found salt works well for that idea.Mixed directly to the paint and it attaches to the model and the paint holds it on.
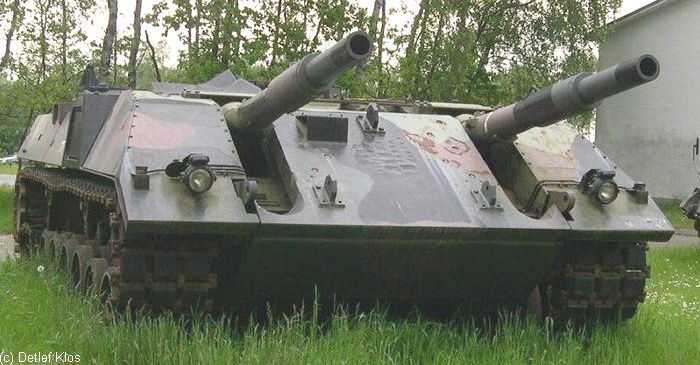
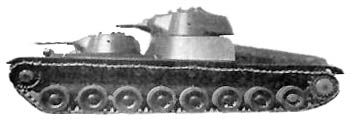
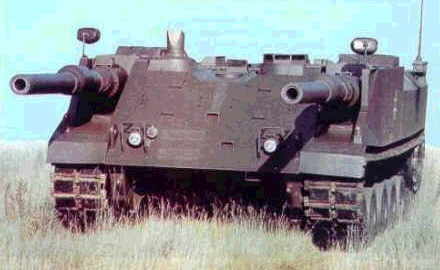
lol yep any target would be securly gone with such a hitter.... it was as i read built to be driving and shooting and the comp would compensate this early in the century the disturbances of the movements while tracking its enemy...holy...
no rotating turrut means you have to orient the tank to point directly at the target, the stabilize. (unless it has like a 5 or 10* slew I am unaware of)
not to mention shooting the main gun (or in this case guns) while driving is impossible, one of the many reasons the Abrhams is to powerful today actually.
and that low profile is very nice, but it also start making terrain a problem as the wheels have a lower incline point.
Well, it can make for a nice sniper tank, lying in wait for a target. But it was another Cold War Era machine. So many experiments in weaponry were tried.
what a menacing power of steel and sinews that put all they have into the fray for the emperor! tho i detect some fresh noobs among that battlegroup^^ seems you need another wash session^^
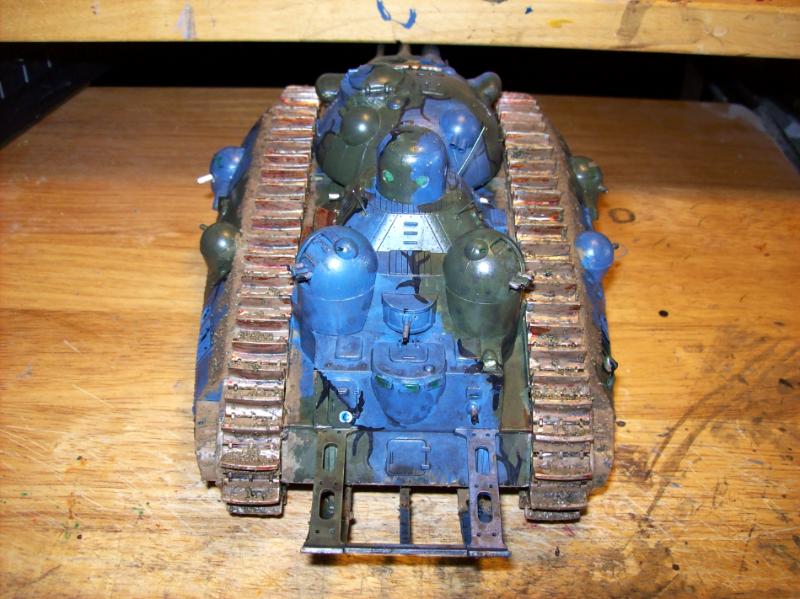
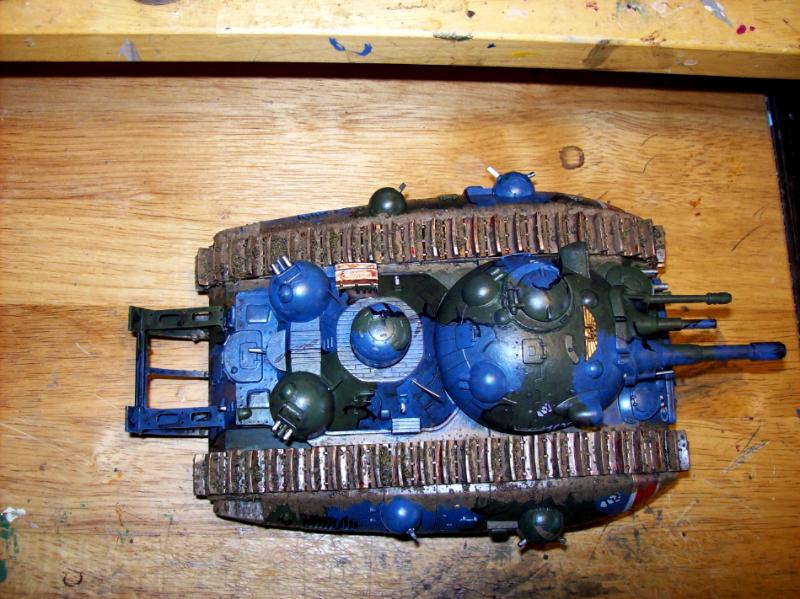
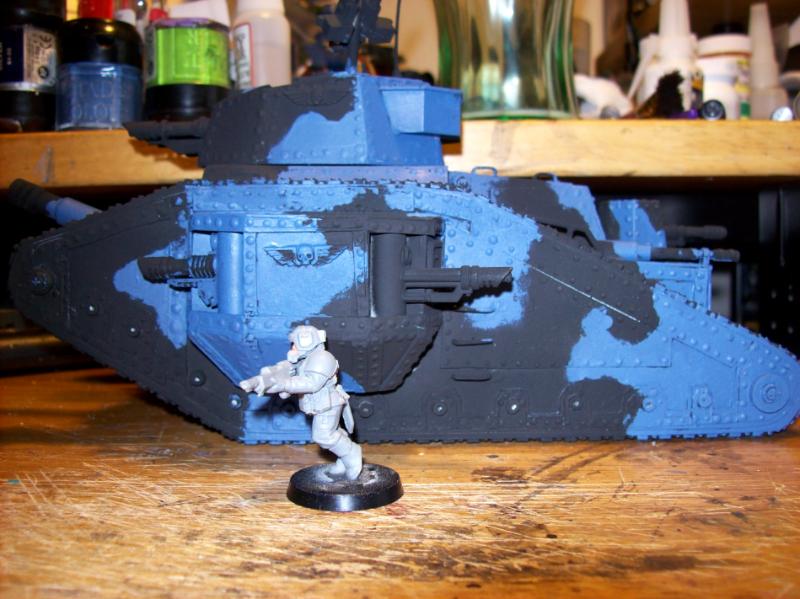
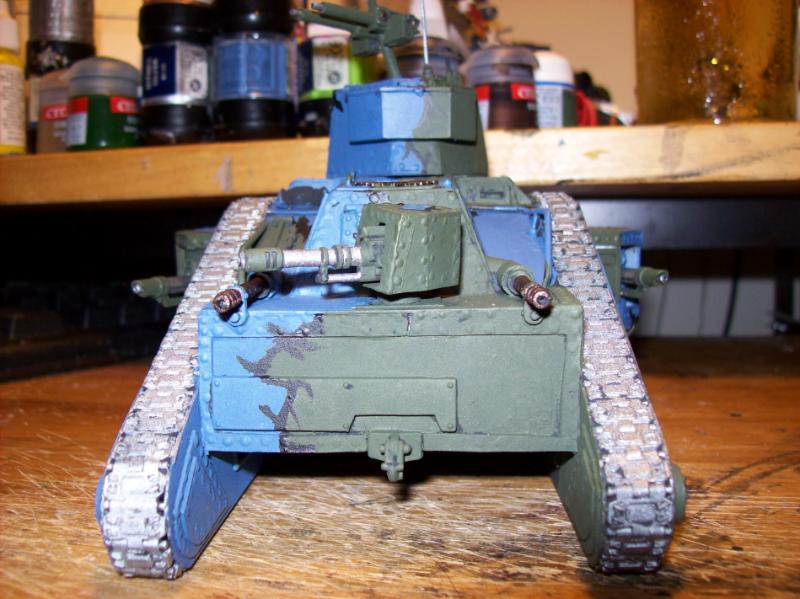
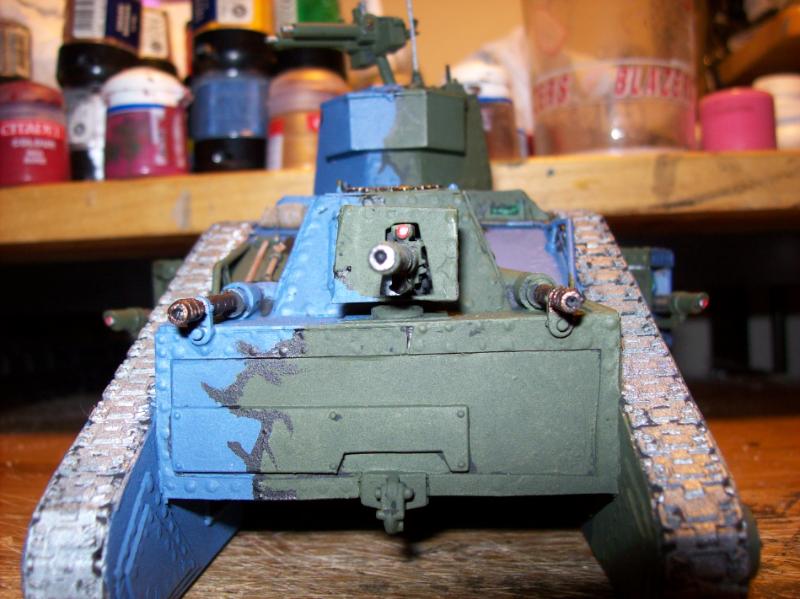
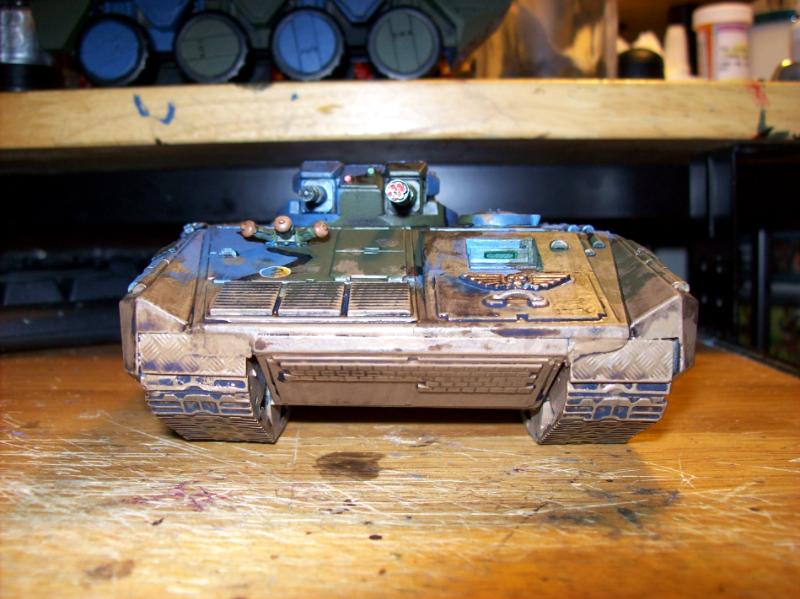
The camera does not show the wash effect on the plain Devlan Mud wash I used earlier, making them seem
clean
but I assure you, they are dirty tanks all!
lol... mean and dirty^^ i hope you feel a tad proud about your work my friend! by the way... i recently got hold of some heads and weapons and they are of a more russian and german setting... would you be interrested? if postage wouldn´t be to high i could send you them over to your foreign island^^
Viktor von Domm wrote:lol... mean and dirty^^ i hope you feel a tad proud about your work my friend! by the way... i recently got hold of some heads and weapons and they are of a more russian and german setting... would you be interrested? if postage wouldn´t be to high i could send you them over to your foreign island^^
Most interesting indeed! If it won;t kill your wallet that is.
Yes, proud I am of the OC tanks, all ready to go! now for the Lemans!
some serious assembly line production with the leman russ one would suspect... i will make a pic of said bitz and you can have a say if you´d be interrested... check that space in the night^^
Viktor von Domm wrote:some serious assembly line production with the leman russ one would suspect... i will make a pic of said bitz and you can have a say if you´d be interrested... check that space in the night^^
No worries Vik, I can see them anytime you post 'em! As for the Leman Russ Tanks, about 12 of them to get painted and such.AND the Baneblade/Malcador/Valdor/T-350/T-290 as well. And the half dozen Chimeras and three tractors for the Thudd-guns to paint!Plus the guns
Automatically Appended Next Post: Smeugal fan: Oh it would be odd all right. But named Preciousss!
No worries Vik, I can see them anytime you post 'em! As for the Leman Russ Tanks, about 12 of them to get painted and such.AND the Baneblade/Malcador/Valdor/T-350/T-290 as well. And the half dozen Chimeras and three tractors for the Thudd-guns to paint!Plus the guns
seems i have to bookmark your threads for eternity^^
LOL! the real challenge for the Malcador is that the treads are all individual pieces and allow the model to literally roll across the table if pushed right.
somehow i get the feeling that this vid is an add for lingery rather than tanktreads...or am i a pervert???
tho i have to say this is a brilliant system...have to do some research now...damn...
yep, remember that version of your malcador fondly^^
12 man crew in that beast of steel... might get a bit whiffy in there in no short order^^
the two engine system seems quite sensible when you think about it... in combat situation this would give you a second chance to be at least a moving target after the first hit...like to hearts in your chest...
hello shaso! i had now the time to make a pic of the promised bitz... here it is...
some of them have the more german related "schiffchen" cap...but then there are fur caps and even gasmaksed helmeted heads of a ?russsian? persuasion...
and some guns^^
Viktor von Domm wrote:hello shaso! i had now the time to make a pic of the promised bitz... here it is...
some of them have the more german related "schiffchen" cap...but then there are fur caps and even gasmaksed helmeted heads of a ?russsian? persuasion...
and some guns^^
well she certainly has too obvious reasons for being tempted to make a purchase on her...a sword AND a boltgun with a drum mag...not what you were thinking^^
by the way went to try to post a smallish pakage only to get some bureaucrats rambling about package size...will have to repack it into a fiting size and then send it today for definite... by the way giving the transfertime from me to you, will you still be staying were you then rightfully belong or will you be on travel?
Viktor von Domm wrote:lol...hypnotizing commssar^^
by the way went to try to post a smallish pakage only to get some bureaucrats rambling about package size...will have to repack it into a fiting size and then send it today for definite... by the way giving the transfertime from me to you, will you still be staying were you then rightfully belong or will you be on travel?
yeah looked at her price and her accessories, not bad for the price.
Viktor von Domm wrote:lol...that was mean^^ but not when you have powerblobs with meltas and plasma... then you choke on them^^
I was speaking from the experience of having lost a 30-man platoon as they were assaulted by Marines in HtH combat as opposed to shooting. The problem when you fight wearing no better than a flak jacket with a knife while you face down power armor wearing foes. A smart commander just has to know how to take advantage of such a loss when it happens by the right positioning of the other troops in his command!
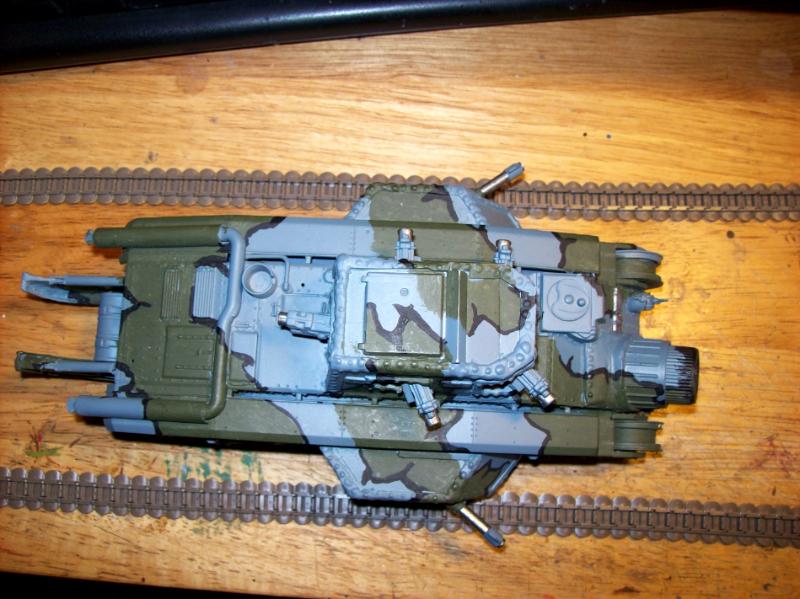
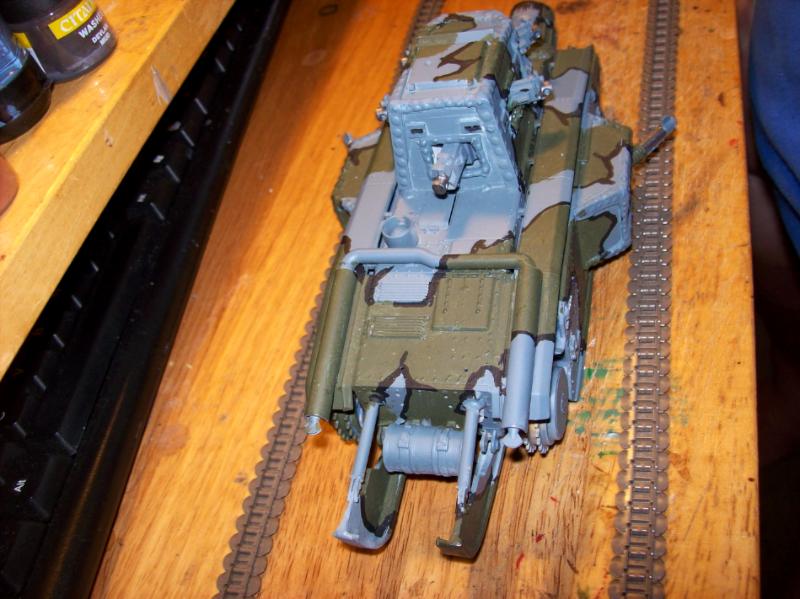
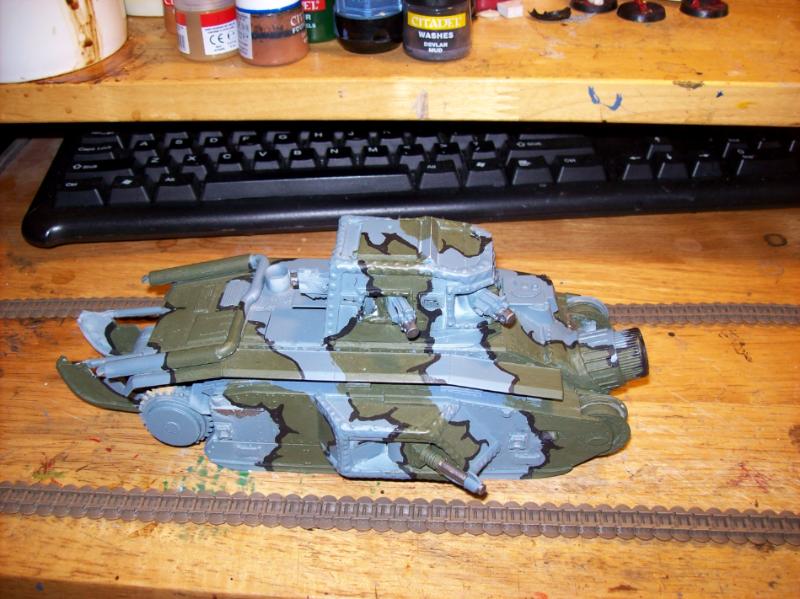
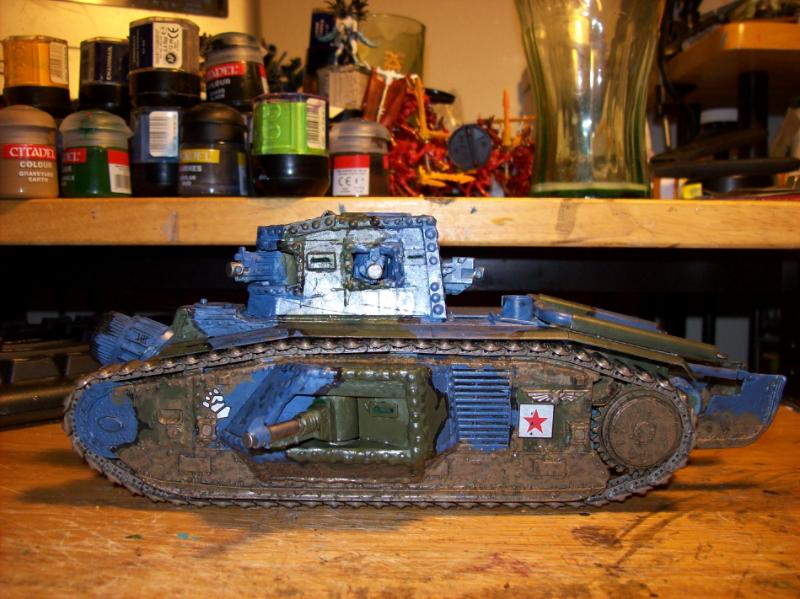
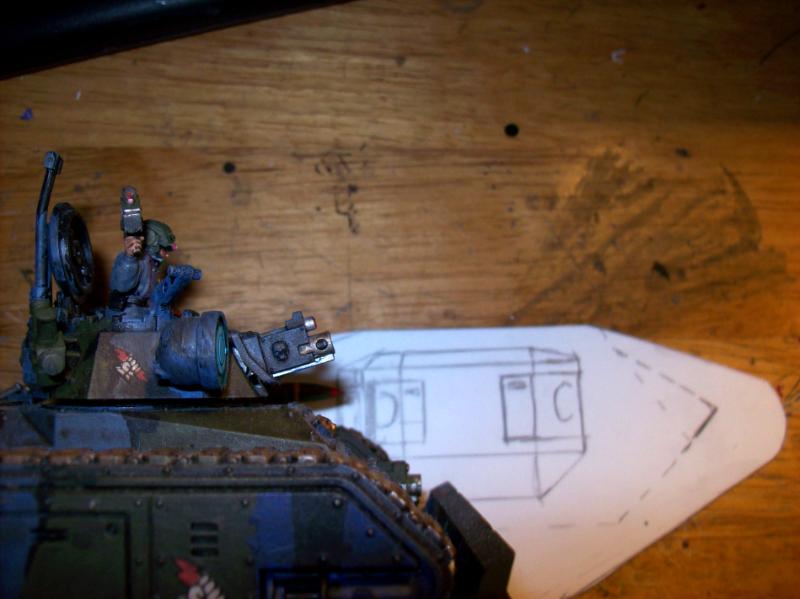
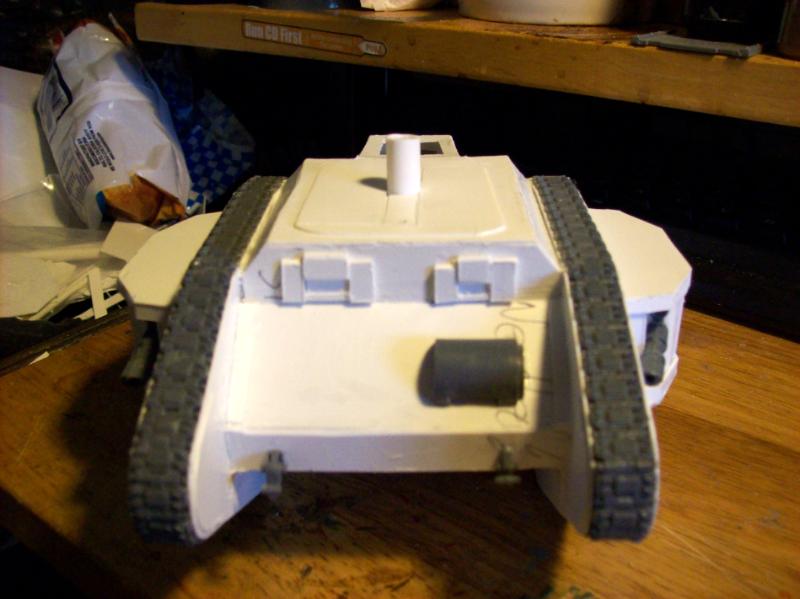
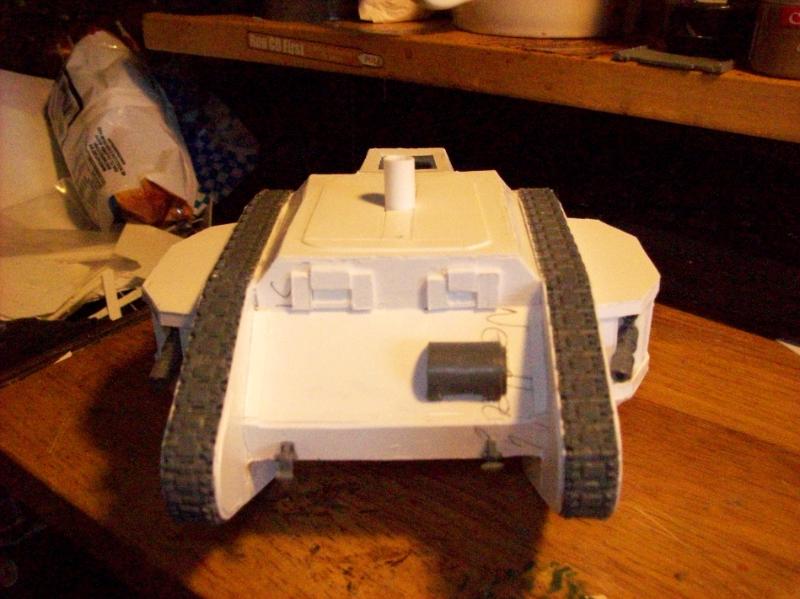
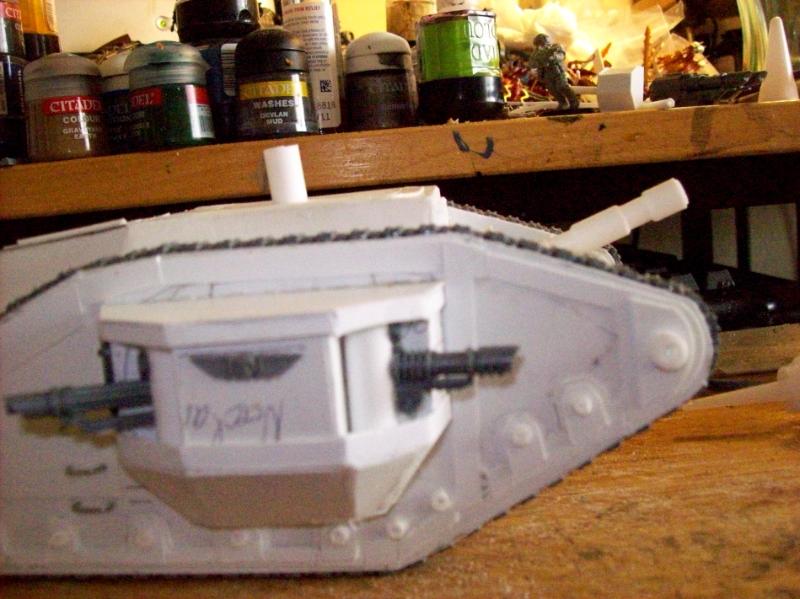
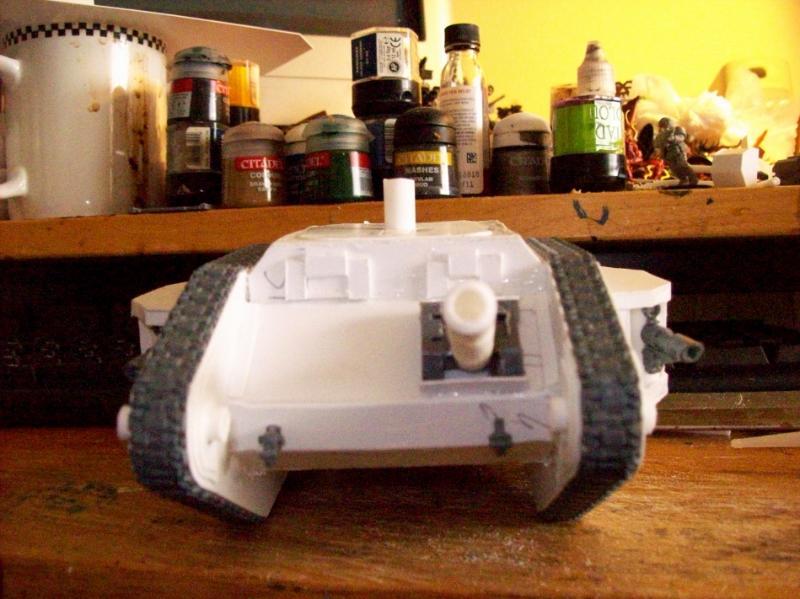
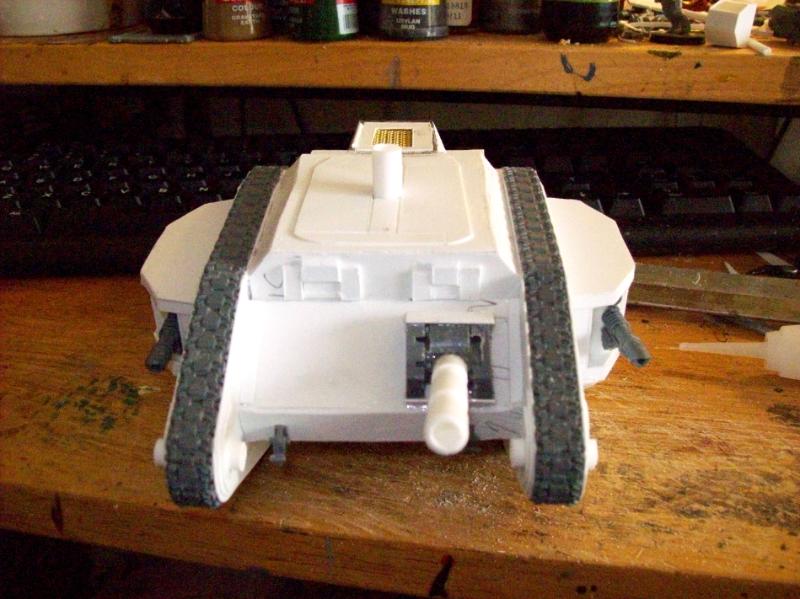
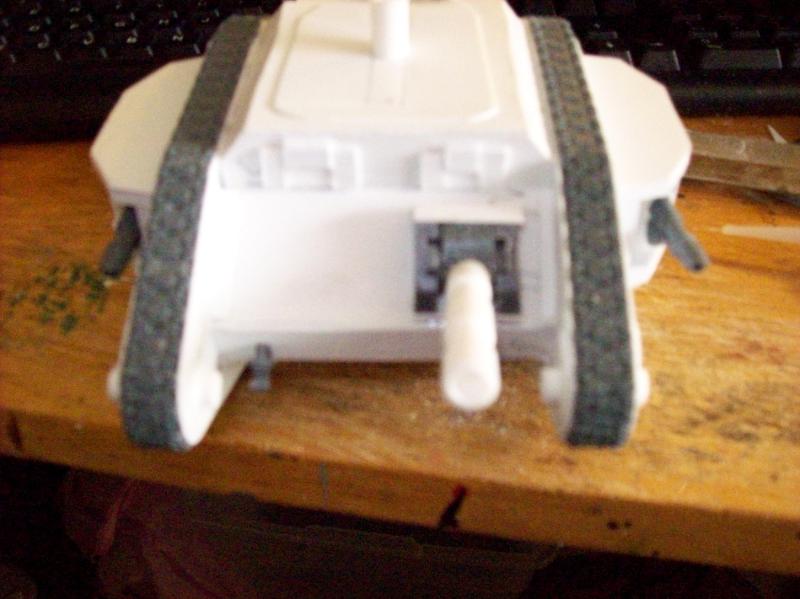
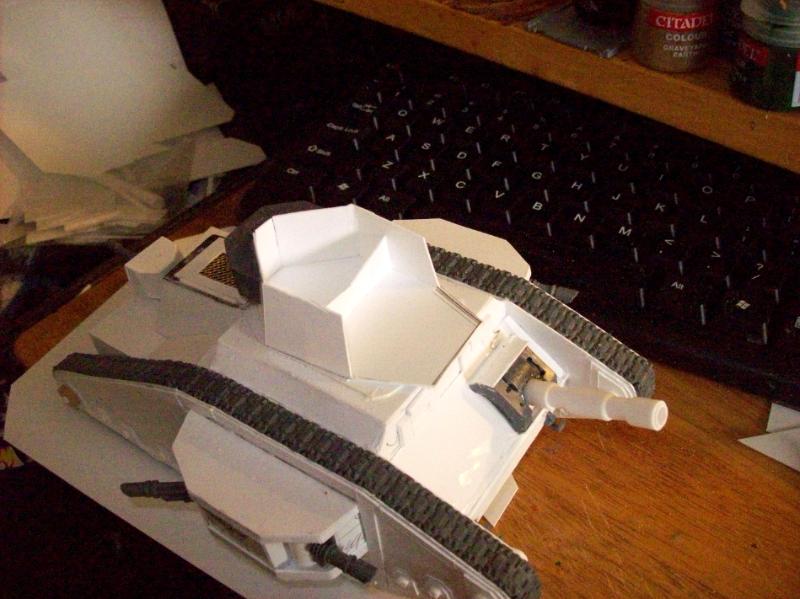
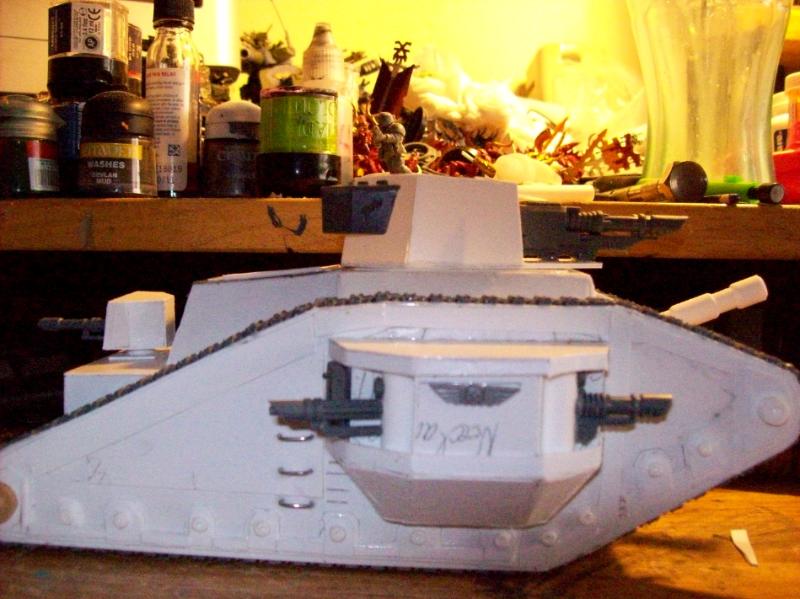
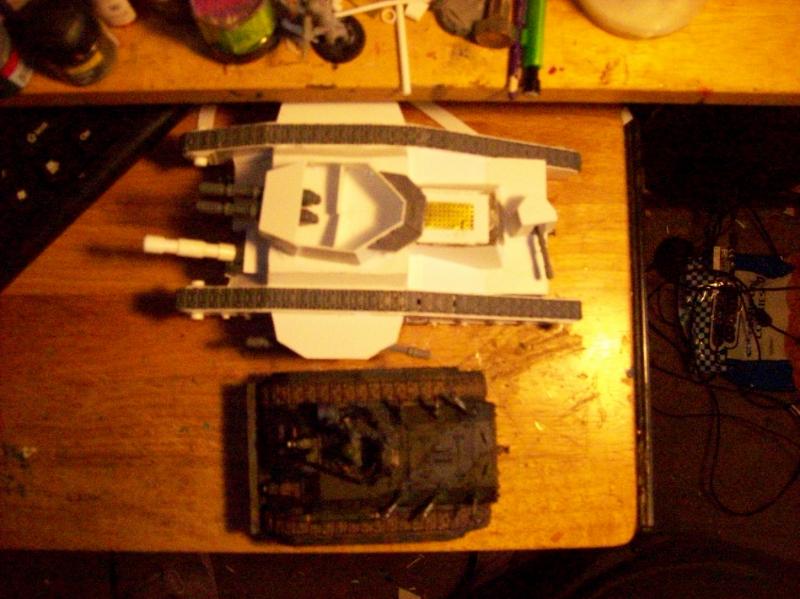
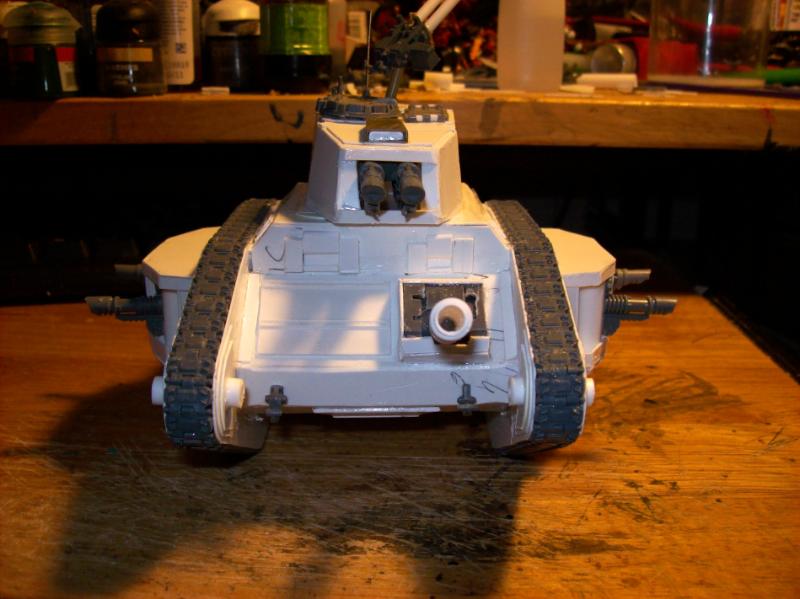
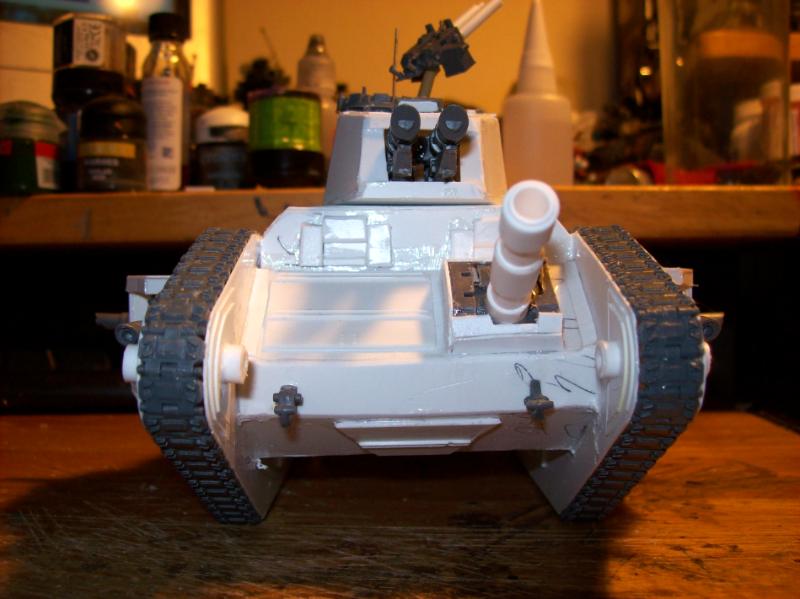
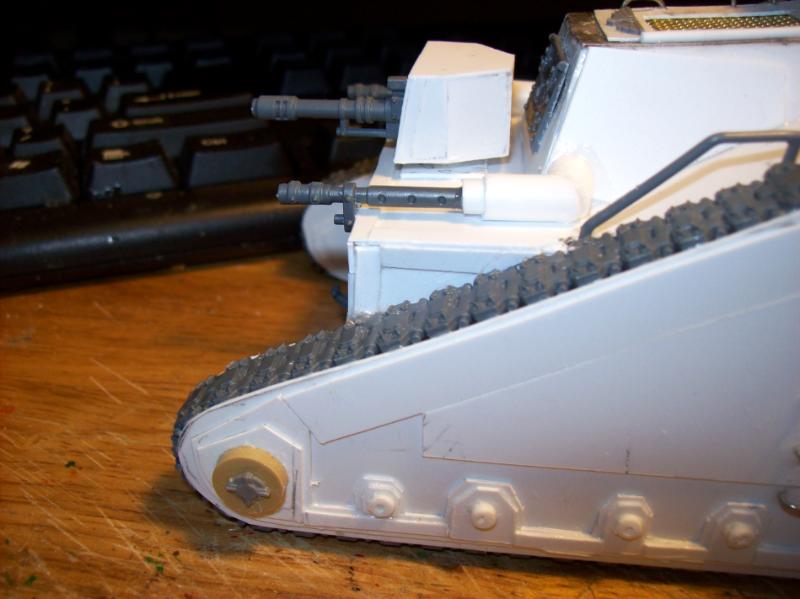
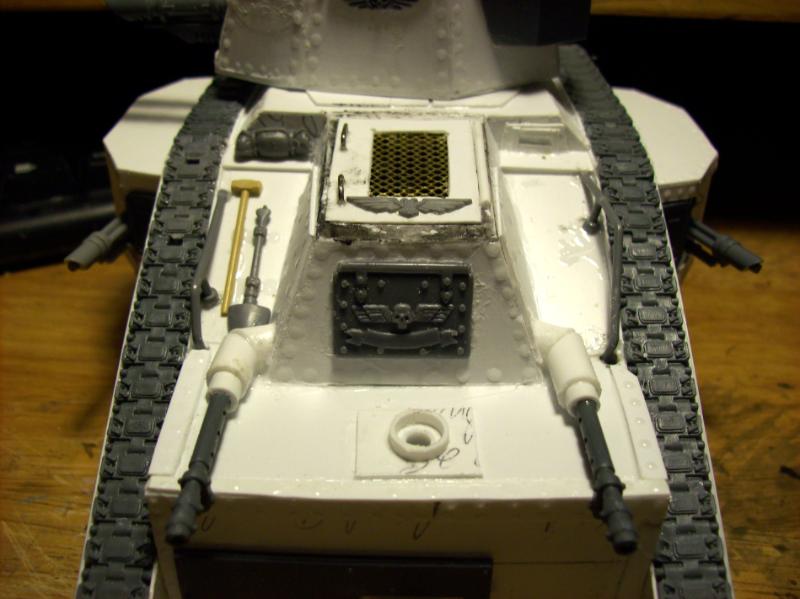
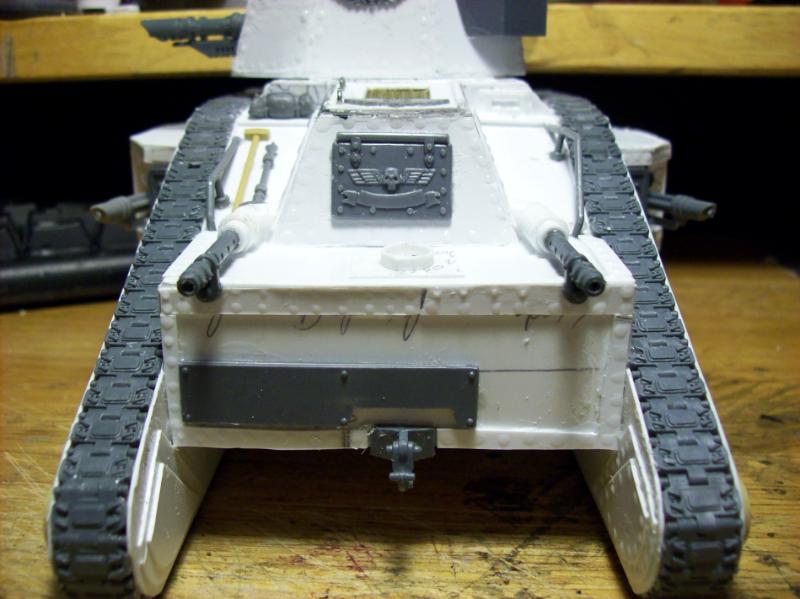
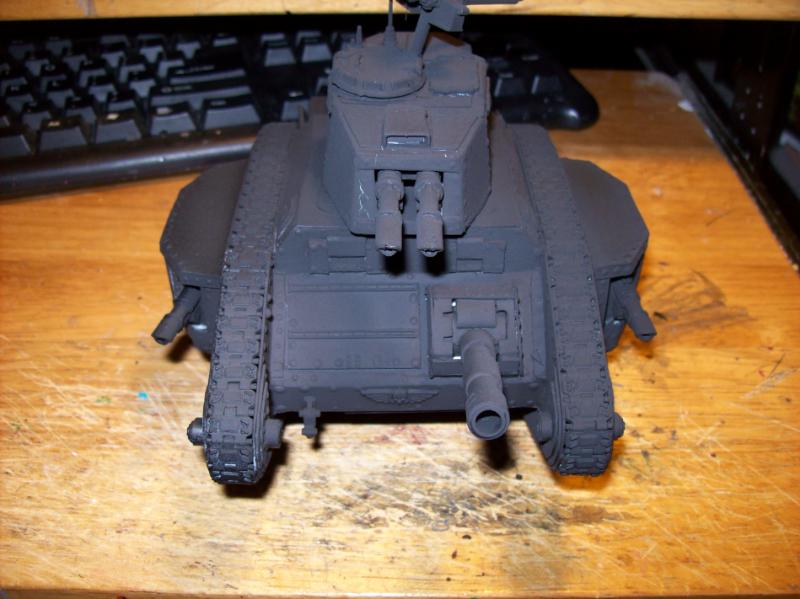
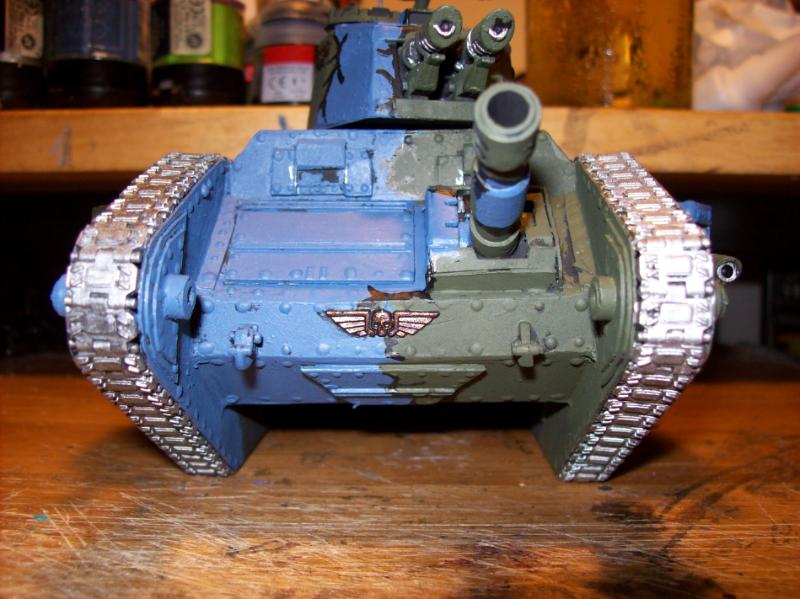
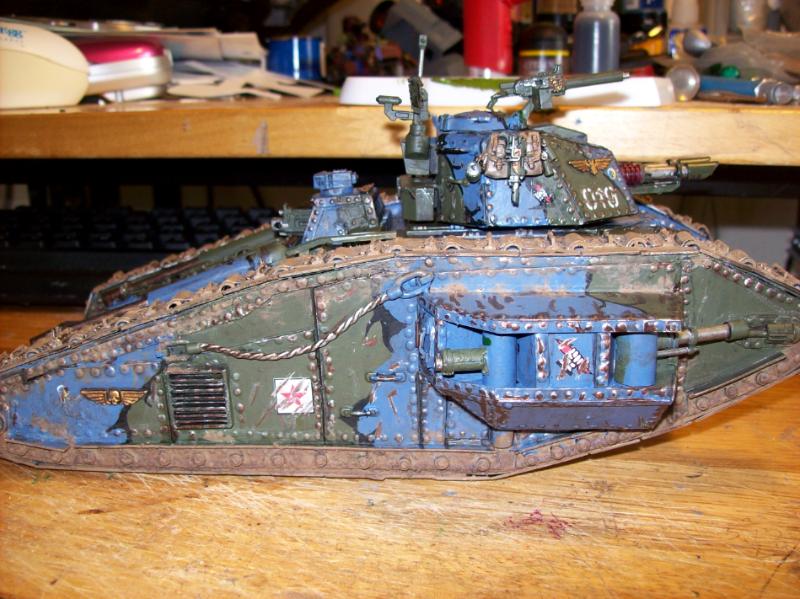
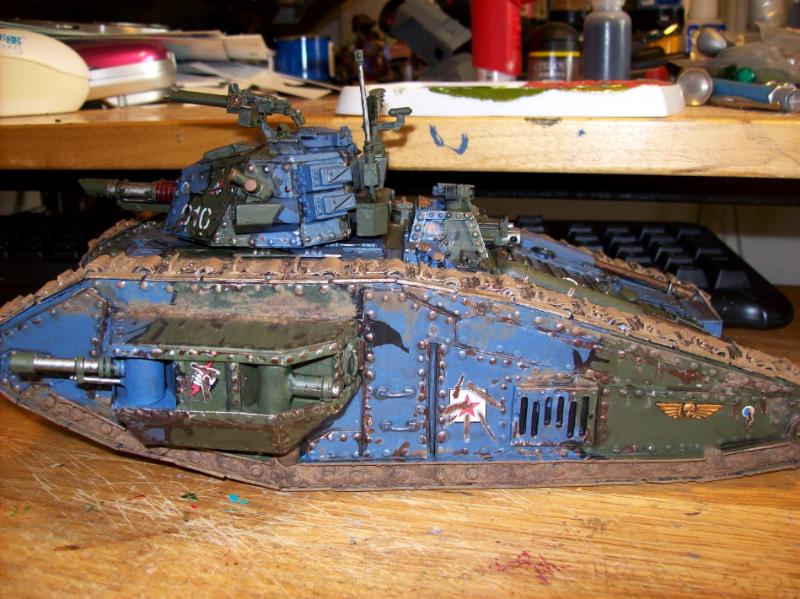
Well, dug out the Malcador(Char-B1) and removed the tracks for the fresh, re-touch of shadow gray, it was spray painted in that color, but for some reason that came out pale and very more gray than shadow gray. Anyway, I am now going to make a stab at touching up all those unpainted areas, the tracks, and decal work before I use the salt infused Graveyard Earth for the mud effects. This was one of my first Major conversion projects, as many have seen with the Perun scratch built tank, my skills have improved since this Malcador.
Anyway, the pre-paint pics before I had to re-charge my camera batteries.
[/img]
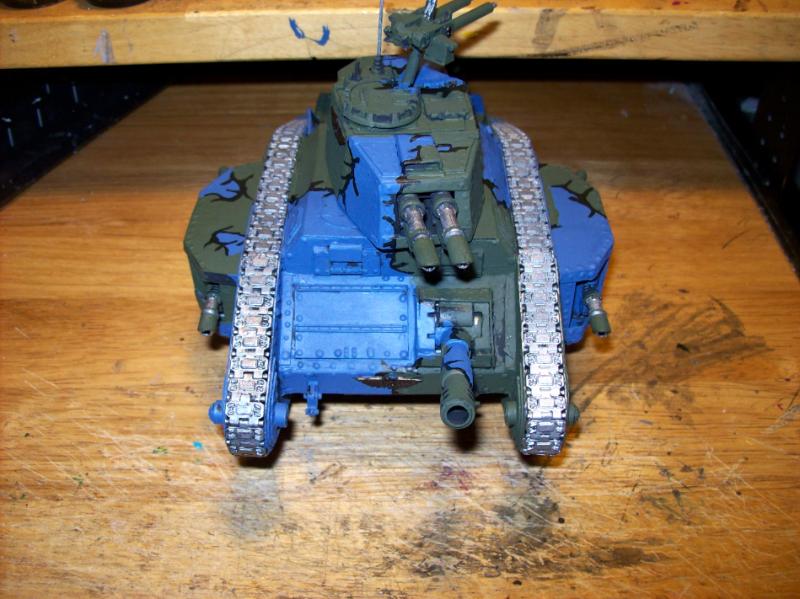
If you thought that was hot before, you should say something, and I will unveil the finished piece!
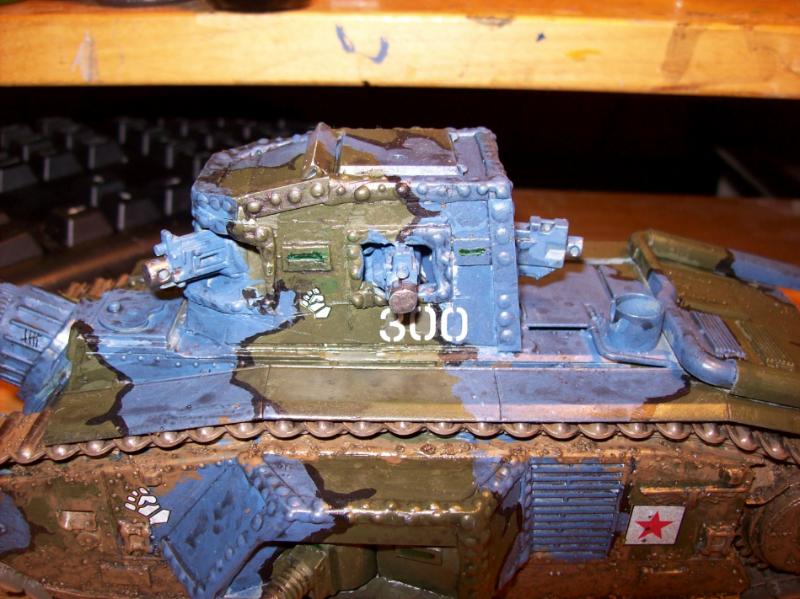
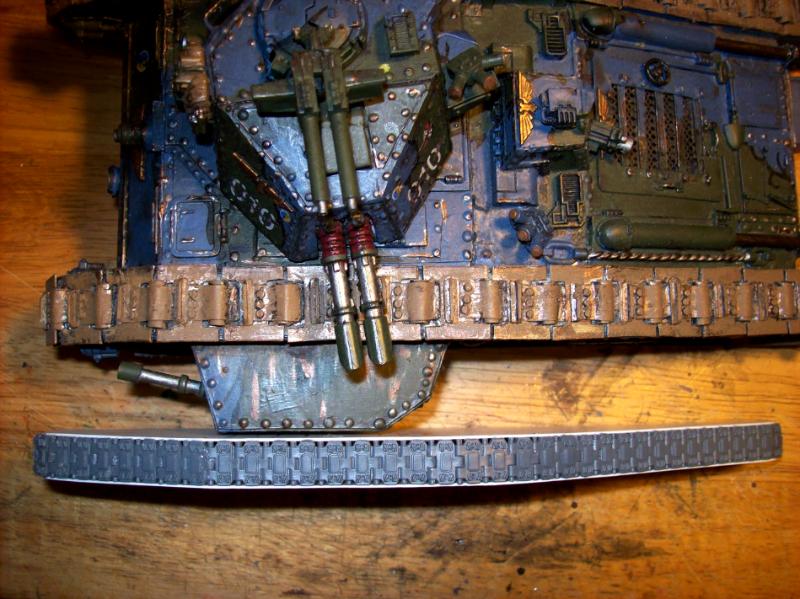
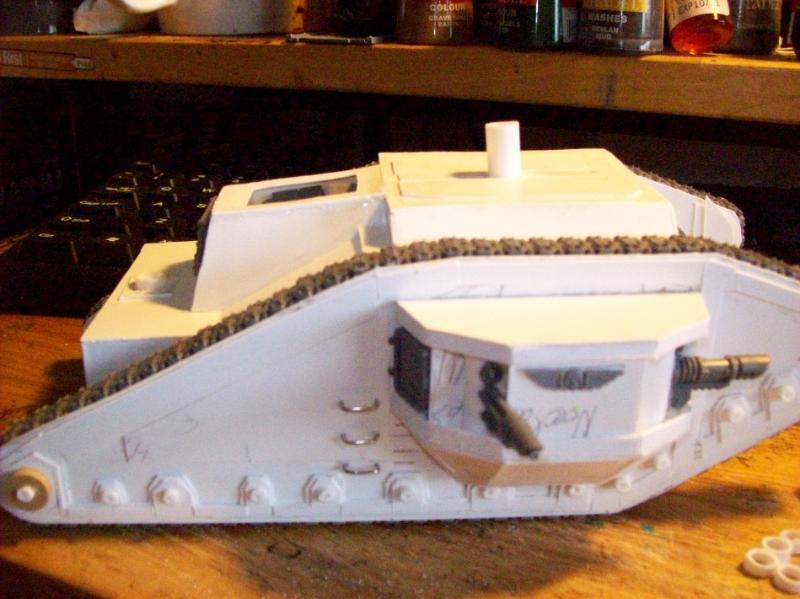
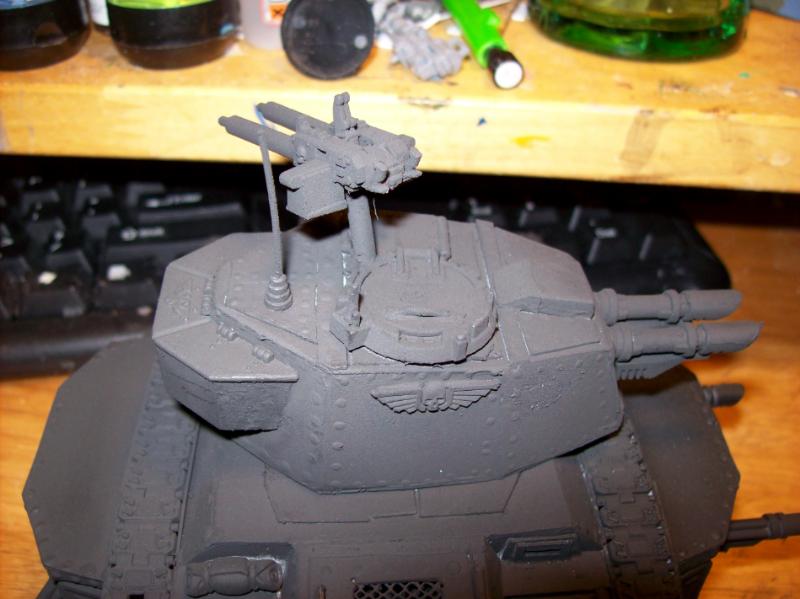
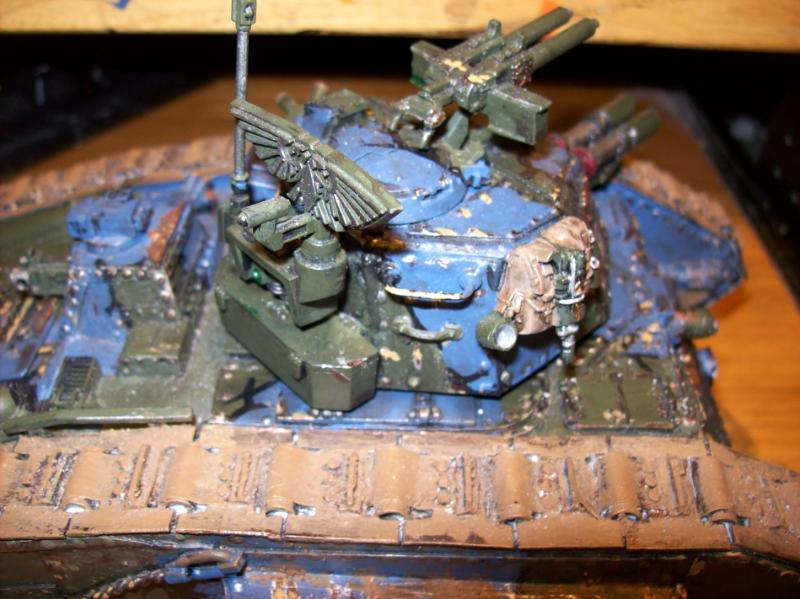
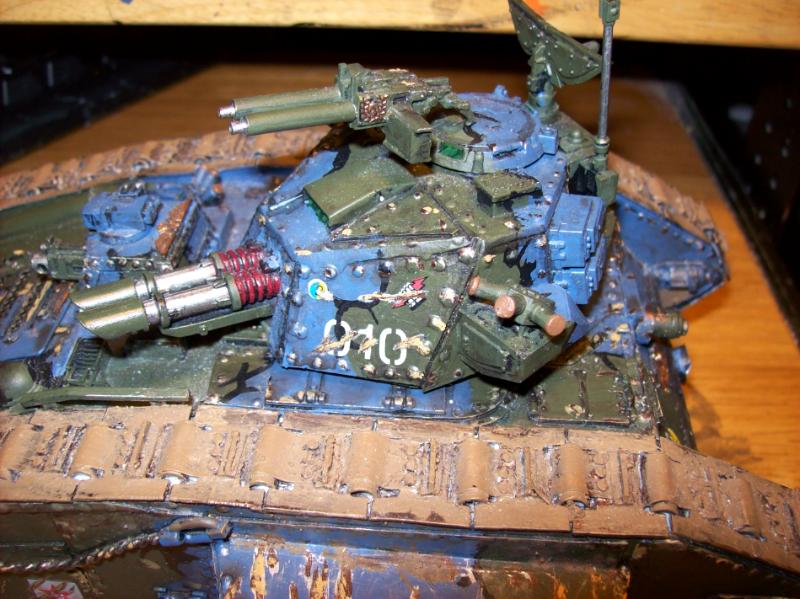
Automatically Appended Next Post: Business end of the Demolisher cannon, it has 4 Monolith kills credited to it! Some muck clinging to the track shoes [/img]
Automatically Appended Next Post: Kill markings [/img]
Automatically Appended Next Post: Yes, i painted a Monolith silhouette for it all!
Automatically Appended Next Post: Look carefully,. you will see that it has also killed 5 regular enemy tanks! [/img[
Automatically Appended Next Post: Kill marking closer up on 300,, Command tank of 3rd Assault Co. [/img]
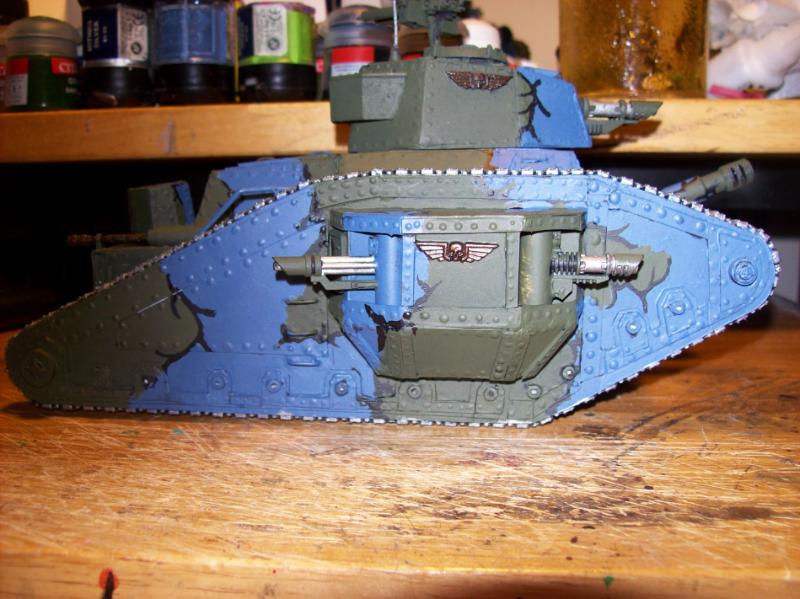
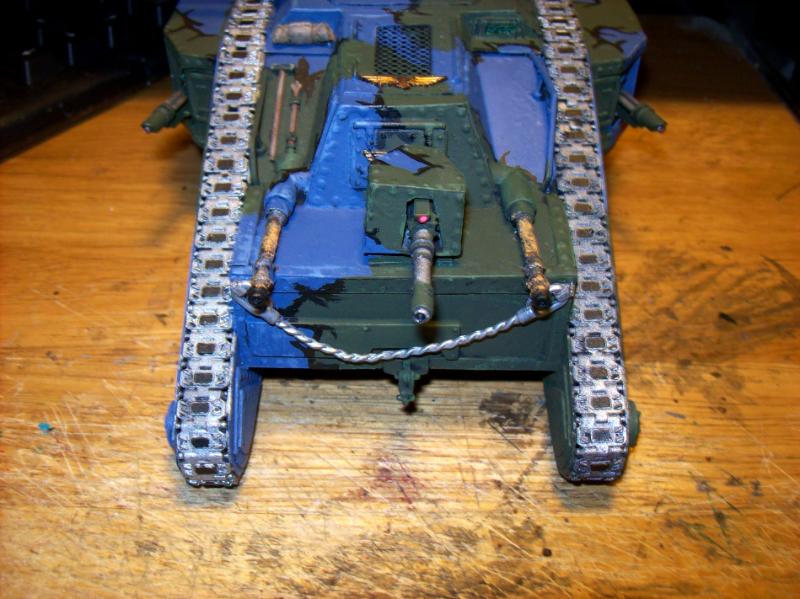
Automatically Appended Next Post: Back view of the trench rails, and fuel can [/img]
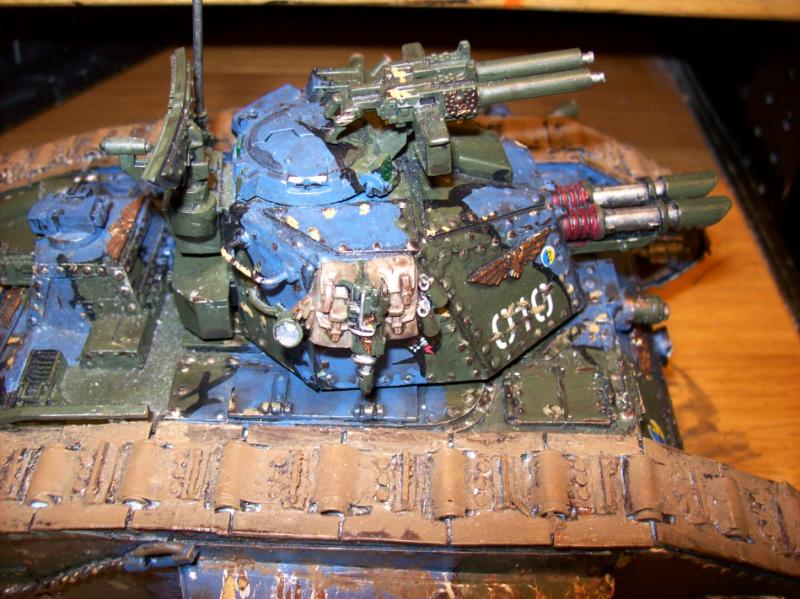
Automatically Appended Next Post: 3 of the heavy bolters and the Las-cannons visible [/img]
Automatically Appended Next Post: Looking here, the right sponson lascannon crew has a claim for 2 Monoliths Killed in action
[/img]
Automatically Appended Next Post: Plenty of markings and mud on this one!
[/img]
the mud looks awsome on this one!
i love how you let actual kills go into a fluffy built with the killmarkings^^ 4 monoliths is quite a feat in itself!!!
and the rest of the kills measures up to 300??? or am i wrong in this one?
the crusty muddeffects is a definite i will try out with my smaller tanks...be sure of that^^
Viktor von Domm wrote:the mud looks awsome on this one!
i love how you let actual kills go into a fluffy built with the killmarkings^^ 4 monoliths is quite a feat in itself!!!
and the rest of the kills measures up to 300??? or am i wrong in this one?
the crusty muddeffects is a definite i will try out with my smaller tanks...be sure of that^^
6 Monoliths once you add in the kills from the right sponson, the left will have kills of normal tanks.
300= 3rd company, command tank-0 of command squad section-0, so 3-0-0
I used some green flock mixed with the paint to get that effect, it worked well with the effect, (salt is too regular).
ah so that... hell it could even be spart for all i can understand^^...
that tank then is quite a killer...or that oponent of yours someone who is either not a good gamer or such a luckless chap....he needs some good fortune^^
i would go for a wooden look... the way i did it was make a dheneb stone basecoat and then wash like hell is after you with devlan mud till oblivion^^ thus i made this:
also i just re- realize how many guns that tank has! holy...
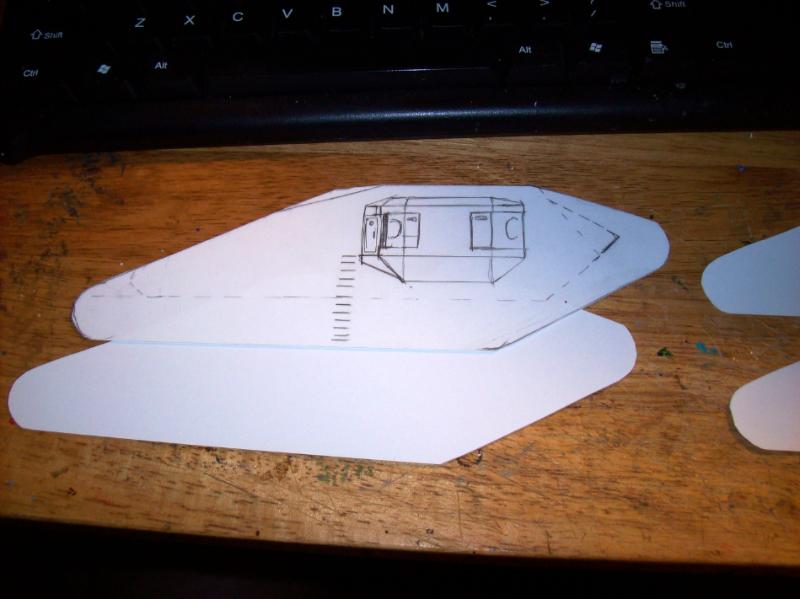
i am ithcy to see some pics of the new creations... do you will go the plasticcard road yet again?... seems this is your kind of material... i think i stick for the time being with cardboard... so armsrace is not only amry wise but material wise as well^^
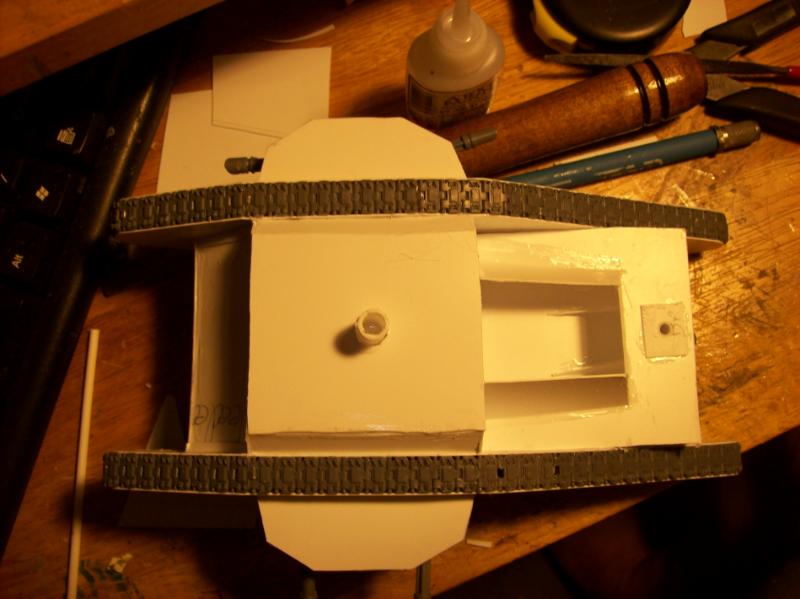
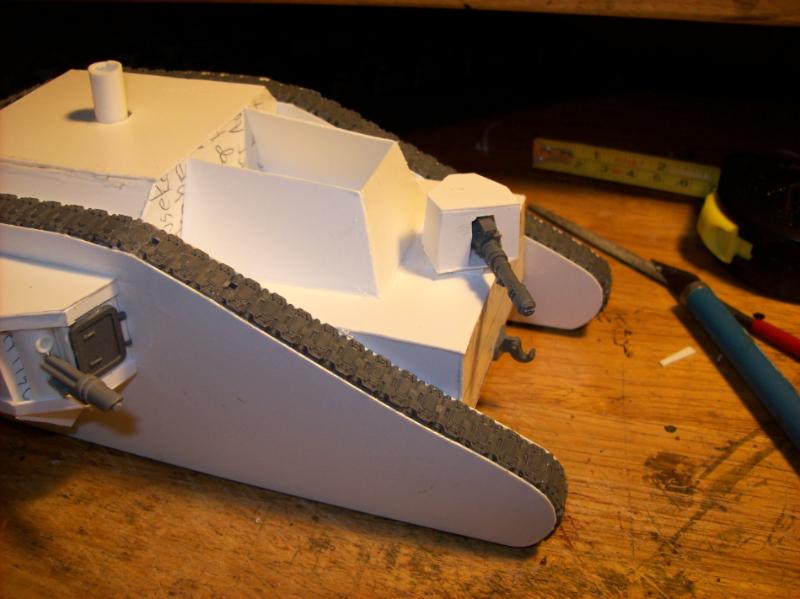
First section done, can see the sponson concept drawn on it. [/img]
[/img]
Automatically Appended Next Post: Finished track section against Chimera [/img]
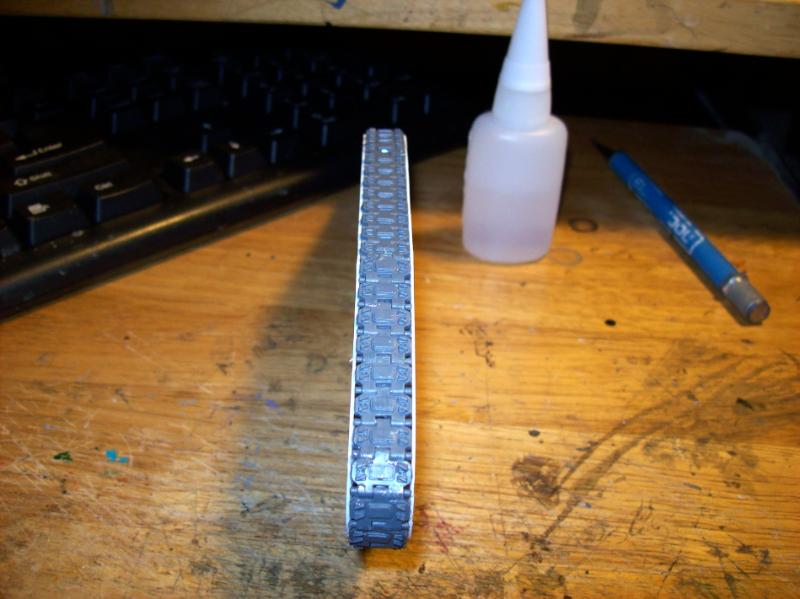
Standard Leman Russ track shoes. Last hurrah for what I had left from older 3rd edition style kits. [/img]
Track section against Perun [/img]
[/img]
[/img]
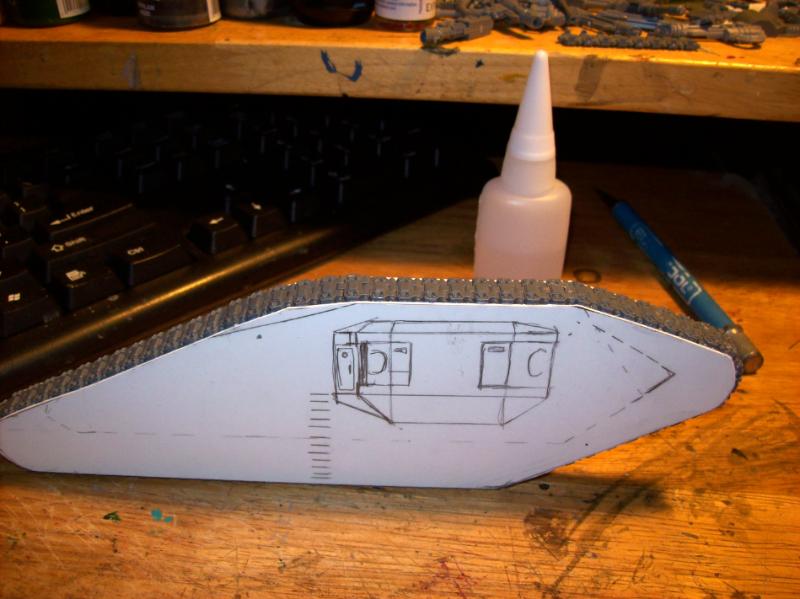
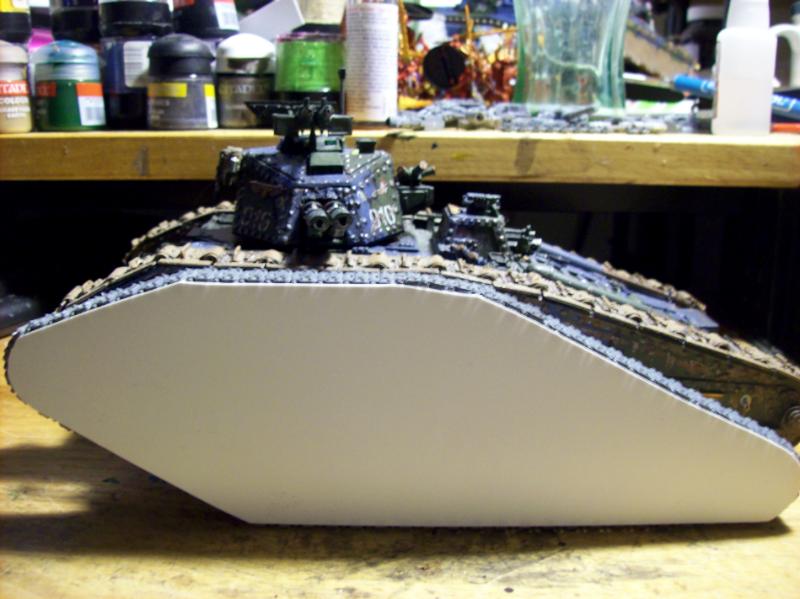
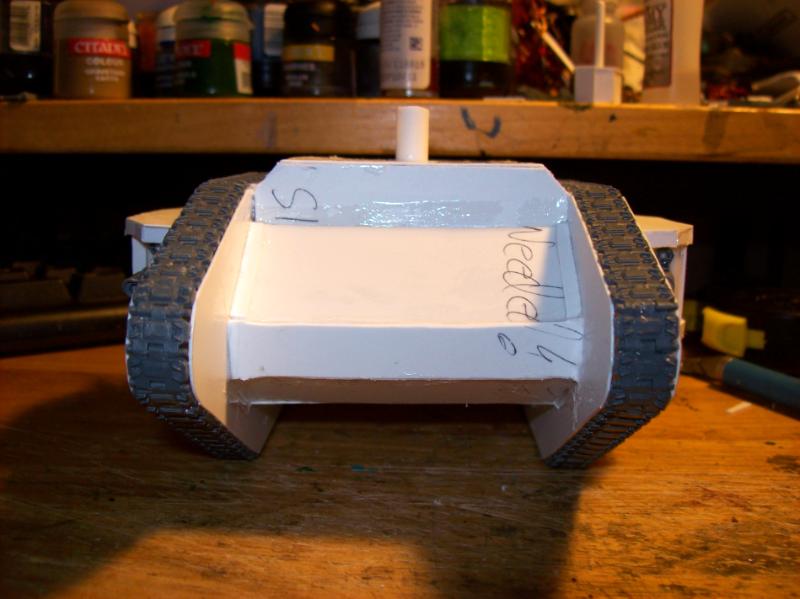
Thinner, shorter, yet taller. [/img]
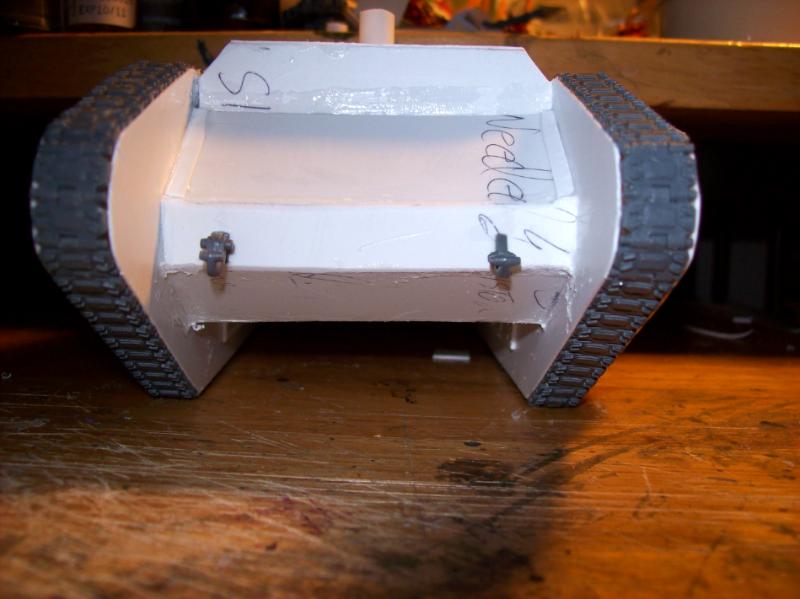
Now for both treads and hull started [/img]
[/img]
Standing taller than a Chimera [/img]
Overall wider so far as well. [/img]
overall wider than the Chimera
Automatically Appended Next Post: The dizzying speed of our patriotic workers at the tank factory is shown by the rapidity with which our tanks roll off the assembly lines, None wishing to be out done by the decadent Bourgeoisie of the other factories of planets such as the Viktorians or others less fervent workers, and to shine as an example to all others that their hard work and efforts will pay off, all for the Emperor!
i am shocked... shellshocked^^ this is running fast...well treadshoes to use is a good way of getting work done faster... still remember how long it took ye to make the scratchbuilt ones for the perun! i myself am currently working on the sponsons...looks like you make a double faced sponson...
by the way... how tall does a LR stand? and how much height is between hull and ground under the leman russ? need to know as i want to know where to put the tracks height wise...
looks very promising and my i add like a bit of a run of the mill... you are getting really fast in that department...^^
The Lemnan Russ sits about 1/2" off the ground between the tracks (15-20mm?) and sits about 2.25inches About 55-60mm? at the track system top. No need to get that precise your tank looks like it may be shorter, (whole different design there, but the armor and weapons would be about the same.
The Perun gave me ideas and techniques worked out for speeding the process, if I had to make the track shoes by hand again, likely be working on the belly plate by now as I would have made simpler shoes.
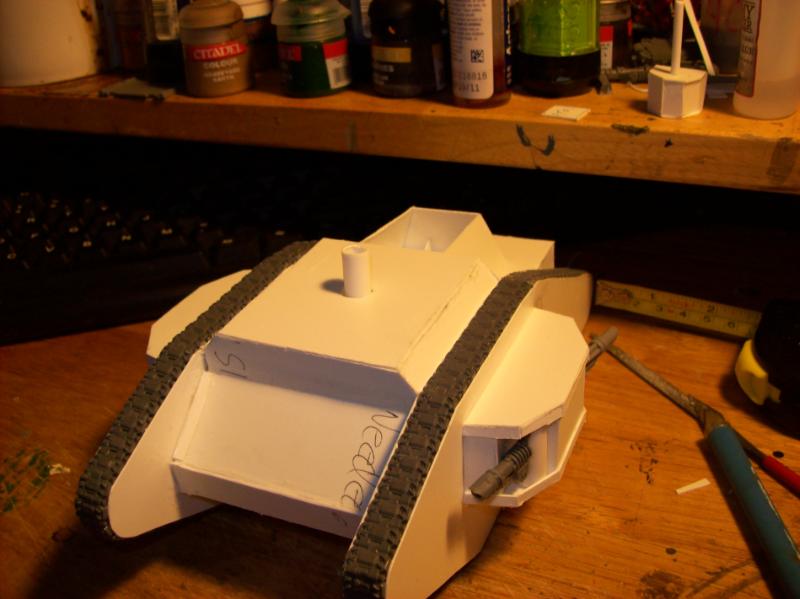
Automatically Appended Next Post: Okay doing the sitting on top trick again. [/img]
[/img]
This shot gives more idea of the width. [/img]
Standing side by side, the T-300 tracks are 65mm tall. [/img]
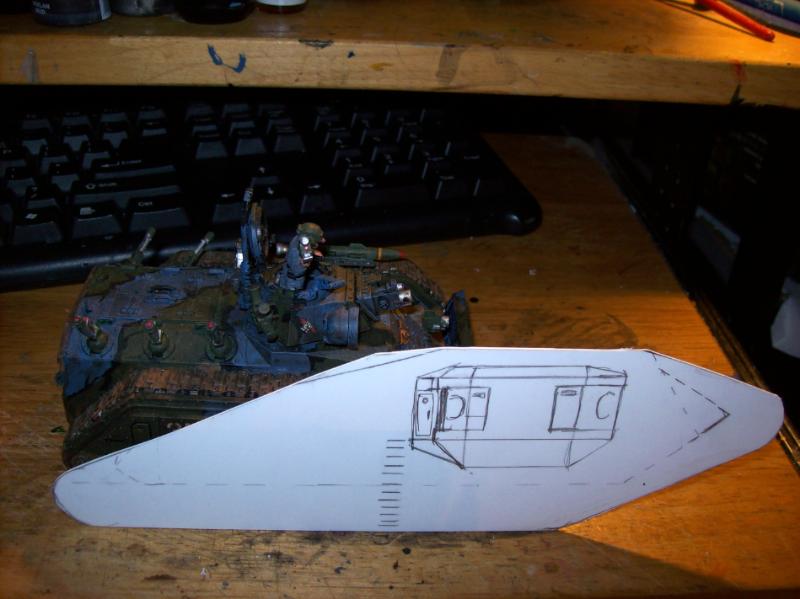
the chimera is yet again dwarfed by this new tank...thanks for the measurements.... i will have to set the tracks and the mainpart in some kind of realtion acording to these data. i know different types fully explain different heights but still...there should be some relation^^
Well, you were looking for ground clearance, and on GW tanks it is usually about that half inch or so. The Chimera's belly armor only clears 10mm off the table top
hmmm....this is rather very low...hmmmi have a pic in my thread of how high the compartment would sit...still not glued on so there is still time to make plans....
mine will definatly be shorter and smaller...20cm is quite a presence on the table! in fact i would go so far that my tank is only half of yours...well it is not the size that counts^^
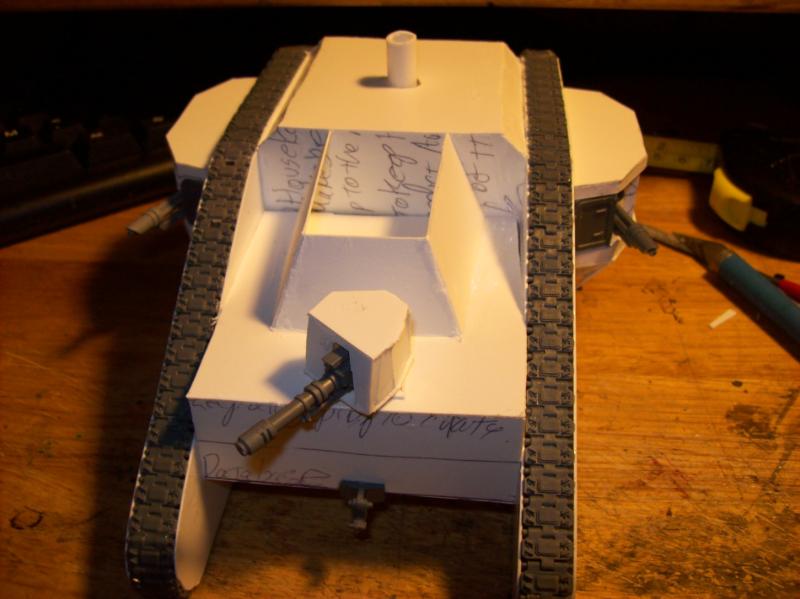
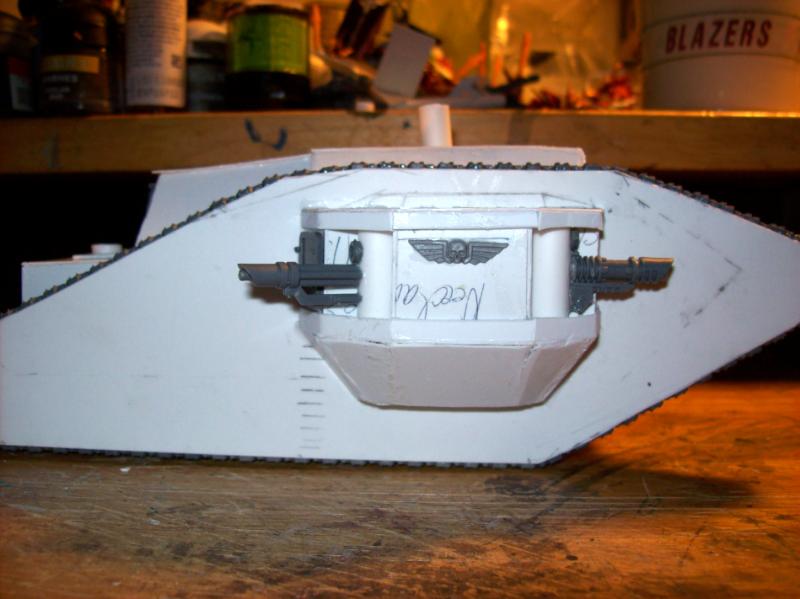
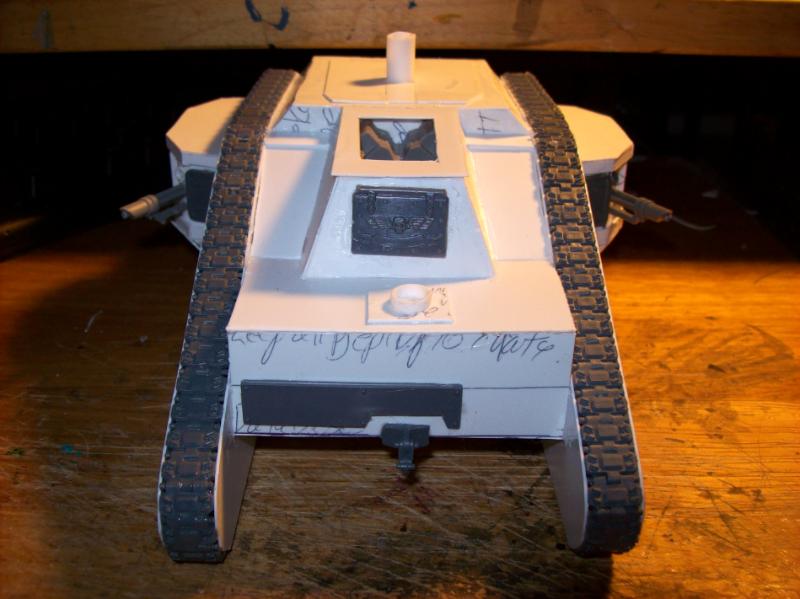
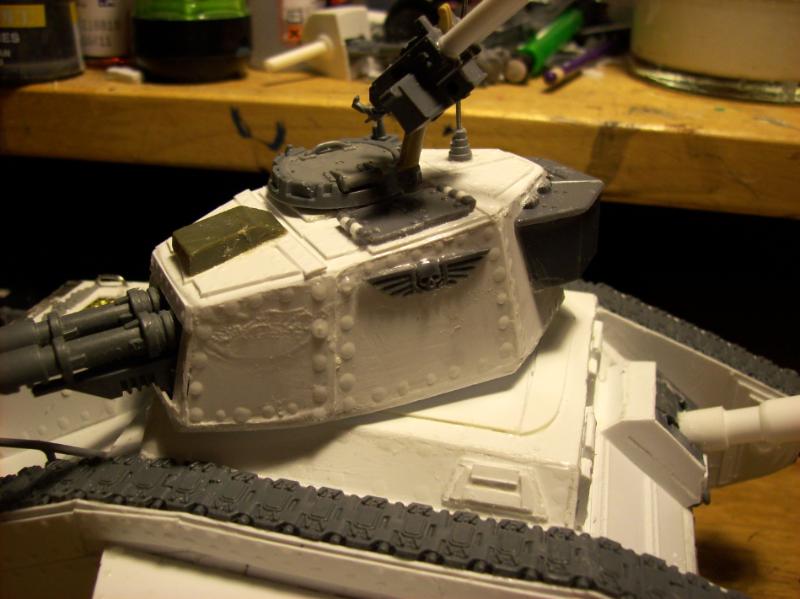
True, the T-300 is another "Heavy" and will come to battle with the Autocannon servo-turret, each sponson sports a Las-cannon and Multi\-laser, the front hull shall have a battle cannon, and the turret twinlinked las-cannons and dual stubber!
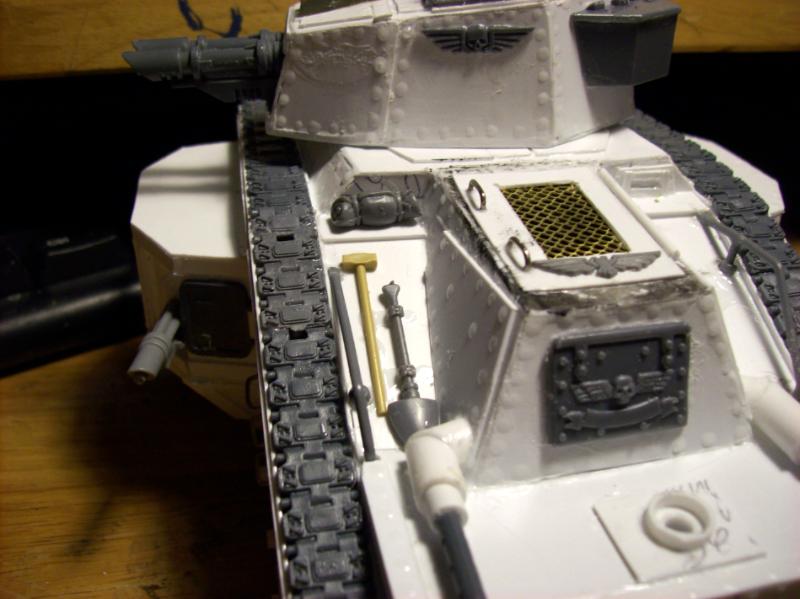
Busy day today, so a break from the tank for a while. still gotta do the engine cover, turret and the tread section plates and other details. I have paperclips ready for handrail duty!
tell you what... the stabilization thingies you used for the undeliying structure of the sponsons...next tank you create you should do a tank matching my excalibur... one old and treasured one... like a jewel pounded into a tank... i think this look before sealing the sponson would be a great way to do so....
no, what i meant was that the butresses served a more artful look... i think you could do a well "dressed tank instead of a high functionality piece...i see you have really got the hang of that...so i think it is a good oportunity to try something new...the Bogatyr is a fully planned concept i wouldn´t touch that...i am meaning to get you afterwards to new shores, so to speak^^
like...a battletank that has a more poilitical/religious role to it... you could do the whole iconical route then... the whole russian sector is very into religious stuff...this could then be switched quite easyly to emperor related stuff...
Well, I have just one Perun., and there will be one Bogatyr and others are one of a kinds in my collection, but one whose fluff also marks it as a lone wolf of the tanks.........
those wheely details on the tracks is a cramp in the rear to do!!! and it is adding such a fine look to the tank! i love that... i tried that on my own tank but i think i did too many wheels....
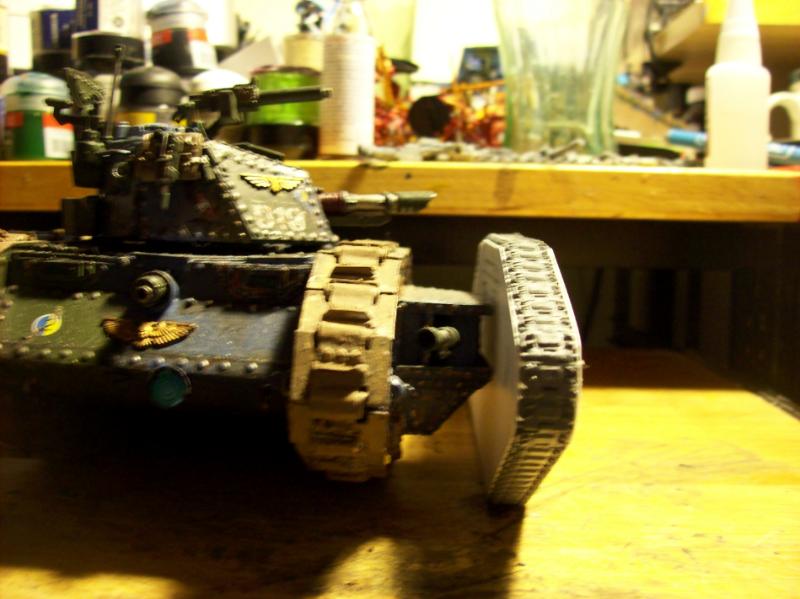
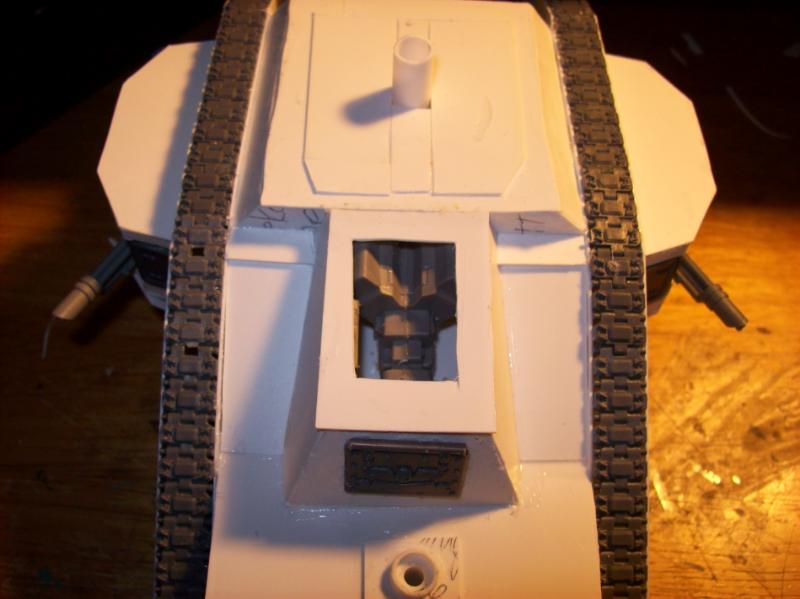
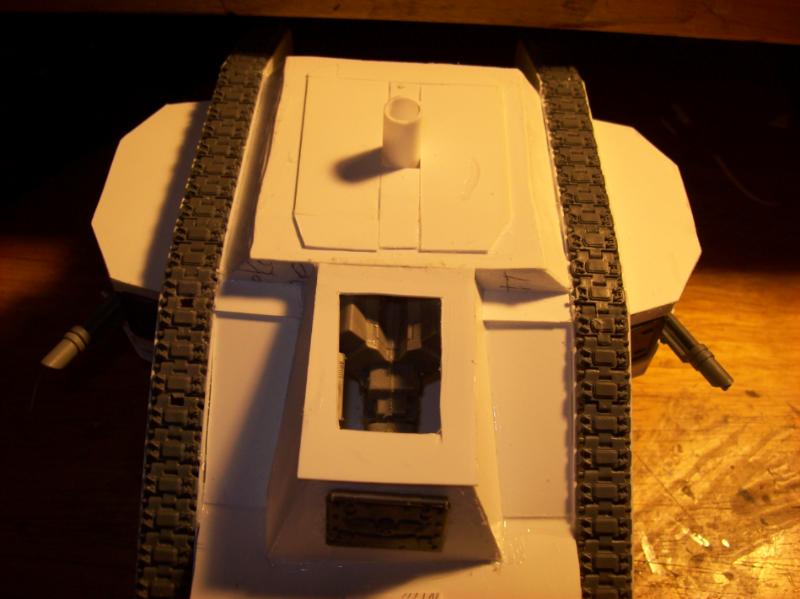
It will have a few more additions, started bending the hand/ladder bits to access the hatches in the sides on the rear of the sponsons. Hav to also do the front vision ports and the Battle cannon. Top turret also has to get done.
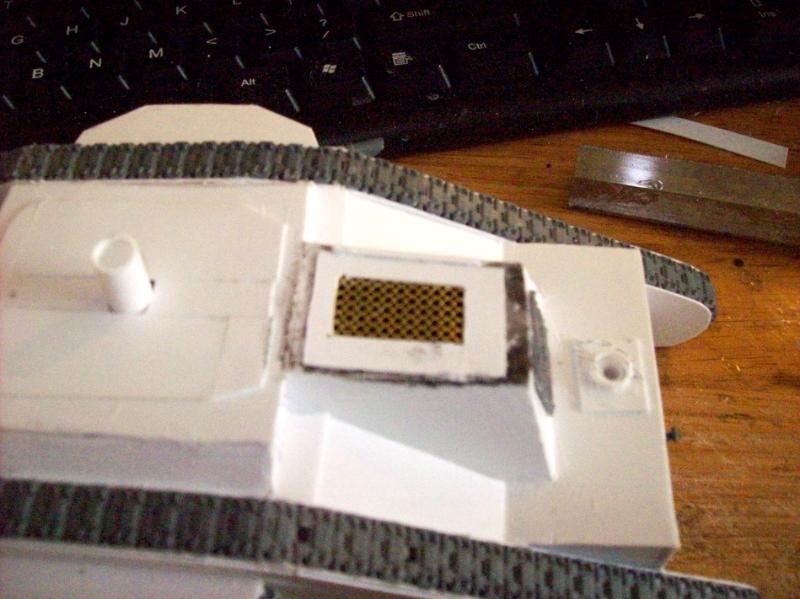
Not yet, still working on the vision blocks for the driver and battle cannon gunner
Automatically Appended Next Post: Okay, now we are done with the vision blocks! I took an idea from Interwar/early WW-II tanks for sliding armor covers for protection during battle for the vision ports, the "glass" will be painted in my usual Dark Angel Green with goblin green streaks.
The basic frame.
[/img]
Armor blocks on and in different levels of coverage.
[/img]
The gunnery block has one slide cover longer for reinforcement from the back wash of the cannon bouncing off of the tracks system.
[/img]
nice idea with the differnt heights to the armor blocks... a lesser man would think you werent able to make them level...lol...only joking... i think that way it look s more realistic and live in...tho i have to add... the right one is a tad to narrow in the width...maybe a newer version to make them similar? only suggesting... cause the cam doesn´t lie^^
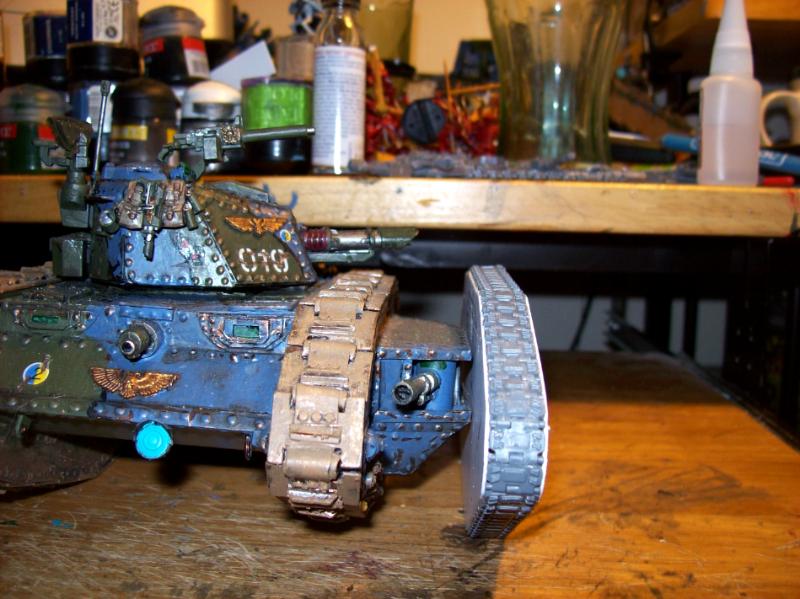
Got more work done on the T-300/Bogatyr. get ready for more astounding and amazing plastic-card wizardry. (one day I may make it even more spectacular, but for now.
Metal ladder rungs
[/img]
[/img]
Engine grill
[/img]
Battlecannon is now in place!
[/img]
[/img]
Hello there!
[/img]
[/img]
[/img]
[/img]
[/img]
Turret started
[/img]
fitted to the hull
[/img]
[/img]
Cutting a promising profile!
[/img]
The factory workers collective would like to apologize for delays as they had to re-work revisions presented by the designers and then the engineers! But the final product should make it out on time for the quotas, and allow a more smoother presentation to the Committee members before shipping out to the front line battle units! As you can see the Smolentz cannon was traded out for the Lika M-46/L seen in the bow mantlet.
May the Emperor's enemies cower in fear at the mere mention of the T-300!
now that is a cool sight to behold! battlecanon is looking good and highly detailed...
i guess with a turret standing as tall as this w need a new set of scaleshots.... by the way... those will be done from my side tonight...^^
the ladders loooking good, for some reasons i seem to forgett always such things...well not forgetting as this would imply planning^^ and this cant be held against me... i never plan ahead...^^
Shuddering? does it inspire the awe and fear such a monster of metal should?
I still need to cut some side breaks at the end of the muzzle part, but thank you, it was needed file work that got those parts to have the angles to smooth it out andf make it look like that!
Turret still needs more work, and a top and cupola is longer than the turret on Perun, but slimmer side to side. the new tank is less wide, and shorter than Perun, but managed to be higher up!
my maingun need more detailwork fer sure on the maingun.... for now it is just a barrel.... so this will follow shortly i guess.... the treads on mine will keep me pretty busy.... do you recon i should do treads all the way round or just where they are bound to be seen?
i guess this is a very fine tank already.... what intrigues me now the most is how you will fit in the double lasconons on the turret into the frame.... this keeps me particularly glued^^
Oh, I had plenty of las-cannons lying around is all, (I still have some more I think. (I'd have to look) I have left over multi-lasers, and some chaotic auto-cannons from my defiler kit(all close combat oriented).
But yes, while staying in our design philosophy, they are distinctly different tanks in their own rights. With the day come better pics, more focused.
T-300 behind T-400
[/img]
T-400 behind T-300
[/img]
From above, T-300 is smaller "footprint" than T-400
[/img]
Turret focus, upper deck of turret starts
[/img]
Automatically Appended Next Post: [/img]
Automatically Appended Next Post: T-300 behind the Malcador
[/img]
Side by side
[/img]
T-300 and Chimera comparatives
[/img]
Can't hide so well behind the Chimera
[/img]
Chimera makes T-300 look BIG
[/img]
T-300 with T-290
[/img]
T-290 behind T-300
[/img]
Width comparison, T-300 is slightly wider.
[/img]
Length comparison, T-300 is definitely longer.
[/img]
the last pics gave me some food for thought....the T-290, your command tank...has the doubled width of the tracks.... do you recon this might be needed to be fixed for the T300? as: is it likley that the treads have enough propulsion power/traction to get the tank moving? just a though from me, no need to pull everything apart... tho it is something i would explain at least fluff wise...
as for the comparrision shot... nearly the whole family is now gathered on different pics ^^
Viktor von Domm wrote:the last pics gave me some food for thought....the T-290, your command tank...has the doubled width of the tracks.... do you recon this might be needed to be fixed for the T300? as: is it likley that the treads have enough propulsion power/traction to get the tank moving? just a though from me, no need to pull everything apart... tho it is something i would explain at least fluff wise...
as for the comparrision shot... nearly the whole family is now gathered on different pics ^^
Well, the plastic glue has already fused the parts together, maybe in the future, if I found enough of the old track shoes, maybe make a mold and mix my own plastic or resin for enough to suit the needs to make a "King-Bogatyr." But the Malcador tanks from Forgeworld use the similar width of the T-300, so that was why I went with the single width this time. The engine system will be sufficient, as this is another tank with a top speed of 6 inches per turn across the table where the Leman Russ can opt to go an extra D-6 inches if it decides not to shoot that turn. (I had plenty of treads when I had the ability to make the T-290 and T-350 coz they came as a 10 tank kit!!!)
I did wish to show how they were all so different.
Now more progress reports because yesterday was very, VERY productive!
Totally closed the turret, more work was done!
[/img]
Heavy stubber left
[/img]
Both parts of the Stubber weapon
[/img]
That pintle mount failed, so while the glue was still wet, I came up with another.
[/img]
Extra armor plates added to the front hull
[/img]
[/img]
New pintle is easily seen here, along with back railing, and exhaust system.
[/img]
This gal has quite the profile!
[/img]
In this light you can see that filing is being done to the rougher edges, and rivets need to be placed all over it!
[/img]
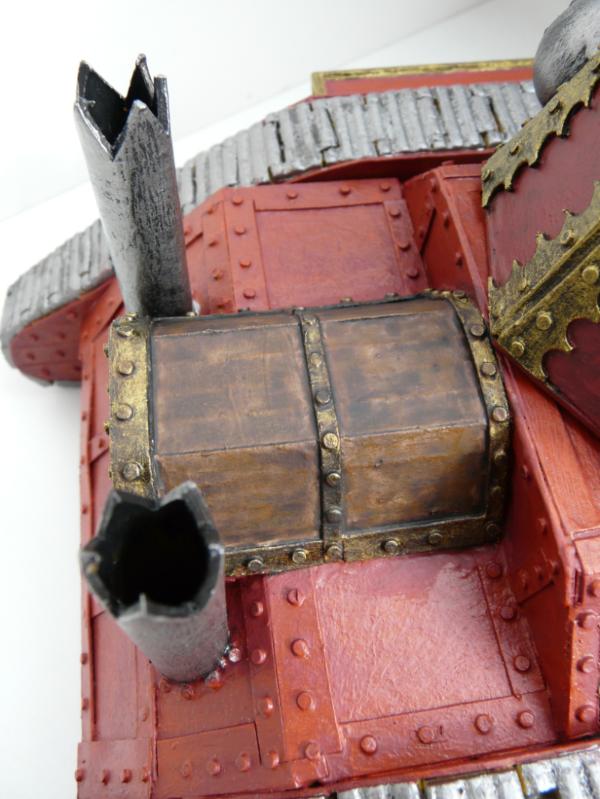
Like an old dreadnought of the seas, massive broadside firepower is this tanks' surprise. The servo turret can swing and fire over the exhausts!
[/img]
[/img]
[/img]
Close up to show the servo turret, exhausts, and banding for rivets to go,
[/img]
Showing off the pintle and stubber guns.
[/img]
Exhaust joins, and tools and rail.
[/img]
Now you may have noticed these odd shapes all over the tank, more vision ports! Left
[/img]
Right
[/img]
Rear.
[/img]
Weapons splayed out
[/img]
From above
[/img]
Coming at you!
[/img]
Now for you to all expound more on this monster-piece. Oh never fear, there will be more Imperial winged skulls on it!, as well as the rivets.
well i will be off this week for th so called elbe-sandstein gebirge...a short trip holiday for me and the family... some needed battery recharging.... i hope you can manage the riveting without my help^^....on second thought... this baby will need plenty^^
like the idea of more viewpoints...seems you need tocheck where everything is when driving...
your own treads...nice idea...if you do that, a short tut and a bit of comment if you would do so again would be nice... i would like to try my hands on this too...
by the way you detailed up the tank already quiete a bit, before riveting.... this will make the job not quite easier...
ouch....last point is a good point or better dang...can´t do nbothing about that....hmmm...
of course will the tank get to look more real once the rivets will be set ....it is almost a fetish now... all those rivets somehow give me a fuzzy warm feeling all over^^
Shas, I just realized I've been gawking at this thread but never spoke...you are a maniac sir! And I appreciate that! Please show us more stunningness!
dsteingass wrote:Shas, I just realized I've been gawking at this thread but never spoke...you are a maniac sir! And I appreciate that! Please show us more stunningness!
Thanks! I just love me some tanks as you can see, and some of the oddest ones possible to boot! I will have the pics soon, right now doing cleaning, of the area, to un-clutter myself. I have seen some of your impressive work that I caught on Vik's thread, amazing buildings and scenery!
shingouki wrote:I have to agree odd looking tanks have a unique charm imo.
Hence why I like to make them as well as collect them!
dsteingass wrote:wow, thanks man...I'm blushing, I'm gonna seek your advice in the armor department then in future endeavors!
Hey credit sent where it is due. I like the looks of the buildings you have in gallery. Now you have me blushing as I know there are some other scratch builders with far more experience than myself out there., But I will gladly share what I have learned as I have made the scratch builds and the kits of oddballs.
I found a sprue with end caps on it from an old sentinel kit I parted out for other projects.
[/img]
[/img]
[/img]
Cap and cannon!
[/img]
[/img]
Muzzle break, I used a semi-curved file, flat on one side, rounded slightly on the other, to get that shape to the slashes of the muzzle break, those will be chaos blacked to make it look hollow.
[/img]
monkeytroll wrote:Ok, caught up, but forgotten what I've seen Nice to see the old crow family shots, have to pick some of those up sometime.
Loving the T-300 so far, very nice. Nice work on the muzzle breaks too
Thanks Monkeytroll, I had a interview call and meeting online, but can now get back to rivets. Glad you liked the OC family photos as well. Once the T-300 is done, all is paintwork, on it, and other tanks that have been waiting for the full color hits and decals.
dsteingass wrote:Aww man! damn the auto-append!..Wow, fan-frakkin-tastic!
Thanks again. More to come in the next few hours.
Automatically Appended Next Post: So, I have finally gotten the rivets done.
[/img]
[/img]
[/img]
[/img]
[/img]
[/img]
[/img]
Automatically Appended Next Post: As soon as the weather is good, I will spray it with black primer, that will change it's appearance a bit.
ChorusLucia wrote:Wow - I'm stunned by how nice this work is. Thanks for posting so much - hopefully us newbs can keep learning from you.
Hey no problem, glad you like the work, and hope it inspires others to make their own models, it winds up far cheaper than some of the resins out there!
For a low costs resin, I would recommend Old Crow, he is sort of overloaded, so be patient you will find the kits he makes worth the extra wait.
But yes, if you want a light weight, plastic heavy tank, these pics hopefully will show, I came up with odd designs in my head, I looked over many old tank pics from the 1920's and 1930's and so forth and got design ideas from those and then mashed them all together is all, and gave the Sci-Fi weapons to them. The pPVA glue rivets are by using an empty plastic cement bottle with a zap-a-gap canula tip(shave down the plastic bottle tip a little), and then practice how big a bubble of glue to use to touch the model, then you should get a rounded rivet as those applied via rivet gun(pnuematic) look. However I do warn you, cutting shapes from plastic will require steady hands, (to avoid cutting self, ) and to get the straightest possible edge(I did all cuts freehanded, next time will be along a metal ruler edge!)
dsteingass wrote:...and far more educational to scratchbuild than a kit (although I do love kits)
Oh don't get me wrong, I do like kits as well, but sometimes those forgeworld prices are crazy!
Automatically Appended Next Post: So, took the T-300 out for a priming when the sun showed itself today. Armoryork Tower black primer is what was on hand.
[/img]
Automatically Appended Next Post: All white spots will be covered by shadow gray, or catatchan green
Automatically Appended Next Post: Now to see what happens with the other pics.
[/img]
Automatically Appended Next Post: Plenty of coverage on the back.
[/img]
[/img]
Automatically Appended Next Post: More side shots
[/img]
Broadside Left
[/img]
Broadsie Right
[/img]
Automatically Appended Next Post: Forward
[/img]
[/img]
Turret close-up
[/img]
Heavy Stubber close up
[/img]
Automatically Appended Next Post: Enginarium close up
[/img]
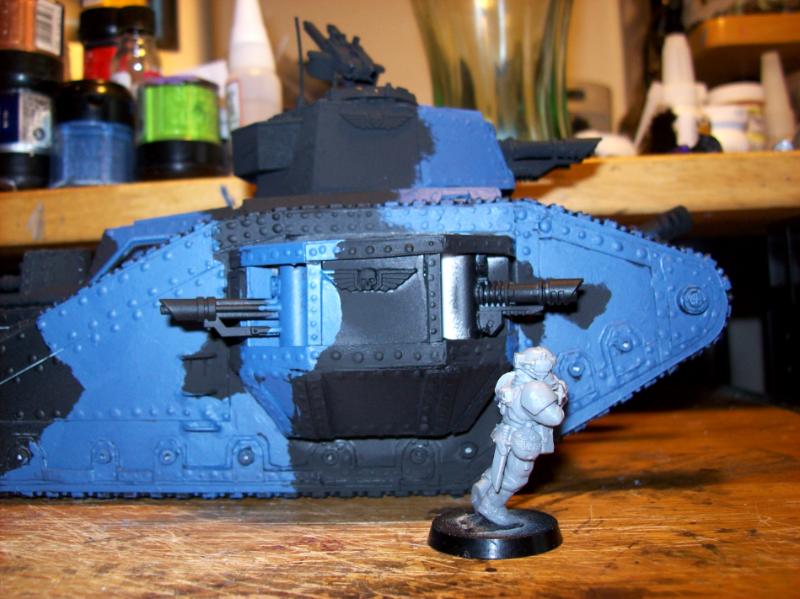
Alrighty, for all of the devoted followers lurking this thread, I have begun the camo pattern painting, I started with the "Shadow Gray" ( a very french blue like color). I also posed a IG rifleman beside it for a show of just how massive it is and how it can dwarf soldiers when in the field. Once I have enough plastic, maybe a Gorgon like transport based off the rhomboid design treads? Or just a simple platoon hauler akin to the Crassus? Any way, here are the pics of the first color laid out, I will post more when the Catachan Green is applied.
[/img]
[/img]
[/img]
[/img]
[/img]
[/img]
[/img]
I hope all are enjoying these views, and please leave comments too if you like, now, how to get the WW-I tunes out of my head?
wow....so much has happened!!!! boy have i missed out on so much development!!! well... the sentinel caps was a masterstroke of genius proportions! these bits added lots of feel to the tank! i am a bit akward about the rivets...but as you know me i have come to love me own rivets done by my ever trusty holepunch so much^^
the primed tank looked a bit thickly at first.... but when i lokked directly for confirmation at the treads i saw that i was mislead....the priming is a good way yet again to tie in all bits and materials into one fine tuned tank!
ad now you even gone camo...so fast!!! wow...again^^
i feel a tingling sensation as to what you might present today^^
as for a new project of a masstransport.... you know the nice saying? just do it!!! you know we and you just want that^^
Well, thank you Vik! I make do w/o a hole punch, otherwise, it would be plastic hole-punch rivets instead of the PVA expediency that I came up with after reading of another's use of them. It does however give that feel of modern rivet gun rounded out tops from those.
Yeah, I like the GW new chaos black primer spray as it goes on like a sheer nightgown over the model, Armory however tends to fuzz up a bit, hence the flannel shirt effect on the model.
Finishing up the black squiggles for today's bit and will post pics later tonight, or for your morning flakes!
Transport will be a while into the future, still have so many paint works to do!
if you would be an apple automatron i would say you have a nice app for camo downloaded^^ the black lines are sooo cool looking and tie yet again the different colors of your camo so well together!
Viktor von Domm wrote:if you would be an apple automatron i would say you have a nice app for camo downloaded^^ the black lines are sooo cool looking and tie yet again the different colors of your camo so well together!
I see you caught the news of the Apple founder dying, But yeah, as the brain is considered a computer by many, I will accept that compliment for what it is! I have the apps! I even remember US/Nato woodland camo from when I had to refresh the worn out paint on our trucks in my unit. That they do! otherwise, the two colors would look "flat"
dsteingass wrote:Looking great!
Thank you kind sir.
Noe for the metals, and other color details to be painted in, once the machine is ready decals will be next, and then the dirtying!
You learned enough from making Excalibur to make the majority of the Knight so much faster, and each of those will give you ideas to use on the next, so your last tank model will llikely go the fastest. Just like the T-300 has been done in half the time of the T-400, Perun taught me a lot as I made him into the tank he is.
yep... the new one got indeed built way faster...and i think a third one will hopefully be much more professional than the ones before...
and because you get so much fatser and better in your constructions i won´t let you off the chain before you have built a shrine tank^^...i am a pitbull for that^^
So I have heard, I also have heard most artists prefer Macs for their CGI works, but some use PC's
Speaking of computers and their operating systems, what started with this
And presently we uses these:
Has lead us to this so far:
May one day lead us to relying on these for our defense:
And they may get upset once they become self aware.
Automatically Appended Next Post:
Viktor von Domm wrote:ahhhh.... a shrine tank done by shaso...this will get even more spectacular!!!
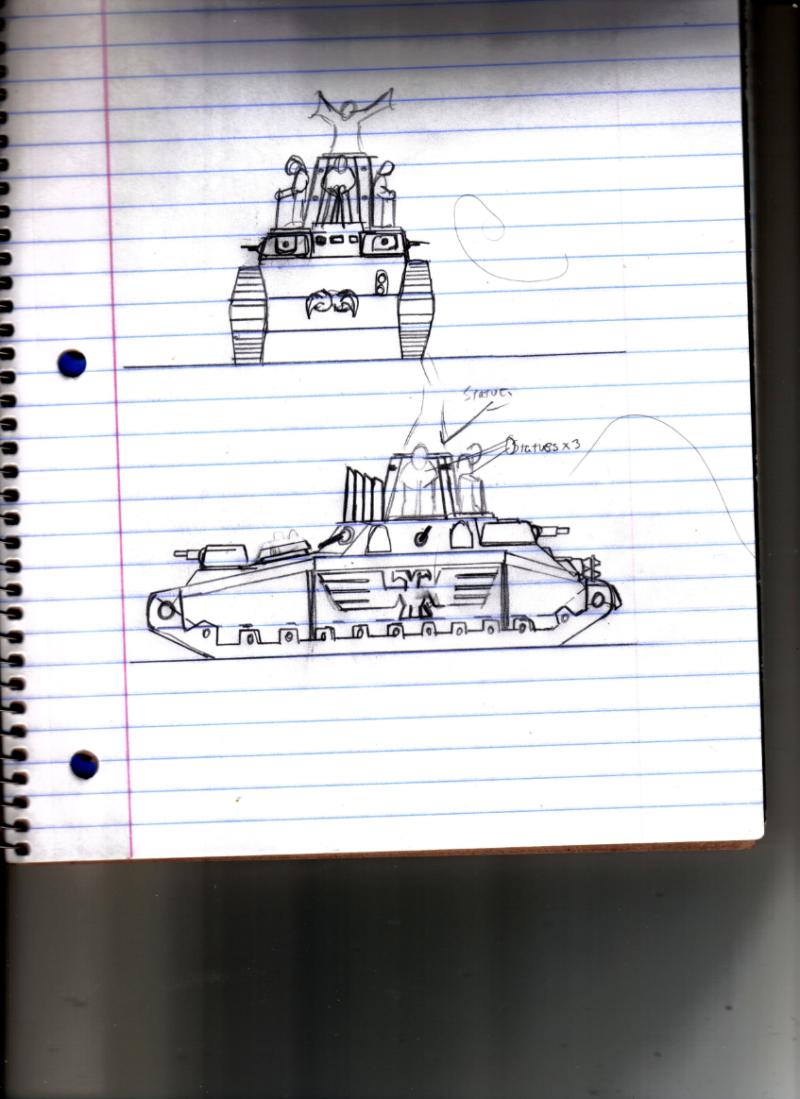
I have it laden with small gun mounts, a more "equalized tread system, and the other drawn concepts are smaller one man turrets and statuary, possbly scrolls and other adornments like filigree work, but is a drawing at present, I would have to scan and post it for you all to see
neil101 wrote:the new tank is even better than the perun shazo, but i think the best is yet to come,did ihear shrine tank?
Thanks, Perun was a teaching experience, and it has given me the knowledge I need to make my own designs now.
And yes, instead of a main gun turret, it has a tower topped by a statue, and surrounded by other statues and a massive pipe organ like arrangement., smaller turrets and guns, and flamers, must have the purging cleanliness of fire!
And they may get upset once they become self aware
this is a skynet one...isn´t it?^^
and what is that third pic showing??? a true one there? or some conceptual work?
And yes, instead of a main gun turret, it has a tower topped by a statue, and surrounded by other statues and a massive pipe organ like arrangement., smaller turrets and guns, and flamers, must have the purging cleanliness of fire!
monkeytroll wrote:Interesting, how big are you looking at?
Something like this definitely fits the superheavy tank range, likely 200-250mm length, like a baneblade, but it will be quite the tall monster for the men to see and be inspired by, as well as allow the laudhailers max coverage!
If I did not have so many normal sized tanks, (between the 12 Leman Russ and Sabres and Mazurka) I would likely make Leman sized models from scratch like Vik, who has no other tanks. (and he is also damn good with that card-board!)
Vik: That all ribs looking thing is a working prototype under testing.
the multi turret concept got me sold instantly...so landship like! and the statues is some very nice concept too...what will you use for these? some reaper minis or some WHFB knights?
does the khardovian konfederacy have some own unique signs? like my viktorians have their take on the union jack? maybe you could use some sort of hammer and sickle version?
this will be a truly epic tank! i am actually kind of envious that you came up with that staue idea! or how about somethink a bit like a "arbeiterdenkmal" with craftsmen and soldiers in the mix... like the old russian monuments were... didn´t find a good pic...
will the all ribs thingy be an organ? that would ne a nice idea....
Viktor von Domm wrote:the multi turret concept got me sold instantly...so landship like! and the statues is some very nice concept too...what will you use for these? some reaper minis or some WHFB knights?
does the khardovian konfederacy have some own unique signs? like my viktorians have their take on the union jack? maybe you could use some sort of hammer and sickle version?
this will be a truly epic tank! i am actually kind of envious that you came up with that staue idea! or how about somethink a bit like a "arbeiterdenkmal" with craftsmen and soldiers in the mix... like the old russian monuments were... didn´t find a good pic...
will the all ribs thingy be an organ? that would ne a nice idea....
Yes, like a landship concept, but with some Muenster tossed in!
I will seek out many minis as to make a statue, then debate on bronze or stone ones for the paint. Statue on top will have some Hammer and sickle in it's hands for the theme feel.
Alas, so many minis are not so workman related, and that "shrine" is supposed to inspire courage/bravery/sacrifice, in the midst of massive battles where death walks amongst the men. But if I find a good one that looks like a Russian worker holding a tool morphed into a weapon.......Hmm, sledge hammer with the haft turning into a rifle at the opposite end of the Head! Oh Yeah!
Not sure if that will get out and be actual US issue or not.
Automatically Appended Next Post: Khadrovian take on Russian Symbols? Hmmm, Maybe different tools or making the stars gold with red border?
And remember, if you're making it all out 'shrine'-y, you don't just want bare, flat plates. Look into making reliefs, sculptures and such for the sides- something I've just found is a pretty nice way to sculpt is to take some of the cheap Crayola air-dry clay, make it into properly-sized tablets, and let it completely dry- then you can carve that with knives and such, and get a ton of precision. You could then either cast them, or just seal them and paint them up, if you're going to be careful with the tank.
*rubbing hands* i like that point where you plan out a new project and the mind is all fizzly and is jetting around the world! that´s when i come truly alive!
the air dry clay plates for carving sounds like a good thing...
as for the sybolism.... i thought not to use the aquilla so ften or rather none at all...the red star would be very fitting...if you have problems with tool and stuff maybe you could look out for playmobil or possibly lego stuff as additions.... they do have fitting tools...at least in a monumental scale...
the old man look nice but more scenic than a statue.... the general form reaper chronoscope i want to use one day as a commissar for my troops woudl be a possible good candidate for a statue... also i would add the occaisional empire kgnight or even too something from reaper...some paladin...in a pose resembling the oscar...or heck get three or four oscar minis and then add some grey stuff for details....like some russian helmets and maybe uniforms...they could stay bare chested...
Viktor von Domm wrote:holy armor...i totally forgott with the first pic that this is a scratch built and not a bought kit...
very good work there...i guess now the decal work will be next? and then the usual mud treatment?
Thank you! I love it when a scratch-build get's such a mis-identification made!
Not quite, still have the vision blocks to do, the tools and fabric roll, and some attempt at making the exhausts look like peeling rust coming off. THEN, I will decal and dirty it, (I also have to paint the track shoe centers black.)
this might be expensive but it got me instantly drooling^^ but i recon you could achive that effect also with a coat of PVA and then thicker paint over the almost dried glue... then the totally drying process of the PVA would let the paint shrink or something... i had some cracks when lastly done that on some points...not inteded then...
Well, for the exhasust the salt lightly coating a fresh batch of Tin bits, and then painting over it with another color, like the track shoes and then rubbing it off should work for what i have available.
looking very good... the ocasional red spot is something that is adding a bit of warmth to the colder scheme...i like that! some touchups needed when you did aply the red tho...you know probably where^^
what is that mini with the sniper gun???
oh and the vision bloks look nicely ... i imagine the crew sitting all in the tank with green battlelight! had that idea for mine too^^
Good.
Touch ups will be done, and yes, red for lascannons works well for that Highland Tundra scheme.
She is an Infiniti mini i was using for my campaign of Dark Heresy, I use her as a female Vindicare assassin attached to the Inspector General Mikhail.
Oh yeah green lights inside, may as well do the same Vik. It works!
it is a bit too clean on the underside but the methode definatly has made a good effect! if you can do something about the shiny underside i say this is perfect!
but what about that rubbery look on the treads.... do you really think the army botheres about torn pavements and streets?
Viktor von Domm wrote:it is a bit too clean on the underside but the methode definatly has made a good effect! if you can do something about the shiny underside i say this is perfect!
but what about that rubbery look on the treads.... do you really think the army botheres about torn pavements and streets?
That silvery metal is all that is left of the basic parts that have yet to rust, so rust in progress was my goal!
Some places do, especially if soft materials are used for paving.Just look at your own nations track links as well as US tracks, BIG rubber blocks added in.
i know that the brits tanks here in berlin had to wear literally shoes for driving on the streets... which they did at least once a year... was always great fun watching them^^ but i think in the grim dark fairytales of 40k no one would bother...
i guess you are right about the exhausts...also i think a wash will happen and will you do the burnt look there? as you suggested for my stacks?
lol yeah... always be in full fluff mode when working with models is a good strategy^^
but remeber while the victorians use beautiful craftmanship products they think of siad craftsmen only as plucky and servicable workers.,..so low class and the enemy is by definition low class otherwise where would be the point in stamping their armies to the ground and mass producing widows and orphans as you go?^^
I got totally distracted today, so unfortunately, nothing new to report. I am still thinking of that vomit brown idea for rust though and how much to apply.
well...my deepest condolencies for you getting to work your bum off in the colemine from now on^^ congratz mate...i hope this will be till you don´t want to anymore^^
Looking a bit crispy!
crispy and rusty!
are we still talking about weathering of tanks or your morning flakes?^^ lol
well i am glad it worked with the foam... to be honest^^ i sent you to the fore with that one as i have similar things on my mind for my tank^^
well since you start at the 7th i think you have to make do with that last free time you get till moving and then laboring^^
Thanks guys! it has taken a long time to finally have a job, even if it is 20-25hrs a week. And classes start the 25th of this month. So many distractions from my tank works!
@Vik, I used a small stick of that carrycase foam, and that was the way I applied the Vomit brown rust to the Tin-bitz and the two work nicely together to make a multi-layered rust effect, in fact, one of the pipes the VB cracked on it's own and looks like it is flaky, as peeling rust!
@Rutgerman, Thanks, so far to my knowledge it is one of the most unique camo patterns out there as I have not seen anyone bu me use it in Google or Bing searches.
@Monkey, Hehe, yeah that 'ole double edged sword thing. Thanks, Vik suggested it with the foam sponge application, ad i suspect that now he sees how well it can work, he may feel comfortable doing it himself!
but seriously i had it done earlier on but it is the right consistecy of the paint that does the trick when apling.... at least for me... a feat i have yet to master...
one thing that has teached me your camo work here is that you have not to tacle wider areas of tank srufaces as i have to fill... camo not only breaks up the outline very good but makes it somewhat easier to know what to do with the given space of a tankhide...my sides i am constanly riddled what to to with them... i cant let them stay that unattened and not too plain looking....maybe the next tank will get a sort of camo too...but thats future music for now...
Vik, any tank can be camoed up! some tanks were plain, (WW-II comes to mind as early on Panzers were a dark grey, and Shermans came in OD green.)
Automatically Appended Next Post: So, I decided that the Perun's exhaust was looking too clean, and decieded to do the same sort of deal the Bogatytr got on it's exhausts on the pipes of the Perun!
1st stage, brushed on more tin bitz in spots and sprinkled salt on.
[/img]
[/img]
[/img]
[/img]
[/img]
2nd stage was to ad a coat of bolt gun metal over the salt and bare Tin Bitz.
[/img]
[/img]
[/img]
Now, once that dries up, I can brush off the excess paint over the salt and go to 3rd step.
well this is just classical...once you step a step further into perfection you see the recent work with more matured eyes... so it is only logical that you tried this methode on the perun! good work! and i so had to repress some laughter as i saw that snowsprinkled exhausts at first^^
i truly wonder how the glue holds the salt in place... is it difficult to paint on that mixture afterwards? or does the slat crumble off once you start the painting?
Some of the salt fell off while painting the other color, but I used the freshly applied spots of the base color of Tin Bitz to hold the salt on, (have to allow the paint to dry)
Now the salt rubbed away
[/img]
[/img]
[/img]
[/img]
[/img]
[/img]
As you all can see, I got a more realistic, raggedy and uneven wear patter for the base of the rust to have with the metal left to show that rust is indeed happening to the exhaust pipes, now to add the vomit brown to the tinbt sections and get that effect that worked on T-300's pipes!
really looking good! i think i have to try that tomorrow out on a secure area on the grey one...i think this could go a long way...really wetted my apetite^^
Viktor von Domm wrote:really looking good! i think i have to try that tomorrow out on a secure area on the grey one...i think this could go a long way...really wetted my apetite^^
Yes, it really is simple and easy to work with thing, add more of the color as the rust base, salt, paint over with clean looking metal color, all the while waiting for the paints to dry each step, and then rub off the salt, then add the vomit brown, voila!
dsteingass wrote:Man Shas, this is looking very cool!
Thanks again! I am striving to have tanks with a sense of character and history to them....even though they never really existed for real life machines., Makes me wonder what some tools, welding gear and a junk yard could make!
Your Tank(s) definately have character! Stout and Mean like the Imperial Guard.That would be awesome, however personally, I'm more comfortable with styrene and an xacto than I am with a socket set.
dsteingass wrote:Your Tank(s) definately have character! Stout and Mean like the Imperial Guard.That would be awesome, however personally, I'm more comfortable with styrene and an xacto than I am with a socket set.
Well, if my medium was real steel and parts, I may be part Mek-Boy! you have seen what I have accomplished with just ideas from my head and the materials at hand...Get ready though, uploads are on the way of more work done!
Looks it is time for 'Naval Jelly" rust remover!
[/img]
[/img]
[/img]
[/img]
The scratches over the star also got the same treatment, no worries, I was just camera snapping so fast!
[/img]
[/img]
[/img]
[/img]
[/img]
[/img]
What do you all think out there? seems poor Perun has the tank equivalent of Psoriasis, no wonder he can be so testy with all of that itchy rust all over!
Drop any steel tank onto a wet deathworld for several months of campaigning and the environment would soon cause this sort of thing, very nice job man!
dsteingass wrote:Drop any steel tank onto a wet deathworld for several months of campaigning and the environment would soon cause this sort of thing, very nice job man!
Thanks! I just saw your latest project concept of the spiral stairway, you are a jammin' madman!
i had a flash! you should really use that methode on the tools strapped on the tanks... the blades on the shovel at least should have peeled off and scratched effects aplenty!! after all there is some serious wear and tear on them...
I have been pondering if the tools have ever gotten used or not, Mainly when something needs an emergency fixing they would, otherwise they would remain unused and painted.
seems only logic if you think about it... all them scratches on the tank hides...she has seen some serious action and thus she had to be helped numerous times by her crew...
seems only logic if you think about it... all them scratches on the tank hides...she has seen some serious action and thus she had to be helped numerous times by her crew...
Viktor von Domm wrote:the shovels i would think would be a very good and apreciating target for that methode too^^ wondered why they had two ways camo colors anyway^^
To minimize showing the spot where a tank is hidden in the brush!
Viktor von Domm wrote:lol... once agian we need more sound on dakka... i just pictured this scene with the tune of old mc donalds has a fram...gee eye joooooeee^^
well you know that your tankmaking has put a serious bumper on your mini making work...?^^
LOL! I was spoofing n old G.I Joe cartoon ending where they present facts to think about like
Well, the next step after I upload the T-300 pics(is ready for mud and dirty washes) is to work on the soldiers to give those heads you sent me a home.
Viktor von Domm wrote:its all in the context as usual....having a fethed up mind as mine also does work to interpret certain innocent wordings into something else^^
No problem Vik. We all know you by now!
Nightfall wrote:looks SOO COOL!
Glad you like it! earlier on I have WIP pics showing it being made.
Alright, I have "muddied up" the T-300 Bogatyr, sadly I had just enough paint to do it the older way, and not "texture" it, I will once I have some more money, but for now, I will present to you all the muddy version as it is now.
oh all that beautifull camo work covered up in muck...^^ cant say well done as it looks too muddy^^ also if paint is an issue.... would old vomit brown be of any help to you? i have quite an amount of that and would help ye out on your endeavors!!! just say the word!
monkeytroll wrote:Looking good shaso. That tow rope's still looking a bit new and shiny though
Oh that cable is gonna get the old oily look with that Badab black wash!
Viktor von Domm wrote:oh all that beautifull camo work covered up in muck...^^ cant say well done as it looks too muddy^^ also if paint is an issue.... would old vomit brown be of any help to you? i have quite an amount of that and would help ye out on your endeavors!!! just say the word!
vik
Ah Vik, It was in the field and test runs it did what many such behemoths like it does, sank into the mud a bit and trudged on through! As for Vomit Brown, it is the lightly orange color I used for that last layer of rust!


 I get 40 lbs of sand for $5 at the local hardware store.

 So looks Imperium made, barring the crosses that let us know it is German made.