LOL! I do have a few of those left floating around.
Automatically Appended Next Post: Oh yeah, I gave an answer to someone who called the Nuka-Cola Cooler a refrigerator,,,,OMG it came out like a friggin' commercial!
neil101 wrote:Hey shazo , love the bren , i always consider buying it at my local hobby store, looking forward to seeing your work on it mate.
No problems!
sluggaslugga wrote:That thing is awesome!
What are the length and witdth measures?
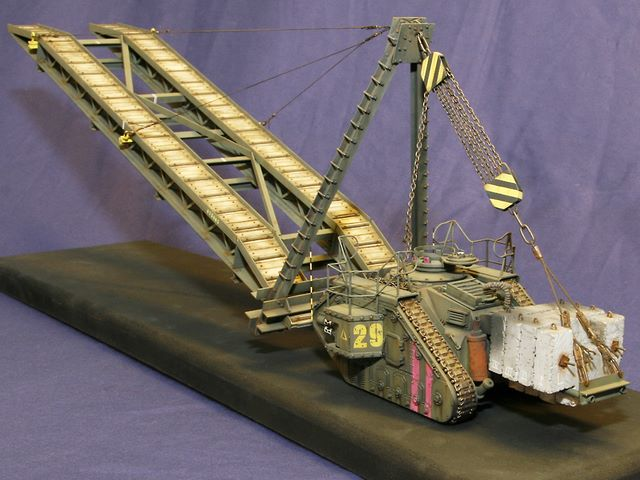
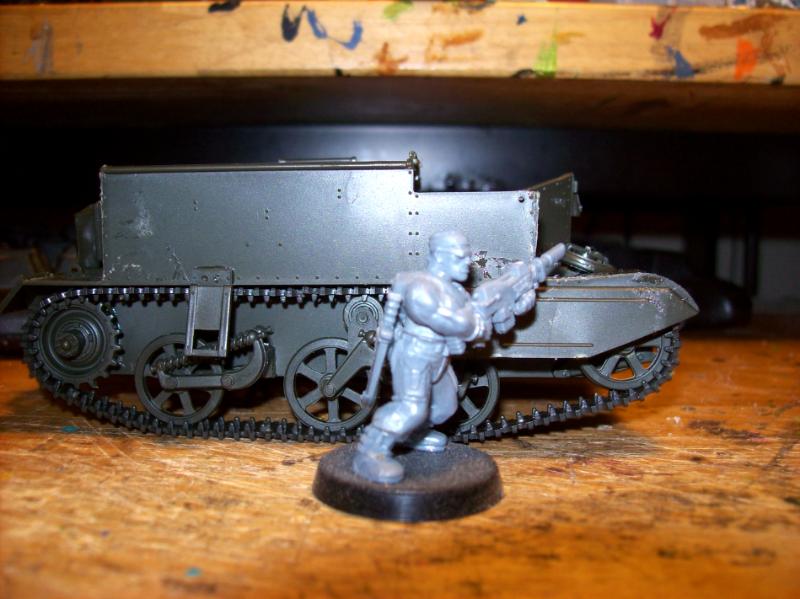
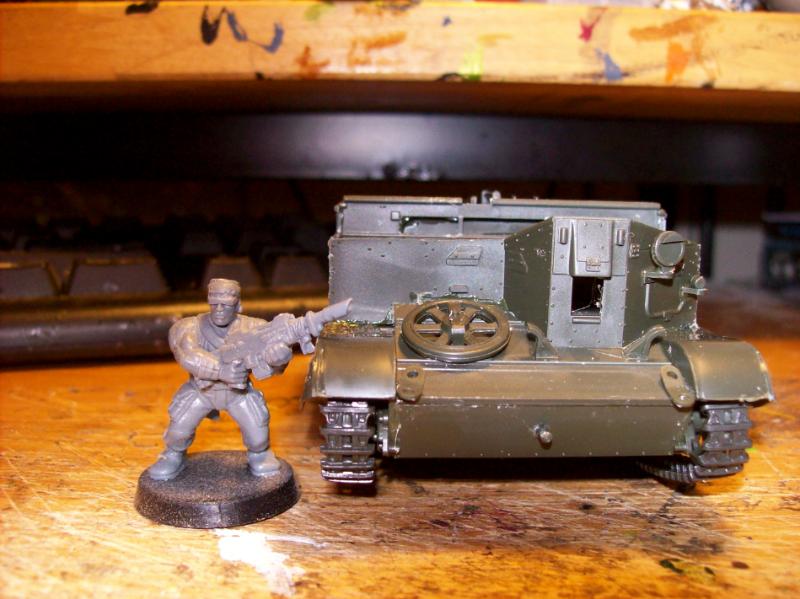
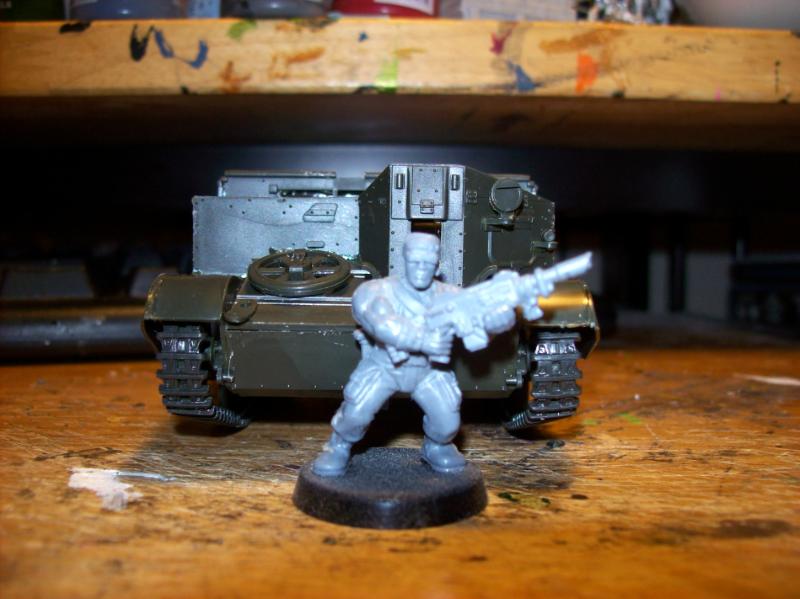
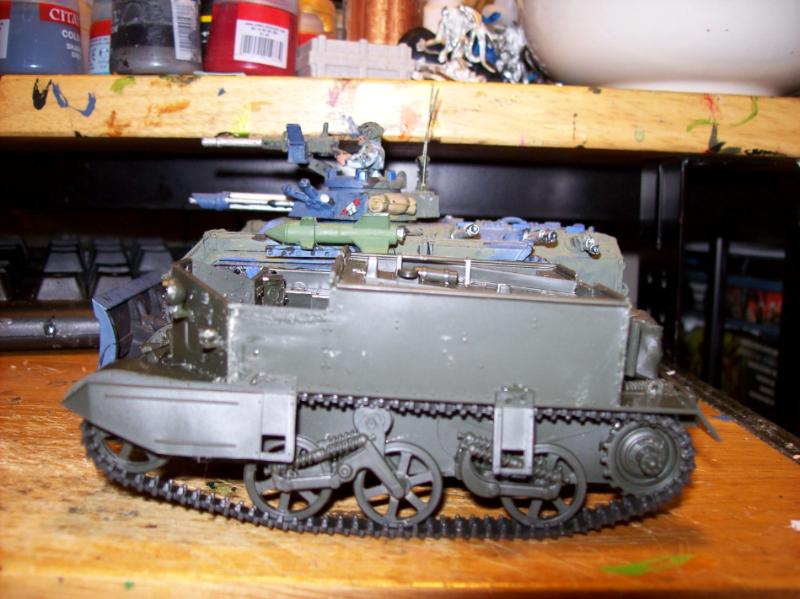
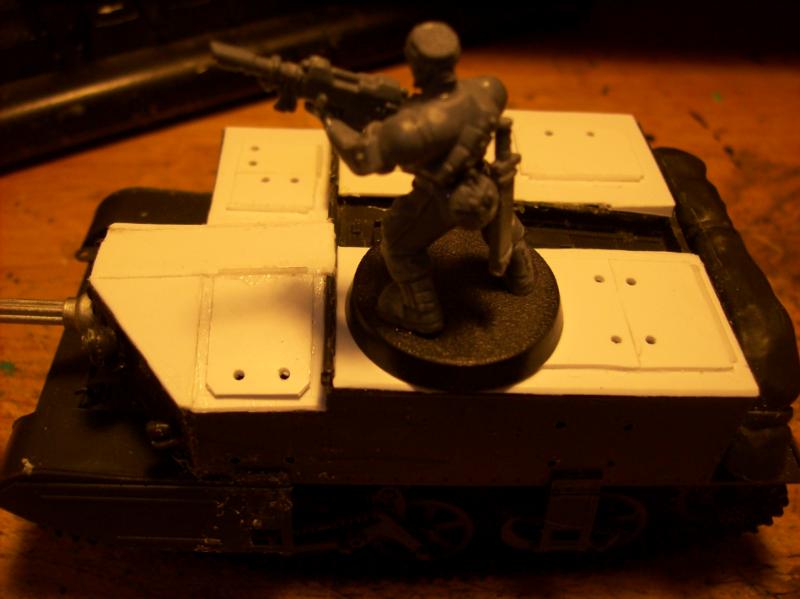
Well, I did pose a catachan and chimera for size references as most know how big each of those are! So here we go, measured against standard models!
[/img]
dsteingass wrote:I think an Autocannon would look best mounted in that bad boy! It would make a great Salamander Scout (or a heavy flamer for a Salamader Command)
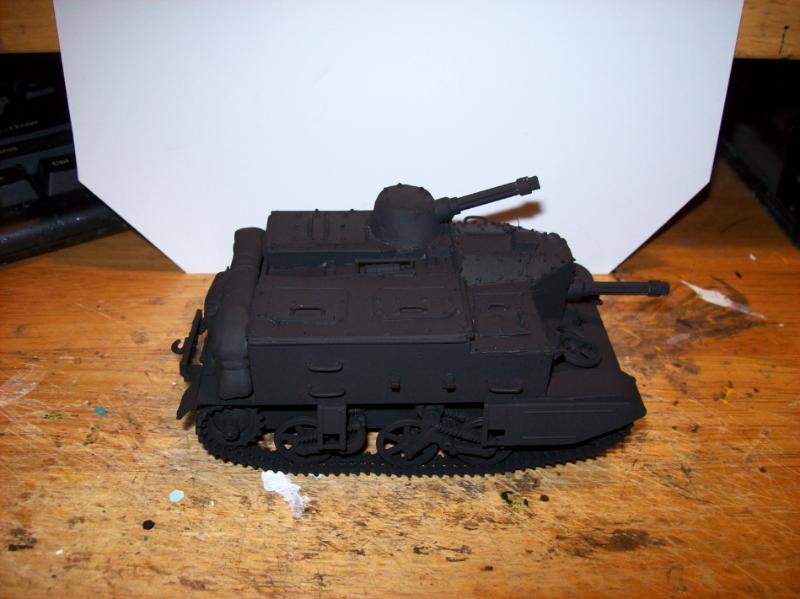
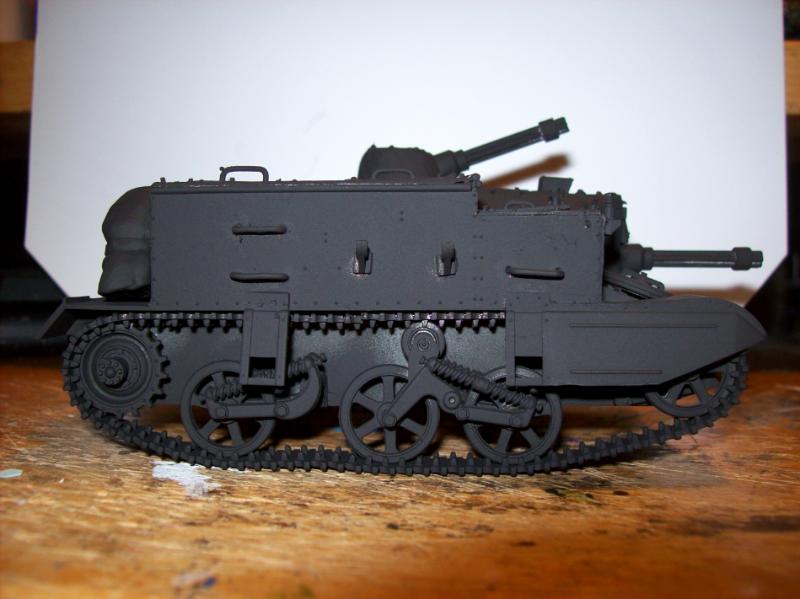
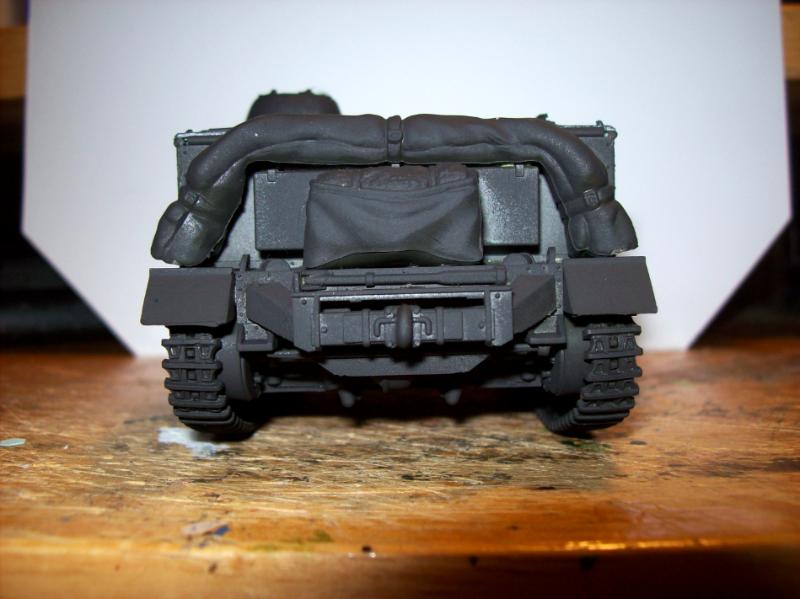
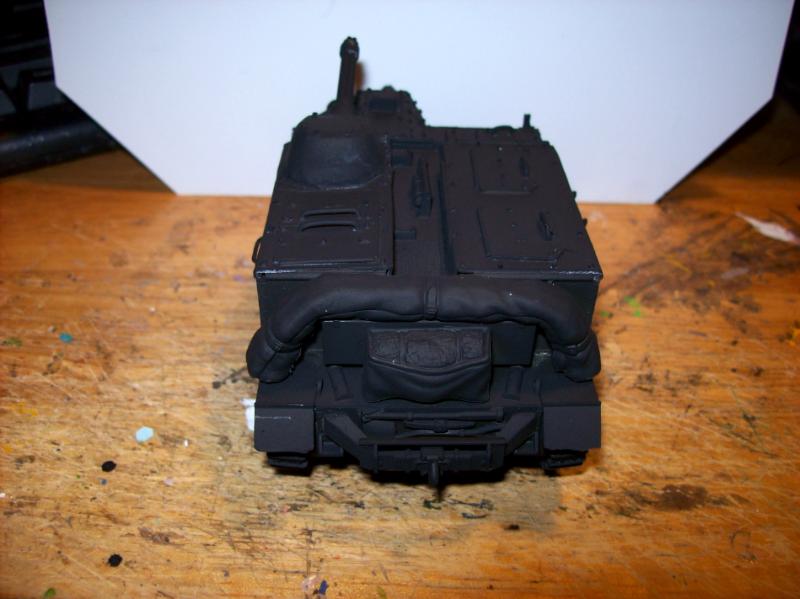
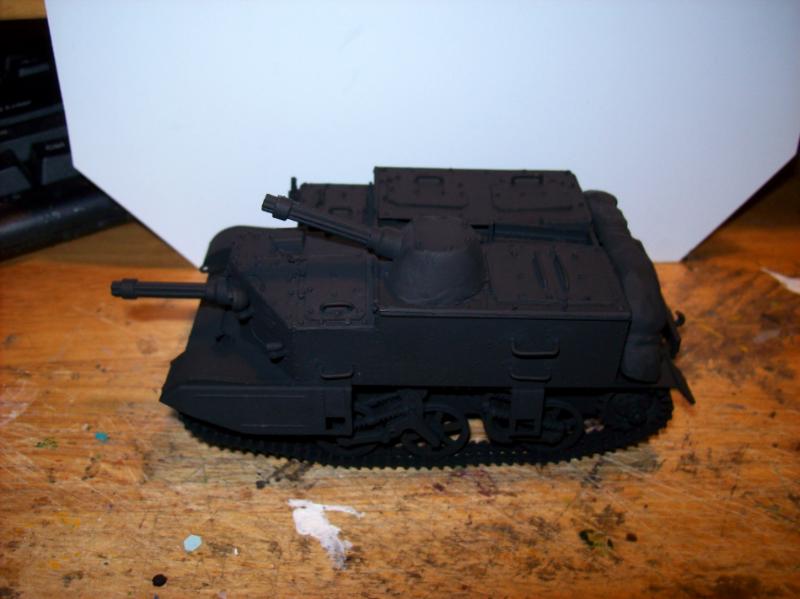
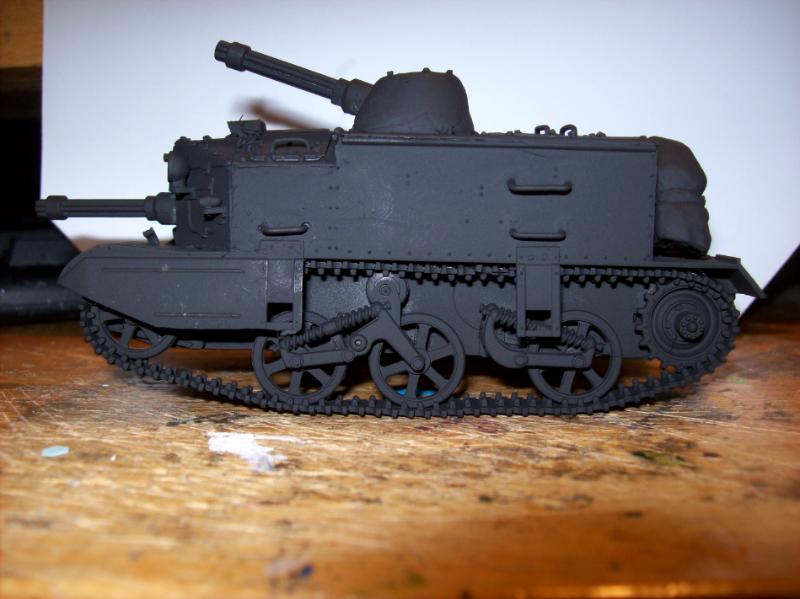
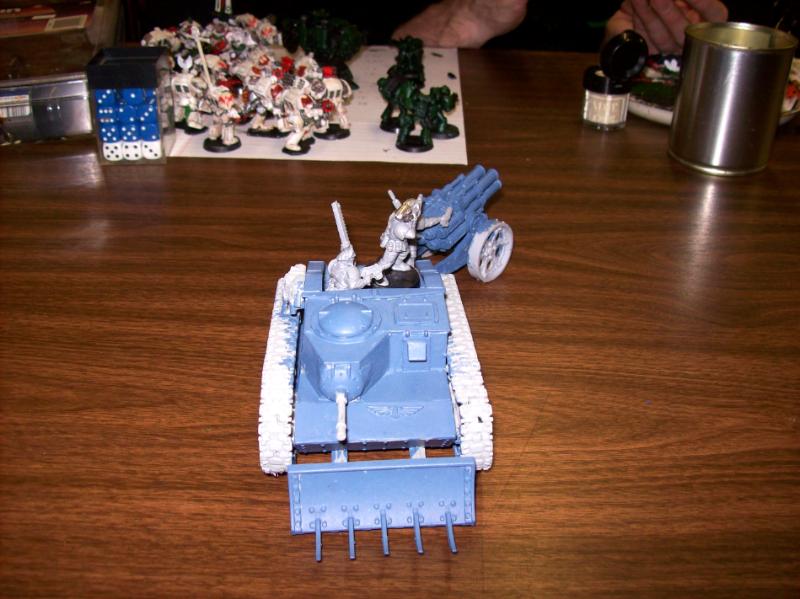
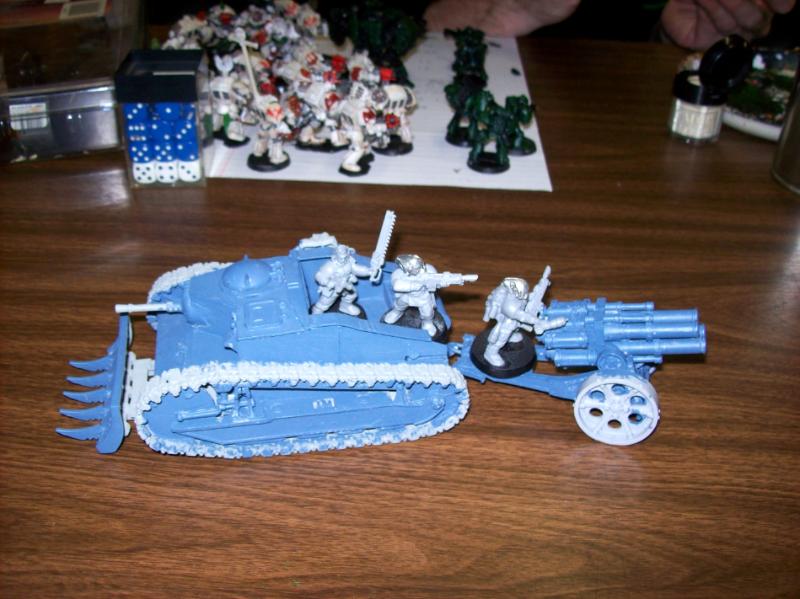
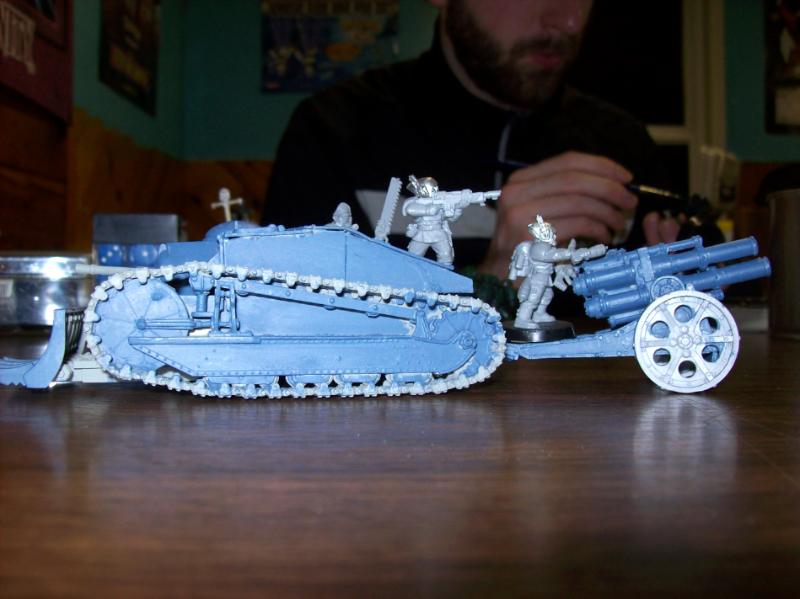
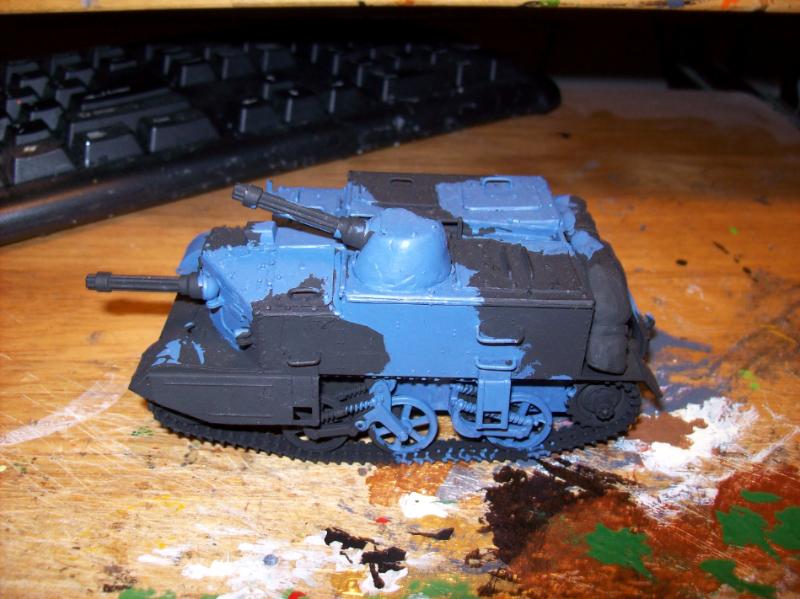
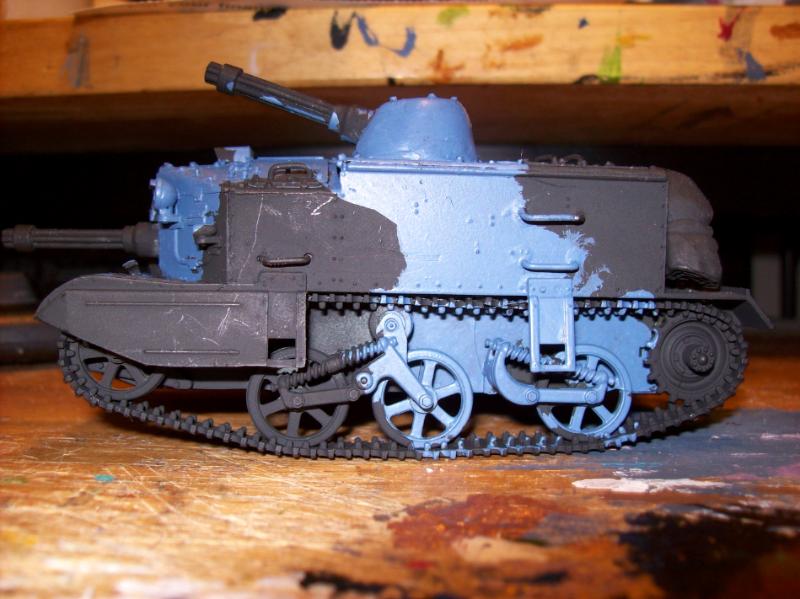
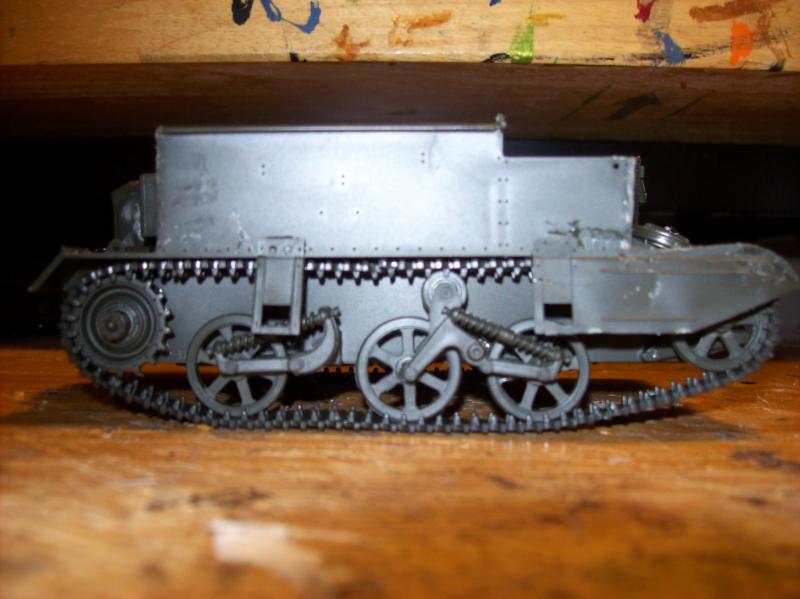
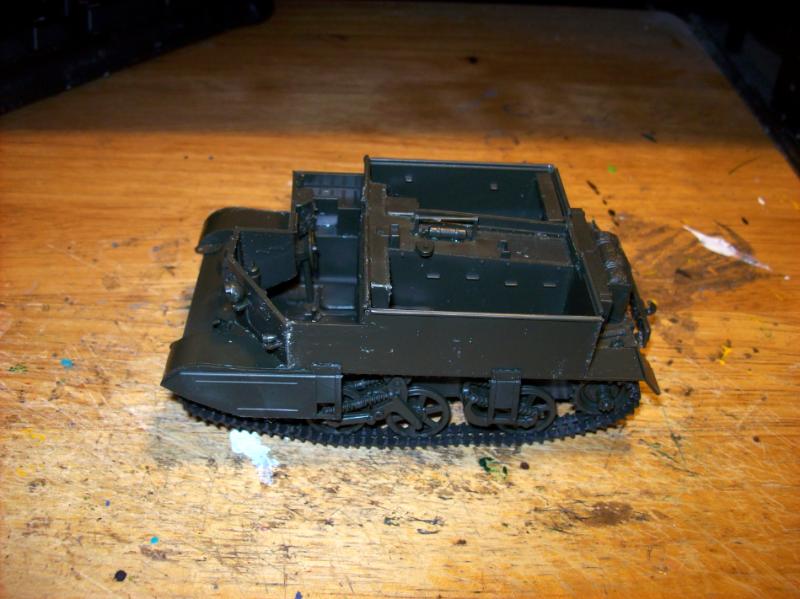
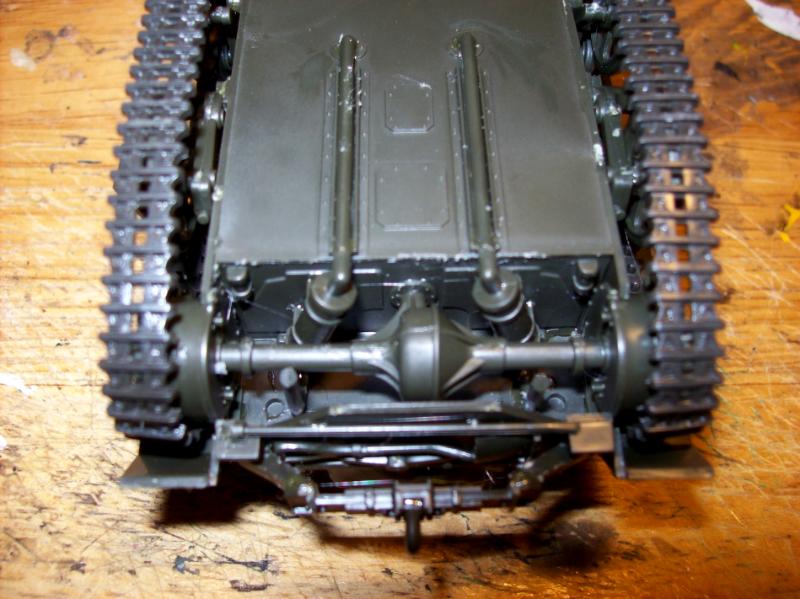
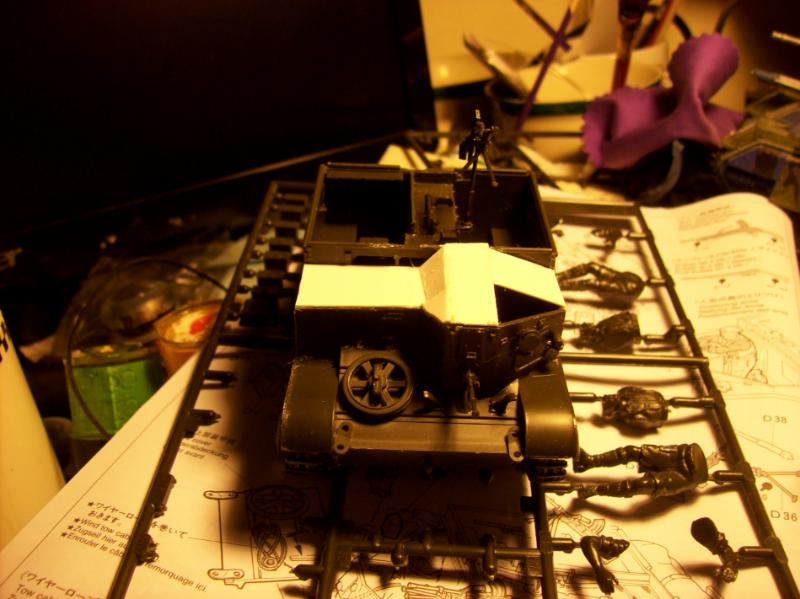
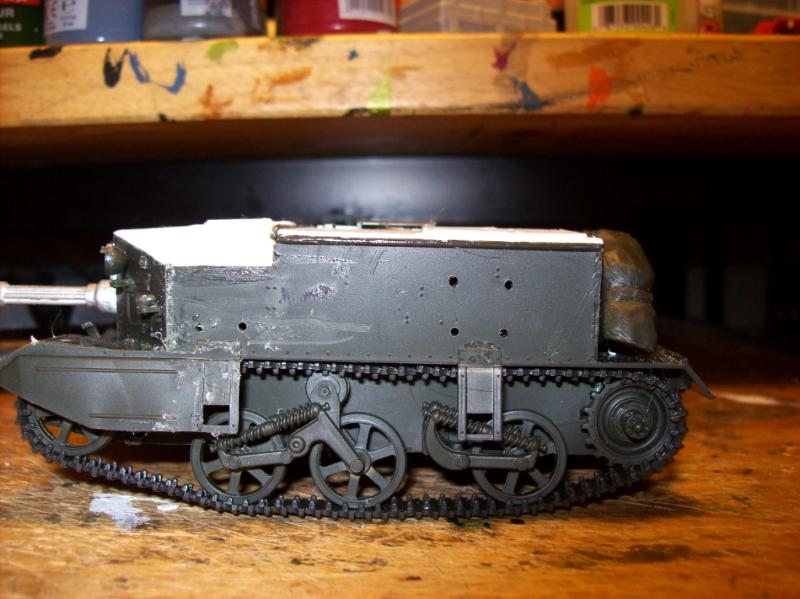
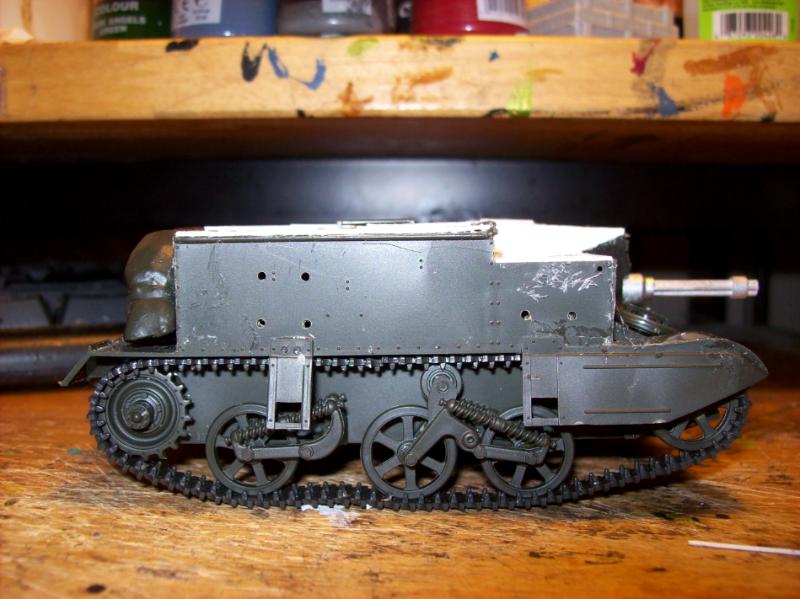
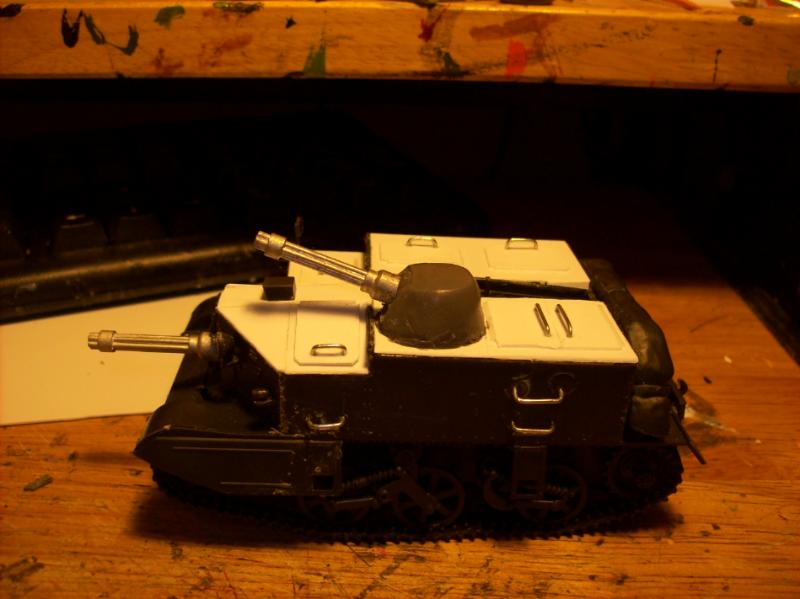
I did put the bren guns on, and well, they are smaller than a lasrifle! Imean it is 1/35th scale and the smaller scale GW hand weapons are bulked out comically compared to the real scale. I will have to look and see if I have any auto-cannons left, but it is more like the FW Centaur, upon which the Bren was the basis. A light tractor/munitions carrier/small squad transport. I am going to enclose the thing too.
But now look at the bren. [/img]
Centaur
Automatically Appended Next Post: Centaur is basically a bren made from a Leman Russ, yet smaller!
dsteingass wrote:Yeah, but that is what I'm saying, that is just an autocannon with a Bren-ish top-loading magazine. Hell, you can make one like that easily enough.
LOL! that is the FW Heavy Stubber that looks like a Bren.
really? WTF? Why is is 2x the size of a regular Hvy stubber then??
Automatically Appended Next Post: So, that vehicle is useful for what then? Drawing fire? lol
Automatically Appended Next Post: Sorry, work is incredibly stupid today, my apologies if my frustration of stupidity is coming through here. It bleeds everywhere in my life...
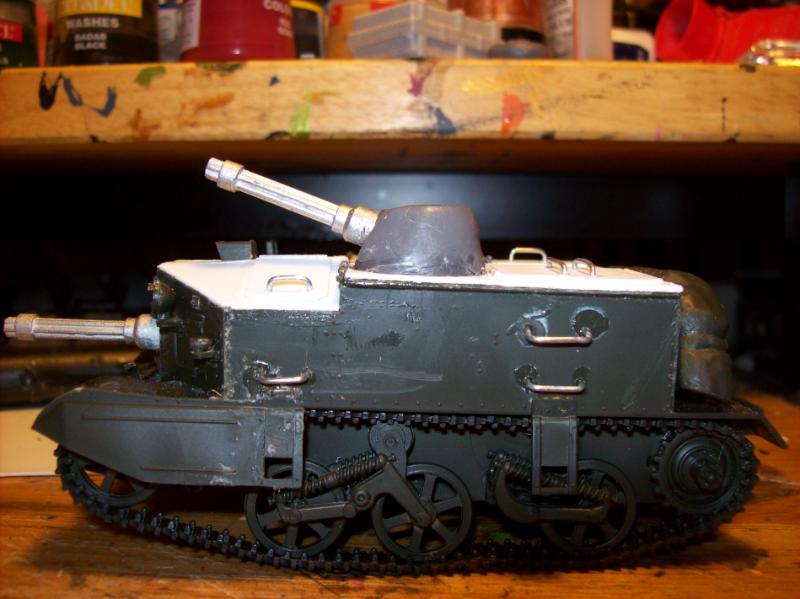
All GW weapons are way bigger than a true scale 56scale figure weapon ought to be. So much so that the auto-cannon is bigger than a 75mm cannon, and their battle cannon which is supposed 120mm, makes a 1/35 scale 120 feel inadequate. GW has no proper sense of proportioning IMHNSHO
dsteingass wrote:The Heavy Stubber is correctly sized to represent a .50 cal IMHO
An actual 1/35scale .50cal, is half the barrel thickness of the GW Hvy Stubber! The body is okay, and is pretty much more spot on, but the barrel is "robust" compared to the model company version.
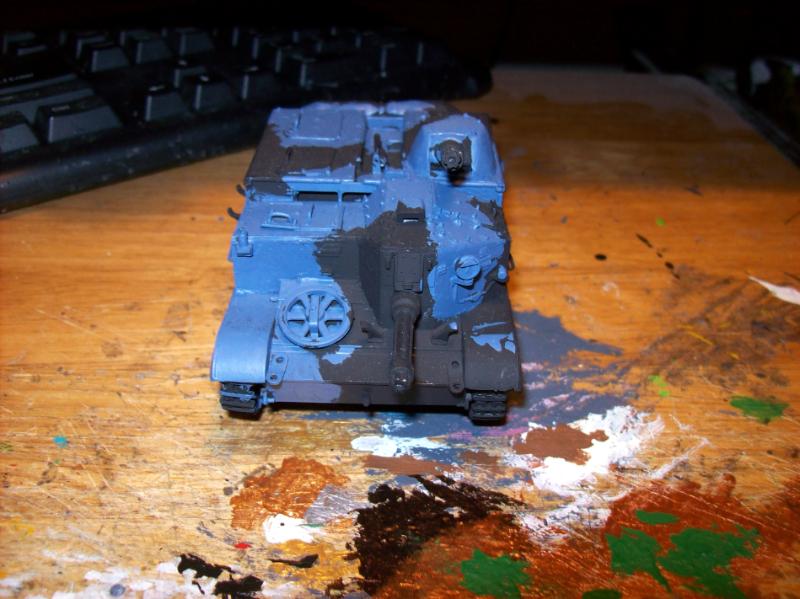
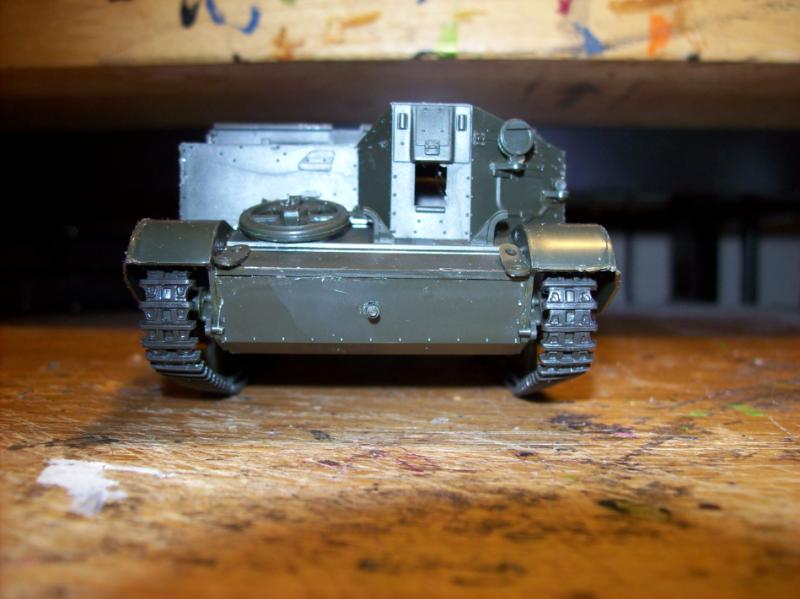
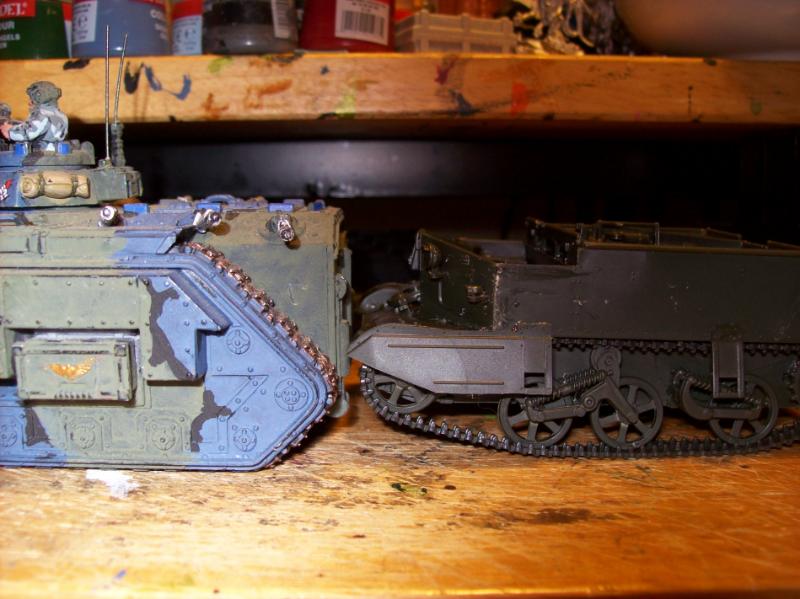
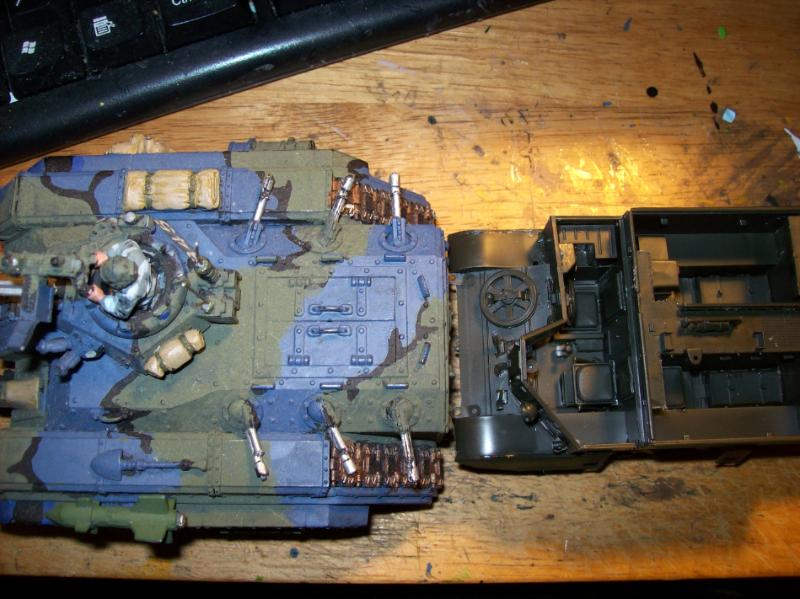
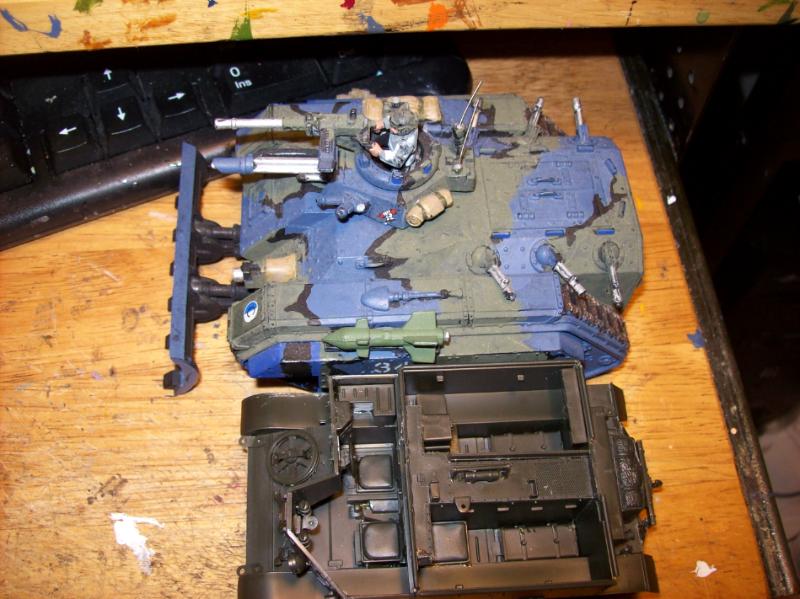
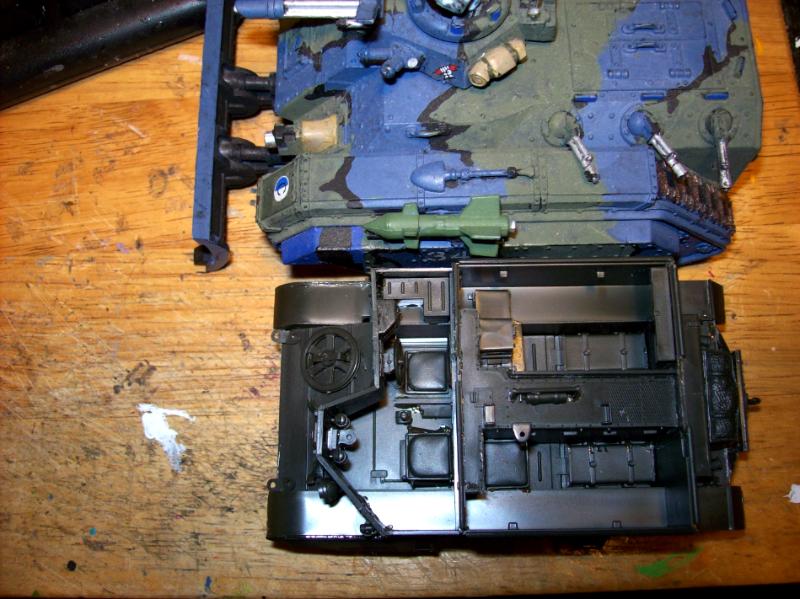
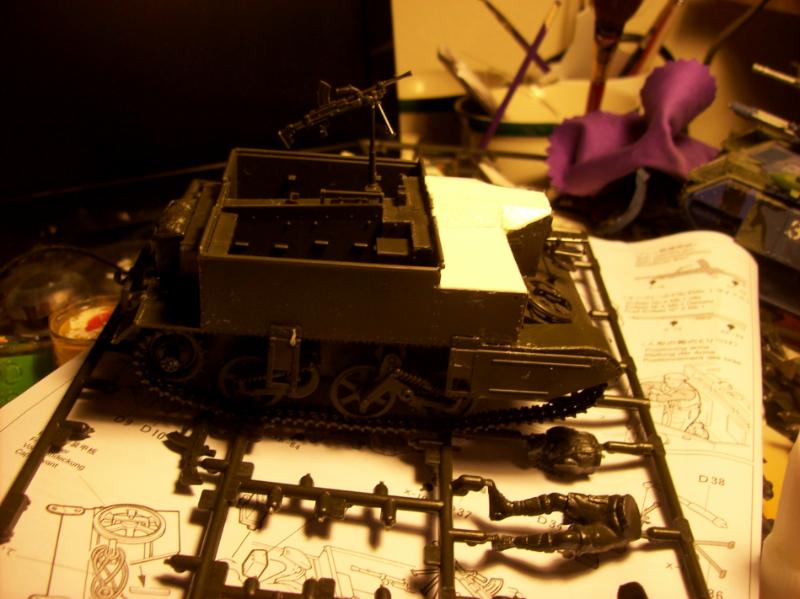
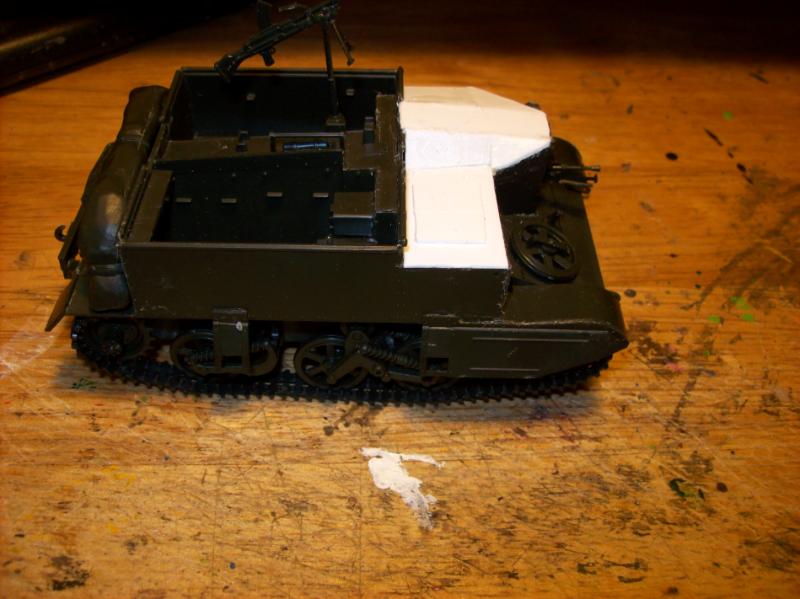
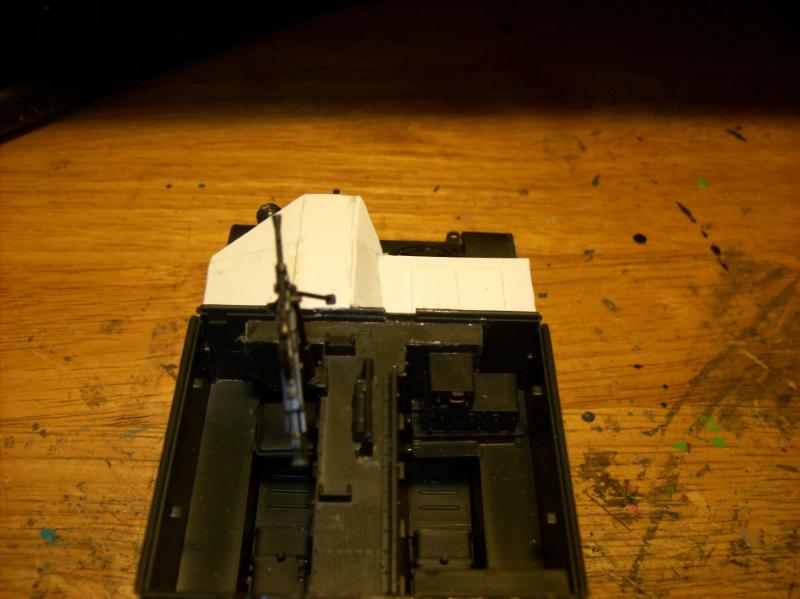
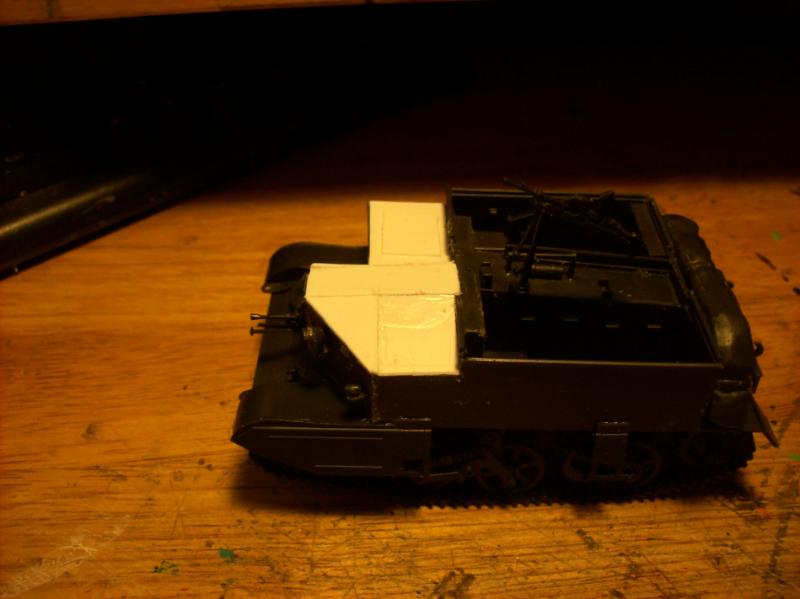
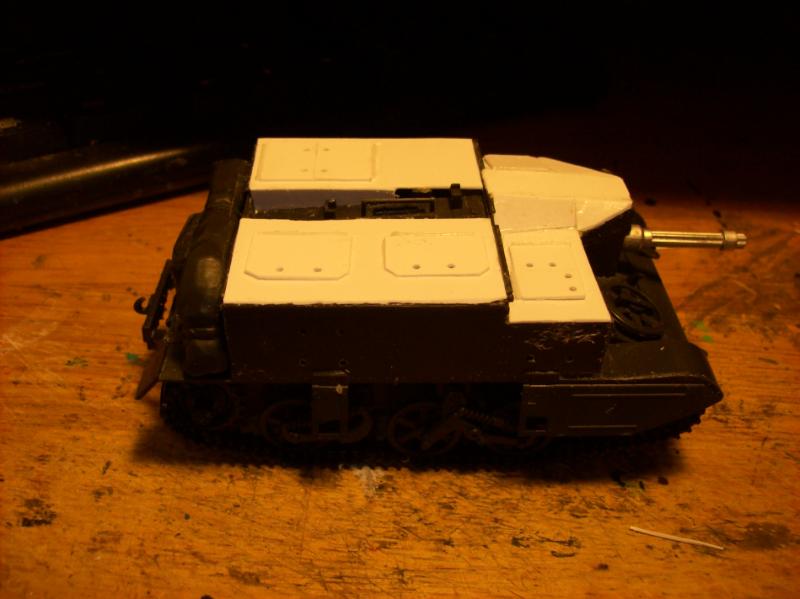
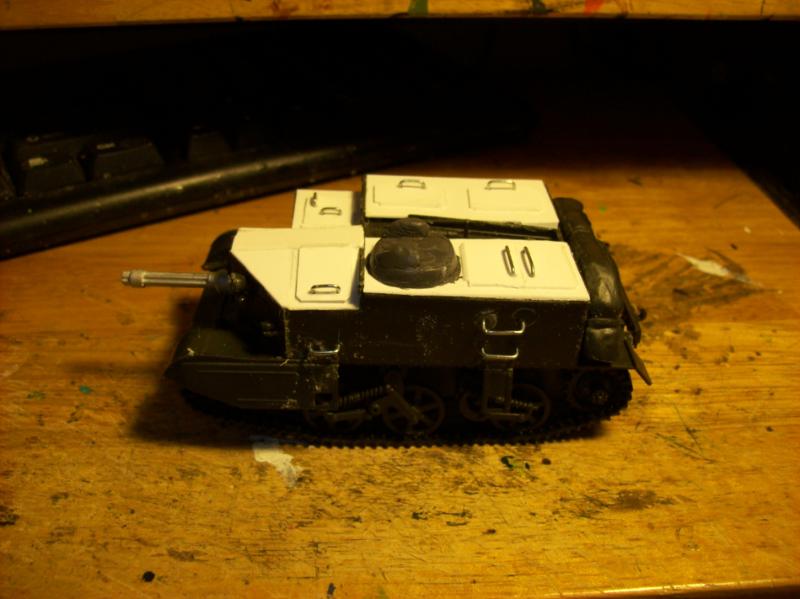
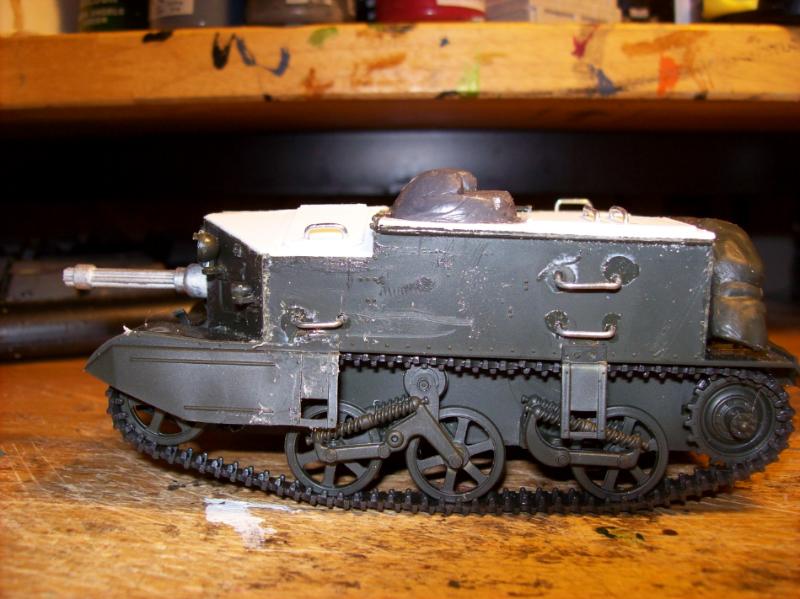
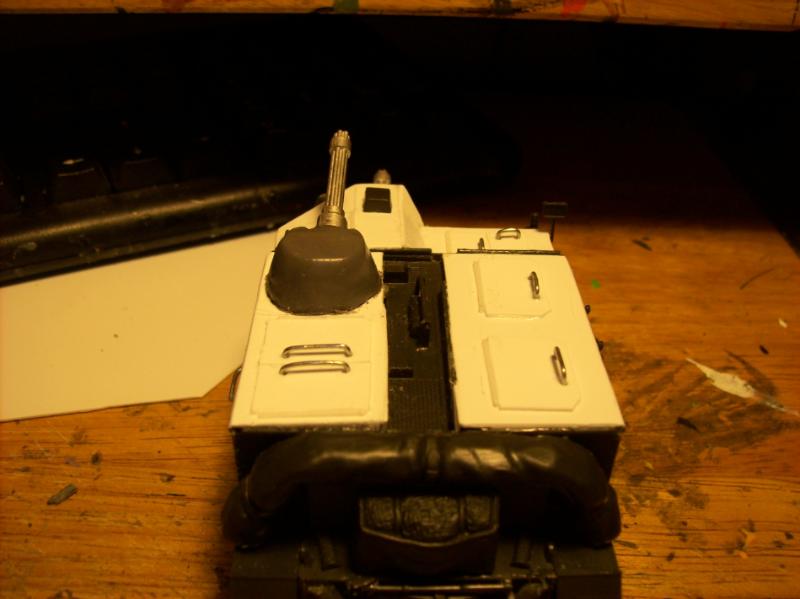
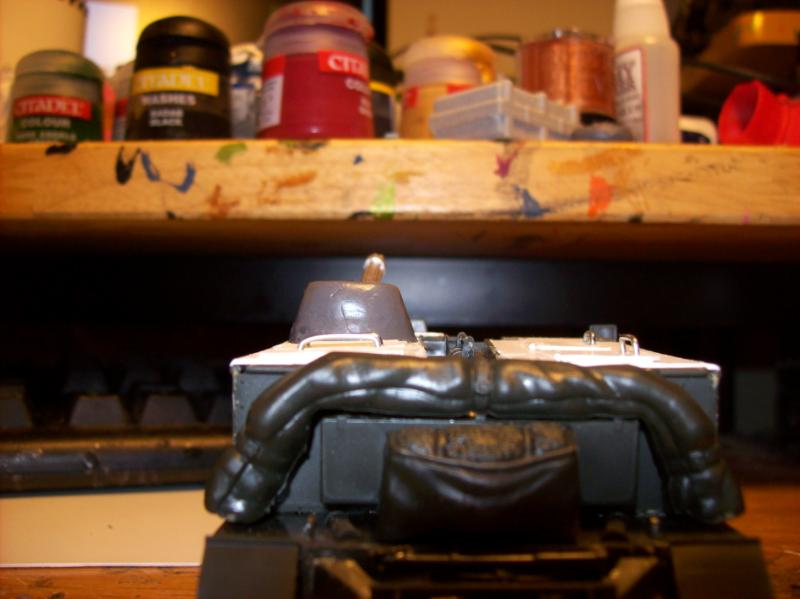
Work is going on for the Bren I may have to find a different name as Russia had the Kosmolets, a similar small tractor like machine. Meanwhile, feast your eyes on the armored covering work so far done.
[/img]
the old gw metal autocannon is also a top loader. should be easy enough to ebay an old heavy weapons team that comes with one and subsequently convert the end of the barrel.
Well, we are on the same coast ya know. I am north of you in Oregon, Dave. I do have some nice cannon barrels I can stick out of the front, but left the little Bren gun, as for the top I can going to plate over the passenger area, and wonder if a servo turret would do the trick? BTW Metal OC cannon barrels.
I was just thinking how prolific your are shazo , every time i look in your thread anew vehicle is been converted and painted up ,
the bren is coming along nicely mate .
neil101 wrote:I was just thinking how prolific your are shazo , every time i look in your thread anew vehicle is been converted and painted up ,
the bren is coming along nicely mate .
Thanks Neil. I figured I would do a conversion from a vehicle of our friends across the pond!
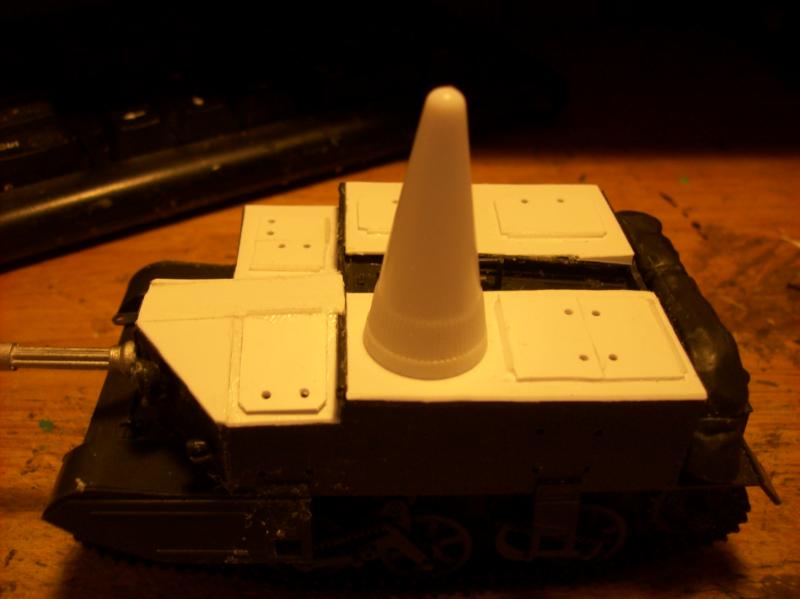
Smaller than a glue cap. and the glue cap I was going to try is still so small for the spot and job! Gray Stuff it may well be....time to truly test those sculptee skills from years ago!
it.s a shame we live so far apart... i have some plastic bitz in my junk box that would go well for this build... they came from those sparkly wine corks made from plastic...
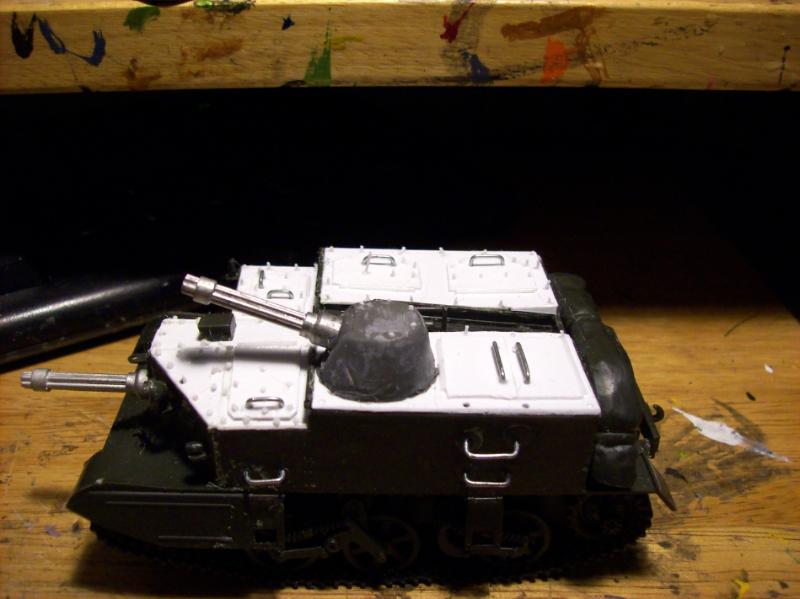
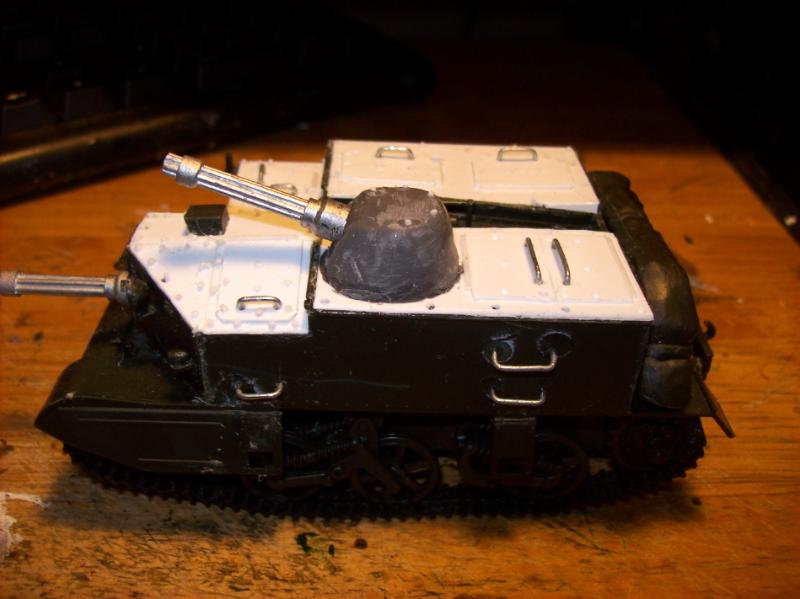
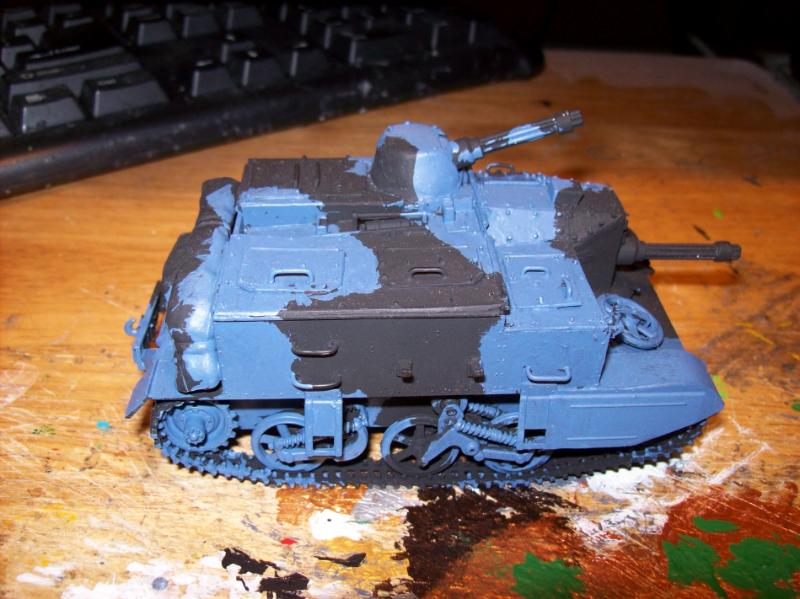
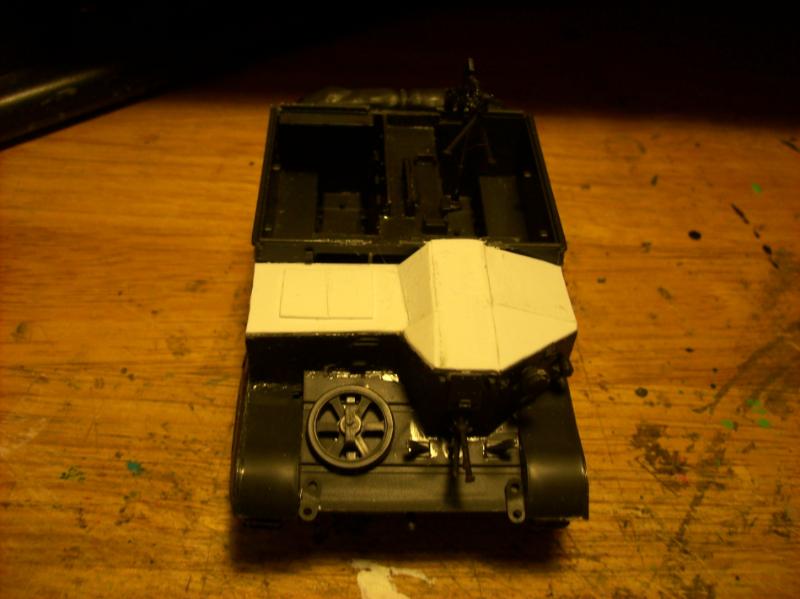
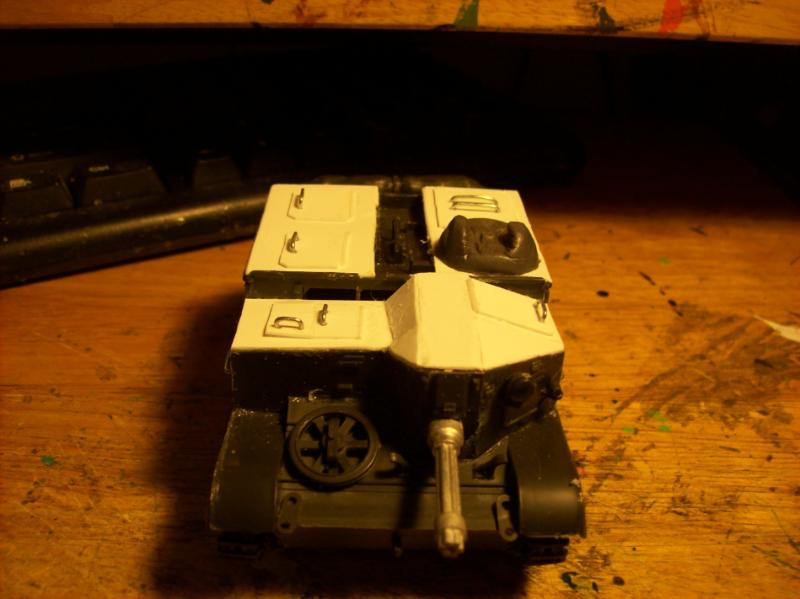
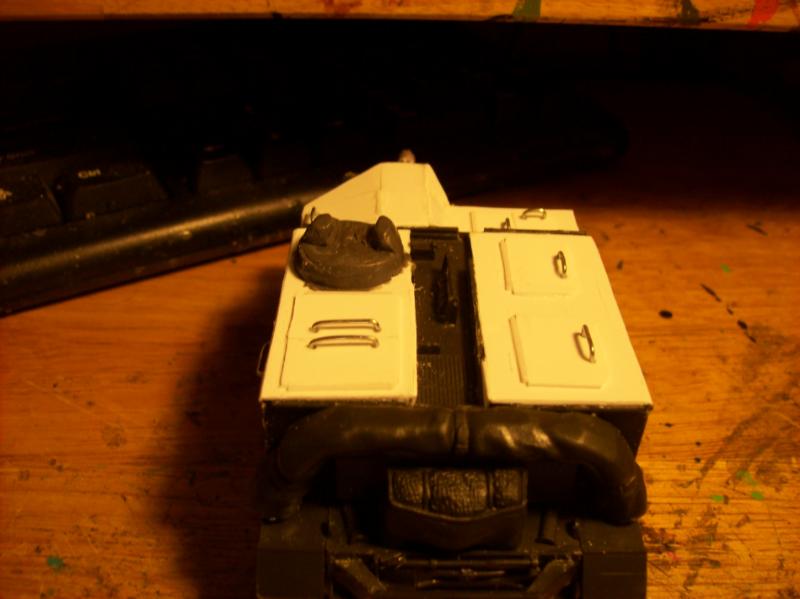
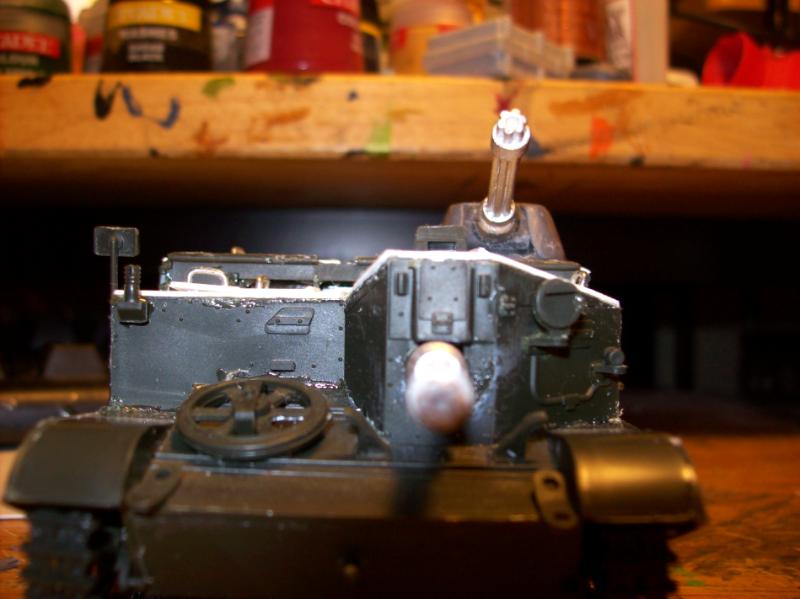
Well now, fror an idea where my madness is taking me for the Bren concept, I have some pics that show drilled holes for the hand rails, the hatches and the bow weapon mounted. For the turrets' area, I have an "Army Painter" glue cap and then that helpful Catachanian trooper in the spot to show the size issue of it all.
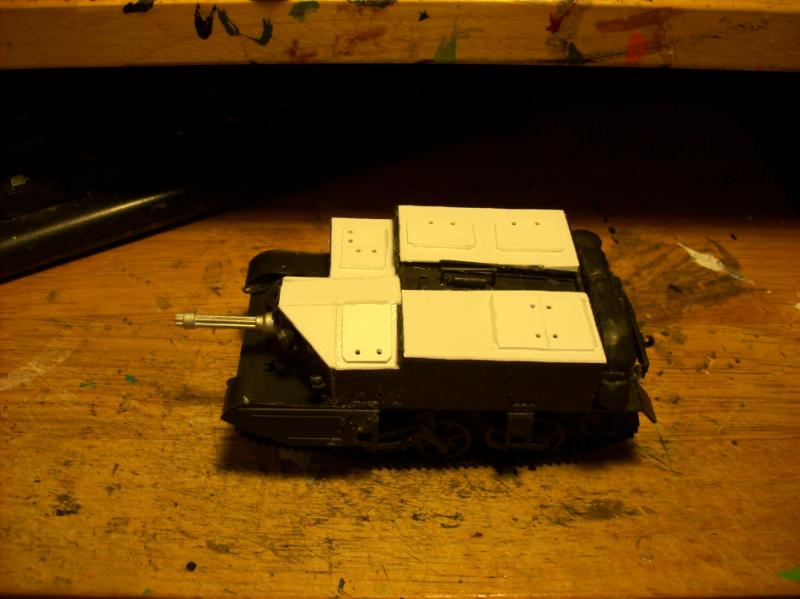
left side, gunner's hatch and climbing points as well as left passenger hatch visible.
[/img]
Climbing points on the left side.
[/img]
Right side, driver's hatch, and right side passengers' hatches shown as well as climbing points.
[/img]
Climbing points right side
[/img]
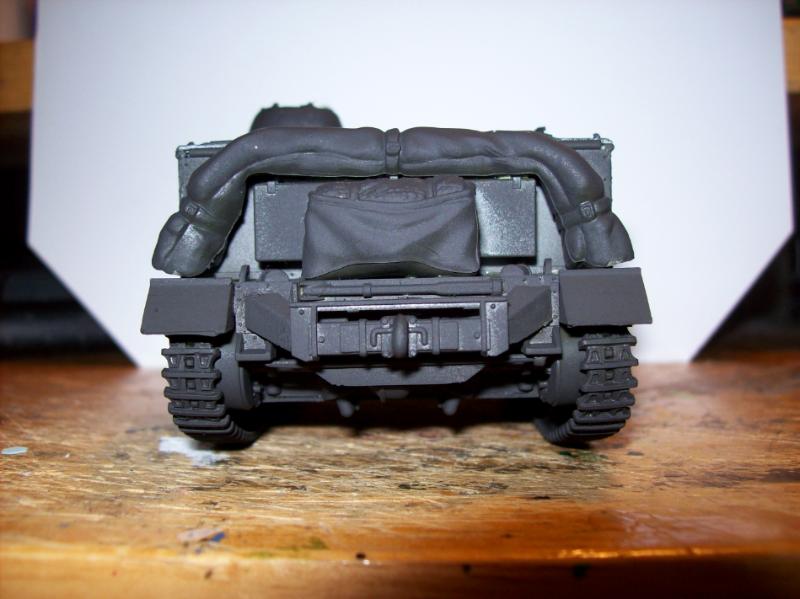
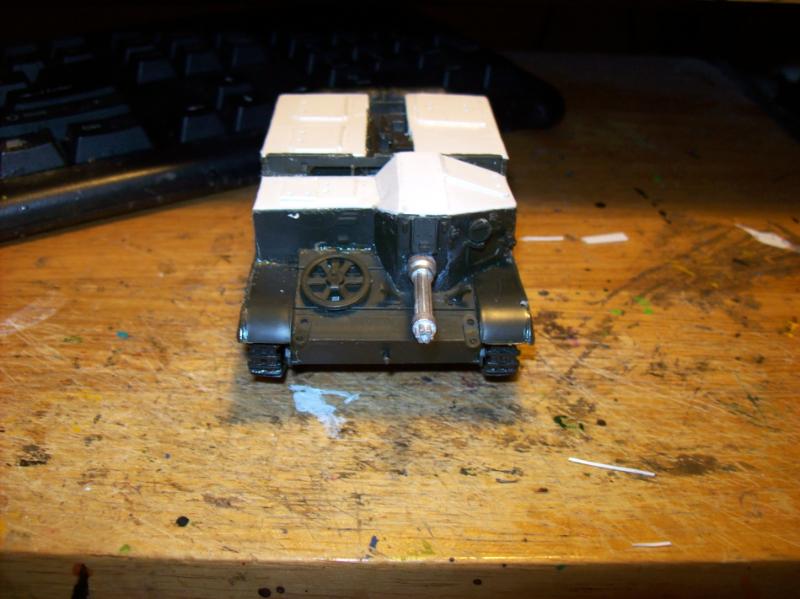
Front end, Bow mounted Gatling Stubber
[/img]
From above
[/img]
With glue cap to show turret area size
[/img]
With Catachan and his 25mm base to show such is to big
[/img]
Handrails as you can see will be metal and super glued in to place. Turret, well, one of those cap bases with some putty around it would work, flat top and a mantlet maybe.
i like the individual armor plates... and the handrails /handles will look good... with so many you really sell the look of a vehicle often used to the comings and goings of troops i think...
turret will be some major issue here... have you looked into thze fridge or other household things for some help? some sodabottles thse sporty ones where you suck the beverage out rather than spill might be helpful too...
Viktor von Domm wrote:i like the individual armor plates... and the handrails /handles will look good... with so many you really sell the look of a vehicle often used to the comings and goings of troops i think...
turret will be some major issue here... have you looked into thze fridge or other household things for some help? some sodabottles thse sporty ones where you suck the beverage out rather than spill might be helpful too...
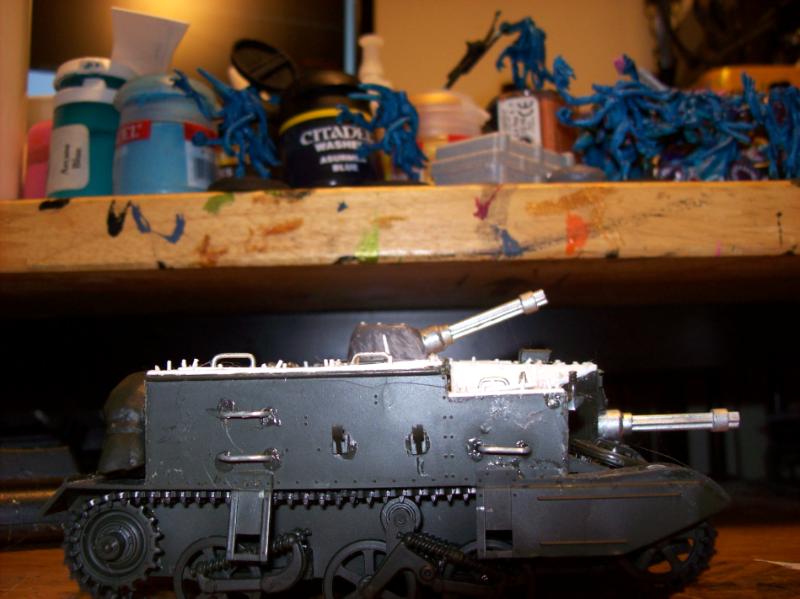
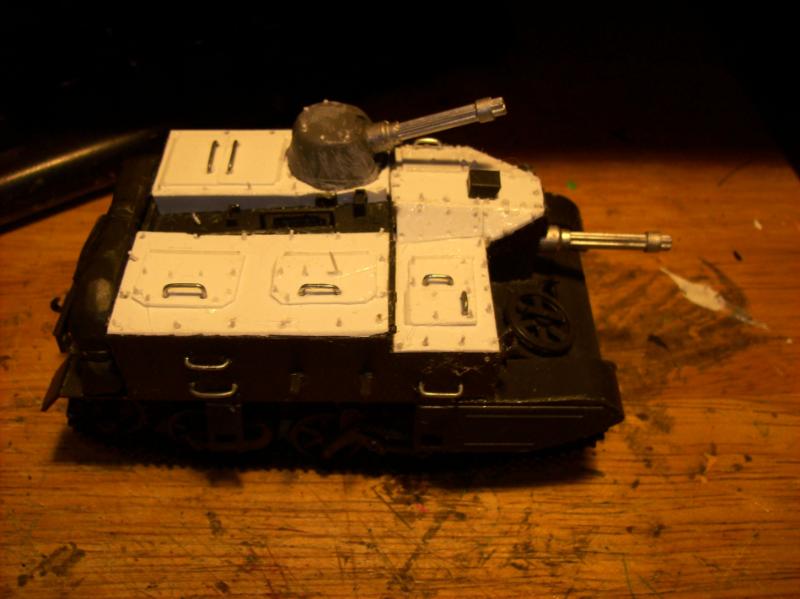
Thanks Vik. I also added round stock to the hatches, I just need to make hing holds for those, handles for lifting the hatches will be next, that turret is still the stumper.
Oh we yanks get just pop-top cans or screw top bottles and those are still too wide for the spot.
will you then build up on the structure or file it? either way that looks very promising!
the handrails seem to be something you have already worked out pretty well...^^
what i was wondering now... how do you want to rivet that vehicle? i fear that by using the glue methode on this you will have way too different sized rivets all over... the model itself is rather more tiny than your other babies so i would suggest you try to get a more uniform pattern of rivets on that one...how...i am at a loss...
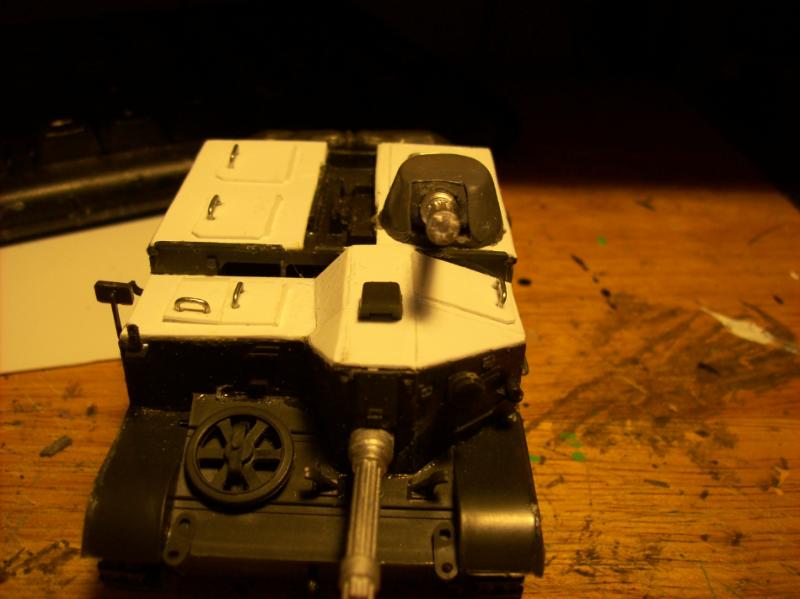
I have some very thin round stock, it may take time to rivet like mad, but glue/snip the pieces, I will also be adding more and shaping to that turret, then smooth it down some more.
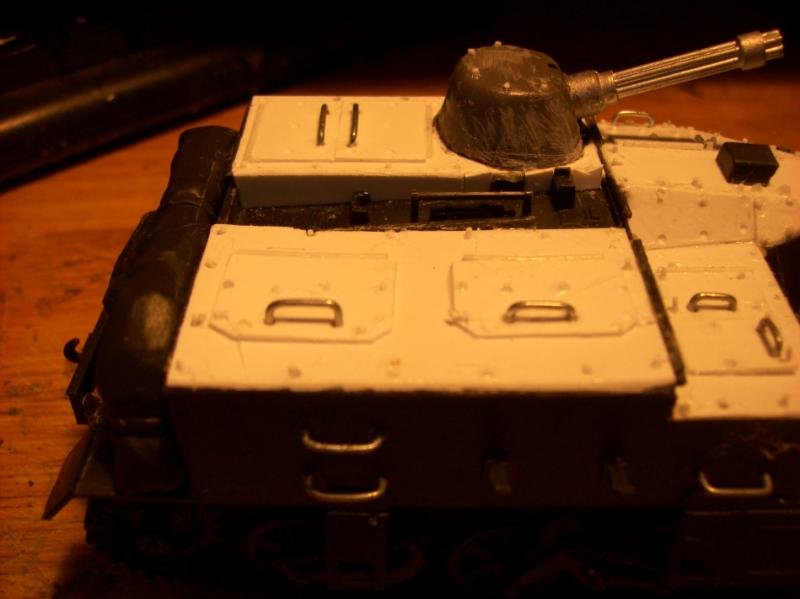
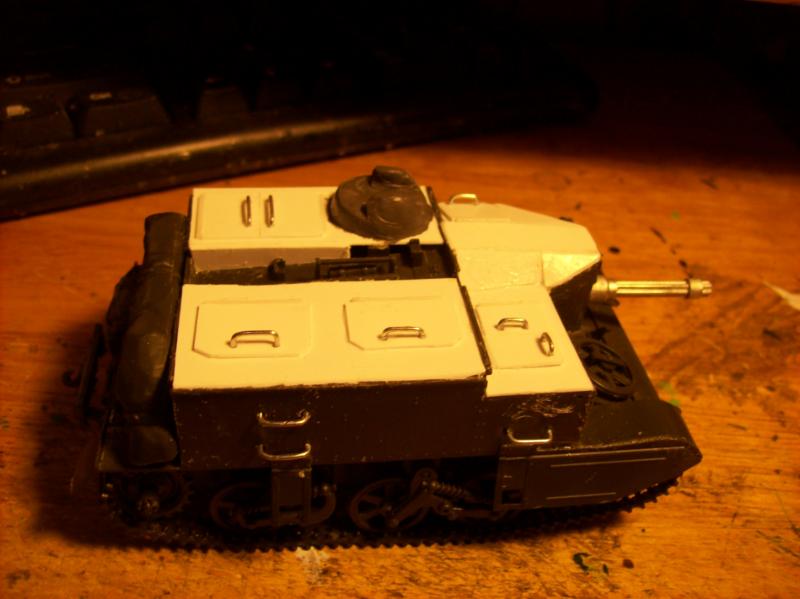
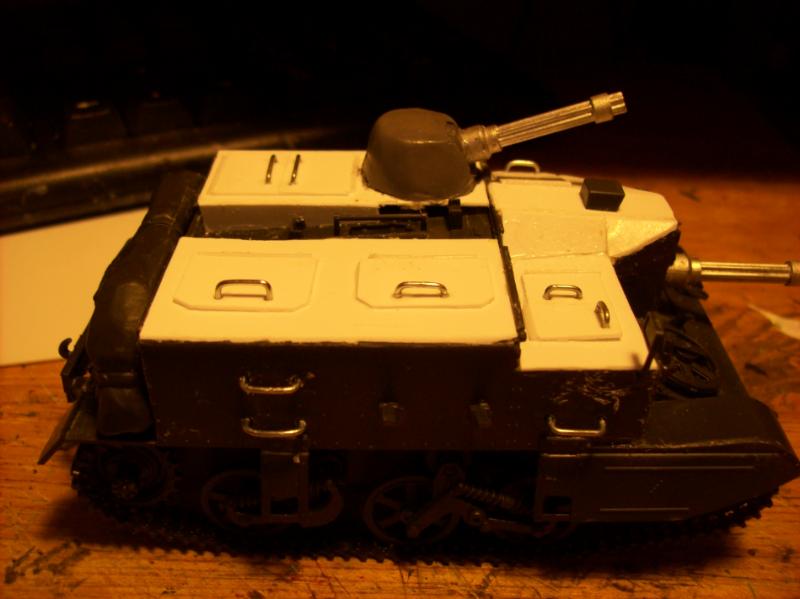
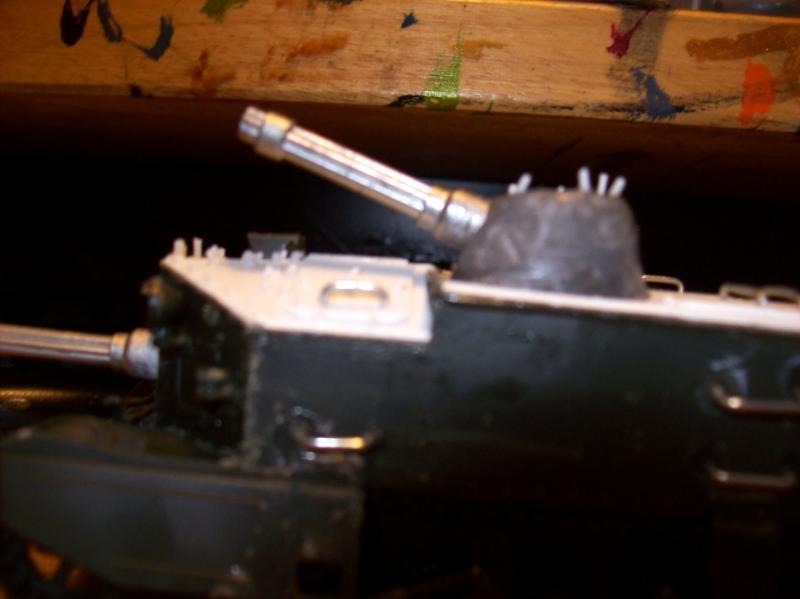
Well, the plastic rods look more thread sized in their 1mm diameter. And the pics will show that while the turret is close to what I was after, certain realities made it different than planned but workable.
Viktor von Domm wrote:looking good... the shape looks very good... how did you get that shape done anyway? such regular shapes are really hard to do...
by the way... are those gattling barrels from the OC stuff?
Thanks. I used a end of the tweezers, wetted it, and smoothed it as I shaped it, avoiding finger prints as much as possible.
Nice work on the conversion. I'm not sure if some other nit picker has already pointed this out, but the original vehicle is a Bren Gun Carrier. The Bren was the UK LMG of choice in the 40s and 50s named after where it was largely designed in Brno and Enfield. Its amazing what sticks with you
A Catachan can soak up as much damage than 4 other guardsmen! They don't need no stinkin armor!
Not really, they die just like the rest, but it makes them seem tougher
Viktor von Domm wrote:where is that pic from? looks like a star wars fan project to me...
but i like the look ...
I caught it on Crackle, is named Trenches, two armies in the future fighting over a crappy planet soon find out that there is something else on planet with them......
Automatically Appended Next Post: xilepictures.com
oh by the way... try making thick twisted cables out of three or four length of wire ...put them in a vice and a drill and just pull the trigger...easy made twisted cables...!!! done that quite often now and it always looks cool! looks even like artificial sinews...
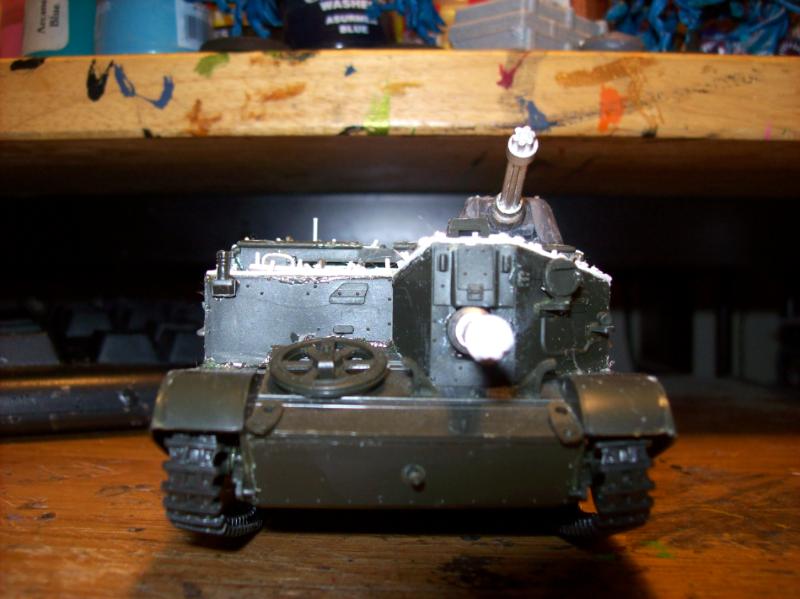
Well, to reclaim my own primacy amongst the core of Me, Vik, and Dave and Max, I figured it is best to show progress on my Bren, aka "Porcupine" I came up with a new technique, I drill a depression, (sometimes a hole appears) apply glue, and then put the rod to the glue, snip, and wait before final cuts and filing for these rivets, thus allowing me to claim smaller rivets in my repretoire od rivets, I ma no loinger just the liquid form riveter, I now have a second process under my belt! MUWAHAHAHAHAHAHAH!
[/img]
[/img]
[/img]
[/img]
Next step for them is that snip/file. Just a few fresh drills and glues to go!
SilverHayabusa wrote:Man looking good! Keep it up!
Glad to hear that you're tackling new processes...
You can also see earlier on my scratchbuilding of tanks for the T-400 and T-300, and the finished Malcador Defender that uses a Tamiya French Char-1B bis with a glue cap for Demolisher Cannon!
hey cool shaso... and so we progress!!! new tech is in da house! seems i need to try the rawson tech soon too... seems it´s da thing to do^^
bren tank looks very good and you were right to try that new methode of riveting for that one... the smaller rivets will make it look very good! more in line to the prefabricated!!!
Viktor von Domm wrote:the finished ones look very good already... and i see how many you are still intending to do...a riveting work day to you^^
Thanks Vik. Yes, the bren is quite the little project, so much so, that it may have to wait for total completion until after the move, I have to also finish painting some other minis for folks before I make that cross continent trip.,
Gundam-Mecha wrote:Great detailing on that conversion.
The turret is also a very nice touch. Are you using sandpaper on it? I'm guessing its sculpted totally from putty?
A little bit of wet sanding with some fine grit paper (tamiya 1000 or 2000 grit) would really smooth out the finish and give you a flawless surface.
EDIT - also great dedication on the rivets! I know how tough that can be!
Thankls!
No sand paper at the moment.
Hmmm, food for thought there.
It was the toughest to date so far.
Viktor von Domm wrote:looks very cool...well black usually does^^ but that bren gun will a really nice addition to your force...
by the way... is that planned as a stand alone tank or will there be more of that kind in the future ?
Aye, it is another in my plans for artillery towers, or five man fire team transport.
That little kit was as expensive as a GW model!!!
Automatically Appended Next Post: So while converting the Bren was cool, i would need a source of less expensive versions as Tamiya is acting the "Porsche" of model kits.
More like future scratch builds once I figure out how to mold treads of my own, Like this little number!
[/img]
[/img]
[/img]
[/img]
[/img]
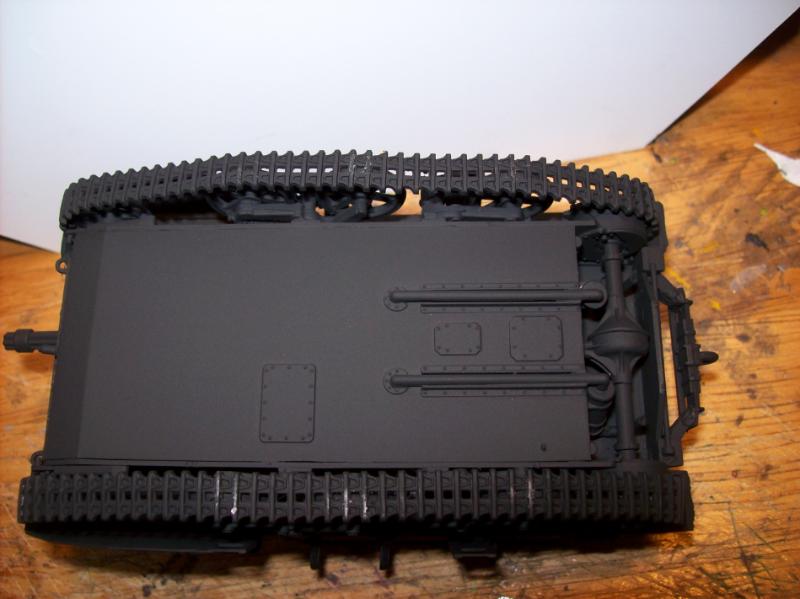
Besides GW tank bits I had at hand, I gave it the wheels and returners of a French FT-17 kit. I was going for something like the Bren, but the gunnery station is on the right side, and the back of the side armor slopes down like something German or Russian.
treads are the main thing i guess why there are not so many scratchbuilt tanks out there... they are the hardest part to do on your won...but maybe a bit sculpting and plasticcard work and you could do them on your own? i bet that!
Viktor von Domm wrote:treads are the main thing i guess why there are not so many scratchbuilt tanks out there... they are the hardest part to do on your won...but maybe a bit sculpting and plasticcard work and you could do them on your own? i bet that!
Some work very well with sanding, like Milliput. Others not so well, like Green Stuff.
I've found that Pro Create is somewhere between the two, and liquid based putties like Squadron sand very well too. Although Squadron white (like Miliput white) is smoother with much finer grain.
I never used to sand before, but I did a little for aircraft (where it sadly is essential) and I found it very useful.
Doesn't have to be anything crazy, but a gentle pass over a few times might really help in the areas where there are any scratches or surface imperfections.
GF-9 Gray stuff.
Cool.
Automatically Appended Next Post:
dsteingass wrote:
It is MUCH MUCH cheaper to buy big sheets of automotive bodywork sandpaper (black grit stuff) and cut them down into smaller sheets.
Although, I am ordering a set of these from MicroMark (e-mail sale ends today!)
Yeah, they have a new scratch build model making DVD I want to order anyways, and those never go on sale. I really wanted to try those 4 corner clamps though...oh well, like you said..next sale is soon
That will be Pro Create then, or if not the same product extremely similar (apparently GF-9 Grey is just repackaged Pro Create or so they say). You should find it works okay with sanding. Better than fully cured Green Stuff.
For me personally my favourite is Miliput white. It hold edges and sharp corners very well, can be blended in and smoothed with water, and sand's like a dream.
i currently work with milliput...the grew yellow stuff...and i must say it is hard to get a shape done withg that... any tips on using that stuff? getting shapes like you want is for me easier with GS but getting smooth surfaces works best with miiliput...
Viktor von Domm wrote:i currently work with milliput...the grew yellow stuff...and i must say it is hard to get a shape done withg that... any tips on using that stuff? getting shapes like you want is for me easier with GS but getting smooth surfaces works best with miiliput...
I use Miliput Superfine White only these days (never tried the brown or silver versions). And find it takes a sharp hard edge very well. Actually ironically I find the reverse! I use Green Stuff for smooth shapes and cloth and Miliput for harder shapes.
I have a bunch of different artists clay shapers that I use, moistened with water. Clay shapers with sharp edges on them are useful. I have one shaped like a chisel, and I use that very carefuly to make hard lines and right angles in the putty.
I've always found personally that clay shapers are much kinder that metal sculpting tools, and give much nicer results. Although I do still use Metal tools sometimes too.
maybe it is all because of my tool...i think i should try other sculpting methods as i am quite pleased with the material itself...
when i said smooth surfaces then i meant that GS tends to be bumby when i work with it... but that is also only tool related ...so when i tool up a bit i think i get better ^^
I really found that when I switched to rubber tipped clay shapers things really picked up for me.
Personally I had only used metal sculpting tools before then, and then I first tried the clay shapers I was like, wow!
Green Stuff can can give a bad surface texture sometimes. I always mix mine to death for a few minutes to try and get rid of nasty lumps. I guess thats because I'm used to mixing up Miliput white for a long time (it's very hard to see when it's mixed into a uniform colour as both parts are white!).
You always manage to get some bits of gunk in stuff though. Especially sometimes if a random metal or plastic shaving from earlier building blows into the mixture when your making it up or something like that.
and gundam mecha...
i try to keep the sculpting material very clean... i work on a clean srubbed glasplate even...and after some rather horrible tries of GWGS...(awfully stuff right there) i bought me a package of galeforce 9 GS and that is for now the best GS i know of...(well i know only two brands...so...)
soon the silicon tipped tools will hit my desk too...tools define as much the possible quality of works as the expiereince of the sclupter does...
Viktor von Domm wrote:after some rather horrible tries of GWGS...(awfully stuff right there) i bought me a package of galeforce 9 GS and that is for now the best GS i know of...(well i know only two brands...so...)
soon the silicon tipped tools will hit my desk too...tools define as much the possible quality of works as the expiereince of the sclupter does...
I think actually my GS I got from a scale model shop. So yes I agree there too!
You're definitely right about tools! Personally I'm not that great at sculpting. I can do simple things, cloth, some armour, etc, but never tried a whole figure from scratch. I really found the different tools really helped my limited sculpting go up.
Automatically Appended Next Post:
shasolenzabi wrote:,,,,just need money flow.
Tell me about it!!!! Forgeworld kills my bank account!!!
Hence my purchase of Old Crow and alternative models getting more tanks for the price of one FW tank is nothing to sneeze at, as well as my scratchbuilt monsters!
if you can do so called simple things my hat is off to you sir! as even those give me quite some trouble ^^ that´s why i work for now with PC to get certain looks...tho i have to say i never really did small scale stuff with GS ...yet...^^
shasolenzabi wrote:Hence my purchase of Old Crow and alternative models getting more tanks for the price of one FW tank is nothing to sneeze at, as well as my scratchbuilt monsters!
I totally agree! Scratch building is great fun!
I'm tempted.... real tempted to get one of those big FW fire dragons though!
It's just easier to replicate things built from sheets and blocks of material IRL, with miniature sheets and blocks. People just don't scratchbuild a lot of Fantasy terrain because WHFB is a troop formation game, needing more flat surfaces where 40k is squad-based, and meant to simulate a different type of warfare. Mordheim, on the other hand, is fantasy, but almost requires scratchbuilding.
well of course terrain is something that needs to be scratchbuild regardless the theme you play in...(couldn´t bring myself to play with terrain just bought...)
but in fantasy you don´t have that many oprtunities for scratchbuilding models like tanks, planes or such likes...
Well, before i move on the 19th, I figured one last update until I am established in my new digs gang. Paints are bagged and ready to go into the box, so no more painting for me till then(Oh the horror!). Packing commenced and soon the totes and boxes will be waiting to roll out and I will be just posting until the 18th, or so , then the computer will be packed for the departure too. So to hold you guys over, I have a final 8 pics
[/img]
[/img]
[/img]
[/img]
[/img]
[/img]
[/img]
[/img]
I hope this will hold you guys over until I can be back online after the move.
well it has to ^^ but it looks promising as usual...
man i don´t want to trade places with you... packaging up all your stuff...that must have taken ages to do...will you have a toehold at your new lodgings gaming wise?
Viktor von Domm wrote:well it has to ^^ but it looks promising as usual...
man i don´t want to trade places with you... packaging up all your stuff...that must have taken ages to do...will you have a toehold at your new lodgings gaming wise?
I am still packing but now the model stuff is all away.
I am looking into it. May be a bit of a drive, roomy has a nid force, so I may have to do a terrain making session or three
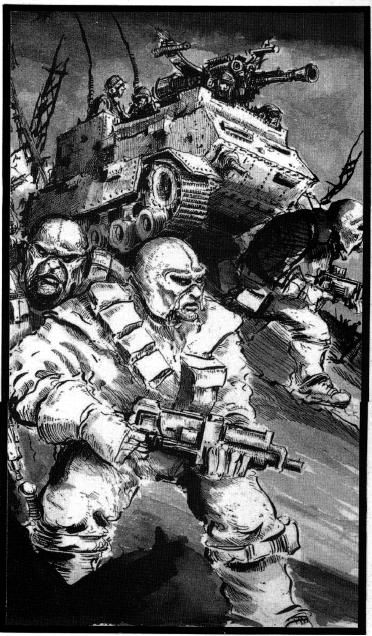
Hey mate, love the work on the modified Bren , it looks really good .. the bren always reminded me of this picture form rogue trader( i think its an Ian Miller )
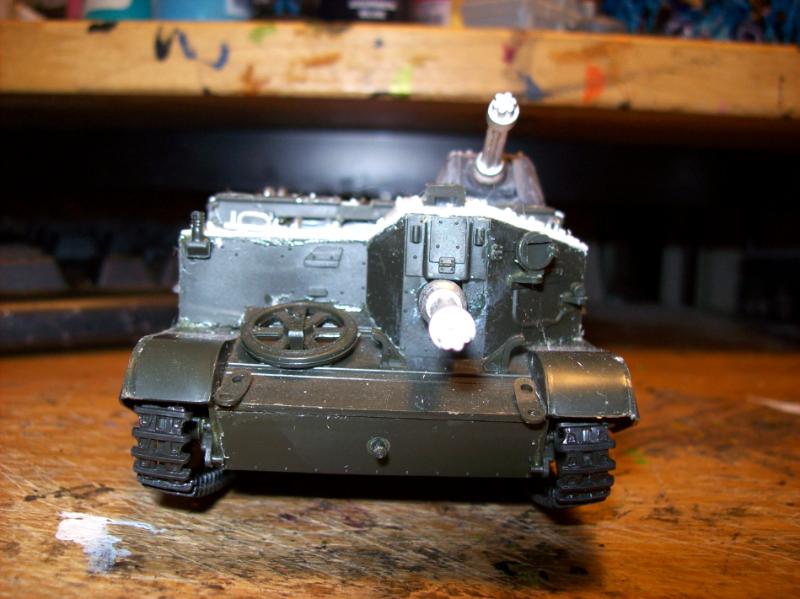
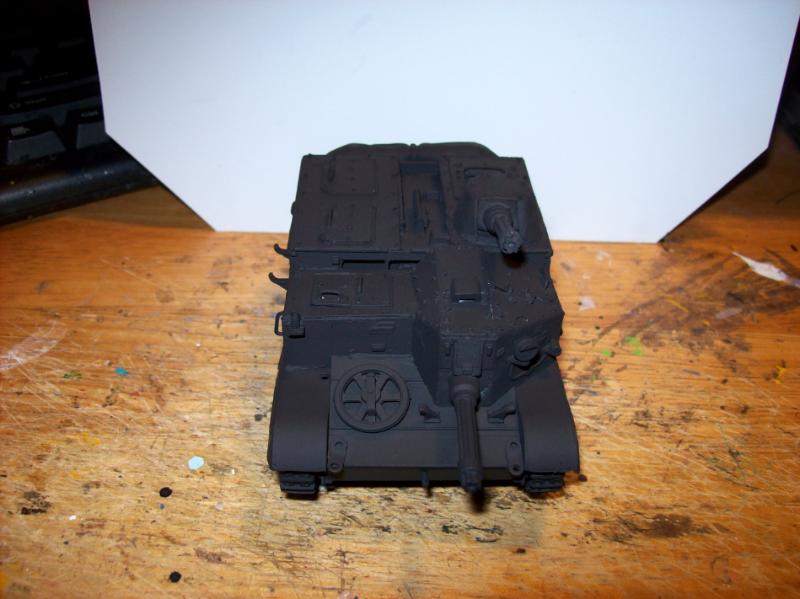
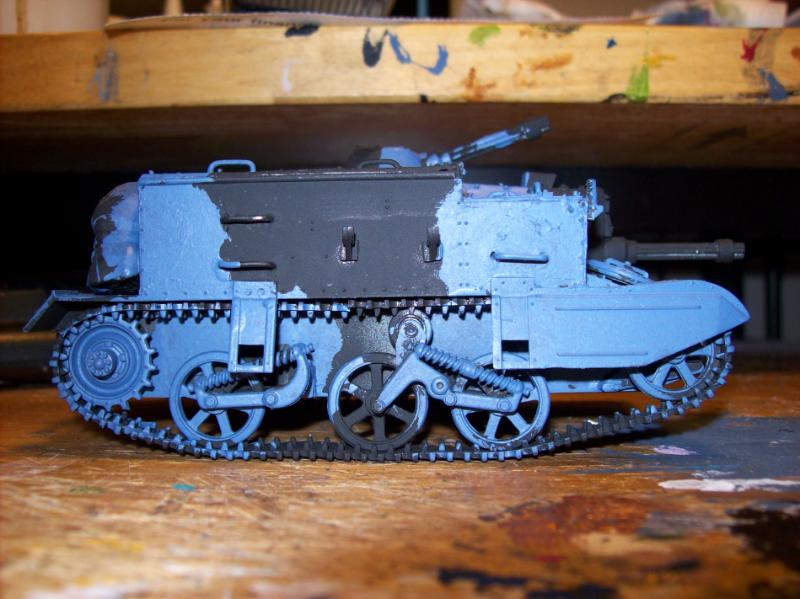
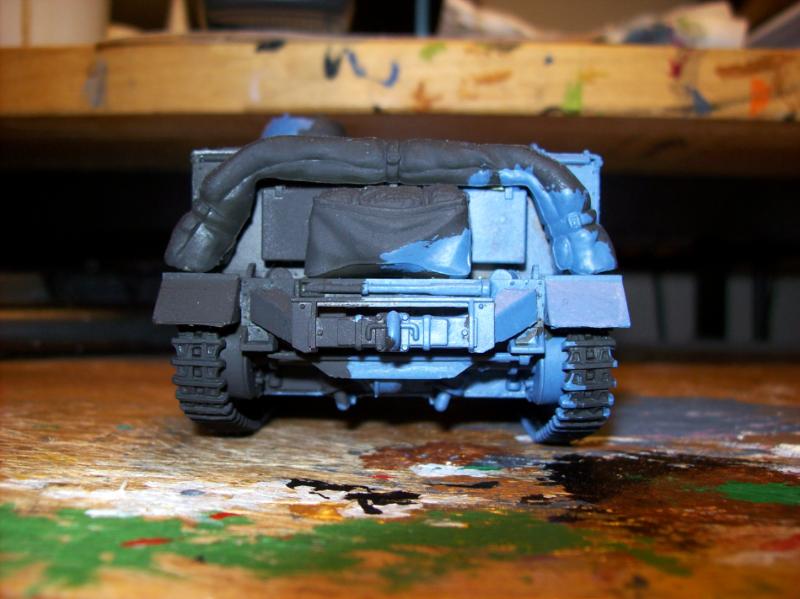
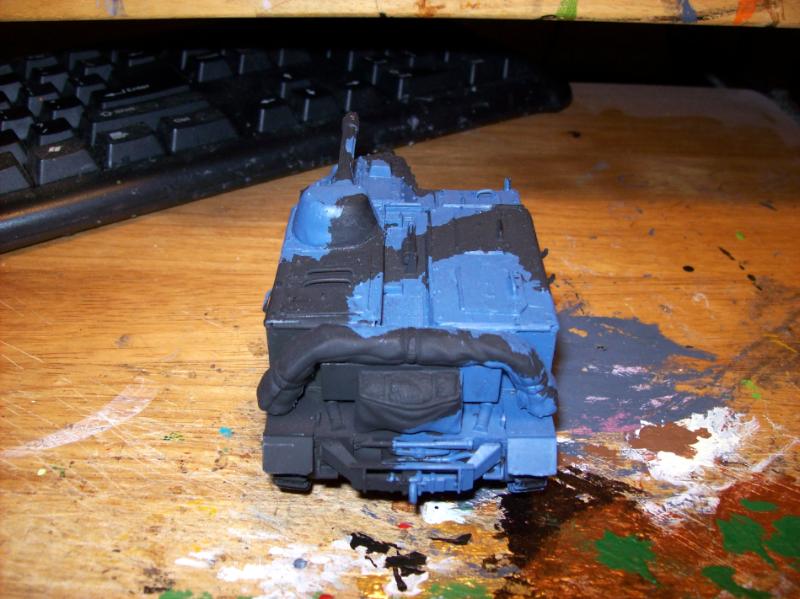
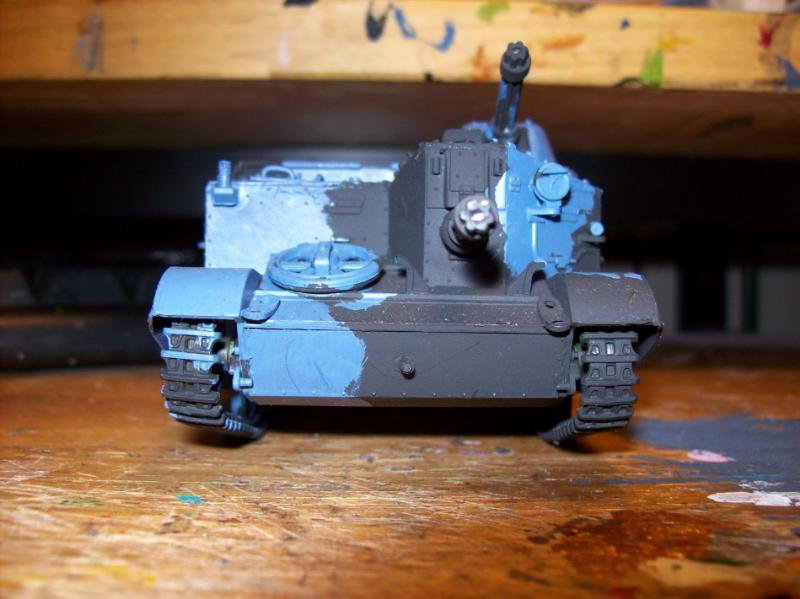
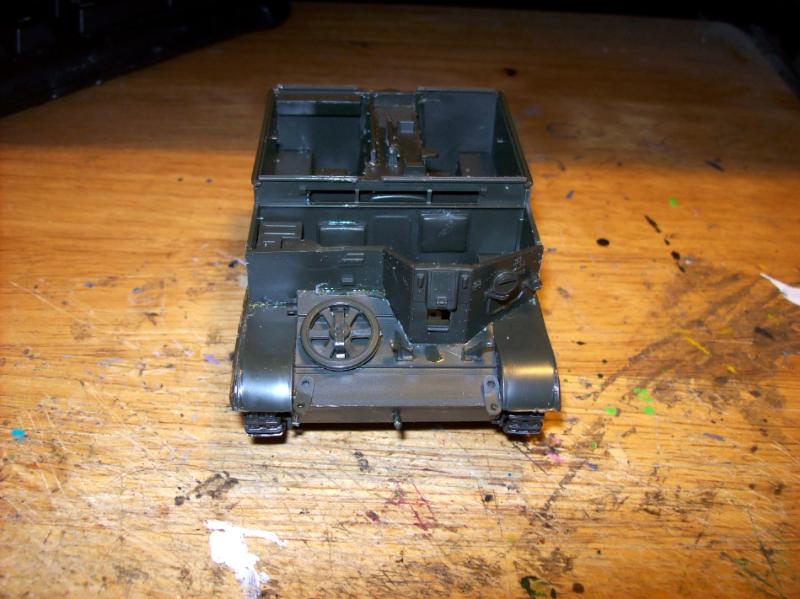
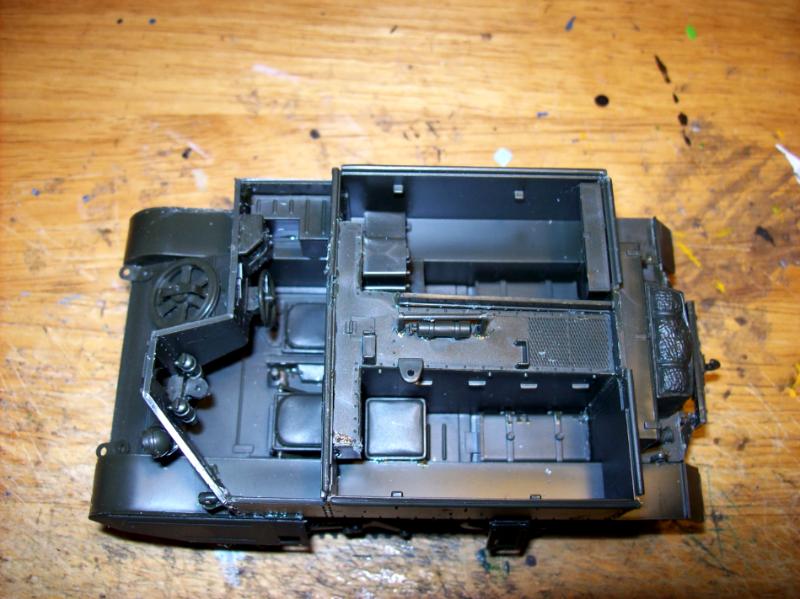
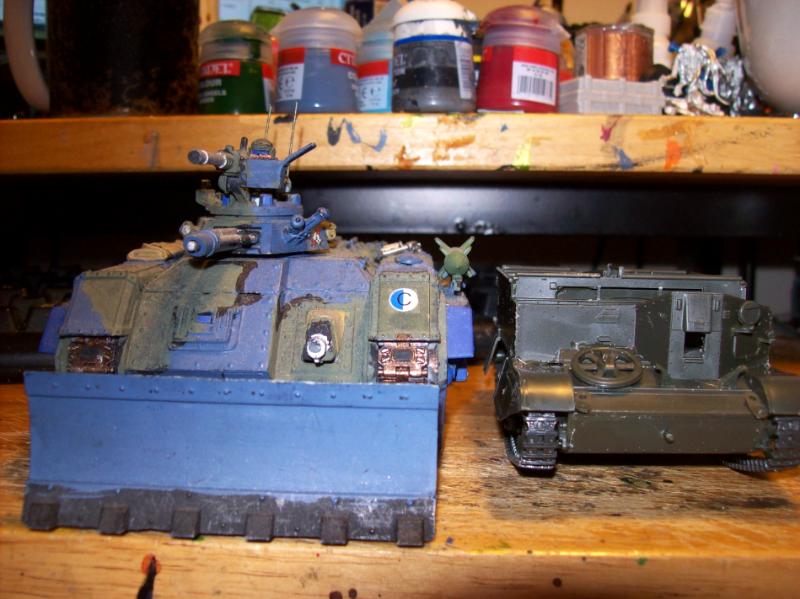
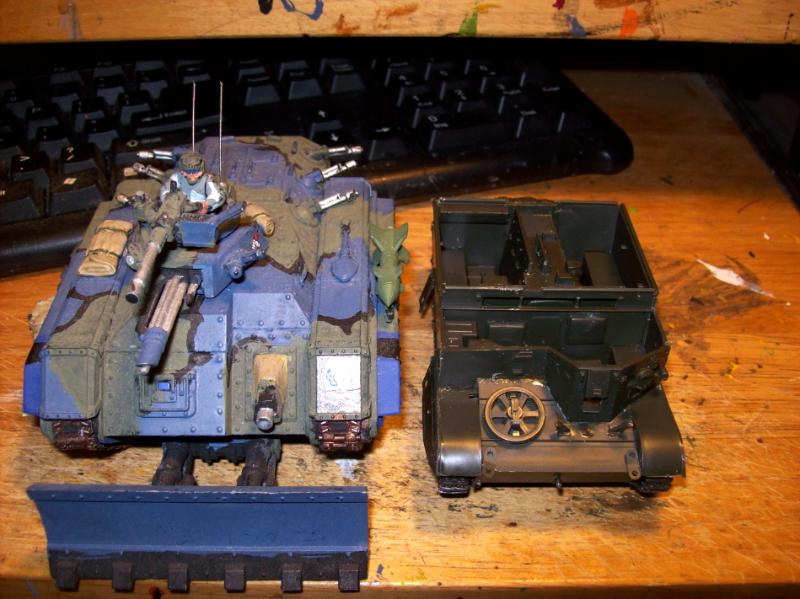
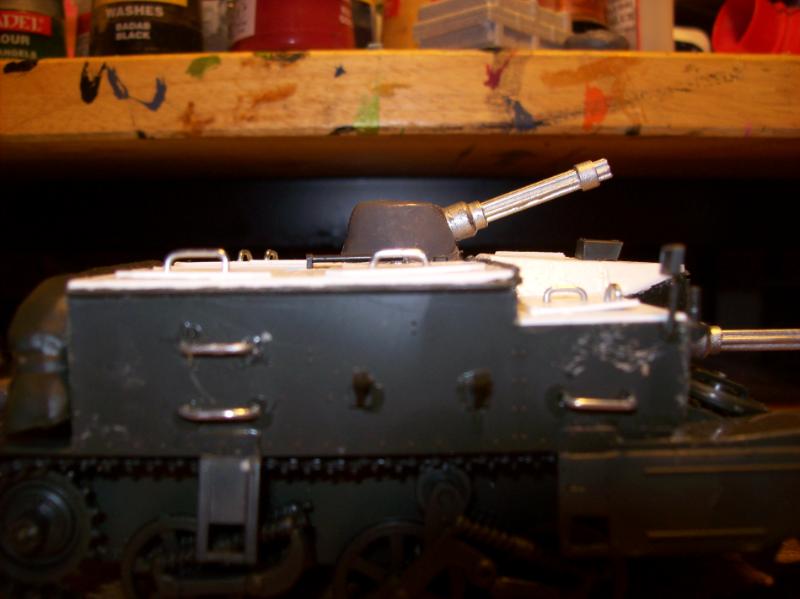
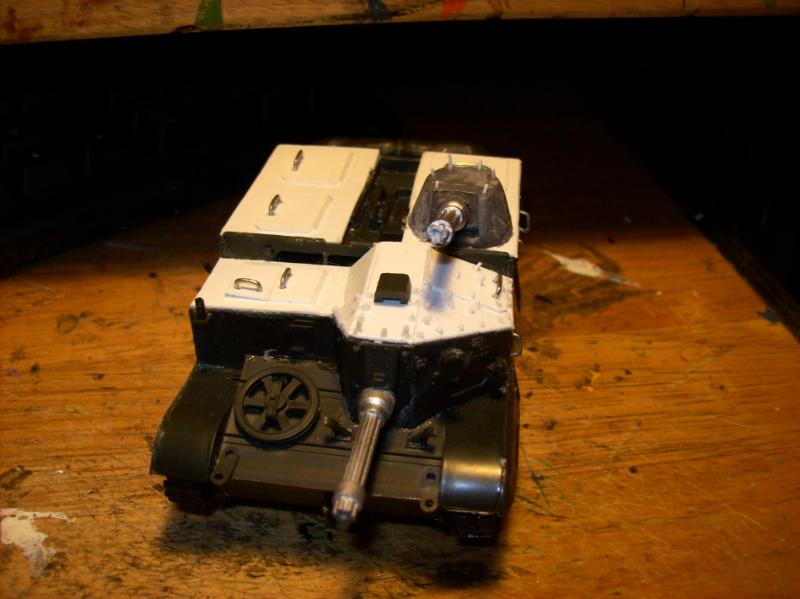
shasolenzabi wrote:You know that the black spray work usually is successful and makes my tanks look sexy! Speaking of which, I present the Bren, in black!
neil101 wrote:Hey mate, love the work on the modified Bren , it looks really good .. the bren always reminded me of this picture form rogue trader( i think its an Ian Miller )
Spoiler:
I recall something like that supposedly for sale at the dollar stores, someone was quite happy using it for an Ork vehicle. Yeah, the Bren does have a bit of an oddball charm to it.
Lone Cat wrote:
Will this be your Chimera? meow?
Actually, it is smaller than a chimera, I was working on it as a Centaur like machine, so it can tow guns, or deliver a fireteam of hardy stormtroopers to an area in style!
neil101 wrote:Hey mate, love the work on the modified Bren , it looks really good .. the bren always reminded me of this picture form rogue trader( i think its an Ian Miller )
Spoiler:
This thing works quite like Rhino. but GW never officially released. mew!
does this thing has a name meow?
dsteingass wrote:Shas came out of the womb wearing a tanker's leather helmet
Shh! since the doctors took it away Ihave no idea if it was the old US helms from the 1930's or the Soviet style tanker helm!
Viktor von Domm wrote:^that!
and shaso... do those terrain sessions... i would love to see you do a whole fortress or maybe at least a suitable depot...
of course and that goes without saying...
riveted up as is fitting as one of the founding fathers of the =]_=
But of course! rivets, rivets, rivets!
Lone Cat wrote:
neil101 wrote:Hey mate, love the work on the modified Bren , it looks really good .. the bren always reminded me of this picture form rogue trader( i think its an Ian Miller )
Spoiler:
This thing works quite like Rhino. but GW never officially released. mew!
does this thing has a name meow?
Not sure they ever named it specifically, so many things in the old Rogue Trader book never saw production, but did help illustrate the concepts is all.
hmmm... do you think that would look good and convincing? i mean that must weigh a ton then... then a direct hit wouldn´t kill by piercing the armor but by sheer force of impact... you´d need some massive means of neck support then...
Curved small plates on the ridges, larger shaped plates on the large areas, and the in between the ridges would be the smaller flat plates all for flexibility, and weight can be kept down the idea is ballistic deflection with such angles and curves.
No worries, just have to find one in stock first, then work on the plates and rivets in metal or may have to just go all costume work and make them from plastic? paint the bits to look like steel, I do not have actual metal work stuff.
I think that making the plates out of plasticard would work wonderfully and is probably the best bet considering your (Probably) not going to get shot at. And painted nicely will look just as good!
er...you want to build that for yourself? wow...how cool will that be?! anyways...i bet you are still here and not already moved^^ keep well mate...and for the time you´re on the dark side of the moon: you will be greatly missed!!!
dsteingass wrote:You'll be back bro! Moving sucks, I'm glad it's you and not me But safe travels, and good luck all the same my friend!
Thanks Dave! No worries, I will also take pics to add to the discussions. I will likely have to do them on Photo-bucket as I cannot post non model/hobby pics to my gallery per the rules
man! what a pointy return mate... page hundred and the man is back in da house^^ well in a new house anyway!!! how is your new lodgings? live on your own or in with a new roomy? your gear for hobby unpacked at all?
great to have you back...so whens the gold being posted to me? *rubs hands*


 or did i knew and i totally forgot about it?...


 that kind of turret.


 I used a end of the tweezers, wetted it, and smoothed it as I shaped it, avoiding finger prints as much as possible.

 I drew similar shoulder armor, and some with extra layers, like lobster plate.