Well my order of Warpath came in about three days ago.
So I am currently in the process of looking over the sprues and considering wether or not to start clipping things from said sprues. I so need to get in touch with a mate to see if I can get my glue and basecoat back now.... (I am actually done clipping with all the Warpath stuff now, I still have a load of Avatar of War Bezerkers to do -_- )

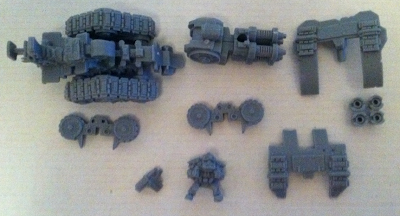
Well I'll give you a picture of all the sprues sitting on my coffee table, currently watching Jeff Dunham as I remove everything and sort all the little bits into plastic containers.
Front Right - Hero
Right - Steel Warriors
Left (in front off the glass) - Stormrage Veterans
Further Left and out of Frame - Jotunn Heavy Hailstorm Cannons
Lots of clipping to go as well as try to sort out how to use the models as guardsmen, and the hailstorm cannons will most likely become Hydra Flak Tanks, based so their size matches that of the official versions.
----------
Automatically Appended Next Post:
So here is a part listing for the Jotunn Heavy Hailstorm Cannon. Ill include the easier parts guide as well as a step by step seeing it is not included with the model (as mine came in plastic bags).
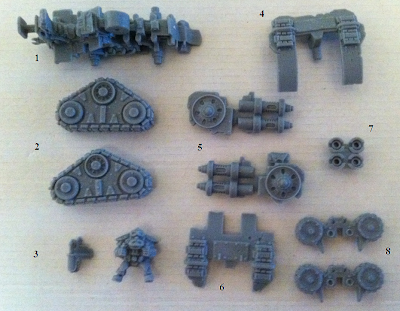
1.) Vehicle Chassis
2.) Tank Treads
3.) Pilot with Sidearm
4.) Shielding, Top
5.) Flak Cannon Parts
6.) Shielding, Lower
7.) Flak Cannon, Tip
8.) Ammo Feeds
So above I added the overly complicated image I made initially followed by a somewhat step by step guide to assembling the vehicle. As my basecoat is still at a friends place I have not started on painting it yet. So bear with me.
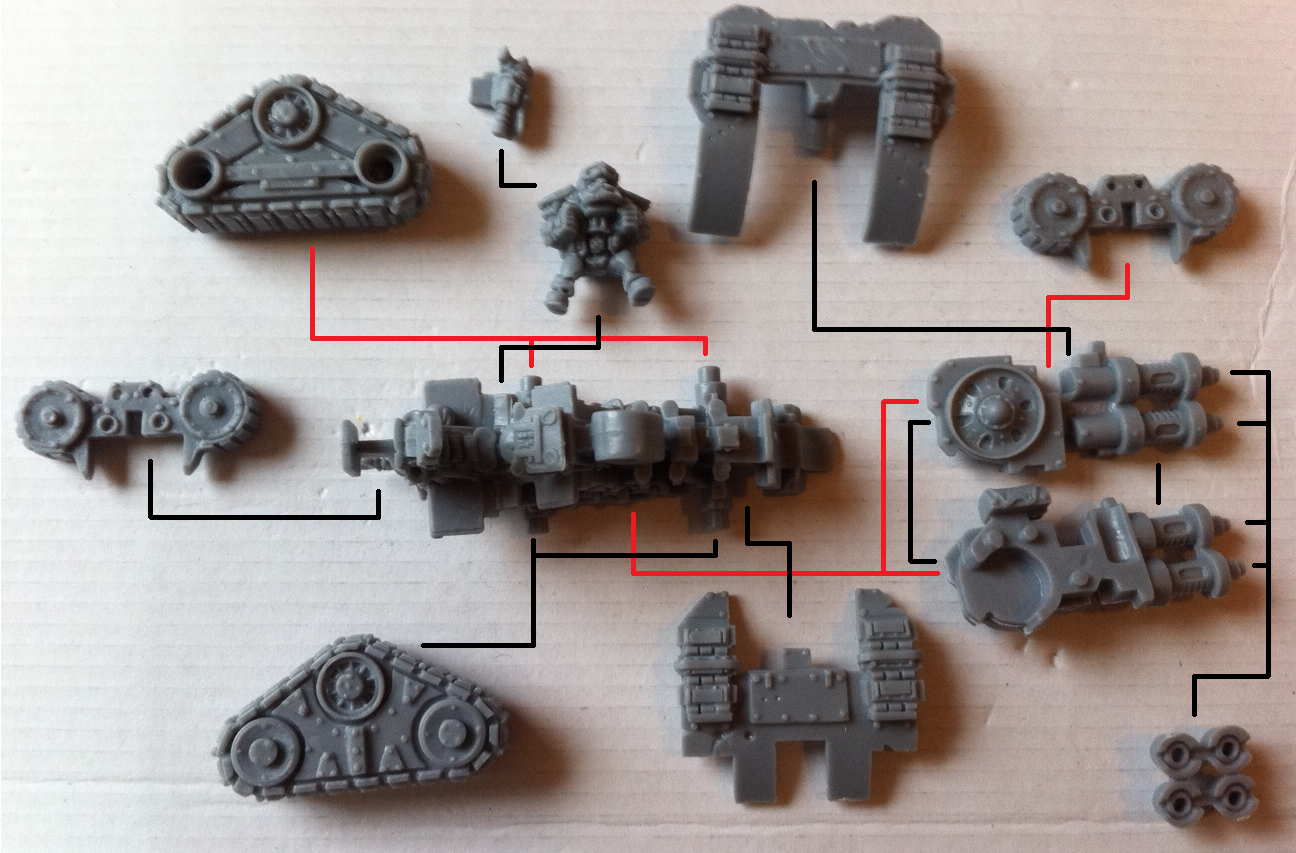
Step One: Attach the Tank Treads (2) to the Vehicle Chassis (1). Assemble the Flak Cannon (5) by glueing the two parts together. You will be left with the parts above.

Step Two: Attach the Lower Shielding (6) to the front of the Vehicle Chassis (1). Attach the Tip of the Flak Cannon (7) to the rest of the Flak Cannon (5) which you glued together in Step One. Finally attach the two Ammo Feeds (8); one to the rear of the Vehicle Chassis (1) and one to Flak Cannon (5). As depicted above. The Flak Cannon Ammo Feed might give you some issue but it is possible to attach it so it sits straight as opposed to slightly crooked as I've seen in most images.
Step Three: Start by attaching the Top Shielding (4) to the Flak Cannon (5), there is a special slot for the part to be glued into so it should fit without too much hassle. Assemble the Pilot (3) by adding the sidearm to the slot in his back then fit him onto the Vehicle Chassis (1). Finally add the Flak Cannon (5) to the Vehicle Chassis (1) as well. Make sure that the thing will fit and the Top Shielding should slide in just behind the Lower Shielding.
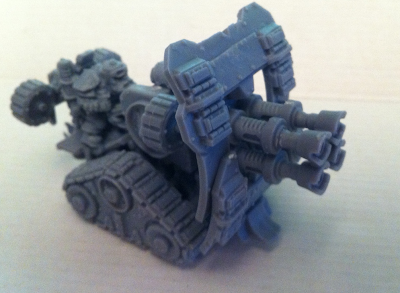
And there you go.
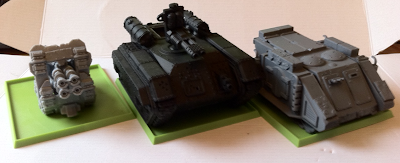
I included a size comparison shot here in order to get a better idea of how big (or in this case small) the vehicle is when compared to other
40K vehicles. I wanted to use them as possible Hydra Flak Tanks. As you can see both the Rhino and the Chimera Chassis actually seem to fill out an entire basic Regiment Base for Warhammer Fantasy. So I figure in order to use this as a stand in model I need to place it on a base that is at least a similar size and measure everything from the base as opposed to from the model itself.
Hope this helps all of the people out there getting busy with Warpath or contemplating using the Forge Fathers for Squats (like I will be).
See you all later.


 Ave Imperator! Imperator, vitam aeternam!


