Wow, thank you very much guys!
Did not anticipate such praise.
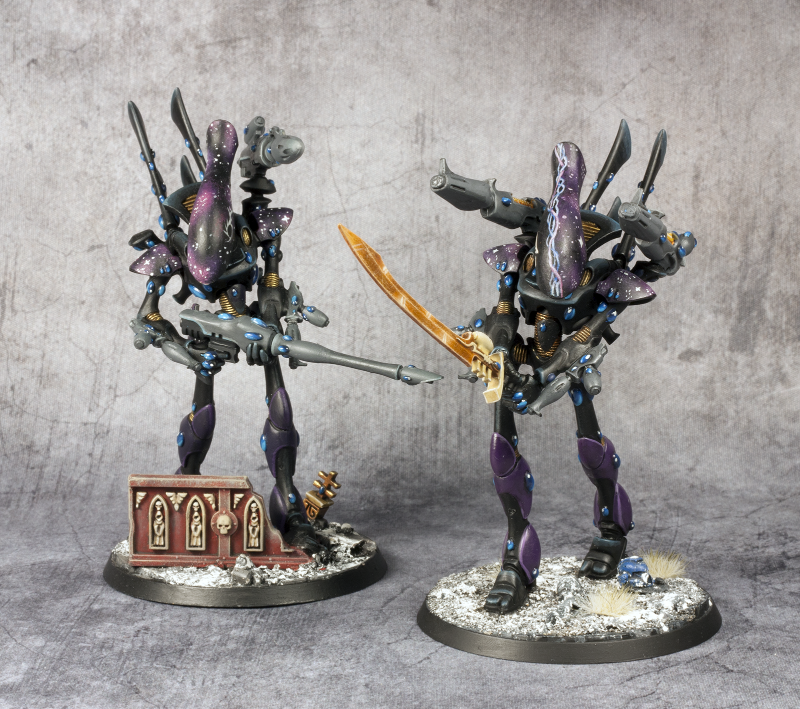
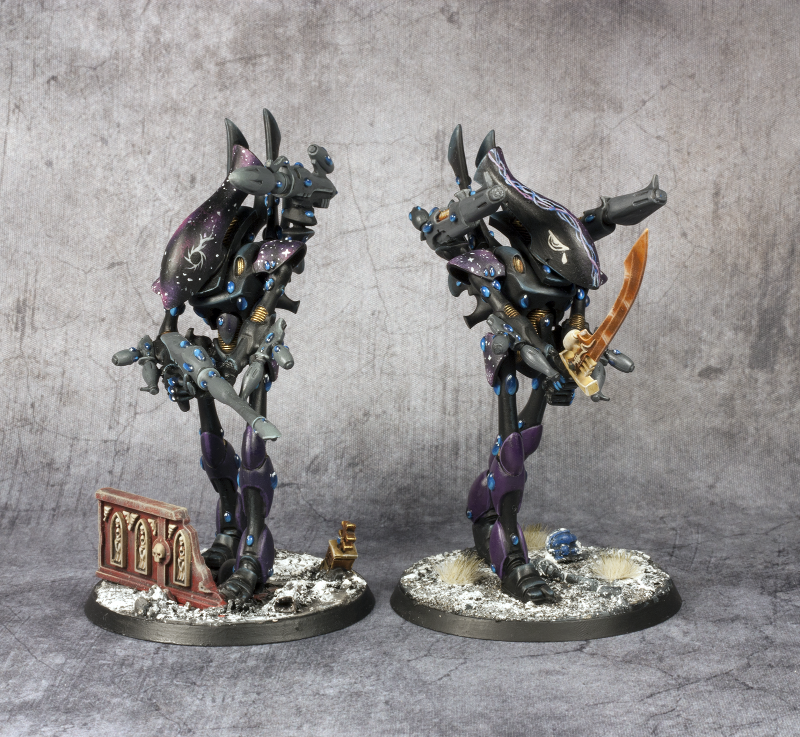
I was a bit worried if the hilt of the sword would pop too much, but apparently it does not.
finnan wrote:Bonus points awarded for doing all the gems as gems! I can never be bothers to do that many! lol Kudos!
Haha, thanks! It's a bit of a pain to do them, but I think it's worth it in the end.
I don't mind Eldar models with unpainted gems, but for some reason I'm really neurotic about painting all of them on mine

Argive wrote:I really like the star cannons.
What recipe did you use on the top bit (gold coils?)
Thanks Argive!
The coils were a bit of an experiment, but the ones in the image were done with the following steps:
- basecoat with Beastial brown
- Paint the raised areas with trollslayer orange (or any orange for that matter, had that on hand)
- paint the "glowy" areas with yellow
- wash the whole thing with orange wash. I experimented with orange and purple inks as well. All the different results are actually in the model still, as they did not differ from each other that much.
- highlight the brightest glowy areas with bone color (or mix bone color with yellow)
So basically layering, washing and a final highlight. With more layers, the result might be smoother.
I need to experiment more with the purple wash. But I think it needs to be put right after the first orange color, so it won't tint the yellow too much.
The coil with purple ink is on the right starcannon, best seen in the last picture.
Next time I'll paint some Starcannons, I try to remember to take a snapshot from each of the steps.
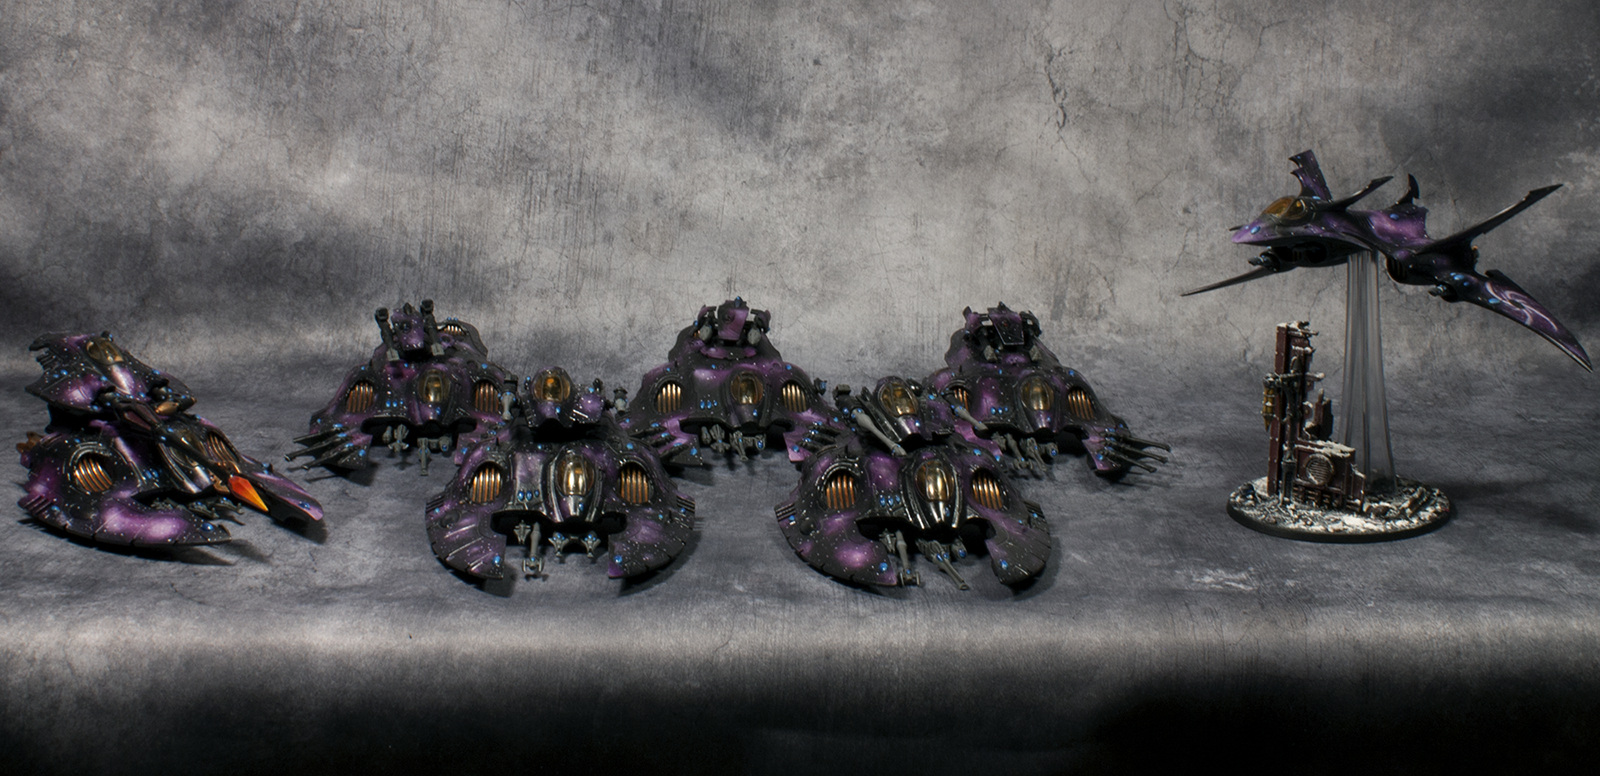
Finished working on the grav tanks for now.
They have been in the works for a really really long time now.
The first iteration of the starpattern was painted back in 2012 and the paintjob is still there. It was a repaint already back then, and I don't even remember how it was painted before that.
Most likely just black with some bone color details.
Then I moved on to repaint all my grav tanks with mixed results. All of these tanks were painted with the current scheme somewhere between 2012 - 2013.
The main color scheme turned out alright, but I missed a lot of details and did very sloppy work back then.
I guess that was a general theme back then: quickly paint something and move to the next project, even if the previous one was not completed.
I have talked about this before when I was doing some renovations to my Orks last winter and spring. Starting from
page 13.
I learned to ignore the mistakes when the grav tanks were on the tabletop, and in the end did not even notice them.
Except every time I packed the models to my foam trays or placing them in the cabinet.
I have once before tried to renovate them a bit, but that just ended in a hobby burnout.
I was not that motivated do it anyway, so trying to do all of them at once was too much.
Gladly it was a different story this time.
There were quite a few sloppy areas. For example this turret, with wrong colored gems:

And black areas with red / gold paint for example. Some due to mistakes, some due to the previous color showing through.

There were many scratches etc, the paint is really thick in many places and all the "antennas" have been broken over the years.
Not too stressed about the antennas (these have seen tons of play after all), but I had to do some fixing nevertheless.
The mistake areas were not bad enough to be seen in the army shots, but definitely something you can notice if you now where to look on the tabletop.
And that bothered the h**l out of me
Anyway, back to the canopies which I mentioned a few posts back.
I could not get my hands on new canopies, so I decided to try and strip the old ones.
It turned out alright, except that I noticed that many of them were stained with glue residue etc.
Can't do anything about that now, so I decided to use these anyway. They are relatively easy to remove, if I can find new ones from somewhere.

Covered the see trough parts with Vallejo liquid mask.

Used orange ink on the backside of the galss to tint the canopies. One or two layers were enough, depending on the thickness.

Don't have an airbrush, so went with a spray primer to color the "support structures".
Then I pealed the mask with a toothpick.
The first completed one in the pic as well.

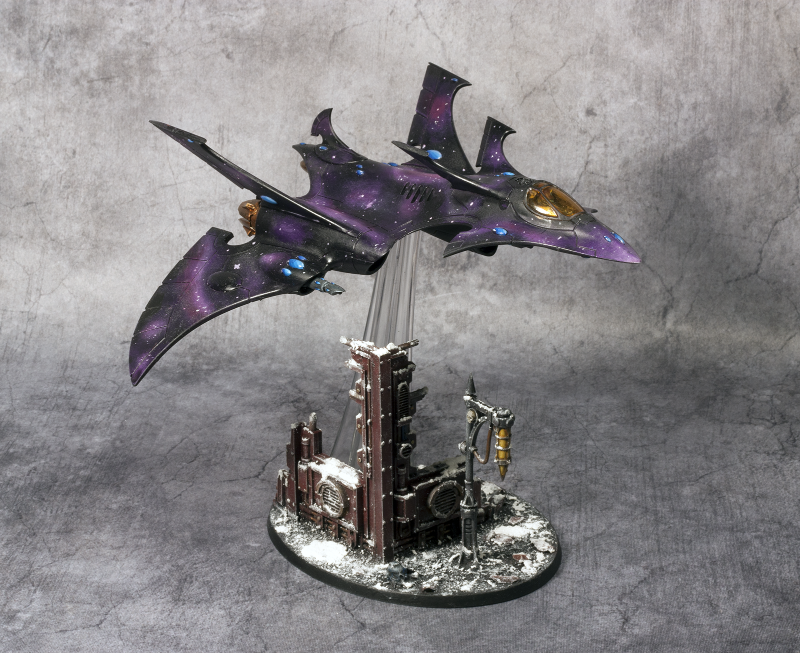
While removing the canopies, I noticed that the Crimson Hunter's pilot did not have a head
That had to be fixed.

Ended up doing quick paint jobs on the pilots, with a wash and some really simple highlighting.
They won't be seen very well through the tinted glass anyway.
Then I proceeded to fix the old mistakes, repaint a few of the largest gems etc.
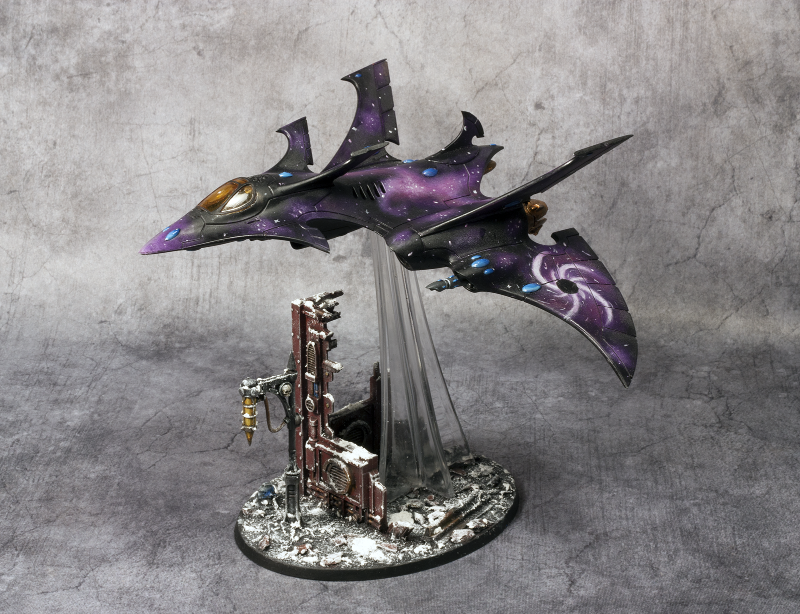
Here's one with the new canopy.
Took a quick shot with my phone in the evening without much light, so it was impossible to take a good picture from all of them.
I will take better pictures tomorrow with the proper camera and with better lighting.

There are a ton of things I would do if I were to paint one of these tanks nowadays.
There are not even any highlights on most of the areas and like mentioned, the paint is really thick on certain areas.
But for some reason, I don't actually mind. Despite them lacking many details, I wanted to keep the original look with a few hot fixes here and there.
I was really proud of them back in 2013, and I still am. And it's always good to have something to compare the new models to.
I'm really happy to finally cross this off my list.
They had been so long in the making, and finally I can call them done.
Until I notice some more mistakes I missed this time
I will most likely paint some more weapon options and magnetize them to the tanks in the future though.
Maybe when the new codex drops at some point.
The Scatter lasers in the Serpent turrets have not seen any action since the 7th, so I have had to proxy them.
To end things off:
I mentioned we rented a gaming room.
It's actually an old office that belonged to the Finnish Defence forces years and years ago.
The rooms are currently being rented to small businesses or hobbyists like us.
The gaming area itself with one gaming table and one modelling table.
The most keen eyed of you might notice the audio equipment we made in the pic


The other room is a smaller storage room with a fridge.

It's neat to finally have a place where you can play without moving the furniture around (like we usually have to) and where I can store most of my terrain.
Therefore organizing a game is quite easy. So hopefully I get to play more frequently from now on.
Thank you for looking!
I'll get back with better pictures soonish.


 Finished Forge World Elysian Army
  Finished Tau Sept Cadre
  Finished Ork Waaagh |
  Alaitoc Eldar Warhost
  Finished Order of Our Martyred Lady - Sisters of Battle
  Finished Necromundian Imperial Guard Regiment


 Eldar- 4436 pts


 1000
1000


 Da Dark Angelz
 Arakasi vs Infinity