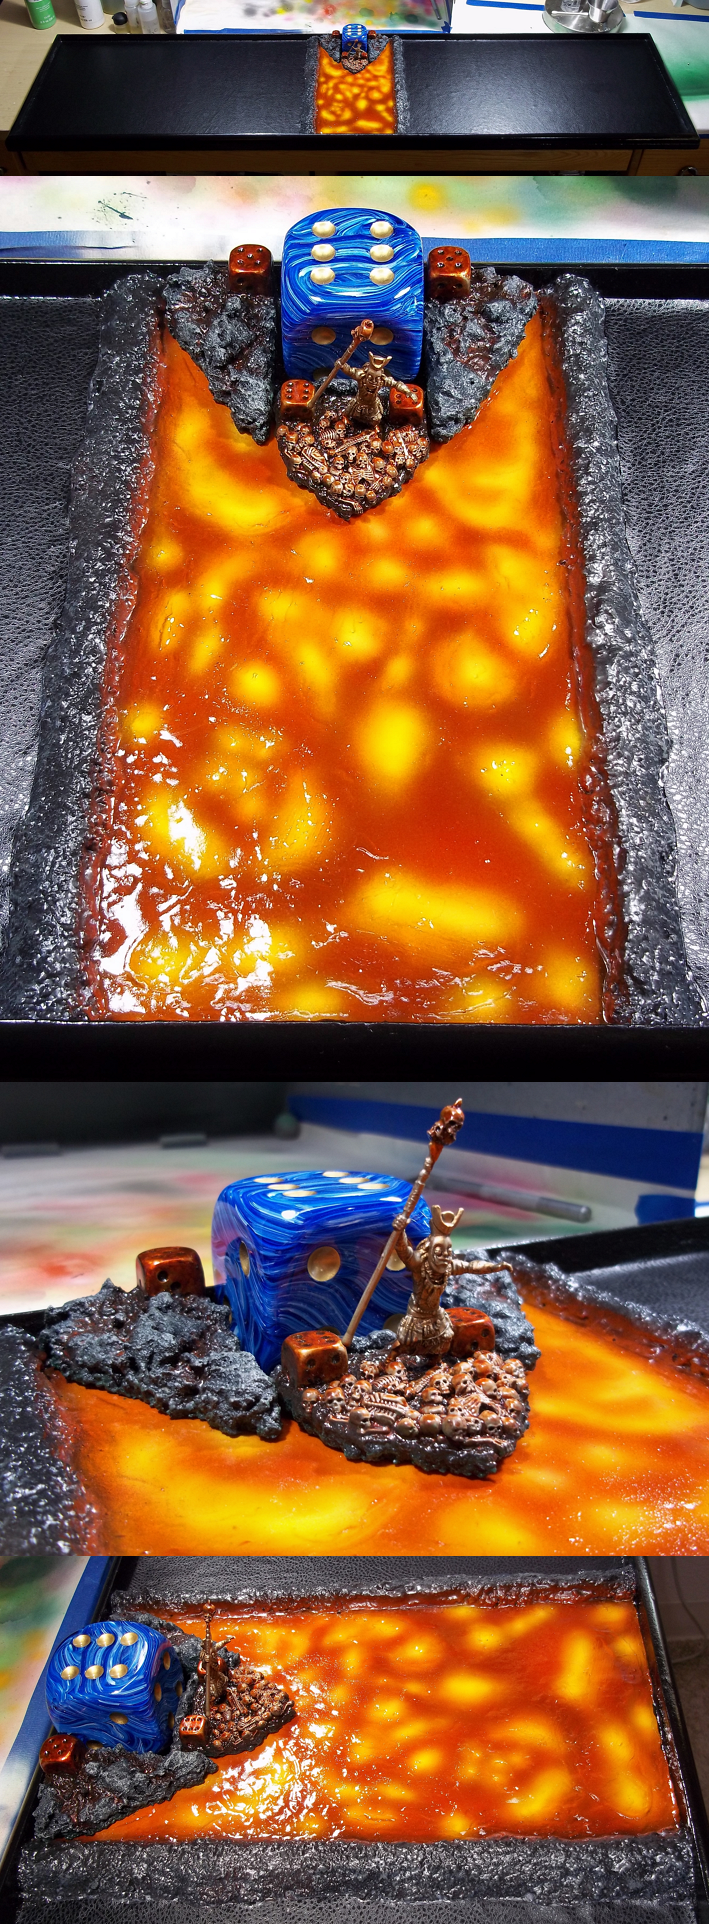
Here's the table. The color appears a little less vibrant than it really is because the gloss surface is hard to photograph. The entire thing has been covered in sheet metal. Magnets have been installed in all terrain pieces (and my PHR army) to make everything more playable.

Here's a detail photo of one of the table ends with the unholy dice god turn counter. The colors here are true to life.
I posted this on the Hawk Wargames forum last year. Hopefully you find it useful. -
<snip>...As you'll see below, things definitely got way out of hand and maybe even a little weird. Buying
raw materials in hardware store quantities meant that I was free to experiment and I therefore created a lot more pieces than had been planned on initially. I came up with a basic technique for making a terrain feature and then modified it over and over just to see what would happen. Some of it may work out well and some of it may not. As always, your feedback is appreciated.
Everything is based on the idea of using a refrigerator door for a gaming surface and treating the terrain features & buildings as fridge magnets. There are magnets in every base and every flat surface (including ramps) has an underlay of sheet metal. The different pieces are designed to be stacked on top of one another to make the play surface as modular as possible.
As per usual, this wouldn't be a proper update without some new tutorials. I will follow them up with a bunch of photos detailing the process so far (over 80 photos in total). Also as per usual, this will be a long post. Not just sorta long, but really really long, even by my standards.
Before we begin, I ask you to read these tutorials with your own designs in mind. While I'm building a lava table, it would be very easy to paint the hills brown instead of black and to add a few patches of flock (or snow!) for a completely different look. These tutorials are written with the intent of being a springboard for your own creations.
Enjoy.
How to Make Modular Wargaming Terrain
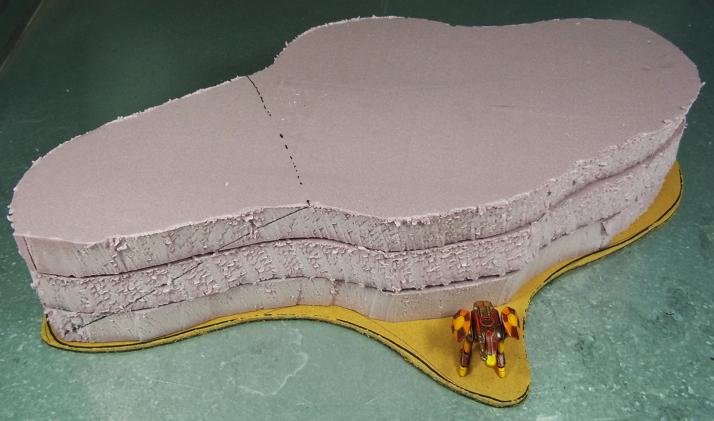
I think the best place to start is with the humble hill. To begin, I cut a rough hill shape out of a piece of 1" insulation foam and then made two copies. They were then stacked on top of a base made from 1/8" hardboard (or similar).
The position of the ramp was then measured out. Hawk allows for a maximum incline of 45°, but I found 25°- 35° to be ideal. If the angle is steeper, models may fall over. If it's shallower, too much of the hill is taken up by the ramp.
I then glued all three pieces of foam together using Loctite Foamboard Construction Adhesive (photos later in this tutorial). I used regular liquid nails in the pic below and later settled on the foamboard adhesive because it's water based and cleanup is infinitely easier.
Once glued, I filled an old 1 gallon jug with water and set it on top of the foam to press the foam pieces together. The foam was allowed to dry overnight.
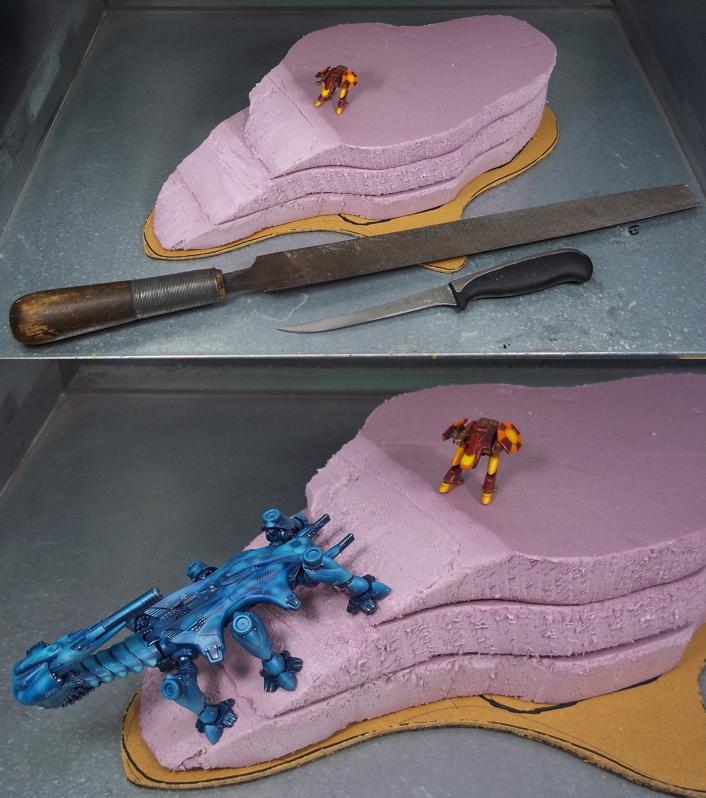
I then carved the rough shape of the ramp with a serrated knife and smoothed it with an old rasp. Carving foam is insanely messy and you will get bits of foam everywhere. Keep a vacuum cleaner handy.
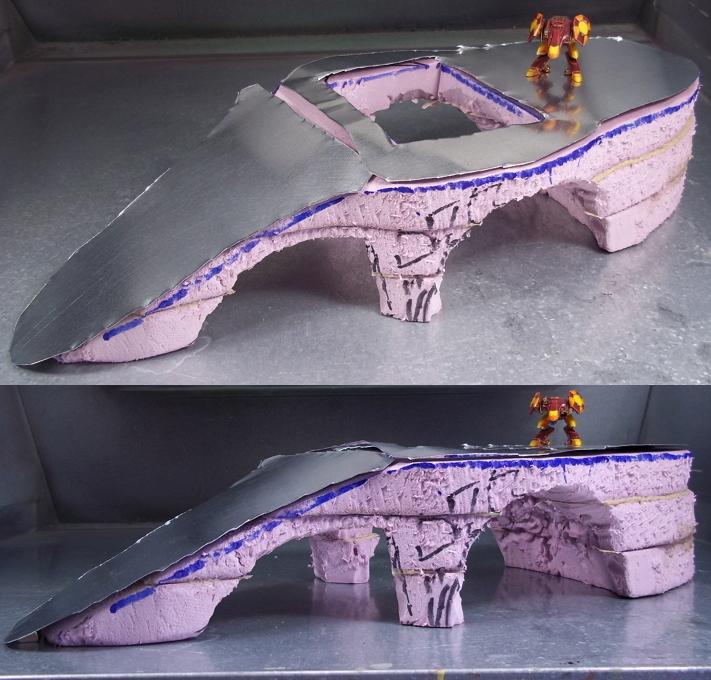
Now things start to get interesting. One of the things that drives me nuts about the paper urban terrain is that everyone just hides behind buildings and things can get repetitive or worse, boring. I therefore wanted to break up terrain features so that there would be lots more opportunities for lines of sight and for cover.
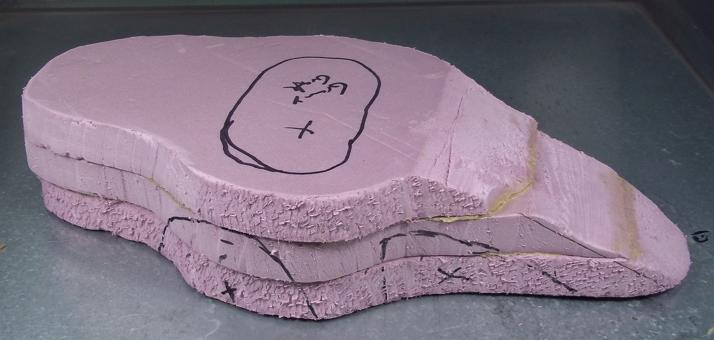
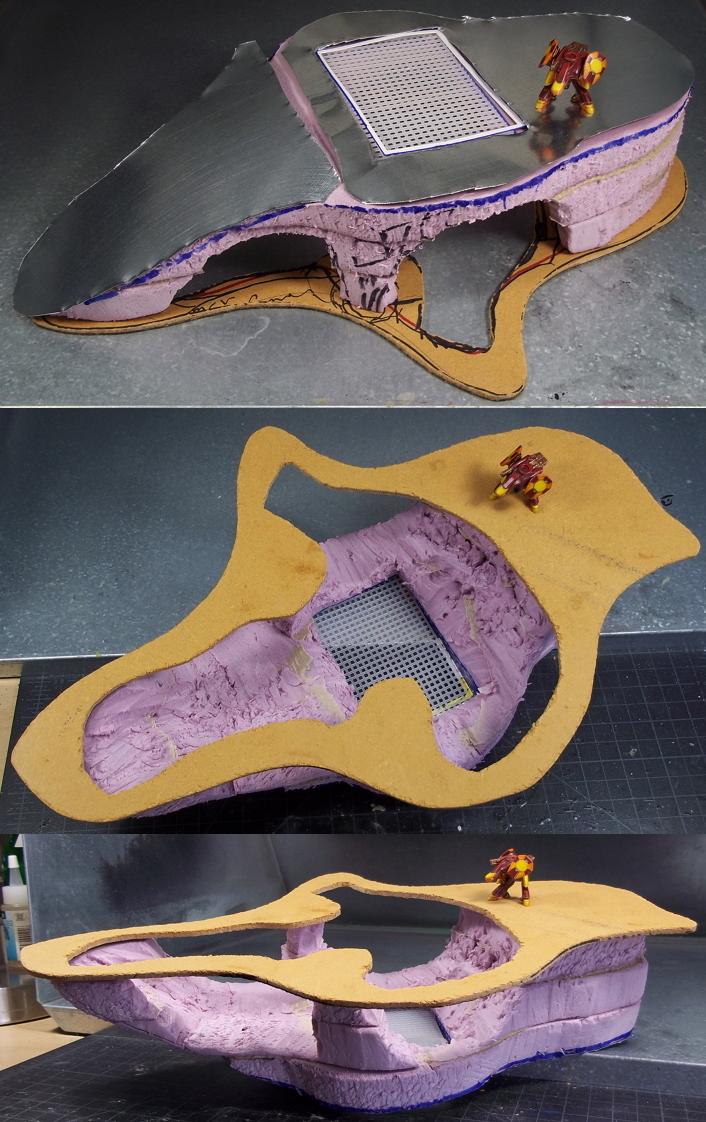
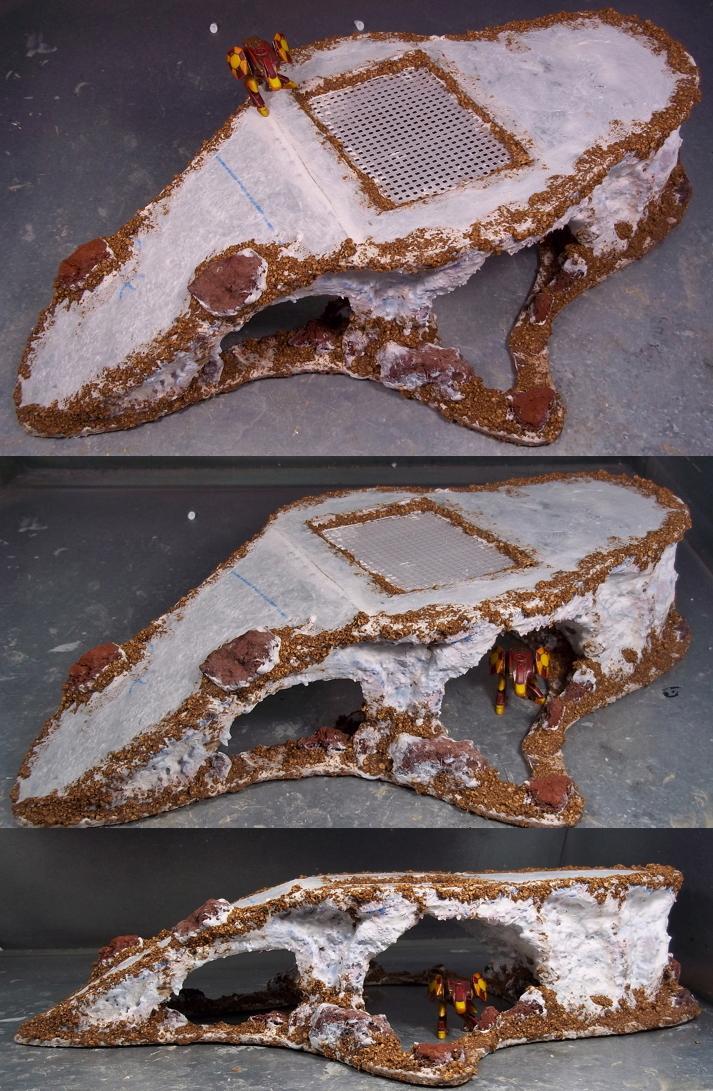
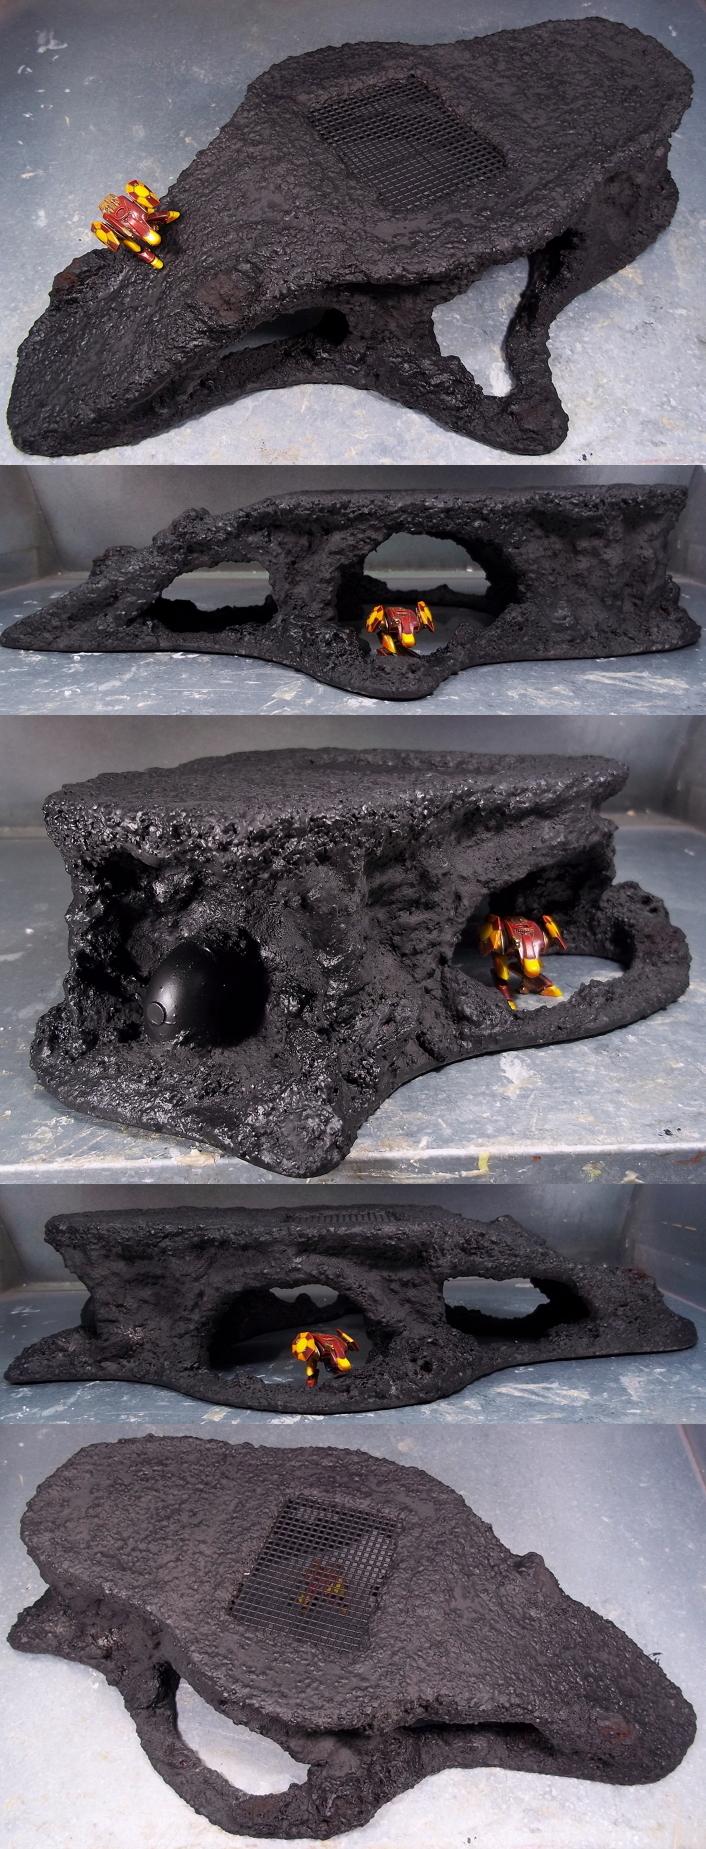
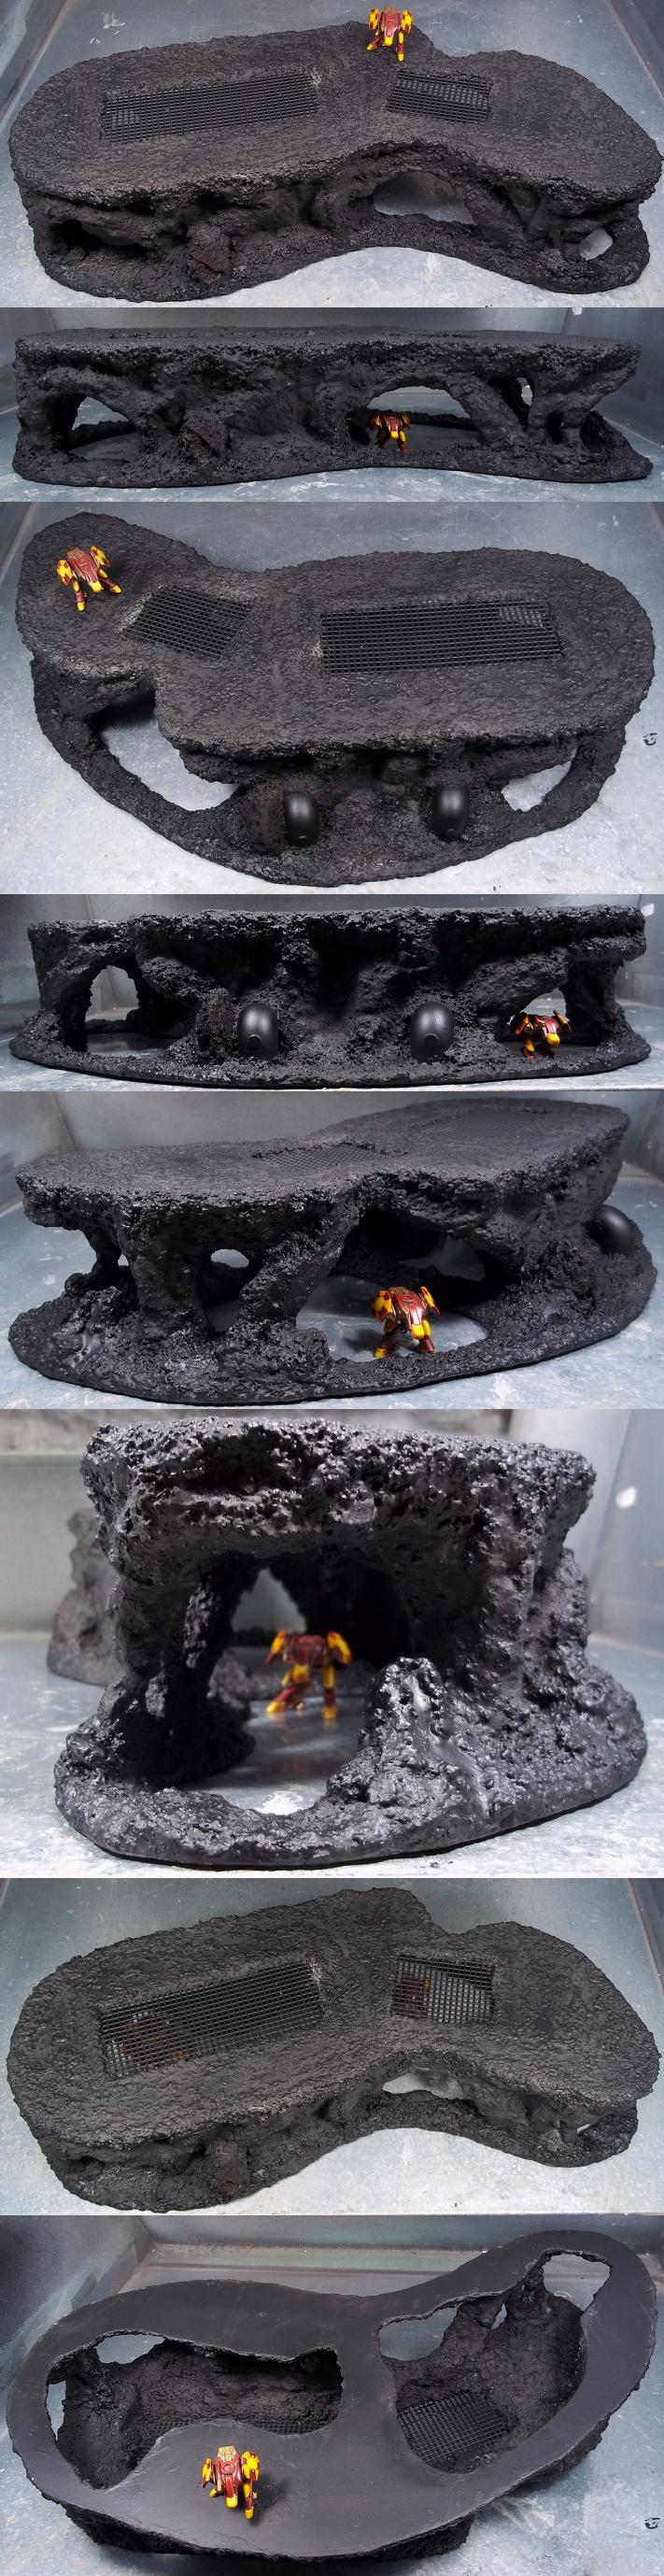
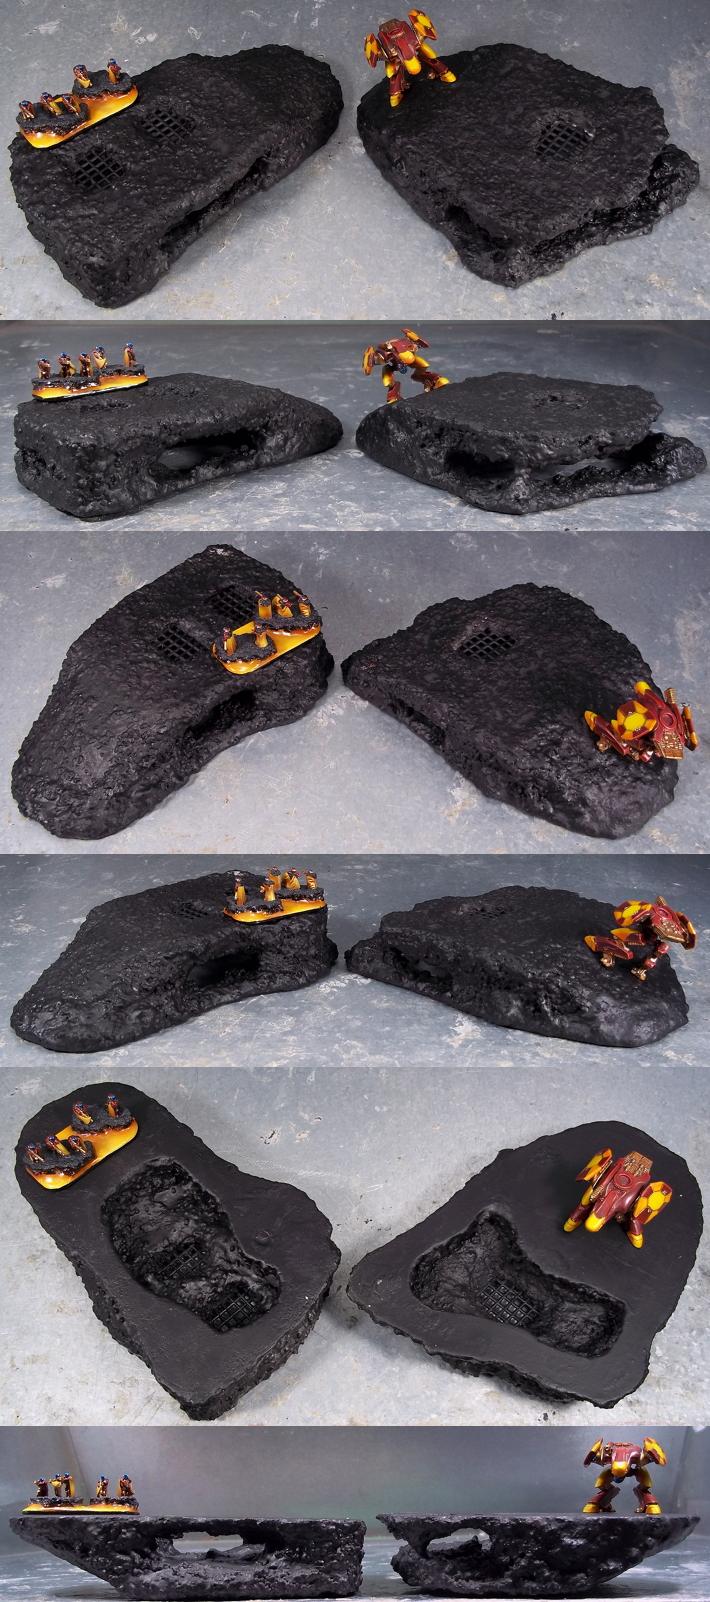
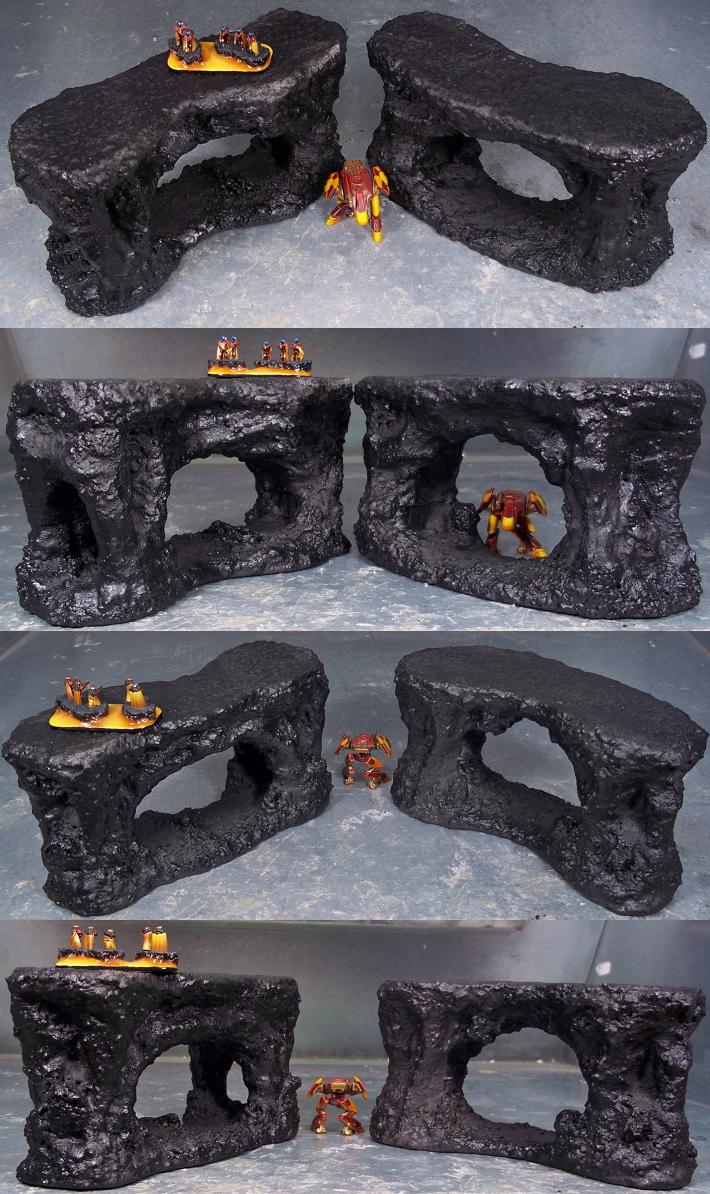
I decided to carve out the inside of the hill and add a hole in the top that will be covered in granny grate. Models can now travel through or engage in combat on top of and inside the hill. Definitely not boring

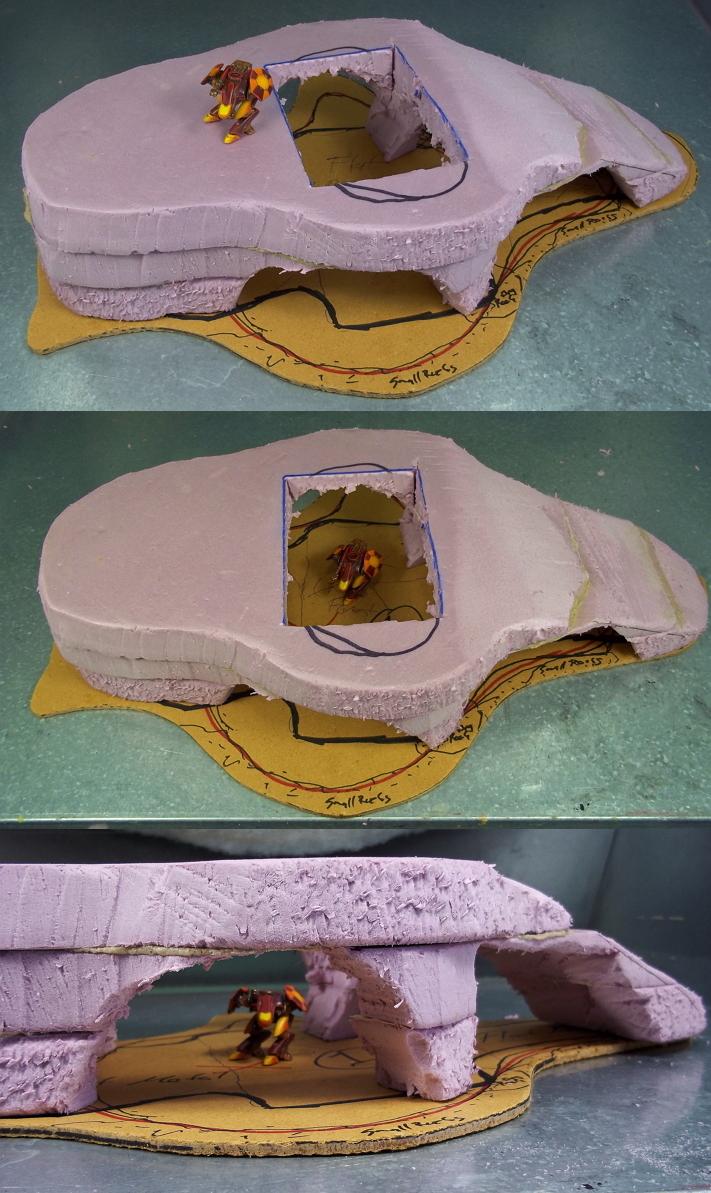
I then used tin snips to cut out sheet metal in the shape of the top of the hill and of the ramp.
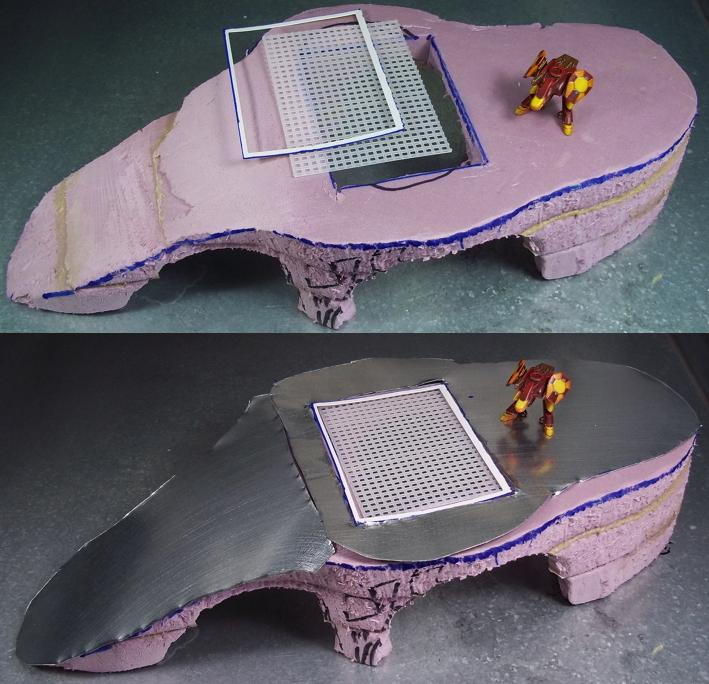
A piece of granny grate was then cut to fit the hole in the foam. I made a frame out of card stock to finish the border.
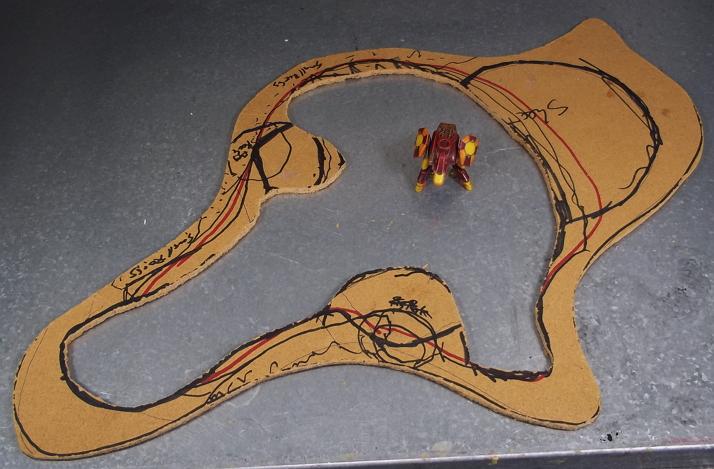
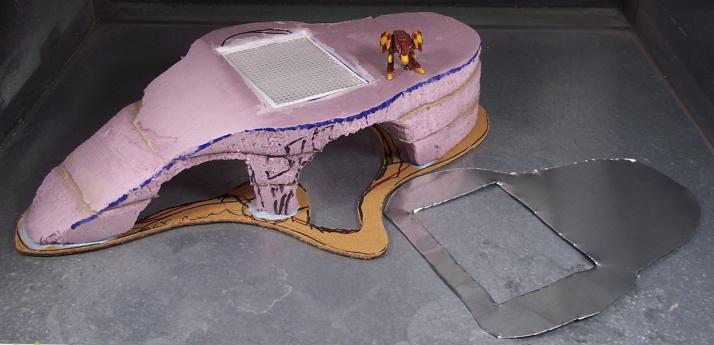
I then cut out the base. I decided to hollow out the center to allow the hot lava of the tabletop to show through.
I then glued the foam to the base with foamboard adhesive.
The sheet metal & granny grate were given a final dry fit. While not pictured here, I also drilled out holes for 1/2" x 1/4" craft magnets (There is a photo later - I found them at Home Depot for less than $6 for 40. They're a lifesaver for magnetizing terrain!).
The sheet metal & granny grate were then glued in place with liquid nails and clamped. I used liquid nails because it's rated for use with metal. Painters caulk was applied around the edges.
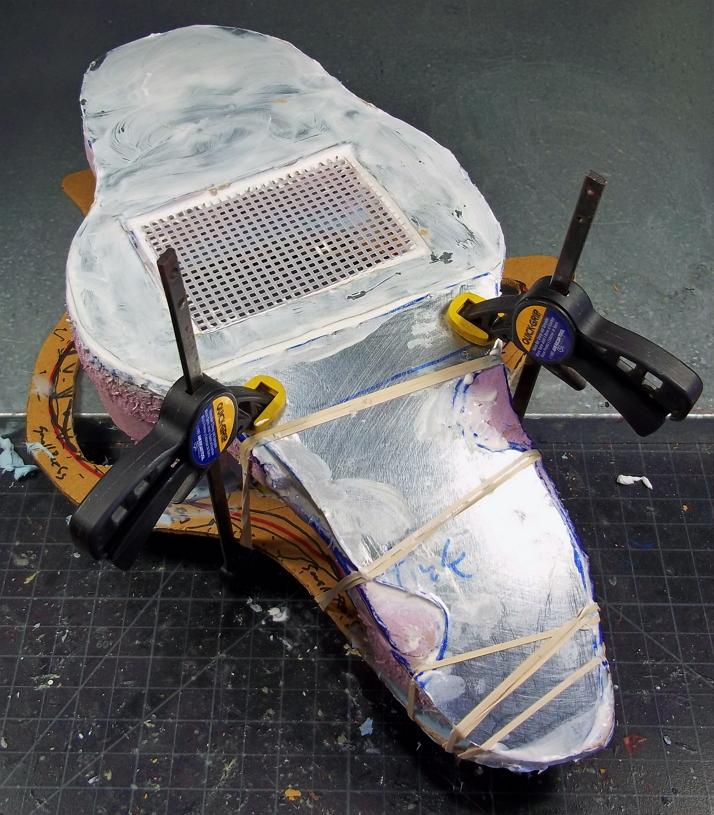
When the glue dried, painters caulk was stippled to the sheet metal with an old brush. Water was added to thin it a bit. Caulking will allow future layers of texture paste to better adhere to the metal.
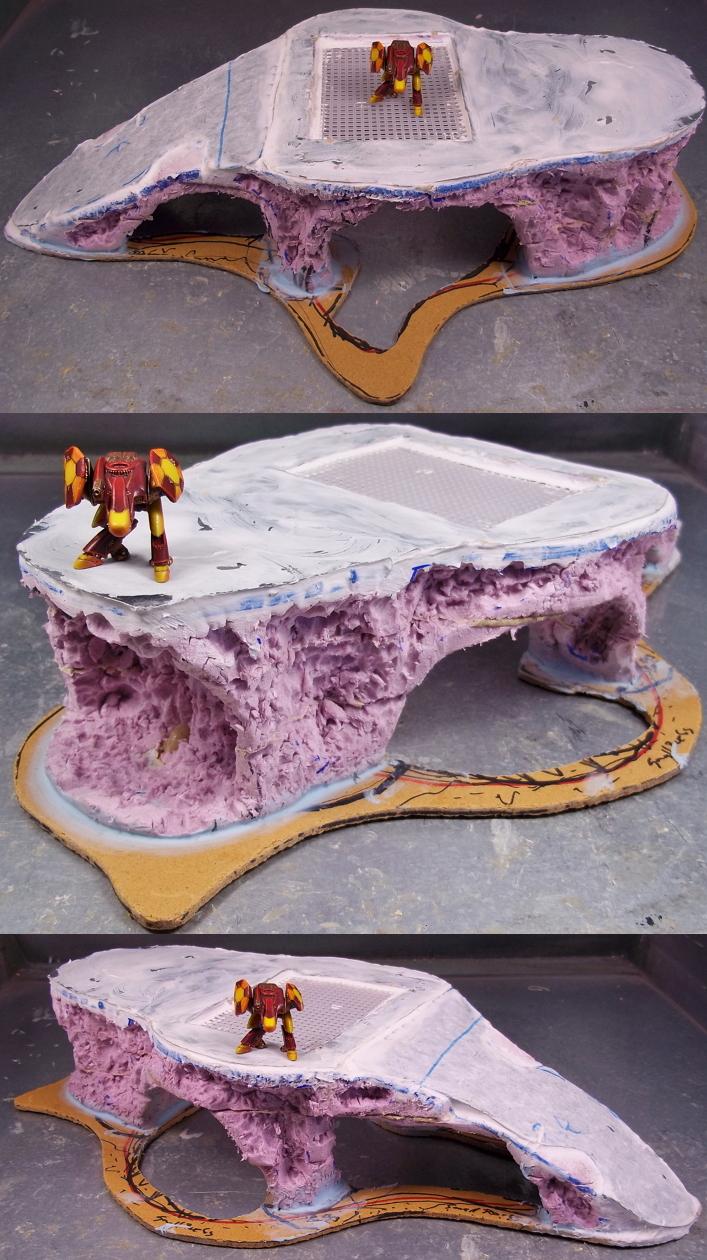
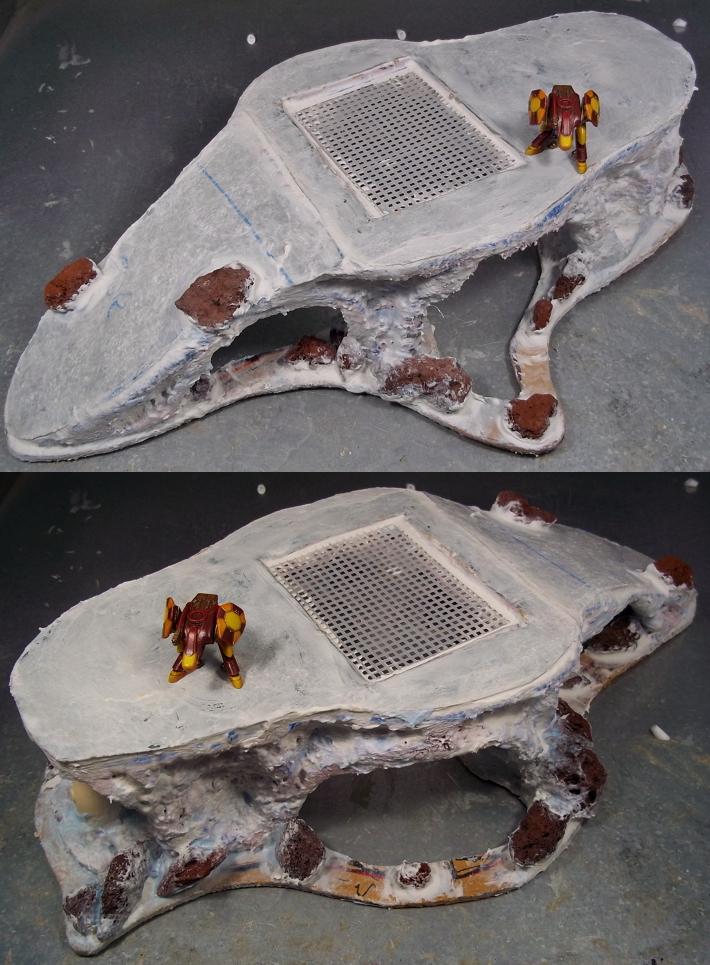
Pumice stones from the local garden center were washed and glued to the base with foamboard adhesive. Foamboard adhesive was also applied to any remaining cracks in the foam and the entire surface was given a generous coat of painters caulk slightly thinned with water. Again, this will improve adhesion of the later texture paste.
I then used an old coffee grinder ($10 at a local thrift store) to grind up chunks of cork sheet. I then mixed the ground cork with diluted PVA glue and applied it around the edges of the model to begin to add texture.
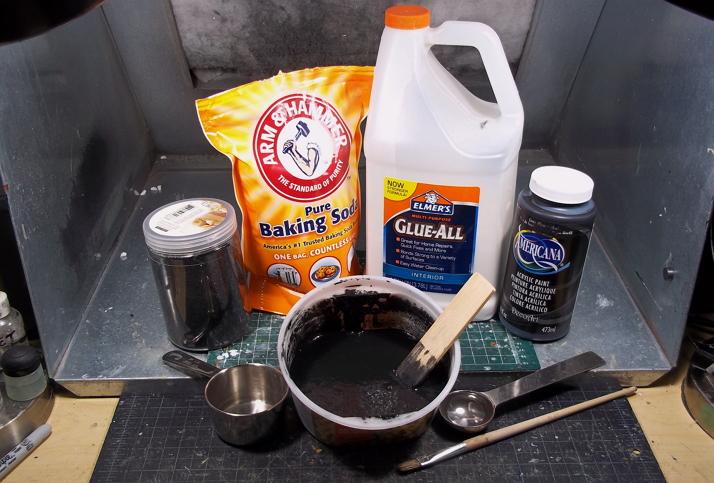
 Nodri's DIY Texture Paste Recipe
Texture paste is expensive. Here's how to make it on the cheap.
1/2 Cup Baking Soda
3
Tbs. PVA Glue
2
Tbs. Acrylic or Latex Paint
3
Tbs. Water
10-15 Total
Tbs. Fine/Medium/Coarse Ballast/Sand/Gritty Stuff
Mix everything together in a bowl and stir until you get a smooth texture. When you think you're done mixing, mix more and then keep mixing. If the mixture seems too thick, add water. If it's not sticking to the surface, add PVA. If you want a creamier paste, add a little extra baking soda. Everything is flexible.
I used only medium & fine grits on the tops of hills to minimize the distance between magnets and sheet metal. Coarse ballast was mixed in to the fine and medium to be used on the sides. On some of the hot lava features, I only used about 10
tbs. of fine ballast (it comes out like Vallejo Sandy Paste) with 3 extra
tbs. of baking soda. The best part of this recipe is that it's as cheap as it is flexible.
Here's the hill with texture paste applied.
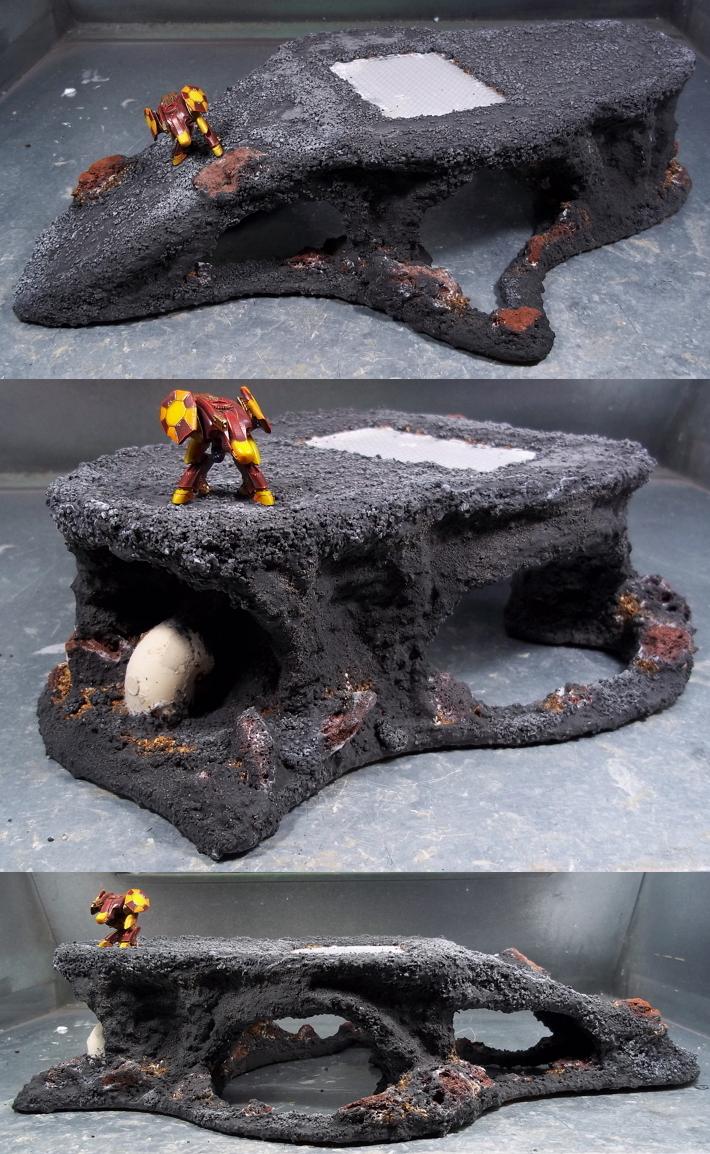
The texture paste was then sealed with two coats of diluted PVA glue. In this photo, you can see the position of the magnets. Once dried, the bottom of the base was sanded with a power sander using coarse grit sandpaper. This was done to remove any drips from the bottom of the base.
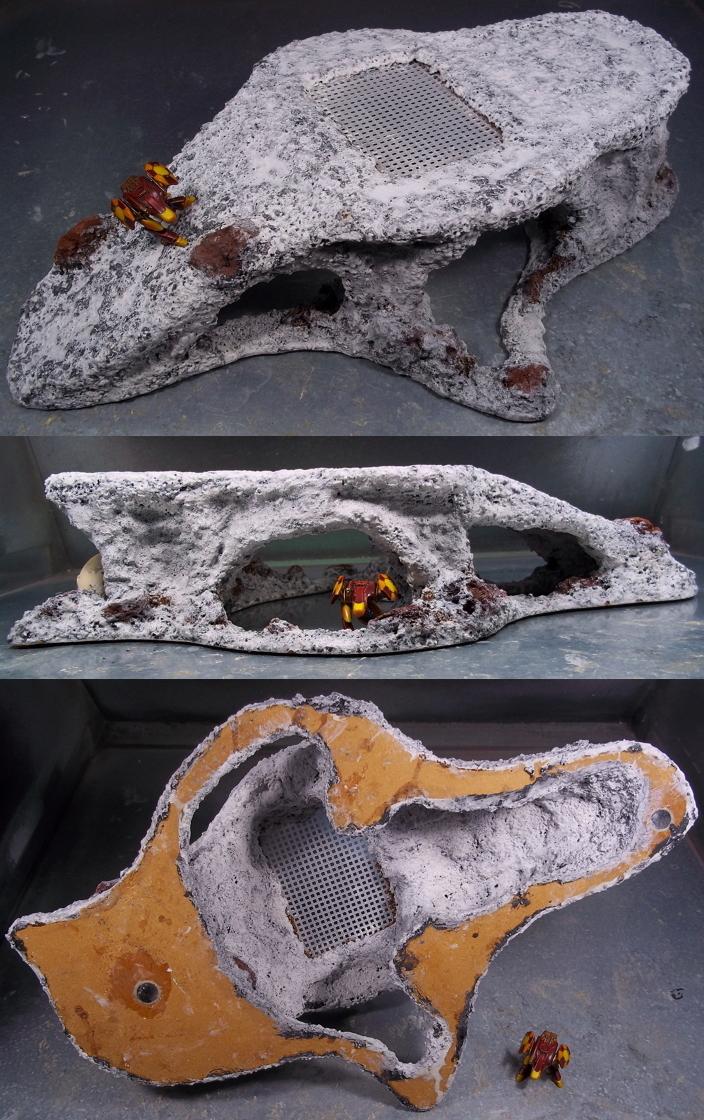
The hill was then given a coat of black spray primer. The final result is a fairly lightweight, durable, and versatile piece of terrain.
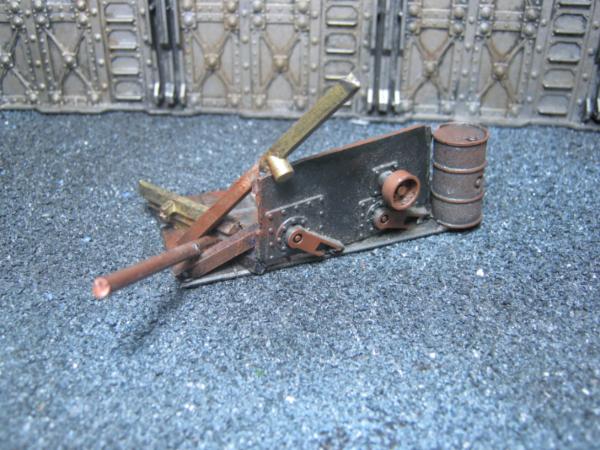
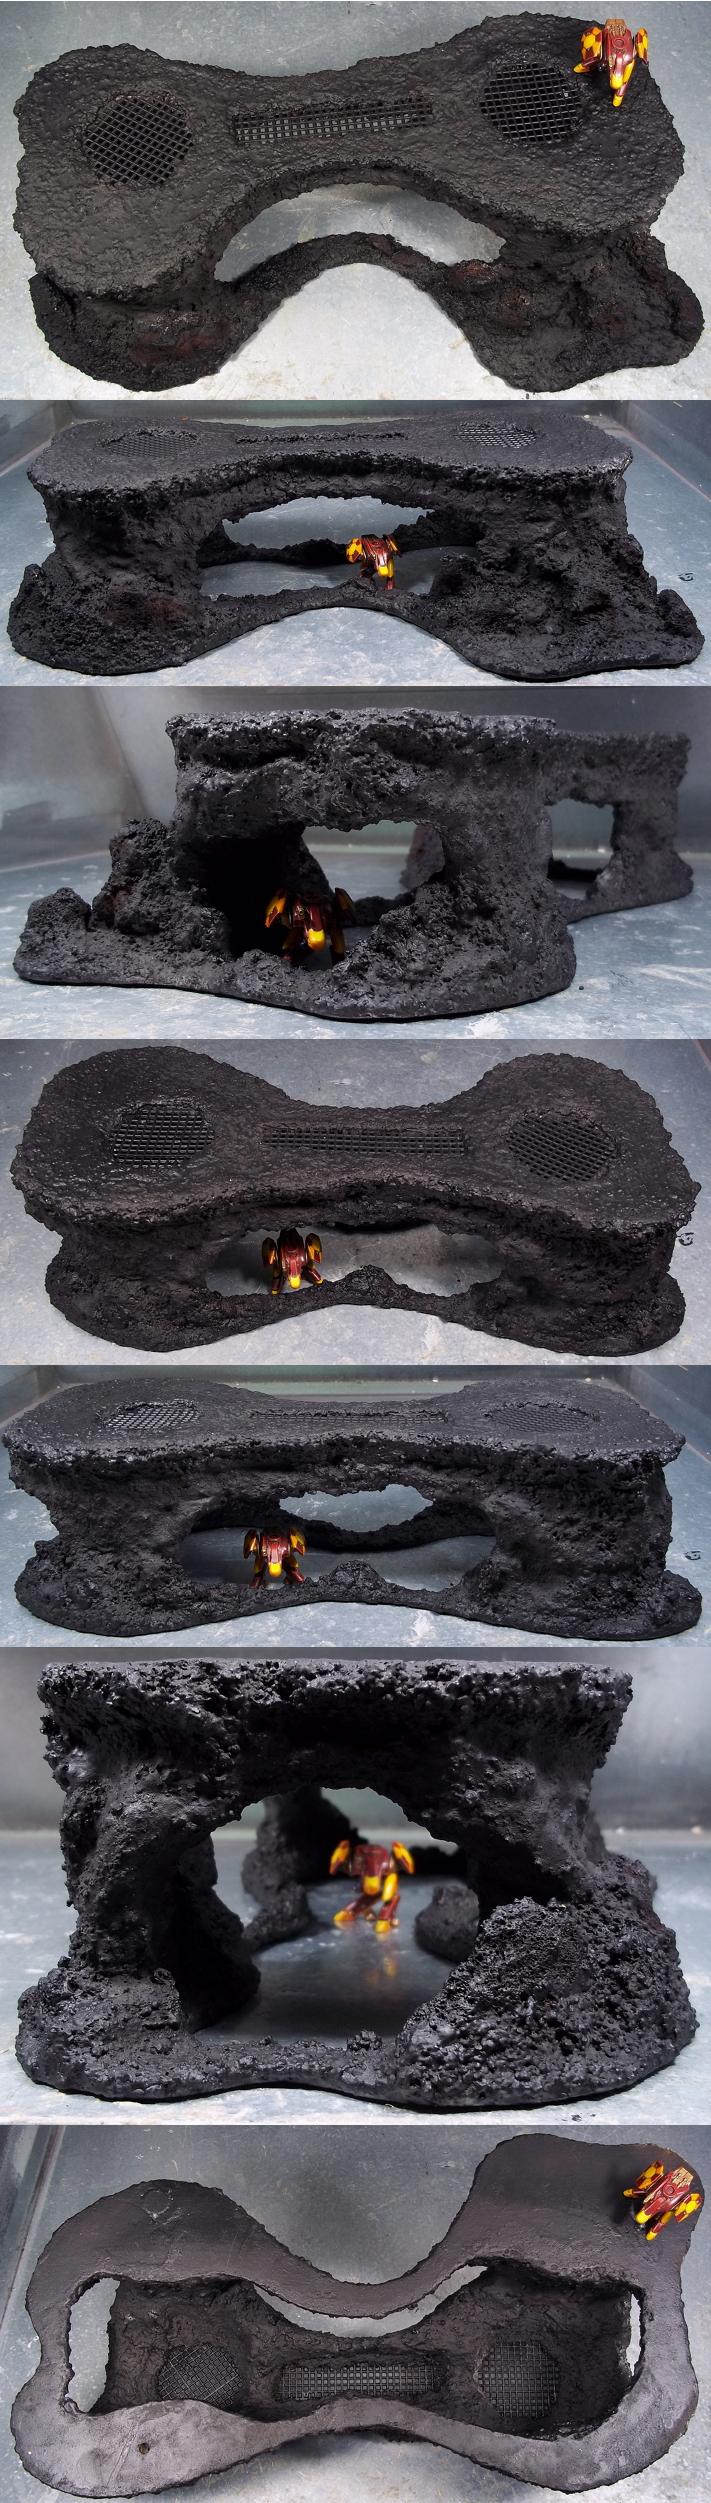
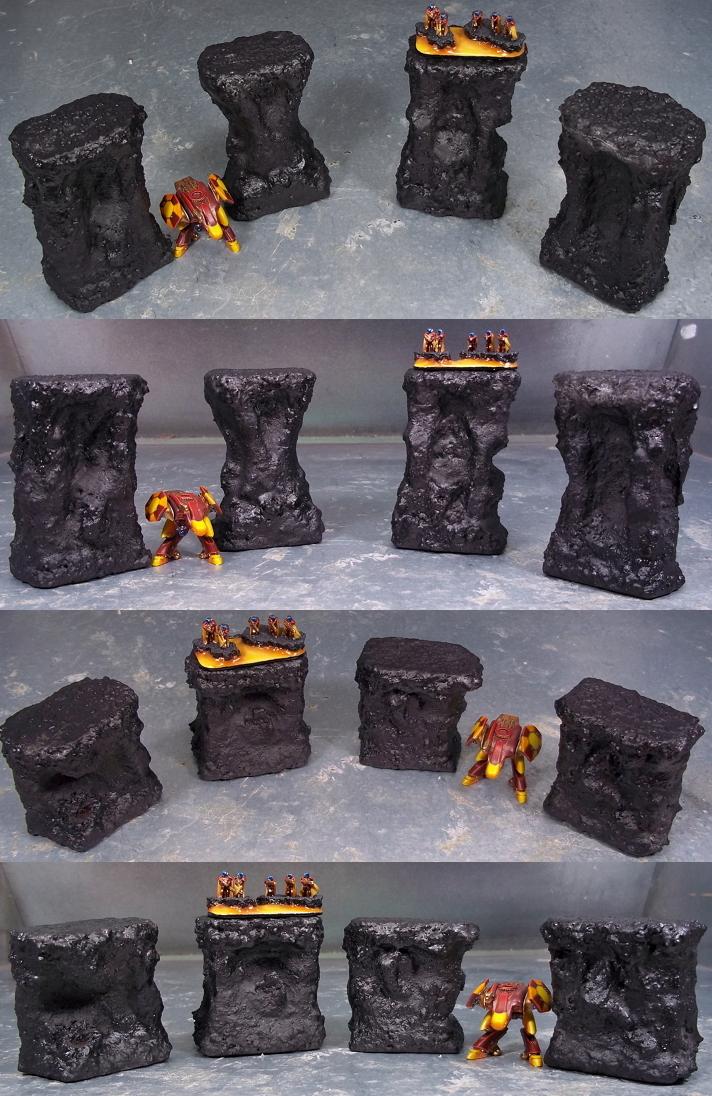
Here's the same technique applied to a bridge support. I added doors to the bridge support (and two large bridges, more on that later) to give infantry more movement options. Here's the same process as above (but abbreviated a bit) on a smaller piece of terrain.
First the foam is cut, stacked, glued with foamboard adhesive, and allowed to dry while being pressed beneath a gallon of water. A sheet of metal was then attached with liquid nails and also allowed do dry overnight beneath a gallon of water. The resulting brick was then carved into shape.
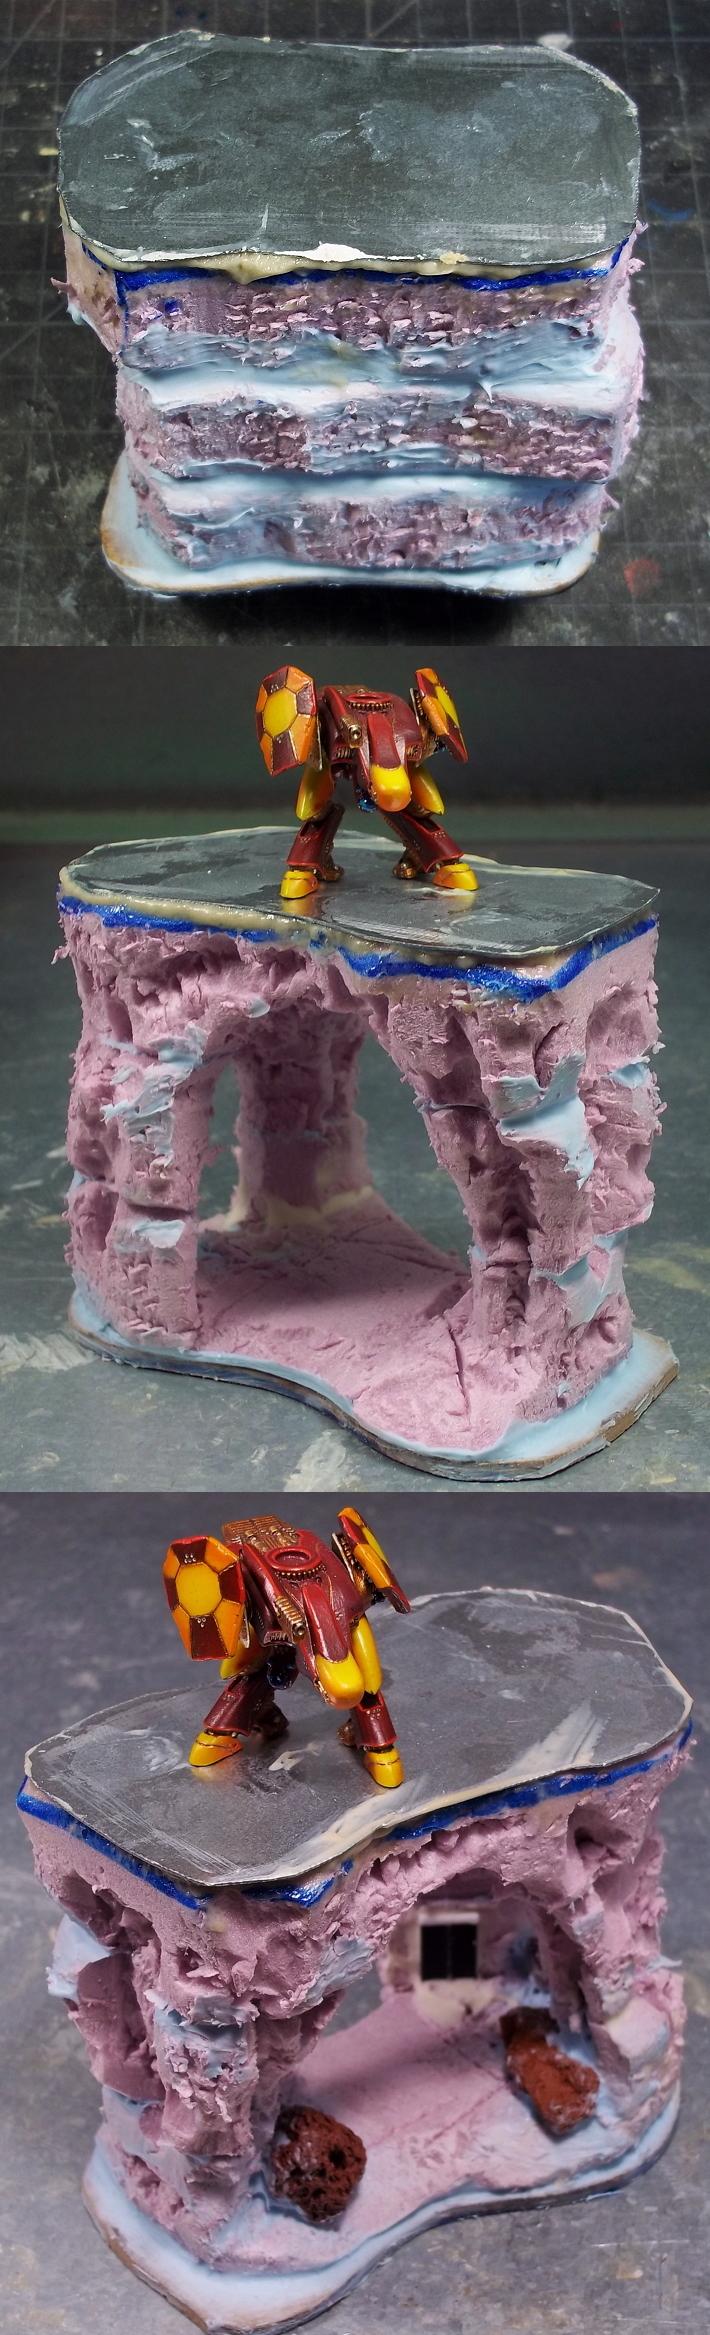
A door and pumice stones were added. The cracks were then sealed with foamboard adhesive.
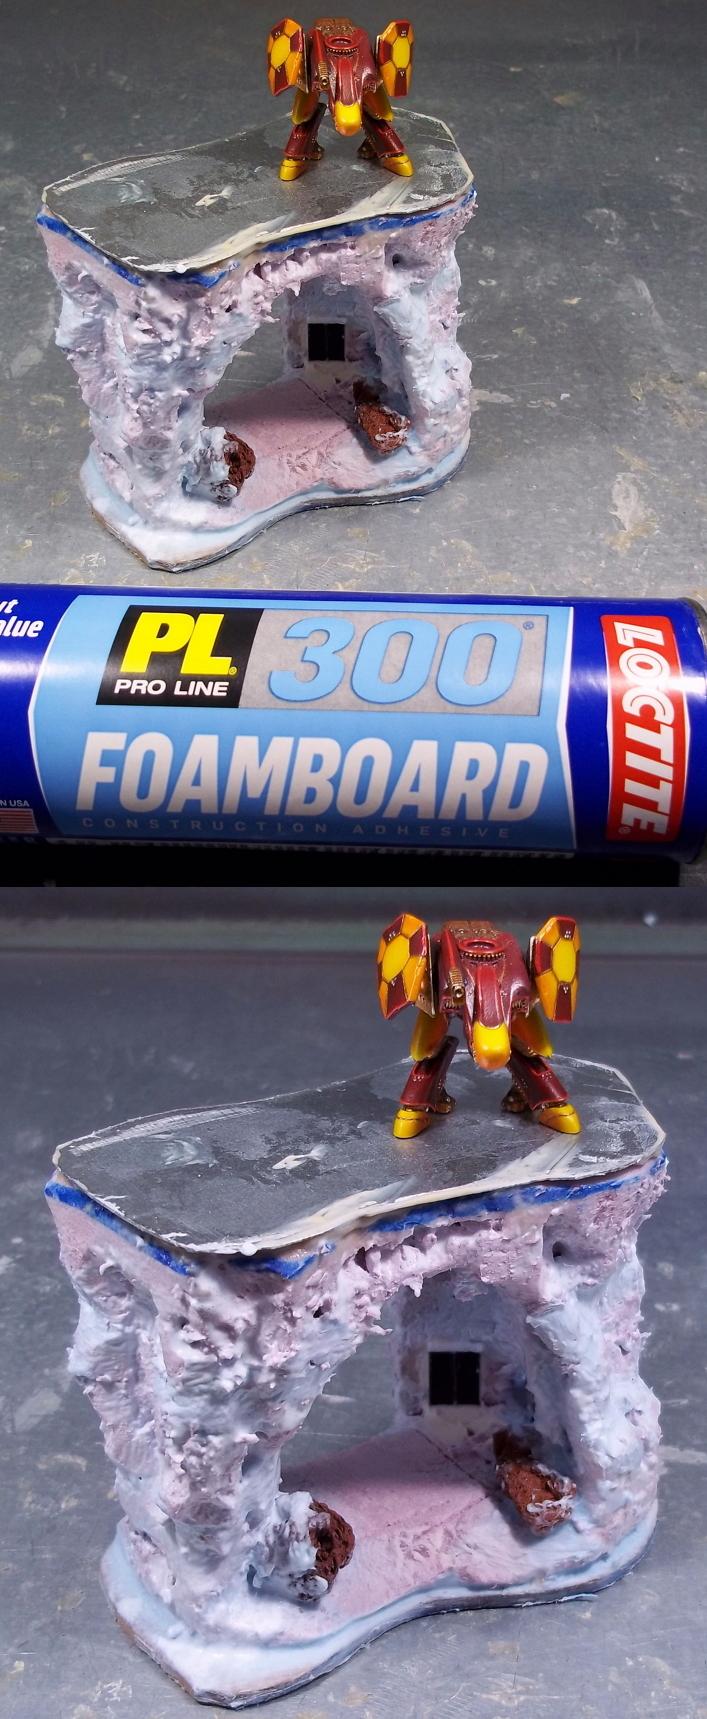
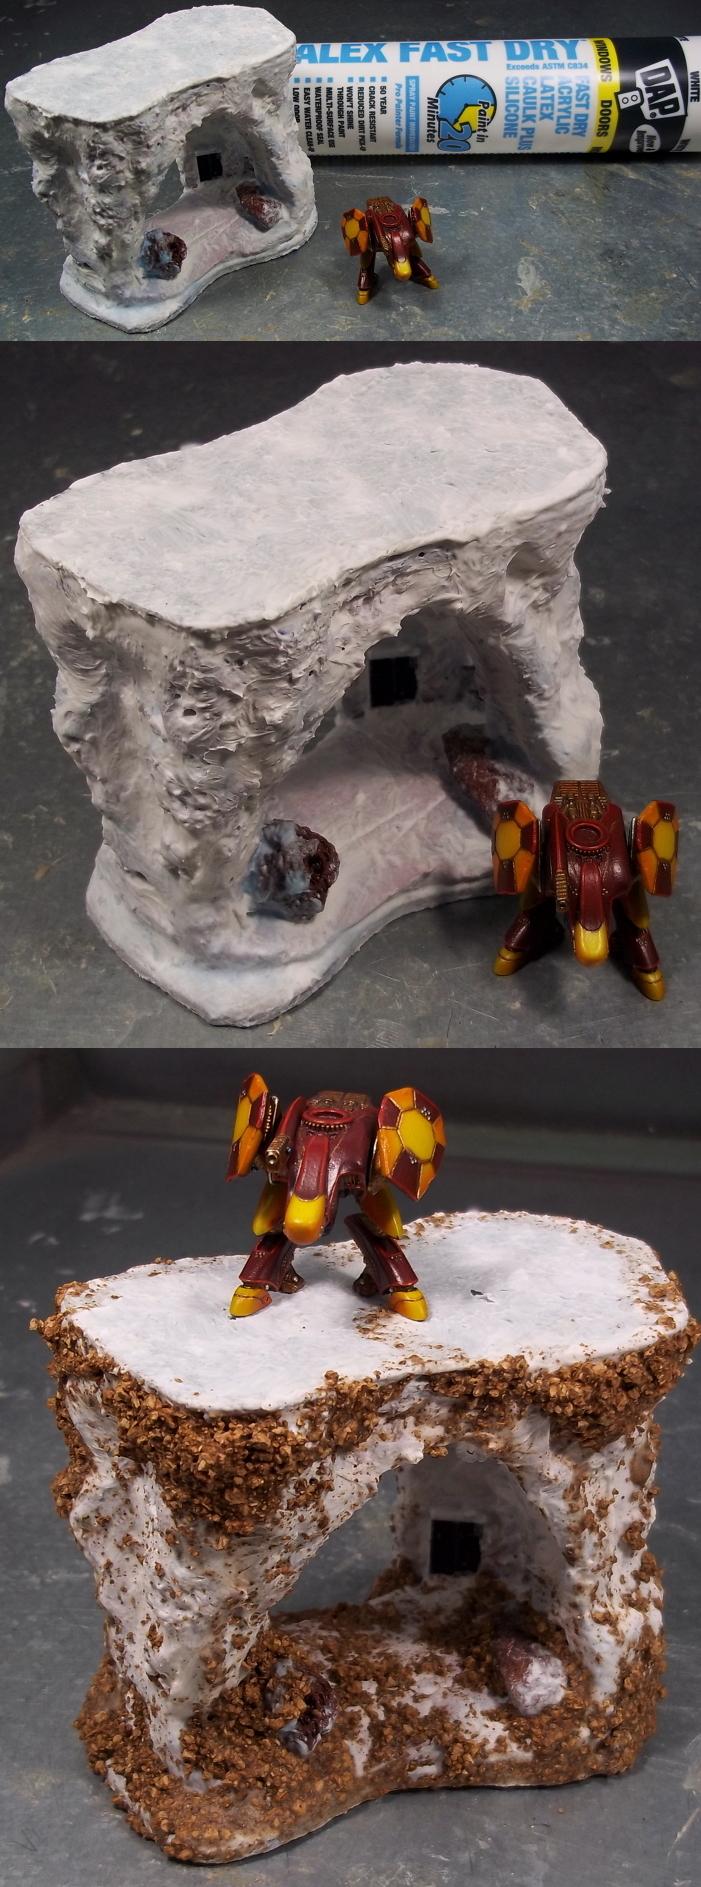
The entire piece was then given a generous coat of painters caulk. After the caulk was dry, it was finished with cork and texture paste, sealed with PVA glue, and then painted as above.
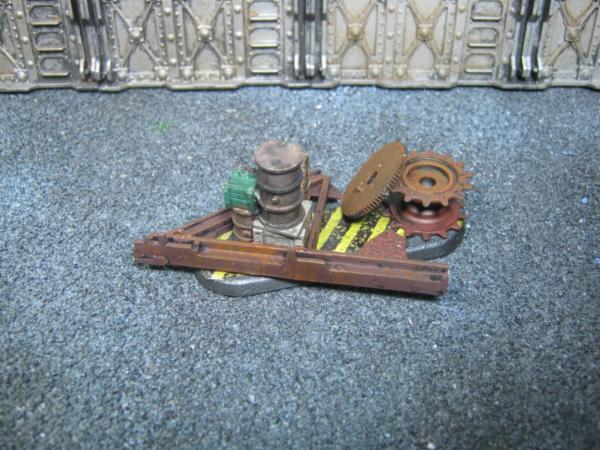
The same basic process was used to create boulder fields. In this case, sheet cork was glued directly to a base with foamboard glue. Pumice stones were then added and the cork was topped with sheet metal. The boulder fields were then finished as above.

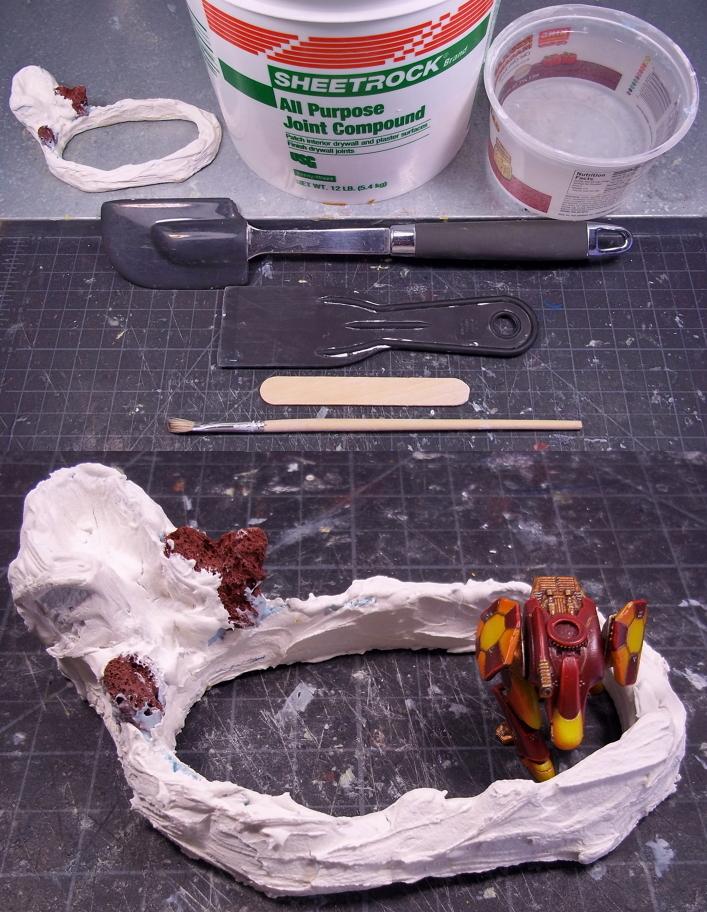
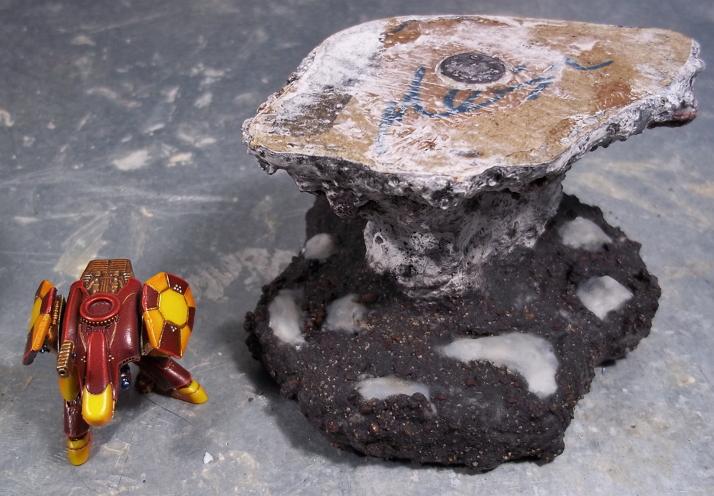
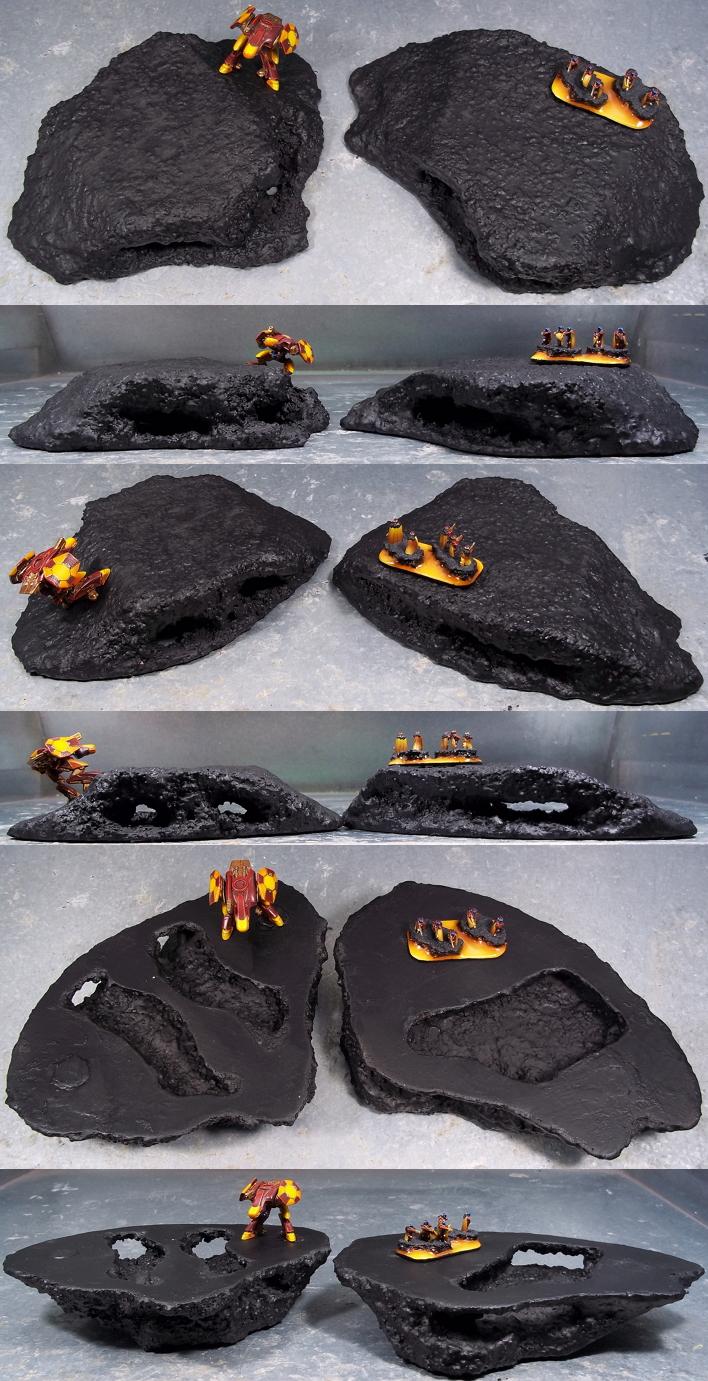
For craters and hot lava features, I first glued foam and pumice stones to a base with foamboard adhesive.

I then covered the piece with drywall compound. Don't worry about making it perfect, just make sure that the gaps get filled. Apply in thin layers to minimize cracking while drying. You can always add more (or remove it) if needed.
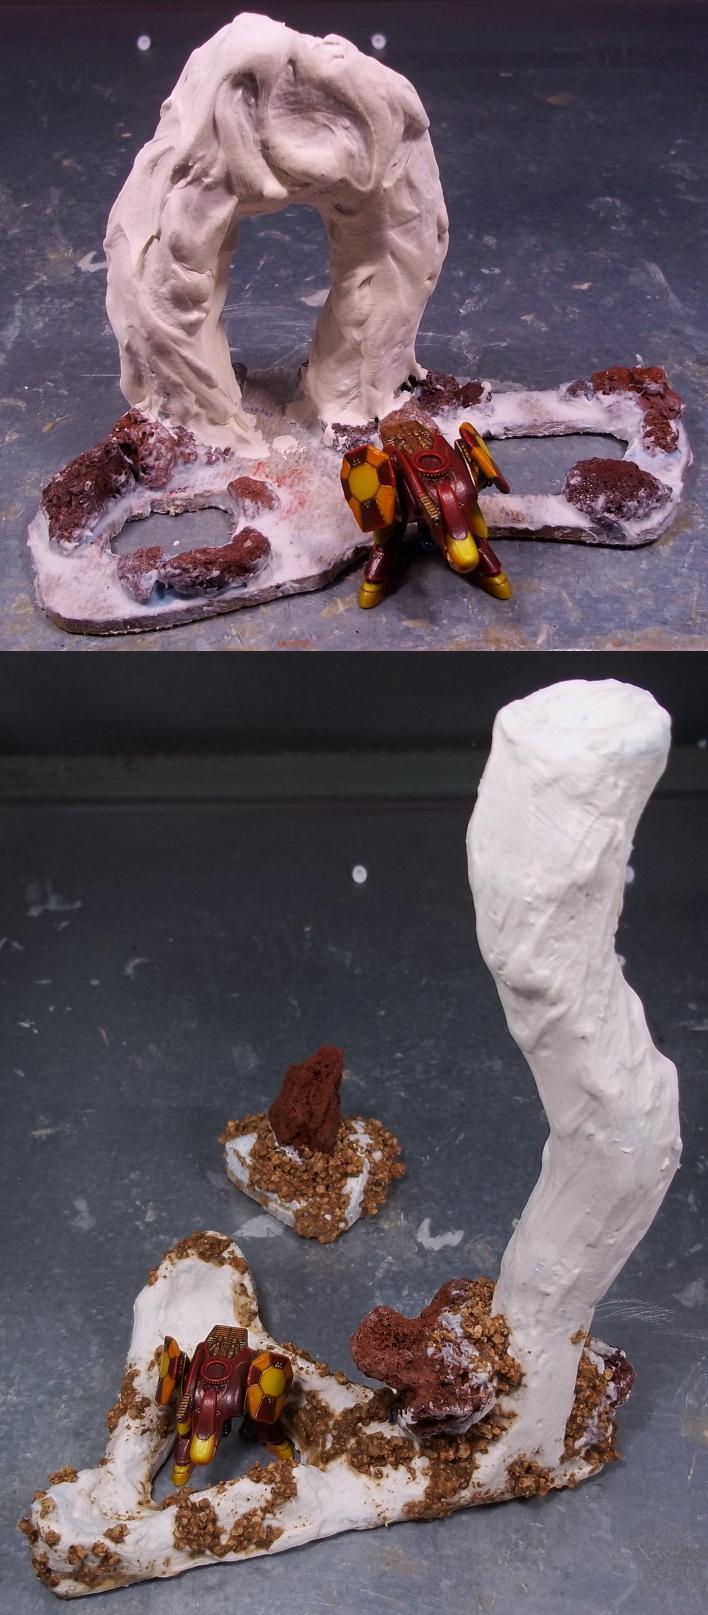
I then use a sanding block and damp towel to smooth out the joint compound and give the final texture. The crater was then finished with texture paste, PVA glue, and painted as above.

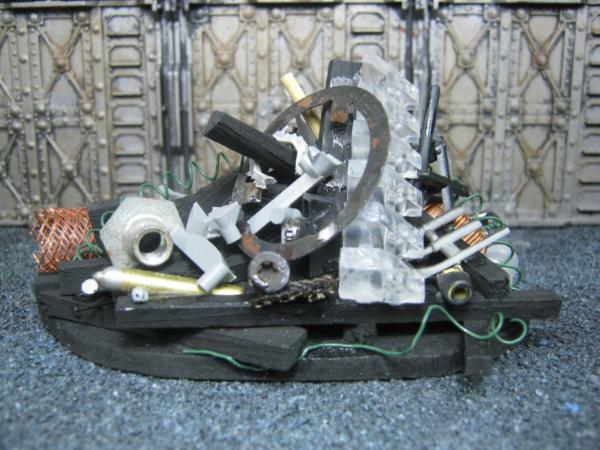
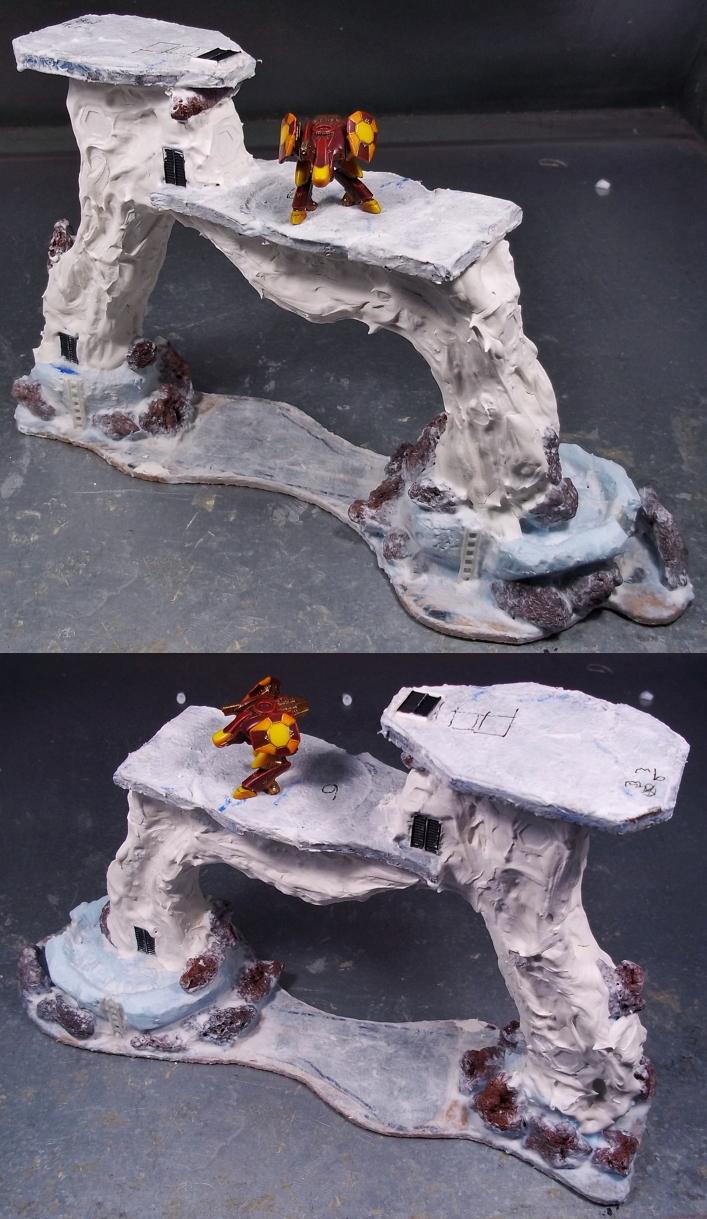
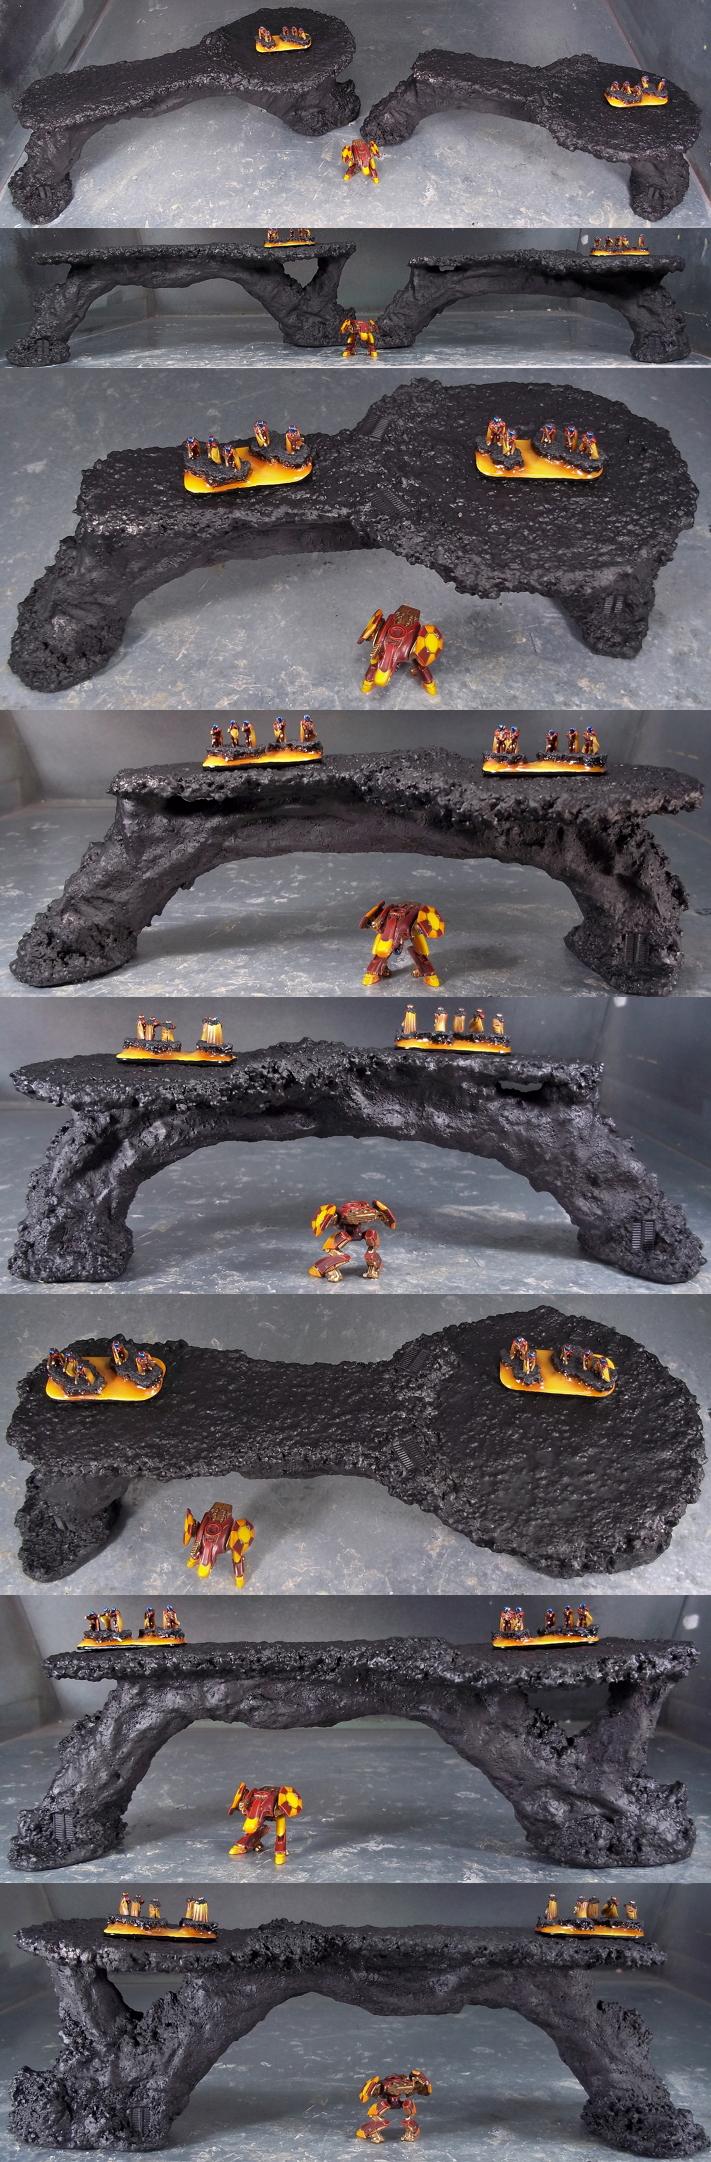
The same method was used to make arches and spires. The landing areas on the larger arch were made with 1/8" foam core, covered in sheet metal, and finished as above.
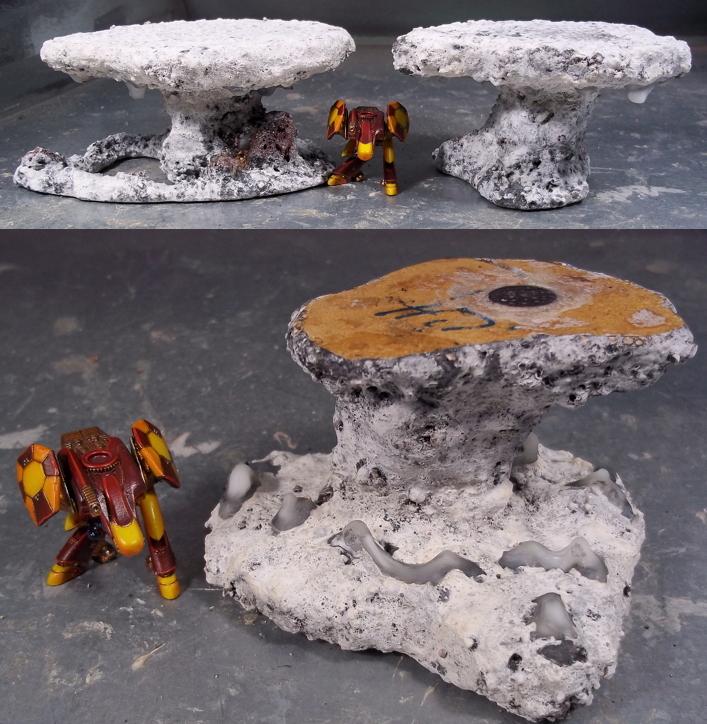
To add hot lava drips or pools, apply undiluted PVA glue to a sealed (but not primed) terrain feature. Allow the terrain piece to dry and add additional layers as needed. On average, 3-5 layers are needed to build up a decent pool or drip of hot lava.
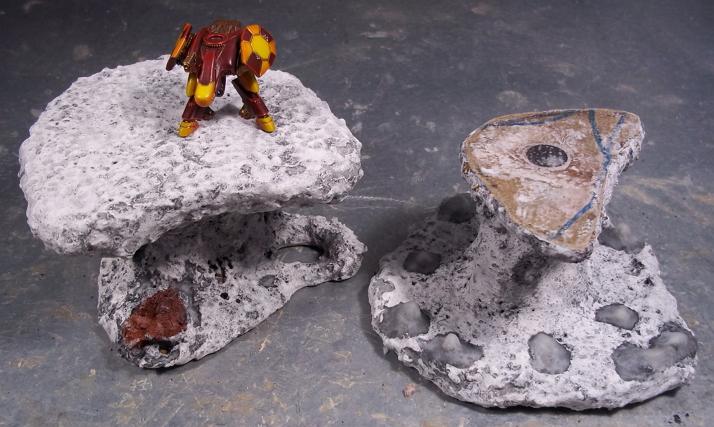
Then apply texture paste around the hot lava drips. This will help to push them into the terrain feature to make it look more natural.
Then seal the whole thing with diluted PVA glue as before.
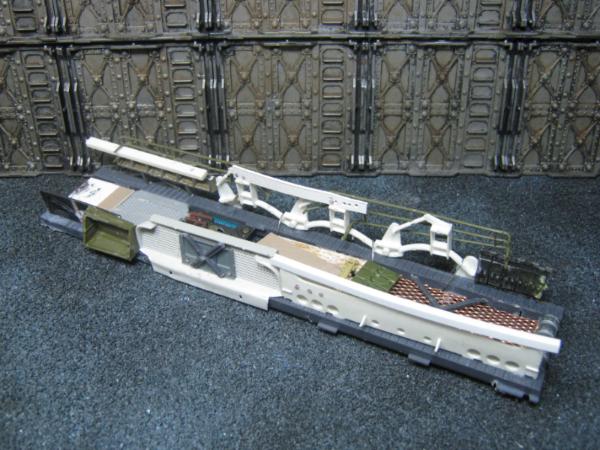
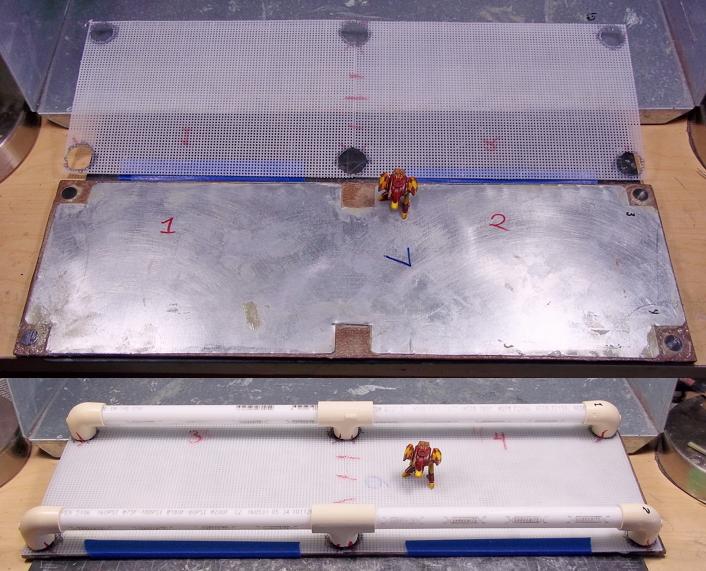
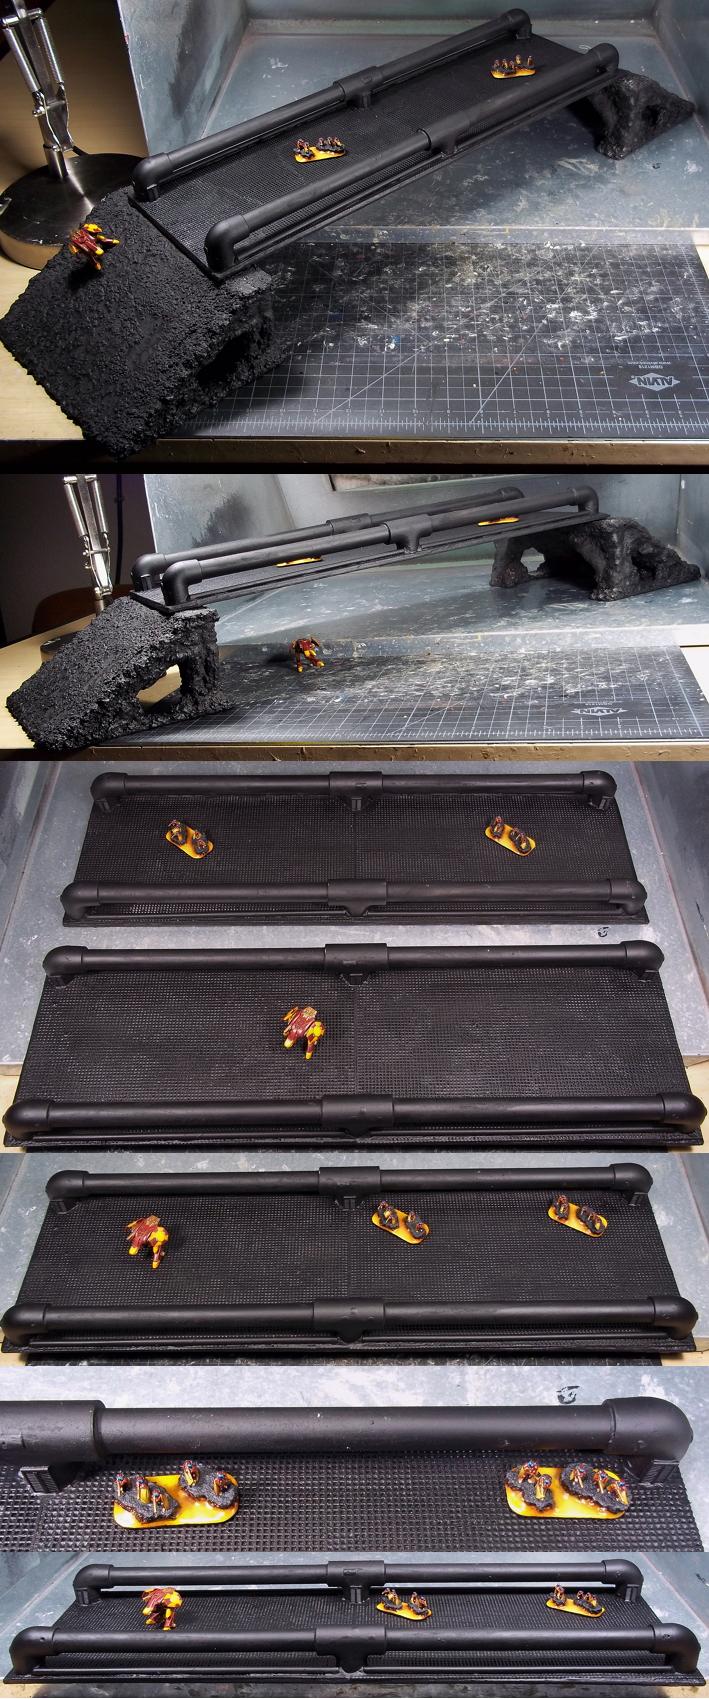
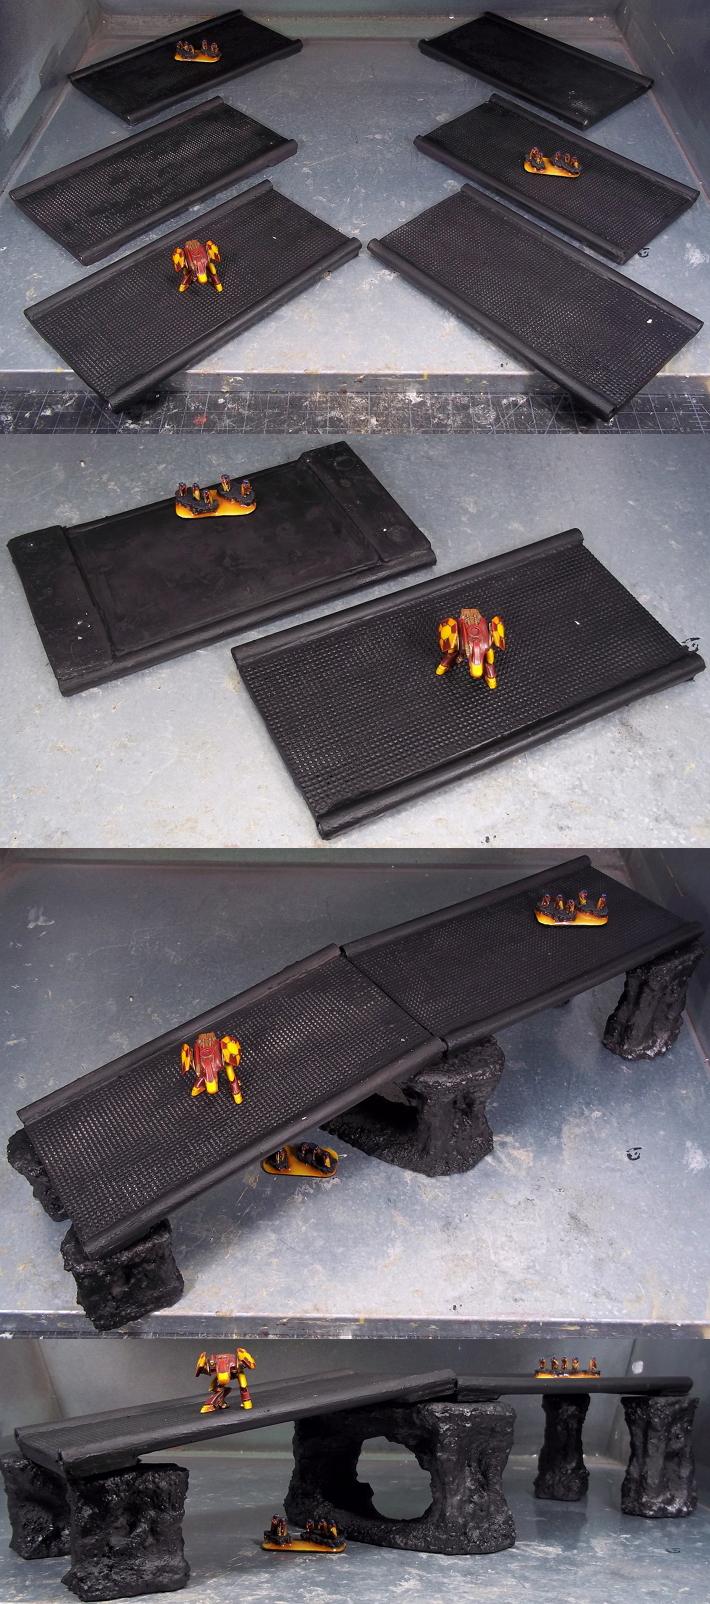
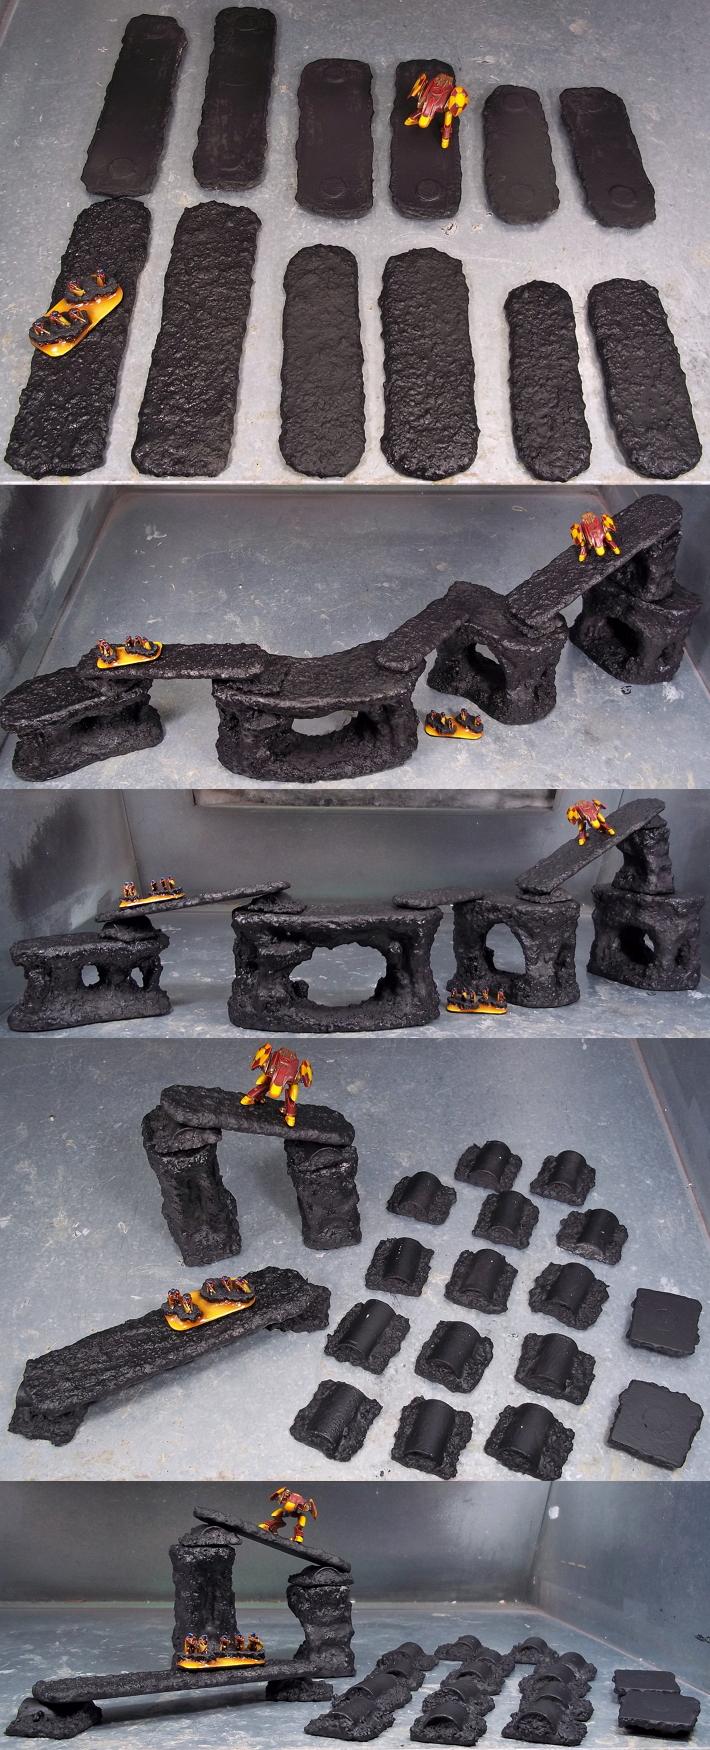
As you may have guessed by now, I've also made bridges. Combined with the hollow hills, bridges will allow for a "sinking city" sort of terrain board with lots of different levels. Three sizes were constructed, and all are basically just sheet metal glued directly to a hard base.
The small footpaths were covered in texture paste to look like pieces of cooled lava.

Medium bridges were covered in granny grate and edged with 1/4" tubing.

Large bridges were covered in granny grate, edged in 1/2" tubing, and had doors installed at the middle and end pieces (not pictured here, but can be seen in the painted images later). The doors allow the bridge to be treated as a building (meaning it can contain infantry / objectives and can also be destroyed without using house rules).
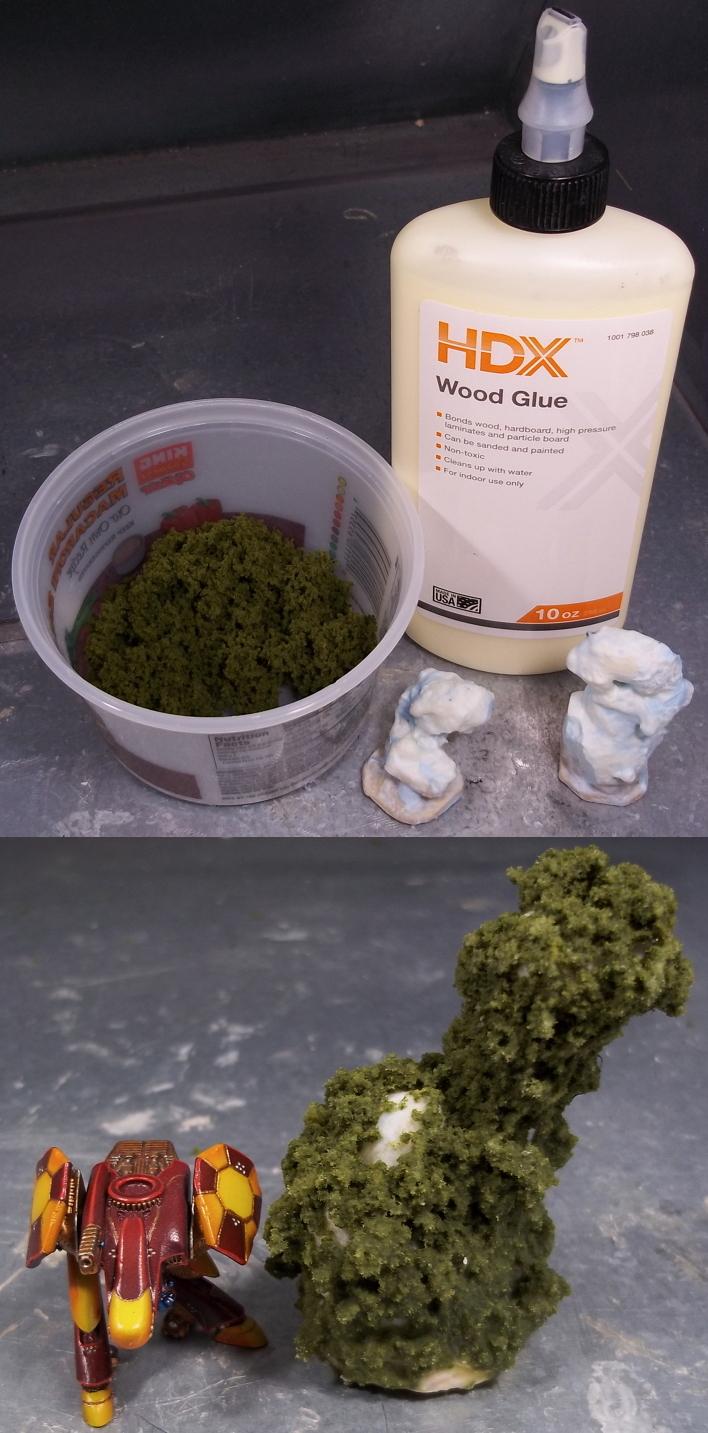
I made smoke markers out of scraps of spray foam (I sprayed out the remnants of cans while filling buildings). The foam was glued to bases made of craft magnets glued into bits of a paint stirring stick. Foamboard adhesive was then stippled all over with a damp brush.
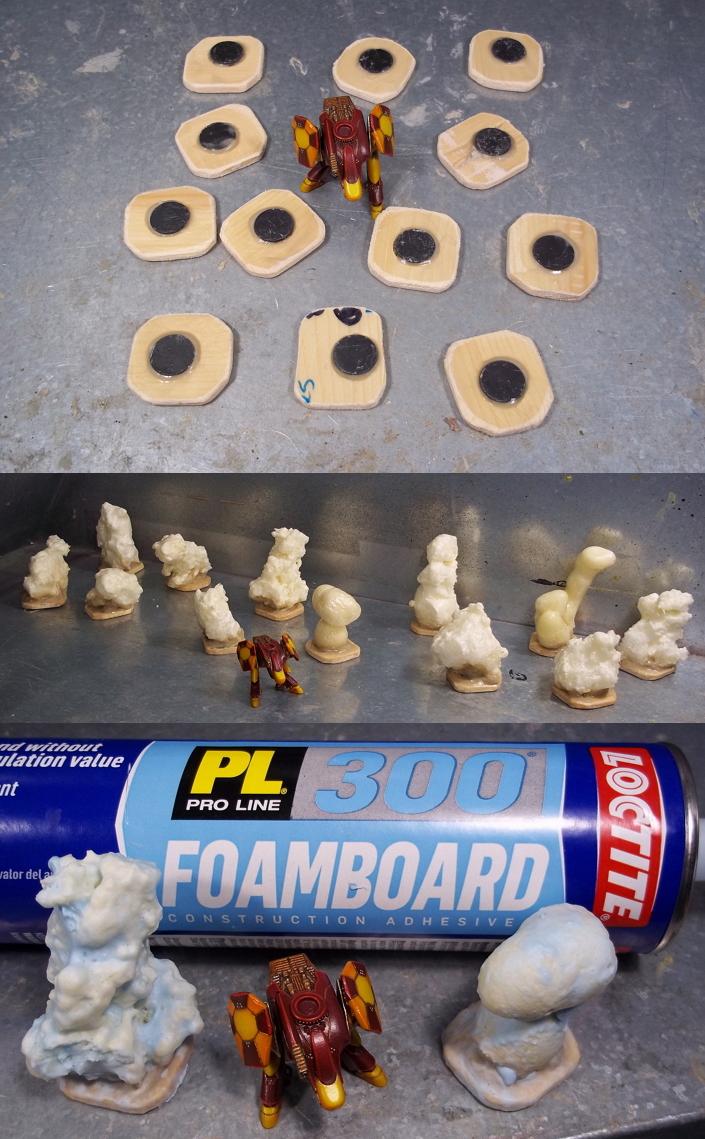
Since I ran out of PVA glue (there's a shortage around here for some reason), I diluted wood glue with water to apply coarse model railroad foam to the bases. I allowed the glue to dry and applied a few additional layers to secure the foam in place. Once painted, the smoke plumes can be placed on any surface to denote soft cover.
As a side note, DO NOT use wood glue in place of PVA in the texture paste recipe. I tried it and the wood glue reacted with the baking soda. The solids and liquid separated into an unusable mess and all of the ingredients I used were completely wasted. :cry:
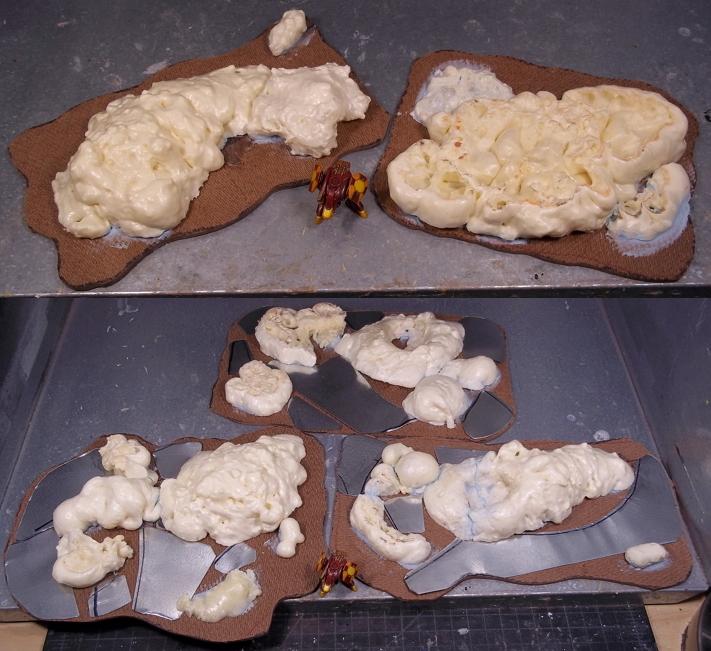
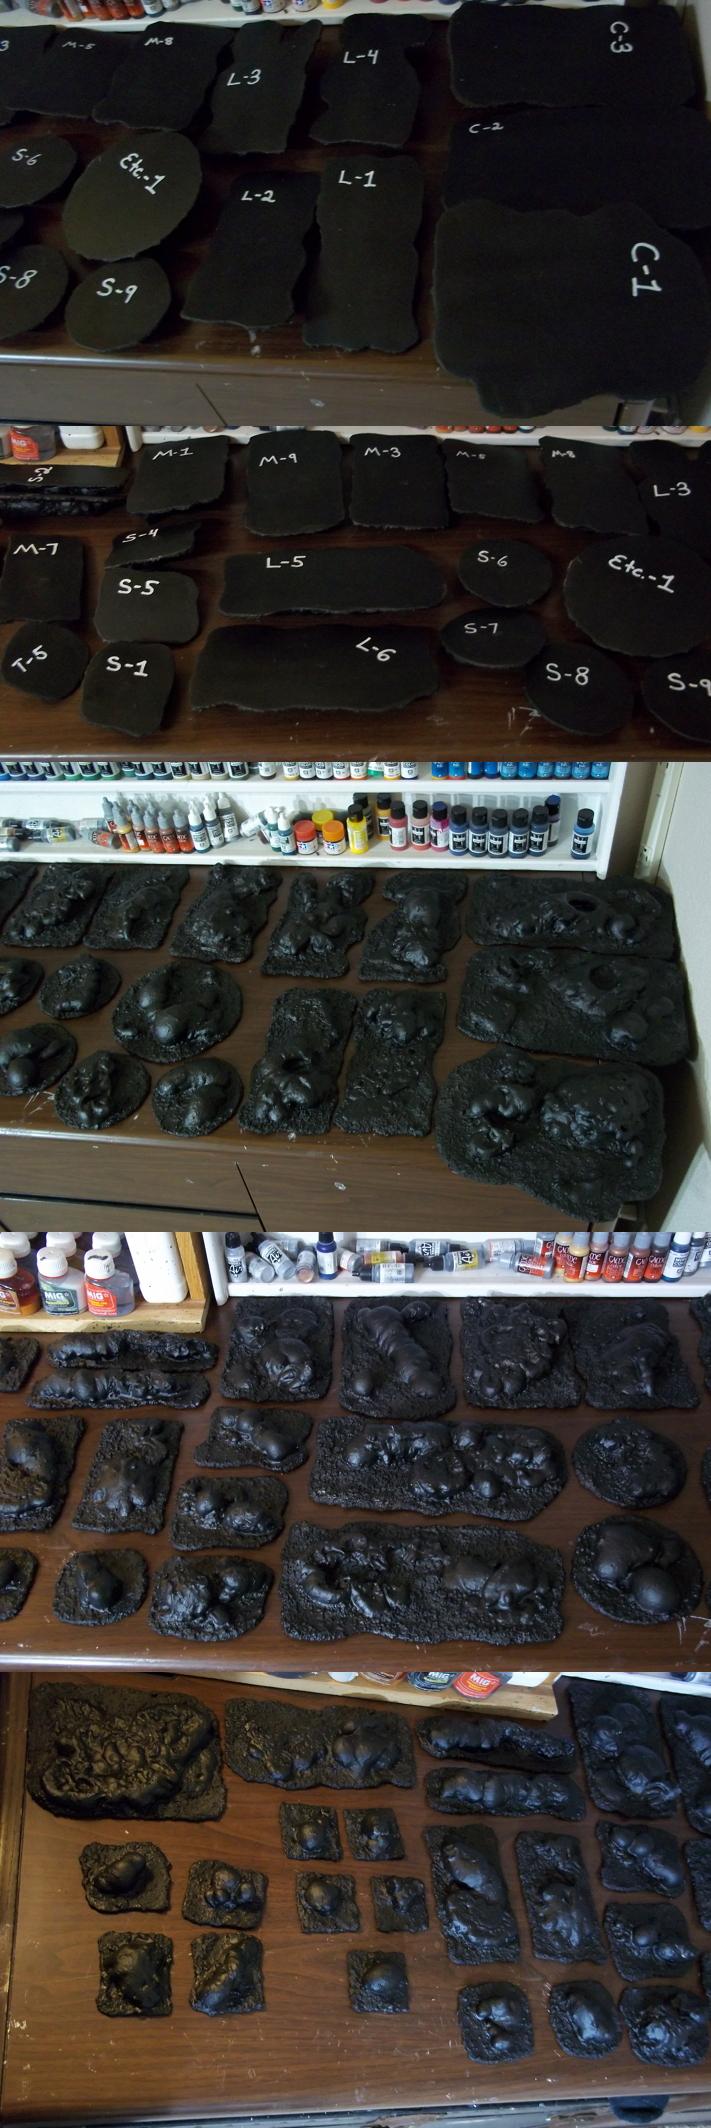
Larger pieces of scrap spray foam were cut into 1" high pieces and glued to hardboard bases for use as destroyed markers. Centerpiece destroyed markers (for the PHR Headquarters, Mega Factory, and Orbital Defense Gun) were magnetized for use as regular terrain features when the centerpiece buildings aren't in play. I plan to paint the foam as hot lava so it looks like the lava bubbles left over from when the structure has collapsed into the surface of the planet.
Texture paste was then applied and the foam was given a generous stippling of painters caulk diluted slightly with water.
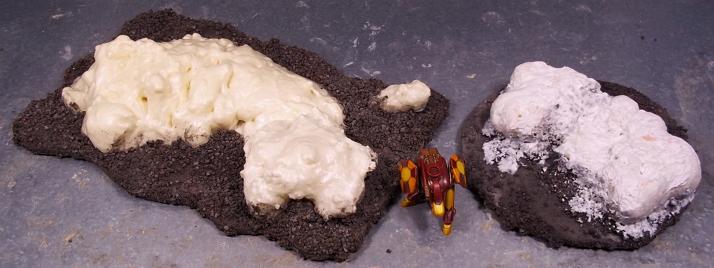
Everything was then sealed with diluted PVA glue. The bases were sanded smooth with coarse sandpaper mounted on a power sander. If you don't have a power sander, be extra careful to clean the bases as you go. Once the glue & ballast mix dries, it's very tough and it will wear out sandpaper (and your arms) very quickly. It takes some elbow grease to clean up the bases with a pad sander. I can't imagine doing it by hand.
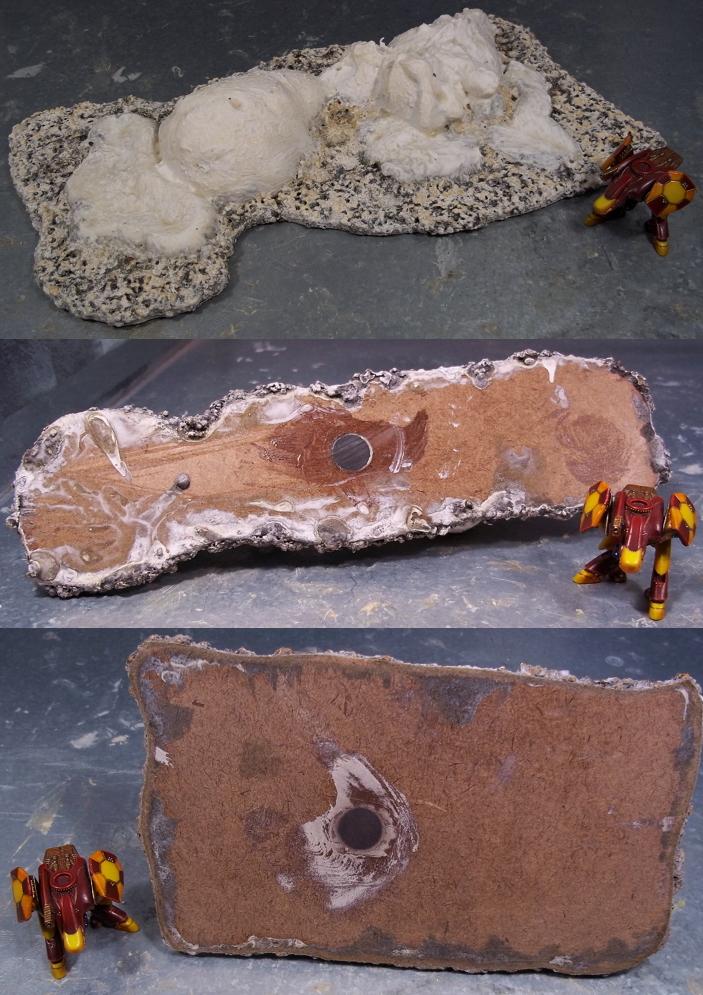
The destroyed markers were then primed black and a code written on the bottom that corresponds to a specific building. The letter notes the size (T=Tiny, S=Small, M=Medium, L=Large., C=Centerpiece, Etc.= Miscellaneous) and the number is tied to a specific building.
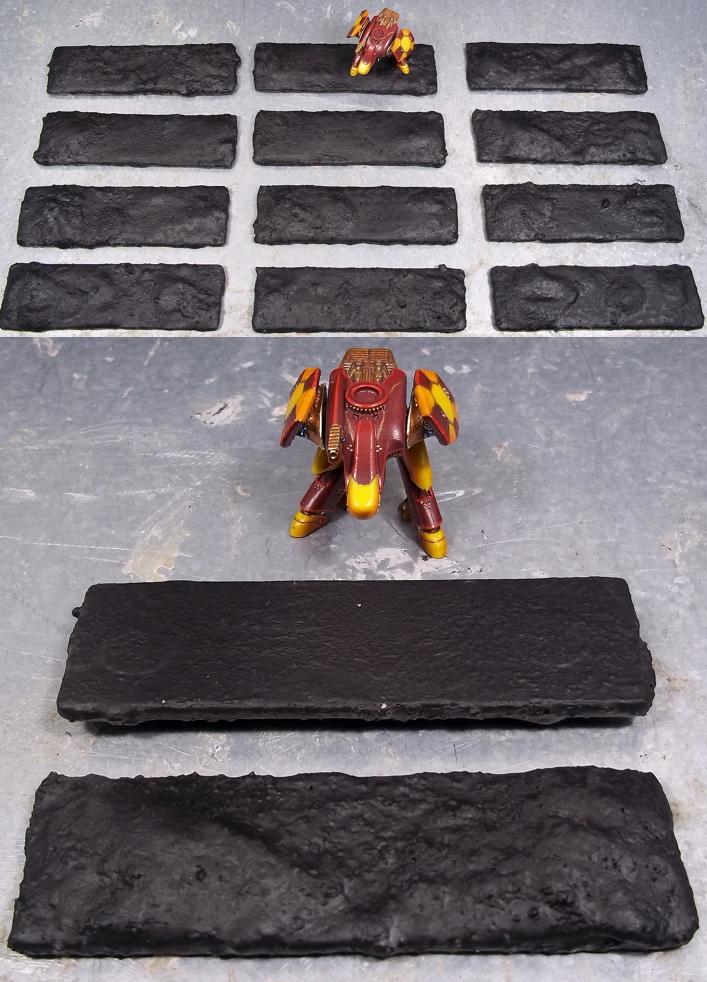
I also made some very straight pieces out of hardboard, magnets, and texture paste. They're designed to mark lines (like when you start a game in the corner or mark a defensive perimeter). The could also be used as very small bridges.
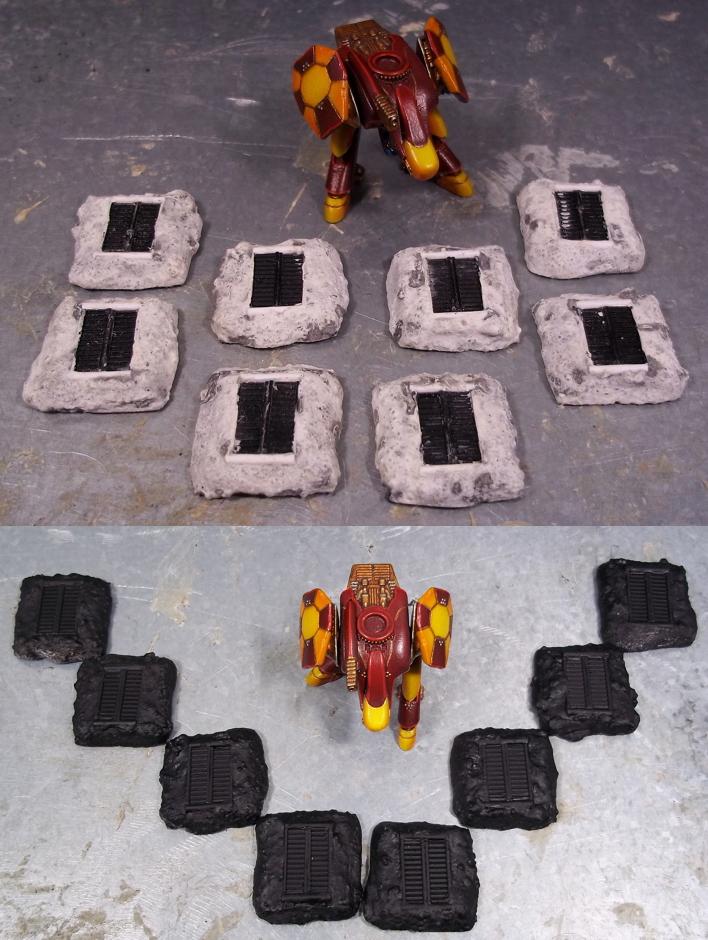
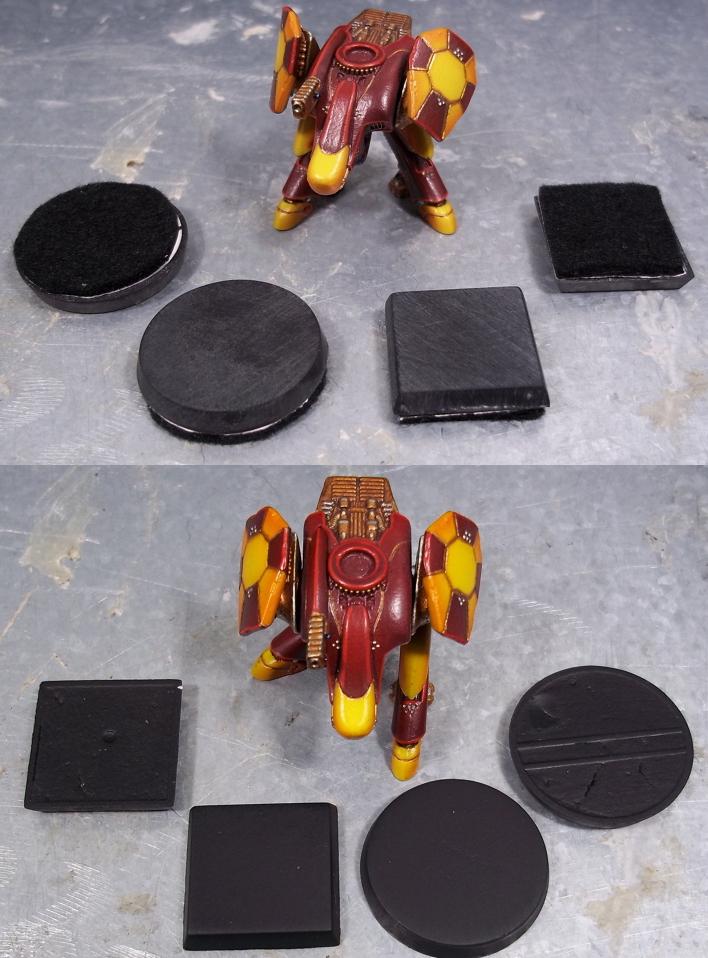
One of the more unique additions are door tokens. The idea came about after putting doors on arches and bridge supports. With door tokens, players can turn any terrain feature into a building or mark out an underground passage. They were made by gluing doors (see previous tutorial) to old Warhammer Fantasy bases and covering them in texture paste.
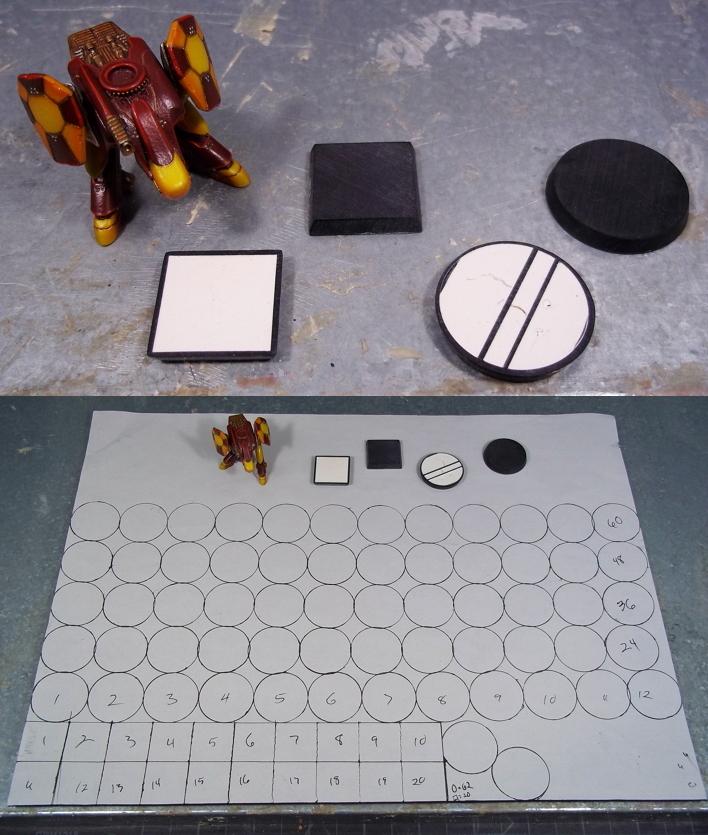
Regular game tokens (objective, intel, focal point, etc.) were made out of old Warhammer Fantasy &
40k bases. There will also be some "Underground" tokens to allow units to move through hills without having to actually place them beneath the terrain feature.
The bases were sanded smooth, filled with drywall compound, sanded smooth again, and then sealed with dilute PVA glue (at least two coats over the drywall compound), and primed black. I then traced the bases over adhesive felt to make a nice a nice finishing touch to the bottoms. I'll peel and stick the felt after the tokens are painted.
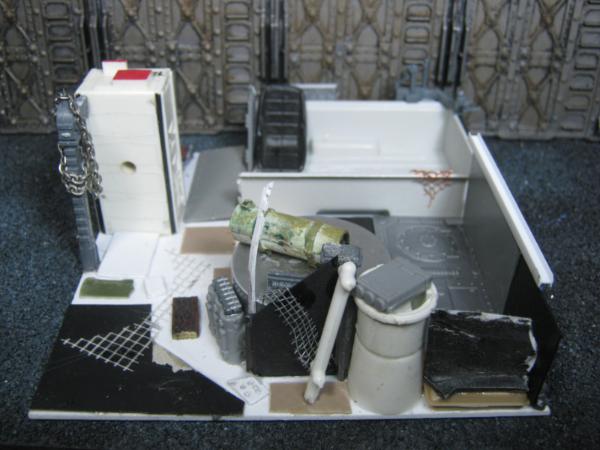
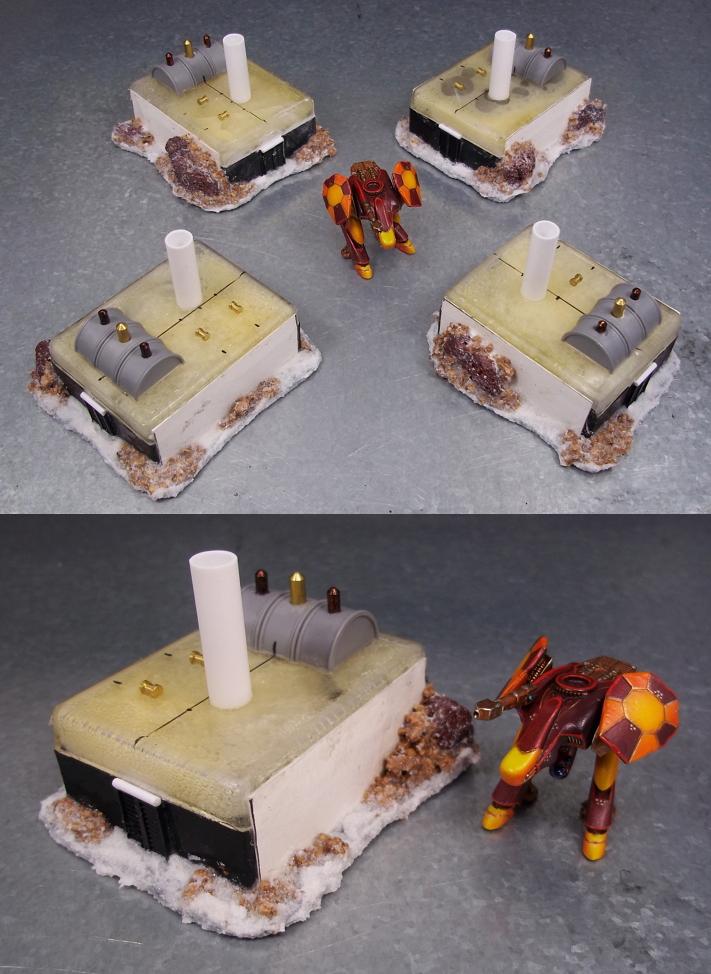
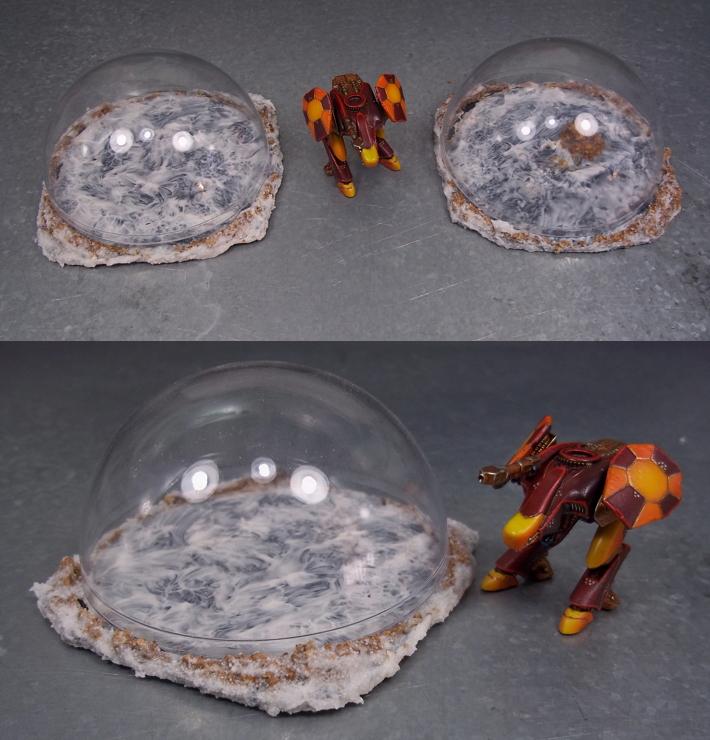
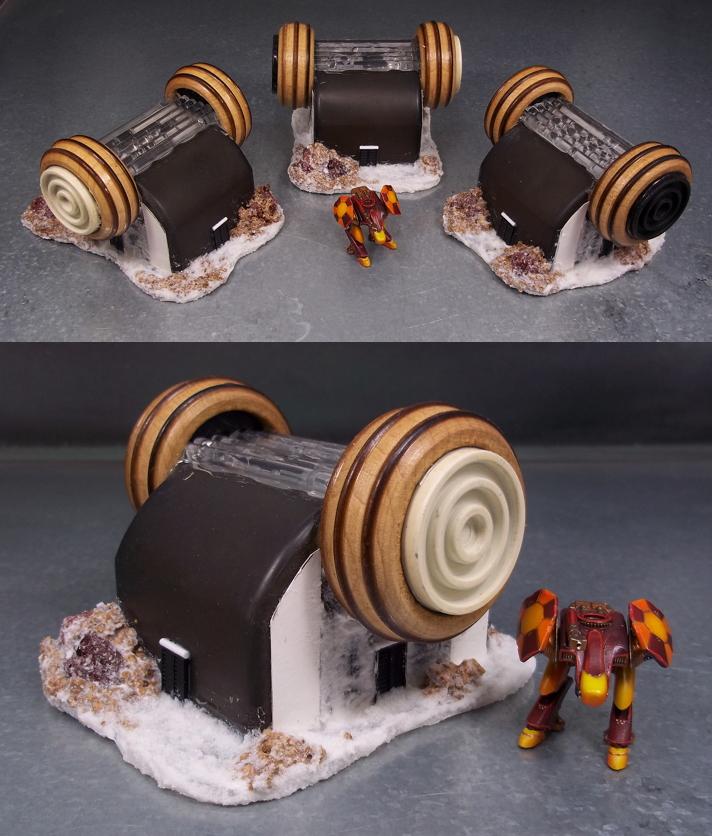
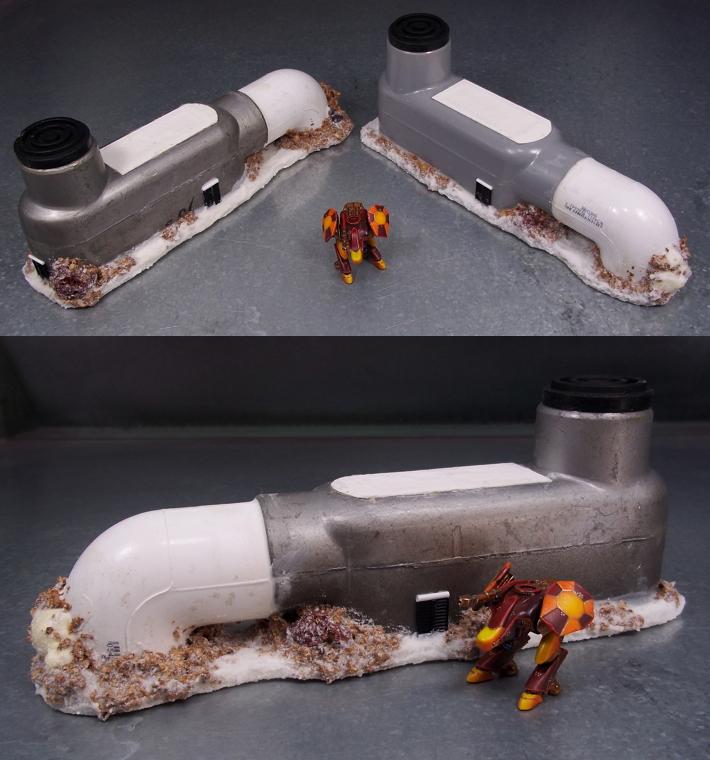
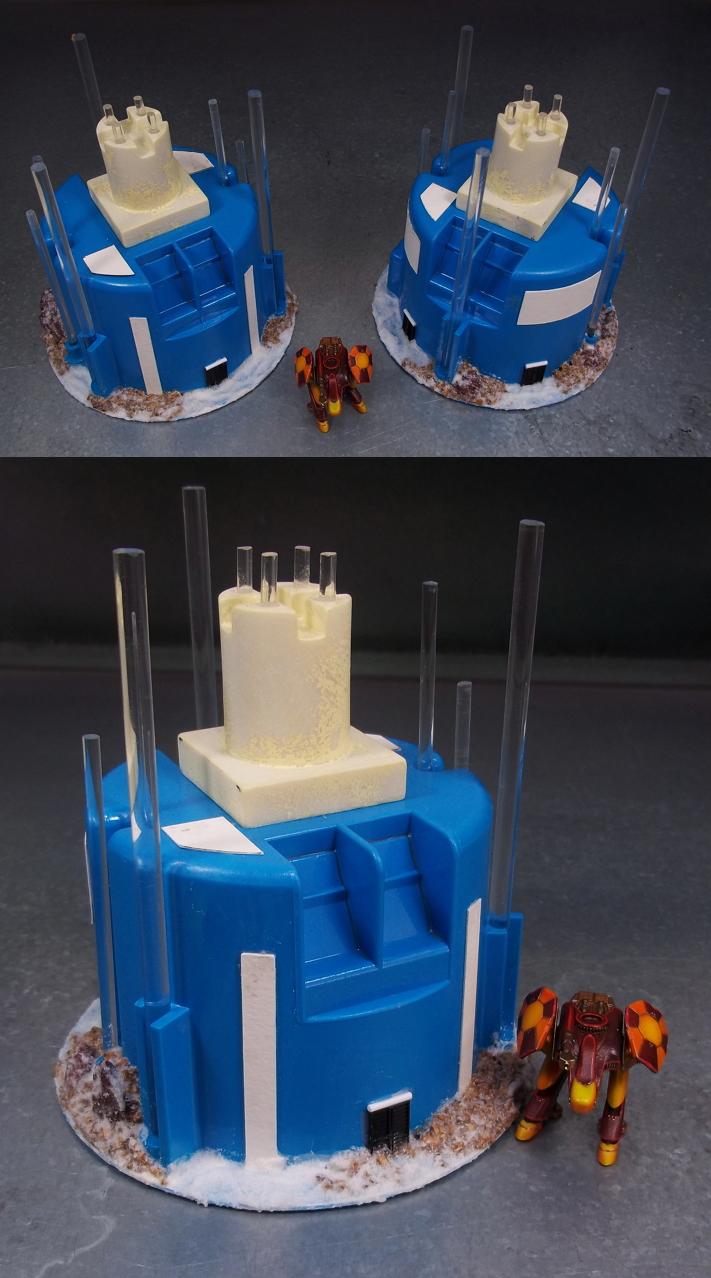
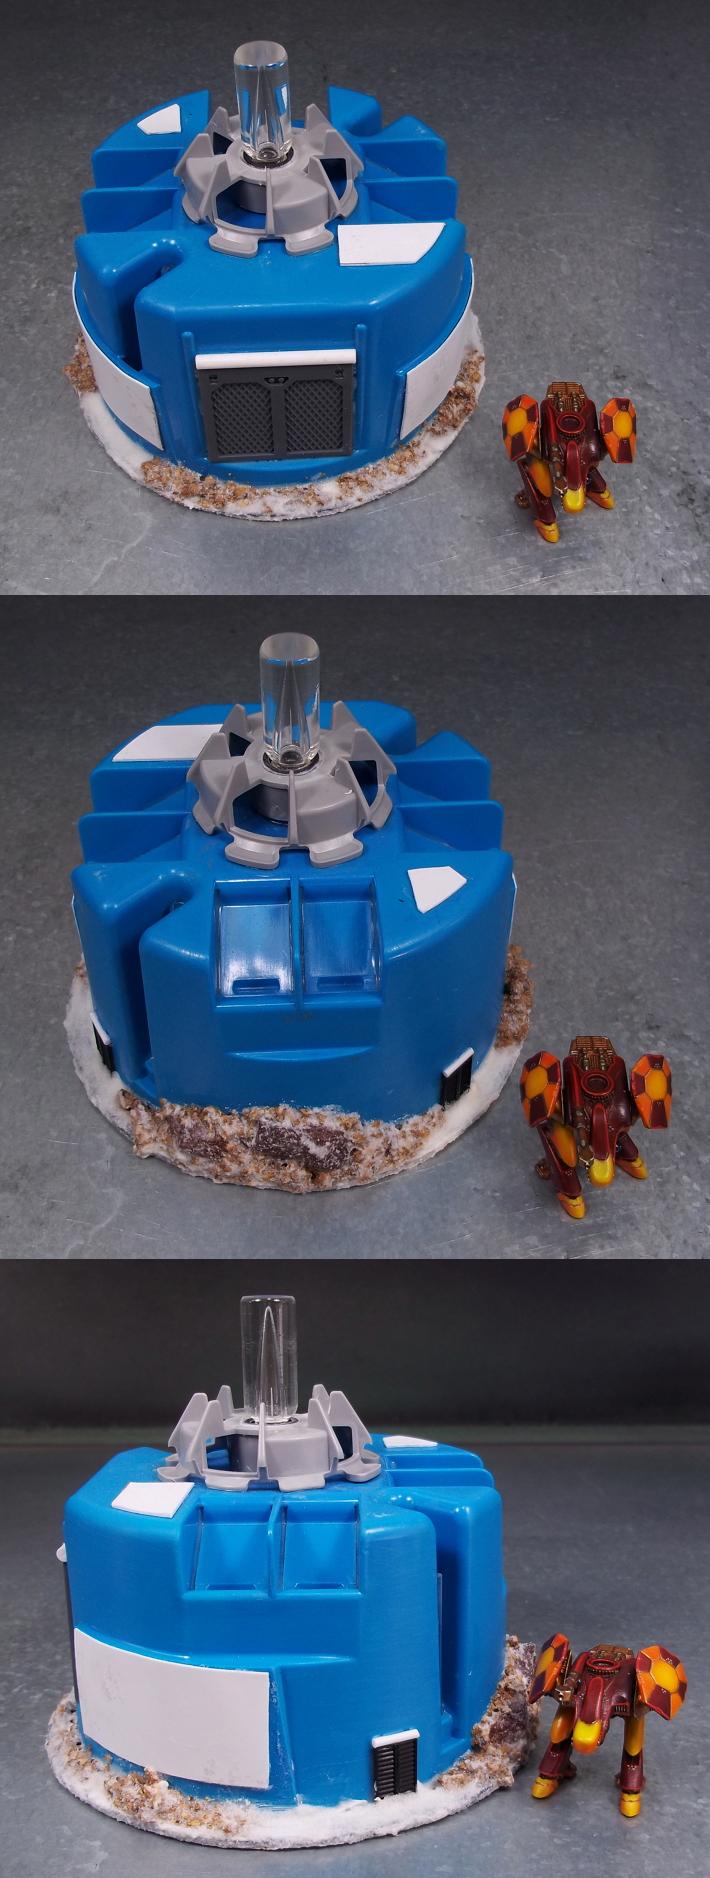
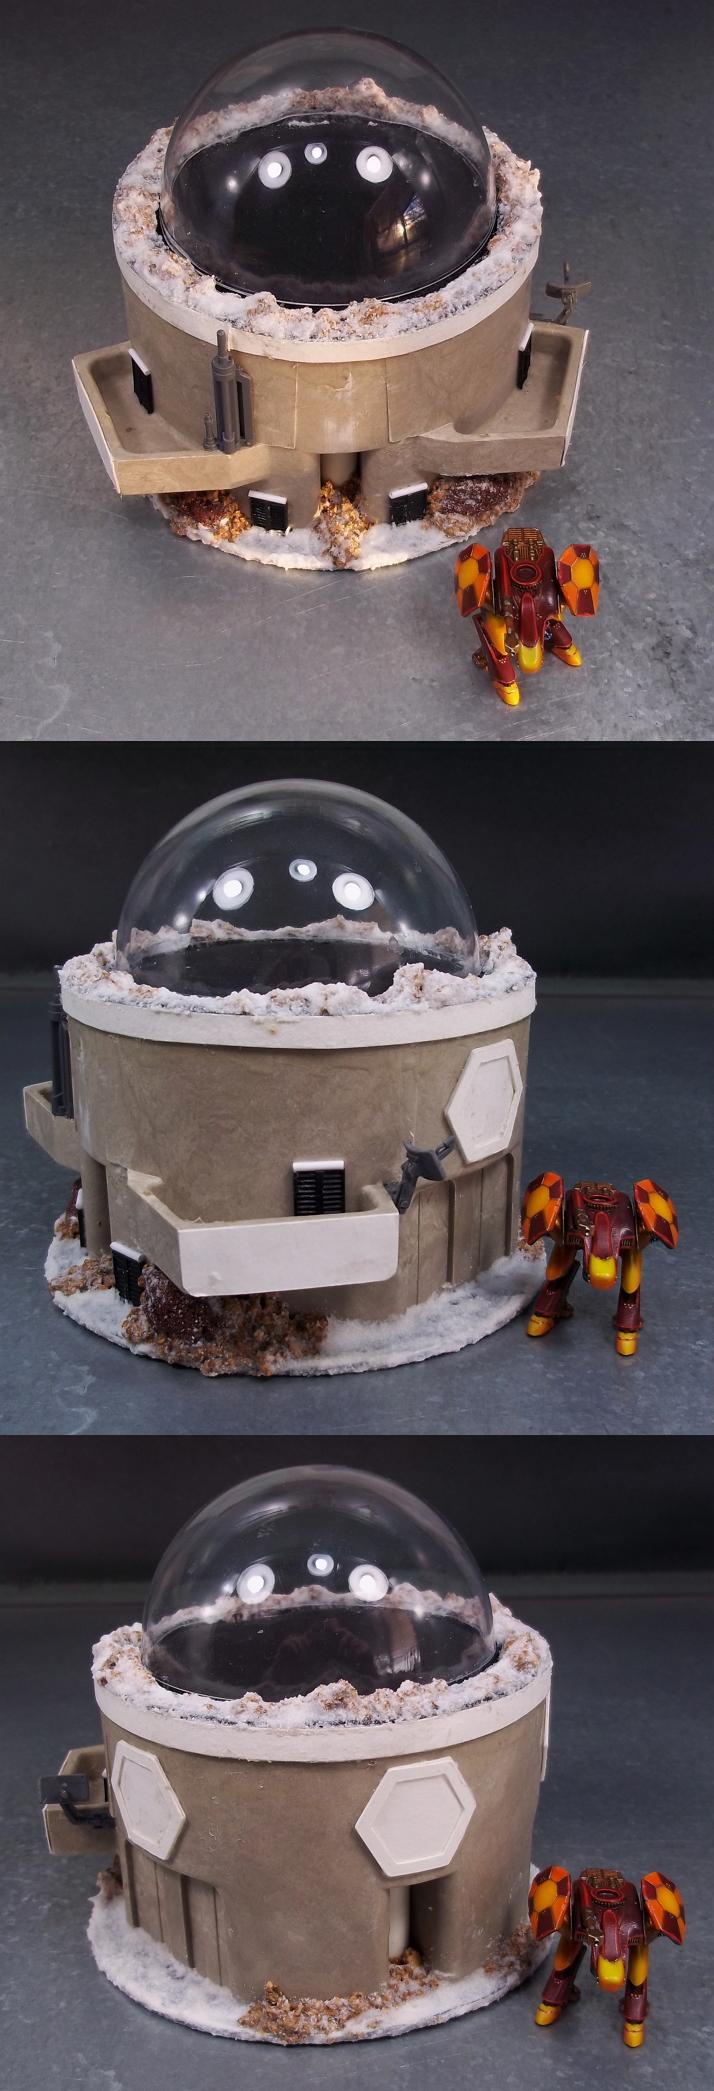
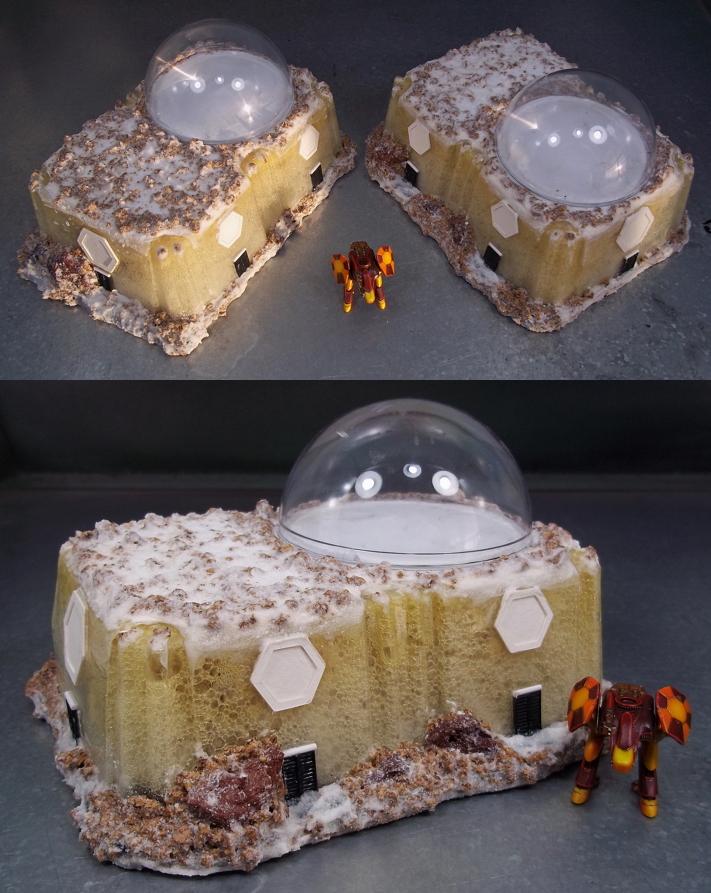
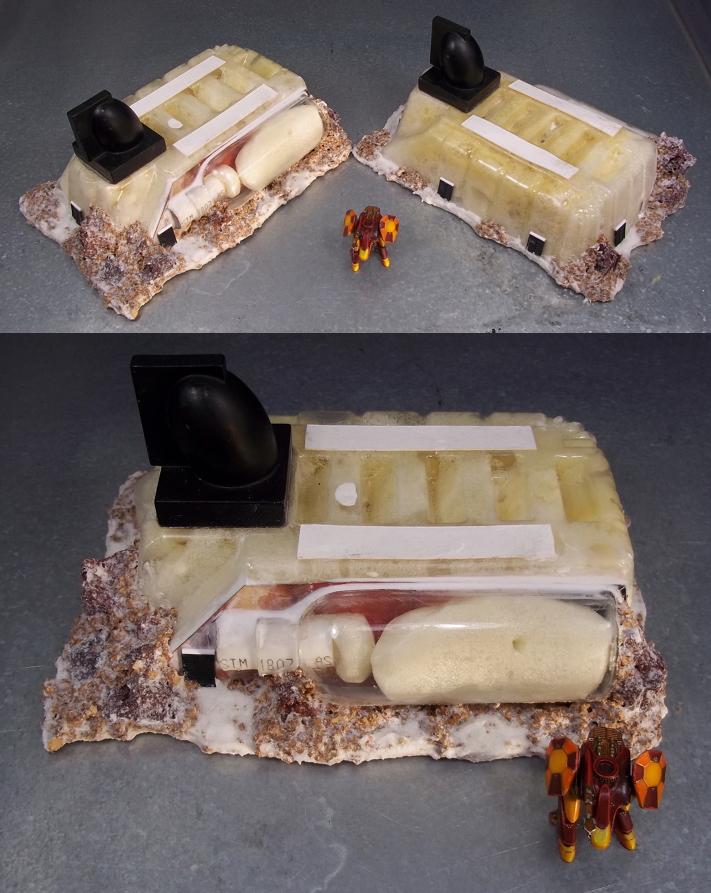
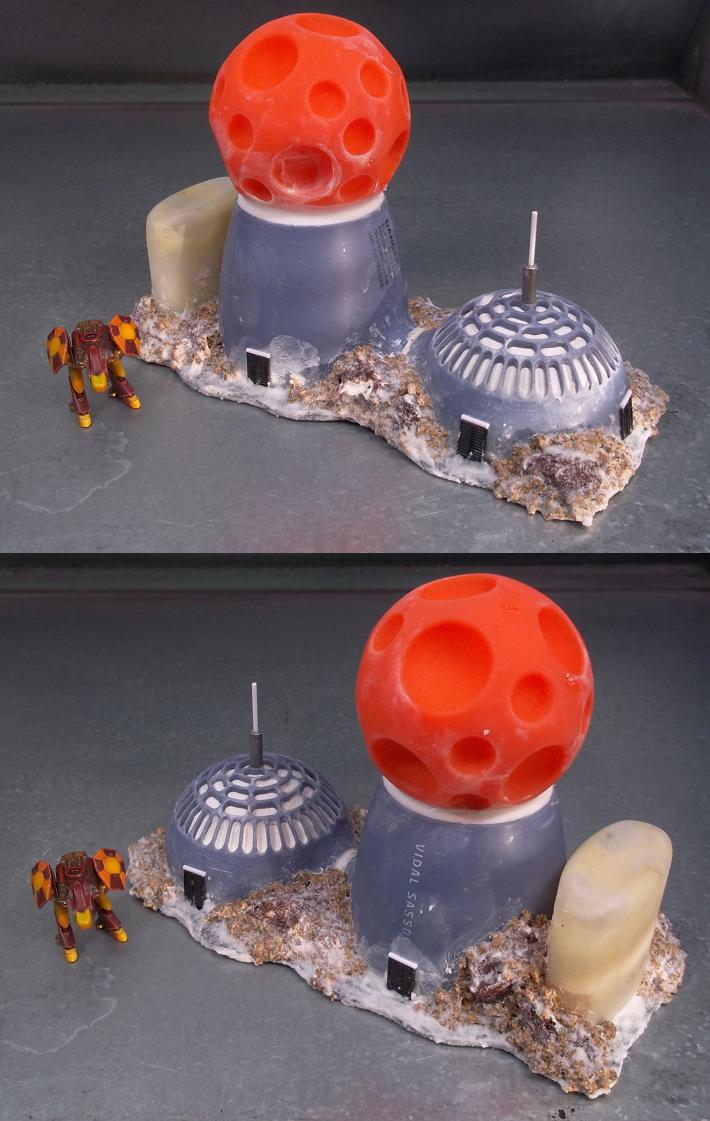
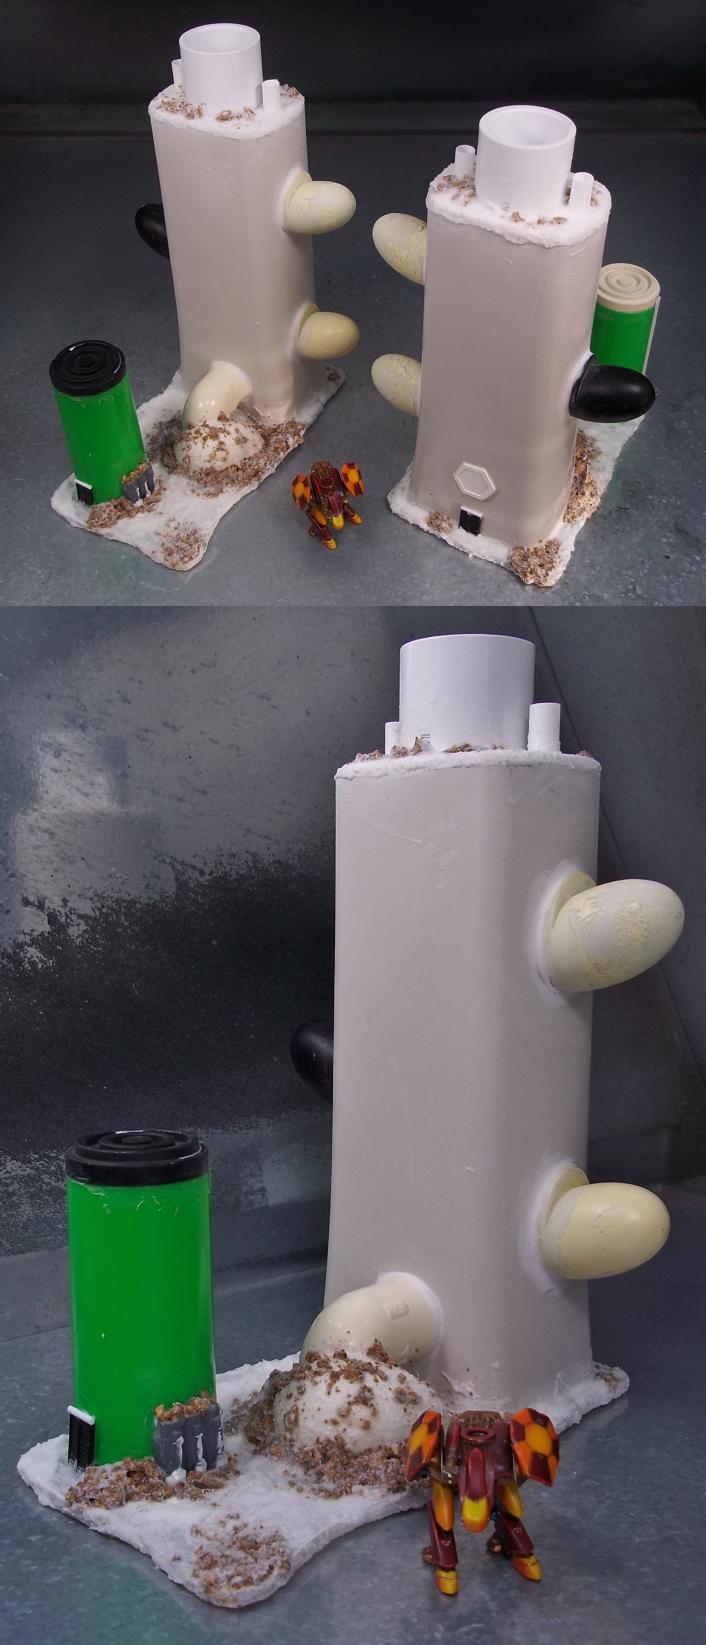
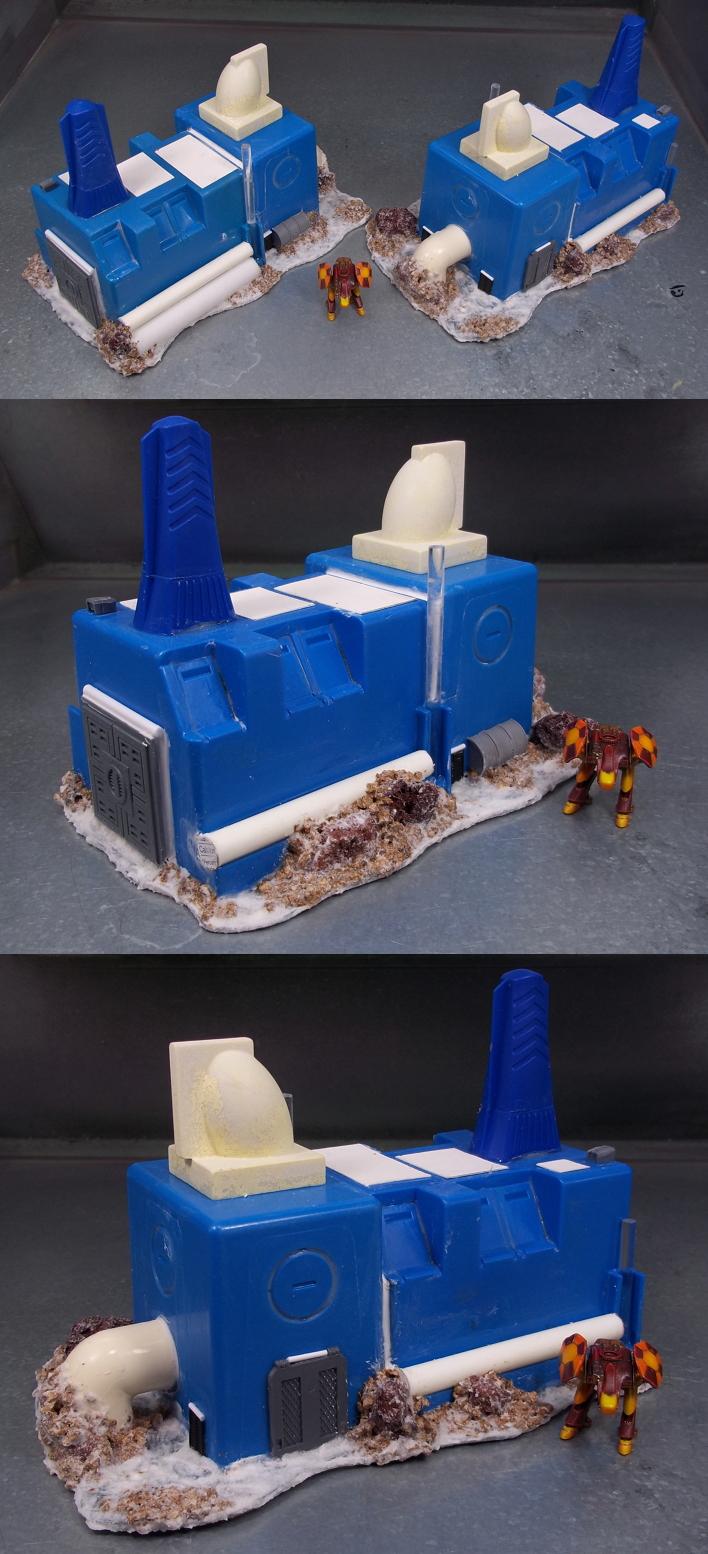
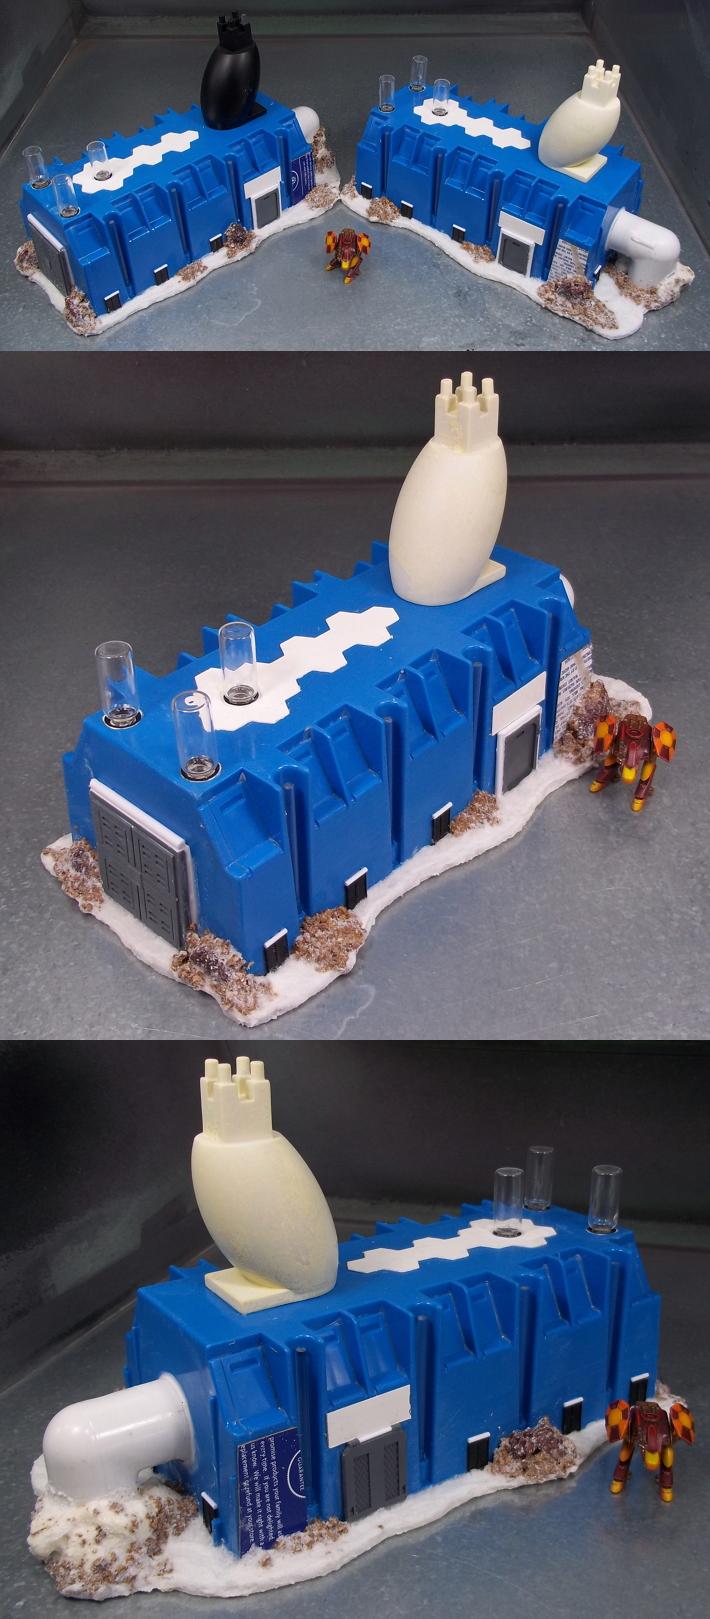
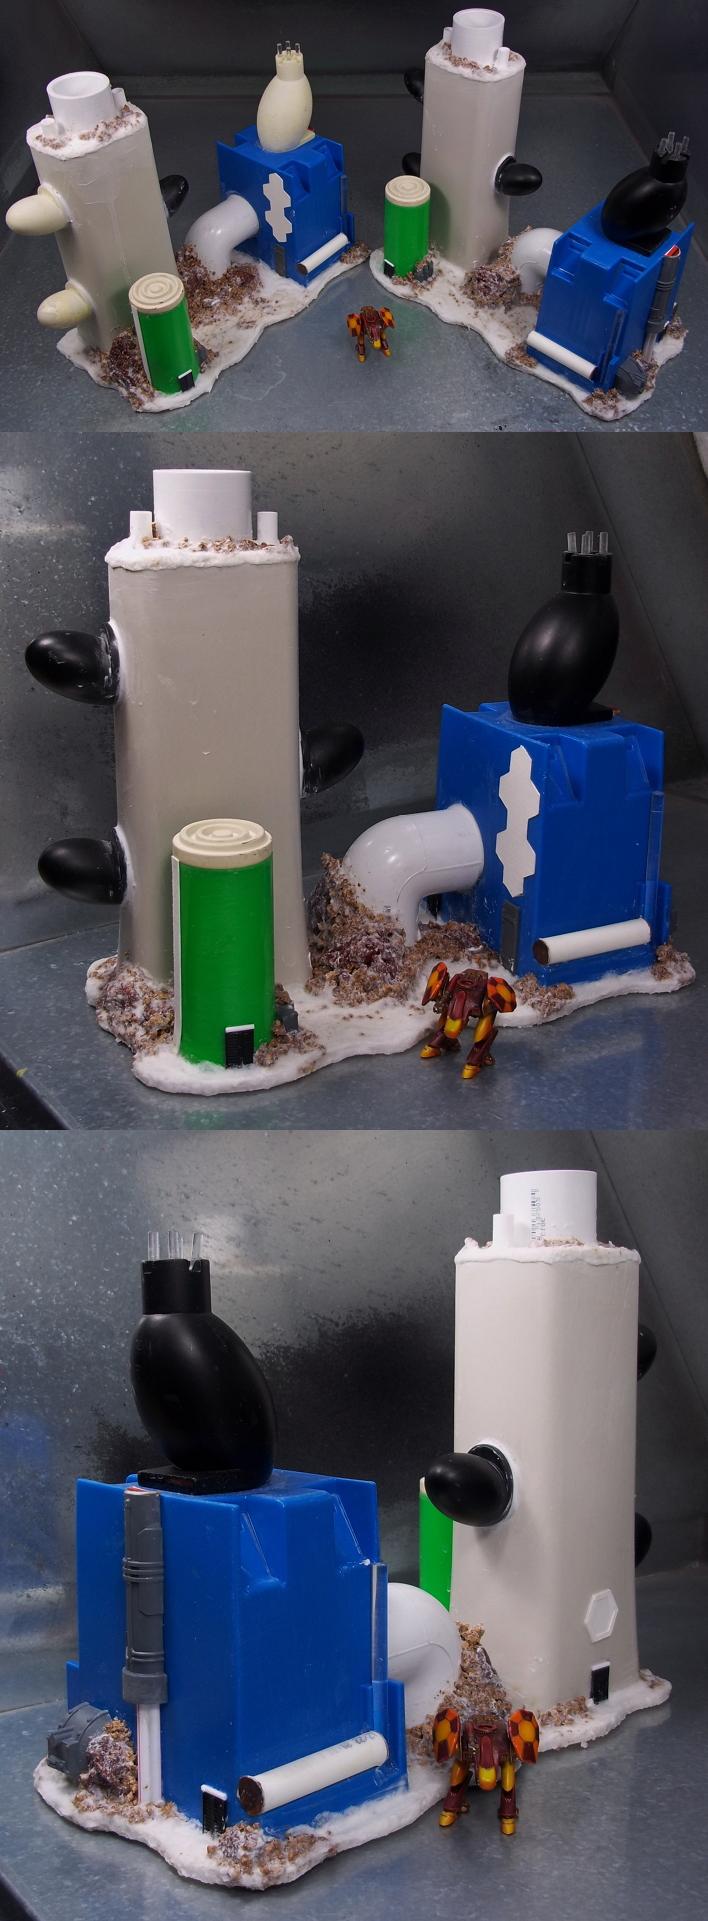
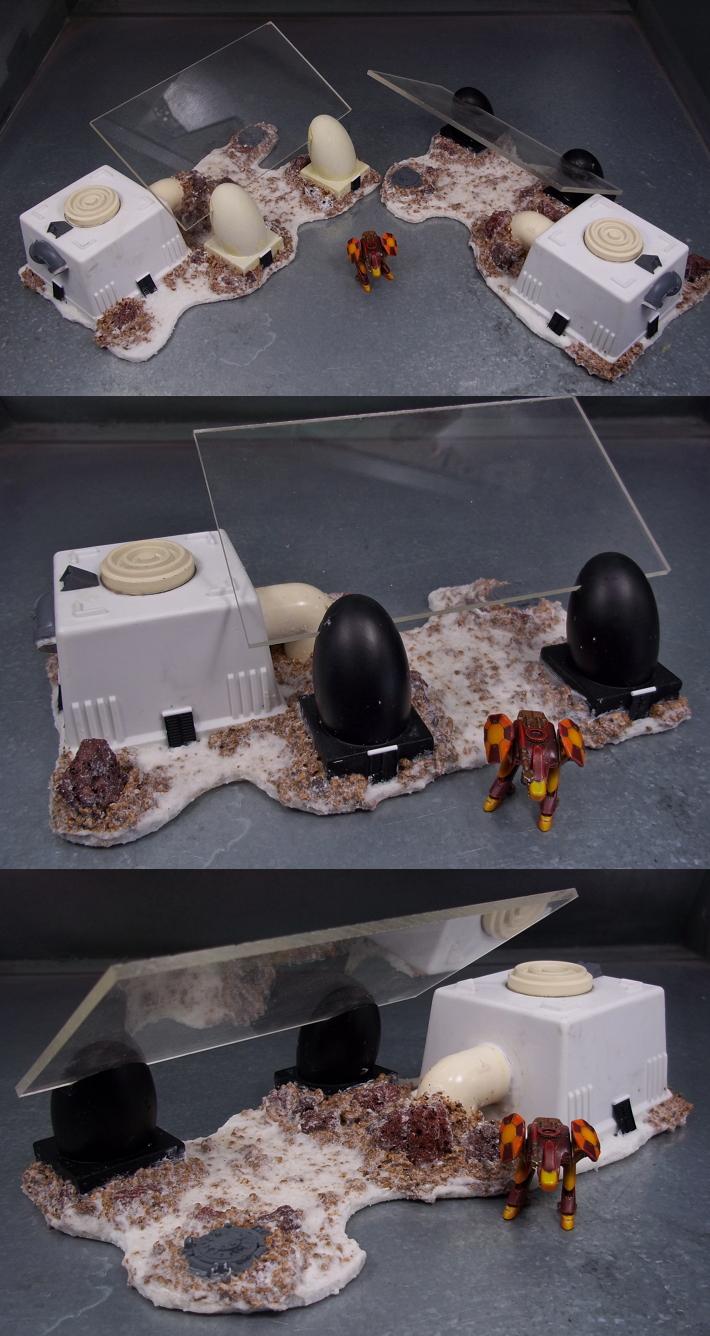
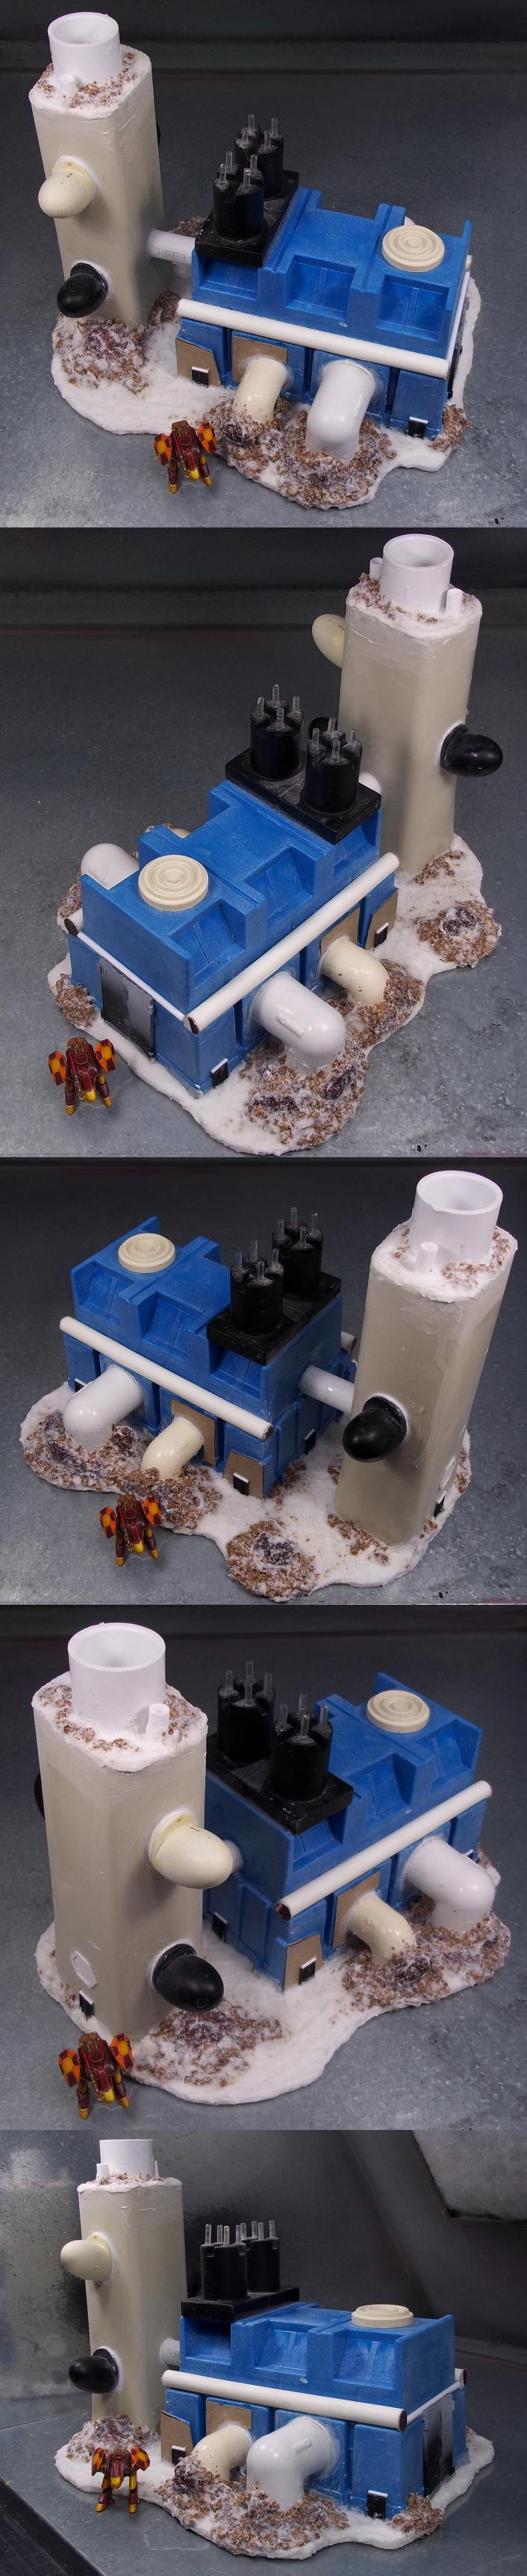
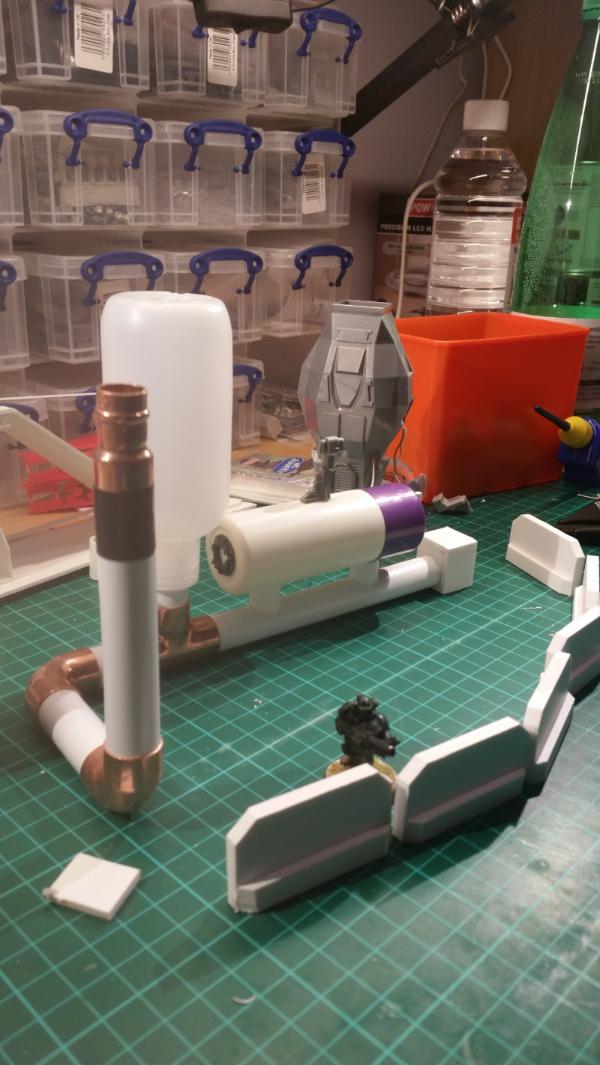
Bunkers were made out of prescription bottles glued to hardboard bases. Pumice stones were then glued on and the whole piece was covered in painter's caulk and then texture paste. The headquarters bunker has an antenna and some
40k bits on top. The other bunkers have a magnetized PHR Taranis misssle pod (they're now included with the Bombards, so I had spares) and have a small piece of sheet metal glued to the roof.

I made large flat pieces out of sheet steel glued directly to hardboard. Three 1/2" craft magnets have been installed in each piece. They're designed to be used as bases for smaller terrain features.
 That's it for the tutorial portion of this post. What follows is the gallery of completed pieces.
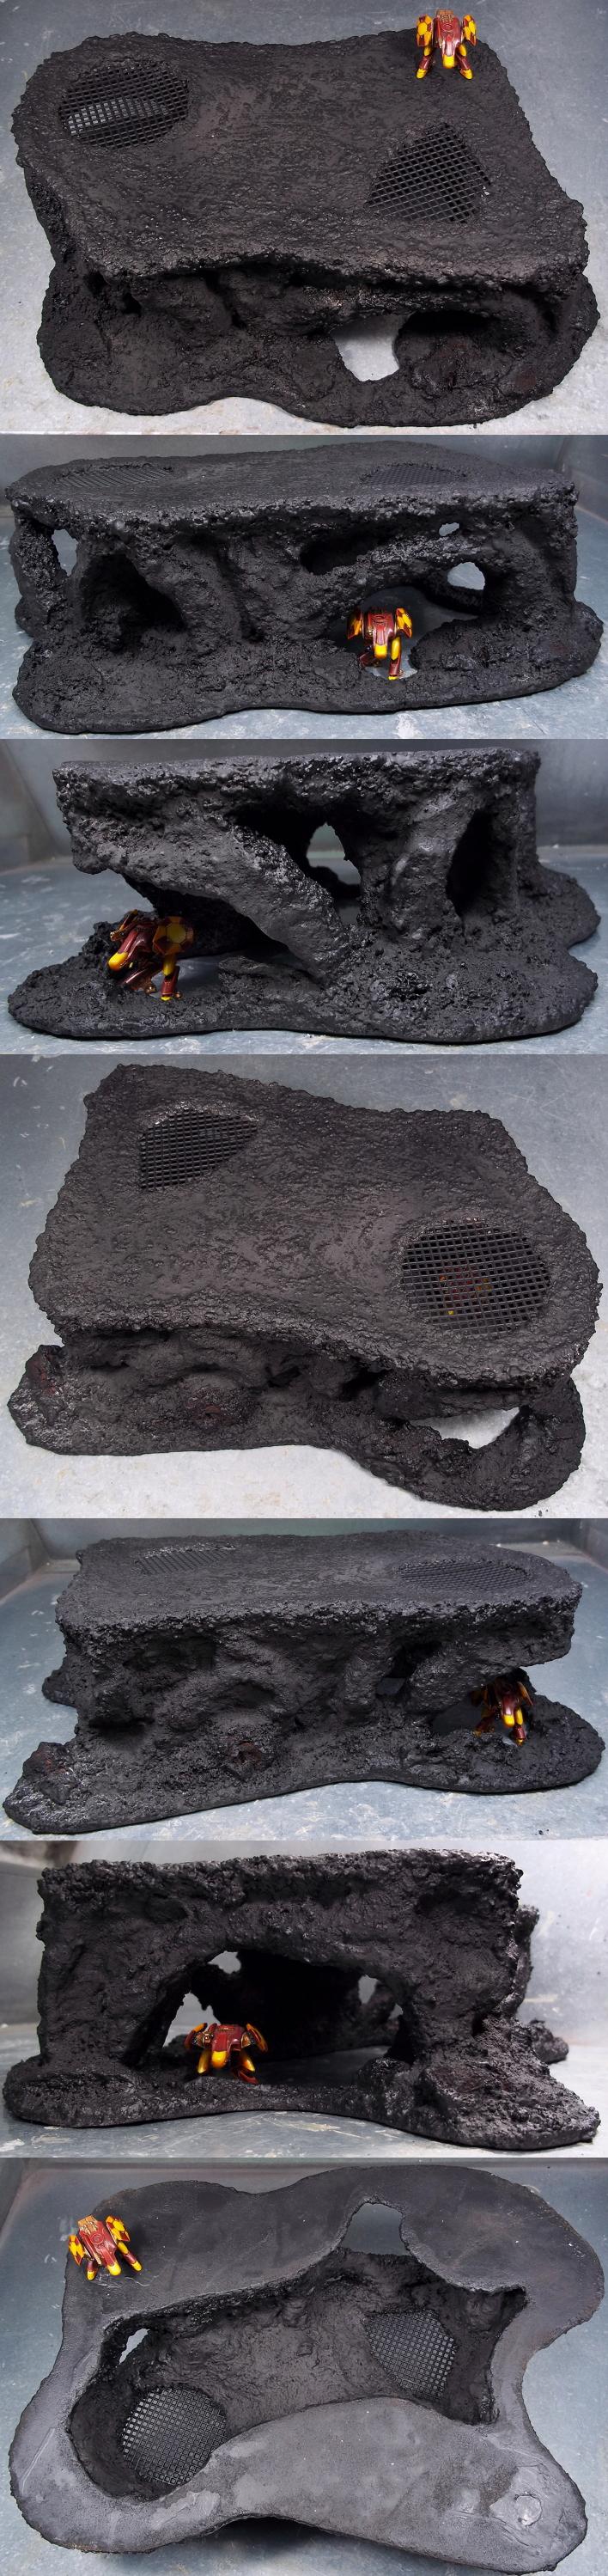
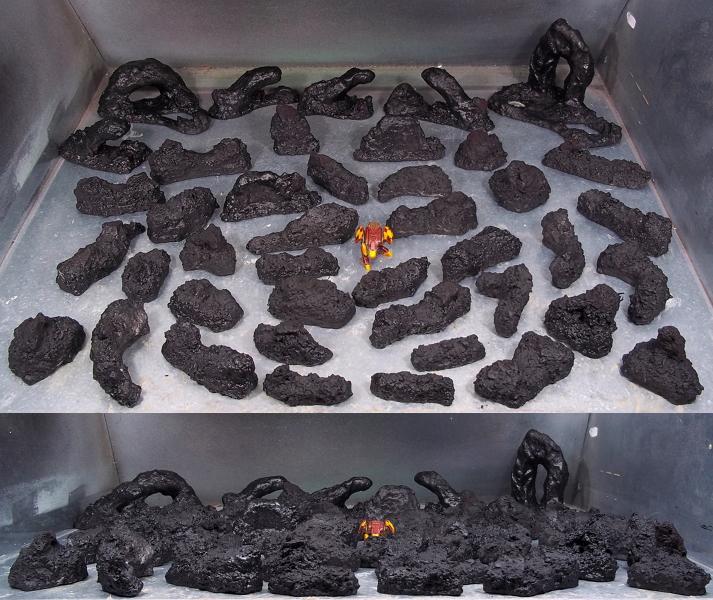
2-Part Centerpiece Hill
That's it for the tutorial portion of this post. What follows is the gallery of completed pieces.
2-Part Centerpiece Hill
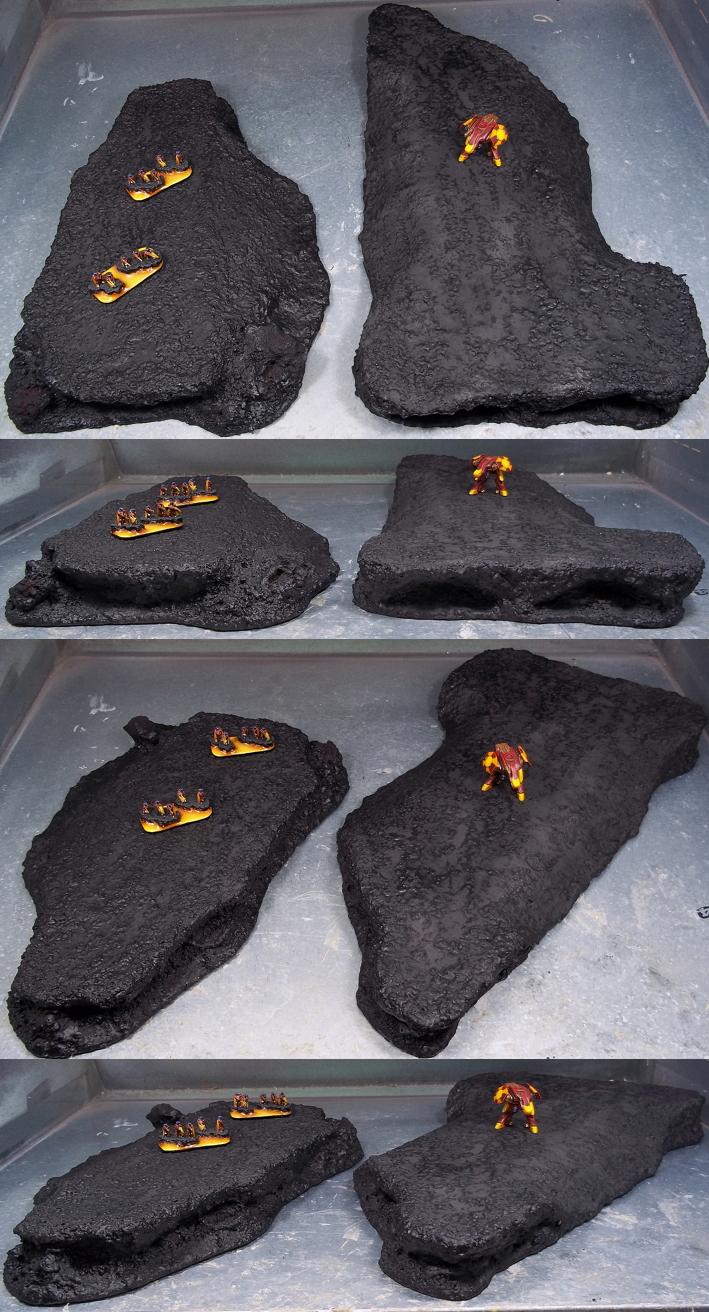
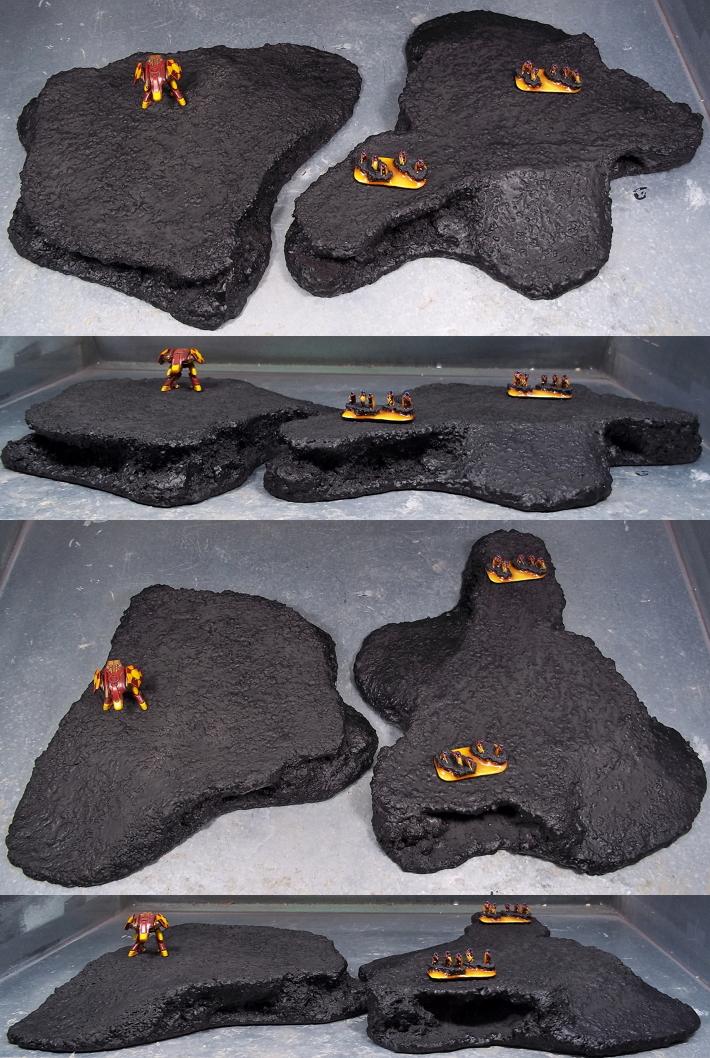
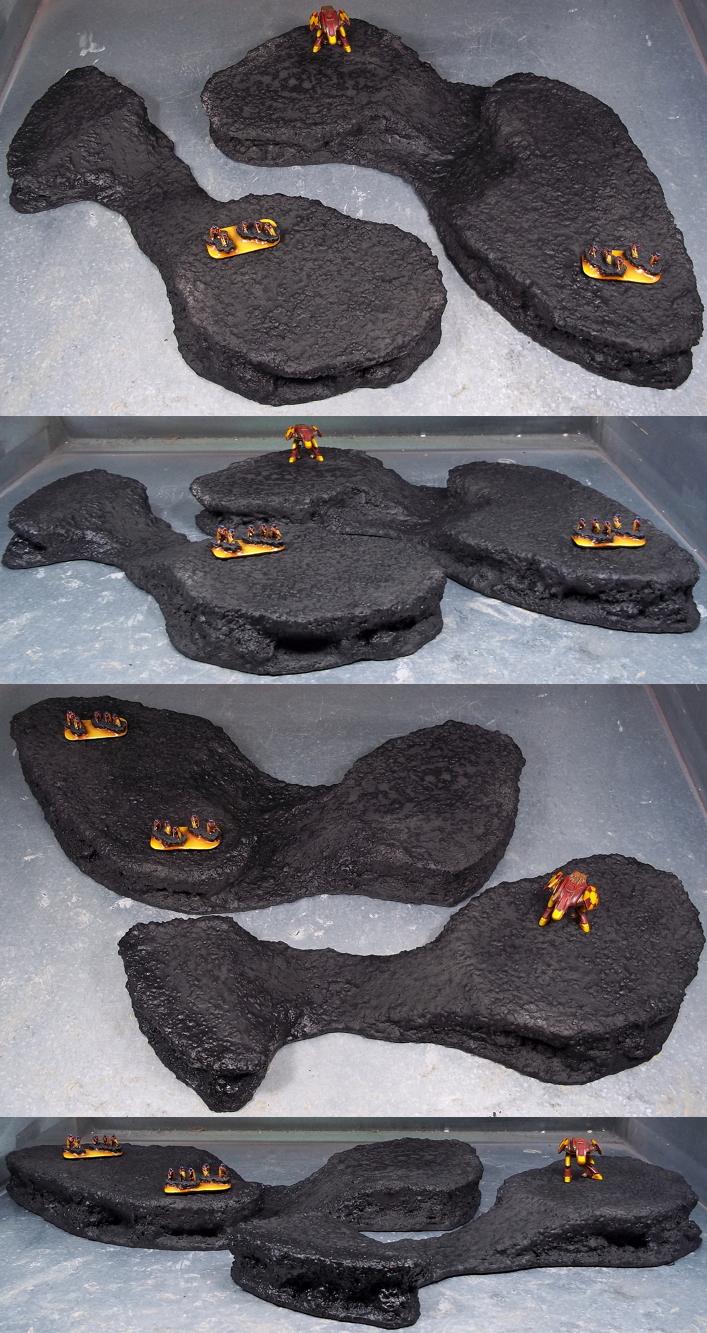
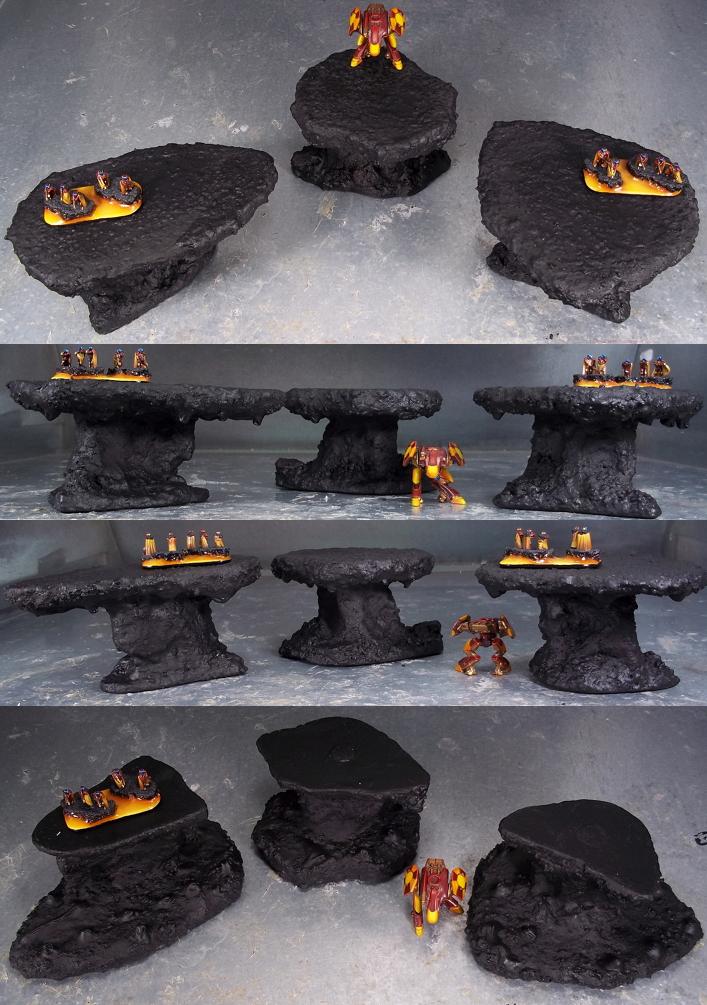
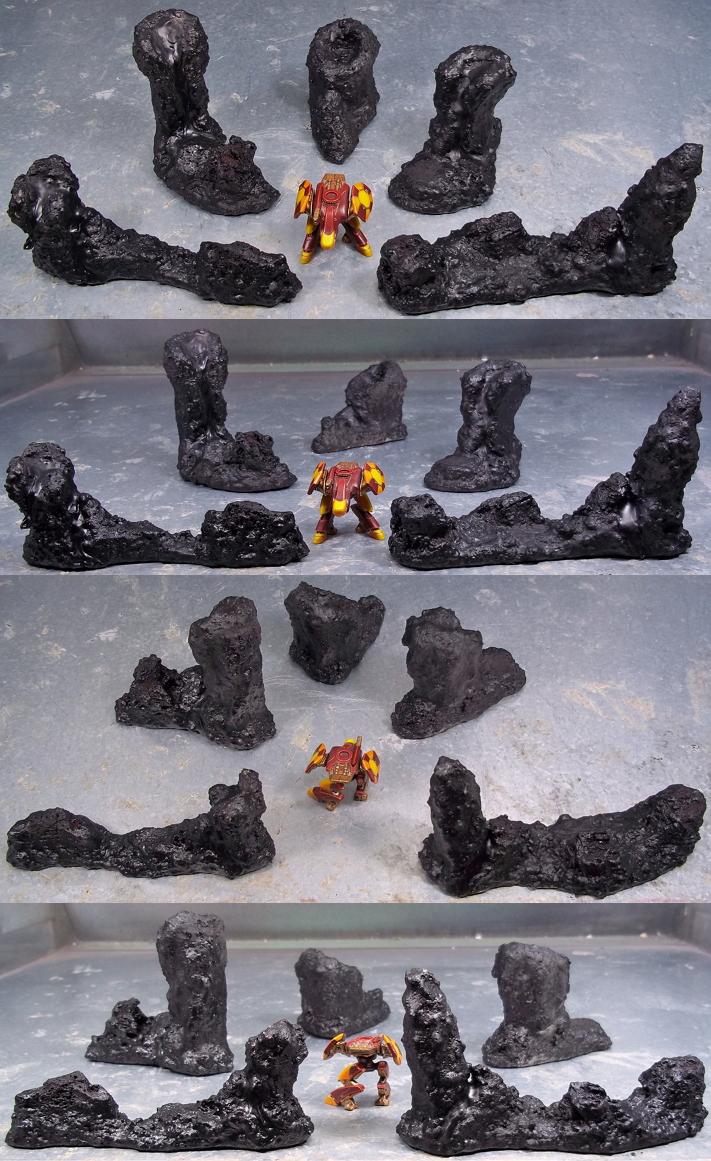
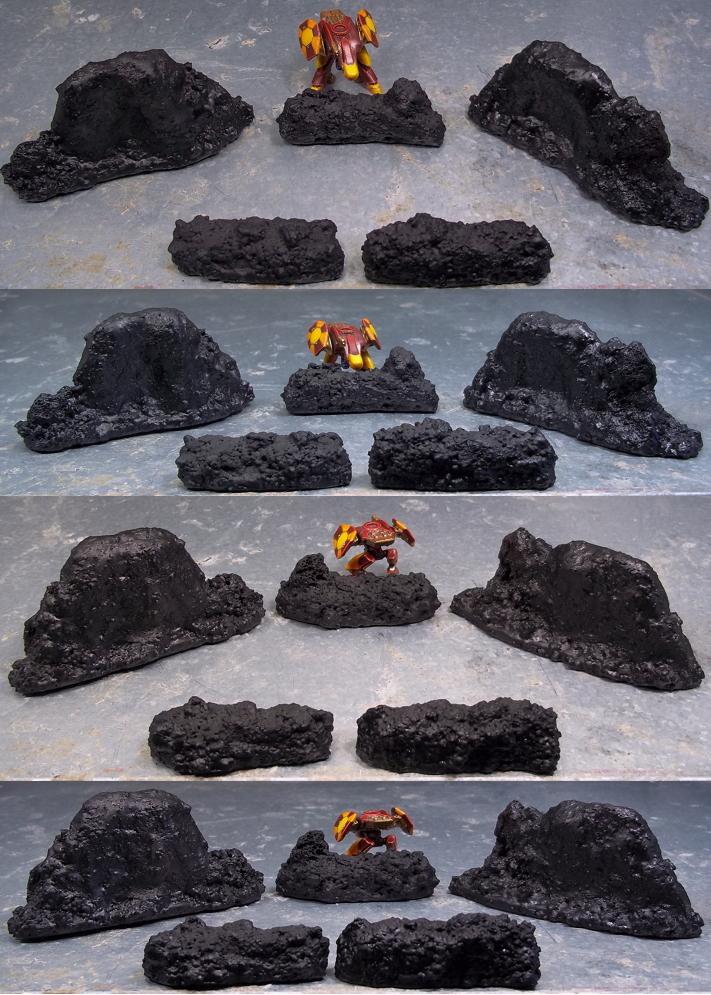
 Big Hills
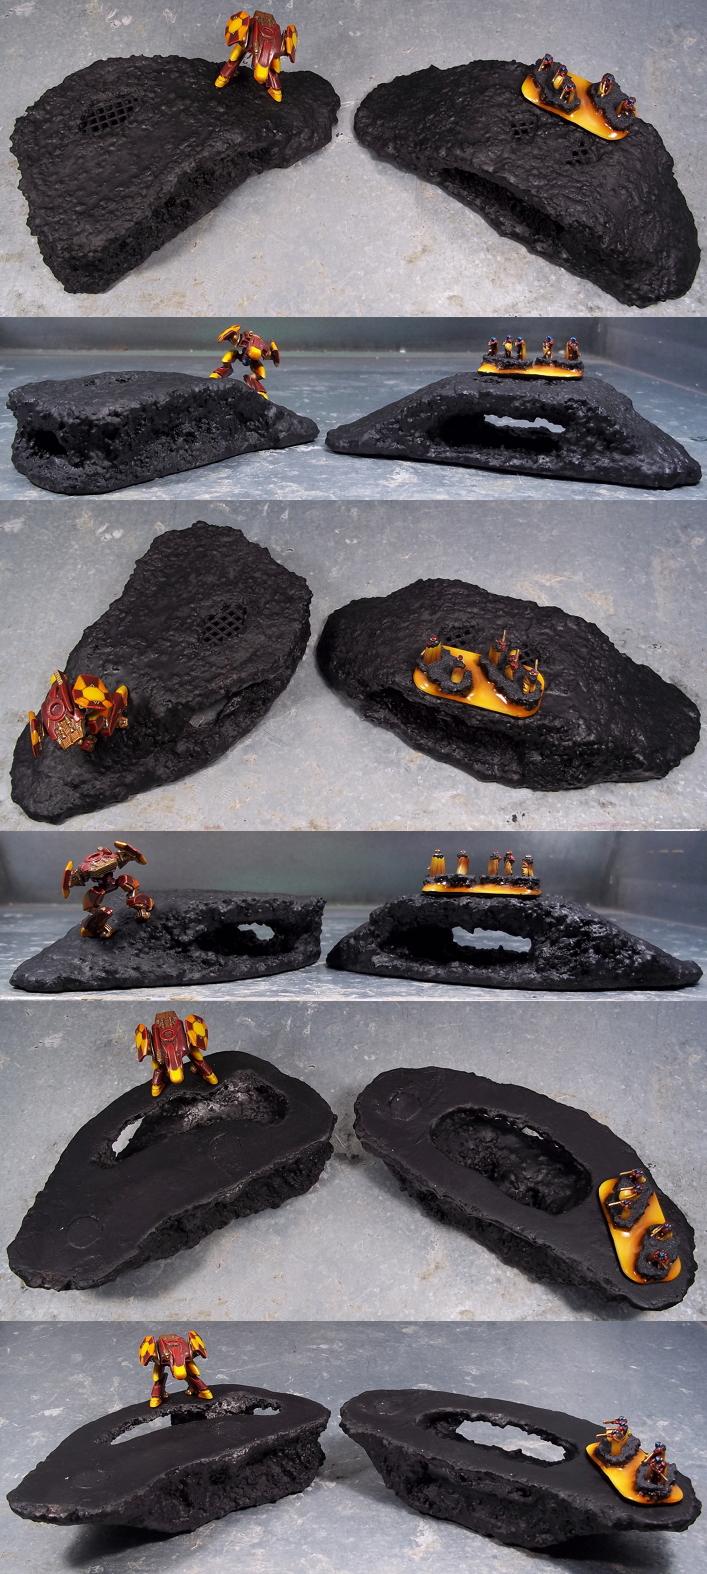
 Medium Hills


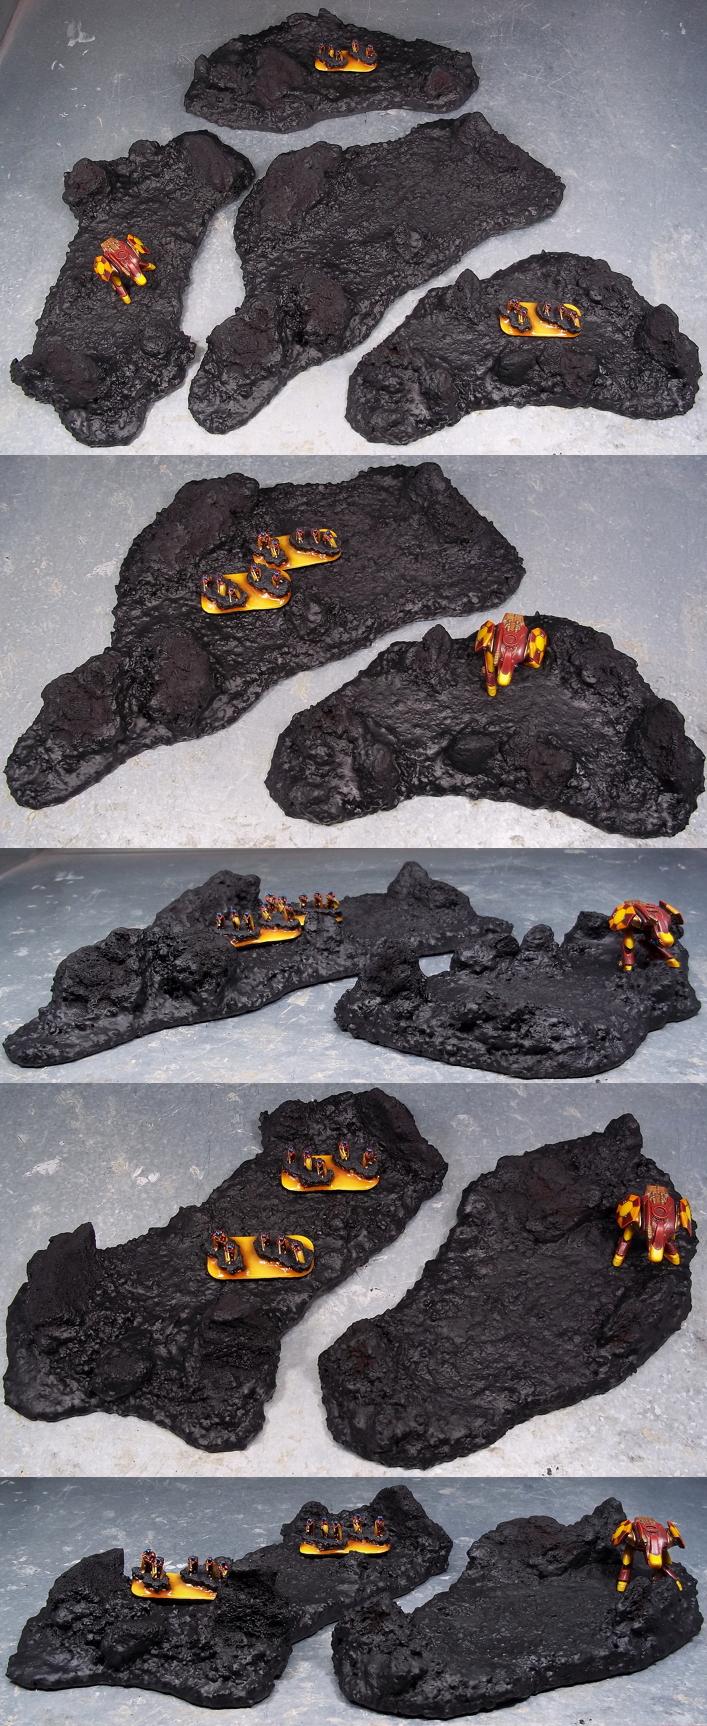
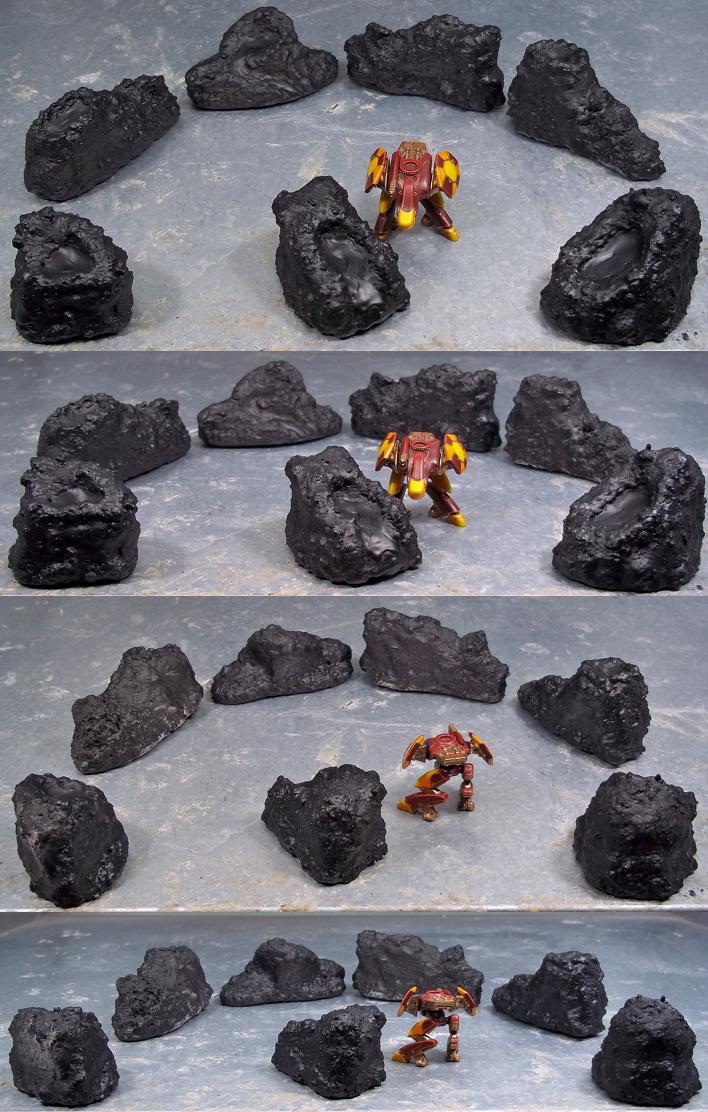
 Boulder Fields
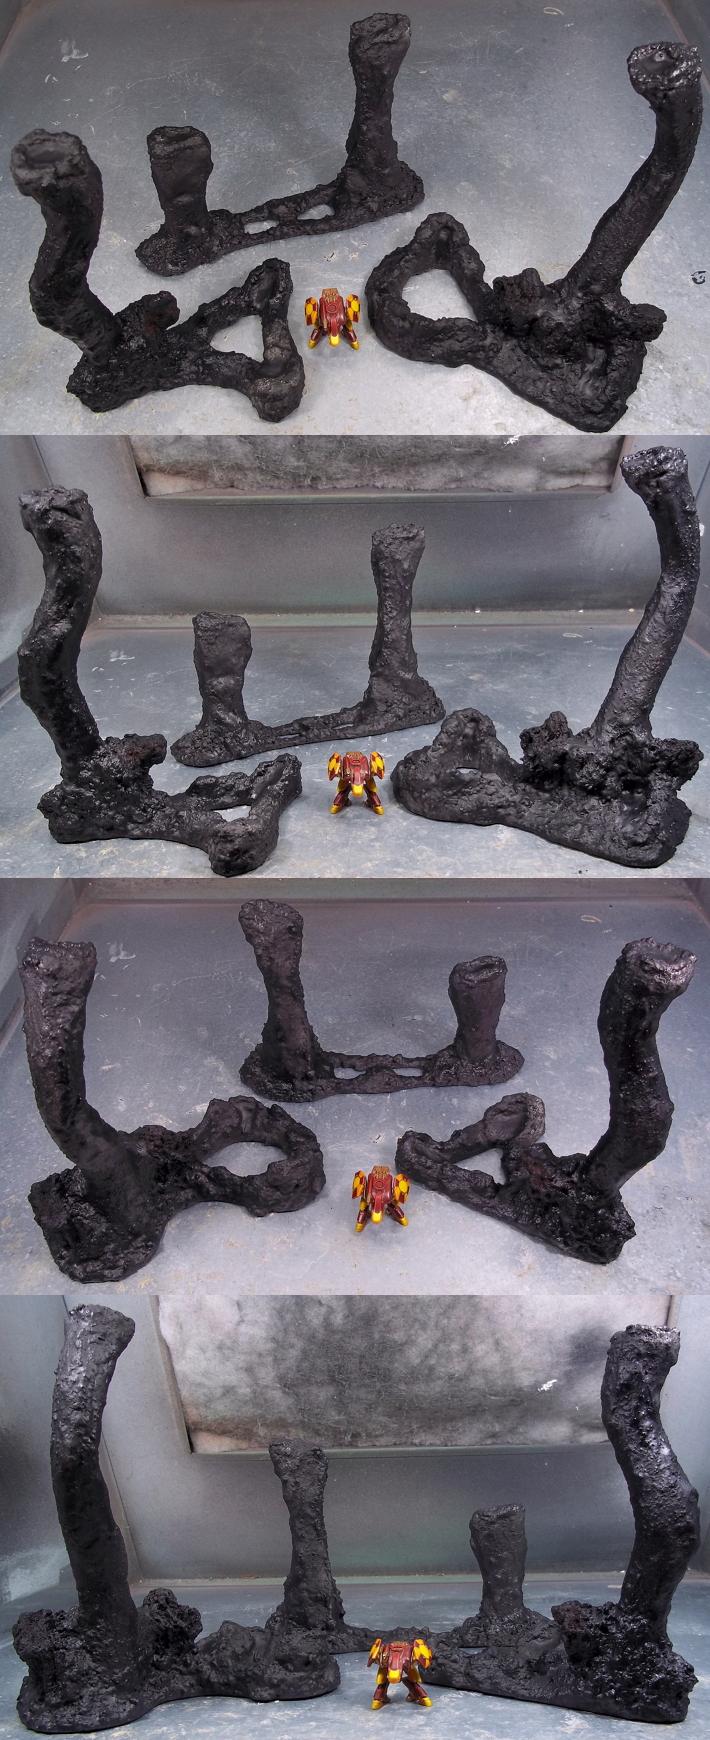
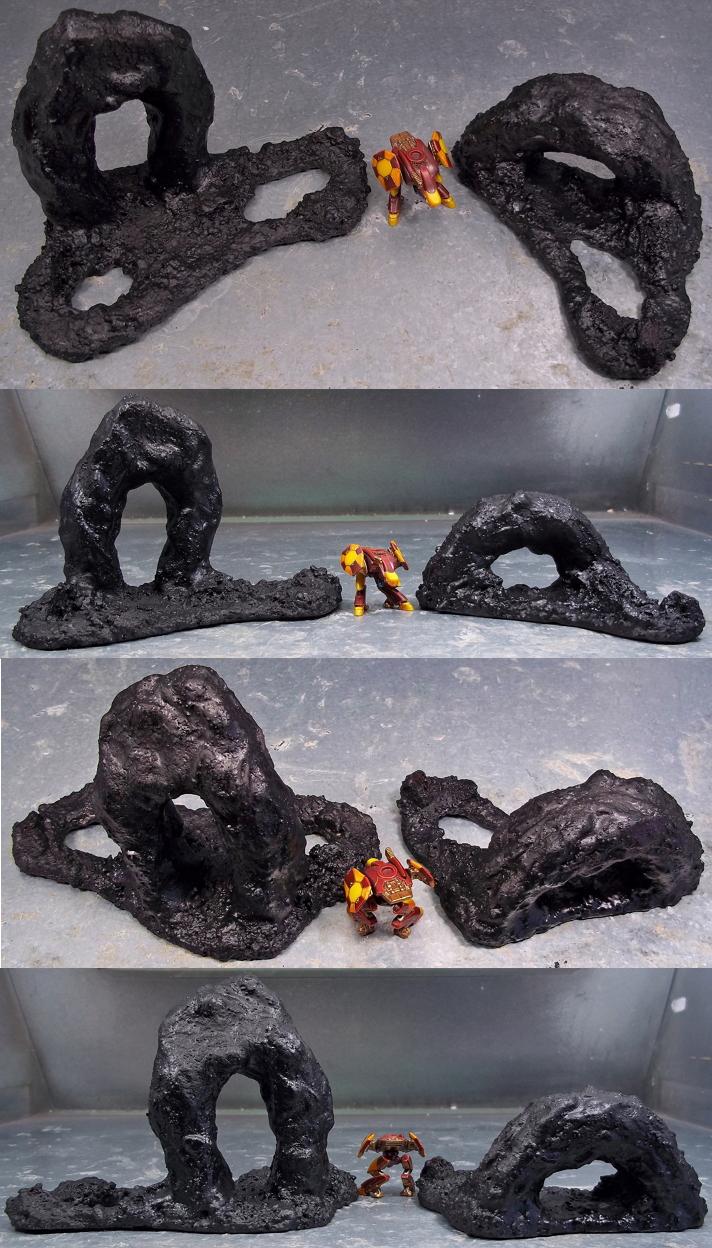
 Arches

 Cool Craters
 Small Hills

 Dripping Lava Tables

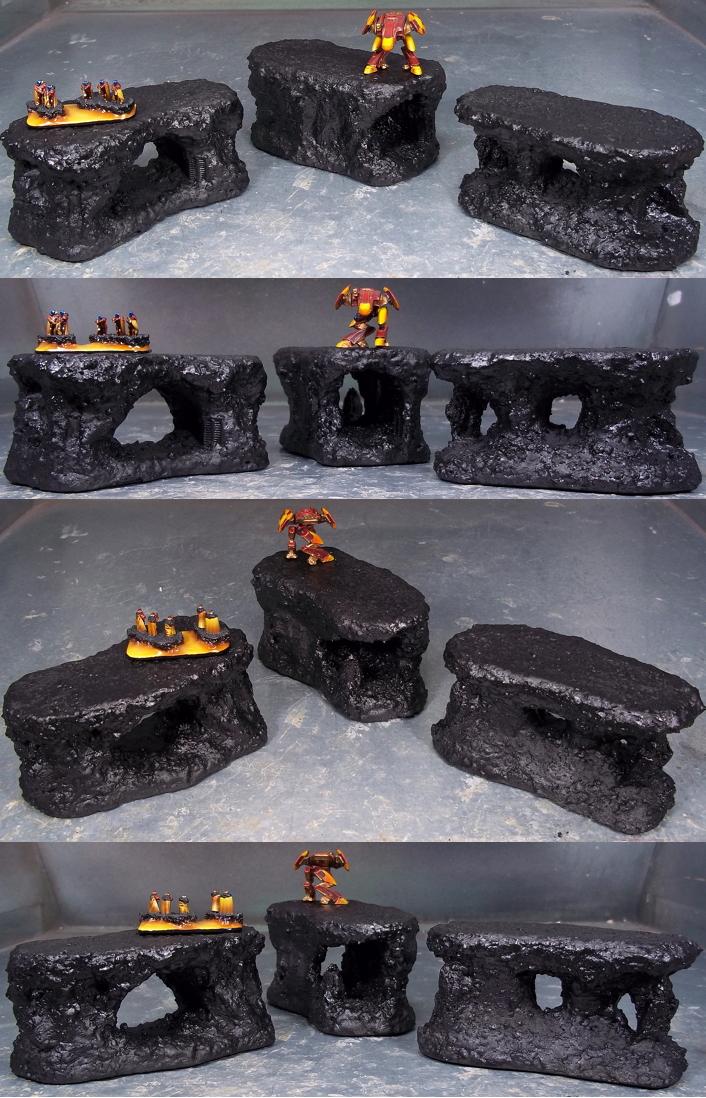
 Hot Lava Features
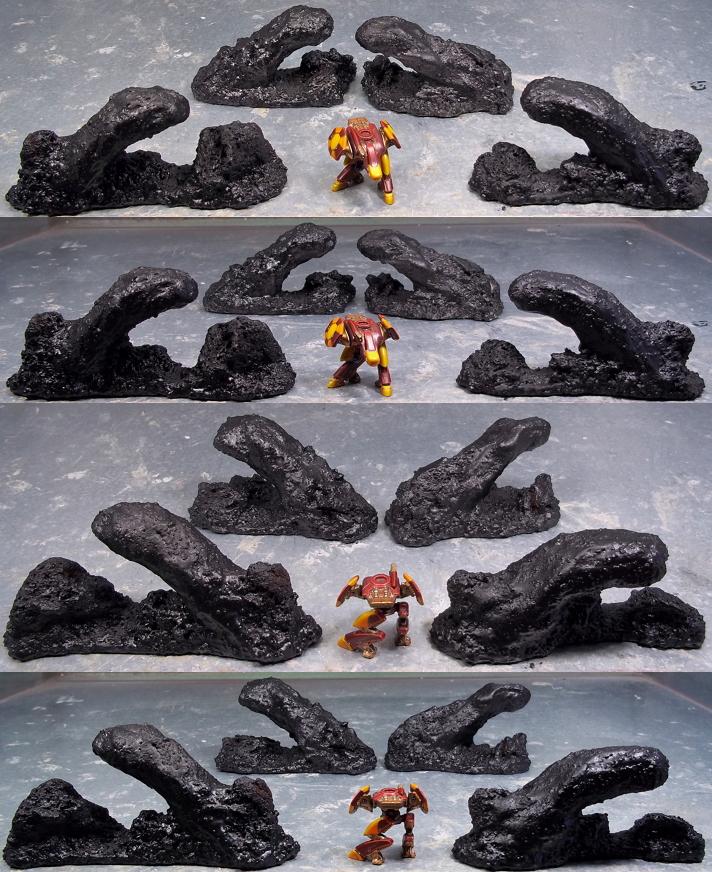
 Cool Lava Features

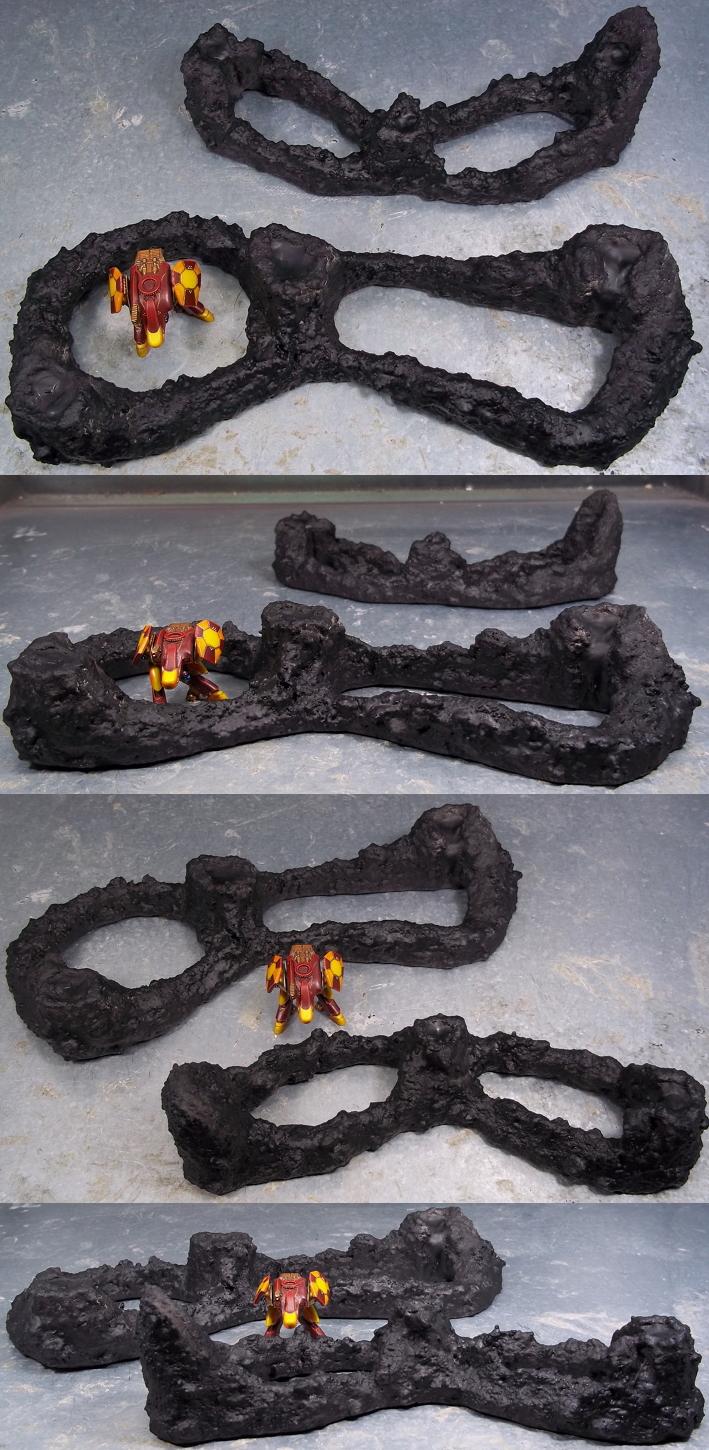
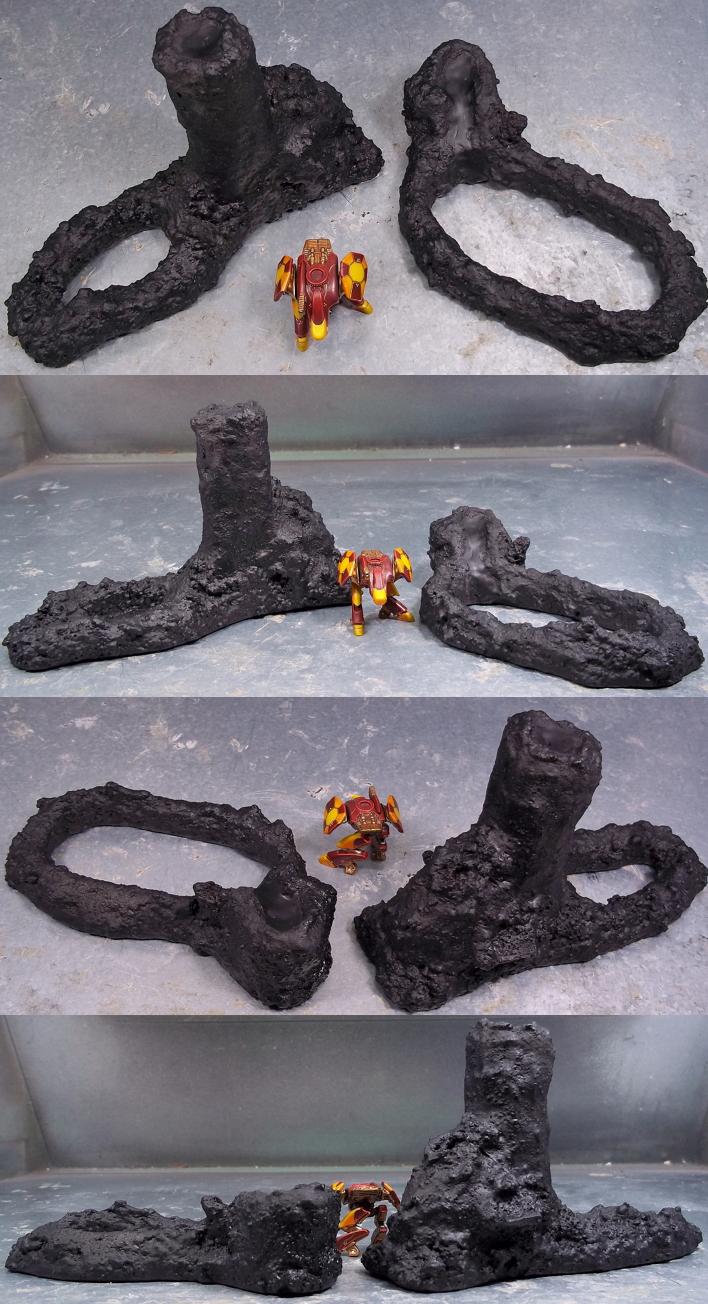
 Bridge Supports
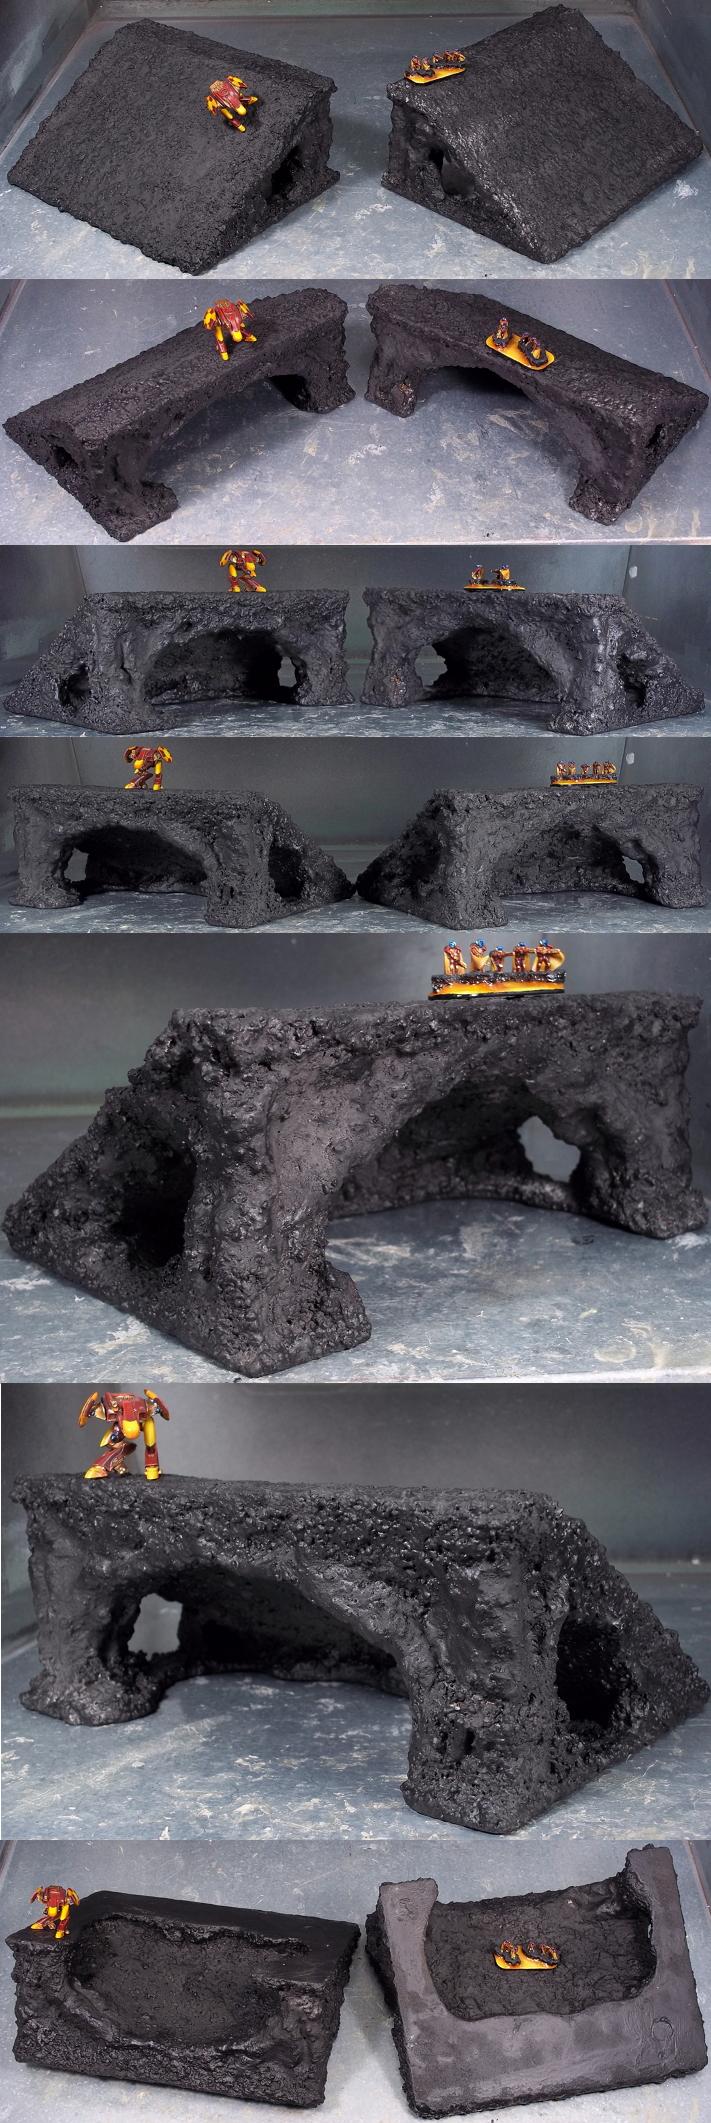

 Bridges


 Necrons - 6000+

 Eldar/DE/Harlequins- 6000+
 Genestealer Cult - 2000
 Currently enthralled by Blanchitsu and INQ28.


 Cadre Coronal Afterglow w1;d0;l0


 )
)